Category: Bacon

Air Fryer Bacon

Have an air fryer? Learn how easy it is to make crispy air fryer bacon in just a few minutes, using this method of cooking it with super-heated air!

I don’t know about you, but we LOVE bacon! Really, really love bacon. Amen! For most of our married life, I’ve cooked bacon slices in a large skillet on our stove top.

I’ve also cooked bacon in the oven (see how to do this in my blog post here).

With the addition of an air fryer (thanks to birthday gift cards), now we’ve started cooking bacon in our Cosori air fryer. It’s easy. Here’s how to make air fryer bacon.

Scroll Down For A Printable Recipe Card At The Bottom Of The Page

Get Ready, Get Set… Go!

Preheat your air fryer to 400°F. This will take a 2-3 minutes to bring the air fryer to temperature. While the machine is preheating, separate the strips of bacon.

Bacon strips are separated before loading into the air fryer.

Time To Cook Some Air Fryer Bacon!

Lay the strips of bacon in the basket of the air fryer. I have had the best results when I keep the bacon strips in a single layer, so that is what I recommend.

You might have to cook the bacon in batches, if you are making a large amount.

I typically use a thick cut of bacon, so if using very thin slices, keep a close eye on your air fryer bacon, to make sure you don’t overcook it!

Thin slices will take less time to cook, so remember that, once they start cooking, and adjust times as necessary!

The bacon strips are laid side by side in the basket of the air fryer to cook.

Cook the air fryer bacon at 400°F for 10 minutes. Halfway through the cooking time, turn the bacon strips to the other side, and then continue cooking.

NOTE: Since air fryers tend to vary quite a bit, temperature-wise, I recommend checking the bacon occasionally, to ensure it cooks thoroughly, but doesn’t overcook!

The thick slices of bacon I used were done in 10 minutes of total cooking time (5 minutes per side).

Ten minutes at 400 degrees is the setting used to cook thick bacon slices.

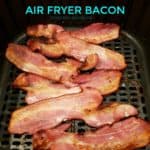
The photo below shows what the air fryer bacon looked like after 5 minutes. This is right after I turned the bacon over to cook the other side.

You can see how browned it already is, after 5 minutes. Again, remember that your bacon might cook cooler or hotter, depending on the type of air fryer you use.

Checking on the bacon at the half way mark through cooking.

Time To Eat Some Air Fryer BACON!

When the bacon has finished cooking, transfer the slices to paper towels. The paper towels will help to absorb any accumulated bacon grease.

After that is done, these crisp pieces of yummy bacon are ready to enjoy! Don’t they look good? Well guess what? They WERE Good!

We enjoyed the bacon with some scrambled eggs, and a biscuit! It was nice to be able to scramble the eggs, without having to cook bacon in a skillet at the same time!

The finished air fryer bacon on paper towels to absorb any grease.

Making bacon in an air fryer is really easy, and I hope you will consider trying it, also! Take care, thanks for stopping by, and I sincerely hope you have a great day.

Looking For More AIR FRYER Recipes?

You can find all of my recipes in the Recipe Index, located at the top of the page. I have several air fryer recipes, including:

Want More Recipes? Get My FREE Newsletter!

I publish a newsletter 2 times per month (1st and 15th) with lots of recipes, tips, etc..
Would you like to join our growing list of subscribers?

There is a Newsletter subscription box on the top right (or bottom) of each blog post, depending on the device you use.
You can submit your e-mail address there, to be added to my mailing list.

Find Me On Social Media:

Facebook page: The Grateful Girl Cooks!
Pinterest:
The Grateful Girl Cooks!
Instagram:
jbatthegratefulgirlcooks

Author's signature

↓↓ PRINTABLE RECIPE BELOW ↓↓

0 from 0 votes
Air Fryer Bacon
Prep Time
4 mins
Cook Time
10 mins
Total Time
14 mins
 

Have an air fryer? Learn how easy it is to make crispy air fryer bacon in just a few minutes, using this method of cooking it with super-heated air!

Category: Breakfast, Brunch, Side Dish
Cuisine: American
Keyword: air fryer bacon
Servings: 6 slices
Calories Per Serving: 92 kcal
Author: JB @ The Grateful Girl Cooks!
Ingredients
  • 6 slices bacon , preferably thick cut bacon
Instructions
  1. Preheat air fryer to 400°F. This will take about 2-3 minutes. While machine preheats, separate strips of bacon.

  2. Lay bacon strips in basket of air fryer. Try to keep them in a single layer. You might have to cook bacon in batches, if you're making a large amount. If using thin slices, keep a close eye on it, to make sure you don't overcook it! Thin slices will take less time to cook, so adjust time as necessary!

  3. Cook air fryer bacon at 400°F for 10 minutes total. Halfway through cooking time, turn bacon strips to other side, and continue cooking. NOTE: Since air fryers tend to vary quite a bit temperature-wise, I recommend checking bacon occasionally, to ensure it cooks thoroughly, but doesn't overcook! When finished cooking, transfer bacon slices to paper towels, to absorb any accumulated bacon grease. Serve, and enjoy!

Nutrition Facts
Air Fryer Bacon
Amount Per Serving (1 g)
Calories 92 Calories from Fat 81
% Daily Value*
Fat 9g14%
Saturated Fat 3g19%
Cholesterol 15mg5%
Sodium 146mg6%
Potassium 44mg1%
Carbohydrates 1g0%
Protein 3g6%
Iron 1mg6%
* Percent Daily Values are based on a 2000 calorie diet.

Here’s one more to pin on your Pinterest boards!Have an air fryer? Learn how easy it is to make crispy air fryer bacon in just a few minutes, using this method of cooking it with super-heated air!

Bacon Broccoli Quiche

Bacon broccoli quiche is a perfect dish for any meal! Bacon, broccoli, red pepper & garlic add flavor to this egg based dish, baked in a pie crust.

Do you like QUICHE? We sure do! I think it is a perfect breakfast, lunch OR dinner dish, which makes it very convenient to have around! It is soooo good!

Making classic quiche lorraine has been something I’ve done for almost 40 years now. I’ve also added my recipes for Italian Sausage and Spinach Quiche, Quiche Lorraine, and Southwestern Bacon Quiche to this blog, and recommend these delicious dishes, as well. Now I can add this bacon broccoli quiche to the list, too!

Scroll Down For A Printable Recipe Card At the Bottom Of The Page

How To Make This Quiche

Preheat oven to 425 degrees. While oven is preheating, cook bacon in a non-stick skillet or in the oven, until it’s completely cooked through, and crispy. I like to cut the bacon into small pieces BEFORE cooking in a skillet, because it cooks much faster that way!

Remove bacon from pan to paper towels (to drain) and crumble it (if you cooked whole slices). Be sure NOT to drain grease from skillet. You will cook the veggies in it, which will add flavor!

Chopped bacon is cooked until crisp, to add to the bacon broccoli quiche.

Using the same skillet (with the bacon grease still in it), cook the onion, red bell pepper and broccoli for 4-5 minutes until softened. Stir often while this mixture cooks.

Add the minced garlic to the veggies, and cook for one more minute, stirring to combine. Remove veggies from the heat, and set them aside to cool down a bit (before adding to pie crust dough) .

Chopped broccoli, red bell peppers, garlic and onion are cooked, before adding to the quiche.

Prepare The Deep Dish Pie Crust

TIP: To save time and effort, you can use a purchased DEEP DISH pie crust. My photos show a homemade pie crust, because that’s just how I roll. Whatever type of pie crust you use, just make sure it is deep dish, because there is a lot of filling that goes into the quiche, itself.

Prepare the unbaked deep dish pie shell by piercing the dough on the bottom and sides with the tines of a fork. This step helps prevent the crust from creating air pockets and puffing up too much while baking. Do this for homemade or purchased pie crust.

Pricking an unbaked quiche crust with the tines of a fork, before baking.

Add The Bacon Broccoli Quiche Filling

Add the crumbled bacon and veggies to the unbaked, prepared pie crust. Top the bacon and veggies with the grated mozzarella and Swiss cheese.

The cooked bacon and veggies are added to an uncooked pie crust.

Grated mozzarella and Swiss cheeses are added to the bacon broccoli quiche.

Mix and Add The Egg and Cream Quiche Filling

In a separate bowl, whisk together whipping cream, eggs, cayenne pepper and salt, until well blended. Pour the egg mixture on top of the bacon/veggies/cheese mixture in the pie crust.

Gently mix ingredients together. I use a fork- just be careful not to mix too hard or you will damage the crust. Mix only enough to blend the ingredients evenly together!

Egg and cream filling are poured over the quiche ingredients in the crust.

Here is the bacon broccoli quiche, before it goes into the oven.

Bake The Broccoli Bacon Quiche

Carefully put quiche into a preheated 425 degree oven. Don’t spill it! Bake at 425 degrees for 15 minutes, then reduce heat to 300 degrees and bake for an additional 35-40 minutes (quiche is done when a knife comes out clean).

Remove the baked bacon broccoli quiche (still in pan) to a wire rack to cool. When it first comes out of the oven it will be nice and puffed up, as in the photo below. The top of the quiche will flatten as it cools down.

 This is a picture of the bacon broccoli quiche right AFTER it comes out of the oven.

Let the quiche cool down a bit, slice into 8 portions, serve… and enjoy! We enjoy eating this bacon broccoli quiche, and think it tastes best when it is warm, but not too hot!

One slice has been removed from the finished quiche.

Slice yourself a piece of this delicious bacon broccoli quiche, and enjoy it for breakfast, lunch OR dinner! It really is quite versatile, and the leftovers store well in the refrigerator for several days!

When you are ready to have a slice of leftover bacon broccoli quiche, simply reheat it in the microwave for a quick and easy meal!

One slice of bacon broccoli quiche, with fresh fruit on the side.

Hope that you will try this yummy quiche, and trust you will enjoy it as much as we do! Have a wonderful day!

Interested In More Recipes?

Thank you for visiting this website. I appreciate you using some of your valuable time to do soIf you’re interested, I publish a newsletter 2 times per month (1st and 15th) with all the latest recipes, and other fun info. I would be honored to have you join our growing list of subscribers, so you never miss a great recipe!

There is a Newsletter subscription box on the top right side (or bottom) of each blog post, depending on the device you use, where you can easily submit your e-mail address (only) to be included in my mailing list.

You Can Also Find Me On Social Media:
Facebook page: The Grateful Girl Cooks!
Pinterest: The Grateful Girl Cooks!
Instagram: jbatthegratefulgirlcooks

Author's signature

Recipe Source: my brain and my mom’s pie crust recipe

0 from 0 votes
Bacon Broccoli Quiche
Prep Time
20 mins
Cook Time
50 mins
Total Time
1 hr 10 mins
 
Bacon broccoli quiche is a perfect dish for any meal! Bacon, broccoli, red pepper & garlic add flavor to this egg based dish, baked in a pie crust.
Category: Breakfast, Brunch, Dinner
Cuisine: American
Keyword: bacon broccoli quiche
Servings: 8 slices
Calories Per Serving: 462 kcal
Author: JB @ The Grateful Girl Cooks!
Ingredients
  • 1 deep dish pie crust (homemade or purchased) , unbaked
  • 6 slices bacon , cooked crisp, crumbled
  • 1/2 cup yellow onion , finely chopped
  • 1/2 cup broccoli florets (fresh or frozen) , finely chopped
  • 1/4 cup red bell pepper , finely chopped
  • 1 teaspoon minced garlic
  • 1/2 cup shredded mozzarella cheese
  • 1/2 cup shredded Swiss cheese
  • 2 cups heavy whipping cream
  • 4 large eggs
  • 1/2 teaspoon salt
  • 1/8 teaspoon cayenne pepper
Instructions
  1. Preheat oven to 425 degrees. While oven is preheating, cook bacon in a non-stick skillet (or oven), until crispy and cooked through. Remove bacon from pan to paper towels (to drain) and then crumble; do NOT drain grease from skillet.

  2. Using the same skillet (with the bacon grease still in it), cook the onion, red bell pepper and broccoli for 4-5 minutes until softened. Add the minced garlic during the last minute of cooking. Remove veggies from the heat, and set aside to cool.
  3. Prepare the unbaked deep dish pie shell by piercing the dough on the bottom and sides with the tines of a fork - (this helps prevent air pockets puffing up while baking). Add the crumbled bacon to the unbaked, prepared pie crust, then add the cooked veggies. Top with the grated mozzarella and Swiss cheese.

  4. In a separate bowl, whisk together whipping cream, eggs, cayenne pepper and salt, until well blended. Pour the egg mixture on top of the bacon/veggies/cheese mixture in the pie crust. Gently mix ingredients together (I use a fork-be careful not to mix too hard or you will damage the crust. Just enough to blend the ingredients evenly together!)
  5. Carefully put quiche into a preheated 425 degree oven. Don't spill it! Bake at 425 degrees for 15 minutes, then reduce heat to 300 degrees and bake for an additional 35-40 minutes (quiche is done when a knife comes out clean). Remove quiche pan to a wire rack. Let it cool down a bit, slice, serve... and enjoy!

Nutrition Facts
Bacon Broccoli Quiche
Amount Per Serving (1 slice)
Calories 462 Calories from Fat 360
% Daily Value*
Fat 40g62%
Saturated Fat 20g125%
Cholesterol 106mg35%
Sodium 437mg19%
Potassium 155mg4%
Carbohydrates 17g6%
Protein 8g16%
Vitamin A 1170IU23%
Vitamin C 12.3mg15%
Calcium 138mg14%
Iron 0.8mg4%
* Percent Daily Values are based on a 2000 calorie diet.

Here’s one more to pin on your Pinterest boards!Bacon broccoli quiche is a perfect dish for any meal! Bacon, broccoli, red pepper & garlic add flavor to this egg based dish, baked in a pie crust.

How To Cook Bacon In An Oven

Do you know how to cook bacon in an oven? This method makes it INCREDIBLY EASY to make “practically hands-free”, perfect bacon every time!
Do you know how to cook bacon in an oven? This method makes it INCREDIBLY EASY to make "practically hands-free", perfect bacon every time!

Well, it is said that “an old dog can’t learn new tricks”. I beg to differ!  After cooking bacon in a skillet and on a electric grill for most of my life, I can safely say I DID learn a new trick! The trick I learned was how to cook bacon in an OVEN!

Cooking bacon in the oven (and the easy clean up) helps save time! You can be busy doing other things while the bacon cooks. PLUS, you don’t have to stand right there, watching the bacon splatter all over the skillet or stove top! You won’t even have to clean out the skillet or griddle once it’s done. Just pull up the foil, wad it up, and throw it in the trash! It’s a WIN-WIN!

Have you ever prepared bacon this way? Gotta tell ya, it is life changing! I love that cooking bacon this way is practically hands-free, clean up is next to nothing, and it is SO EASY! Once you’ve made bacon this way (and it turns out perfect), you will be “hooked for life”!

Scroll Down For A Printable Recipe Card At The Bottom Of The Page

How To Cook Bacon In An Oven!

It’s always best to do first things first, right? Line a large baking sheet with aluminum foil (up the edges), and then lightly spray the foil with non-stick baking spray. Lay the strips of uncooked bacon onto the foil in a single layer, leaving just a bit of space in between each slice.

IMPORTANT: Place the baking sheet into your oven, and THEN turn the oven on to 400°F. THAT’S RIGHT! Don’t preheat the oven!

Bacon is placed in a single layer on sprayed foil on baking sheet before cooking.

Turn on the oven AFTER you add the bacon. Cook the bacon slices for 15-20 minutes, without disturbing. There is no need to turn the bacon over, or do anything else to it! Since this is “hands-free” cooking, I was able to prepare the rest of our meal while the bacon was in the oven!

TIP: If you want the bacon to be REALLY crisp, you can place it on a wire rack to cook, but I have found that we prefer it, cooked right on the foil.

Timing The Bacon For Doneness

My recommendation is to check the bacon at the 15 minute mark! Obviously thin slices of bacon will cook for a slightly shorter amount of time than a thicker slice of bacon! I was using fairly thick slices, and they were perfectly done in 16 minutes! Plus, did you notice that when you cook bacon in an oven, the bacon slices don’t shrink up as much? .

To perfectly cook bacon in an oven is very easy, and is practically "hands free"!

Once the bacon is done cooking, remove the baking sheet from the oven. Transfer the cooked bacon to a couple layers of paper towels. The paper towels will help to absorb any extra bacon grease left on the bacon.

Cooked bacon is drained on paper towels before serving.

That’s it! Just like that, and with hardly any effort, you’ve learned how to cook bacon in an oven!  We enjoyed perfectly cooked bacon with some scrambled eggs and yummy cinnamon roll crescents. YUM!

The cooked bacon is done perfectly, and served with cinnamon crescent rolls and scrambled eggs!

This truly is the easiest way to cook bacon in an oven! No splatter screens and grease filled skillets anymore… just perfectly cooked bacon slices! As an added bonus, you can just roll up the used aluminum foil, and throw it into the trash with no pan cleanup!

Hope you will try this method next time you want bacon for breakfast, or to add to a burger (or other recipes).

Looking For More BACON Recipes?

Everything is better with bacon, right? You can find all my recipes in the Recipe Index, located at the top of the page. Here are a few other recipes you might enjoy that heavily feature BACON:

Interested In More Recipes?

Thank you for visiting this website. I appreciate you using some of your valuable time to do soIf you’re interested, I publish a newsletter 2 times per month (1st and 15th) with all the latest recipes, and other fun info. I would be honored to have you join our growing list of subscribers, so you never miss a great recipe!

There is a Newsletter subscription box on the top right side (or bottom) of each blog post, depending on the device you use, where you can easily submit your e-mail address (only) to be included in my mailing list.

You Can Also Find Me On Social Media:
Facebook page: The Grateful Girl Cooks!
Pinterest: The Grateful Girl Cooks!
Instagram: jbatthegratefulgirlcooks

Author's signature.

0 from 0 votes
How To Cook Bacon In An Oven
Prep Time
5 mins
Cook Time
15 mins
Total Time
20 mins
 
Do you know how to cook bacon in an oven? This method makes it INCREDIBLY EASY to make "practically hands-free", perfect bacon every time!
Category: Breakfast, Tip
Cuisine: American
Keyword: cook bacon in an oven
Servings: 8 slices
Calories Per Serving: 91 kcal
Author: JB @ The Grateful Girl Cooks!
Ingredients
  • 8 slices bacon
  • Non-stick baking spray
Instructions
  1. Line a large baking sheet with aluminum foil (up the edges), and then lightly spray foil with non-stick baking spray.

  2. Lay strips of uncooked bacon onto the foil in a single layer, leaving a bit of space between each slice. IMPORTANT: Place baking sheet into oven, and THEN turn the oven on to 400°F. THAT'S RIGHT! Don't preheat the oven!

  3. Turn on the oven AFTER you add the bacon. Cook bacon slices at 400° for 15-20 minutes, without disturbing. Check them at 15 minutes, because due to varying thicknesses of bacon, cooking times can vary slightly. There is no need to turn the bacon over, or do anything else to it!

  4. Once bacon is done cooking to your desired amount of "crispness", remove  baking sheet from oven. Transfer cooked bacon to a couple layers of paper towels. The paper towels will absorb any extra bacon grease left on the bacon. Serve, and enjoy!

Nutrition Facts
How To Cook Bacon In An Oven
Amount Per Serving (1 slice)
Calories 91 Calories from Fat 72
% Daily Value*
Fat 8g12%
Saturated Fat 2g13%
Cholesterol 14mg5%
Sodium 145mg6%
Potassium 43mg1%
Protein 2g4%
Vitamin A 10IU0%
Iron 0.1mg1%
* Percent Daily Values are based on a 2000 calorie diet.

Here’s one more to pin on your Pinterest boards!Do you know how to cook bacon in an oven? This method makes it INCREDIBLY EASY to make "practically hands-free", perfect bacon every time!

Tortellini Bacon & Peas Skillet

Tortellini Bacon & Peas Skillet is a simple, quick dish to make in about 20 minutes! Seasoned with onions, Italian spices and Parmesan, it’s a delicious meal!
Tortellini Bacon & Peas Skillet is a simple, quick dish to make in about 20 minutes! Seasoned with onions, Italian spices and Parmesan, it's a delicious meal!

Ever have those days when you need to cook dinner, but are out of ideas?  Believe it or not, I sure do!  This recipe for Tortellini, Bacon & Peas Skillet came about as a result of wracking my brain to come up with a dinner plan recently.

I raided my pantry and found dried tortellini pasta.  Next, I raided my refrigerator and came up with bacon and and onion.  An idea started forming in my head… hmmm. Then I found a bag of frozen petite peas, and BAM… I knew what I would cook for our dinner, and created this dish!

The recipe is very simple to make in only a few steps. It only took about 20 minutes from my pillaging in the kitchen, until we were eating this delicious meal! Not too bad for a quick and delicious weeknight meal, if I do say so myself!

Scroll Down For A Printable Recipe Card At The Bottom Of The Page

Here’s How To Prepare The Tortellini, Bacon & Peas Skillet

One of the ingredients in this dish is cooked and crumbled bacon. The first thing I did was to cook the bacon. I cooked the onion along with the bacon. The easiest way I have found to cook bacon quickly is to stack bacon slices, then thinly slice them into small pieces.

NOTE: Use a large skillet to cook bacon and onion. The tortellini will be added to the skillet later, so it needs to big enough to hold it all!  Once the small bacon strips (and chopped onion) are added to the skillet, they will cook very quickly, with minimal stirring!

Slicing the bacon up thin to cook, in order to add to tortellini dish.

Once the bacon (and chopped onions) are finished cooking, remove them from skillet with a slotted spoon. Place the bacon mixture on a paper towel, to finish draining. Set bacon aside. IMPORTANT: Keep the bacon drippings in the skillet (do not discard). It will be used when the dish is put together and will add additional amazing flavor to the tortellini!

Bacon is cooked until crumbly and drained before adding it to tortellini.

Which Kind Of Tortellini Should I Use?

I used dried cheese tortellini for this recipe.  However… you can easily substitute refrigerated cheese tortellini found in the deli section at most grocery stores, if that is more convenient for you!

Cook cheese tortellini in salted, boiling water, according to package directions. The great thing is that you could, in theory, cook the tortellini ahead of time. That way, if pressed for time to get dinner on the table, it will take even less time to throw this meal together later!

If using dried tortellini, you will need 1½ cups dry tortellini to cook. However, if you will be using refrigerated tortellini, you will need a total of 3 cups cheese tortellini.

Tortellini boiling in water, for tortellini bacon & peas skillet.

When done cooking, drain the tortellini.

Cheese tortellini is cooked then drained before adding it to skillet.

To Assemble Tortellini Bacon & Peas Skillet

Pour a teaspoon of olive oil into pan that has the reserved bacon drippings in it. Turn heat to medium. Once oil/bacon drippings are hot, add the cooked and drained tortellini. Add cooked crumbled bacon/onion mixture, thawed peas (thawed frozen peas won’t be as mushy as canned peas), salt, pepper, garlic powder, and Italian seasoning.

Stir to combine, and cook on medium heat until mixture is heated through. Taste test a small bite. If necessary, add more salt/pepper, to suit your personal taste.

To Serve:

Once heated thoroughly, remove pan from heat. Add grated Parmesan cheese (optional, but GOOD) to top of dish, and serve hot!

All ingredients are added to the tortellini in skillet before topping with Parmesan cheese.

That’s it!  I really hope you enjoy this quick, satisfying (and quite tasty) Tortellini, Bacon & Peas Skillet! We sure did. Hope you have a wonderful day, and thank you for stopping by. Come back soon!

Looking For More TORTELLINI Dishes?

You can find all of my pasta recipes in the Recipe Index, located at the top of the page. I have several tortellini recipes, including:

Interested In More Recipes?

Thank you for visiting this website. I appreciate you using some of your valuable time to do soIf you’re interested, I publish a newsletter 2 times per month (1st and 15th) with all the latest recipes, and other fun info. I would be honored to have you join our growing list of subscribers, so you never miss a great recipe!
There is a Newsletter subscription box on the top right side (or bottom) of each blog post, depending on the device you use, where you can easily submit your e-mail address (only) to be included in my mailing list.

You Can Also Find Me On Social Media:

Facebook page: The Grateful Girl Cooks!
Pinterest:
The Grateful Girl Cooks!
Instagram:
jbatthegratefulgirlcooks

Author's signature

↓↓ PRINTABLE RECIPE BELOW ↓↓

0 from 0 votes
Tortellini Bacon & Peas Skillet
Prep Time
15 mins
Cook Time
5 mins
Total Time
20 mins
 
Tortellini Bacon & Peas Skillet is a simple, quick dish to make in about 20 minutes! Seasoned with onions, Italian spices and Parmesan, it's a delicious meal!
Category: Entree
Cuisine: Italian
Keyword: tortellini
Servings: 3 servings (approx 1 cup each)
Calories Per Serving: 640 kcal
Author: JB @ The Grateful Girl Cooks!
Ingredients
  • 12 ounces dry tortellini pasta (can sub. 3 cups fresh tortellini)
  • 3 slices bacon , drippings reserved after cooking
  • 1/2 cup frozen peas , thawed
  • 1/4 cup onions , chopped
  • 1 Tablespoon olive oil
  • 1/2 teaspoon Italian seasoning
  • 1/4 teaspoon garlic powder
  • 1/4 teaspoon (each) salt and pepper , plus more, to taste
  • 2 Tablespoons grated Parmesan cheese , for garnish (optional)
Instructions
  1. Use a large skillet to cook bacon and onion. The tortellini will be added to the skillet later, so it needs to big enough to hold it all! Once the bacon (and chopped onions) are finished cooking, remove them from skillet with a slotted spoon. Place the bacon mixture on a paper towel, to finish draining. Crumble. Set bacon aside. IMPORTANT: Keep the bacon drippings in the pan (do not discard). It will be used when the dish is put together and will add additional amazing flavor to the tortellini!

  2. Cook cheese tortellini in salted, boiling water, according to package directions. When done cooking, drain the tortellini.

  3. Pour a teaspoon of olive oil into the skillet with reserved bacon drippings in it. Turn heat to medium. Once oil/bacon drippings are hot, add the cooked, drained tortellini. Add cooked bacon/onion mixture, thawed peas, salt, pepper, garlic powder, and Italian seasoning. Stir to combine, and cook on medium heat until mixture is heated through. Taste test a small bite. If necessary, add more salt/pepper, to suit your taste.

  4. Once heated thoroughly, remove pan from heat. Add grated Parmesan cheese on top to garnish dish (optional, but GOOD), and serve hot! Enjoy!

Nutrition Facts
Tortellini Bacon & Peas Skillet
Amount Per Serving (1 (1/3 of total))
Calories 640 Calories from Fat 270
% Daily Value*
Fat 30g46%
Saturated Fat 9g56%
Cholesterol 88mg29%
Sodium 1211mg53%
Potassium 121mg3%
Carbohydrates 70g23%
Fiber 7g29%
Sugar 6g7%
Protein 21g42%
Vitamin A 415IU8%
Vitamin C 10.6mg13%
Calcium 211mg21%
Iron 2mg11%
* Percent Daily Values are based on a 2000 calorie diet.

Here’s one more to pin on your Pinterest boards!Tortellini Bacon & Peas Skillet is a simple, quick dish to make in about 20 minutes! Seasoned with onions, Italian spices and Parmesan, it's a delicious meal!

Chicken Wild Rice and Bacon Soup

Chicken wild rice soup, w/ thick-cut bacon, carrots, onions and spices are the backdrop for this easy, delicious, creamy and filling dish!On a cool Fall day, nothing warms you up better than a hearty bowl of Chicken wild rice and bacon soup!  Chicken, wild rice, thick-cut bacon, carrots, onions and spices are the backdrop for this easy, delicious, creamy and filling meal!

On a cool Fall day, nothing warms you up better than a hearty bowl of Chicken wild rice and bacon soup!  Chicken, wild rice, thick-cut bacon, carrots, onions and spices are the backdrop for this easy, delicious, creamy and filling meal!

I found this recipe in a cookbook I bought for my friend Shari last Christmas!  I gave her the cookbook (she LOVES to cook), and cringed just a bit when she said her son had given her the exact same cookbook. It was funny (and kind of sad) when she gave it back to me and told me to keep it. Gadzooks!

Of course, I kept it (a small sacrifice, right?), and I have loved finding new soup recipes for our family in it, including THIS one.  My husband and I loved this amazing Chicken wild rice soup (with bacon)!

Scroll Down for A Printable Recipe Card At the bottom Of the Page

Is This An Easy Soup To Prepare?

The chicken wild rice soup has a rather long cook time (60 minutes) in order to soften the wild rice, but other than that, it was a simple soup to prepare. I recommend this recipe (AND the cookbook) whole-heartedly, and hope you will consider trying it!  Here’s how to make the soup:

How To Make Chicken Wild Rice and Bacon Soup

Cook bacon pieces in a large, heavy pot.  *TIP: I cut the bacon into 1″ strips with kitchen scissors before cooking, because it cooks faster. Simply stack the bacon, then cut through strips with scissors (or sharp knife).

Cook the bacon on medium-high heat until crisp (takes about 5-7 minutes). When done, transfer bacon with a slotted spoon to paper towels to drain. Set aside. Leave bacon grease in pot.

Cooking bacon for chicken wild rice soup.

Place butter, chopped carrot and onion into the pot. Cook on medium-high, stirring often, until carrot begins to soften (about 5-6 minutes).

Carrots and onions are cooked for chicken wild rice soup.

Add minced garlic and dried thyme. Cook for one minute, stirring, so the garlic doesn’t burn. Pour in the white wine. Cook for 3 minutes, stirring often to scrape up any bacon “bits” from bottom of pan (these will add flavor to soup).

Spices and white wine are cooked with vegetables for wild rice chicken soup.

Add Wild Rice And Cook Until Tender

Now add chicken broth and wild rice to pot. Stir to combine. Turn heat down to Low, put a lid on the pot and cook for 60 minutes or until rice is tender.

Wild rice and chicken broth is added to the soup pot.

Once rice is tender, add cooked bacon and chicken to soup. By the way, I quickly cooked the chicken while the soup was cooking, so it was ready to go once the rice was tender. TIP: You can also use rotisserie chicken or leftover baked or boiled chicken to save time, as well!

Chicken and bacon are added to the pot full of chicken wild rice soup.

Add the heavy whipping cream. Stir to combine. Return the chicken wild rice soup to a low simmer; cook soup, uncovered for 5 more minutes, until heated through, and soup has thickened a bit.

Heavy whipping cream is added to the chicken wild rice soup.

Once chicken wild rice soup has heated through, season with salt and black pepper, to taste. Now it’s ready to serve!

The chicken wild rice soup is heated through, then it's ready to eat.

Chicken Wild Rice Soup Is Ready To Serve!

This is how it looked when I ladled it into our soup bowls… doesn’t it look yummy?  Guess what… it TASTES yummy, too! Serve the soup with some crusty french bread, and enjoy!

A bowl full of chicken wild rice soup.

A white bowl, full of chicken wild rice soup, with bacon.

I really hope you will consider trying this soup!  I know it’s hard to look at a picture and wonder if it actually tastes good… but it does!  The kitchen smelled incredibly good, too, while this was cooking!

The leftovers were good for lunch the next day, as well.  You will notice with the leftovers (IF you have any leftovers… wink, wink) that the rice absorbs more of the broth if refrigerated overnight.  Simply add a bit more broth when you reheat the soup, and it will be as good as the first night you made it! Have a great day… and make some SOUP!

Looking for More SOUP Recipes?

You can find ALL of my recipes in the Recipe Index, which is located at the top of the page. I have lots of yummy, comforting homemade soup recipes, including:

Interested In More Recipes?

Thank you for visiting this website. I appreciate you using some of your valuable time to do soIf you’re interested, I publish a newsletter 2 times per month (1st and 15th) with all the latest recipes, and other fun info. I would be honored to have you join our growing list of subscribers, so you never miss a great recipe!
There is a Newsletter subscription box on the top right side (or bottom) of each blog post, depending on the device you use, where you can easily submit your e-mail address (only) to be included in my mailing list.

You Can Also Find Me On Social Media:

Facebook page: The Grateful Girl Cooks!
Pinterest:
The Grateful Girl Cooks!
Instagram:
jbatthegratefulgirlcooks

Author's signature

Recipe Adapted From: The cookbook “Williams-Sonoma Soup Of The Day”, published by Weldon Owen, Inc. and Williams-Sonoma, Inc., 2011, page 61.

0 from 0 votes
Chicken Wild Rice and Bacon Soup
Prep Time
20 mins
Cook Time
1 hr 5 mins
Total Time
1 hr 25 mins
 
Chicken, chewy wild rice, thick-cut bacon, carrots, onions and spices are the backdrop for this delicious, creamy and filling soup!
Category: Soup
Cuisine: American
Keyword: chicken wild rice soup
Servings: 4 servings
Calories Per Serving: 471 kcal
Author: JB @ The Grateful Girl Cooks!
Ingredients
  • 6-7 slices thick cut bacon , cut into 1" strips (use kitchen scissors or sharp knife to cut)
  • 1 Tablespoon butter
  • 1 carrot , peeled and chopped
  • 1 yellow onion (medium), chopped
  • 2 cloves garlic , minced
  • 1/2 teaspoon dried thyme
  • 1/4 cup dry white wine
  • 4 cups chicken broth
  • 1 cup uncooked wild rice
  • 1 chicken breast (skinless, boneless), cooked and chopped (1" chunks)
  • 3 Tablespoons heavy whipping cream
  • Salt and fresh ground black pepper , to taste
Instructions
  1. Cut bacon into 1" strips with kitchen scissors (stack bacon, then cut through strips with scissors or sharp knife). Cook bacon pieces in a large, heavy pot on medium-high heat until crisp (takes about 5-7 minutes). When done, transfer bacon with a slotted spoon to paper towels to drain. Set aside. Leave bacon grease in pot.

  2. Place butter, chopped carrot and onion into the pot. Cook on medium-high, stirring often, until carrot begins to soften (about 5-6 minutes). Add minced garlic and dried thyme. Cook for an additional minute, stirring, so the garlic doesn't burn. Add wine. Cook for 3 minutes, stirring often to scrape up any bacon "bits" from bottom of pan (these add flavor to soup). Add chicken broth and wild rice to pot. Stir to combine. Turn heat down to Low, put a lid on the pot and cook for 60 minutes or until rice is tender.
  3. Once rice is tender, add cooked bacon and chicken to soup. Add heavy whipping cream. Stir to combine. Return soup to a low simmer; cook soup, uncovered, for 5 minutes, until heated through, and soup has thickened a bit. Once soup is heated through, season with salt and pepper, to taste. Serve, and enjoy!
Nutrition Facts
Chicken Wild Rice and Bacon Soup
Amount Per Serving (1 serving)
Calories 471 Calories from Fat 234
% Daily Value*
Fat 26g40%
Saturated Fat 9g56%
Cholesterol 62mg21%
Sodium 1291mg56%
Potassium 669mg19%
Carbohydrates 36g12%
Fiber 3g13%
Sugar 3g3%
Protein 20g40%
Vitamin A 2655IU53%
Vitamin C 20.2mg24%
Calcium 39mg4%
Iron 1.8mg10%
* Percent Daily Values are based on a 2000 calorie diet.

Here’s one more to pin on your Pinterest boards! Chicken wild rice soup, w/ thick-cut bacon, carrots, onions and spices are the backdrop for this easy, delicious, creamy and filling dish!

Fresh Tomato, Bacon and Onion Fettucine

You’re gonna love this fresh tomato bacon onion fettucine, a delicious Italian seasoned pasta dish that can be easily made in only 20 minutes!You're gonna love this fresh tomato bacon onion fettucine... a delicious Italian seasoned pasta dish that can be easily made in only 20 minutes!
A few days ago our oldest son popped in for a visit, and ended up staying to have dinner with us. I made this yummy, quick recipe for Fresh Tomato Bacon Onion Fettucine, and we enjoyed it very much!

The recipe is one I’ve had for years and years, but do not know the original source, since only the recipe was written down on a little 3×5 card.  I’ve made a few changes to the recipe over the years to suit my taste buds, and let me tell you… it is good!

The basic recipe for this tomato bacon onion fettucine is actually quite simple… cook bacon, cook pasta, cook a few other simple fresh ingredients, combine, and serve in about 20 minutes! It tastes wonderful, too!  Here’s how you make this dish:

Scroll Down For A Printable Recipe Card At The Bottom Of The Page

How To Make Tomato Bacon Onion Fettucine

In a skillet, cook the bacon pieces until crisp. When done, transfer bacon pieces to paper towels to absorb the grease. Drain off the bacon drippings, BUT LEAVE 1 TABLESPOON BACON DRIPPINGS IN SKILLET (sorry for the slightly blurry photo). **Tip: While bacon is cooking, bring water for pasta to boiling, then cook in separate pot**.

Bacon is cooked until crispy for the fettucine sauce.
Add chopped onion, tomato, basil and crispy cooked bacon pieces to reserved Tablespoon of bacon drippings in skillet. The photo below is before I added the cooked bacon. (I used a variety of colored tomatoes, but any fresh tomatoes will be perfectly fine!).

Cook 3-4 minutes until onion is tender, and tomatoes have begun to break down. Add minced garlic and a couple Tablespoons of starchy water from the pasta that is cooking. Stir well, to combine. Cook, stirring occasionally, until heated completely through on medium heat.

Fresh tomatoes, onions are added to skillet.

Tomatoes, bacon, onions and Italian spices are cooked to make sauce for fettucine.

Prepare Fettucine Noodles

Heat lightly salted water in a large pot for cooking the pasta. Once the water is boiling, add the fettucine pasta, and cook according to package directions. (Note:  I did this while cooking the bacon and sauce to save time).

I made the fettucine from scratch with my little pasta machine earlier in the day just for fun!  Isn’t it beautiful?  I used it in this meal (because I find it relaxing to make homemade pasta), but absolutely recommend using store bought pasta for the easiest way to make this dish!

Fettucine pasta I made to use in this dish.

Fettucine noodles are cooked in boiling water until done.

When the pasta has finished cooking, drain it, then add pasta to the skillet with the sauce. Gently toss with tongs, to thoroughly coat the tomato bacon onion fettucine pasta with sauce. Cook until heated through, adding an additional touch of water if necessary to thin the sauce to cover.

Cooked and drained fettucine noodles are added to tomato, bacon and onion sauce.

Tomato, bacon and onion sauce is stirred into cooked fettucine pasta.

Serve The Tomato Bacon Onion Fettucine

Place pasta and sauce onto serving dishes, then garnish the tomato bacon onion fettucine with grated Parmesan cheese and a sprinkle of dried or fresh parsley. Serve, and enjoy!

Fresh tomato, bacon onion fettucine is served in white bowl.

Close up photo to fettucine with bacon, tomato and onion Italian sauce.

We really enjoyed this tomato bacon onion fettucine with a simple mixed green salad on the side.  The recipe, as written, makes 3 main course servings or 4-5 small side servings. The caloric calculation is based on 3 main course servings.

As I write this blog today, my heart is broken over the Hurricane Harvey destruction and horrific flooding occurring in Texas and Louisiana this week. We are continuing to pray for our fellow citizens impacted by this event, and are hopeful God will meet their needs physically, emotionally and spiritually during and after this tragedy. He is “a very present help in times of trouble”.

Have a good day, friends. May you know God’s unconditional love, no matter what you are going through!

Looking for More PASTA Recipes?

You can find all of my recipes in the Recipe Index, located at the top of the page. I have some delicious pasta recipes you might want to try, including:

Interested In More Recipes?

Thank you for visiting this website. I appreciate you using some of your valuable time to do soIf you’re interested, I publish a newsletter 2 times per month (1st and 15th) with all the latest recipes, and other fun info. I would be honored to have you join our growing list of subscribers, so you never miss a great recipe!
There is a Newsletter subscription box on the top right side (or bottom) of each blog post, depending on the device you use, where you can easily submit your e-mail address (only) to be included in my mailing list.

You Can Also Find Me On Social Media:

Facebook page: The Grateful Girl Cooks!
Pinterest:
The Grateful Girl Cooks!
Instagram:
jbatthegratefulgirlcooks

Author's signature

Original Recipe Source: unknown (recipe handwritten on a 3×5 card many years ago)

0 from 0 votes
Fresh Tomato Bacon Onion Fettucine
Prep Time
10 mins
Cook Time
10 mins
Total Time
20 mins
 
You're gonna love this fresh tomato bacon onion fettucine... a delicious Italian seasoned pasta dish that can be easily made in only 20 minutes!
Category: Main Course
Cuisine: Italian
Keyword: tomato bacon onion fettucine
Servings: 3
Calories Per Serving: 347 kcal
Author: JB @ The Grateful Girl Cooks!
Ingredients
  • 6 ounces fettucine noodles
  • 3 slices raw bacon , cut into 1/2 inch slices
  • 1/4 cup chopped onion
  • 1 cup chopped tomato
  • 1 teaspoon minced garlic
  • 1/2 teaspoon dried basil (or 2 Tablespoons chopped fresh basil)
  • 2-3 Tablespoons starchy pasta water
  • Grated Parmesan cheese (for garnish)
  • Dried parsley (for garnish)
Instructions
  1. Heat lightly salted water in large pot. When boiling, add pasta, and cook according to package directions. (I did this at same time I was cooking bacon and sauce).
  2. In a skillet, cook bacon pieces until crisp. Transfer bacon pieces to paper towel to absorb grease. Drain grease from skillet, BUT LEAVE 1 TABLESPOON BACON GREASE IN SKILLET.
  3. Add chopped onion, tomato, basil and bacon pieces to bacon drippings in skillet. Cook 3-4 minutes until onion is tender, and tomatoes have begun to break down. Add minced garlic and a couple Tablespoons of water from the pasta that is cooking. Stir well, to combine. Cook, stirring occasionally, until heated completely through on medium heat.
  4. When pasta is finished cooking, drain and add pasta to skillet with the sauce. Gently toss to coat the pasta with the sauce. Heat until hot throughout. Place pasta and sauce onto serving plates, and garnish with grated Parmesan cheese and a sprinkle of dried parsley. Serve, and enjoy!
Nutrition Facts
Fresh Tomato Bacon Onion Fettucine
Amount Per Serving (1 g)
Calories 347 Calories from Fat 108
% Daily Value*
Fat 12g18%
Saturated Fat 4g25%
Cholesterol 66mg22%
Sodium 237mg10%
Potassium 319mg9%
Carbohydrates 44g15%
Fiber 2g8%
Sugar 3g3%
Protein 13g26%
Vitamin A 490IU10%
Vitamin C 8.1mg10%
Calcium 84mg8%
Iron 1.5mg8%
* Percent Daily Values are based on a 2000 calorie diet.

Here’s one more to pin on your Pinterest boards!You're gonna love this fresh tomato bacon onion fettucine... a delicious Italian seasoned pasta dish that can be easily made in only 20 minutes!


Save

Save

Save

Save

Save

Save

Save

Save

Save

Swiss Chard with Bacon and Mushrooms

You’re going to enjoy Swiss Chard with Bacon and Mushrooms! This flavorful vegetable side dish also has onions and garlic, and is ready in under 20 minutes! You're going to enjoy Swiss Chard with Bacon and Mushrooms! This flavorful vegetable side dish also has onions and garlic, and is ready in under 20 minutes!
I started growing rainbow chard in my garden several years ago, so I enjoy trying new ways to prepare it.  Recently I cooked Swiss Chard with bacon and mushrooms, red onion, and garlic as a side dish for dinner, and was very pleased with the results. The addition of bacon, mushrooms, onion and garlic to Swiss chard made this quite a flavorful vegetable dish!

Scroll Down For A Printable Recipe Card At The Bottom Of The Page

What Is Swiss Chard?

Swiss chard is a leafy green vegetable that has been around for centuries. The chard develops large stalks, once mature. The leaves can be green or slightly red, and the stalks can vary in color, such as white, yellow or red. The leaves are very nutritious, and fresh young leaves can be eaten raw in salads.

For this recipe I used red chard, and did not use a published recipe. I used only my ideas for what might taste good paired with this veggie I grew in our backyard garden.

Growing Swiss chard in our garden.

Prepare The Bacon

Stack bacon pieces on top of each other. Using a sharp knife, slice bacon into thin strips. Place bacon pieces (sliced) into a large skillet. Cook on medium-high heat, stirring occasionally, until bacon pieces begin to brown (3-4 minutes).

Leave all bacon grease in the skillet (this photo is from another recipe, but shows how I slice the bacon for quick cooking).

Cooking bacon to add to Swiss chard and mushrooms.

Cook The Swiss Chard

Add chard stems, sliced mushrooms and chopped red onion to the bacon and bacon drippings in the skillet. Continue to cook until chard stems become slightly tender (3-4 mins). Now add the chopped chard leaves, and stir to combine. Continue to cook on medium heat, stirring occasionally, until leaves have wilted and are cooked through (2-3 minutes).

Swiss chard, bacon, red onion and mushrooms cooking in bacon drippings in skillet.

Add minced garlic and stir to combine. Cook for 1 minute, being careful to not burn the garlic. Add salt and pepper, to taste.

Minced garlic, salt and pepper added to cooked Swiss chard.

Time To Eat Swiss Chard With Bacon And Mushrooms

Serve this Swiss chard immediately, while hot. It is a simple side dish to prepare that will compliment a variety of main dishes.

Swiss Chard with Bacon and Mushrooms served in white bowl.

I cut the Swiss Chard stalks into fairly large slices as you can see from the photos, so if you prefer smaller bites, slice them to the thickness you prefer. Some folks prefer to leave the stalks out and only cook the leaves… whatever your preference is, GREAT!

Hope you will consider trying this recipe, and as always, I sincerely trust you will enjoy it! If you enjoy Swiss chard, be sure to check out my recipe for Swiss Chard with Onions and Garlic!

Looking For More Veggie Side Dish Recipes?

You can find all of my veggie side dish recipes in the Recipe Index, which is located at the top of the page. I have quite a few, including:

Interested In More Recipes?

Thank you for visiting this website. I appreciate you using some of your valuable time to do soIf you’re interested, I publish a newsletter 2 times per month (1st and 15th) with all the latest recipes, and other fun info. I would be honored to have you join our growing list of subscribers, so you never miss a great recipe!
There is a Newsletter subscription box on the top right side (or bottom) of each blog post, depending on the device you use, where you can easily submit your e-mail address (only) to be included in my mailing list.

You Can Also Find Me On Social Media:
Facebook page: The Grateful Girl Cooks!
Pinterest: The Grateful Girl Cooks!
Instagram: jbatthegratefulgirlcooks

Have a GREAT day!

Author's signature

↓↓ PRINTABLE RECIPE BELOW ↓↓

0 from 0 votes
Swiss Chard with Bacon and Mushrooms
Prep Time
5 mins
Cook Time
12 mins
Total Time
17 mins
 
You're going to enjoy Swiss Chard with Bacon and Mushrooms! This flavorful vegetable side dish also has onions and garlic, and is ready in under 20 minutes!
Category: Vegetable Dish
Cuisine: American
Keyword: swiss chard
Servings: 4 servings
Calories Per Serving: 210 kcal
Author: JB @ The Grateful Girl Cooks!
Ingredients
  • 4-5 slices bacon , (cut into thin pieces before cooking)
  • 8-10 mushrooms , sliced thin
  • 1/4 cup red onion , chopped
  • 3 Tablespoons bacon grease (approx. from cooked bacon)
  • 1 head Swiss chard (I used red chard), chopped and divided (stems separated from leaves)
  • 1 teaspoon minced garlic
  • Salt and Pepper to taste
Instructions
  1. Stack bacon pieces on top of each other. Using a sharp knife, slice into thin strips. Place bacon pieces (sliced) into a large skillet. Cook on medium-high heat, stirring occasionally, until bacon pieces begin to brown (3-4 minutes). Leave all bacon grease in the skillet.
  2. Add chard stems, sliced mushrooms and chopped red onion. Continue to cook until chard stems become slightly tender (3-4 mins).
  3. Add chopped chard leaves, and stir to combine. Continue to cook on medium heat, stirring occasionally, until leaves have wilted and are cooked through (2-3 minutes).
  4. Add minced garlic and stir to combine. Cook for 1 minute, being careful to not burn the garlic.
  5. Add salt and pepper to taste, then serve while hot.
Nutrition Facts
Swiss Chard with Bacon and Mushrooms
Amount Per Serving (1 serving)
Calories 210 Calories from Fat 171
% Daily Value*
Fat 19g29%
Saturated Fat 7g44%
Cholesterol 24mg8%
Sodium 332mg14%
Potassium 455mg13%
Carbohydrates 4g1%
Fiber 1g4%
Sugar 1g1%
Protein 5g10%
Vitamin A 4585IU92%
Vitamin C 23.6mg29%
Calcium 38mg4%
Iron 1.6mg9%
* Percent Daily Values are based on a 2000 calorie diet.

Here’s another to pin to your Pinterest boards!You're going to enjoy Swiss Chard with Bacon and Mushrooms! This flavorful vegetable side dish also has onions and garlic, and is ready in under 20 minutes!

Save

Save

Save

Save

Save

Save

Save

Save

Save

Save

Save

Save

Brussel Sprouts with Bacon and Mushrooms

Pan-seared Brussel sprouts with bacon, mushrooms, shallots, butter and garlic are a perfect side dish for your holiday dinner, or any other meal!Pan-seared Brussel sprouts with bacon, mushrooms, shallots, butter and garlic are a perfect side dish for your holiday dinner or any other meal!
If you like trying new vegetable dishes, I’m sure you will LOVE this simple side dish recipe for Brussel Sprouts with Bacon and Mushrooms! 

We enjoyed this delicious side dish with our dinner recently! This delicious veggie dish is a perfect one to be enjoyed for the holidays or other meals!

I grew up not liking Brussel sprouts at all, but as an adult, I’ve come to love them! We eat them pan-seared, roasted, steamed, and practically every way they can be prepared.

I decided to create a new recipe from scratch, to come up with a new way to enjoy them!

For this recipe I pan-seared Brussel sprouts with bacon, then added mushrooms, shallots, salt, pepper, minced garlic. I finished this dish off with a touch of butter. The results are DELICIOUS!

Scroll Down For A Printable Recipe Card At The Bottom Of The Page

How To Make Brussel Sprouts With Bacon and Mushrooms

Chop up the bacon and add it to a large skillet. I like to use kitchen scissors to cut the slices of bacon into tiny pieces before cooking. It makes the bacon cook a lot faster this way!

Cook the bacon on medium heat 2-3 minutes, until it is about half-way done.

Cooking the bacon pieces to add to pan-seared brussel sprouts.

Place brussel sprouts (that have been cut in half) into the same skillet.  Continue to pan-sear the vegetables in the bacon drippings for a couple minutes.

If necessary, you might want to add a little bit of olive oil to skillet, in order to keep from burning the veggies.  Lightly season the brussel sprouts with salt and pepper.

Brussel sprouts and bacon pieces are cooked in bacon drippings in skillet.

Continue cooking the brussel sprouts until they begin begin to soften (3-4 minutes). Make sure to turn them over to the other side, half way through cooking time.

Measure 3 Tablespoons of water into the pan, and cook until the water has dissipated.

Water is added to brussel sprouts and bacon and cooked until it is gone.

Add the sliced mushrooms and shallots to the skillet. Continue cooking until the mushrooms are done and cooked through (approx. 3-4 minutes).

Stir in the minced garlic, and cook for an additional minute, stirring often, so you won’t burn the garlic.

To Finish Cooking The Brussel Sprouts

At this point, the brussel sprouts and mushrooms should be cooked through. Toss a tiny pat of butter into the skillet, and stir until it melts and coats the veggies.

NOTE: **Butter is completely optional, but it does add more flavor… just sayin’.

Sliced mushrooms and shallots are added to brussel sprouts and bacon in skillet.

Serving The Brussel Sprouts

Remove pan from the heat, and season with additional salt and pepper to taste, and then serve the brussel sprouts. Transfer them to a serving plate, and dig in!

Brussel Sprouts with Bacon and Mushrooms are served on white platter.

The bacon will be fully cooked , the Brussel sprouts will be tender, and there will be a whole lot of flavor going on!

Cooked brussel sprouts on platter, with bacon and mushrooms.

Brussel sprouts with bacon and mushrooms is a very simple, yet tasty side dish to prepare.  I hope you will have the opportunity to make this easy recipe.

It’s one more way to get yummy veggies (including Brussel sprouts!) onto dinner plates. Plus… everything’s better with bacon, right? 

Thanks for stopping by, and please come back again soon for more family-friendly recipes. Take care, and have a great day!

Looking For More VEGETABLE Dishes?

You can find all of my vegetable dishes in the Recipe Index at the top of the page. A few favorite recipes are:

Want More Recipes? Get My FREE Newsletter!

I publish a newsletter 2 times per month (1st and 15th) with lots of recipes, tips, etc..
Would you like to join our growing list of subscribers?

There is a Newsletter subscription box on the top right (or bottom) of each blog post, depending on the device you use.
You can submit your e-mail address there, to be added to my mailing list.

Find Me On Social Media:

Facebook page: The Grateful Girl Cooks!
Pinterest:
The Grateful Girl Cooks!
Instagram:
jbatthegratefulgirlcooks

Instagram: jbatthegratefulgirlcooks

Author's signature

↓↓ PRINTABLE RECIPE BELOW ↓↓

0 from 0 votes
Brussel Sprouts with Bacon and Mushrooms
Prep Time
5 mins
Cook Time
15 mins
Total Time
20 mins
 
Pan-seared Brussel sprouts with bacon, mushrooms, shallots, butter and garlic are a perfect side dish for your holiday dinner or any other meal!
Category: Side Dish, Vegetables
Cuisine: American
Keyword: brussel sprouts
Servings: 2 servings
Calories Per Serving: 144 kcal
Author: JB @ The Grateful Girl Cooks!
Ingredients
  • 10 Brussel Sprouts (approx. 5 per person), cut in half (and stem removed)
  • 1-2 slices thick cut bacon , chopped into small pieces
  • Olive oil (only if necessary due to low bacon dripping residue in skillet)
  • salt & pepper , to taste
  • 3 Tablespoons water
  • 4-6 mushrooms , sliced
  • 1 teaspoon finely chopped shallots
  • 1/2 teaspoon minced garlic
  • 1 teaspoon butter
Instructions
  1. Add chopped bacon to medium skillet. Cook on medium heat until about 1/2 way done. (do not drain bacon drippings).
  2. Add brussel sprouts that have been cut in half (and de-stemmed). Continue to pan-sear brussel sprouts in bacon drippings for a couple minutes (add a tiny bit of olive oil to skillet only if necessary). Lightly season brussel sprouts with salt and pepper.
  3. Continue cooking until brussel sprouts begin to soften (3-4 minutes), flipping over half way through cooking. Add 3 Tablespoons water to skillet; cook until water has cooked away.
  4. Add sliced mushrooms and shallots to skillet. Continue cooking until mushrooms are done and cooked through (approx. 3-4 minutes). Add minced garlic; cook for additional minute. At this point, brussel sprouts and mushrooms should be cooked through. Add butter, and stir until butter has melted and coated veggies. (Note: Butter is completely optional, but adds good flavor)
  5. Remove pan from heat, season with additional salt and pepper (if needed), then serve.
Nutrition Facts
Brussel Sprouts with Bacon and Mushrooms
Amount Per Serving (1 serving)
Calories 144 Calories from Fat 81
% Daily Value*
Fat 9g14%
Saturated Fat 3g19%
Cholesterol 17mg6%
Sodium 164mg7%
Potassium 532mg15%
Carbohydrates 10g3%
Fiber 4g17%
Sugar 2g2%
Protein 6g12%
Vitamin A 780IU16%
Vitamin C 81.6mg99%
Calcium 40mg4%
Iron 1.5mg8%
* Percent Daily Values are based on a 2000 calorie diet.

Here’s one more to pin on your Pinterest boards!Pan-seared Brussel sprouts with bacon, mushrooms, shallots, butter and garlic are a perfect side dish for your holiday dinner or any other meal!

Save

Save

Save

Save

Save

Save

Save

Save

Save

Save

Save

Save

Save

Save

Save

Save

Save

Bacon, Mushroom, Spinach And Cheese Omelette

Hungry for a filling breakfast? Whip up this bacon mushroom cheese omelette, with fresh spinach leaves thrown in for good measure. It’s delicious!Hungry for a filling breakfast? Whip up this bacon mushroom cheese omelette, with fresh spinach leaves thrown in for good measure. It's delicious!
Do you enjoy omelettes? My husband and I sure do… but only eat them a couple times each month. The other day we enjoyed a homemade breakfast together.  I made us each a Bacon, Mushroom, Spinach and Cheese Omelette, and decided to share it on my blog… because it tasted fantastic!

Because we both work from our home, we had a late breakfast… which ended up being so filling we didn’t have to eat lunch! I’m so thankful to have opportunities occasionally to leisurely share a nice breakfast together, sip on orange juice and coffee, and talk about the day ahead of us.

What’s IN This Bacon Mushroom Cheese Omelette?

I am NOT going to post a printable “recipe” for this omelette, because I know a lot of people like different ingredients in their omelettes. That being said… (and in case you ARE wondering) for 2 omelettes I used: 6 large eggs, tiny bit of milk (approx. 3 Tablespoons), salt and pepper, 2 teaspoon of butter, 4 slices bacon, 6 mushrooms, couple handfuls of fresh baby spinach, and a couple handfuls of grated cheddar cheese.

Pre-Cook the Bacon

As to the “process”… this is how I made these delicious omelettes.  To start off, cut 4 pieces bacon into small strips (using kitchen scissors). Slice fresh mushrooms (about 6), then cook mushrooms AND bacon together on medium heat in a large skillet until bacon is done and crisp.

The bacon will cook a bit faster because it has been cut into tiny strips.  Remove bacon strips and mushrooms from the skillet and drain them on several thicknesses of paper towels. Set aside.

Cooking bacon in skillet

Cooked bacon pieces draining on paper towel

In medium bowl combine eggs, a little bit of milk, and salt and pepper. Whisk well to combine.

Whisking eggs and milk in metal bowl
Preparing The Omelette

Melt half the butter in a small non-stick skillet on medium-low.  Pour in half of the egg mixture for ONE omelette.

As the omelette begins to cook around the edges, slightly lift up the edges with the spatula, tilt pan, and let some of the egg mixture run under the cooked edges all around the pan. I use a rubber spatula to do this. You will slowly let the “runny” uncooked egg mixture run to the underneath side of the cooked egg, and it will cook.

Omelette egg mixture beginning to cook in skillet

Once almost all of the egg mixture has “cooked”, place a handful of fresh baby spinach leaves onto one HALF side of the omelette.  The spinach leaves will slightly wilt from the heat of the egg mixture.

Raw spinach added to omelette in skillet
Now add half of the cooked bacon/mushroom mixture to half of the omelette, on top of the spinach.

Cooked bacon added to omelette with spinach
Now add a small handful of grated cheese to HALF of the omelette (on top of the bacon/mushroom mixture). I used Cheddar for this one, but use whatever you prefer!

Grated cheddar cheese added to eggs, bacon and spinach in skillet

Almost Done!

Using a rubber spatula, carefully flip the “empty” side of the omelette over onto the stuffed half, to cover.  The heat from the eggs will slightly melt the cheese. Gently lift and slide the omelette out of the skillet and onto the serving plate.

If you want cheese totally melted, just put omelette (on microwaveable plate) into microwave for a few seconds.  Remove and serve hot.  Repeat same cooking process for the remaining ingredients to make second omelette.

Omelette flipped over halfway over bacon, spinach and cheese

This really is a hearty breakfast… a three egg omelette (can cut back to 2 eggs per person, if desired), a couple pieces of bacon, some healthy spinach and creamy cheddar cheese makes for a delicious start to the day!

Make It Your OWN!

If you wish, you can also cut the omelette in half for smaller appetites!  Add a piece of toast, some juice and coffee, and you will be quite full, satisfied, and ready to take on the day!

The beauty of making your own omelette is that you can create one using YOUR favorite ingredients. You can substitute ham for the bacon, add green onions, pepperjack cheese, salsa, etc. The possibilities are endless!  Here’s to starting the day with a great breakfast.

Thanks for stopping by this blog.  My sincere hope is that your day will be blessed by the One who made you and loves you the most.  I know that my own life has been changed forever for the better because of the undeserved grace and mercy God has shown me through His son, Jesus. For that I am truly GRATEFUL.

Interested In More Recipes?

Thank you for visiting this website. I appreciate you using some of your valuable time to do soIf you’re interested, I publish a newsletter 2 times per month (1st and 15th) with all the latest recipes, and other fun info. I would be honored to have you join our growing list of subscribers, so you never miss a great recipe!
There is a Newsletter subscription box on the top right side (or bottom) of each blog post, depending on the device you use, where you can easily submit your e-mail address (only) to be included in my mailing list.

You Can Also Find Me On Social Media:
Facebook page: The Grateful Girl Cooks!
Pinterest: The Grateful Girl Cooks!
Instagram: jbatthegratefulgirlcooks

Author's signature

Here’s one more to pin on your Pinterest boards!Hungry for a filling breakfast? Whip up this bacon mushroom cheese omelette, with fresh spinach leaves thrown in for good measure. It's delicious!

Save

Save

Save

Save

Save

Save

Save

Save

Save

Save

Save

Save

Save

Save

Save

Candied Bacon Ice Cream

What do you do when providing dessert for a “Bacon-Themed” Dinner? You make homemade Candied Bacon Ice Cream, of course! And, oh boy… was it ever good! Bacon makes everything better, including desserts, with this amazing, delicious homemade ice cream flavored with candied bacon, cinnamon, rum, and brown sugar!
Last summer a small group of friends enjoyed another Themed Dinner. This time our theme was BACON. Everything, from beverages, appetizers, main courses, to desserts, including this ice cream and Chocolate-Covered Bacon and Maple Bacon Pecan Truffles and Bacon Pecan Pralines, had to include some form of bacon.

Oh my goodness. It was amazing! Look at some of the food we enjoyed, in this photo!

Collage of nine bacon-themed food pictures

I am usually in charge of bringing several desserts to our themed dinner parties, so I scoured the internet to find some good choices utilizing BACON. This homemade bacon ice cream recipe was one of them, from celebrated author David Lebovitz… and let me tell you… it was FANTASTIC! Who knew bacon ice cream could taste so good? Here’s how you make this decadent dessert treat:

Scroll Down For A Printable Recipe Card At The Bottom Of The Page

Make The Candied Bacon

First thing I did was to “candy” some thick cut bacon. The instructions are in the recipe that follows, but if you want more in-depth pics, etc. see my previous post for How To Make Candied Bacon.

Brown sugar is sprinkled on raw bacon
Short version… bacon is coated with brown sugar and baked. Then it is cut into small pieces and cooled to room temp.

Chopped, candied bacon for ice cream, on green cutting boardMake The Ice Cream Base

Combine the half and half and the whipping cream. Measure out 1 ½ cups of this mixture into a medium bowl, which is set over another larger bowl that is filled with ice and water (ice bath). Put a mesh strainer over the top of the cream mixture. Set aside.

Next thing to do is make the ice cream “custard base”. Melt the butter in a medium saucepan, then remove it from the heat. Let it cool down a bit (you want it warm, not HOT). Stir in the brown sugar, and then add the remaining half and half/cream mixture (the amount NOT over the water bath). Stir to combine; set aside.

Cooking custard base for homemade candied bacon ice cream

In a separate bowl, whisk the egg yolks.

Egg yolks in metal bowl, with whisk

Temper The Eggs

Remove ½ cup of the (warm, not hot) butter/brown sugar/half and half/ whipping cream mixture from the saucepan. Pour it slowly into the egg yolks, whisking constantly while it is being added. This helps to “temper” the eggs, so they won’t scramble when adding them to saucepan. I know we’re adding bacon to ice cream, but bacon AND scrambled eggs? I don’t think so!

Pouring brown sugar and half and half into egg yolks in bowl

The “tempered” egg yolks are then poured slowly back into the saucepan with the butter/brown sugar/ half and half mixture, whisking while adding.

Tempered egg yolks for ice cream poured into red saucepan

Cook The Ice Cream Base

The ice cream base is then cooked on low-medium heat until the liquid thickens enough to coat a spatula. Stir constantly while this is cooking, making sure to scrape the bottom of the pan (so the liquid won’t stick and burn on bottom).

Ice cream ingredients in red saucepan with spatula

Remove the ice cream base from the heat, and let cool slightly (you don’t want it HOT). Once it has cooled down some, pour the ice cream base through the strainer into the half and half/whipping cream in the bowl over the ice bath, stirring as you pour.

Straining ice cream base liquid into bowl

Add the liquor, vanilla extract and cinnamon to the ice cream base. Stir to combine. Refrigerate ice cream liquid for 2-3 hours until completely chilled.

Time To Freeze The Candied Bacon Ice Cream

Once totally cold, pour mixture into ice cream maker, and freeze according to manufacturer’s directions. During the last couple minutes the ice cream is churning, add the chopped candied bacon pieces.

Adding candied bacon to ice cream machine

Once ice cream is done, remove ice cream to a covered container. Place in freezer for several hours until nice and firm. You MIGHT want to sneak a little bitty bite before freezing it, just so you can see how GOOD this stuff is (*QUALITY CONTROL). Just sayin’.

Spoonful of bacon ice cream from frozen cannister

When ready to serve, remove ice cream from freezer, and dish up a big scoop of this decadent, rich and creamy, frozen treat. I served each scoop with one of my Bacon Pecan Pralines. It was a BACON-THEMED dinner party, and EVERYTHING is better with bacon, after all! Right? EVEN bacon ice cream!!

Candied Bacon Ice Cream, with a praline

I love to make homemade ice cream and enjoy trying new flavors each summer. Some recipes I like, some I love. This bacon ice cream sure was a unique recipe, but I gotta be honest… it was absolutely DELICIOUS and we loved it!!!

Hope you’ll consider making this on a hot summer’s night (or any night, for that matter!). Think you’re gonna be surprised how good this really is!

Looking For More ICE CREAM Recipes?

You can find ALL of my recipes in the Recipe Index, which is located at the top of the page. I have LOTS of decadent ice cream recipes, including:

Interested In More Recipes?

Thank you for visiting this website. I appreciate you using some of your valuable time to do soIf you’re interested, I publish a newsletter 2 times per month (1st and 15th) with all the latest recipes, and other fun info. I would be honored to have you join our growing list of subscribers, so you never miss a great recipe!
There is a Newsletter subscription box on the top right side (or bottom) of each blog post, depending on the device you use, where you can easily submit your e-mail address (only) to be included in my mailing list.

You Can Also Find Me On Social Media:

Facebook page: The Grateful Girl Cooks!
Pinterest:
The Grateful Girl Cooks!
Instagram:
jbatthegratefulgirlcooks

Author's Signature

Recipe Source: www.davidlebovitz.com/2008/03/candied-bacon-i-1/

0 from 0 votes
Candied Bacon Ice Cream
Prep Time
1 hr 30 mins
Cook Time
0 mins
Total Time
1 hr 30 mins
 

Bacon makes everything better, including desserts, with this amazing, delicious homemade ice cream flavored with Candied Bacon, cinnamon, rum, and brown sugar!

Category: Dessert
Cuisine: American
Keyword: candied bacon ice cream
Servings: 16 1/2 cup servings (2 qts. total)
Calories Per Serving: 204 kcal
Author: JB @ The Grateful Girl Cooks!
Ingredients
For The Candied Bacon:
  • 5 strips thick cut bacon
  • 8 teaspoons brown sugar (I used dark, but light is great, as well)
For The Ice Cream Base:
  • 3 Tablespoons salted butter
  • 3/4 cup brown sugar (packed-I used dark, but can use either kind)
  • 2 cups Half and Half (may substitute 2 c. whole milk if you don't have Half and Half)
  • 1 cup Heavy whipping cream
  • 5 large egg yolks
  • 2 teaspoons dark rum or whiskey
  • 1/4 teaspoon vanilla extract
  • 1/4 teaspoon ground cinnamon (this is optional, but USE IT!)
Instructions
Make candied bacon before beginning ice cream base.
  1. Preheat oven to 400 degrees. Put bacon strips onto baking sheet lined with foil or silicone mat. Leave space between each strip. Sprinkle each piece with approx. 1½ teaspoons brown sugar. Bake at 400 degrees for 12-16 minutes. Halfway through baking time, turn bacon over, dragging pieces through syrup on foil. Bake until bacon is dark brown and cooked through. Remove from oven; let bacon cool on wire rack. Once cool, cut into very small pieces!)

Make Ice Cream Base:
  1. Combine the half and half and whipping cream in a bowl, and stir, to combine. In a medium saucepan, melt butter. Stir in ¾ cup brown sugar. Measure out ONE CUP of the half and half/whipping cream mixture and add it to the pan. Set aside.

  2. Pour the remaining half and half/whipping cream mixture into a medium bowl. Set this bowl on top of a larger bowl that has been filled with ice cubes and water (ice bath). Place a mesh strainer over the top of the bowl containing the half and half. Set aside.

  3. In a separate bowl, whisk together egg yolks. Slowly pour some (not all) of the warm brown sugar mixture (in the saucepan) into the whisked eggs, whisking constantly while you pour. Once mixed, pour this mixture back into the saucepan with the butter/brown sugar/half and half mixture. Cook on low heat, stirring constantly until it thickens enough to coat a spatula. Keep bottom of the pan stirred and scraped, so it doesn't stick to the bottom of the pan.

  4. Once thickened, slowly pour this mixture through the mesh strainer, into the half and half in the bowl over the ice bath. Continue to stir the ice cream base over the ice bath, until the mixture has cooled completely. Remove bowl with ice cream base from the ice bath bowl.

  5. Add liquor, vanilla and cinnamon to the ice cream base, and stir to combine. Cover and refrigerate. Once completely cold, freeze in your ice cream maker, per manufacturer's directions. A couple minutes before ice cream is "done", pour the candied bacon pieces into the ice cream (or stir them in to finished ice cream, if desired).

  6. Place ice cream in a covered container, and freeze for at least 2-3 hours to firm up. Once firm, scoop, serve... and enjoy this delicious ice cream!

Recipe Notes

Prep time includes everything (including refrigeration time prior to freezing ice cream). Additional non-active prep time is 2-3 hours AFTER ice cream is done, to firm it up in the freezer.

Nutrition Facts
Candied Bacon Ice Cream
Amount Per Serving (0.5 cups)
Calories 204 Calories from Fat 135
% Daily Value*
Fat 15g23%
Saturated Fat 8g50%
Cholesterol 102mg34%
Sodium 88mg4%
Potassium 86mg2%
Carbohydrates 14g5%
Sugar 12g13%
Protein 2g4%
Vitamin A 470IU9%
Vitamin C 0.3mg0%
Calcium 60mg6%
Iron 0.3mg2%
* Percent Daily Values are based on a 2000 calorie diet.

Here’s one more to pin on your Pinterest boards! Bacon makes everything better, including desserts, with this amazing, delicious homemade ice cream flavored with candied bacon, cinnamon, rum, and brown sugar!


Save