Category: Breakfast

Raspberry Surprise Muffins

Raspberry Surprise Muffins taste great and are easy to make! You’ll enjoy their light almond flavor and raspberry jam inside. Makes 1 dozen.
Raspberry Surprise Muffins taste great and are easy to make! You'll enjoy their light almond flavor and raspberry jam inside. Makes 1 dozen.

Do you enjoy muffins for breakfast? We sure do at our home! What I enjoy about muffins is that they typically don’t take a lot of time to make, but yield quite a few that (in our house) can last my husband and I for a few days (or more, if we freeze some of them). A little work for several meals or snacks… YESSSS!

Today I am sharing a delicious recipe with you that I discovered in a wonderful cookbook that was published quite a few years ago. The recipe is very simple to prepare, and yields a dozen delicious muffins that I’m sure you’re going to enjoy! Here’s how to make them:

Scroll Down For A Printable Recipe Card At The Bottom Of The Page

Make The Muffin Batter

Before making the batter, preheat your oven to 400°F, and line a 12 cup standard muffin pan with paper liners (or spray). It doesn’t take long to make the muffin batter, so you will want both the oven and the muffin pan ready to go!

Okay… now let’s make the muffin batter! Place all purpose flour, sugar, baking powder and salt in a large mixing bowl. Stir until these dry ingredients are combined. Add in milk, melted butter, one egg, vanilla extract and almond extract. Stir the batter only until all ingredients have been combined and moistened. Yes… you may have some small lumps, but do not overmix the batter.

Dry ingredients for the muffins are measured into a large bowl and combined.Milk, egg, melted butter, vanilla and almond extracts are added to the dry muffin batter ingredients.Batter for the muffins is stirred only until all ingredients have been incorporated.

Preparing The Muffins For Baking

Spoon the batter into the muffin cups only until HALFWAY FULL. Top the batter in each muffin cup with one teaspoon of raspberry jam (seeded or seedless). Divide and spoon the remaining batter over the muffins to cover the jam.

Sprinkle the top of each muffin with the reserved 2 Tablespoons of granulated sugar, dividing the sugar evenly between the 12 muffins. Now the raspberry surprise muffins are ready for the oven. NOTE: If desired, you can add a few thinly sliced almonds to decorate the top of the muffins before baking, but that is OPTIONAL (we prefer them without).

Muffin cups are filled only halfway with the batter for raspberry surprise muffins.Raspberry jam (regular or seedless) is spooned on top of the muffin batter.Muffin batter is added to cover jam, then muffin tops are sprinkled with sugar before baking.

Bake The Muffins

Bake the raspberry surprise muffins at 400°F. for between15-17 minutes (or more, if necessary). When done, a toothpick inserted into the top of a muffin should come out clean. The tops of the muffins should also be very light golden brown in color, as well.

Transfer the muffin pan to a wire rack and let the muffins cool (in the pan) for 5 minutes, then transfer the muffins out of the pan to the wire rack to finish cooling.

A dozen Raspberry Surprise Muffins cooling on a wire rack after baking.A close up reveals a bit of the surprise raspberry filling peeking out from the muffin.

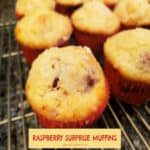
Time To Enjoy Some Raspberry Surprise Muffins!

We enjoy eating these raspberry surprise muffins when they are just slightly warm! You really can’t see the raspberry jam from the outside looking at the muffins, but it is a nice SURPRISE to take a bite and SEE the surprise raspberry filling inside. YUM!

The muffins taste good with a dab of softened butter spread on them, too, if you like that on your muffins. The subtle almond flavor pairs very well with the sweet raspberry jam filling. I think you’re going to like these tasty muffins for breakfast or enjoyed as a snack! They freeze well, if wrapped tightly and stored in the freezer in an airtight container or bag!

A bite taken from the muffin shows the surprise raspberry filling inside the muffin.One of the raspberry surprise muffins is cut apart, revealing the surprise filling hidden inside.

I hope you have the opportunity to try these delicious muffins, and trust you’ll enjoy them as much as we do! Thank you so much for stopping by, and I invite you to come back soon for more family-friendly recipes. Have a GREAT day!

Looking For More MUFFIN RECIPES?

You can find ALL of my recipes in the Recipe Index, which is located at the top of the page. I have a lot of wonderful muffin recipes for you to choose from, including:

Interested In More Recipes?

Thank you for visiting this website. I appreciate you using some of your valuable time to do soIf you’re interested, I publish a newsletter 2 times per month (1st and 15th) with all the latest recipes, and other fun info. I would be honored to have you join our growing list of subscribers, so you never miss a great recipe!
There is a Newsletter subscription box on the top right side (or bottom) of each blog post, depending on the device you use, where you can easily submit your e-mail address (only) to be included in my mailing list.

You Can Also Find Me On Social Media:

Facebook page: The Grateful Girl Cooks!
Pinterest:
The Grateful Girl Cooks!
Instagram:
jbatthegratefulgirlcooks

Author's signature

Original recipe source: “Gooseberry Patch – Have Yourself A Homemade Christmas”, page 162, published by Time Home Entertainment/Oxmoor House in 2014

↓↓ PRINTABLE RECIPE BELOW ↓↓

0 from 0 votes
Raspberry Surprise Muffins
Prep Time
13 mins
Cook Time
17 mins
Total Time
30 mins
 

Raspberry Surprise Muffins taste great and are easy to make! You'll enjoy their light almond flavor and raspberry jam inside. Makes 1 dozen.

Category: Breakfast, Snack
Cuisine: American
Keyword: raspberry surprise muffins
Servings: 12 muffins
Calories Per Serving: 230 kcal
Author: JB @ The Grateful Girl Cooks!
Ingredients
  • 2 cups all purpose flour
  • cup granulated sugar
  • 2 teaspoons baking powder
  • ½ teaspoon salt
  • 1 cup milk whole, 1% or 2%
  • ½ cup butter melted
  • 1 large egg lightly beaten
  • 1 teaspoon vanilla extract
  • ½ teaspoon almond extract
  • ¼ cup raspberry jam regular or seedless
  • 2 Tablespoons granulated sugar to sprinkle on top of muffin batter
Instructions
  1. Preheat oven to 400°F, Line a 12 cup standard muffin pan with paper liners (or use non-stick spray).

  2. Measure flour, ⅔ cup of sugar, baking powder and salt into a large bowl. Stir until combined. Add milk, melted butter, egg, vanilla and almond extracts. Stir batter only until ingredients are combined and moistened. Don't overmix batter.

  3. Spoon batter into muffin cups only until HALFWAY FULL. Top the batter in each muffin cup with one teaspoon of raspberry jam. Finish filling muffin cups with remaining batter (dividing it evenly) to cover the jam.

  4. Sprinkle each muffin with reserved 2 Tablespoons of granulated sugar, dividing sugar evenly between the muffins. NOTE: If desired, you can also add thinly sliced almonds to the top of the muffins before baking (OPTIONAL).

  5. Bake muffins at 400°F. for 15-17 minutes (or more, if necessary). When done, a toothpick inserted into the top of a muffin should come out clean. Tops of the muffins should be light golden brown in color. Transfer muffin pan to wire rack and let muffins cool (in the pan) for 5 minutes. Transfer muffins out of the pan to wire rack to finish cooling. Serve and enjoy. (NOTE: Leftover muffins freeze well, if wrapped tightly and stored in the freezer in an airtight container or bag!)

Recipe Notes

NOTE: Caloric calculation made using 1% milk.

Nutrition Facts
Raspberry Surprise Muffins
Amount Per Serving (1 muffin)
Calories 230 Calories from Fat 81
% Daily Value*
Fat 9g14%
Saturated Fat 5g31%
Trans Fat 0.3g
Polyunsaturated Fat 0.5g
Monounsaturated Fat 2g
Cholesterol 37mg12%
Sodium 175mg8%
Potassium 135mg4%
Carbohydrates 35g12%
Fiber 1g4%
Sugar 18g20%
Protein 3g6%
Vitamin A 297IU6%
Vitamin C 1mg1%
Calcium 63mg6%
Iron 1mg6%
* Percent Daily Values are based on a 2000 calorie diet.

Here’s one more to pin on your Pinterest boards!Raspberry Surprise Muffins taste great and are easy to make! You'll enjoy their light almond flavor and raspberry jam inside. Makes 1 dozen.

Banana Nut Bagels

Make a batch of 9 homemade New York-style Banana Nut Bagels from scratch! They’re chewy, delicious, and can be made with pecans or walnuts!
Make a batch of 9 homemade New York-style Banana Nut Bagels from scratch! They're chewy, delicious, and can be made with pecans or walnuts!

Do you like a good chewy New-York style bagel? You know… the kind that are boiled and then baked? That’s the best way to make them, and this recipe I am sharing with you today fits the bill perfectly! Over the years I’ve shared several bagel recipes on my blog, and I love to make bagels from scratch.

Years ago a recipe for Banana Nut Bagels was shared on a blog from a woman in Sweden named Anne. She shared the recipe back in 2006, and I am just now getting around to sharing it here on my blog. I knew I would have to try them, and after adapting the recipe from European measurements to an American measuring system, I made a couple changes to her original recipe and then made them. Guess what? They’re GOOD! Let me show you how simple it is to make a batch of 9 delicious banana nut bagels!

Scroll Down For A Printable Recipe Card At The Bottom Of The Page

Make The Bagel Dough

Measure active dry yeast, sugar, and warm water (110°F) in a mixing bowl or in the bowl of an electric mixer (like a KitchenAid). If the water is too hot, it can kill the yeast, so use a kitchen thermometer if you have it. Stir to combine these ingredients, then let it sit for 5 minutes. The yeast should bubble on the surface during this time, ensuring the yeast is “good” to use to help the dough rise.

In a separate small bowl, mash 2 bananas with ground cinnamon. After the yeast mixture has rested, add the banana mixture to the mixing bowl. Combine on Low speed and mix until the bananas and cinnamon have been incorporated into the batter. NOTE: You can also mix this by hand, if you prefer.

Yeast is bubbling in a small bowl, indicating the yeast is "good" to use.Bananas are mashed with a fork before adding them to the bagel dough.Ground cinnamon and mashed bananas are mixed into the yeast mixture.

In another bowl, mix all purpose flour with salt, then slowly add these ingredients, a little at a time, to the mixer. Continue adding and slowly mixing until all flour/salt has been added and a thick dough has formed. About half way through the mixing, toss in chopped pecans (or walnuts, if using), and mix them into the dough The dough should end up being smooth and very elastic in texture.

NOTE: If necessary, you may need to add a tiny bit more flour a little at a time to achieve this texture. You do NOT want the dough to be sticky when touched, however be careful not to add too much flour or the dough will become really dry and “floury”.

Roll the dough into a large ball, and put it into a lightly-oiled (or sprayed) large bowl. Turn the dough over so some of the oil (or spray) gets on all sides of the dough. Cover the bowl with a dish towel, and let the dough rise in a warm place for 1 hour. When done, the dough should have almost doubled in size.

Halfway through the mixing time, chopped pecans (or walnuts) are added to bagel dough.Ball of dough is placed in a greased large bowl, covered, and left to rise for 1 hour.

Shape The Bagels

After dough has risen for about an hour it will be fluffy and puffy. Punch the dough down a couple times with your fist, which helps to knock excess air out of the dough. Let the dough rest for 10 minutes. After the dough has rested, evenly divide it into 9 dough balls. If you have a kitchen scale it helps ensure each dough ball weighs about the same.

Shape each piece into a round ball, then take one dough ball into your hands. Use your fingers to make a small hole in the middle of the bagel, then gently stretch the hole out until the bagel has a nice shaped hole in the middle (like a doughnut). Repeat this with all the dough balls, placing each of the 9 bagels onto a baking sheet. Cover the bagels with a dish towel, and let them rest again for 10 more minutes.

Banana nut bagel dough is punched down after rising, to remove excess air.Using fingers, a hole is made in the center of each of the 9 bagel dough balls.Banana nut bagels have been shaped, and wait to be boiled.

Boil the Bagels

Bring a large saucepan (or Dutch oven) of water to a boil, then lower the temperature to a gentle simmer. Place 2-3 bagels at a time into the simmering water. Let them cook undisturbed for about 1 minute, then flip them over to the other side. I use a couple of chopsticks to easily flip the bagels because I can fit one in the middle of the bagel for stability. Two large spoons will do the trick, as well!

Cook the 2nd side for another minute, then carefully remove the boiled bagels to a baking sheet. Repeat until all bagels have been boiled on both sides. Use a slotted spoon to remove the bagels one at a time, letting excess water drain through the spoon back into the saucepan. Now the bagels are ready for the final step… BAKING them!

The bagels are boiled, a few at a time, in hot simmering water.

Bake The Bagels

Place the bagels in a single layer on a large baking sheet with a little space between each one. Bake them at 425°F. for 18-20 minutes. When done, the banana nut bagels will be golden brown in color and should be firm to the touch. Remove them from the oven, and place the bagels on a wire rack to cool.

After boiling, the banana nut bagels are put on baking sheet to be baked.Golden browned on top, the baked bagels come out of the oven to cool.

The Banana Nut Bagels Are Ready To Eat!

Let the bagels cool on a wire rack, then serve them any way you prefer, plain or toasted! I love them served with some cream cheese spread on them… yum! Another way I enjoy banana nut bagels is to toast (or broil) them, then generously butter them while hot. Those are really, really good, too! However you choose to eat them, I’m confident you’ll enjoy these chewy, delicious homemade bagels.

A close up of one of the banana nut bagels cooling on a wire rack.A bagel, cut in half and smeared with cream cheese, ready to be eaten.

Thanks for stopping by today, and I hope you have the opportunity to try these yummy bagels! Don’t forget the butter and/or cream cheese! Please come back again soon, for more family-friendly recipes. Take care, and have a GREAT day!

Looking For More BAGEL Recipes?

You can find ALL of my recipes in the Recipe Index, which is located at the top of the page. I have some wonderful bagel recipes for you to enjoy, including:

Interested In More Recipes?

Thank you for visiting this website. I appreciate you using some of your valuable time to do soIf you’re interested, I publish a newsletter 2 times per month (1st and 15th) with all the latest recipes, and other fun info. I would be honored to have you join our growing list of subscribers, so you never miss a great recipe!
There is a Newsletter subscription box on the top right side (or bottom) of each blog post, depending on the device you use, where you can easily submit your e-mail address (only) to be included in my mailing list.

You Can Also Find Me On Social Media:

Facebook page: The Grateful Girl Cooks!
Pinterest:
The Grateful Girl Cooks!
Instagram:
jbatthegratefulgirlcooks

Author's signature

Recipe adapted from: annesfood.blogspot.com/2006/02/banana-pecan-bagels-with-cinnamon.html?spref=pi

↓↓ PRINTABLE RECIPE BELOW ↓↓

5 from 1 vote
Banana Nut Bagels
Prep Time
20 mins
Cook Time
20 mins
Inactive- Dough Rising Time
1 hr
Total Time
1 hr 40 mins
 

Make a batch of 9 homemade New York-style Banana Nut Bagels from scratch! They're chewy, delicious, and can be made with pecans or walnuts!

Category: Bread, Breakfast, Snack
Cuisine: American
Keyword: banana nut bagels
Servings: 9 bagels
Calories Per Serving: 336 kcal
Author: JB @ The Grateful Girl Cooks!
Ingredients
  • teaspoons active dry yeast =1 small envelope
  • 1 Tablespoon granulated sugar
  • cups warm water 110°F, DIVIDED USE
  • 2 medium bananas very ripe, mashed
  • 1 Tablespoon cinnamon
  • 5 cups all purpose flour + more as needed
  • 1 pinch salt
  • ½ cup chopped pecans (or walnuts)
Instructions
  1. Stir yeast, sugar, and warm water (110°F) together in mixing bowl or in the bowl of an electric mixer (like a KitchenAid). If water is too hot, it can kill yeast, so use a kitchen thermometer if you have one Let it sit for 5 minutes. Yeast should bubble, ensuring the yeast is "good" to use to help the dough rise.

  2. In separate bowl, mash 2 bananas. After the yeast mixture has rested, add the bananas and cinnamon. Mix on Low speed until bananas/cinnamon have been incorporated. NOTE: You can mix this by hand, if you prefer.

  3. In another bowl, mix flour with salt, then slowly add, a little at a time, to the mixer bowl. Continue adding SLOWLY, mixing on Low until all flour/salt has been added and thick dough has formed. Half way through mixing, add chopped nuts; mix them into the dough. Dough should end up being smooth and very elastic in texture. NOTE: If necessary, you may need to add a bit more flour (a little at a time) to achieve this texture. You do NOT want dough to be sticky when touched, however be careful not to add too much flour or dough will become really dry and "floury".

  4. Shape dough into a ball; put it in lightly-oiled (or sprayed) large bowl. Turn dough over so some oil (or spray) gets on all sides. Cover bowl with dish towel; let dough rise in warm place for 1 hour.

  5. After 1 hour, dough should be almost doubled in size. Punch dough down a couple times with your fist to remove excess air. Let dough rest 10 minutes, then evenly divide into 9 dough balls. Shape each into a round ball, then take one into your hands. Use your fingers to make a hole in the middle of the bagel, then gently stretch/shape hole until bagel has a round hole (like a doughnut) in the middle. Repeat with all dough balls, placing shaped bagels on a large baking sheet. Cover bagels with a dish towel; let them rest for 10 minutes.

  6. Preheat oven to 425°F.

  7. Bring a large saucepan (or Dutch oven) of water to a boil, then lower temp. to a gentle simmer. Place 2-3 bagels at a time into simmering water. Let cook undisturbed for 1 minute, then flip them over to the other side. Cook second side for 1 minute. Carefully remove boiled bagels with slotted spoon (to drain water); transfer to a baking sheet. Repeat until all bagels have been boiled.

  8. Place bagels in a single layer on large baking sheet leaving space between each one. Bake at 425°F. for 18-20 minutes. When done, bagels should be nicely browned on top, and firm to the touch. Remove from oven; place on a wire rack to cool. Serve and enjoy!

Recipe Notes

NOTE: Caloric calculation made using walnuts.

Nutrition Facts
Banana Nut Bagels
Amount Per Serving (1 bagel)
Calories 336 Calories from Fat 45
% Daily Value*
Fat 5g8%
Saturated Fat 1g6%
Polyunsaturated Fat 3g
Monounsaturated Fat 1g
Sodium 9mg0%
Potassium 229mg7%
Carbohydrates 63g21%
Fiber 4g17%
Sugar 5g6%
Protein 10g20%
Vitamin A 21IU0%
Vitamin C 2mg2%
Calcium 29mg3%
Iron 4mg22%
* Percent Daily Values are based on a 2000 calorie diet.

Here’s one more to pin on your Pinterest boards!Make a batch of 9 homemade New York-style Banana Nut Bagels from scratch! They're chewy, delicious, and can be made with pecans or walnuts!

Vanilla Glazed Blueberry Biscuits

Vanilla Glazed Blueberry Biscuits are buttery, filled with blueberries, topped with sweet glaze, and take 15 minutes prep. They’re DELICIOUS!
Vanilla Glazed Blueberry Biscuits are buttery, filled with blueberries, topped with sweet glaze, and take 15 minutes prep. They're DELICIOUS!

Have you ever had a sweet, blueberry BISCUIT before? They’re pretty amazing! After trying these biscuits the first time I was hooked, so I decided to show you how easy they are to make! Did I mention the fact that THEY ARE DELICIOUS? Uh huh… they sure are!

I’ve included step by step photos, so if you’ve never made biscuits before, you can be successful with these! After the biscuits have baked and cooled, a sweet vanilla icing is brushed on top for a nice finishing touch! Here’s how to make vanilla glazed blueberry biscuits:

Scroll Down For A Printable Recipe Card At The Bottom Of The Page

Make The Biscuit Dough

The first thing you need to do is preheat your oven to 500°F. Now it’s time to make the biscuit dough! Place 2 cups flour, granulated sugar, baking powder and salt in a large mixing bowl and stir, to combine. Cut in COLD butter using a pastry blender or two forks until the butter has become about the size of peas.

Slowly drizzle buttermilk into the dry ingredients in the bowl, and stir it in only until the buttermilk has been combined with the dry ingredients. The biscuit dough should pull away from the sides of the mixing bowl and form a shaggy ball of dough.

Cold butter is cut into the dry biscuit ingredients in a bowl.Buttermilk is slowly drizzled into the dry biscuit mixture.

Roll Out The Dough And Add Blueberries!

Generously sprinkle a large workspace with flour. Place the dough ball onto the floured workspace (I use my good old large cutting board), then sprinkle the dough with some more flour. Using your fingers, press the dough out, and then flatten it out until the dough is about 1/2″ thick. The dough is very workable and you won’t need a rolling pin to do this.

Place the FROZEN blueberries onto HALF of the dough, leaving a small edge bare on the blueberry side (as seen below in 2nd photo). Carefully fold the bare side of the dough in half, up and over the blueberries, trying to make the edges meet.

NOTE: THIS STEP CAN BE A BIT CHALLENGING! Those silly little frozen blueberries tend to roll out the sides… just keep stuffing them back in with your fingers the best you can! It will NOT be perfect… just try to cover as much as you can.

A shaggy ball of biscuit dough on a floured work surface before being flattened.Frozen blueberries are added to half of the biscuit dough.Half of the biscuit dough is pulled up and over the blueberries.

Cut Out The Biscuits

Once the blueberries are “in” the dough, fold the dough over, and gently knead it with your hands a couple of times. Re-flatten the dough back out with your hands until it is about 1″ thick. Don’t worry if the blueberries “bleed” their blue color onto the dough… that is no big deal!

Use a biscuit cutter, the top of a glass, or a canning jar lid to cut out the biscuits. I use an old canning lid ring! NOTE: When you press straight down on the dough, do not twist the cutting item around. Simply press straight down to cut the biscuit, then remove the dough from your “cutter of choice”. 

When using a regular sized canning jar ring or a cup, I can get 8 biscuits from the dough. If you are using a large biscuit cutter (4″), you may only get 6 biscuits from the dough. Your choice!

Dough is gently kneaded then it's ready for biscuits to be cut out.A small canning jar lid is used to cut out 8 blueberry biscuits from the dough.

Time To Bake!

Place the biscuits into a cast iron skillet (or other oven-safe skillet. Make sure when you place them in the skillet that all the biscuits are touching each other. This allows the biscuits to rise up instead of widen out. Place the skillet in the preheated oven and bake at 500°F. for 6 minutes.

While the biscuits are baking, melt 4 Tablespoons (1/2 stick) of butter in a small pan. Once the biscuits have cooked for 6 minutes, pull the skillet out of the oven. Using a pastry brush, spread the surface of the biscuits with the melted butter. If it looks like a lot of butter don’t worry- it will bake into the biscuits… trust me! Just don’t skip this step, and use all the melted butter!

Put the biscuits back into the oven and finish baking them for another 4-6 minutes. Oven temps can vary greatly, so keep an eye on them. When done the biscuits should be very light golden brown on top and a toothpick inserted into the middle of a biscuit should come out free of batter.

Biscuits are placed in a cast iron skillet, touching each other for baking.Melted butter is poured over the partially baked biscuits, then skillet goes back into oven.Baked blueberry biscuits have absorbed butter and are golden brown when done.

Cool, Then Glaze The Biscuits

Remove the skillet of biscuits from the oven and let it cool for about 10 minutes on a wire rack. While they are cooling, mix together the simple vanilla glaze. To make the glaze, combine powdered sugar, milk and vanilla extract in a small mixing bowl. Stir well, until the glaze is lump-free and smooth.

After the blueberry biscuits have cooled for 10 minutes, use a pastry brush to cover them with the glaze. You can pour the glaze over them if you prefer, but I have found I get them covered best by brushing on the glaze. Try to get every nook and cranny covered!

A simple vanilla glaze is made by combining powdered sugar, milk and vanilla.Brushing icing on the cooled vanilla glazed blueberry biscuits, after baking.

Serve The Vanilla Glazed Blueberry Biscuits

Let the vanilla glazed blueberry biscuits cool a few minutes longer, until the glaze has firmed up a bit. Once the glaze is firm, the biscuits are ready to be gobbled up. Use a knife to separate each biscuit from the others, then use a spatula to remove a biscuit from the skillet for serving.

The biscuits are filled with plump, juicy blueberries, have a wonderful texture, and the sweet glaze makes them practically perfect in every way. YUM! Any leftovers can be covered with plastic wrap, then reheated in a microwave on medium-low heat to enjoy later.

After the icing firms up, the vanilla glazed blueberry biscuits are ready to eat. A fork and one of the vanilla glazed blueberry biscuits, on a white plate.

I hope you enjoy making and eating these truly delicious vanilla glazed blueberry biscuits! Thank you for stopping by today, and I invite you to come back soon for more family-friendly recipes. Take care, and have a GREAT day!

Looking For More BREAKFAST Recipes?

You can find ALL of my recipes in the Recipe Index, located at the top of the page. I have a great variety of breakfast recipes for you to check out, including:

Interested In More Recipes?

Thank you for visiting this website. I appreciate you using some of your valuable time to do soIf you’re interested, I publish a newsletter 2 times per month (1st and 15th) with all the latest recipes, and other fun info. I would be honored to have you join our growing list of subscribers, so you never miss a great recipe!
There is a Newsletter subscription box on the top right side (or bottom) of each blog post, depending on the device you use, where you can easily submit your e-mail address (only) to be included in my mailing list.

You Can Also Find Me On Social Media:

Facebook page: The Grateful Girl Cooks!
Pinterest:
The Grateful Girl Cooks!
Instagram:
jbatthegratefulgirlcooks

Author's signature

Original recipe source: http://tastykitchen.com/recipes/breads/sweet-blueberry-biscuits/

↓↓ PRINTABLE RECIPE BELOW ↓↓

0 from 0 votes
Vanilla Glazed Blueberry Biscuits
Prep Time
15 mins
Cook Time
12 mins
Total Time
27 mins
 

Vanilla Glazed Blueberry Biscuits are buttery, filled with blueberries, topped with sweet glaze, and take 15 minutes prep. They're DELICIOUS!

Category: Bread/Breakfast
Cuisine: American
Keyword: vanilla glazed blueberry biscuits
Servings: 8 biscuits
Calories Per Serving: 371 kcal
Author: JB @ The Grateful Girl Cooks!
Ingredients
For Biscuit Dough:
  • 2 cups all purpose flour
  • 3 Tablespoons granulated sugar
  • 1 Tablespoon baking powder
  • ½ teaspoon salt
  • 1 stick butter (equals 8T. or ½ cup) COLD, cut in chunks
  • ¾ cup buttermilk
  • 1 cup FROZEN blueberries unthawed
  • ½ stick butter (equals 4T. or ¼ cup) MELTED
For Vanilla Glaze:
  • 1 cup powdered sugar (confectioner's)
  • 3 Tablespoons milk
  • ½ teaspoon vanilla extract
Instructions
  1. Preheat oven to 500°F.

  2. Place flour, sugar, baking powder and salt in large mixing bowl; stir, to combine. Cut in COLD butter with pastry blender or two forks until butter becomes the size of peas. Slowly drizzle buttermilk into the dry ingredients; stir only until is incorporated into ingredients. Mixture should pull away from sides of bowl and form a shaggy dough ball.

  3. Generously sprinkle a cutting board or workspace with extra flour. Place dough ball onto floured workspace; sprinkle dough with more flour. Using your fingers, press dough and flatten it out until 1/2" thick. Place FROZEN blueberries onto HALF of the dough, leaving a small edge bare around the edges of that half. Carefully fold the empty half of the dough up and over the blueberries, until edges meet. NOTE: This can be a bit challenging! The blueberries tend to roll out the sides... just keep stuffing them back in the best you can! Turn the dough over, and gently knead it with your hands a couple of times. Re-flatten dough with your hands until 1" thick. Don't worry if blueberries "bleed" color onto dough!

  4. Use a biscuit cutter, rim of a glass glass, or a canning jar lid to cut out the biscuits. NOTE: When you press down on dough, don't twist biscuit cutter around. Simply press straight down to cut the biscuit, then remove dough circle. *Using canning jar lid or a cup can yield 8 biscuits from the dough. If using large biscuit cutter (4"), you may only get 6 biscuits.

  5. Place biscuits into a 9" cast iron skillet (or oven-safe skillet). Make sure biscuits are touching each other. This allows biscuits to rise up instead of widen out. Place in preheated oven; bake at 500°F. for 6 minutes. While biscuits bake, melt 4 T. butter in small pan. Once biscuits have cooked for 6 minutes, pull skillet out of oven. Brush surface of biscuits with melted butter. Don't skip this step, and use all the melted butter! Put biscuits back into oven: continue baking another 4-6 minutes. Oven temps can vary, so keep an eye on them. When done, biscuits should be golden brown on top and a toothpick inserted into the middle of a biscuit should come out clean. Remove from oven; put skillet on wire rack; let biscuits cool (in skillet) for10 minutes.

  6. While biscuits cool, make vanilla glaze. Stir powdered sugar, milk and vanilla together in small bowl, until glaze is smooth and lump-free. Once biscuits have cooled 10 minutes, use a pastry brush to fully cover them with glaze.

  7. Let cool until glaze has firmed up, then serve. Use a knife to separate biscuits, then a spatula to remove biscuits from skillet. Leftovers can be reheated in microwave on medium-low heat.

Nutrition Facts
Vanilla Glazed Blueberry Biscuits
Amount Per Serving (1 biscuit)
Calories 371 Calories from Fat 162
% Daily Value*
Fat 18g28%
Saturated Fat 11g69%
Trans Fat 1g
Polyunsaturated Fat 1g
Monounsaturated Fat 5g
Cholesterol 48mg16%
Sodium 310mg13%
Potassium 243mg7%
Carbohydrates 48g16%
Fiber 1g4%
Sugar 23g26%
Protein 4g8%
Vitamin A 582IU12%
Vitamin C 2mg2%
Calcium 109mg11%
Iron 2mg11%
* Percent Daily Values are based on a 2000 calorie diet.

Here’s one more to pin on your Pinterest boards!Vanilla Glazed Blueberry Biscuits are buttery, filled with blueberries, topped with sweet glaze, and take 15 minutes prep. They're DELICIOUS!


Strawberry Pecan Bread

Enjoy a delicious loaf of Strawberry Pecan Bread! Ten minutes prep time and into the oven it goes. This easy to make bread yields 8 slices!

Recently I made a loaf of this delicious bread and photographed the “process” so I could share it here on the ol’ blog. Strawberry Pecan Bread is absolutely scrumptious, and I’m pretty confident you’ll enjoy it, too! The recipe is super easy to prepare, and before you know it, it will be baking away in your oven.

This bread loaf also freezes well, so if you want to double the written recipe, you can wrap the extra loaf very well in freezer bags or foil. It will store well in the freezer until you’re ready for another loaf to enjoy with family or friends! Here are the instructions for how to make this yummy strawberry pecan bread.

Making The Bread Batter

To make the batter for the bread, place flour, sugar, cinnamon, baking soda and salt into a large bowl. Stir well, to combine. Add 2 eggs, ONE AT A TIME, beating well after each one, using an electric mixer. The dough will be very crumbly, even after mixing.

Dry ingredients are combined, then eggs are added and beaten in, one at a time.Dough for the bread is crumbly after the eggs are beaten in.

Add The Remaining Ingredients

Stir oil into the mixture until incorporated into the “batter”. Once combined, add sliced strawberries and chopped pecans (or walnuts, if using), and stir gently until they’re mixed in. At this point, the dough will not be too fluid, but will be quite thick.

Oil is added, and stirred into the dough until incorporated.Sliced strawberries and chopped pecans (or walnuts) are stirred into the batter.The dough for the strawberry pecan bread is ready to add to a loaf pan for baking.

Time To Bake The Bread

Spoon the strawberry pecan bread batter into a generously greased and floured 9″x5″ loaf pan until evenly distributed. Pat the dough down with the back of a spoon until solidly combined.

Bake the bread in a preheated 350°F oven (on the middle rack) for 55-60 minutes, or until a toothpick inserted deep into the top of the loaf comes out clean. When done, transfer the pan to a wire rack, and let the strawberry pecan bread cool 10-12 minutes before removing it from the pan. Run a butter knife around the edges of the bread to loosen, then invert the pan to remove the loaf.

Bread batter is patted down in a 9x5" loaf pan before baking.After baking, the loaf of strawberry pecan bread cools before being removed from pan.

Who Wants A Slice Of Strawberry Pecan Bread?

After removing the loaf from the pan, let it cool completely before slicing and serving. We think this bread tastes the best when served at room temperature. Once sliced, you can see those strawberry slices and chopped pecans inside the bread. It’s delicious, and I am sure you’re going to like it!

Out of the loaf pan, the strawberry bread cools before slicing and serving.A slice of the strawberry pecan bread, ready to enjoy!I hope you have the chance to make this delicious strawberry pecan bread for yourself or for those you love. Thanks for stopping by, and I invite you to come back soon for more family-friendly recipes. Take care, God bless you, and have a great day.

Looking For More BREAD Recipes?

You can find ALL of my recipes in the Recipe Index, located at the top of the page. I have some wonderful bread recipes for you to choose from, including:

Interested In More Recipes?

Thank you for visiting this website. I appreciate you using some of your valuable time to do soIf you’re interested, I publish a newsletter 2 times per month (1st and 15th) with all the latest recipes, and other fun info. I would be honored to have you join our growing list of subscribers, so you never miss a great recipe!
There is a Newsletter subscription box on the top right side (or bottom) of each blog post, depending on the device you use, where you can easily submit your e-mail address (only) to be included in my mailing list.

You Can Also Find Me On Social Media:

Facebook page: The Grateful Girl Cooks!
Pinterest:
The Grateful Girl Cooks!
Instagram:
jbatthegratefulgirlcooks

Author's signature

Recipe adapted from original recipe in: “Gooseberry Patch Big Book Of Holiday Cooking”, published in 2012 by Gooseberry Patch & Oxmoor House, page 73

↓↓ PRINTABLE RECIPE BELOW ↓↓

0 from 0 votes
Strawberry Pecan Bread
Prep Time
10 mins
Cook Time
55 mins
Total Time
1 hr 5 mins
 

Enjoy a delicious loaf of Strawberry Pecan Bread! Ten minutes prep time and into the oven it goes. This easy to make bread yields 8 slices!

Category: Bread/Breakfast, Snack
Cuisine: American
Keyword: strawberry pecan bread
Servings: 8 slices (about 1" thick)
Calories Per Serving: 277 kcal
Author: JB @ The Grateful Girl Cooks!
Ingredients
  • cups all purpose flour
  • ¾ teaspoon ground cinnamon
  • ½ teaspoon salt
  • ½ teaspoon baking soda
  • 1 cup granulated sugar
  • 2 large eggs
  • ¾ cup vegetable or canola oil
  • 1 cup fresh strawberries hulled and thinly sliced
  • ¾ cup chopped pecans (or walnuts)
Instructions
  1. Preheat oven to 350°F. Generously grease and flour a 9" x 5" loaf pan.

  2. Measure flour, sugar, cinnamon, baking soda and salt into large bowl. Stir well, to combine. Add eggs, ONE AT A TIME, beating well after each one, using electric mixer. Dough will be crumbly, Add oil; stir until incorporated, then add strawberries and pecans (or walnuts, if using). Stir gently until combined (mixture will be thick).

  3. Spoon dough into prepared loaf pan until evenly distributed. Pat dough down with back of a spoon until solidly combined.

  4. Bake at 350°F (on middle rack) for 55-60 minutes, or until a toothpick inserted deep into the top of the loaf comes out clean. Transfer pan to a wire rack. Let bread cool 10-12 minutes before removing from pan. Run a butter knife around edges of bread to loosen, then invert the pan to remove loaf. Let bread cool completely before slicing and serving.

Nutrition Facts
Strawberry Pecan Bread
Amount Per Serving (1 slice (1" wide))
Calories 277 Calories from Fat 81
% Daily Value*
Fat 9g14%
Saturated Fat 1g6%
Trans Fat 1g
Polyunsaturated Fat 6g
Monounsaturated Fat 1g
Cholesterol 47mg16%
Sodium 233mg10%
Potassium 120mg3%
Carbohydrates 46g15%
Fiber 2g8%
Sugar 26g29%
Protein 6g12%
Vitamin A 72IU1%
Vitamin C 11mg13%
Calcium 26mg3%
Iron 2mg11%
* Percent Daily Values are based on a 2000 calorie diet.

Here’s one more to pin on your Pinterest boards!Enjoy a delicious loaf of Strawberry Pecan Bread! Ten minutes prep time and into the oven it goes. This easy to make bread yields 8 slices!


Hearty Oatmeal Bowl

Enjoy a hearty oatmeal bowl, a filling breakfast with oats, toasted pecans, raisins, apples, brown sugar and cinnamon! Easy and delicious!

Do you enjoy oatmeal? I sure do! In its purest form oatmeal is known to provide antioxidants, and helps you to feel full (thanks to fiber)! It has other health benefits as well, but I especially love it because it’s filling and you can add so many different ingredients to it for flavor!

The recipe I want to share today is one of my favorite ways to prepare and enjoy oatmeal. I call it a hearty oatmeal bowl, because it is just that… hearty! Filled with dried fruit and nuts, and seasoned with cinnamon and brown sugar, how can you go wrong? I enjoy using dried apples in it, but you can substitute or add dried cranberries, peaches or blueberries, if you prefer! This oatmeal is simple to prepare and really delicious. Here’s how to make it:

Scroll Down For A Printable Recipe Card At The Bottom Of The Page

Making The Oatmeal

Bring 1 cup of milk and ¼ cup of water to a boil in a medium saucepan. Once it begins to boil, add old fashioned oats, raisins, dried apples, toasted pecans, brown sugar, cinnamon and salt to the pan. Stir these ingredients well, until incorporated into the liquid.

Milk and water are brought to a boil in a medium sized saucepan.Oats, raisins, apple, pecans, brown sugar, cinnamon and salt are added to the milk in the pan.

Turn the heat to Medium-Low, and continue cooking the oatmeal mixture for between 5-7 minutes, or until it reaches YOUR desired consistency. As it cooks, the oatmeal will become creamy and will thicken.

The oatmeal and added ingredients cook in the saucepan until thickened.When the oatmeal is cooking to desired consistency, it is ready to be served.

Serve The Hearty Oatmeal Bowl

When done cooking, spoon portions into individual serving bowls, and sprinkle lightly with additional ground cinnamon, if desired. The raisins are plump, it’s sweetened with brown sugar, the toasted pecans add crunch, and the cinnamon and apples add great flavor to this hearty oatmeal bowl.

All in all, this is an incredibly simple, yet filling breakfast which will yield 3 small servings or 2 large servings. I really think you’re going to enjoy it!

A hearty oatmeal bowl ready to be eaten, sprinkled with ground cinnamon on top.One spoonful of oats from the heaty oatmeal bowl.

Thanks for stopping by today. I really hope you have a chance to try this recipe for a hearty oatmeal bowl, and trust you will enjoy it! Please come back again soon for more delicious recipes, take care, and have a great day.

Looking For More OATMEAL Recipes?

Yu can find ALL of my recipes in the Recipe Index, located at the top of the page. I have some delicious oatmeal recipes for you to check out, including:

Interested In More Recipes?

Thank you for visiting this website. I appreciate you using some of your valuable time to do soIf you’re interested, I publish a newsletter 2 times per month (1st and 15th) with all the latest recipes, and other fun info. I would be honored to have you join our growing list of subscribers, so you never miss a great recipe!
There is a Newsletter subscription box on the top right side (or bottom) of each blog post, depending on the device you use, where you can easily submit your e-mail address (only) to be included in my mailing list.

You Can Also Find Me On Social Media:

Facebook page: The Grateful Girl Cooks!
Pinterest:
The Grateful Girl Cooks!
Instagram:
jbatthegratefulgirlcooks

Author's signature

↓↓ PRINTABLE RECIPE BELOW ↓↓

0 from 0 votes
Hearty Oatmeal Bowl
Prep Time
5 mins
Cook Time
5 mins
Total Time
10 mins
 

Enjoy a hearty oatmeal bowl, a filling breakfast with oats, toasted pecans, raisins, apples, brown sugar and cinnamon! Easy and delicious!

Category: Breakfast
Cuisine: American
Keyword: oatmeal, breakfast
Servings: 3 small servings
Calories Per Serving: 329 kcal
Author: JB @ The Grateful Girl Cooks!
Ingredients
  • 1 cup low-fat milk (1%)
  • ¼ cup water
  • cups old fashioned oats uncooked
  • ¼ cup dried apples (chopped) or other dried fruit
  • ¼ cup raisins
  • ¼ cup toasted pecans chopped, measured after chopping
  • 2 Tablespoons brown sugar
  • ½ teaspoon ground cinnamon
  • teaspoon salt
Instructions
  1. Bring milk and water to a boil on medium heat in a medium saucepan. Once it begins boiling, add remaining ingredients to pan. Stir well, to combine.

  2. Turn heat to medium-low, and continue cooking for 5-7 minutes, or until it reaches YOUR desired consistency. Stir often. Oatmeal will become creamy and will thicken as it cooks.

  3. To serve, transfer oatmeal into individual serving bowls. Sprinkle lightly with additional cinnamon, if desired. Serve hot, and enjoy!

Recipe Notes

NOTE: Can substitute dried cranberries, peaches, blueberries, etc. for the dried apple called for in recipe.

Nutrition Facts
Hearty Oatmeal Bowl
Amount Per Serving (1 1/3 of total)
Calories 329 Calories from Fat 81
% Daily Value*
Fat 9g14%
Saturated Fat 1g6%
Polyunsaturated Fat 3g
Monounsaturated Fat 4g
Cholesterol 4mg1%
Sodium 143mg6%
Potassium 450mg13%
Carbohydrates 55g18%
Fiber 7g29%
Sugar 16g18%
Protein 9g18%
Vitamin A 160IU3%
Vitamin C 1mg1%
Calcium 141mg14%
Iron 2mg11%
* Percent Daily Values are based on a 2000 calorie diet.

Here’s one more to pin on your Pinterest boards!Enjoy a hearty oatmeal bowl, a filling breakfast with oats, toasted pecans, raisins, apples, brown sugar and cinnamon! Easy and delicious!

Blueberry Cinnamon Overnight Oats

Blueberry Cinnamon Overnight Oats are a delicious, “make ahead” meal (5 min. prep). Chill overnight, then enjoy a blueberry-packed breakfast!
Blueberry Cinnamon Overnight Oats are a delicious, "make ahead" meal (5 min. prep). Chill overnight, then enjoy a blueberry-packed breakfast!

If you enjoy delicious meals that can quickly be eaten OR taken with you to work, etc., then overnight oats are a meal you’ll enjoy! It only takes a couple minutes to mix the ingredients in canning jars, then put them in the fridge overnight! I love overnight oats, because they’re so convenient to make ahead, and they taste delicious!

The next morning, if you’re in a hurry to get to work, school, etc., just open the jar, give them a stir, and EAT! Overnight oats do not have to be heated, and are made to be eaten cold! Individual servings in canning jars also make overnight oats PORTABLE! Grab a spoon, a jar out of the fridge… and out the door you go… with a filling breakfast or snack you can eat later!

Blueberry Cinnamon Overnight Oats are filled with fresh (or frozen) blueberries, and have almond butter added, for added protein! Cinnamon and vanilla add extra flavor, blueberries provide sweetness, and the oats become thick and creamy, once refrigerated! Here’s how easy blueberry cinnamon overnight oats are to prepare:

Scroll Down For A Printable Recipe Card At The Bottom Of The Page

What Ingredients Will I Need?

You need old fashioned oats, almond butter, fresh OR frozen blueberries, cinnamon, vanilla, and almond milk (or dairy milk) for this recipe. The recipe yields 2 jars of blueberry cinnamon overnight oats, but can easily be doubled. You can safely store jars of these overnight oats in the fridge up to 3 days.

Oats, cinnamon, vanilla, almond butter, milk and frozen or fresh blueberries are used in the recipe.

How To Prepare Blueberry Cinnamon Overnight Oats

This recipe makes enough for TWO jars, so the ingredients will need to be divided evenly between them. Place ½ C. of oats, ½ C. almond milk, 1 T. almond butter, and ½ t. each of cinnamon and vanilla into EACH JAR. Stir the ingredients well, until they are combined. TIP: Use a PINT sized jar, to have room for all the ingredients, and have room to stir them.

Gently stir ½ C. blueberries into each jar, until they’re incorporated into the oat mixture NOTE: If using FROZEN blueberries, DO NOT THAW before adding!

Milk, oats, cinnamon, vanilla and almond butter are combined in a Mason jar.Part of the blueberries are added to the jar, then gently stirred into the oat mixture.

Mix Then Add MORE Blueberries!

Once the blueberries have been mixed in, add another ½ C. of blueberries to each jar. Do not stir them into the oats, but let them sit on top of the oats! Screw on the lid to each jar, and place in the refrigerator.

Blueberry Cinnamon Overnight Oats will need to chill for about 8 hours in a refrigerator for best results. Make them, and refrigerate the jars before heading to bed, and they’ll be ready when you wake up.

The overnight oats are mixed with fresh or frozen blueberries in the jar.Topped with more blueberries, the jars are then covered and refrigerated overnight.

The Blueberry Cinnamon Oats Are Ready To Eat!

After the jars of oats have chilled overnight, they are ready to be enjoyed. Old-fashioned oats absorb the milk, leaving a creamy, thick oatmeal treat, filled with all those juicy blueberries! YUM! You can safely store jars of oats (or “breakfast on the go”) in the refrigerator for up to 3 days! YES… overnight oats are meant to be eaten cold. There’s no need to heat them!

Blueberry Cinnamon Overnight Oats turn out creamy and delicious after refrigerating overnight.

I hope you enjoy these delicious blueberry cinnamon overnight oats! Thank you for taking time out of your busy day to visit this website today. I do hope you will come back again for more family-friendly recipes. Take care… and have a GREAT day! May God bless you.

Looking For More OVERNIGHT OATS Recipes?

You can find ALL my recipes in the Recipe Index, located at the top of the page. I have some wonderful recipes for overnight oats I’m confident you’ll enjoy, which include:

Interested In More Recipes?

Thank you for visiting this website. I appreciate you using some of your valuable time to do soIf you’re interested, I publish a newsletter 2 times per month (1st and 15th) with all the latest recipes, and other fun info. I would be honored to have you join our growing list of subscribers, so you never miss a great recipe!
There is a Newsletter subscription box on the top right side (or bottom) of each blog post, depending on the device you use, where you can easily submit your e-mail address (only) to be included in my mailing list.

You Can Also Find Me On Social Media:

Facebook page: The Grateful Girl Cooks!
Pinterest:
The Grateful Girl Cooks!
Instagram:
jbatthegratefulgirlcooks

Author's signature

Recipe adapted from: Isabel D. Price in the book, “Food Meets Faith”, published by Live Smart Solutions, LLC, 2019, page 82

↓↓ PRINTABLE RECIPE BELOW ↓↓

0 from 0 votes
Blueberry Cinnamon Overnight Oats
Prep Time
5 mins
Cook Time
0 mins
Refrigeration (inactive time)
8 hrs
Total Time
8 hrs 5 mins
 

Blueberry Cinnamon Overnight Oats are a delicious, "make ahead" meal (5 min. prep). Chill overnight, then enjoy a blueberry-packed breakfast!

Category: Breakfast, Snack
Cuisine: American
Keyword: blueberry, cinnamon, overnight oats
Servings: 2
Calories Per Serving: 362 kcal
Author: JB @ The Grateful Girl Cooks!
Ingredients
  • 1 cup old-fashioned oats NOT instant
  • 1 cup unsweetened almond milk can sub. dairy milk or coconut milk
  • 2 Tablespoons almond butter
  • 1 teaspoon cinnamon
  • 1 teaspoon vanilla extract
  • 2 cups blueberries fresh or frozen (unthawed)
Instructions
  1. Place ½ C. of oats, ½ C. almond milk, 1 T. almond butter, and ½ t. each of cinnamon and vanilla into EACH PINT JAR. Stir well, until combined.

  2. Gently stir ½ C. blueberries into each jar, until incorporated into oat mixture. NOTE: If using FROZEN blueberries, DO NOT THAW before adding!

  3. Add another ½ C. of blueberries to each jar, but do not stir them into the oats. Let them sit on top! Screw the lid onto each jar; place jars in fridge. Chill overnight (8 hours) for best results.

  4. Once chilled, remove lid; stir content wells; oats are to be eaten cold. Store jars up to 3 days in fridge. Enjoy!

Nutrition Facts
Blueberry Cinnamon Overnight Oats
Amount Per Serving (1 g)
Calories 362 Calories from Fat 126
% Daily Value*
Fat 14g22%
Saturated Fat 1g6%
Polyunsaturated Fat 4g
Monounsaturated Fat 7g
Sodium 168mg7%
Potassium 388mg11%
Carbohydrates 53g18%
Fiber 10g42%
Sugar 16g18%
Protein 10g20%
Vitamin A 83IU2%
Vitamin C 14mg17%
Calcium 246mg25%
Iron 3mg17%
* Percent Daily Values are based on a 2000 calorie diet.

Here’s one more to pin on your Pinterest boards!Blueberry Cinnamon Overnight Oats are a delicious, "make ahead" meal (5 min. prep). Chill overnight, then enjoy a blueberry-packed breakfast!

Bacon, Onion and Spinach Tart

Enjoy a Bacon, Onion and Spinach Tart for breakfast, lunch or dinner! It’s yummy, and filled with caramelized onions, cheese, spinach & bacon.
Enjoy a Bacon, Onion and Spinach Tart for breakfast, lunch or dinner! It's yummy, and filled with caramelized onions, cheese, spinach & bacon.

If you’re interested in an absolutely scrumptious recipe that can do double duty as either breakfast, lunch OR dinner, may I suggest this bacon, onion and spinach tart? How convenient it is to make this tart, then have it in the fridge to enjoy the leftovers throughout the week!

Caramelized onions are the unabashed star of this dish, as their flavor and sweetness permeate every bite! Add some bacon, spinach, cheese, and eggs to the filling, and you’ve got yourself a fabulous recipe! Here’s how to make this flavor-packed bacon, onion and spinach tart.

Scroll Down For A Printable Recipe Card At The Bottom Of The Page

Prepare The Crust For The Tart

For this tart, feel free to use either a homemade pie crust OR a purchased, refrigerated rolled, flat pie crust. Roll the dough out, and fit the pie crust into a 9″ tart pan (with a removable bottom). Press the dough into the sides of the pan, then trim away excess crust from the top edge. You will want the top edge of the crust to be flush with the pan.

Use the tines of a fork to prick the dough in several places on the sides and bottom. Keep the prepared crust in the refrigerator while the filling for the tart is made.

Pie dough is placed and shaped in a tart pan, to be ready for the filling.

Cook The Bacon And Spinach

Cut 4 strips of bacon crosswise into small thin strips. I use kitchen scissors and stack the bacon strips to quickly cut the pieces. Place the bacon strips into a large non-stick skillet and cook on Medium heat, stirring often. Cook the bacon for approximately 6-8 minutes.

Add 6 cups of fresh baby spinach into the skillet with the bacon. It looks like a lot of spinach, but will greatly reduce in size as it cooks. Continue to stir and cook for 1 minute, or until the spinach has wilted. Transfer the bacon/spinach mixture out of the skillet with a slotted spoon. Place on a plate lined with paper towels, to absorb excess grease.

Strips of bacon are quickly cooked in a large skillet.Baby spinach leaves are added to the cooked bacon in a large skillet.After cooking, the bacon and spinach will be removed from the pan to cool.

Caramelize The Onions

Caramelized onions will take about 25 minutes to turn out perfect, so plan ahead! Place sliced onions, dried thyme and (part of) the salt into the same large skillet you cooked the bacon/spinach in. Turn the heat to MEDIUM, and put a lid on the skillet.

Cook the onions (covered) for 25 minutes, stirring occasionally. Continue to cook (covered) until the onions have caramelized. They will also reduce in size as they become browned and fully cooked. The longer they cook, the more caramelized and sweeter the onions become! TIP: PREHEAT your oven while the onions are cooking!

Once the onions have caramelized, take the skillet off the heat, stir, then let them cool, uncovered, for 5 minutes.

Sliced onions, salt and thyme are placed in large skillet to cook.A lid is placed on the skillet of onions while they cook and caramelize.Once caramelized, the onions in the skillet become brown in color.

Prepare The Bacon, Onion And Spinach Tart For Baking

Now it’s time to make the filling for the Bacon, Onion and Spinach Tart! In a large mixing bowl, whisk together eggs, half and half, pepper and remaining salt until fully combined. Stir in the bacon and spinach mixture. Add the cooled caramelized onions, and stir until all ingredients are incorporated.

Carefully pour the tart filling into the prepared crust. The filling will come very close to the top of the crust. Make sure the spinach and bacon are evenly distributed in the filling. Now the bacon, onion and spinach tart is ready for baking.

Cooked bacon and spinach are added to the tarts egg filling in a large bowl.Filling for the bacon, onion and spinach tart is poured into prepared crust in a tart pan.

Bake And Broil

Bake the tart at 375°F. for 15 minutes, then reduce the heat to 325°, and bake another 20 minutes at the lower temperature. Remove the tart from the oven and turn the oven to the BROIL setting. Sprinkle the top of the tart with shredded cheese, then place the tart about 6″ from the broiler heating element. Let it broil for 1-2 minutes, or only until the cheese has melted!. Keep an eye on it so you don’t burn the top!

Transfer the bacon, onion and spinach tart to a wire rack and let it cool about 5 minutes, before you attempt to slice and serve it.

After baking, cheese is sprinkled on top of the tart and placed under broiler to melt it.A baked bacon, onion and spinach tart cools on wire rack for 5 minutes before serving.

Slice And Serve The Bacon, Onion and Spinach Tart

Carefully remove the tart rim from the tart by pushing up from the bottom to separate the tart from the metal rim. Slice the tart into 8 slices, serve, and enjoy! Keep any leftovers covered and refrigerated for up to 4-5 days.

The leftovers can be easily microwaved to reheat, which makes this delicious tart a perfect choice to enjoy again for breakfast, lunch or dinner the next day! When we had this for dinner, we enjoyed it served with fresh fruit and Pistachio Asparagus In Orange Sauce!

A slice of the bacon, onion and spinach tart is removed from the pan, for serving.Asparagus and fresh fruit are served alongside a slice of bacon, onion and spinach tart.

I really do love the versatility of this dish! The leftovers are wonderful as they hold up well taste-wise, even after being refrigerated for several days! I’m confident you’re going to enjoy this meal. Thanks for stopping by, and I invite you to come back again soon for more family friendly recipes. Take care, and have a GREAT day! 

Looking For More TART Or QUICHE Recipes?

You can find ALL of my recipes in the Recipe Index, located at the top of the page. I have other tart recipes (quiches, too) that you might enjoy, including:

Interested In More Recipes?

Thank you for visiting this website. I appreciate you using some of your valuable time to do soIf you’re interested, I publish a newsletter 2 times per month (1st and 15th) with all the latest recipes, and other fun info. I would be honored to have you join our growing list of subscribers, so you never miss a great recipe!
There is a Newsletter subscription box on the top right side (or bottom) of each blog post, depending on the device you use, where you can easily submit your e-mail address (only) to be included in my mailing list.

You Can Also Find Me On Social Media:

Facebook page: The Grateful Girl Cooks!
Pinterest:
The Grateful Girl Cooks!
Instagram:
jbatthegratefulgirlcooks

Author's signature

Recipe adapted from and printed from original source in April, 2018 at FamilyCircle.com

↓↓ PRINTABLE RECIPE BELOW ↓↓

5 from 1 vote
Bacon, Onion and Spinach Tart
Prep Time
30 mins
Cook Time
35 mins
Total Time
1 hr 5 mins
 

Enjoy a Bacon, Onion and Spinach Tart for breakfast, lunch or dinner! It's yummy, and filled with caramelized onions, cheese, spinach & bacon.

Category: Breakfast, Dinner, Lunch
Cuisine: American
Keyword: bacon onion and cheese tart
Servings: 8
Calories Per Serving: 258 kcal
Author: JB @ The Grateful Girl Cooks!
Ingredients
  • 1 refrigerated rolled pie crust or homemade
  • 4 slices bacon crosswise cut into ¼" strips
  • 6 cups baby spinach leaves
  • pounds yellow onions (about 4) cut into ¼" slices (about 6 cups total)
  • ¾ teaspoon salt
  • ¼ teaspoon dried thyme
  • 3 large eggs
  • ¾ cup half and half
  • ¼ teaspoon black pepper
  • cup shredded cheddar cheese or Gruyere
Instructions
Prep:
  1. Roll out dough; fit it into a 9" tart pan (with removable bottom). Press dough into sides of pan; trim away excess crust from top edge, so top of crust is flush with pan. Use fork tines to prick dough on sides and bottom. Refrigerate crust while making tart filling.

  2. Cut 4 strips of bacon crosswise into small thin strips. Place bacon strips in a large non-stick skillet. Cook on Medium heat, stirring often. Cook approx. 6-8 minutes. Add spinach. Continue to stir; cook for 1 minute, or until spinach has wilted. Transfer bacon/spinach mixture out of skillet with a slotted spoon. Place on plate lined with paper towels, to absorb excess grease. Do not clean skillet.

Caramelize Onions:
  1. Place onions, thyme and ¼ teaspoon salt into the same skillet. Turn to Medium heat; put a lid on skillet. Cook onions (covered) for 25 minutes, stirring occasionally. Continue to cook (covered) until onions have caramelized, softened and are a rich brown color. When done, remove skillet from heat. Stir, then let them cool, uncovered, for 5 minutes. TIP: Preheat oven to 375°F. while onions are cooking.

Make Tart Filling:
  1. In large mixing bowl, whisk together eggs, half and half, pepper and remaining ½ tsp. salt until combined. Stir in bacon/spinach. Add cooled onions; stir until combined. Carefully pour filling into crust, making sure spinach/onions/bacon are evenly distributed.

Time For The Oven:
  1. Bake at 375°F. for 15 minutes, then reduce the heat to 325°, and bake another 20 minutes at lower temperature. Remove tart from oven, and turn oven to BROIL setting. Sprinkle top of tart with shredded cheese. Place tart about 6" from broiler heating element. Let it broil for 1-2 minutes, or until cheese has melted. Keep an eye on it so you don't burn the top! Transfer tart to wire rack. Let cool 5 minutes before removing from tart pan, slicing and serving.

  2. Carefully remove metal rim from the tart by pushing up from the bottom to separate tart from outer rim. Cut into 8 slices, serve, and enjoy! Keep any leftovers covered/refrigerated up to 4-5 days.

Nutrition Facts
Bacon, Onion and Spinach Tart
Amount Per Serving (1 slice (1/8 of total))
Calories 258 Calories from Fat 144
% Daily Value*
Fat 16g25%
Saturated Fat 6g38%
Trans Fat 1g
Polyunsaturated Fat 2g
Monounsaturated Fat 6g
Cholesterol 90mg30%
Sodium 470mg20%
Potassium 353mg10%
Carbohydrates 21g7%
Fiber 3g13%
Sugar 5g6%
Protein 8g16%
Vitamin A 2346IU47%
Vitamin C 13mg16%
Calcium 115mg12%
Iron 2mg11%
* Percent Daily Values are based on a 2000 calorie diet.

Here’s one more to pin on your Pinterest boards!Enjoy a Bacon, Onion and Spinach Tart for breakfast, lunch or dinner! It's yummy, and filled with caramelized onions, cheese, spinach & bacon.

Baked Banana Doughnuts

Whip up some Baked Banana Doughnuts, glazed, then topped with chocolate and toasted nuts! Easy to make, delicious, and ready in 25 minutes!

Good morning! Today I want to share a delicious recipe for baked banana doughnuts! Our family enjoyed them at our Easter brunch this past April, and they were a wonderful addition to our “feast”. Banana baked doughnuts have wonderful flavor, and look good, too!. I “prettied them up” a bit by adding chocolate drizzle and toasted nuts to each one, which gave them even better presentation and flavor! A family member was overheard saying they look like “REAL” doughnuts… ha ha!!

These breakfast treats (or snacks) are BAKED, and not FRIED, which makes them even easier to prepare! To make them, you will need to have a doughnut pan with a six doughnut well in it. I got mine years ago online, and it was fairly inexpensive. I’ve used mine many times over the years to make doughnuts, so it was a worthwhile purchase. 

Scroll Down For A Printable Recipe Card At The Bottom Of The Page

Make The Batter For The Doughnuts

Before beginning, remember to preheat your oven to 325°F. It doesn’t take long at all to prepare the batter, so you will want that oven hot and ready to go, when you’re ready to bake the doughnuts. While the oven preheats, make the batter. Lightly spray or grease the doughnut pan, as well.

Whisk together all purpose flour, granulated sugar, cinnamon, baking powder and salt in a large bowl. Once you’ve combined these ingredients, make a “well” in the center of the mix, then set the bowl aside. In a separate bowl, combine mashed banana, buttermilk, a beaten egg, melted (cooled) butter and vanilla extract.

Flour, sugar, baking powder, cinnamon and salt are placed in a medium bowl and combined.Egg, banana, buttermilk, vanilla and melted butter are combined in bowl.

Pour the banana mixture into the well in the middle of the dry ingredients, and then stir until all ingredients are combined. Don’t overmix the batter… only stir until all ingredients have been incorporated into a thick batter.

Egg mixture is poured into a well in the dry ingredients, then combined.Batter for baked banana doughnuts is thoroughly combined and ready to use.

Bake The Doughnuts

Evenly divide the doughnut batter into your lightly greased doughnut pan. I spoon the batter into each doughnut well, and it is not too messy at all. You will find that the batter will fill each well almost to the top.

Bake the doughnuts on the middle rack of the oven, at 325°F. for about 10-12 minutes. They will not be overly browned once done baking, but they should be set on top and cooked through. If you gently touch the top of the doughnut, it should spring back lightly.

Transfer the pan to a wire rack to cool slightly before removing the baked banana doughnuts from the pan. Once cooled slightly, place the doughnuts onto the wire rack, and put a sheet of wax paper or aluminum foil UNDER the rack. The foil or wax paper will catch any drips when you glaze the doughnuts later.

The baked banana doughnut batter is divided evenly into six wells in doughnut pan.After baking, the banana doughnuts cool in the pan on a wire rack before removing.Baked banana doughnuts cooling on a wire rack.

Glaze And Decorate The Doughnuts

While the baked banana doughnuts cool, make the simple glaze. Stir or whisk together powdered sugar, vanilla extract and milk until the glaze is smooth (no lumps!). Once the doughnuts have cooled to room temperature, dip the top of each doughnut (one at a time) into the glaze.

Dip doughnuts enough to cover the top of the doughnut, then quickly flip it over, allowing excess glaze to drip back into the bowl. Set the glazed doughnut back (frosting side UP) onto the wire rack, and repeat this process with the remaining doughnuts. 

A glaze is made with powdered sugar, milk and vanilla to frost the baked doughnuts.Each doughnut is placed in the glaze to fully coat the top of each one.Six baked banana doughnuts on a wire rack after being glazed.

Once the glaze has been applied and has firmed up just a bit… drizzle melted chocolate over each donut, then add the toasted, chopped nuts on top of the chocolate. Lightly press the nuts into the chocolate so they will adhere to the doughnut. Let the toppings firm up before serving.

Chopped toasted nuts and melted chocolate are added to the top of each doughnut.

Serve The Baked Banana Doughnuts!

Once the glaze and chocolate toppings have firmed up, the baked banana doughnuts are ready to serve! We served them at our Easter brunch, and they were a hit! In the photo below you can see them (with the red arrow), along with our other choices.

We enjoyed them with a variety of dishes, including creamy deviled eggs, snickerdoodle bread, egg, cheese and veggie breakfast casserole, chocolate chip orange scones, and blueberry lemon muffins!

A serving plate with six baked banana doughnuts on it, ready to eat!Easter brunch included the baked banana doughnuts (see red arrow).

I hope you enjoy these yummy baked banana doughnuts! Thank you for stopping by my blog today, and I invite you to come back again for more family friendly recipes. Take care, and have a GREAT day!

Looking for More DOUGHNUT Recipes?

You can find ALL of my recipes in the Recipe Index, located at the top of the page. I have some absolutely delicious doughnut recipes for you to enjoy, including:

Interested In More Recipes?

Thank you for visiting this website. I appreciate you using some of your valuable time to do soIf you’re interested, I publish a newsletter 2 times per month (1st and 15th) with all the latest recipes, and other fun info. I would be honored to have you join our growing list of subscribers, so you never miss a great recipe!
There is a Newsletter subscription box on the top right side (or bottom) of each blog post, depending on the device you use, where you can easily submit your e-mail address (only) to be included in my mailing list.

You Can Also Find Me On Social Media:

Facebook page: The Grateful Girl Cooks!
Pinterest:
The Grateful Girl Cooks!
Instagram:
jbatthegratefulgirlcooks

Author's signature

Recipe adapted from: https://www.imbored-letsgo.com/baked-banana-donuts/

↓↓ PRINTABLE RECIPE BELOW ↓↓

0 from 0 votes
Baked Banana Doughnuts
Prep Time
15 mins
Cook Time
10 mins
Total Time
25 mins
 

Whip up some Baked Banana Doughnuts, glazed, then topped with chocolate and toasted nuts! Easy to make, delicious, and ready in 25 minutes!

Category: Breakfast, Snack
Cuisine: American
Keyword: , doughnuts, baked banana doughnuts, banana donuts
Servings: 6 doughnuts
Calories Per Serving: 307 kcal
Author: JB @ The Grateful Girl Cooks!
Ingredients
  • 1 cup all purpose flour
  • ¼ cup granulated sugar
  • 1 teaspoon baking powder
  • ½ teaspoon salt
  • ½ teaspoon cinnamon
  • 1 banana very ripe, mashed
  • 1 large egg beaten
  • ¼ cup buttermilk
  • 1 teaspoon vanilla extract
  • 1 Tablespoon butter melted
For Glaze:
  • 1 cup powdered sugar
  • 1 Tablespoon milk
  • ½ teaspoon vanilla extract
For Topping:
  • 10 walnuts or pecans lightly toasted, chopped
  • ¼ cup semi-sweet chocolate melted
Instructions
  1. Preheat oven to 325°F. Lightly spray/grease doughnut pan.

  2. Whisk flour, sugar, cinnamon, baking powder and salt in large bowl. Once combined, make a "well" in the center; set bowl aside.

  3. In separate bowl, combine mashed banana, buttermilk, egg, melted butter (cooled) and vanilla. Add this to the flour mixture. Stir to combine ingredients only until incorporated into batter.

  4. Evenly spoon batter into prepared pan, filling each well almost to the top. Bake at 325°F. for 10-12 minutes (on middle rack of oven). Finished doughnuts will be cooked through, and lightly sping back when gently touched on the top. Place pan on wire rack to cool 1-2 minutes, then transfer doughnuts out of pan to wire rack. Let cool completely. Place foil or wax paper UNDER the rack to prepare for glazing doughnuts.

Glaze/Garnish Doughnuts
  1. While doughnuts cool, make glaze. In a small bowl, stir powdered sugar, vanilla and milk until smooth (no lumps!). Once the doughnuts have cooled to room temp., dip top of doughnuts (one at a time) into glaze, to cover top of doughnut. Allow excess glaze to drip back into bowl, then flip doughnut over. Set doughnut, glazed side UP on wire rack. Repeat with remaining doughnuts.

  2. Once glaze has firmed up, drizzle melted chocolate over each donut, then quickly sprinkle with toasted, chopped nuts. Lightly press the nuts into the chocolate so they adhere. Let toppings firm up before serving.

Recipe Notes

NOTE: To toast walnuts/pecans, place them in a skillet and heat on medium heat for 2-3 minutes, stirring occasionally until lightly toasted and aromatic.

Nutrition Facts
Baked Banana Doughnuts
Amount Per Serving (1 doughnut)
Calories 307 Calories from Fat 72
% Daily Value*
Fat 8g12%
Saturated Fat 4g25%
Trans Fat 1g
Polyunsaturated Fat 2g
Monounsaturated Fat 2g
Cholesterol 38mg13%
Sodium 235mg10%
Potassium 248mg7%
Carbohydrates 54g18%
Fiber 2g8%
Sugar 34g38%
Protein 5g10%
Vitamin A 140IU3%
Vitamin C 2mg2%
Calcium 63mg6%
Iron 2mg11%
* Percent Daily Values are based on a 2000 calorie diet.

Here’s one more to pin on your Pinterest boards!Whip up some Baked Banana Doughnuts, glazed, then topped with chocolate and toasted nuts! Easy to make, delicious, and ready in 25 minutes!

Pecan Pie Baked Oatmeal

Pecan Pie Baked Oatmeal is a delicious breakfast, simply made by mixing ingredients then baking! This EASY recipe yields 6 yummy servings!

Do you enjoy oatmeal? Have you ever tried BAKED oatmeal? I definitely answer YES to both questions, and want to share an easy, tasty recipe for baked oatmeal with you today. This recipe only takes a couple of minutes to prep before baking, and the results are outstanding! I found the original recipe online several years ago, and we really like it.

Brown sugar, pecans, butter and vanilla bring great flavor to this simple dish, and it tastes a bit like eating pecan pie! Old fashioned oats help make this dish filling, too! It really could not be more simple to prepare, and I’m happy to share this recipe with you, so you can enjoy it, too. Here’s how to make pecan pie baked oatmeal.

Scroll Down For A Printable Recipe Card At The Bottom Of The Page

Make The Batter For Pecan Pie Baked Oatmeal

The first thing you need to do is preheat your oven to 350°F. and grease the bottom and sides of an 8″ x 8″ baking dish. This recipe comes together quickly, so you want your oven hot when the oatmeal batter is ready to bake. While the oven preheats, you can mix together a few simple ingredients!

Whisk eggs together in a large bowl. Add melted and cooled butter, brown sugar, vanilla extract, milk and salt, then stir to combine these ingredients. Now stir in old fashioned oats and chopped pecans until they are fully incorporated into the batter.

Eggs are whisked in a medium bowl before adding other ingredients.Butter, brown sugar, milk, pecans and old fashioned oats are added to egg mixture.

Pour the batter for the pecan pie baked oatmeal into the prepared (greased) baking dish, spreading it evenly in the pan.

The batter for the pecan pie baked oatmeal is combined and ready to put into pan.The batter for the baked oatmeal is poured into an 8x8 baking pan.

Time To BAKE!

Place the baking dish on the middle rack of a preheated 350°F. oven. Bake the oatmeal for 40-45 minutes. When done, the top will be golden brown and the center of the baked oatmeal should not jiggle, but should be set.

Pecan Pie Baked Oatmeal cools after being baked and removed from oven.

Transfer the baking dish to a wire rack, and allow the pecan pie baked oatmeal to cool for 10-15 minutes before serving. We think this baked oatmeal tastes best served slightly warm, or at room temperature, so that’s how we usually eat it.

Once it has cooled enough to suit your taste, you can easily slice pecan pie baked oatmeal into six portions, or scoop it out of the dish. Place portions onto individual serving plates, serve and enjoy this delicious breakfast!

Slices have been removed for serving from the baked oatmeal.A portion of the pecan pie baked oatmeal, served on a white plate.

I truly hope you  (and those you love) enjoy this recipe for pecan pie baked oatmeal. It will last for several days (covered), and you can keep it on the counter, as it doesn’t require refrigeration. I’m confident you’ll enjoy it as much as we do! Take care and have a great day.

Looking For More OATMEAL Recipes?

Yu can find ALL of my recipes in the Recipe Index, located at the top of the page. I have some great breakfast recipes, as well as quite a few oatmeal recipes, including:

Interested In More Recipes?

Thank you for visiting this website. I appreciate you using some of your valuable time to do soIf you’re interested, I publish a newsletter 2 times per month (1st and 15th) with all the latest recipes, and other fun info. I would be honored to have you join our growing list of subscribers, so you never miss a great recipe!
There is a Newsletter subscription box on the top right side (or bottom) of each blog post, depending on the device you use, where you can easily submit your e-mail address (only) to be included in my mailing list.

You Can Also Find Me On Social Media:

Facebook page: The Grateful Girl Cooks!
Pinterest:
The Grateful Girl Cooks!
Instagram:
jbatthegratefulgirlcooks

Author's signature

Original recipe source: https://frugalfarmwife.com/article/pecan-pie-baked-oatmeal-recipe/

↓↓ PRINTABLE RECIPE BELOW ↓↓

0 from 0 votes
Pecan Pie Baked Oatmeal
Prep Time
5 mins
Cook Time
40 mins
Total Time
45 mins
 

Pecan Pie Baked Oatmeal is a delicious breakfast, simply made by mixing ingredients then baking! This EASY recipe yields 6 yummy servings!

Category: Breakfast
Cuisine: American
Keyword: pecan pie baked oatmeal
Servings: 6
Calories Per Serving: 409 kcal
Author: JB @ The Grateful Girl Cooks!
Ingredients
  • 4 large eggs can substitute 4 medium
  • 1 cup brown sugar
  • ¼ cup butter (½ stick) melted, cooled to room temp.
  • cup milk
  • 1 teaspoon vanilla extract
  • ¼ taspoon salt
  • 1 cup old fashioned oats
  • ¾ cup chopped pecans
Instructions
  1. Preheat oven to 350°F. Grease bottom/sides of 8" x 8" baking dish.

  2. Whisk eggs in large bowl. Add melted (cooled) butter, brown sugar, vanilla, milk and salt; stir to combine. Stir in oats and pecans until incorporated into batter. Pour batter evenly into greased baking dish.

  3. Place dish on middle rack in oven. Bake for 40-45 minutes. When done, top should be golden brown and center of oatmeal should be "set" and not jiggle.

  4. Transfer dish to a wire rack; let oatmeal cool 10-15 minutes before serving. Slice into six portions, or scoop it out of the dish. Enjoy!

Nutrition Facts
Pecan Pie Baked Oatmeal
Amount Per Serving (1 (1/6 of total))
Calories 409 Calories from Fat 198
% Daily Value*
Fat 22g34%
Saturated Fat 7g44%
Trans Fat 1g
Polyunsaturated Fat 4g
Monounsaturated Fat 9g
Cholesterol 145mg48%
Sodium 142mg6%
Potassium 221mg6%
Carbohydrates 48g16%
Fiber 3g13%
Sugar 37g41%
Protein 8g16%
Vitamin A 437IU9%
Vitamin C 1mg1%
Calcium 84mg8%
Iron 2mg11%
* Percent Daily Values are based on a 2000 calorie diet.

Here’s one more to pin on your Pinterest boards!Pecan Pie Baked Oatmeal is a delicious breakfast, simply made by mixing ingredients then baking! This EASY recipe yields 6 yummy servings!

TexMex Veggie Egg Scramble

TexMex Veggie Egg Scramble is a delicious and filling breakfast, flavored with zucchini, scallions, bell peppers, tomatoes and spices.

My husband and I really enjoy scrambled eggs. Typically we drink coffee and have a bowl of oatmeal, cereal or an English muffin for breakfast, but we DO love a nice big breakfast occasionally.

This recipe for TexMex Veggie Egg Scramble is one I’ve made often. It is quite delicious!

The recipe is simple to prepare, and the hot finished breakfast makes a healthy sized portion to enjoy! How can you go wrong with lots of protein and veggies to start the day? Here’s how to make this breakfast dish.

Scroll Down For A Printable Recipe Card At The Bottom Of The Page

Cook The Veggies

Heat olive oil (or whatever type oil you are using) on Medium heat in a large, non-stick skillet. When the oil is hot, but not smoking, add chopped zucchini, tomatoes, bell pepper and green onions.

Cook the veggies (and stir often) until they become tender (but not mushy).

TIP: If you do not like zucchini, broccoli makes a great substitute and tastes good in this dish, as well! If you don’t enjoy tomatoes with the eggs, you can substitute chopped red bell pepper as well. Just keep the quantity the same for any substitutions, and you will be just fine. You really can’t hurt this egg dish.

Scallions, bell peppers, zucchini and tomatoes are cooked until tender in large skillet.

Prepare The Eggs

While the veggies are cooking, place eggs, garlic powder, ground cumin, paprika, a pinch of salt and pepper, and oregano into a small bowl. Whisk them until fully combined.

Eggs, oregano, garlic powder, cumin, paprika and salt and pepper are combined in a bowl.

Time To Make A TexMex Veggie Egg Scramble!

Put the skillet of veggies back on Medium heat, then pour the egg mixture into the skillet. Cook the TexMex Veggie Egg Scramble until the eggs are set, stirring often to scramble them while they cook.

Beaten, seasoned eggs are added to the cooked veggies in the skillet to cook.Using a spatula to mix and cook the TexMex veggie egg scramble.

Once the TexMex Veggie Egg Scramble is cooked to your desired consistency, remove the skillet from the heat. Take a little bite, and add additional salt and pepper, if desired. Serve the eggs hot. This makes a large serving, and the healthy veggies cooked with the eggs will help to fill you up. 

If you do not want that large of a portion, simply use two eggs. You can also increase the number of eggs to four, then divide the total into two servings. Your choice! 

The TexMex veggie egg scramble on a plate, with blueberries above it.

I hope you have a chance to try this breakfast dish. The veggies add extra flavor and texture to scrambled eggs, and the spices add a nice TexMex touch, too! YUM. Hope you enjoy them. Thanks for stopping by, and have a wonderful day.

Looking For More BREAKFAST Recipes?

You can find ALL of my recipes in the Recipe Index, located at the top of the page. I have a great variety of breakfast recipes you may enjoy, including:

Interested In More Recipes?

Thank you for visiting this website. I appreciate you using some of your valuable time to do soIf you’re interested, I publish a newsletter 2 times per month (1st and 15th) with all the latest recipes, and other fun info. I would be honored to have you join our growing list of subscribers, so you never miss a great recipe!
There is a Newsletter subscription box on the top right side (or bottom) of each blog post, depending on the device you use, where you can easily submit your e-mail address (only) to be included in my mailing list.

You Can Also Find Me On Social Media:

Facebook page: The Grateful Girl Cooks!
Pinterest:
The Grateful Girl Cooks!
Instagram:
jbatthegratefulgirlcooks

Author's signature

↓↓ PRINTABLE RECIPE BELOW ↓↓

0 from 0 votes
TexMex Veggie Egg Scramble
Prep Time
7 mins
Cook Time
3 mins
Total Time
10 mins
 

TexMex Veggie Egg Scramble is a delicious and filling breakfast, flavored with zucchini, scallions, bell peppers, tomatoes and spices.

Category: Breakfast
Cuisine: American, Southwestern
Keyword: TexMex veggie egg scramble
Servings: 1
Calories Per Serving: 247 kcal
Author: JB @ The Grateful Girl Cooks!
Ingredients
  • ¾ tsp canola oil or other light neutral oil
  • 1/3 cup zucchini diced
  • cup green bell pepper seeded, diced
  • cup fresh tomatoes diced
  • 1 Tablespoon green onion (scallion) slices white/green parts
  • 3 medium eggs lightly beaten
  • teaspoon garlic powder
  • teaspoon ground cumin
  • teaspoon paprika
  • teaspoon dried oregano
  • 1 pinch salt and black pepper , season to taste
Instructions
  1. Heat oil on Medium heat in a large, non-stick skillet. When oil is hot, add zucchini, tomatoes, bell pepper and green onions. Cook, stirring often, until they become tender (but not mushy).

    TIP: If you don't like zucchini, broccoli is a great substitute. If you don't like tomatoes, substitute chopped red bell pepper or omit them.

  2. While veggies cook, place eggs, garlic powder, ground cumin, paprika, oregano and a pinch of salt and pepper in a small bowl. Whisk until combined. Put the skillet of veggies back on Medium heat. Pour egg mixture into skillet.

  3. Cook until eggs are scrambled/set, stirring often while they cook. Remove skillet from heat. Take a bite; add additional salt and pepper, if desired. Serve hot.

Recipe Notes

TIP: This makes a large serving. If you do not want that large of a portion, use two eggs. You can also increase the eggs to four, then divide total into two servings. Your choice! 

Nutrition Facts
TexMex Veggie Egg Scramble
Amount Per Serving (1 g)
Calories 247 Calories from Fat 144
% Daily Value*
Fat 16g25%
Saturated Fat 4g25%
Trans Fat 1g
Polyunsaturated Fat 4g
Monounsaturated Fat 7g
Cholesterol 491mg164%
Sodium 197mg9%
Potassium 529mg15%
Carbohydrates 8g3%
Fiber 2g8%
Sugar 4g4%
Protein 18g36%
Vitamin A 1583IU32%
Vitamin C 55mg67%
Calcium 102mg10%
Iron 3mg17%
* Percent Daily Values are based on a 2000 calorie diet.

Here’s one more to pin on your Pinterest boards!TexMex Veggie Egg Scramble is a delicious and filling breakfast, flavored with zucchini, scallions, bell peppers, tomatoes and spices.