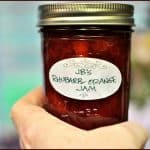
If you enjoy the flavor combination of rhubarb and oranges, then you will enjoy this recipe for canning Rhubarb-Orange Marmalade! You will enjoy this thick, delicious, rhubarb-orange marmalade (made without pectin) using fresh oranges and rhubarb, on toast and biscuits, etc. using fresh oranges and rhubarb. Delicious spread for toast, biscuits, etc. / The Grateful Girl Cooks!")
This rhubarb-orange marmalade recipe is fairly simple in that it requires NO PECTIN, and only three ingredients to make some incredible tasting jam! If you prefer a “not as chunky” JAM that uses Pectin to make this same flavor combo, be sure and check out my recipe for Rhubarb-Orange Jam… that recipe uses a slightly different process for preparing the jam.
Scroll Down For A Pintable Recipe Card At The Bottom Of The Page
Before beginning, prepare your water bath canner, jars and lids, according to canning and manufacturer guidelines. Place rhubarb and granulated sugar into a large soup pot or Dutch oven.

Place the two oranges (I cut them into chunks and removed any seeds), INCLUDING PEEL, into a food processor. Process the oranges until blended and in small pieces.

Preparing the Rhubarb-Orange Marmalade For Canning
Add the processed oranges to the rhubarb-sugar mixture in pan. Bring the fruit mixture to a boil, stirring frequently. Once fruit begins boiling, turn down the heat and simmer mixture (uncovered) for about an hour, stirring frequently to prevent scorching.

Mash the rhubarb with a potato masher as it cooks to help break down the rhubarb. Cook marmalade until mixture “sheets” from a very cold spoon (about an hour). **Notes on the “sheeting” process can be found in the NOTES section of the printable recipe. Once the marmalade is done cooking, and the gel stage has been reached, remove the pan from the stove. If any foam has appeared on the surface of jam, remove it with a spoon and discard.
![]()

Fill the Jars
Carefully ladle the hot marmalade into prepared hot canning jars, leaving 1/4 inch headspace.

Be sure to remove any air bubbles, and adjust headspace, if necessary, by adding or removing jam to reach correct headspace. Wipe the jar rims clean with a wet cloth or paper towel to remove spills and ensure a good seal. Place the prepared lids and screwband on jars; tighten to fingertip tight.
Processing The Jars Of Rhubarb-Orange Marmalade
Place filled jars into simmering water onto canning rack in water bath canner. Make sure the jars are completely covered (by at least an inch above the top of jars) with hot water. Bring water to a boil; once water has reached a full boil, process jars for 10 minutes.

When done, carefully remove the HOT jars to a dish towel on countertop. Do not place directly on counter as temperature variations could cause jars to crack. Let the jars cool completely, undisturbed for 12-24 hours. Label and store. This recipe makes approximately 7- 8 half-pint or 4 pint jars of rhubarb-orange marmalade. Processing time is the same for both sized jars.
![]()

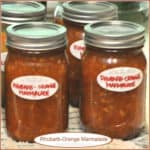
I love to make jams and marmalades to sample throughout the year OR to tuck into a gift basket for a friend when they least expect it! This Rhubarb-Orange Marmalade is delicious!
Looking for More JAM Recipes?
You can find ALL my recipes in the Recipe Index, located at the top of the page. I have lots of delicious jam recipes, including:
Interested In More Recipes?
Thank you for visiting this website. I appreciate you using some of your valuable time to do so. If you’re interested, I publish a newsletter 2 times per month (1st and 15th) with all the latest recipes, and other fun info. I would be honored to have you join our growing list of subscribers, so you never miss a great recipe!
There is a Newsletter subscription box on the top right side (or bottom) of each blog post, depending on the device you use, where you can easily submit your e-mail address (only) to be included in my mailing list.
You Can Also Find Me On Social Media:
Facebook page: The Grateful Girl Cooks!
Pinterest: The Grateful Girl Cooks!
Instagram: jbatthegratefulgirlcooks
Have a GREAT day!

Recipe Source: http://www.tasteofhome.com/recipes/rhubarb-marmalade/
↓↓ PRINTABLE RECIPE BELOW ↓↓
- 6 cups fresh rhubarb , chopped (See NOTES section for info on using frozen rhubarb)
- 6 cups sugar
- 2 medium oranges (including peel), cut into chunks
- Place the chopped rhubarb and sugar into a large Dutch oven or soup pot.
- Place the orange chunks (yes, peel included!) into a food processor. Process the oranges until small pieces are left. Add the orange pieces to the rhubarb/sugar mixture in the Dutch oven. Stir well, to combine.
- Bring mixture to a full boil, then reduce heat to a simmer. Cook, uncovered for about 1 hour, stirring quite often (to prevent burning on bottom of pot). When done the marmalade should "sheet" off of a spoon. (See NOTES section for explanation of process).
- While marmalade is cooking, prepare water bath canner, canning jars and lids, according to manufacturer and USDA canning instructions.
- Remove the marmalade and pan from the heat. Skim any foam off the top of the marmalade and discard. Ladle the hot marmalade into prepared and heated pint jars. Leave 1/4 inch headspace in each jar. Remove any air bubbles, and adjust the headspace by adding or removing marmalade. Wipe the lids of each jar well with a damp towel to ensure a good seal. Place the heated flat lid onto each jar, then screw on the jar band until it is fingertip-tight.
- Carefully place hot jars into simmering water in the canner. Make sure jars are completely covered with hot water by at least an inch. Bring water in canner to a full boil; process jars for 10 minutes.
If using frozen rhubarb... measure frozen, then thaw. Drain in colander-don't press juice out
Processing time is for 1,000 feet of altitude and lower. Be sure to add a minute of processing time for each 1,000 feet higher in altitude you are.
"Sheeting process": Dip a very cold metal spoon into hot marmalade. Lift up spoon; hold it horizontally. The syrup will run off the edge of spoon. As it cooks, the syrup will usually run off in drops, two at a time. Keep cooking. Once jam has cooked enough that the drops mix together and "sheet" (blob together in solid sheet) off a very cold spoon, you've reached the gel stage.
Here’s one more to pin on your Pinterest boards!
 using fresh oranges and rhubarb. Delicious spread for toast, biscuits, etc. / The Grateful Girl Cooks!")


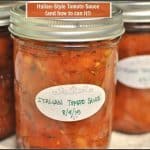
. Learn how to make this classic sauce, and can it for long term storage! / The Grateful Girl Cooks!")

 / The Grateful Girl Cooks!")
 / The Grateful Girl Cooks!")
 / The Grateful Girl Cooks!")
. Learn how to make this classic sauce, and can it for long term storage! / The Grateful Girl Cooks!")