Category: From Our Veggie Garden

Oven Roasted Green Beans

Oven roasted green beans are a delicious side dish that’s simple to prepare. Fresh green beans and 3 other ingredients are all you need!Oven roasted green beans are a delicious side dish that's simple to prepare. Fresh green beans and 3 other ingredients are all you need!
Today I want to share with you a simple way to make and serve oven roasted green beans. I grow a lot of green beans in our little backyard raised bed garden, so we eat a lot of them.

Oven roasting green beans is a super easy, but delicious way to serve fresh green beans with minimal effort involved.

The recipe as written will yield four servings, but can easily be cut in half, doubled or tripled for your needs. Here’s how to make this simple veggie side dish.

Scroll Down For A Printable Recipe Card At The Bottom Of The Page

What Will I Need For This Recipe?

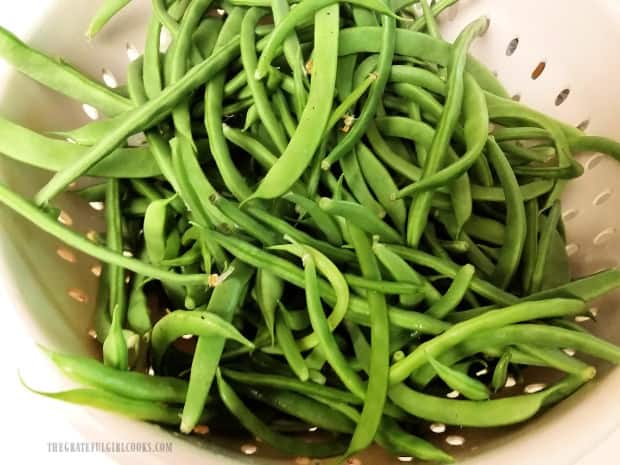
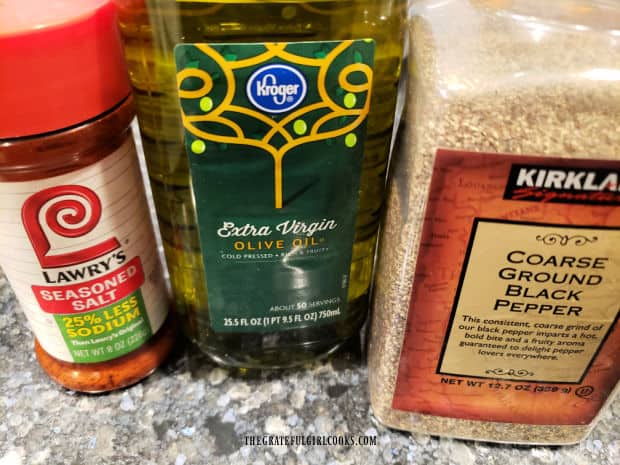
This recipe, as written to serve four people, calls for one pound of fresh green beans, olive oil, seasoning salt, and coarse black pepper.

NOTE: When I photographed this recipe, I only made HALF of the amount called for, as my husband and I were the only ones that would be eating.

Fresh green beans are trimmed, then are ready to be seasoned.Seasoning salt, olive oil and black pepper are used to season oven roasted green beans.

A Quick Toss With The Seasonings Before Oven Roasting

Preheat your oven to 375°F before starting on the green beans. It won’t take long at all to get the green beans ready, and you want that oven hot and ready to go!

Trim the stem ends off of the green beans (by cutting or snapping), and then place the beans in a large mixing bowl.

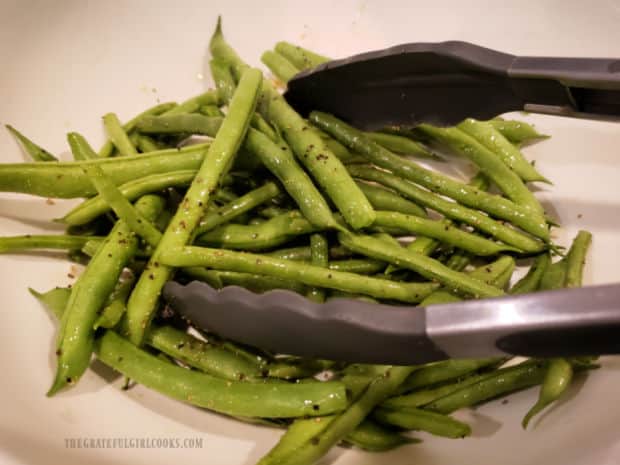
Add the olive oil, seasoning salt, and pepper, and toss them together until the beans are well coated on all sides.

Fresh green beans are tossed with olive oil, seasoning salt and pepper until coated.

Time For The Oven!

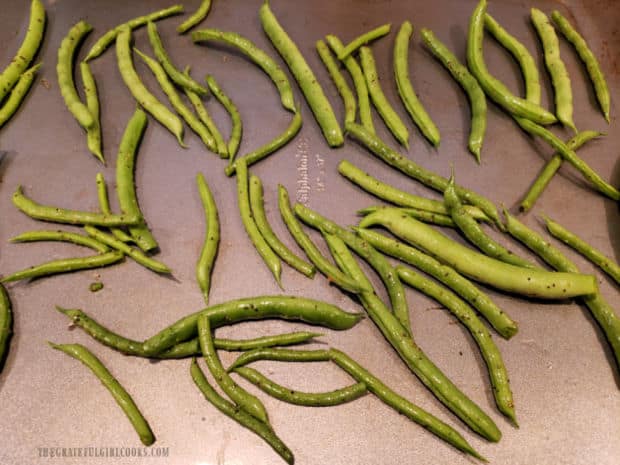
Spread the seasoned green beans out on a large baking sheet in a single layer. Place the baking sheet on the middle rack of the preheated oven.

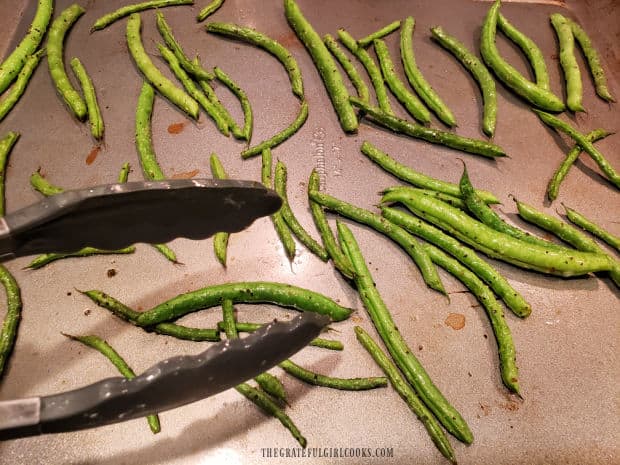
Bake at 375°F. for about 15-20 minutes total, turning the beans over, halfway through the baking time.

Keep an eye on the beans as they bake. Larger beans may take a minute or two more to cook through. When I oven roast green beans, ours usually take about 15 minutes total, but your oven time may vary.

Oven roasted green beans are placed on baking sheet in a single layer for baking.Halfway through baking time, the oven roasted green beans are flipped to other side.

Serve The Oven Roasted Green Beans

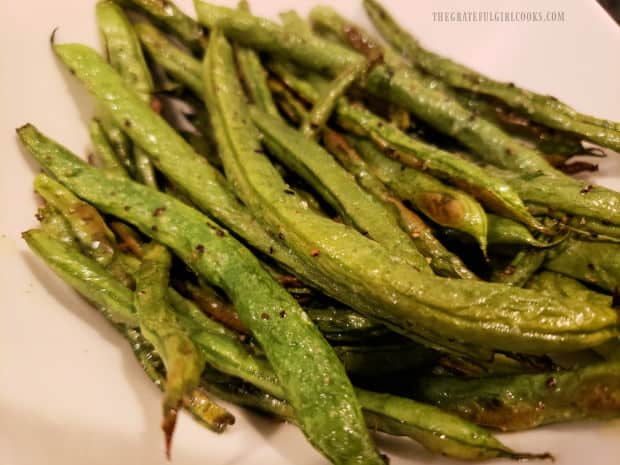
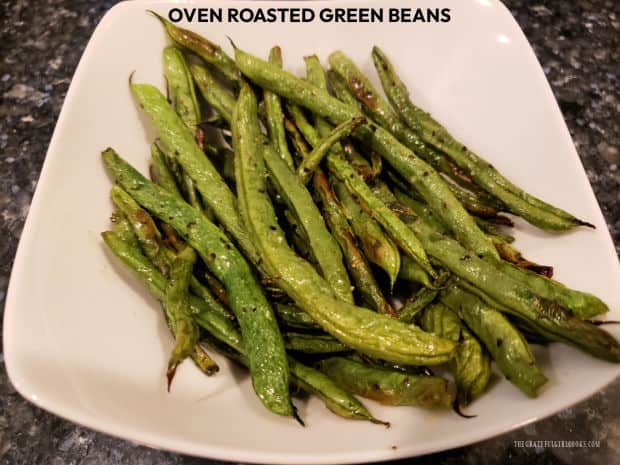
When done, the green beans will look a little bit “wrinkly or blistered” on the outside and may have some lightly browned spots. That is wonderful! That’s how they should look once they’re fully roasted!

Remove oven roasted green beans, and transfer them to a serving bowl. Serve immediately, while hot! This is a perfect side dish for an endless amount of main dishes, and it’s truly is a simple recipe to prepare.

I’m pretty confident you will enjoy having this easy recipe conveniently stored in your “kitchen toolbag” for future use. Here’s to many more meals, accompanied by delicious oven roasted green beans!

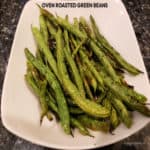
Oven roasted green beans, are served hot in a white bowl, after baking is done.

I hope you enjoy making (and eating!) oven roasted green beans. They could not be any easier to make, and trust you and those you love will enjoy them as much as we do!

Thanks for stopping by- please come back again soon for more family-friendly recipes. Have a GREAT day!

Looking For More Veggie Side Dish Recipes?

You can find all of my recipes in the Recipe Index, which is located at the top of the page. I have lots of delicious veggie side dish recipes for you to check out, including:

Want More Recipes? Get My FREE Newsletter!

I publish a newsletter 2 times per month (1st and 15th) with lots of recipes, tips, etc..
Would you like to join our growing list of subscribers?

There is a Newsletter subscription box on the top right (or bottom) of each blog post, depending on the device you use.
You can submit your e-mail address there, to be added to my mailing list.

Find Me On Social Media:

Facebook page: The Grateful Girl Cooks!
Pinterest:
The Grateful Girl Cooks!
Instagram:
jbatthegratefulgirlcooks

Author's signature

↓↓ PRINTABLE RECIPE BELOW ↓↓

0 from 0 votes
Oven Roasted Green Beans
Prep Time
5 mins
Cook Time
15 mins
Total Time
20 mins
 

Oven roasted green beans are a delicious side dish that's simple to prepare. Fresh green beans and 3 other ingredients are all you need!

Category: Side Dishes, Vegetable Dish
Cuisine: American
Keyword: oven roasted green beans
Servings: 4
Calories Per Serving: 98 kcal
Author: JB @ The Grateful Girl Cooks!
Ingredients
  • 1 pound fresh green beans stem ends trimmed
  • 2 Tablespoons extra virgin olive oil
  • 1 teaspoon seasoning salt
  • ½ teaspoon black pepper
Instructions
  1. Preheat oven to 375°F.

  2. Trim stem end off of green beans (by cutting or snapping). Place beans in large bowl. Add olive oil, seasoning salt, and pepper; toss until beans are coated on all sides.

  3. Spread beans on large baking sheet in a single layer. Bake at 375°F. for 15-20 minutes total, flipping beans over, halfway through the baking time.

  4. When done, beans will look "wrinkly or blistered" on the outside and may have lightly browned spots. Transfer beans to serving bowl; serve immediately, Enjoy!
Nutrition Facts
Oven Roasted Green Beans
Amount Per Serving (1 (1/4 of total))
Calories 98 Calories from Fat 63
% Daily Value*
Fat 7g11%
Saturated Fat 1g6%
Polyunsaturated Fat 1g
Monounsaturated Fat 5g
Sodium 588mg26%
Potassium 243mg7%
Carbohydrates 8g3%
Fiber 3g13%
Sugar 4g4%
Protein 2g4%
Vitamin A 784IU16%
Vitamin C 14mg17%
Calcium 43mg4%
Iron 1mg6%
* Percent Daily Values are based on a 2000 calorie diet.

Here’s one more to pin on your Pinterest boards!Oven roasted green beans are a delicious side dish that's simple to prepare. Fresh green beans and 3 other ingredients are all you need!

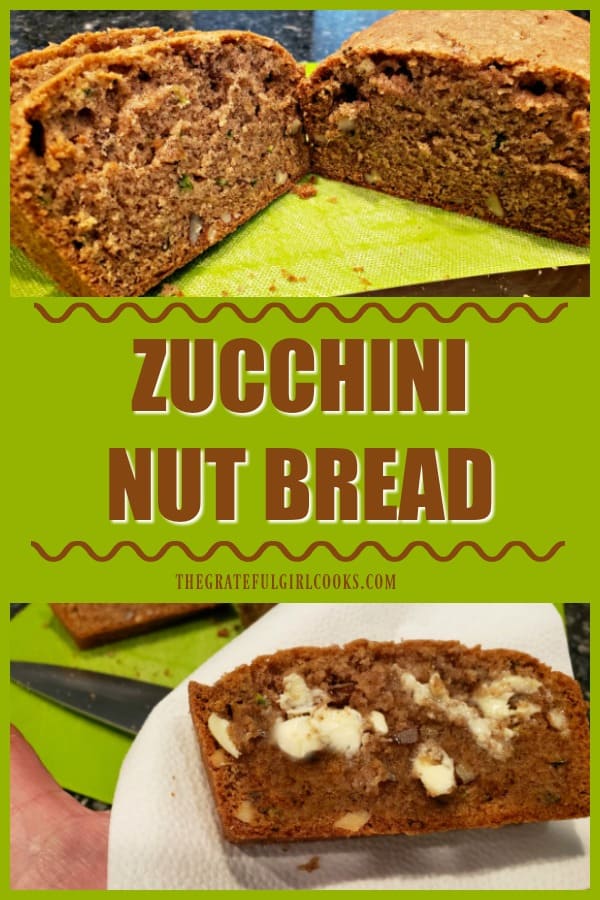
Zucchini Nut Bread

This simple recipe for zucchini nut bread yields two standard-sized loaves. The bread is EASY to make (honest!), and tastes absolutely delicious!This simple recipe for zucchini nut bread yields two standard-sized loaves. The bread is EASY to make (honest!), and tastes absolutely delicious!

My husband and I are spending “quality time” staying at home during the ongoing viral health scare currently spreading it’s reach around the world. A few days ago I decided to make a couple loaves of my old “stand by” zucchini nut bread recipe to have around the house, for us to enjoy for breakfast or an afternoon snack, as we “hunker down”.

This delicious recipe makes two standard sized loaves of zucchini bread, which equals out to about 16 slices. Since it is a very easy recipe to prepare, it was a fantastic way to use one of my large zucchinis in the fridge, to make several breakfasts (or snacks). This is a wonderful slightly sweet, cinnamon spiced bread, and it tastes wonderful! Here’s how to make it:

Scroll Down For A Printable Recipe Card At The Bottom Of The Page

Prepare The Batter For Zucchini Nut Bread

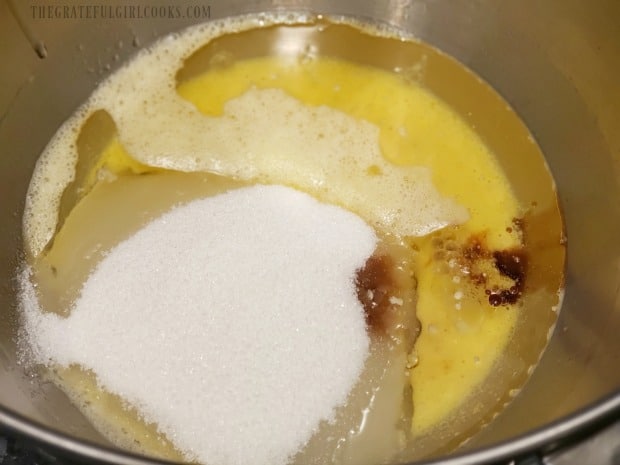
Place the eggs in a large mixing bowl (or the base of a stand mixer), and lightly beat them. Add granulated sugar, vegetable oil, and vanilla extract to the eggs. Mix well (with stand mixer or hand held electric mixer), to fully combine these “wet ingredients”.

Eggs, sugar, oil, and vanilla are mixed together in large bowl.

Preparing The Zucchini

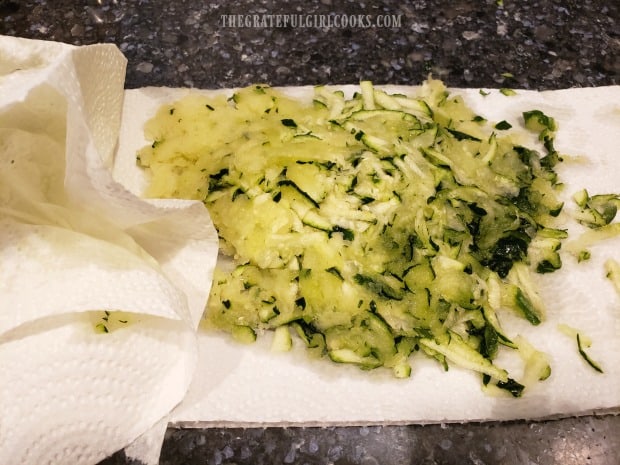
Grate the zucchini onto absorbent paper towels, leaving the peel ON. Once you’re finished grating, lightly press the zucchini with more paper towels, to dry the zucchini and remove LOTS of moisture.

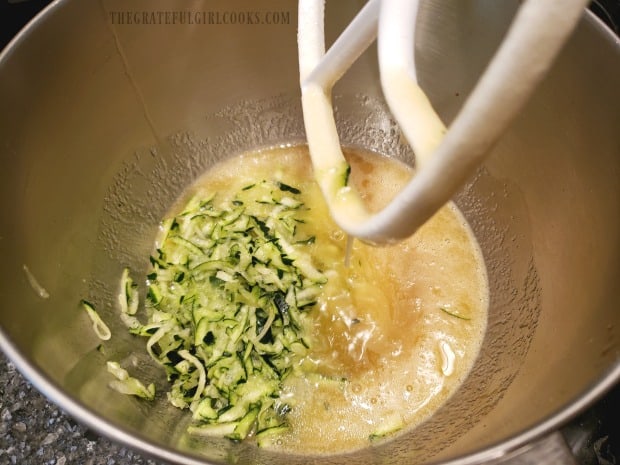
Add the grated zucchini to the wet ingredients in the bowl, and beat again, just until the ingredients are combined.

Unpeeled zucchini is grated, then dabbed with paper towels to absorb moisture.The grated zucchini is added to the wet bread ingredients and mixed together.

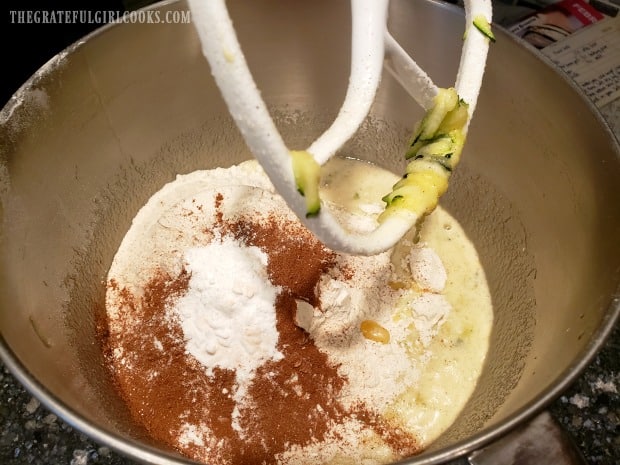
Now add the dry ingredients (flour/cinnamon/salt/baking soda and baking powder) to the wet ingredients, and mix until everything is combined. If using a stand mixer, once the ingredients are fully combined, remove the bowl from the base.

The "dry" ingredients are then combined with the "wet" ingredients in bowl.

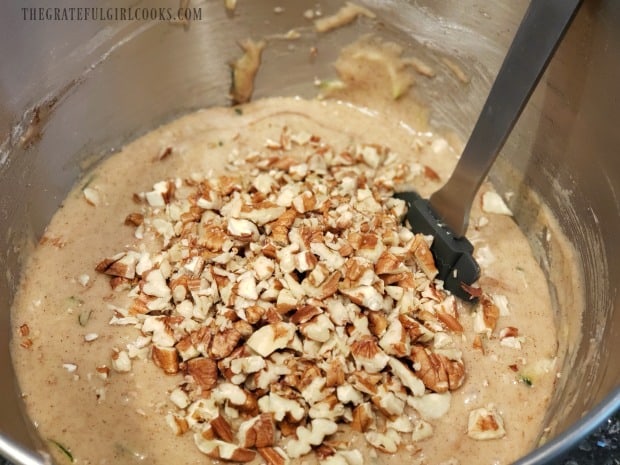
STIR in the chopped pecans (or walnuts, if using). Whoo Hoo… that’s it! Now the batter for your zucchini nut bread is ready to bake!

Chopped pecans (or walnuts) are stirred into the bread batter.

Baking The Zucchini Nut Bread

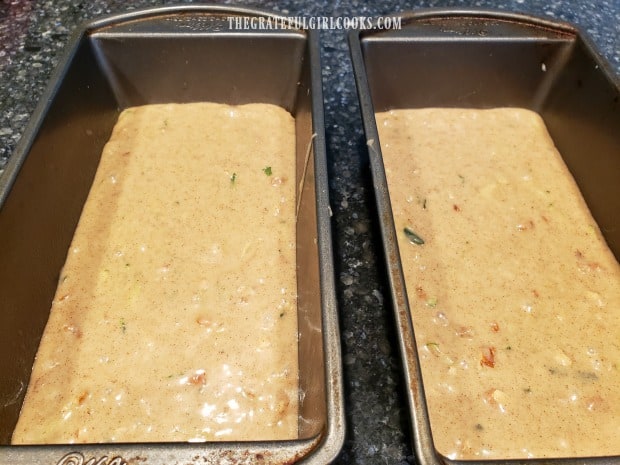
Lightly grease or spray two 9×5″ bread loaf pans on the bottom and sides. Divide the zucchini nut bread batter between the two pans. Place the pans on the middle rack in a preheated 325°F oven. Bake for 1 hour, or until a toothpick inserted into the top of the bread comes out clean.

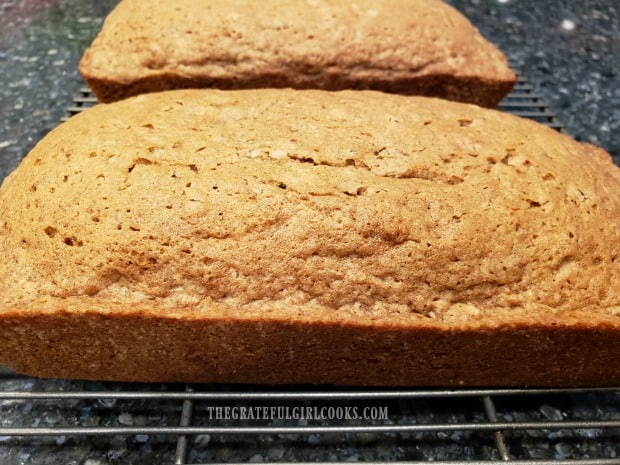
Remove the baking pans to a wire rack and let cool for 10-15 minutes, before attempting to remove the zucchini nut bread from the pan. When ready to remove, run a butter knife around the edges of the pan, then turn pan over, to release the bread.

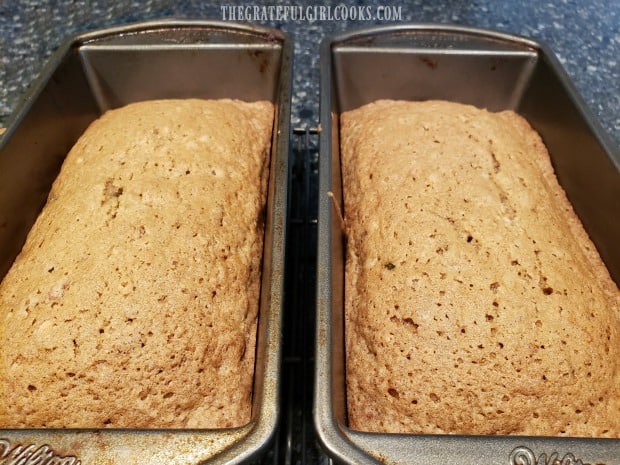
Zucchini nut bread batter is evenly divided into 2 greased loaf pans to bake.Here are the golden brown loaves of zucchini nut bread. hot from the oven.

Time To Slice The Bread And EAT!

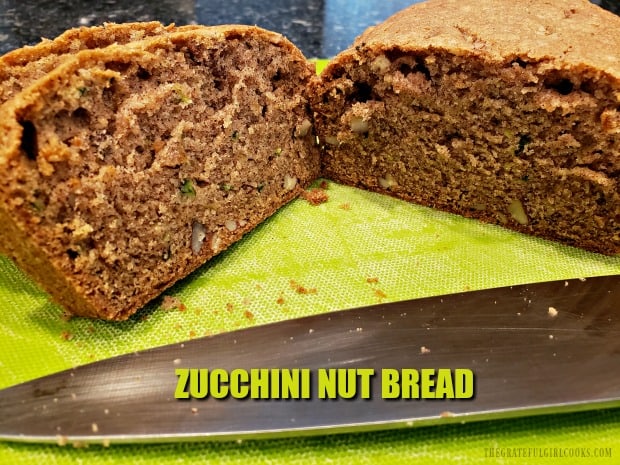
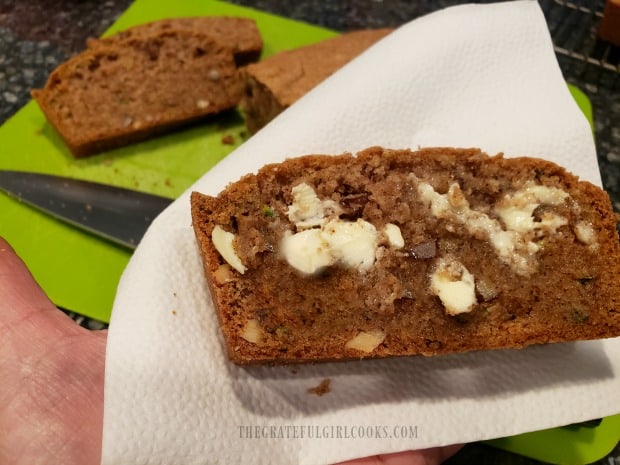
Once the bread has been removed from the pan, and has cooled slightly, you can slice into this yummy treat, and serve it! We always enjoy  cutting a slice of zucchini nut bread, and eating it with some butter spread on it. YUM! It’s so good, and has a slight cinnamon flavor, too!

CAN YOU FREEZE THIS BREAD? YES!!!! We usually eat one loaf and freeze the other. If freezing, let the loaf (or loaves) completely cool down. Once cool, wrap each loaf tightly in plastic wrap, and then in aluminum foil, and store in the freezer, to have a loaf to enjoy another time!


Cooling loaves of bread on wire racks, before slicing.One slice of warm zucchini nut bread, smeared with butter, and ready to eat!

Hope you enjoy this recipe for zucchini nut bread! Thank you for taking the time to stop by for a visit. Have a wonderful day, even if circumstances look less than optimal. Beauty and joy can be found all around, if you earnestly seek to find it. May God bless you (and those you love) with good health and deep love for each other. Hang in there!

Looking For Other BREAD Recipes?

You can find all of my bread recipes in the Recipe Index, located at the top of the page. I have quite a few, including:

Interested In More Recipes?

Thank you for visiting this website. I appreciate you using some of your valuable time to do soIf you’re interested, I publish a newsletter 2 times per month (1st and 15th) with all the latest recipes, and other fun info. I would be honored to have you join our growing list of subscribers, so you never miss a great recipe!
There is a Newsletter subscription box on the top right side (or bottom) of each blog post, depending on the device you use, where you can easily submit your e-mail address (only) to be included in my mailing list.

You Can Also Find Me On Social Media:
Facebook page: The Grateful Girl Cooks!
Pinterest: The Grateful Girl Cooks!
Instagram: jbatthegratefulgirlcooks

Author's signature

Original recipe source: unknown (found in an old recipe box many years ago, handwritten on a 3×5 index card)

↓↓ PRINTABLE RECIPE BELOW ↓↓

0 from 0 votes
Zucchini Nut Bread
Prep Time
15 mins
Cook Time
1 hr
Total Time
1 hr 15 mins
 

This simple recipe for zucchini nut bread yields two standard-sized loaves. The bread is EASY to make (honest!), and tastes absolutely delicious!

Category: Bread, Breakfast, Snack
Cuisine: American
Keyword: zucchini nut bread
Servings: 16 (2 loaves)
Calories Per Serving: 263 kcal
Author: JB @ The Grateful Girl Cooks!
Ingredients
  • 3 large eggs , lightly beaten
  • 2 cups granulated sugar
  • 1 cup vegetable oil
  • 3 teaspoons vanilla extract
  • 2 cups unpeeled, grated zucchini (approx. 1 large zucchini)
  • 3 cups all purpose flour
  • 3 teaspoons ground cinnamon
  • 1 teaspoon baking soda
  • 1 teaspoon salt
  • ¼ teaspoon baking powder
  • 1 cup chopped pecans (or walnuts)
  • non stick spray or grease (for pans)
Instructions
  1. Preheat oven to 325°F. Grease or spray two 9x5 loaf pans on the bottom and sides. Set aside.

  2. Place eggs in large mixing bowl (or the base of a stand mixer), and beat lightly. Add granulated sugar, vegetable oil and vanilla. Mix well (with stand mixer or hand held electric mixer), to combine.

  3. Grate unpeeled zucchini onto absorbent paper towels. Once done, press zucchini with more paper towels, to remove LOTS of moisture. Add zucchini to wet ingredients in bowl, and beat again, just until incorporated. Add flour/cinnamon/salt/baking soda and baking powder, and mix until everything is combined. STIR in the chopped pecans (or walnuts, if using).

  4. Divide batter between two greased loaf pans. Place pans on middle rack in preheated oven. Bake for 1 hour, or until a toothpick inserted into top of the bread comes out clean. Transfer baking pans to a wire rack; let cool 10-15 minutes, before attempting to remove bread. To remove, run a butter knife around the edges of the pan, then turn pan over, to release bread. Let cool (if desired), then slice and enjoy!

Recipe Notes

NOTE: If freezing, let bread cool completely. Wrap loaf in plastic wrap, then in aluminum foil, and store in freezer.

Nutrition Facts
Zucchini Nut Bread
Amount Per Serving (1 slice (1/16th of total))
Calories 263 Calories from Fat 63
% Daily Value*
Fat 7g11%
Saturated Fat 2g13%
Cholesterol 40mg13%
Sodium 231mg10%
Potassium 119mg3%
Carbohydrates 45g15%
Fiber 1g4%
Sugar 26g29%
Protein 5g10%
Vitamin A 88IU2%
Vitamin C 3mg4%
Calcium 26mg3%
Iron 2mg11%
* Percent Daily Values are based on a 2000 calorie diet.

Here’s one more to pin on your Pinterest boards!This simple recipe for zucchini nut bread yields two standard-sized loaves. The bread is EASY to make (honest!), and tastes absolutely delicious!

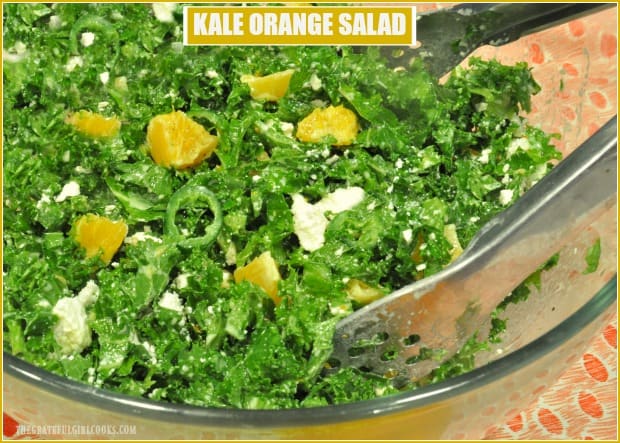
Kale Orange Salad

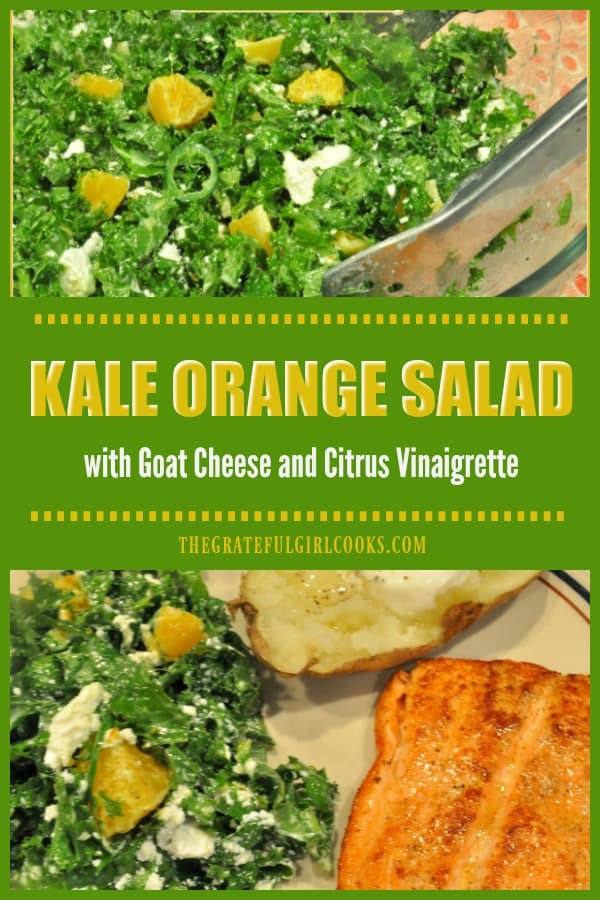
Kale Orange Salad, topped with a creamy citrus vinaigrette, crumbled goat cheese, fresh oranges, and jalapeño slices, may surprise you with just how GOOD it tastes!
Kale Orange Salad, topped with citrus vinaigrette, crumbled goat cheese, fresh oranges, and jalapeño slices, may surprise you with how GOOD it tastes!

KALE… most people either LIKE it or HATE it! I happen to like it. Several years ago I found a recipe for a kale and citrus salad online, from Ree Drummond, also known as The Pioneer Woman.  She had ordered a similar salad at a restaurant in Hollywood, loved it, then went home and recreated it! I enjoy her cookbooks and recipes, so I knew this kale orange salad just HAD to be GOOD!

Our little backyard raised bed garden, at the time, happened to be overflowing with kale! I use our homegrown kale in my recipe for Olive Garden’s “Zuppa Toscana” Soup (a favorite), so I try to have it around. After reading through the ingredient list, a kale orange salad sounded very interesting, so I harvested a bunch from our garden, and made this salad! YUM!

My husband and I really enjoyed this unique salad (and he’s not a HUGE kale fan)!  It’s also easy to make, which is always a big PLUS in my book! Here’s how to make this delicious salad:

Scroll Down For a Printable Recipe Card At the Bottom Of The Page

Prepare The Kale For The Salad

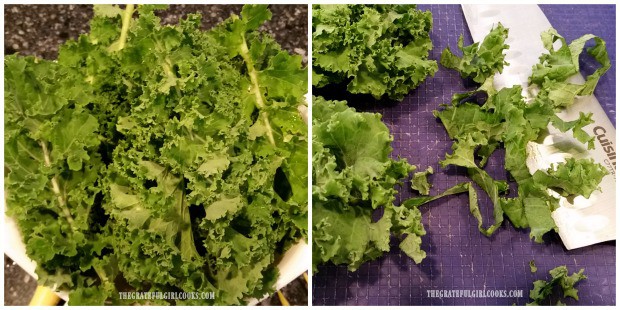
Rinse and drain the kale thoroughly, then place the leaves onto a cutting surface. Using a sharp knife, remove the long stem from the middle of the leaves (discard the stems). Once de-stemmed, thinly slice the kale, a handful of leaves at a time. Place all the sliced kale into a large salad bowl, and set aside.

Kale is rinsed, then finely chopped to prepare it for the kale orange salad.

Make The Salad Dressing For The Kale Orange Salad

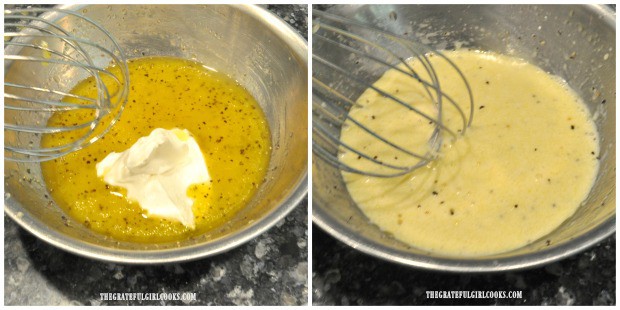
Place the orange juice, olive oil, white wine vinegar, granulated sugar, minced garlic, salt and pepper in a small bowl.  Whisk these ingredients together until fully blended. Add the sour cream (or plain Greek yogurt, if using), and whisk again, to blend fully. The finished salad dressing will be smooth and creamy.

The citrus vinaigrette is prepared, to dress the finished kale orange salad.

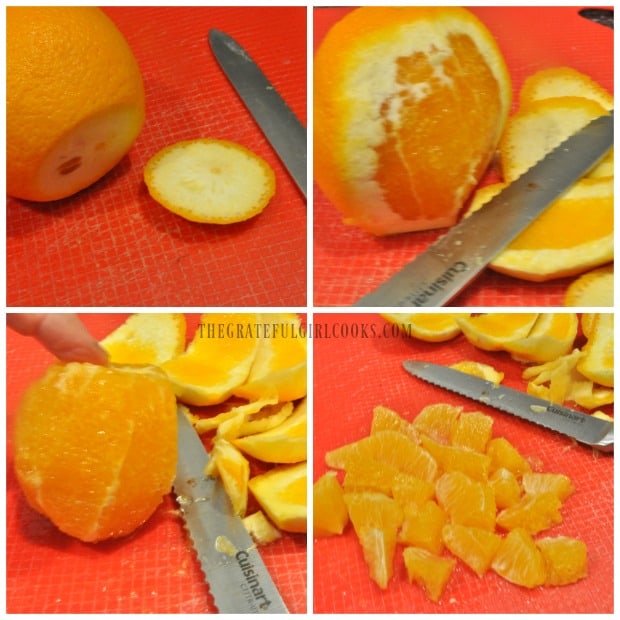
You will need beautiful, peeled orange chunks for this salad. Below is a handy photo of how to peel an orange to get perfect little chunks, without all the bitter tasting white “pith” attached!

Cut a slice off the bottom of the orange. Stand up the orange with the sliced edge on the bottom. Carefully cut off the peel, from top to bottom, following the curve of the orange. Remove all the white “pith” from the outside of the orange. Slice the peeled orange into chunks.

Photo collage showing how to peel whole orange to add to the kale orange salad.

Assemble The Kale Orange Salad

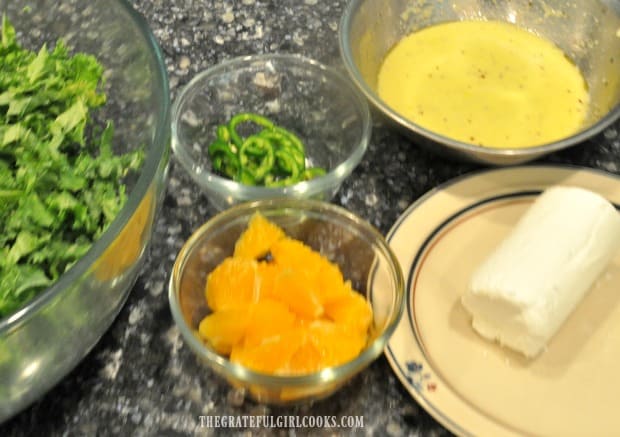
Gather the salad bowl and the rest of the ingredients when ready to build the salad. This includes the thinly sliced kale, seeded and thinly sliced jalapeños, citrus salad dressing, orange chunks, and the goat cheese. (Oops… sorry about the slightly blurry photo).

Kale, jalapenos, orange chunks, goat cheese and salad dressing ready to make a kale orange salad.

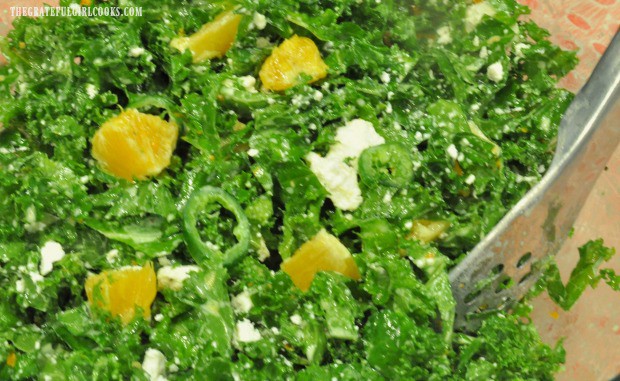
Pour HALF the salad dressing over the sliced kale, and give it a good toss.  Add the oranges and the sliced jalapeños, and toss again, to ensure everything is covered with salad dressing. If the kale orange salad needs a bit more dressing, add more, until it is to your liking. TIP: Any extra salad dressing can be stored (covered), in the refrigerator for several days, and can be used on other salads.

Use a fork to crumble up the goat cheese, and add it to the kale orange salad right before you serve it! Give the salad one final toss, to combine ingredients, then serve!

The kale orange salad is tossed with the salad dressing before serving.

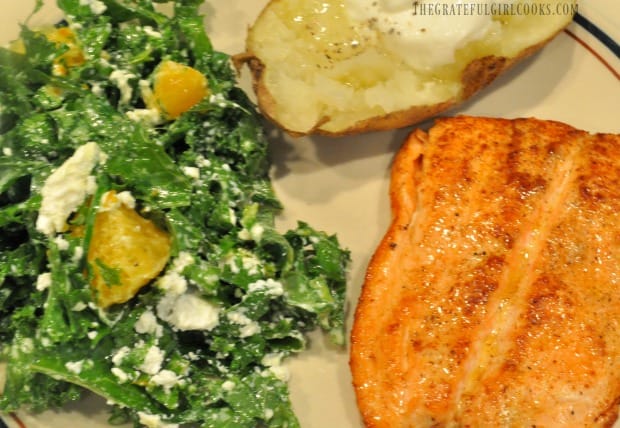
We enjoyed this simple, but yummy salad, along with a piece of pan seared creole salmon, and a small baked potato! The creamy goat cheese, along with the sweet oranges and creamy citrus salad dressing really make this a delicious side salad!

Baked potato and roasted salmon on dinner plate with the kale orange salad.

I hope you will consider trying this kale orange salad, and have a feeling you will be pleasantly surprised with the taste (even if you’re not a big KALE fan!). Have a wonderful day!

Looking For More SALAD Recipes?

Interested In More Recipes?

Thank you for visiting this website. I appreciate you using some of your valuable time to do soIf you’re interested, I publish a newsletter 2 times per month (1st and 15th) with all the latest recipes, and other fun info. I would be honored to have you join our growing list of subscribers, so you never miss a great recipe!
There is a Newsletter subscription box on the top right side (or bottom) of each blog post, depending on the device you use, where you can easily submit your e-mail address (only) to be included in my mailing list.

You Can Also Find Me On Social Media:

Facebook page: The Grateful Girl Cooks!
Pinterest:
The Grateful Girl Cooks!
Instagram:
jbatthegratefulgirlcooks

Author's signature

Original Recipe Source: http://tastykitchen.com/recipes/salads/kale-citrus-salad/

0 from 0 votes
Kale Orange Salad
Prep Time
20 mins
Cook Time
0 mins
Total Time
20 mins
 

Kale Orange Salad, topped with citrus vinaigrette, crumbled goat cheese, fresh oranges, and jalapeño slices, may surprise you with just how GOOD it tastes!

Category: Salad
Cuisine: American
Keyword: kale orange salad
Servings: 6
Calories Per Serving: 127 kcal
Author: JB @ The Grateful Girl Cooks!
Ingredients
For Salad:
  • 1 bunch kale , rinsed, stems removed
  • 1 large orange , peeled and cut into chunks
  • 1 medium fresh jalapeño pepper , seeded/sliced very thin
  • 4 ounces goat cheese (chevre)
For Salad Dressing:
  • 1/4 cup orange juice
  • 2 Tablespoons olive oil
  • 1 teaspoon white wine vinegar
  • 1 clove garlic , minced
  • 1 teaspoon granulated sugar
  • Salt and Pepper, to taste
  • 1 Tablespoon sour cream , or plain Greek yogurt
Instructions
  1. Prepare kale: Rinse and drain kale thoroughly, then place leaves onto cutting surface. Using a sharp knife, remove long stem from the middle of the leaves (discard the stems). Once de-stemmed, thinly slice kale, a handful at a time. Place sliced kale into a large salad bowl; set aside.

  2. Make The Salad Dressing: Place orange juice, olive oil, white wine vinegar, granulated sugar, minced garlic, salt and pepper in a small bowl.  Whisk together until fully blended. Add sour cream (or plain Greek yogurt, if using), and whisk again, to blend fully. Finished salad dressing will be smooth and creamy.

  3. Build Salad: Pour HALF the salad dressing over sliced kale in bowl; give it a good toss, to distribute salad dressing.  Add orange pieces and sliced jalapeños, and toss again, to ensure everything is coated with salad dressing. If salad needs a bit more dressing, add more until it is to your liking. TIP: Any extra dressing can be stored (covered), in refrigerator for several days, and can be used on other salads.

    Use a fork to crumble up the goat cheese, and add it to the kale orange salad right before you serve it! Give the salad one final toss, to combine ingredients, then serve! Enjoy!
Recipe Notes

Substitutions for the orange chunks in the Salad: 3 tangerines or clementines.

Nutrition Facts
Kale Orange Salad
Amount Per Serving (1 (1/6th of total))
Calories 127 Calories from Fat 81
% Daily Value*
Fat 9g14%
Saturated Fat 3g19%
Cholesterol 9mg3%
Sodium 79mg3%
Potassium 182mg5%
Carbohydrates 7g2%
Sugar 4g4%
Protein 4g8%
Vitamin A 2475IU50%
Vitamin C 50.4mg61%
Calcium 74mg7%
Iron 0.7mg4%
* Percent Daily Values are based on a 2000 calorie diet.

Here’s one more to pin on your Pinterest boards!Kale Orange Salad, topped with citrus vinaigrette, crumbled goat cheese, fresh oranges, and jalapeño slices, may surprise you with how GOOD it tastes!

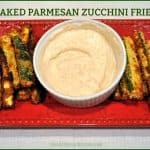
Baked Parmesan Zucchini Fries

Baked Parmesan Zucchini Fries are a delicious side dish or appetizer! Baked until crispy, and served with dipping sauce, these “fries” will be a big hit!Baked Parmesan Zucchini Fries are a delicious side dish or appetizer! Baked until crispy, and served with dipping sauce, these "fries" will be a big hit!

Baked Parmesan Zucchini Fries are a delicious family-friendly way to get kids (and adults) to EAT THEIR VEGGIES!  Baked (not fried) to a crispy finish, and served with a cool, seasoned dipping sauce on the side, these “fries” won’t last long, as a side dish or an appetizer!

The zucchini are crispy on the outside, and have lots of flavor with the simple coating, and the PLUS is that they are BAKED, not FRIED. They are really very easy to prepare, and it’s a great way to get more veggies into the food rotation!

It’s easy to get these veggies into everyone, in a fun way (especially if the kids like French fries)!  Zucchini fries are delicious baked and eaten without any accompaniments, but I like to dip them in a tasty sauce (or ranch dressing).

Scroll Down For A Printable Recipe Card At the Bottom Of The Page

Making The Sauce/Dip For Baked Parmesan Zucchini Fries

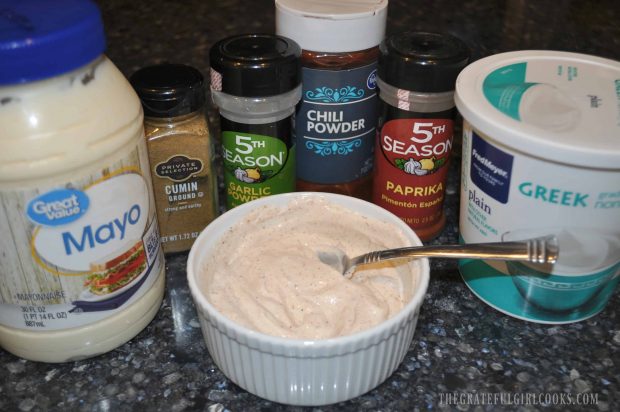
This time I made up a quick and simple Mexican-spiced dip/sauce (with some of my favorite spices), to serve on the side. I made the sauce by combining non-fat plain Greek yogurt with a Tablespoon of mayonnaise. I then added cumin, garlic powder, chili powder, and paprika, and mixed until blended.

The dipping sauce has good Southwestern flavor, but is not too spicy, by the way! Make ahead, cover,  and refrigerate until ready to use.

Ingredients for dipping sauce for Baked Parmesan Zucchini Fries.

How To Cut Zucchini For Zucchini Fries

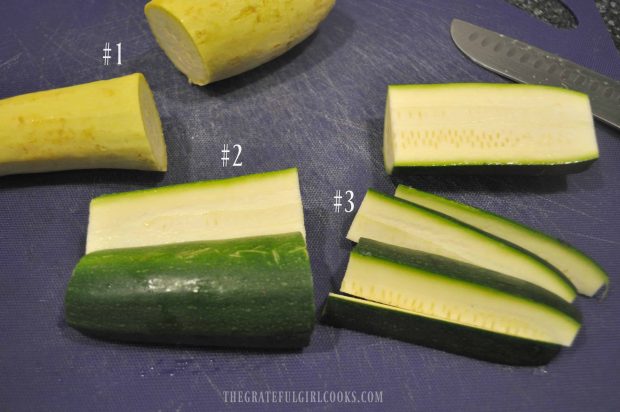
I used a green zucchini and a yellow zucchini to make the fries. After slicing the ends off, they were cut like this:

  • #1 Cut each in half in the middle.
  • #2 Cut each half in half lengthwise.
  • #3 Cut those pieces into 4 lengthwise slices each (so they are wedges about 1/2 an inch wide).

Zucchini is sliced into wedges to make Baked Parmesan zucchini fries.

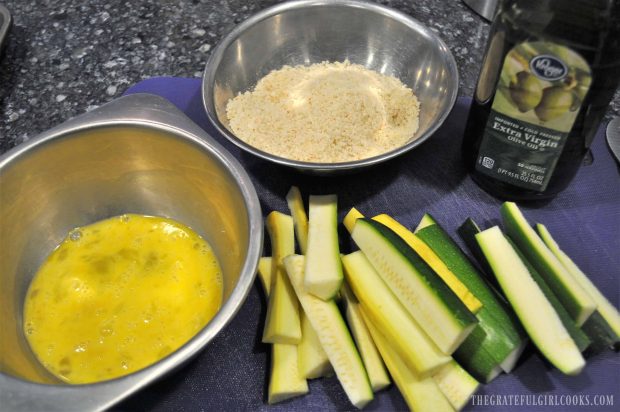
In a small bowl, place two eggs. Lightly beat the eggs until they are fully combined. In a separate bowl, place Panko crumbs and Parmesan cheese. Add the garlic powder, salt, pepper, paprika and Italian seasoning, and stir until combined.

Beaten eggs, and panko bread crumbs are needed to coat zucchini fries before baking.

Prepping Zucchini Fries For Baking

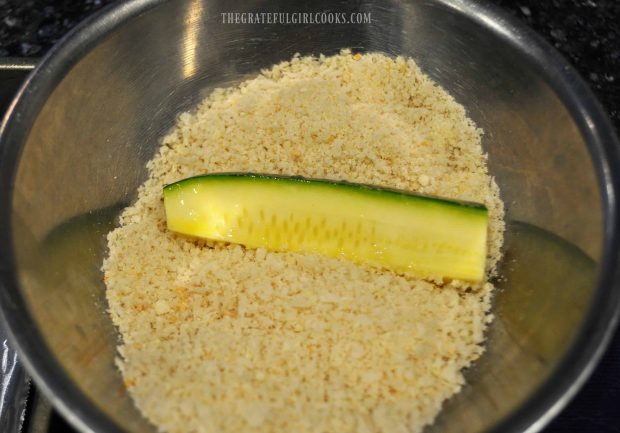
Dip the zucchini wedges, one at a time into the egg mixture to coat. Shake off excess egg back into bowl, and then dip and roll in Panko mixture to coat all sides.

Zucchini fries are coated with panko breadcrumbs before baking.

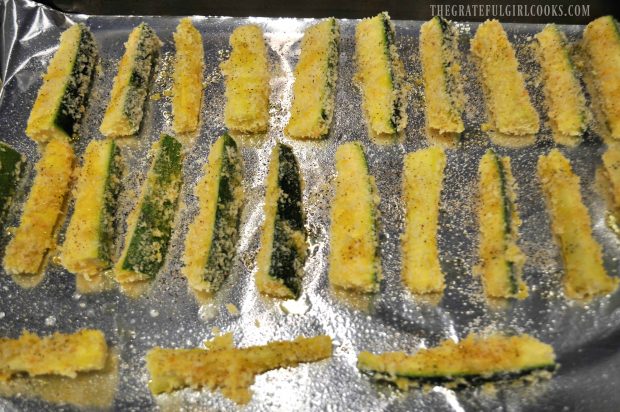
Place each coated piece of zucchini on a baking sheet which has been lined with aluminum foil, covered with non-stick spray. Repeat until all “fries” have been coated.  Make sure to keep wedges separated on foil.

Parmesan zucchini fries are placed in single layer onto baking sheet to bake.

Cooking The Baked Parmesan Zucchini Fries

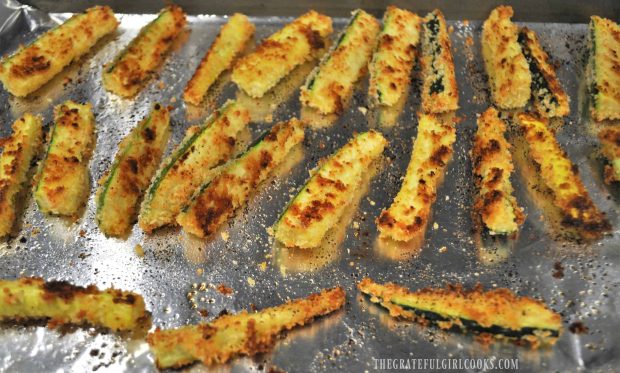
Spray the top of the zucchini with cooking spray or lightly drizzle with olive oil.  Bake in a preheated 425 degree oven for 22-25 minutes, flipping zucchini fries over,  half way through the cooking time. When done, the zucchini should be crisp on the outside and lightly browned.

Baked Parmesan Zucchini Fries are golden brown and crispy after baking.

Time To Eat!

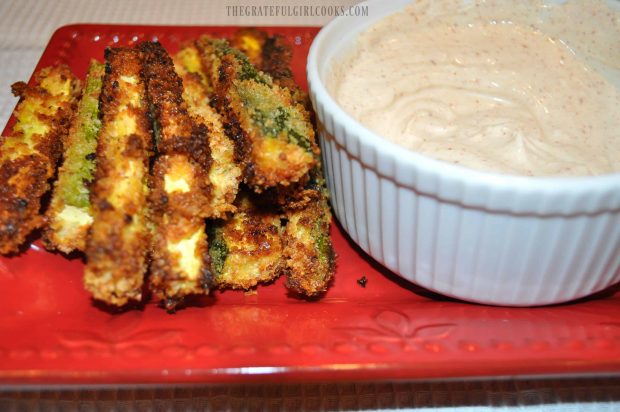
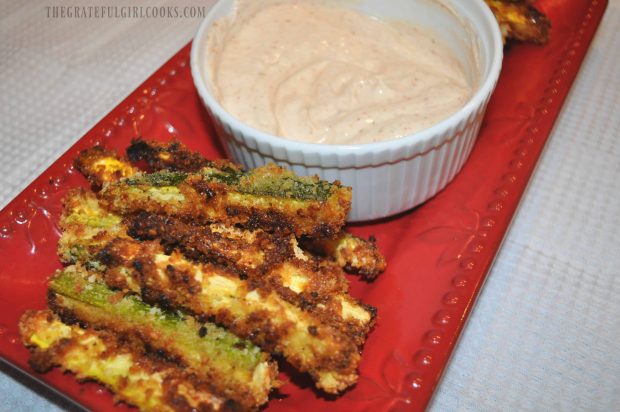
Transfer zucchini fries to a platter, and serve with dipping sauce (if desired). They taste the very best when served hot, crispy, and fresh!

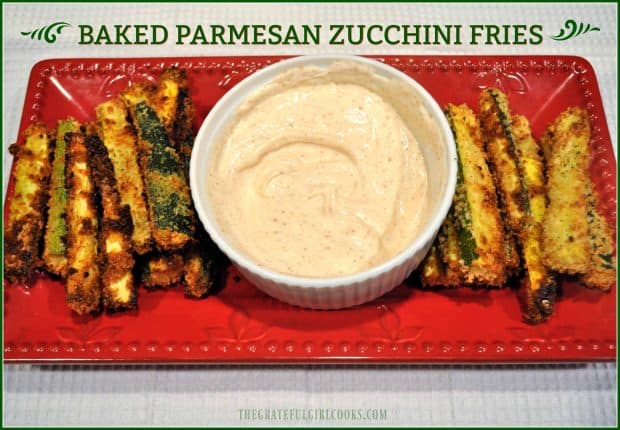
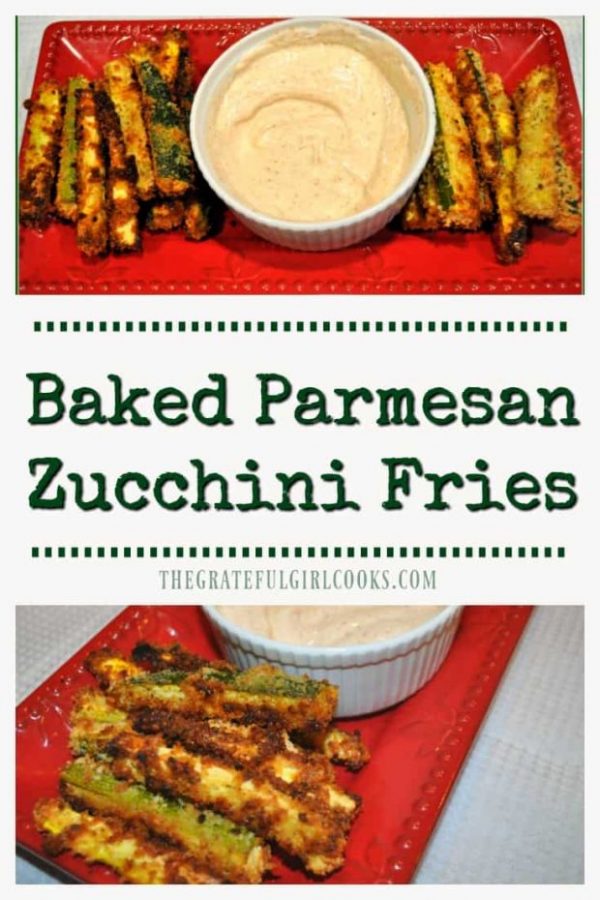
Baked Parmesan Zucchini Fries are served with dipping sauce.

Baked Parmesan Zucchini Fries on red platter, with dipping sauce.

Serve, and enjoy this yummy finger food side dish (or appetizer!).  Recipe is easily doubled for a larger crowd… as written, the recipe makes 32 “fries”. Hope you enjoy these zucchini fries – we sure did!

Looking For More APPETIZER Recipes?

You can find all of my recipes in the Recipe Index, located at the top of the page. I have some delicious appetizer recipes you might enjoy, including:

Interested In More Recipes?

Thank you for visiting this website. I appreciate you using some of your valuable time to do soIf you’re interested, I publish a newsletter 2 times per month (1st and 15th) with all the latest recipes, and other fun info. I would be honored to have you join our growing list of subscribers, so you never miss a great recipe!
There is a Newsletter subscription box on the top right side (or bottom) of each blog post, depending on the device you use, where you can easily submit your e-mail address (only) to be included in my mailing list.

You Can Also Find Me On Social Media:

Facebook page: The Grateful Girl Cooks!
Pinterest:
The Grateful Girl Cooks!
Instagram:
jbatthegratefulgirlcooks

Baked Parmesan Zucchini Fries / The Grateful Girl Cooks!

Zucchini Fries Recipe Source: Trish, at https://www.momontimeout.com/baked-parmesan-zucchini-fries-recipe/

0 from 0 votes
Baked Parmesan Zucchini Fries
Prep Time
10 mins
Cook Time
22 mins
Total Time
32 mins
 
Baked Parmesan Zucchini Fries are a delicious side dish or appetizer! Baked until crispy, and served with dipping sauce, these "fries" will be a big hit!
Category: Side Dish / Appetizer
Cuisine: American
Keyword: baked Parmesan zucchini fries
Servings: 32 fries
Calories Per Serving: 18 kcal
Author: JB @ The Grateful Girl Cooks!
Ingredients
  • 2 zucchini (medium sized- I used 1 green and 1 yellow)
  • 2 eggs , beaten lightly
  • 1/2 cup Panko bread crumbs
  • 1/4 cup grated Parmesan cheese
  • 1/4 teaspoon Italian seasoning
  • 1/4 teaspoon garlic powder
  • 1/4 teaspoon salt
  • 1/4 teaspoon black pepper
  • 1/4 teaspoon paprika
For Dipping Sauce:
  • 1/2 cup non-fat Greek yogurt (can substitute sour cream)
  • 1 Tablespoon Mayonnaise
  • 1/4 teaspoon EACH of spices (chili powder, ground cumin, garlic powder and paprika)
Instructions
To Make Dipping Sauce:
  1. Mix Greek yogurt, mayonnaise, cumin, garlic powder, chili powder, and paprika in small bowl until blended. Cover, and refrigerate until ready to use.
To Make Zucchini Fries:
  1. Cut both ends off each zucchini (discard). Cut each zucchini in half across the middle, then cut each half in half lengthwise, then cut those pieces into 4 lengthwise slices each (so they are wedges about 1/2 an inch wide). You should have 32 wedges.
  2. In a bowl, lightly beat eggs until combined. Set aside.
  3. In another bowl, mix Panko crumbs, Parmesan cheese, garlic powder, salt, pepper, paprika and Italian seasoning until combined.
  4. Dip zucchini wedges, one at a time into the egg mixture to coat. Shake excess egg back into bowl, then dip and roll zucchini slice in Panko mixture to coat all sides. Place each coated piece of zucchini on baking sheet lined with foil, and sprayed lightly with non-stick spray. Repeat until all "fries" have been coated. Keep wedges separated. Spray the top of the zucchini with cooking spray, or lightly drizzle with olive oil.
  5. Bake in preheated 425 degree oven for 22-25 minutes, turning zucchini slices over, half way through cooking time. When done, zucchini should be crisp on the outside and lightly browned. Transfer zucchini fries to a platter, and serve with dipping sauce (if desired).
Nutrition Facts
Baked Parmesan Zucchini Fries
Amount Per Serving (4 wedges)
Calories 18
% Daily Value*
Cholesterol 11mg4%
Sodium 45mg2%
Potassium 42mg1%
Carbohydrates 1g0%
Protein 1g2%
Vitamin A 55IU1%
Vitamin C 2.2mg3%
Calcium 17mg2%
Iron 0.1mg1%
* Percent Daily Values are based on a 2000 calorie diet.

Here’s one more to pin on your Pinterest boards!Baked Parmesan Zucchini Fries are a delicious side dish or appetizer! Baked until crispy, and served with dipping sauce, these "fries" will be a big hit!

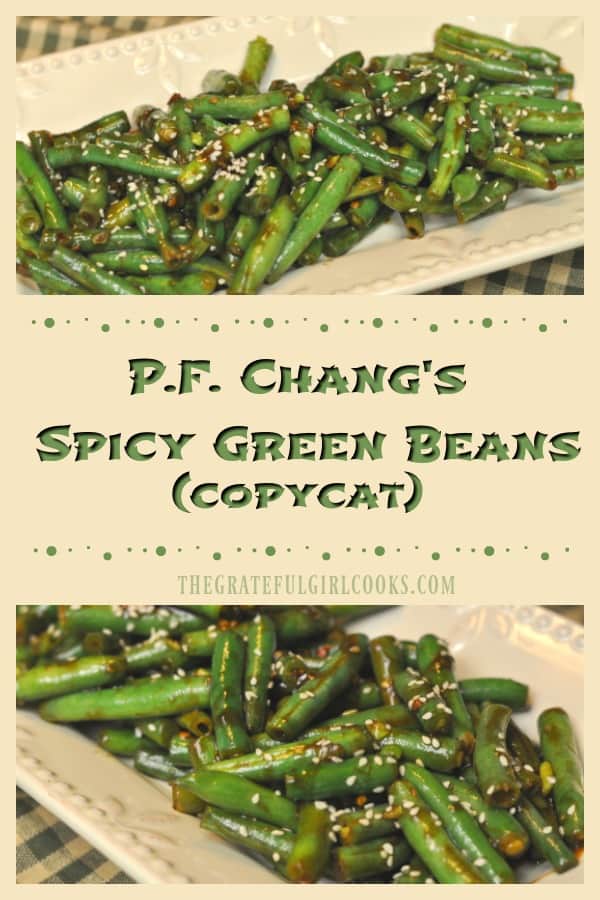
P.F. Chang’s Spicy Green Beans (copycat)

P.F. Chang’s spicy green beans are fresh green beans cooked in a flavorful Asian sauce, in this delicious restaurant copycat recipe!P.F. Chang's spicy green beans are fresh green beans cooked in a flavorful Asian sauce, in this delicious restaurant copycat recipe!

Looking for a tasty new way to serve those yummy summer green beans you get from the grocery store, Farmer’s Market or your own garden?  How about this delicious, quick and easy recipe for P.F. Chang’s Spicy Green Beans (copycat)?

I’ve grown my own green beans for years now, so I’m always on the lookout for new ways to cook and serve them.  I found this “copycat” recipe for spicy green beans on Pinterest, and decided to give it a try. You will be surprised how GOOD these green beans are!  The addition of an Asian pan sauce makes them “practically perfect in every way” (to coin a phrase from Mary Poppins).

Scroll Down For A Printable Recipe Card At The Bottom Of The Page

Are These Spicy Green Beans Difficult To Make?

Are these spicy green beans difficult to make? Absolutely NOT! All in all, the beans take only 5-6 minutes to cook… really!  The “hardest” thing you will have to do is snip the ends off the beans… ha ha! Here’s how to make delicious P.F. Chang’s Spicy Green Beans from the comfort of your own home:

Make The Asian Sauce

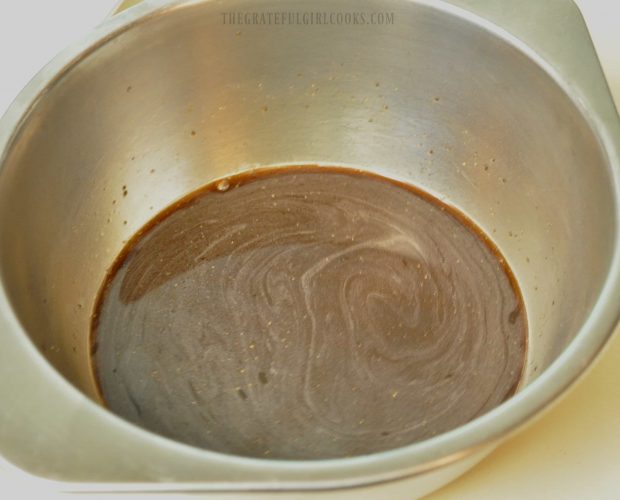
First make the Asian sauce by mixing the ingredients together in a small bowl, and then set aside until ready to put it in use. See how EASY that was?

An Asian inspired sauce is mixed in small bowl to add to green beans.
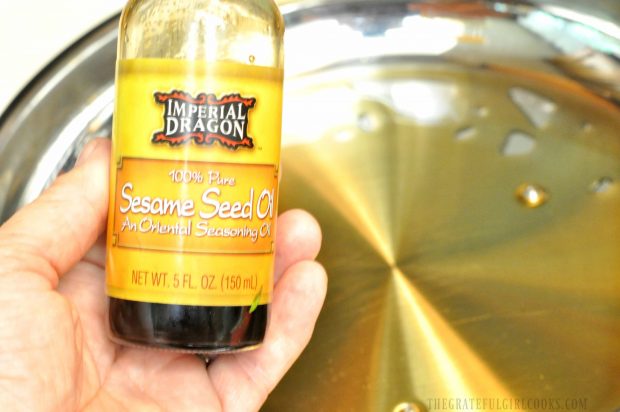
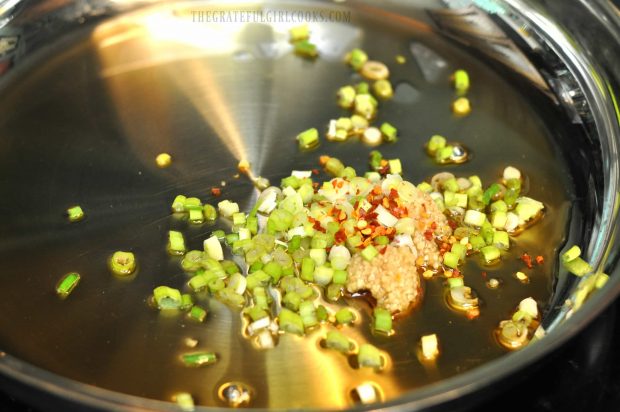
Pour the sesame oil into a large skillet or wok. NOTE: You can buy sesame oil in the Asian food section of most supermarkets. Turn the heat to medium high for about 30 seconds, and when the oil is hot, add the chopped green onions, minced garlic, and red pepper flakes.

Stir well, and cook for 30 seconds, stirring constantly. Be careful NOT to burn the garlic.

Sesame oil is used to add flavor to the cooked veggies in this dish.

Green onions, garlic and red pepper flakes are cooked in a skillet with sesame oil.
Time To Add The Fresh Green Beans!

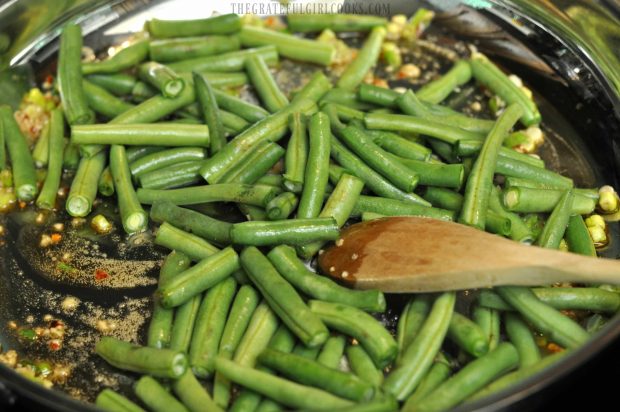
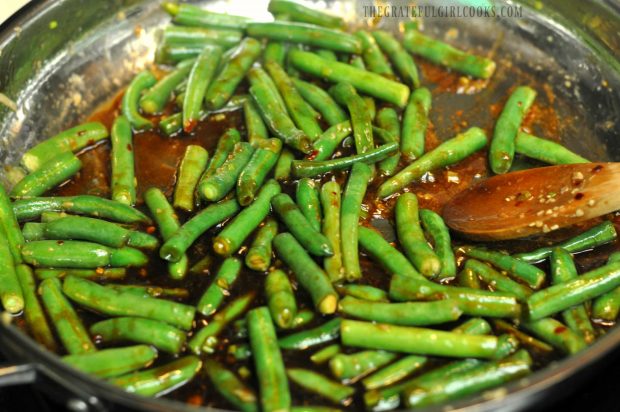
Add the green beans to the skillet. Stir them constantly, and continue to cook them for 3-4 minutes, until they are almost fully cooked. The beans will turn a deeper green color as they cook.

Green beans are added to the skillet.

Add The Sauce To The Spicy Green Beans

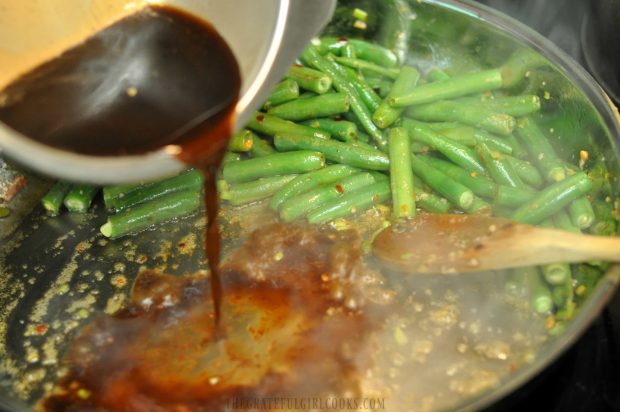
When the green beans are done cooking, move them over to one side of the skillet. Give the Asian sauce a good stir, and then add it to the skillet. Stir well, and cook the sauce for 30 seconds (still on medium-high heat). Let the sauce come to a boil, then turn the heat to LOW. The sauce will thicken very slightly as it cooks.

Adding the Asian sauce to the spicy green beans in skillet.
Stir the sauce into the green beans to fully coat them.  Cook the spicy green beans and sauce for another 30 seconds, and then remove the skillet from the heat.

Spicy green beans finish cooking in the Asian sauce.

P.F. Chang’s Spicy Green Beans Are Ready To Serve!

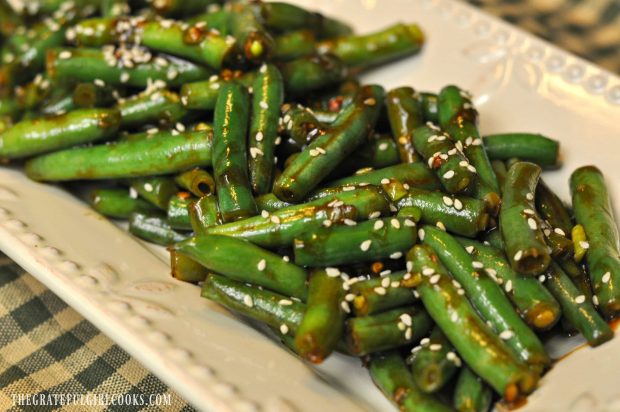
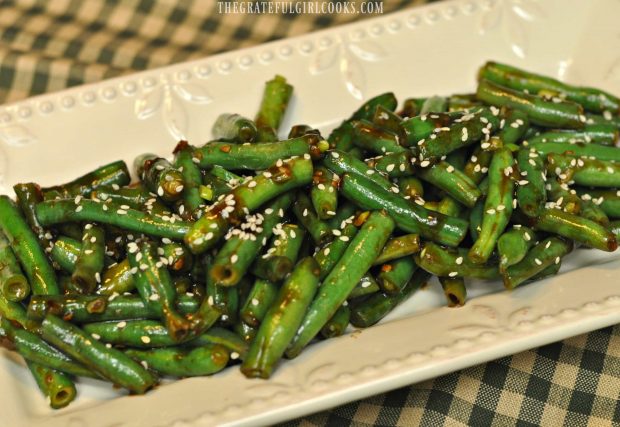
Place the hot green beans and sauce onto serving plate or into a bowl, and garnish with sesame seeds (if using). Serve the spicy green beans while hot, and ENJOY!

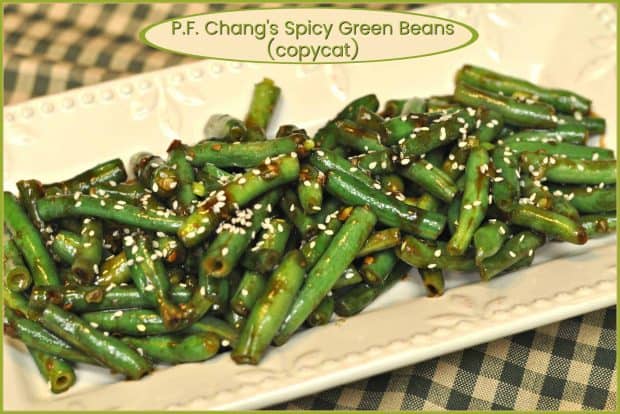
The spicy green beans are sprinkled with sesame seeds and served.

Sesame seeds garnish the serving plate covered with P.F. Chang's Spicy Green Beans.

We enjoyed trying this recipe for spicy green beans. They are NOT too spicy at all, and have fantastic flavor!  I used only 1 pound of green beans, so if you are using 2 pounds of beans the quantity will be much larger than shown in my photos!

Hope you will consider trying this recipe. I trust you will find it just as delicious as we did! Have a great day, and please come back again soon!

Looking For More VEGETABLE SIDE DISHES?

You can find all of my vegetable dishes in the Recipe Index, located at the top of the page. A few recipes you might enjoy include:

Interested In More Recipes?

Thank you for visiting this website. I appreciate you using some of your valuable time to do soIf you’re interested, I publish a newsletter 2 times per month (1st and 15th) with all the latest recipes, and other fun info. I would be honored to have you join our growing list of subscribers, so you never miss a great recipe!
There is a Newsletter subscription box on the top right side (or bottom) of each blog post, depending on the device you use, where you can easily submit your e-mail address (only) to be included in my mailing list.

You Can Also Find Me On Social Media:
Facebook page: The Grateful Girl Cooks!
Pinterest: The Grateful Girl Cooks!
Instagram: jbatthegratefulgirlcooks

Author's signature

Recipe Source: http://domesticsuperhero.com/copycat-pf-changs-spicy-green-beans/

0 from 0 votes
P.F. Chang's Spicy Green Beans
Prep Time
10 mins
Cook Time
5 mins
Total Time
15 mins
 
P.F. Chang's spicy green beans are fresh green beans cooked in a flavorful Asian sauce, in this delicious restaurant copycat recipe!
Category: Side Dish, Vegetable Dish
Cuisine: Asian
Keyword: spicy green beans
Servings: 6 servings
Calories Per Serving: 75 kcal
Author: JB @ The Grateful Girl Cooks!
Ingredients
For Beans:
  • 1-2 pounds fresh green beans , ends trimmed and beans cut into 2 inch pieces
  • 2 green onions , chopped thin
  • 1 teaspoon red pepper flakes
  • 4 garlic cloves , minced
  • 2 Tablespoons sesame oil
For Asian Sauce:
  • 1/8 teaspoon salt
  • 1/8 teaspoon black pepper
  • 2 Tablespoons low sodium soy sauce
  • 1 Tablespoon rice vinegar
  • 1 teaspoon white granulated sugar
  • 1/4 cup water
  • Sesame Seeds , for garnish (optional)
Instructions
  1. Make the Asian sauce by mixing ingredients in a small bowl. Set the bowl aside until ready to use.
  2. Put sesame oil into a large skillet or wok. Turn heat to medium high for 30 seconds. To the hot oil add chopped green onions, minced garlic, and red pepper flakes. Stir well and cook for 30 seconds, stirring constantly and being careful NOT to burn the garlic.
  3. Add the green beans to the skillet. Stir constantly and cook for 3-4 minutes, until they are just about fully cooked. The beans will turn a deeper green color as they cook. When beans are done, move them over to one side of the skillet. Give the Asian sauce a good stir and add it to the skillet. Stir well, and cook the sauce for 30 seconds (still on medium-high heat); let the sauce come to a boil, then turn the heat to LOW. The sauce will thicken slightly. Stir the sauce into the green beans to coat. Cook beans and sauce for another 30 seconds, then remove skillet from heat.
  4. Place the hot green beans and sauce onto serving plate or in a bowl, and garnish with sesame seeds (if using). Serve the green beans while hot... and ENJOY!
Nutrition Facts
P.F. Chang's Spicy Green Beans
Amount Per Serving (1 serving)
Calories 75 Calories from Fat 36
% Daily Value*
Fat 4g6%
Sodium 237mg10%
Potassium 194mg6%
Carbohydrates 7g2%
Fiber 2g8%
Sugar 3g3%
Protein 1g2%
Vitamin A 660IU13%
Vitamin C 10.6mg13%
Calcium 34mg3%
Iron 1mg6%
* Percent Daily Values are based on a 2000 calorie diet.

Here’s one more to pin to your Pinterest boards!P.F. Chang's spicy green beans are fresh green beans cooked in a flavorful Asian sauce, in this delicious restaurant copycat recipe!

Save

Save

Save

Save

Save

Save

Save

Save

Save

Save

Save

Save

Save

Save

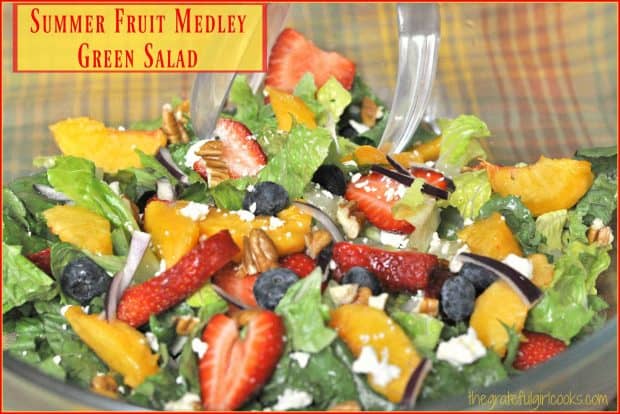
Summer Fruit Medley Green Salad

Mixed greens, strawberries, peaches, blueberries, feta, red onion and pecans combine to create a delicious, colorful, summer fruit medley green salad!Mixed greens, strawberries, peaches, blueberries, feta, red onion and pecans combine to create a delicious, colorful, summer fruit medley green salad!
I love salads during the HOT Summertime! They are light, cold, and taste yummy when it is too hot outside to want a heavy dinner. A few nights ago I made this delicious Summer Fruit Medley Green Salad.  It was soooo good, I’m making it again tonight!

Summer and fresh picked fruit just really seem to go together! Juicy sweet fruits, like blueberries, strawberries, and fresh peaches taste absolutely amazing when you pair them up in a savory salad.

Scroll Down For a Printable Recipe Card At The Bottom Of The Page

Fresh Fruit Makes This Fruit Medley Green Salad The Best!

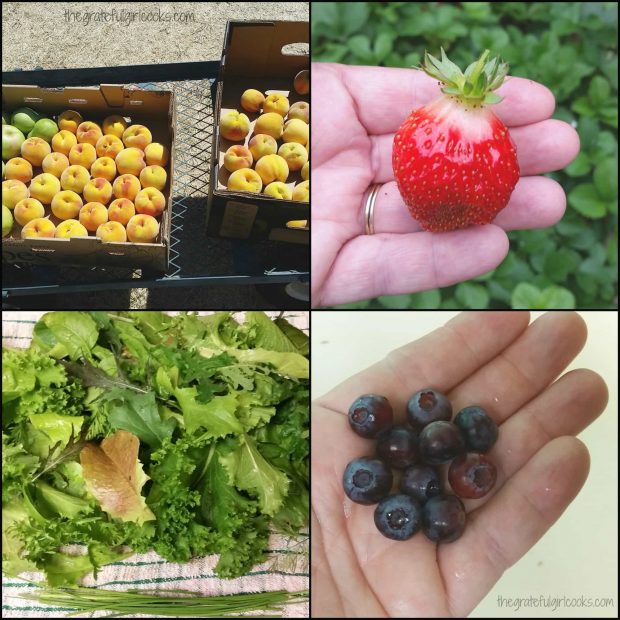
The day I made this salad the first time, I had just picked fresh peaches at a local U-Pick Farm. I also had fresh blueberries, strawberries and mixed greens right in my little backyard raised bed garden! They were nice and RIPE! How could I NOT use them in something yummy?!!!

A collage of photos showing the fresh fruit in the salad.

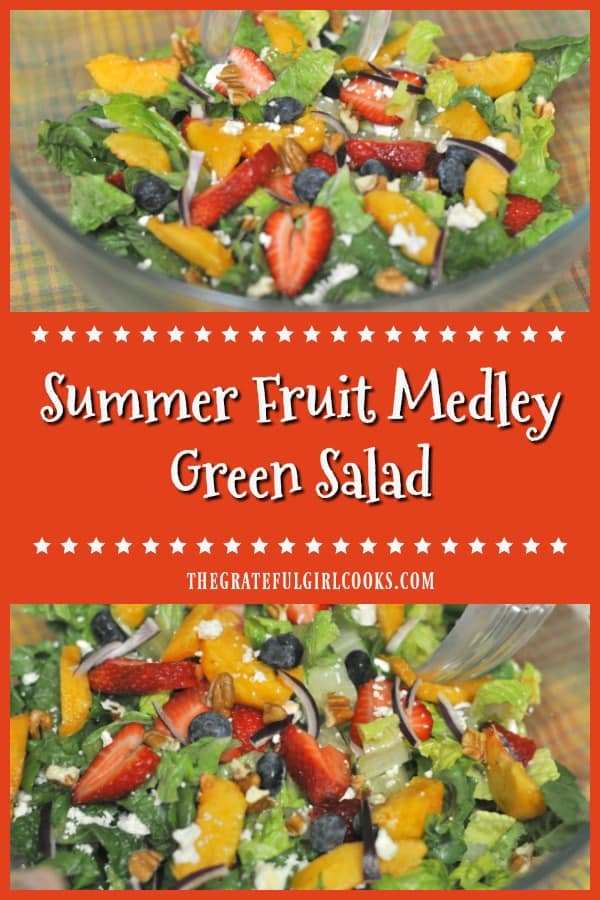
The fruit medley green salad came together in a FLASH!  In about 10 minutes, I had all the ingredients in a serving bowl. It sure looks pretty with colorful fresh fruit, feta cheese, red onions, Romaine lettuce, mesculin greens, and pecan pieces in it!

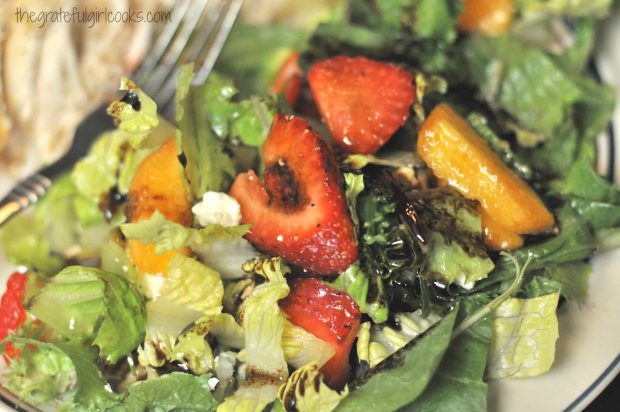
The fruit medley green salad sure is colorful and delicious!

Add Salad Dressing And Serve

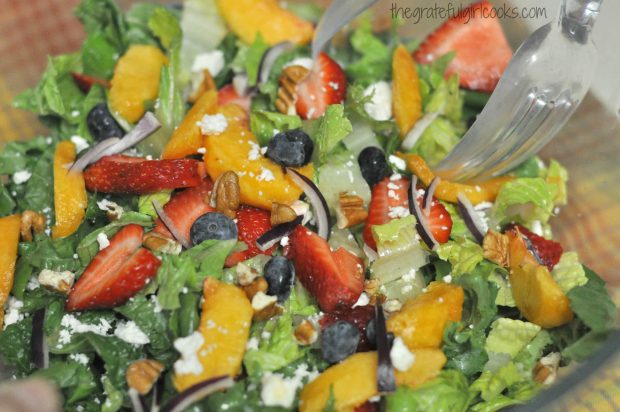
To dress the salad I made a super quick balsamic vinegar and olive oil dressing (that took all of about 30 seconds to mix together), drizzled it over the salad, and BOOM! Love at first bite!  I served the summer fruit medley green salad with slices of rotisserie chicken on the side.

The sweetness of the fresh ripe fruit, paired with the slight saltiness of feta cheese, and the crunch of the crisp lettuce and pecans makes ONE GREAT TASTING SALAD!

This fruit medley green salad is drizzled with an olive oil/balsamic dressing.

Sure hope you will consider making this quick, easy, and scrumptious fruit medley green salad, especially now, when summer fruits are at their peak of delicious-ness! Gotta go now and get our dinner ready. We’re having salmon, with this salad on the side tonight! YUM! Have a great day!

Looking For More SALAD Recipes?

You can find all of my recipes in the Recipe Index, located at the top of the page. I have quite a few salad recipes for you to enjoy, including:

Interested In More Recipes?

Thank you for visiting this website. I appreciate you using some of your valuable time to do soIf you’re interested, I publish a newsletter 2 times per month (1st and 15th) with all the latest recipes, and other fun info. I would be honored to have you join our growing list of subscribers, so you never miss a great recipe!
There is a Newsletter subscription box on the top right side (or bottom) of each blog post, depending on the device you use, where you can easily submit your e-mail address (only) to be included in my mailing list.

You Can Also Find Me On Social Media:

Facebook page: The Grateful Girl Cooks!
Pinterest:
The Grateful Girl Cooks!
Instagram:
jbatthegratefulgirlcooks

Author's signature

0 from 0 votes
Summer Fruit Medley Green Salad
Prep Time
10 mins
Cook Time
0 mins
Total Time
10 mins
 

Mixed greens, strawberries, peaches, blueberries, feta, red onion and pecans combine to create a delicious, colorful, summer fruit medley green salad!

Category: Salad
Cuisine: American
Keyword: fruit medley green salad
Servings: 4 servings
Calories Per Serving: 87 kcal
Author: JB @ The Grateful Girl Cooks!
Ingredients
  • 1 small head Romaine lettuce , chilled and chopped
  • 2 cups mixed salad greens (Spring greens or mesculin, chilled and chopped)
  • 1 fresh peach (peeled, pitted, and sliced thin)
  • 5-6 fresh strawberries (sliced thin)
  • 1/2 cup fresh blueberries
  • 1/3 cup crumbled feta cheese
  • 1/4 cup red onion (thinly sliced)
  • 8-10 pecans or walnuts (broken into pieces)
  • Optional Dressing: (but it goes perfectly with sweetness of fruit/saltiness of feta!)
  • 2 parts dark balsamic vinegar to 1 part olive oil (can make as much or as little as desired)
Instructions
  1. Place cold chopped mixed greens in large salad bowl.
  2. Add peach slices, strawberry slices, blueberries, and crumbled feta cheese. Top with red onion slices and broken pecan (or walnut) pieces.
  3. In a separate bowl, mix the olive oil and balsamic vinegar together with a fork until fully emulsified/combined. Drizzle dressing over salad..
  4. Serve chilled, and enjoy!
Recipe Notes

NOTE: Caloric calculation does not include the optional oil/vinegar dressing.
If by any chance you happen to have a Peach-Cinnamon balsamic vinegar hanging around your kitchen... by all means, use it in the salad dressing!!!

Nutrition Facts
Summer Fruit Medley Green Salad
Amount Per Serving (1 serving)
Calories 87 Calories from Fat 36
% Daily Value*
Fat 4g6%
Saturated Fat 2g13%
Cholesterol 11mg4%
Sodium 145mg6%
Potassium 171mg5%
Carbohydrates 9g3%
Fiber 1g4%
Sugar 6g7%
Protein 2g4%
Vitamin A 1010IU20%
Vitamin C 18mg22%
Calcium 64mg6%
Iron 0.6mg3%
* Percent Daily Values are based on a 2000 calorie diet.

Here’s one more to add to your Pinterest boards!Mixed greens, strawberries, peaches, blueberries, feta, red onion and pecans combine to create a delicious, colorful, summer fruit medley green salad!


Save

Save

Save

Summer Vegetable Tian

There are a lot of fantastic Summer veggies coming into season right now. This Summer Vegetable Tian is a GREAT way to simply & creatively serve fresh veggies to those you love!Summer Vegetable Tian is a delicious and colorful baked vegetable side dish, layered with zucchini, yellow squash, potato, tomato, herbs and Italian cheese.
The recipe serves 6, and is very inexpensive to make (especially if you have a backyard garden like me, and are bursting with harvested zucchini, onions, yellow squash and tomatoes about this time of year)!

If you have ONE onion, ONE zucchini, ONE yellow squash, ONE potato, and ONE tomato, then you have almost everything you will need to make this great side dish!

Scroll Down For A Printable Recipe Card At The Bottom Of The Page

How To Make A Summer Vegetable Tian

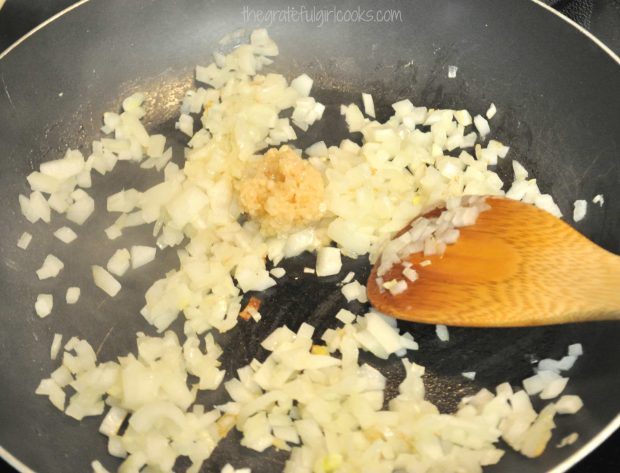
Here’s how you make this beautiful, delicious summer vegetable tian:  Start by sautéing the diced onions and minced garlic in olive oil for a few minutes. Note: I added garlic during the last minute of cooking, so it wouldn’t burn or become bitter.

Cooking onions and garlic for vegetable tian

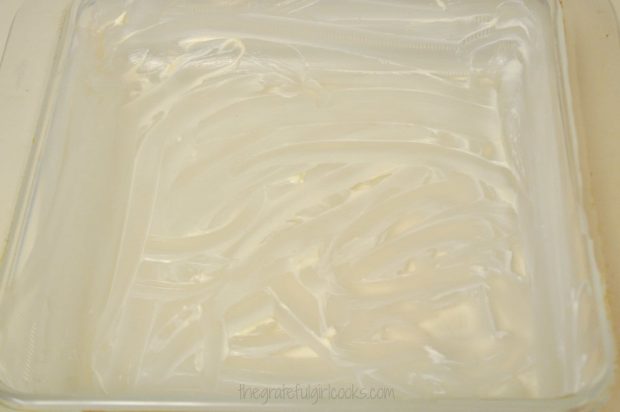
Spread softened butter on the bottom and sides of a baking dish (again… playing with your food).

Baking dish for vegetable tian is coated with softened butter

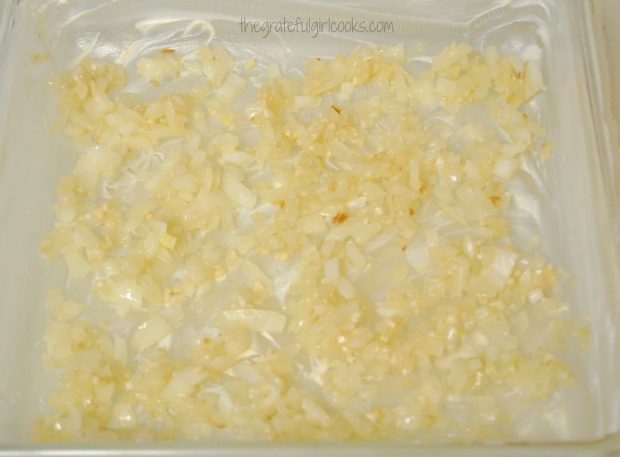
Spread the cooked onions and garlic on the bottom of the dish.

Cooked onions and garlic are added to baking dish

Now It’s Time To Arrange The Veggies!

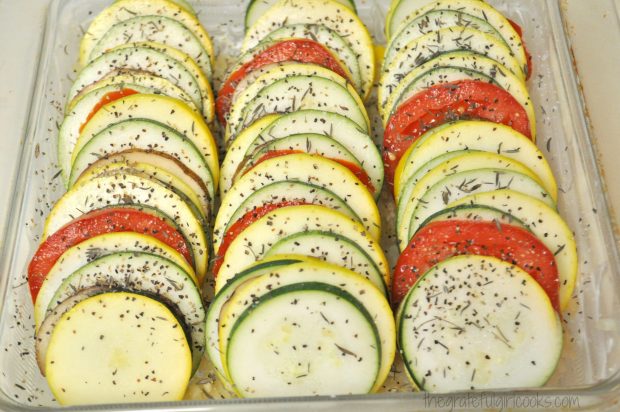
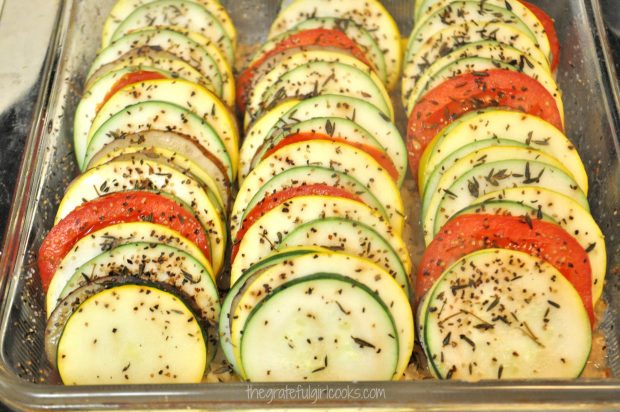
Alternating veggies, stack the sliced vegetables in the dish vertically until it is filled. (You will notice there won’t be as many tomato slices as everything else- no worries, just add them in.  Have fun playing with your food!  Season the veggies generously with salt and pepper, then add dried thyme.

Layered summer vegetables for tian are placed into baking dish.

Cover the baking dish with aluminum foil, and place the pan in a preheated 400 degree oven. Bake veggies for 30 minutes, then take the foil off the dish, cover the top of the veggies with the shredded Parmesan cheese, then continue baking for another 15-20 minutes.

This is what they looked like when I removed the foil. (oops-forgot to take a picture after adding shredded cheese to the top after this!)

Partially baked summer vegetable tian with Italian seasoning.

Time To Eat The Summer Vegetable Tian!

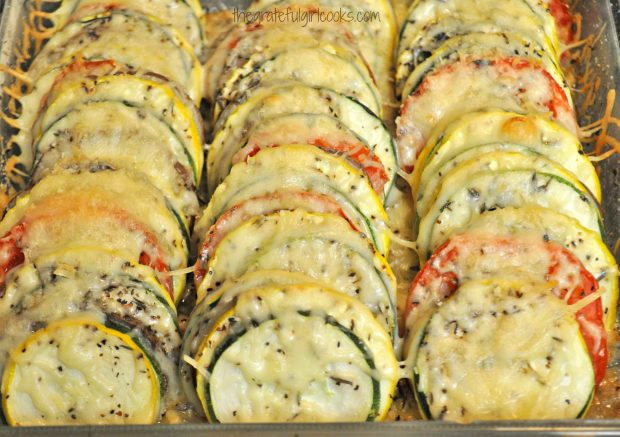
When done, the Parmesan cheese will be melted and light brown in color, and the veggies will be cooked through.  Remove baking dish from oven, and serve while hot!  I found it easiest to remove a “serving sized section” of veggies using a spatula to keep them together in a compact, colorful line.

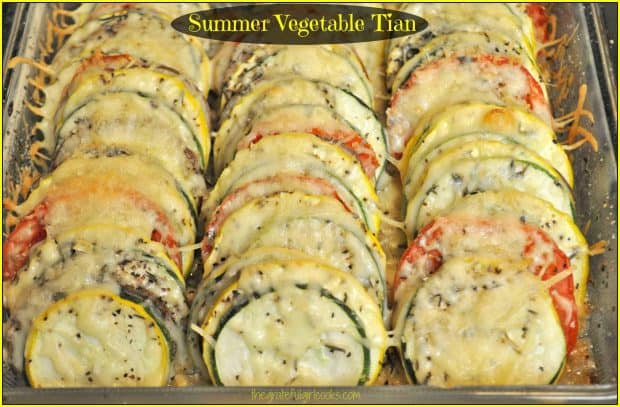
Summer vegetable tian with melted cheese is fully baked.

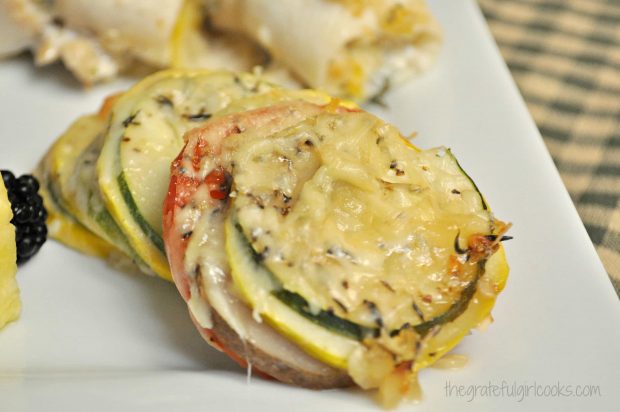
On the plate, and ready to eat! I served this summer vegetable tian dish with Baked Dover Sole Rollatini, but it would be a great side dish for a variety of main courses!

Summer vegetable tian is served as a delicious side dish

I don’t think you can EVER go wrong with fresh vegetables on the table! The alternating colors displayed so beautifully made it a very appetizing looking dish. The vegetables tasted wonderful, too, so I will definitely be making this again! Have a blessed day!

Looking For More VEGGIE Recipes?

You can find all of my veggie dishes in the Recipe Index, located at the top of the page. I have lots of vegetable dishes I think you will enjoy, including:

Interested In More Recipes?

Thank you for visiting this website. I appreciate you using some of your valuable time to do soIf you’re interested, I publish a newsletter 2 times per month (1st and 15th) with all the latest recipes, and other fun info. I would be honored to have you join our growing list of subscribers, so you never miss a great recipe!
There is a Newsletter subscription box on the top right side (or bottom) of each blog post, depending on the device you use, where you can easily submit your e-mail address (only) to be included in my mailing list.

You Can Also Find Me On Social Media:
Facebook page: The Grateful Girl Cooks!
Pinterest: The Grateful Girl Cooks!
Instagram: jbatthegratefulgirlcooks

Author's signature

Recipe Source:  http://www.budgetbytes.com/2011/08/summer-vegetable-tian/

↓↓ PRINTABLE RECIPE BELOW ↓↓

0 from 0 votes
Summer Vegetable Tian
Prep Time
15 mins
Cook Time
45 mins
Total Time
1 hr
 
Summer Vegetable Tian is a delicious and colorful baked vegetable side dish, layered with zucchini, yellow squash, potato, tomato, herbs and Italian cheese.
Category: Side Dishes, Vegetable Dish
Cuisine: American
Keyword: summer vegetable tian
Servings: 6 servings
Calories Per Serving: 144 kcal
Author: JB @ The Grateful Girl Cooks!
Ingredients
  • 1 medium sized brown onion , diced
  • 2 cloves garlic , minced
  • 1 Tablespoon olive oil
  • 1 medium sized zucchini , thinly sliced
  • 1 medium sized yellow squash , thinly sliced
  • 1 medium potato , thinly sliced
  • 1 medium tomato , thinly sliced
  • 1 teaspoon dried thyme
  • Salt and Pepper (to taste)
  • 1 cup shredded Italian Cheese (I used shredded Parmesan)
  • Non-stick spray (or softened butter), for pan. I used butter!
Instructions
  1. Preheat your oven to 400º F. While oven is preheating, dice the onion (finely) and mince the 2 cloves of garlic. Heat olive oil in skillet on medium heat. Add onions; sauté them for 4-5 minutes, or until soft and translucent. Add garlic the last minute of cooking, so as not to burn it. Set aside.
  2. THINLY slice zucchini, yellow squash, potato and tomato. It is best if these vegetables are all about the same circumference around, for uniformity.
  3. Spray an 8x8 baking dish with non-stick spray or coat bottom and sides of pan with softened butter (I used butter!). Place the cooked onions and garlic on the bottom of pan, spreading evenly.
  4. Evenly stack the thinly sliced vegetables vertically in dish (alternating veggies) to form a long line of colorful veggies in the pan. When one row is done, start another row, until all veggies have been distributed. (Think of this as playing with your food!)
  5. Once vegetables are arranged in dish, season them liberally with salt and pepper, then add thyme.
  6. Cover baking dish with aluminum foil; Bake at 400 degrees for 30 minutes. Take the foil off the dish, cover the tops of the veggies with shredded Parmesan cheese, then continue cooking (uncovered) for an additional 15-20 minutes (until the cheese turns light brown).
  7. Remove pan from oven, and serve! Enjoy!
Recipe Notes

I found it is easiest to serve the veggies by lifting a "section" out of the baking dish with a long spatula. That keeps the veggies together in a compact, colorful line.

Nutrition Facts
Summer Vegetable Tian
Amount Per Serving (1 serving)
Calories 144 Calories from Fat 63
% Daily Value*
Fat 7g11%
Saturated Fat 3g19%
Cholesterol 14mg5%
Sodium 268mg12%
Potassium 415mg12%
Carbohydrates 12g4%
Fiber 1g4%
Sugar 3g3%
Protein 8g16%
Vitamin A 445IU9%
Vitamin C 17.9mg22%
Calcium 211mg21%
Iron 1mg6%
* Percent Daily Values are based on a 2000 calorie diet.

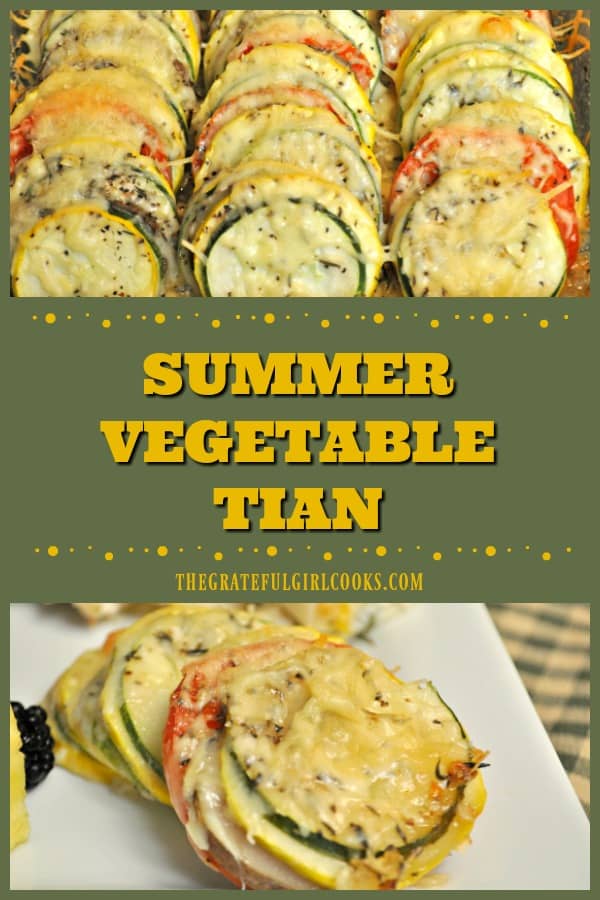
Here’s one more to pin on your Pinterest boards!Summer Vegetable Tian is a delicious and colorful baked vegetable side dish, layered with zucchini, yellow squash, potato, tomato, herbs and Italian cheese.


Save

Save

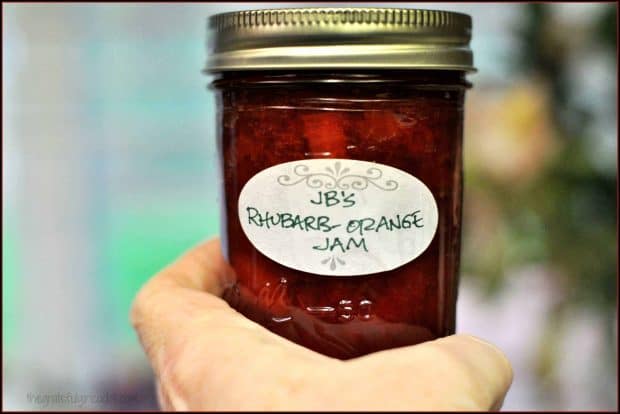
Rhubarb-Orange Jam

Sweet and just a little tart, this Rhubarb-Orange Jam is a perfect combo to enjoy on toast or muffins! Canning instructions for long term storage are included with recipe.Sweet and just a little tart, this Rhubarb-Orange Jam is a perfect combo to enjoy on toast or muffins! Canning instructions included with recipe.

Last year I ordered the newest edition of “The Ball Blue Book – Guide To Preserving”, and had fun looking at recipes and getting ideas for jams.

The first recipe I used from the book was for Rhubarb-Orange Jam, and boy, was I was surprised at just how GOOD it tastes!

Scroll Down For A Printable Recipe Card At The Bottom Of The Page

How Much Jam Will this Recipe Yield?

This recipe will yield enough jam for about 7 half-pint jars, so I have plenty for our pantry and a few to give to friends!  Talk about simple – this recipe only has 4 ingredients… rhubarb, oranges, sugar, and pectin. If you’ve made jam and canned it before, it is pretty “textbook” jam making.

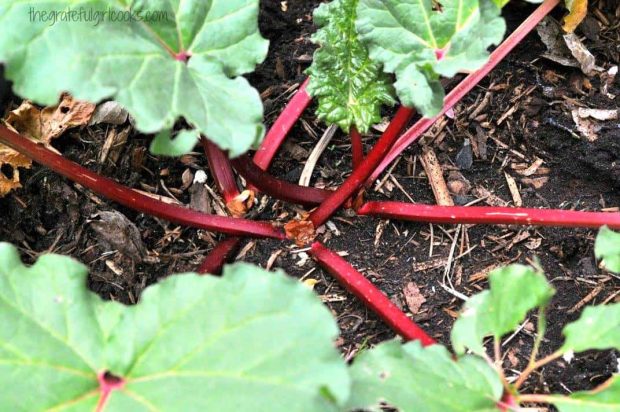
This rhubarb-orange jam is really delicious! A cool thing for me was being able to use rhubarb grown in our own backyard garden to make this jam!

Rhubarb growing in garden, used for making rhubarb-orange jam.

Can I Make Rhubarb-Orange Jam If I Will NOT Be Canning IT?

The answer is YES. However, if storing in the refrigerator, the jam will have a much shorter “life” than processed and canned jam.

If you are NOT going to be canning the jam, make sure to store the jam in a sealed container(s) in the refrigerator. The recipe makes approximately 7 half pint jars of jam, so you will have a LOT of jam to eat! That’s about 112 TABLESPOONS of rhubarb-orange jam!

You can also put this delicious jam (not processed for long term storage) in half-pint jars and give to friends or family, with instructions directing them to keep in the fridge, and use soon. The “unprocessed or un-canned” jars will NOT be shelf stable for long term storage.

If You Are Going To Can The Rhubarb-Orange Jam

I recommend following all basic USDA guidelines for canning, as a matter of precaution. This includes sterilizing the jars and flat lids that you will be using.

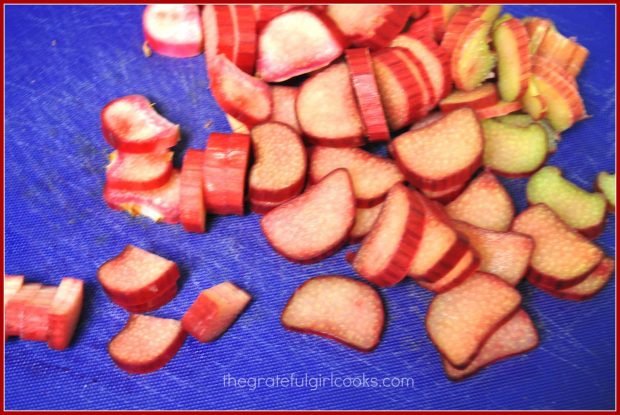
The rhubarb used to make rhubarb-orange jam is sliced before cooking.

Processing Jars Of Rhubarb-Orange Jam

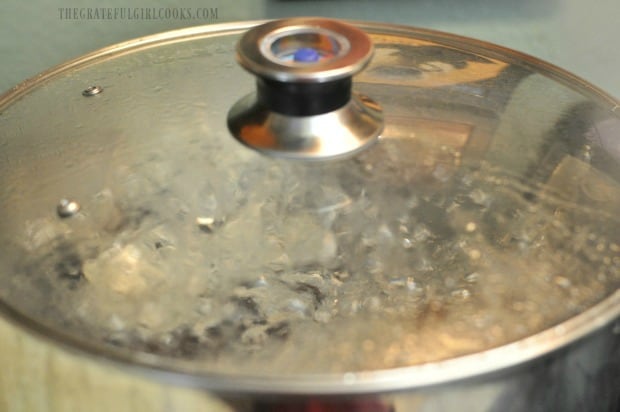
This jam is easily made in a water bath canner. After pre-cooking the rhubarb, oranges, sugar and pectin, the rhubarb-orange jam is carefully ladled into hot, sterilized half-pint canning jars.

The jars are filled, wiped clean, and secured with a flat lid and screw band.  Filled jars of rhubarb-orange jam are then placed on an elevated rack and covered with simmering water in the canner.

Jars of rhubarb-orange jam are processed for ten minutes in a water bath canner.

This jam is processed for 10 minutes in the water bath canner.  When done, the hot jars are carefully removed, and they are left undisturbed, overnight, to cool completely.

Once cooled, the jars of rhubarb-orange jam are then wiped clean of any sticky residue from the canning process.

The only thing left to do is label the jars, and place them in the pantry, for long term storage.

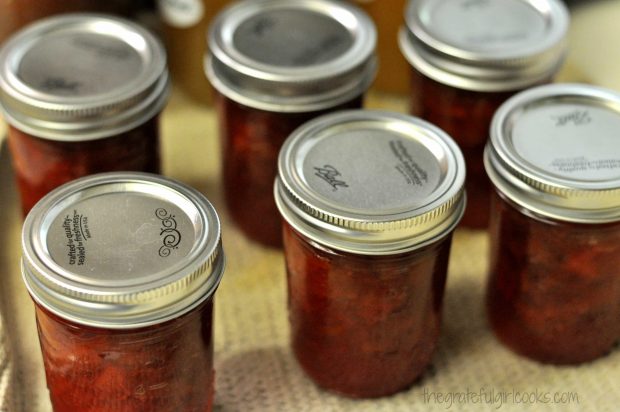
Jars of rhubarb-orange jam cooling on a dish towel, after processing.

Rhubarb and orange flavors present in this jam are very delightful! A little burst of citrus from the orange zest and juice nicely compliments the slightly tart flavor of the rhubarb.

The rhubarb-orange jam will provide a delicious topping for your toast and muffins, etc. If you have canned it for long term storage, you can pull a shelf-stable jar of this yummy jam out of the pantry any time you want!

I hope you consider trying this recipe for rhubarb-orange jam… and trust you will enjoy it!  Have a fantastic day, and please come back again soon.

Looking For More JAM Recipes?

You can find all of my jam recipes in the Recipe Index, located at the top of the page.  A few family favorites include:

Want More Recipes? Get My FREE Newsletter!

I publish a newsletter 2 times per month (1st and 15th) with lots of recipes, tips, etc..
Would you like to join our growing list of subscribers?

There is a Newsletter subscription box on the top right (or bottom) of each blog post, depending on the device you use.
You can submit your e-mail address there, to be added to my mailing list.

Find Me On Social Media:

Facebook page: The Grateful Girl Cooks!
Pinterest:
The Grateful Girl Cooks!
Instagram:
jbatthegratefulgirlcooks

Author's signature

Recipe Source: “Ball Blue Book – Guide To Preserving”, copyright 2014, Hearthmark, LLC (dba Jarden Home Brands), page 54.

↓↓ PRINTABLE RECIPE BELOW ↓↓

0 from 0 votes
Rhubarb-Orange Jam
Prep Time
25 mins
Cook Time
10 mins
Total Time
35 mins
 
Sweet and just a little tart, this Rhubarb-Orange Jam is a perfect combo to enjoy on toast or muffins!
Category: Jam / Canning and Preserving
Cuisine: American
Keyword: rhubarb-orange jam
Servings: 112 Tablespoons (approx. 7 half-pint jars)
Calories Per Serving: 47 kcal
Author: JB @ The Grateful Girl Cooks!
Ingredients
  • 2 1/2 pounds fresh rhubarb (between 10 and 18 stalks, depending on size)
  • 2-3 medium navel oranges
  • 6 Tablespoons Ball Classic Powdered Pectin
  • 6 cups granulated sugar
Instructions
Prep The Fruit:
  1. Prep the rhubarb and oranges. Wash and drain rhubarb, then cut off the leafy tops and the root ends from the rhubarb stalks. Discard. Slice rhubarb into 1/2 inch chunks. Rinse oranges. Cut them in half and take out the seeds. Juice the oranges (you will need 1 cup of fresh squeezed orange juice) Remove the peel from one of the orange halves. Remove the white part (pith) from the peel. Slice the peel into very thin little pieces.
Cook The Jam:
  1. Place the chopped rhubarb, fresh squeezed orange juice and orange peel slivers in a large saucepan. Cover the pan, and cook on a low simmer for about 3 minutes (the rhubarb should be tender when done). Stir in 6 Tablespoons of pectin powder, and stir until fully mixed. Turn the heat up to medium-high, and cook jam mixture until it comes to a boil. Once it reaches a full boil, add the sugar to the pan all at once, stirring well, until the sugar dissolves. Continue cooking the jam until the mixture reaches a FULL ROLLING BOIL (meaning it continues to boil even when stirring). Boil this for 1 minute. stirring constantly while boiling. After one minute, remove the pan from the heat. Use a spoon to skim off any foam that has appeared on top of the jam mixture (and discard).
Fill the Hot Canning Jars:
  1. Canning jars should be sterilized and preheated before filling. Ladle hot jam mixture into your prepared, hot canning jars. Leave 1/4 inch headspace for each jar. Remove any air bubbles by running a plastic utensil down through jam. Completely wipe the jar rim clean. Put the jar lid and ring on jar. Tighten lid to fingertip tight. Place jars on rack in hot water bath canner over simmering water (180 degree F). Repeat with remaining jars.
To Process Jam:
  1. Make sure jars are on rack in simmering water. Water should cover the top of the jars by an inch. (Add boiling water to pan if necessary to completely cover tops of jars). Turn the heat to medium-high. Put a lid on the canner and bring it to a rolling boil. Once boiling, process jars (1/2 pint) for 10 minutes. Turn the heat off and take the lid off the pan. Let the jars sit in pan for 5 minutes to slightly cool. Remove jars from canner (don't try to re-tighten the lids if they have loosened up). Let the jars cool on a dish towel on the counter for 12 hours (don't put hot jars right onto countertop). You should hear each jar "ping" as it seals. Check jars for secure seal after they have cooled for 12 hours. Label jars and store.
Nutrition Facts
Rhubarb-Orange Jam
Amount Per Serving (1 Tablespoon)
Calories 47
% Daily Value*
Sodium 2mg0%
Potassium 33mg1%
Carbohydrates 12g4%
Sugar 11g12%
Vitamin A 15IU0%
Vitamin C 2.1mg3%
Calcium 10mg1%
Iron 0.1mg1%
* Percent Daily Values are based on a 2000 calorie diet.

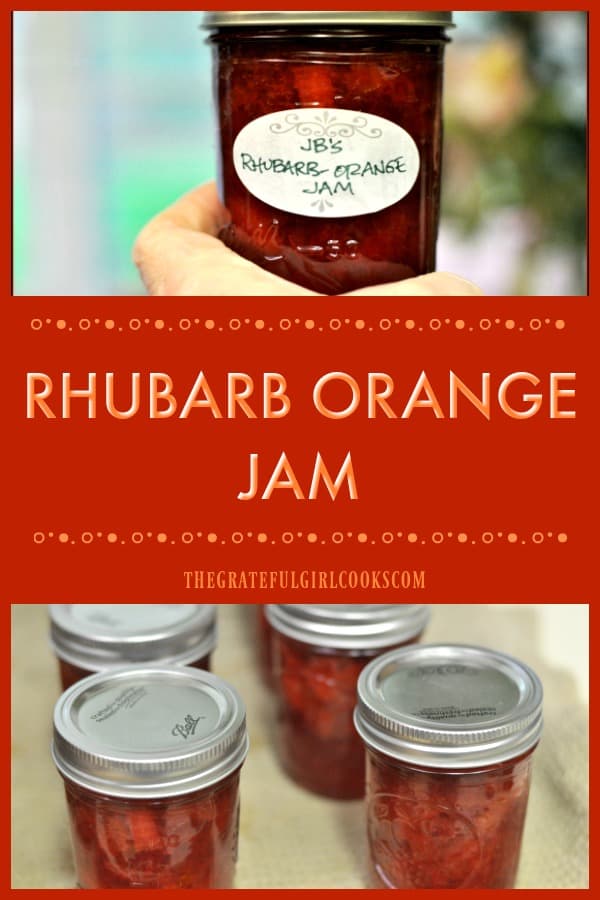
Here’s one more to pin on your Pinterest boards!Sweet and just a little tart, this Rhubarb-Orange Jam is a perfect combo to enjoy on toast or muffins! Canning instructions included with recipe.


Save

Save

Save

Save

Cucumber And Zucchini Carpaccio Salad

You will LOVE this GORGEOUS and DELICIOUS carpaccio salad, with thinly sliced cucumbers, zucchini, feta cheese, and pecans, topped with a light, herb-seasoned dressing!You'll LOVE this GORGEOUS and DELICIOUS carpaccio salad, featuring thinly sliced cucumbers, zucchini, feta, pecans,and a light, herb-seasoned dressing!
Recently I used a birthday gift card I received to purchase a cookbook I had my eye on for a while: “Cristina Ferrare’s Big Bowl Of Love”. It is a great cookbook… and this cucumber and zucchini carpaccio salad is the FIRST recipe I made from the book.

I wasn’t quite sure what to expect, but found the dressing (which features fresh dill, flat leaf parsley, and mint), and the addition of feta cheese, and toasted pecans make this a unique looking and absolutely delicious, fresh crunchy salad! The salad is scrumptious, pretty to look at, and would be a perfect brunch, potluck or party dish!

Scroll Down For A Printable Recipe Card At the Bottom Of The Page

What Exactly IS A “Carpaccio Salad”?

I thought the salad looked wonderful, but was very curious what a “Carpaccio” salad actually was. Turns out the word Carpaccio (according to Wikipedia) originally referred to a dish utilizing extremely thin slices of raw meat, layered with white truffles or Parmesan cheese.

The dish was named after a Venetian painter named Vittore Carpaccio, who was well known for his paintings which prominently featured red and white tones. (see where the red meat and white truffles played a part?).

Nowadays the term “carpaccio” can be used for any dish made with thinly sliced raw meat, fish or vegetables. THIS carpaccio salad uses fresh cucumbers and zucchini. Only veggies-no raw meat for me!

How To Prepare This Cucumber Zucchini Carpaccio Salad

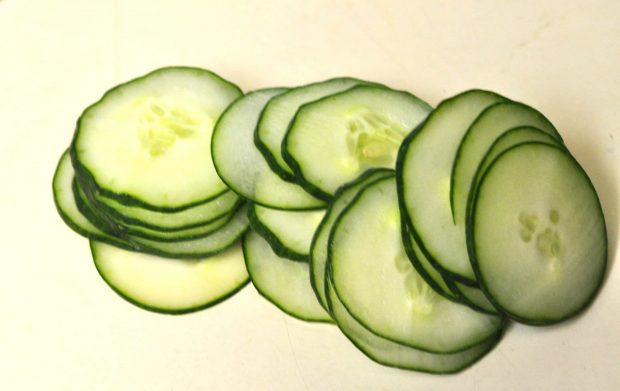
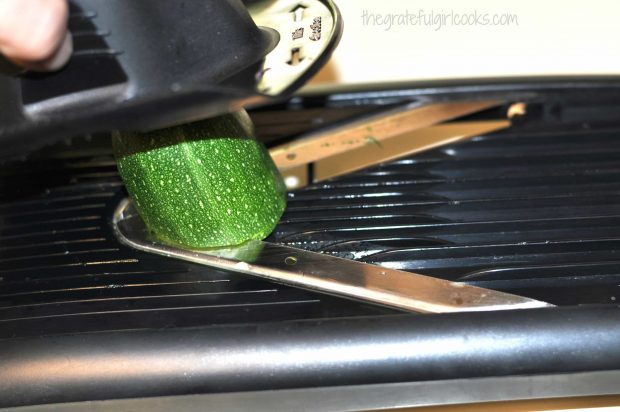
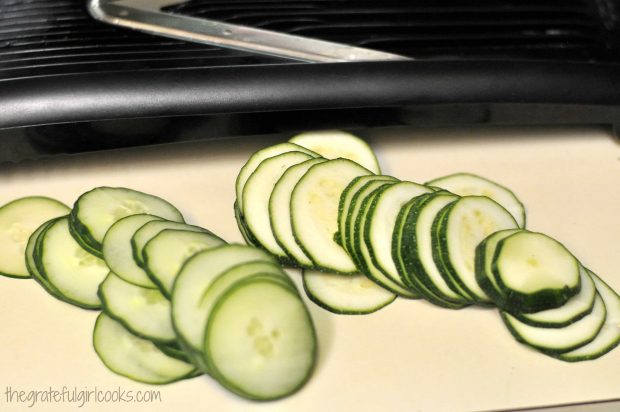
Very thinly slice one large cucumber and one zucchini of equal size (I picked both from my garden-yeehaw!). I used a mandolin to thinly slice the veggies, which made it very easy. However, if you are slicing the cucumbers and zucchini by hand, make sure you get the slices as thin as possible. Here are the cucumber slices, so you can see their “thin-ness”.

Very thinly sliced cucumbers for carpaccio salad
Here is me and my trusty mandolin (a gift from our oldest son), slicing the zucchini thinly. This is a great tool for this recipe!

Slicing zucchini for salad very thinly using a mandolin
Here are the finished cucumber and zucchini slices. The peel is left intact, which adds color to the cucumber zucchini carpaccio salad.

Cucumber and zucchini slices cut using mandolin
Arranging The Carpaccio Salad Veggies

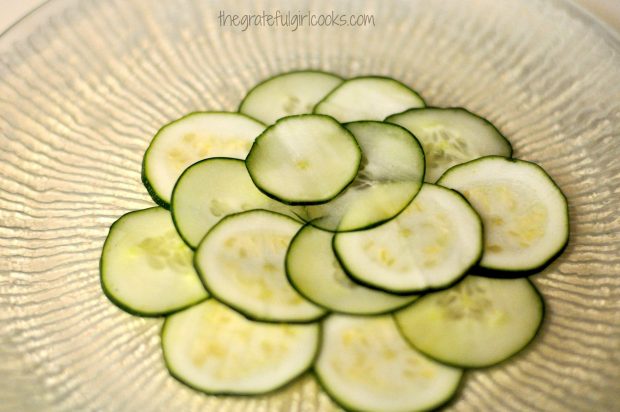
Begin in the center of a round serving plate, and alternately arrange the slices (one cucumber, one zucchini, etc.), working outward around the circle.

Cucumber, zucchini slices overlapping from center of platter
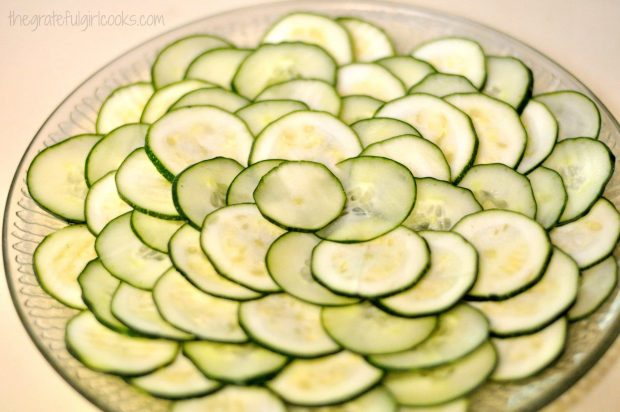
Keep layering the veggies, one zucchini, one cucumber, and so on. Keep layering until all the veggies are distributed and the carpaccio salad looks like this:

Serving platter with decoratively arranged cucumber and zucchini slices

Prepare The Salad Dressing

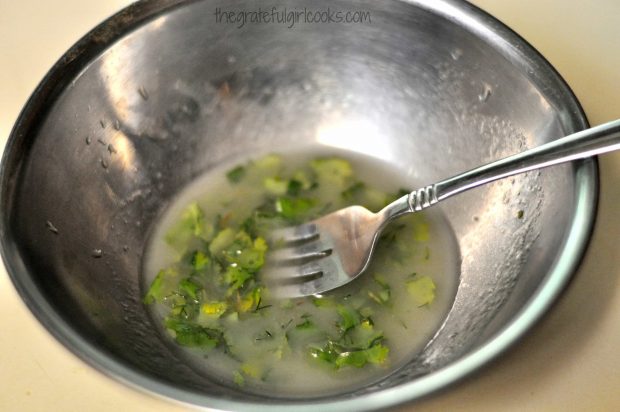
Looks good already, doesn’t it? I think so! Mix the dressing, which includes, olive oil, lemon juice, rice wine vinegar, fresh mint, flat leaf parsley and dill (herbs were from our garden… nice).

Salad dressing for carpaccio salad mixed in small metal bowlToast The Pecans For The Salad

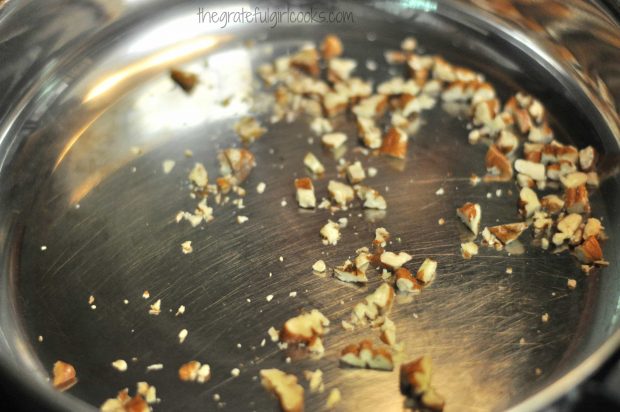
Toast chopped pecans in a “dry” skillet. A “dry skillet means you use no oil. Simply add chopped pecans, and heat on medium-low for 3-4 minutes, keeping them stirred, until lightly toasted.

Chopped pecans for salad dry toasting in skillet
To Serve The Cucumber Zucchini Carpaccio Salad

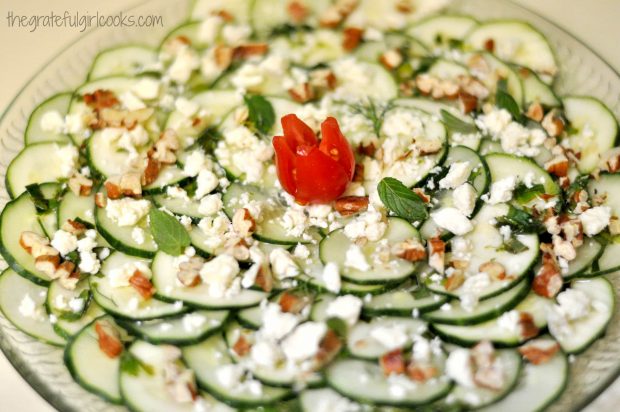
Mix the dressing really well, then drizzle it over the top of the veggies, trying to cover them all.  Sprinkle the top of the cucumber zucchini carpaccio salad with crumbled feta cheese, toasted pecans, and some cracked black pepper. I also added a few small mint leaves and dill for garnish, and a small red pear tomato (cut in quarters almost to bottom) from our garden, and that was it!

MAKE AHEAD TIP: If you want to make this up early, arrange the cucumbers and zucchini on plate, then cover and refrigerate. Right before serving, add the dressing, feta, pecans and black pepper. This is what it looked like at serving time! Pretty, huh?

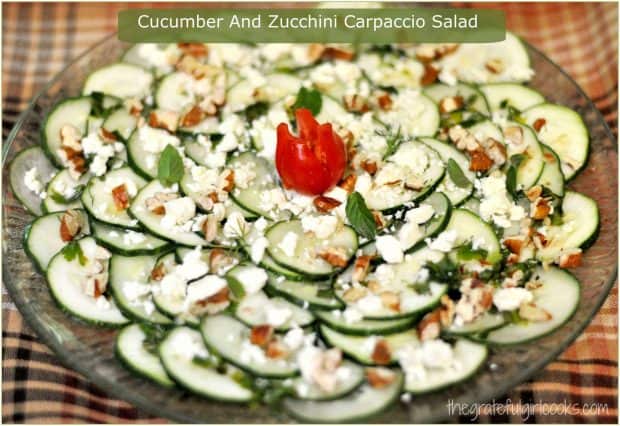
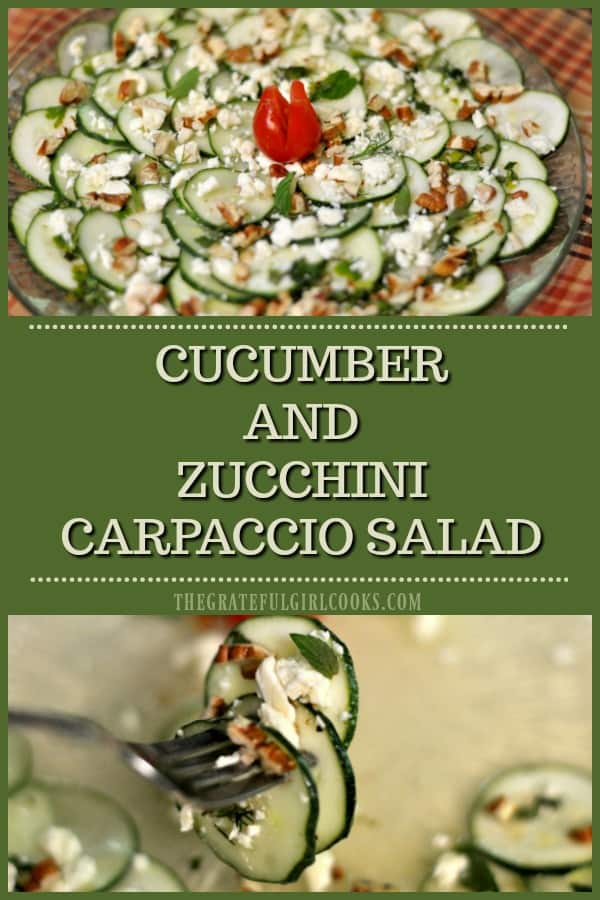
Cucumber and Zucchini Carpaccio Salad ready to serve!
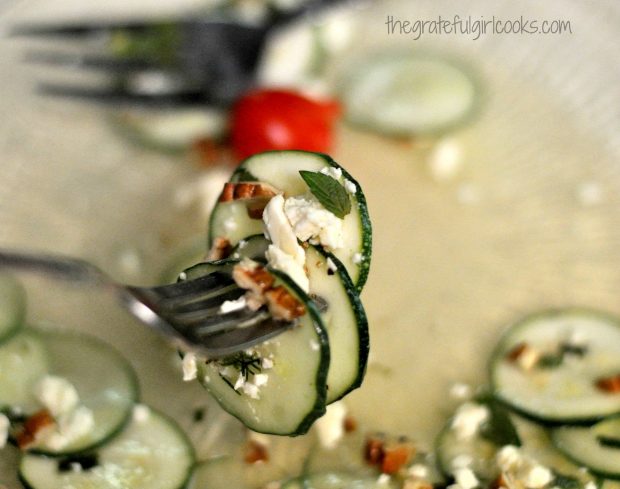
Trust me – this carpaccio salad is amazing! The dressing is fresh, and the fresh herbs shine through, to make this such a wonderful, tasty, and beautiful salad. Here… I saved a bite for you! (You’re welcome).

Close up bite of zucchini and cucumber salad on fork
I will most definitely be making this carpaccio salad again! Sure hope you will give it a try, also! Have a great day. Thank you for stopping by, and I hope you will come back again soon.

Looking For More Salads Using VEGGIES?

You can find all my salad recipes in the Recipe Index, located at the top of the page.  A few favorites include:

Interested In More Recipes?

Thank you for visiting this website. I appreciate you using some of your valuable time to do soIf you’re interested, I publish a newsletter 2 times per month (1st and 15th) with all the latest recipes, and other fun info. I would be honored to have you join our growing list of subscribers, so you never miss a great recipe!
There is a Newsletter subscription box on the top right side (or bottom) of each blog post, depending on the device you use, where you can easily submit your e-mail address (only) to be included in my mailing list.

You Can Also Find Me On Social Media:

Facebook page: The Grateful Girl Cooks!
Pinterest:
The Grateful Girl Cooks!
Instagram:
jbatthegratefulgirlcooks

Have a wonderful day!

Author's signatureRecipe Source: “Cristina Ferrare’s Big Bowl Of Love”, page 54, copyright 2011, by Cristina Ferrare., Sterling Publishing Co., Inc.

0 from 0 votes
Cucumber And Zucchini Carpaccio Salad
Prep Time
15 mins
Cook Time
0 mins
Total Time
15 mins
 

You will LOVE this GORGEOUS and DELICIOUS carpaccio salad, featuring thinly sliced cucumbers, zucchini, feta, pecans, and a light, herb-seasoned dressing!

Category: Salad, Vegetable Dish
Cuisine: American
Keyword: carpaccio salad
Servings: 6 servings
Calories Per Serving: 170 kcal
Author: JB @ The Grateful Girl Cooks!
Ingredients
For salad dressing:
  • 1/4 cup extra virgin olive oil
  • 4 Tablespoons fresh squeezed lemon juice
  • 1 Tablespoon rice wine vinegar
  • 1 Tablespoon finely chopped fresh mint
  • 2 teaspoons finely chopped fresh dill
  • 1 Tablespoon finely chopped Italian flat leaf parsley
For salad:
  • 2 zucchini , sliced very thin
  • 2 cucumbers , sliced very thin
  • 1/2 teaspoon Kosher salt
  • 1/2 cup feta cheese , crumbled
  • 1/4 cup finely chopped roasted pecans (or walnuts)
  • Freshly cracked black pepper
Instructions
  1. In a small bowl, whisk the olive oil, lemon juice, rice wine vinegar, mint, dill and parsley together until well combined. Set salad dressing aside (or cover with plastic wrap and refrigerate if making ahead).
  2. To make the salad, very thinly slice the cucumbers and zucchini. Arrange the veggie slices on a large serving plate, by alternating cucumbers and zucchini. Work from the inside of the plate around the circle to the outside, filling the entire plate. Once the veggies are arranged, sprinkle lightly with salt. NOTE: If you are making this salad ahead of serving time, wrap the veggie plate with plastic wrap and refrigerate at this point. Add the rest (salad dressing, feta, pecans, etc. at serving time).
  3. When ready to serve, drizzle the salad dressing over the entire salad, trying to cover all the veggies lightly.
  4. Add the crumbled feta cheese, distributing over the top of the salad. Do the same with the toasted pecans (or walnuts), then finish with cracked black pepper.
  5. If desired, garnish salad with additional mint leaves or dill sprigs. I added a small red pear tomato (cut into quarters, sliced from top to bottom). Serve, and enjoy!!!
Recipe Notes

NOTE: For my husband and myself, I cut the SALAD ingredients in half (i.e. one cucumber, one zucchini, etc.), but kept the quantity of salad dressing the same. There was still enough salad for 3-4 small servings. Just an FYI.

Nutrition Facts
Cucumber And Zucchini Carpaccio Salad
Amount Per Serving (1 serving)
Calories 170 Calories from Fat 135
% Daily Value*
Fat 15g23%
Saturated Fat 3g19%
Cholesterol 11mg4%
Sodium 341mg15%
Potassium 343mg10%
Carbohydrates 6g2%
Fiber 1g4%
Sugar 3g3%
Protein 3g6%
Vitamin A 345IU7%
Vitamin C 19.9mg24%
Calcium 91mg9%
Iron 0.8mg4%
* Percent Daily Values are based on a 2000 calorie diet.

Here’s one more to pin on your Pinterest boards!You'll LOVE this GORGEOUS and DELICIOUS carpaccio salad, featuring thinly sliced cucumbers, zucchini, feta, pecans,and a light, herb-seasoned dressing!

Save

Save

Skillet Potatoes With Scallions And Parmesan

Skillet potatoes, cooked with garlic, scallions and Parmesan cheese, are an easy, delicious, and inexpensive side dish you will enjoy!Skillet potatoes, cooked with garlic, scallions and Parmesan cheese, are an easy, delicious, and inexpensive side dish you will enjoy!
I don’t know about you, but I’m on the lookout for new, easy, and inexpensive side dishes to add to our dinner meal. It’s easy to fall into a rut and serve the same old, same old veggies. That’s why I enjoyed making these Skillet Potatoes With Scallions And Parmesan!  Yum! They’re an easy and delicious dish you can serve with a variety of meats.

Scroll Down For A Printable Recipe Card At The Bottom Of The Page

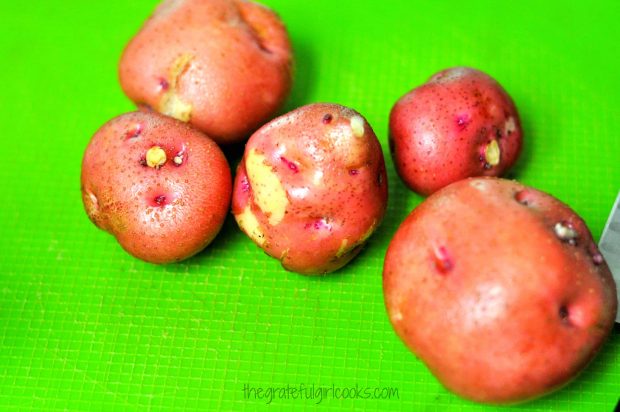
It helped that I had just harvested some red potatoes from our backyard garden. Some of them were a little scarred from digging them up), but I was excited to use a few of them. I used 5 red potatoes, which made enough for 2-3 servings.

Red potatoes are used for this recipe after cleaning.
Prepare The Potatoes

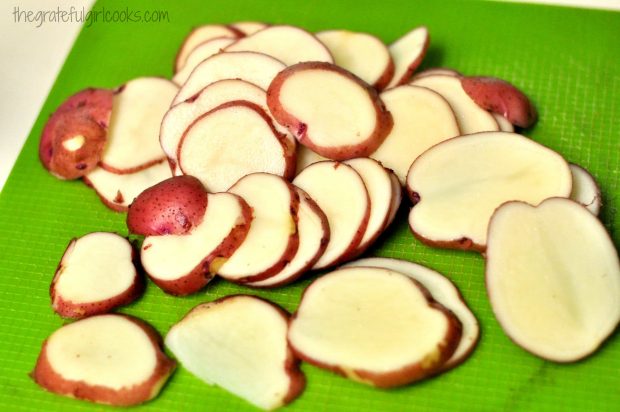
Wash the potatoes very well, then slice them into about 1/2 inch slices. I keep the peel on, because I think the color looks really good in the finished dish, plus they contain extra fiber.

The red potatoes are sliced into rounds before cooking.
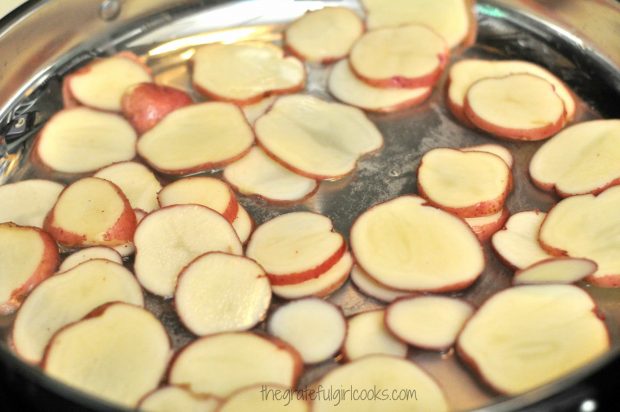
Place enough water in a large skillet to cover the bottom with about 1/2 – 3/4 inch of water. Put the sliced potatoes into the water and begin to cook them on medium-high heat.

Continue cooking the potatoes, turning gently, and added more water, when necessary, to ensure the potatoes do not stick to the bottom of the skillet. TIP: As the water cooks away you will need to add additional water.

Red potato slices begin cooking in a bit of water, in a large skillet.
Finish Cooking, Then Garnish Skillet Potatoes

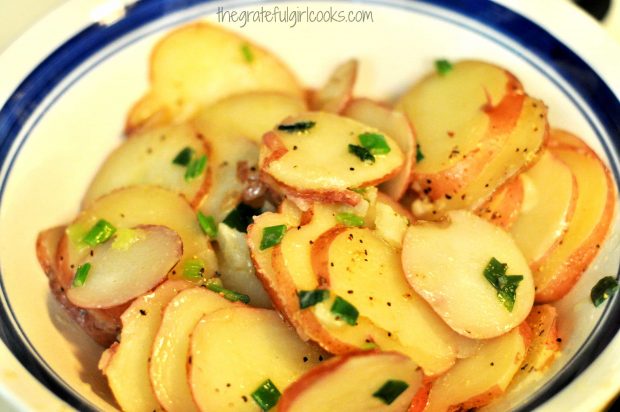
Keep an eye on the potatoes as they finish cooking. Making sure there is enough water in skillet is the key to this dish.  Continue cooking (about 15 minutes or so) until the potatoes are fork-tender. Once fork-tender, remove any remaining water from the skillet. Add the butter, salt, pepper, minced garlic chopped scallions (green onions) to the skillet.

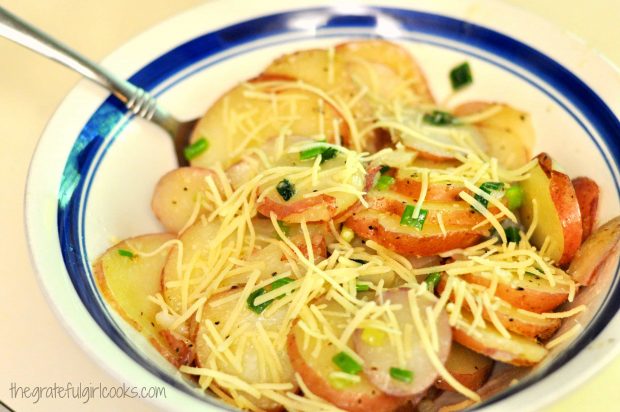
Coat the potatoes with the melted butter by spooning it up and over the top of the potatoes while they cook. Remove the potatoes from the heat after 1-2 minutes (don’t burn the garlic!). Gently pour potatoes into a serving bowl, and immediately sprinkle with grated Parmesan cheese.

Skillet Potatoes are garnished with butter, seasoning and green onions.

Grated Parmesan cheese is sprinkled on top of the hot potatoes.
Time To Eat The Skillet Potatoes With Scallions And Parmesan!

The cheese will melt in about a minute over the hot potato slices, then they are ready. Add additional salt and/or black pepper to taste, if desired. Serve, and enjoy!
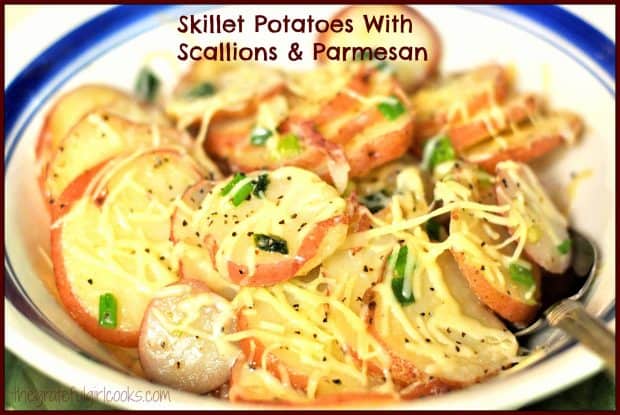
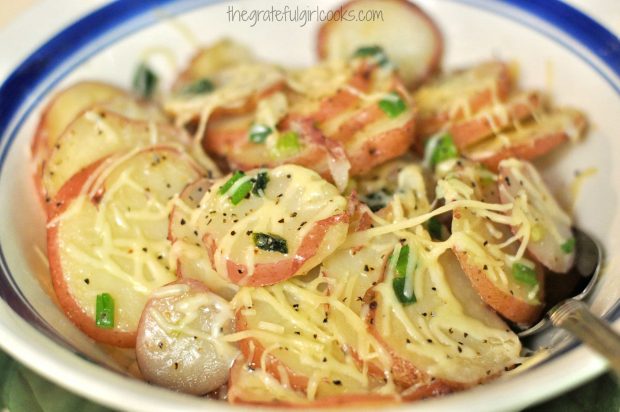
A bowl of Parmesan and scallion covered buttered skillet potatoes, ready to eat.
 I’m pretty confident you will love these potatoes! The recipe is easily adapted to double or triple the amount of potatoes YOU want to serve!

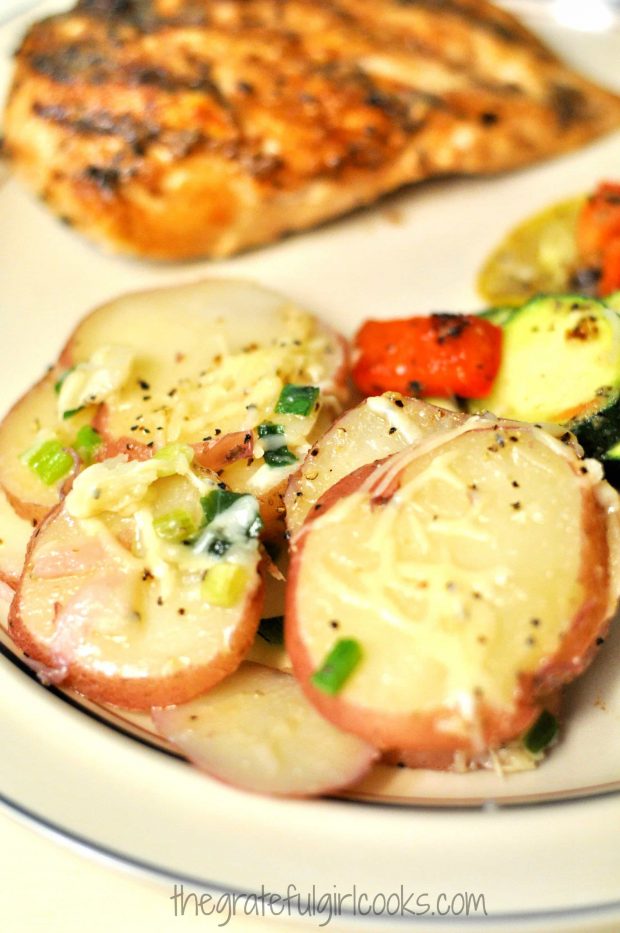
A close-up photo of the skillet potatoes, served with chicken (in background).Thanks for stopping by today. I hope you have the opportunity to try these delicious skillet potatoes. Have a great day! I hope it is a memorable, and fun one for you! Please come back soon for more delicious recipes.

Looking For More POTATO Recipes?

You can find all of my potato recipes in the Recipe Index, located at the top of the page. I have some delicious ones, including:

Interested In More Recipes?

Thank you for visiting this website. I appreciate you using some of your valuable time to do soIf you’re interested, I publish a newsletter 2 times per month (1st and 15th) with all the latest recipes, and other fun info. I would be honored to have you join our growing list of subscribers, so you never miss a great recipe!
There is a Newsletter subscription box on the top right side (or bottom) of each blog post, depending on the device you use, where you can easily submit your e-mail address (only) to be included in my mailing list.

You Can Also Find Me On Social Media:

Facebook page: The Grateful Girl Cooks!
Pinterest:
The Grateful Girl Cooks!
Instagram:
jbatthegratefulgirlcooks

Author's signatureRecipe Source: My brain. This dish was a no brainer.

0 from 0 votes
Skillet Potatoes With Scallions And Parmesan
Prep Time
5 mins
Cook Time
15 mins
Total Time
20 mins
 

Skillet potatoes, cooked with garlic, scallions and Parmesan cheese, are an easy, delicious, and inexpensive side dish you will enjoy!
Category: Side Dishes
Cuisine: American
Keyword: skillet potatoes
Servings: 3 servings
Calories Per Serving: 320 kcal
Author: JB @ The Grateful Girl Cooks!
Ingredients
  • 5 red potatoes
  • water (enough to continue filling bottom of skillet during cooking time)
  • salt and pepper , to taste
  • 2 Tablespoons butter
  • 2 scallions (2 green onion stalks-green and white part), sliced
  • 1 teaspoon minced garlic
Instructions
  1. Slice potatoes into 1/2 inch slices.
  2. Pour enough water into large skillet to completely cover bottom of skillet by about an inch.
  3. Add potato slices to water. Heat on medium heat until fork-tender (approx. 15-20 minutes). Keep an eye on water level... add additional water, as needed, to ensure potatoes do not stick to bottom of pan as they cook.
  4. When potatoes are done, remove any remaining water from skillet. Add butter, salt, pepper, garlic, and chopped scallions to potatoes in skillet. Mix gently, to combine. Continue to spoon melted butter over the tops of the potatoes. Cook an additional 1-2 minutes.
  5. Remove potatoes from heat. Place into serving bowl, and immediately garnish with grated Parmesan cheese. The heat from the potatoes will melt the cheese. Taste, and add additional salt and pepper, if necessary.
  6. Serve, and enjoy!
Nutrition Facts
Skillet Potatoes With Scallions And Parmesan
Amount Per Serving (1 g)
Calories 320 Calories from Fat 72
% Daily Value*
Fat 8g12%
Saturated Fat 4g25%
Cholesterol 20mg7%
Sodium 132mg6%
Potassium 1637mg47%
Carbohydrates 57g19%
Fiber 6g25%
Sugar 4g4%
Protein 7g14%
Vitamin A 340IU7%
Vitamin C 32.6mg40%
Calcium 41mg4%
Iron 2.7mg15%
* Percent Daily Values are based on a 2000 calorie diet.

Here’s one more to pin on your Pinterest boards!Skillet potatoes, cooked with garlic, scallions and Parmesan cheese, are an easy, delicious, and inexpensive side dish you will enjoy!


Save

Save

Save

Save