Category: Holidays!

Pumpkin Spice Coconut Milk Latte

Enjoy a tasty pumpkin spice coconut milk latte any time! Using canned coconut milk, this latte can be dairy-free, w/out whipped cream topping.

Just like that, Fall has arrived just like clockwork! For us here in the Pacific Northwest, this means cooler temps, gorgeous foliage, sweatshirts/fleeces, football games, pumpkin patch visits, and umbrellas. It also means the arrival of pumpkin spice coffee creamer and pumpkin spice lattes! 

This recipe is an old hand-me-down from a while back. You know… the kind where a friend shares a recipe with a friend who then writes it down and shares it with another friend, etc.,  and the original source is lost to the ages. Yeah… that kind of recipe! I am not dairy-free, but my sister-in-law is a vegan (and completely dairy-free), and this is a lovely hot drink she can truly enjoy!

The recipe is for a delicious hot coffee beverage that is made with canned coconut milk! If you are not acquainted with canned coconut milk, it can usually be found in the Asian section of your grocery store. I’ve been enjoying it for YEARS! That’s right… canned coconut milk, and it tastes wonderful in this latte. You can also make it with whole milk as a substitute if dairy products are fine with you. I’ve had it both ways, and I think I prefer the flavor even more using coconut milk!

This latte is a nice alternative seasonal beverage for anyone, especially those who need to be dairy-free, for dietary reasons. The added bonus is that this pumpkin latte (which makes two servings) is absolutely simple to prepare. Here’s how to make two servings of this hot Fall beverage (which you can make ANY time of the year!).

Scroll Down For A Printable Recipe Card At The Bottom Of The Page

What Ingredients Will I Need?

The “cast of characters” you will need to make the latte are strong brewed coffee, canned coconut milk, pumpkin pie spice mix, honey, pumpkin puree, and vanilla extract. For the pumpkin puree, you can choose to use homemade puree or canned. TIP: If you need a quick recipe for homemade pumpkin pie spice mix, you can use this one.

I typically use homemade pumpkin puree, which is slightly lighter in color than canned. If you are using canned pumpkin, be sure to NOT use pumpkin pie filling. Use pumpkin puree, and all will be right in the world, okay? Okay!.

Ingredients for the latte include coffee, pumpkin pie spice, coconut milk, honey, pumpkin puree and vanilla.

Preparing The Pumpkin Spice Coconut Milk Latte

The first thing you will need to do is brew one cup of very strong coffee. If you tend to use a mild roast or generic brand of coffee, slightly increase the amount of coffee grounds you use to make it stronger. This amount of coffee made will be split between the two drinks. Once brewed, pour the coffee into a medium saucepan.

Add the canned coconut milk, pumpkin puree, vanilla, pumpkin spice and honey. Whisk or stir well, to combine these ingredients. NOTE: If you do not have access to canned coconut milk, you can substitute one cup of whole milk if you are okay with using dairy products. TIP: When using canned coconut milk, be sure to thoroughly stir the contents before adding to the saucepan. This will incorporate the coconut cream into the coconut milk.

Turn the heat to LOW, and simmer for 4-5 minutes. Whisk occasionally as it cooks, to fully incorporate the spices into the liquid. When the latte is fully heated through (and quite HOT), it is done!

Whisking and cooking the pumpkin spice coconut milk latte until hot in a saucepan.

Ladle the hot pumpkin spice coconut milk latte into two mugs. if desired (optional, but yummy), top each latte with whipped cream, and then sprinkle (or sift) a bit more pumpkin spice onto the whipped cream. Serve hot, and enjoy!

Are you DAIRY-FREE? If you are dairy-free, ladle the hot drink into mugs. Sprinkle each drink with a bit more pumpkin spice mix, then serve and enjoy while hot.

Pumpkin Spice Coconut Milk Latte, topped with whipped cream and pumpkin spice sprinkles.

I hope you enjoy this yummy, hot pumpkin spice coconut milk latte. To me, it’s a little taste of Fall! Thank you for stopping by today, and I sincerely hope you will come back again for another visit and more recipes. Have a wonderful day, friends.

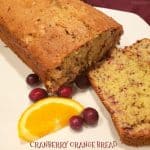
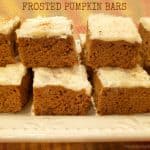
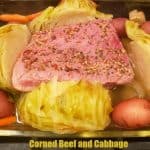
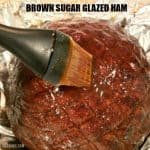
Looking For More HOT BEVERAGE Recipes?

You can find ALL of my recipes in the Recipe Index, located at the top of the page. I have some wonderfully delicious hot beverage recipes you might enjoy, including:

Interested In More Recipes?

Thank you for visiting this website. I appreciate you using some of your valuable time to do soIf you’re interested, I publish a newsletter 2 times per month (1st and 15th) with all the latest recipes, and other fun info. I would be honored to have you join our growing list of subscribers, so you never miss a great recipe!
There is a Newsletter subscription box on the top right side (or bottom) of each blog post, depending on the device you use, where you can easily submit your e-mail address (only) to be included in my mailing list.

You Can Also Find Me On Social Media:

Facebook page: The Grateful Girl Cooks!
Pinterest:
The Grateful Girl Cooks!
Instagram:
jbatthegratefulgirlcooks

Author's signature

Original recipe source unknown… It’s a hand-me-down from a while back.

0 from 0 votes
Pumpkin Spice Coconut Milk Latte
Prep Time
2 mins
Cook Time
5 mins
Total Time
7 mins
 

Enjoy a tasty pumpkin spice coconut milk latte any time! Using canned coconut milk, this latte can be dairy-free, w/out whipped cream topping.

Category: Beverage
Cuisine: American
Keyword: pumpkin spice coconut milk latte
Servings: 2 (1 cup+ per serving)
Calories Per Serving: 360 kcal
Author: JB @ The Grateful Girl Cooks!
Ingredients
  • cups strong, prepared coffee
  • 1 cup canned coconut milk , full-fat or low-fat
  • 1⅓ Tablespoons raw honey
  • 5 Tablespoons pumpkin puree (NOT pumpkin pie filling)
  • 4 teaspoons vanilla extract
  • teaspoons pumpkin spice mix
OPTIONAL: Whipped cream and/or sifted pumpkin pie spice, for garnish
    Instructions
    1. Brew one cup of very strong coffee. If you tend to use a mild roast or generic brand of coffee, slightly increase the amount of coffee grounds you use to make it stronger. This amount of coffee will be split between the two lattes. Once brewed, pour the coffee into a medium saucepan.

    2. Add the canned coconut milk, pumpkin puree, vanilla, pumpkin spice and honey to the coffee. Whisk or stir well, to combine these ingredients. Turn the heat to LOW, and simmer for 4-5 minutes, whisking occasionally as it cooks. When the latte is heated through (and quite HOT), it is done! ***TIP: When using canned coconut milk, be sure to thoroughly stir the contents before adding to the saucepan. This will incorporate the coconut cream into the coconut milk (it tends to separate in the can).

    3. Ladle the pumpkin spice coconut milk latte into two mugs while hot. **OPTIONAL- Top each latte with whipped cream, and then sprinkle (or sift) a bit more pumpkin pie spice onto the whipped cream. Serve hot, and enjoy! **NOTE: If dairy-free, simply sprinkle each mug with a bit more pumpkin spice mix, then serve and enjoy while hot.

    Recipe Notes

    NOTE: Caloric calculation was made using the calories for full fat canned coconut milk. If you use low-fat canned coconut milk, the caloric total will be approx. 153. Whipped cream garnish was not included, as this is an optional topping. 

    Nutrition Facts
    Pumpkin Spice Coconut Milk Latte
    Amount Per Serving (1 cup)
    Calories 360 Calories from Fat 261
    % Daily Value*
    Fat 29g45%
    Saturated Fat 26g163%
    Polyunsaturated Fat 1g
    Monounsaturated Fat 1g
    Sodium 25mg1%
    Potassium 507mg14%
    Carbohydrates 23g8%
    Fiber 4g17%
    Sugar 18g20%
    Protein 3g6%
    Vitamin A 5839IU117%
    Vitamin C 5mg6%
    Calcium 43mg4%
    Iron 3mg17%
    * Percent Daily Values are based on a 2000 calorie diet.

    Here’s one more to pin on your Pinterest boards!Enjoy a tasty pumpkin spice coconut milk latte any time! Using canned coconut milk, this latte can be dairy-free, w/out whipped cream topping.

    Mint Brownie Pie

    Mint Brownie Pie is a perfect St. Patrick’s Day (or any other day) dessert! Mint cream cheese filling tops a brownie base. Easy and yummy!
    Mint Brownie Pie is a perfect St. Patrick's Day (or any other day) dessert! Mint cream cheese filling tops a brownie base. Easy and yummy!

    If you’re looking for a fantastic dessert to have on St. Patrick’s Day, or Christmas, OR any other day of the year, may I suggest this mint brownie pie? It tastes wonderful, due to a brownie layer on bottom and a creamy mint filling on top! It is sooo good!

    A couple of months ago I made (and photographed) this delicious dessert, and was able to share quite a few pieces with several of our neighbors.

    It was so yummy I could have eaten the entire thing by myself (seriously!)… but my husband and I decided to share this treat (and the calories) with others!

    I had the recipe because it came from one of my “Taste of Home” magazines (from 1999) that I have saved for many, many years. This mint brownie pie is a favorite, and decided this was the time to share the recipe on my blog. Here’s how to make it:

    Scroll Down For A Printable Recipe Card At The Bottom Of The Page

    Prepare The Brownie Base Layer

    The first thing (after preheating your oven) you will do is make a brownie base for the dessert. To do this, melt butter and unsweetened chocolate in a medium saucepan, stirring often.

    Once melted, add granulated sugar, and stir well, to fully blend ingredients. Remove the pan from the heat.

    Unsweetened chocolate and butter are melted in a saucepan.Granulated sugar is added to the melted chocolate and butter in saucepan.

    Whisk 2 eggs and vanilla extract in a small bowl, and add this to the chocolate mixture. Mix well, to combine. Stir in  flour, a little at a time. Continue to stir after each addition until all the flour has been blended into the chocolate.

    Whisked eggs and vanilla extract are added to chocolate in saucepan.Flour is stirred into the chocolate mixture, a little at a time.

    Bake The Brownie Base

    Pour the mint brownie pie batter into a greased (bottom and sides) 9″ springform pan. Place the pan on the middle rack of a preheated oven.

    Bake at 350° F. for 18-20 minutes OR until a toothpick inserted in the middle of the brownie pie comes out clean and free of batter.

    Remove the mint brownie pie from the oven and let it cool (still in pan) on a wire rack. Do not open the pan or remove the brownie base from the pan.

    Mint brownie pie batter is poured into a greased springform pan.After baking, the mint brownie pie chocolate layer cools in the pan on a wire rack.

    Make The Mint Cream Cheese Topping

    Now it’s time to make the mint cream cheese topping while the brownie base cools to room temperature. Using an electric mixer, beat softened cream cheese and sugar until it becomes smooth.

    Add green food coloring (if using) and peppermint extract to the cream cheese filling, and mix well until combined and all color has blended in. The food coloring is optional, but I recommend it, especially if you’re making this dessert for St. Patrick’s Day!

    Use a few drops or as much as you wish to achieve a mint green color. Once the filling is fully tinted and blended, gently fold in whipped topping.

    When the brownie layer has completely cooled, gently add the mint cream cheese filling on top. Spread the filling to cover the entire top surface. Cover the pan, and refrigerate the mint brownie pie for one hour (at least).

    Whipped topping is gently folded into the green tinted cream cheese filling.The mint cream cheese filling is spread on the surface of the mint brownie pie.

    Refrigerate Then Decorate The Mint Brownie Pie!

    After the mint brownie pie has been chilled in the refrigerator for at least an hour, it’s ready to remove from the springform pan and decorate for serving. Run a butter knife all the way around between the pan and the pie to assist in releasing the pie from the pan.

    Melt chocolate chips and drizzle the chocolate decoratively over the surface of the mint brownie pie, any way you wish.

    I also like to pipe stabilized whipped cream (which holds its shape for days) on top and sprinkle with finely grated chocolate. Those are optional, but really do make the dessert look great.

    If you’re using aerosol whipped cream, spray onto individual pieces just before serving, as it will not hold it’s shape for any length of time.

    Melted chocolate is drizzled decoratively over the top of the mint brownie pie.Whipped cream is piped on top of the mint brownie pie and grated chocolate is added for garnish.

    Grab A Slice Of Mint Brownie Pie… And Dig In!

    Slice the mint brownie pie into 10 wedges, serve… and enjoy this decadent dessert! I’m confident you and those you love will really love this yummy treat!

    The dense, fudgy bottom layer, and the creamy, mint cream cheese topping makes a wonderful treat for the ol’ taste buds. YUM!

    A slice of mint brownie pie, served on a white plate.

    Thank you for stopping by to check out this scrumptious recipe. If you’re looking for more St. Patrick’s day dishes, check out my recipes for Irish Chocolate Pots de Créme, Irish Soda Bread, Guinness Baked Cheese Dip, Irish Colcannon With Bacon, and Corned Beef and Cabbage.

    I hope you will be able to come back again soon for more family-friendly recipes. Have a GREAT day, and may God bless you.

    Looking For More DESSERT Recipes?

    You can find more dessert recipes in my Recipe Index, which is located located at the top of this page. I have many dessert recipes you will really love, including:

    Want More Recipes? Get My FREE Newsletter!

    I publish a newsletter 2 times per month (1st and 15th) with lots of recipes, tips, etc..
    Would you like to join our growing list of subscribers?

    There is a Newsletter subscription box on the top right (or bottom) of each blog post, depending on the device you use.
    You can submit your e-mail address there, to be added to my mailing list.

    Find Me On Social Media:

    Facebook page: The Grateful Girl Cooks!
    Pinterest:
    The Grateful Girl Cooks!
    Instagram:
    jbatthegratefulgirlcooks

    Author's signature

    Original recipe source: “Taste of Home” magazine, February/March 1999 edition, page 67, published by Reiman Publications, Inc.

    ↓↓ PRINTABLE RECIPE BELOW ↓↓

    0 from 0 votes
    Mint Brownie Pie
    Prep Time
    15 mins
    Cook Time
    20 mins
    Inactive Refrigeration Time
    1 hr
    Total Time
    1 hr 35 mins
     

    Mint Brownie Pie is a perfect St. Patrick's Day (or any other day) dessert! Mint cream cheese filling tops a brownie base. Easy and yummy!

    Category: Dessert
    Cuisine: American
    Keyword: mint brownie pie
    Servings: 10 slices
    Calories Per Serving: 362 kcal
    Author: JB @ The Grateful Girl Cooks!
    Ingredients
    For Brownie Layer:
    • 6 Tablespoons butter (no substitutes)
    • 2 ounces unsweetened chocolate (2 one oz. squares)
    • 1 cup granulated sugar
    • 2 large eggs
    • ½ teaspoon vanilla extract
    • ½ cup all purpose flour
    Mint Cream Cheese Layer:
    • 8 ounces cream cheese , softened
    • ¾ cup granulated sugar
    • ½ teaspoon peppermint extract
    • green food coloring (optional, but recommended)
    • 8 ounces frozen whipped topping, thawed
    For Decorating:
    • ¼ cup semi-sweet chocolate chips , melted
    • 2 teaspoons vegetable shortening
    • Piped whipped cream and grated chocolate (optional)
    Instructions
    1. Melt butter and unsweetened chocolate in medium saucepan, stirring often. Once melted, add granulated sugar, and stir to fully blend ingredients. Remove pan from heat. Whisk eggs and vanilla extract in small bowl; add to chocolate mixture. Stir well, to combine. Stir in flour, a little at a time. Stir after each addition until all flour has been blended into chocolate.

    2. Pour batter into greased (bottom and sides) 9" springform pan. Place pan on middle rack in preheated oven. Bake at 350° F. for 18-20 minutes OR until a toothpick inserted in middle of brownie layer comes out clean. Remove from the oven and let cool (still in pan) on a wire rack. Do not remove brownie base from pan.

    3. Make mint cream cheese topping while brownie layer cools. Using an electric mixer, beat softened cream cheese and sugar until it becomes smooth. Add green food coloring (if using) and peppermint extract to cream cheese; mix well until combined and all color is blended in. Use a few drops or as much as you wish to achieve a mint green color. Once filling is tinted and blended, gently fold in whipped topping. When brownie layer is completely cooled, add cream cheese filling on top. Spread filling to cover top surface. Cover pan; refrigerate for one hour (at least).

    4. Remove chilled dessert from refrigerator. Release dessert from springform pan and decorate for serving. Melt chocolate chips; drizzle chocolate decoratively over surface of pie, any way you wish. Slice into wedges and serve. NOTE: I also decorate top with piped on stabilized whipped cream (which holds its shape for days) and sprinkle with finely grated chocolate. Those are optional, but really make the dessert look great. If using aerosol whipped cream, spray onto individual pieces just before serving, as it will not hold it's shape for any length of time. Store leftovers, covered, in refrigerator.

    Nutrition Facts
    Mint Brownie Pie
    Amount Per Serving (1 slice)
    Calories 362 Calories from Fat 153
    % Daily Value*
    Fat 17g26%
    Saturated Fat 10g63%
    Trans Fat 1g
    Cholesterol 34mg11%
    Sodium 185mg8%
    Potassium 163mg5%
    Carbohydrates 51g17%
    Fiber 2g8%
    Sugar 42g47%
    Protein 4g8%
    Vitamin A 377IU8%
    Calcium 70mg7%
    Iron 2mg11%
    * Percent Daily Values are based on a 2000 calorie diet.

    Here’s one more to pin on your Pinterest boards!Mint Brownie Pie is a perfect St. Patricks Day (or any other day) dessert! Mint cream cheese filling tops a brownie base. Easy and yummy!

    Corned Beef And Cabbage

    What’s more Irish than Corned Beef and Cabbage? Baked with cabbage, red potatoes, carrots and onions, this St. Patrick’s Day meal is yummy!What's more Irish than Corned Beef and Cabbage? Baked with cabbage, red potatoes, carrots and onions, this St. Patrick's Day meal is yummy!

    Top of the morning to ya! (said in my most perfect Irish brogue-ha ha!). Today I want to share the recipe for a simple, classic meal of corned beef and cabbage. With a few red potatoes, carrots and onions tossed in for good measure, this really is an all in one holiday meal. It’s also very easy to prepare.

    Over the years I have used the directions on the package of corned beef to prepare this dish, and have made only a couple very minor changes to this traditional Irish dinner.

    The best part? You don’t even have to be Irish to enjoy it!  You can “pretend” for the day with this simple meal. My husband really enjoys this meal and asked me to make it again last year, so I grabbed my camera and took some photos as I cooked it!

    The trick is to cook it low and slow, for tender corned beef. Here’s how to make this simple recipe for corned beef and cabbage:

    Scroll Down For A Printable Recipe Card At The Bottom Of The Page

    Prepare The Corned Beef

    This recipe calls for a “standard-sized 3 pound piece of corned beef. Most packages of corned beef come with a cute little spice packet. If yours does not, you can use a Tablespoon of pickling spice (found in spice section at grocery store).

    Place the meat on a large sheet of heavy duty foil inside of a large baking dish (9″ x13” works well).

    Sprinkle the meat with the spices. NOTE: The meat will be cooked with the fatty side up. It is fairly common to sprinkle the spices on the fat side, however I have found I prefer it sprinkled on the meat side, with only a tiny bit sprinkled on the fat side. It is your choice.

    Spices cover the surface of a corned beef, ready for baking.The seasoned corned beef is wrapped in foil, fat-side up.

    Baking The Corned Beef And Cabbage

    Once the meat has been seasoned, place it fat side UP in the foil, and seal the foil packet tightly. Place the baking dish with the foil-wrapped corned beef on the middle rack of a preheated 300°F. oven. 

    Wrapped tightly in foil, the corned beef is ready for baking.

    Bake the corned beef for 1½ hours, then remove the pan from the oven. Carefully open the foil pouch, and place carrots, onion wedges and whole, unpeeled red potatoes around the edges of the corned beef. Seal the pouch back up, and cook for 30 more minutes.

    Red potatoes, baby carrots and onion wedges are place around the corned beef.

    Remove the pouch from the oven again, and add the 4 quartered pieces of cabbage around the edges of the corned beef. Re-seal the foil pouch, and place it back in the oven. Bake for another 1½ hours, or until the corned beef has an internal temperature of of 145°F.

    Remove the corned beef and cabbage from the oven, carefully turn the corned beef over so the meat side is UP, and then let it rest for 5 minutes before slicing.

    Cabbage quarters are added to the corned beef and it is baked more.The corned beef and cabbage is fully baked and ready to serve.

    Serving The Corned Beef And Cabbage

    After the meat has rested 5 minutes, slice the meat (fat side down), and serve with the carrots, potatoes, and onions on the side. You can cut the cabbage wedges in half (for 6+ servings), if desired, or serve the whole quarter piece (for 4 servings).

    Spoon some of the accumulated juices over the meat and vegetables, for extra flavor. Season the veggies to taste with salt and pepper.

    And there you have it… a simple meal in honor of St. Patrick’s Day… corned beef and cabbage. Hope you enjoy it!

    Slices of the corned beef are ready for serving.Corned beef and cabbage served with potatoes, onions and carrots.

    I hope you have the opportunity to make corned beef and cabbage some day. It’s fun to celebrate the St. Patrick’s Day holiday with traditional Irish foods.

    Why not start the meal of with a delicious appetizer? Guinness Baked Cheese Dip is a great place to start! Next, serve the corned beef and cabbage with delicious Irish Colcannon With Bacon and slices of warm Irish Soda Bread on the side.

    While you’re at it, what would a good feast be without dessert? Finish off your Irish dinner with easy, decadent Irish Chocolate Pots de Creme for a delectable, sweet treat!

    Thanks for stopping by. I hope you enjoy this recipe, and trust you will come back soon for more family recipes. Have a GREAT day!

    Want More Recipes? Get My FREE Newsletter!

    I publish a newsletter 2 times per month (1st and 15th) with lots of recipes, tips, etc..
    Would you like to join our growing list of subscribers?

    There is a Newsletter subscription box on the top right (or bottom) of each blog post, depending on the device you use.
    You can submit your e-mail address there, to be added to my mailing list.

    Find Me On Social Media:

    Facebook page: The Grateful Girl Cooks!
    Pinterest:
    The Grateful Girl Cooks!
    Instagram:
    jbatthegratefulgirlcooks

    Author's signature

    Recipe adapted from: a store-bought bag of corned beef

    ↓↓ PRINTABLE RECIPE BELOW ↓↓

    0 from 0 votes
    Corned Beef And Cabbage
    Prep Time
    15 mins
    Cook Time
    3 hrs 30 mins
    Total Time
    3 hrs 45 mins
     

    What's more Irish than Corned Beef and Cabbage? Baked with cabbage, red potatoes, carrots and onions, this St. Patrick's Day meal is yummy!

    Category: Main Course
    Cuisine: Irish
    Keyword: corned beef and cabbage, St. Patrick's Day
    Servings: 6
    Calories Per Serving: 647 kcal
    Author: JB @ The Grateful Girl Cooks!
    Ingredients
    • 3 pounds packaged corned beef (+ spice packet) (see note below)
    • 6 medium red potatoes , do not peel
    • 20 baby carrots , or 3 large peeled carrots-cut into 2" chunks
    • 1 large yellow onion
    • 1 medium green cabbage , cut into quarters
    Instructions
    1. Preheat oven to 300°F.

    2. Place corned beef on aluminum foil inside of a large baking dish (9" x13" works well). Sprinkle meat with contents of spice packet (or substitute 1 T. pickling spice). NOTE: meat is cooked fat side up. It is fairly common to sprinkle spices on the fat side, however I prefer it sprinkled on the meat side. It's your choice. Place seasoned meat on foil, fat side UP; seal foil packet tightly. Place baking dish on middle rack of oven. 

    3. Bake for 1½ hours, then remove from oven. Carefully open foil pouch; place carrots, onions and potatoes around the outer edges of the corned beef. Seal the pouch, and cook for 30 more minutes. Remove baking dish again; add cabbage wedges around the corned beef. Re-seal foil; place dish back in oven. Bake for 1½ hours, or until corned beef has reached an internal temperature of 145°F. Remove dish from oven; turn corned beef over so meat side is UP; let meat rest 5 minutes before slicing.

    4. Slice corned beef (fat side down); serve with carrots, potatoes, onions, and cabbage on the side. *Cut cabbage wedges in half (for 6+ servings), or serve the whole quarter piece (for 4 servings). Spoon accumulated juices in foil packet over the meat and vegetables, for extra flavor. Season veggies to taste with salt and pepper. Enjoy!

    Recipe Notes

    NOTE: If corned beef did not come with a spice packet, use 1 Tablespoon of pickling spice as a substitute.

    Nutrition Facts
    Corned Beef And Cabbage
    Amount Per Serving (1 (1/6 of total))
    Calories 647 Calories from Fat 306
    % Daily Value*
    Fat 34g52%
    Saturated Fat 11g69%
    Cholesterol 122mg41%
    Sodium 2829mg123%
    Potassium 1947mg56%
    Carbohydrates 46g15%
    Fiber 8g33%
    Sugar 9g10%
    Protein 40g80%
    Vitamin A 721IU14%
    Vitamin C 137mg166%
    Calcium 105mg11%
    Iron 6mg33%
    * Percent Daily Values are based on a 2000 calorie diet.

    Here’s one more to pin on your Pinterest boards!What's more Irish than Corned Beef and Cabbage? Baked with cabbage, red potatoes, carrots and onions, this St. Patrick's Day meal is yummy!

    Merry Christmas 2020

    Merry Christmas 2020. It’s been quite an unexpected, interesting year, hasn’t it? Whew. As this year draws to a close, I want to say “thank you” for your encouragement, e-mails, and visits to this blog. I hope you’ve found lots of delicious recipes to prepare for yourself and those you love. They have been fun, and my great honor to share with you!

    Merry Christmas greeting from our home to yours.

    I will be taking a couple weeks off to enjoy the holiday (and take a break), then look forward to sharing some wonderful and delicious recipes with you in the New Year! In the meantime, if you’re looking for great recipes, be sure to check out my Recipe Index, because it has over 850 categorized recipes I’m confident you will enjoy. 

    Merry Christmas, and Happy New Year from our home in Oregon to yours. May God bless you and keep you, make His face shine upon you, and give you PEACE.

    Author's signature

    Brown Sugar Glazed Ham

    Brown Sugar Glazed Ham is perfect for dinners or holiday feasts! A honey, brown sugar, OJ and spice glaze coats the ham (boneless or bone-in).Brown Sugar Glazed Ham is perfect for dinners or holiday feasts! A honey, brown sugar, OJ and spice glaze coats the ham (boneless or bone-in).

    My husband LOVES ham! We don’t have it that much during the year, but wow, does he ever love it at Christmas time and at Easter. In the past we’ve bought pre-glazed hams (at Honey-Baked using gift certificates).

    We’ve also bought hams at the grocery that come with the cute little glaze package attached (where all you add is water).

    Those are all wonderful options, but truthfully, it is sooo easy to make your own homemade brown sugar glazed ham. Today I will show you how you can make your own sauce to baste your holiday ham.

    The “recipe” is incredibly simple, and the ham tastes wonderful after being fully glazed at 3 different points during the baking time.

    The recipe as written is for a six pound ham, but can be easily adapted for a much larger one, too! Here’s how easy it is to make this delicious glazed ham:

    Scroll Down For A Printable Recipe Card At The Bottom Of The Page

    Make The Brown Sugar Glaze

    Simple, simple, simple. The sweet glaze is super easy to make! Basically it involves placing the ingredients in a pan and cooking for a couple minutes. That’s it!

    Place brown sugar, orange juice, honey, white vinegar, mustard, onion powder, garlic powder and cinnamon in a medium saucepan. Whisk the ingredients together. Once combined, bring the sauce to a simmer on medium-low heat.

    Let it cook for about 2 minutes (stirring occasionally) or until the sauce has slightly thickened, then remove the pan from the heat source.

    Brown sugar, OJ, honey & spices are combined in saucepan to cook the glaze.The brown sugar glaze is cooked for 1-2 minutes until it thickens slightly.

    Time To Glaze The Ham – Glaze #1

    TIP: Take the ham out of the refrigerator about an hour before beginning, so some of the “chill” can be take off the meat. *It will cook more evenly if you do this.

    Lay two large pieces of aluminum foil on counter (overlapping slightly in middle). Place your ham right in the middle of the foil. Use 1/3 of the brown sugar glaze to cover the entire outside surface of the ham.

    If you are using a spiral sliced ham, let some of the glaze drizzle down between slices, if desired. Wrap up the ham tightly with the aluminum foil, until it is well sealed.

    Place the ham in a large baking dish, flat side of the ham facing down in the dish, then place the dish into a preheated 325°F oven (on a middle rack).

    A ham is place on aluminum foil, then coated with brown sugar glaze.Aluminum foil tightly seals the brown sugar glazed ham for baking.

    Baking The Brown Sugar Glazed Ham – Glaze #2

    Bake the brown sugar glazed ham at 325°F for 15 minutes for every pound of meat you are cooking, OR until the internal temperature of the ham reaches 100-110°F. For example, this 6 pound ham was cooked for 90 minutes. As the weight of your ham may vary, it is important to follow these guidelines to ensure a juicy ham!

    Remove the ham from the oven, but TURN up the oven temperature to 400°F, as you remove it. Carefully open the foil wrap, and brush the ham with another 1/3 of the brown sugar glaze all over. Place the ham STILL UNCOVERED back into the now 400°F oven. Cook for 15-20 minutes more. Keeping it uncovered will help the sugar to slightly caramelize on the ham.

    Glaze # 3- The Final Glaze

    Remove the ham from the oven after 15-20 minutes OR when the internal temperature reaches 160°F. Brush the remaining glaze over the surface of the ham, then tightly seal the foil back up, and let the ham rest for 10 minutes (covered), before slicing.

    The ham’s internal juices will redistribute throughout the meat during this 10 minute “resting” time. This will help it to stay juicy when serving. Once “rested”, the ham is ready to slice and eat.

    After baking, another coating of glaze is applied to the ham, then cooked longer.Final glaze is applied to ham after baking, then it rests to redistribute internal juices.

    Ready To Eat

    Slice the ham and serve to your hungry family or guests. This boneless brown sugar glazed ham sliced easily, the meat was fully cooked and juicy, and the glaze added extra flavor!

    Boneless brown sugar glazed ham is sliced for serving.

    You can also use this glaze for your spiral-sliced bone-in hams, too. The simple, but sweet glaze adds a wonderful layer of extra flavor to any ham.

    A spiral-sliced ham can also be used for this recipe.

    We enjoyed our delicious ham slices with French-style green beans and maple cinnamon sweet potatoes. It was a simple, but absolutely delicious meal.

    The ham leftovers were pretty incredible too, and were used to make ham and cheese scrambled eggs, ham sandwiches, and more. YUM.

    Green beans and a sweet potato are served with a brown sugar glazed ham slice.

    I hope you will consider trying this simple brown sugar glazed ham. I’m confident you will enjoy it on your favorite variety of ham.

    Thank you so much for visiting this blog. May God bless and keep you, and make His face shine upon you. Have a GREAT day, friends.

    Looking For More HAM Recipes?

    You can find my recipes that use ham (or pork) in the Recipe Index, located at the top of the page. I have some delicious recipes, including:

    Want More Recipes? Get My FREE Newsletter!

    I publish a newsletter 2 times per month (1st and 15th) with lots of recipes, tips, etc..
    Would you like to join our growing list of subscribers?

    There is a Newsletter subscription box on the top right (or bottom) of each blog post, depending on the device you use.
    You can submit your e-mail address there, to be added to my mailing list.

    Find Me On Social Media:

    Facebook page: The Grateful Girl Cooks!
    Pinterest:
    The Grateful Girl Cooks!
    Instagram:
    jbatthegratefulgirlcooks

    Author's signature

    Recipe adapted from: Melissa, at: https://www.blessthismessplease.com/brown-sugar-glazed-ham/

    ↓↓ PRINTABLE RECIPE BELOW ↓↓

    0 from 0 votes
    Brown Sugar Glazed Ham
    Prep Time
    5 mins
    Cook Time
    1 hr 45 mins
    Total Time
    1 hr 50 mins
     

    Brown Sugar Glazed Ham is perfect for dinners or holiday feasts! A honey, brown sugar, OJ and spice glaze coats the ham (boneless or bone-in).

    Category: Entree
    Cuisine: American
    Keyword: brown sugar glazed ham
    Servings: 12
    Calories Per Serving: 598 kcal
    Author: JB @ The Grateful Girl Cooks!
    Ingredients
    • 6 pound ham (bone-in or boneless) pre-cooked (intact or spiral cut)
    • ½ cup dark brown sugar (firmly packed)
    • ¼ cup orange juice
    • 1 Tablespoon white vinegar
    • 1 Tablespoon yellow mustard
    • Tablespoons honey
    • teaspoon ground cinnamon
    • 1 pinch nutmeg
    • ¼ teaspoon garlic powder
    • ¼ teaspoon onion powder
    Instructions
    1. Remove ham from fridge 1 hour before beginning, to take chill off. Preheat oven to 325°F.

    2. Place remaining ingredients in a medium saucepan. Whisk together, to combine, and bring to a simmer on medium-low heat. Cook for 2 minutes (stirring occasionally) or until sauce has slightly thickened. Remove pan from heat source.

    3. Lay two large pieces of aluminum foil on counter (overlapping slightly in middle). Place ham in middle of the foil. Brush 1/3 of the brown sugar glaze on, to cover surface of ham. If using spiral sliced ham, let glaze drizzle down between slices. Wrap ham with foil, until well sealed. Place ham in a large baking dish, flat side down. Place dish on middle rack in 325°F oven.

    4. Bake at 325°F for 15 minutes for every pound of meat you are cooking, OR until the internal temperature of the ham reaches 100-110°F. As ham weights vary, it is important to follow these guidelines to ensure juicy ham! Remove ham from oven, and TURN up oven temperature to 400°F. Carefully open foil, and pull it slightly away from the meat (but leave it in pan); brush ham with another 1/3 of the brown sugar glaze. 

    5. Place ham (STILL UNCOVERED) back into 400°F oven. Cook 15-20 minutes more. Remove ham after 15-20 minutes OR when the internal temperature reaches 160°F. Brush ham with remaining 1/3 glaze; seal the foil back up, and let ham rest for 10 minutes (covered), before slicing to allow juices to redistribute through meat. Once "rested", it's ready to slice and serve.

    Nutrition Facts
    Brown Sugar Glazed Ham
    Amount Per Serving (1 (8 ounce slice))
    Calories 598 Calories from Fat 342
    % Daily Value*
    Fat 38g58%
    Saturated Fat 14g88%
    Cholesterol 141mg47%
    Sodium 2709mg118%
    Potassium 671mg19%
    Carbohydrates 12g4%
    Fiber 1g4%
    Sugar 12g13%
    Protein 49g98%
    Vitamin A 10IU0%
    Vitamin C 3mg4%
    Calcium 23mg2%
    Iron 2mg11%
    * Percent Daily Values are based on a 2000 calorie diet.

    Here’s one more to pin on your Pinterest boards!Brown Sugar Glazed Ham is perfect for dinners or holiday feasts! A honey, brown sugar, OJ and spice glaze coats the ham (boneless or bone-in).

    Cranberry Orange Bread

    Make a large, delicious loaf of Cranberry Orange Bread! You’ll love this EASY recipe which is perfect for snacking, holidays, or gift-giving!Make a large, delicious loaf of Cranberry Orange Bread! You'll love this EASY recipe which is perfect for snacking, holidays, or gift-giving!

    Do you like the flavor combination of cranberries and oranges? I sure do! In the past I’ve posted recipes here using cranberry-orange flavor palettes for cake, scones, and muffins.

    I’ve even used the cranberry-orange combo for saladsIsraeli couscous, bagels, sauce and cookies, but realized I’ve never posted my tried and true recipe for simple, easy cranberry orange BREAD. No glazes, icings, etc. to complicate it… just sweet, delicious cranberry orange bread. YUMMO.

    This recipe is SO EASY to make! The prep time is very minimal, and then into a hot oven a pan full of batter goes, only to re-appear as a golden loaf of amazing tasting bread!

    Cranberry Orange Bread is a yummy treat you will enjoy for breakfast, snacking, OR giving lovingly to a dear friend or family member over the holidays! Here’s how easy it is to make:

    Scroll Down For A Printable Recipe Card At The Bottom Of The Page

    Prepare The  Batter

    Before beginning, preheat your oven to 350°F. Whisk (or stir) together flour, granulated sugar, baking powder, salt and baking soda in a large mixing bowl, until combined.

    Add one egg (lightly beaten), orange juice, orange zest, and vegetable shortening to the flour mixture. 

    The dry ingredients are whisked together in a large bowl until combined.Egg, orange juice, orange zest and shortening are added to dry ingredients.

    Use an electric mixer to fully combine these ingredients together, then remove the beaters.

    Once mixed, STIR in finely chopped cranberries and nuts (walnuts or pecans). Stir only until all ingredients have been incorporated into the batter.

    Wet and dry ingredients are mixed together to form batter for the bread.Finely chopped cranberries and pecans are added to the bread batter.After stirring, the cranberry orange bread batter is ready for a baking pan.

    Bake The Cranberry Orange Bread

    Now that the batter for the cranberry orange bread is ready, it’s time to bake! Grease or spray the bottom only of a 9×5 inch bread pan.

    Transfer the batter into the prepared bread pan, evenly distributing the batter. Place the pan on the middle rack of a preheated oven.

    Time to bake the cranberry orange bread.

    Bake at 350°F for 50-55 minutes, or until a toothpick inserted into the top of the loaf comes out clean.

    Oven temperatures tend to vary quite a bit, so I recommend checking the bread at the 50 minute mark, just to make sure you don’t over-cook it.

    Removing The Bread From The Pan

    When done, the top should be beautiful and golden brown, and a toothpick will come out CLEAN. Transfer the pan to a wire rack, and let cool for about 10 minutes, before attempting to remove it from the pan.

    After it cools, gently slide a butter knife around the edges of the bread to loosen it from the pan.

    Place a platter on top of the bread pan. Quickly turn the loaf upside down, and tap on the bottom of the pan until the bread releases. If it doesn’t immediately release, turn it back over, re-do the sides with the butter knife, and let it cool a few more minutes.

    Carefully place the loaf back onto a wire rack to finish cooling after removing it from the pan.

    When done, the cranberry orange bread is golden brown on top.A side view of the finished loaf of bread while cooling on wire rack.

    Cool, Slice, And Eat!

    Let the cranberry orange bread cool for awhile before slicing. This will ensure a nicely cut slice! You can eat the bread warm with a dab of butter if desired. We enjoy this bread the most when served at room temperature, but it’s most certainly YOUR choice.

    However you choose to eat it, either still warm or at room temperature… it really is delicious! The cranberry orange flavor is wonderful, and I am confident you will like it! The bread also freezes well, if wrapped very well!

    Two slices of cranberry orange bread and remaining loaf on a white plate.

    Thank you so much for stopping by. I am grateful you took some of your precious time and spent it here. Hopefully you will have the opportunity to try this delicious bread for yourself, or can make a loaf for someone you love.

    Please come back again soon for more family-friendly recipes! Have a great day, and may God bless you.

    Looking For More “SWEET” BREAD Recipes?

    You can find all of my bread recipes (sweetened and savory) in the Recipe Index, located at the top of the page. I have quite a few “sweet” bread recipes, including:

    Want More Recipes? Get My FREE Newsletter!

    I publish a newsletter 2 times per month (1st and 15th) with lots of recipes, tips, etc..
    Would you like to join our growing list of subscribers?

    There is a Newsletter subscription box on the top right (or bottom) of each blog post, depending on the device you use.
    You can submit your e-mail address there, to be added to my mailing list.

    Find Me On Social Media:

    Facebook page: The Grateful Girl Cooks!
    Pinterest:
    The Grateful Girl Cooks!
    Instagram:
    jbatthegratefulgirlcooks

    Author's signatureOriginal recipe source: unknown (written on an index card I’ve had for over 30 years)

    ↓↓ PRINTABLE RECIPE BELOW ↓↓

    0 from 0 votes
    Cranberry Orange Bread
    Prep Time
    10 mins
    Cook Time
    50 mins
    Total Time
    1 hr
     

    Make a large, delicious loaf of Cranberry Orange Bread! You'll love this EASY recipe which is perfect for snacking, holidays, or gift-giving!

    Category: Bread/Breakfast, Snack
    Cuisine: American
    Keyword: cranberry orange bread
    Servings: 9
    Calories Per Serving: 278 kcal
    Author: JB @ The Grateful Girl Cooks!
    Ingredients
    • 2 cups all purpose flour
    • 1 cup granulated sugar
    • teaspoons baking powder
    • 1 teaspoon salt
    • ½ teaspoon baking soda
    • ¾ cup orange juice
    • 1 large egg , lightly beaten
    • 2 Tablespoons vegetable shortening
    • 1 Tablespoon orange zest , finely grated orange peel
    • 1 cup cranberries , finely chopped
    • ½ cup walnuts or pecans , finely chopped
    Instructions
    1. Preheat oven to 350°F. Grease or spray the bottom only of a 9x5 inch bread pan.

    2. Whisk (or stir) flour, sugar, baking powder, salt and baking soda in a large bowl, until combined. Add egg (lightly beaten), orange juice, orange zest, and vegetable shortening to flour mixture. Use an electric mixer to mix ingredients together. STIR in cranberries and nuts. Stir only until all ingredients have been incorporated into batter. Transfer batter into prepared pan, evenly distributing batter. Place pan on middle rack in preheated oven.

    3. Bake at 350°F for 50-55 minutes, or until a toothpick inserted into the top of loaf comes out clean. I recommend checking the bread at 50 minutes, to make sure you don't over-cook it.

    4. When done, the top should be golden brown, and a toothpick has come out CLEAN. Transfer pan to a wire rack; let cool for 10 minutes, before attempting to remove bread from pan. After it cools, slide a butter knife around edges of the bread to loosen it from pan. Place a platter on top of the bread pan. Holding both platter and bread pan carefully turn loaf upside down; tap on bottom of pan until bread releases. If it doesn't immediately release, turn it back over, re-do sides with butter knife, and let cool 3-4 more minutes. Carefully place loaf on wire rack to finish cooling after removing it from pan. Let cool, slice and enjoy warm, or at room temperature.

    Recipe Notes

    Caloric calculation made using pecans.

    Nutrition Facts
    Cranberry Orange Bread
    Amount Per Serving (1 g)
    Calories 278 Calories from Fat 72
    % Daily Value*
    Fat 8g12%
    Saturated Fat 1g6%
    Cholesterol 21mg7%
    Sodium 329mg14%
    Potassium 184mg5%
    Carbohydrates 48g16%
    Fiber 2g8%
    Sugar 25g28%
    Protein 5g10%
    Vitamin A 78IU2%
    Vitamin C 13mg16%
    Calcium 45mg5%
    Iron 2mg11%
    * Percent Daily Values are based on a 2000 calorie diet.

    Here’s one more to pin on your Pinterest boards!Make a large, delicious loaf of Cranberry Orange Bread! You'll love this EASY recipe which is perfect for snacking, holidays, or gift-giving!


    Awesome Pecan Pie

    Ready for the holidays? Why not bake an awesome pecan pie from scratch? This pie is absolutely delicious, and it’s very simple to make.
    Ready for the holidays? Why not bake an awesome pecan pie from scratch? This pie is absolutely delicious, and it's very simple to make. My husband absolutely LOVES pecan pie. For many, many years I have made pecan pies, using the recipe found on the bottle of corn syrup (one of the ingredients).

    All that has changed now, ever since I began making awesome pecan pie using another recipe. It’s a total KEEPER, and I want to share the recipe here with you today, and show you how to make it.

    One of the unique things about this recipe that sets it apart is in its use of pecans. The recipe calls for finely chopped pecans, quartered pecans, and whole pecan halves used to decorate the top of this delicious pie.

    This is also a vey easy pie to make. The flaky buttery crust, as written in the recipe is fantastic, but if really pressed for time, you could always use a pie dough shell. Let me show you how to make an awesome pecan pie!

    Scroll Down For A Printable Recipe Card At The Bottom Of The Page

    Make The Pie Crust

    Measure all purpose flour, granulated sugar and salt into a large mixing bowl. Use a pastry cutter to “cut” chunks of very cold butter into the flour mixture. Do this until the butter has been “cut” into the crumbs (and becomes about the size of peas).

    Sprinkle the dough with ice water, and stir until the pastry dough is bound together enough to form a dough ball.

    Tip: You can also do this step in a food processor, if desired. Pulse cold butter chunks into flour mixture until butter is the size of peas. Drizzle in cold water while machine is running, until dough ball is formed.

    Place the dough ball on a lightly floured work surface. Roll the dough out until it becomes a circle that is at least an inch larger than the pie pan you will be using.

    Carefully transfer the pie crust to the pie pan (I fold the dough circle in half, then lift it up and place it into the pie pan). PLACE THE PIE CRUST IN YOUR REFRIGERATOR TO KEEP IT COLD WHILE YOU MAKE THE FILLING!

    Butter is cut into pie crust ingredients, and then a ball of dough is formed.Pie crust is rolled out, then put in pie pan, leaving crust overhanging the sides.

    Make The Awesome Pecan Pie Filling

    Now it’s time to make the pie filling. The ingredients for the filling are eggs, light and dark corn syrup, butter, brown sugar, a pinch of salt, and finely chopped pecans.

    Whisk or stir these ingredients together in a medium sized mixing bowl until they are fully combined. I usually whisk the eggs lightly, then stir in the rest!

    The pie filling ingredients are whisked together before adding to the crust.

    Fill The Pie

    Use the tines of a fork to puncture the crust dough in several places on the bottom and sides. This helps to prevent air pockets from forming.

    Add the quartered pecans to the crust, spreading them in a single layer, to cover the bottom as much as possible.

    Pie crust is pierced with fork tines, then quartered pecans are added.Carefully pour the pie filling over the quartered pecans in the pie crust. Once the filling is in, decoratively arrange the remaining pecan halves over the top of the pie.

    I start by going around the edge, and then work my way into the center with the pecan halves. They will lay right on top of the filling.
    The pie filling is poured into crust, and then topped with pecan halves.

    Bake Your Awesome Pecan Pie

    The last thing you will need to do is trim off any excess dough, then crimp the edges of your pie crust decoratively. Once that’s done, place the pie on the middle rack of a preheated 350°F oven.

    Bake the pie for 1 hour, or until firm and nicely browned. The crust should be golden and flaky when done.

    Pecans decorate the top of the pie before it is baked.The top of the awesome pecan pie is golden browned after baking.

    Time For A Slice Of Pecan Pie!

    Once the pie has cooled (for about an hour), it is ready to serve (it slices better, too!). We actually prefer it served at room temperature.

    If you want, you can serve it warm with a tiny scoop of vanilla ice cream! The pie is rich and sweet, so we “usually” eat it without ice cream.

    Once cooled, the pie can be easily sliced into 12 thin wedges and transferred to individual plates, for serving. Grab a fork, and dig in. I really think you will LOVE this awesome pecan pie!

    Taking a peek at the inside of the finished pecan pie.A slice of awesome pecan pie, with a scoop of ice cream on the side.

    I really hope you enjoy this awesome pecan pie! We absolutely LOVE it, and trust you will find it delicious, too! Thank you for stopping by today. I hope you will come back soon.

    Looking For More PIE Recipes?

    You can find all my pie recipes in the Recipe Index, located at the top of the page. I have quite a few, including:

    Want More Recipes? Get My FREE Newsletter!

    I publish a newsletter 2 times per month (1st and 15th) with lots of recipes, tips, etc..
    Would you like to join our growing list of subscribers?

    There is a Newsletter subscription box on the top right (or bottom) of each blog post, depending on the device you use.
    You can submit your e-mail address there, to be added to my mailing list.

    Find Me On Social Media:

    Facebook page: The Grateful Girl Cooks!
    Pinterest:
    The Grateful Girl Cooks!
    Instagram:
    jbatthegratefulgirlcooks

    Author's signature

    Original recipe source: allrecipes.com/recipe/18433/irresistible-pecan-pie/

    ↓↓ PRINTABLE RECIPE BELOW ↓↓

    0 from 0 votes
    Awesome Pecan Pie
    Prep Time
    30 mins
    Cook Time
    1 hr
    Total Time
    1 hr 30 mins
     

    Ready for the holidays? Why not bake an awesome pecan pie from scratch? This pie is absolutely delicious, and it's very simple to make.

    Category: Dessert
    Cuisine: American
    Keyword: awesome pecan pie
    Servings: 12
    Calories Per Serving: 444 kcal
    Author: JB @ The Grateful Girl Cooks!
    Ingredients
    For Crust:
    • cups all purpose flour
    • 2 Tablespoons granulated sugar
    • ½ teaspoon salt
    • ½ cup butter (1 stick) , very cold & cut in chunks
    • 4 Tablespoons ice water
    For Pie Filling:
    • 3 large eggs
    • ¾ cup light corn syrup
    • 2 Tablespoons dark corn syrup
    • ¾ cup light brown sugar
    • 3 Tablespoons butter , melted
    • 1 pinch salt
    • ½ cup pecans, finely chopped
    • 1 cup pecan halves, quartered (each half cut in 4 pcs.)
    • 1 cup pecan halves
    Instructions
    1. Preheat oven to 350°F.

    2. Make The Crust: Mix flour, sugar and salt in a medium mixing bowl. Cut chunks of cold butter into flour mixture, using two forks or a pastry blender. Continue until butter has been reduced to about the size of peas). Sprinkle dough with ice water, and stir well until the pastry dough is bound together enough to form a dough ball. Tip: You can also do this step in a food processor, if desired. Pulse cold butter chunks into flour mixture until butter is the size of peas. Drizzle in cold water while machine is running, until dough ball is formed.

      Place dough ball on floured work surface. Roll out until it becomes a circle an inch larger than the pie pan. Transfer crust to pan (fold circle in half, lift it up, place it in pie pan, unfold). PLACE PIE CRUST (IN PAN) INTO REFRIGERATOR TO KEEP IT COLD WHILE YOU MAKE THE PIE FILLING!

    3. Make The Filling: Whisk/stir eggs, light and dark corn syrups, melted butter, brown sugar, salt, and finely chopped pecans in medium mixing bowl until fully combined.

    4. Remove crust from refrigerator. Use fork tines to pierce crust in several places (bottom and sides). Spread quartered pecans on bottom of crust in a single layer. Pour pie filling evenly over the quartered pecans. Decoratively arrange remaining pecan halves over the top. Trim excess dough and crimp edges of pie crust.

    5. Bake pie at 350°F (on the middle rack of oven) for 1 hour, or until firm/nicely browned on top. Crust should be golden/flaky. Let pie cool for an hour, before slicing and serving. Enjoy!

    Nutrition Facts
    Awesome Pecan Pie
    Amount Per Serving (1 slice (1/12th of total))
    Calories 444 Calories from Fat 243
    % Daily Value*
    Fat 27g42%
    Saturated Fat 8g50%
    Cholesterol 74mg25%
    Sodium 233mg10%
    Potassium 139mg4%
    Carbohydrates 50g17%
    Fiber 2g8%
    Sugar 35g39%
    Protein 5g10%
    Vitamin A 401IU8%
    Vitamin C 1mg1%
    Calcium 41mg4%
    Iron 2mg11%
    * Percent Daily Values are based on a 2000 calorie diet.

    Here’s one more to pin on your Pinterest boards!

    Ready for the holidays? Why not bake an awesome pecan pie from scratch? This pie is absolutely delicious, and it's very simple to make.

    Frosted Pumpkin Bars

    Frosted Pumpkin Bars are easy-to-make delicious treats, with cream cheese frosting, cinnamon, ginger and cloves, for a true taste of FALL!
    Frosted Pumpkin Bars are easy-to-make delicious treats, with cream cheese frosting, cinnamon, ginger and cloves, for a true taste of FALL!

    I can’t say enough great things about these yummy pumpkin bars. They’re SO GOOD. I’ve made them for many years (over 20), since my good friend Carla gave me her recipe way back in October, 1999. This year I realized I hadn’t ever posted the recipe on my blog, so I whipped up another batch a few weeks ago, and took photos as I made them.

    Our oldest son was staying with us for just over a week, because of the horrible Oregon wildfires and hazardous smoke that saturated our area. We have air conditioning/air filtering, and since he lived right at the evacuation zone, it was “easier for him to breathe” here. We were glad to have him here, so he could enjoy his “Mom’s cooking”, AND gobble up several of these frosted pumpkin bars.

    They are ALWAYS a huge hit (especially this time of year), and are incredibly simple to prepare. Today I want to share the recipe with you, so you can enjoy them, too! Here’s how to make 16 frosted pumpkin bars:

    SCROLL DOWN FOR A PRINTABLE RECIPE CARD AT THE BOTTOM OF THIS PAGE

    Prepare The Batter

    In a large bowl, beat softened butter for about 30 seconds until creamy. Add granulated sugar, and beat until the mixture is rather “fluffy” (about 2-3 minutes). Add pumpkin puree (NOT pumpkin pie filling), an egg, and vanilla extract to the bowl. Beat well, until fully incorporated. These are your “wet” ingredients for the pumpkin bars.

    Butter is beaten until creamy, then sugar is added.Pumpkin puree, egg, and vanilla are added to creamed butter mixture.The pumpkin batter of wet ingredients, after being mixed together

    In a separate medium-sized bowl, whisk together the dry ingredients. This dry ingredient mixture includes flour, baking soda, salt, cinnamon, ginger and cloves. Add the dry ingredients to the wet ingredients, and beat until the ingredients are fully blended together. Now your batter for the frosted pumpkin bars is complete. Time to bake!

    Flour, cinnamon and other spices are whisked together for dry ingredients.The dry ingredients are added to the wet pumpkin ingredients and mixed together.

    Time To Bake!

    Evenly spread the pumpkin batter in an 8″x8″ greased or sprayed baking dish (bottom and sides). Bake the bars at 350°F for about 20-25 minutes. You will know the bars are done when a toothpick inserted into the top center comes out clean.

    Once done, remove the pan from the oven, and place it on a wire rack to let the pumpkin bars cool. Let the bars FULLY cool before attempting to frost them! Trust me on this – if you try to frost them too soon, the heat will melt the butter and cream cheese in the frosting, which is not good. Just be patient and WAIT.

    Batter for frosted pumpkin bars is spread in a greased 8x8" pan for baking.A pan of pumpkin bars, cooling on wire rack after baking.

    Make The Frosting For The Pumpkin Bars

    While the pumpkin bars are cooling, whip up the cream cheese frosting. In a medium bowl, beat together cream cheese and softened butter until fully combined. Add vanilla extract and powdered sugar to the bowl, then beat on low, until smooth.

    Once the pumpkin bars have TOTALLY COOLED, spread the cream cheese frosting over the top of the bars. Lightly sprinkle the frosting with ground cinnamon. Cover the pan, and place the pan of frosted pumpkin bars in the REFRIGERATOR to chill completely, in order to give the frosting time to firm up slightly.

    Cream cheese frosting is mixed together to frost the pumpkin bars.The pan of frosted pumpkin bars, ready to cut and enjoy!

    Let’s Eat Some Frosted Pumpkin Bars!

    After the frosting has chilled and had time to firm up a bit, slice the bars into 16 portions, and serve. Get ready to enjoy a yummy treat! The bars are filled with the flavors of Fall, thanks to the wonderful “warm” spices of cinnamon, cloves, and ginger.

    YUM… they are soooo good. And the simple cream cheese frosting – don’t even get me started on that, cause I could eat it with a spoon! Store any uneaten frosted pumpkin bars, covered, in the refrigerator for up to 5 days, IF they last that long.

    Long platter of stacked, frosted pumpkin bars, ready to enjoy!Delicious frosted pumpkin bars, ready to eat!

    I really hope you will have the opportunity to try these absolutely delicious frosted pumpkin bars! They are a wonderful tasting dessert your family and friends will love. If you enjoy these pumpkin bars, be sure to check out my recipe for a pumpkin cream cheese roll! It’s a delicious and a beautiful dessert, that is perfect for the holidays.

    Thank you for stopping by, and I invite you to come back soon for more family-friendly recipes. Have a GREAT day, and may God bless you.

    Looking For More BAR COOKIE Recipes?

    You can find all of my recipes in the Recipe Index, located at the top of the page. I have quite a few, delicious bar cookie recipes I think you will enjoy, including:

    Interested In More Recipes?

    Thank you for visiting this website. I appreciate you using some of your valuable time to do soIf you’re interested, I publish a newsletter 2 times per month (1st and 15th) with all the latest recipes, and other fun info. I would be honored to have you join our growing list of subscribers, so you never miss a great recipe!
    There is a Newsletter subscription box on the top right side (or bottom) of each blog post, depending on the device you use, where you can easily submit your e-mail address (only) to be included in my mailing list.

    You Can Also Find Me On Social Media:

    Facebook page: The Grateful Girl Cooks!
    Pinterest:
    The Grateful Girl Cooks!
    Instagram:
    jbatthegratefulgirlcooks

    Author's signature

    Original recipe source: my dear friend, Carla Merrill

    0 from 0 votes
    Frosted Pumpkin Bars
    Prep Time
    10 mins
    Cook Time
    20 mins
    Total Time
    30 mins
     

    Frosted Pumpkin Bars are easy-to-make delicious treats, with cream cheese frosting, cinnamon, ginger and cloves, for a true taste of FALL!

    Category: Dessert, Snack
    Cuisine: American
    Keyword: frosted pumpkin bars
    Servings: 16
    Calories Per Serving: 167 kcal
    Author: JB @ The Grateful Girl Cooks!
    Ingredients
    • ¼ cup butter , softened
    • ¾ cup granulated sugar
    • 1 large egg
    • ¾ cup canned pumpkin puree , NOT pumpkin pie filling
    • 1 teaspoon vanilla extract
    • cups all purpose flour
    • 1 teaspoon ground cinnamon
    • ½ teaspoon baking soda
    • ½ teaspoon salt
    • ½ teaspoon ground ginger
    • ¼ teaspoon ground cloves
    For Frosting:
    • ounces cream cheese (light)
    • ¼ cup butter , softened
    • 1 cup powdered sugar
    • ½ teaspoon vanilla extract
    Instructions
    1. In a large bowl, use an electric mixer to beat softened butter for 30 seconds until creamy. Add granulated sugar; beat until mixture is "fluffy" (2-3 minutes). Add pumpkin puree, egg, and vanilla. Beat well, until fully incorporated.

    2. In a separate bowl, whisk together flour, baking soda, salt, cinnamon, ginger and cloves. Add to the wet ingredients, and beat until fully blended. Spread batter in an 8"x8" greased or sprayed baking dish (grease bottom and sides).

    3. Bake at 350°F for about 20-25 minutes. Bars are done when a toothpick inserted into the top center comes out clean. Remove pan from oven; place pan on wire rack. Let bars fully cool before attempting to frost them!

    Make Cream Cheese Frosting While Bars Cool:
    1. Beat cream cheese and softened butter in a medium bowl until fully combined. Add vanilla extract and powdered sugar; beat until smooth. Once pumpkin bars have TOTALLY COOLED, spread frosting evenly on bars. Lightly sprinkle with cinnamon. Cover pan, and place frosted pumpkin bars in the REFRIGERATOR to chill completely.

    2. Once frosting firms up and bars have chilled, they are ready to serve. Slice into 16 bars, serve, and enjoy! Store leftovers, covered in refrigerator, for up to 5 days.

    Nutrition Facts
    Frosted Pumpkin Bars
    Amount Per Serving (1 pumpkin bar)
    Calories 167 Calories from Fat 63
    % Daily Value*
    Fat 7g11%
    Saturated Fat 4g25%
    Cholesterol 28mg9%
    Sodium 176mg8%
    Potassium 45mg1%
    Carbohydrates 26g9%
    Fiber 1g4%
    Sugar 17g19%
    Protein 2g4%
    Vitamin A 1996IU40%
    Vitamin C 1mg1%
    Calcium 13mg1%
    Iron 1mg6%
    * Percent Daily Values are based on a 2000 calorie diet.

    Here’s one more to pin on your Pinterest boards!Frosted Pumpkin Bars are easy-to-make delicious treats, with cream cheese frosting, cinnamon, ginger and cloves, for a true taste of FALL!

    Lemon Hazelnut Green Beans

    Lemon Hazelnut Green Beans are a delicious, flavor-filled side dish, and are a perfect choice for either a casual meal or a holiday feast!
    Lemon Hazelnut Green Beans are a delicious, flavor-filled side dish, and are a perfect choice for either a casual meal or a holiday feast!

    I’m always looking for different ways to prepare green beans. Each summer I harvest a bumper crop of them in our little backyard raised garden. I can a lot of them, putting aside 15-20 jars each year in our pantry for the coming Fall and Winter. The rest we enjoy in a variety of different recipes as summer progresses.

    We eat a LOT of green beans in the summer, and this recipe is one I came up with (after experimenting), and have enjoyed ever since. Lemon hazelnut green beans are a simple side dish, but let me tell you… there’s a LOT of flavor to enjoy in every bite. Freshly grated lemon zest adds a pop of fresh, bright flavor, shallots, garlic and red chili flakes give them a bit of zing, and the hazelnuts give the dish CRUNCH.

    Lemon Hazelnut Green Beans are a perfect side for any “average” dinner of beef, chicken, pork or seafood. “These beans plays well with others”, as they say. However, this dish would also be absolutely wonderful served for Thanksgiving, or any other special celebration. Here’s how easy it is to make them:

    Scroll Down For A Printable Recipe Card At The Bottom Of The Page

    How To Make This Veggie Side Dish

    Measure a Tablespoon of extra virgin olive oil into a large skillet, and spread it around to cover the bottom of the skillet. Heat the oil on medium heat. Once hot (but not smoking), add chopped shallots (milder than a red onion). Cook, stirring often for 1-2 minutes.

    TIP: If you do not have access to shallots, use a yellow onion as a substitute (same measurement).

    Chopped shallots are cooked in hot olive oil in a large skillet.

    Cooking The Lemon Hazelnut Green Beans

    Add the green beans and the vegetable (or chicken) broth to the skillet. The liquid will steam and sizzle when it hits the hot skillet. Stir to combine, and let the green beans cook (uncovered) for approximately 10 minutes. When done, the broth should have dissipated, and the beans should be crisp-tender (not mushy).

    NOTE: I recommend using FRESH green beans, without apologies. There’s just something about crisp FRESH green beans for this dish, versus using frozen beans. Just my humble opinion…

    Green beans and vegetable (or chicken) broth are added to the skillet.The green beans are cooked about 10 minutes until broth has dissipated.

    Immediately add minced garlic, red chili flakes, lemon zest, and roughly chopped roasted hazelnuts to the skillet. Give everything a good stir to incorporate all the ingredients.

    TIP: The hazelnuts give the dish a nice crunch, which we really love. Remember- you can always substitute sliced, roasted almonds if hazelnuts are difficult to find in your area. They will add a wonderful crunch, as well!

    Cook for about one minute, stirring OFTEN (so garlic doesn’t burn), until the lemon hazelnut green beans are fully heated through. Season to taste with salt and pepper, if desired. Remove the skillet from the heat source, and transfer green beans to a serving dish.

    Minced garlic, chili flakes, lemon zest and hazelnuts are added to green beans.

    Time To Serve The Lemon Hazelnut Green Beans

    As soon as you remove the lemon hazelnut green beans from the heat, it is time to serve them while HOT! Transfer everything to a serving bowl, and dish it up.** If desired, a simple garnish of a few roasted hazelnuts and some pretty thinly sliced lemon peel looks nice (but is totally optional).

    Lemon Hazelnut Green Beans are garnished and ready to serve.

    The green beans have so much flavor, I’m confident you will enjoy them. The recipe makes enough for 4 side servings, but can be EASILY doubled! The lemon hazelnut green beans pair wonderfully with chicken, beef, pork OR fish, so it’s a versatile side dish for all occasions.

    A look at the Lemon Hazelnut Green Beans, up close in a white bowl.

    I really hope you enjoy this easy, but absolutely DELICIOUS veggie dish. Easy to prepare, and packed with bright flavors, you’re gonna love them. Have a great day, and come back for a visit again soon.

    Looking For More VEGGIE SIDE DISH Recipes?

    You can find ALL of my side dish recipes in the Recipe Index, located at the top of the page. I have quite a few delicious veggie side dishes, including:

    Interested In More Recipes?

    Thank you for visiting this website. I appreciate you using some of your valuable time to do soIf you’re interested, I publish a newsletter 2 times per month (1st and 15th) with all the latest recipes, and other fun info. I would be honored to have you join our growing list of subscribers, so you never miss a great recipe!
    There is a Newsletter subscription box on the top right side (or bottom) of each blog post, depending on the device you use, where you can easily submit your e-mail address (only) to be included in my mailing list.

    You Can Also Find Me On Social Media:

    Facebook page: The Grateful Girl Cooks!
    Pinterest:
    The Grateful Girl Cooks!
    Instagram:
    jbatthegratefulgirlcooks

    Author's signature

    0 from 0 votes
    Lemon Hazelnut Green Beans
    Prep Time
    12 mins
    Cook Time
    13 mins
    Total Time
    25 mins
     

    Lemon Hazelnut Green Beans are a delicious, flavor-filled side dish, and are a perfect choice for either a casual meal or a holiday feast!

    Category: Side Dish, Vegetable Dish
    Cuisine: American
    Keyword: lemon hazelnut green beans
    Servings: 4
    Calories Per Serving: 120 kcal
    Author: JB @ The Grateful Girl Cooks!
    Ingredients
    • 1 Tablespoon extra virgin olive oil
    • 2 Tablespoons chopped shallots
    • 1 pound green beans , trimmed/snapped or cut into 2" pieces
    • ½ cup vegetable OR chicken broth
    • 1 large clove garlic , minced
    • ½ large lemon (ZEST OF) , zest only
    • ¼ teaspoon red chili flakes
    • 3 Tablespoons roughly chopped roasted hazelnuts
    • salt & black pepper , to season to taste
    Instructions
    1. Measure olive oil into a large skillet, and spread around to cover bottom of skillet. Heat on medium heat. Once hot (but not smoking), add chopped shallots. Cook, stirring often for 1-2 minutes.

    2. Add green beans and broth to skillet. Stir to combine; cook (uncovered) for 9-10 minutes. When done, broth should have dissipated, and beans should be crisp-tender.

    3. Immediately add garlic, red chili flakes, lemon zest, and hazelnuts to skillet. Stir, to combine. Cook for one minute, stirring OFTEN (so garlic doesn't burn), until beans are heated through. Season to taste with salt and pepper, if desired. Garnish with additional hazelnuts and thinly sliced lemon peel, if desired. Serve immediately.

      TIP: Substitute sliced, roasted almonds if hazelnuts are difficult to find in your area. Enjoy!

    Nutrition Facts
    Lemon Hazelnut Green Beans
    Amount Per Serving (1 g)
    Calories 120 Calories from Fat 72
    % Daily Value*
    Fat 8g12%
    Saturated Fat 1g6%
    Sodium 10mg0%
    Potassium 307mg9%
    Carbohydrates 11g4%
    Fiber 4g17%
    Sugar 5g6%
    Protein 4g8%
    Vitamin A 820IU16%
    Vitamin C 16mg19%
    Calcium 51mg5%
    Iron 2mg11%
    * Percent Daily Values are based on a 2000 calorie diet.

    Here’s one more to pin on your Pinterest boards!

    Lemon Hazelnut Green Beans are a delicious, flavor-filled side dish, and are a perfect choice for either a casual meal or a holiday feast!

    Candied Sweet Potatoes

    Candied Sweet Potatoes are delicious, and easy to make for a simple dinner or a holiday feast! Soft, caramelized, & baked in an amazing sauce, you’ll love ’em!
    Candied Sweet Potatoes are delicious, and easy to make for dinner or a holiday feast! Soft, caramelized, & baked in an amazing sauce, you'll love 'em!

    Whoa! If you’re looking for an easy, delicious side dish for dinner, may I suggest these amazing candied sweet potatoes? You don’t have to wait until Thanksgiving or other traditional holidays to enjoy these buttery, soft delicious veggies.

    And guess what? This recipe uses FRESH sweet potatoes… and they are a CINCH to make!

    Fresh sweet potato slices are coated in an amazing butter, brown sugar, and maple syrup sauce, which is seasoned with cinnamon, nutmeg, ginger, vanilla, and orange zest!

    I’m not joking… the sauce is AMAZING. The candied sweet potatoes are then baked, coated in all that yummy sauce until they become soft and tender, and practically perfect in every way. YUM! Here’s how to make them:

    Scroll Down For A Printable Recipe Card At The Bottom Of The Page

    Prepare The Sweet Potatoes

    The first thing you will need to do is peel the copper-skinned sweet potatoes with a vegetable peeler or knife, and take a small slice off both ends of each potato. You can use either 3 medium sized sweet potatoes or 2 large ones, as I did.

    Once the sweet potatoes are peeled, cut each potato into 1/2″ thick round slices. Don’t cut them too thick or they will take too long to bake.

    If you cut them too thin, they will take less time to bake. I even drug out a tape measure to get an idea of just what 1/2″ thickness was! You know… for quality control! Ha Ha!

    Peeling the sweet potatoes is the first step necessary for making this recipe.Sweet potatoes are peeled, then cut into 1/2" thick round slices.

    Spray an oven-safe (approx. 1½- 2 quart) baking dish with non-stick spray, and place the sliced sweet potatoes in the dish.

    Sprinkle the potatoes lightly with salt, and then set dish aside while you make the yummy sauce.

    Peeled, fresh sweet potato rounds are placed into a greased baking dish.

    Make The Sauce For The Candied Sweet Potatoes

    Place the butter in a medium saucepan, and melt on low heat. Once melted, add the water, maple syrup, brown sugar, orange zest, cinnamon, nutmeg and ginger (do NOT add the vanilla), and stir to combine.

    Turn the heat up to medium. While stirring, bring the sauce to a low boil. Once it begins boiling, remove the spoon and let the sauce boil (gently) for 2 minutes (without stirring at all).

    When it has gently boiled for two minutes, remove the pan from the heat, and stir in the vanilla extract.

    Butter, maple syrup, water, brown sugar, orange zest and spices are cooked for sauce.Vanilla extract is added to the butter and spice sauce in pan.

    Pour the hot (and yummy smelling) sauce over the sliced sweet potatoes. Stir or use tongs to coat the slices well with the buttery sweet sauce.

    Sauce is poured over the sweet potato rounds, to coat before baking.

    Time To Bake The Candied Sweet Potatoes

    Okay, now the candied sweet potatoes are ready for the oven. Bake in a preheated 375°F. oven, uncovered, for 20 minutes. Remove the potatoes from the oven, and give them a quick, gentle stir to keep them coated in sauce.

    Before placing them back in the oven, cover the dish with aluminum foil, and pop ’em back into the hot oven.

    Bake for an additional 20 minutes, then remove and stir again to coat the slices. At this point, stick a butter knife into one of the slices to check for tenderness. The candied sweet potatoes were perfectly tender, so I knew they were done!

    If the knife cannot be easily inserted and removed (like butter!), pop ’em back in the oven again for another 5-10 minutes, then check again (mine took 45 total). They should be slightly caramelized on the outside, but creamy and soft on the inside!

    NOTE: If you are doubling the recipe and using a 9×13″ baking dish, it may take up to an hour to bake all the sweet potatoes evenly. Just be sure to check on their tenderness after the 40 minute mark.

    Close up of candied sweet potatoes with sprigs of fresh thyme on top.

    Time To Serve Candied Sweet Potatoes

    Once the sweet potatoes are done, remove the pan from the oven. Spoon a bit more sauce on top when serving. If desired, lightly sprinkle the top of the sweet potatoes with flaky sea salt (optional, but it’s a good contrast to the sweet sauce).

    You can also garnish the dish with sprigs of fresh thyme or rosemary, if desired.

    My husband and I absolutely LOVE these flavor-packed, tender, candied sweet potatoes! The sauce is soooo good, I could eat it right out of the pan (maybe I DID!). It tends to thicken just a little bit as the sweet potatoes cool slightly.

    The candied sweet potatoes were a delicious side dish (along with my home canned green beans) for our grilled lemon chicken breasts.

    Candied sweet potatoes on plate with grilled lemon chicken and green beans.

    I really hope you will take the opportunity to try this delicious veggie side dish. The recipe can easily doubled to serve 8-10 people, which makes this a GREAT holiday or large gathering veggie side dish. I know you will love it.

    Take care, thank you for stopping by, and have a GREAT day!

    Looking For More VEGETABLE SIDE DISH Recipes?

    You can find all of my side dish recipes in the Recipe Index, located at the top of the page. I have quite a few veggie side dishes, including:

    Interested In More Recipes?

    Thank you for visiting this website. I appreciate you using some of your valuable time to do soIf you’re interested, I publish a newsletter 2 times per month (1st and 15th) with all the latest recipes, and other fun info. I would be honored to have you join our growing list of subscribers, so you never miss a great recipe!
    There is a Newsletter subscription box on the top right side (or bottom) of each blog post, depending on the device you use, where you can easily submit your e-mail address (only) to be included in my mailing list.

    You Can Also Find Me On Social Media:
    Facebook page: The Grateful Girl Cooks!
    Pinterest: The Grateful Girl Cooks!
    Instagram: jbatthegratefulgirlcooks

    Author's signature

    Recipe adapted from: https://sallysbakingaddiction.com/candied-sweet-potatoes/

    0 from 0 votes
    Candied Sweet Potatoes
    Prep Time
    15 mins
    Cook Time
    45 mins
    Total Time
    1 hr
     

    Candied Sweet Potatoes are delicious, and easy to make for dinner or a holiday feast! Soft, caramelized, & baked in an amazing sauce, you'll love 'em!

    Category: Side Dish, Vegetable Dish
    Cuisine: American
    Keyword: candied sweet potatoes
    Servings: 4
    Calories Per Serving: 383 kcal
    Author: JB @ The Grateful Girl Cooks!
    Ingredients
    • 2 large sweet potatoes , or 3 medium
    • ¼ teaspoon salt
    • ¼ cup butter , equals 4 Tablespoons (½ stick)
    • Tablespoons water
    • cup pure maple syrup
    • ½ cup brown sugar (packed)
    • teaspoons orange zest
    • ½ teaspoon ground cinnamon
    • ¼ teaspoon ground nutmeg
    • ¼ teaspoon ground ginger
    • ½ teaspoon vanilla extract
    • sea salt (optional, to sprinkle as garnish)
    Instructions
    1. Preheat oven to 375°F. Spray a 2 quart baking dish with non-stick spray (sides and bottom).

    2. Peel sweet potatoes , then cut each one into 1/2" thick round slices. Place slices in prepared dish. Sprinkle potatoes with salt, and then set dish aside.

    3. MAKE SAUCE: Melt butter on low heat in a medium pan. Add water, maple syrup, brown sugar, orange zest, cinnamon, nutmeg and ginger; stir to combine. Turn heat to medium. While stirring, bring sauce to a low boil. Once it begins boiling, remove spoon and let sauce boil for 2 minutes (without stirring). Remove pan from heat; stir in vanilla extract. Pour sauce over sweet potatoes. Toss gently, to coat slices well.

    4. Bake, uncovered, in 375°F. oven for 20 minutes. Remove potatoes from oven, and gently stir, to keep them coated in sauce. Cover the dish with aluminum foil, and place dish back into oven. Bake for an additional 20 minutes; remove and stir again. Insert a butter knife into a slice to check for tenderness. If knife cannot be easily inserted and removed (like butter!), pop 'em back in the oven for another 5-10 minutes, then check again (mine took 45). They should be slightly caramelized on the outside, but creamy and soft on the inside! NOTE: If you are doubling the recipe (5-6 potatoes) and using a 9x13" baking dish, it may take up to an hour to bake all the sweet potatoes evenly. Just be sure to check on the tenderness after the 40 minute mark.

    5. When done, remove pan from oven. Uncover pan; let cool for about 10 minutes before serving. To serve: Spoon a bit of sauce on top. Lightly sprinkle sweet potatoes with flaky sea salt (optional, but a good contrast to sweet sauce). Garnish with sprigs of fresh thyme or rosemary, if desired. Enjoy!

    Recipe Notes

    TIP: According to the original recipe author, this dish can be frozen for up to 3 months. Thaw in refrigerator. When ready to re-heat, cover dish with foil, and reheat in 350°F. oven for 25-30 minutes (or until fully heated through).

    Nutrition Facts
    Candied Sweet Potatoes
    Amount Per Serving (1 g)
    Calories 383 Calories from Fat 108
    % Daily Value*
    Fat 12g18%
    Saturated Fat 7g44%
    Cholesterol 31mg10%
    Sodium 349mg15%
    Potassium 632mg18%
    Carbohydrates 69g23%
    Fiber 5g21%
    Sugar 40g44%
    Protein 3g6%
    Vitamin A 24472IU489%
    Vitamin C 5mg6%
    Calcium 88mg9%
    Iron 1mg6%
    * Percent Daily Values are based on a 2000 calorie diet.

    Here’s one more to pin on your Pinterest boards!Candied Sweet Potatoes are delicious, and easy to make for dinner or a holiday feast! Soft, caramelized, & baked in an amazing sauce, you'll love 'em!