Category: Main Dishes

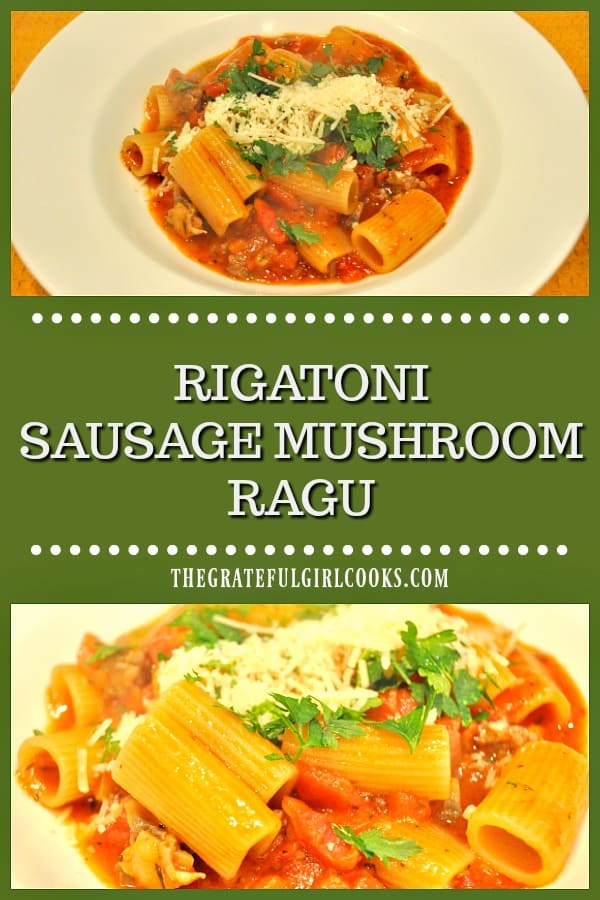
Rigatoni Sausage Mushroom Ragu

You’re gonna enjoy rigatoni sausage mushroom ragu, an easy to make, one pot Italian meal that you will want to make again and again, because it is SO GOOD!
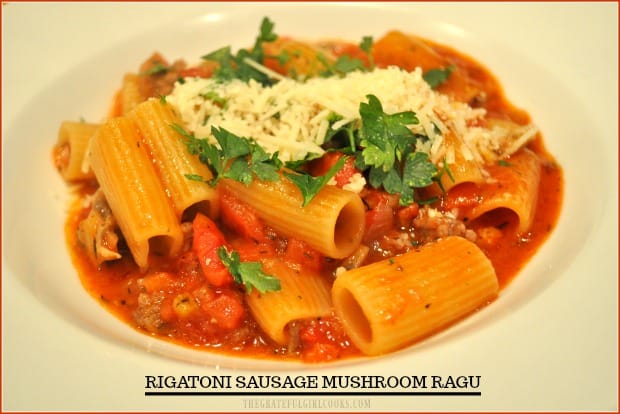
You're gonna enjoy rigatoni sausage mushroom ragu, an easy to make, one pot Italian meal that you will want to make again and again, because it is SO GOOD!

I found a recipe for a vegetarian ragu pasta dish online and thought it sounded interesting!  Just in case you’re wondering – no… this Ragu is not a brand of spaghetti sauce found in the jar on a grocery shelf.  Well, actually it is that, but the recipe I am sharing today is a homemade ragu sauce!

I made a couple changes to the original recipe, such as adding Italian sausage and beef broth, and ended up with an amazing rigatoni sausage mushroom ragu!

Don’t let the long ingredient list stop you from trying this dish… if you look closely, you will see that many of the ingredients are common ingredients or spices you probably already have in your home!  This hearty, delicious ragu tastes amazing, and I hope you will read on… and make this dish!

Scroll Down For A Printable Recipe Card At The bottom Of The Page

How To Make Rigatoni Sausage Mushroom Ragu

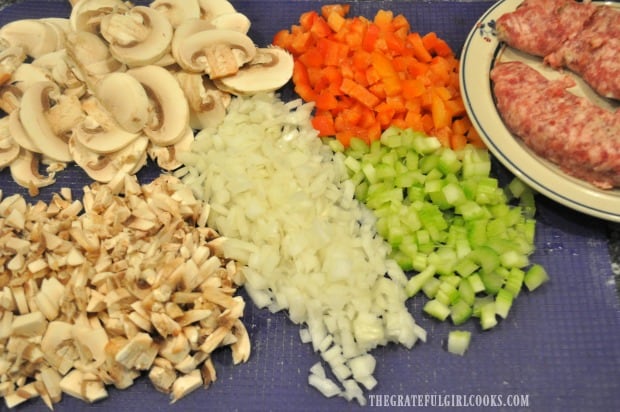
Before starting the actual cooking, be sure to have the veggies chopped ahead of time, and the rest of the ingredients ready to go!. You will thank me later. No… really! Note that half of the mushrooms are sliced, the other half are chopped. You will add them to the dish at different times. The chopped mushrooms will help add thickness to the sauce.

Mushrooms, onions, red pepper, celery and Italian sausage are used to make ragu sauce.

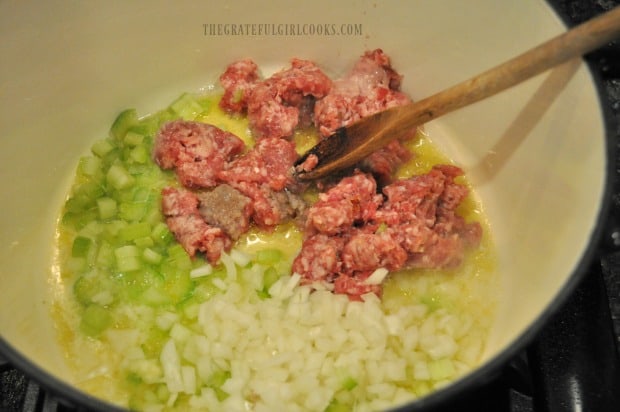
Put Italian sausage (taken OUT of the casings), butter and vegetable oil into a large stockpot (or skillet). Heat on medium heat, stirring often, until butter has melted. Add chopped onions and celery to the pot.

Cook them for a few minutes, stirring often, until the sausage has fully cooked, and the veggies have softened.

Italian sausage, mushrooms and celery are cooked in butter and olive oil for ragu sauce.

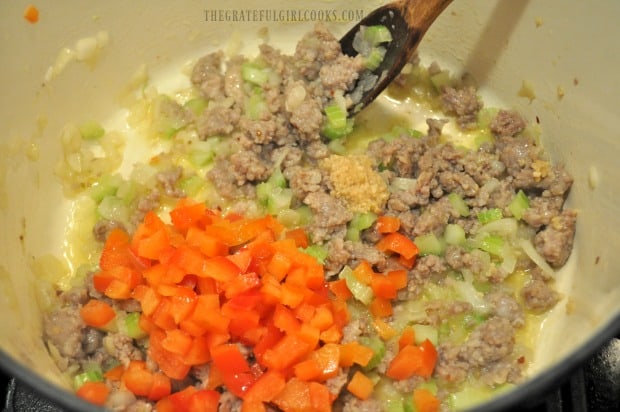
Add chopped red bell pepper and minced garlic. Cook, stirring often, for two minutes.

Red bell pepper and garlic added to ragu sauce in pot.

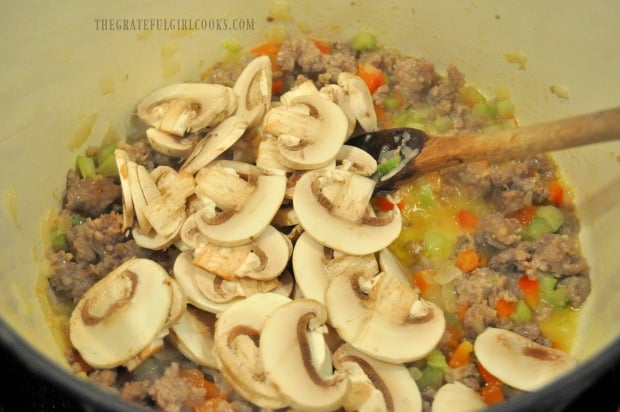
Add sliced mushrooms; cook for 1 more minute, stirring as they cook. You are slowly adding in layers of flavor!

Sliced mushrooms are added to ragu sauce in pot.

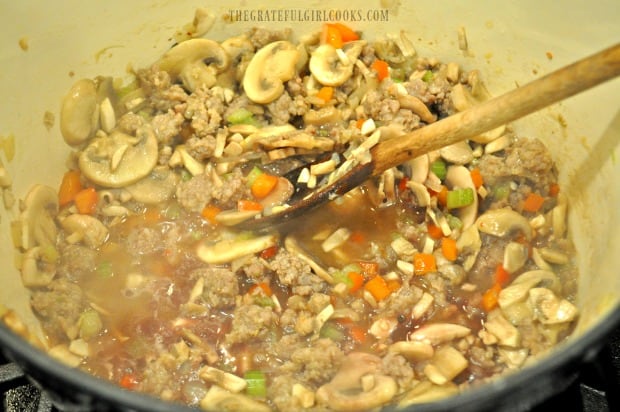
Add the chopped mushrooms, and cook for 1 minute.  Add red wine to pan. Heat, and let the wine gently boil for 2 minutes.

Chopped mushrooms, red wine, and broth are added to make ragu sauce.

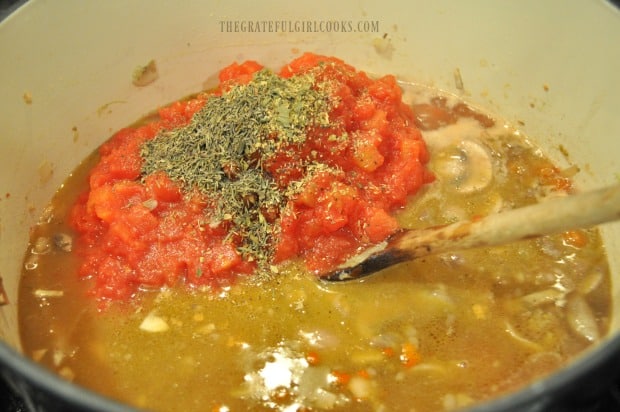
Add canned tomatoes, tomato paste, beef stock (or vegetable stock), and spices. Stir to combine all ingredients.

Canned tomatoes and spices are added to make ragu sauce.

Time To Add The Rigatoni Pasta

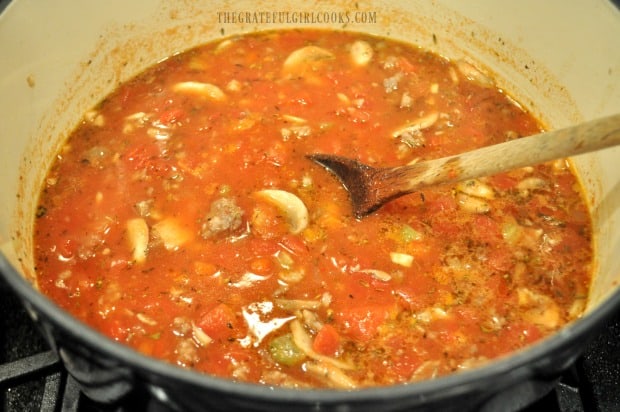
Bring the sauce to a boil.

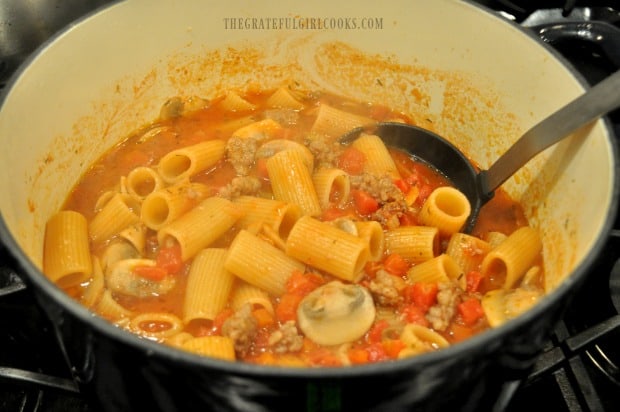
Sausage mushroom ragu sauce is cooking in large pot.

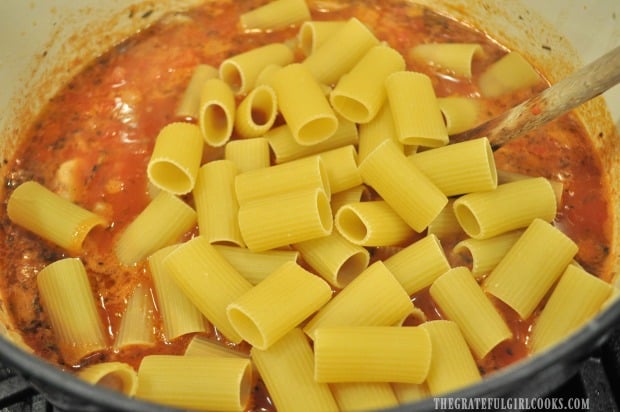
Once sauce is boiling, stir in the dry rigatoni noodles, to combine.  Put a lid on the pan (or cover with aluminum foil), and turn the heat down to LOW.

Rigatoni pasta is added to sausage musroom ragu sauce.

Let the pasta cook for 13-15 minutes (mine took 15), or until the pasta is cooked all the way through. Give the pasta a stir a few times while it is cooking, then put lid back on pan.

TIP: If at any time, the rigatoni sausage mushroom ragu looks like it is getting too dry (if heat was too high), then just add several spoonfuls of hot water to pan, and stir in, to combine.

Rigatoni sausage mushroom ragu is ready to be served.

Time To Serve Rigatoni Sausage Mushroom Ragu!

When the rigatoni sausage mushroom ragu is fully cooked, it is time to serve! Give the pasta a stir, then portion it out into serving bowls. Bowls seem to hold the sauce better than on a plate.

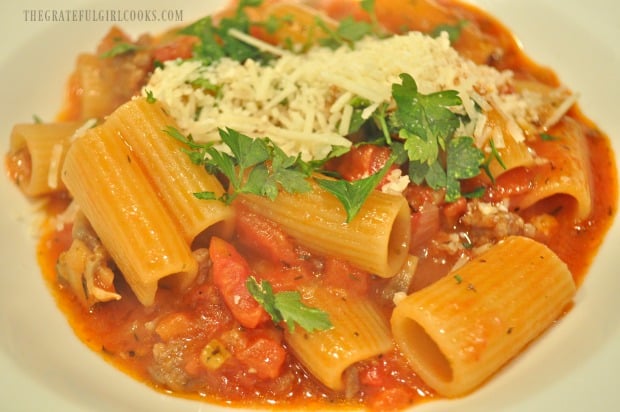
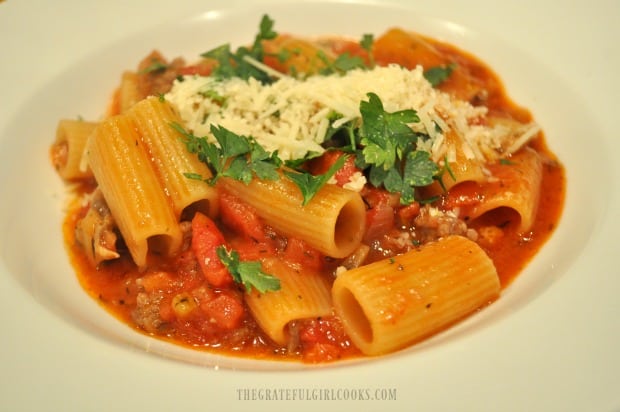
Garnish top of each bowl of pasta with some roughly chopped flat leaf parsley and grated Parmesan cheese. Serve… and enjoy! This rigatoni sausage mushroom ragu tastes AMAZING!

Rigatoni sausage mushroom ragu is garnished with flat leaf parsley and Parmesan cheese.

Rigatoni sausage mushroom ragu is served, garnished with Parmesan cheese and parsley.

And there you have it! Rigatoni sausage mushroom ragu for dinner! It tastes DELICIOUS, and I sincerely hope you will give this recipe a try!

If You Enjoy Pasta Recipes

If you enjoy pasta dishes, be sure to check out my recipes for Simple Chicken Sausage Pasta, Butternut Squash Ravioli with Browned Butter Sage Sauce, Vegetarian Spicy Noodles in Peanut Sauce, Shrimp and Penne Pasta Alfredo, or Florentine Lasagna Roll, to name a few!

ALL of my recipes are listed in the Recipe Index, located at the top of the page. I’m sure you will enjoy them, as well. Have a wonderful day!

Interested In More Recipes?

Thank you for visiting this website. I appreciate you using some of your valuable time to do soIf you’re interested, I publish a newsletter 2 times per month (1st and 15th) with all the latest recipes, and other fun info. I would be honored to have you join our growing list of subscribers, so you never miss a great recipe!
There is a Newsletter subscription box on the top right side (or bottom) of each blog post, depending on the device you use, where you can easily submit your e-mail address (only) to be included in my mailing list.

You Can Also Find Me On Social Media:

Facebook page: The Grateful Girl Cooks!
Pinterest:
The Grateful Girl Cooks!
Instagram:
jbatthegratefulgirlcooks

Author's signature

Recipe adapted from Nicky at: https://www.kitchensanctuary.com/one-pot-mushroom-ragu-with-pasta/
0 from 0 votes
Rigatoni Sausage Mushroom Ragu
Prep Time
10 mins
Cook Time
30 mins
Total Time
40 mins
 
You're gonna enjoy rigatoni sausage mushroom ragu, an easy to make, one pot Italian meal that you will want to make again and again, because it is SO GOOD!
Category: Entree
Cuisine: Italian
Keyword: rigatoni sausage mushroom ragu
Servings: 5
Calories Per Serving: 484 kcal
Author: JB @ The Grateful Girl Cooks!
Ingredients
  • 2 links Italian sausage (mild or hot) , casings removed
  • 1/2 pound mushrooms ,1/2 sliced, 1/2 chopped
  • 2 Tablespoons butter
  • 1 Tablespoon vegetable oil
  • 1 medium red bell pepper , de-seeded and chopped
  • 1 medium onion , finely chopped
  • 1 stick celery , finely chopped
  • 2 cloves garlic , minced
  • 1/4 cup red wine
  • 28 ounces canned diced tomatoes , 2 cans (14 oz.)
  • cups beef stock (or vegetable)
  • 1 teaspoon granulated sugar
  • 1 Tablespoon dried thyme
  • 1 teaspoon dried oregano
  • 1/2 teaspoon salt
  • 1/2 teaspoon black pepper
  • 2 Tablespoons tomato paste
  • 8 ounces rigatoni pasta
  • 2 Tablespoons Parmesan cheese
  • 1/4 cup flat leaf parsley , roughly chopped (for garnish)
Instructions
  1. Put Italian sausage (taken OUT of the casings), butter and vegetable oil into a large stockpot (or skillet). Heat on medium heat, stirring often, until butter has melted. Add chopped onions and celery to the pot. Cook for a few minutes, stirring often, until the sausage has fully cooked, and veggies have softened.

  2. Add chopped red bell pepper and minced garlic. Cook, stirring often, for two minutes. Add SLICED mushrooms; cook for 1 more minute, stirring as they cook. You are slowly adding in layers of flavor! Add CHOPPED mushrooms, and cook for 1 minute.  Add red wine to pan. Heat, and let wine gently boil for 2 minutes. Add canned tomatoes, tomato paste, beef stock (or vegetable stock), and spices. Stir, to combine all ingredients. 

  3. Bring sauce to a boil. Once sauce is boiling, add dry rigatoni noodles; stir to combine.  Put a lid on the pan (or cover with aluminum foil); turn heat down to LOW. Let pasta cook for 13-15 minutes (mine took 15), or until pasta is cooked all the way through. Give pasta a stir a few times while it is cooking, then put lid back on pan. If at any time, the rigatoni sausage mushroom ragu looks like it's getting too dry (if heat was too high), add several spoonfuls of hot water to pan, and stir in, to combine.

  4. When the rigatoni sausage mushroom ragu is fully cooked, it's time to serve! Give the pasta a stir, then portion it out into serving bowls. Bowls seem to hold the sauce better than on a plate. Garnish top of each bowl of pasta with some roughly chopped flat leaf parsley and grated Parmesan cheese. Serve... and enjoy!

Nutrition Facts
Rigatoni Sausage Mushroom Ragu
Amount Per Serving (1 (1/5 of total))
Calories 484 Calories from Fat 207
% Daily Value*
Fat 23g35%
Saturated Fat 10g63%
Cholesterol 47mg16%
Sodium 1068mg46%
Potassium 990mg28%
Carbohydrates 50g17%
Fiber 5g21%
Sugar 10g11%
Protein 18g36%
Vitamin A 1505IU30%
Vitamin C 55mg67%
Calcium 135mg14%
Iron 4.8mg27%
* Percent Daily Values are based on a 2000 calorie diet.

Here’s one more to pin on your Pinterest boards!You're gonna enjoy rigatoni sausage mushroom ragu, an easy to make, one pot Italian meal that you will want to make again and again, because it is SO GOOD!


Kung Pao Zoodles

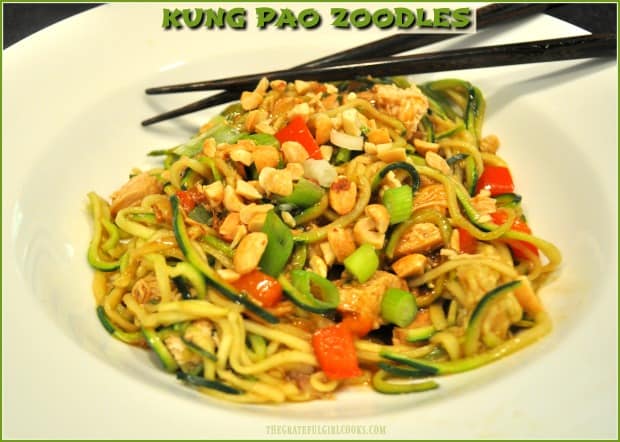
Kung Pao Zoodles is a low calorie (under 300), low carb dish using spiralized zucchini noodles, cooked in a sweet/spicy Asian sauce, and it can be made with or without chicken.
Kung Pao Zoodles is a low calorie (under 300), low carb dish using spiralized zucchini noodles, cooked in a sweet/spicy Asian sauce, w/or without chicken.

I’ve got to be honest here… this recipe totally surprised me! I purchased a spiralizer recently, to essentially make “noodles” out of a lot of different vegetables. I’d been wanting one for a while, and finally bought a fairly inexpensive one ($29).

Scroll Down For A Printable Recipe Card At The Bottom Of The Page

What If I Do Not Have A Spiralizer?

If you do not have access to a Spiralizer, it IS possible to make zucchini noodles by hand. The best video I’ve seen to describe how to do this is on YouTube, which demonstrates three easy ways to make your own “zoodles” (with box grater, vegetable peeler, or mandoline). I recommend watching it! Here’s the link to the short video, from Kelly Senyei at “Just A Taste”: https://www.youtube.com/watch?v=ETgPaDQh9S4 This was the first recipe I made using it, and my expectations were fairly low for what Kung Pao Zoodles would taste like. Zoodles is a word commonly used to describe Zucchini Noodles!
Whoa! I’m NOT KIDDING… I totally LOVED this dish!  This dish can also be a healthy/delicious meatless meal, by simply omitting the chicken breast.  It only took a couple minutes to turn two medium sized zucchini into gorgeous pasta like strands of veggie goodness!  Once cooked with the amazingly easy Asian inspired sauce, this dish made me GIDDY with excitement with my first bite!
This recipe for Kung Pao Zoodles is very easy to prepare. If there is one tip I can give you, it is to HAVE EVERYTHING PREPPED AND READY TO GO BEFORE BEGINNING COOKING! The dish comes together very quickly once started, so be prepared!

How Do I Make Kung Pao Zoodles?

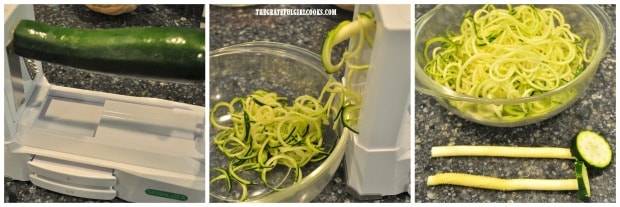
Cut ends off both zucchini, then spiralize them into spaghetti-like noodles, catching them as they come out into a medium sized bowl. If using a Spiralizer, cut the noodles with kitchen shears into 7 or 8 inch strips (cut long zoodles right in the bowl a couple of times- snip, snip!). Set aside.

Zucchini being spiralized into noodles to make Kung Pao zoodles.

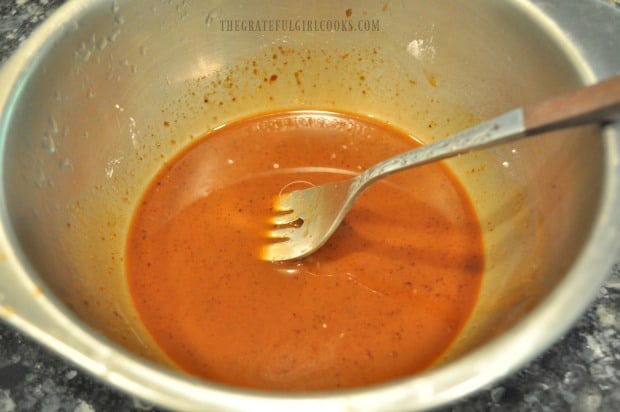
Stir or whisk Asian sauce ingredients together in a small bowl (soy or tamari sauce, balsamic vinegar, hoisin sauce, water, sriracha, sugar and cornstarch). Set sauce aside.

Asian sauce is mixed in bowl for Kung Pao Zoodles.

If You Are Preparing Kung Pao Zoodles WITH Chicken:

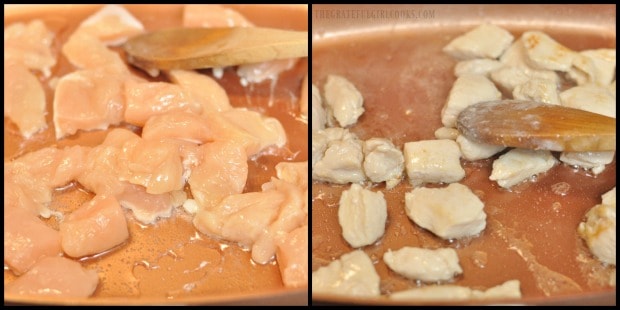
If adding chicken to this dish, season lightly with salt and black pepper. Heat vegetable oil over medium high heat. Place chicken cubes into large skillet; cook until lightly browned on all sides and cooked through. Remove chicken from skillet and set aside (or drain on paper towel).

Chicken breast cubes are cooked for Kung Pao Zoodle dish.

Prepare The Rest of This Dish

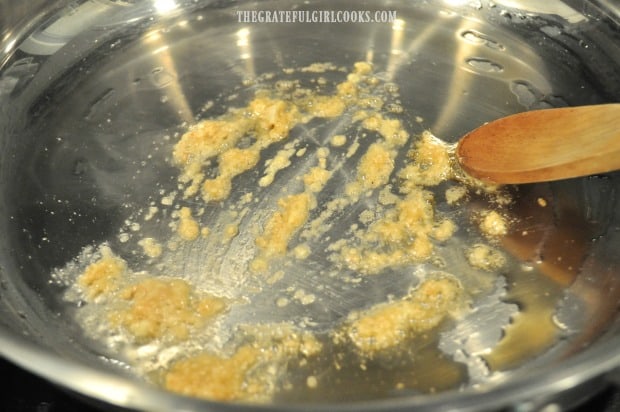
Turn the heat down to medium and add sesame oil, minced garlic and grated fresh ginger to skillet. Stir and cook for 30-45 seconds, being careful to not let the garlic burn.

Sesame oil, garlic and ginger cooking for kung pao zoodles.

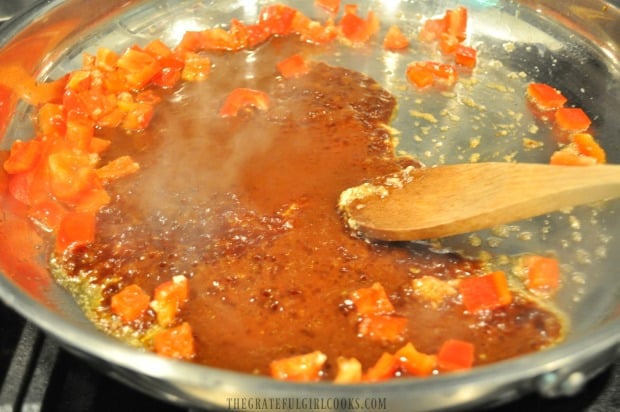
Add chopped red peppers, then stir in the Asian sauce. Bring sauce to a quick boil, then turn heat down to LOW, and cook for a minute or so until sauce is bubbling and has thickened.

Asian sauce and red bell peppers are added to skillet for kung pao sauce.

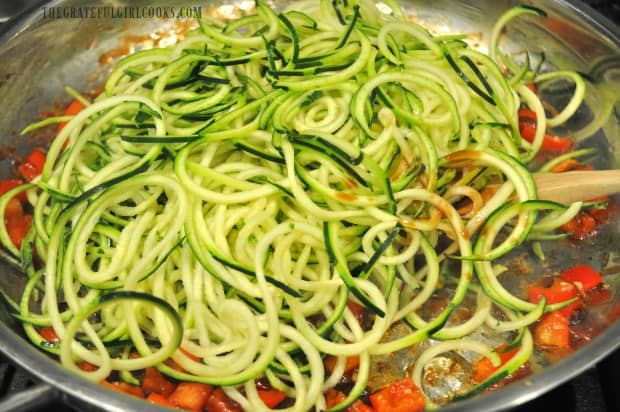
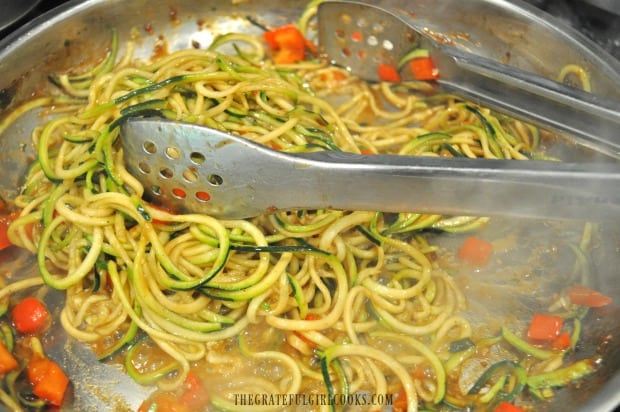
Add zucchini noodles (zoodles) to skillet.  Stir while cooking until the zoodles are coated with sauce.  Cook for two minutes, stirring often. As the zucchini noodles cook, they will release water, which will help to blend the sauce together with the noodles.

Zucchini noodles (zoodles) are added to skillet.

Zoodles (zucchini noodles) are cooked in the Kung Pao sauce.

Time To Eat Some Kung Pao Zoodles!

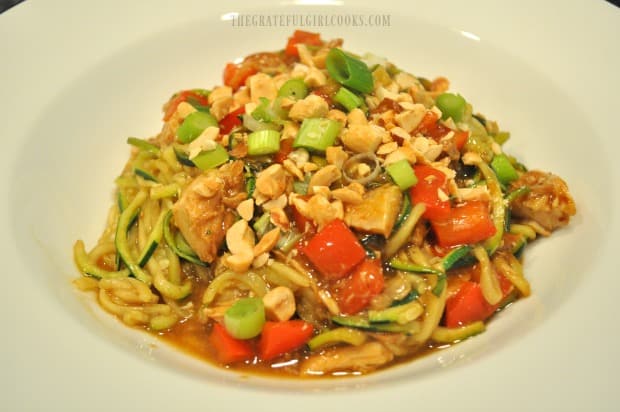
When done, add the cooked chicken pieces (if using) to the skillet, and stir to combine. I found using tongs worked great at getting everything mixed together. Divide Kung Pao zoodles between two serving bowls, and garnish each with chopped dry roasted peanuts and sliced green onions.

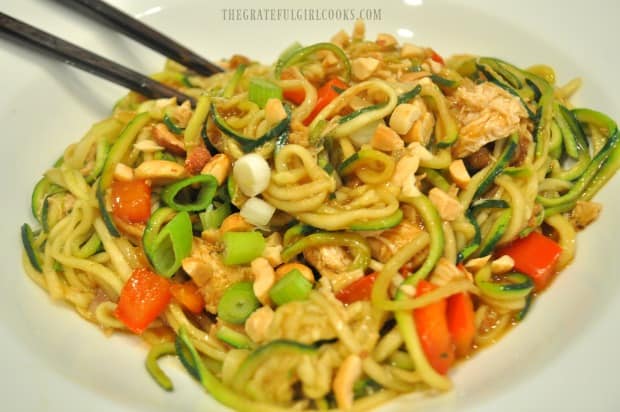
Bowl of Kung Pao Zoodles garnished with chopped peanuts and green onions.

Serve these delicious Kung Pao zoodles and enjoy! I absolutely LOVED this dish…there is so much yummy flavor! This meal is filling (as each serving is about 2 cups), it tastes amazing, and it so low in calories! Winner, winner… ZOODLE dinner!

Kung Pao Zoodles with a pair of chopsticks... ready to serve!

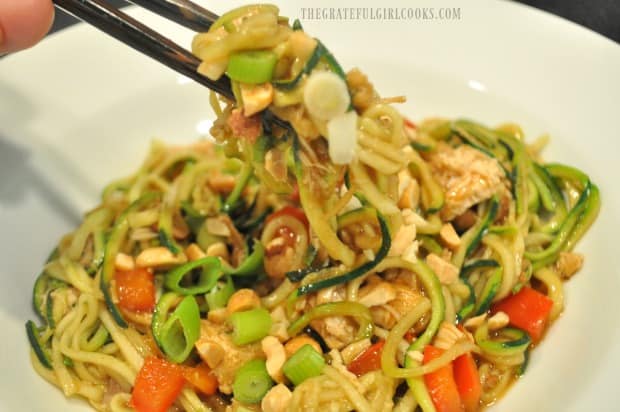
Chopsticks lifting up a bite of Kung Pao Zoodles!

I really hope you will try making these Kung Pao Zoodles!  If you prefer the more traditional version of Kung Pao Chicken, I hope you will check out that recipe, as well.

Looking For More SPIRALIZED FOOD Recipes?

You can find ALL my recipes in the Recipe Index, located at the top of the page. I have a few delicious zoodle recipes, including:

Interested In More Recipes?

Thank you for visiting this website. I appreciate you using some of your valuable time to do soIf you’re interested, I publish a newsletter 2 times per month (1st and 15th) with all the latest recipes, and other fun info. I would be honored to have you join our growing list of subscribers, so you never miss a great recipe!
There is a Newsletter subscription box on the top right side (or bottom) of each blog post, depending on the device you use, where you can easily submit your e-mail address (only) to be included in my mailing list.

You Can Also Find Me On Social Media:

Facebook page: The Grateful Girl Cooks!
Pinterest:
The Grateful Girl Cooks!
Instagram:
jbatthegratefulgirlcooks

Author's signature

Recipe Source: http://recipestotry.ca/kung-pao-chicken-with-zucchini/

0 from 0 votes
Kung Pao Zoodles
Prep Time
10 mins
Cook Time
10 mins
Total Time
20 mins
 
Kung Pao Zoodles is a low calorie (under 300), low carb dish using spiralized zucchini noodles, cooked in a sweet/spicy Asian sauce, w/or without chicken.
Category: Dinner
Cuisine: Asian
Keyword: kung pao zoodles
Servings: 2 (approx. 2 cups per serving)
Calories Per Serving: 281 kcal
Author: JB @ The Grateful Girl Cooks!
Ingredients
For Zoodles:
  • 2 medium zucchini , ends trimmed
  • 1 teaspoon vegetable or canola oil **if adding chicken
  • 6 ounces boneless, skinless chicken breast **cut in 1/2 inch cubes (if adding chicken)
  • 1 pinch salt and pepper , to taste
  • 1/2 medium red bell pepper , cut into 1/2" pieces
  • 1 teaspoon sesame oil
  • 1 teaspoon freshly ground ginger
  • 2 cloves garlic , minced
  • 2 Tablespoons finely chopped dry roasted peanuts (for garnish)
  • 2 Tablespoons thinly sliced green onions (for garnish)
For Asian Sauce:
  • Tablespoons reduced sodium soy sauce (tamari for gluten free)
  • 1 teaspoon hoisin sauce
  • 1 Tablespoon balsamic vinegar
  • Tablespoons water
  • 1/2 Tablespoon Sriracha sauce
  • 2 teaspoons granulated sugar
  • 2 teaspoons cornstarch
Instructions
  1. Cut ends off both zucchini, then spiralize them into spaghetti-like noodles,. Cut noodles with kitchen shears into 8 inch strips. Set aside.

  2. Stir or whisk Asian sauce ingredients together in a small bowl (soy or tamari sauce, balsamic vinegar, hoisin sauce, water, sriracha, sugar and cornstarch). Set sauce aside.
  3. If adding chicken to this dish, season lightly with salt and black pepper. Heat vegetable oil over medium high heat. Place chicken cubes into large skillet; cook until lightly browned on all sides and cooked through. Remove chicken from skillet and set aside (drain on paper towel).

  4. Turn heat down to medium and add sesame oil, minced garlic and grated fresh ginger to skillet. Stir and cook for 30-45 seconds, being careful to not let garlic burn. Add chopped red peppers, then stir in Asian sauce. Bring sauce to a boil, then turn heat to LOW, and cook for a minute or so until sauce is bubbling and has thickened.  Add zucchini noodles to skillet.  Stir while cooking until zoodles are coated with sauce.  Cook for two minutes, stirring often. As the zucchini noodles cook, they will release water, which will help to blend the sauce together with the noodles. When done, add cooked chicken pieces (if using), and stir to combine. I found using tongs worked great at getting everything mixed together.

  5. To serve, divide Kung Pao zoodles between two serving bowls, and garnish with chopped peanuts and sliced green onions. Serve hot, and enjoy!

Recipe Notes

NOTE: Caloric calculation of 281 per serving includes chicken and vegetable oil to cook it in.  If preparing this recipe as a MEATLESS meal, the calorie count would be approximately 167 calories per (2 cup) serving.

**Weight Watchers - Points+ = 7 points (with chicken).

Nutrition Facts
Kung Pao Zoodles
Amount Per Serving (1 g)
Calories 281 Calories from Fat 108
% Daily Value*
Fat 12g18%
Saturated Fat 3g19%
Cholesterol 54mg18%
Sodium 724mg31%
Potassium 976mg28%
Carbohydrates 20g7%
Fiber 3g13%
Sugar 12g13%
Protein 24g48%
Vitamin A 1410IU28%
Vitamin C 78.6mg95%
Calcium 42mg4%
Iron 1.6mg9%
* Percent Daily Values are based on a 2000 calorie diet.

Here’s one more to pin on your Pinterest boards!Kung Pao Zoodles is a low calorie (under 300), low carb dish using spiralized zucchini noodles, cooked in a sweet/spicy Asian sauce, w/or without chicken.

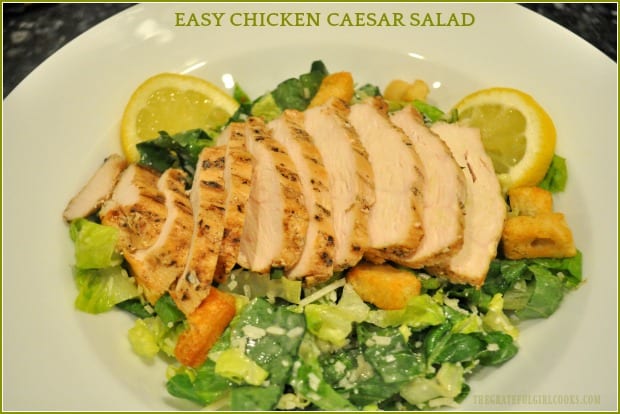
Easy Chicken Caesar Salad

Easy Chicken Caesar Salad is a light, yet filling entree, with grilled chicken breast on crisp romaine lettuce, with Parmesan cheese, croutons, and bottled dressing!Easy Chicken Caesar Salad is a light, yet filling entree, with grilled chicken breast on romaine lettuce, Parmesan cheese, croutons, and bottled dressing!

Do you enjoy Chicken Caesar Salad?  We sure do, in our home!  We have one for dinner every couple of weeks (especially in the summer), and it continues to be a family favorite meal.

Scroll Down For A Printable Recipe Card At the Bottom Of The Page

How Do You Season The Chicken For The Caesar Salad?

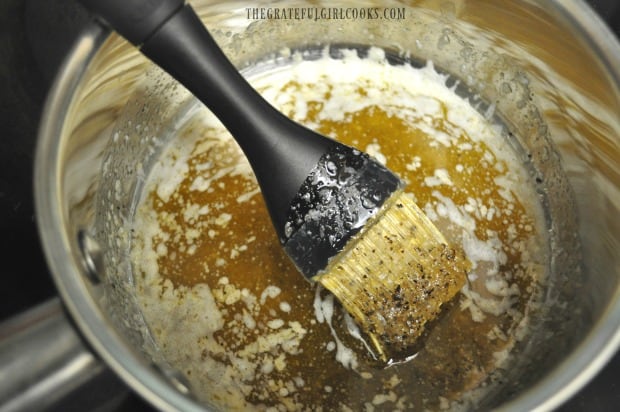
Whenever we grill chicken and use my Mom’s trusty chicken basting sauce (been using her recipe for over 40 years), I always try to grill two extra breasts to put aside for this salad! That way, the chicken is ready to go, any time we want to have this salad for dinner!

Basting sauce used for grilling chicken for caesar salad.

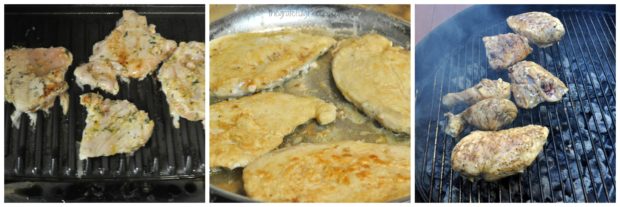
Having the chicken already grilled makes this a very quick meal to make… BUT… whether you use leftover chicken breasts, or grill them on an indoor grill, in the skillet, or on your BBQ, simply make sure you have a cooked, lightly seasoned chicken breast for each salad!

Many ways to cook chicken for a caesar salad.

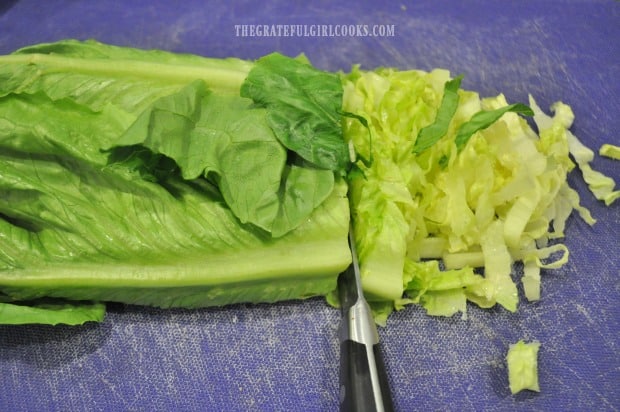
When you are ready to make the chicken caesar salad, slice a head of romaine lettuce into thin strips. I typically buy romaine hearts (these have a lot of the darker outside leaves taken off) for this salad, but it really doesn’t matter.

Okay… So How Do I Make The Chicken Caesar Salad?

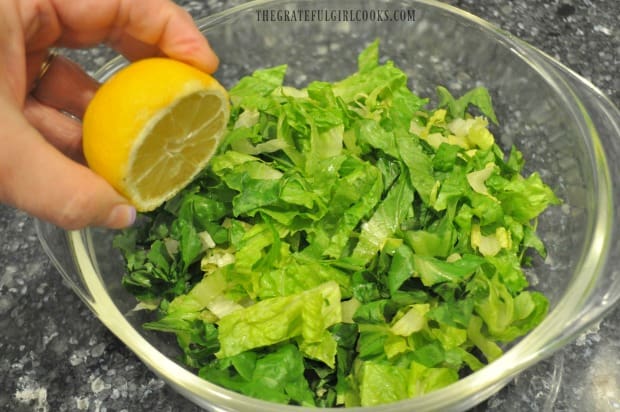
If using romaine hearts, one whole one should be enough for two entree salads. Place thinly sliced romaine into large bowl. Squeeze the juice of half a lemon over lettuce, catching any seeds that try to jump in!

Slicing romaine lettuce for chicken caesar salad.

Fresh lemon juice brings out the flavor in a chicken caesar salad.

Now, I have seen so many recipes to make homemade Caesar dressing, with anchovies, etc. in it, but when you want a quick dinner, what I use is bottled salad dressing!

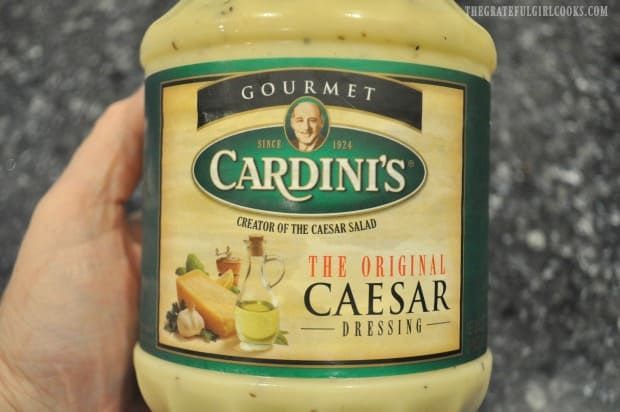
We have used Cardini’s Caesar dressing for many many years. Caesar Cardini is the man who is known for creating Caesar salads, and we have found this dressing to be the very best tasting one on the market! Obviously you can use whatever Caesar dressing you wish, but we give this one, found in most grocery stores (or Amazon) a thumbs up, for sure!

Add the Caesar Salad Dressing

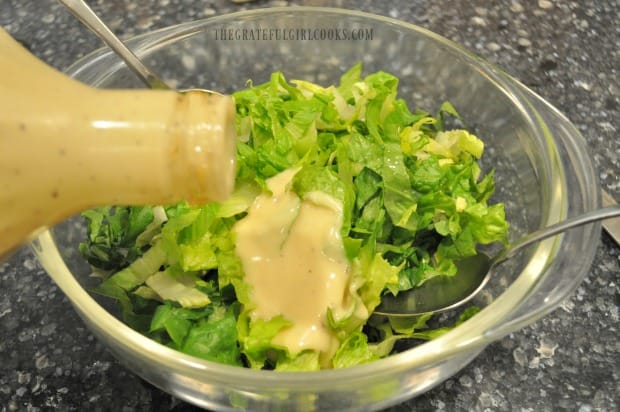
Pour the desired amount of salad dressing over the lettuce in the bowl, then mix it, to combine.

Romaine lettuce is topped with Caesar dressing.

I use the original Caesar Cardini dressing on this salad.

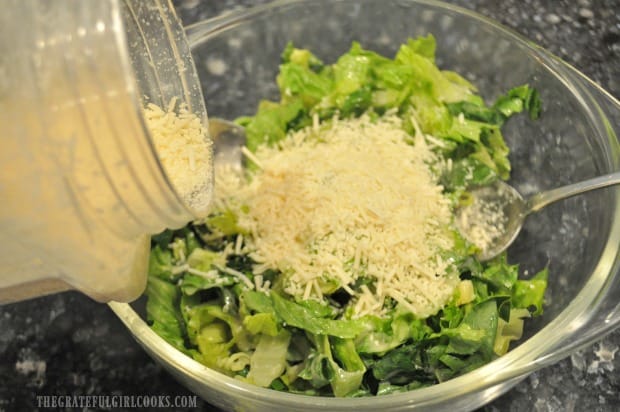
TIP: After the lettuce has the salad dressing on it, THEN add grated Parmesan cheese!  Because the lettuce has salad dressing on it, the cheese will stick to the romaine and not fall to the bottom of the bowl. Best tip I’ve ever found for a caesar salad! Mix to fully combine ingredients.

Shredded Parmesan cheese is added to caesar salad.

Serving The Salad

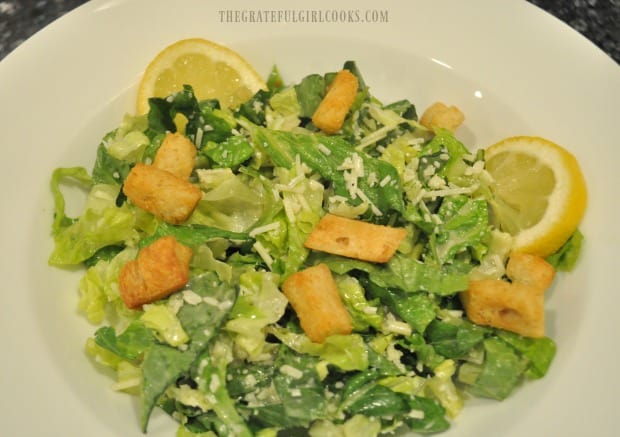
Portion salad into 2 serving bowls or plates.  Place croutons on top, and add a couple thin slices of lemon to dish as a garnish. Adding lemon slices looks good, and each person can squeeze additional lemon juice on their salad, if desired.

Croutons and lemon slices are added to caesar salad.

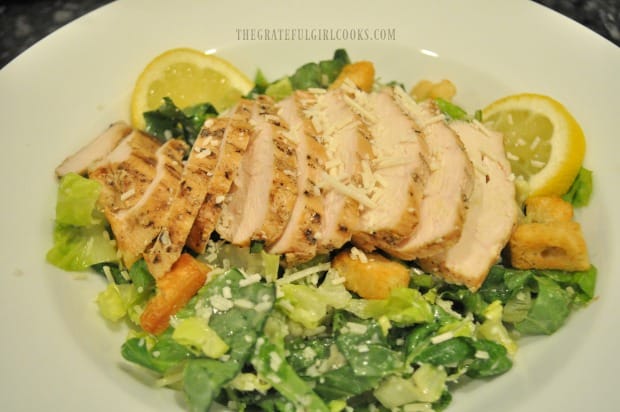
Slice the precooked grilled chicken breasts into thin slices.  Place the sliced chicken on top of the salad, slightly fanning out the slices across the salad. The chicken can be hot or chilled… we serve it both ways.

Garnish your chicken Caesar salad with additional Parmesan cheese, if desired. Serve, and enjoy this absolutely YUMMY entree salad!

Grilled chicken breast is sliced, then fanned out on top of caesar salad before serving.

I really hope you enjoy this classic grilled chicken Caesar salad, and trust you will enjoy it as much as we do! If you enjoy this salad, chances are you will also enjoy my recipes for Grilled Chili & Lime Chicken Fajita Salad or Strawberry Avocado Spinach Salad with Grilled Chicken (YUM). Don’t forget to check out ALL my recipes in the Recipe Index, located at the top of the page. Have a wonderful day.

Interested In More Recipes?

Thank you for visiting this website. I appreciate you using some of your valuable time to do soIf you’re interested, I publish a newsletter 2 times per month (1st and 15th) with all the latest recipes, and other fun info. I would be honored to have you join our growing list of subscribers, so you never miss a great recipe!
There is a Newsletter subscription box on the top right side (or bottom) of each blog post, depending on the device you use, where you can easily submit your e-mail address (only) to be included in my mailing list.

You Can Also Find Me On Social Media:

Facebook page: The Grateful Girl Cooks!
Pinterest:
The Grateful Girl Cooks!
Instagram:
jbatthegratefulgirlcooks

Author's signature

0 from 0 votes
Easy Chicken Caesar Salad
Prep Time
15 mins
Cook Time
0 mins
Total Time
15 mins
 
Easy Chicken Caesar Salad is a light, yet filling entree, with grilled chicken breast on romaine lettuce, Parmesan cheese, croutons, and bottled dressing!
Category: Entree Salad
Cuisine: American
Keyword: chicken caesar salad
Servings: 2 main course salads
Calories Per Serving: 530 kcal
Author: JB @ The Grateful Girl Cooks!
Ingredients
  • 2 small boneless, skinless chicken breasts , pre-grilled or baked
  • 1 head romaine lettuce (I use romaine hearts)
  • 1/2 large lemon
  • 1/4 cup Caesar salad dressing
  • 1/2 cup Parmesan Cheese
  • 3 Tablespoons croutons , for garnish
  • 4 thin slices lemon , for garnish
Instructions
  1. NOTE: Having the chicken already grilled makes this a very quick meal to make... BUT... whether you use leftover chicken breasts, or grill them on an indoor grill, in the skillet, or on your BBQ, simply make sure you have a small, cooked, lightly seasoned boneless chicken breast for each salad!

  2. Place thinly sliced romaine into large bowl. Squeeze the juice of half a lemon over lettuce, catching any seeds that try to jump in!  Pour desired amount of salad dressing over lettuce, then mix to combine.

  3. After the lettuce has the salad dressing on it, THEN add grated Parmesan cheese!  Because the lettuce has salad dressing on it, the cheese will stick to it, and not fall to the bottom of the bowl. Mix to fully combine ingredients.

  4. Portion salad into 2 serving bowls or plates.  Place croutons on top, and add a couple thin slices of lemon to dish as a garnish.

  5. Slice precooked grilled chicken breasts into thin slices.  Place chicken slices on top of salad, fanning out the slices across the salad. The chicken can be hot or chilled... we serve it both ways.  Garnish salad with additional grated Parmesan cheese, if desired. Serve, and enjoy this absolutely YUMMY entree salad!

Recipe Notes

NOTE: Caloric calculation is approximate, based on a 4 ounce chicken breast per serving. Caloric count will vary, due to weight of chicken and amount / type of salad dressing used.

Nutrition Facts
Easy Chicken Caesar Salad
Amount Per Serving (1 g)
Calories 530 Calories from Fat 252
% Daily Value*
Fat 28g43%
Saturated Fat 7g44%
Cholesterol 101mg34%
Sodium 1067mg46%
Potassium 1243mg36%
Carbohydrates 28g9%
Fiber 7g29%
Sugar 4g4%
Protein 40g80%
Vitamin A 27490IU550%
Vitamin C 14.9mg18%
Calcium 436mg44%
Iron 4.9mg27%
* Percent Daily Values are based on a 2000 calorie diet.

Here’s one more to pin on your Pinterest boards!Easy Chicken Caesar Salad is a light, yet filling entree, with grilled chicken breast on romaine lettuce, Parmesan cheese, croutons, and bottled dressing!

Dry Rub Spice Mix

It’s easy to enhance the flavor of grilled chicken or pork with this Dry Rub Spice Mix! Make enough mix to season meat for several BBQ’s, in under 5 minutes!
It's easy to enhance the flavor of grilled chicken or pork with this Dry Rub Spice Mix! Make enough mix to season meat for several BBQ's, in under 5 minutes!

I enjoy finding new seasoning mixes to use in different recipes to enhance flavors.  I’ve shared posts in the past for Homemade Cajun Seasoning, Grilled Chicken Sauce, Homemade Taco Seasoning Mix, and Herb Butter for Steaks, so when I found this recipe for a dry rub spice mix online (for grilled chicken or pork), and I knew I had to try it! Guess what? It is WONDERFUL!

Scroll Down For A Printable Recipe Card At the Bottom Of The Page

How To Make This Dry Rub Spice Mix

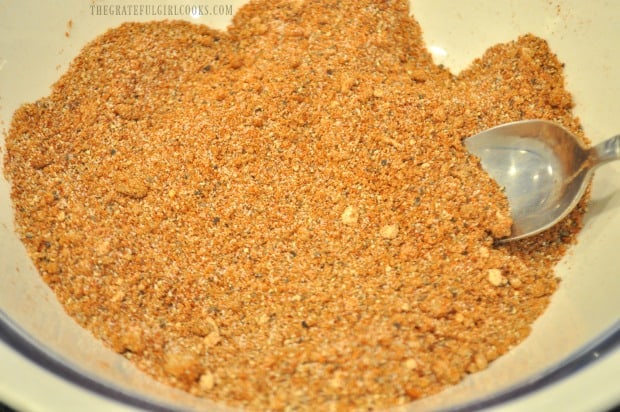
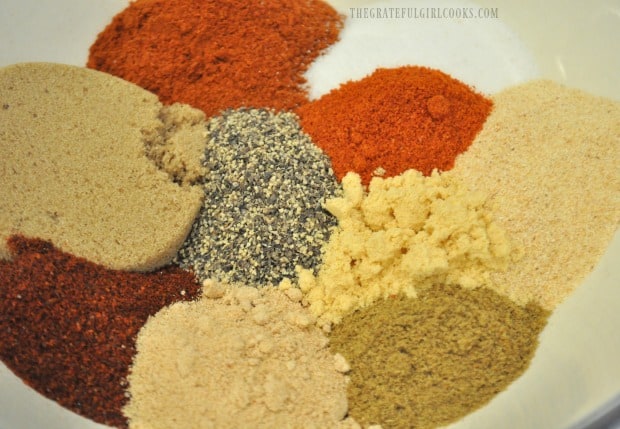
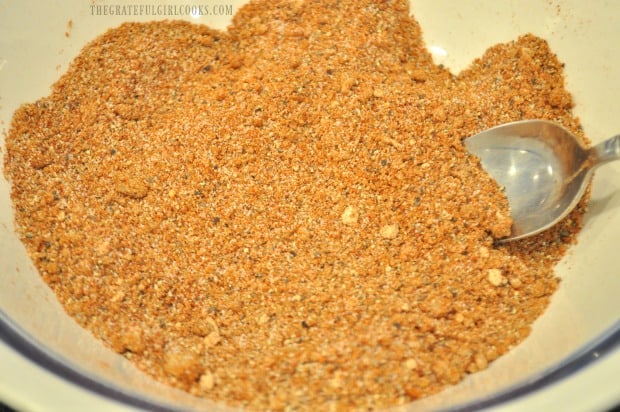
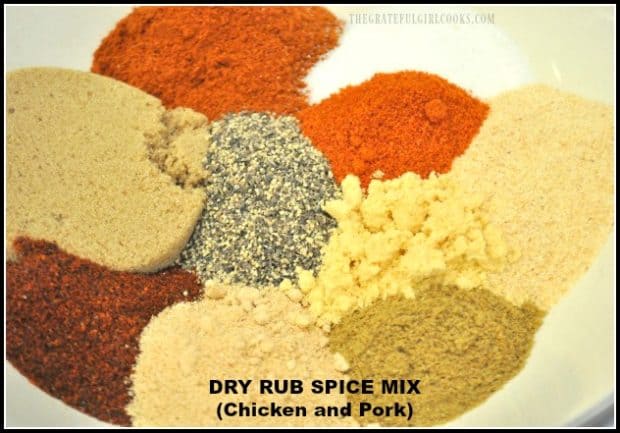
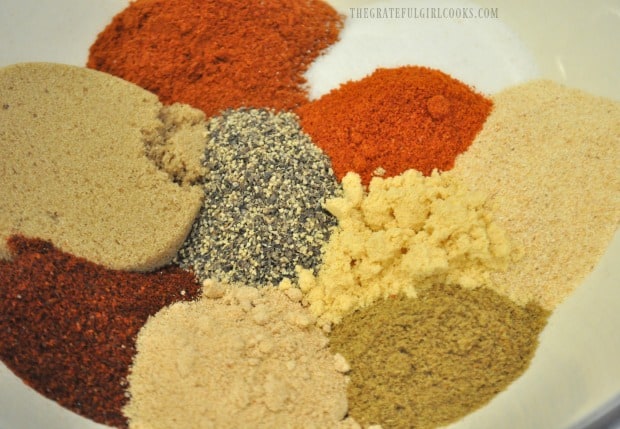
Start by making the dry spice rub. EASY! Place the dry rub spices in a medium sized bowl. Stir well, to fully combine ingredients. I cut the recipe in half, and even after cutting it in half, it made enough dry rub spice mix to season a pork loin roast, and a few whole chickens.

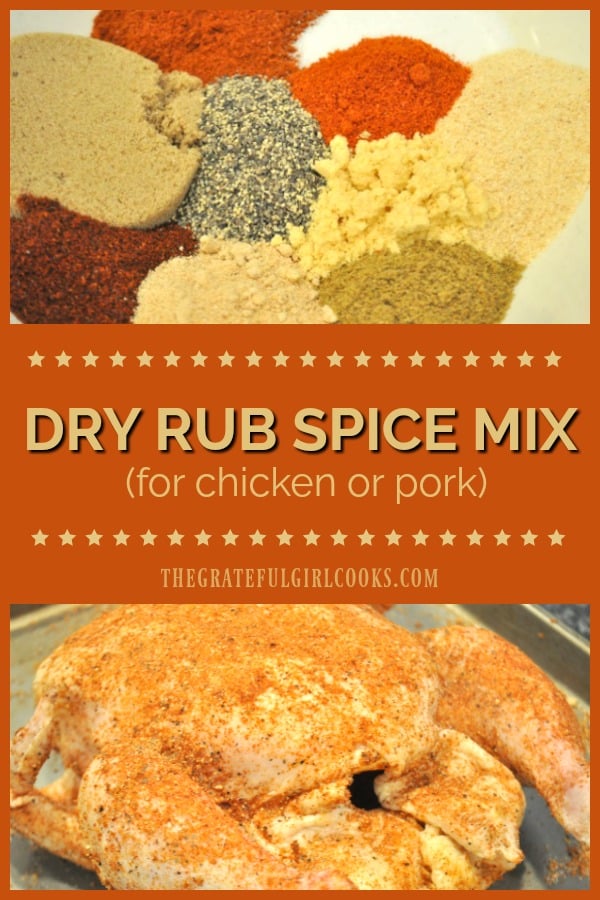
Spices used to make dry rub spice mix measured into bowl before mixing.

Dry rub spice mix for chicken and pork ready to season meat!

Using this Spice Rub On Whole Chickens

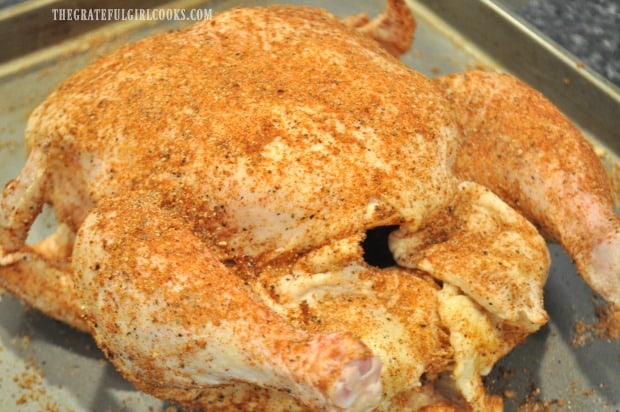
Cover all sides of a whole chicken with the dry spice rub, lightly rubbing it onto the surface of the meat. The slight moisture of the meat will help the spices stick! Sprinkle some of the spice mix into the cavity of the chicken.  When done, set seasoned chicken aside until ready to cook in a smoker or on the grill.

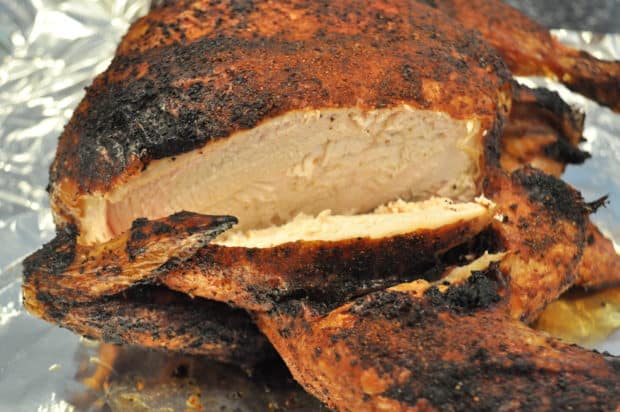
Here is a photo of a whole chicken with the rub on it. We cooked two chickens this time, on our Traeger grill; they both turned out perfect, with a great added flavor from the spices!

Whole chicken with dry rub spice mix applied to skin.Whole chicken with dry rub spice mix, after roasting on Traeger grill.

Using The Spice Rub On A Pork Roast

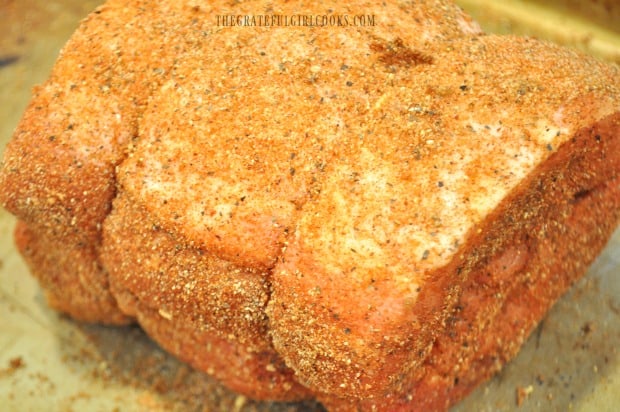
Here are a couple photos from when we used this spice rub on a pork loin roast! We covered all sides of the roast with the spice rub, smoked the pork, then roasted it, long and slow on our Traeger grill. We then shredded about half of the meat, added BBQ sauce, and made incredible tasting BBQ pulled pork sandwiches!

Pork loin roast with dry rub spice mix applied to surface of meat.

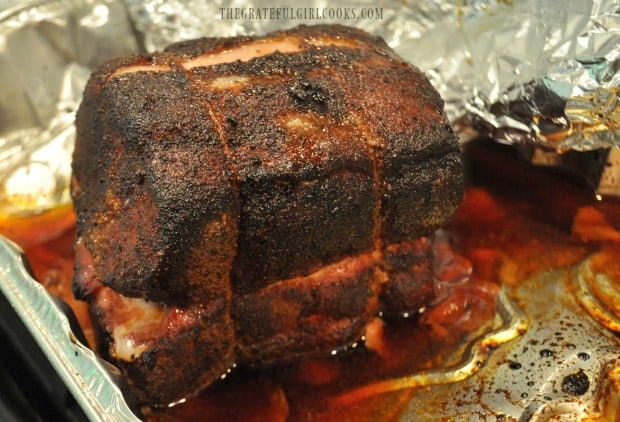
Pork loin roast with dry rub spice mix, after roasting on grill

I hope you will enjoy this quick and easy to prepare dry rub spice mix… if you store it in an airtight container, you will have it handy, and ready to use to enhance the flavor of your next grilled chicken or pork dish!

Thanks for stopping by. I hope you will choose to come back soon. Be sure to check out ALL of my recipes in the Recipe Index, located at the top of the page. Have a great day.

Interested In More Recipes?

Thank you for visiting this website. I appreciate you using some of your valuable time to do soIf you’re interested, I publish a newsletter 2 times per month (1st and 15th) with all the latest recipes, and other fun info. I would be honored to have you join our growing list of subscribers, so you never miss a great recipe!
There is a Newsletter subscription box on the top right side (or bottom) of each blog post, depending on the device you use, where you can easily submit your e-mail address (only) to be included in my mailing list.

You Can Also Find Me On Social Media:

Facebook page: The Grateful Girl Cooks!
Pinterest:
The Grateful Girl Cooks!
Instagram:
jbatthegratefulgirlcooks

Have a GREAT day!

Author's signature

Recipe Adapted From: https://www.tastesoflizzyt.com/pulled-pork-rub/

0 from 0 votes
Dry Rub Spice Mix (for chicken and pork)
Prep Time
5 mins
Cook Time
0 mins
Total Time
5 mins
 
It's easy to enhance the flavor of grilled chicken or pork with this Dry Rub Spice Mix! Make enough mix to season meat for several BBQ's, in under 5 minutes!
Category: Spices
Cuisine: American
Keyword: dry rub spice mix
Servings: 8 (1/4 cup servings)
Calories Per Serving: 72 kcal
Author: JB @ The Grateful Girl Cooks!
Ingredients
  • 1/3 cup dark brown sugar
  • 1/2 cup smoked paprika
  • 1/4 cup garlic powder
  • 1/4 cup salt
  • 2 Tablespoons black pepper
  • 2 Tablespoons onion powder
  • 1 Tablespoon cayenne pepper
  • 1 Tablespoon ground cumin
  • 1 Tablespoon dry mustard
Instructions
  1. In a medium sized bowl, combine all spice rub ingredients. Stir to mix, until all ingredients are fully combined.

  2. When ready to use, sprinkle rub on chicken or pork, and pat it down to adhere to surface of meat. Smoke or grill meat until done. Enjoy!

Store unused spice rub mix in an airtight container until next use.
    Recipe Notes

    As written, dry rub recipe makes almost 2 cups. I cut the recipe for the dry rub in half. The quantities are easy to cut in half (except for the 1/3 cup of dark brown sugar. If cutting brown sugar in half, use 2 Tablespoons PLUS 2 teaspoons brown sugar). If halved, you'll end up with about 1 cup of spice rub, which is enough for 3 pork roasts or chickens (about 3 pounds each). Each roast or whole chicken will need approx. 1/3 cup of the rub to cover. Store leftover spice mix in airtight sealed container.

    Nutrition Facts
    Dry Rub Spice Mix (for chicken and pork)
    Amount Per Serving (0.25 cup)
    Calories 72 Calories from Fat 9
    % Daily Value*
    Fat 1g2%
    Sodium 3546mg154%
    Potassium 235mg7%
    Carbohydrates 15g5%
    Fiber 3g13%
    Sugar 9g10%
    Protein 1g2%
    Vitamin A 3600IU72%
    Vitamin C 0.9mg1%
    Calcium 48mg5%
    Iron 2.4mg13%
    * Percent Daily Values are based on a 2000 calorie diet.

    Here’s one more to pin on your Pinterest boards!It's easy to enhance the flavor of grilled chicken or pork with this Dry Rub Spice Mix! Make enough mix to season meat for several BBQ's, in under 5 minutes!

    Coconut Milk Braised Chicken

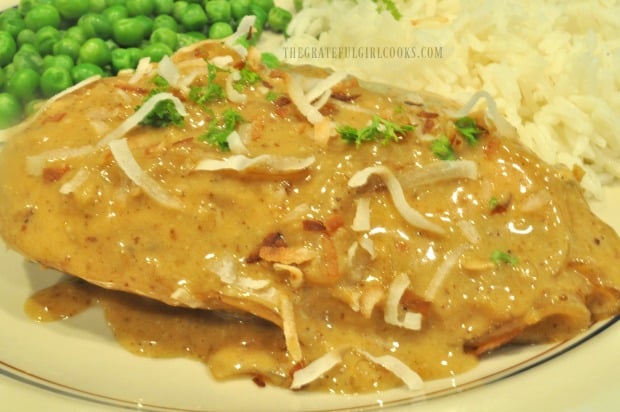
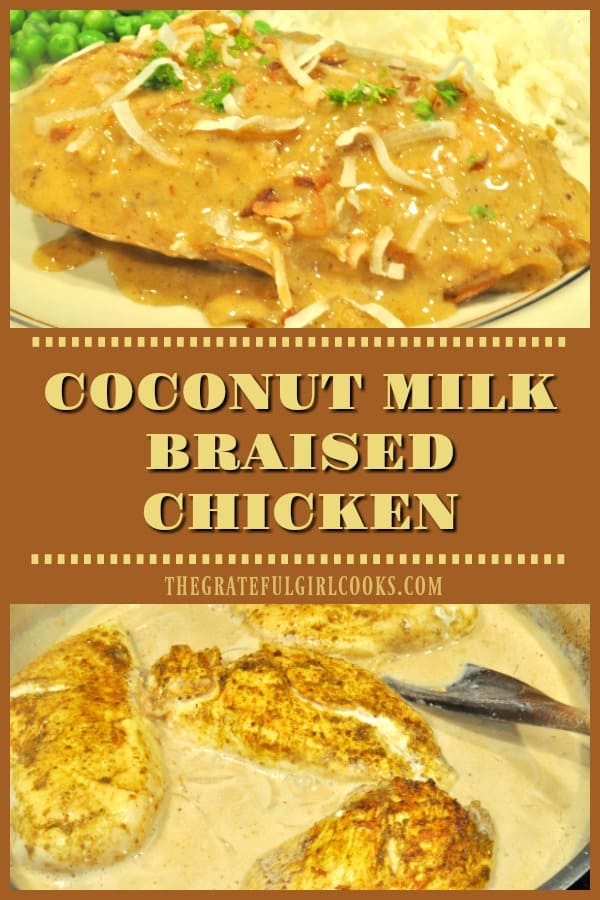
    Easy Coconut Milk Braised Chicken – big in flavor, low in calories (under 300)! Pan seared seasoned chicken breasts are cooked in, and topped with a spiced coconut milk sauce. You’re gonna LOVE this dish! YUM!
    Easy Coconut Milk Braised Chicken - big flavor, low calorie (under 300)! Pan seared seasoned breasts are cooked in/topped with a spiced coconut milk sauce. YUM!

    We just returned from our annual summer vacation to Whidbey Island, WA. One of my traditions while there is to visit a local community thrift store and browse for cookbooks to add to my collection. I LOVE to look at recipes in cookbooks… it’s been a crazy “down time” hobby of mine for years, even before I started blogging. I love the “thrill of the hunt” for great recipes to make for my family.

    This year I found several (8) “new to me” used cookbooks, including the one I found this recipe for coconut milk braised chicken in, for a tiny fraction of their original retail price. I paid $17.35 for 8 cookbooks, but their original retail value was over $150! Now that’s what I call a DEAL!!!! This recipe, for coconut milk braised chicken sounded really interesting to me, so I gave it a try…wowzer!  This is a FANTASTIC recipe! Seriously GOOD!  It’s also very easy to prepare, so it’s a WIN-WIN in my book!

    The chicken is seasoned nicely (it only has a tiny “kick” to it), and the coconut milk sauce tastes amazing! I “might” have taste-tested the sauce several times as it cooked…yum.  Who knew coconut milk braised chicken could taste so good? Let me show you how easy this dish is to make!

    Scroll Down For A Printable Recipe Card At The Bottom Of The Page

    How To Prepare Coconut Milk Braised Chicken

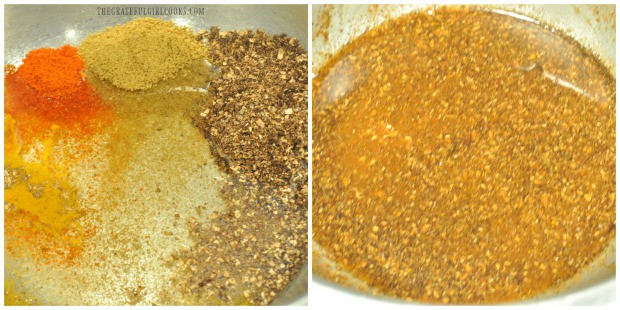
    Mix spices for the chicken in a small bowl (coriander, cumin, turmeric, cayenne pepper).  Add white wine vinegar, and stir to combine ingredients fully.

    (SIDE NOTE: I was able to hand grind coriander seeds I had dried from our garden a year or two ago… YAY for homegrown! If you use store bought ground coriander, it will be more powdery, so your sauce will be smoother… mine has “bumps” from hand-grinding coriander seeds).

    Mixing spices for braised chicken seasoning

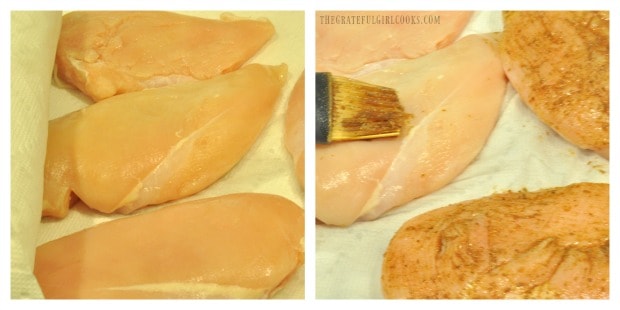
    Give the chicken breasts a rinse, then place them on a paper towel, and pat them dry.  Rub or brush on the seasoning mixture, covering both sides of chicken.

    Chicken breasts are patted dry, then covered with seasoning mix.

    Cook The Chicken

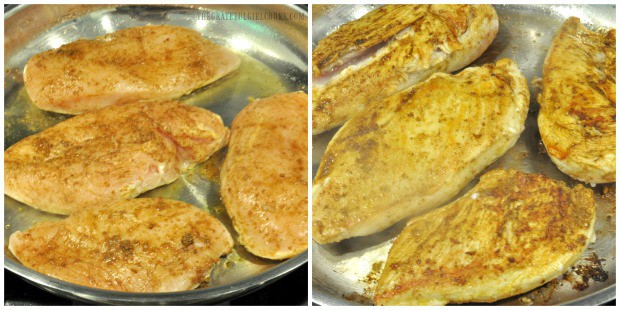
    Heat oil in a large (10-12 inch) non-stick skillet on high heat.  Once the oil gets really hot (but not smoking), add the seasoned chicken breasts. Cook chicken for 2-3 minutes (without moving), then carefully flip chicken over and cook the other side 2-3 minutes.

    Both sides should be a nice golden brown color. Transfer the chicken to a rimmed plate (a rimmed plate will catch any juices from chicken as it sits). Do NOT clean out skillet.

    Seasoned chicken breasts are pan-seared in skillet, until golden brown in color.

    Create The Sauce For The Chicken

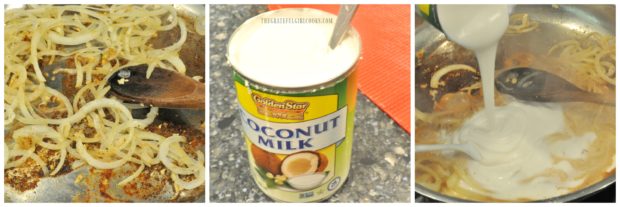
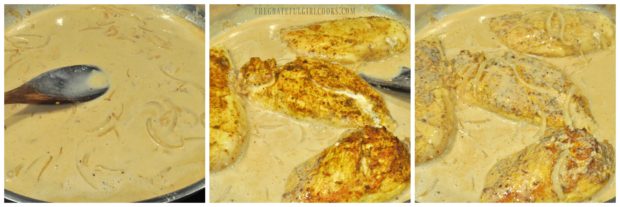
    Place onion slices and minced ginger into the same skillet.  Cook, stirring often for 2-3 minutes while the onions turn a golden color. Add the garlic, and stir well while it cooks for 1 more minute. Stir the coconut milk well with a fork or spoon while still in can (it’s thick). Pour entire can of coconut milk into the onion mixture in the skillet. Add salt. Stir well, to combine ingredients.

    (Note: this recipe (as written) calls for LIGHT canned coconut milk, which has far less calories than regular. I only had regular coconut milk in our pantry, so that is what I used, and what you see in photo below).Onions, ginger and garlic are cooked, then coconut milk is added to make sauce.

    Finish The Coconut Milk Braised Chicken

    Cook on medium heat until the sauce comes to a boil. Transfer the chicken breasts back into the sauce. Pour any accumulated juices into the skillet, as well. Reduce heat, and cook chicken (turning once) for 10-12 minutes total, and the chicken is cooked through and no longer pink in the thickest part. I also spoon sauce over the top of chicken occasionally as it cooks.

    Coconut milk sauce is used to braise chicken breasts in skillet.

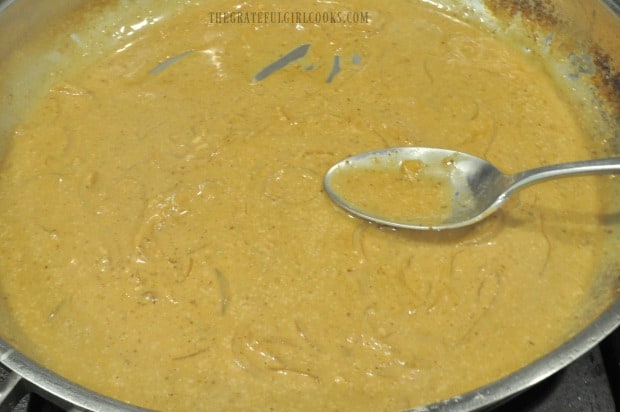
    When chicken is finished cooking, remove chicken breasts; transfer them back onto the rimmed plate. Cover with foil to keep warm. Turn the heat back up to high and bring sauce to a boil. Cook the coconut sauce for about 4 minutes, or until the sauce has thickened a bit, and reduced down to about 1½ cups.

    Coconut milk sauce is reduced in volume before serving.

    Toast Shredded Coconut While the Sauce Thickens

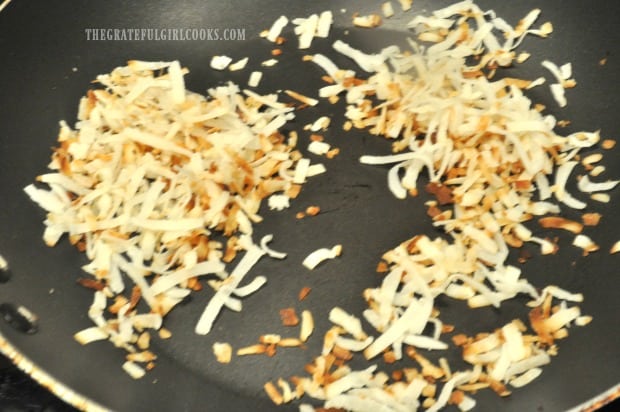
    While the sauce is cooking, I quickly toast some shredded coconut in a small dry skillet. I use this toasted coconut as a garnish for the finished dish.

    To toast coconut, simply place coconut in skillet, and cook on low heat, stirring often, until coconut turns a golden brown in color (only takes a couple minutes). Remove from heat; transfer coconut to a plate or paper towel to cool. This step can also be done ahead of time or while the chicken is cooking.

    Shredded coconut is toasted for garnish for braised chicken

    Serve Coconut Milk Braised Chicken

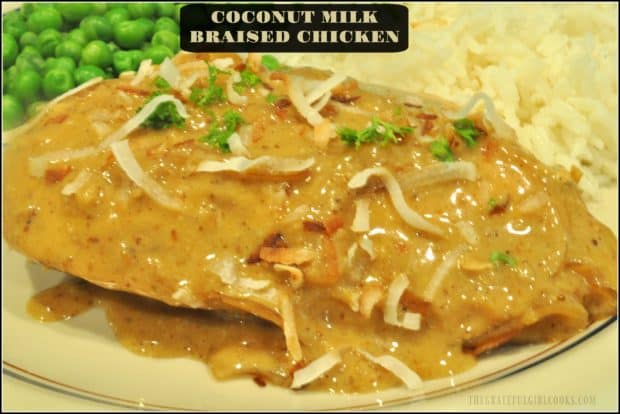
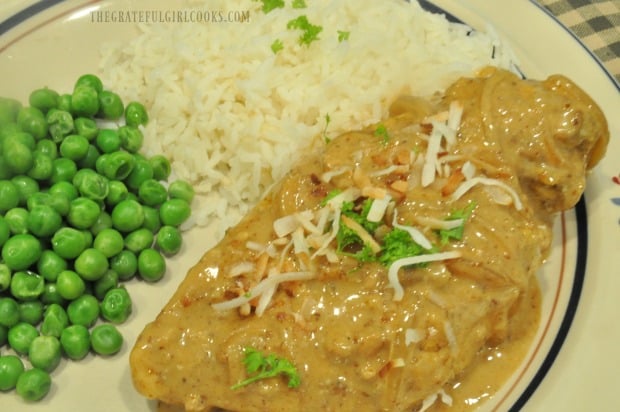
    Place the coconut milk braised chicken breasts onto individual plates or a serving platter. Spoon the sauce evenly over the pieces. Garnish with chopped fresh parsley and toasted coconut, (if desired). Season with additional salt, if desired. I served the coconut milk braised chicken with white rice and peas. YUM!

    Coconut Milk Braised Chicken is served with rice and peas.

    Coconut Milk Braised Chicken is garnished with parsley and toasted coconut for serving.

    I REALLY hope you will give this recipe for coconut milk braised chicken a try.  My husband and I really enjoyed it, and I will definitely be making this quick dish again! I sure got my money’s worth finding that old used cookbook!

    Looking For More CHICKEN Recipes?

    If you enjoy chicken dishes, be sure to check out my recipes for Coq au Vin, Chicken Broccoli Fettucine Alfredo, Chicken Fried Chicken, and many, many others, all of which are listed in the Recipe Index shown at the top of the page.

    Interested In More Recipes?

    Thank you for visiting this website. I appreciate you using some of your valuable time to do soIf you’re interested, I publish a newsletter 2 times per month (1st and 15th) with all the latest recipes, and other fun info. I would be honored to have you join our growing list of subscribers, so you never miss a great recipe!
    There is a Newsletter subscription box on the top right side (or bottom) of each blog post, depending on the device you use, where you can easily submit your e-mail address (only) to be included in my mailing list.

    You Can Also Find Me On Social Media:

    Facebook page: The Grateful Girl Cooks!
    Pinterest:
    The Grateful Girl Cooks!
    Instagram:
    jbatthegratefulgirlcooks

    Have a WONDERFUL day!

    Author's signature

    Recipe Source: Sunset – Recipe Annual Cookbook (2002 Edition), page 14, Published November, 2001 by Sunset Publishing Corporation.

    0 from 0 votes
    Coconut Milk Braised Chicken
    Prep Time
    10 mins
    Cook Time
    25 mins
    Total Time
    35 mins
     
    Coconut Milk Braised Chicken - big flavor, low calorie (under 300)! Pan seared seasoned breasts are cooked in/topped with a spiced coconut milk sauce.
    Category: Entree
    Cuisine: American
    Keyword: coconut milk braised chicken
    Servings: 4
    Calories Per Serving: 277 kcal
    Author: JB @ The Grateful Girl Cooks!
    Ingredients
    For Chicken Seasoning:
    • 2 teaspoons ground coriander
    • 1 teaspoon ground cumin
    • 1/4 teaspoon ground dried turmeric
    • 1/2 teaspoon cayenne pepper
    • 2 Tablespoons white wine vinegar
    For Rest of Dish:
    • 4 chicken breasts (5-6 oz. each) (boneless, skinless)
    • 1 teaspoon vegetable oil
    • 1 cup thinly sliced onion
    • 2 Tablespoons minced garlic
    • 1 Tablespoon minced fresh ginger
    • 1 (14 oz.) canned coconut milk (reduced fat)
    • 1/2 teaspoon salt
    • 2 Tablespoons fresh parsley, chopped (optional garnish)
    • 3 Tablespoons shredded coconut
    Instructions
    1. Mix seasonings for chicken in a small bowl (coriander, cumin, turmeric, cayenne pepper).  Add white wine vinegar; stir to combine ingredients fully.

    2. Rinse chicken, then place on paper towel, and pat dry.  Rub or brush on seasoning mixture, covering both sides of chicken. Heat oil in a large (10-12 inch) non-stick skillet on high heat.  Once oil gets hot (but not smoking), add chicken. Cook 2-3 minutes (without moving), then flip chicken over and cook other side 2-3 minutes.  Both sides should be golden brown. Transfer chicken to a rimmed plate (rimmed plate will catch juices from chicken). Do NOT clean out skillet.

    3. Place onion slices and minced ginger into the same skillet.  Cook, stirring often for 2-3 minutes until onions turn a golden color. Add garlic; stir well while it cooks for 1 minute.  Stir coconut milk with a fork or spoon while still in can (it's thick). Pour coconut milk into onion mixture. Add salt. Stir well to combine ingredients.  Cook on medium heat until it comes to a boil.

    4. Transfer chicken back into sauce. Pour any accumulated juices into skillet. Reduce heat; cook chicken for 10-12 minutes total (turning once), until chicken is no longer pink in the middle of thickest part. Spoon sauce over top of chicken often as it cooks. When chicken is done, remove chicken from skillet back onto rimmed plate. Cover chicken with foil to keep warm.

    5. Turn heat back up to high; bring sauce to a boil. Cook sauce for 4 minutes, or until the sauce has thickened a bit, and reduced down to about 1½ cups.

    6. While sauce is reducing, toast coconut (for garnish) by placing shredded coconut into a dry skillet; cook on low, stirring often, until it turns golden brown (takes a couple minutes). Remove from heat; transfer coconut to a paper towel to cool. **This step can also be done ahead of time or while the chicken is cooking.

    7. Place chicken breasts onto individual plates or serving platter. Spoon sauce evenly over chicken. Garnish with chopped fresh parsley and toasted coconut, (if desired), and season with additional salt, to taste. Serve, and enjoy!

    Nutrition Facts
    Coconut Milk Braised Chicken
    Amount Per Serving (1 chicken breast + sauce)
    Calories 277 Calories from Fat 108
    % Daily Value*
    Fat 12g18%
    Saturated Fat 9g56%
    Cholesterol 72mg24%
    Sodium 524mg23%
    Potassium 531mg15%
    Carbohydrates 11g4%
    Fiber 1g4%
    Sugar 4g4%
    Protein 25g50%
    Vitamin A 305IU6%
    Vitamin C 8.5mg10%
    Calcium 30mg3%
    Iron 1.2mg7%
    * Percent Daily Values are based on a 2000 calorie diet.

    Here’s one more to pin on your Pinterest boards!Easy Coconut Milk Braised Chicken - big flavor, low calorie (under 300)! Pan seared seasoned breasts are cooked in/topped with a spiced coconut milk sauce. YUM! 


    Parmesan Crust Baked Cod

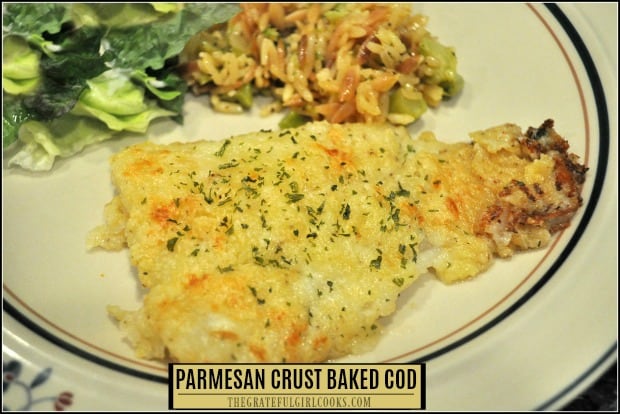
    Parmesan Crust Baked Cod features fish fillets, coated with butter and a seasoned flour/cornmeal Parmesan cheese topping to form a crust, then baked until done!
    Parmesan Crust Baked Cod features fish fillets, coated with butter and a seasoned flour/cornmeal Parmesan cheese topping to form a crust, then baked until done!

    Do you enjoy seafood? If I’m being honest, it would not be my first choice at any restaurant… but I am always on the lookout for new ideas for preparing fish (in this case COD), since it is so good for you, and is low in calories.

    I found this recipe for Parmesan crust baked cod online and decided to make it for my husband and myself for dinner recently. The recipe, as written, serves 4 (but I cheated and cut the recipe in half since there were only two of us here to eat it). Parmesan crust baked cod is an extremely easy dish to prepare, which is always a plus, in my opinion!

    Cod is a very mild in flavor fish that flakes easily when cooked. I’ve used it in other recipes including Beer Battered Fish and Chips, and Chili, Lime and Cumin Cod.

    Scroll Down For A Printable Recipe Card At The Bottom Of The Page

    How To Make Parmesan Crust Baked Cod

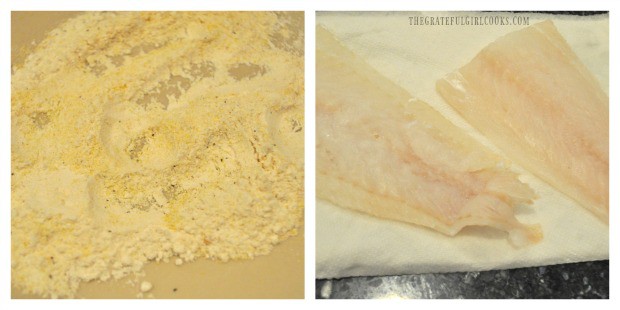
    Mix together flour, cornmeal and spices on a shallow dish. I use a dinner plate and just mixed ingredients with my fingers.  Rinse the cod fillets, then pat them dry on a paper towel.

    Flour/cornmeal coating readied for fresh cod fillets

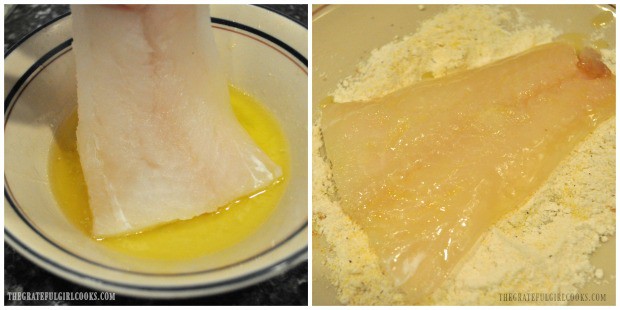
    Melt the butter in a medium sized bowl, then dip each piece of fish, one at a time in the butter. Let excess butter drip back into bowl, then place fish into seasoned flour/cornmeal mixture on plate. Turn to cover both sides of the cod with the seasoned flour mixture. Place coated fish into a baking dish. Repeat process with other fillets until all are coated and in the baking dish.

    Cod is dipped in butter, than coated with flour mixture before baking

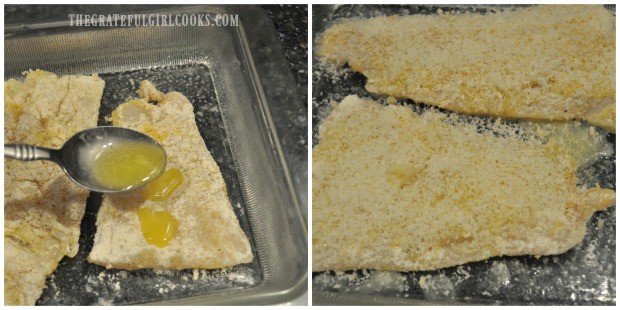
    Drizzle fish pieces with the remaining melted butter. Sprinkle with shredded Parmesan cheese to cover top of fish.

    Bake The Fish

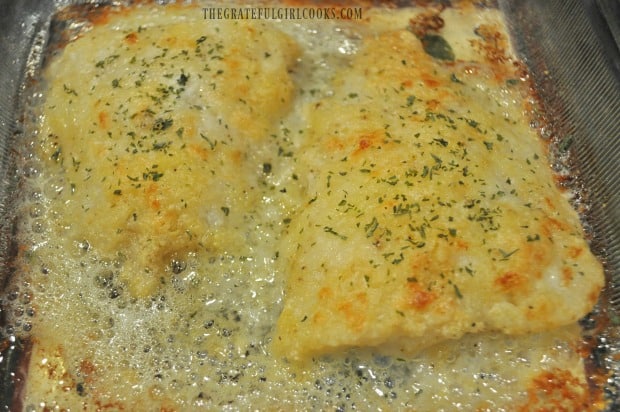
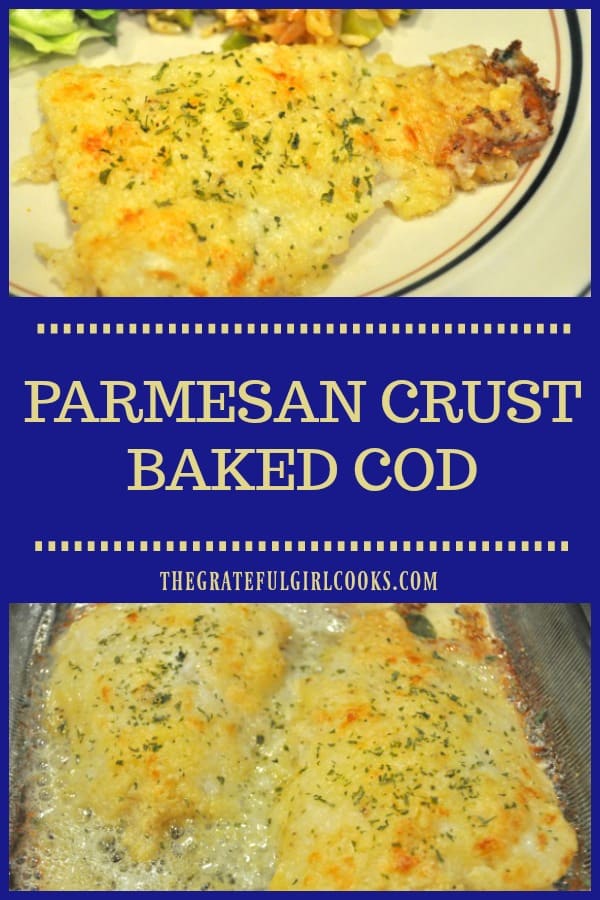
    Bake in a preheated 450° oven for 12-14 minutes. When done, the Parmesan topping will be golden brown in color, and the fish will flake very easily when tested with a fork. I sprinkle it with a few dried parsley flakes right before serving (optional).

    Parmesan crust baked cod, hot out of the oven!

    Time To Serve the Parmesan Crust Baked Cod

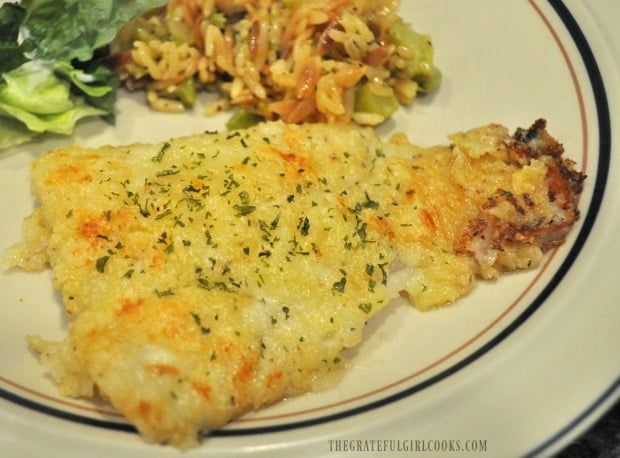
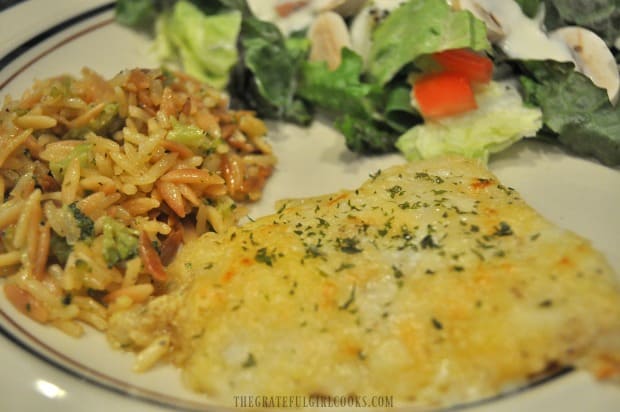
    I served the Parmesan crust baked cod with homemade Broccoli au Gratin Rice Pilaf and a simple green salad on the side.

    Parmesan crust baked cod served with salad and rice pilaf

    Baked cod with Parmesan crust is served with salad and rice pilaf

    Hope that you will consider trying this recipe for Parmesan crust baked cod. It’s always nice to try new low calorie recipes for fish, and find ones you enjoy. Thanks for stopping by, and I hope you will come back again soon. Have a great day!

    Looking For Recipes Using COD?

    You can find all of my seafood recipes in the Recipe Index, located at the top of the page. I have quite a few, including several that feature cod, including:

    Interested In More Recipes?

    Thank you for visiting this website. I appreciate you using some of your valuable time to do soIf you’re interested, I publish a newsletter 2 times per month (1st and 15th) with all the latest recipes, and other fun info. I would be honored to have you join our growing list of subscribers, so you never miss a great recipe!
    There is a Newsletter subscription box on the top right side (or bottom) of each blog post, depending on the device you use, where you can easily submit your e-mail address (only) to be included in my mailing list.

    You Can Also Find Me On Social Media:

    Facebook page: The Grateful Girl Cooks!
    Pinterest:
    The Grateful Girl Cooks!
    Instagram:
    jbatthegratefulgirlcooks

    Have a great day!

    Author's signature

    Recipe Adapted From: http://www.dierbergs.com/Recipes/Recipes/P/Pa/Parmesan/Parmesan-Baked-Cod

    0 from 0 votes
    Parmesan Crust Baked Cod
    Prep Time
    6 mins
    Cook Time
    14 mins
    Total Time
    20 mins
     
    Parmesan Crust Baked Cod features fish fillets, coated with butter and a seasoned flour/cornmeal Parmesan cheese topping to form a crust, then baked until done!
    Category: Dinner
    Cuisine: American
    Keyword: parmesan crust baked cod
    Servings: 4
    Calories Per Serving: 171 kcal
    Author: JB @ The Grateful Girl Cooks!
    Ingredients
    • 1 pound cod (4 four-ounce fillets)
    • 2 Tablespoons butter
    • 1/4 teaspoon salt
    • 1/8 teaspoon black pepper
    • 2 teaspoons cornmeal
    • 2 Tablespoons flour
    • 1/2 teaspoon onion powder
    • 2 Tablespoons Parmesan cheese (grated)
    Instructions
    1. Mix together flour, cornmeal and spices on a shallow dish (I used a dinner plate and just mixed ingredients with my fingers).  Rinse the cod fillets, then pat them dry on a paper towel.
    2. Melt the butter in a medium sized bowl, then dip each piece of fish, one at a time in the butter. Let excess butter drip back into bowl, then place fish into flour mixture on plate. Turn to cover both sides of the cod with the seasoned flour mixture. Place coated fish into a baking dish. Repeat process with other fillets.
    3. Drizzle fish pieces with the remaining melted butter. Sprinkle with shredded Parmesan cheese to cover top of fish.
    4. Bake in a preheated 450° oven for 12-14 minutes. When done, the Parmesan topping will be golden brown in color, and the fish will flake very easily when tested with a fork. Sprinkle with dried parsley right before serving, if desired Enjoy!

    Nutrition Facts
    Parmesan Crust Baked Cod
    Amount Per Serving (1 piece)
    Calories 171 Calories from Fat 63
    % Daily Value*
    Fat 7g11%
    Saturated Fat 4g25%
    Cholesterol 65mg22%
    Sodium 296mg13%
    Potassium 468mg13%
    Carbohydrates 3g1%
    Protein 21g42%
    Vitamin A 240IU5%
    Vitamin C 1.2mg1%
    Calcium 48mg5%
    Iron 0.6mg3%
    * Percent Daily Values are based on a 2000 calorie diet.

    Here’s one more to pin on your Pinterest boards!Parmesan Crust Baked Cod features fish fillets, coated with butter and a seasoned flour/cornmeal Parmesan cheese topping to form a crust, then baked until done!

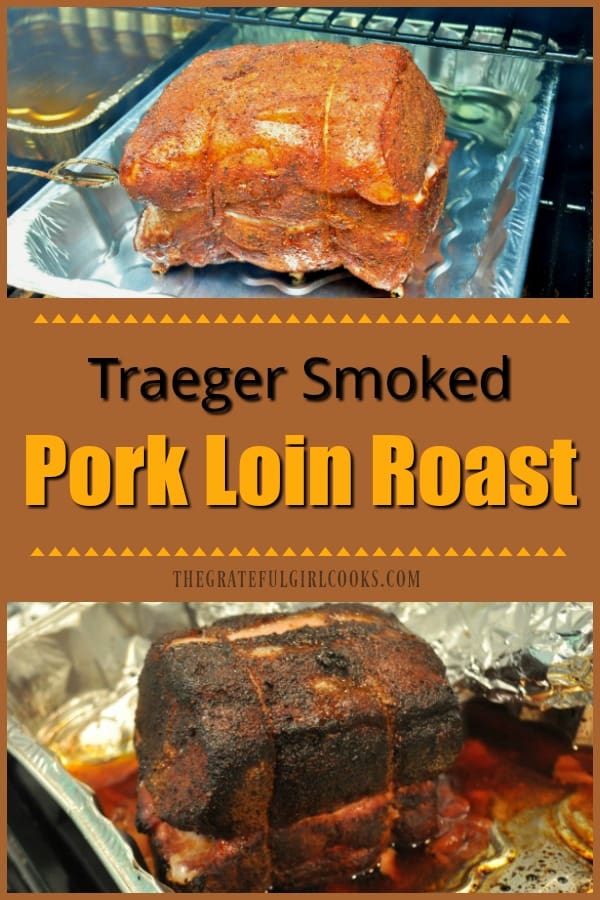
    Traeger Smoked Pork Loin Roast

    Traeger Smoked Pork Loin Roast (seasoned with dry rub spices) tastes amazing right off the smoker, OR as a tasty pulled pork sandwich, coated in BBQ sauce!
    Traeger Smoked Pork Loin Roast (seasoned with dry rub spices) tastes amazing right off the smoker, OR as a tasty pulled pork sandwich, coated in BBQ sauce!

    Someone Got A TRAEGER!

    My husband has a NEW Traeger grill that he received for his birthday and Father’s Day (what a great combo gift) this past June. We have had fun trying new recipes for chicken, sausages, pork, steak, (and even dessert) ever since!

    Someone is excited to have a new Traeger grill!
    We were anxious to try pulled pork (as well as a “bazillion” other recipes), so I searched for a spice rub recipe online that sounded like it would be really good. My husband bought a 3 pound pork loin roast and we decided to cook it on our grill, seasoned with some of the spice rub I found online (which is perfect for pork or chicken).

    We used the cookbook that came with the grill purchase to determine how long the roast would take to smoke, then slow roast. We crossed our fingers and followed the process exactly, and the results were wonderful! YAY- SUCCESS on a smoked pork loin roast!

    Scroll Down For A Printable Recipe Card At The Bottom Of The Page

    Here’s How We Made This Delicious Roast On Our Traeger Grill

    Start by making the dry spice rub. EASY! Place the dry rub spices in a medium sized bowl. Mix well, to fully combine ingredients. I cut the recipe in half. The flavor-filled dry rub recipe made enough for the pork roast, PLUS a couple of extra uses. We’ve  also used the spice rub on a whole chicken, and STILL have some left over (stored in an airtight container) for the next pork roast or chicken we grill.

    Dry rub spices for smoked pork loin

    Dry rub to put on pork roast before smoking on grill

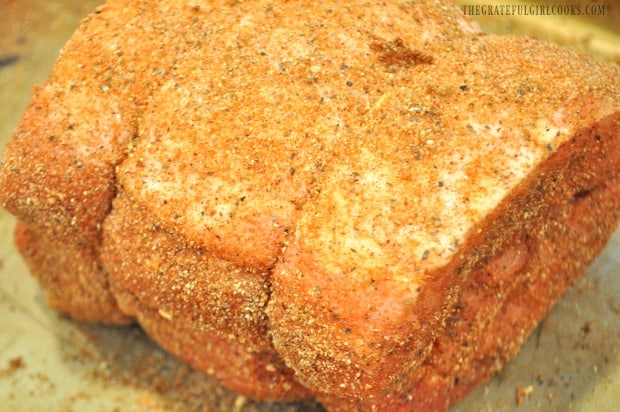
    Cover all sides of the pork roast with the dry spice rub, patting it onto the surface of the meat. The slight moisture of the meat will help the spices stick!  When done, set seasoned roast aside until ready to put it in the smoker.

    Pork loin roast is covered with dry spice rub before smoking meat on grill

    Ready To Make A Traeger Smoked Pork Loin Roast?

    When ready to begin, turn the Traeger grill to the SMOKE setting. Let it fire up for 4-5 minutes, with the lid OPEN. Once grill is smoking, turn the temperature gauge to 225° F. Close the lid on the grill and let it preheat for 10 to 15 minutes. It doesn’t really matter, but in case you’re curious… we used Mesquite wood pellets for our Traeger smoked pork loin.

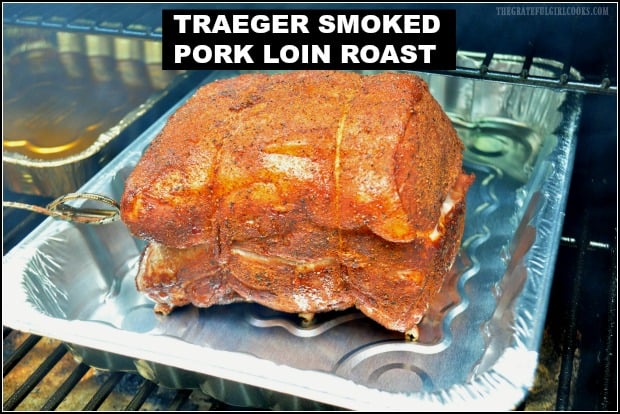
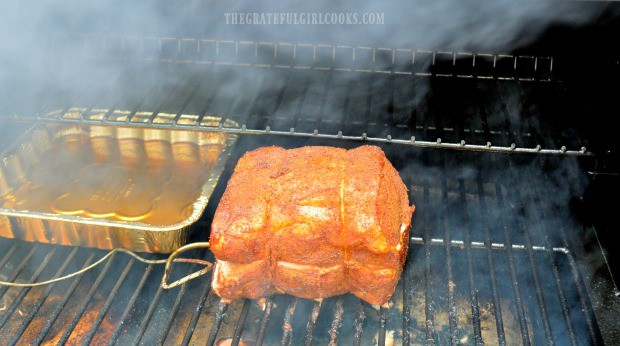
    Once the grill/smoker is preheated, place an aluminum pan with 2 cups of apple juice into a corner (this will help keep some nice moisture in the grill during the long smoking process). Another option for this is to use a spray bottle and spritz the apple juice onto the roast about once an hour, if desired. Place the seasoned pork loin roast on the grill, FAT SIDE UP. Insert the temperature probe into the meat. Roast the pork for 3 hours, with the lid closed.

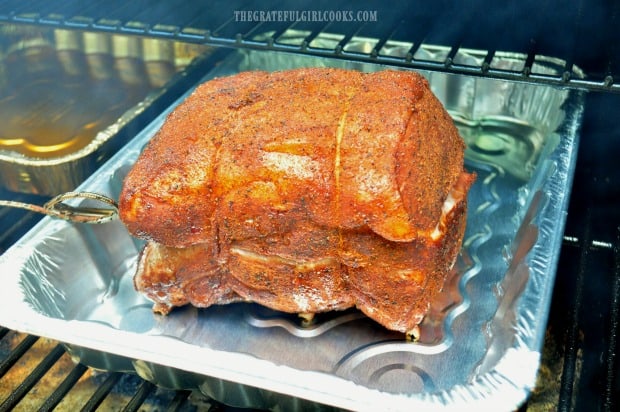
    Pork loin roast smoking on Traeger grill

    After pork has smoked/roasted for 3 hours, transfer the meat into an aluminum pan, and place back onto grill (with temperature probe still attached). Continue to cook the smoked pork loin roast for 5-6 hours, or until the temperature in the thickest part of the meat (not touching any bones) reaches an internal temperature of 190° F. The long cooking time ensures the meat will be very tender!

    Smoked pork loin roast moved to aluminum pan on Traeger grill, to finish cooking.

    Almost Time to EAT!

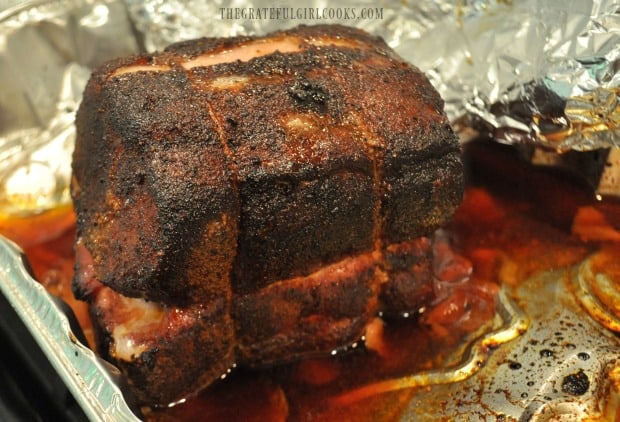
    This is what the pork loin roast looked like, once it was done. Remove roast from grill. Cover the pan loosely with aluminum foil, and let the meat rest for approximately 30 minutes. Pour any accumulated juices in the pan into a separate container (or gravy separator). Transfer the Traeger smoked pork loin roast to a cutting board.

    Finished smoked pork loin roast.

    While the pork is still quite hot, slice it OR pull the pork into chunks (or shred with two forks). Be sure to discard any fat or bones (nobody wants a big bite of THAT!). You can add additional seasoning rub (and a little of the reserved juices) to the meat at this point OR mix meat with a favorite BBQ sauce. At that point, it’s ready to gobble up, and we cut off a portion of the Traeger smoked pork loin roast to eat just as it was (with it’s incredible smoked flavor). Yum.

    We Shredded Part Of The Pork Loin To Make BBQ Sandwiches

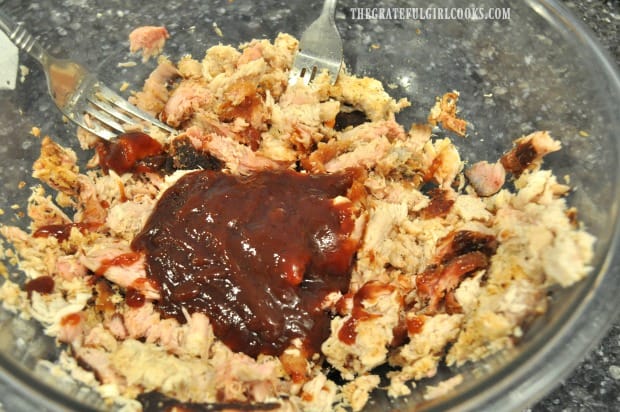
    After that, we took the remaining half of the roast, and pulled it into shreds. To the shredded pork we added a delicious a sweet n’ spicy BBQ sauce (Sweet Baby Ray’s), and mixed it until everything was covered! You can still see part of the pink “smoke” ring in the meat before I mixed in the sauce!

    Barbecue sauce is added to pulled smoked pork, for sandwiches

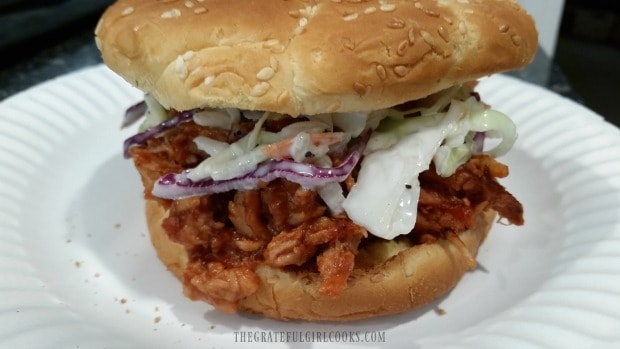
    Since we decided to make BBQ pulled pork sandwiches, the next thing I did was to lightly toast hamburger buns, piled each one high with shredded BBQ smoked pork, covered the pork with homemade coleslaw (for added crunch), and enjoyed it for dinner!

    Oh boy… this was a fantastic BBQ Traeger smoked pork loin sandwich! YUM! We enjoyed the leftovers for days!

    Traeger smoked pork loin and BBQ sauce, with coleslaw makes a GREAT tasting sandwich!

    I hope you enjoyed seeing the process of making this delicious Traeger smoked pork loin on our grill.  If you own a smoker of any kind, I hope you will consider trying this recipe for your loved ones. We truly enjoyed it, and will make it again, this exact way!

    If you have a smoker grill, you might also be interested in my recipe for Berry Cobbler (Traeger Grill Style), another of our first experiments on our Traeger. It was absolutely DELICIOUS!

    Looking For More TRAEGER Recipes?

    You can find all of my recipes in the Recipe Index, which is located at the top of the page. I have quite a few Traeger recipes you might enjoy, including:

    Interested In More Recipes?

    Thank you for visiting this website. I appreciate you using some of your valuable time to do soIf you’re interested, I publish a newsletter 2 times per month (1st and 15th) with all the latest recipes, and other fun info. I would be honored to have you join our growing list of subscribers, so you never miss a great recipe!
    There is a Newsletter subscription box on the top right side (or bottom) of each blog post, depending on the device you use, where you can easily submit your e-mail address (only) to be included in my mailing list.

    You Can Also Find Me On Social Media:

    Facebook page: The Grateful Girl Cooks!
    Pinterest:
    The Grateful Girl Cooks!
    Instagram:
    jbatthegratefulgirlcooks

    Have a wonderful day!

    Author's signature

    Recipe Source for cooking pork: Cookbook that came with purchase of Traeger grill.
    Source for dry rub recipe: https://www.tastesoflizzyt.com/pulled-pork-rub/

    ↓↓ PRINTABLE RECIPE BELOW ↓↓

    0 from 0 votes
    Traeger Smoked Pork Loin Roast
    Prep Time
    15 mins
    Cook Time
    9 hrs
    Total Time
    9 hrs 15 mins
     
    Traeger Smoked Pork Loin Roast (seasoned with dry rub spices) tastes amazing right off the smoker, OR as a tasty pulled pork sandwich, coated in BBQ sauce!
    Category: Dinner, Grill
    Cuisine: American
    Keyword: smoked pork loin roast
    Servings: 10 servings
    Calories Per Serving: 246 kcal
    Author: JB @ The Grateful Girl Cooks!
    Ingredients
    Dry Rub Spice Mix (makes about 2 cups total- you need 1/3 cup for this roast. See NOTES below):
    • 1/3 cup dark brown sugar
    • 1/2 cup smoked paprika
    • 1/4 cup garlic powder
    • 1/4 cup salt
    • 2 Tablespoons black pepper
    • 2 Tablespoons chili powder
    • 2 Tablespoons chipotle chili pepper (optional)
    • 2 Tablespoons onion powder
    • 1 Tablespoon cayenne pepper
    • 1 Tablespoon ground cumin
    • 1 Tablespoon dry mustard
    For pork roast:
    • 3 pounds pork loin roast
    • 2 cups apple juice
    Instructions
    1. Make the dry spice rub by placing spices in a medium sized bowl. Mix well, to fully combine ingredients. Cover roast with about 1/3 cup of the dry spice rub, patting  it onto the surface of the meat, making sure to cover all sides. *You will have leftover spice rub- SEE RECIPE NOTES BELOW)*. When done, set roast aside until ready for smoker.

    2. When ready to begin, turn the Traeger grill to the SMOKE setting. Let it fire up for 4-5 minutes, with the lid OPEN. Once grill is smoking, turn the temperature gauge to 225° F. Close the lid on the grill and let it preheat for 10 to 15 minutes. We used mesquite pellets.

    3. Once the grill/smoker is preheated, place an aluminum pan with 2 cups of apple juice into a corner (this will help keep some nice moisture in the grill during the long smoking process). Another option for this is to use a spray bottle and spritz the apple juice onto the roast about once an hour, if desired. Place the seasoned pork loin roast on the grill, FAT SIDE UP. Insert the temperature probe into thickest part of meat (but not touching any bones). Roast the pork for 3 hours, with the lid closed.

    4. After pork has smoked/roasted for 3 hours, transfer the roast into an aluminum pan, and place back onto grill (with temperature probe still attached).  Continue to cook the smoked pork loin roast for 5-6 hours, or until the temperature in the thickest part of the meat reaches an internal temperature of 190° F.

    5. Remove roast from grill. Cover the pan loosely with aluminum foil, and let the meat rest for approximately 30 minutes. Pour any accumulated juices in the pan into a separate container (or gravy separator). Transfer the roast to a cutting board.

    6. While the pork is still quite hot, slice it, or pull the pork into chunks or shred with two forks. Be sure to discard any fat or bones that you find (nobody wants a big bite of THAT!). You can add additional seasoning rub (and a little of the reserved juices) to the meat at this point OR a favorite BBQ sauce (if using pork to make sandwiches). Serve sliced or pulled, with or without and enjoy the delicious smoky flavor!

    Recipe Notes

    NOTE: As written, dry rub recipe makes almost 2 cups. I cut the recipe for the dry rub in half. The quantities are easy to cut in half (except for the 1/3 cup of dark brown sugar. If cutting brown sugar in half, use 2 Tablespoons PLUS 2 teaspoons brown sugar). If halved, you'll end up with about 1 cup of spice rub, which is enough for 3 pork roasts or chickens (about 3 pounds each). Each roast uses about 1/3 cup of the rub to cover. Store leftover spice mix in airtight sealed container.

    Nutrition Facts
    Traeger Smoked Pork Loin Roast
    Amount Per Serving (1 g)
    Calories 246 Calories from Fat 63
    % Daily Value*
    Fat 7g11%
    Saturated Fat 1g6%
    Cholesterol 85mg28%
    Sodium 2956mg129%
    Potassium 759mg22%
    Carbohydrates 14g5%
    Fiber 3g13%
    Sugar 8g9%
    Protein 32g64%
    Vitamin A 3830IU77%
    Vitamin C 0.7mg1%
    Calcium 56mg6%
    Iron 3.2mg18%
    * Percent Daily Values are based on a 2000 calorie diet.

    Here’s one more to pin on your Pinterest boards!Traeger Smoked Pork Loin Roast (seasoned with dry rub spices) tastes amazing right off the smoker, OR as a tasty pulled pork sandwich, coated in BBQ sauce!


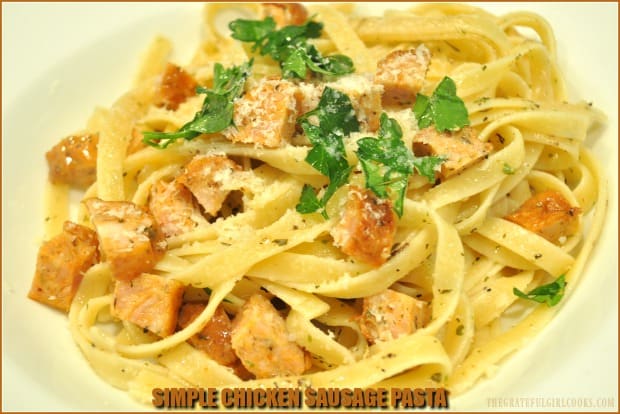
    Simple Chicken Sausage Pasta

    Simple chicken sausage pasta is an easy, quick and delicious meal to prepare. Pasta is tossed with Italian spices, olive oil, butter, Parmesan cheese and chicken sausage, then served in this flavor-filled, simple dish!
    Simple chicken sausage pasta is an easy, delicious meal to prepare. Pasta is tossed with Italian spices, olive oil, butter, Parmesan cheese and chicken sausage!

    We love pasta at our house… do you?  Years ago, I started experimenting with simple pasta dishes that were not drenched in Italian tomato sauce or alfredo sauce, and came up with this EASY, yet great tasting chicken sausage pasta!

    We love those traditional sauces I mentioned above, but I was trying to create SIMPLE and QUICK new pasta dishes without using heavy sauces! This one is our favorite! I make this dish when I don’t want to mess with making a sauce, and just want something for dinner that is filling, tasty, and EASY to fix after a busy day.  Sometimes we have it without meat of any kind added, but other times we add it in.

    We had two leftover grilled chicken sausages in our refrigerator, so when my husband asked if we could have pasta for dinner, it was so easy to pull this meal together in a matter of minutes!

    Scroll Down For A Printable Recipe Card At The Bottom Of The Page

    How To Make Simple Chicken Sausage Pasta

    This recipe uses two links of Italian flavored chicken sausage, and gives it a little extra protein and flavor! Here’s how to make this chicken sausage pasta:

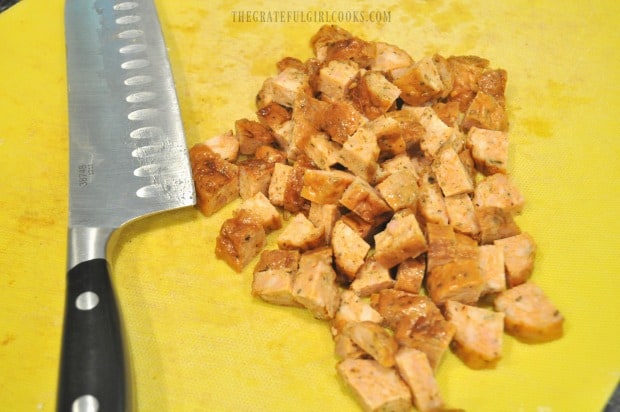
    Two COOKED chicken sausages are sliced, then each slice is cut into quarters. If you want, you can pan cook the sausages while the pasta is cooking (to save time). Set aside the chicken sausages until ready to add to pasta.

    Cooked chicken Italian sausages are cut in slices, then into quarter sized pieces.

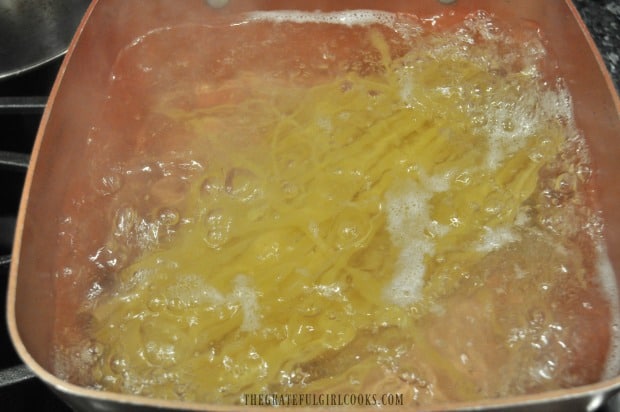
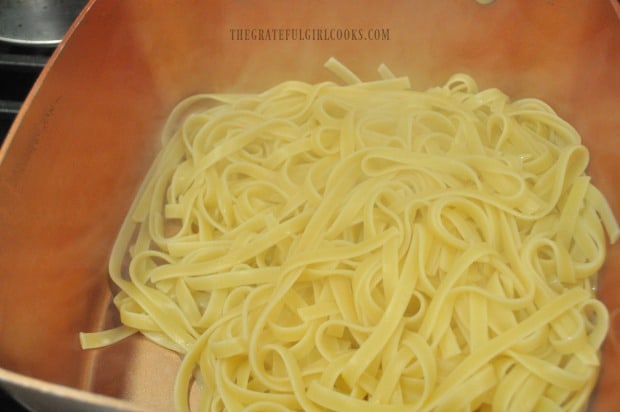
    Prepare pasta according to package instructions. My preferred pasta is fettucine noodles, but regular spaghetti noodles work just as well for this simple meal (I speak from experience!). Once pasta is done cooking, drain noodles in a colander (but do not rinse), then put hot noodles immediately back into the pot you cooked them in (minus the water, of course).

    Pasta is cooked according to package instructions.

    Cooked pasta is drained, then placed back into pan.

    Season The Cooked Pasta

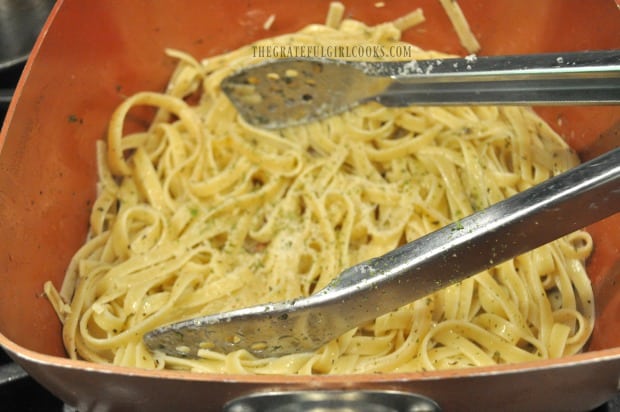
    Quickly stir in butter while the pasta is hot so it can melt. Add olive oil and Italian spices, and toss to coat the pasta with the ingredients. Tongs work wonderfully for this! Taste test the pasta. If desired, add additional salt and pepper, to suit your taste buds.

    Italian spices, olive oil, butter and Parmesan are added to hot cooked pasta

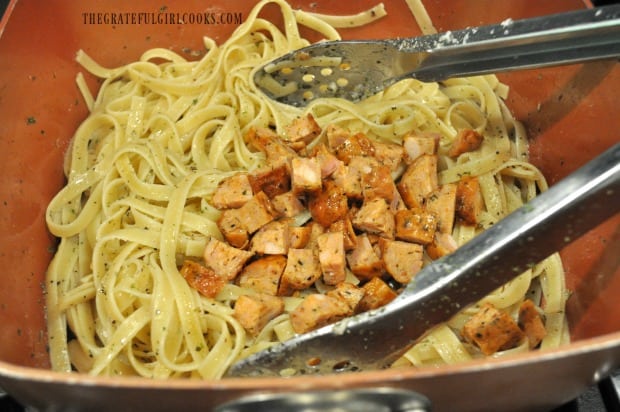
    Add warm chicken sausage to the pasta, and toss well, to combine. If necessary, turn heat on LOW while tossing pasta, just to keep pasta hot. Once mixed, divide pasta and sausage among serving bowls or plates.

    Cooked chicken Italian sausage pieces are tossed into seasoned pasta.

    Serve The Chicken Sausage Pasta

    That’s it! See how simple it is to make this chicken sausage pasta?  To serve, grate additional fresh Parmesan cheese over the top of the hot pasta. Garnish with some chopped flat leaf Italian parsley. I was able to use some parsley that is growing in our little garden-yay!).

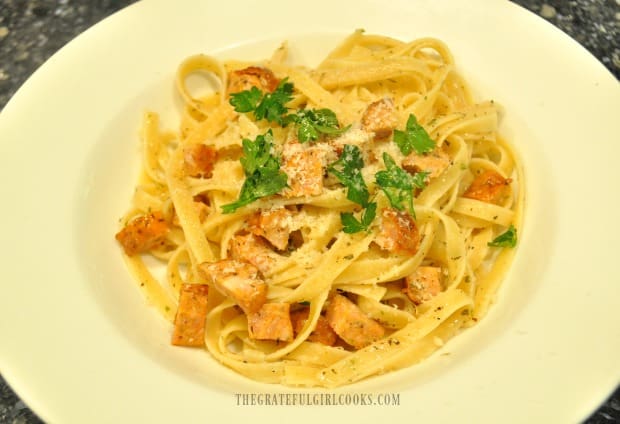
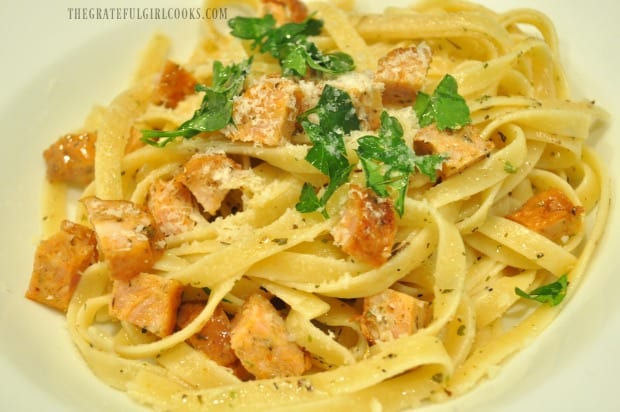
    Chicken sausage pasta is garnished with parsley and Parmesan cheese.

    You don’t have to have a thick sauce to serve up a flavor-filled pasta dish!  This is one of our favorite ways to have pasta… and it takes hardly any time at all to whip this up for dinner!

    The finished simple chicken sausage pasta is garnished with Parmesan cheese and fresh parsley.

    If you enjoy pasta, you might also want to try Florentine Manicotti, Pasta Carbonara, or Chicken Broccoli Fettucine Alfredo. I heartily recommend any of those recipes. You can find other yummy pasta recipes in my Recipe Index shown at the top of each blog post.

    Sure do hope you will give this simple chicken sausage pasta a try! It tastes wonderful using regular (pork) Italian sausages, too. Next time you grill, throw a couple sausages on, then save them in your refrigerator or freezer until you make this dish. It’s a great timesaver!

    Interested In More Recipes?

    Thank you for visiting this website. I appreciate you using some of your valuable time to do soIf you’re interested, I publish a newsletter 2 times per month (1st and 15th) with all the latest recipes, and other fun info. I would be honored to have you join our growing list of subscribers, so you never miss a great recipe!
    There is a Newsletter subscription box on the top right side (or bottom) of each blog post, depending on the device you use, where you can easily submit your e-mail address (only) to be included in my mailing list.

    You Can Also Find Me On Social Media:

    Facebook page: The Grateful Girl Cooks!
    Pinterest:
    The Grateful Girl Cooks!
    Instagram:
    jbatthegratefulgirlcooks

    Have a wonderful day, and may God bless you in all you do!

    Author's signature

    0 from 0 votes
    Simple Chicken Sausage Pasta
    Prep Time
    10 mins
    Cook Time
    11 mins
    Total Time
    21 mins
     
    Simple chicken sausage pasta is an easy, delicious meal to prepare. Pasta is tossed with Italian spices, olive oil, butter, Parmesan cheese and chicken sausage!
    Category: Entree
    Cuisine: Italian
    Keyword: chicken sausage pasta
    Servings: 4 servings
    Calories Per Serving: 440 kcal
    Author: JB @ The Grateful Girl Cooks!
    Ingredients
    • 2 links Italian chicken sausage , cooked
    • 8 ounces fettucine pasta (1/2 pound)
    • 2 Tablespoons butter
    • 2 Tablespoons extra virgin olive oil
    • 1/4 teaspoon garlic powder
    • 1/4 teaspoon Italian seasoning
    • 1/8 teaspoon dried oregano
    • 1/4 cup Parmesan cheese , grated
    • 1-2 pinches salt/pepper ,to taste
    • 4 teaspoons Parmesan cheese , for garnish (optional)
    • 2 Tablespoons Flat leaf Italian parsley (fresh) , for garnish (optional)
    Instructions
    1. Slice two COOKED chicken sausages into 1/2 inch slices, then cut each slice into quarters. You can pan cook the sausages while the pasta is cooking (to save time). Set aside cooked chicken sausage pieces until ready to add to cooked pasta.

    2. Prepare pasta according to package directions.  When pasta is done, drain noodles in a colander (do not rinse), then put them back into pot you cooked them in (minus the water, of course).

    3. Quickly stir in butter while the pasta is hot so it can melt. Add olive oil and Italian spices, and toss to coat the pasta with the butter, oil and spices.  Taste test pasta. If desired, add additional salt and pepper, to suit your taste buds. Add chicken sausage to pasta and toss, to combine. If necessary, turn heat on LOW while tossing pasta, just to keep pasta hot.

    4. To serve, divide pasta and sausage among serving bowls, grate additional fresh Parmesan cheese over the top of the hot pasta, then garnish with chopped flat leaf Italian parsley. Enjoy! 

    Recipe Notes

    Caloric calculation does not include optional garnish of additional Parmesan cheese and parsley.

    Nutrition Facts
    Simple Chicken Sausage Pasta
    Amount Per Serving (1 (1/4 of total))
    Calories 440 Calories from Fat 198
    % Daily Value*
    Fat 22g34%
    Saturated Fat 7g44%
    Cholesterol 96mg32%
    Sodium 606mg26%
    Potassium 138mg4%
    Carbohydrates 42g14%
    Fiber 1g4%
    Sugar 1g1%
    Protein 16g32%
    Vitamin A 410IU8%
    Vitamin C 0.6mg1%
    Calcium 94mg9%
    Iron 1.5mg8%
    * Percent Daily Values are based on a 2000 calorie diet.

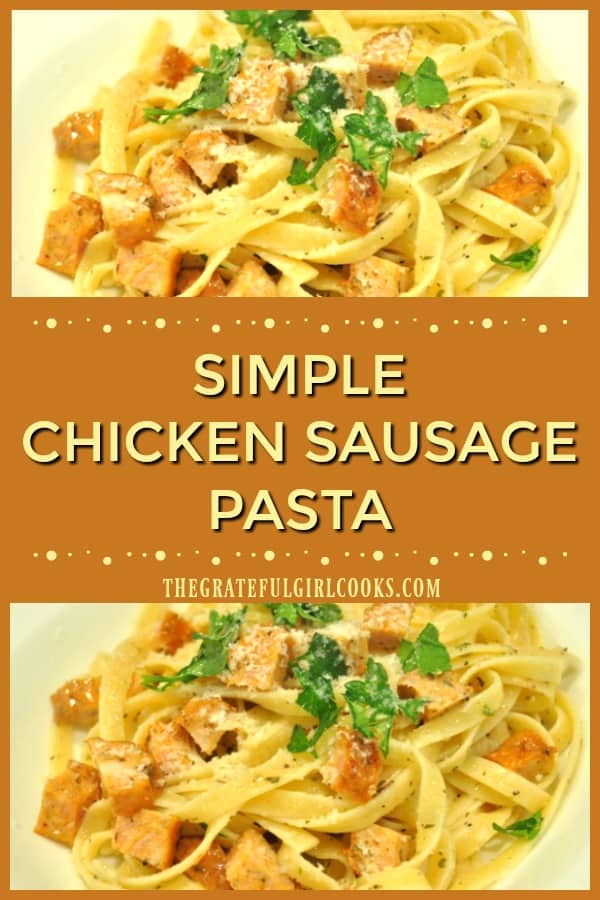
    Here’s one more to pin on your Pinterest boards!Simple chicken sausage pasta is an easy, delicious meal to prepare. Pasta is tossed with Italian spices, olive oil, butter, Parmesan cheese and chicken sausage! 


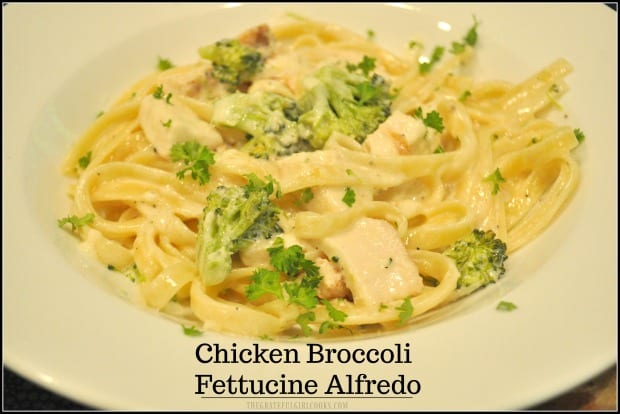
    Chicken Broccoli Fettucine Alfredo

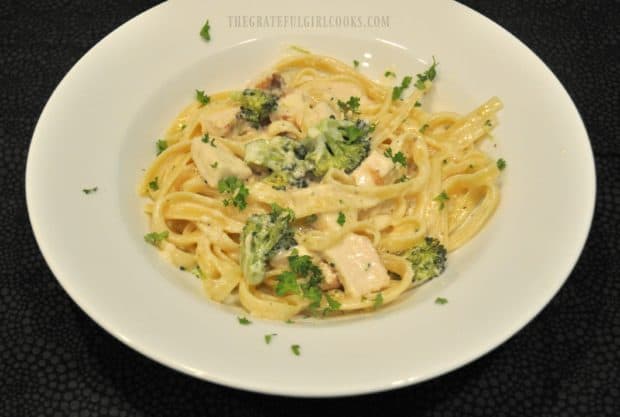
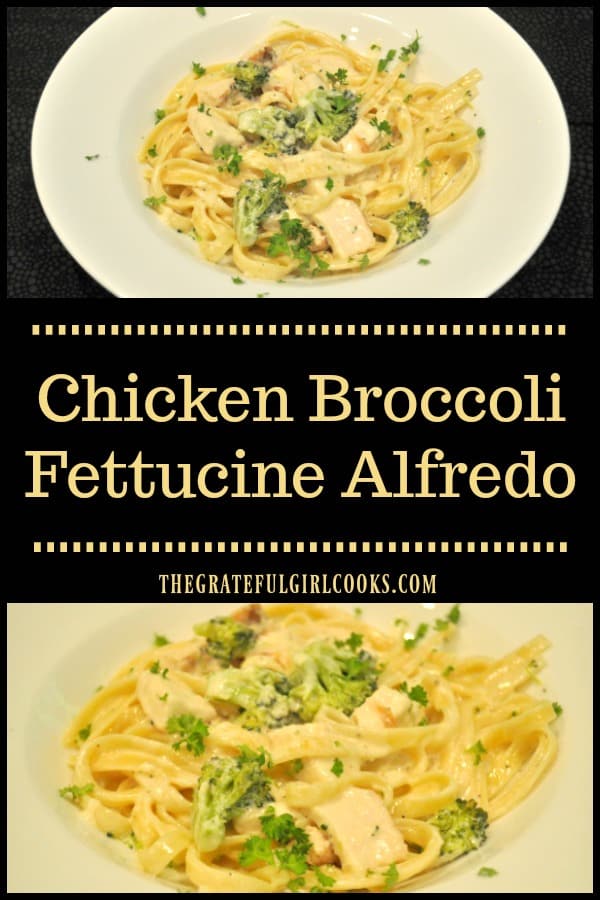
    Chicken Broccoli Fettucine Alfredo- this classic Italian dish with a creamy butter Parmesan sauce is delicious, and can be on the table in about 30 minutes!
    Chicken Broccoli Fettucine Alfredo- this classic Italian dish with a creamy butter Parmesan sauce is delicious, and can be on the table in about 30 minutes!

    You know what? Right up front I have to tell you this “all in one” meal is fairly high in calories, but I gotta be honest here… sometimes you just have to enjoy yourself! This dish is Italian comfort food at it’s very best!!!

    Chicken broccoli fettucine alfredo is one of my favorite Italian dishes, but I only make it occasionally, because it has more delicious calories than I need to routinely consume in one meal!

    But… having said that, I cannot say enough GOOD things about this dish- the pasta is coated in a creamy Parmesan butter alfredo sauce packed with flavor, and features chicken breasts and broccoli… an all in one dinner! It tastes DELICIOUS! Oh boy… is it ever delicious!

    Scroll Down For A Printable Recipe Card At The Bottom Of The Page

    SO HOW DO I MAKE CHICKEN BROCCOLI FETTUCINE ALFREDO?

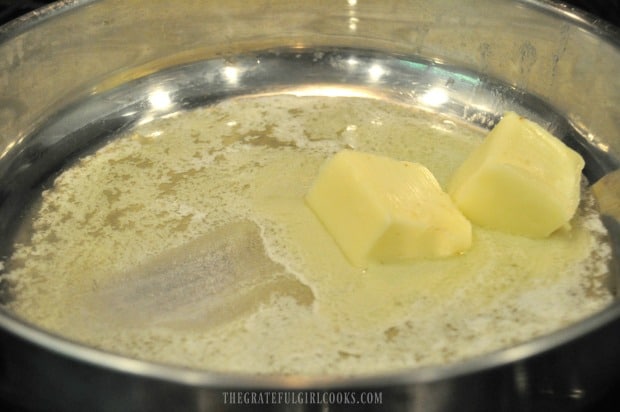
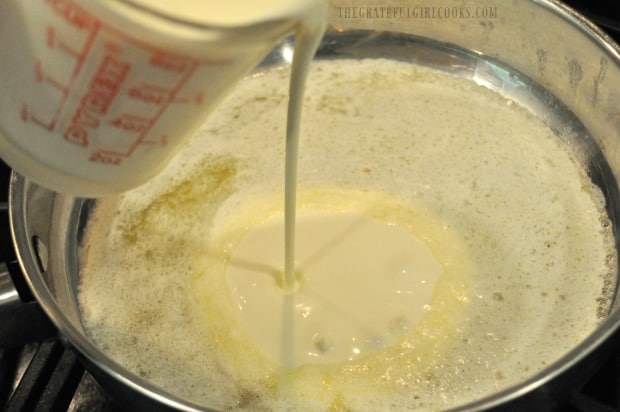
    The first thing you will need to do is make the alfredo sauce for the pasta. It’s EASY!  Melt butter in a large skillet. Once butter is melted, add heavy whipping cream, pepper, and garlic powder. Stir until combined. Cook this sauce for about 5 minutes on medium low. Try to NOT let it come to a boil.

    Butter is melted for fettucine alfredo sauce

    Heavy whipping cream is added to alfredo sauce in pan

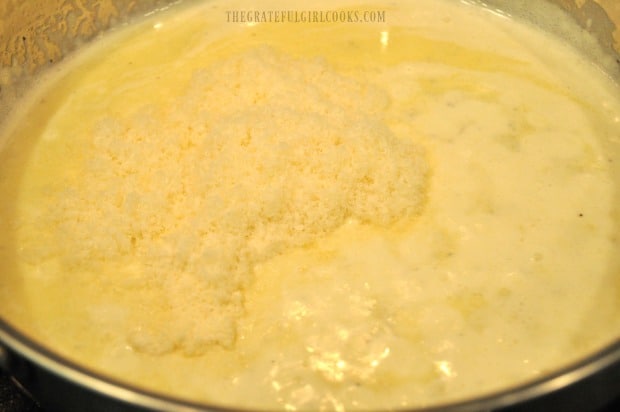
    Add grated fresh Parmesan cheese to the sauce, and stir to combine. Cook these ingredients on medium low until the cheese has melted and the sauce has thickened.

    Grated Parmesan cheese is added to alfredo sauce in pan

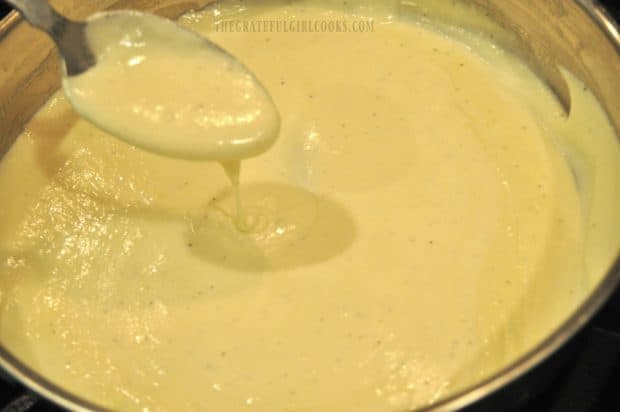
    Alfredo sauce has thickened to the perfect consistency

    Prepare The “Add-Ins”

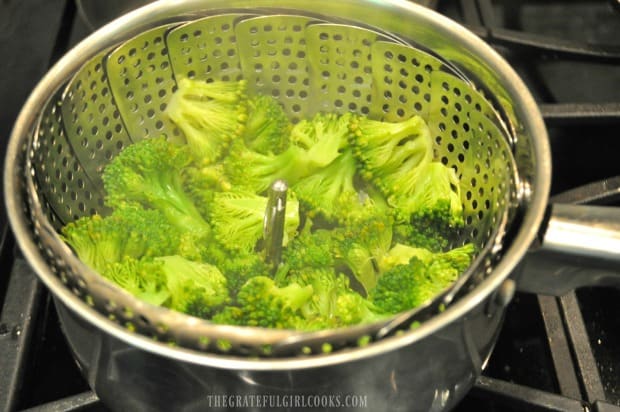
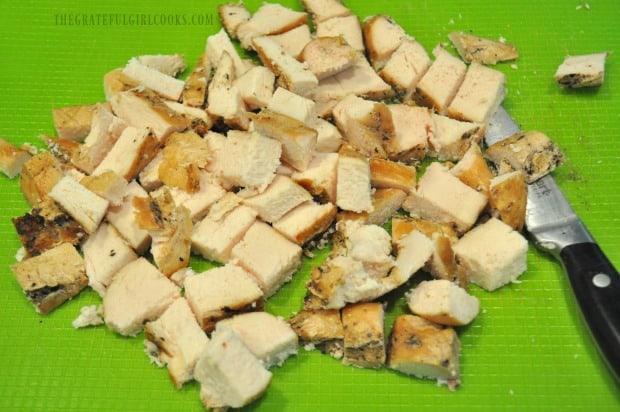
    NOTE: (This step can be done ahead of time!) Cook broccoli florets (either fresh or frozen). I use fresh broccoli florets and steam them over boiling water until they are done. Set aside until you’re ready to add them to the sauce. Cut the cooked chicken breast into bite-sized pieces.

    Broccoli florets are steamed before adding to alfredo sauce

    Cooked chicken breasts are cut into cubes before adding to alfredo sauce.

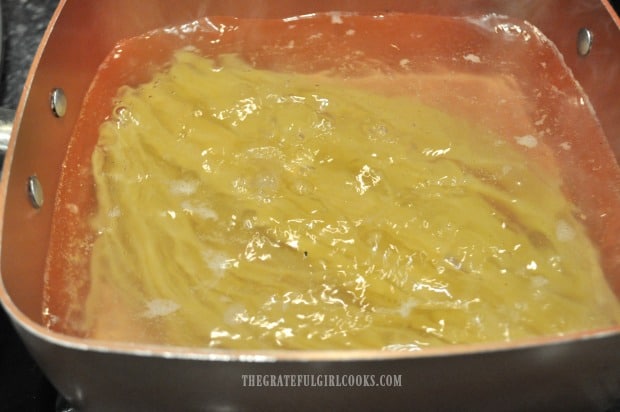
    Cook fettucine pasta according to the package directions.  When done, drain pasta well.

    Fettucine noodles cooking in pan

    Finishing The Chicken Broccoli Fettucine Alfredo

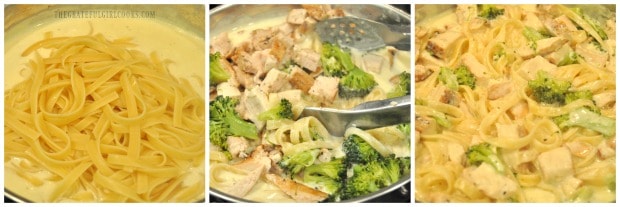
    Add cooked and drained fettucine noodles to the alfredo sauce.  Next add cooked broccoli and chicken pieces.  Stir well, to combine ingredients and fully coat everything with the alfredo sauce. TIP: If the mixture seems too thick, simply add a bit more whipping cream to the pan, and stir to blend it in.

    Taste test the pasta (it’s a hard job, but someone’s gotta do it). Season with salt and pepper, to suit your taste. Continue cooking on medium low for a minute or two to ensure everything is heated through before serving.

    Fettucine noodles, chicken and broccoli are added to alfredo sauce

    Time To Serve This Delicious Meal

    To serve, transfer chicken broccoli fettucine alfredo to individual serving bowls or plates. Garnish each serving with chopped fresh parsley, if desired. If you don’t mind the extra calories, you can also grated a tiny bit of Parmesan cheese over the top, too.

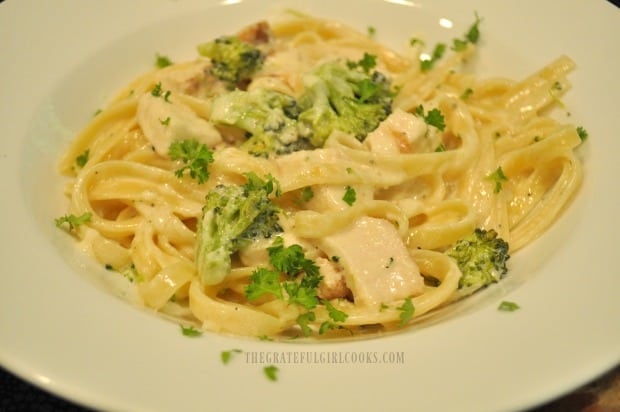
    Chicken broccoli fettucine, served in a white bowl

    Serve this delicious pasta, and enjoy every single yummy, high calorie bite! If you enjoy this meal, you might also want to check out my recipe for Shrimp and Penne Pasta Alfredo.

    Chicken fettucine is garnished with parsley before serving

    While this may not be the “healthiest” dish you’ve ever had… it might be one of the most delicious dishes you’ve ever had!  The fettucine is so good… creamy, cheesy, and hey… since there is a vegetable (broccoli) and lean protein (chicken breast) in it, that’s gotta count for something, right?  It’s all about BALANCE in everything! Sure hope you enjoy this meal!

    Looking For More PASTA Recipes?

    You can find ALL of my recipes in the Recipe Index, which is located at the top of the page. I have lots of yummy pasta dishes, including:

    Interested In More Recipes?

    Thank you for visiting this website. I appreciate you using some of your valuable time to do soIf you’re interested, I publish a newsletter 2 times per month (1st and 15th) with all the latest recipes, and other fun info. I would be honored to have you join our growing list of subscribers, so you never miss a great recipe!
    There is a Newsletter subscription box on the top right side (or bottom) of each blog post, depending on the device you use, where you can easily submit your e-mail address (only) to be included in my mailing list.

    You Can Also Find Me On Social Media:

    Facebook page: The Grateful Girl Cooks!
    Pinterest:
    The Grateful Girl Cooks!
    Instagram:
    jbatthegratefulgirlcooks

    Hope you have a fantastic day!

    Author's signature

    0 from 0 votes
    Chicken Broccoli Fettucine Alfredo
    Prep Time
    15 mins
    Cook Time
    11 mins
    Total Time
    26 mins
     
    Chicken Broccoli Fettucine Alfredo- this classic Italian dish with a creamy butter Parmesan sauce is delicious, and can be on the table in about 30 minutes!
    Category: Dinner
    Cuisine: Italian
    Keyword: chicken broccoli fettucine alfredo
    Servings: 5 servings
    Calories Per Serving: 934 kcal
    Author: JB @ The Grateful Girl Cooks!
    Ingredients
    • 12 ounces fettucine pasta
    • 3/4 cup butter
    • cups heavy whipping cream
    • 1/4 teaspoon black pepper
    • 1/4 teaspoon garlic powder
    • cups Parmesan cheese , grated
    • 2 chicken breasts (boneless, skinless) , precooked
    • 2 cups broccoli , steamed
    • 2 teaspoons parsley (fresh) , for garnish (if desired)
    Instructions
    1. Make the alfredo sauce for the pasta. Melt butter in a large skillet. Once butter is melted, add heavy whipping cream, pepper, and garlic powder. Stir until combined. Cook this sauce for about 5 minutes on medium low. Try to NOT let it come to a boil. Add grated fresh Parmesan cheese to the sauce, and stir to combine. Cook on medium low until the cheese has melted and the sauce has thickened.

    2. NOTE: To save time, these two steps can be done ahead of time: #1-Cook broccoli florets until done.  #2-Cut two pre-cooked boneless, skinless chicken breasts into bite sized pieces.  Set broccoli and chicken aside until ready to add to sauce.

    3. Cook fettucine pasta according to the package directions.  When done, drain pasta well.
    4. Add drained fettucine noodles to the alfredo sauce in pan, then add cooked broccoli and chicken pieces.  Stir well, to combine ingredients and fully coat everything with alfredo sauce. If the mixture seems too thick, simply add a bit more whipping cream to the pan, and stir to blend it in. Taste test the pasta. Season with additional salt and pepper, if desired. Continue cooking on low for a minute or two, to ensure everything is hot.

    5. To serve, transfer chicken broccoli fettucine alfredo to individual serving dishes. Garnish each serving with chopped fresh parsley, if desired. If you don't mind the extra calories, you can also grated a tiny bit of Parmesan cheese over the top, too. Serve hot, and enjoy!

    Nutrition Facts
    Chicken Broccoli Fettucine Alfredo
    Amount Per Serving (1 serving)
    Calories 934 Calories from Fat 594
    % Daily Value*
    Fat 66g102%
    Saturated Fat 39g244%
    Cholesterol 277mg92%
    Sodium 829mg36%
    Potassium 537mg15%
    Carbohydrates 54g18%
    Fiber 3g13%
    Sugar 2g2%
    Protein 32g64%
    Vitamin A 2415IU48%
    Vitamin C 33.4mg40%
    Calcium 453mg45%
    Iron 2mg11%
    * Percent Daily Values are based on a 2000 calorie diet.

    Here’s one more to pin on your Pinterest boards!Chicken Broccoli Fettucine Alfredo- this classic Italian dish with a creamy butter Parmesan sauce is delicious, and can be on the table in about 30 minutes!


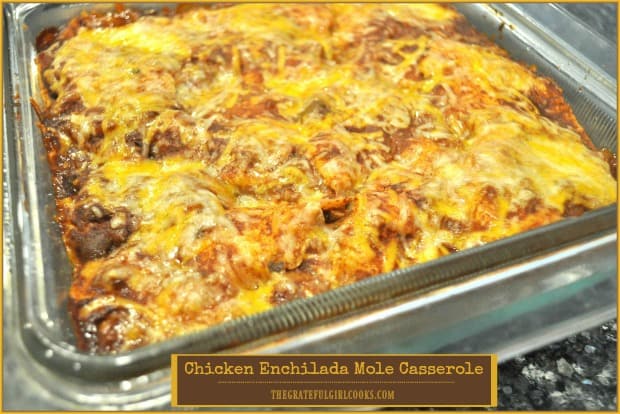
    Chicken Enchilada Mole Casserole

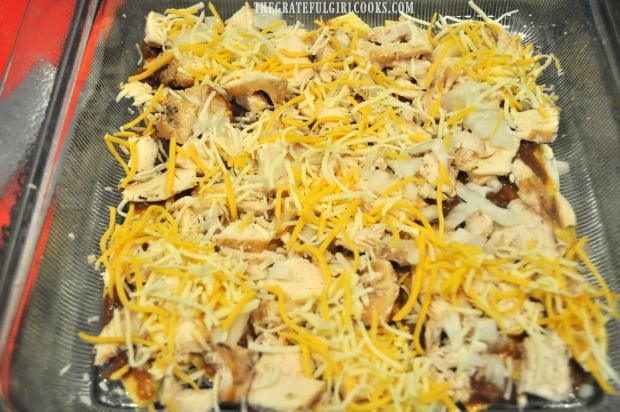
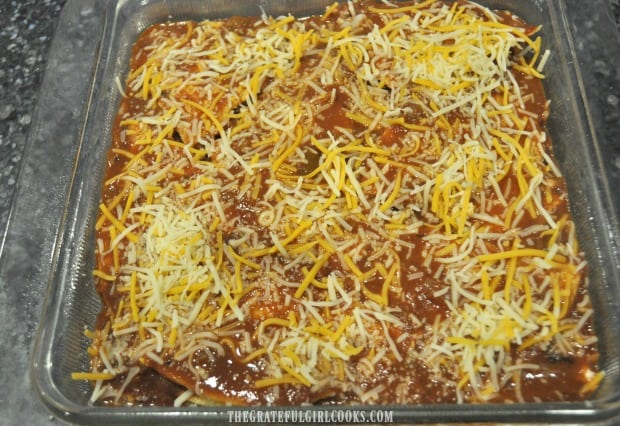
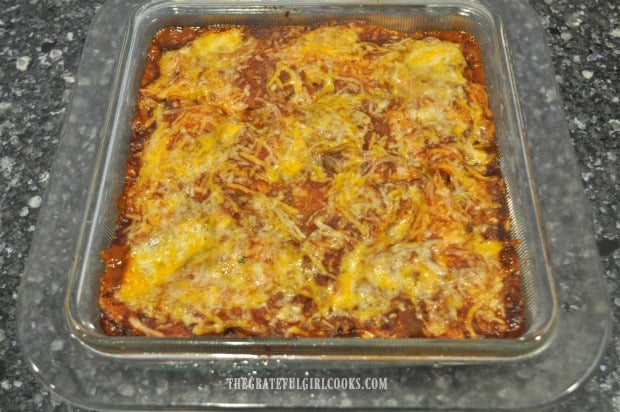
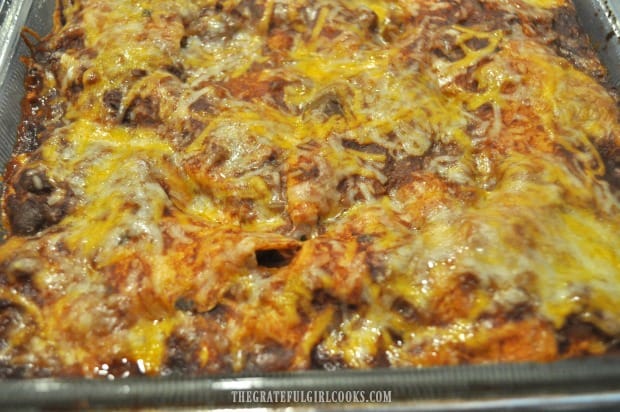
    Chicken Enchilada Mole Casserole is an easy to make dinner, with layers of corn tortillas, chicken breast strips, enchilada and mole sauce, onions and cheese, and is ready in 35 minutes!Chicken Enchilada Mole Casserole is an easy to make dinner, with layers of corn tortillas, chicken breast strips, enchilada and mole sauce, onions and cheese, and is ready in 35 minutes!

    Ever have one of those days where you know you need to fix something for dinner, but don’t have a clue what that will be?  That is how I came up with this simple layered chicken enchilada casserole! I used my recipe for Layered Chicken Enchilada Casserole as inspiration (which uses a creamy green sauce). Then I started pulling things out of the refrigerator and pantry and then just started cooking!

    I gathered two leftover grilled chicken breasts, some homemade red enchilada sauce (it was in our freezer, but I thawed it out!), a jar of mole sauce (check out this link to find out what is in this traditional Mexican sauce), onion, a few tortillas and some Mexican blend cheese and got busy creating this easy casserole dish that serves 6.

    By the way… don’t worry about using homemade enchilada sauce… a large (28 oz.) can will do just fine… and mole sauce? You can pretty much find small 8.25 oz. jars of it in almost every grocery store in the Mexican Foods section. Mole sauce adds a rich depth of flavor to standard enchilada sauce and partners very well in this recipe.

    Scroll Down For A Printable Recipe Card At The Bottom Of The Page

    So… How Do I Make This Chicken Enchilada Casserole?

    It’s easy. You will just be creating a layer of ingredients, then repeating the layers, etc.  Start by thinly slicing two grilled chicken breasts (I used leftovers). A quick and easy substitution would be to use two rotisserie chicken breasts, lightly seasoned with salt and pepper.

    Slicing chicken breast for enchilada casserole

    Mix enchilada sauce and mole sauce in pan. Stir until blended, then cook on low heat for 5 minutes. This allows the flavors to come together a bit! (Note: I used homemade enchilada sauce, so your version may look slightly different)

    Cooking enchilada and mole sauces for casserole

    Spray an 8×8 inch pan with non-stick cooking spray. Rip two tortillas into large pieces and layer the bottom of the dish, trying to cover as much as possible.

    Torn tortillas are layered into casserole dish

    Spread 1/3 of the sauce over the tortilla pieces, spreading to cover.

    Enchilada/mole sauce is spread over tortillas

    Cover the sauce with 1/2 of the chicken slices, 1/2 of the chopped onions and top them with 1/3 of the grated Mexican cheese blend.

    Chicken, onions and cheese layered onto enchilada casserole

    Repeat Layers

    Repeat another layer in the same order:  2 torn tortillas, 1/3 of the sauce, remaining 1/2 of the chicken and onions, then top this second layer with 1/3 of the grated Mexican blend cheese. For the final layer, simply add the remaining two torn tortilla pieces, top with remaining sauce, then top it all off with the remaining grated cheese.

    Chicken enchilada mole casserole is ready to bake

    Time To Bake The Chicken Enchilada Mole Casserole

    Bake the casserole (uncovered) in a 350° F. preheated oven for 20-25 minutes (mine was done in 20). The cheese and sauce should be bubbly when done. Remove chicken enchilada casserole from oven to a wire rack.

    Chicken enchilada casserole, hot from the oven

    Let the casserole rest for a  minute or two to let the cheese firm up, so it will be easier to slice.

    Melted cheese on top of chicken enchilada casserole

    Slice the casserole into 6 pieces, and transfer to plates. Serve each piece with a dollop of sour cream and a cilantro leaf garnish, if desired.

    Chicken Enchilada Mole Casserole on a plate, with sour cream and cilantro garnish

    And that’s how this casserole came to be made and eaten at our house!  Hope you will give it a try! Since this yummy casserole can be on the table in about 35 minutes, it’s a great meal for busy weeknights!

    Looking For More Mexican-Inspired Recipes?

    You can find ALL of my recipes in the Recipe Index, which is located at the top of the page. I have quite a few Mexican-inspired recipes you might enjoy, including:

    Interested In More Recipes?

    Thank you for visiting this website. I appreciate you using some of your valuable time to do soIf you’re interested, I publish a newsletter 2 times per month (1st and 15th) with all the latest recipes, and other fun info. I would be honored to have you join our growing list of subscribers, so you never miss a great recipe!
    There is a Newsletter subscription box on the top right side (or bottom) of each blog post, depending on the device you use, where you can easily submit your e-mail address (only) to be included in my mailing list.

    You Can Also Find Me On Social Media:

    Facebook page: The Grateful Girl Cooks!
    Pinterest:
    The Grateful Girl Cooks!
    Instagram:
    jbatthegratefulgirlcooks

    Author's signature

    0 from 0 votes
    Chicken Enchilada Mole Casserole
    Prep Time
    15 mins
    Cook Time
    20 mins
    Total Time
    35 mins
     
    Chicken Enchilada Mole Casserole is an easy to make dinner, with layers of corn tortillas, chicken breast strips, enchilada and mole sauce, onions and cheese, and is ready in 35 minutes!
    Category: Dinner
    Cuisine: Mexican
    Keyword: chicken enchilada mole casserole
    Servings: 6 servings
    Calories Per Serving: 499 kcal
    Author: JB @ The Grateful Girl Cooks!
    Ingredients
    • 6 corn tortillas
    • 28 ounces Red enchilada sauce
    • 1/2 cup Mole sauce (found in Mexican food sections of grocery store)
    • 2 chicken breasts (cooked)
    • 1/2 cup white onion , finely chopped
    • 2 cups Mexican 4 blend cheese (or combo of cheddar/jack)
    • 4 Tablespoons sour cream
    • 4 cilantro leaves (optional)
    Instructions
    1. Preheat oven to 350° F.

    2. Thinly slice two grilled chicken breasts for the casserole. A quick and easy substitution would be to use two rotisserie chicken breasts, lightly seasoned with salt and pepper.
    3. Mix enchilada sauce and mole sauce in pan. Stir until blended, then cook on low heat for 5 minutes.
    4. Spray an 8x8 inch baking dish with non-stick cooking spray. Rip two tortillas into large pieces and layer the bottom of the dish, trying to cover as much as possible. Spread 1/3 of sauce over the tortilla pieces. Cover sauce with 1/2 of the chicken, 1/2 of the onions and top them with 1/3 of the grated Mexican cheese blend. Repeat another layer in the same order:  2 torn tortillas, 1/3 of the sauce, remaining 1/2 of the chicken and onions, then top this second layer with 1/3 of the grated Mexican blend cheese. For the final layer, add remaining two torn tortilla pieces, cover with remaining sauce, then top it all off with the remaining grated cheese.

    5. Bake the casserole (uncovered) in a 350° F. preheated oven for 20-25 minutes (mine was done in 20). The cheese and sauce should be bubbly when done. Remove chicken enchilada casserole from oven to a wire rack. Let the casserole rest for a  minute or two to let the cheese firm up, so it will be easier to slice.

    6. Slice the casserole into 6 pieces, and transfer to plates. Serve each piece with a dollop of sour cream and a cilantro leaf garnish, if desired. Enjoy!

    Nutrition Facts
    Chicken Enchilada Mole Casserole
    Amount Per Serving (1 serving)
    Calories 499 Calories from Fat 144
    % Daily Value*
    Fat 16g25%
    Saturated Fat 9g56%
    Cholesterol 68mg23%
    Sodium 1474mg64%
    Potassium 274mg8%
    Carbohydrates 24g8%
    Fiber 3g13%
    Sugar 9g10%
    Protein 22g44%
    Vitamin A 1445IU29%
    Vitamin C 3.8mg5%
    Calcium 336mg34%
    Iron 1.6mg9%
    * Percent Daily Values are based on a 2000 calorie diet.

    Here’s one more to pin on your Pinterest boards!Chicken Enchilada Mole Casserole is an easy to make dinner, with layers of corn tortillas, chicken breast strips, enchilada and mole sauce, onions and cheese, and is ready in 35 minutes!