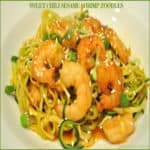
Sweet Chili Sesame Shrimp Zoodles, with shrimp in an Asian-inspired sauce on spiralized zucchini noodles, is a delicious, low calorie dish!

Since receiving a spiralizer appliance with a gift card I was given, it’s been fun to search and try some new recipes using spiralized veggies. We really enjoyed a couple recent meals which featured Kung Pao Zoodles and a delicious Spiralized Carrot Salad in Lemon Ginger Dressing!
This recipe for sweet chili sesame shrimp zoodles was a wonderful experiment for me. Using zucchini noodles instead of pasta cuts down on the carbs, and significantly reduces the total calories of this meal.
The large shrimp are a delicious low calorie source of protein, and the amazing Asian inspired sauce only has three ingredients! This recipe is totally EASY to prepare, and tastes GREAT! Here’s how to make this dish:
Scroll Down For A Printable Recipe Card At The Bottom Of The Page
How To Prepare The Zoodles
To make this dish, you will first need to spiralize the zucchini to make the noodles. If you have a spiralizer, process the zucchini using a spaghetti blade, for long noodles. NOTE: If you do not own a spiralizer, you can use a vegetable peeler to peel the length of each zucchini, and slice into thin strands (spaghetti sized), if desired.
Place the “zoodles” into a colander, which is set on top of a large bowl. Lightly sprinkle the zoodles with salt, and gently mix to combine. Place the colander of zoodles (and bowl) into a refrigerator. Let the zoodles drain off their excess liquid for about 30 minutes.
When done, remove the zoodles from the fridge. Spread them out on a large dish towel. Blot the zoodles dry with another dish towel (or paper towels), trying to absorb most of the extra moisture. Set aside.

Make The Sweet Chili Sauce For The Sesame Shrimp Zoodles
The sweet chili sauce is VERY easy to make! In a medium sized bowl, combine the sweet chili sauce (I used Mae Ploy), sesame oil, and low sodium soy sauce.
Whisk these 3 ingredients together until fully blended. Measure out 1/2 cup of the sauce, and transfer to another dish, to save for later!

Prepare The Shrimp
Rinse, peel and de-vein the shrimp (removing tails, as well). Drain well, then add the shrimp to the sweet chili sauce in the medium sized bowl. Toss the shrimp, to ensure they become fully coated with the sweet chili sauce.

Cooking Sweet Chili Sesame Shrimp Zoodles
Spray a large skillet with non-stick spray, and turn heat to medium temperature. When the skillet is hot (but not smoking), add the shrimp in a single layer. NOTE: If making extra quantities of this dish, you can cook the shrimp in batches, re-spraying skillet between each batch.
Cook the shrimp on medium heat for 2 minutes, then turn the shrimp over and continue to cook the other side for 1-2 minutes. Spoon some of the sweet chili sauce over the top of each shrimp (the cooked side). Transfer the cooked shrimp to a plate, and cover, to keep warm.

Turn the heat on the stove up to medium-high, and add the spiralized zucchini to the same skillet you cooked the shrimp in.
Cook the zoodles for 1 minute, then add the 1/2 cup of reserved sauce into the skillet. Give the zoodles a toss, to mix the sauce with the zucchini. Cook this mixture for 2 more minutes, tossing occasionally. Add the cooked shrimp to the skillet, and toss, to combine. Cook the sweet chili sesame shrimp zoodles until heated through ( a minute or two).

To Serve Sweet Chili Sesame Shrimp Zoodles
When the sweet chili sesame shrimp zoodles are heated through, they are ready to serve! Use tongs to place zoodles and shrimp onto individual plates, or into serving bowls. Spoon any of the leftover sauce in the skillet onto the sesame shrimp zoodles, and garnish with sesame seeds and sliced green onions. Serve immediately, and enjoy!


I really hope you will consider trying this delicious recipe for sweet chili sesame shrimp zoodles! We really enjoyed this meal, and trust you will, too! Have a wonderful day, friends.
Interested In More SHRIMP Recipes?
You can find all my seafood recipe in the Recipe Index, located at the top of the page. A few favorite shrimp recipes include:
- Fried Shrimp
- Stir Fry Asian Glazed Shrimp and Veggies
- Pineapple Coconut Shrimp Kabobs
- Shrimp Scampi
- Mushroom Risotto with Pan-Seared Shrimp
Interested In More Recipes?
Thank you for visiting this website. I appreciate you using some of your valuable time to do so. If you’re interested, I publish a newsletter 2 times per month (1st and 15th) with all the latest recipes, and other fun info. I would be honored to have you join our growing list of subscribers, so you never miss a great recipe!
There is a Newsletter subscription box on the top right side (or bottom) of each blog post, depending on the device you use, where you can easily submit your e-mail address (only) to be included in my mailing list.
You Can Also Find Me On Social Media:
Facebook page: The Grateful Girl Cooks!
Pinterest: The Grateful Girl Cooks!
Instagram: jbatthegratefulgirlcooks

Recipe Adapted From: https://iowagirleats.com/2017/06/14/sweet-chili-sesame-shrimp-and-zoodles/
↓↓ PRINTABLE RECIPE BELOW ↓↓
- 3 medium zucchini , end trimmed
- 7 Tablespoons sweet chili sauce , I used Mae Ploy
- 1/4 cup low sodium soy sauce , or Tamari sauce
- 1½ teaspoons sesame oil
- 3/4 pound large shrimp , peel, deveined, patted dry
- 1 stem green onion (scallion) , sliced
- 1 teaspoon sesame seeds
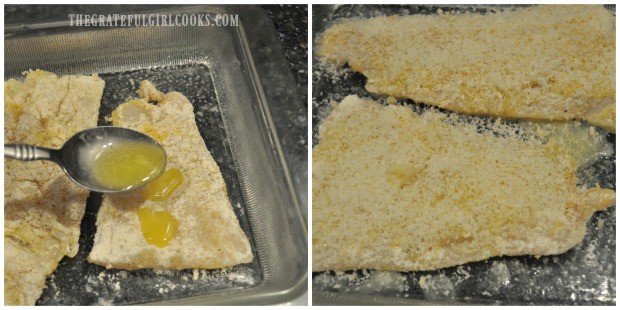
Spiralize the zucchini to make noodles. If you have a spiralizer, process the zucchini using a spaghetti blade. NOTE: If you don't own a spiralizer, you can use a vegetable peeler to peel the length of each zucchini, and then slice into thin strands (spaghetti sized). Place zoodles in a colander, set on top of a large bowl. Lightly sprinkle with salt; gently mix to combine. Place the colander of zoodles (and bowl) into refrigerator. Let the zoodles drain their extra liquid for about 30 minutes. When done, spread zoodles onto a dish towel. Blot dry with another dish towel (or paper towels), trying to absorb any extra moisture. Set aside.
In a medium sized bowl, combine the sweet chili sauce, sesame oil, and low sodium soy sauce. Whisk them together until fully blended. Measure out 1/2 cup of the sauce, and transfer to another dish, to reserve for later!
Rinse, peel and de-vein shrimp (removing tails, as well). Drain well, then add them to the sweet chili sauce in the medium sized bowl. Toss the shrimp, to ensure they become fully coated with the sauce.
Spray a large skillet with non-stick spray, and turn heat to medium. When skillet is hot (but not smoking), add the shrimp in a single layer. NOTE: If making extra quantities, you can cook shrimp in batches, re-spraying skillet between each batch. Cook shrimp on medium heat for 2 minutes, then turn shrimp over and continue to cook for 1-2 minutes. Spoon a little bit of the sweet chili sauce over the top of each shrimp while cooking (cooked side). Transfer shrimp to a plate; keep warm.
Turn the heat on stove to medium-high. Add zucchini noodles to the skillet you cooked the shrimp in. Cook for 1 minute, then add the reserved sauce. Give zoodles a toss, to coat with the sauce. Cook for 2 more minutes, tossing occasionally. Add cooked shrimp to the skillet, and toss, to combine. Cook until heated through (1-2 minutes), then transfer to serving plates. Spoon any leftover sauce in the skillet onto the shrimp, and garnish dish with sesame seeds and sliced green onions. Serve immediately, and enjoy!
I used 2 green zucchini, and 1 yellow zucchini for this dish.
Here’s one more to pin on your Pinterest boards!
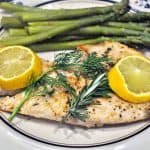
 meal, with seasoned pan-seared fish topped with light, fresh salsa! / The Grateful Girl Cooks!")


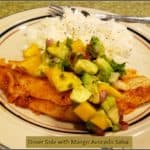
 meal, with seasoned pan-seared fish topped with light, fresh salsa! / The Grateful Girl Cooks!")


 fish tacos, w/ corn tortillas, crisp marinated slaw and avocado, topped with a creamy Southwestern flavored Baja sauce! / The Grateful Girl Cooks!")
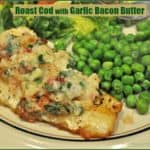
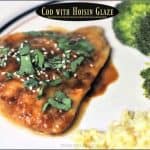
 in this delicious, low calorie seafood dish!")


 in this delicious, low calorie seafood dish!")


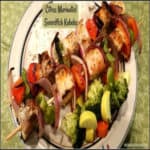
. / The Grateful Girl Cooks!")


. / The Grateful Girl Cooks!")