Category: Lunch – Quick and Easy

Coney Dogs

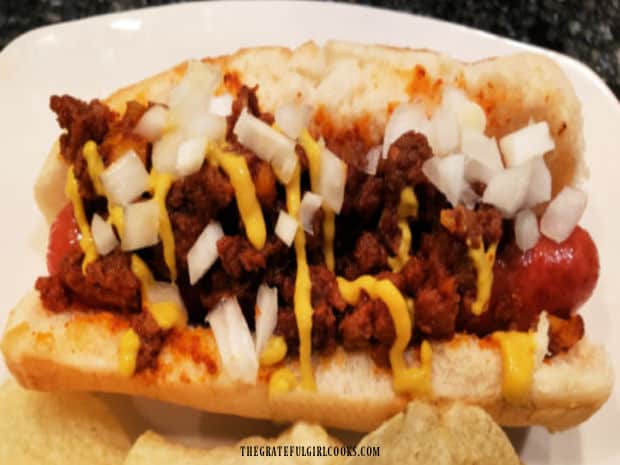
Looking for an easy meal for your family? Make Coney Dogs! Learn how to make this simple, flavorful meat sauce for your favorite hot dogs.


Coney dogs have been around since the early 1900’s, in one version or another. There has always been some disagreement regarding how Coney dogs became popular in the United States.

Years ago I found this recipe in one of my old cooking magazines, and knew I had to try it out. My husband wasn’t sure he would like it, but he (and I) ended up loving this sauce and our Coney dogs!

Coney Dog History 

I grew up thinking Coney dogs got their name because originated in Coney Island, New York, but according to historians, that may not actually be the case. I

f you are interested in the history of this classic hot dog and sauce, check out this article from the Smithsonian magazine here. It is quite fascinating to read about its origins, and is a quick, easy read!

Coney Dogs Flavor Profile

If you enjoy traditional chili dogs, then you will most likely enjoy Coney dogs, as they share some similarities, but have a slightly different flavor profile (slightly sweet). 

The sauce for Coney dogs is incredibly EASY to prepare, using ground beef, onions, celery, brown sugar, tomato sauce and spices, etc.

When this sauce is used to top your favorite hot dogs, I’m confident you’ll enjoy them! Here’s how simple it is to prepare Coney dogs!

Scroll Down For A Printable Recipe Card At The Bottom Of The Page

Cook The Ground Beef

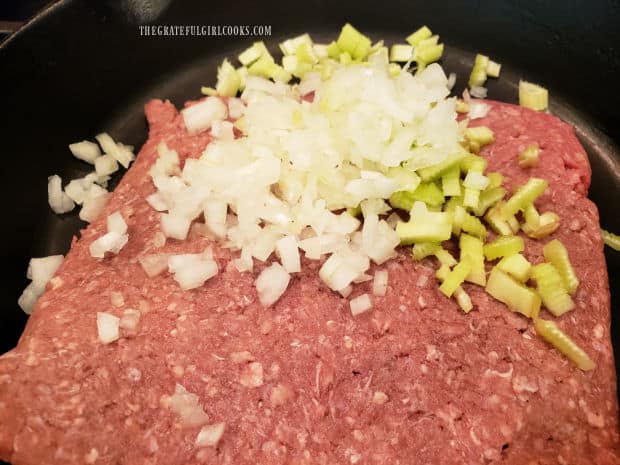
Cook ground beef, chopped onions and celery in a large skillet on Medium heat. Break the beef up until it is in small pieces.

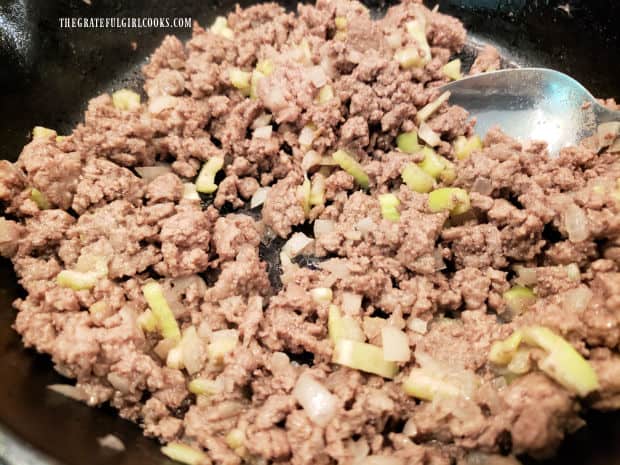
Stir often, and continue cooking the beef until fully cooked through. Once the meat is done cooking, drain off any accumulated grease in the skillet and discard. 

Ground beef is cooked in a skillet with chopped onions and celery.Hamburger meat is cooked until it is fully browned and cooked through.

Let’s Make The Sauce For The Coney Dogs!

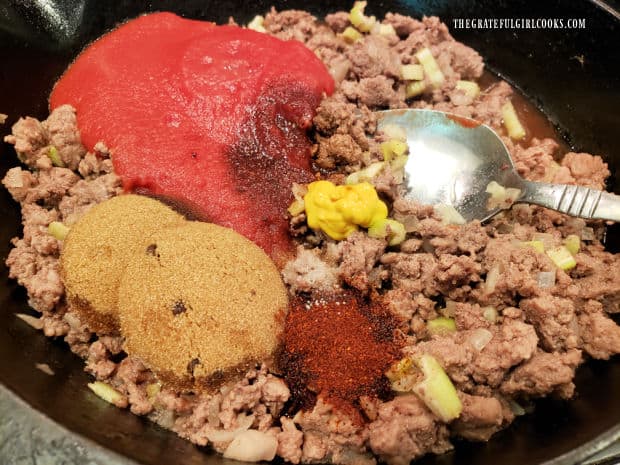
Now it’s time to make the Coney sauce for the hot dogs. Add tomato sauce, brown sugar, lemon juice, Worcestershire sauce, chili powder, yellow mustard and salt to the ground beef mixture.

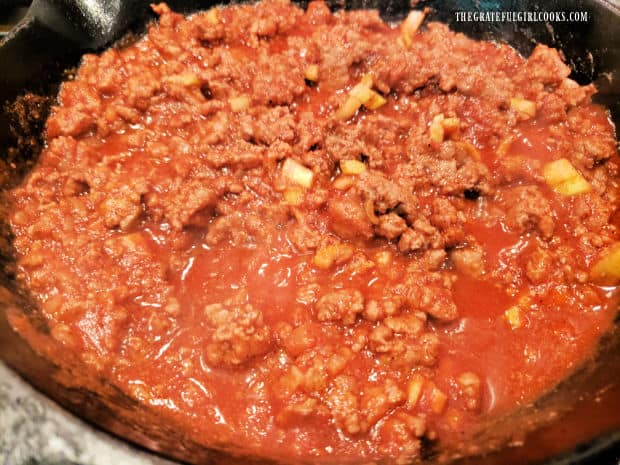
Bring the sauce to a boil on MEDIUM heat. Once it begins to boil, reduce the heat to LOW. Let the sauce simmer UNCOVERED on LOW heat for 15 minutes, stirring it occasionally while it cooks. 

While the sauce is simmering, cook the hot dogs according to the instructions on the package or by using your favorite method (boil, grill, oven broil, air fryer, etc.).

Plan your time so that the hot dogs will be ready when the sauce is finished cooking!

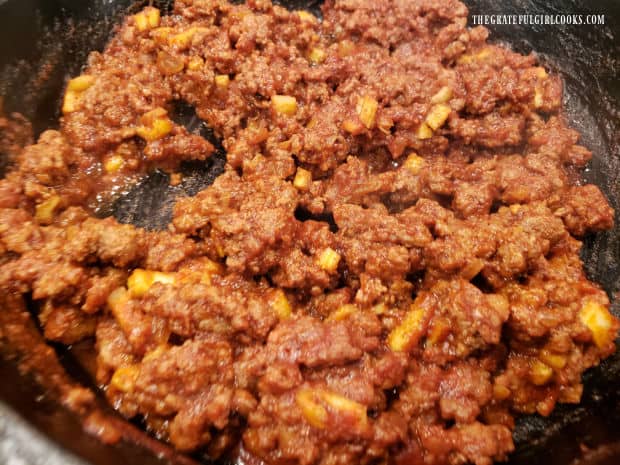
Tomato sauce, brown sugar and other seasonings are added to the browned ground beef in skillet.The sauce for the Coney dogs is cooked for 15 minutes until it has thickened.

Once done, the Coney dog sauce will have thickened considerably, and most of the liquid will have been absorbed.

Once this occurs, and the meat is fully heated through, the sauce is ready to serve as a topper for the hot dogs!

Once thickened and fully cooked through, the Coney sauce is ready to add to cooked hot dogs.

Who’s Ready For Some Coney Dogs?

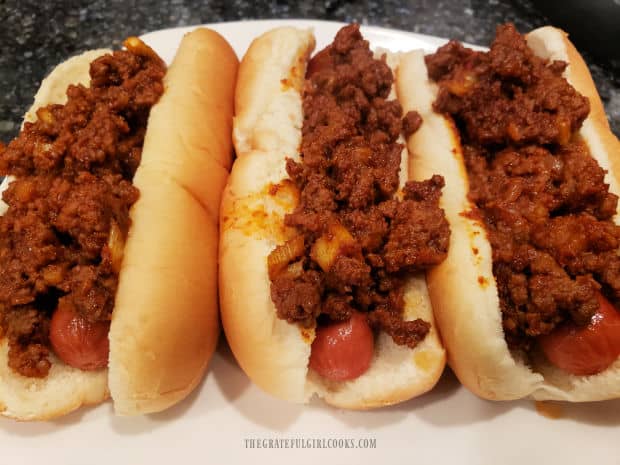
Place the cooked hot dogs into hot dog buns, and then spoon some of the sauce onto each hot dog. A lot of folks enjoy eating Coney dogs just like this (only adding the sauce), but add your favorite condiments, as well.

My favorite way to enjoy a Coney dog is to add diced fresh onion and yellow mustard on top of the sauce. My husband enjoys adding chopped onions and shredded cheddar cheese to his.

Serve the Coney dogs hot, and enjoy their wonderful flavor! This recipe makes enough sauce to top 8 hot dogs.

Any leftover Coney sauce can be frozen for later use when sealed in an airtight freezer bag or container.

The Coney meat sauce is spooned on top of cooked hot dogs in buns, to serve.Mustard and chopped onions are added to the top of one of the Coney dogs to enjoy.

I hope you enjoy this simple meal. We really do, because it is so simple to prepare, and is a nice change from plain hot dogs or traditional chili cheese dogs!

Thank you for stopping by and I hope you will come back for more family friend recipes again soon. Take care, and have a great day!

Looking For More EASY LUNCH or DINNER Recipes?

You can find ALL of my recipes in the Recipe Index, which is located at the top of the page. I have some yummy lunch recipes you can check out, including:

Want More Recipes? Get My FREE Newsletter!

I publish a newsletter 2 times per month (1st and 15th) with lots of recipes, tips, etc..
Would you like to join our growing list of subscribers?

There is a Newsletter subscription box on the top right (or bottom) of each blog post, depending on the device you use.
You can submit your e-mail address there, to be added to my mailing list.

Find Me On Social Media:

Facebook page: The Grateful Girl Cooks!
Pinterest:
The Grateful Girl Cooks!
Instagram:
jbatthegratefulgirlcooks

Author's signature

Original recipe source: “Taste of Home” magazine, June/July 2005 edition, page 54, published by Reiman Publications

↓↓ PRINTABLE RECIPE BELOW ↓↓

0 from 0 votes
Coney Dogs
Prep Time
10 mins
Cook Time
15 mins
Total Time
25 mins
 

Looking for an easy meal for your family? Make Coney Dogs! Learn how to make this simple, flavorful meat sauce for your favorite hot dogs.

Category: Dinner, Lunch
Cuisine: American
Keyword: coney dogs
Servings: 8 coney dogs
Calories Per Serving: 84 kcal
Author: JB @ The Grateful Girl Cooks!
Ingredients
For Coney Sauce:
  • ½ pound ground beef
  • ¼ cup chopped yellow onions
  • 2 Tablespoons chopped celery
  • 8 ounces canned tomato sauce
  • 2 Tablespoons brown sugar light or dark
  • 1 Tablespoon lemon juice
  • teaspoons Worcestershire sauce
  • ¾ teaspoon chili powder
  • ½ teaspoon prepared yellow mustard
  • ¼ teaspoon salt
For Hot Dogs (these items not included in caloric calculation as varieties/brands of hot dogs and buns may vary greatly):
  • 8 hot dogs/weiners
  • 8 hot dog buns
Instructions
  1. Cook beef, onions and celery in a large skillet on Medium heat. Break beef up until it's in small pieces. Stir often; continue cooking beef until fully cooked through. Drain off any accumulated grease in skillet and discard.

  2. Add tomato sauce, brown sugar, lemon juice, Worcestershire sauce, chili powder, mustard and salt to ground beef mixture. Bring sauce to a boil on MEDIUM heat. Once it begins to boil, reduce heat to LOW. Let sauce simmer UNCOVERED on LOW heat for 15 minutes, stirring occasionally while it cooks. NOTE: While sauce is simmering, cook hot dogs according to pkg. instructions or use your favorite method (boil, grill, oven broil, air fryer, etc.). Plan ahead so hot dogs will be ready when sauce is finished cooking!

  3. When done, the sauce will have thickened considerably, and most liquid will have been absorbed. The sauce is now ready to serve as a topper for the hot dogs!

  4. Place cooked hot dogs into warm hot dog buns. Top each one with sauce. Enjoy the hot dogs with just the added coney sauce OR add additional condiments like cheese, yellow mustard, chopped onions, or other condiments you enjoy.

  5. NOTE: This recipe makes enough sauce to top 8 hot dogs. Any leftover meat sauce can be frozen for later use when sealed in an airtight freezer bag or container.

Recipe Notes

NOTE: Hot dogs and buns were not included in caloric calculation, as varieties/brands/calories of hot dogs and buns will vary greatly. Caloric calculation is for the coney sauce (1/8th portion of total sauce).
Nutrition Facts
Coney Dogs
Amount Per Serving (1 serving sauce)
Calories 84 Calories from Fat 36
% Daily Value*
Fat 4g6%
Saturated Fat 2g13%
Trans Fat 0.3g
Polyunsaturated Fat 0.2g
Monounsaturated Fat 2g
Cholesterol 19mg6%
Sodium 257mg11%
Potassium 204mg6%
Carbohydrates 6g2%
Fiber 1g4%
Sugar 4g4%
Protein 6g12%
Vitamin A 189IU4%
Vitamin C 3mg4%
Calcium 15mg2%
Iron 1mg6%
* Percent Daily Values are based on a 2000 calorie diet.

Here’s one more to pin on your Pinterest boards!Looking for an easy meal for your family? Make Coney Dogs! Learn how to make this simple, flavorful meat sauce for your favorite hot dogs.

Tuscan Cannellini Tuna Salad

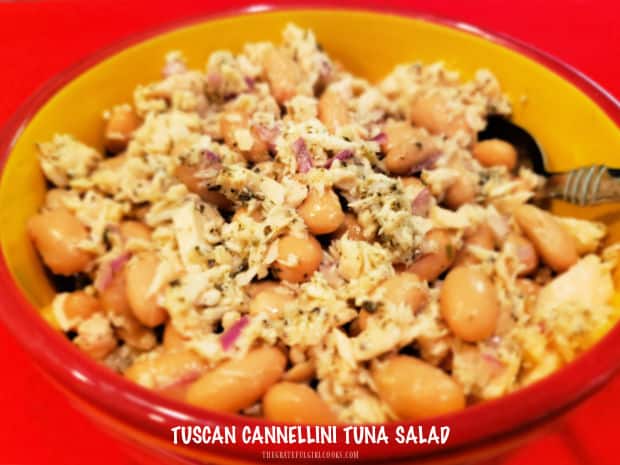
Tuscan Cannellini Tuna Salad is an easy dish with albacore tuna, cannellini beans and red onion tossed in a delicious, light salad dressing!

If you’re looking for a protein-filled salad to enjoy for lunch or a simple dinner, how about Tuscan Cannellini Tuna Salad? I found the original recipe in one of my very old Weight Watcher cookbooks (from 1998), and it’s delicious.

This salad has wonderful flavor, and is a CINCH to make! You NEED TO PLAN AHEAD, though, because for best flavor, the salad dressing needs to be made about 45 minutes ahead of time. This extra time allows the flavors to develop fully! You can always mix the salad dressing up in the morning, then it’s ready for a quick lunch later!

The actual salad itself is made up of only 3 ingredients… a can of albacore tuna, red onion, and protein-packed cannellini beans. Cannellini beans are also called white kidney beans, and can be found in most grocery stores. The salad is then tossed with the amazing salad dressing before serving. Let me show you how to make this tasty salad, which yields enough for four portions.

Scroll Down For A Printable Recipe Card At The Bottom Of The Page

Make The Salad Dressing

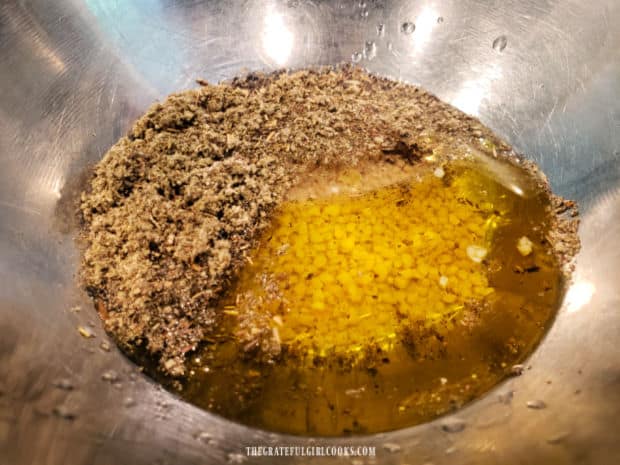
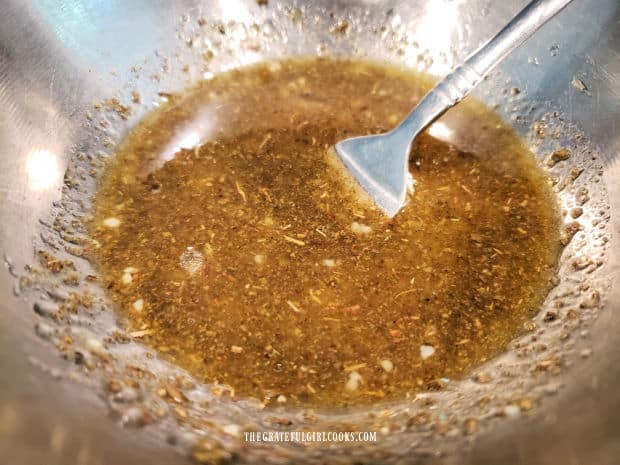
The salad dressing used is the source of this salads great flavor! Best part? It only takes a minute or two to make! Place dried sage, olive oil, white wine, garlic, white wine vinegar, salt and pepper in a small bowl. Use a whisk to combine these ingredients very well.

PLAN AHEAD! For the very BEST flavor (recommended!), cover the salad dressing once it’s fully combined. Let the salad dressing sit (covered) at room temperature for 45 minutes. Plan ahead for this, because this time gives the flavors a chance to fully develop!

Salad dressing ingredients are placed in a small bowl before combining.Tuscan Cannellini tuna Salad dressing is mixed together before adding it to the salad.

Combine The Salad Ingredients

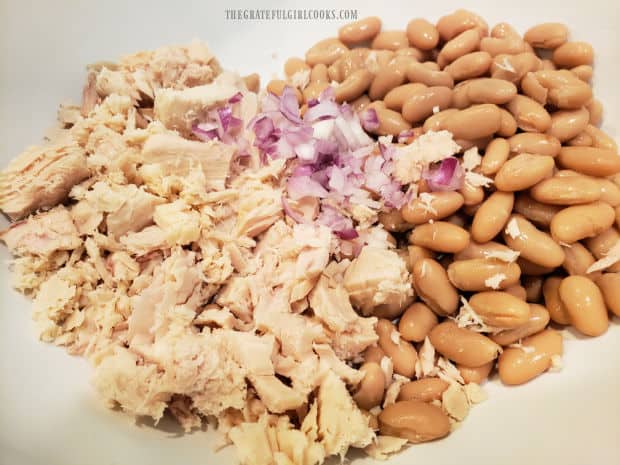
It’s time to finish making the Tuscan Cannellini Tuna Salad, once the salad dressing has “rested”. Place the drained, rinsed cannellini beans, drained and flaked albacore tuna and chopped red onion into a medium bowl. Toss lightly to combine these three ingredients.

Rinsed, drained cannellini beans, red onion, and albacore tuna are combined in a large bowl.

Dressing The Salad

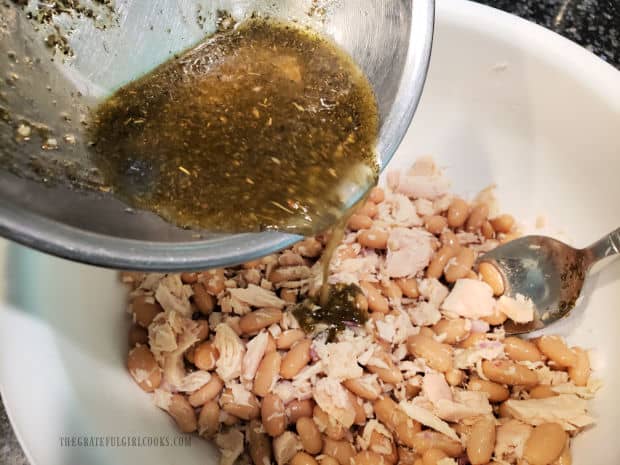
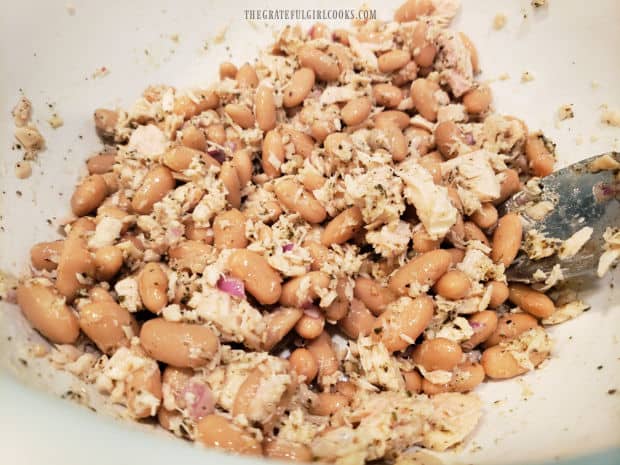
Give the salad dressing a quick stir to re-combine the ingredients and pour it over the tuna, cannellini beans and red onion. Toss the salad, so that the dressing is coating the salad ingredients very well.

Salad dressing is poured over the Tuscan Cannellini Tuna Salad before mixing.After mixing in the salad dressing, the salad is ready to be served.

Time To Enjoy Tuscan Cannellini Tuna Salad!

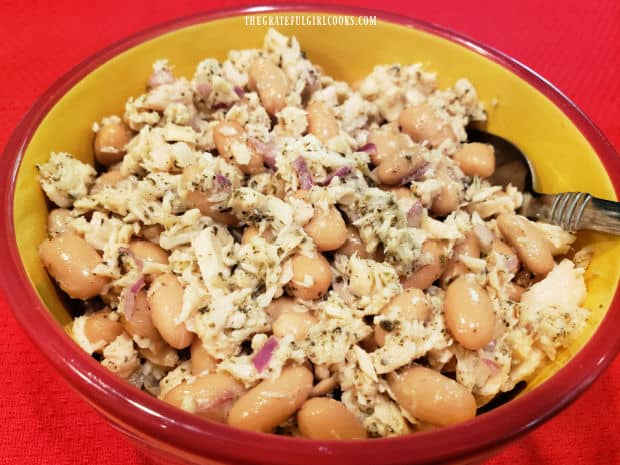
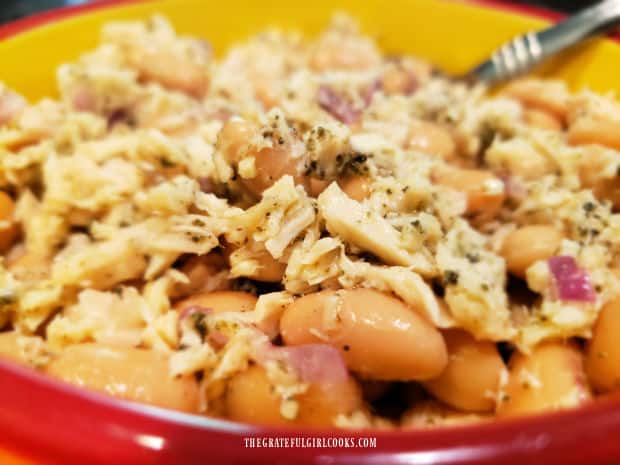
Transfer the Tuscan Cannellini Tuna Salad into a pretty serving bowl, if desired, and then serve. The salad has wonderful flavors, thanks to that delicious salad dressing! This recipe makes four servings, and you can store any leftovers (covered or in airtight container) in the refrigerator for several days.

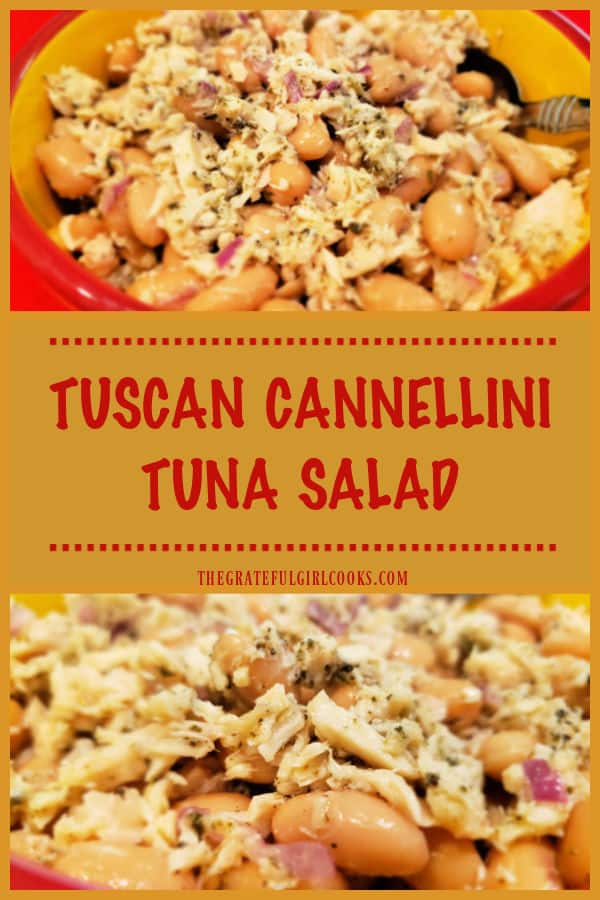
A bowl filled with Tuscan Cannellini Tuna Salad is ready to be served.A close up photo of the Tuscan Cannellini Tuna Salad.

That’s how simple it is to make this yummy Tuscan Cannellini Tuna Salad, which can be served on its own for lunch, dinner or as a side dish. I hope you enjoy it, and trust you will come back soon for more family-friendly recipes. Take care and have a GREAT day.

Looking For More SALAD Recipes?

You can find ALL of my recipes in the Recipe Index, which is located at the top of the page. I have lots of yummy salad recipes for you to check out, including:

Interested In More Recipes?

Thank you for visiting this website. I appreciate you using some of your valuable time to do soIf you’re interested, I publish a newsletter 2 times per month (1st and 15th) with all the latest recipes, and other fun info. I would be honored to have you join our growing list of subscribers, so you never miss a great recipe!
There is a Newsletter subscription box on the top right side (or bottom) of each blog post, depending on the device you use, where you can easily submit your e-mail address (only) to be included in my mailing list.

You Can Also Find Me On Social Media:

Facebook page: The Grateful Girl Cooks!
Pinterest:
The Grateful Girl Cooks!
Instagram:
jbatthegratefulgirlcooks

Author's signature

Original recipe source: “Weight Watchers New Complete Cookbook”, page 433, published by Wiley Publishing, Inc., 1998

↓↓ PRINTABLE RECIPE BELOW ↓↓

0 from 0 votes
Tuscan Cannellini Tuna Salad
Prep Time
5 mins
Cook Time
0 mins
Resting Time-Salad Dressing (inactive prep)
45 mins
Total Time
50 mins
 

Tuscan Cannellini Tuna Salad is an easy dish with albacore tuna, cannellini beans and red onion tossed in a delicious, light salad dressing!

Category: Lunch, Salads
Cuisine: All Cuisines
Keyword: Tuscan cannellini tuna salad
Servings: 4
Calories Per Serving: 235 kcal
Author: JB @ The Grateful Girl Cooks!
Ingredients
For Dressing:
  • 4 teaspoons extra virgin olive oil
  • 1 Tablespoon white wine vinegar
  • 1 Tablespoon dry white wine
  • 2 teaspoons dried sage or 2 Tablespoons fresh (minced)
  • 2 cloves garlic minced
  • ¼ teaspoon salt
  • teaspoon ground black pepper
For Salad:
  • 16 ounces cannellini beans (canned) rinsed/drained
  • 7 ounces albacore tuna (canned, in water) drained. flaked
  • 1 Tablespoon chopped red onion
Instructions
Make Salad Dressing (at least 45 minutes before assembling salad)
  1. Place dried sage, olive oil, white wine, garlic, white wine vinegar, salt and pepper in a small bowl. Use a whisk to combine these ingredients very well. For the very BEST flavor, cover salad dressing once combined. Let salad dressing sit (covered) at room temperature for at least 45 minutes. Plan ahead, because this time gives the flavors in the salad dressing the chance to fully develop!

Finish Salad
  1. Place cannellini beans, tuna and red onion into a medium bowl. Toss lightly, to combine.

  2. Give salad dressing a stir to re-blend ingredients; pour it over the salad Toss gently, so that salad dressing is coating salad ingredients well. Serve, and enjoy!

  3. Any leftovers can be stored (covered or in airtight container) in refrigerator for several days.

Nutrition Facts
Tuscan Cannellini Tuna Salad
Amount Per Serving (1 (1/4 of total))
Calories 235 Calories from Fat 54
% Daily Value*
Fat 6g9%
Saturated Fat 1g6%
Polyunsaturated Fat 1g
Monounsaturated Fat 3g
Cholesterol 21mg7%
Sodium 339mg15%
Potassium 648mg19%
Carbohydrates 25g8%
Fiber 6g25%
Sugar 0.5g1%
Protein 20g40%
Vitamin A 13IU0%
Vitamin C 1mg1%
Calcium 95mg10%
Iron 4mg22%
* Percent Daily Values are based on a 2000 calorie diet.

Here’s one more to pin on your Pinterest boards!Tuscan Cannellini Tuna Salad is an easy dish with albacore tuna, cannellini beans and red onion tossed in a delicious, light salad dressing!


Cheesy Calzone Pinwheels

Cheesy Calzone Pinwheels are yummy crescent roll appetizers, with pepperoni, bell pepper, mushrooms, and 3 cheeses, served with marinara sauce.

Do you like the taste of Italian calzones? We do… in fact in the past I’ve posted the recipe for Fully Stuffed Calzones, which are amazing Those are full-sized calzones made from scratch and they are delicious! I found this fun little recipe online several years ago for small, appetizer style calzone pinwheels (made with crescent roll dough). I knew I had to try them!

Using crescent roll dough makes this a very simple (and convenient) recipe! Because the recipe yields 16 cheesy calzone pinwheels, it is a great appetizer to serve to a crowd (or a bunch of hungry kids). The pinwheels are stuffed with pepperoni, bell peppers, onions, Italian seasoning and three different types of cheese, so you know they will be tasty! Here’s how to make them:

Scroll Down For A Printable Recipe Card At The Bottom Of The Page

Prepare The Filling

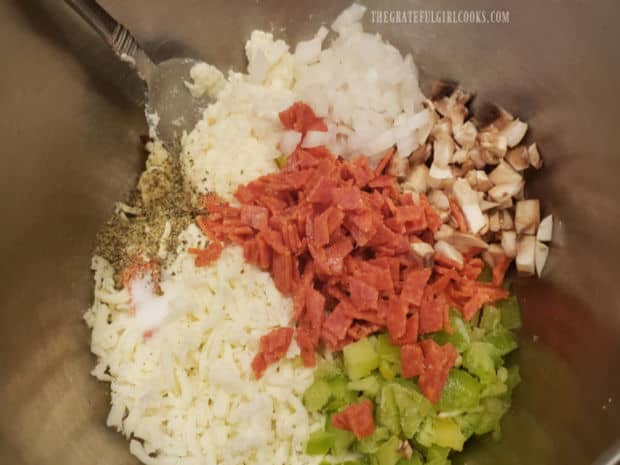
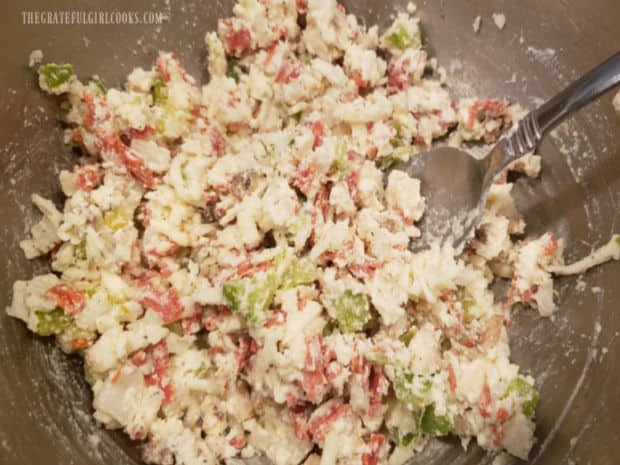
Before starting to make the filling, preheat your oven to 375°F. Mix together mozzarella, ricotta, Parmesan, pepperoni, mushrooms, green pepper, onion, Italian seasoning and salt in a medium bowl. Stir well, to fully combine these ingredients. This is the mixture you will use to fill the cheesy calzone pinwheels.

Onions, mushrooms, pepperoni, spices and 3 cheeses make up the calzone filling.The filling for cheesy calzone pinwheels is stirred until fully combined.

Make The Cheesy Calzone Pinwheels

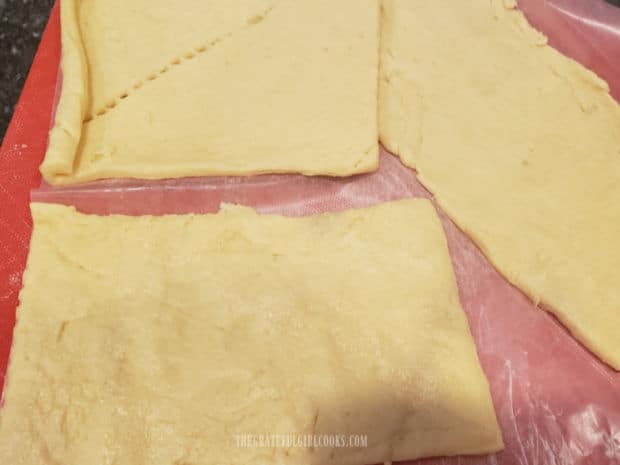
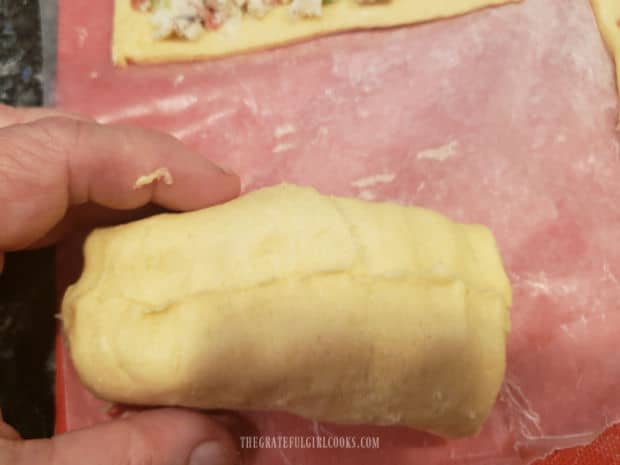
Carefully unroll the crescent dough from the package. Separate the dough into four rectangles (I put them on wax paper). Make sure to gently press out the perforations, to seal the dough well.

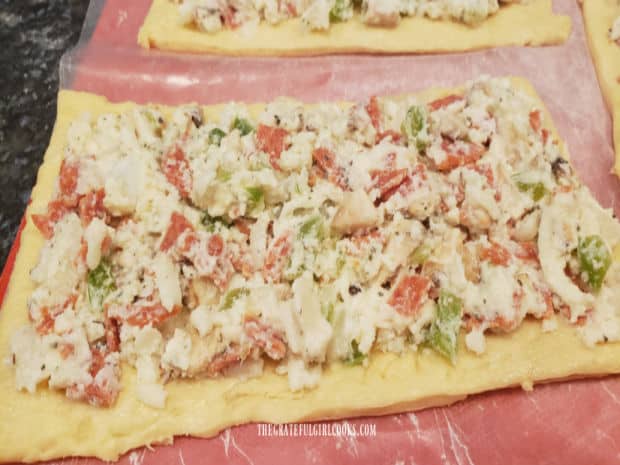
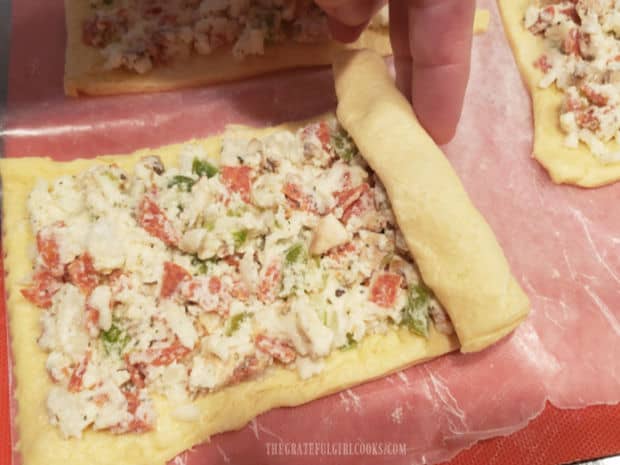
Divide the calzone filling evenly between the four dough rectangles. Spread the filling carefully over the surface of the dough, leaving about 1/4″ around the edges without any filling. Roll up each piece of dough, beginning with the short side. 

Crescent roll dough is separated into 4 rectangles, and perforations sealed.Filling is spread out to within 1/4" of the edges of the dough.Each filled calzone dough rectangle is rolled up, starting at short side.

Seal And Slice

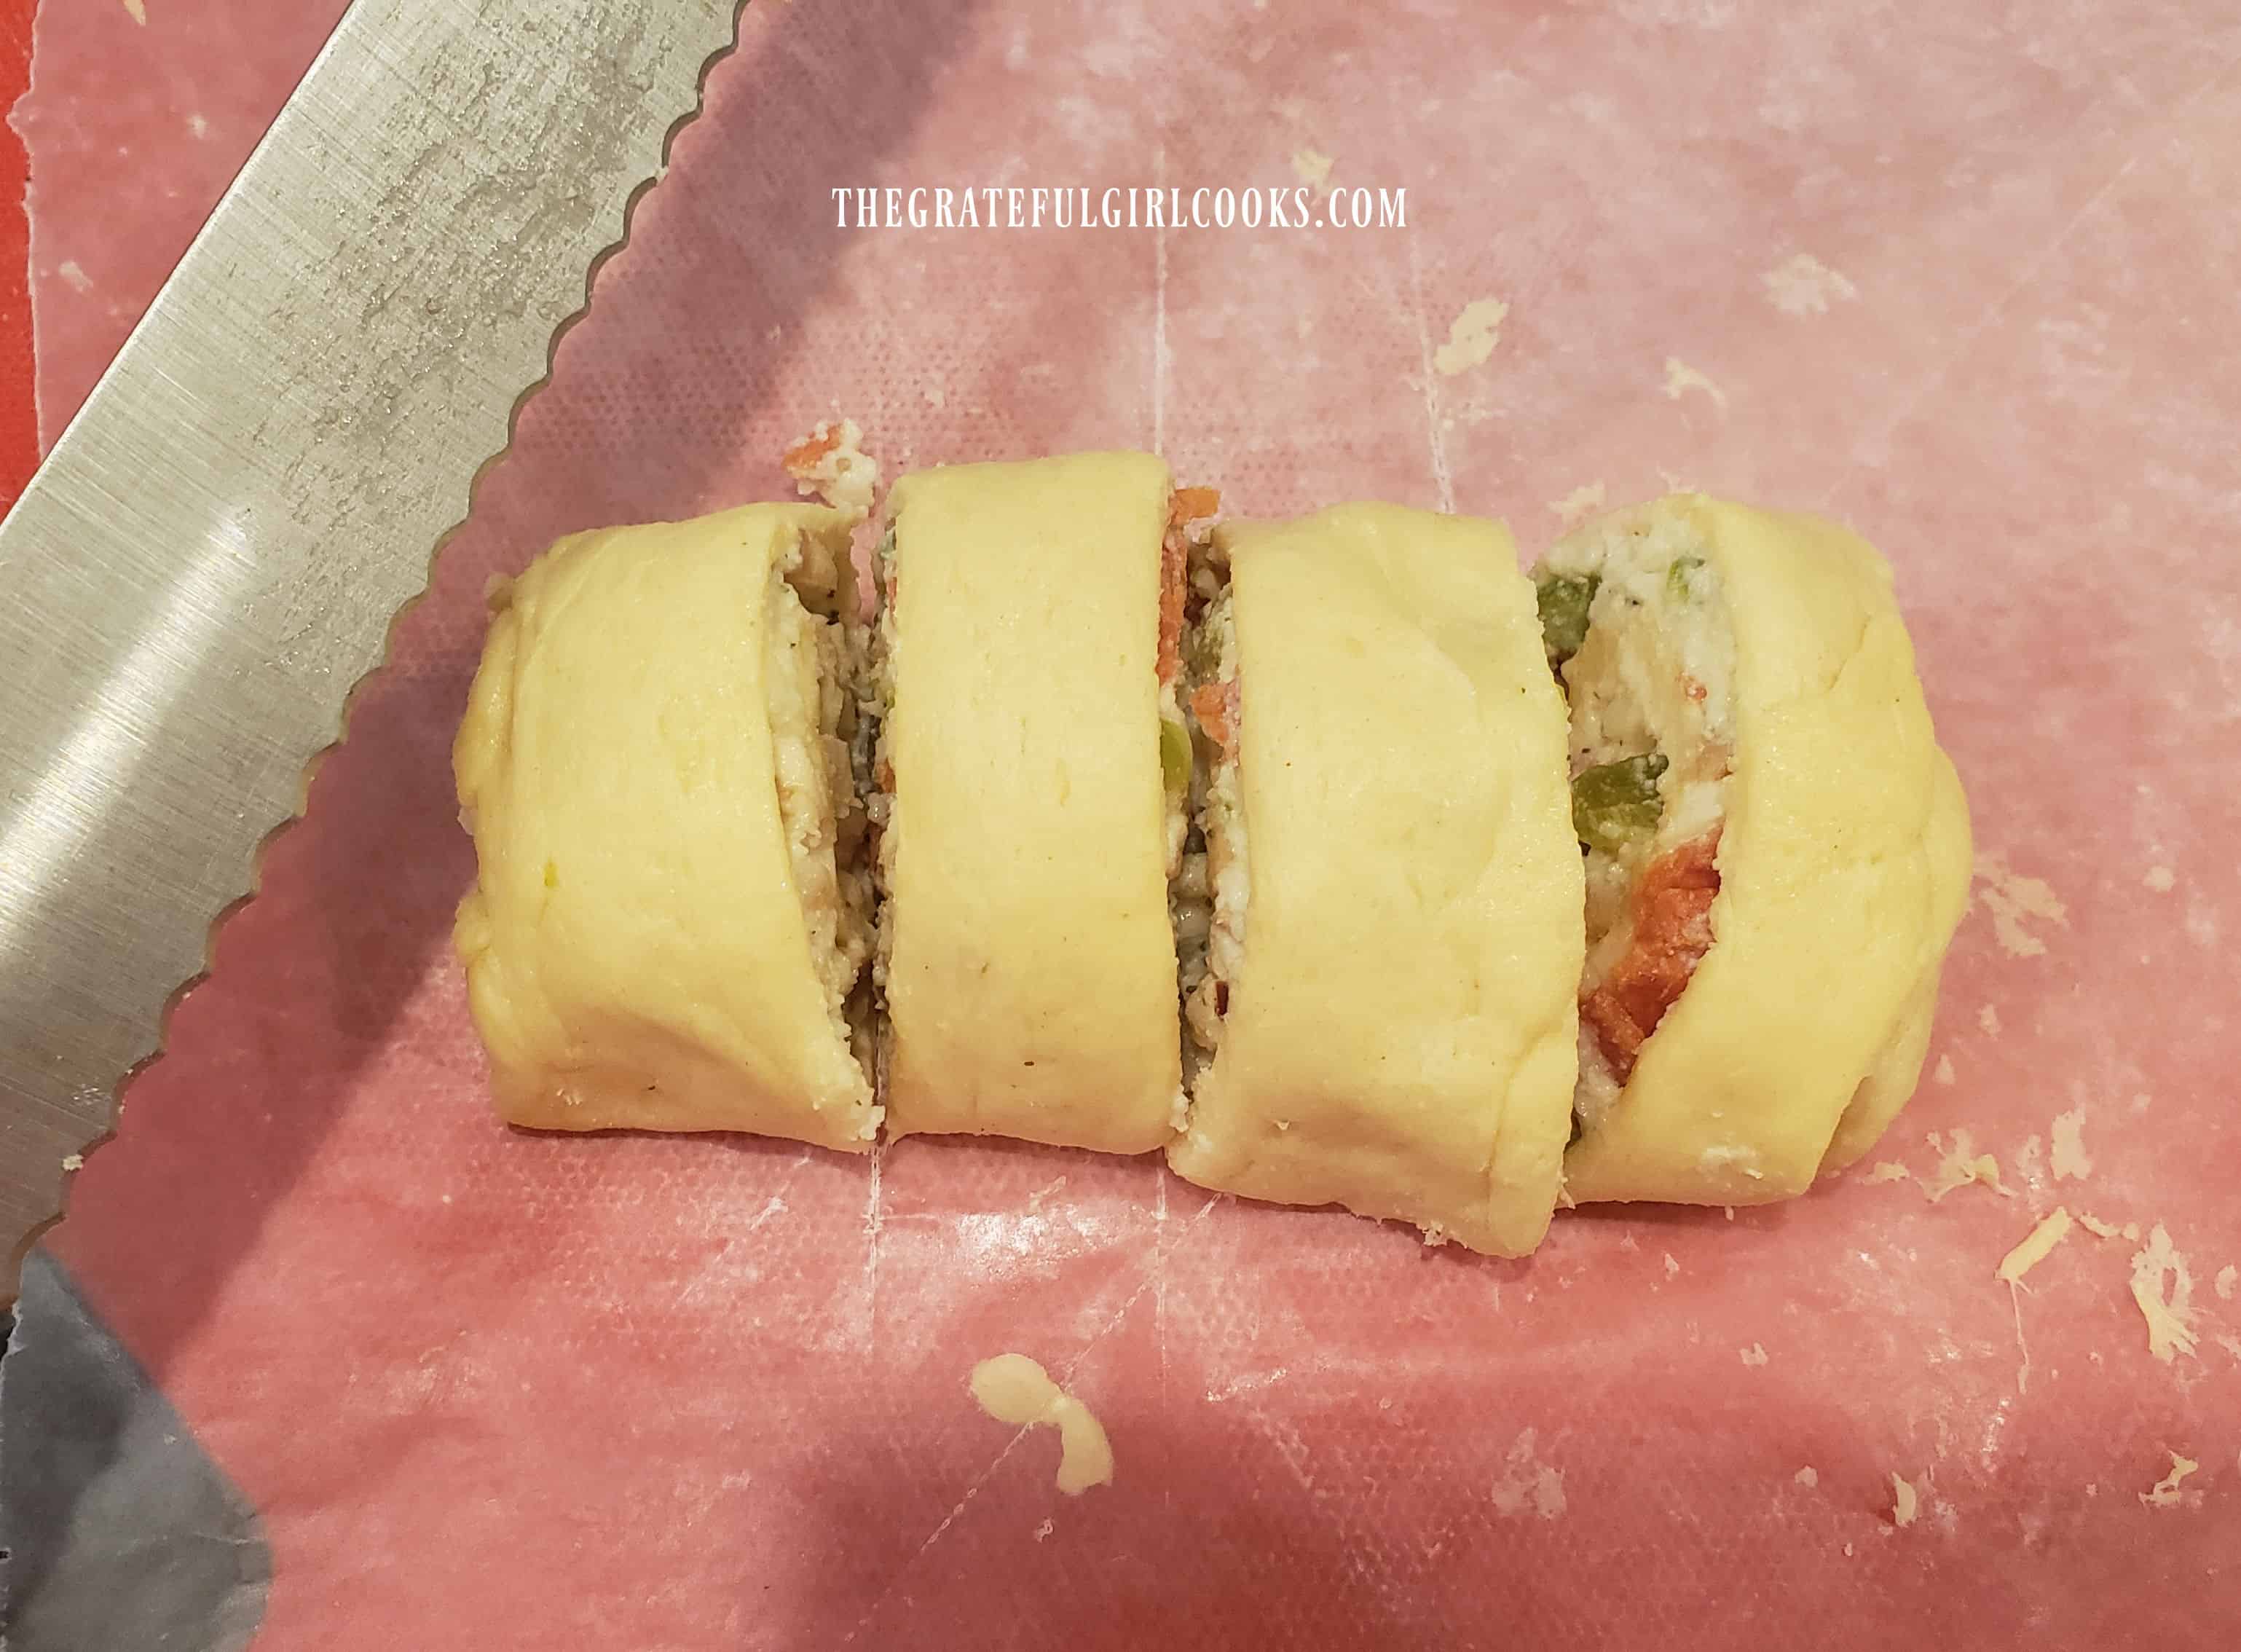
Once completely rolled, carefully pinch the seams together. Place the rolls, seam side down, and gently cut each roll into 4 slices, using a serrated knife (for best results).Repeat with remaining rolls, until you have 16 slices total.

Seams are pinched together on the dough.Each of the calzone rolls are cut into four slices with a serrated knife.

Time To BAKE!

Okay… the cheesy calzone pinwheels are evenly sliced, and now they are ready to bake! Place the slices, cut side down onto a large, GREASED OR SPRAYED baking sheet. Leave a couple inches between each slice, because they will expand a bit once cooked.

Bake the cheesy calzone pinwheels in a preheated 375°F. oven for approximately 13-15 minutes. When done, they should be nice and golden brown in color. Remove the pan from the oven and let them cool for a couple minutes before serving.

Sixteen cheesy calzone pinwheels on baking sheet, ready to bake.When done baking, the pinwheels are golden brown in color.

Time To EAT!

When you are ready to serve the cheesy calzone pinwheels, place them on a serving platter. We especially enjoy them when served with a warm marinara dipping sauce on the side. These little bitty pastries taste like a calzone, with the pepperoni, three cheeses, mushrooms and peppers with that warm marinara sauce. YUM!

Close up photo of four of the cheesy calzone pinwheels, ready to eat.The baked pinwheels are served with warm marinara or pizza sauce on the side.

I hope you have the opportunity to make these cheesy calzone pinwheels for friends or family. They are a great snack or a wonderful appetizer to put out for a crowd. Thank you for stopping by, and I hope you will come back soon for more family-friendly recipes. Have a wonderful day.

Looking For More APPETIZER Recipes?

You can find ALL of my recipes in the Recipe Index, which is located at the top of the page. I have some wonderful tasting appetizers you might enjoy, including:

Interested In More Recipes?

Thank you for visiting this website. I appreciate you using some of your valuable time to do soIf you’re interested, I publish a newsletter 2 times per month (1st and 15th) with all the latest recipes, and other fun info. I would be honored to have you join our growing list of subscribers, so you never miss a great recipe!
There is a Newsletter subscription box on the top right side (or bottom) of each blog post, depending on the device you use, where you can easily submit your e-mail address (only) to be included in my mailing list.

You Can Also Find Me On Social Media:

Facebook page: The Grateful Girl Cooks!
Pinterest:
The Grateful Girl Cooks!
Instagram:
jbatthegratefulgirlcooks

Author's signature

Original recipe source: Lisa Smith, via https://www.tasteofhome.com/recipes/calzone-pinwheels/

0 from 0 votes
Cheesy Calzone Pinwheels
Prep Time
15 mins
Cook Time
15 mins
Total Time
30 mins
 

Cheesy Calzone Pinwheels are yummy crescent roll appetizers, with pepperoni, bell pepper, mushrooms, and 3 cheeses, served with marinara sauce.

Category: Appetizers, Snack
Cuisine: Italian
Keyword: cheesy calzone pinwheels
Servings: 16
Calories Per Serving: 99 kcal
Author: JB @ The Grateful Girl Cooks!
Ingredients
  • ½ cup diced pepperoni
  • ½ cup shredded part-skim mozzarella cheese
  • ½ cup part-skim ricotta cheese
  • ¼ cup grated Parmesan cheese
  • ¼ cup finely chopped green bell pepper
  • ¼ cup chopped fresh mushrooms
  • 2 Tablespoons finely chopped yellow onion
  • 1 teaspoon Italian seasoning
  • ¼ teaspoon salt
  • 8 ounces refrigerated crescent rolls one 8 oz. can
  • 1 cup marinara sauce or pizza sauce wamed
Instructions
  1. Preheat oven to 375°F. Spray or grease a 139" baking sheet. Set aside.

  2. Mix together mozzarella, ricotta, Parmesan, pepperoni, mushrooms, green pepper, onion, Italian seasoning and salt in a medium bowl. Stir well, to fully combine.

  3. Carefully unroll crescent dough from package. Separate dough into four rectangles (I place them on wax paper). Gently press out the perforations, to seal the dough Divide calzone filling evenly between the four dough rectangles. Spread filling over surface of the dough, leaving about 1/4" bare around the edges. Roll up each rectangle, beginning with the short side. 

  4. Once completely rolled, carefully pinch the seams together. Place rolls, seam side down, and gently cut each roll into 4 even slices, using a serrated knife (for best results). Repeat with remaining rolls, until you have 16 slices. Place slices, cut side down onto prepared baking sheet. Leave a couple inches between slices.

  5. Bake at 375°F. for 13-15 minutes. When done, they should be golden brown in color. Remove from oven. Transfer to serving platter with warm marinara or pizza sauce on the side. Serve and enjoy!

Nutrition Facts
Cheesy Calzone Pinwheels
Amount Per Serving (1 pinwheel)
Calories 99 Calories from Fat 54
% Daily Value*
Fat 6g9%
Saturated Fat 3g19%
Trans Fat 1g
Polyunsaturated Fat 1g
Monounsaturated Fat 2g
Cholesterol 10mg3%
Sodium 345mg15%
Potassium 87mg2%
Carbohydrates 7g2%
Fiber 1g4%
Sugar 2g2%
Protein 4g8%
Vitamin A 137IU3%
Vitamin C 3mg4%
Calcium 71mg7%
Iron 1mg6%
* Percent Daily Values are based on a 2000 calorie diet.

Here’s one more to pin on your Pinterest boards!Cheesy Calzone Pinwheels are yummy crescent roll appetizers, with pepperoni, bell pepper, mushrooms, and 3 cheeses, served with marinara sauce.

Ham ‘n Cheese Crescent Bites

Ham ‘n Cheese Crescent Bites are yummy, & easy to make with only 4 ingredients! A crescent roll braid is filled w/ ham, cheese, & honey mustard.
Ham 'n Cheese Crescent Bites are yummy, & easy to make with only 4 ingredients! A crescent roll braid filled w/ ham, cheese, & honey mustard.

Do you use crescent rolls? We do, and I find them VERY convenient to have around for a variety of purposes besides a quick side dish with dinner! I love to use them for a variety of other uses, including quick lunches or breakfast! That little can of dough is amazing!

The recipe I am sharing today is called Ham ‘n Cheese Crescent Bites. Crescent roll dough is filled with ham, cheese, and honey mustard, braided up in a long roll, and baked. It’s really easy to make… here’s how:

Scroll Down For A Printable Recipe Card At The Bottom Of The Page

What Ingredients Do I Need?

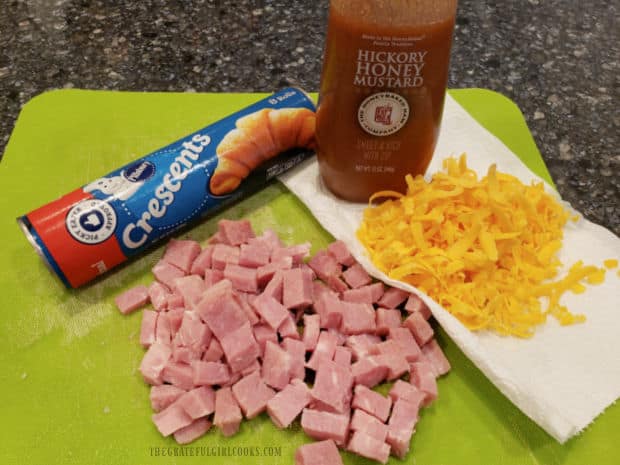
There are only a few main ingredients needed for this dish! You will need a can of refrigerated crescent roll dough, cooked and chopped ham, honey mustard, and cheddar cheese. That’s all you need for the basic recipe.

**I usually also add sliced green onions to mine (optional), but if you don’t like them, just leave them out! If desired you can garnish the finished bites with chopped parsley, green onions or chives, but that is also optional.

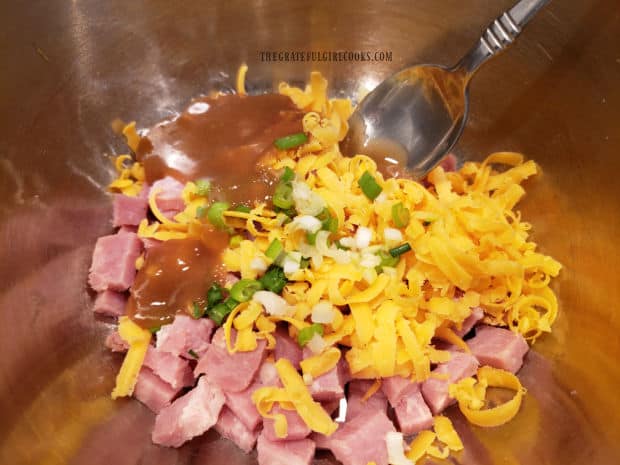
Okay… let’s get started! Place the ham, honey mustard and grated cheese in a medium bowl, and stir well, to combine. If you want to add the green onions, this is where to add them.

The main ingredients are crescent roll dough, honey mustard, ham and cheese.Ingredients are stirred together until combined in a small bowl.

Preparing The Crescent Roll Braid

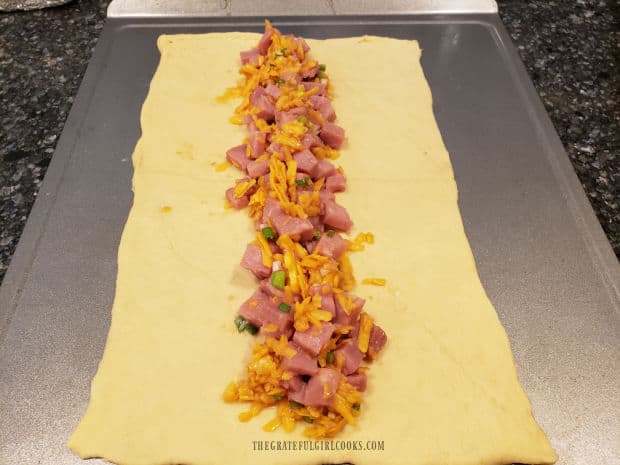
Remove the crescent roll dough from the can. Don’t separate the individual rolls. Roll the dough out into a rectangle on a lightly greased baking sheet. Seal all the perforations in the dough. Spoon the ham, mustard and cheese filling down the middle of the dough rectangle (lengthwise).

Ham and cheese filling is placed down the center of crescent roll dough.

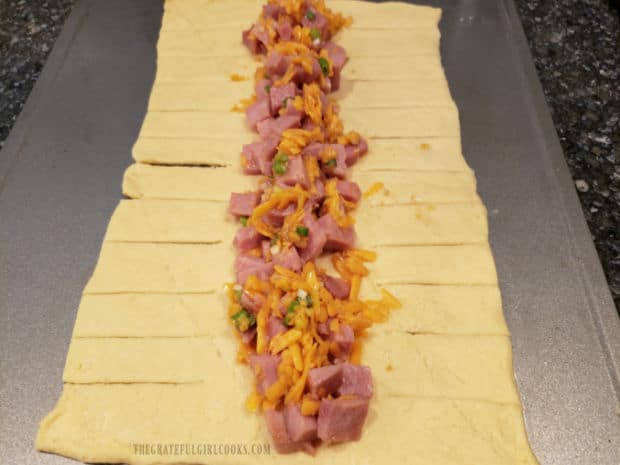
Cut 10 or 12 strips on each side of the dough (your choice). Make sure to slice almost all the way to the filling in the middle. Starting at the bottom, lift one strip up and across the filling at a slight angle.
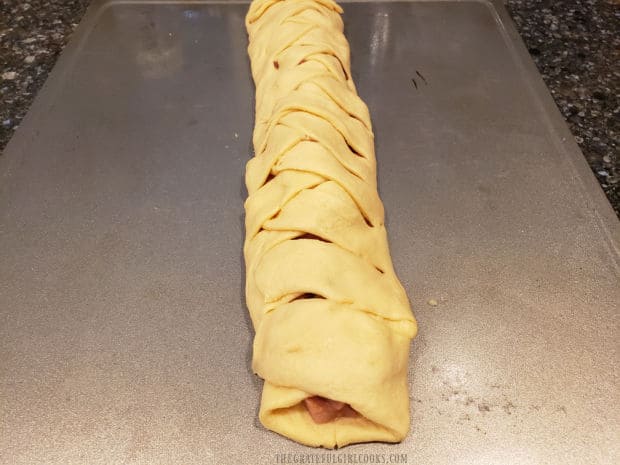
Now lift the corresponding strip on the other side up and over the filling to kind of “meet in the middle” in a braided fashion. Repeat the process (left, right, left, right) OR (right, left, right, left), alternating strips, until all strips have been “braided”.

Slits are cut into the dough on each side of the ham and cheese filling.The crescent roll dough is braided together over the ham and cheese filling.

Time To Bake!

Place the baking sheet with the braided ham ‘n cheese crescent bites into a preheated 375°F oven. NOTE: When I make these, I let it bake for about 22-25 minutes total. A couple minutes before it is finished baking (shown in the photo below), I like to top it with a couple extra  Tablespoons of grated cheddar cheese. TIP: You don’t have to add the grated cheese, but it sure looks good once it melts on top of the crescent braid.

Once the ham ‘n cheese crescent bites are finished baking, the braid will be golden brown all across the top, and any added cheddar cheese will have melted.

When almost finished baking, more cheddar cheese is added to the top of the braid.

Serving The Ham ‘n Cheese Crescent Bites

Once nicely browned on top, remove the ham ‘n cheese crescent bites from the oven. Garnish with chopped chives, parsley or green onions, if desired. Let it cool for a couple minutes before attempting to slice it, to give the cheese a chance to solidify a bit inside. Slice into six portions, and serve immediately.

The braid of ham 'n cheese crescent bites is golden brown once baked.Six portions of ham 'n cheese crescent bites are cut for serving.

You can see all the yummy ham and cheese filling inside each piece. This is a great tasting quick lunch (or dinner) I’m sure you and your family will enjoy! Ham ‘n cheese crescent bites are so simple to make, and hardly take any time at all to whip up!

You can see meat and cheese inside one of the ham 'n cheese crescent bites..

Thank you for stopping by… I really appreciate it. Hope you have the chance to make these ham ‘n cheese crescent bites soon, and trust you will enjoy them, too. God Bless You.

Looking For More Recipes Using CRESCENT ROLLS?

You can find all of my blog recipes in the Recipe Index, located at the top of the page. I have several recipes that feature crescent rolls, including:

Interested In More Recipes?

Thank you for visiting this website. I appreciate you using some of your valuable time to do soIf you’re interested, I publish a newsletter 2 times per month (1st and 15th) with all the latest recipes, and other fun info. I would be honored to have you join our growing list of subscribers, so you never miss a great recipe!
There is a Newsletter subscription box on the top right side (or bottom) of each blog post, depending on the device you use, where you can easily submit your e-mail address (only) to be included in my mailing list.

You Can Also Find Me On Social Media:

Facebook page: The Grateful Girl Cooks!
Pinterest:
The Grateful Girl Cooks!
Instagram:
jbatthegratefulgirlcooks

Author's signature

Original recipe source: https://www.plainchicken.com/ham-cheese-braid/

0 from 0 votes
Ham 'n Cheese Crescent Bites
Prep Time
10 mins
Cook Time
20 mins
Total Time
30 mins
 

Ham 'n Cheese Crescent Bites are yummy, & easy to make with only 4 ingredients! A crescent roll braid filled w/ ham, cheese, & honey mustard.

Category: Appetizer/Snack, Dinner, Lunch
Cuisine: American
Keyword: crescent rolls, ham 'n cheese crescent bites
Servings: 6
Calories Per Serving: 288 kcal
Author: JB @ The Grateful Girl Cooks!
Ingredients
  • 1 can refrigerated crescent rolls
  • cup cooked, chopped ham
  • cup grated cheddar cheese
  • ¼ cup honey mustard dressing
  • 2 Tablespoons chopped green onions (OPTIONAL)
Optional Toppings:
  • 2-3 Tablespoons grated cheddar cheese , added to top, last 2-3 minutes of baking
  • chopped parsley, green onions, or chives
Instructions
  1. Preheat oven to 375°F. Very lightly grease/spray a large baking sheet.

  2. Place ham, honey mustard and grated cheese (plus green onions, if using) in a medium bowl; stir well, to combine.

  3. Remove crescent roll dough from can. Don't separate individual rolls. Roll dough out into a rectangle on the baking sheet. Seal all perforations in the dough. Spoon ham/cheese filling lengthwise down middle of dough.

  4. Cut 10 or 12 strips on each side of the dough. Make sure to slice almost all the way to the filling in the middle. Starting at the bottom, lift one strip up and across the filling at a slight angle. Now lift corresponding strip on the other side up and over the filling to kind of overlap in the middle, in a braided fashion. Repeat process (left, right, left, right) OR (right, left, right, left), alternating strips, until all strips have been "braided".

  5. Place baking sheet onto the middle rack in preheated 375°F oven. Bake for 22-25 minutes. NOTE: If desired, a couple minutes before it is finished baking, top the braid with a couple extra Tablespoons grated cheddar. When done, the braid should be golden brown on top, and any added cheddar cheese will have melted. Remove from oven. If desired, garnish with chopped parsley, chives or green onion. Let cool a few minutes, then slice into 6 portions. Serve, and enjoy!

Nutrition Facts
Ham 'n Cheese Crescent Bites
Amount Per Serving (1 (1/6 of total))
Calories 288 Calories from Fat 162
% Daily Value*
Fat 18g28%
Saturated Fat 8g50%
Cholesterol 35mg12%
Sodium 841mg37%
Potassium 112mg3%
Carbohydrates 19g6%
Sugar 6g7%
Protein 12g24%
Vitamin A 126IU3%
Calcium 93mg9%
Iron 1mg6%
* Percent Daily Values are based on a 2000 calorie diet.

Here’s one more to pin on your Pinterest boards!Ham 'n Cheese Crescent Bites are yummy, & easy to make with only 4 ingredients! A crescent roll braid filled w/ ham, cheese, & honey mustard.


Classic Pimiento Cheese

Need a delicious, EASY, quick appetizer or sandwich? Make a small batch of classic pimiento cheese to serve on crackers or a favorite bread.

True story. I used to cringe when my mom made or talked about pimiento cheese. She is from the South, and this is something she grew up with, and has great memories of eating. Growing up, she would occasionally make it, and I thought it was disgusting!

Classic pimiento cheese is basically a cheese spread, commonly used on crackers or sandwiches, especially in the South. I’ve now made it many times, and always enjoy it.

Scroll Down For A Printable Recipe Card At The Bottom Of The Page

Who Knew I Would End Up Loving Classic Pimiento Cheese? A True Story.

In January of this year, I helped my mom move from Southern California to Georgia. Once of the things she wanted on our first quick visit to the store to get a few necessities was PIMIENTO CHEESE. Pre-made pimiento cheese in a carton to have around. Ugh.

HOWEVER…(this is where it gets interesting)…one late evening after helping unpack her moving boxes (and not eating dinner) I was quite hungry. Mom didn’t have much food in her pantry because she eats most meals in the dining room at her retirement community. That’s when I saw it. That carton of pre-made pimiento cheese in her refrigerator, taunting me.

Well, against my better judgement, I spread a couple spoonfuls on a piece of bread (desperate times call for desperate measures). Guess what? I LIKED IT. What?  Ever since then, I’ve thought about that pimiento cheese, and now I’ve found a wonderfully delicious recipe to make it from scratch on my own (with a couple tweaks). I LOVE IT! My husband wasn’t sure he would like it when he first saw it, and HE LIKES IT TOO. Here’s how to make it (adapted from a Paula Deen recipe):

What Ingredients Will I Need?

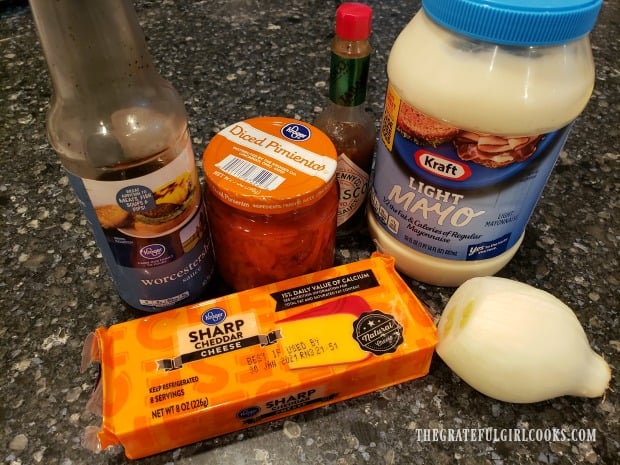
To make this recipe for pimiento cheese, you will need mayonnaise, diced pimientos, yellow onion, Tabasco sauce (or other hot sauce), Worcestershire sauce, and SHARP cheddar cheese. I use light mayo, but feel free to use regular fat mayo, if that’s what you have. No problem.

NOTE: For this recipe I prefer to use sharp cheese that I grate myself with my box grater. I feel like it blends better than the bagged versions (which have added stabilizers), but it’s up to you which you decide to use. Sharp cheese is a must for the best flavor!

Ingredients used to make pimiento cheese, ready to go.

How To Make Classic Pimiento Cheese

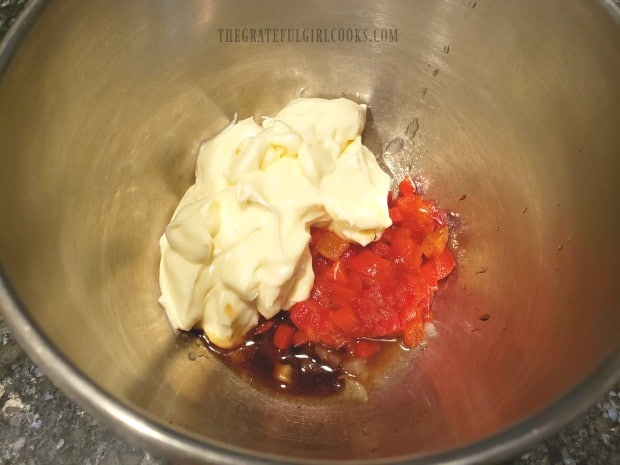
This recipe is so super easy to make you won’t believe it! Place all of the ingredients EXCEPT THE CHEESE in a medium sized mixing bowl. This will be mayo, finely chopped and drained pimientos, finely grated onion, Worcestershire sauce, and hot sauce. Stir them together well, until they’re fully combined.

Mayonnaise, pimientos, Worcestershire, onion, and Tabasco sauce in mixing bowl.

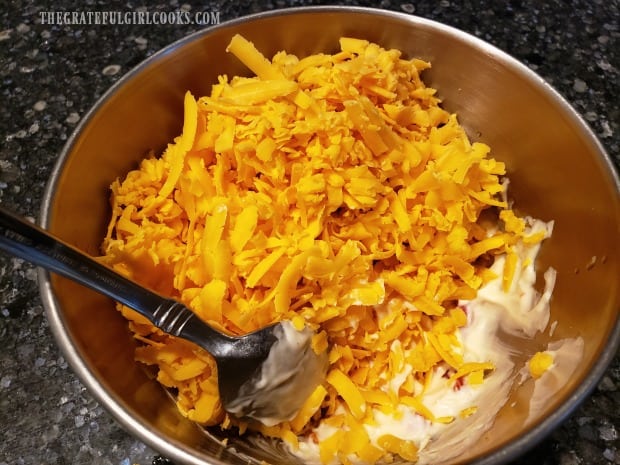
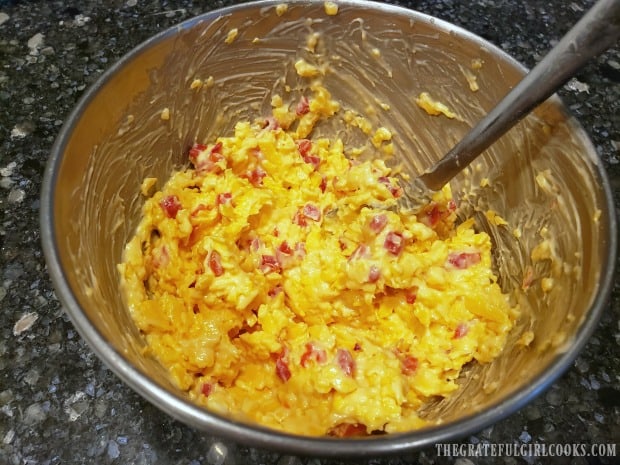
Add the grated sharp cheddar cheese to the bowl, and stir really well. Keep on stirring until the pimiento cheese is completely mixed  together. This only takes a minute or two (with no special equipment needed), and BOOM- your classic pimiento cheese is DONE!

Grated sharp cheddar cheese is added to the ingredients in the mixing bowl.The pimiento cheese ingredients are stirred together until it forms a cheese spread.

Serving Classic Pimiento Cheese

You can eat the pimiento cheese right away if you want, OR you can cover it and let it chill in the refrigerator for an hour or so (whatever you want). This classic pimiento cheese will stay “good” for up to a week, if covered and stored in the refrigerator.

If you want to use it for an appetizer, simply transfer the cheese to a small serving bowl or crock. Serve with a variety of crisp crackers, and let your family or guests gobble it up. The recipe as written below will yield about 1¼ cups ( which comes out to about 20 servings, at 1 Tablespoon each). It is VERY easy to double this recipe, if serving more guests.

Classic pimiento cheese can be served with crackers for an appetizer.

My Mom’s absolute favorite way to enjoy classic pimiento cheese is to simply spread it on a fresh piece of white bread. She is in her “happy place” when she can enjoy a pimiento cheese sandwich for a quick lunch (or dinner, at times!).

A quick and delicious sandwich can be made with classic pimiento cheese.

If you’ve never made pimiento cheese before, I would urge you to give it a try. It makes a wonderful appetizer, and only takes 6 ingredients and 5 minutes to prepare. That’s a winner in my book! Hope you enjoy it, and thanks for stopping by. Hope you come back soon.

Looking For More APPETIZER Recipes?

You can find ALL of my recipes in the Recipe Index, located in the Menu at the top of the page. I have some wonderful appetizer recipes you’ll enjoy, including:

Interested In More Recipes?

Thank you for visiting this website. I appreciate you using some of your valuable time to do soIf you’re interested, I publish a newsletter 2 times per month (1st and 15th) with all the latest recipes, and other fun info. I would be honored to have you join our growing list of subscribers, so you never miss a great recipe!
There is a Newsletter subscription box on the top right side (or bottom) of each blog post, depending on the device you use, where you can easily submit your e-mail address (only) to be included in my mailing list.

You Can Also Find Me On Social Media:

Facebook page: The Grateful Girl Cooks!
Pinterest:
The Grateful Girl Cooks!
Instagram:
jbatthegratefulgirlcooks

Author's signature

Recipe adapted from: pauladeenmagazine.com/classic-pimiento-cheese-recipe/

0 from 0 votes
Classic Pimiento Cheese
Prep Time
5 mins
Cook Time
0 mins
Total Time
5 mins
 

Need a delicious, EASY, quick appetizer or sandwich? Make a small batch of classic pimiento cheese to serve on crackers or a favorite bread.

Category: Appetizer
Cuisine: All Cuisines
Keyword: classic pimiento cheese
Servings: 20 Tablespoons (1.25 cups)
Calories Per Serving: 60 kcal
Author: JB @ The Grateful Girl Cooks!
Ingredients
  • ½ cup light mayonnaise
  • 2 ounces jarred, diced pimientos , drained
  • 1 teaspoon finely grated yellow onion
  • ½ teaspoon Worcestershire sauce
  • ¼ teaspoon Tabasco sauce , or other hot sauce
  • 8 ounces sharp cheddar cheese , grated (fresh is best)
Instructions
  1. Place all ingredients EXCEPT CHEESE in a medium sized mixing bowl. Stir together, until fully combined.

  2. Add grated sharp cheddar cheese, and stir really well. Keep on stirring until pimiento cheese is completely mixed  together. This only takes a minute or two.

  3. To serve, transfer pimiento cheese to a small bowl or crock. Serve with crackers, or use as a sandwich spread. Store leftover pimiento cheese in covered container for up to a week. Enjoy!

Nutrition Facts
Classic Pimiento Cheese
Amount Per Serving (1 Tablespoon)
Calories 60 Calories from Fat 45
% Daily Value*
Fat 5g8%
Saturated Fat 3g19%
Cholesterol 13mg4%
Sodium 115mg5%
Potassium 16mg0%
Carbohydrates 1g0%
Fiber 1g4%
Sugar 1g1%
Protein 3g6%
Vitamin A 193IU4%
Vitamin C 2mg2%
Calcium 82mg8%
Iron 1mg6%
* Percent Daily Values are based on a 2000 calorie diet.

Here’s one more to pin on your Pinterest boards!Need a delicious, EASY, quick appetizer or sandwich? Make a small batch of classic pimiento cheese to serve on crackers or a favorite bread.


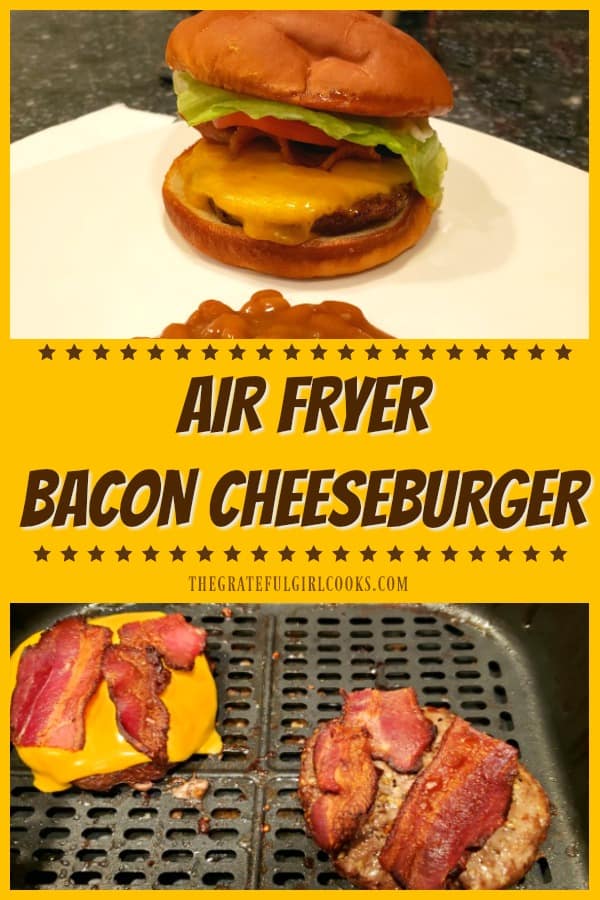
Air Fryer Bacon Cheeseburger

Learn how easy it is to make a juicy good Air Fryer Bacon Cheeseburger, using this appliance. Can’t get outside to grill? Use an air fryer instead!
Learn how easy it is to make a juicy good Air Fryer Bacon Cheeseburger, using this appliance. Can't get outside to grill? Use an air fryer instead!

When it’s raining outside and we can’t grill burgers on our BBQ, we make ’em in our air fryer! My husband and I have made air fryer bacon cheeseburgers quite a few times now, and guess what? They’re really GOOD! They are also very easy to prepare with super heated hot air.

Now that we have this recipe in our air fryer cooking tool belt, even the weather can’t stop us from enjoying a great burger whenever we want one. Here’s how we make ’em:

Scroll Down For A Printable Recipe Card At The Bottom Of The Page

Toast The Buns (optional)

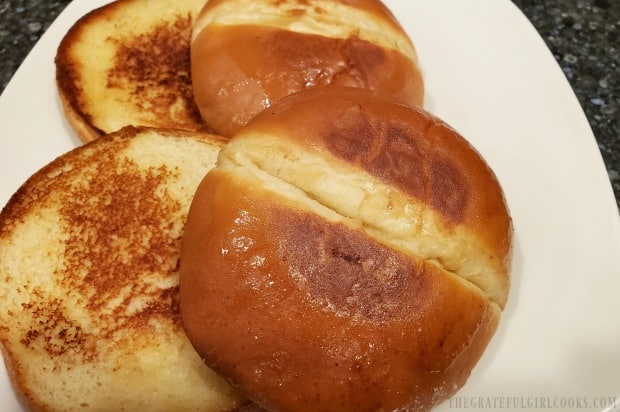
Before cooking the hamburger patties, if you would like to toast the hamburger buns, simply lightly spread each half with butter and cook on low heat in a large skillet until golden brown. We love them toasted, which helps keep the buns from getting too soggy. Set the buns aside once toasted. This is completely optional, but it makes an air fryer bacon cheeseburger even better, in our humble opinion.

Hamburger buns, after being lightly toasted with butter in a skillet

Season The Hamburger Patties

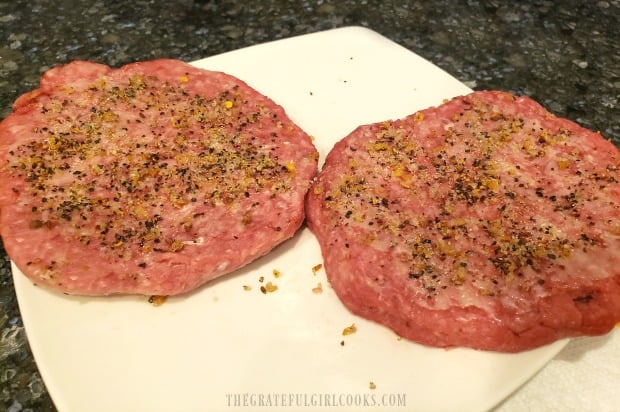
We used 1/4 pound ground beef patties. To season the hamburger patties for air fryer cooking, lightly brush each patty on one side with melted butter and a tiny bit of liquid smoke flavoring. The liquid smoke is optional, but we find it really helps provide a smoky taste to the meat (like outside grilling does). Lightly sprinkle the patties on one side with salt and Montreal steak seasoning. You can substitute your own favorite seasonings, if desired, to suit your personal taste.

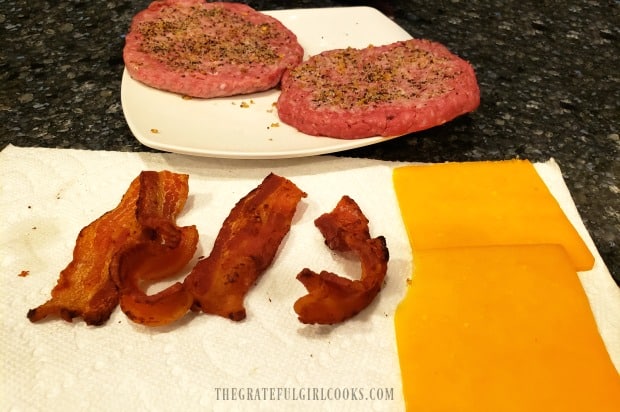
Have the slices of cheddar (or American) cheese AND the precooked bacon nearby. Did you know you can even cook bacon in an air fryer? Yes you can… and it is fabulous! For each cheeseburger I use a strip of precooked bacon that has been cut in half. You will add these right at the end of the air frying time, so will need them nearby, ready to go!

Hamburger patties are seasoned with spices, butter, and liquid smoke before cooking.Pre-cooked bacon and cheddar cheese slices ready to add to cooked burgers.

Cooking An Air Fryer Bacon Cheeseburger

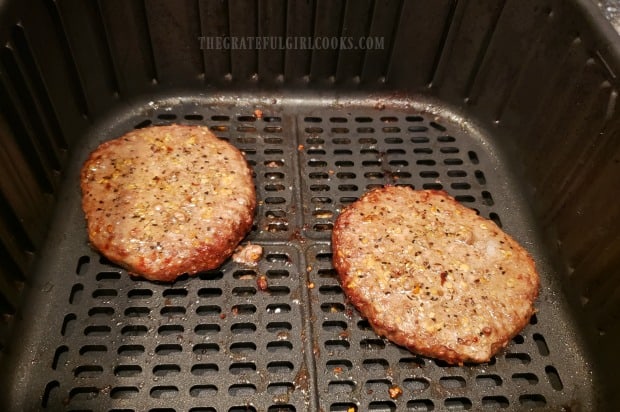
Preheat your air fryer to 360°F. This will take 3-4 minutes typically. Place the patties in the air fryer basket, seasoned side down. Cook for 5 minutes, then turn the patties over, and continue cooking for 2 more minutes. Our burgers were medium-well once done.

NOTE: Because air fryer temps for different models of air fryers, your cooking time may be a tiny bit less or a tiny bit longer. Check for your preferred done-ness. Once done, TURN OFF THE AIR FRYER (and quickly do the next step)!

Burgers are cooked in air fryer, then flipped and cooked some more.


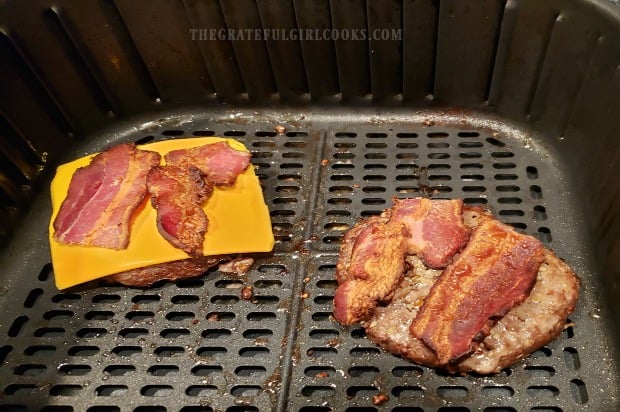
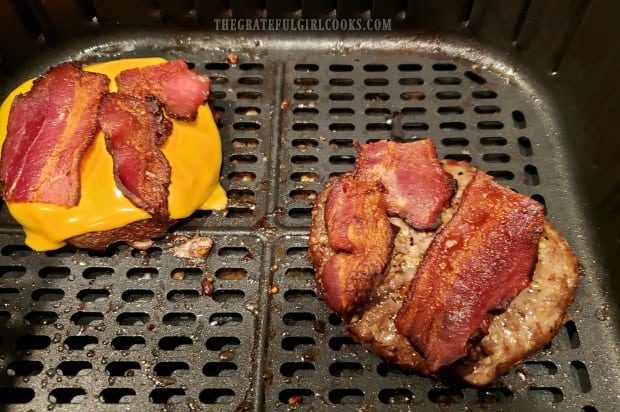
Once the air fryer is turned off (but still really HOT), immediately place a slice of cheese onto each burger patty. Lay the bacon strips on top of the cheese (2 halves per burger). Close the air fryer and let the patties sit, in the still hot (but powered off) air fryer. After 2 minutes, remove the burger patties from the air fryer.

The heat will have melted the cheese and re-heated the bacon. My husband decided at the last moment to leave the cheese off his air fryer bacon cheeseburger (how dare he!), and ate the cheese by itself, instead. Jeepers.

Bacon slices, cheddar cheese added to air fryer bacon cheeseburger.Cheese has melted and bacon is hot. Time to build a burger.

Build Your Air Fryer Bacon Cheeseburger and Eat!

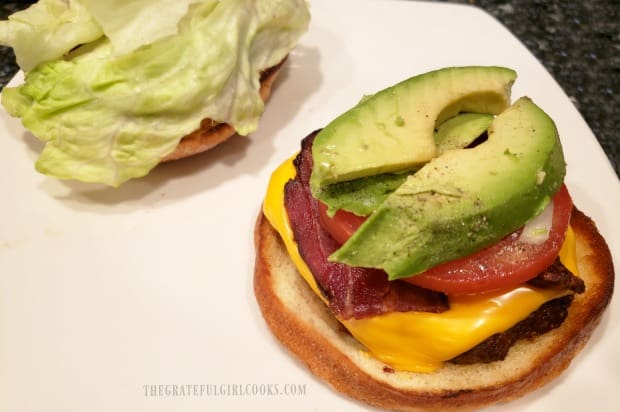
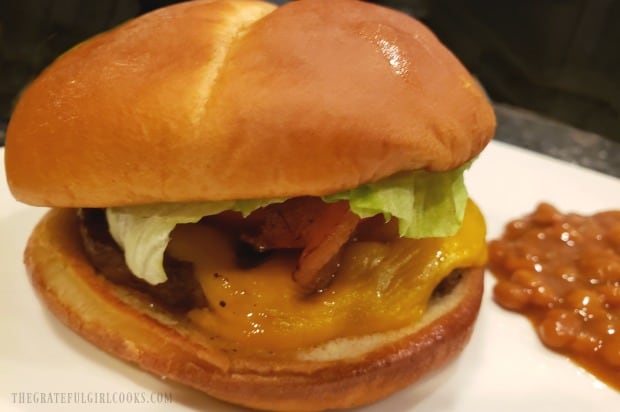
Place the burger patties onto toasted (or untoasted) buns. Add your favorite condiments, along with lettuce tomato, and pickles. We LOVE our air fryer bacon cheeseburgers with fresh avocado slices, too. YUM. Serve, and enjoy these delicious burgers.

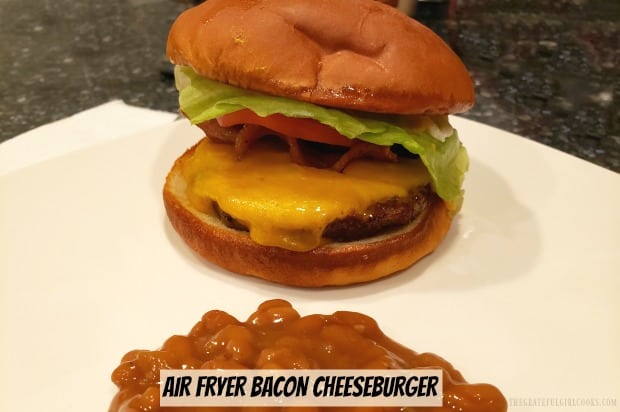
Air fryer bacon cheeseburger is assembled before eating.A juicy, hot air fryer bacon cheeseburger, ready to devour.

We’ve made these air fryer burgers quite a few times, since we get our fair share of rain here in Oregon. We love to grill burgers outside on our Weber BBQ, but also love making them in our handy air fryer when rainy or snowy weather prohibits it!

Hope you give this air fryer bacon cheeseburger recipe a try, and trust you will enjoy it as much as we do. Take care, and have a great day.

Looking For More AIR FRYER recipes?

You can find all of my recipes in the Recipe Index, located at the top of the page. I have several delicious air fryer recipes, including:

Interested In More Recipes?

Thank you for visiting this website. I appreciate you using some of your valuable time to do soIf you’re interested, I publish a newsletter 2 times per month (1st and 15th) with all the latest recipes, and other fun info. I would be honored to have you join our growing list of subscribers, so you never miss a great recipe!
There is a Newsletter subscription box on the top right side (or bottom) of each blog post, depending on the device you use, where you can easily submit your e-mail address (only) to be included in my mailing list.

You Can Also Find Me On Social Media:
Facebook page: The Grateful Girl Cooks!
Pinterest: The Grateful Girl Cooks!
Instagram: jbatthegratefulgirlcooks

Author's signature

5 from 1 vote
Air Fryer Bacon Cheeseburger
Prep Time
5 mins
Cook Time
7 mins
Total Time
12 mins
 

Learn how easy it is to make a juicy good Air Fryer Bacon Cheeseburger, using this appliance. Can't get outside to grill? Use an air fryer instead!

Category: Dinner, Entree, Lunch
Cuisine: American
Keyword: air fryer bacon cheeseburger
Servings: 2
Calories Per Serving: 399 kcal
Author: JB @ The Grateful Girl Cooks!
Ingredients
  • 2 medium hamburger buns , pan-toasted with melted butter (if using toasted buns)
  • 2 slices bacon, pre-cooked
  • 2 slices cheddar cheese (or American)
  • ½ pound ground beef burger patties ,two patties - 1/4 pound each
  • 1 teaspoon butter, melted
  • ½ teaspoon liquid smoke flavoring, divided (optional)
  • salt and Montreal steak seasoning to taste , or preferred seasonings
  • Condiments and Burger Toppings, as desired
Instructions
  1. Before cooking hamburger patties, if you'd like to toast the hamburger buns, simply spread each half lightly with softened butter. Cook on low heat (butter side down) in a large skillet until golden brown. Set aside.

  2. Season hamburger patties by lightly brushing each on one side with melted butter and a tiny bit of liquid smoke flavoring. Lightly sprinkle patties with salt and Montreal steak seasoning. You can substitute your favorite seasonings, if desired, to suit your personal taste. Have cheese slices AND precooked bacon nearby. You will quickly add these at the end of the air frying time, so you'll need them close.

  3. Preheat air fryer to 360°F. This takes 3-4 minutes. Place patties in air fryer basket, seasoned side down. Cook for 5 minutes, then turn patties over, and continue cooking for 2 more minutes. NOTE: Because air fryer temps vary quite a bit, your cooking time may be a bit less or a bit longer. Once done, TURN OFF THE AIR FRYER! Immediately place a slice of cheese onto each burger patty. Lay bacon strips on top of the cheese (2 halves per burger). Close the air fryer and let the patties sit in the hot (but powered off) air fryer. After 2 minutes, remove the patties from the air fryer. The residual heat will have melted the cheese and heated the bacon.

  4. Place burger patties onto prepared buns, and garnish with your preferred condiments and toppings. Serve, and enjoy!

Recipe Notes

Caloric calculation was made using untoasted hamburger buns, lean ground beef, bacon and cheese for the burgers. No additional condiments or burger toppings were calculated as they may vary, by personal choice.

Nutrition Facts
Air Fryer Bacon Cheeseburger
Amount Per Serving (1 burger (without condiments))
Calories 399 Calories from Fat 162
% Daily Value*
Fat 18g28%
Saturated Fat 9g56%
Cholesterol 101mg34%
Sodium 553mg24%
Potassium 487mg14%
Carbohydrates 22g7%
Fiber 1g4%
Sugar 3g3%
Protein 36g72%
Vitamin A 233IU5%
Vitamin C 1mg1%
Calcium 207mg21%
Iron 4mg22%
* Percent Daily Values are based on a 2000 calorie diet.

Here’s one more to pin on your Pinterest boards!Learn how easy it is to make a juicy good Air Fryer Bacon Cheeseburger, using this appliance. Can't get outside to grill? Use an air fryer instead!

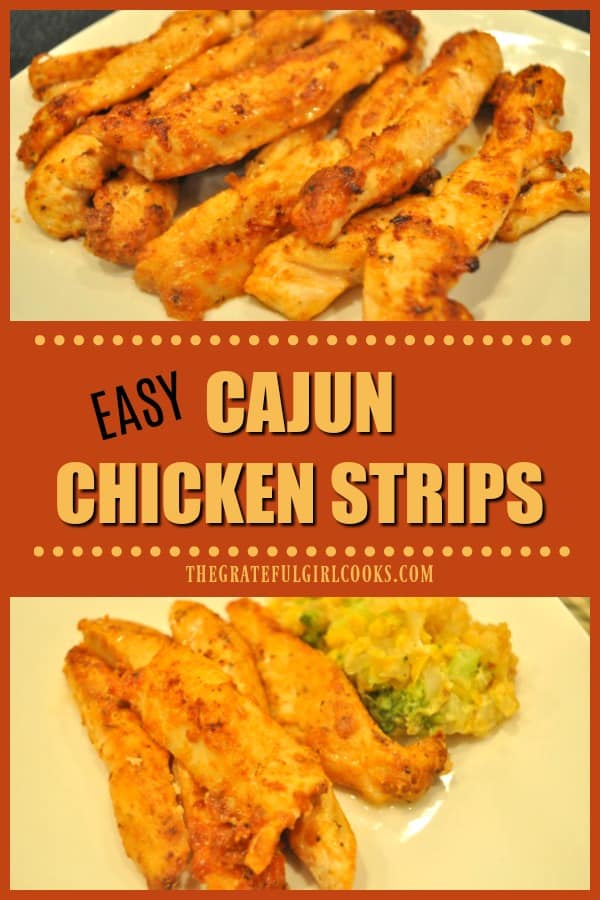
Cajun Chicken Strips

Making these yummy Cajun Chicken Strips couldn’t be easier! Dry spice seasoned chicken is pan-seared in butter for this EASY, quick lunch or dinner!
Making these yummy Cajun Chicken Strips couldn't be easier! Dry spice seasoned chicken is pan-seared in butter for this EASY, quick lunch or dinner!

Do you enjoy chicken strips, or tenders, as they are often called? We sure do, and today I want to share a ridiculously EASY way to make CAJUN chicken strips! There’s no long prep time, and before you know it, you can be munching on this delicious chicken!

Whether you prefer to call them chicken strips, chicken planks, or chicken tenders, these “pieces of chicken” are really yummy, and are a quick dish to whip up for lunch or dinner!

In this simple recipe, chicken breasts are cut into strips, coated in a mild Cajun spice mix, and then pan-seared and browned in butter until done. BOOM! Talk about EASY!!!! This is a GREAT recipe to have in your “bag of tricks”. Here’s how to make this dish:

Scroll Down For A Printable Recipe Card At The Bottom Of The Page

Prepare The Chicken

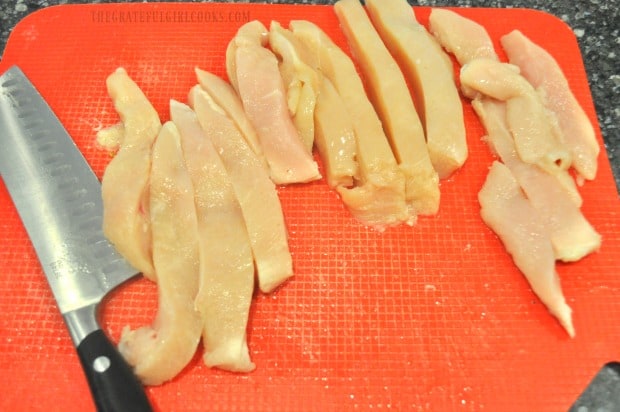
Place boneless, skinless chicken breasts on a cutting mat or board. Slice the chicken into strips, about 3/4″ wide. Pat the chicken pieces dry, using paper towels, to absorb some of the moisture.

Boneless chicken breasts are cut into strips before adding spices.

Season The Chicken Strips

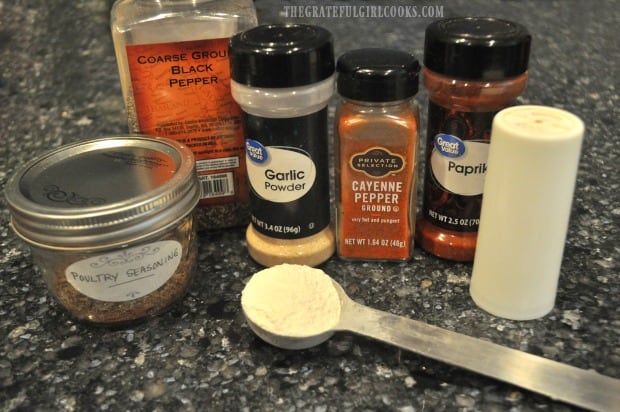
Measure the spices for the seasoning mix into a resealable container or plastic bag. The spices you will need are flour, poultry seasoning (mine’s homemade), garlic powder, paprika, cayenne pepper, salt and pepper.

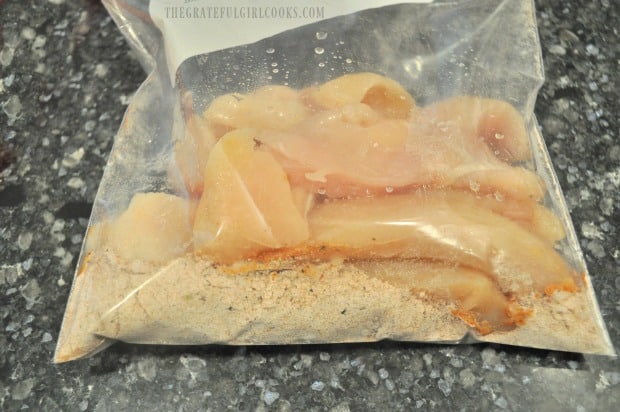
Once the spices are mixed, add the chicken strips, and mix together until the chicken is well coated. You “might” need to do this in batches, depending on the amount of chicken strips you will be making.

The spices for the chicken strips seasoning are ready to mix.

Chicken strips are added to spice mix in plastic bag, and combined to coat.

Time To Cook The Cajun Chicken Strips!

Once the chicken is seasoned, it’s time to cook the strips! You might need to cook the chicken in a couple batches, depending on the size skillet you are using.

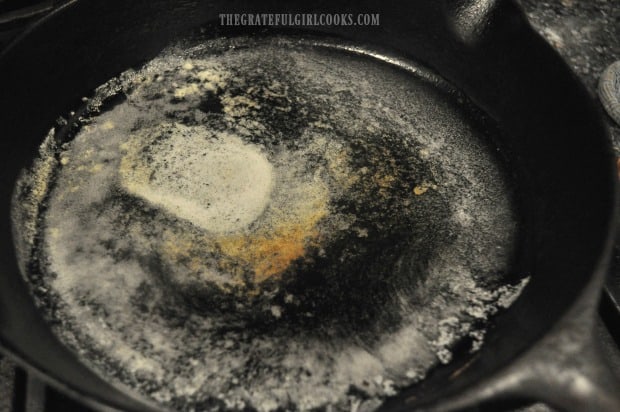
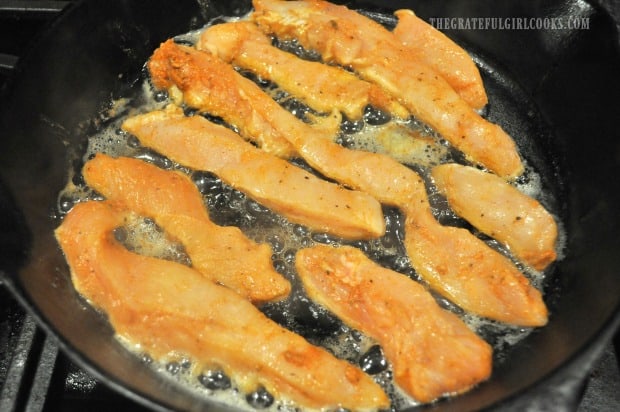
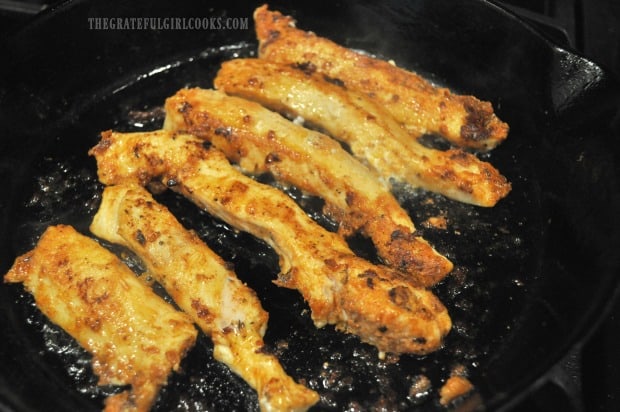
Melt the butter in a large skillet, and let the skillet get very hot (but not smoking). Add the Cajun chicken strips in a single layer, but be sure to not overcrowd the skillet. Cook the chicken strips for about 4 minutes without moving them.

Butter is melted and heated in skillet before adding seasoned chicken strips.Cajun chicken strips are added to the hot skillet to brown.

Carefully flip the chicken strips to the other side after about four minutes. The chicken should be well-browned on the bottom before you turn them over.

Continue to sear the chicken for 4-5 minutes, or until the chicken is cooked all the way through. Remove the chicken from the skillet, once done. If your chicken strips are really thick, it may take a couple minutes longer to cook all the way through.

The chicken strips are flipped to cook the other side after browning.

Time To Eat Some Cajun Chicken Strips!

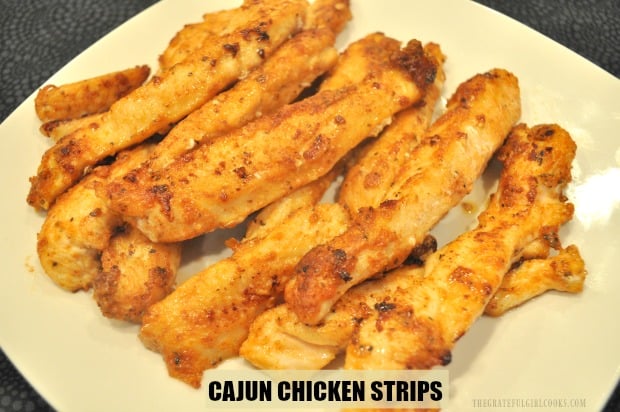
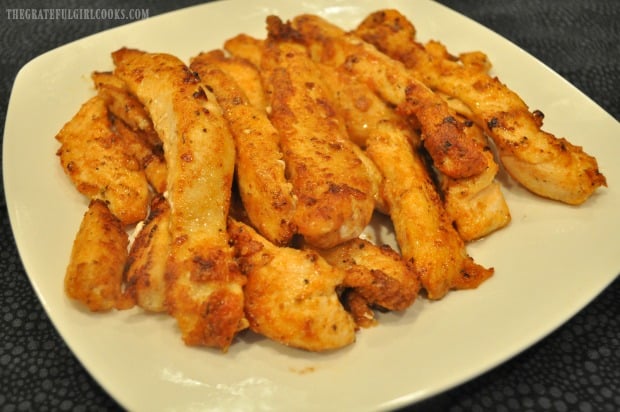
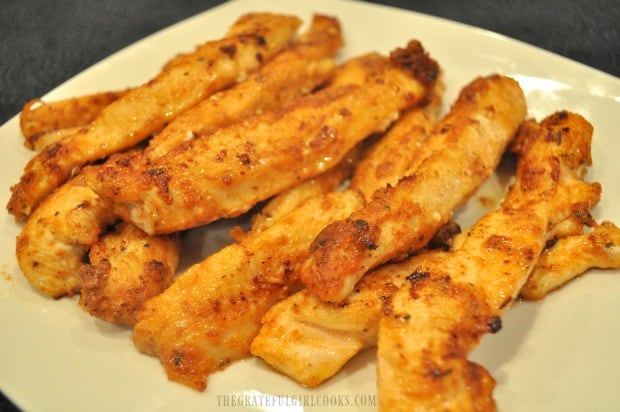
Once the chicken is cooked through and is golden brown on all sides, these yummy chicken strips are ready to serve! They have a very mild kick to them (but not too much), and taste wonderful served as is, or with a dipping sauce (Ranch dressing or Bleu cheese).
A plate full of cajun chicken strips, cooked and ready to eat!Close up of browned chicken strips with cajun seasoning on a plate.

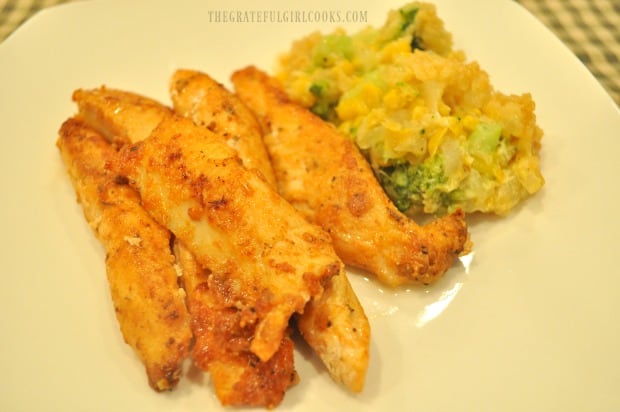
We have even had these served alongside a delicious broccoli corn casserole (so we could get our veggies in, too!). The chicken is tender, seasoned nicely, and was a super simple twist on plain chicken strips!
A few Cajun chicken strips, served with broccoli corn casserole on the side.
Hope you will consider trying out this really easy recipe for Cajun chicken strips. They are flavorful, but mild enough for kids and adults who don’t like things too spicy! Thank you for stopping by and spending some of your valuable time on this blog. I hope you enjoy a wonderful day!

Looking For More CHICKEN Recipes?

You can find all of my recipes in the Recipe Index, located at the top of the page. I have many chicken recipes for you to enjoy, including:

Interested In More Recipes?

Thank you for visiting this website. I appreciate you using some of your valuable time to do soIf you’re interested, I publish a newsletter 2 times per month (1st and 15th) with all the latest recipes, and other fun info. I would be honored to have you join our growing list of subscribers, so you never miss a great recipe!
There is a Newsletter subscription box on the top right side (or bottom) of each blog post, depending on the device you use, where you can easily submit your e-mail address (only) to be included in my mailing list.

You Can Also Find Me On Social Media:
Facebook page: The Grateful Girl Cooks!
Pinterest: The Grateful Girl Cooks!
Instagram: jbatthegratefulgirlcooks

Author's signature

Original recipe source: unknown. Found handwritten on a 3×5 card in one of my old recipe boxes.

0 from 0 votes
Cajun Chicken Strips
Prep Time
10 mins
Cook Time
8 mins
Total Time
18 mins
 

Making these yummy Cajun Chicken Strips couldn't be easier! Dry spice seasoned chicken is pan-seared in butter for this EASY, quick lunch or dinner!

Category: Dinner
Cuisine: Cajun
Keyword: cajun chicken strips
Servings: 4
Calories Per Serving: 255 kcal
Author: JB @ The Grateful Girl Cooks!
Ingredients
  • pounds boneless, skinless chicken breasts , cut into 3/4" strips
  • 1 teaspoon poultry seasoning
  • ¼ teaspoon cayenne pepper
  • ½ teaspoon paprika
  • 1 Tablespoon flour
  • ¾ teaspoon garlic powder
  • ¼ teaspoon salt and pepper (¼ tsp. each)
  • 2 Tablespoons butter
Instructions
  1. Place boneless, skinless chicken breasts onto a cutting mat or board. Slice chicken into long strips, about 3/4" wide. Pat chicken pieces dry, using paper towels, to absorb some of the moisture. Set aside.

  2. Measure spices into a resealable container or plastic bag, and stir, to combine. Once mixed, add chicken strips; mix until chicken is well coated. You "might" need to do this in batches, depending on the amount of chicken you make.

  3. Melt butter in a large skillet. Once skillet is very hot, add chicken strips in a single layer. Don't overcrowd skillet. Cook for 4 minutes without moving them. Once bottom is well-browned, carefully flip chicken to the other side. Continue to cook for 4-5 minutes, until chicken is cooked through. Note: If your chicken strips are really thick, it may take a couple minutes longer to cook all the way through. Remove chicken from skillet, once done. Serve chicken strips as is, or with a dipping sauce! Enjoy!

Nutrition Facts
Cajun Chicken Strips
Amount Per Serving (1 (1/4 of total))
Calories 255 Calories from Fat 90
% Daily Value*
Fat 10g15%
Saturated Fat 5g31%
Cholesterol 124mg41%
Sodium 393mg17%
Potassium 629mg18%
Carbohydrates 2g1%
Fiber 1g4%
Sugar 1g1%
Protein 37g74%
Vitamin A 414IU8%
Vitamin C 2mg2%
Calcium 13mg1%
Iron 1mg6%
* Percent Daily Values are based on a 2000 calorie diet.

Here’s one more to pin on your Pinterest boards!Making these yummy Cajun Chicken Strips couldn't be easier! Dry spice seasoned chicken is pan-seared in butter for this EASY, quick lunch or dinner!

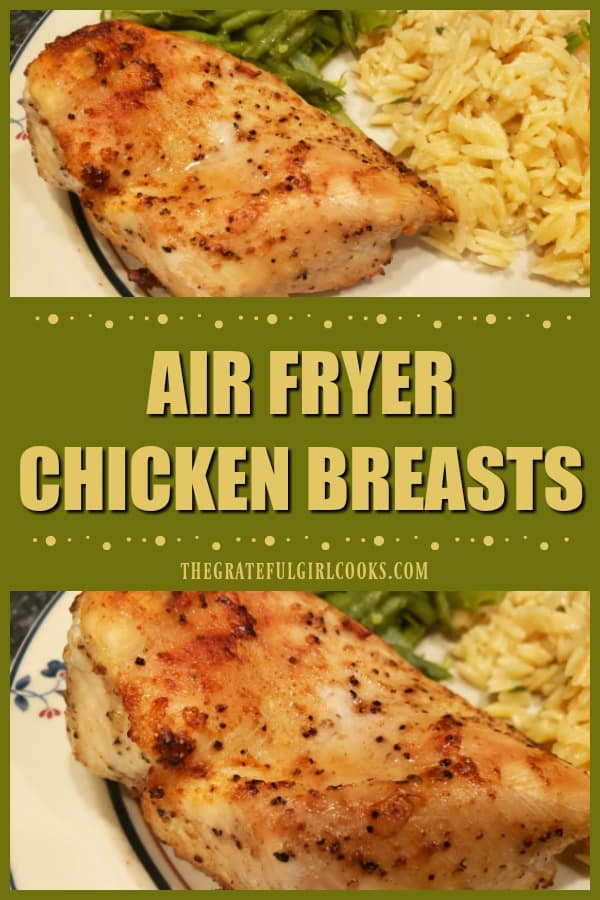
Air Fryer Chicken Breasts

Simple spices and butter provide wonderful flavor for these easy air fryer chicken breasts! Use your air fryer to make this tasty main dish quickly!

This past summer I received a Cosori air fryer for my birthday. It’s fun to cook foods with hot air, and with only a minimum amount of oil! I’ve been having fun with it ever since, trying out recipes for both main dishes, muffins, side dishes and desserts!

I’ve already posted a few delicious air fryer recipes, including:

Last month I made air fryer chicken breasts.  I knew I wanted to experiment with our family favorite sauce we use for grilling chicken breasts outside, but wanted to re-create it using my air fryer! Guess what? It turned out fabulous, so I want to share the recipe for this EASY dish.

Scroll Down For A Printable Recipe Card At the Bottom Of The Page

Make The Basting Sauce For The Chicken Breasts

The basting sauce recipe for the chicken breasts came from my Mom. It was how we ate our grilled chicken while growing up. We use it all summer long when we grill chicken on our BBQ, and have used the same recipe for almost 50 years. I thought it would be a perfect seasoning for these air fryer chicken breasts! And it WAS!

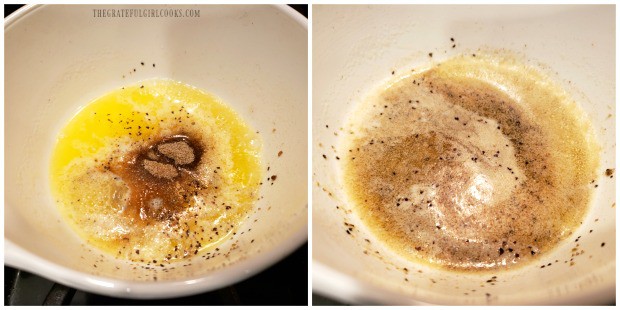
To make the sauce, combine the seasonings (garlic powder, celery salt, seasoning salt and coarse black pepper) with melted butter. Stir, until fully combined. Easy, right?

Sauce for chicken is made with combining melted butter and a few common spices.

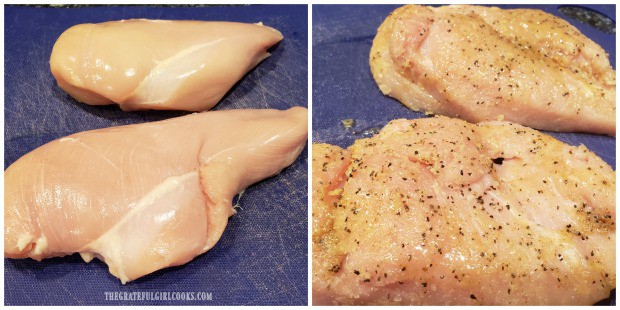
Brush the sauce over 1 side of the boneless, skinless chicken breasts.

Seasoning sauce is brushed over one side of the chicken breasts.

Ready To Cook Air Fryer Chicken Breasts!

Preheat your air fryer to 370° (this usually takes about 3-4 minutes). TIP: To save time, preheat the air fryer while making the sauce and basting the chicken.

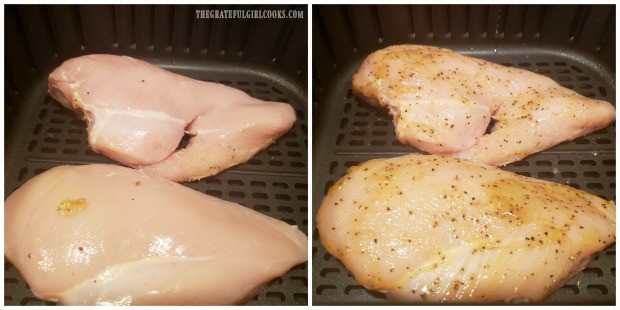
Place the chicken breasts, with the sauce side down in the basket of the preheated air fryer. Now brush the remaining sauce over the top of the chicken.

The chicken is placed in preheated air fryer, and other side is basted with sauce.

Cook the chicken breasts in the air fryer for 4 minutes, and then pause the air fryer and flip the chicken to the other side. Continue cooking for 4-5 additional minutes, or until chicken is golden brown, cooked through and is at a safe internal temperature of 165° F.

Your cooking time may vary a little bit, due to two factors: the size and weight of the chicken breasts you are using, and the ambient temps with air fryers. Because air fryer temperatures can vary, make sure to check the chicken while cooking to make sure you know when it is done.

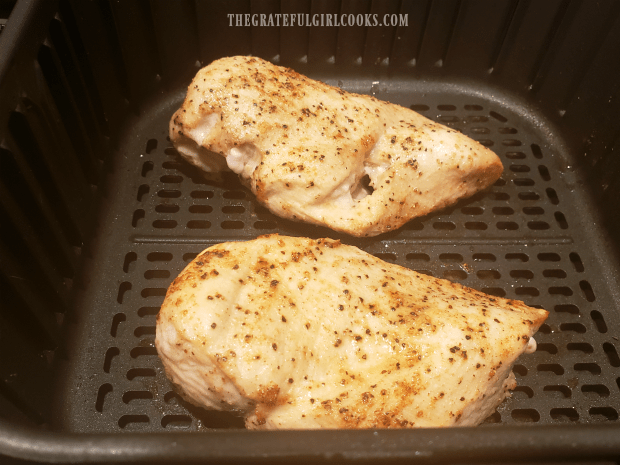
The photo below shows the chicken breasts about halfway through the cooking time. You can see that the pieces are already beginning to brown.

Halfway through cooking time, air fryer chicken breasts are turning golden brown.

When the air fryer chicken breasts are finished cooking, carefully remove them from the hot basket, and serve immediately! BOOM! See how easy that was?

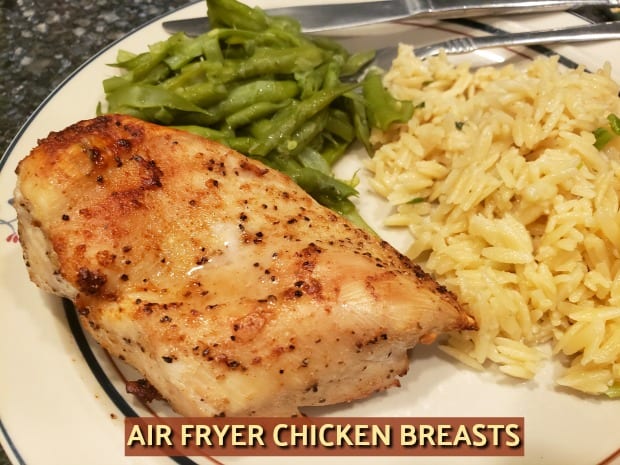
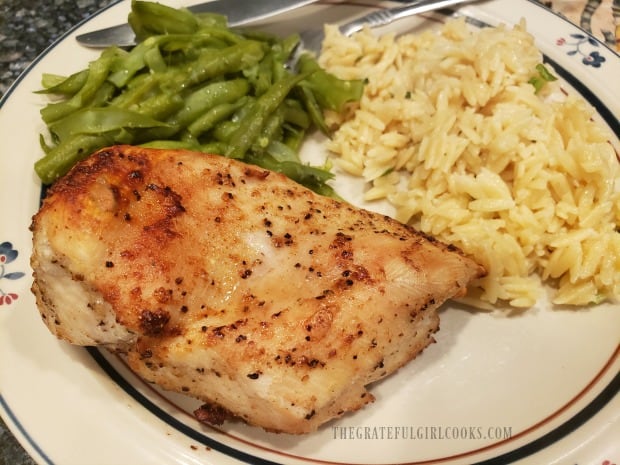
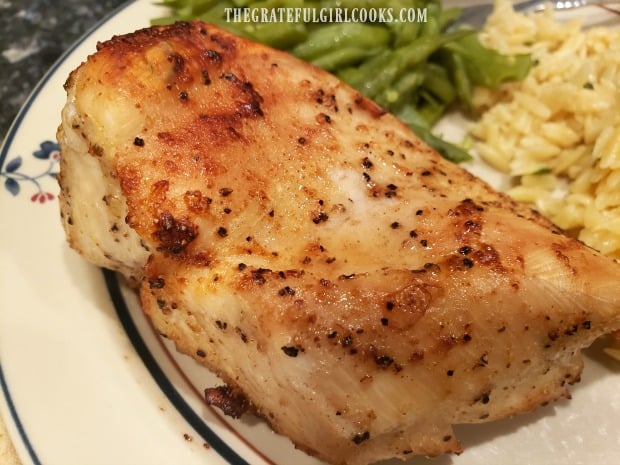
Now it’s time to enjoy one of the air fryer chicken breasts with some home canned green beans, and some orzo with Parmesan on the side. YUM! It was a good dinner!

Air fryer chicken breasts were served with orzo and green beans.

The air fryer chicken breasts were fully cooked and juicy inside, had a bit of a browned, crunchy crust on them, and had GREAT flavor! They were soooo good!

One of the air fryer chicken breasts in a close up photo.

If you have an air fryer, then I hope you will enjoy this quick and easy chicken recipe! Have a great day, friends! Why not look for ways throughout the day to be an encourager, because there are LOTS of hurting, lonely people around. Won’t you join me in trying to make a difference? Have a great day.

Looking For More CHICKEN Recipes?

You can find all of my chicken recipes in the Recipe Index, located at the top of the page. I have lots of them… including:

Interested In More Recipes?

Thank you for visiting this website. I appreciate you using some of your valuable time to do soIf you’re interested, I publish a newsletter 2 times per month (1st and 15th) with all the latest recipes, and other fun info. I would be honored to have you join our growing list of subscribers, so you never miss a great recipe!
There is a Newsletter subscription box on the top right side (or bottom) of each blog post, depending on the device you use, where you can easily submit your e-mail address (only) to be included in my mailing list.

You Can Also Find Me On Social Media:
Facebook page: The Grateful Girl Cooks!
Pinterest: The Grateful Girl Cooks!
Instagram: jbatthegratefulgirlcooks

Author's signature

Recipe source: my brain, and my mom’s recipe for basting sauce

0 from 0 votes
Air Fryer Chicken Breasts
Prep Time
5 mins
Cook Time
8 mins
Total Time
13 mins
 

Simple spices and butter provide wonderful flavor for these easy air fryer chicken breasts! Use your air fryer to make this tasty main dish quickly!

Category: Entree, Main Course
Cuisine: American
Keyword: air fryer chicken breasts
Servings: 2
Calories Per Serving: 295 kcal
Author: JB @ The Grateful Girl Cooks!
Ingredients
  • 12 ounces chicken breasts
  • 2 Tablespoons butter , melted
  • teaspoon garlic powder
  • teaspoon celery salt
  • teaspoon seasoning salt
  • teaspoon coarse ground black pepper
Instructions
  1. Preheat your air fryer to 370° (this usually takes about 4-5 minutes). TIP: To save time, mix the sauce and baste the chicken while the air fryer preheats.

  2. Combine garlic powder, celery salt, seasoning salt and coarse black pepper in a small bowl with the melted butter. Stir, until fully combined.

  3. Brush half of the sauce over 1 side of the boneless, skinless chicken breasts. When air fryer is at temperature, place chicken breasts, sauce side down in the basket of the air fryer. Brush remaining sauce over the top of the chicken.

  4. Cook at 370° F. for 4 minutes; pause the air fryer and turn chicken to the other side. Continue cooking for 4-5 more minutes, or until chicken is golden brown, cooked through and has an internal temperature of 165° F. When done, remove chicken, serve, and enjoy!

    NOTE: Your cooking time may vary, due to two factors: the size and weight of the chicken breasts you are using, and the ambient temps with air fryers. Because air fryer temperatures can vary, be sure to check the chicken while cooking to make sure you know when it is done.

Nutrition Facts
Air Fryer Chicken Breasts
Amount Per Serving (1 chicken breast)
Calories 295 Calories from Fat 144
% Daily Value*
Fat 16g25%
Saturated Fat 8g50%
Cholesterol 139mg46%
Sodium 588mg26%
Potassium 629mg18%
Carbohydrates 1g0%
Sugar 1g1%
Protein 36g72%
Vitamin A 401IU8%
Vitamin C 2mg2%
Calcium 9mg1%
Iron 1mg6%
* Percent Daily Values are based on a 2000 calorie diet.

Here’s one more to pin on your Pinterest boards!Simple spices and butter provide wonderful flavor for these easy air fryer chicken breasts! Use your air fryer to make this tasty main dish quickly!

Classic Tuna Salad

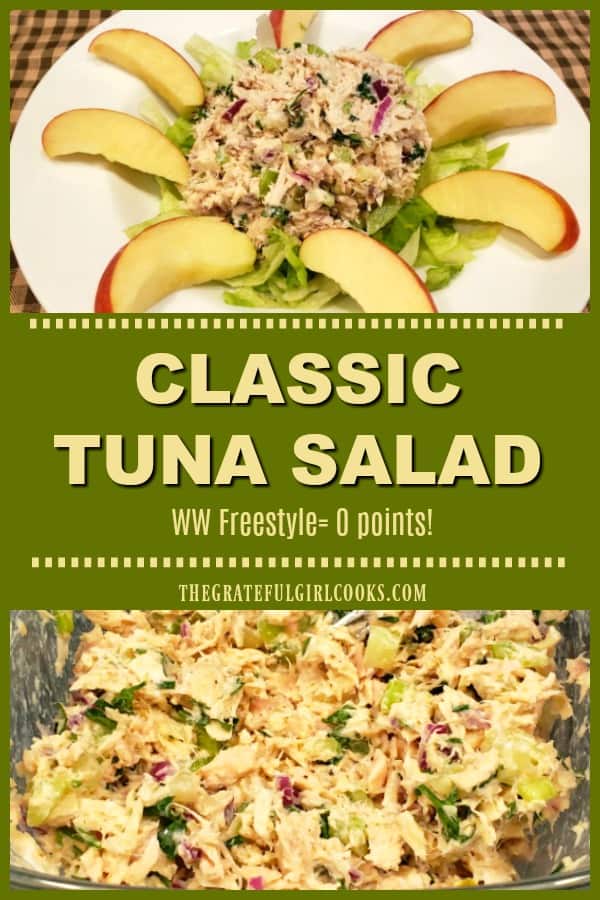
Classic Tuna Salad is a filling, healthy, delicious entree salad that’s Weight Watchers friendly (ZERO points Freestyle), and is ready in 10 minutes!
Classic Tuna Salad is a filling, healthy, delicious entree salad that's Weight Watchers friendly (ZERO points Freestyle), and is ready in 10 minutes!

Do you enjoy tuna salad? We sure do, but typically we enjoy it on sandwiches. My husband likes to add hard boiled eggs and mayo to drained tuna, and that’s about it! Recently I stumbled upon a recipe for classic tuna salad that can be served as a quick lunch or dinner main course, and decided to give it a try! YUM!!!! The entire salad took under 10 minutes to make (including chopping and slicing the veggies). That’s a WIN, in my book.

The tuna salad is so delicious (even as leftovers the next day) I thought I would share it with you today.  This recipe was adapted by a Weight Watchers member from a cookbook recipe she had. Even if you are not following a WW plan, this is a very filling, low calorie and delicious salad.

This recipe for classic tuna salad uses non fat Greek yogurt instead of mayonnaise to cut out  some fat calories and make it compatible with a Weight Watchers Freestyle eating plan. That small change made this salad have ZERO Freestyle points (for those of you who follow a WW plan and know the over 200 foods that have a zero points value).
Scroll Down For A Printable Recipe Card At The Bottom Of The Page

How To Make This Classic Tuna Salad

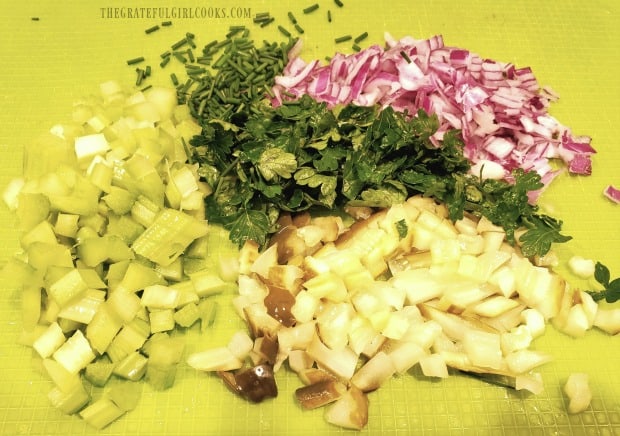
Truthfully, there is nothing even remotely difficult involved in making this delicious tuna salad.  Simply prep the veggies, by cutting, chopping and slicing. Seen below are the chopped dill pickles, celery, fresh parsley and chives (from our garden), and red onion.

Celery, parsley, red onion, and dill pickles are chopped to add to tuna salad.

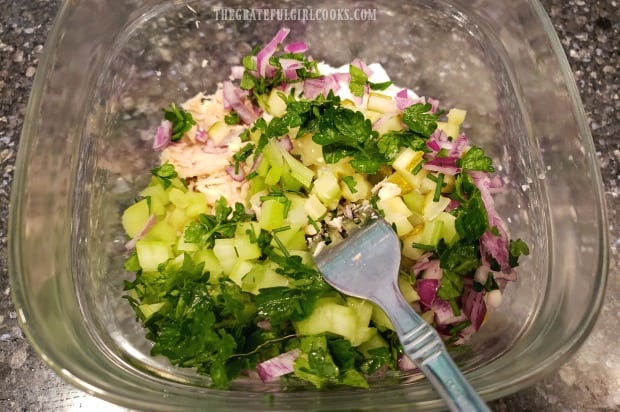
Once you’ve “prepped” the veggies, place them in a medium sized bowl with drained albacore tuna, spices, lemon juice, and non fat Greek yogurt.

Tuna, chopped veggies and non-fat Greek yogurt are mixed in bowl.

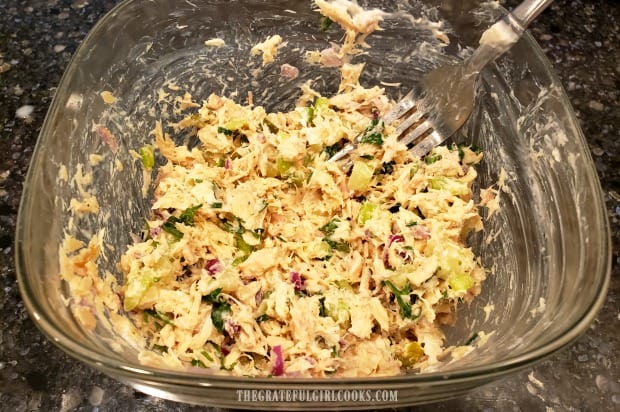
Combine all the ingredients, adding a little bit more Greek yogurt if necessary, to reach the consistency you prefer. I started with 3 Tablespoons, then added just a smidge more.

All the ingredients for the classic tuna salad are mixed together in bowl.

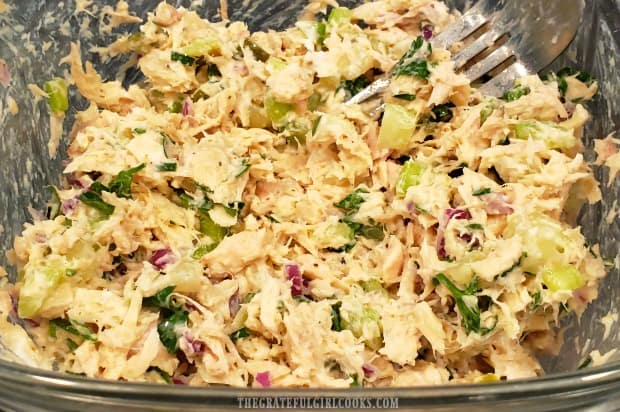
Here is an up close look at the tuna salad after all ingredients are mixed together.

Time To Enjoy A Classic Tuna Salad

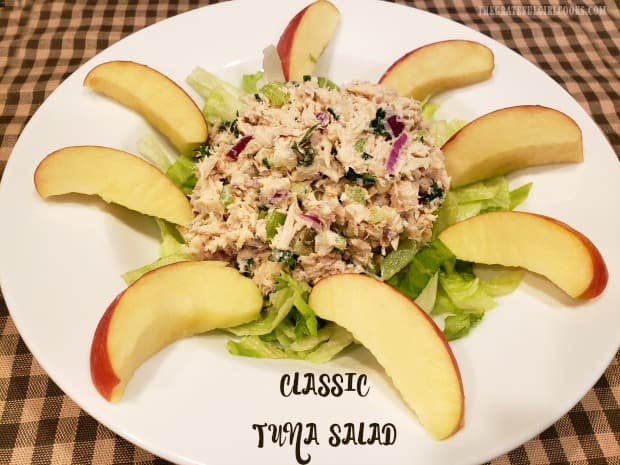
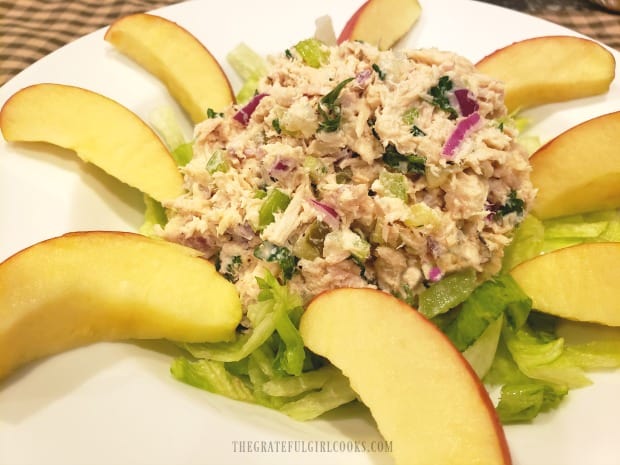
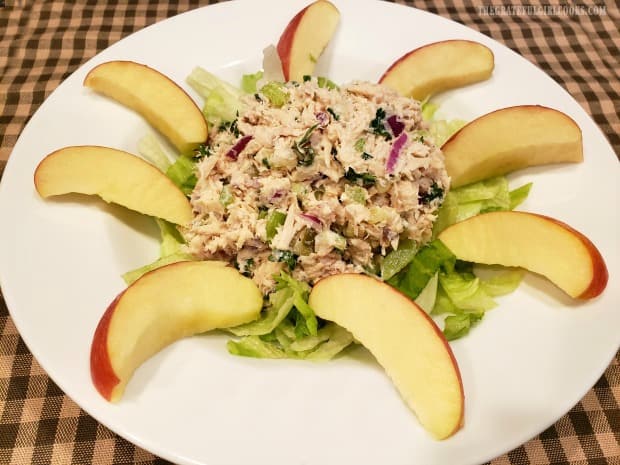
Once everything is combined, you are ready to enjoy this wonderful ZERO point, flavor-packed, classic tuna salad! It is often said you eat with your eyes first, so I served it on a bed of chopped iceberg lettuce, and surrounded this classic tuna salad with a sliced Gala apple! 

The salad LOOKED good served this way, and the crunchy sweetness of the apple tasted GREAT alongside this delicious salad!

Classic tuna salad, on a bed of chopped lettuce, with apple slices on the side.

There you have it! A healthy, and quite filling entree salad that has ZERO Freestyle points if you follow a WW plan. That works for me! Cover and refrigerate any leftovers.  By the way, I had the exact same lunch the very next day, as well! It really is a great tasting lunch or dinner!

The classic tuna salad, with apple slices on the side is a filling, flavor packed meal!

I sure do hope you will consider trying this delicious classic tuna salad recipe! Even if you are not following a Weight Watchers plan, I am confident you will really enjoy this delicious salad. Have a wonderful day!

Looking For More MAIN COURSE SALAD Recipes?

You can find all of my entree salad recipes in the Recipe Index, located at the top of the page. Here’s a few favorites you might want to check out:

Interested In More Recipes?

Thank you for visiting this website. I appreciate you using some of your valuable time to do soIf you’re interested, I publish a newsletter 2 times per month (1st and 15th) with all the latest recipes, and other fun info. I would be honored to have you join our growing list of subscribers, so you never miss a great recipe!
There is a Newsletter subscription box on the top right side (or bottom) of each blog post, depending on the device you use, where you can easily submit your e-mail address (only) to be included in my mailing list.

You Can Also Find Me On Social Media:
Facebook page: The Grateful Girl Cooks!
Pinterest: The Grateful Girl Cooks!
Instagram: jbatthegratefulgirlcooks

Author's signature

Recipe Adapted From: The Cookbook “Well Fed 2: More Paleo Recipes For People Who Love To Eat”, by Melissa Joulwan, published by Smudge Publishing. Recipe was adapted by a WW member, then posted in WW connect community.

0 from 0 votes
Classic Tuna Salad
Prep Time
10 mins
Cook Time
0 mins
Total Time
10 mins
 

Classic Tuna Salad is a filling, healthy, delicious entree salad that's Weight Watchers friendly (ZERO points Freestyle), and is ready in 10 minutes!

Category: Entree/Salad
Cuisine: American
Keyword: classic tuna salad
Servings: 4
Calories Per Serving: 143 kcal
Author: JB @ The Grateful Girl Cooks!
Ingredients
  • 2 cans albacore tuna (in water) , drained (7 oz. per can)
  • 1/4 cup red onion , finely chopped
  • 1 rib celery , finely diced
  • 1/4 cup dill pickle , finely diced
  • 1/4 cup fresh parsley , chopped
  • 2 Tablespoons chives , finely chopped (fresh or dried)
  • 1/2 Tablespoon lemon juice , freshly squeezed
  • 1/4 teaspoon black pepper
  • 1/8 teaspoon salt
  • 1 dash cayenne pepper
  • 3-4 Tablespoons non fat, plain Greek yogurt
Instructions
  1. Drain tuna, and cut, chop or slice the veggies.

  2. Combine all ingredients in a medium sized bowl, and stir well, to fully mix all the veggies and spices with the tuna and non-fat Greek yogurt. Cover and refrigerate until ready to serve (can also be eaten immediately).
  3. To serve, place a rounded large scoop on a bed of chopped lettuce, or make into a sandwich, whichever way you want to enjoy this classic tuna salad. Cover and refrigerate any leftovers. Enjoy!
Nutrition Facts
Classic Tuna Salad
Amount Per Serving (1 (1/4 of total))
Calories 143 Calories from Fat 27
% Daily Value*
Fat 3g5%
Saturated Fat 1g6%
Cholesterol 42mg14%
Sodium 540mg23%
Potassium 312mg9%
Carbohydrates 2g1%
Fiber 1g4%
Sugar 1g1%
Protein 25g50%
Vitamin A 460IU9%
Vitamin C 7.7mg9%
Calcium 39mg4%
Iron 1.2mg7%
* Percent Daily Values are based on a 2000 calorie diet.

Here is one more to pin on your Pinterest boards!Classic Tuna Salad is a filling, healthy, delicious entree salad that's Weight Watchers friendly (ZERO points Freestyle), and is ready in 10 minutes!


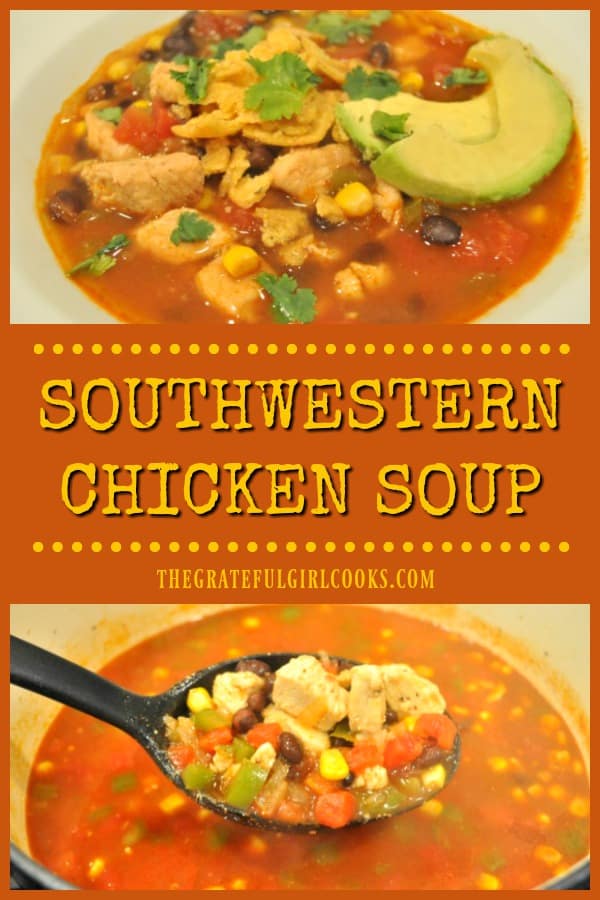
Southwestern Chicken Soup

You’ll love this delicious Southwestern Chicken Soup, a Weight Watchers dish with corn, black beans, tomatoes, bell peppers, and avocado slices!
You'll love this delicious Southwestern Chicken Soup, a Weight Watchers dish with corn, black beans, tomatoes, bell peppers, and avocado slices!

Recently I tried a new (to us) soup recipe that I found on Weight Watchers.  The soup sounded really good, and since it was freezing cold outside (the middle of winter), I decided to make some. A bowl of hot soup really warms a gal up on a chilly February evening!

Whoa! This Southwestern chicken soup tastes amazing! The portion size is large (1¾ cups per serving = 3 Smart Points), and is packed with corn, black beans, tomatoes, in a Southwestern spiced broth. Trust me- this is one flavor-packed bowl of soup!

If you enjoy Southwestern flavored dishes, chances are you will LOVE this hearty soup! It’s very easy to make, so you can be serving up steaming hot bowls of Southwestern chicken soup before you know it!

Scroll Down For A Printable Recipe Card At The Bottom Of The Page

How To Make Southwestern Chicken Soup

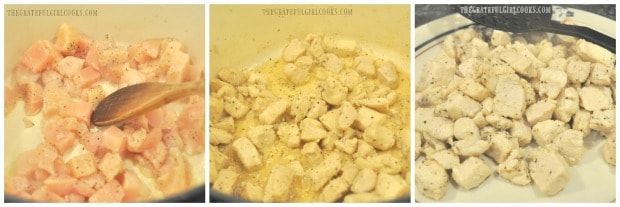
Place one teaspoon of olive oil in a large soup pot or Dutch oven. Heat oil on medium-high heat until very hot, but not smoking. Lightly season chicken pieces with salt and pepper, then add to the pot.

Cook the chicken on all sides, stirring often, for approximately 5 minutes. The chicken should be very lightly browned and cooked all the way through. Once the chicken is done, remove it from pan with a slotted spoon, and transfer to a plate. Set chicken aside until later.

Cooking the chicken breast pieces for Southwestern chicken soup.

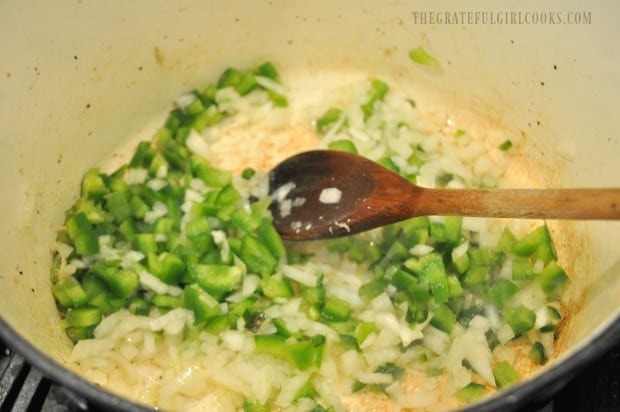
Add the remaining 1 teaspoon of olive oil back into the pan (the same one you cooked the chicken in). Heat oil on medium-high, then add the onion, bell pepper, and jalapeño to the pan.

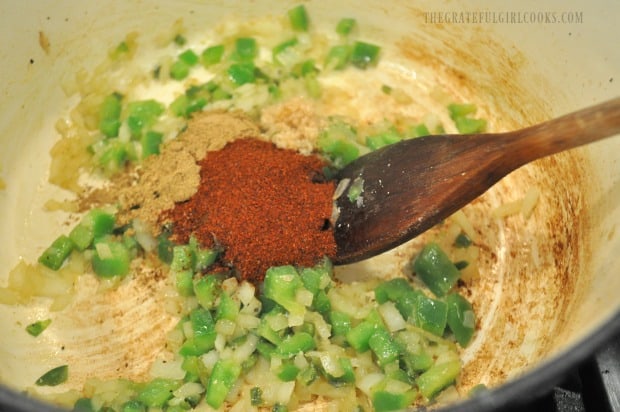
Cook for 3 minutes, stirring often, until veggies have softened up a bit. Add the chili powder, minced garlic, and ground cumin to the pan, and stir to combine. Cook this mixture for an additional 30 seconds once combined.

Bell peppers, jalapeño and onions are cooked, to add to Southwestern chicken soup.

Spices for Southwestern chicken soup are added to onions, jalapeños and peppers in pan

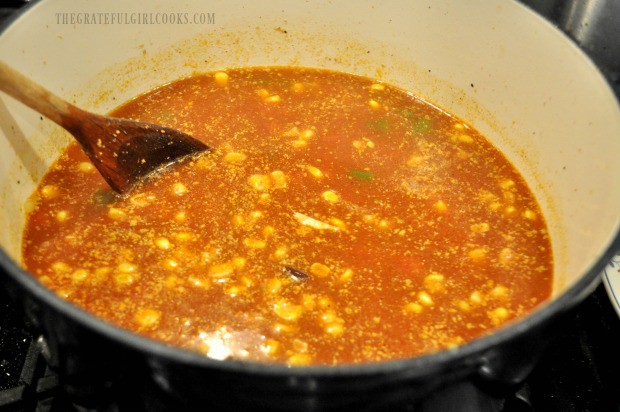
Stir the chicken broth, diced tomatoes, black beans and corn into the soup. Bring the soup to a boil. Once soup begins to boil, put a lid on the pan, and turn the heat down to LOW. Continue to cook the Southwestern chicken soup on low heat (covered) for about 8-9 minutes. The veggies should be nice and tender at this point.

Broth, tomatoes and corn are added to the pan of Southwestern chicken soup.

Add The Cooked Chicken And Finish The Soup

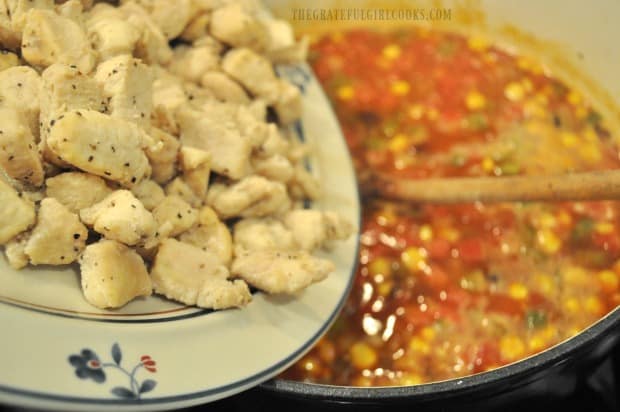
Carefully add the cooked chicken pieces back into the hot Southwestern chicken soup. Stir the ingredients to combine, and continue to cook just until the chicken is fully heated through. It should only take about 2-3 minutes to reheat the chicken.

Remove the pot of soup from the heat, and stir in the fresh lime juice. The Southwestern Chicken Soup is now ready to garnish, then eat!

Cooked chicken pieces are added to the pot of Southwestern chicken soup.

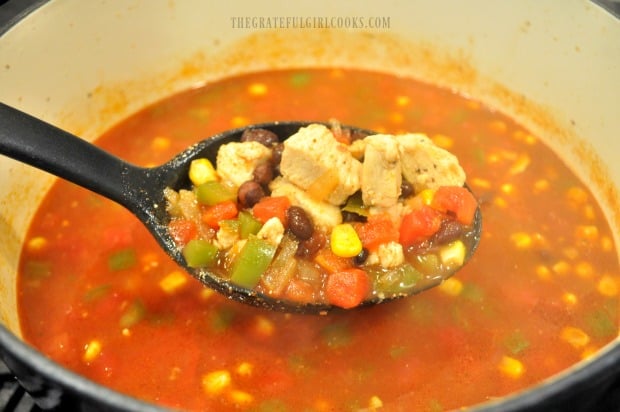
See all those nice veggies and chicken chunks in this soup? You’re gonna enjoy this!

A ladle, full of yummy Southwestern chicken soup.

To Serve Southwestern Chicken Soup

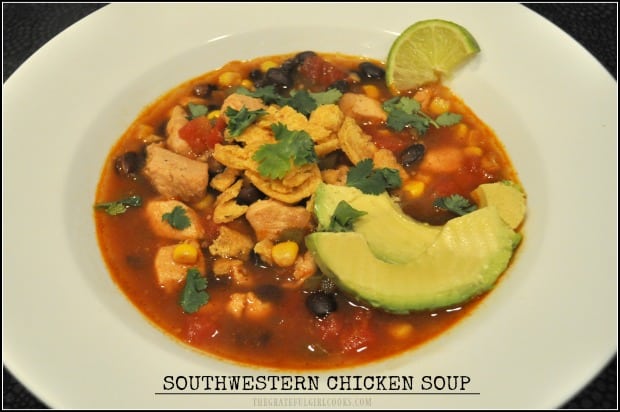
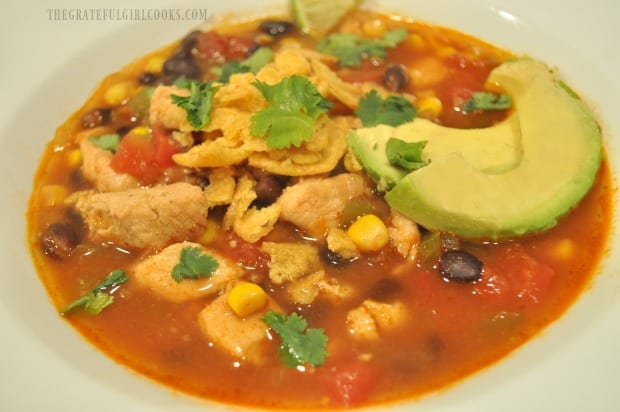
When ready to serve, ladle the soup into bowls. Each serving of this hearty soup is 1¾ cups, so full bowls of Southwestern Chicken Soup are in order! Garnish each bowl of soup with 2 slices of ripe avocado, and a few cilantro leaves, and some crumbled corn chips. Grab a spoon and help yourself to a big bite of this delicious Southwestern chicken soup!

NOTE: The original Weight Watchers recipe did NOT use corn chips. I added 3 crumbled up corn chips to each bowl of soup, for a nice looking presentation and “crunch”. 

Southwestern Chicken Soup is served with avocado slices, corn chips and cilantro on top.

We really LOVED this soup!  My husband said this might have become his new FAVORITE soup! Wow! That’s saying a lot, since I make a lot of yummy soups! The leftovers were yummy, too! The soup will keep for 4 days in refrigerator and up to 3 months in the freezer.

Sure do hope you will consider trying this Southwestern chicken soup. It is incredibly easy to make, and tastes absolutely wonderful. If you follow the Weight Watchers program to track your food intake, this recipe has a value of 3 Smart Points (without corn chips). Have a great day!

Looking For More SOUP Recipes?

You can find all of my recipes in the Recipe Index, located at the top of the page. I have lots of soup recipes published, including:

Interested In More Recipes?

Thank you for visiting this website. I appreciate you using some of your valuable time to do soIf you’re interested, I publish a newsletter 2 times per month (1st and 15th) with all the latest recipes, and other fun info. I would be honored to have you join our growing list of subscribers, so you never miss a great recipe!
There is a Newsletter subscription box on the top right side (or bottom) of each blog post, depending on the device you use, where you can easily submit your e-mail address (only) to be included in my mailing list.

You Can Also Find Me On Social Media:

Facebook page: The Grateful Girl Cooks!
Pinterest:
The Grateful Girl Cooks!
Instagram:
jbatthegratefulgirlcooks

Author's signature

Original Recipe Source: https://www.weightwatchers.com/us/recipe/southwestern-chicken-soup/59779f66112c2b4e18b0fd84 

0 from 0 votes
Southwestern Chicken Soup
Prep Time
10 mins
Cook Time
25 mins
Total Time
35 mins
 

You'll love this delicious Southwestern Chicken Soup, a Weight Watchers dish with corn, black beans, tomatoes, bell peppers, and avocado slices!

Category: Entree, Soup
Cuisine: Southwestern
Keyword: Southwestern chicken soup
Servings: 4
Calories Per Serving: 401 kcal
Author: JB @ The Grateful Girl Cooks!
Ingredients
  • 2 teaspoons olive oil , divided use
  • 1 pound chicken breasts (boneless, skinless) , cut in 1/2" cubes
  • 1/2 teaspoon salt
  • 1/4 teaspoon black pepper
  • 1 medium onion , chopped
  • 1 small green bell pepper , seeded and chopped
  • 2 cloves garlic , minced
  • 1 medium jalapeño pepper , seeded and chopped
  • 1 Tablespoon chili powder
  • 2 teaspoons ground cumin
  • 29 ounces chicken broth (reduced sodium) (this is two 14.5 oz. cans)
  • 14.5 ounces canned diced tomatoes , drained
  • 1 cup frozen corn kernels (or fresh)
  • 15.25 ounces canned black beans , drained and rinsed
  • 1 Tablespoon fresh lime juice
  • 1/2 medium avocado , pitted, peeled, cut into 8 slices
  • 1/4 cup cilantro leaves
Instructions
  1. Heat 1 teaspoon of the olive oil in a large soup pot, on medium-high heat until very hot, but not smoking. Lightly season chicken pieces with salt and pepper, then add to pan Cook chicken on all sides, stirring often, for about 5 minutes. Chicken should be lightly browned and cooked all the way through. Once chicken is done, remove from pan, and transfer to a plate. Set chicken aside.

  2. Add remaining 1 teaspoon of oil back into the pan (the same one you cooked chicken in). Heat oil on medium-high, then add onion, bell pepper, and jalapeño. Cook for 3 minutes, stirring often, until veggies have softened a bit. Stir in the chili powder, minced garlic, and ground cumin. Cook this mixture for an additional 30 seconds once combined. Stir in chicken broth, diced tomatoes, black beans and corn.

  3. Bring the soup to a boil. Once it boils, put a lid on the pan, and turn heat to LOW. Continue to cook soup on low heat (covered) for about 8-9 minutes. The veggies should be nice and tender.

  4. Carefully add the cooked chicken back into soup. Stir to combine, and continue to cook until chicken is heated through. This should take 2-3 minutes. Remove pan from the heat, and stir in the fresh lime juice. 

  5. To serve, ladle the soup into bowls. Each serving is 1¾ cups. Garnish each bowl of soup with 2 avocado slices, and a few cilantro leaves. You can also add a few crumbled corn chips (optional) if you want! Serve, and enjoy!

Recipe Notes

OPTIONAL: You can crumble up two or three corn chips on top to garnish each bowl of soup. The corn chips are NOT included in caloric or WW points calculation.

Nutrition Facts
Southwestern Chicken Soup
Amount Per Serving (1 bowl (1¾ cups + 2 avocado slices per serving))
Calories 401 Calories from Fat 99
% Daily Value*
Fat 11g17%
Saturated Fat 2g13%
Cholesterol 72mg24%
Sodium 1085mg47%
Potassium 1457mg42%
Carbohydrates 40g13%
Fiber 12g50%
Sugar 6g7%
Protein 38g76%
Vitamin A 1070IU21%
Vitamin C 41.4mg50%
Calcium 112mg11%
Iron 5.3mg29%
* Percent Daily Values are based on a 2000 calorie diet.

Here’s one more to pin on your Pinterest boards!You'll love this delicious Southwestern Chicken Soup, a Weight Watchers dish with corn, black beans, tomatoes, bell peppers, and avocado slices!