Category: Sauces and Dressings

Blackberry Pancake Syrup

Learn how to make delicious Blackberry Pancake Syrup with fresh or frozen blackberries. Easy to make, and it’s yummy on waffles and ice cream, too!Learn how to make delicious Blackberry Pancake Syrup with fresh or frozen blackberries. Easy to make- yummy on waffles and ice cream, too!
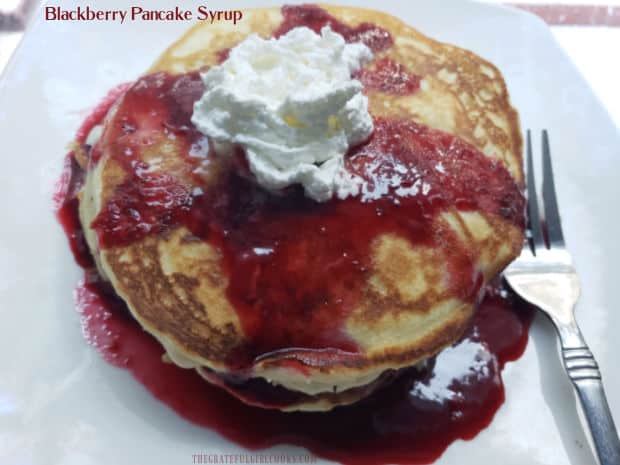
I love pancakes. I can’t help myself… they bring back so many memories of my childhood. Usually we eat our pancakes the traditional way- with maple syrup… BUT it is so awesome to make a batch of homemade blackberry pancake syrup for an occasional treat!

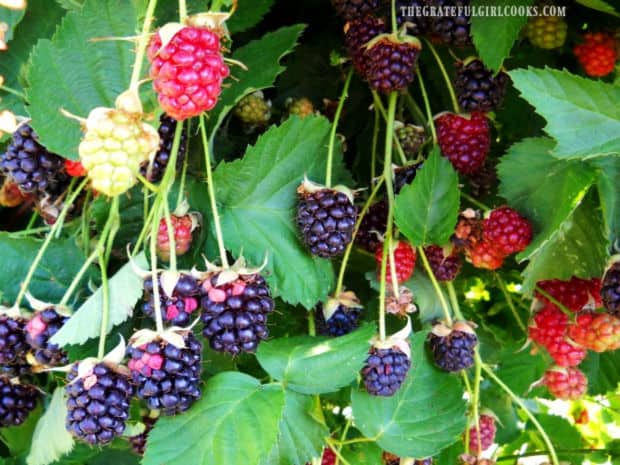
In our little corner of Oregon, blackberries grow wild just about everywhere you turn during the heat of summer! We have several vines that grown up and over our back fence (from the neighborhood park), so I can get all the free blackberries I want! I can even store them in our freezer to use later in the year. WhooHoo!

Blackberries growing over our back fence.

Blackberry pancake syrup is one of the treats I can make with fresh (or frozen) blackberries, and it is really tasty! Other foods I have made with my treasure trove of blackberries are muffins, blackberry jam, crisps, handpies, scones, soda, and bar cookies, etc. Today I want to show you how to make blackberry pancake syrup using only a few ingredients. Here’s how:

NOTE: The recipe (as written) will yield about 3 cups syrup. My photos reflect a doubled recipe. I also used frozen blackberries when I photographed this blog post.

Scroll Down For A Printable Recipe Card At The Bottom Of The Page

How To Make Blackberry Pancake Syrup

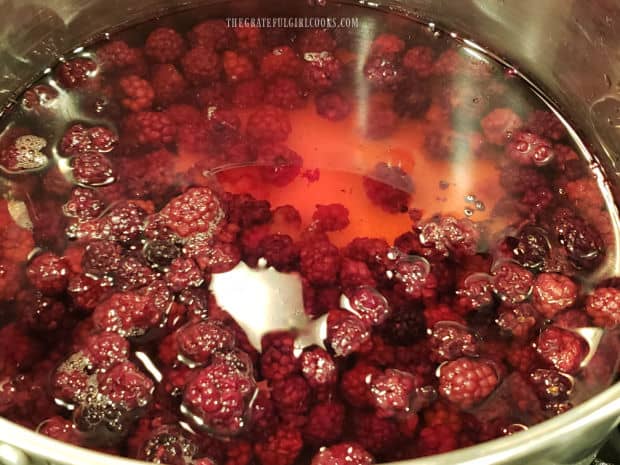
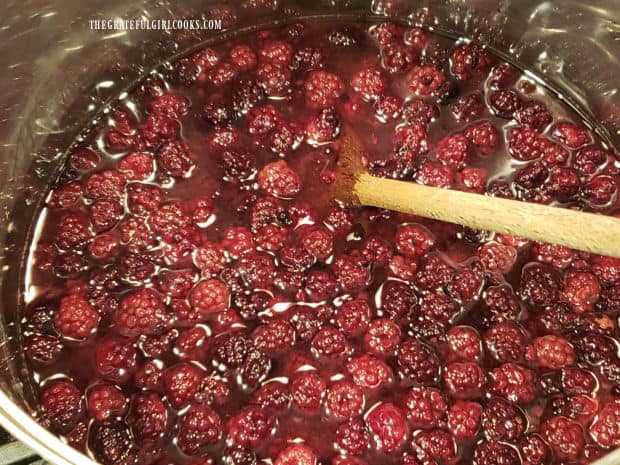
Place blackberries, granulated sugar and water in a large pot (see NOTE section of printable recipe for details regarding using frozen berries). **Not sure why these turned out looking so red under the lights, but yep… they REALLY are blackberries that had been frozen**. Stir the mixture well, and turn the heat to medium-high. Bring the berries to a FULL BOIL, then reduce the heat to Low. Let the berries and liquid simmer 10-12 minutes, stirring occasionally, then remove the pot from the heat.

Mash the berries really well. You can use a potato masher, the back of a large spoon, or a fork to do this. I vote for the potato masher, if you have access to one (quicker). Once mashed, let the berry mixture cool (off the heat) for 20-25 minutes.

Blackberries, water and sugar cooking in order to make pancake syrup.Lots of blackberries cooking in large pot to make pancake syrup.

Strain Berries to Remove The Seeds

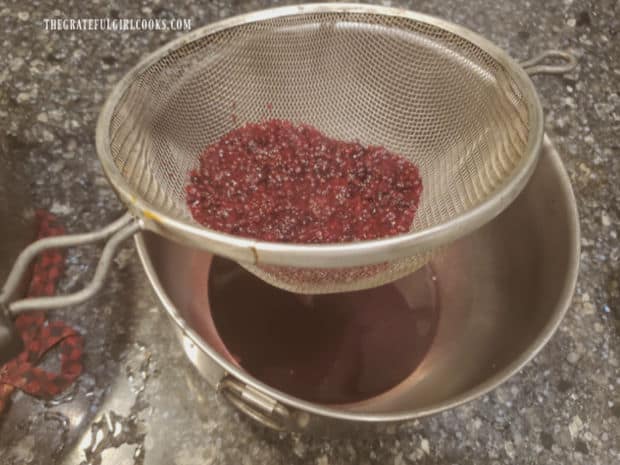
This step can be a bit time-consuming, but it will be worth it in the end, because it will remove almost all the seeds from your pancake syrup. First, place a large bowl on the counter, and place a wire sieve over it. Transfer a cup or two of the berry/juice mixture to the strainer.

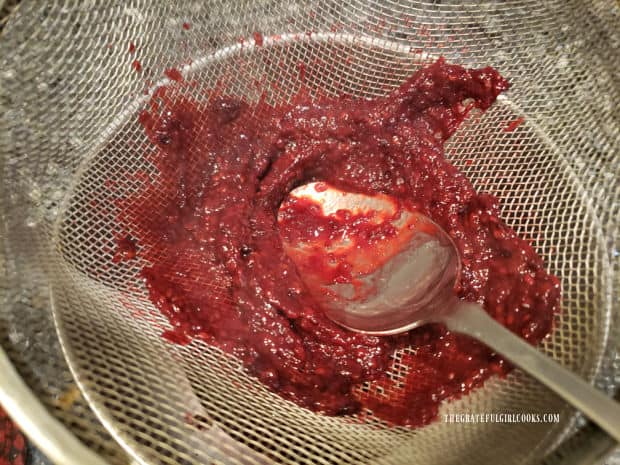
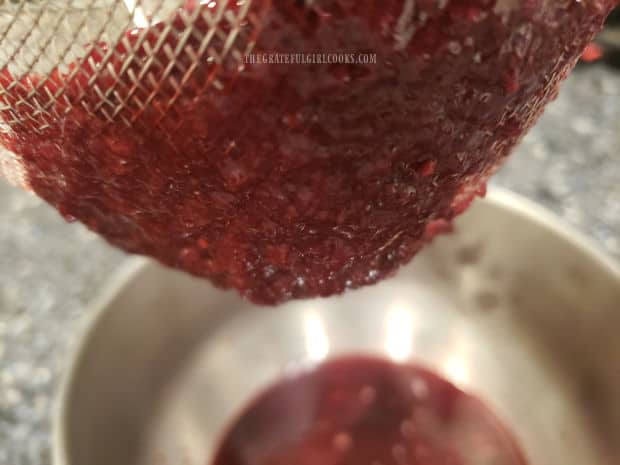
Using the back of a large spoon, firmly press the “syrupy” blackberry puree into the sieve. The juice for the syrup will drip through into the bowl below. Continue pressing until almost all of the juice and puree have been filtered through the sieve. Just keep on pressing!

Pressing cooked blackberries through sieve to remove seeds from syrup below.Back of a spoon is used to press cooked blackberries through sieve to filter out seeds.

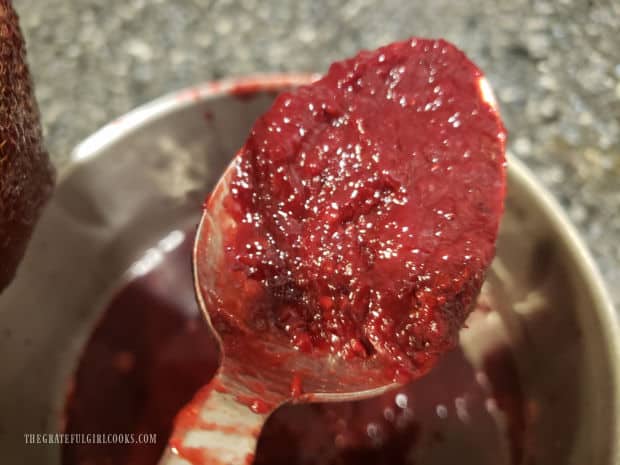
Be sure to take a spoon and remove all the thick blackberry puree clinging to the underside bottom of the sieve and add it to the juices in the bowl. This thick puree is what will help thicken the syrup, so it is GOLD! Discard the seeds that remain inside of the sieve, then give the sieve a quick rinse. Process the next bit of berries and juice, continuing until all have been processed in this way.

Continue to repeat this process until all the berries and juice have been “processed” this way. The blackberry pancake syrup that is in the bowl is what you will use. Your syrup may vary in thickness consistency, depending on whether you use frozen (tends to be thinner) or fresh blackberries, but there are ways to thicken it more, if necessary. See below.

Thickened blackberry pulp is collected from bottom of sieve to thicken syrup.Spoon with blackberry pulp to add to the pancake syrup to thicken it.

Tips for Thickening Syrup

TIP: Do you want the syrup thicker? Here are two options: I have heard from others that if you want the finished syrup to be thicker in consistency, you can add 1/2 cup of light corn syrup to the blackberry syrup and stir to combine (after seeds have been removed). You can also cook the syrup again for 2-3 minutes more at this point to reduce the volume (and thicken it more). Your choice, if you think it’s necessary (usually it’s not), but it’s good to have options, right?

Time to Enjoy Homemade Blackberry Pancake Syrup!

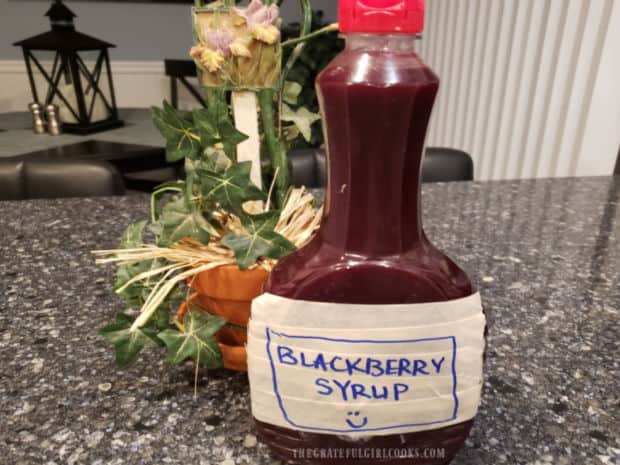
Pour the finished blackberry syrup into the container of your choice. I like to use a clean, empty old pancake syrup bottle for this purpose, but you can use whatever you have available (with a lid, of course). 

Because I doubled this recipe it made enough to fill a standard sized pancake syrup bottle, plus an “almost full” quart jar. Be sure to store the blackberry pancake syrup in the refrigerator when not using. TIP: You can also store extra blackberry pancake syrup in the freezer to use at a later date. Thaw and reheat to use.

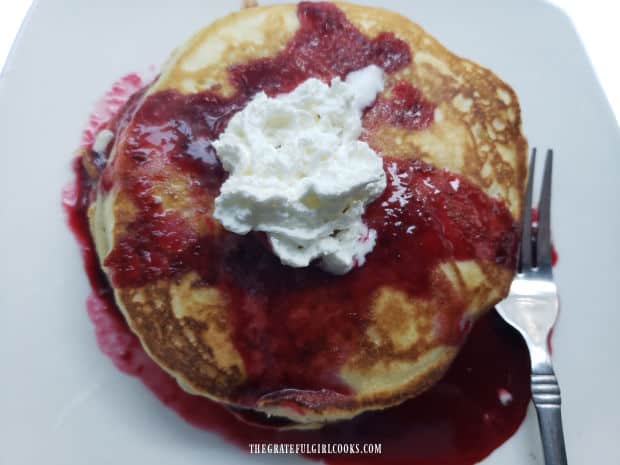
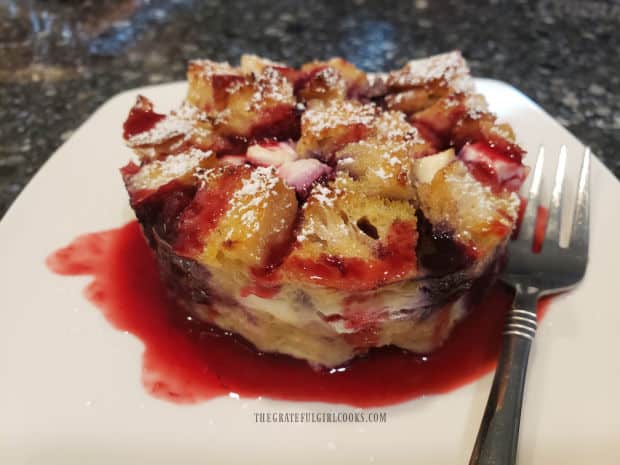
Serve blackberry pancake syrup warm or at room temperature on your favorite stack of pancakes! Enjoy this delicious treat- it’s a nice reminder year-round of summer’s bountiful blackberry harvest! It’s also yummy on ice cream, pound cake, cheesecake or other desserts! I even used it on my Triple Berry French Toast Cups (3rd photo below). YUM!

A bottle full of homemade blackberry pancake syrup is ready to use.A stack of pancakes topped with homemade blackberry pancake syrup and whipped cream.Blackberry pancake syrup, served with a baked French Toast cup.

I hope you have the opportunity to make this delicious blackberry pancake syrup. It’s really quite delicious, and it’s a very versatile syrup to have in the refrigerator for a number of desserts, too. Thanks for stopping by, and I sincerely hope you will come back soon.

Looking For Some PANCAKE Recipes?

You can find all of my recipes in the Recipe Index, which is located at the top of the page. I have several delicious pancake recipes you might enjoy, including:

Interested In More Recipes?

Thank you for visiting this website. I appreciate you using some of your valuable time to do soIf you’re interested, I publish a newsletter 2 times per month (1st and 15th) with all the latest recipes, and other fun info. I would be honored to have you join our growing list of subscribers, so you never miss a great recipe!
There is a Newsletter subscription box on the top right side (or bottom) of each blog post, depending on the device you use, where you can easily submit your e-mail address (only) to be included in my mailing list.

You Can Also Find Me On Social Media:

Facebook page: The Grateful Girl Cooks!
Pinterest:
The Grateful Girl Cooks!
Instagram:
jbatthegratefulgirlcooks

Author's signature

0 from 0 votes
Blackberry Pancake Syrup
Prep Time
30 mins
Cook Time
10 mins
Total Time
40 mins
 

Learn how to make delicious Blackberry Pancake Syrup with fresh or frozen blackberries. Easy to make- yummy on waffles and ice cream, too!

Category: Sauce
Cuisine: American
Keyword: blackberry pancake syrup
Servings: 12 (1/4 cup per serving)
Calories Per Serving: 107 kcal
Author: JB @ The Grateful Girl Cooks!
Ingredients
  • cups water
  • cups granulated sugar
  • 2 cups blackberries (fresh or frozen)
Instructions
  1. Place blackberries, sugar and water in a large pot. Stir well; turn heat to medium-high. Bring berries to a FULL BOIL; reduce heat to Low. Let berries simmer 10-12 minutes, stirring occasionally, then remove from the heat. Mash the berries with potato masher, back of a large spoon, or fork. Once mashed, let berry mixture cool 20-25 minutes.

  2. Strain syrup from berry mixture: Place a wire sieve on top of a large bowl. Transfer 1-2 cups of berry/juice mixture into sieve. Using the back of a large spoon, firmly press blackberries and juice into sieve. The juice will drip through sieve into bowl below; seeds will remain in sieve. Continue pressing until almost all juice and puree have been filtered through sieve. Use a spoon to remove blackberry puree clinging to underside of sieve; add to juice in bowl. This puree will help thicken syrup.

  3. Discard seeds in sieve; give sieve a quick rinse. Repeat process until all berries and juice have been filtered through sieve. Pour syrup from bowl into container of your choice. Store (covered) in refrigerator. Serve blackberry pancake syrup warm (or at room temperature) on your favorite stack of pancakes! **Also good on ice cream, cheesecake, or other desserts.

  4. NOTE: You can store extra syrup in freezer to use at a later date. Thaw and reheat to use.

    If you feel your syrup is too thin (especially if you used frozen berries), you can cook the syrup for a few minutes after straining out seeds. This will reduce the volume slightly, but will help to thicken the syrup. Other people suggest adding 1/2 cup light corn syrup to thicken the finished syrup. Not really necessary, but it is another option.

Recipe Notes

Caloric calculation made using 1/4 cup serving size out of approximately 3 cups total syrup.

Nutrition Facts
Blackberry Pancake Syrup
Amount Per Serving (1 (1/4 cup))
Calories 107 Calories from Fat 9
% Daily Value*
Fat 1g2%
Saturated Fat 1g6%
Polyunsaturated Fat 1g
Monounsaturated Fat 1g
Sodium 3mg0%
Potassium 39mg1%
Carbohydrates 27g9%
Fiber 1g4%
Sugar 26g29%
Protein 1g2%
Vitamin A 51IU1%
Vitamin C 5mg6%
Calcium 9mg1%
Iron 1mg6%
* Percent Daily Values are based on a 2000 calorie diet.

Original recipe source: biscuitsandburlap.com/blackberry-syrup/

Here’s one more to pin on your Pinterest boards!Learn how to make delicious Blackberry Pancake Syrup with fresh or frozen blackberries. Easy to make- yummy on waffles and ice cream, too!

Homemade Honey BBQ Sauce

Make Homemade Honey BBQ Sauce in under 10 minutes with common ingredients! Sweet, tangy and a perfect basting sauce for chicken, beef or pork!

Today I want to share a delicious homemade barbeque sauce that I’m confident you’re gonna love! It can be made in less than 10 minutes, and is a very versatile sauce that can be used in many ways. Whether it is used on baked or grilled chicken, pork or beef, or used to make pulled pork, beef or chicken sandwiches, the flavor of this sauce will really impress you (with very little work involved).

The recipe came from one of my old “Taste of Home” magazines, and it is a definite KEEPER. I keep all the ingredients needed for this yummy sauce in our pantry, so it is convenient and easy to make whenever we need it. It’s so easy to make, and takes less time to whip up a batch then it does to drive to the store to buy a bottle of bbq sauce. That’s a win-win in my book! Let me show you just how simple it is to make this homemade honey BBQ sauce:

Scroll Down For A Printable Recipe Card At The Bottom Of The Page

What Ingredients Will I Need To Make This BBQ Sauce?

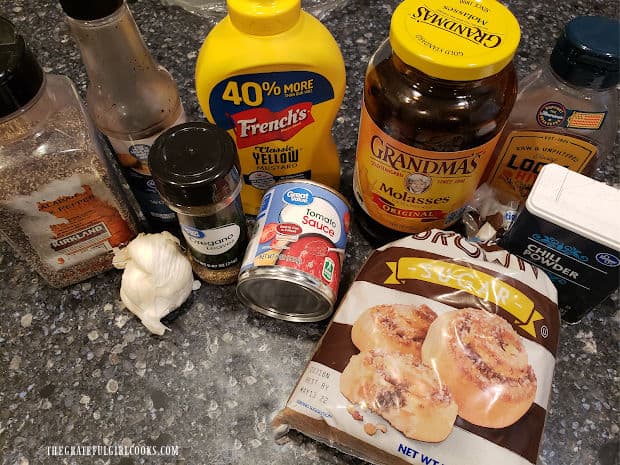
To make homemade honey BBQ sauce you will need several common pantry ingredients. They are tomato sauce, brown sugar, molasses, honey, Worcestershire sauce, mustard, garlic, oregano, chili powder and pepper.

The ingredients used to make homemade honey bbq sauce.

Make The Homemade Honey BBQ Sauce

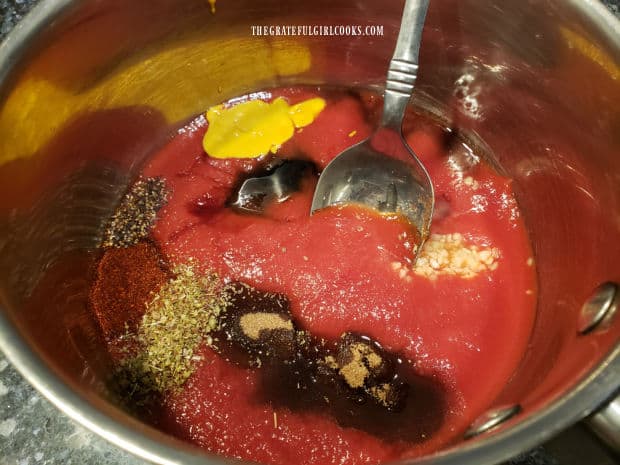
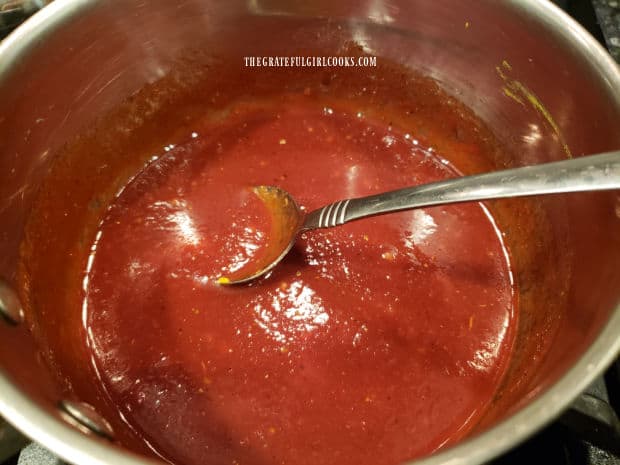
Measure all the ingredients for the BBQ sauce into a medium-sized saucepan. Stir the ingredients well, until they’re fully combined. Bring the homemade honey BBQ sauce to a full boil on medium heat. Once it has boiled for a minute, remove the pan from the heat.

That’s it! You’ve just made a batch of homemade honey BBQ sauce, and it’s ready to be used to enhance the flavor of chicken, pork or beef! You can use it right away, or if using later, store it covered in the refrigerator up to 3-4 days. When ready to use the sauce, simply bring it back to room temperature. See how EASY that was?

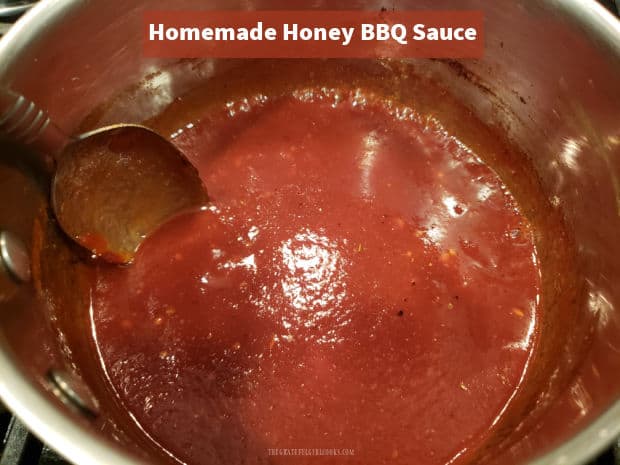
Ingredients for bbq sauce are placed in a medium saucepan, then stirred together.Homemade honey BBQ sauce is brought to a boil in pan, then is ready to use.

Time To Grill (Or Bake!)

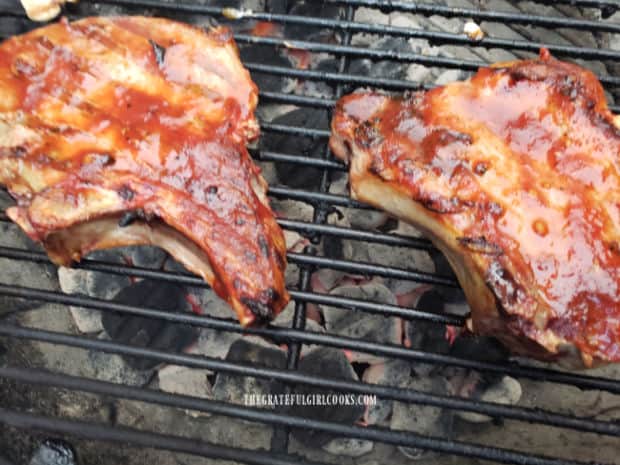
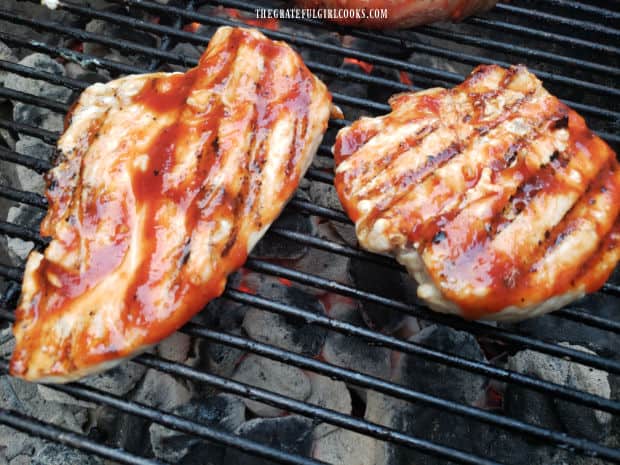
When ready to grill (or bake) a favorite meat dish, liberally brush the homemade honey BBQ sauce on your favorite meats. We love this BBQ sauce on grilled pork chops and grilled or baked chicken. The sauce can also be enjoyed on ribs, and pulled pork, chicken or BBQ beef sandwiches, too. 

This sauce has a fantastic taste, and the flavors really shine. I truly think you will love this sauce as much as we do! The recipe as written, will make about 1⅓ cups of sauce, so you may or may not have some sauce left over, depending on the amount of meat you are cooking. You can store it covered in the fridge for a few days, OR you can freeze it in an airtight container for use at a later date. Simply thaw, and reheat the BBQ sauce in a small sauce pan before using.

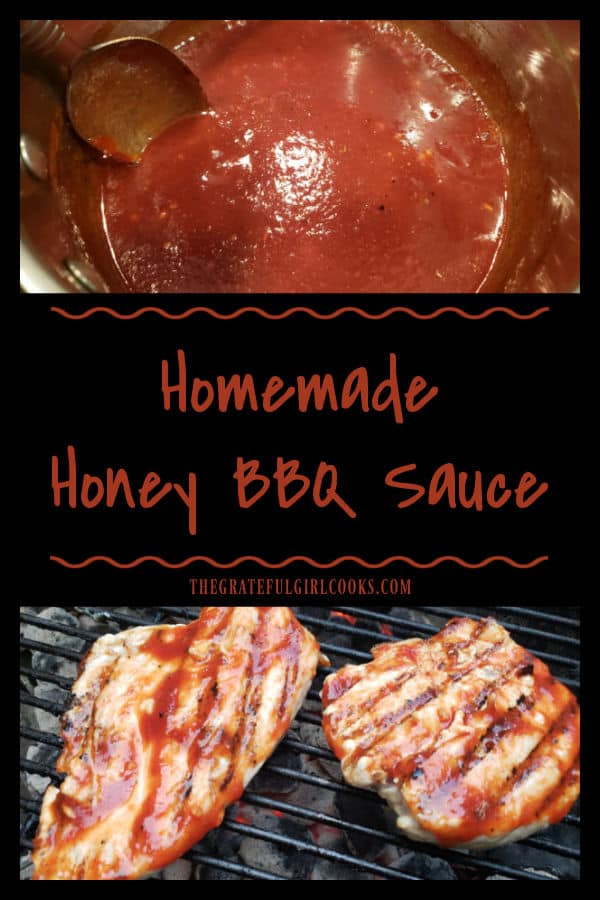
Pork chops on the grill, coated with the honey BBQ sauce.Pieces of chicken brushed with homemade honey BBQ sauce, cooking on the grill.

Thank you for stopping by my blog today. I sincerely hope you have the opportunity to make this homemade honey BBQ sauce, and trust you and those you love will really enjoy it. Please come back soon for another visit and more yummy, family-friendly recipes.

Looking For More HOMEMADE SAUCE Recipes?

You can find all of my recipes in the Recipe Index, located at the top of the page. I have some wonderful tasting recipes for SAUCES that you’ll enjoy, including:

Interested In More Recipes?

Thank you for visiting this website. I appreciate you using some of your valuable time to do soIf you’re interested, I publish a newsletter 2 times per month (1st and 15th) with all the latest recipes, and other fun info. I would be honored to have you join our growing list of subscribers, so you never miss a great recipe!
There is a Newsletter subscription box on the top right side (or bottom) of each blog post, depending on the device you use, where you can easily submit your e-mail address (only) to be included in my mailing list.

You Can Also Find Me On Social Media:

Facebook page: The Grateful Girl Cooks!
Pinterest:
The Grateful Girl Cooks!
Instagram:
jbatthegratefulgirlcooks

Author's signature

Original recipe source: “Taste of Home” magazine, August/September 2008 edition, page 14 , published by Reiman Media Group, Inc.

0 from 0 votes
Homemade Honey BBQ Sauce
Prep Time
5 mins
Cook Time
3 mins
Total Time
8 mins
 

Make Homemade Honey BBQ Sauce in under 10 minutes with common ingredients! Sweet, tangy and a perfect basting sauce for chicken, beef or pork!

Category: Condiments, Sauces
Cuisine: American
Keyword: homemade honey bbq sauce
Servings: 11 (2 T. per serving-1 ⅓ cups total)
Calories Per Serving: 37 kcal
Author: JB @ The Grateful Girl Cooks!
Ingredients
  • 8 ounces tomato sauce (1 can)
  • 2 Tablespoons brown sugar
  • 2 Tablespoons molasses
  • 2 Tablespoons honey
  • teaspoons Worcestershire sauce
  • teaspoons prepared yellow mustard
  • 1 large garlic clove , minced
  • ¼ teaspoon chili powder
  • ¼ teaspoon dried oregano
  • teaspoon ground black pepper
Instructions
  1. Measure all the ingredients into a medium-sized saucepan. Stir well, until fully combined.

  2. Bring sauce to a full boil on medium heat. Once it has boiled for 1 minute, remove pan from the heat.

  3. Brush sauce onto beef, chicken or pork (for grilling or baking). Leftovers can be stored (covered) in refrigerator up to 3-4 days, or can be frozen in an airtight container (to thaw and reheat later).

Nutrition Facts
Homemade Honey BBQ Sauce
Amount Per Serving (1 (2 Tablespoons))
Calories 37 Calories from Fat 9
% Daily Value*
Fat 1g2%
Saturated Fat 1g6%
Sodium 127mg6%
Potassium 137mg4%
Carbohydrates 9g3%
Fiber 1g4%
Sugar 9g10%
Protein 1g2%
Vitamin A 105IU2%
Vitamin C 2mg2%
Calcium 15mg2%
Iron 1mg6%
* Percent Daily Values are based on a 2000 calorie diet.

Here’s one more to pin on your Pinterest boards!Make Homemade Honey BBQ Sauce in under 10 minutes with common ingredients! Sweet, tangy and a perfect basting sauce for chicken, beef or pork!

Homemade Balsamic Vinaigrette

It’s EASY to make Homemade Balsamic Vinaigrette, with only a few simple ingredients! This is a tasty way to top a favorite mixed green salad!
It's EASY to make Homemade Balsamic Vinaigrette, with only a few simple ingredients! This is a tasty way to top a favorite mixed green salad!

I love to make salad dressings from scratch. Over the years I’ve found some wonderful tasting recipes which I’ve added to this blog as time permits. Today I want to share with you a SUPER EASY recipe for homemade balsamic vinaigrette. I found the original recipe years ago in one of my cookbooks. It tastes wonderful, and I think you will love it! The recipe yield almost a cup of vinaigrette, so there is enough for quite a few salads.

Using fairly common ingredients, it only takes a few minutes to mix up a batch, which is incredibly convenient. Perfect for mixed green salads, this is a “go to” easy dressing to make in a pinch, or if you’re just wanting to try a new variety of salad dressing. Save yourself a trip to the grocery store, and make this dressing in the comfort of your own home in about 5 minutes or less!

Scroll Down For A Printable Recipe Card At The Bottom Of The Page

What Ingredients Will I Need?

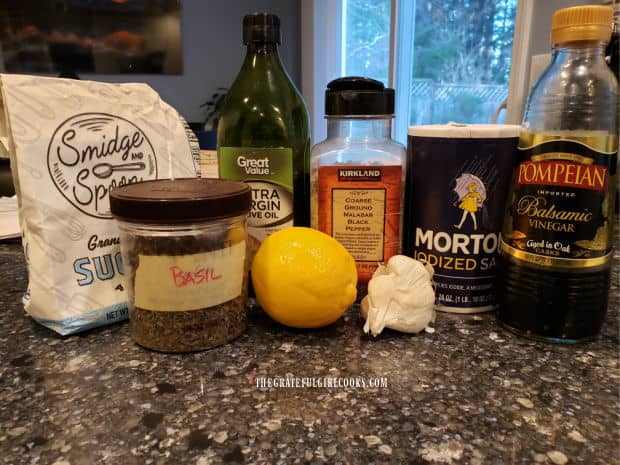
The ingredients you will need to make this vinaigrette are fairly common household ingredients. They are olive oil, balsamic vinegar, lemon juice, minced garlic, sugar, salt, pepper, and dried basil.

NOTE: If you have fresh basil available you can substitute that for dried basil. If you use fresh basil you will need a bit more in quantity than dried, but I have noted that amount in the printable recipe card. 

Common ingredients are used to make homemade balsamic vinaigrette.

How To Make Homemade Balsamic Vinaigrette

Making this homemade balsamic vinaigrette couldn’t be any easier! Be sure to use a container with a secure-fitting lid. I like to use a pint jar when I make this. This recipe yields almost a cup of vinaigrette, so a pint jar is just the right size for the dressing. A pint jar holds approximately 8 ounces of liquid, and can be used to mix and store the salad dressing.

Measure the ingredients for the homemade balsamic vinaigrette into the container you are using. Securely attach the lid, and holding the lid on tight, shake the jar (or container) for a minute or two to fully combine the ingredients.

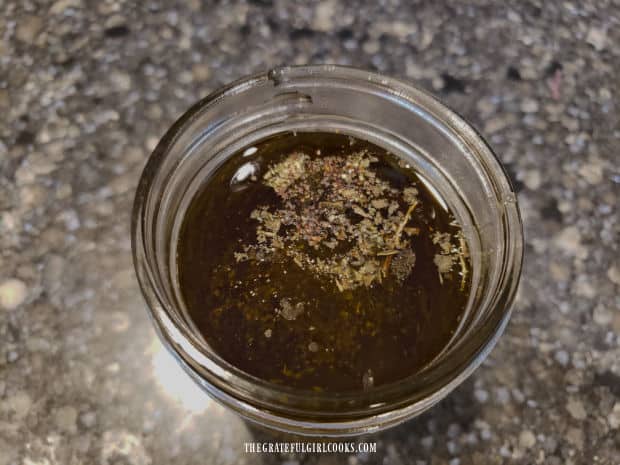
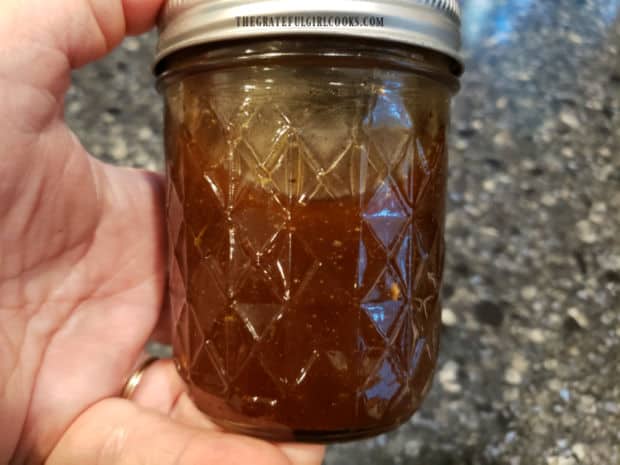
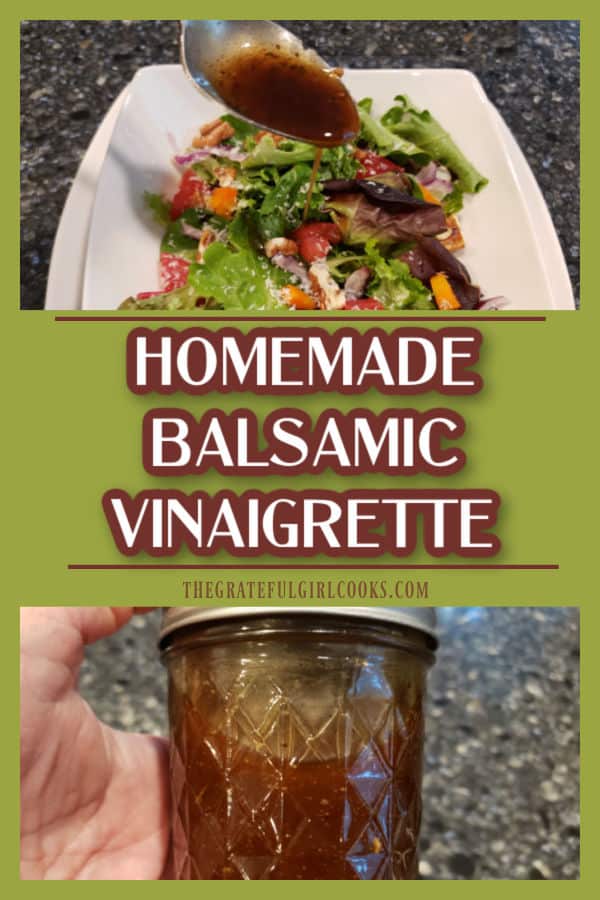
All ingredients for the vinaigrette are put in a pint jar before mixing.A pint jar is used to mix up the homemade balsamic vinaigrette.

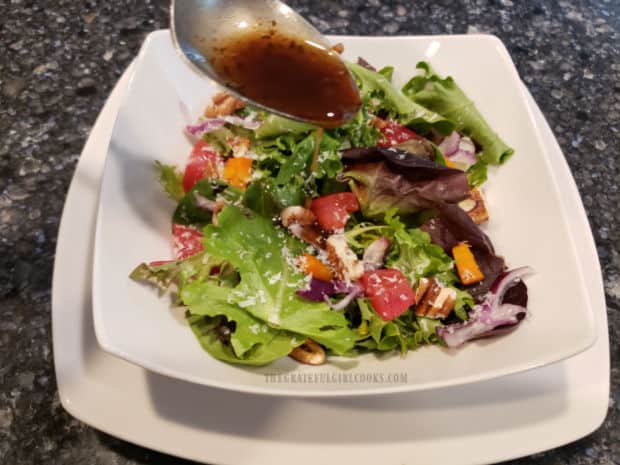
Drizzle the homemade balsamic vinaigrette over your favorite mixed green salad. Store any leftover vinaigrette, covered, in the refrigerator.

As the salad dressing chills in the fridge, it may thicken slightly. The next time you want to use it, simply take it out of the fridge a few minutes before using, and give it a good shake to re-mix.

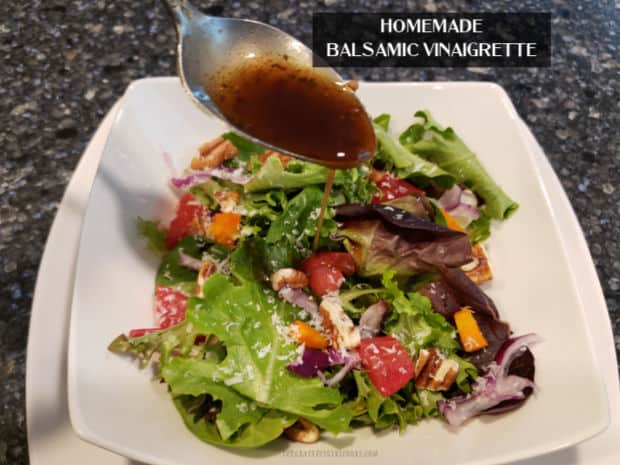
The vinaigrette is drizzled onto a mixed green salad.

That’s it! See how easy it was to make homemade balsamic vinaigrette from scratch? This salad dressing has great flavor, and is a quick way to make your own salad dressing right in your own kitchen!

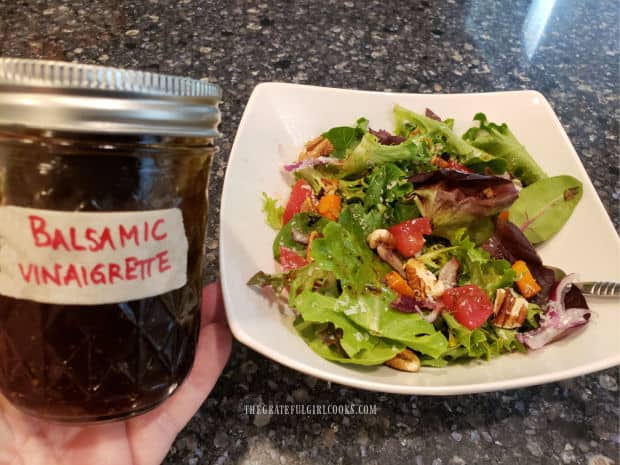
Homemade Balsamic Vinaigrette used on mixed green salad.

Thanks for stopping by today. I hope you have the opportunity to make this salad dressing sometime. It really is quite delicious! Take care, and come back again soon, ok?

Looking For More Salad Dressing Recipes?

You can find all of my salad dressing recipes in the Recipe Index, located at the top of the page. I have quite a few I believe you will enjoy, including:

Interested In More Recipes?

Thank you for visiting this website. I appreciate you using some of your valuable time to do soIf you’re interested, I publish a newsletter 2 times per month (1st and 15th) with all the latest recipes, and other fun info. I would be honored to have you join our growing list of subscribers, so you never miss a great recipe!
There is a Newsletter subscription box on the top right side (or bottom) of each blog post, depending on the device you use, where you can easily submit your e-mail address (only) to be included in my mailing list.

You Can Also Find Me On Social Media:

Facebook page: The Grateful Girl Cooks!
Pinterest:
The Grateful Girl Cooks!
Instagram:
jbatthegratefulgirlcooks

Author's signature

Original recipe source: The cookbook “What’s For Dinner?”, by Maryana Vollstedt, page 55, published by Chronicle Books, 1997

0 from 0 votes
Homemade Balsamic Vinaigrette
Prep Time
5 mins
Cook Time
0 mins
Total Time
5 mins
 

It's EASY to make Homemade Balsamic Vinaigrette, with only a few simple ingredients! This is a tasty way to top a favorite mixed green salad!

Category: Salad Dressing
Cuisine: American
Keyword: homemade balsamic vinaigrette
Servings: 15 Tablespoons
Calories Per Serving: 89 kcal
Author: JB @ The Grateful Girl Cooks!
Ingredients
  • cup extra virgin olive oil
  • 3 Tablespoons balsamic vinegar
  • 2 teaspoons fresh lemon juice
  • 1 clove garlic minced
  • ¼ teaspoon dried basil or 1 Tablespoon fresh, chopped
  • ½ teaspoon granulated sugar
  • ½ teaspoon salt
  • teaspoon black pepper
Instructions
  1. Measure all ingredients into the container you are using (container needs to hold at least 8 ounces). Securely attach the lid, and holding the lid on tight, shake the jar (or container) for a minute or two to fully combine the ingredients.

  2. Drizzle vinaigrette on a favorite green salad, serve and enjoy!

  3. Store unused vinaigrette in an airtight, covered container in the refrigerator. Before each use, remove from fridge a few minutes beforehand, and shake very well, to re-combine ingredients.

Nutrition Facts
Homemade Balsamic Vinaigrette
Amount Per Serving (1 Tablespoon)
Calories 89 Calories from Fat 90
% Daily Value*
Fat 10g15%
Saturated Fat 1g6%
Sodium 79mg3%
Potassium 6mg0%
Carbohydrates 1g0%
Fiber 1g4%
Sugar 1g1%
Protein 1g2%
Vitamin A 1IU0%
Vitamin C 1mg1%
Calcium 2mg0%
Iron 1mg6%
* Percent Daily Values are based on a 2000 calorie diet.

Here’s one more to pin on your Pinterest boards!It's EASY to make Homemade Balsamic Vinaigrette, with only a few simple ingredients! This is a tasty way to top a favorite mixed green salad!

Easy Homemade Enchilada Sauce

Make a batch of Easy Homemade Enchilada Sauce in 10 minutes to use to make your favorite enchiladas, with this step by step EASY tutorial.

Do you like enchiladas? We sure do in our family! I typically keep a large can of store-bought enchilada sauce (for backup) in our pantry, but many times I forget to buy another one once it’s gone. If you’re like me, you don’t want to stop everything and run to the grocery store for one item (especially during Covid-19, right?). Have no fear!

It is so very simple to make it right at home. It’s a cinch to make 4 cups (32 ounces) of easy homemade enchilada sauce in only a few minutes! A LARGE can of enchilada sauce at the store is 28 ounces, so this recipe will give you a bit more that that (and it freezes well), so it’s a win-win.

Today I want to show you, step by step, how EASY it is to make this flavorful enchilada sauce. I found the handwritten recipe in my old recipe box, but there was no source noted to give credit where it is due! I’ve had the recipe for many years, and let me tell you, this is one great tasting red enchilada sauce! Here’s how to make it:

Scroll Down For A Printable Recipe At The Bottom Of The Page

What Ingredients Will I Need To Make The Sauce?

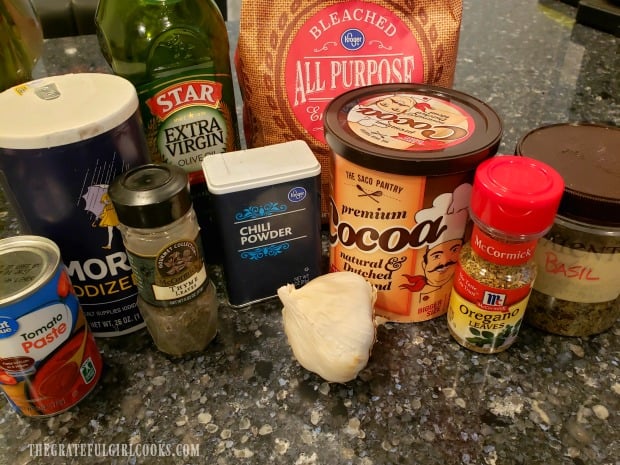
The ingredients you will use to make this delicious enchilada sauce are olive oil, flour, cocoa, tomato paste, sugar, water, and fresh garlic. You will also use the following spices to add the perfect flavor: chili powder, salt, oregano, basil, thyme, and ground cumin.

A collection of the ingredients used to make this enchilada sauce.

How To Make Easy Homemade Enchilada Sauce

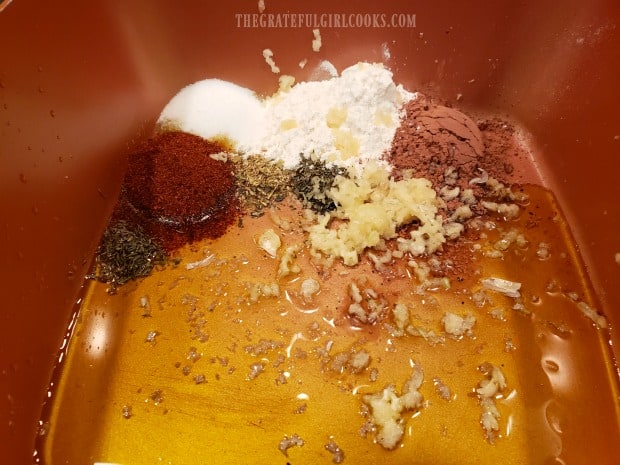
Heat olive oil in a large saucepan on medium-low heat. Add flour, cocoa powder, salt, chili powder, sugar, minced fresh garlic, oregano, basil, cumin and thyme into a large saucepan. Stir these ingredients together until blended.

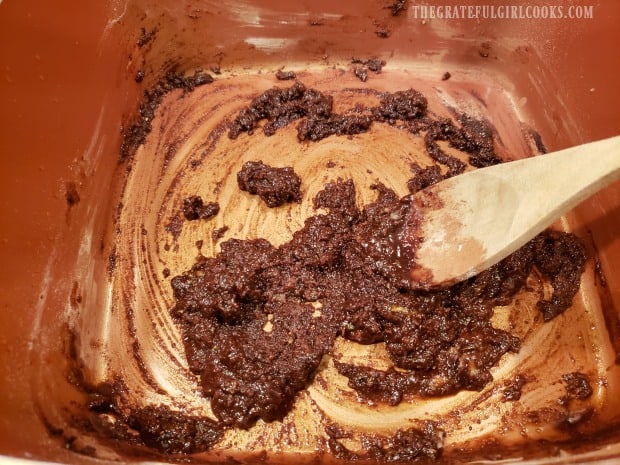
The mixture will be very thick and will be dark brown in color. Perfect! Cook for 1 minute on medium-low heat, stirring often.

Ingredients for the sauce are combined, then cooked until slightly thickened.Ingredients for easy homemade enchilada sauce are stirred before water is added.

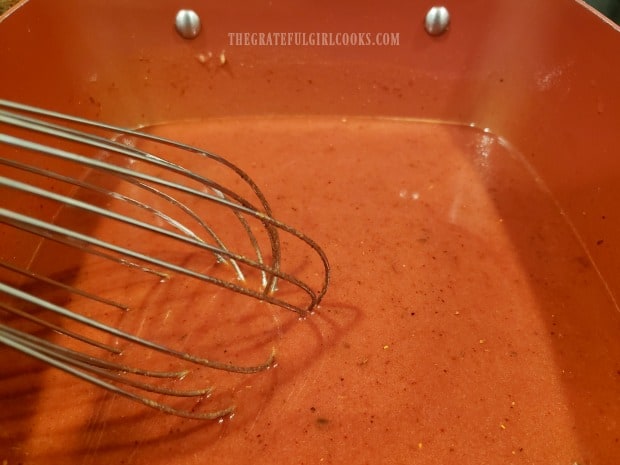
Whisk or stir a small (6 oz.) can of tomato paste and 3 cups of water into the mixture until fully combined. Cook the easy homemade enchilada sauce on medium heat (uncovered) for 5-6 minutes. Stir often while it cooks. The enchilada sauce will thicken slightly as it cooks.

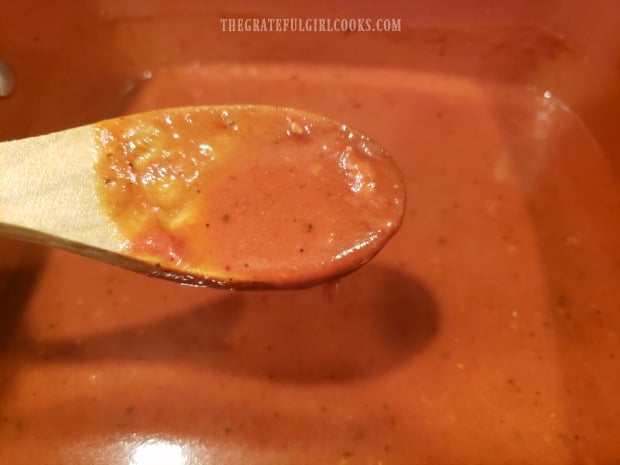
Once the sauce is slightly thickened, it is ready to be put to good use in a favorite enchilada recipe. That’s it! See how easy it is to make this sauce? 

Sauce is cooked until blended and slightly thickened.Easy Homemade Enchilada Sauce is now ready to use in recipes.

Time To USE Easy Homemade Enchilada Sauce!

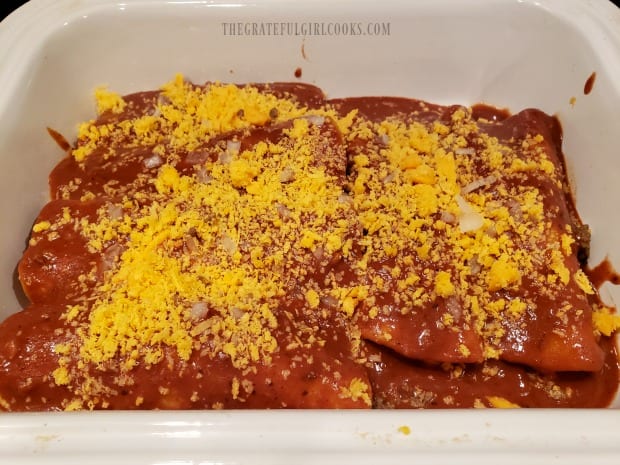
I like to use a good flavored red sauce for my Easy Cheesy Enchiladas, and this sauce is perfect for that! Simply pour a base of the sauce on the bottom of the dish, add rolled filled enchiladas, and top them with more sauce, cheese and onions before baking. YUMMO!

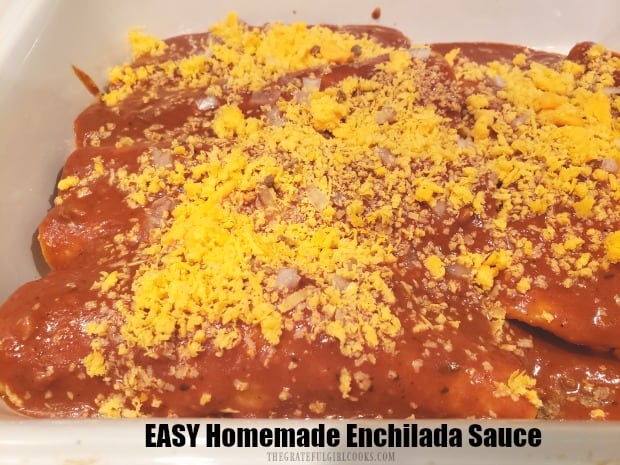
A baking dish of enchiladas covered in easy homemade enchilada sauce.

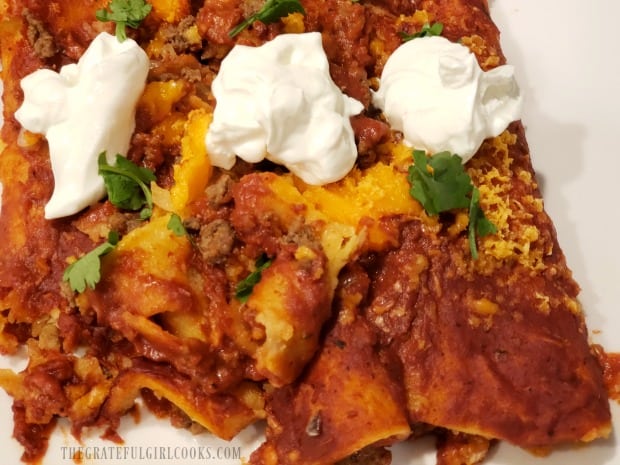
After baking, I serve enchiladas (made with my easy homemade enchilada sauce) with dollops of sour cream and some chopped fresh cilantro. They’re delicious, and this wonderful homemade sauce plays a large part of that.

Baked enchiladas ready to serve, garnished with sour cream and cilantro.

I hope you will consider trying this easy to make homemade enchilada sauce. It really does taste GREAT! Any leftover sauce freezes well, so even if I only make 4-5 enchiladas for my husband and myself, I know I always have sauce ready for another round in our freezer.

Thank you so much for stopping by today. I hope you have a wonderful day, filled with love, laughter, and encouragement. Please come back for another visit soon to find more delicious recipes to make for those you love.

Looking For More MEXICAN-INSPIRED  Recipes?

You can find all of my recipes in the Recipe Index, located at the top of the page. I have quite a few Mexican-inspired recipes, including:

Interested In More Recipes?

Thank you for visiting this website. I appreciate you using some of your valuable time to do soIf you’re interested, I publish a newsletter 2 times per month (1st and 15th) with all the latest recipes, and other fun info. I would be honored to have you join our growing list of subscribers, so you never miss a great recipe!
There is a Newsletter subscription box on the top right side (or bottom) of each blog post, depending on the device you use, where you can easily submit your e-mail address (only) to be included in my mailing list.

You Can Also Find Me On Social Media:

Facebook page: The Grateful Girl Cooks!
Pinterest:
The Grateful Girl Cooks!
Instagram:
jbatthegratefulgirlcooks

Author's signature

Original recipe source: unknown (old recipe found written on a recipe card from years ago)

0 from 0 votes
EASY Homemade Enchilada Sauce
Prep Time
5 mins
Cook Time
5 mins
Total Time
10 mins
 

Make a batch of Easy Homemade Enchilada Sauce in 10 minutes to use to make your favorite enchiladas, with this step by step EASY tutorial.

Category: Sauce
Cuisine: Mexican
Keyword: easy homemade enchilada sauce
Servings: 12 (1/3 cup per serving)
Calories Per Serving: 66 kcal
Author: JB @ The Grateful Girl Cooks!
Ingredients
  • ¼ cup extra virgin olive oil
  • 3 Tablespoons all purpose flour
  • 6 cloves fresh garlic finely minced
  • 1 Tablespoon chile powder
  • 1 Tablespoon cocoa powder
  • 1 Tablespoon salt
  • ¼ teaspoon dried oregano
  • ¼ teaspoon dried thyme
  • ¼ teaspoon ground cumin
  • ¼ teaspoon dried basil
  • 2 teaspoons sugar
  • 6 ounces tomato paste (canned)
  • 3 cups water
Instructions
  1. Heat olive oil on medium-low heat in a large saucepan. Add flour, cocoa, salt, chili powder, sugar, garlic, oregano, basil, cumin and thyme to pan. Stir until blended. Mixture will be thick and dark brown in color. Cook for 1 minute on medium-low heat, stirring often.

  2. Whisk or stir tomato paste and water into the mixture until fully combined. Cook sauce on medium heat (uncovered) for 5-6 minutes. Stir often while it cooks. The enchilada sauce will thicken slightly as it cooks.

  3. Once sauce has slightly thickened, remove from heat, and use in your favorite recipes. Sauce may be frozen, if stored in a sealed, airtight container. Thaw fully before using.

Recipe Notes

The recipe makes approx. 4 cups enchilada sauce. Caloric calculation is made based on using 1/3 cup per portion.

Nutrition Facts
EASY Homemade Enchilada Sauce
Amount Per Serving (1 (1/3 cup portion))
Calories 66 Calories from Fat 45
% Daily Value*
Fat 5g8%
Saturated Fat 1g6%
Sodium 708mg31%
Potassium 169mg5%
Carbohydrates 6g2%
Fiber 1g4%
Sugar 2g2%
Protein 1g2%
Vitamin A 414IU8%
Vitamin C 4mg5%
Calcium 12mg1%
Iron 1mg6%
* Percent Daily Values are based on a 2000 calorie diet.

Here’s one more to pin on your Pinterest boards!Make a batch of Easy Homemade Enchilada Sauce in 10 minutes to use to make your favorite enchiladas, with this step by step EASY tutorial.

Lemon Ginger Salad Dressing

It’s easy to make flavor-filled Lemon Ginger Salad Dressing in a few minutes! This light dressing will compliment most mixed green salads.
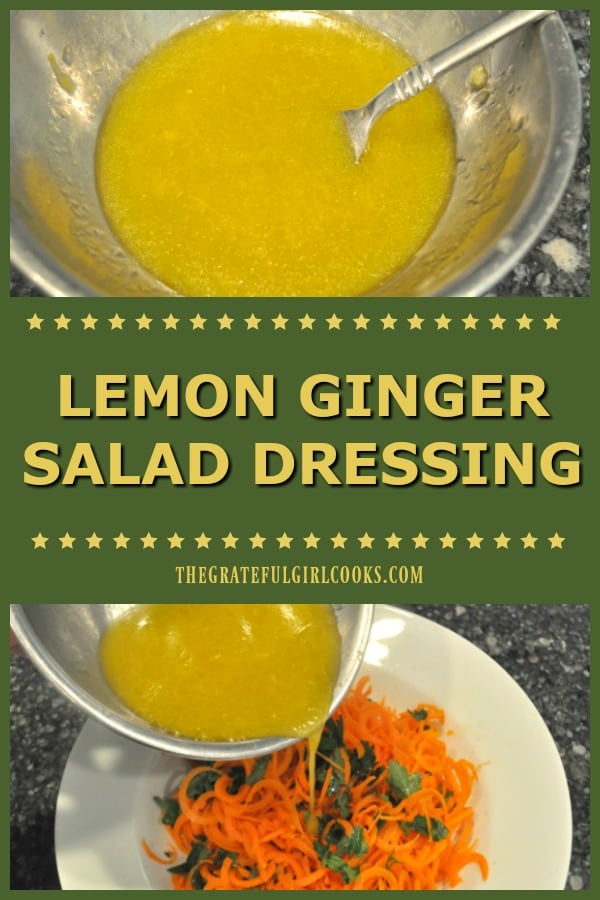
It's easy to make flavor-filled Lemon Ginger Salad Dressing in a few minutes! This light dressing will compliment most mixed green salads.

Making homemade salad dressings at home is a simple way to most often save money, and KNOW exactly what is going into the finished product. Best of all, most homemade dressings are a cinch to make, including this Lemon Ginger Salad Dressing.

This light salad dressing is not only easy to make, it’s packed with flavor! I first tried it on a carrot salad, but have found the dressing is just as good on a mixed green salad. It has become a permanent member of the ol’ salad dressing rotation in our home. Here’s how easy it is to make:

Scroll Down For A Printable Recipe Card At The Bottom Of The Page

What Is In Lemon Ginger Salad Dressing?

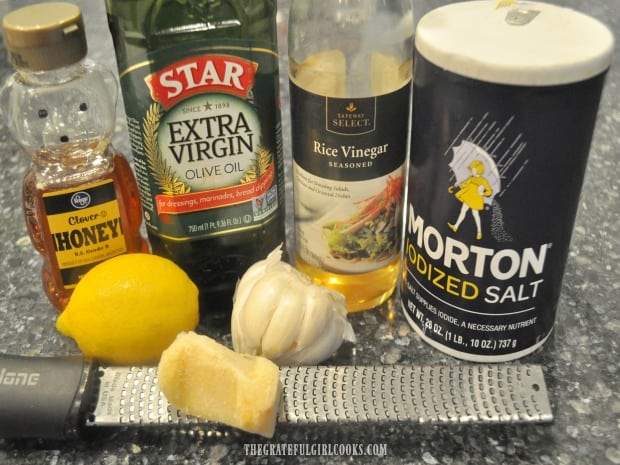
The recipe uses easy to find, common ingredients. The ingredients are extra virgin olive oil, rice vinegar, salt, honey, ginger, garlic and the juice and zest from one lemon.

Ingredients for the salad dressing, ready to be mixed together.

How To Make Lemon Ginger Salad Dressing

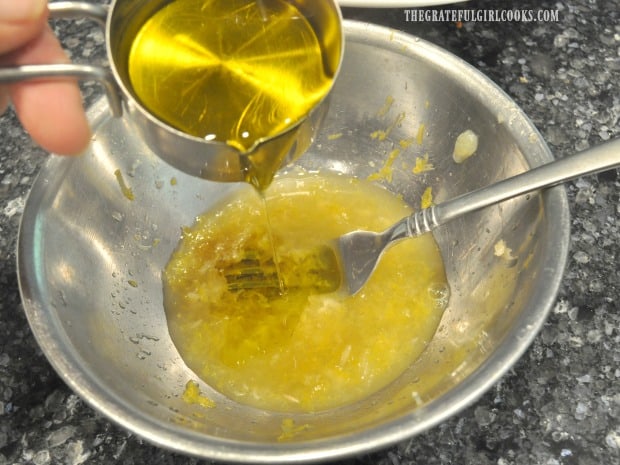
Making this salad dressing is simple and pretty straightforward. Measure all ingredients EXCEPT FOR THE OLIVE OIL into a medium bowl. Stir well, to combine these ingredients. Slowly drizzle in the olive oil, whisking with a fork or wire whisk the entire time you are adding the oil. Pour oil with one hand, and whisk with the other!

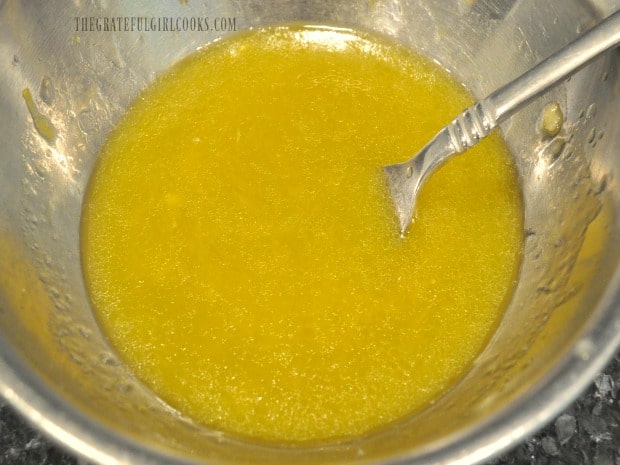
Continue to whisk until the dressing has emulsified. Emulsified means that the olive oil has been incorporated so well into the other ingredients that it doesn’t separate (kind of like oil and water).

Olive oil is slowly drizzled into salad dressing while whisking.

And just like that, your lemon ginger salad dressing is ready! Serve it on your favorite mixed green salad right away, OR you can cover the bowl and store it in your refrigerator until ready to serve.

Once refrigerated, the olive oil will thicken up slightly, so take it out of the fridge a few minutes before serving and whisk it, before drizzling it on a favorite green salad.

Lemon ginger salad dressing is emulsified and waiting to drizzle on a salad.

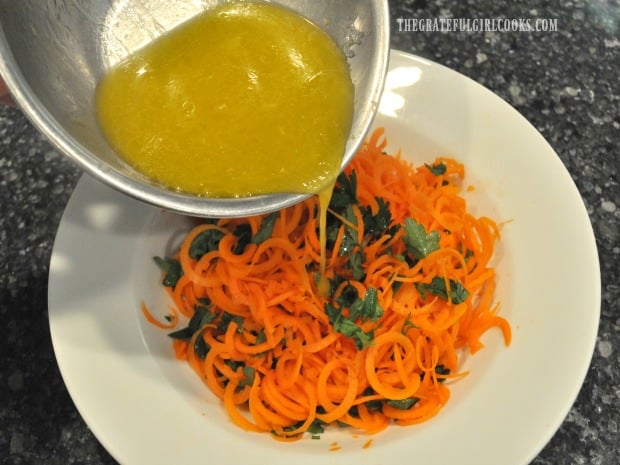
You don’t have to only use this salad dressing on green salads. Actually, one of my favorite ways to enjoy this dressing is drizzled onto a spiralized carrot salad. Wow… is THAT ever good!

The lemon ginger salad dressing is drizzled on a spiralized carrot salad.

I hope you enjoy this recipe for simple lemon ginger salad dressing. It makes a small amount (1/2 cup) of fresh dressing, but can easily be doubled. Thank you for stopping by, and I hope you visit again soon. Take care, and have a wonderful day, full of adventure and possibilities!

Looking For More SALAD DRESSING Recipes?

You can find all of my salad dressing recipes in the Recipe Index, located in the MENU toolbar at the top of the page. I have quite a few delicious ones, including:

Interested In More Recipes?

Thank you for visiting this website. I appreciate you using some of your valuable time to do soIf you’re interested, I publish a newsletter 2 times per month (1st and 15th) with all the latest recipes, and other fun info. I would be honored to have you join our growing list of subscribers, so you never miss a great recipe!
There is a Newsletter subscription box on the top right side (or bottom) of each blog post, depending on the device you use, where you can easily submit your e-mail address (only) to be included in my mailing list.

You Can Also Find Me On Social Media:

Facebook page: The Grateful Girl Cooks!
Pinterest:
The Grateful Girl Cooks!
Instagram:
jbatthegratefulgirlcooks

Author's signature

Original recipe source: http://girlinthelittleredkitchen.com/2015/06/spiralized-carrot-salad-with-lemon-ginger-dressing/

0 from 0 votes
Lemon Ginger Salad Dressing
Prep Time
5 mins
Cook Time
0 mins
Total Time
5 mins
 

It's easy to make flavor-filled Lemon Ginger Salad Dressing in a few minutes! This light dressing will compliment most mixed green salads.

Category: Salad Dressing
Cuisine: American
Keyword: lemon ginger salad dressing
Servings: 6 (1 Tablespoon per serving)
Calories Per Serving: 86 kcal
Author: JB @ The Grateful Girl Cooks!
Ingredients
  • 1 large lemon (juice and zest)
  • 1 teaspoon honey
  • 1 inch piece of fresh ginger (peeled, finely minced)
  • 1 medium garlic clove (peeled, finely minced)
  • 1 Tablespoon rice vinegar
  • ½ teaspoon salt
  • ¼ cup extra virgin olive oil
Instructions
  1. Measure all ingredients EXCEPT FOR THE OLIVE OIL into a medium bowl. Stir to combine. Slowly drizzle in the olive oil, whisking with a fork or wire whisk the entire time you are adding the oil. Pour oil with one hand; whisk with the other! Continue to whisk until the dressing has emulsified.

  2. Serve it right away, OR cover the bowl and store it in your refrigerator until ready to serve. Once refrigerated, olive oil will thicken slightly; take it out of the fridge a few minutes before serving and give it a good whisk before drizzling it on your favorite green salad. Enjoy!

Nutrition Facts
Lemon Ginger Salad Dressing
Amount Per Serving (1 Tablespoon)
Calories 86 Calories from Fat 81
% Daily Value*
Fat 9g14%
Saturated Fat 1g6%
Sodium 194mg8%
Carbohydrates 2g1%
Sugar 1g1%
Protein 1g2%
Vitamin C 2mg2%
Iron 1mg6%
* Percent Daily Values are based on a 2000 calorie diet.

Here’s one more to pin on your Pinterest boards!It's easy to make flavor-filled Lemon Ginger Salad Dressing in a few minutes! This light dressing will compliment most mixed green salads.

Pumpkin Vinaigrette

It’s easy to make pumpkin vinaigrette in 5 minutes with a few ingredients! It’s a delicious salad dressing for mixed green or rice salads.
It's easy to make pumpkin vinaigrette in 5 minutes with a few ingredients! It's a delicious salad dressing for mixed green or rice salads.

Last year I made an absolutely delicious wild rice salad, with pumpkin vinaigrette for the dressing. It was fantastic, so today I want to share the recipe for the salad dressing. This vinaigrette is delicious on most mixed green salads, too, which is why it is good to have the recipe in my salad dressing “toolbox”.

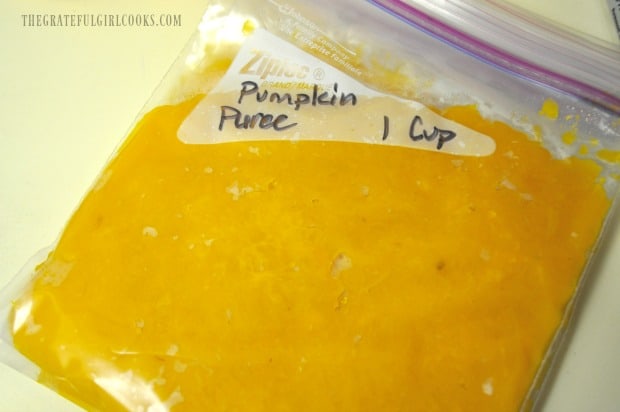
You can use canned pumpkin puree (not pumpkin pie mix) OR your own homemade pumpkin puree, which is what I typically use to make this vinaigrette. Obviously the canned pumpkin puree is very convenient, but since I usually have several bags of homemade puree stored in our freezer, homemade is my “go to”.

The recipe is super easy to make in 5 minutes or less, with a few simple ingredients. Here’s how to make this delicious dressing:

Scroll down for a printable recipe card at the bottom of this page.

How To Make Pumpkin Vinaigrette

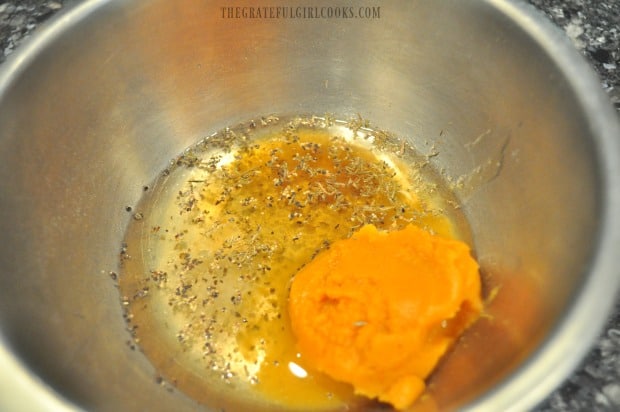
Measure 1/4 cup of pumpkin puree (canned or homemade) into a small bowl. NOTE: Remember to NOT use pumpkin pie filling, or you probably won’t like this dressing!

Homemade or canned pumpkin puree is used as the base for this vinaigrette.

To the pumpkin puree add white wine vinegar, honey, salt, pepper, and some dried thyme. (Exact measurements are found in the printable recipe card at the bottom of this post).

Spices, white wine vinegar and pumpkin puree are measured into a small bowl.

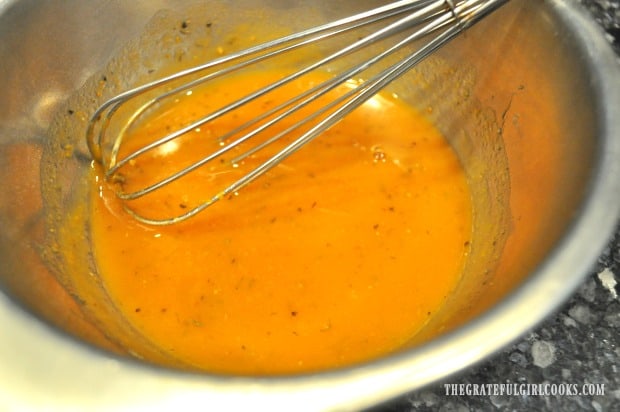
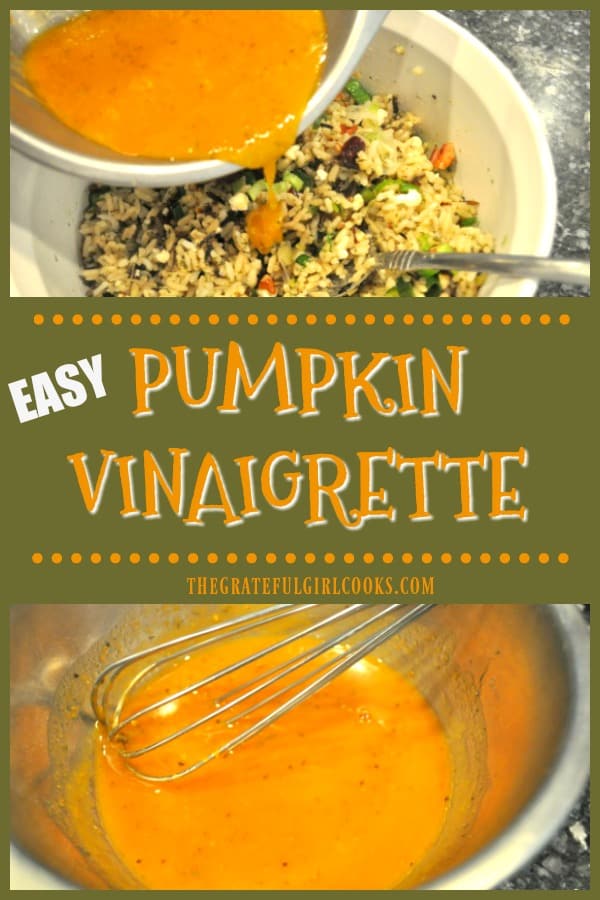
Whisk these ingredients together until they are fully blended, and the vinaigrette is creamy. The mixture will be fairly thick.

The ingredients for pumpkin vinaigrette are whisked together until blended.

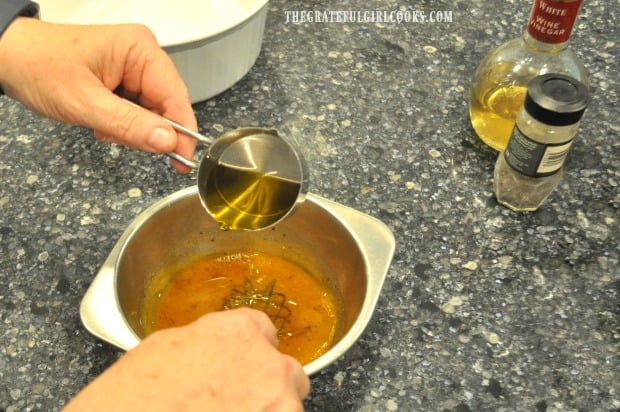
Slowly drizzle olive oil into the pumpkin vinaigrette mixture. Be sure to whisk continuously as you slowly drizzle the olive oil in, because slow drizzling and whisking continuously helps the vinaigrette to emulsify. That basically means you mix the ingredients so well that ingredients that normally don’t combine well (like oil and water), can “come together” in a way that disperses them into a stabilized unit.

Most vinaigrettes are emulsified, to fully blend the various vinegars and oils. It’s a simple process, and you end up with a great dressing for your salads. Once the pumpkin vinaigrette is fully blended, then it is ready to serve on your favorite salad.

Olive oil is whisked into the pumpkin vinaigrette before serving.

Time To Dress A Salad With Pumpkin Vinaigrette

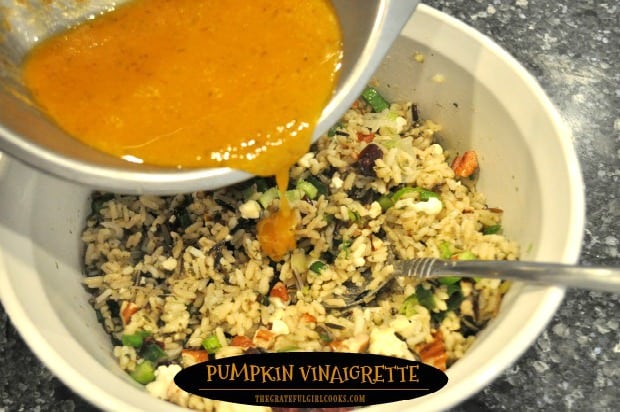
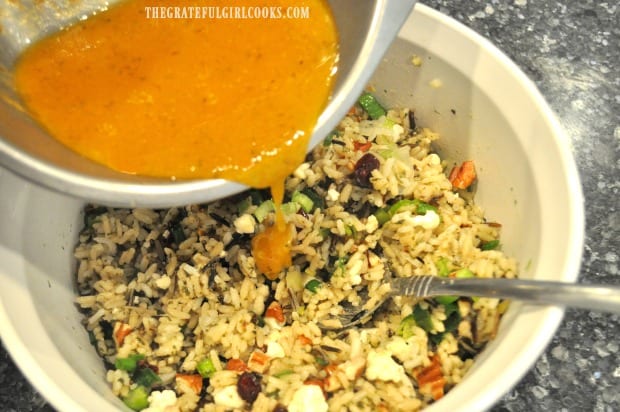
The photo below shows the pumpkin vinaigrette being added to my wild rice salad. This dressing is really delicious, full of unique flavors, and is a great addition to most salads.  I think you will really enjoy it.

Store any leftover salad dressing in a covered container in the refrigerator. After it has been refrigerated, bring it back to room temperature, because the oil will have slightly solidified. Shake or stir the vinaigrette vigorously before using again.

The finished pumpkin vinaigrette is poured over wild rice salad and then served.

Hope you enjoy this simple pumpkin vinaigrette. Thanks for stopping by, take care, and have a GREAT day!

Looking For More SALAD DRESSING Recipes?

You can find all of my salad dressing recipes in the Recipe Index, located at the top of the page. I have several, which include:

Interested In More Recipes?

Thank you for visiting this website. I appreciate you using some of your valuable time to do soIf you’re interested, I publish a newsletter 2 times per month (1st and 15th) with all the latest recipes, and other fun info. I would be honored to have you join our growing list of subscribers, so you never miss a great recipe!
There is a Newsletter subscription box on the top right side (or bottom) of each blog post, depending on the device you use, where you can easily submit your e-mail address (only) to be included in my mailing list.

You Can Also Find Me On Social Media:
Facebook page: The Grateful Girl Cooks!
Pinterest: The Grateful Girl Cooks!
Instagram: jbatthegratefulgirlcooks

Author's signature

Original recipe source: My “Southern Living 2009 Annual Recipes Cookbook”, published 1999 by Oxmoor House, Inc., page 195

0 from 0 votes
Pumpkin Vinaigrette
Prep Time
5 mins
Cook Time
0 mins
Total Time
5 mins
 

It's easy to make pumpkin vinaigrette in 5 minutes with a few ingredients! It's a delicious salad dressing for mixed green or rice salads.

Category: Salad Dressing
Cuisine: American
Keyword: pumpkin vinaigrette
Servings: 10 Tablespoons (approx. 2/3 cup total)
Calories Per Serving: 73 kcal
Author: JB @ The Grateful Girl Cooks!
Ingredients
  • ¼ cup canned pumpkin puree (or homemade) , NOT pumpkin pie filling
  • ¼ cup white wine vinegar
  • 1 Tablespoon honey
  • ½ teaspoon salt
  • ¼ teaspoon ground black pepper
  • ¼ teaspoon dried thyme
  • cup extra virgin olive oil
Instructions
  1. Measure pumpkin puree (canned or homemade) into a small bowl. Add white wine vinegar, honey, salt, pepper, and dried thyme. Whisk these ingredients together until fully blended and creamy.

  2. Slowly drizzle olive oil into vinaigrette. Whisk continuously as you drizzle the olive oil, because slow drizzling and whisking continuously helps the vinaigrette emulsify. Once pumpkin vinaigrette is fully blended, it is ready to serve on your favorite salad.

  3. Store leftover salad dressing in a covered container in refrigerator. After it's been refrigerated, bring it back to room temperature, because oil will have slightly solidified. Shake or stir vinaigrette vigorously before using again. Enjoy!

Nutrition Facts
Pumpkin Vinaigrette
Amount Per Serving (1 Tablespoon)
Calories 73 Calories from Fat 63
% Daily Value*
Fat 7g11%
Saturated Fat 1g6%
Sodium 117mg5%
Potassium 13mg0%
Carbohydrates 2g1%
Fiber 1g4%
Sugar 2g2%
Protein 1g2%
Vitamin A 953IU19%
Vitamin C 1mg1%
Calcium 2mg0%
Iron 1mg6%
* Percent Daily Values are based on a 2000 calorie diet.

Here’s one more to pin on your Pinterest boards!It's easy to make pumpkin vinaigrette in 5 minutes with a few ingredients! It's a delicious salad dressing for mixed green or rice salads.

Ginger Sesame Salad Dressing

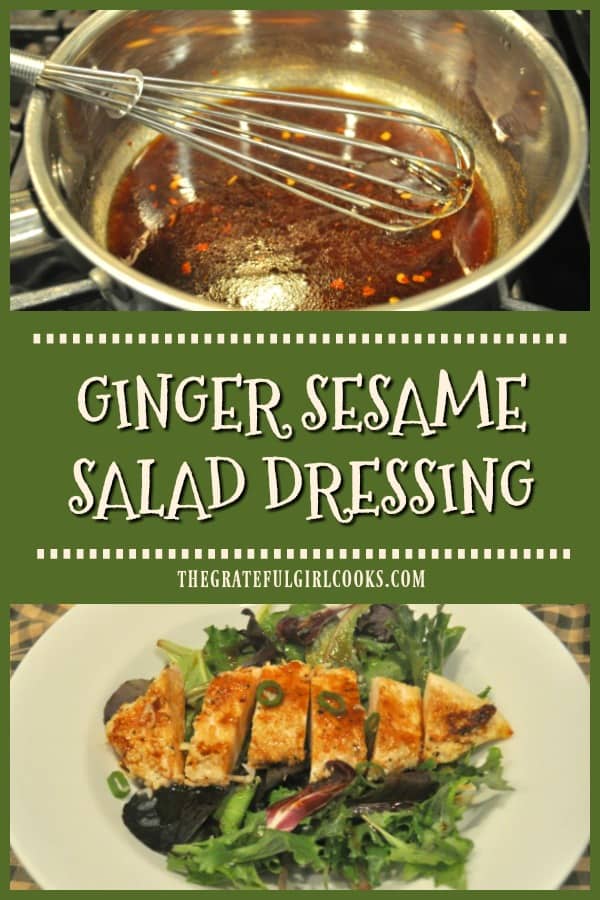
Ginger Sesame Salad Dressing is easy to make in a few minutes! Drizzle this tasty Asian-inspired dressing on a favorite mixed green or entree salad.

Today I want to share this incredibly easy homemade ginger sesame salad dressing. I love this dressing because it is full of flavor, goes well with practically any mixed green salad, is a cinch to make, and it tastes GREAT!

I found the recipe in an old Weight Watchers cookbook I have in my cookbook collection. Yes- I have collected hundreds of cookbooks and cooking magazines for over 40 years now, and to this day I still enjoy the “thrill of the hunt” for new recipes.

The recipe, as written, makes a fairly small batch of salad dressing. It will yield about 1/3 cup, or about 5 small servings of a Tablespoon each). However, the ingredients can be easily doubled or tripled to suit your needs. The printable recipe card is at the bottom of this post.

Scroll Down For A Printable Recipe Card At the Bottom Of The Page

What’s IN This Ginger Sesame Salad Dressing?

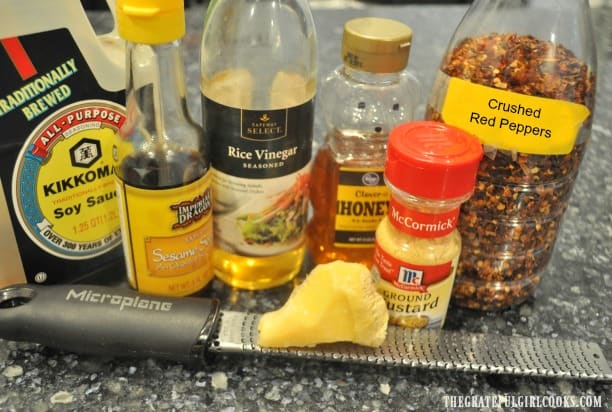
Well, I’m glad you asked. The ingredients you will need to make the salad dressing are soy sauce (regular or low-sodium), rice vinegar, Asian sesame oil, honey, dry mustard powder, fresh ginger, and crushed red pepper.

I prefer using low sodium soy sauce to reduce the amount of sodium in this dressing, but when I took the photo below (long after the fact), I used regular soy sauce in my quick ingredient picture.

All of these ingredients can typically be found in your local supermarket. A couple of them may be located in the Asian section. Fresh ginger is peeled, and then grated using a microplane zester, to finely shred it.

The ingredients are gathered to make the salad dressing.

How To Make The Salad Dressing

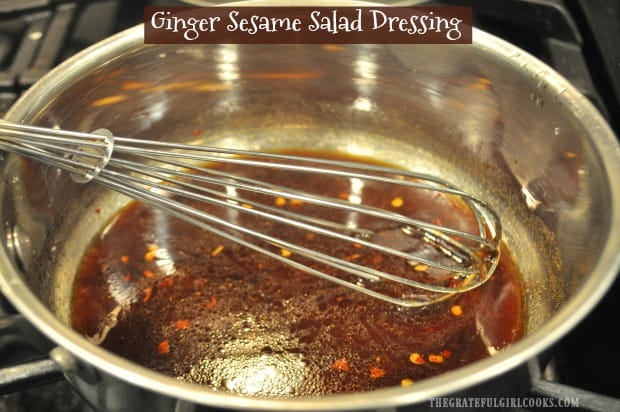
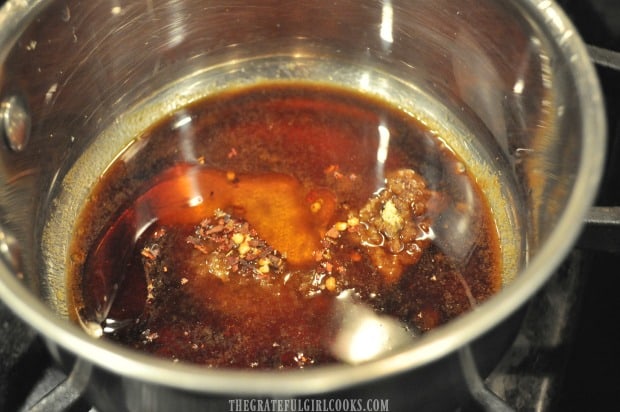
Making this ginger sesame salad dressing is very simple. First, measure all of the the ingredients into a medium saucepan.

The salad dressing ingredients are measured into a medium saucepan.

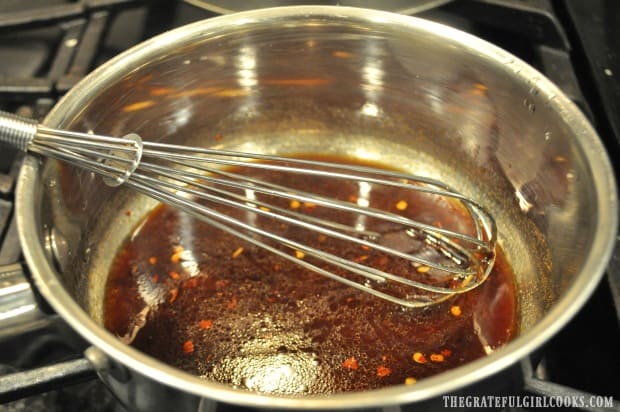
Whisk the ingredients to fully blend them together. Bring the salad dressing to a boil, using medium heat. As soon as it comes to a boil, remove the pan from the heat source. Let the salad dressing cool to room temperature before using.

IF PREPARING AHEAD OF TIME: Let the salad dressing cool naturally for a couple minutes, then cover and place in the refrigerator to chill until you are ready to serve. When ready to serve, take it out of the fridge and let it warm up, just enough to take the chill off.

Ginger sesame salad dressing is whisked, then brought to a boil on the stove.

Enjoy The Ginger Sesame Salad Dressing

Drizzle the salad dressing over your “green salad of choice”. The ginger sesame salad dressing lends a slightly Asian-inspired flavor to any mixed green salad. Store any leftovers, covered, in your refrigerator for up to a week.

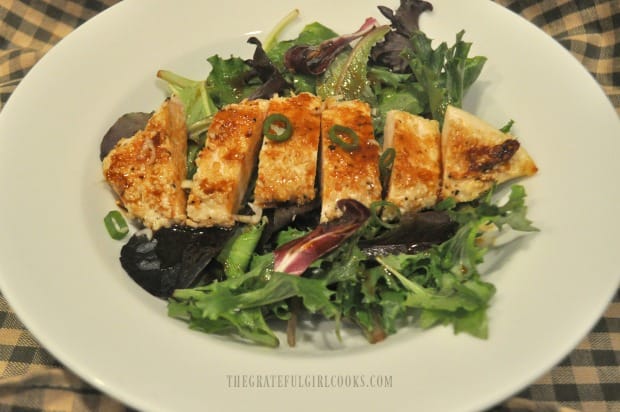
Our favorite way to enjoy this dressing is drizzled on Sesame Chicken Salad, which is a really delicious lunch OR main course dinner!

A main dish chicken salad in a bowl, topped with ginger sesame salad dressing.

I hope you have the opportunity to try this salad dressing. It’s nice knowing what all the ingredients are, and it’s so simple to make in just a few minutes. Thank you for visiting , and I sincerely hope you will come back soon. Have a great day.

Looking For More Homemade SALAD DRESSING Recipes?

You can find all of my recipes for salad dressings in the Recipe Index, which is located at the top of the page. I have quite a few I think you will enjoy, including:

Interested In More Recipes?

Thank you for visiting this website. I appreciate you using some of your valuable time to do soIf you’re interested, I publish a newsletter 2 times per month (1st and 15th) with all the latest recipes, and other fun info. I would be honored to have you join our growing list of subscribers, so you never miss a great recipe!
There is a Newsletter subscription box on the top right side (or bottom) of each blog post, depending on the device you use, where you can easily submit your e-mail address (only) to be included in my mailing list.

You Can Also Find Me On Social Media:

Facebook page: The Grateful Girl Cooks!
Pinterest: The Grateful Girl Cooks!
Instagram: jbatthegratefulgirlcooks

Author's signature

Recipe source: The cookbook “Weight Watchers-Great Cooking Every Day”, published 2001 by Wt. Watchers International, Inc., page 45

0 from 0 votes
Ginger Sesame Salad Dressing
Prep Time
3 mins
Cook Time
3 mins
Total Time
6 mins
 

Ginger Sesame Salad Dressing is easy to make in a few minutes! Drizzle this tasty Asian-inspired dressing on a favorite mixed green or entree salad.

Category: Salad, Salad Dressing
Cuisine: Asian
Keyword: ginger sesame salad dressing
Servings: 5 Tablespoons (about 1/3 cup)
Calories Per Serving: 27 kcal
Author: JB @ The Grateful Girl Cooks!
Ingredients
  • 2 Tablespoons soy sauce , reduced sodium, if available
  • 2 Tablespoons rice vinegar
  • 2 teaspoons fresh ginger , peeled, finely minced
  • 1 Tablespoon honey
  • 1 teaspoon dry mustard powder
  • 1 teaspoon Asian sesame oil (dark)
  • ¼ teaspoon crushed red pepper
Instructions
  1. Measure all ingredients into a medium saucepan. Whisk ingredients, to fully blend together.

  2. Bring to a boil, on medium heat. As soon as it comes to a boil, remove pan from the heat. Let salad dressing cool to room temperature before using.

  3. IF PREPARING AHEAD OF TIME: Let salad dressing cool naturally for a couple minutes; cover and place in refrigerator to chill until ready to serve. When ready to serve, remove from fridge; let it warm up enough to take the chill off.

Recipe Notes

NOTES: The recipe caloric calculation was made using low sodium soy sauce. If using regular soy sauce the amount of sodium will be considerably higher.

Nutrition Facts
Ginger Sesame Salad Dressing
Amount Per Serving (1 Tablespoon)
Calories 27 Calories from Fat 9
% Daily Value*
Fat 1g2%
Saturated Fat 1g6%
Sodium 215mg9%
Potassium 12mg0%
Carbohydrates 4g1%
Fiber 1g4%
Sugar 4g4%
Protein 1g2%
Vitamin A 30IU1%
Iron 1mg6%
* Percent Daily Values are based on a 2000 calorie diet.

Here’s one more to pin on your Pinterest boards!Ginger Sesame Salad Dressing is easy to make in a few minutes! Drizzle this tasty Asian-inspired dressing on a favorite mixed green or entree salad.

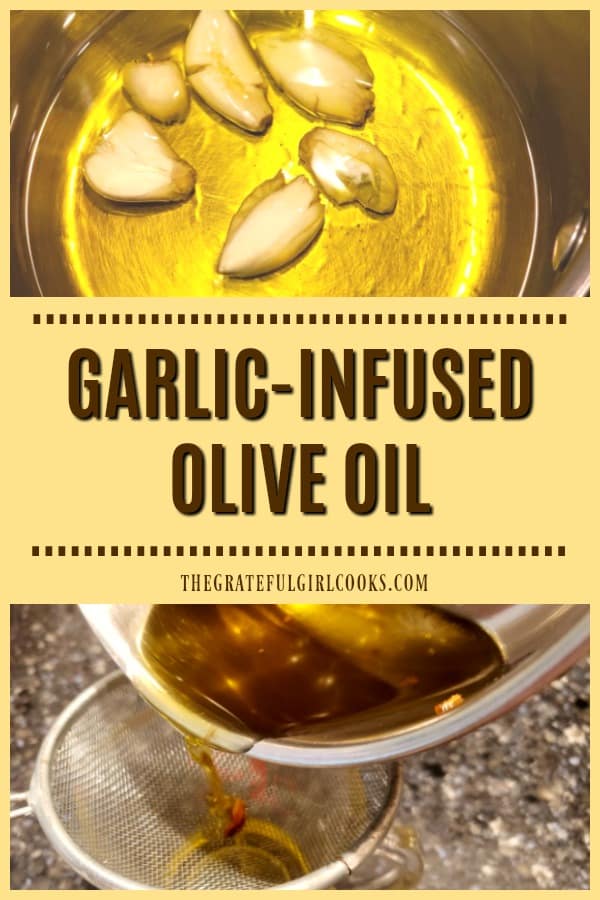
Garlic-Infused Olive Oil

Need Garlic-Infused Olive Oil for a recipe? It’s easy to make your own in minutes (with 2 ingredients), for salad dressings, veggies, & other dishes.
Need Garlic-Infused Olive Oil for a recipe? It's easy to make your own in minutes (with 2 ingredients), for salad dressings, veggies, & other dishes.

I love to use garlic-infused olive oil in various recipes, like vegetables, salad dressings, etc. For several years I have bought bottles of it from a local olive oil and balsamic vinegar tasting room near our home. Well, I ran out of it a couple months ago, and discovered my local store had gone out of business… uh oh. POOF… it is gone! That made me very sad.

I knew of no other stores close to my home (worth making a separate trip to), so I decided to make some myself. Guess what my research showed me? The process is easy, and the resulting garlic-infused olive oil tastes wonderful! In only a few minutes, I had a great tasting copycat for the product I was used to buying, it costs a lot less, AND I made it in my own kitchen. Here’s how simple it is:

Scroll Down For A Printable Recipe Card At The Bottom Of The Page

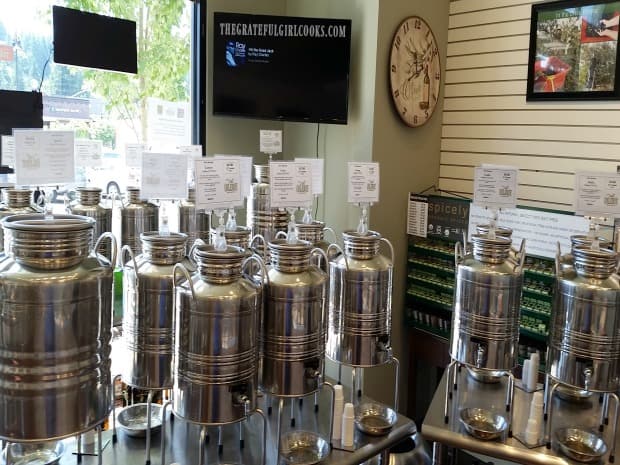
Photo showing inside of our local olive oil and vinegar tasting room.

Prepare The Fresh Garlic Cloves

To make your own garlic-infused olive oil, it’s important to use FRESH garlic, and a good quality olive oil. I do not recommend jarred or canned minced garlic for this recipe. Trust me- you want to use fresh garlic for the very best flavor!

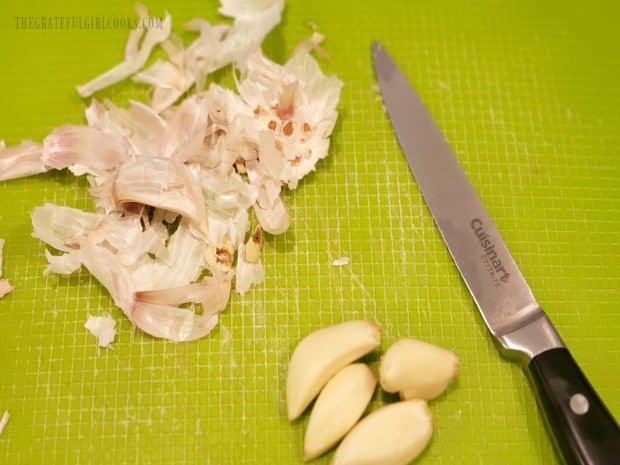
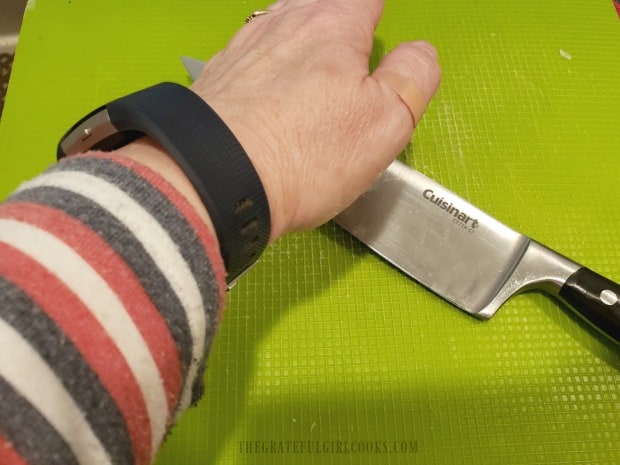
Peel all the paper peel/skin off of the garlic cloves. This recipe yields 1 cup of infused olive oil, so you will need between 6-8 large garlic cloves (I used 6). Place one peeled clove at a time under the flat, wide blade of a large kitchen knife.

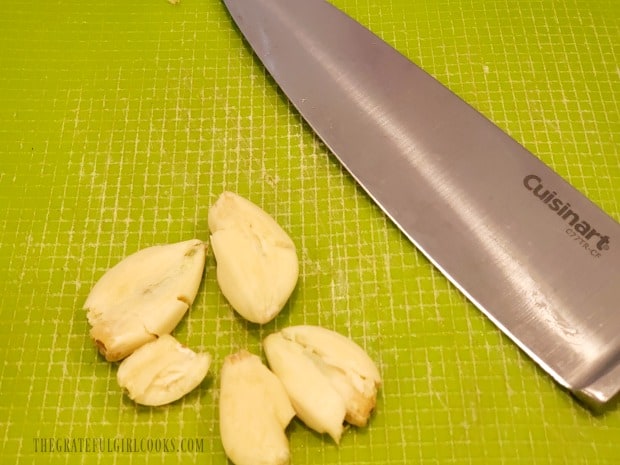
Pound the flat, broad side of the knife hard, with the ball of your hand, to smash the garlic clove underneath. It should only take one “pounding” to flatten and split the clove open. Repeat with the other cloves, one at a time.

Cloves of garlic must be stripped of the papery thin skin covering.Smashing each clove of garlic with the broad flat side of a knife.

Infusing Garlic Into The Oil

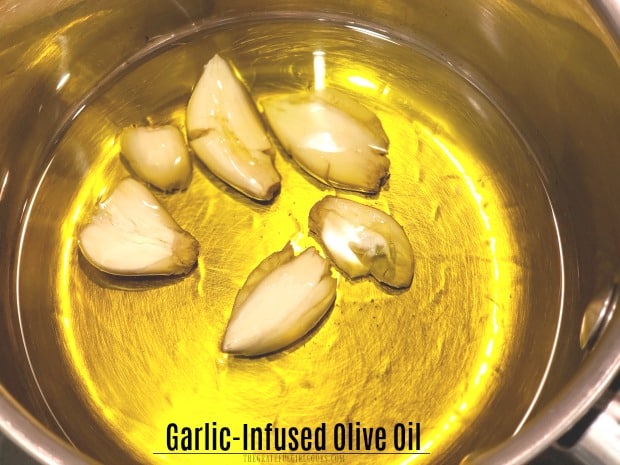
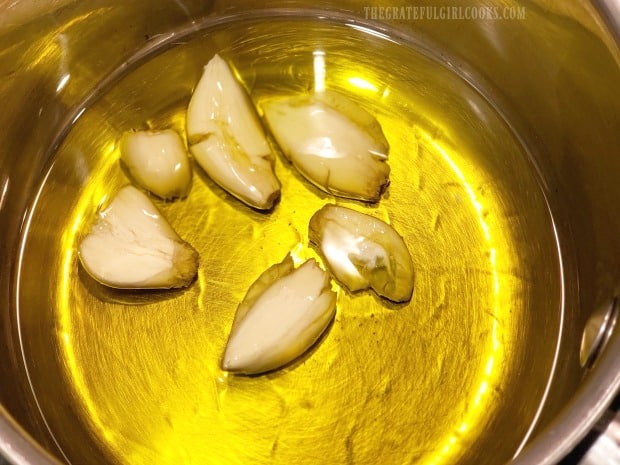
Once you have “flattened” each of the garlic cloves, place them in a small saucepan with one cup of olive oil. Turn the heat to LOW, and let the oil cook for 5 minutes.

The garlic cloves have each been smashed with the knife to release the flavor.Cooking the smashed garlic cloves with olive oil.

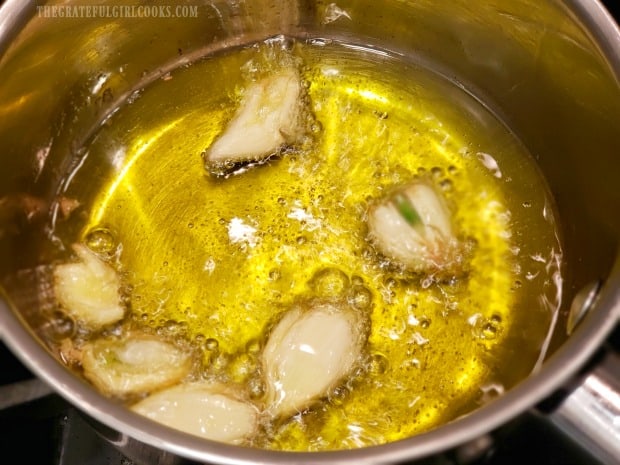
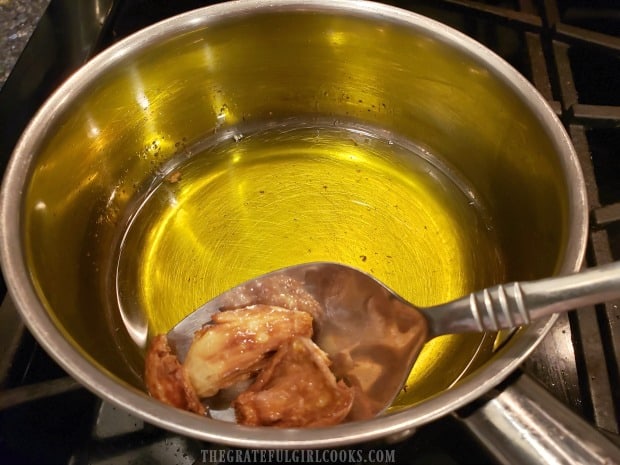
The oil will begin to slightly boil as it is heated. The flattened garlic cloves will release their aromatic flavor into the hot oil. This is how it becomes garlic-“infused” olive oil. When done, use a slotted spoon to remove the browned, crispy garlic cloves from the oil. You can discard the garlic cloves, or use them in any other way you choose.

Garlic-infused olive oil is cooking away in the pan.The crispy garlic cloves are removed from the garlic-infused olive oil.

Finish Preparing The Garlic-Infused Olive Oil

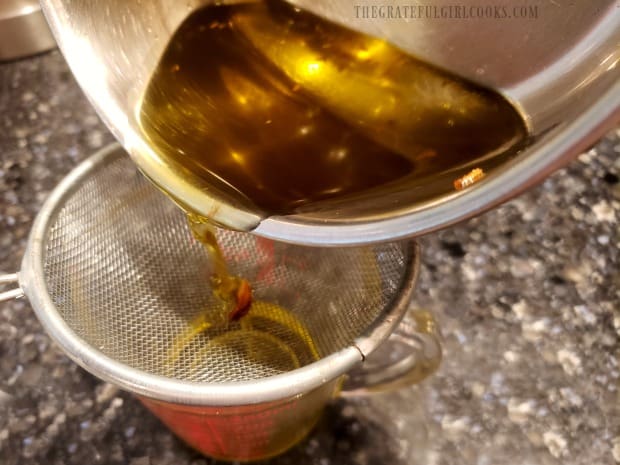
After removing the garlic, you’ll probably have some leftover “crispy bits” left in the pan with the olive oil. You will need to strain the oil, once it has cooled, in order to remove them.

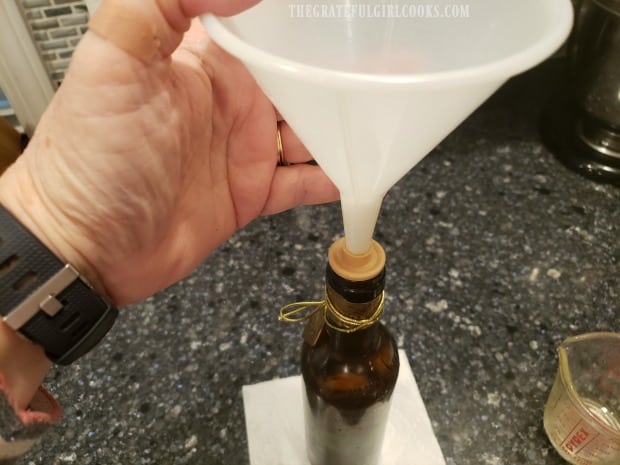
Place a small wire mesh strainer over a bowl or measuring cup, and carefully pour the infused oil through the strainer into the container. Any tiny bits of crispy garlic will now have been removed from your oil. Once the olive oil is completely cooled, pour it through a funnel into the bottle or jar that you will be storing the oil in. Olive oil should be stored (covered), away from direct sunlight, in a dark, cool location.

NOTE: There are differing opinions and research on how long a non-commercial infused olive oil can be safely stored. Homemade infused olive oil using the method I’ve described should ideally be used within 4-5 days. It can also be frozen for safe, long-term storage.

The olive oil is strained into a cup to remove any small crispy garlic pieces.A funnel is used to add the garlic-infused olive oil to a bottle for storage.

That’s it… now you have 8 ounces of delicious, garlic-infused olive oil to pan-sear meats, use in salad dressings, or vegetable stir-frys, etc. Thank you for stopping by. I hope you have the opportunity to try infusing olive oil, and trust you will find it convenient to have in your own kitchen. The printable recipe card is below, for your convenience. Take care, and have a GREAT day!

Interested In More Recipes?

Thank you for visiting this website. I appreciate you using some of your valuable time to do soIf you’re interested, I publish a newsletter 2 times per month (1st and 15th) with all the latest recipes, and other fun info. I would be honored to have you join our growing list of subscribers, so you never miss a great recipe!
There is a Newsletter subscription box on the top right side (or bottom) of each blog post, depending on the device you use, where you can easily submit your e-mail address (only) to be included in my mailing list.

You Can Also Find Me On Social Media:
Facebook page: The Grateful Girl Cooks!
Pinterest: The Grateful Girl Cooks!
Instagram: jbatthegratefulgirlcooks

Author's signature

0 from 0 votes
Garlic-Infused Olive Oil
Prep Time
3 mins
Cook Time
5 mins
Total Time
8 mins
 

Need Garlic-Infused Olive Oil for a recipe? It's easy to make your own in minutes (with 2 ingredients), for salad dressings, veggies, & other dishes.

Category: Condiments
Cuisine: All Cuisines
Keyword: garlic-infused olive oil
Servings: 1 cup
Calories Per Serving: 218 kcal
Author: JB @ The Grateful Girl Cooks!
Ingredients
  • 1 cup olive oil extra virgin or regular
  • 6-8 large FRESH garlic cloves do NOT use canned or jarred minced garlic
Instructions
  1. Remove paper/skin off garlic cloves. Place one peeled clove at a time under the flat, wide blade of a large kitchen knife. Pound the flat, broad side of the knife hard, with the ball of your hand, to smash garlic clove underneath. Repeat with remaining cloves, one at a time.

  2. Place one cup of olive oil in a small saucepan. Add smashed garlic cloves. Turn heat to LOW, and cook for 5 minutes. When done, use a slotted spoon to remove browned, crispy garlic cloves from oil. Discard cloves.

  3. Strain oil, to remove any remaining crispy bits in oil. Place a wire mesh strainer over a bowl or measuring cup; carefully pour oil through strainer into container. Once oil has completely cooled, pour it through a funnel into a bottle or jar that you will be storing the oil in. Store oil (covered), away from sunlight, in a dark, cool location. Infused olive oil made using this method should be used within 4-5 days. It can also be frozen for safe long-term storage.

Recipe Notes

Caloric calculation made using extra virgin olive oil.  One cup of oil will yield approx.16 Tablespoons. Each Tablespoon of this oil is approximately 13.62 calories. 

Nutrition Facts
Garlic-Infused Olive Oil
Amount Per Serving (1 g)
Calories 218 Calories from Fat 198
% Daily Value*
Fat 22g34%
Saturated Fat 3g19%
Sodium 3mg0%
Potassium 72mg2%
Carbohydrates 6g2%
Fiber 1g4%
Sugar 1g1%
Protein 1g2%
Vitamin C 6mg7%
Calcium 33mg3%
Iron 1mg6%
* Percent Daily Values are based on a 2000 calorie diet.

Here’s one more to pin on your Pinterest boards!Need Garlic-Infused Olive Oil for a recipe? It's easy to make your own in minutes (with 2 ingredients), for salad dressings, veggies, & other dishes.

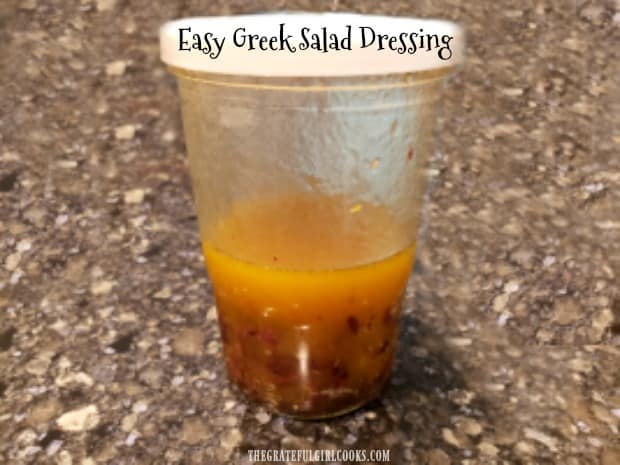
Easy Greek Salad Dressing

Make Easy Greek Salad Dressing in under 5 minutes. Use this delicious dressing (w/ chopped kalamata olives) on a favorite Greek or mixed green salad.
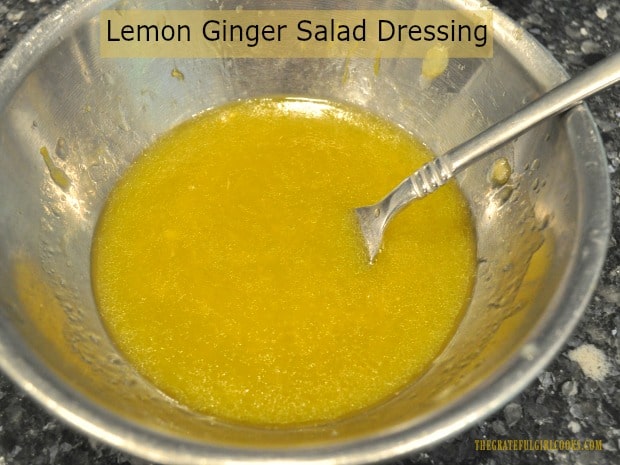

If you’re looking for a great tasting salad dressing that is perfect to drizzle on any mixed green salad, may I suggest this one? The recipe makes a small batch (enough for 4 small servings). It’s a great way to compliment any salad (especially a GREEK salad!). This salad dressing can be made easily in just a few minutes, and I think you will really enjoy it.

Scroll Down For A Printable Recipe Card At The Bottom Of The Page

What’s In The Salad Dressing?

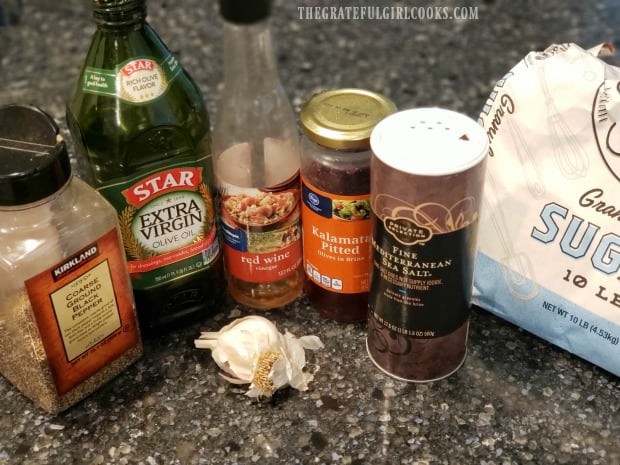
The ingredients for the salad dressing are olive oil, red wine vinegar, sugar, minced garlic, salt, pepper, and chopped kalamata olives. Kalamata olives are a type of Greek olive, that have a wonderful, tangy flavor, and add tons of flavor to the dressing. YUM.

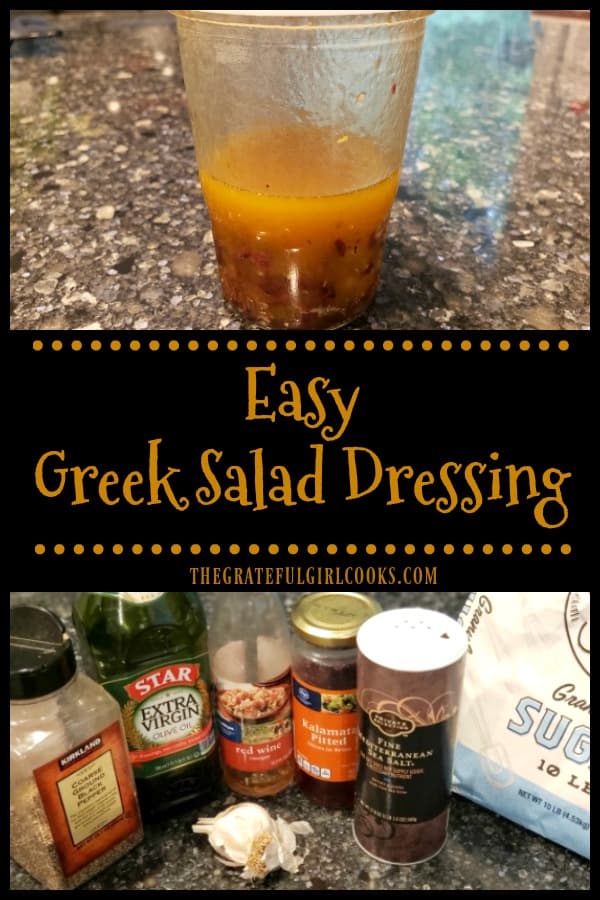
Getting the ingredients ready to make the salad dressing.

How To Make This Easy Greek Salad Dressing

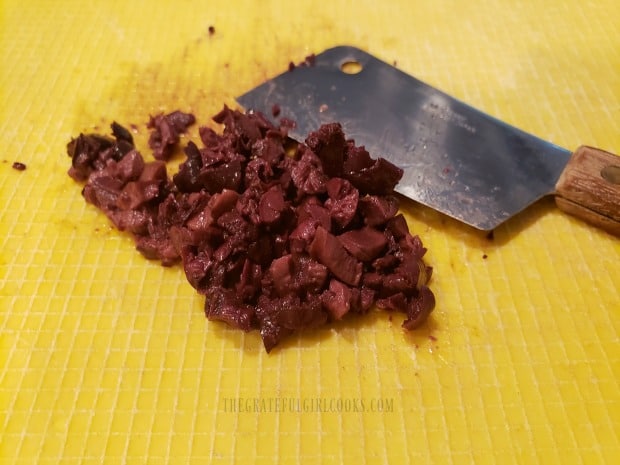
Finely chop the pitted kalamata olives. You want them fairly small. The recipe only used 6 olives, but let me tell you, they will add a LOT of flavor to the salad dressing. You can store the rest of the jar of olives in the refrigerator for another batch later on!

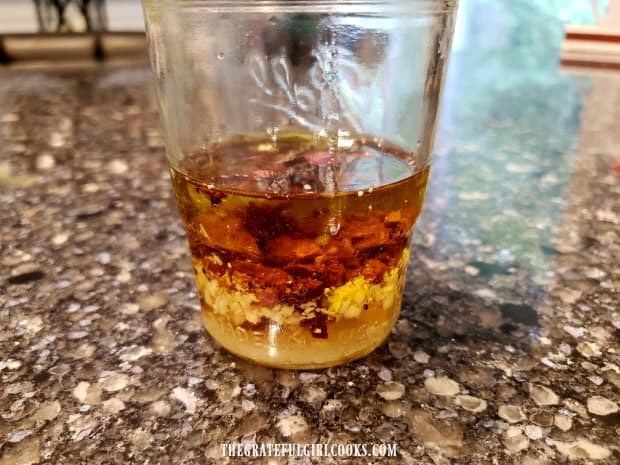
Add the chopped olives, and the rest of the ingredients to a small jar or container with a lid. One “small batch” of this salad dressing is only about 1/3 of a cup, so you won’t need a large container, unless you plan to double or triple the recipe.

Kalamata olives are finely chopped, and add great flavor to this salad dressing.The ingredients for the easy Greek salad dressing are placed in a sealed container.

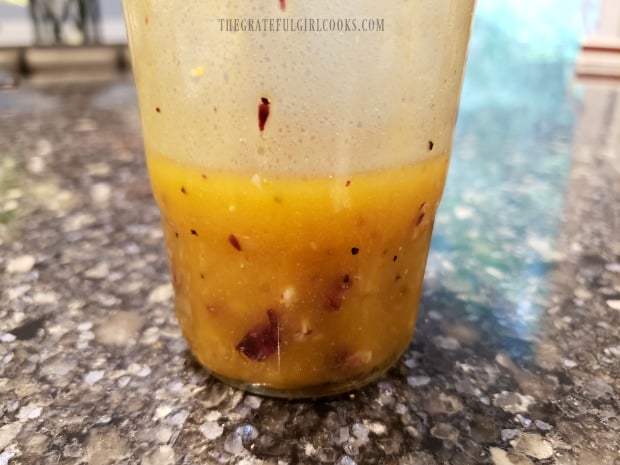
Cover the jar or container, and (holding the lid on), shake the easy Greek salad dressing vigorously for about a minute. This will allow the sugar to dissolve, and the oil and vinegar to emulsify, and “come together”. That’s IT! See how EASY that was?

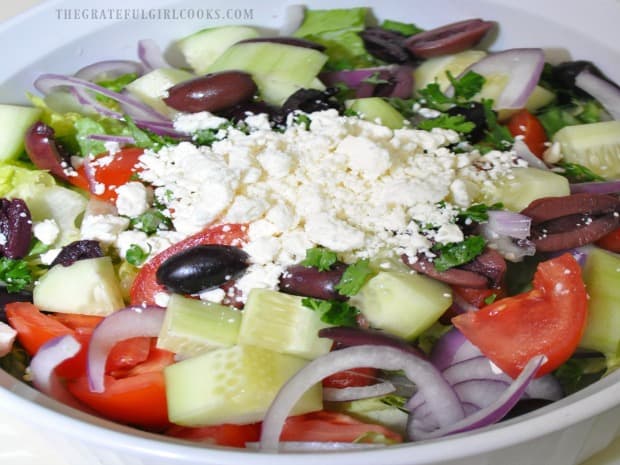
Pour the easy Greek salad dressing over a wonderful Greek salad OR you can use it on any mixed green salad that you enjoy.

After shaking the jar, the Greek salad dressing is emulsified and ready to use.Drizzle the salad dressing over a favorite Greek salad.

Storing The Salad Dressing

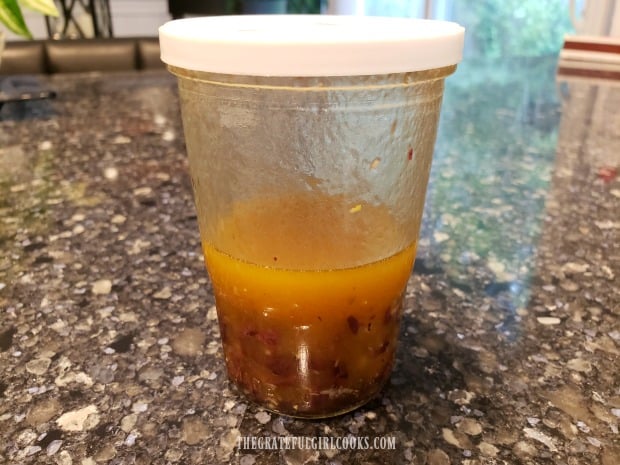
Store any leftover dressing in a covered container in the refrigerator. The olive oil may solidify once chilled, but all you need to do is remove the jar from the refrigerator about 15 minutes before using again. It will return to room temperature, and then just give it a few good shakes before using.

The recipe can be easily doubled or tripled if that is more convenient for you.  The yield from this small batch is approximately 1/3 cup, which is enough for several side salads (1 Tablespoon per side salad), or one large salad.

Store the easy Greek salad dressing in a covered container in the refrigerator.

Hope you enjoy this delicious salad dressing. I enjoy keeping a small batch around for variety, and just used it last evening on a delicious mixed green salad. It’s really good! Thank you for stopping by, and I truly hope you enjoy your day.

Looking For More SALAD DRESSING Recipes?

You can find all of my recipes in the Recipe Index, located at the top of the page. I have quite a few easy salad dressing recipes, including:

Interested In More Recipes?

Thank you for visiting this website. I appreciate you using some of your valuable time to do soIf you’re interested, I publish a newsletter 2 times per month (1st and 15th) with all the latest recipes, and other fun info. I would be honored to have you join our growing list of subscribers, so you never miss a great recipe!
There is a Newsletter subscription box on the top right side (or bottom) of each blog post, depending on the device you use, where you can easily submit your e-mail address (only) to be included in my mailing list.

You Can Also Find Me On Social Media:
Facebook page: The Grateful Girl Cooks!
Pinterest: The Grateful Girl Cooks!
Instagram: jbatthegratefulgirlcooks

Author's signature

Original recipe source: http://thepioneerwoman.com/cooking/2011/04/greek-salad/

0 from 0 votes
Easy Greek Salad Dressing
Prep Time
5 mins
Cook Time
0 mins
Total Time
5 mins
 

Make Easy Greek Salad Dressing in under 5 minutes. Use this delicious dressing (w/ chopped kalamata olives) on a favorite Greek or mixed green salad.

Category: Condiment, Salad Dressing
Cuisine: Greek
Keyword: easy Greek salad dressing
Servings: 4
Calories Per Serving: 135 kcal
Author: JB @ The Grateful Girl Cooks!
Ingredients
  • ¼ cup extra virgin olive oil
  • 2 Tablespoons red wine vinegar
  • 1 teaspoon granulated sugar
  • 6 kalamata olives , pitted / finely chopped
  • 1 clove garlic , minced
  • ¼ teaspoon salt
  • 2-3 pinches ground black pepper
Instructions
  1. Add all ingredients to a small jar or container with a secure lid. NOTE: If doubling or tripling recipe, use larger container.

  2. Cover the jar or container, and (holding the lid on securely), shake the salad dressing vigorously for about a minute. This allows the sugar to dissolve, and the oil and vinegar to emulsify, and "come together".

  3. Serve, and enjoy on your favorite Greek or mixed green salad! Store any leftover salad dressing in covered container in refrigerator. NOTE: After refrigerating, the olive oil will slightly thicken. Let salad dressing sit at room temperature 15 minutes before serving, to allow it to thin out again. Shake or stir dressing to re-blend, and serve.

Nutrition Facts
Easy Greek Salad Dressing
Amount Per Serving (1.5 Tablespoons)
Calories 135 Calories from Fat 126
% Daily Value*
Fat 14g22%
Saturated Fat 2g13%
Sodium 240mg10%
Carbohydrates 2g1%
Fiber 1g4%
Sugar 1g1%
Protein 1g2%
Vitamin A 24IU0%
Calcium 3mg0%
Iron 1mg6%
* Percent Daily Values are based on a 2000 calorie diet.

Here’s one more to pin on your Pinterest boards!Make Easy Greek Salad Dressing in under 5 minutes. Use this delicious dressing (w/ chopped kalamata olives) on a favorite Greek or mixed green salad.

Orange Herb Vinaigrette

It’s EASY to make this delicious Orange Herb Vinaigrette in under 5 minutes, to add flavor and color to your favorite mixed green or couscous salads.
It's EASY to make this delicious Orange Herb Vinaigrette in under 5 minutes, to add flavor and color to your favorite mixed green or couscous salads.

If you’re looking for a new salad dressing that has a ton of flavor, may I suggest this orange herb vinaigrette? I originally found it in a recipe I was trying a few years ago, and have made this salad dressing many times since then.

It only takes a few minutes to throw together, which is another win-win for busy folks, and it tastes great on orzo or couscous salads, as well as on a chilled mixed green salad. YUMMO! Here’s how to make this simple dressing:

Scroll Down For A Printable Recipe Card At The Bottom Of The Page

Ingredients Needed For Orange Herb Vinaigrette

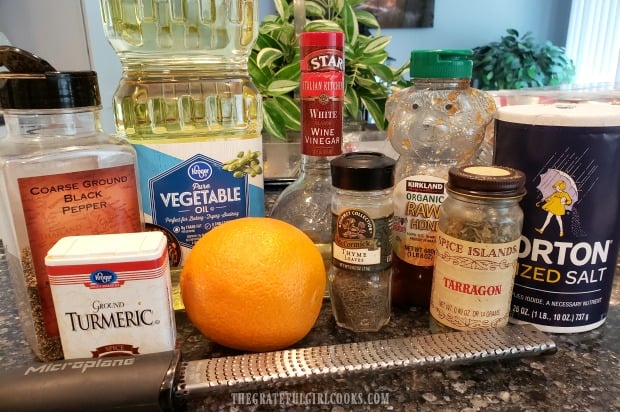
To make this orange herb vinaigrette you will need the following ingredients (shown below). They are oil, white wine vinegar, an orange, honey, and some dried spices (turmeric, tarragon, thyme, salt & pepper).

I typically use vegetable oil for this vinaigrette, but you can substitute canola or grapeseed oil, as well, for the same great taste. It’s also helpful to have a microplane (seen in photo below) to finely grate or “zest” the orange peel. TIP: If you don’t have access to a microplane zester, use the smallest opening on a box grater. The orange “zest” is added, in addition to the juice of the orange, for an abundance of citrus flavor.

The ingredients needed to make the vinaigrette salad dressing.

Mix Up The Vinaigrette

Just in case you’re wondering, I don’t mean “confuse the vinaigrette” when I say “mix up the vinaigrette”. OK? OK. Just makin’ sure we’re on the same page here (wink, wink). Place all the ingredients EXCEPT for the salt and pepper into a small bowl or measuring cup. Whisk well, with a wire whisk or a small fork, until the ingredients are fully combined and the vinaigrette has emulsified.

To “emulsify” salad dressing means to mix so thoroughly that ingredients that normally don’t combine well (like oil and water), can “come together” in a way that transforms them into a stabilized unit. Most vinaigrettes are emulsified, to fully incorporate the vinegar and oil, which are pretty standard ingredients.

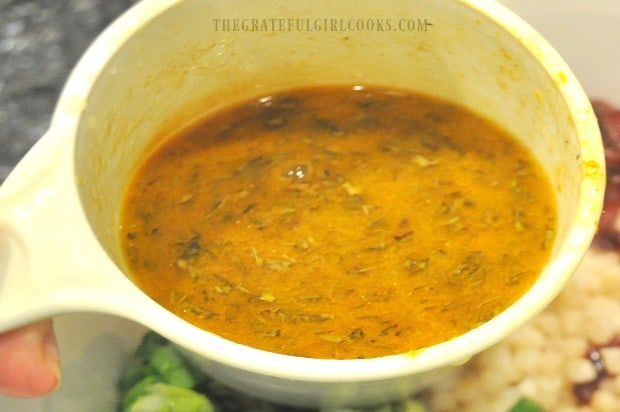
Once the orange herb vinaigrette is fully mixed, it is ready to use on the salad.

Ready To Serve!

Once the vinaigrette has emulsified, season it lightly to taste, with the salt and ground black pepper. Give it another quick stir, and the vinaigrette is ready to be used.

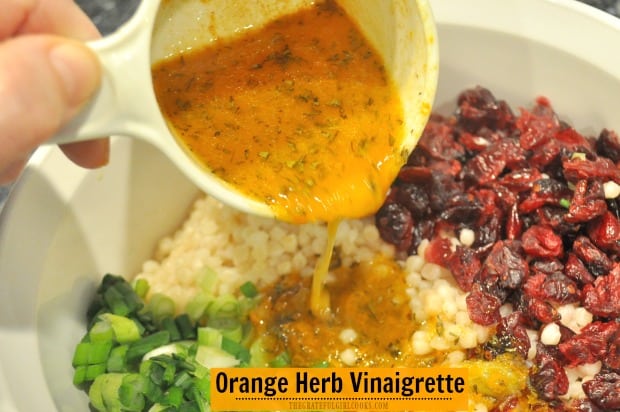
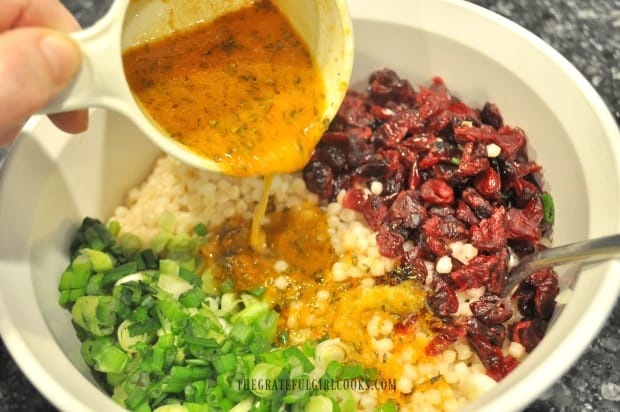
Drizzle this salad dressing over your favorite mixed green salad, orzo or couscous salad. In the photo below, you can the vinaigrette being drizzled over my Cranberry Orange Israeli Couscous. It tastes FANTASTIC! Hope you like it, too.

The orange herb vinaigrette is poured on an Israeli couscous salad and then tossed.

In no time at all you can create this wonderful homemade salad dressing. I’m confident you will enjoy it, using your own ingredients, and made in your own kitchen. Thanks for stopping by today, and spending some of your valuable time on this blog. Take care, and have a great day. See below for the printable recipe card.

Looking For More SALAD DRESSING Recipes?

You can find all of my salad dressing recipes in the Recipe Index, located at the top of the page. I have quite a few, including:

Interested In More Recipes?

Thank you for visiting this website. I appreciate you using some of your valuable time to do soIf you’re interested, I publish a newsletter 2 times per month (1st and 15th) with all the latest recipes, and other fun info. I would be honored to have you join our growing list of subscribers, so you never miss a great recipe!
There is a Newsletter subscription box on the top right side (or bottom) of each blog post, depending on the device you use, where you can easily submit your e-mail address (only) to be included in my mailing list.

You Can Also Find Me On Social Media:
Facebook page: The Grateful Girl Cooks!
Pinterest: The Grateful Girl Cooks!
Instagram: jbatthegratefulgirlcooks

Author's signature

Original recipe source (a blog no longer around): http://artisinalfood.blogspot.com/2011/12/israeli-couscous-with-cranberries-and.html

0 from 0 votes
Orange Herb Vinaigrette
Prep Time
5 mins
Cook Time
0 mins
Total Time
5 mins
 

It's EASY to make this delicious Orange Herb Vinaigrette in under 5 minutes, to add flavor and color to your favorite mixed green or couscous salads.

Category: Salad, Salad Dressing
Cuisine: All Cuisines
Keyword: orange herb vinaigrette
Servings: 8 Tablespoons (approx. 1/2 cup)
Calories Per Serving: 62 kcal
Author: JB @ The Grateful Girl Cooks!
Ingredients
  • 3 Tablespoons vegetable oil (or canola/grapeseed oil)
  • Tablespoons white wine vinegar
  • 1 Tablespoon honey
  • 1 medium orange (juice and zest)
  • ½ teaspoon turmeric
  • ½ teaspoon dried thyme
  • ½ teaspoon dried tarragon
  • salt/pepper, to taste
Instructions
  1. Place all ingredients EXCEPT for salt and pepper in a small bowl or measuring cup. Whisk well, with a wire whisk or a small fork, until the ingredients are fully combined and the vinaigrette has emulsified. NOTE: To "emulsify" salad dressing means to mix so thoroughly that ingredients that normally don't combine well (like oil and water), can "come together" in a way that transforms them into a stabilized unit.

  2. Season lightly with salt and black pepper, to taste. Stir again, and then drizzle over salad to serve.

  3. Store any leftover vinaigrette in a sealed container in the refrigerator for up to 2-3 days. Remove vinaigrette from refrigerator a few minutes before serving, and stir well, to re-blend before using.

Nutrition Facts
Orange Herb Vinaigrette
Amount Per Serving (1 Tablespoon)
Calories 62 Calories from Fat 45
% Daily Value*
Fat 5g8%
Saturated Fat 4g25%
Sodium 1mg0%
Potassium 30mg1%
Carbohydrates 4g1%
Fiber 1g4%
Sugar 4g4%
Protein 1g2%
Vitamin A 37IU1%
Vitamin C 9mg11%
Calcium 8mg1%
Iron 1mg6%
* Percent Daily Values are based on a 2000 calorie diet.

Here’s one more to pin on your Pinterest boards!It's EASY to make this delicious Orange Herb Vinaigrette in under 5 minutes, to add flavor and color to your favorite mixed green or couscous salads.