Summer Squash Bacon Sauté

Summer Squash Bacon Sauté is a simple veggie side dish with green and yellow zucchini, crisp bacon, carrot, onions, garlic and cheese, and takes only minutes to make!
Summer Squash Bacon Sauté is a simple side dish with green and yellow zucchini, crisp bacon, carrot, onions, garlic and cheese, and takes only minutes to make!

We have a small raised bed garden in our backyard.  I love to grow green and yellow zucchini (since they multiply like crazy). It’s always fun to pick beautiful summer squash and then use them to create something fresh and delicious in our kitchen!

Scroll Down For A Printable Recipe Card At The Bottom Of The Page

Do You Enjoy Recipes Using Zucchini?

I’ve posted several recipes on this blog using our fresh garden zucchini, including Summer Vegetable Tian, Zucchini Relish, Chili Mac with Summer Squash, Baked Parmesan Zucchini Fries,  Cucumber and Zucchini Carpaccio Salad, and Curried Zucchini Soup.

Collage of recipes on blog using summer squash (zucchini).

All are wonderful ways to use up any over abundance of zucchini you grow, are given by a neighbor with a garden, or what you buy at the store!

I decided to play around with a couple of the zucchini (yellow and green) and some bacon in the kitchen (cooking NOT juggling!), and a few other ingredients, and came up with this simple, delicious veggie side dish! I served it with pan-seared Creole salmon and rice, and it was delicious!

Yellow and green summer squash (zucchini) are used for veggie side dish

How To Make The Summer Squash Bacon Sauté

To make this Summer Squash Bacon Sauté, I began by cutting two strips of thick bacon into strips (using kitchen scissors), and placed the pieces in a skillet with some thin slices of red onion. You will not need to spray the skillet, because the bacon will provide it’s own “oil” as it cooks.

Bacon pieces and red onion slices sauté in skillet

Sauté on medium heat until bacon is crisp and the fat (bacon grease) is rendered into skillet.

Bacon is cooked until crispy and some fat is rendered.

Add The Veggies

Add green and yellow zucchini (cut into bite sized chunks), and carrot to skillet. Season with a pinch or two of salt and pepper (to your taste). Stir and cook in the bacon “drippings” for 4-5 minutes on medium heat, until zucchini is slightly browned, and is tender-crisp (NOT soggy!).

Summer squash and carrots are added to bacon sauté.

Add minced garlic, and stir to combine. Cook for an additional minute, stirring often. The reason to put the garlic in at the last minute is so that it does not burn (which makes the garlic taste bitter- no one wants THAT!).

Minced garlic is added to sauteéd summer squash.

Sprinkle grated sharp cheddar cheese over the top of the veggies. Do NOT stir. Turn off heat. Place a skillet lid over top of skillet for about a minute (this will melt the cheese).

Grated cheddar cheese is added to the top of the summer squash.

Time To Eat The Summer Squash Bacon Sauté

Remove skillet lid, and you will see the cheese has melted.  Use a spatula and transfer veggies to individual serving plates. Serve hot… and enjoy this delicious vegetable dish!

Cheddar cheese melts to top of the summer squash bacon sauté.

I love to try new veggie dishes… I mean, doesn’t EVERYONE get tired of boring, plain vegetables at one time or another? This one tasted GREAT (a bit of bacon makes EVERYTHING better, right?). I hope you will consider trying this summer squash bacon sauté- the quantity can be easily doubled or tripled!

Thanks for stopping by today, and I hope you will come back again soon. Don’t forget to check out ALL of my recipes, which are in the Recipe Index, located at the top of the page.

Interested In More Recipes?

Thank you for visiting this website. I appreciate you using some of your valuable time to do soIf you’re interested, I publish a newsletter 2 times per month (1st and 15th) with all the latest recipes, and other fun info. I would be honored to have you join our growing list of subscribers, so you never miss a great recipe!
There is a Newsletter subscription box on the top right side (or bottom) of each blog post, depending on the device you use, where you can easily submit your e-mail address (only) to be included in my mailing list.

You Can Also Find Me On Social Media:

Facebook page: The Grateful Girl Cooks!
Pinterest:
The Grateful Girl Cooks!
Instagram:
jbatthegratefulgirlcooks

Have a GREAT day!

Author's signature

↓↓ PRINTABLE RECIPE BELOW ↓↓

0 from 0 votes
Summer Squash Bacon Sauté
Prep Time
10 mins
Cook Time
5 mins
Total Time
15 mins
 
Summer Squash Bacon Sauté is a simple side dish with green and yellow zucchini, crisp bacon, carrot, onions, garlic and cheese, and takes only minutes to make!
Category: Vegetable Dish
Cuisine: American
Keyword: summer squash bacon saute
Servings: 3 servings
Calories Per Serving: 157 kcal
Author: JB @ The Grateful Girl Cooks!
Ingredients
  • 2 slices bacon
  • 1/4 cup red onion (thinly sliced)
  • green zucchinis (medium sized)
  • 1/2 yellow zucchini (or crookneck squash) (medium sized)
  • 1 carrot (medium sized)
  • 1/2 teaspoon minced garlic
  • 1 pinch salt/pepper (to taste)
  • 3 Tablespoons sharp cheddar cheese (grated)
Instructions
  1. Cut bacon into thin slices (with knife or kitchen scissors). Thinly slice red onion. Cut zucchini in bite sized chunks. Peel carrot and cut into chunks. Set aside.

  2. Place bacon pieces in skillet with thin slices of red onion. You don't need to spray skillet, because the bacon will provide it's own "oil" as it cooks. Sauté on medium heat until bacon is crisp and fat (bacon grease) is rendered into skillet.

  3. Add green and yellow zucchini (cut into bite sized chunks), and carrot to skillet. Season with a pinch or two of salt and pepper (to taste). Stir and cook in the bacon "drippings" for 4-5 minutes on medium heat, stirring occasionally, until zucchini is slightly browned, and tender-crisp (NOT soggy!). Add minced garlic, and stir to combine. Cook for an additional minute, stirring often. The reason to put the garlic in at the last minute is so that it does not burn (which makes the garlic taste bitter- no one wants THAT!).

  4. Sprinkle grated sharp cheddar cheese over the top of the veggies. Do NOT stir. Turn off heat. Place a skillet lid over top of skillet for about a minute (this will melt the cheese). Remove skillet lid, and you will see the cheese has melted.  Use a spatula and transfer veggies to individual serving plates. Serve hot... and enjoy!

Nutrition Facts
Summer Squash Bacon Sauté
Amount Per Serving (1 (1/3 of total))
Calories 157 Calories from Fat 99
% Daily Value*
Fat 11g17%
Saturated Fat 5g31%
Cholesterol 25mg8%
Sodium 226mg10%
Potassium 469mg13%
Carbohydrates 7g2%
Fiber 2g8%
Sugar 4g4%
Protein 7g14%
Vitamin A 3810IU76%
Vitamin C 25.2mg31%
Calcium 135mg14%
Iron 0.6mg3%
* Percent Daily Values are based on a 2000 calorie diet.

Here’s one more to pin on your Pinterest boards!Summer Squash Bacon Sauté is a simple side dish with green and yellow zucchini, crisp bacon, carrot, onions, garlic and cheese, and takes only minutes to make!

Traeger Smoked Pork Loin Roast

Traeger Smoked Pork Loin Roast (seasoned with dry rub spices) tastes amazing right off the smoker, OR as a tasty pulled pork sandwich, coated in BBQ sauce!

Someone Got A TRAEGER!

My husband has a NEW Traeger grill that he received for his birthday and Father’s Day (what a great combo gift) this past June. We have had fun trying new recipes for chicken, sausages, pork, steak, (and even dessert) ever since!

Someone is excited to have a new Traeger grill!
We were anxious to try pulled pork (as well as a “bazillion” other recipes), so I searched for a spice rub recipe online that sounded like it would be really good. My husband bought a 3 pound pork loin roast and we decided to cook it on our grill, seasoned with some of the spice rub I found online (which is perfect for pork or chicken).

We used the cookbook that came with the grill purchase to determine how long the roast would take to smoke, then slow roast. We crossed our fingers and followed the process exactly, and the results were wonderful! YAY- SUCCESS on a smoked pork loin roast!

Scroll Down For A Printable Recipe Card At The Bottom Of The Page

Here’s How We Made This Delicious Roast On Our Traeger Grill

Start by making the dry spice rub. EASY! Place the dry rub spices in a medium sized bowl. Mix well, to fully combine ingredients. I cut the recipe in half. The flavor-filled dry rub recipe made enough for the pork roast, PLUS a couple of extra uses. We’ve  also used the spice rub on a whole chicken, and STILL have some left over (stored in an airtight container) for the next pork roast or chicken we grill.

Dry rub spices for smoked pork loin

Dry rub to put on pork roast before smoking on grill

Cover all sides of the pork roast with the dry spice rub, patting it onto the surface of the meat. The slight moisture of the meat will help the spices stick!  When done, set seasoned roast aside until ready to put it in the smoker.

Pork loin roast is covered with dry spice rub before smoking meat on grill

Ready To Make A Traeger Smoked Pork Loin Roast?

When ready to begin, turn the Traeger grill to the SMOKE setting. Let it fire up for 4-5 minutes, with the lid OPEN. Once grill is smoking, turn the temperature gauge to 225° F. Close the lid on the grill and let it preheat for 10 to 15 minutes. It doesn’t really matter, but in case you’re curious… we used Mesquite wood pellets for our Traeger smoked pork loin.

Once the grill/smoker is preheated, place an aluminum pan with 2 cups of apple juice into a corner (this will help keep some nice moisture in the grill during the long smoking process). Another option for this is to use a spray bottle and spritz the apple juice onto the roast about once an hour, if desired. Place the seasoned pork loin roast on the grill, FAT SIDE UP. Insert the temperature probe into the meat. Roast the pork for 3 hours, with the lid closed.

Pork loin roast smoking on Traeger grill

After pork has smoked/roasted for 3 hours, transfer the meat into an aluminum pan, and place back onto grill (with temperature probe still attached). Continue to cook the smoked pork loin roast for 5-6 hours, or until the temperature in the thickest part of the meat (not touching any bones) reaches an internal temperature of 190° F. The long cooking time ensures the meat will be very tender!

Smoked pork loin roast moved to aluminum pan on Traeger grill, to finish cooking.

Almost Time to EAT!

This is what the pork loin roast looked like, once it was done. Remove roast from grill. Cover the pan loosely with aluminum foil, and let the meat rest for approximately 30 minutes. Pour any accumulated juices in the pan into a separate container (or gravy separator). Transfer the Traeger smoked pork loin roast to a cutting board.

Finished smoked pork loin roast.

While the pork is still quite hot, slice it OR pull the pork into chunks (or shred with two forks). Be sure to discard any fat or bones (nobody wants a big bite of THAT!). You can add additional seasoning rub (and a little of the reserved juices) to the meat at this point OR mix meat with a favorite BBQ sauce. At that point, it’s ready to gobble up, and we cut off a portion of the Traeger smoked pork loin roast to eat just as it was (with it’s incredible smoked flavor). Yum.

We Shredded Part Of The Pork Loin To Make BBQ Sandwiches

After that, we took the remaining half of the roast, and pulled it into shreds. To the shredded pork we added a delicious a sweet n’ spicy BBQ sauce (Sweet Baby Ray’s), and mixed it until everything was covered! You can still see part of the pink “smoke” ring in the meat before I mixed in the sauce!

Barbecue sauce is added to pulled smoked pork, for sandwiches

Since we decided to make BBQ pulled pork sandwiches, the next thing I did was to lightly toast hamburger buns, piled each one high with shredded BBQ smoked pork, covered the pork with homemade coleslaw (for added crunch), and enjoyed it for dinner!

Oh boy… this was a fantastic BBQ Traeger smoked pork loin sandwich! YUM! We enjoyed the leftovers for days!

Traeger smoked pork loin and BBQ sauce, with coleslaw makes a GREAT tasting sandwich!

I hope you enjoyed seeing the process of making this delicious Traeger smoked pork loin on our grill.  If you own a smoker of any kind, I hope you will consider trying this recipe for your loved ones. We truly enjoyed it, and will make it again, this exact way!

If you have a smoker grill, you might also be interested in my recipe for Berry Cobbler (Traeger Grill Style), another of our first experiments on our Traeger. It was absolutely DELICIOUS!

Looking For More TRAEGER Recipes?

You can find all of my recipes in the Recipe Index, which is located at the top of the page. I have quite a few Traeger recipes you might enjoy, including:

Interested In More Recipes?

Thank you for visiting this website. I appreciate you using some of your valuable time to do soIf you’re interested, I publish a newsletter 2 times per month (1st and 15th) with all the latest recipes, and other fun info. I would be honored to have you join our growing list of subscribers, so you never miss a great recipe!
There is a Newsletter subscription box on the top right side (or bottom) of each blog post, depending on the device you use, where you can easily submit your e-mail address (only) to be included in my mailing list.

You Can Also Find Me On Social Media:

Facebook page: The Grateful Girl Cooks!
Pinterest:
The Grateful Girl Cooks!
Instagram:
jbatthegratefulgirlcooks

Have a wonderful day!

Author's signature

Recipe Source for cooking pork: Cookbook that came with purchase of Traeger grill.
Source for dry rub recipe: https://www.tastesoflizzyt.com/pulled-pork-rub/

↓↓ PRINTABLE RECIPE BELOW ↓↓

0 from 0 votes
Traeger Smoked Pork Loin Roast
Prep Time
15 mins
Cook Time
9 hrs
Total Time
9 hrs 15 mins
 
Traeger Smoked Pork Loin Roast (seasoned with dry rub spices) tastes amazing right off the smoker, OR as a tasty pulled pork sandwich, coated in BBQ sauce!
Category: Dinner, Grill
Cuisine: American
Keyword: smoked pork loin roast
Servings: 10 servings
Calories Per Serving: 246 kcal
Author: JB @ The Grateful Girl Cooks!
Ingredients
Dry Rub Spice Mix (makes about 2 cups total- you need 1/3 cup for this roast. See NOTES below):
  • 1/3 cup dark brown sugar
  • 1/2 cup smoked paprika
  • 1/4 cup garlic powder
  • 1/4 cup salt
  • 2 Tablespoons black pepper
  • 2 Tablespoons chili powder
  • 2 Tablespoons chipotle chili pepper (optional)
  • 2 Tablespoons onion powder
  • 1 Tablespoon cayenne pepper
  • 1 Tablespoon ground cumin
  • 1 Tablespoon dry mustard
For pork roast:
  • 3 pounds pork loin roast
  • 2 cups apple juice
Instructions
  1. Make the dry spice rub by placing spices in a medium sized bowl. Mix well, to fully combine ingredients. Cover roast with about 1/3 cup of the dry spice rub, patting  it onto the surface of the meat, making sure to cover all sides. *You will have leftover spice rub- SEE RECIPE NOTES BELOW)*. When done, set roast aside until ready for smoker.

  2. When ready to begin, turn the Traeger grill to the SMOKE setting. Let it fire up for 4-5 minutes, with the lid OPEN. Once grill is smoking, turn the temperature gauge to 225° F. Close the lid on the grill and let it preheat for 10 to 15 minutes. We used mesquite pellets.

  3. Once the grill/smoker is preheated, place an aluminum pan with 2 cups of apple juice into a corner (this will help keep some nice moisture in the grill during the long smoking process). Another option for this is to use a spray bottle and spritz the apple juice onto the roast about once an hour, if desired. Place the seasoned pork loin roast on the grill, FAT SIDE UP. Insert the temperature probe into thickest part of meat (but not touching any bones). Roast the pork for 3 hours, with the lid closed.

  4. After pork has smoked/roasted for 3 hours, transfer the roast into an aluminum pan, and place back onto grill (with temperature probe still attached).  Continue to cook the smoked pork loin roast for 5-6 hours, or until the temperature in the thickest part of the meat reaches an internal temperature of 190° F.

  5. Remove roast from grill. Cover the pan loosely with aluminum foil, and let the meat rest for approximately 30 minutes. Pour any accumulated juices in the pan into a separate container (or gravy separator). Transfer the roast to a cutting board.

  6. While the pork is still quite hot, slice it, or pull the pork into chunks or shred with two forks. Be sure to discard any fat or bones that you find (nobody wants a big bite of THAT!). You can add additional seasoning rub (and a little of the reserved juices) to the meat at this point OR a favorite BBQ sauce (if using pork to make sandwiches). Serve sliced or pulled, with or without and enjoy the delicious smoky flavor!

Recipe Notes

NOTE: As written, dry rub recipe makes almost 2 cups. I cut the recipe for the dry rub in half. The quantities are easy to cut in half (except for the 1/3 cup of dark brown sugar. If cutting brown sugar in half, use 2 Tablespoons PLUS 2 teaspoons brown sugar). If halved, you'll end up with about 1 cup of spice rub, which is enough for 3 pork roasts or chickens (about 3 pounds each). Each roast uses about 1/3 cup of the rub to cover. Store leftover spice mix in airtight sealed container.

Nutrition Facts
Traeger Smoked Pork Loin Roast
Amount Per Serving (1 g)
Calories 246 Calories from Fat 63
% Daily Value*
Fat 7g11%
Saturated Fat 1g6%
Cholesterol 85mg28%
Sodium 2956mg129%
Potassium 759mg22%
Carbohydrates 14g5%
Fiber 3g13%
Sugar 8g9%
Protein 32g64%
Vitamin A 3830IU77%
Vitamin C 0.7mg1%
Calcium 56mg6%
Iron 3.2mg18%
* Percent Daily Values are based on a 2000 calorie diet.

Here’s one more to pin on your Pinterest boards!Traeger Smoked Pork Loin Roast (seasoned with dry rub spices) tastes amazing right off the smoker, OR as a tasty pulled pork sandwich, coated in BBQ sauce!


Boysenberry Jam

Homemade boysenberry jam is a delicious reminder of summer time at it’s BEST! Learn how to make this classic jam, and can it for long term storage!
Homemade boysenberry jam is a reminder of summer time at it's BEST! Learn how to make this classic jam, and can it for long term storage!

I love summers in Oregon!  Our temperatures climb higher than normal, and the local farms are filled with fresh fruit and vegetables!  I LOVE to go picking at local U-Pick farms, where you can easily pick 10-20 pounds of a variety of fresh berries, apples, pears, peaches, etc., for a fraction of the price you would pay for them at the grocery store!

Growing up in Southern California, I had a Great-Aunt who grew boysenberries in her garden, and we could pick and eat them when we visited in the summer. She also made incredible boysenberry cobblers for us, too! We lived fairly close to Knott’s Berry Farm, which is another place where boysenberries became my FAVORITE berry! 

Scroll Down For A Printable Recipe Card At The Bottom Of The Page

I LOVE Picking Fresh Berries!

I recently picked fresh boysenberries (my favorite berry). I went to our local U-Pick farm early in the morning, while it was still a bit cool. With a smile on my face I spent about an hour walking down rows bursting with fresh berries, and I picked them to my hearts content.

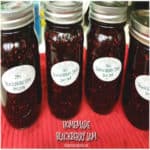
The U-Pick farm I go to each year has a policy that you can nibble for free while you pick, so I tasted several of these juicy beauties while I worked, and enjoyed them a LOT! Once I got home I froze some to use later in the year, ate a lot of fresh berries with breakfast, and made 10 jars of jam, which I will store in our pantry (and give away to family and friends)

Look at the size of that fresh picked boysenberry!

One of our sons came over the next day and got a couple jars of boysenberry jam and  raspberry jam for his own home. It makes me happy to be able to give him some of my fresh homemade preserves!

What Else Can You Make With Boysenberries?

I also love using boysenberries in my recipes for Boysenberry Shortbread Tart, Deep Dish Boysenberry Pie or regular, classic Boysenberry Pie! Boysenberry Cobbler is a favorite, too!

Fresh boysenberries on the vine-ready to be picked to make jam!

The process for making jam is really not too difficult, once you understand the basics. My hope is that this post will walk you through how to make this delicious boysenberry jam, from scratch. Once you are successful, you will be thrilled that you can stock your pantry with homemade jam for long term storage!

I’ll bet you will be ready to make other jams, too, once you’ve started! You might be interested in trying my other jam recipes for Peach, Bing Cherry, Homemade Blackberry, Orange Marmalade, Strawberry or Blueberry, to name a few.

How To Make Boysenberry Jam

Before beginning, make sure you have all the ingredients and equipment (canner, jars, lids, utensils, etc.) ready to go. Wash jars and lids in soapy hot water. Fill a water bath canner half full of water. Bring this to a low simmer.

Fill jars with water and put in canner on an elevated rack, while water is simmering, to keep jars warm (or you can set jars on dish towel on a cookie sheet and keep in oven at 250 degrees for 20 minutes for same effect). At the same time, start a teapot with water going, so I will have boiling water for the jar lids later on when needed.  Put flat jar lids in small bowl. In a large bowl, measure out the exact amount of sugar. Set aside.

Crush the berries one cup at a time (it is very easy if you use a potato masher).NOTE: You will need a couple cups more fresh berries then you think, because you must measure out 6 cups of CRUSHED berries, so plan for that! Put the finely crushed berries (6 cups total) into a large stock pot.

Boysenberries are mashed then added to large pot to cook.

Stir a box of powdered fruit Pectin into the berries. Bring this mixture to a full rolling boil on high heat, stirring constantly (a rolling boil is when it is boiling hard, it won’t stop bubbling even when stirred). Once berries are at full rolling boil stage, stir in all of the sugar quickly (all at once). Stir well to combine.

At this point, I pour boiling water over the jar lids that are in the little separate bowl. Let them just sit in the hot water for 5 minutes while you finish the boysenberry jam.

Pectin is added to boysenberries; it is cooked then sugar is added to fruit.

Bring the jam/juice/pectin/sugar mixture back to a full, rolling boil. Once it is a full rolling boil, boil it for exactly 4 minutes, stirring constantly. When time is up, remove pan from heat, then skim off any accumulated foam (and discard foam). Ladle the hot jam mixture into drained, hot, prepared jars. A wide mouth canning funnel makes this a lot less messy!

Fill the jars, but leave 1/8 inch headspace at the top of each jar. Insert a plastic knife into each jar a couple times to help remove air bubbles. Adjust the headspace if necessary. Use a damp cloth or paper towel to wipe down the rim and edges of the jar (you need it free of debris in order to get a good seal on the jar).

Jam ladled into jars, air removed, then rims wiped clean before canning.

Cover the jars with the hot, flat jar lid. I love my magnetic canning wand that lifts the flat lids out of the hot water easily! Screw on the jar rings tightly. Lower each of the jars onto an elevated rack in the canner. The jars must be completely covered with water, and must have at least an inch of water over the top of the jar. Add more boiling water to canner, if necessary, to make sure.

Cover the canner; bring to a gentle boil. Once the water is boiling, process the jars for 10 minutes.

Jars are sealed then processed in water bath canner.

When done, wait for a couple minutes, then carefully remove canner lid (lift lid away from you because of steam); carefully lift each jar out of water (with canning tongs), and place on a dish towel on the counter to cool. TIP: Do not put jars directly on counter cause you don’t want temperature differences to possibly crack jars. You should hear “ping” sound as the jars of boysenberry jam seal properly.

After the jars cool off, you can check to see they sealed properly by pressing the middle of the lid. The jar should NOT spring back when touched. If it does spring back, then you will need to refrigerate that particular jar. Let the sealed jars stand at room temp for 24 hours, then store unopened in a cool, dark place for up to 1 year. If any jars do NOT seal, store in refrigerator and use immediately.

Jars of jam cooling down on dish towel on counter.

Time To Enjoy Some Boysenberry Jam!

Here is a close up of the boysenberry jam I made,  on a toasted English muffin (just waiting for me to gobble it up). Doesn’t it look yummy? Let me tell ya… it IS GOOD! All I needed with it was a good cup of hot coffee and a comfortable chair to sit in while I enjoyed them both!

Fresh homemade boysenberry jam on english muffins

Yummy boysenberry jam spread onto english muffins.

I really hope you enjoy this boysenberry jam!  It’s my favorite jam of all time! I also hope that you will enjoy the process of making jam, and will be motivated to try other flavors, as well. Don’t forget that you can find ALL of my recipes in the Recipe Index, located at the top of the page. Thanks for stopping by, and come back soon!

Interested In More Recipes?

Thank you for visiting this website. I appreciate you using some of your valuable time to do soIf you’re interested, I publish a newsletter 2 times per month (1st and 15th) with all the latest recipes, and other fun info. I would be honored to have you join our growing list of subscribers, so you never miss a great recipe!
There is a Newsletter subscription box on the top right side (or bottom) of each blog post, depending on the device you use, where you can easily submit your e-mail address (only) to be included in my mailing list.

You Can Also Find Me On Social Media:

Facebook page: The Grateful Girl Cooks!
Pinterest:
The Grateful Girl Cooks!
Instagram:
jbatthegratefulgirlcooks

Have a fantastic day!

Author's signature

Recipe Source: Recipe found inside box of MCP Premium Fruit Pectin

0 from 0 votes
Boysenberry Jam
Prep Time
20 mins
Cook Time
10 mins
Total Time
30 mins
 
Homemade boysenberry jam is a delicious reminder of summer time at it's BEST! Learn how to make this classic jam, and can it for long term storage!
Category: Jam / Canning and Preserving
Cuisine: American
Keyword: boysenberry jam
Servings: 10 half-pint jars (or 5 pint jars)
Calories Per Serving: 44 kcal
Author: JB @ The Grateful Girl Cooks!
Ingredients
  • 6 cups crushed boysenberries
  • 2 ounces powdered fruit pectin , 1 box (some are 1.75 ounces)
  • cups granulated sugar
Instructions
  1. Before beginning, make sure you have all the ingredients and equipment (canner, jars, lids, utensils, etc.) ready to go. Wash jars and lids in soapy hot water. Fill a water canner half full of water. Bring this to a low simmer. Fill jars with water and put on an elevated rack in canner , while water is simmering, to keep jars warm. (Or you can set jars on dish towel on a cookie sheet and keep in oven at 250 degrees for 20 minutes for same effect). At the same time, I start a teapot with water going, (so I will have boiling water for the jar lids later on).  

  2. Put flat jar lids in small bowl and set aside. In a large bowl, measure out the exact amount of sugar needed. Set aside.

  3. Crush the berries one cup at a time (it is very easy if you use a potato masher). Put the finely crushed berries (6 cups total) into a large stock pot. Stir the box of Pectin into the berries. Bring this mixture to a full rolling boil on high heat, stirring constantly (a rolling boil is when it is boiling hard, it won't stop bubbling even when stirred). Once berries are at full rolling boil stage, stir in all of the sugar quickly (all at once). Stir well to combine.

  4. At this point, I pour boiling water over the jar lids that are in the little bowl. Let them just sit in the hot water for 5 minutes while you finish the jam.
  5. Bring the jam/juice/pectin/sugar mixture back to a full, rolling boil. Once it is a full rolling boil, boil it for exactly 4 minutes, stirring constantly. When time is up, remove pan from heat, then skim off any accumulated foam (and discard foam). Ladle the hot jam mixture into drained, hot, prepared jars. Fill the jars, but leave 1/8 inch headspace at the top of each jar. Insert a plastic knife into each jar a couple times to help remove air bubbles. Adjust the headspace if necessary. Use a damp cloth or paper towel to wipe down the rim and edges of the jar (you need it free of debris in order to get a good seal on the jar). Cover the jars with the hot, flat jar lid. Screw on the jar rings tightly. Lower each of the jars onto an elevated rack in the canner. The jars must be completely covered with water, and must have at least an inch of water over the top of the jar. Add more boiling water to canner, if necessary, to make sure.
  6. Cover the canner; bring to a gentle boil. Once the water is boiling, process the jars for 10 minutes. When done, wait for a couple minutes, then carefully remove canner lid (lift lid away from you because of steam); carefully lift each jar out of water (with canning tongs), and place on dish towel on the counter to cool (do not put jars directly on counter cause you don't want temperature differences to possibly crack jars). You should hear "ping" sound as the jars seal properly.
  7. After the jars cool off, you can check to see they sealed properly by pressing the middle of the lid. The jar should NOT spring back when touched. If it does spring back, then you will need to refrigerate that particular jar. Let the sealed jars stand at room temp for 24 hours, then store unopened in a cool, dark place for up to 1 year. If any jars do NOT seal, store in refrigerator and use immediately.
Recipe Notes

Plan ahead... The amount of berries needed is 6 cups CRUSHED berries. Make sure you have a couple cups of extra boysenberries before beginning, to ensure you have the correct amount necessary for this jam!

Nutrition Facts
Boysenberry Jam
Amount Per Serving (1 Tablespoon)
Calories 44
% Daily Value*
Potassium 6mg0%
Carbohydrates 11g4%
Sugar 10g11%
Vitamin A 5IU0%
Vitamin C 0.2mg0%
Calcium 1mg0%
Iron 0.1mg1%
* Percent Daily Values are based on a 2000 calorie diet.

Here’s one more to pin on your Pinterest boards!Homemade boysenberry jam is a delicious reminder of summer time at it's BEST! Learn how to make this classic jam, and can it for long term storage!


Herb Butter For Steaks

Take your summer grilling up a notch with Herb Butter For Steaks! Top a perfectly grilled juicy steak with a simple herb flavored butter compound to add another layer of deliciousness!Take your summer grilling up a notch with Herb Butter For Steaks! Top a juicy steak with a simple herb flavored butter to add another layer of deliciousness!

My husband loves to grill on our BBQ, and one of his absolute favorite things to grill is a nice steak (rib-eyes are his personal favorite). I don’t eat too much steak, but I did have a good sized piece last tie we grilled them, because I wanted to try this herb butter added to the cooked meat.

Many restaurants serve their grilled steaks with a nice pad of flavored butter, because it adds just the perfect finishing touch to a good steak. I searched for and found a recipe on Pinterest that interested me, so I set out to try it! It’s so EASY to make, and it did add another layer of flavor to some pretty tasty steaks!

Scroll Down For A Printable Recipe Card At The Bottom Of The Page

What Ingredients Are Needed For Herb Butter For Steaks?

The necessary items for this herb butter for steaks are only a few simple ingredients: softened butter, lemon zest, minced garlic, salt, pepper, and freshly chopped flat leaf parsley! That’s it!

Simple ingredients used for herb butter

Mix softened butter with all the other ingredients until fully combined.  You will definitely want to use room temperature butter so it mixes easily. A fork will easily mix the ingredients. Once done, set the herb butter for steaks aside, until the meat is finished cooking.

Herb butter is mixed and ready to use on steaks!

Season your steaks with your favorite seasoning. Our favorite is Montreal seasoning (found in most stores). We lightly seasoned the rib-eye steaks after removing them from the refrigerator and let them sit for 30 minutes to take off the chill.

Steaks are seasoned and ready to grill!

The Grillmeister At Work

Onto the old Weber charcoal grill they went, and my hubby Ken (the official “GRILLMEISTER”) cooked them until they reached the desired doneness. I think the smoke from the BBQ must have affected his eyes, cause he’s trying to pour lighter fluid into his wine glass! Ha Ha.

Once done, he removed the meat from the grill, and brought it in to be crowned with the waiting herb butter for steaks!

My husband, (the "Grillmeister") getting ready to grill steaks with herb butter

Cooking rib eye steaks on our Weber grill

To Add The Herb Butter

I find it really convenient to use a small cookie dough scoop to top the steaks with the butter. You can also use a rounded Tablespoon of the herb butter. Both will work well!

I used a cookie scoop to portion out the herb butter for steaks

Top Meat With Herb Butter For Steaks

As soon as steaks are off the grill, transfer them to a serving platter. Immediately top each steak with a small scoop of herb butter.  The heat from the steaks will begin to melt the butter and herbs onto the top of the meat.

As the herb butter melts, it covers the top of the meat, and adds additional spices and flavor finish to a great steak! Let the steaks rest for a few minutes before serving, to allow time for the butter to melt AND for the internal juices in the steak to redistribute throughout the meat.

Herb butter for steaks placed on top of cooked meat where it melts!

That’s all you need to do to add this simple finishing touch to your favorite steak! I told you it was EASY! I really hope you will consider trying this little add-on the next time you cook a steak, and hope you enjoy the extra pop of flavor it adds!

The steaks would taste great served with Easy Grilled Corn On The Cob or Grilled Summer Veggies. Both of these delicious side dishes can also be cooked on the BBQ, which really helps to keep the ol’ kitchen cool during the heat of summer! Have a great day, and be sure to check out ALL my recipes in the Recipe Index, located at the top of the page.

Interested In More Recipes?

Thank you for visiting this website. I appreciate you using some of your valuable time to do soIf you’re interested, I publish a newsletter 2 times per month (1st and 15th) with all the latest recipes, and other fun info. I would be honored to have you join our growing list of subscribers, so you never miss a great recipe!
There is a Newsletter subscription box on the top right side (or bottom) of each blog post, depending on the device you use, where you can easily submit your e-mail address (only) to be included in my mailing list.

You Can Also Find Me On Social Media:

Facebook page: The Grateful Girl Cooks!
Pinterest:
The Grateful Girl Cooks!
Instagram:
jbatthegratefulgirlcooks

Have a GREAT day!

Author's signature

Original recipe source: Beth, at https://www.smalltownwoman.com/simply-perfect-easy-steak-butter/

0 from 0 votes
Herb Butter For Steaks
Prep Time
5 mins
Cook Time
0 mins
Total Time
5 mins
 
Take your summer grilling up a notch with Herb Butter For Steaks! Top a juicy steak with a simple herb flavored butter to add another layer of deliciousness!
Category: Condiment
Cuisine: American
Keyword: herb butter for steaks
Servings: 4 servings
Calories Per Serving: 103 kcal
Author: JB @ The Grateful Girl Cooks!
Ingredients
  • 4 Tablespoons butter , room temperature
  • 2 Tablespoons flat leaf parsley , finely chopped
  • 2 cloves garlic , minced
  • 1 teaspoon lemon rind (zest) , finely grated
  • 1/4 teaspoon sea salt
  • 1/4 teaspoon black pepper
Instructions
  1. Place all ingredients in a small bowl. Add room temperature butter, then add chopped parsley, garlic, lemon zest, salt and pepper. Cover and set aside until ready to use.

  2. Remove steaks from refrigerator approximately 30 minutes before grilling (to take the chill off).  Grill meat until it reaches desired doneness.  When done, remove steaks from grill; transfer to a serving platter. 

  3. Immediately top each steak with a scoop (or rounded Tablespoon) of the herb butter.  Let meat rest for a few minutes so that internal juices redistribute throughout meat. The butter should begin to melt over the top of the hot steaks during this time.  Serve, and enjoy!

Nutrition Facts
Herb Butter For Steaks
Amount Per Serving (1 Tablespoon)
Calories 103 Calories from Fat 99
% Daily Value*
Fat 11g17%
Saturated Fat 7g44%
Cholesterol 30mg10%
Sodium 246mg11%
Potassium 11mg0%
Vitamin A 520IU10%
Vitamin C 3.8mg5%
Calcium 9mg1%
Iron 0.1mg1%
* Percent Daily Values are based on a 2000 calorie diet.

Here’s one more to pin on your Pinterest boards!Take your summer grilling up a notch with Herb Butter For Steaks! Top a juicy steak with a simple herb flavored butter to add another layer of deliciousness!


Perfectly Peachy Ice Cream

Nothing says summer like homemade perfectly peachy ice cream, made with a few simple ingredients like fresh peaches, cream, sugar and spices! You will LOVE it!Nothing says summer like homemade perfectly peachy ice cream, made with a few simple ingredients like fresh peaches, cream, sugar and spices! You will LOVE it!

Made with only a few simple ingredients, this Perfectly Peachy Ice Cream is a scrumptious frozen treat to enjoy during those HOT summer days, or to make any other time of year!

Scroll Down For A Printable Recipe Card At The Bottom Of The Page

Fresh Ripe Peaches Are the Best!

Each summer I love to pick fresh peaches at a local U-Pick farm (usually in late July/early August).  This year my husband asked if we could have fresh peach ice cream as dessert for July 4th, but the local peaches here in Oregon weren’t fully ripe enough to pick.

He ended up going to Costco, and bought a small flat of gorgeous peaches and brought them home, just so we could have this homemade ice cream for Independence Day!

The peaches he bought at the store were absolutely delicious!  Still, there’s just something about picking those peaches right off the tree that screams “summer” to me.  Here are some of the peaches I’ve been able to pick in the past at my local U-Pick peach farm! Aren’t they gorgeous?

Fresh peaches on the tree... ready for me to pick them to make ice cream and pies!

Picked these fresh peaches YUM!

I don’t know about you… but we LOVE peach ice cream!  I have a recipe already on my blog from several years ago for homemade peach ice cream. It uses canned peach nectar and sour cream in it, and tastes wonderful.

This year I wanted to try a simpler peach ice cream recipe with only the basics: peaches, cream, sugar and spices! This delicious ice cream is the result! Boy… is it GOOD! Here’s how to make this wonderful homemade ice cream:

Here’s How To Make Perfectly Peachy Ice Cream

Peel and thinly slice fresh peaches. These were SO juicy! The juice was running down my hands while I sliced them…yum!

Fresh peaches are peeled, then sliced for perfectly peachy ice cream

Place sliced peaches into a large mixing bowl.  Add granulated sugar, juice of one lemon, vanilla and almond extracts and a bit of cinnamon.

Stir to combine, then let fruit sit for 15-20 minutes.  This resting time will allow the peaches to release some of that juicy goodness, AND let the sugar fully dissolve. Once done “resting”, mash the peaches into small pieces using a potato masher.

Fresh peach slices are crushed with a potato masher for ice cream

Once peaches are mashed, remove 2 cups of crushed peaches. Place them in a blender. Puree peaches until you have a smooth fruit mixture.

Part of the peaches are blended for ice cream

Pour the remaining crushed peaches (the ones left in the mixing bowl) into a container, cover, and keep refrigerated until ice cream is finished freezing.

Part of the peaches are set aside and chilled before adding to ice cream.

Getting Ready To FREEZE The Perfectly Peach Ice Cream

Add the heavy whipping cream to the 2 cups of peach puree in the blender. Give it a couple pulses to combine peach puree and whipping cream.  Cover blender (or pour into a container with a lid) and refrigerate this peach puree/cream mixture until very cold.

You can also pour the fruit/cream mixture into large bowl, cover with plastic wrap and refrigerate (but it’s one more bowl to clean- just sayin’!).

After peach/cream mixture is really cold, pour it into cannister of ice cream machine, and freeze ice cream according to the manufacturer’s instructions. I use a Cuisinart machine, and the ice cream is thick and soft serve consistency in about 20 minutes.

Peach ice cream mixture is added to ice cream machine.

Perfectly peach ice cream is done freezing.

Let The Ice Cream “Ripen” In the Freezer, Then ENJOY!

Transfer the ice cream to a bowl with a lid as soon as it is done churning in the freezer. Immediately add the reserved mashed and chilled peaches, and stir to combine. Place lid on container and put it in freezer to “ripen and firm up” for a few hours!

Cold reserved peaches are added to finished ice cream and stirred in.

Once ice cream has firmed up, it is ready to serve and gobble up!  The recipe makes approximately 1½ quarts, which means you will en up with about 12 (half-cup) servings of this delicious frozen “perfectly peachy ice cream”!

Big scoop of perfectly peachy ice cream is served with a mint sprig.

And that is how easy it is to make this delicious, perfectly peachy ice cream! It tasted soooo good, and we loved this easy to prepare, simple recipe! I hope you will consider making it for those you love.

If you love homemade ice cream like we do, be sure to check out the Recipe Index at the top of each blog post where you will find all the homemade ice cream recipes on this blog. They include Blueberry Cheesecake, Candied Bacon, Chocolate Peanut Butter, Coffee, Strawberry, and many others! Enjoy the, and have a great day. Come back soon.

Interested In More Recipes?

Thank you for visiting this website. I appreciate you using some of your valuable time to do soIf you’re interested, I publish a newsletter 2 times per month (1st and 15th) with all the latest recipes, and other fun info. I would be honored to have you join our growing list of subscribers, so you never miss a great recipe!
There is a Newsletter subscription box on the top right side (or bottom) of each blog post, depending on the device you use, where you can easily submit your e-mail address (only) to be included in my mailing list.

You Can Also Find Me On Social Media:

Facebook page: The Grateful Girl Cooks!
Pinterest:
The Grateful Girl Cooks!
Instagram:
jbatthegratefulgirlcooks

Have a wonderful day!

Author's signature

Recipe Source: https://www.makeandtakes.com/fresh-peach-ice-cream

0 from 0 votes
Perfectly Peachy Ice Cream
Prep Time
30 mins
Cook Time
0 mins
Freezer Firming Up Time
2 hrs
Total Time
2 hrs 30 mins
 
Nothing says summer like homemade perfectly peachy ice cream, made with a few simple ingredients like fresh peaches, cream, sugar and spices! You will LOVE it!
Category: Desserts- Ice Cream
Cuisine: American
Keyword: perfectly peachy ice cream
Servings: 12 (1/2 cup)-1½ quarts total
Calories Per Serving: 265 kcal
Author: JB @ The Grateful Girl Cooks!
Ingredients
  • 6 fresh peaches , peeled and sliced thin
  • cups granulated sugar
  • 1 large lemon (juice of)
  • 2 teaspoons vanilla extract
  • 1/8 teaspoon almond extract
  • 1/4 teaspoon ground cinnamon
  • 2 cups heavy whipping cream (no substitutions!)
Instructions
  1. Peel and thinly slice fresh peaches.  Place sliced peaches into a large mixing bowl.  Add granulated sugar, juice of one lemon, vanilla and almond extracts and cinnamon.  Stir to combine, then let fruit sit for 15-20 minutes.  This resting time will allow the peaches to release some of their juicy goodness, AND let the sugar fully dissolve. Once done "resting", smash the peaches into small pieces using a potato masher. 

  2. Once peaches are mashed, remove 2 cups of crushed peaches. Place them in a blender. Puree these two cups of peaches until you have a smooth fruit mixture.

  3. Pour the remaining crushed peaches (the ones left in the mixing bowl) into a container, cover, and keep refrigerated until ice cream is finished freezing.
  4. Add whipping cream to the 2 cups of peach puree in blender. Give it a few pulses to combine peach puree and whipping cream.  Cover blender (or pour into a container with a lid) and refrigerate this peach puree/cream mixture until very cold.  After peach/cream mixture is really cold, pour it into cannister of ice cream machine, and freeze according to the manufacturer's instructions.

  5. Transfer ice cream to a large bowl/container as soon as it is done churning in the freezer. Immediately add reserved mashed/chilled peaches; stir to combine.  Place lid on container and place in freezer to "firm up" for a few hours! When firmed up, serve, and enjoy!

Nutrition Facts
Perfectly Peachy Ice Cream
Amount Per Serving (0.5 cup)
Calories 265 Calories from Fat 126
% Daily Value*
Fat 14g22%
Saturated Fat 9g56%
Cholesterol 54mg18%
Sodium 15mg1%
Potassium 172mg5%
Carbohydrates 33g11%
Fiber 1g4%
Sugar 31g34%
Protein 1g2%
Vitamin A 830IU17%
Vitamin C 6.2mg8%
Calcium 30mg3%
Iron 0.2mg1%
* Percent Daily Values are based on a 2000 calorie diet.

Here’s one more to pin on your Pinterest boards!Nothing says summer like homemade perfectly peachy ice cream, made with a few simple ingredients like fresh peaches, cream, sugar and spices! You will LOVE it!

Simple Chicken Sausage Pasta

Simple chicken sausage pasta is an easy, quick and delicious meal to prepare. Pasta is tossed with Italian spices, olive oil, butter, Parmesan cheese and chicken sausage, then served in this flavor-filled, simple dish!
Simple chicken sausage pasta is an easy, delicious meal to prepare. Pasta is tossed with Italian spices, olive oil, butter, Parmesan cheese and chicken sausage!

We love pasta at our house… do you?  Years ago, I started experimenting with simple pasta dishes that were not drenched in Italian tomato sauce or alfredo sauce, and came up with this EASY, yet great tasting chicken sausage pasta!

We love those traditional sauces I mentioned above, but I was trying to create SIMPLE and QUICK new pasta dishes without using heavy sauces! This one is our favorite! I make this dish when I don’t want to mess with making a sauce, and just want something for dinner that is filling, tasty, and EASY to fix after a busy day.  Sometimes we have it without meat of any kind added, but other times we add it in.

We had two leftover grilled chicken sausages in our refrigerator, so when my husband asked if we could have pasta for dinner, it was so easy to pull this meal together in a matter of minutes!

Scroll Down For A Printable Recipe Card At The Bottom Of The Page

How To Make Simple Chicken Sausage Pasta

This recipe uses two links of Italian flavored chicken sausage, and gives it a little extra protein and flavor! Here’s how to make this chicken sausage pasta:

Two COOKED chicken sausages are sliced, then each slice is cut into quarters. If you want, you can pan cook the sausages while the pasta is cooking (to save time). Set aside the chicken sausages until ready to add to pasta.

Cooked chicken Italian sausages are cut in slices, then into quarter sized pieces.

Prepare pasta according to package instructions. My preferred pasta is fettucine noodles, but regular spaghetti noodles work just as well for this simple meal (I speak from experience!). Once pasta is done cooking, drain noodles in a colander (but do not rinse), then put hot noodles immediately back into the pot you cooked them in (minus the water, of course).

Pasta is cooked according to package instructions.

Cooked pasta is drained, then placed back into pan.

Season The Cooked Pasta

Quickly stir in butter while the pasta is hot so it can melt. Add olive oil and Italian spices, and toss to coat the pasta with the ingredients. Tongs work wonderfully for this! Taste test the pasta. If desired, add additional salt and pepper, to suit your taste buds.

Italian spices, olive oil, butter and Parmesan are added to hot cooked pasta

Add warm chicken sausage to the pasta, and toss well, to combine. If necessary, turn heat on LOW while tossing pasta, just to keep pasta hot. Once mixed, divide pasta and sausage among serving bowls or plates.

Cooked chicken Italian sausage pieces are tossed into seasoned pasta.

Serve The Chicken Sausage Pasta

That’s it! See how simple it is to make this chicken sausage pasta?  To serve, grate additional fresh Parmesan cheese over the top of the hot pasta. Garnish with some chopped flat leaf Italian parsley. I was able to use some parsley that is growing in our little garden-yay!).

Chicken sausage pasta is garnished with parsley and Parmesan cheese.

You don’t have to have a thick sauce to serve up a flavor-filled pasta dish!  This is one of our favorite ways to have pasta… and it takes hardly any time at all to whip this up for dinner!

The finished simple chicken sausage pasta is garnished with Parmesan cheese and fresh parsley.

If you enjoy pasta, you might also want to try Florentine Manicotti, Pasta Carbonara, or Chicken Broccoli Fettucine Alfredo. I heartily recommend any of those recipes. You can find other yummy pasta recipes in my Recipe Index shown at the top of each blog post.

Sure do hope you will give this simple chicken sausage pasta a try! It tastes wonderful using regular (pork) Italian sausages, too. Next time you grill, throw a couple sausages on, then save them in your refrigerator or freezer until you make this dish. It’s a great timesaver!

Interested In More Recipes?

Thank you for visiting this website. I appreciate you using some of your valuable time to do soIf you’re interested, I publish a newsletter 2 times per month (1st and 15th) with all the latest recipes, and other fun info. I would be honored to have you join our growing list of subscribers, so you never miss a great recipe!
There is a Newsletter subscription box on the top right side (or bottom) of each blog post, depending on the device you use, where you can easily submit your e-mail address (only) to be included in my mailing list.

You Can Also Find Me On Social Media:

Facebook page: The Grateful Girl Cooks!
Pinterest:
The Grateful Girl Cooks!
Instagram:
jbatthegratefulgirlcooks

Have a wonderful day, and may God bless you in all you do!

Author's signature

0 from 0 votes
Simple Chicken Sausage Pasta
Prep Time
10 mins
Cook Time
11 mins
Total Time
21 mins
 
Simple chicken sausage pasta is an easy, delicious meal to prepare. Pasta is tossed with Italian spices, olive oil, butter, Parmesan cheese and chicken sausage!
Category: Entree
Cuisine: Italian
Keyword: chicken sausage pasta
Servings: 4 servings
Calories Per Serving: 440 kcal
Author: JB @ The Grateful Girl Cooks!
Ingredients
  • 2 links Italian chicken sausage , cooked
  • 8 ounces fettucine pasta (1/2 pound)
  • 2 Tablespoons butter
  • 2 Tablespoons extra virgin olive oil
  • 1/4 teaspoon garlic powder
  • 1/4 teaspoon Italian seasoning
  • 1/8 teaspoon dried oregano
  • 1/4 cup Parmesan cheese , grated
  • 1-2 pinches salt/pepper ,to taste
  • 4 teaspoons Parmesan cheese , for garnish (optional)
  • 2 Tablespoons Flat leaf Italian parsley (fresh) , for garnish (optional)
Instructions
  1. Slice two COOKED chicken sausages into 1/2 inch slices, then cut each slice into quarters. You can pan cook the sausages while the pasta is cooking (to save time). Set aside cooked chicken sausage pieces until ready to add to cooked pasta.

  2. Prepare pasta according to package directions.  When pasta is done, drain noodles in a colander (do not rinse), then put them back into pot you cooked them in (minus the water, of course).

  3. Quickly stir in butter while the pasta is hot so it can melt. Add olive oil and Italian spices, and toss to coat the pasta with the butter, oil and spices.  Taste test pasta. If desired, add additional salt and pepper, to suit your taste buds. Add chicken sausage to pasta and toss, to combine. If necessary, turn heat on LOW while tossing pasta, just to keep pasta hot.

  4. To serve, divide pasta and sausage among serving bowls, grate additional fresh Parmesan cheese over the top of the hot pasta, then garnish with chopped flat leaf Italian parsley. Enjoy! 

Recipe Notes

Caloric calculation does not include optional garnish of additional Parmesan cheese and parsley.

Nutrition Facts
Simple Chicken Sausage Pasta
Amount Per Serving (1 (1/4 of total))
Calories 440 Calories from Fat 198
% Daily Value*
Fat 22g34%
Saturated Fat 7g44%
Cholesterol 96mg32%
Sodium 606mg26%
Potassium 138mg4%
Carbohydrates 42g14%
Fiber 1g4%
Sugar 1g1%
Protein 16g32%
Vitamin A 410IU8%
Vitamin C 0.6mg1%
Calcium 94mg9%
Iron 1.5mg8%
* Percent Daily Values are based on a 2000 calorie diet.

Here’s one more to pin on your Pinterest boards!Simple chicken sausage pasta is an easy, delicious meal to prepare. Pasta is tossed with Italian spices, olive oil, butter, Parmesan cheese and chicken sausage! 


Berry Cobbler Traeger Grill Style

Make an incredibly delicious berry cobbler Traeger grill style, by cooking this dessert, with blackberries, blueberries and raspberries on a BBQ (or in oven)! Make an incredibly delicious berry cobbler Traeger grill style, by cooking this dessert, with blackberries, blueberries and raspberries on a BBQ (or in oven)!

Who wants a serving of berry cobbler, made Traeger grill style? That’s right! Did you know you can make a scrumptious fruit cobbler on a BBQ? Guess what? It tastes GREAT!

My husband recently received a new Traeger smoker grill for a combination birthday/Father’s Day present. I had been saving my money for a long time to buy him one as a special surprise (he’d wanted one for almost a year since he saw a demo), and boy, was he excited when he saw what I asked him to help me unload from the back of our truck!

Now that we had the grill, we had to figure out how to use it – DUH! (our first smoker). Certainly, we were used to using our Weber charcoal grill (direct heat). We also knew a Traeger grill could also double as an oven (due to using indirect heat), so we set about researching various recipes to try.

Scroll Down For A Printable Recipe Card At The Bottom Of The Page

Experimenting With Our New Traeger Grill

Our first attempt turned out wonderful as we smoked and grilled chicken Italian sausages, a rib eye steak, and several chicken breasts.  For our second go around with the Traeger, we smoked a pork loin roast (made some tasty BBQ pork sandwiches) and a whole chicken.

We then finished the day off by cooking a delicious triple berry cobbler for dessert ON THE GRILL. **Head implodes**. Who knew you could do that? We sure didn’t… until we bought this grill (see that big smile on my hubby’s face when I surprised him with it?).

My husband, with his new Traeger grill.

The berry cobbler we finished off the grilling session with is incredibly EASY to make… and delicious! I tweaked a rhubarb cobbler recipe I found on their app and adapted it for triple berries!

Berry Cobbler For The Traeger Grill OR In The Oven!

This recipe was specifically written for cooking the cobbler on a Traeger grill, BUT… it can just as easily be made in your oven… honest! Directions for baking it in the oven are included in the printable recipe below. I love the idea of being able to “bake” something on a hot summer’s day without heating up the kitchen, if I’m being honest. This has opened up new experimental cooking adventures for me, to be sure!

Here’s How To Make Berry Cobbler Traeger Style!

Combine frozen blackberries, blueberries and raspberries in a large mixing bowl. The recipe calls for mixed berries (I ended up using 3 full cups of frozen unsweetened mixed berries, straight out of a Richland frozen combo bag from Costco!). The frozen berries are then mixed with brown sugar, lemon juice, lemon zest, vanilla and a little pinch of salt.

Blackberries, blueberries and raspberries are mixed with brown sugar, etc. for cobbler

After the berries were coated well, I placed them in a 10″ cast iron skillet (you can also use an 8×8 aluminum pan for grilling) or an 8×8 baking dish (if baking in oven). I let them sit in the skillet and thaw while I was making the cobbler topping. Any accumulated juices from the thawing fruit stayed in the skillet.

Berries (for cobbler) are placed into cast iron skillet.

Make The Topping For The Cobbler

The berry cobbler topping is made by mixing flour, sugar, baking powder and salt in a medium bowl. COLD butter is cut into the flour with a pastry blender (or a couple forks) until the butter is the size of peas. Once mixed, sour cream is gently stirred into the mixture only until the dough begins to come together.

Dough is made for topping the berry cobbler.

The dough is then pinched into small pieces and placed all over the top of the fruit for the cobbler.

Dough is pinched off and covers the entire surface of the fruit for cobbler.

Granulated sugar is lightly sprinkled on top of the cobbler dough, then the berry cobbler is ready to be cooked on the smoker or in the oven..

Instructions For Baking In OVEN

If planning to bake in oven, preheat oven to 350°, then bake for 30-35 minutes or until topping is golden brown, and juices are bubbling around the edges. If you are using a Traeger grill, follow instructions below.

Instructions For Cooking On Traeger Grill Or Other Smoker

The Traeger grill is started on the “Smoke” setting with the lid open for 4-5 minutes, or until the fire has been established and grill is smoking. Turn temperature setting to 350° and preheat the grill for 10-15 minutes with the lid closed until temperature has been reached.

Place cast iron skillet (or aluminum pan) directly onto the grill grate. Close lid, and cook the cobbler for 35 minutes at 350° (may take just a few minutes longer if you want the topping to be more golden brown in color).  Cook until the dough topping is golden brown, and the juices are bubbling up all around the edges of the cobbler.

Once done, carefully remove skillet from grill (remember the pan is very HOT).  Let cobbler cool down for a few minutes, then scoop it up and serve. That’s how you make this scrumptious berry cobbler Traeger grill style!

Berry cobbler in cast iron skillet is cooked outside on a Traeger grill

Finished berry cobbler Traeger grill style!

See how good the inside of the cobbler looks? YUM. Only one thing can possibly make this triple berry cobbler taste even better. What on earth could THAT be?

An inside peek at the berry cobbler cooked on our Traeger grill!

Yep… a BIG scoop of homemade vanilla ice cream is the perfect finishing touch for this amazing tasting cobbler! If you like this cobbler, you might also want to take a look at my recipe for Strawberry Cobbler (baked). It’s yummy, too!

Berry Cobbler Trager grill style, served with a scoop of homemade vanilla ice cream!

We really LOVED this berry cobbler, cooked Traeger grill style! I am excited to try other desserts on the grill, as well, including chocolate chip cookies!  I hope you will consider making this recipe. I realize lots of people do not have Traeger grills, but this is a very good tasting cobbler, so I would encourage you to make it in your oven. It will taste DELICIOUS!

Looking For More “Traeger Smoked” Dessert Recipes?

You can find all of my recipes in the Recipe Index, located at the top of the page. You might enjoy some additional “smoked” dessert recipes we have cooked on our Traeger smoker, including:

Interested In More Recipes?

Thank you for visiting this website. I appreciate you using some of your valuable time to do soIf you’re interested, I publish a newsletter 2 times per month (1st and 15th) with all the latest recipes, and other fun info. I would be honored to have you join our growing list of subscribers, so you never miss a great recipe!
There is a Newsletter subscription box on the top right side (or bottom) of each blog post, depending on the device you use, where you can easily submit your e-mail address (only) to be included in my mailing list.

You Can Also Find Me On Social Media:

Facebook page: The Grateful Girl Cooks!
Pinterest:
The Grateful Girl Cooks!
Instagram:
jbatthegratefulgirlcooks

Have a fantastic day!

Author's signature

Recipe Adapted from: https://www.traegergrills.com/recipes/baked-goods/rhubarb-cobbler

0 from 0 votes
Berry Cobbler (Traeger Grill Style)
Prep Time
15 mins
Cook Time
35 mins
Total Time
50 mins
 
Make an incredibly delicious berry cobbler Traeger grill style, by cooking this dessert, with blackberries, blueberries and raspberries on a BBQ (or in oven)! 
Category: Dessert, Grill
Cuisine: American
Keyword: berry cobbler
Servings: 8 servings
Calories Per Serving: 371 kcal
Author: JB @ The Grateful Girl Cooks!
Ingredients
For Fruit Filling
  • 3 cups mixed berries (blackberries, blueberries, raspberries) ,frozen
  • 1 cup brown sugar
  • 1 pinch salt
  • 1 teaspoon lemon zest , finely grated
  • 1 lemon (juice of)
  • 1 teaspoon vanilla extract
For Cobbler Topping
  • cups all purpose flour
  • 3 Tablespoons granulated sugar
  • 1.5 teaspoons Baking powder
  • 1/2 teaspoon salt
  • 8 Tablespoons COLD butter , 1 cube= 1/2 cup
  • 1/2 cup sour cream
  • 2 Tablespoons raw sugar
Instructions
  1. Combine frozen blackberries, blueberries and raspberries in a large mixing bowl. Add brown sugar, lemon juice, lemon zest, vanilla and a little pinch of salt. Stir to fully coat fruit. Place fruit in a 10" cast iron skillet (or an 8x8 aluminum pan for grilling) or an 8x8 baking dish (if baking in oven). Let fruit sit in skillet and thaw while you make cobbler topping. Leave any accumulated juices from the thawing fruit in skillet. Set aside.

  2. Make cobbler topping by mixing flour, sugar, baking powder and salt in a medium bowl. COLD butter is cut into the flour with a pastry blender (or a couple forks) until the butter is the size of peas.  Once mixed, gently stir sour cream into the mixture (only until the dough begins to come together). Pinch dough into small pieces and place over the top of the fruit until covered. Sprinkle top of cobbler with raw sugar, if desired.

If Baking In Oven:
  1. If baking in oven, preheat oven to 350°, then bake for 30-35 minutes or until top of cobbler is golden brown and juices are bubbling around the edges.

If Using Traeger Grill:
  1. Start Traeger grill on the "Smoke" setting with the lid open for 4-5 minutes, or until the fire has been established and grill begins smoking. Turn temperature setting to 350° and preheat the grill for 10-15 minutes with the lid closed until temperature has been reached.  Place cast iron skillet (or aluminum pan) directly onto the grill grate. Close lid, and cook the cobbler for 35 minutes at 350° (may take just a few minutes longer if you want the topping to be more golden brown in color). Cook until the dough topping is golden brown, and the juices are bubbling up around the edges of the cobbler.

  2. Once cobbler is done, carefully remove skillet from grill or oven (remember the cast iron skillet will be very HOT). Let cobbler cool down for a few minutes, then scoop it up and serve warm, with a scoop of vanilla ice cream! ENJOY!

Recipe Notes

Traeger suggests using Apple or Pecan wood for this dessert. We ended up using Mesquite left over from cooking chicken and pork - no noticeable difference in taste!

Nutrition Facts
Berry Cobbler (Traeger Grill Style)
Amount Per Serving (1 serving)
Calories 371 Calories from Fat 117
% Daily Value*
Fat 13g20%
Saturated Fat 8g50%
Cholesterol 35mg12%
Sodium 269mg12%
Potassium 123mg4%
Carbohydrates 60g20%
Fiber 2g8%
Sugar 39g43%
Protein 3g6%
Vitamin A 425IU9%
Vitamin C 3.4mg4%
Calcium 55mg6%
Iron 1.4mg8%
* Percent Daily Values are based on a 2000 calorie diet.

Here’s one more to pin on your Pinterest boards!Make an incredibly delicious berry cobbler Traeger grill style, by cooking this dessert, with blackberries, blueberries and raspberries on a BBQ (or in oven)!

Raspberry Lemon Crumb Cake

You will LOVE this easy, delicious Raspberry Lemon Crumb Cake, which can be served as a dessert (yummy with a scoop of ice cream) OR a breakfast coffeecake.

This time of the year is the PERFECT time to find ripe raspberries at local farms or in the local produce section at the grocery store. Then you can make this absolutely yummy raspberry lemon crumb cake!

This past weekend I took my sister and brother-in-law raspberry picking at a local U-Pick farm. They were visiting Oregon from Southern CA for several days, and this is one of the activities my sister really enjoys when she comes up here to visit.

Scroll Down For A Printable Recipe Card At The Bottom Of The Page

Where I Go To Pick Fresh Berries Every Summer

Rowell Brothers Berry Farm has been around since 1853, is about 15 minutes from our home, and is one of the scenic places I LOVE to pick raspberries, blueberries, and boysenberries each summer (plus the fact that you can eat berries for free while you pick is always fun!).

We got to the farm early in the morning, picked raspberries for half an hour and then we were done! Over eight pounds of raspberries picked in half an hour, and we only paid a little over $10, which is a real deal, compared to what they sell for at the grocery store.

A couple days later I used the berries to make homemade raspberry jam , froze a lot of them to use another time, and then also made this delicious raspberry lemon crumb cake with the remaining berries!

Raspberries ready to pick at local U-Pick farm!Fresh picked raspberries are so delicious!

How I Got This Recipe For Raspberry Lemon Crumb Cake

I received this recipe from a friend from Southern California 3 years ago.  Diane and I grew up together in the youth group at church, and ran into each other once again at a music group reunion we both attended. I hadn’t seen her in over 40 years! It was fun catching up with her, and I learned she had attended culinary school in the past.  Ooh… how fun!

Once I returned home to Oregon, Diane sent me this recipe via e-mail and suggested I might enjoy trying it!  I saved the recipe in a basket which contains a HUGE pile of recipes I want to try (too many recipes, never enough TIME), and just this week finally hunted it down and pulled it out to use with these fresh picked raspberries! So glad I did – this is a delicious recipe!

The recipe is incredibly EASY, and the fruit-filled crumb cake tastes wonderful.  We enjoy a slice for breakfast, accompanied by a good, strong cup of coffee! My husband said his favorite way to eat this would be with a big ol’ scoop of vanilla ice cream on the side!  It’s that versatile – it can be either a breakfast coffeecake or a dessert cake!

Here’s How To Make Raspberry Lemon Crumb Cake

Very cold chunks of butter are cut into flour sugar and salt, using a pastry blender. The butter is worked into the dry ingredients until mixture is crumbly and butter is about the size of a pea. One half of a cup of the crumbly mixture is set aside to use for a crumb topping for the cake later on.

Butter is cut into flour and sugar for cake

The remaining flour mixture is combined with baking powder, baking soda, egg, buttermilk and fresh lemon juice, and blended until fully combined.

Egg, lemon juice and buttermilk are blended into dry ingredients for cake

Fresh raspberries are gently stirred into cake batter.  The batter is then placed into a cake pan that has been coated (bottom and sides) with non-stick cooking spray.

Raspberries are gently stirred into batter, then batter is placed in cake pan

Lemon zest and juice are then added to the reserved flour mixture that was set aside earlier. This crumb topping is mixed until combined, then sprinkled over the top of the cake batter in cake pan.

Lemon zest and juice added to crumb topping, then sprinkled onto cake batter

Time To Bake The Cake!

The raspberry lemon crumb cake is baked in a preheated 350°F oven for 25-30 minutes, or until the cake springs back when touched lightly in the center. This picture below shows how it looked straight out of the oven.

Raspberry lemon crumb cake, right out of the oven.

Once the cake cooled to room temperature, it was cut into 8 wedges. The top was garnished with a few raspberries and a sprig of fresh mint (from my garden!).

Raspberry lemon crumb cake cut in 8 wedges, garnished with raspberries and mint leaf.

The inside look at a slice of this raspberry cake in pan.

Time To EAT!

You can see what the raspberry lemon crumb cake looks like on the plate. It’s LOADED with raspberries! The cake is not dry at all, and the combination of raspberry and lemon flavors are absolutely perfect!

A slice of raspberry lemon crumb cake, served on a white plate

Slice of raspberry lemon crumb cake, with fresh raspberries and mint garnish.

We truly enjoyed this simple, yet delicious raspberry lemon crumb cake!  I really hope you will consider trying this cake for yourself… you will be surprised just how easy it is to make, and hope you will enjoy it, as well!

Looking For More CAKE Recipes?

You can find ALL my recipes in the Recipe Index, located at the top of the page. I have a nice variety of delicious cake recipes, including:

Interested In More Recipes?

Thank you for visiting this website. I appreciate you using some of your valuable time to do soIf you’re interested, I publish a newsletter 2 times per month (1st and 15th) with all the latest recipes, and other fun info. I would be honored to have you join our growing list of subscribers, so you never miss a great recipe!
There is a Newsletter subscription box on the top right side (or bottom) of each blog post, depending on the device you use, where you can easily submit your e-mail address (only) to be included in my mailing list.

You Can Also Find Me On Social Media:

Facebook page: The Grateful Girl Cooks!
Pinterest:
The Grateful Girl Cooks!
Instagram:
jbatthegratefulgirlcooks

Have a wonderful day!

Author's signature

Recipe Source: Diane Schultz O’Brien

0 from 0 votes
Raspberry Lemon Crumb Cake
Prep Time
10 mins
Cook Time
30 mins
Total Time
40 mins
 
You will LOVE this easy, delicious Raspberry Lemon Crumb Cake, which can be served as a dessert (yummy with a scoop of ice cream) OR a breakfast coffeecake. 
Category: Dessert or Coffeecake
Cuisine: American
Keyword: raspberry lemon crumb cake
Servings: 8 slices
Calories Per Serving: 207 kcal
Author: JB @ The Grateful Girl Cooks!
Ingredients
  • cups all purpose flour
  • 2/3 cup granulated sugar
  • 1/8 teaspoon salt
  • 1/4 cup butter (very cold)
  • 1/2 teaspoon baking powder
  • 1/4 teaspoon baking soda
  • 1/3 cup buttermilk (low-fat)
  • 2 Tablespoons lemon juice (fresh)
  • 1 egg
  • 1 cup fresh raspberries
  • 2 teaspoons lemon zest (finely grated lemon rind)
  • 3/4 teaspoon lemon juice (fresh)
Instructions
  1. Preheat oven to 350°F. Coat an 8" round cake pan with non-stick cooking spray (bottom and sides).

  2. Place flour, granulated sugar and salt in a large mixing bowl. Cut in chunks of COLD butter, using a pastry blender or 2 knives or forks, until the butter/crumbs are about the size of peas.  Measure out 1/2 cup of this crumb mixture and set aside to use as crumb topping later (set aside).

  3. To the mixing bowl with remaining flour mixture add the baking powder, baking soda, buttermilk, lemon juice, and egg. Beat on medium speed with a mixer until well blended. Gently STIR in fresh raspberries until fully combined with batter. Spoon batter into the prepared (sprayed) cake pan. Gently spread to cover bottom of pan.

  4. Take the reserved flour/crumb mixture and add lemon zest and juice to it. Combine these ingredients with a fork until crumbly.  Sprinkle this mixture over the top of the cake batter, until top of cake is covered.

  5. Bake cake on center rack of preheated 350°F oven for 25-30 minutes or until it is light golden brown on top and cake springs back with touched lightly in the center (mine took 30 minutes). Remove cake pan to a wire rack to cool to room temperature. Slice into 8 wedges, and garnish cake with fresh raspberries and a mint sprig, if desired. ENJOY!

Nutrition Facts
Raspberry Lemon Crumb Cake
Amount Per Serving (1 slice)
Calories 207 Calories from Fat 54
% Daily Value*
Fat 6g9%
Saturated Fat 3g19%
Cholesterol 36mg12%
Sodium 140mg6%
Potassium 91mg3%
Carbohydrates 34g11%
Fiber 1g4%
Sugar 17g19%
Protein 3g6%
Vitamin A 205IU4%
Vitamin C 6.2mg8%
Calcium 34mg3%
Iron 1.1mg6%
* Percent Daily Values are based on a 2000 calorie diet.

Here’s one more to pin on your Pinterest boards!You will LOVE this easy, delicious Raspberry Lemon Crumb Cake, which can be served as a dessert (yummy with a scoop of ice cream) OR a breakfast coffeecake.

Homemade Blackberry Jam

Enjoy the taste of summer berries all year long by making homemade blackberry jam! Instructions included for canning this jam for long term storage.

Do you enjoy fresh blackberries when they are at their peak during the Summer season? We sure do! I LOVE fresh blackberries, and especially homemade blackberry jam!

We are blessed here in our “neck of the woods” in Oregon to have an abundance of fresh blackberries growing wild EVERYWHERE!

You can you pick them at a local U-Pick farms, find them growing along the road, or (in our case), growing wild right along our back fence, or at the local elementary school!

Scroll Down For A Printable Recipe Card At The Bottom Of The Page

What Else Can You Use Fresh Blackberries For?

These delicious berries can be used in a variety of yummy dishes, such as Blackberry Scones, Blackberry Soda, Blackberry Cobbler, or Blackberry Pie Bars!

These delectable berries can also be used to make jars of scrumptious homemade blackberry jam!

Blackberries, ready for picking!

Two buckets of fresh picked blackberries- time to make JAM!

What Do I Need To Make Homemade Blackberry Jam?

The process for making blackberry jam is fairly simple, and requires only a few ingredients, the most important ingredient being fresh blackberries!

This recipe requires 5¾ cups of fresh berries, which is is the equivalent of approximately 6 pint-sized baskets you can find at the grocery store. You will also need lemon juice, sugar, pectin. You will also need canning jars, lids, and a water bath canner.

This recipe also uses powdered pectin, which is a substance that is naturally found in some types of fruit. Pectin is sold in powdered or liquid form (usually in the baking section) at most grocery stores. This jam recipe uses powdered fruit pectin.

The recipe as written below yields a quantity of 5 pint jars of jam, or if you want smaller jars, 9-10 half-pints of homemade jam.

Fresh picked blackberries in a box.

Rinsing blackberries in a colander, before making jam

Canning Homemade Blackberry Jam

The process is fairly straightforward, and even if you have not canned jam before, I think you will be surprised how simple it actually is!

Cooking blackberries to make homemade jam.

Blackberries are cooked with sugar, lemon juice and pectin. Warm, sterilized canning jars are then filled with the hot jam.

Air is removed from the jars, the rims are wiped clean, and then flat lids are placed on top and screwed down.

Sterile canning jars and canning funnel ready to fill with blackberry jam

How Long Does It Take To Process The Jars Of Jam?

The canning jars full of jam are then placed on a raised rack, and processed in a boiling water bath canner for 10 minutes.

Jars of jam sit on a rack in water bath canner

Filled jars are processed in a water bath canner

Once the jam is finished processing, the hot jars are removed from canner and are transferred to a dish towel on the counter, where they sit and cool down/stabilize for several hours. The jars will make a “pinging” sound as each jar seals securely.

Homemade blackberry jam, processed in jars and ready to store in pantry

Once you know the jars of jam have sealed properly, the only thing left to do is wipe the jars clean, attach a label to identify the contents, and store jars in the pantry.

Time To Enjoy Some Jam!

Once you’re ready for some delicious, jam, simply open a jar, and spread a bit on toast, biscuits or English muffins. Take a huge bite…and enjoy this “little taste of Summer”!

Toast with blackberry jam on a plate.

Had to try a bite of that toast and homemade blackberry jam!

I am confident you will LOVE this blackberry jam! I’ve made it many times. Once I learned “how” to can jam and jellies, it changed everything for me. I no longer have to buy jam at the grocery store.

It’s also very convenient to have extra jars of homemade jam in my pantry to give a thoughtful, homemade gift to to family and friends (and they love receiving the jam, as well!).

This girl (me, myself and I) sincerely hopes you will consider making your very own homemade jam! It sure is nice to can jars of it to stock up the ol’ family cupboards! YUM!

Looking For More JAM Recipes?

You can find ALL my recipes in the Recipe Index, located at the top of the page. I have quite a few delicious homemade jam recipes, including:

Want More Recipes? Get My FREE Newsletter!

I publish a newsletter 2 times per month (1st and 15th) with lots of recipes, tips, etc..
Would you like to join our growing list of subscribers?

There is a Newsletter subscription box on the top right (or bottom) of each blog post, depending on the device you use.
You can submit your e-mail address there, to be added to my mailing list.

Find Me On Social Media:

Facebook page: The Grateful Girl Cooks!
Pinterest:
The Grateful Girl Cooks!
Instagram:
jbatthegratefulgirlcooks

Author's signature

Recipe Source: Instructions found inside a box of MCP Premium Fruit Pectin

↓↓ PRINTABLE RECIPE BELOW ↓↓

0 from 0 votes
Homemade Blackberry Jam
Prep Time
30 mins
Cook Time
10 mins
Total Time
40 mins
 
Enjoy the taste of summer berries all year long by making homemade blackberry jam! Instructions included for canning this jam for long term storage.
Category: Jam / Canning and Preserving
Cuisine: American
Keyword: blackberry jam
Servings: 10 cups (5 pint or 10 half-pint jars)
Calories Per Serving: 47 kcal
Author: JB @ The Grateful Girl Cooks!
Ingredients
  • cups fresh blackberries (approx. 6 pint-sized baskets)
  • 1/4 cup fresh lemon juice
  • 2 ounces powdered Fruit Pectin ( 1 box)
  • 8 cups sugar
Instructions
  1. Before beginning, make sure you have all the ingredients and equipment (canner, jars, lids, utensils, etc.) ready to go. Wash jars and lids in soapy hot water. Fill a water canner half full of water. Bring this to a low simmer. Fill jars with water and put on an elevated rack in canner , while water is simmering, to keep jars warm. (Or you can set jars on dish towel on a cookie sheet and keep in oven at 250 degrees for 20 minutes for same effect). At the same time, I start a teapot with water going, (so I will have boiling water for the jar lids later on).

  2. Put flat jar lids in small bowl and set aside. In a large bowl, measure out the exact amount of sugar needed. Set aside.
  3. Crush the berries one cup at a time (it is very easy if you use a potato masher). Put the finely crushed berries (5¾ cups total) into a large stock pot. Add lemon juice. Stir the box of Pectin into the berries. Bring this mixture to a full rolling boil on high heat, stirring constantly (a rolling boil is when it is boiling hard, it won't stop bubbling even when stirred). Once berries are at full rolling boil stage, stir in all of the sugar quickly (all at once). Stir well to combine.

  4. At this point, I pour boiling water over the jar lids that are in the small bowl. Let them just sit in the hot water for 5 minutes while you finish the jam.

  5. Bring the jam/juice/pectin/sugar mixture back to a full, rolling boil. Once it is a full rolling boil, boil it for exactly 4 minutes, stirring constantly. When time is up, remove pan from heat, then skim off any accumulated foam (and discard foam). Ladle the hot jam mixture into drained, hot, prepared jars. Fill the jars, but leave 1/8 inch headspace at the top of each jar. Insert a plastic knife into each jar a couple times to help remove air bubbles. Adjust the headspace if necessary. Use a damp cloth or paper towel to wipe down the rim and edges of the jar (you need it free of debris in order to get a good seal on the jar). Cover the jars with the hot, flat jar lid. Screw on the jar rings tightly. Lower each of the jars onto an elevated rack in the canner. The jars must be completely covered with water, and must have at least an inch of water over the top of the jar. Add more boiling water to canner, if necessary, to make sure.

  6. Cover the canner; bring to a gentle boil. Once the water is boiling, process the jars for 10 minutes. When done, wait for a couple minutes, then carefully remove canner lid (lift lid away from you because of steam); carefully lift each jar out of water (with canning tongs), and place on dish towel on the counter to cool (do not put jars directly on counter cause you don't want temperature differences to possibly crack jars). You should hear "ping" sound as the jars seal properly.
  7. After the jars cool off, you can check to see they sealed properly by pressing the middle of the lid. The jar should NOT spring back when touched. If it does spring back, then you will need to refrigerate that particular jar. Let the sealed jars stand at room temp for 24 hours, then store unopened in a cool, dark place for up to 1 year. If any jars do NOT seal, store in refrigerator and use immediately.
Nutrition Facts
Homemade Blackberry Jam
Amount Per Serving (1 Tablespoon)
Calories 47
% Daily Value*
Potassium 29mg1%
Carbohydrates 12g4%
Sugar 10g11%
Vitamin A 40IU1%
Vitamin C 3.9mg5%
Calcium 5mg1%
Iron 0.1mg1%
* Percent Daily Values are based on a 2000 calorie diet.

Here’s one more to pin on your Pinterest boards!Enjoy the taste of summer berries all year long by making homemade blackberry jam! Instructions included for canning this jam for long term storage.


Chicken Broccoli Fettucine Alfredo

Chicken Broccoli Fettucine Alfredo- this classic Italian dish with a creamy butter Parmesan sauce is delicious, and can be on the table in about 30 minutes!

You know what? Right up front I have to tell you this “all in one” meal is fairly high in calories, but I gotta be honest here… sometimes you just have to enjoy yourself! This dish is Italian comfort food at it’s very best!!!

Chicken broccoli fettucine alfredo is one of my favorite Italian dishes, but I only make it occasionally, because it has more delicious calories than I need to routinely consume in one meal!

But… having said that, I cannot say enough GOOD things about this dish- the pasta is coated in a creamy Parmesan butter alfredo sauce packed with flavor, and features chicken breasts and broccoli… an all in one dinner! It tastes DELICIOUS! Oh boy… is it ever delicious!

Scroll Down For A Printable Recipe Card At The Bottom Of The Page

SO HOW DO I MAKE CHICKEN BROCCOLI FETTUCINE ALFREDO?

The first thing you will need to do is make the alfredo sauce for the pasta. It’s EASY!  Melt butter in a large skillet. Once butter is melted, add heavy whipping cream, pepper, and garlic powder. Stir until combined. Cook this sauce for about 5 minutes on medium low. Try to NOT let it come to a boil.

Butter is melted for fettucine alfredo sauce

Heavy whipping cream is added to alfredo sauce in pan

Add grated fresh Parmesan cheese to the sauce, and stir to combine. Cook these ingredients on medium low until the cheese has melted and the sauce has thickened.

Grated Parmesan cheese is added to alfredo sauce in pan

Alfredo sauce has thickened to the perfect consistency

Prepare The “Add-Ins”

NOTE: (This step can be done ahead of time!) Cook broccoli florets (either fresh or frozen). I use fresh broccoli florets and steam them over boiling water until they are done. Set aside until you’re ready to add them to the sauce. Cut the cooked chicken breast into bite-sized pieces.

Broccoli florets are steamed before adding to alfredo sauce

Cooked chicken breasts are cut into cubes before adding to alfredo sauce.

Cook fettucine pasta according to the package directions.  When done, drain pasta well.

Fettucine noodles cooking in pan

Finishing The Chicken Broccoli Fettucine Alfredo

Add cooked and drained fettucine noodles to the alfredo sauce.  Next add cooked broccoli and chicken pieces.  Stir well, to combine ingredients and fully coat everything with the alfredo sauce. TIP: If the mixture seems too thick, simply add a bit more whipping cream to the pan, and stir to blend it in.

Taste test the pasta (it’s a hard job, but someone’s gotta do it). Season with salt and pepper, to suit your taste. Continue cooking on medium low for a minute or two to ensure everything is heated through before serving.

Fettucine noodles, chicken and broccoli are added to alfredo sauce

Time To Serve This Delicious Meal

To serve, transfer chicken broccoli fettucine alfredo to individual serving bowls or plates. Garnish each serving with chopped fresh parsley, if desired. If you don’t mind the extra calories, you can also grated a tiny bit of Parmesan cheese over the top, too.

Chicken broccoli fettucine, served in a white bowl

Serve this delicious pasta, and enjoy every single yummy, high calorie bite! If you enjoy this meal, you might also want to check out my recipe for Shrimp and Penne Pasta Alfredo.

Chicken fettucine is garnished with parsley before serving

While this may not be the “healthiest” dish you’ve ever had… it might be one of the most delicious dishes you’ve ever had!  The fettucine is so good… creamy, cheesy, and hey… since there is a vegetable (broccoli) and lean protein (chicken breast) in it, that’s gotta count for something, right?  It’s all about BALANCE in everything! Sure hope you enjoy this meal!

Looking For More PASTA Recipes?

You can find ALL of my recipes in the Recipe Index, which is located at the top of the page. I have lots of yummy pasta dishes, including:

Interested In More Recipes?

Thank you for visiting this website. I appreciate you using some of your valuable time to do soIf you’re interested, I publish a newsletter 2 times per month (1st and 15th) with all the latest recipes, and other fun info. I would be honored to have you join our growing list of subscribers, so you never miss a great recipe!
There is a Newsletter subscription box on the top right side (or bottom) of each blog post, depending on the device you use, where you can easily submit your e-mail address (only) to be included in my mailing list.

You Can Also Find Me On Social Media:

Facebook page: The Grateful Girl Cooks!
Pinterest:
The Grateful Girl Cooks!
Instagram:
jbatthegratefulgirlcooks

Hope you have a fantastic day!

Author's signature

0 from 0 votes
Chicken Broccoli Fettucine Alfredo
Prep Time
15 mins
Cook Time
11 mins
Total Time
26 mins
 
Chicken Broccoli Fettucine Alfredo- this classic Italian dish with a creamy butter Parmesan sauce is delicious, and can be on the table in about 30 minutes!
Category: Dinner
Cuisine: Italian
Keyword: chicken broccoli fettucine alfredo
Servings: 5 servings
Calories Per Serving: 934 kcal
Author: JB @ The Grateful Girl Cooks!
Ingredients
  • 12 ounces fettucine pasta
  • 3/4 cup butter
  • cups heavy whipping cream
  • 1/4 teaspoon black pepper
  • 1/4 teaspoon garlic powder
  • cups Parmesan cheese , grated
  • 2 chicken breasts (boneless, skinless) , precooked
  • 2 cups broccoli , steamed
  • 2 teaspoons parsley (fresh) , for garnish (if desired)
Instructions
  1. Make the alfredo sauce for the pasta. Melt butter in a large skillet. Once butter is melted, add heavy whipping cream, pepper, and garlic powder. Stir until combined. Cook this sauce for about 5 minutes on medium low. Try to NOT let it come to a boil. Add grated fresh Parmesan cheese to the sauce, and stir to combine. Cook on medium low until the cheese has melted and the sauce has thickened.

  2. NOTE: To save time, these two steps can be done ahead of time: #1-Cook broccoli florets until done.  #2-Cut two pre-cooked boneless, skinless chicken breasts into bite sized pieces.  Set broccoli and chicken aside until ready to add to sauce.

  3. Cook fettucine pasta according to the package directions.  When done, drain pasta well.
  4. Add drained fettucine noodles to the alfredo sauce in pan, then add cooked broccoli and chicken pieces.  Stir well, to combine ingredients and fully coat everything with alfredo sauce. If the mixture seems too thick, simply add a bit more whipping cream to the pan, and stir to blend it in. Taste test the pasta. Season with additional salt and pepper, if desired. Continue cooking on low for a minute or two, to ensure everything is hot.

  5. To serve, transfer chicken broccoli fettucine alfredo to individual serving dishes. Garnish each serving with chopped fresh parsley, if desired. If you don't mind the extra calories, you can also grated a tiny bit of Parmesan cheese over the top, too. Serve hot, and enjoy!

Nutrition Facts
Chicken Broccoli Fettucine Alfredo
Amount Per Serving (1 serving)
Calories 934 Calories from Fat 594
% Daily Value*
Fat 66g102%
Saturated Fat 39g244%
Cholesterol 277mg92%
Sodium 829mg36%
Potassium 537mg15%
Carbohydrates 54g18%
Fiber 3g13%
Sugar 2g2%
Protein 32g64%
Vitamin A 2415IU48%
Vitamin C 33.4mg40%
Calcium 453mg45%
Iron 2mg11%
* Percent Daily Values are based on a 2000 calorie diet.

Here’s one more to pin on your Pinterest boards!Chicken Broccoli Fettucine Alfredo- this classic Italian dish with a creamy butter Parmesan sauce is delicious, and can be on the table in about 30 minutes!