Overnight Banana Coconut Oats

5 minutes prep time is all you need to make a family friendly breakfast of Overnight Banana Coconut Oats! A quick, easy and delicious dish everyone will enjoy! 5 minutes prep time is all you need to make a family friendly breakfast of Overnight Banana Coconut Oats! A quick, easy and delicious dish everyone will enjoy!

Have you ever made overnight oats before? I would like to recommend these Overnight Banana Coconut Oats today, for your consideration! Take a couple minutes to mix up the ingredients, and simply refrigerate them while you sleep, then wake up to a thick and creamy cup of “ready to go DELICIOUS oatmeal” the next morning!

I really like the idea of having overnight oats ready to grab and go in the morning. There’s no fuss- just a hearty, filling, DELICIOUS breakfast to enjoy with my coffee!

It couldn’t be easier to make banana coconut oats, with a few ingredients! Make a few up and go to bed at night, knowing your breakfast will be waiting for YOU!  Here’s how to make one serving:

Scroll Down For A Printable Recipe Card At The Bottom Of The Page

How To Make Overnight Banana Coconut Oats

In an airtight container with a lid (I used a pint sized Mason jar), place rolled oats, sliced banana, vanilla extract, chia seeds, shredded coconut, and pure maple syrup. NOTE: If you want more coconut flavor, you can also add a very small bit of coconut extract.  I didn’t find it necessary, but it is an option!

Oats, chia seeds, coconut, bananas and maple syrup are placed in a mason jar.

Add unsweetened coconut milk until the oats are fully covered. Give the ingredients a good stir, until they are completely mixed together. If necessary, you might need to add a bit more coconut milk to ensure the ingredients are covered.

Canned coconut milk is added to jar with overnight banana coconut oats.

This is what the overnight banana coconut oats looked like after mixing.  Place a lid on the jar or container, and refrigerate overnight.

Overnight Banana Coconut Oats are mixed in jar, then refrigerated overnight.

The next morning, remove jar from refrigerator and remove lid.  Overnight the oats will have absorbed quite a bit of the coconut milk, leaving a creamy, thicker consistency of oats. You can add in a bit more coconut milk, to thin out the oats more and loosen them up, if desired. Give the oats a good stir, and they are ready to eat cold (no, you don’t heat them!).

Overnight Banana Coconut Oats have thickened after refrigerating overnight.

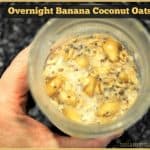
See how thick the banana coconut oats have become after being refrigerated overnight? They taste wonderful cold, too… kind of like pudding!

Overnight Banana Coconut Oats have the consistency of pudding after being refrigerated overnight.

The recipe as written below will yield ONE serving, but is easily doubled or tripled to make several more servings. Overnight banana coconut oats can be prepared 2-3 days in advance.  If you enjoy the flavors of coconut and banana, you will enjoy this easy breakfast that will also fill you up!

Looking for More OVERNIGHT OAT Recipes?

You can find ALL my recipes in the Recipe Index, located at the top of the page. You might also enjoy my other overnight oats recipes, including:

Interested In More Recipes?

Thank you for visiting this website. I appreciate you using some of your valuable time to do soIf you’re interested, I publish a newsletter 2 times per month (1st and 15th) with all the latest recipes, and other fun info. I would be honored to have you join our growing list of subscribers, so you never miss a great recipe!
There is a Newsletter subscription box on the top right side (or bottom) of each blog post, depending on the device you use, where you can easily submit your e-mail address (only) to be included in my mailing list.

You Can Also Find Me On Social Media:

Facebook page: The Grateful Girl Cooks!
Pinterest:
The Grateful Girl Cooks!
Instagram:
jbatthegratefulgirlcooks

Author's signature

Recipe Source: Tammy, at https://www.organizeyourselfskinny.com/2017/07/05/banana-coconut-overnight-oats/

0 from 0 votes
Overnight Banana Coconut Oats
Prep Time
5 mins
Cook Time
0 mins
Total Time
5 mins
 

5 minutes prep time is all you need to make a family friendly breakfast of Overnight Banana Coconut Oats! A quick, easy and delicious dish everyone will enjoy!

Category: Breakfast
Cuisine: American
Keyword: overnight banana coconut oats
Servings: 1 serving
Calories Per Serving: 581 kcal
Author: JB @ The Grateful Girl Cooks!
Ingredients
  • 1/2 cup old fashioned rolled oats (not instant)
  • 1/2 very ripe banana , sliced thin
  • 1/4 teaspoon vanilla extract
  • 1 Tablespoon shredded coconut (unsweetened preferred)
  • 1 teaspoon chia seeds
  • 2 teaspoon pure maple syrup
  • 1/2 cup unsweetened coconut milk (plus more, if necessary)
  • 1/8 teaspoon coconut extract (OPTIONAL-use only if more coconut flavor desired)
Instructions
  1. Place all ingredients (except coconut milk) in a mason jar or container with a lid. Give ingredients a stir until combined.
  2. Pour coconut milk into container. Stir well. Make sure the ingredients are fully covered by coconut milk. Add additional coconut milk (if necessary), to cover. Seal jar or container. Refrigerate overnight.
  3. When ready to serve, remove from refrigerator, remove lid, and give oats a stir. Stir in additional coconut milk, if desired, to thin out the oats a bit.
  4. Serve, and enjoy!
Recipe Notes

Oats can be prepared 2-3 days in advance, if desired.

Nutrition Facts
Overnight Banana Coconut Oats
Amount Per Serving (1 serving)
Calories 581 Calories from Fat 315
% Daily Value*
Fat 35g54%
Saturated Fat 28g175%
Sodium 42mg2%
Potassium 673mg19%
Carbohydrates 62g21%
Fiber 9g38%
Sugar 23g26%
Protein 9g18%
Vitamin C 8.5mg10%
Calcium 81mg8%
Iron 4mg22%
* Percent Daily Values are based on a 2000 calorie diet.

Here’s one more to pin on your Pinterest boards!5 minutes prep time is all you need to make a family friendly breakfast of Overnight Banana Coconut Oats! A quick, easy and delicious dish everyone will enjoy!


Baked Parmesan Zucchini Fries

Baked Parmesan Zucchini Fries are a delicious side dish or appetizer! Baked until crispy, and served with dipping sauce, these “fries” will be a big hit!Baked Parmesan Zucchini Fries are a delicious side dish or appetizer! Baked until crispy, and served with dipping sauce, these "fries" will be a big hit!

Baked Parmesan Zucchini Fries are a delicious family-friendly way to get kids (and adults) to EAT THEIR VEGGIES!  Baked (not fried) to a crispy finish, and served with a cool, seasoned dipping sauce on the side, these “fries” won’t last long, as a side dish or an appetizer!

The zucchini are crispy on the outside, and have lots of flavor with the simple coating, and the PLUS is that they are BAKED, not FRIED. They are really very easy to prepare, and it’s a great way to get more veggies into the food rotation!

It’s easy to get these veggies into everyone, in a fun way (especially if the kids like French fries)!  Zucchini fries are delicious baked and eaten without any accompaniments, but I like to dip them in a tasty sauce (or ranch dressing).

Scroll Down For A Printable Recipe Card At the Bottom Of The Page

Making The Sauce/Dip For Baked Parmesan Zucchini Fries

This time I made up a quick and simple Mexican-spiced dip/sauce (with some of my favorite spices), to serve on the side. I made the sauce by combining non-fat plain Greek yogurt with a Tablespoon of mayonnaise. I then added cumin, garlic powder, chili powder, and paprika, and mixed until blended.

The dipping sauce has good Southwestern flavor, but is not too spicy, by the way! Make ahead, cover,  and refrigerate until ready to use.

Ingredients for dipping sauce for Baked Parmesan Zucchini Fries.

How To Cut Zucchini For Zucchini Fries

I used a green zucchini and a yellow zucchini to make the fries. After slicing the ends off, they were cut like this:

  • #1 Cut each in half in the middle.
  • #2 Cut each half in half lengthwise.
  • #3 Cut those pieces into 4 lengthwise slices each (so they are wedges about 1/2 an inch wide).

Zucchini is sliced into wedges to make Baked Parmesan zucchini fries.

In a small bowl, place two eggs. Lightly beat the eggs until they are fully combined. In a separate bowl, place Panko crumbs and Parmesan cheese. Add the garlic powder, salt, pepper, paprika and Italian seasoning, and stir until combined.

Beaten eggs, and panko bread crumbs are needed to coat zucchini fries before baking.

Prepping Zucchini Fries For Baking

Dip the zucchini wedges, one at a time into the egg mixture to coat. Shake off excess egg back into bowl, and then dip and roll in Panko mixture to coat all sides.

Zucchini fries are coated with panko breadcrumbs before baking.

Place each coated piece of zucchini on a baking sheet which has been lined with aluminum foil, covered with non-stick spray. Repeat until all “fries” have been coated.  Make sure to keep wedges separated on foil.

Parmesan zucchini fries are placed in single layer onto baking sheet to bake.

Cooking The Baked Parmesan Zucchini Fries

Spray the top of the zucchini with cooking spray or lightly drizzle with olive oil.  Bake in a preheated 425 degree oven for 22-25 minutes, flipping zucchini fries over,  half way through the cooking time. When done, the zucchini should be crisp on the outside and lightly browned.

Baked Parmesan Zucchini Fries are golden brown and crispy after baking.

Time To Eat!

Transfer zucchini fries to a platter, and serve with dipping sauce (if desired). They taste the very best when served hot, crispy, and fresh!

Baked Parmesan Zucchini Fries are served with dipping sauce.

Baked Parmesan Zucchini Fries on red platter, with dipping sauce.

Serve, and enjoy this yummy finger food side dish (or appetizer!).  Recipe is easily doubled for a larger crowd… as written, the recipe makes 32 “fries”. Hope you enjoy these zucchini fries – we sure did!

Looking For More APPETIZER Recipes?

You can find all of my recipes in the Recipe Index, located at the top of the page. I have some delicious appetizer recipes you might enjoy, including:

Interested In More Recipes?

Thank you for visiting this website. I appreciate you using some of your valuable time to do soIf you’re interested, I publish a newsletter 2 times per month (1st and 15th) with all the latest recipes, and other fun info. I would be honored to have you join our growing list of subscribers, so you never miss a great recipe!
There is a Newsletter subscription box on the top right side (or bottom) of each blog post, depending on the device you use, where you can easily submit your e-mail address (only) to be included in my mailing list.

You Can Also Find Me On Social Media:

Facebook page: The Grateful Girl Cooks!
Pinterest:
The Grateful Girl Cooks!
Instagram:
jbatthegratefulgirlcooks

Baked Parmesan Zucchini Fries / The Grateful Girl Cooks!

Zucchini Fries Recipe Source: Trish, at https://www.momontimeout.com/baked-parmesan-zucchini-fries-recipe/

0 from 0 votes
Baked Parmesan Zucchini Fries
Prep Time
10 mins
Cook Time
22 mins
Total Time
32 mins
 
Baked Parmesan Zucchini Fries are a delicious side dish or appetizer! Baked until crispy, and served with dipping sauce, these "fries" will be a big hit!
Category: Side Dish / Appetizer
Cuisine: American
Keyword: baked Parmesan zucchini fries
Servings: 32 fries
Calories Per Serving: 18 kcal
Author: JB @ The Grateful Girl Cooks!
Ingredients
  • 2 zucchini (medium sized- I used 1 green and 1 yellow)
  • 2 eggs , beaten lightly
  • 1/2 cup Panko bread crumbs
  • 1/4 cup grated Parmesan cheese
  • 1/4 teaspoon Italian seasoning
  • 1/4 teaspoon garlic powder
  • 1/4 teaspoon salt
  • 1/4 teaspoon black pepper
  • 1/4 teaspoon paprika
For Dipping Sauce:
  • 1/2 cup non-fat Greek yogurt (can substitute sour cream)
  • 1 Tablespoon Mayonnaise
  • 1/4 teaspoon EACH of spices (chili powder, ground cumin, garlic powder and paprika)
Instructions
To Make Dipping Sauce:
  1. Mix Greek yogurt, mayonnaise, cumin, garlic powder, chili powder, and paprika in small bowl until blended. Cover, and refrigerate until ready to use.
To Make Zucchini Fries:
  1. Cut both ends off each zucchini (discard). Cut each zucchini in half across the middle, then cut each half in half lengthwise, then cut those pieces into 4 lengthwise slices each (so they are wedges about 1/2 an inch wide). You should have 32 wedges.
  2. In a bowl, lightly beat eggs until combined. Set aside.
  3. In another bowl, mix Panko crumbs, Parmesan cheese, garlic powder, salt, pepper, paprika and Italian seasoning until combined.
  4. Dip zucchini wedges, one at a time into the egg mixture to coat. Shake excess egg back into bowl, then dip and roll zucchini slice in Panko mixture to coat all sides. Place each coated piece of zucchini on baking sheet lined with foil, and sprayed lightly with non-stick spray. Repeat until all "fries" have been coated. Keep wedges separated. Spray the top of the zucchini with cooking spray, or lightly drizzle with olive oil.
  5. Bake in preheated 425 degree oven for 22-25 minutes, turning zucchini slices over, half way through cooking time. When done, zucchini should be crisp on the outside and lightly browned. Transfer zucchini fries to a platter, and serve with dipping sauce (if desired).
Nutrition Facts
Baked Parmesan Zucchini Fries
Amount Per Serving (4 wedges)
Calories 18
% Daily Value*
Cholesterol 11mg4%
Sodium 45mg2%
Potassium 42mg1%
Carbohydrates 1g0%
Protein 1g2%
Vitamin A 55IU1%
Vitamin C 2.2mg3%
Calcium 17mg2%
Iron 0.1mg1%
* Percent Daily Values are based on a 2000 calorie diet.

Here’s one more to pin on your Pinterest boards!Baked Parmesan Zucchini Fries are a delicious side dish or appetizer! Baked until crispy, and served with dipping sauce, these "fries" will be a big hit!

Lemon Ricotta Pancakes

If you are looking for a decadent breakfast that is easy to prepare and incredibly DELICIOUS, may I suggest Lemon Ricotta Pancakes? Easily made from scratch, light and fluffy, and infused with lemon flavor, this is one breakfast your family and friends will remember!Lemon Ricotta Pancakes are easily made from scratch, light and fluffy, and infused with lemon flavor, for an absolutely delicious breakfast you'll remember!

I first tasted lemon ricotta pancakes last Fall when my husband and I enjoyed a 4 day getaway to Bend, Oregon. Oh my goodness! We stumbled upon a restaurant called The McKay Cottage Restaurant (voted best breakfast restaurant in Bend, every year since 2010), and had a wonderful breakfast there.

Our meal was so good, we ended up going back again the next day, and thoroughly enjoyed their incredible lemon ricotta pancakes! Soooo good! Look how scrumptious they looked when served to us! YUM!

The lemon ricotta pancakes served at McKay Cottage, in Bend, Oregon.

Once we returned home, I vowed to eventually make them from scratch, so we could enjoy them here in our home, instead of a restaurant 4 hours away from us! I searched online for a recipe that sounded perfect, and picked this one!

Scroll Down For A Printable Recipe Card At The Bottom Of The Page

Lemons, Lemons, Lemons!

Right before Christmas, I received a box of fresh, homegrown Meyer lemons from my dear friend Lenita, in Southern California. I KNEW I had to use a few of those extraordinary lemons to make some pancakes… STAT!  So I did, and yes…they were amazing! Here’s how easy it is to make a batch of these fluffy and delicious pancakes from scratch!:

Lemon Ricotta Pancakes / The Grateful Girl Cooks!

Make The Batter For Lemon Ricotta Pancakes

Whisk together flour, sugar, salt, baking soda and baking powder in a large mixing bowl.

Lemon Ricotta Pancakes / The Grateful Girl Cooks!

In a separate mixing bowl, whisk eggs until blended. Add ricotta cheese, milk and vanilla extract. Whisk these very well, so the ingredients are fully blended.

Lemon Ricotta Pancakes / The Grateful Girl Cooks!

Pour the wet ingredients into the bowl with the dry ingredients. Stir until all ingredients are fully combined (do not OVERMIX!). Add fresh squeezed lemon juice and lemon zest; stir only until they are incorporated into batter.

Lemon Ricotta Pancakes / The Grateful Girl Cooks!

Lemon Ricotta Pancakes / The Grateful Girl Cooks!

Cook the Lemon Ricotta Pancakes

Lightly spray, butter or grease a griddle or large skillet. Heat griddle until very hot, then pour 1/3 cup of batter for each pancake onto hot griddle. Make sure to leave enough space between them, so they do not run into each other.

Cook a couple minutes, until bubbles form on top of batter. Flip over, and cook the other side for a couple minutes or until the bottom is golden brown. Repeat process with remaining batter (you can keep the cooked pancakes in the oven on a low temperature to keep them warm).

Lemon Ricotta Pancakes / The Grateful Girl Cooks!

Serve The Pancakes!

When ready to serve, place stack of pancakes onto individual plates. Sift powdered sugar over the top of the pancakes and garnish with fresh fruit (if desired).

I tend to “eat with my eyes” first, so I “fancied” the pancakes up a bit (like the restaurant did)! I used thin lemon slices, raspberries and blueberries. Sliced fresh strawberries would be pretty, as well!

Lemon Ricotta Pancakes / The Grateful Girl Cooks! Lemon Ricotta Pancakes are easily made from scratch, light and fluffy, and infused with lemon flavor, for an absolutely delicious breakfast you'll remember!

Serve warm, with maple syrup or whipped cream!  Take a big bite and enjoy this decadent breakfast treat! They taste WONDERFUL, and LOOK pretty good, too!

Lemon Ricotta Pancakes / The Grateful Girl Cooks!

I really hope you will consider trying this recipe… the lemon ricotta pancakes are EASY to prepare, and would be perfect for a weekend breakfast with family or friends! You’ll definitely enjoy these absolutely delicious pancakes! They’re so good I bet you’ll want to make them again… and again!  Have a great day!

Looking For More PANCAKE Recipes?

You can find ALL my recipes in the Recipe Index, located at the top of the page. I have some delicious pancake recipes, including:

Interested In More Recipes?

Thank you for visiting this website. I appreciate you using some of your valuable time to do soIf you’re interested, I publish a newsletter 2 times per month (1st and 15th) with all the latest recipes, and other fun info. I would be honored to have you join our growing list of subscribers, so you never miss a great recipe!
There is a Newsletter subscription box on the top right side (or bottom) of each blog post, depending on the device you use, where you can easily submit your e-mail address (only) to be included in my mailing list.

You Can Also Find Me On Social Media:

Facebook page: The Grateful Girl Cooks!
Pinterest:
The Grateful Girl Cooks!
Instagram:
jbatthegratefulgirlcooks

Author's signature

Recipe Source: Ashley, at https//bakerbynature.com/lemon-ricotta-pancakes/

0 from 0 votes
Lemon Ricotta Pancakes
Prep Time
10 mins
Cook Time
3 mins
Total Time
13 mins
 
Lemon Ricotta Pancakes are easily made from scratch, light and fluffy, and infused with lemon flavor, for an absolutely delicious breakfast you'll remember!
Category: Breakfast
Cuisine: American
Keyword: lemon ricotta pancakes
Servings: 16 pancakes
Calories Per Serving: 115 kcal
Author: JB @ The Grateful Girl Cooks!
Ingredients
  • 2 cups all purpose flour
  • 1/4 cup granulated sugar
  • 3/4 teaspoon salt
  • 3/4 teaspoon baking powder
  • teaspoons baking soda
  • 2 eggs (large)
  • cups milk
  • 1 cup ricotta cheese (full fat is best!)
  • teaspoons vanilla extract
  • 1/4 cup freshly squeezed lemon juice (approx. 2 large lemons)
  • 2 teaspoons lemon zest
For Garnish/Serving (if desired):
  • Powdered sugar (sifted), Fresh fruit, or whipped cream
  • Maple syrup
Instructions
  1. Whisk together flour, sugar, salt, baking soda and baking powder in a large mixing bowl.
  2. In a separate mixing bowl, whisk eggs until blended. Add ricotta cheese, milk and vanilla extract. Whisk these very well, so the ingredients are fully blended. Pour the wet ingredients into the bowl with the dry ingredients. Stir until all ingredients are fully combined (do not OVERMIX!). Add fresh squeezed lemon juice and lemon zest; stir only until they are incorporated into batter.
  3. Lightly spray, butter or grease a griddle or large skillet. Heat griddle until hot, then pour 1/3 cup of batter for each pancake onto hot griddle. Make sure to leave enough space between them, so they do not run into each other. Cook a couple minutes, until bubbles form on top of batter. Flip over, and cook the other side for a couple minutes or until the bottom is golden brown. Repeat process with remaining batter (you can keep the cooked pancakes in the oven on a low temperature to keep them warm).
  4. When ready to serve, place stack of pancakes onto individual plates. Sift powdered sugar over the top of the pancakes and garnish with fresh fruit (if desired). Serve warm, with maple syrup or whipped cream, and ENJOY!
Recipe Notes

The pancakes can easily be frozen. Place a sheet of wax paper between each room temp. pancake, wrap securely in aluminum foil or resealable plastic storage bag, and store in freezer. Reheat pancakes (in oven or microwave) for another meal. 
*Caloric count does not include powdered sugar garnish or maple syrup.

Nutrition Facts
Lemon Ricotta Pancakes
Amount Per Serving (1 pancake)
Calories 115 Calories from Fat 18
% Daily Value*
Fat 2g3%
Saturated Fat 1g6%
Cholesterol 29mg10%
Sodium 242mg11%
Potassium 96mg3%
Carbohydrates 17g6%
Sugar 4g4%
Protein 4g8%
Vitamin A 140IU3%
Vitamin C 1.8mg2%
Calcium 73mg7%
Iron 0.9mg5%
* Percent Daily Values are based on a 2000 calorie diet.

Here’s one more to pin on your Pinterest boards!Lemon Ricotta Pancakes are easily made from scratch, light and fluffy, and infused with lemon flavor, for an absolutely delicious breakfast you'll remember!

Southwest Chicken Salad

You’ll love this Southwest chicken salad with marinated chicken, beans, corn, tomatoes, avocados, and lettuce, topped w/ a creamy lime cilantro dressing!You'll love this Southwest-inspired salad with marinated chicken, beans, corn, tomatoes, avocados, and lettuce, topped w/ a creamy lime cilantro dressing!

If you enjoy flavor-filled main dish salads, you will love this Southwest Chicken Salad. It is a wonderful main dish salad, full of flavor!

I found this recipe for Southwest chicken salad on Pinterest, and it not only sounded HEALTHY, but DELICIOUS!  The original recipe serves 4, but I very slightly modified it to make two servings, for my husband and I to enjoy!

OH MY GOODNESS- this delicious salad is amazing, and I mean it is “we ate every single bite” amazing! Here’s how to make it.

Scroll Down For A Printable Recipe Card At The Bottom Of the Page

Making The Marinade

I made the marinade early in the day, and let the chicken “bathe” in it for hours, to soak up great flavor! When I was ready to fix dinner, all I had to do was grill the chicken on my stove top and assemble the salad. EASY!  

To make the marinade, combine the marinade/salad dressing ingredients in a medium bowl, EXCEPT FOR THE YOGURT! Mix together until all are well blended.

Pour HALF of the marinade (set aside the other half) into a rimmed dish and add the pieces of chicken.

Ingredients for the chicken marinade are combined in a bowl.

Marinate The Chicken

Turn the pieces of chicken over in the dish, to coat all sides of the meat well. Cover the chicken and place the dish in a refrigerator for 2 hours (or more, if time allows).

Cover the remaining half of the marinade and keep it refrigerated until it’s ready to be used.

The chicken is marinated in the refrigerator to add flavor.

When you’re ready to assemble the salad for your meal, remove the reserved marinade from refrigerator. Blend in the Greek yogurt, until it’s fully incorporated and the sauce is creamy.

Greek yogurt is added to reserved marinade for the salad dressing.

Creamy salad dressing is ready to drizzle on the Southwest chicken salad.

Cook The Marinated Chicken

After the chicken has fully marinated, remove it from the refrigerator.  Heat a teaspoon of oil in a skillet or on a grill on medium-high heat until very hot, but not smoking.

Sear the chicken on the first side (without moving it in the pan) until the bottom is golden brown and crispy. Flip the chicken over and cook other side until it is fully done (internal temp. of 165°F). 

I typically use an indoor cast iron grill to cook the chicken, and it takes about 8-10 minutes per side. If the chicken pieces are very thin, your cooking time may be less.

Once done, remove the chicken from the dish (and discard the chicken marinade).  Let the chicken rest for 5 minutes so the juices can redistribute internally, then cut each piece into thin slices,.

Marinated chicken is grilled until browned and cooked through.

The chicken pieces are fully cooked before slicing and adding to the salad.

Assemble The Southwest Chicken Salad

When you are ready to assemble salad, fill individual bowls or plates with cold, chopped romaine lettuce. Divide the corn, beans, and cherry tomato halves between servings.

Top each Southwest chicken salad with avocado and chicken slices. It looks quite decorative if the chicken and avocado are fanned out slightly..

My husband wanted an entire half an avocado sliced on his salad, as you can tell from the 2nd photo below… ha ha!

Building the Southwest chicken salad with lettuce, corn, black beans and cherry tomatoes.

Grilled chicken strips and sliced avocados are added to the salad.

Time To EAT The Southwest Chicken Salad

Drizzle the salad with the prepared cilantro lime salad dressing. Serve, and enjoy this absolutely amazing tasting meal!

NOTE: I made 2 large entree size salads for us. If making 4 large salads, increase chicken to 4 pieces, and double the amount of corn, beans, cherry tomatoes, and add additional lettuce. You will not need to double the marinade.

The Southwest chicken salad is drizzled with salad dressing, and is ready to eat.

A close up view of this delicious salad, with grilled chicken and avocados.

We absolutely LOVED this Southwest chicken salad; we were very full and completely satisfied after eating!  The grilled chicken had great flavor, thanks  to the lime cilantro marinade, and the low fat flavor-filled dressing made this dish shine!

I sincerely hope you will consider trying this recipe and trust you’ll love it as much as we do! Southwest Chicken Salad is totally delicious, filling, and very colorful!

Thanks for stopping by, and I invite you to come back again soon for more family-friendly recipes. Take care, and have a fantastic day!

Looking for More MAIN COURSE SALAD Recipes?

You can find ALL my recipes in the Recipe Index, which is located at the top of the page. I have a nice variety of main course salads you might want to check out, including:

Want More Recipes? Get My FREE Newsletter!

I publish a newsletter 2 times per month (1st and 15th) with lots of recipes, tips, etc..
Would you like to join our growing list of subscribers?

There is a Newsletter subscription box on the top right (or bottom) of each blog post, depending on the device you use.
You can submit your e-mail address there, to be added to my mailing list.

Find Me On Social Media:

Facebook page: The Grateful Girl Cooks!
Pinterest:
The Grateful Girl Cooks!
Instagram:
jbatthegratefulgirlcooks

Author's signature

Recipe Adapted From: Karina, at https://cafedelites.com/southwestern-chicken-salad/

↓↓ PRINTABLE RECIPE BELOW ↓↓

0 from 0 votes
Southwest Chicken Salad
Prep Time
2 hrs
Cook Time
20 mins
Total Time
2 hrs 20 mins
 

You'll love this Southwest chicken salad with marinated chicken, beans, corn, tomatoes, avocados, and lettuce, topped w/ a creamy lime cilantro dressing!

Category: Dinner
Cuisine: Southwest
Keyword: Southwest chicken salad
Servings: 2
Calories Per Serving: 468 kcal
Author: JB @ The Grateful Girl Cooks!
Ingredients
  • 2 large chicken thighs (boneless, skinless)
For Marinade/Salad Dressing:
  • 2 Tablespoons olive oil
  • 1/3 cup fresh lime juice (approx. 2 large limes)
  • 1 teaspoon lime zest
  • 4 Tablespoons fresh cilantro (finely chopped)
  • 1 teaspoon brown sugar
  • 2 garlic cloves , minced
  • 1/2 teaspoon cumin (ground)
  • 1/2 teaspoon red chili pepper flakes
  • 1 teaspoon salt
  • 1/4 cup plain Greek yogurt (THIS IS USED FOR DRESSING ONLY!!!)
For Salad:
  • 4 cups romaine lettuce (torn or chopped)
  • 1/2 cup cherry tomatoes (cut in half)
  • 1/2 avocado , thinly sliced
  • 1/2 cup canned black beans (drained, rinsed)
  • 1/2 cup canned whole kernel corn (drained, rinsed)
Instructions
  1. In a medium sized bowl, combine all marinade/salad dressing ingredients EXCEPT FOR THE YOGURT! Mix together until well blended. Pour HALF of the marinade (set aside the other half) into a rimmed shallow dish and add the chicken. Toss to coat well. Cover chicken and place in refrigerator for 2 hours (or more, if time allows). Cover remaining marinade and refrigerate until ready to use.
  2. After chicken has fully marinated, remove it from refrigerator. Heat a teaspoon of oil in a skillet or on a grill on medium-high heat until very hot, but not smoking. Cook chicken on first side until bottom is golden brown and crispy, then flip and cook other side until chicken is fully cooked throughout. (I used an indoor cast iron grill and it took about 10 minutes per side). Once done, remove chicken, and let it rest so juices can settle internally. After chicken has rested for 5 minutes, cut each piece into thin slices. Discard chicken marinade.
  3. When ready to assemble salad, remove reserved marinade from refrigerator. Blend in the Greek yogurt, until completely incorporated and creamy.
  4. To assemble salads, fill individual bowls or plates with chopped romaine. Divide corn, beans, and cherry tomato halves between servings. Place avocado and chicken slices decoratively on top of salad. Drizzle each salad with reserved creamy cilantro lime dressing. Serve, and enjoy!
Recipe Notes

*NOTE: I made 2 large salads for us. If making 4 servings, increase chicken to 4 pieces, and double the amount of corn, beans, cherry tomatoes, and add additional lettuce, as desired. (Use same amounts written for marinade/dressing).

Nutrition Facts
Southwest Chicken Salad
Amount Per Serving (1 main course salad)
Calories 468 Calories from Fat 243
% Daily Value*
Fat 27g42%
Saturated Fat 4g25%
Cholesterol 108mg36%
Sodium 1525mg66%
Potassium 1092mg31%
Carbohydrates 28g9%
Fiber 8g33%
Sugar 5g6%
Protein 30g60%
Vitamin A 8670IU173%
Vitamin C 32.1mg39%
Calcium 101mg10%
Iron 3.5mg19%
* Percent Daily Values are based on a 2000 calorie diet.

Here’s one more to pin on your Pinterest boards!You'll love this Southwest chicken salad with marinated chicken, beans, corn, tomatoes, avocados, and lettuce, topped w/ a creamy lime cilantro dressing!

Weight Watchers French Onion Soup

You’ll love this recipe for Weight Watchers French Onion Soup, with caramelized onions! All the flavor without the extra calories!You'll love this recipe for Weight Watchers French Onion Soup, with caramelized onions! All the flavor without the extra calories!

If you enjoy a robust, flavor-filled bowl of soup, but are dieting OR looking to cut a few calories, then you will LOVE this recipe for Weight Watchers French Onion Soup!  It has caramelized onions and the amazing flavor of the original, but with less calories!

On a cold day recently, I was craving a big bowl of French Onion Soup, but since I am watching my calories, and have lost over 26 pounds the past several months, I wanted the TASTE of this delicious soup, but without the extra calories from bread and that yummy, gooey CHEESE! The most difficult thing about making this (and it’s a cinch), is cutting up those crazy onions (wiping away the tears!).

So… I found this recipe using my Weight Watchers app, and decided to try it. The original recipe was designed to use a slow cooker, but it took almost 12 hours to make, so I modified the recipe so it could be made on the stove top in about 40 minutes total (prep and cook time). OH MY GOODNESS… it is so incredibly delicious!  The caramelized onions swimming in a rich, flavorful broth, and a bit of Parmesan cheese on top tasted amazing. I didn’t even miss the bread! You need to make this soup ASAP!

My husband and I LOVED this meal, and since a serving size is 1½ cups, we each had a large bowl of soup (with a salad on the side). *Note: I made HALF the recipe… so my photos reflect this!) Here’s how easy it is to make:

Scroll Down For A Printable Recipe Card At The Bottom Of The Page  

Prepare The Onions (and wipe away the tears)

Peel onions and thinly slice. Remember, slicing onions is not for sissies… (wiping away more tears). I cut them in half (top to bottom), then peeled them and then sliced.

Weight Watchers French Onion Soup / The Grateful Girl Cooks!

Caramelize The Onions

Melt butter in large skillet. Add sliced onions and salt. Cook on medium heat until the onions are well browned, stirring often. This will take about 20 minutes. I made a salad while the onions were cooking, but came back and gave them a good stir every few minutes!

**Here’s my tip on cooking the onions… don’t rush the process. Take your time cooking the onions… you want them nice and brown, caramelized, soft and fragrant, for the best tasting soup!

Weight Watchers French Onion Soup / The Grateful Girl Cooks!

Weight Watchers French Onion Soup / The Grateful Girl Cooks!

Finish “Building” The Weight Watchers French Onion Soup

Once the onions are wonderfully brown (and smell so good!), add a bay leaf and some fresh thyme to the skillet. If you do not have access to fresh thyme, you can add dried thyme, but you will need to reduce the amount by 1/3, since dried herbs are more concentrated in flavor.

Weight Watchers French Onion Soup / The Grateful Girl Cooks!

Add sherry, minced garlic, sugar, chicken broth and beef broth to skillet. Stir well, to combine all ingredients. Let this cook for 20 minutes, stirring occasionally. This will allow the alcohol (sherry) to burn off, and allow the flavors to develop. When done, remove bay leaf and thyme sprigs from soup.  Stir in soy sauce and black pepper.

Weight Watchers French Onion Soup / The Grateful Girl Cooks!

Time To Eat!

Ladle the soup into bowls, and immediately garnish each serving with 1/2 Tablespoon grated Parmesan cheese and fresh thyme (if desired). Serve, and enjoy! Here’s a photo of my bowl of soup BEFORE I gobbled it up!.

Weight Watchers French Onion Soup / The Grateful Girl Cooks! You'll love the rich, decadent flavor of caramelized onions in this "lightened up" version of French Onion Soup! All the flavor without all the extra calories!

Shown below is a photo of my husband’s bowl of soup. He wanted a bit of the traditional melted “stringy” cheese on his at the last minute, so I grabbed a thin slice of Swiss cheese we keep on hand for sandwiches.

The cheese was put on the top and I microwaved the soup for about 30 seconds to melt the cheese. It was nice and “gooey” and stringy… just the way he likes it (and only added 70 more calories!)

Weight Watchers French Onion Soup / The Grateful Girl Cooks!

We both really loved this soup!   If you happen to follow a Weight Watchers plan, the total for this delicious bowl of “yummy-ness” is 3 Smart Points!  I highly recommend this recipe… low in calories, high in taste and satisfaction!  Have a great day!

Looking For More SOUP Recipes?

You can find all of my recipes in the Recipe Index, located at the top of the page. I have LOTS of yummy soup recipes to check out, including:

Interested In More Recipes?

Thank you for visiting this website. I appreciate you using some of your valuable time to do soIf you’re interested, I publish a newsletter 2 times per month (1st and 15th) with all the latest recipes, and other fun info. I would be honored to have you join our growing list of subscribers, so you never miss a great recipe!
There is a Newsletter subscription box on the top right side (or bottom) of each blog post, depending on the device you use, where you can easily submit your e-mail address (only) to be included in my mailing list.

You Can Also Find Me On Social Media:

Facebook page: The Grateful Girl Cooks!
Pinterest:
The Grateful Girl Cooks!
Instagram:
jbatthegratefulgirlcooks

Weight Watchers French Onion Soup / The Grateful Girl Cooks!

Recipe Adapted From: https://www.weightwatchers.com

↓↓ PRINTABLE RECIPE BELOW ↓↓

0 from 0 votes
Weight Watchers French Onion Soup
Prep Time
20 mins
Cook Time
20 mins
Total Time
40 mins
 

You'll love this recipe for Weight Watchers French Onion Soup, with caramelized onions! All the flavor without the extra calories!

Category: Soup
Cuisine: French
Keyword: french onion soup
Servings: 6 (1½ cup) servings
Calories Per Serving: 116 kcal
Author: JB @ The Grateful Girl Cooks!
Ingredients
  • 6-7 large uncooked brown onions , peeled and thinly sliced (approx. 3 lbs.)
  • 2 Tablespoons unsalted butter
  • 2 teaspoons salt
  • 1 bay leaf
  • 5 sprigs fresh thyme (plus extra if using for garnish)
  • 1/4 cup sherry
  • 2 teaspoons minced garlic
  • 1 teaspoon granulated sugar
  • 3 cups beef broth (reduced sodium)
  • 3 cups chicken broth (reduced sodium)
  • 1 teaspoon soy sauce (low sodium)
  • 1/4 teaspoon black pepper
  • 3 Tablespoons grated Parmesan cheese (to garnish hot soup)
  • Additional sprigs fresh thyme (to garnish hot soup)
Instructions
  1. Peel onions and thinly slice.
  2. Melt butter in large skillet. Add sliced onions and salt. Cook on medium heat until the onions are well browned, stirring every couple of minutes. This will take approximately 20 minutes. Once the onions are wonderfully brown (and smell so good!), add a bay leaf and fresh thyme sprigs to the skillet (if using dried thyme, reduce by 1/2 the amount used). Add sherry, minced garlic, sugar, beef broth and chicken broth to skillet. Stir well, to combine all ingredients. Let this mixture cook, uncovered for 20 minutes on medium heat, stirring occasionally. This will burn off the alcohol (sherry). When done, remove bay leaf and thyme sprigs from soup. Stir in soy sauce and black pepper.
  3. Ladle the hot soup into bowls, and immediately garnish each serving with 1/2 Tablespoon grated Parmesan cheese and fresh thyme (if desired). Serve, and ENJOY! (the leftovers are wonderful, as well!)
Nutrition Facts
Weight Watchers French Onion Soup
Amount Per Serving (1 serving (1½ cups))
Calories 116 Calories from Fat 45
% Daily Value*
Fat 5g8%
Saturated Fat 3g19%
Cholesterol 12mg4%
Sodium 1751mg76%
Potassium 326mg9%
Carbohydrates 12g4%
Fiber 1g4%
Sugar 5g6%
Protein 4g8%
Vitamin A 180IU4%
Vitamin C 18mg22%
Calcium 72mg7%
Iron 0.8mg4%
* Percent Daily Values are based on a 2000 calorie diet.

Here’s one more to pin on your Pinterest boards!You'll love this recipe for Weight Watchers French Onion Soup, with caramelized onions! All the flavor without the extra calories!

Triple Berry Banana Smoothie

A Triple Berry Banana Smoothie is a delicious treat, with raspberries, blueberries, blackberries, banana, spinach, orange juice, and Greek yogurt!

Do you enjoy cold, fresh fruit smoothies? We sure do at our house! Recently for lunch I made a Triple Berry Banana Smoothie, which included blended frozen raspberries, blueberries, and blackberries with a banana, orange juice, Greek yogurt and spinach! It was DELICIOUS!

Here in the Portland, Oregon area, we’ve been experiencing many days with temperatures in the low 30’s this Winter. I realize that sounds like a “heat wave” to others experiencing absolutely frigid temps, heavy snowfall and blizzard conditions, BUT… it still was COLD.

So in spite of everything my brain told me NOT to do on a freezing cold day, I made a really COLD fruit smoothie for lunch… ha ha! And guess what? IT WAS WONDERFUL!

Scroll Down For A Printable Recipe Card At The Bottom Of The Page

What’s IN A Triple Berry Banana Smoothie?

The smoothie couldn’t be easier to make!  Here are the cast of characters… frozen berries (3 kinds- blueberry, blackberry and raspberry, bought in a fruit medley bag at Costco. I added non-fat plain Greek yogurt (a good source of protein), a handful of fresh baby spinach (trust me- the kids will NEVER know there’s a veggie in there!), a banana, and a small amount of orange juice.

It’s EASY To Make This Smoothie!

All the ingredients are placed into a blender and mixed until it is smooth! That’s it!  There is enough to make 2 (8 ounce) smoothies, or 4 little smoothies (for the kids). By using frozen berries there is no need to add ice to make the smoothie cold (which can possibly water down the drink).

All the ingredients used to make a triple berry banana smoothie!

Looking For Other Smoothie Recipes?

If you are a lover of fruit smoothies, I would also recommend checking out my recipes for Orange Julius (copycat), Blueberry, Banana and Kale Smoothie, or a Super Creamy Chocolate Peanut Butter Smoothie! They all taste wonderful, and are very easy to prepare!

You might also enjoy this Orange Julius (copycat).

Maybe you would also enjoy this Blueberry, Banana, and Kale Smoothie.

This Super Creamy Chocolate Peanut Butter Smoothie is another smoothie that is delicious.

A Triple Berry Banana Smoothie Is SO EASY To Make

But for now, let’s go back to THIS incredible tasting triple berry banana smoothie! Once it is well blended, pour yourself a great big glass full, and ENJOY this yummy, filling drink! The best part is that it only takes a couple minutes to make, tastes GREAT, and is nice and cold from those frozen berries! Lip-smackin’ good!

One serving of the triple berry banana smoothie.

Hope you enjoy this triple berry banana smoothie! We sure did! The recipe for the triple berry smoothie is easily doubled, and can be easily adapted to use other berries you may enjoy.  It was a very light lunch for me that day, but it left me filling full and satisfied. 

Thank you for stopping by, and I hope you will come back again soon. Don’t forget to check out ALL my recipes in the Recipe Index, located at the top of the page. Have a wonderful day!

Interested In More Recipes?

Thank you for visiting this website. I appreciate you using some of your valuable time to do soIf you’re interested, I publish a newsletter 2 times per month (1st and 15th) with all the latest recipes, and other fun info. I would be honored to have you join our growing list of subscribers, so you never miss a great recipe! 

There is a Newsletter subscription box on the top right side (or bottom) of each blog post, depending on the device you use, where you can easily submit your e-mail address (only) to be included in my mailing list.

You Can Also Find Me On Social Media:

Facebook page: The Grateful Girl Cooks!
Pinterest:
The Grateful Girl Cooks!
Instagram:
jbatthegratefulgirlcooks

Author's signature

↓↓ PRINTABLE RECIPE BELOW ↓↓

0 from 0 votes
Triple Berry Banana Smoothie
Prep Time
3 mins
Cook Time
0 mins
Total Time
3 mins
 

A Triple Berry Banana Smoothie is a delicious treat, with raspberries, blueberries, blackberries, banana, spinach, orange juice, and Greek yogurt!

Category: Beverage, Breakfast
Cuisine: American
Keyword: triple berry banana smoothie
Servings: 2 (8 ounce) servings
Calories Per Serving: 160 kcal
Author: JB @ The Grateful Girl Cooks!
Ingredients
  • 2 cups frozen berry medley (blueberries, blackberries, raspberries)
  • 1 large banana
  • 1 large handful fresh baby spinach leaves (approx. 1½ cups)
  • 3 heaping Tablespoons non-fat Greek yogurt
  • 1/2 cup orange juice (I used commercially prepared)
Instructions
  1. Place all ingredients in blender. Make sure berries (or banana) are frozen before adding. By using frozen fruit, you avoid having to add ice cubes to the drink to make it cold, which can water it down.
  2. Process ingredients until well blended and smooth.
  3. Pour into glasses and serve!
Recipe Notes

Recipe yields approximately 2 (8 ounce) servings) or 4 (1/2 cup) servings.

Nutrition Facts
Triple Berry Banana Smoothie
Amount Per Serving (1 serving (8 ounce))
Calories 160 Calories from Fat 9
% Daily Value*
Fat 1g2%
Sodium 3mg0%
Potassium 418mg12%
Carbohydrates 38g13%
Fiber 5g21%
Sugar 25g28%
Protein 1g2%
Vitamin A 280IU6%
Vitamin C 40mg48%
Calcium 19mg2%
Iron 0.6mg3%
* Percent Daily Values are based on a 2000 calorie diet.

Here’s one more to pin on your Pinterest boards!A Triple Berry Banana Smoothie is a delicious treat, with raspberries, blueberries, blackberries, banana, spinach, orange juice, and Greek yogurt!


Chocolate Angel Food Mug Cake

Make a master mix with two ingredients , then enjoy an easy “low-calorie” chocolate angel food mug cake any time you want, cooked for only ONE MINUTE in a microwave! Make a master mix with two ingredients , then enjoy an easy "low-calorie" chocolate mug cake any time you want, cooked for only ONE MINUTE in a microwave!

If you’re trying to lose weight or cut calories, but enjoy dessert… you’ll enjoy this recipe for Chocolate Angel Food Mug Cake, made in a microwave in 1 MINUTE!  You’ll feel like you’re “cheating”, but with the cake being only 80 calories, it’s a fast, tasty option to curb a sweet tooth!

My sister Joni told me about the Weight Watchers 3-2-1 Cake. She heard about it, tried it,  and then told me about it. So I just HAD to make this chocolate angel food mug cake, too!

Scroll Down for A Printable Recipe Card At The Bottom Of The Page

Why This Dessert Is Also Called A 3-2-1 Cake

The numbers 3-2-1 refer to the easy way to remember the recipe for each individual mug cake. 3 Tablespoons mix- 2 Tablespoons water- 1 minute in the microwave! Get it?  It is one of the EASIEST ways to quickly satisfy a sweet tooth “attack”, without going overboard!!

The “mix” is made by simply combining dry cake mix with angel food cake mix (the kind that only has you add water). Both dry cake mixes are whisked together until well blended, with no lumps. Store the mix in an airtight, sealed container, then you can use it as needed.

The cake mixes used to make the mug cake.

The recipe makes enough for 46 mug cakes, so there will be plenty! I used 2 quart sized canning jars to store the cake mixture, and taped instructions to each jar for future use.

The dry cake mixes are combined in a large bowl.

I used Devil’s Food cake mix to make my mug cake chocolate flavored, but you can substitute any flavor mix for the Devil’s Food. You can also add 2-3 teaspoons mix-ins like finely chopped nuts or dried fruit, or mini chocolate chips for additional flavor, if you want.

**Please note that adding these additional ingredients will raise the caloric value!! The cake by itself with no additional filling or topping equals 80 calories per serving, AND if you follow WW, the point value is 2 Points Plus, or 3 Smart Points.**  

The chocolate mug cake mix is stored in airtight containers until needed.

Okay, I Made The Mix. How Do I MAKE The Chocolate Mug Cake?

Once you’ve made the Master Mix, when the craving for something a little sweet mug cake hits, make the cake. For one single chocolate mug cake, place 3 Tablespoons mix into a straight sided microwave safe mug.

Measuring the mug cake mix into microwaveable mug.

Add 2 Tablespoons water, and mix well with a spoon or fork until mixture is smooth.

Water is added to the cake mix in mug.

Ingredients for the mug cake are stirred together in the coffee cup before cooking.

Microwave for 1 minute on HIGH power. Remove mug from microwave; let it sit and cool down a little bit. It will come out looking like this…

The cake cooks for one minute in the microwave.

It can be eaten straight from the mug, OR you can run a butter knife around edges and gently remove the cake from the mug onto a plate.

Chocolate angel food mug cake can be eaten plain, without any additional toppings.

Serve the mug cake plain for least amount of calories (80), or top it with frosting, ice cream, fruit, powdered sugar, frozen yogurt, and/or chocolate syrup.

Chocolate mug cake, topped with powdered sugar and chocolate syrup.

Now can you see why it is commonly called a 3-2-1 Mug Cake?  THREE tablespoons of prepared mix, TWO tablespoons of water, and ONE minute in the microwave!!! It’s a perfect mix to keep on hand, so when the urge for dessert hits you can satisfy your craving with a slightly “healthier” solution!

Sure hope you will make this mug cake mix and will enjoy having it on hand in your kitchen for those “gotta have something sweet now” emergencies… ha ha!

Looking For More CAKE Recipes?

You can find all of my recipes in the Recipe Index, located at the top of the page. I have quite a few delicious cake recipes, including:

Interested In More Recipes?

Thank you for visiting this website. I appreciate you using some of your valuable time to do soIf you’re interested, I publish a newsletter 2 times per month (1st and 15th) with all the latest recipes, and other fun info. I would be honored to have you join our growing list of subscribers, so you never miss a great recipe!
There is a Newsletter subscription box on the top right side (or bottom) of each blog post, depending on the device you use, where you can easily submit your e-mail address (only) to be included in my mailing list.

You Can Also Find Me On Social Media:

Facebook page: The Grateful Girl Cooks!
Pinterest:
The Grateful Girl Cooks!
Instagram:
jbatthegratefulgirlcooks

Author's signature

Recipe Source: https://simple-nourished-living.com/weight-watchers-3-2-1-microwave-mug-cake/

0 from 0 votes
Chocolate Angel Food Mug Cake
Prep Time
2 mins
Cook Time
1 min
Total Time
3 mins
 
Make a master mix with two ingredients , then enjoy an easy "low-calorie" chocolate mug cake any time you want, cooked for only ONE MINUTE in a microwave!
Category: Dessert
Cuisine: American
Keyword: mug cake
Servings: 46 cakes
Calories Per Serving: 72 kcal
Author: JB @ The Grateful Girl Cooks!
Ingredients
For Cake Mix:
  • 1 box (15.25 - 18.25 ounces) Devil's Food cake mix
  • 1 box (16 ounces) Angel Food cake mix (the type that only needs water-one step)
To Make One Mug Cake:
  • 3 Tablespoons of the combined dry cake mix
  • 2 Tablespoons water
Instructions
  1. Whisk both dry cake mixes together until well blended, with no lumps. Store in an airtight, sealed container. I used canning jars to store the cake mixture, and taped instructions to jar.
  2. When ready to make one mug cake, place 3 Tablespoons mix into a straight sided microwave safe mug. Add 2 Tablespoons water, and mix well until mixture is smooth.
  3. Microwave for 1 minute on HIGH power. Remove mug from microwave; let it sit and cool down a little bit. It will be ready to eat straight from the mug, OR you can run a butter knife around edges and gently remove the cake from the mug onto a plate. Serve the cake plain for least amount of calories (80), or you can garnish cake with frosting, ice cream or frozen yogurt, fruit, powdered sugar (sifted) and/or chocolate syrup.
Recipe Notes

TIP# 1 - You can substitute any flavor cake mix for the Devil's Food.
TIP # 2 - May also add 2-3 teaspoons additional mix-ins like finely chopped nuts or dried fruit, or mini chocolate chips for additional flavor. Please note that adding these additional ingredients will raise the caloric value.

Nutrition Facts
Chocolate Angel Food Mug Cake
Amount Per Serving (1 cake)
Calories 72
* Percent Daily Values are based on a 2000 calorie diet.

Here’s one more to pin on your Pinterest boards!Make a master mix with two ingredients , then enjoy an easy "low-calorie" chocolate mug cake any time you want, cooked for only ONE MINUTE in a microwave!

Southwest Quinoa Salad

Southwest Quinoa Salad is a healthy side or vegetarian dish featuring quinoa, tomatoes, corn, beans, peppers, avocado, and a flavorful cilantro lime dressing!
Happy New Year! If you’re like many others, you’ve started the year with a determination to eat healthier or lose some weight! This Southwest Quinoa Salad is a delicious, healthy recipe solution for you! It features quinoa, black beans, tomatoes, corn, bell peppers, and avocado, topped with a scrumptious cilantro lime dressing! YUM!

This is my first official blog post of 2018, and I’m so grateful to be able to share this recipe with you from our newly remodeled kitchen.  I don’t know about you, but we managed to eat quite a bit of Christmas goodies and take-out over the holidays (due to my husband and I loving sweets AND having no kitchen to cook in for the past 2 months).

Now we have begun the year determined to make wiser choices.  Say hello to this quinoa salad. It’s a flavor-filled healthy “meatless” dish is perfect as a light side dish or a quick lunch!

Scroll Down For A Printable Recipe Cad At The Bottom Of The Page

Here’s How To Make Southwest Quinoa Salad

Put the uncooked quinoa in a fine mesh strainer and rinse with water (this helps clean the  quinoa). Place the rinsed quinoa, water and salt in a saucepan; bring the mixture to a boil over high heat.

When it comes to a boil, reduce heat to medium-low and put a lid on the pan. Cook quinoa for approximately 17-20 minutes (or until all liquid has been absorbed). Remove pan from heat, set aside, and let quinoa cool down to room temperature.

Southwest Quinoa Salad / The Grateful Girl Cooks!

Place cherry tomatoes, corn, black beans, bell peppers, avocado and room temperature quinoa into a large salad bowl. Set aside. TIP: An easy tip for cubing an avocado is to cut it in half, remove pit, then use a knife to slice grid lines into avocado lengthwise, then horizontally, without cutting through peel. Once cut, slide a large spoon around the inside of the peel, and the avocado cubes should fall out!

Southwest Quinoa Salad / The Grateful Girl Cooks!

Make The Cilantro Lime Salad Dressing

To make the simple cilantro lime dressing, whisk together olive oil, light sour cream, lime zest and juice, garlic powder, cumin, salt, pepper and cilantro in a small bowl . Be sure to mix well.

Southwest Quinoa Salad / The Grateful Girl Cooks!

Pour all of the dressing over salad, and stir well, to combine all ingredients thoroughly. The quinoa will absorb all the delicious Southwestern flavors from the dressing and will really make this dish shine!

Southwest Quinoa Salad / The Grateful Girl Cooks!

Southwest Quinoa Salad Is Ready To Enjoy!

Garnish the Southwest quinoa salad with a sprig of fresh cilantro, and serve it as a side dish. Since it is so filling, this salad (even without meat), would be a quick vegetarian meal or “take to work” packed lunch! The salad tastes good served at room temperature OR chilled!

Southwest Quinoa Salad / The Grateful Girl Cooks!

Here’s a close up of some Southwest Quinoa Salad goodness. Yum!  I love the fact that it not only tastes wonderful, but is quite colorful and good for you!

Southwest Quinoa Salad / The Grateful Girl Cooks!

New Beginnings

I served this Southwest Quinoa Salad with roasted turkey breast and steamed broccoli, for a healthy New Years Day dinner! My husband and I really enjoyed it, and it was FUN to prepare my first recipe for 2018 in our newly remodeled kitchen.

This was after 2 months of not being able to cook in there! Yay for our new, updated kitchen, appliances and counter tops! We still  have some work to do, but I’ve begun cooking in my kitchen once again. Yay!

Southwest Quinoa Salad / The Grateful Girl Cooks!

I want to wish you again a Happy New Year from our home to yours!  The arrival of a new year brings with it an infinite number of opportunities to encourage and serve others. Opportunities will also arise to grow as a person, create great memories, and cook delicious meals for yourself and those you love!

Hope you will join me in rising to the occasion, and as always, thank you for visiting The Grateful Girl Cooks. I appreciate each one of you. Have a great day!

Looking For More Recipes That Use QUINOA?

You can find ALL my recipes in the Recipe Index, located at the top of the page. I have some delicious recipes that feature quinoa you might enjoy, including:

Interested In More Recipes?

Thank you for visiting this website. I appreciate you using some of your valuable time to do soIf you’re interested, I publish a newsletter 2 times per month (1st and 15th) with all the latest recipes, and other fun info. I would be honored to have you join our growing list of subscribers, so you never miss a great recipe!
There is a Newsletter subscription box on the top right side (or bottom) of each blog post, depending on the device you use, where you can easily submit your e-mail address (only) to be included in my mailing list.

You Can Also Find Me On Social Media:

Facebook page: The Grateful Girl Cooks!
Pinterest:
The Grateful Girl Cooks!
Instagram:
jbatthegratefulgirlcooks

Southwest Quinoa Salad / The Grateful Girl Cooks!

Recipe Source: http://togetherasfamily.com/2017/05/fiesta-quinoa-salad/

0 from 0 votes
Southwest Quinoa Salad
Prep Time
8 mins
Cook Time
17 mins
Total Time
25 mins
 
Southwest Quinoa Salad is a healthy side or vegetarian dish featuring quinoa, tomatoes, corn, beans, peppers, avocado, and a flavorful cilantro lime dressing!
Category: Salad
Cuisine: Southwest
Keyword: Southwest quinoa salad
Servings: 8 side servings
Calories Per Serving: 218 kcal
Author: JB @ The Grateful Girl Cooks!
Ingredients
For Salad:
  • cups uncooked quinoa
  • cups water
  • 1/2 teaspoon salt
  • 1 cup halved cherry tomatoes
  • 1 can corn , drained (standard sized can)
  • 1 can black beans , drained and rinsed
  • 1 orange bell pepper , chopped (I used a combination of red, orange and green)
  • 1 avocado , peeled and cubed
For Cilantro Lime Dressing:
  • 1/4 cup olive oil
  • 1/4 cup reduced fat sour cream (can substitute plain non-fat yogurt)
  • Zest and juice from 1 lime
  • 1 teaspoon garlic powder
  • 1 teaspoon ground cumin
  • 1/2 teaspoon salt
  • 1/4 teaspoon black pepper
  • 1/3 cup chopped cilantro
Instructions
  1. Put the uncooked quinoa in a fine mesh strainer and rinse with water (this helps clean quinoa). Place the rinsed quinoa, water and salt in a saucepan; bring the mixture to a boil over high heat. When it comes to a boil, reduce heat to medium-low and put a lid on the pan. Cook quinoa for approximately 17-20 minutes (or until all liquid has been absorbed). Remove pan from heat, set aside, and let quinoa cool down to room temperature.
  2. Place cherry tomatoes, corn, black beans, bell peppers, avocado and cooled quinoa into a large salad bowl.
  3. To make cilantro lime dressing, in a small bowl whisk together olive oil, light sour cream, lime zest and juice, garlic powder, cumin, salt, pepper and cilantro. Be sure to mix well. Pour all of the dressing over salad, and stir well to combine all ingredients thoroughly. Serve as a side dish or as a healthy meatless meal, and enjoy! (Store leftovers in a covered container in refrigerator).
Nutrition Facts
Southwest Quinoa Salad
Amount Per Serving (1 serving)
Calories 218 Calories from Fat 108
% Daily Value*
Fat 12g18%
Saturated Fat 2g13%
Cholesterol 2mg1%
Sodium 307mg13%
Potassium 367mg10%
Carbohydrates 21g7%
Fiber 4g17%
Sugar 1g1%
Protein 4g8%
Vitamin A 660IU13%
Vitamin C 25.9mg31%
Calcium 32mg3%
Iron 1.7mg9%
* Percent Daily Values are based on a 2000 calorie diet.

Here’s one more to pin on your Pinterest boards!Southwest Quinoa Salad is a healthy side or vegetarian dish featuring quinoa, tomatoes, corn, beans, peppers, avocado, and a flavorful cilantro lime dressing!

Karen’s Delicious Apple Cobbler

Four ingredients and thirty minutes is all you need to make this EASY and delicious apple cobbler for dessert!Four ingredients and thirty minutes is all you need to make this EASY and delicious apple cobbler for dessert!

If you’re looking for an EASY dessert that can be made quickly, may I suggest  this simple recipe for Karen’s Delicious Apple Cobbler? You only need 4 ingredients and 30 minutes to make this amazing dessert! It’s REALLY quite tasty!

Scroll Down For A Printable Recipe Card At The Bottom Of The Page

Why This Apple Cobbler Is Named After My Friend, Karen

When I was a newlywed 40 years ago, my husband and I moved from Southern California to a small town in Southern Oregon. I was privileged to meet a woman named Karen at the church where my husband was the Music Pastor.

Karen sang in our choir, had an amazing voice, and an even sweeter personality and infectious laugh. She graciously invited us over for meals, became a dear friend, and even let me do our laundry at her home several times… THAT was also a huge gift because it meant I didn’t have to hang out at the local laundromat for hours.

Karen made this apple cobbler for us once (40 years ago), and I loved it.  Being a newlywed, and loving to cook, I asked her if she would share her recipe with me. She laughed and told me how incredibly easy it was to make (a big plus!), and gave it to me.

I named the recipe after her and wrote it on the recipe card, so I wouldn’t ever forget who gave it to me. I’ve made this recipe many times over the years, and finally decided to add it to my blog.  Karen passed away quite suddenly in 2014, but her sweet spirit, love, zest for life, and memories live on in every person she poured herself into, including ME!

How EASY Is This Apple Cobbler To Make?

Here’s how to make this… it’s so very EASY!  Preheat oven to 350° F. Lightly grease a 13×9 pan (or two smaller sized pans) with non-stick spray.  Spread fruit pie filling evenly in pan.

Apple pie filling is spread into baking pans.In medium bowl, mix butter, yellow cake mix and chopped nuts until crumbly.

Butter is blended into dry ingredients using a pastry blender.

Chopped pecans are added to dry ingredients for cobbler

Dry ingredients, butter and pecans are crumbly and ready to top apple cobbler.

Sprinkle this dry mixture evenly over the apple pie filling. The cobbler is usually made in a 9×13 pan, but this time I made it in a square pan (8×8) and a 9 inch cake pan, so I could give one away to a friend recovering from surgery, yet still have one for our family.

Crumb topping has been placed on top of the apple pie filling in baking pan.

Bake at 350° F. for approximately 30 minutes, or until bubbly and crumb mixture is light golden brown on top. Remove pan to a wire rack and let cool down slightly before serving.

Two pans of Karen's delicious apple cobbler are cooling on wire rack after baking.

Once cobbler has cooled down a bit, serve up individual portions.  This cobbler tastes best served slightly warm, with a big ol’ scoop of vanilla ice cream on top!

Karen's Delicious Apple Cobbler is serving in ramekin with a scoop of ice cream.

This cobbler is so very easy to make, and truly is quite scrumptious!

Do You Enjoy Cobblers And Crisps?

Speaking of cobblers, if you enjoy this type of dessert you might be interested in other cobbler and crisp recipes on this blog. I have quite a few cobbler recipes. Some of them are Strawberry Cobbler, Blackberry Cobbler, or Old-Fashioned Peach Crisp. You might also enjoy learning about the history of cobblers, crisps, pandowdy, etc.

A spoonful of Karen's delicious apple cobbler is ready to eat!

It’s wonderful to have a recipe card for an apple cobbler that is yummy and soooo simple to make, permanently stored in my recipe box (and now on my blog)!  With every bite, I am reminded of the sweet friend who gave it to me, and miss her very much! Have a great day, and be sure to check out ALL my recipes in the Recipe Index, located at the top of the page.

Interested In More Recipes?

Thank you for visiting this website. I appreciate you using some of your valuable time to do soIf you’re interested, I publish a newsletter 2 times per month (1st and 15th) with all the latest recipes, and other fun info. I would be honored to have you join our growing list of subscribers, so you never miss a great recipe!
There is a Newsletter subscription box on the top right side (or bottom) of each blog post, depending on the device you use, where you can easily submit your e-mail address (only) to be included in my mailing list.

You Can Also Find Me On Social Media:

Facebook page: The Grateful Girl Cooks!
Pinterest:
The Grateful Girl Cooks!
Instagram:
jbatthegratefulgirlcooks

Author's signatureRecipe Source: Karen Cobb Nelson

0 from 0 votes
Karen's Delicious Apple Cobbler
Prep Time
5 mins
Cook Time
30 mins
Total Time
35 mins
 

Four ingredients and thirty minutes is all you need to make this EASY and delicious apple cobbler for dessert!

Category: Dessert
Cuisine: American
Keyword: apple cobbler
Servings: 12 servings
Calories Per Serving: 342 kcal
Author: JB @ The Grateful Girl Cooks!
Ingredients
  • 1 can apple pie filling (21 ounces)
  • 1 cube butter , at room temperature
  • 1 yellow cake mix
  • 1 cup walnuts or pecans , chopped
  • Non-stick spray
Instructions
  1. Preheat oven to 350° F. Lightly grease a 13x9 pan (or two smaller sized pans) with non-stick spray.
  2. Spread fruit pie filling evenly in pan.
  3. In medium bowl, mix butter, yellow cake mix and chopped nuts until crumbly. Sprinkle this dry mixture evenly over the apple pie filling.
  4. Bake at 350° F. for approximately 30 minutes, or until bubbly and crumb mixture is light golden brown on top. Remove pan to a wire rack and let cool down slightly before serving. This cobbler tastes best served slightly warm, with a big ol' scoop of vanilla ice cream on top!
Nutrition Facts
Karen's Delicious Apple Cobbler
Amount Per Serving (1 serving)
Calories 342
* Percent Daily Values are based on a 2000 calorie diet.

Here’s one more to pin on your Pinterest boards!Four ingredients and thirty minutes is all you need to make this EASY and delicious apple cobbler for dessert!

Mexican Stuffed Pasta Shells

Mexican Stuffed Pasta Shells, with seasoned beef, cheese and onion, are baked and topped with cheese, cilantro, tomatoes, and sour cream!Mexican Stuffed Pasta Shells, with seasoned beef, cheese and onion, are baked and topped with cheese, cilantro, tomatoes, and sour cream!
Mexican Stuffed Pasta Shells are a delicious twist on traditional stuffed pasta. Ground beef, cheese and onion filled pasta shells are baked in enchilada sauce, then topped with cheese, cilantro, tomatoes, and garnished with a dollop of sour cream, for a flavor-filled dinner!

Last Spring I made Chicken and Broccoli Alfredo Stuffed Shells and we really enjoyed them.  Now fast forward to about 4 months later when I started thinking about how much my husband and I absolutely LOVE Mexican food. A light bulb went off in my head and I decided to experiment and make more stuffed shells, but this time create a recipe with a Mexican twist!  We really enjoyed them, so am sharing the details on the ol’ blog today.

Scroll Down For A Printable Recipe Card At The Bottom Of The Page

How Do You Make Mexican Stuffed Pasta Shells?

These Mexican stuffed pasta shells are really easy to prepare.  Start by cooking 1 pound of ground beef with sliced green onions in large skillet on medium heat. Once the meat is cooked, drain grease from pan (discard grease). Add one taco seasoning packet and cook according to seasoning package instructions.

When the meat has been cooked and seasoned, transfer it to a large mixing bowl and let it cool for 4-5 minutes.  Add 3 Tablespoons of enchilada sauce, grated cheddar and jack cheeses; and stir to combine. Set aside.

Cooking ground beef and onions to stuff into pasta shells.

Grated cheeses are added to ground beef for the stuffed pasta shells.

Cook The Pasta Shells

In a large pot of boiling salted water, cook the jumbo pasta shells according to package directions.  When the pasta shells are finished cooking, drain them well. Place the drained shells in a single layer on wax paper or parchment paper.

Jumbo pasta shells are cooked before being stuffed with Mexican flavored filling.

Prepare The Filled Mexican Stuffed Pasta Shells For Baking

Place several heaping spoonfuls of enchilada sauce on the bottom of a baking dish (enough to just barely cover the bottom of dish). Fill the cooked pasta shells with the ground beef mixture, then place them into a baking dish in a single layer.

Seasoned meat is stuffed into cooked pasta shells.

Mexican Stuffed Pasta Shells are arranged in dish before baking.

Once all shells are filled and in the baking dish, spoon the rest of the enchilada sauce over the shells to cover.  Sprinkle with the remaining half of the cheddar and jack cheeses.

Mexican Stuffed Pasta Shells are covered with grated cheese before baking.

Bake The Mexican Stuffed Pasta Shells

Cover dish with aluminum foil and bake in preheated 350 degree oven for 25-30 minutes total.  Remove the foil for the last 10 minutes of baking.  Sauce and cheese should be bubbly when done.  Remove dish from oven.

Mexican Stuffed Pasta Shells , right after removing them from oven.

Garnish And Serve The Stuffed Shells!

To serve, top with additional cheese, tomato, cilantro and green onions, for a great splash of color (and added flavor)! This dish will not only taste good… it will look good, too!

Mexican Stuffed Pasta Shells are garnished with tomatoes, cilantro before serving.

Mexican Stuffed Pasta Shells are ready to serve and eat!

Place 2-3 shells onto each individual serving plate, and top each shell with a small dollop of sour cream. Serve… and enjoy!

Mexican Stuffed Pasta Shells are served with a dollop of sour cream on top!

Hope you will consider making these flavor-filled Mexican stuffed pasta shells for an upcoming meal.  I served them with a simple mixed green salad on the side, and they were quite filling. Have a great day!

Looking For More Mexican-Inspired Recipes?

You can find ALL my recipes in the Recipe Index, located at the top of the page. I have lots of delicious, Mexican-inspired recipes you might want to check out, including:

Interested In More Recipes?

Thank you for visiting this website. I appreciate you using some of your valuable time to do soIf you’re interested, I publish a newsletter 2 times per month (1st and 15th) with all the latest recipes, and other fun info. I would be honored to have you join our growing list of subscribers, so you never miss a great recipe!
There is a Newsletter subscription box on the top right side (or bottom) of each blog post, depending on the device you use, where you can easily submit your e-mail address (only) to be included in my mailing list.

You Can Also Find Me On Social Media:

Facebook page: The Grateful Girl Cooks!
Pinterest:
The Grateful Girl Cooks!
Instagram:
jbatthegratefulgirlcooks

Author's signature

0 from 0 votes
Mexican Stuffed Pasta Shells
Prep Time
20 mins
Cook Time
25 mins
Total Time
45 mins
 
Mexican Stuffed Pasta Shells, with seasoned beef, cheese and onion, are baked and topped with cheese, cilantro, tomatoes, and sour cream!
Category: Entree
Cuisine: Mexican
Keyword: Mexican stuffed pasta shells
Servings: 6 servings (3 shells per serving)
Calories Per Serving: 445 kcal
Author: JB @ The Grateful Girl Cooks!
Ingredients
  • 1 pound ground beef
  • 2 green onions (sliced, use green stalk and white bulb)
  • 1 envelope taco seasoning
  • 3 Tablespoons chopped cilantro
  • 1/2 cup grated cheddar cheese , DIVIDED
  • 1/2 cup grated jack cheese , DIVIDED
  • 1 can (19 ounces) red enchilada sauce
  • Approx. 1/2 box jumbo pasta shells (I used 18 shells)
For Garnish (use as little or as much as you desire)
  • Chopped tomato, green onion, cilantro, grated cheddar, and sour cream
Instructions
  1. Preheat oven to 350 degrees. Place several large spoonfuls of enchilada sauce on the bottom of a baking dish (enough to just cover the bottom). Set aside.
  2. Cook ground beef with chopped green onions in large skillet on medium heat. When meat is cooked, drain and discard grease. Add taco seasoning packet and cook according to seasoning package instructions. Once meat has finished cooking, transfer it to a bowl, and let cool down for 4-5 minutes. Discard grease from pan. Add 3 Tablespoons enchilada sauce and HALF of the grated cheddar and jack cheeses to the meat; stir to combine. Set aside.
  3. In a large pot of boiling salted water, cook jumbo pasta shells according to package directions. When pasta is done cooking, drain, then place shells in a single layer on wax paper or parchment paper. Fill cooked pasta shells with the ground beef mixture, then place into baking dish (on top of sauce) in a single layer.
  4. Once all shells are filled and in baking dish, spoon the rest of the enchilada sauce over shells to cover. Sprinkle with the remaining half of the cheddar and jack cheeses.
  5. Cover dish with aluminum foil and bake in preheated 350 degree oven for 25-30 minutes total. Remove foil for the last 10 minutes of baking. Sauce and cheese should be bubbly when done. Remove dish from oven.
  6. To serve, garnish with additional cheese, chopped tomato, chopped cilantro, and green onions, for a great splash of color and flavor! Place 2-3 shells onto each person's plate; top each shell with a small dollop of sour cream. Serve and enjoy!
Nutrition Facts
Mexican Stuffed Pasta Shells
Amount Per Serving (1 serving)
Calories 445
* Percent Daily Values are based on a 2000 calorie diet.

Here’s one more to pin on your Pinterest boards!Mexican Stuffed Pasta Shells, with seasoned beef, cheese and onion, are baked and topped with cheese, cilantro, tomatoes, and sour cream!


Save

Save

Save

Save