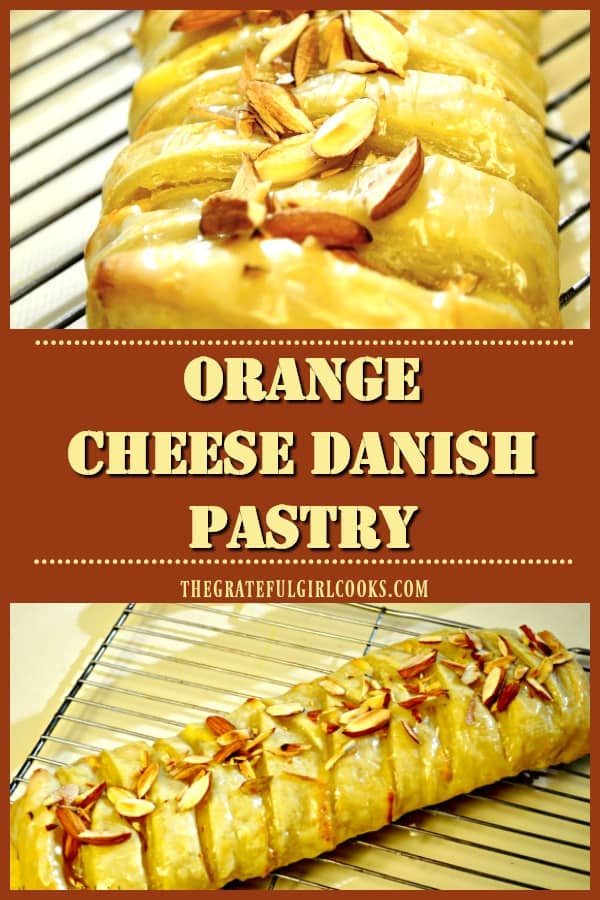
Category: Doughnuts/Pastries

Fruit and Cheese Danish Pastry

Fruit and Cheese Danish Pastry is an easy to make treat using puff pastry dough, topped with cream cheese filling, assorted fruit jams, and icing.Fruit and Cheese Danish Pastry / The Grateful Girl Cooks!
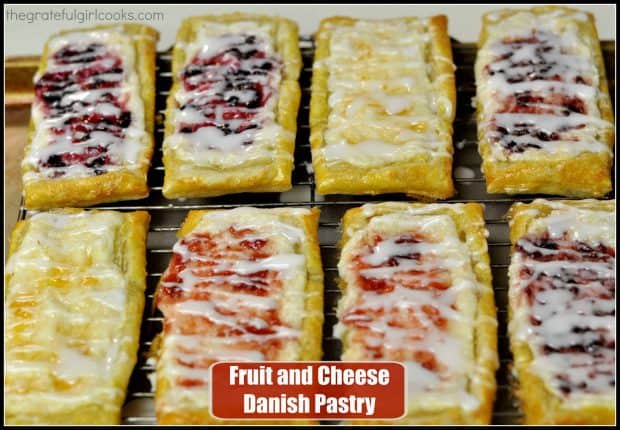
I tried a new recipe for Fruit and Cheese Danish Pastry recently. The recipe was found on Pinterest after clicking through different websites looking for a great breakfast pastry recipe.  This recipe I landed on is absolutely delicious and easy to prepare.

I happened to have a box of Puff Pastry sitting in my freezer patiently waiting (for a few months) it’s turn to be transformed into something wonderful. Well… this recipe for fruit and cheese danish was a great way to utilize it!

The pastries were perfect for an “out of the ordinary” breakfast for my husband and myself. Honestly, munching on one of these and sipping a large cup of strong, HOT coffee was a nice way to start the day. This pastry recipe is pretty straightforward, doesn’t require a degree in rocket science to make, and they are delicious! Hope you’ll give these fruit and cheese danish pastries a try!

Scroll Down for A Printable Recipe Card At The Bottom Of The Page

How To Make Fruit and Cheese Danish Pastry

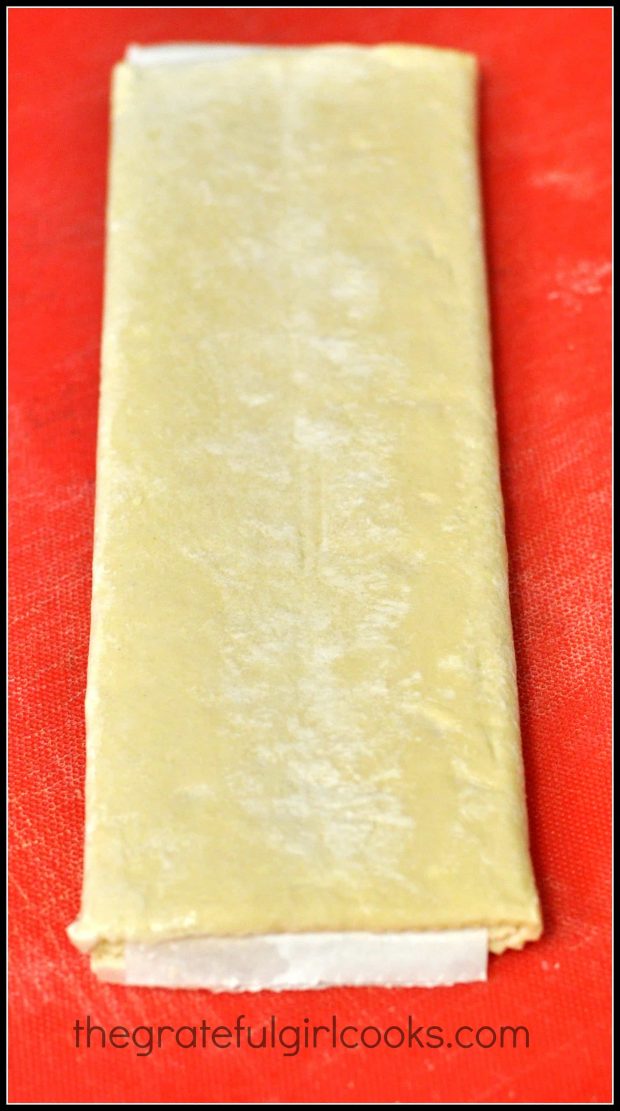
Here’s what you do:  First, remove one sheet of puff pastry from box and let it thaw slightly before unfolding it.

Puff pastry rests before unfolding it to make pastries.

While the puff pastry dough is thawing, prepare the cream cheese filling… easy!
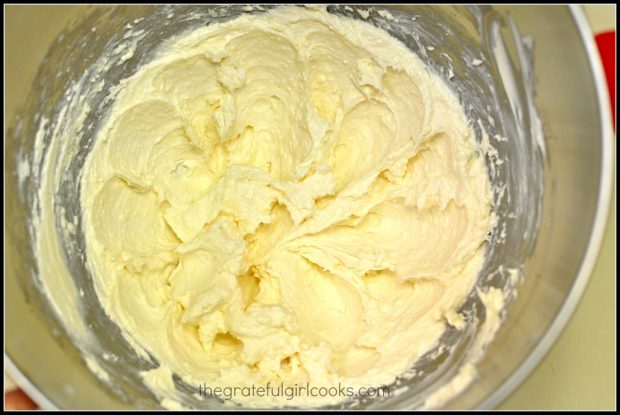
The cream cheese filling for the pastry is mixed together until creamy.
Cut The Pastry Dough In Steps

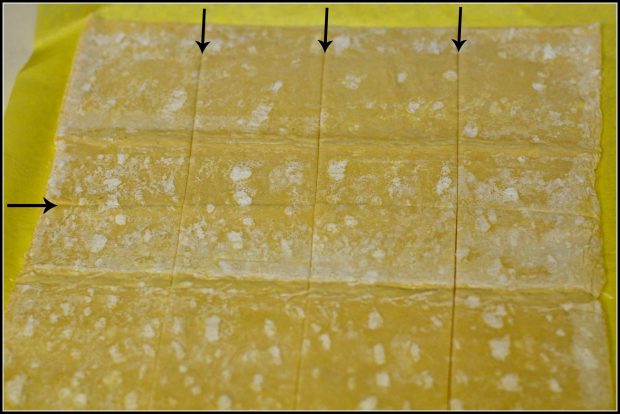
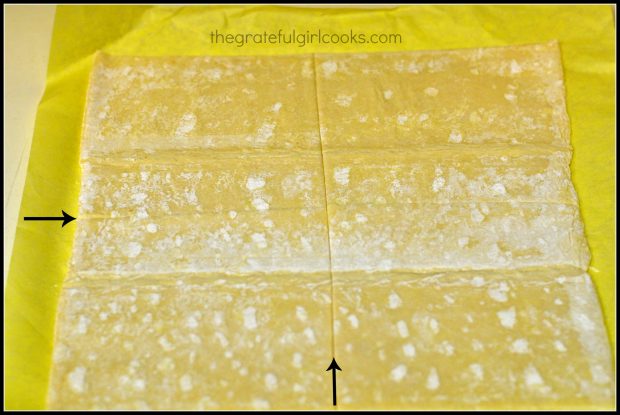
The next step is to unroll the dough. Press together the fold lines, and then cut the dough in half. I used my pizza cutter to make the cuts.
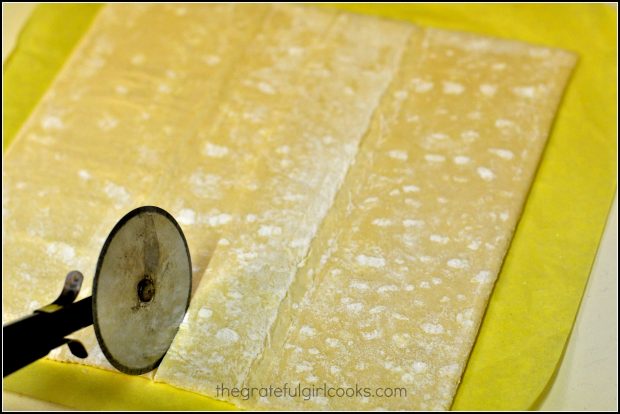
Cutting the pastry dough with a pizza cutter.Now you need to cut the dough in half again. You should now have 4 equal sized squares of puff pastry.
The pastry dough is cut in half again.Cut each of the 4 puff pastry squares in half. You should now have 8 rectangle sized pieces of pastry dough.

The last cut leaves 8 rectangular sized pieces of puff pastry.

Forming and Filling The Fruit and Cheese Danish

Place 4 pieces of the dough onto a parchment paper lined baking sheet. Place the remaining 4 pieces of  pastry dough onto another lined sheet, making sure to leave lots of space in between each piece.

Using a sharp knife, cut a border all around the edge (but don’t cut all the way through the pastry dough!). The outside part will rise up nice and puffy. The inside pastry will also rise, but not as much, due to the weight of the fruit and cheese.
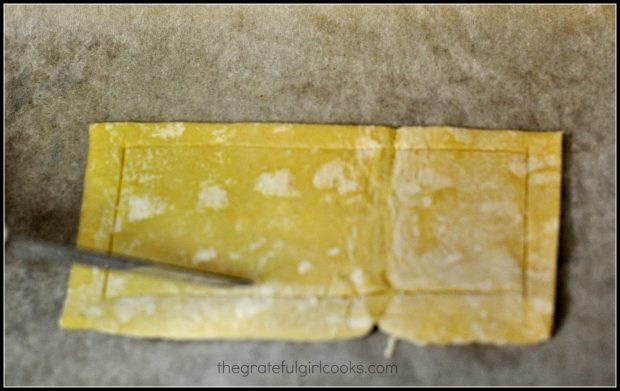
Each pastry dough piece is scored with a knife around the edges.Now spoon some of the cream cheese filling onto each piece of dough like this, as shown below.
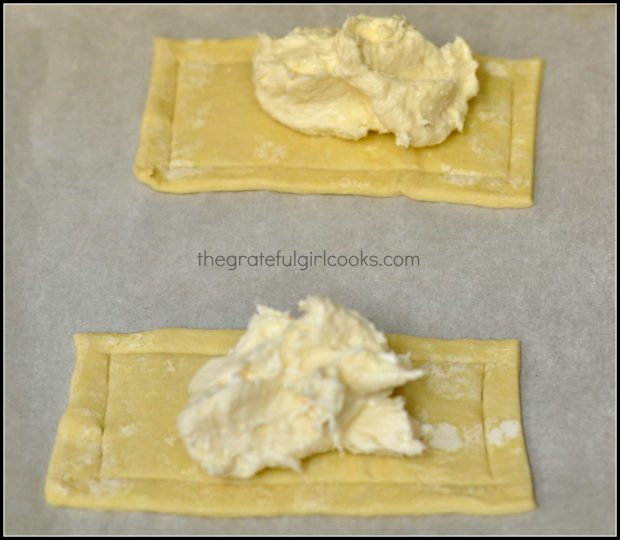
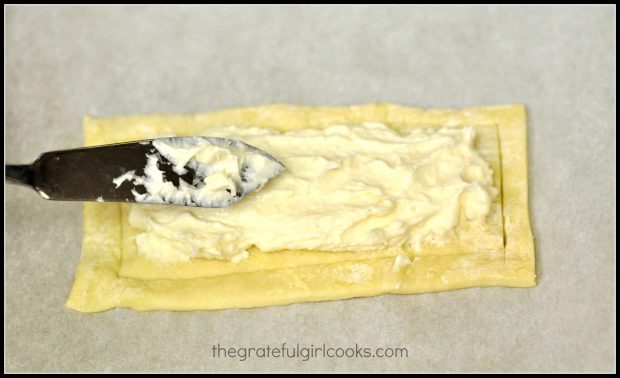
Spoonfuls for cream cheese filling are placed onto middle of dough.Carefully spread the cream cheese filling out, almost to the border. This is where you need to stay within the lines!

Cream cheese filling is spread out in inner rectangle of the dough.

Add The Fruit Toppings

Now place a small dollop of your favorite jam on top of the cream cheese and swirl it around a bit to blend (I used a toothpick). Use any flavor jam you prefer. I used my homemade jams: orange marmalade, strawberry, raspberry, and boysenberry and made a couple pastries of each flavor. It should look kind of like this shown below:
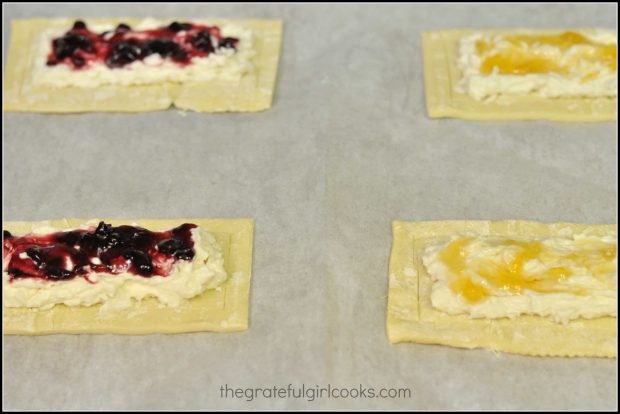
Jam is added to each fruit and cheese danish before baking.Bake The Fruit And Cheese Danish

Brush the outside border of each pastry with an egg yolk mixture, then sprinkle the border with turbinado sugar. Place pans into the oven, and bake for 13-14 minutes (or until golden brown).
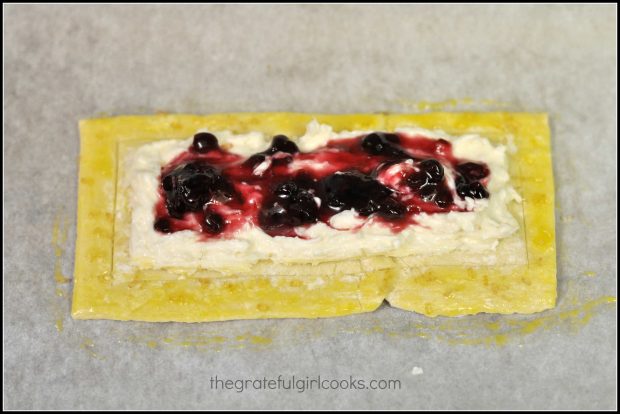
Egg yolk is brushed around edges, and sugar is sprinkled on before baking. The fruit and cheese danish pastries will look like this when you remove them from oven. Don’t they look colorful and good enough to eat?
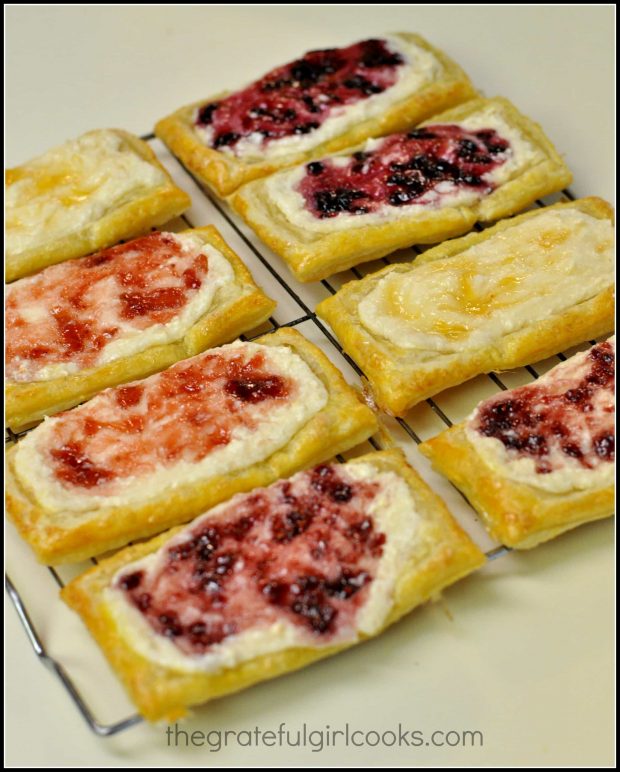
Eight Fruit and Cheese Danish Pastries cool on a wire rack after baking. Here’s an “up close and personal” look at a boysenberry fruit and cheese danish. YUM.
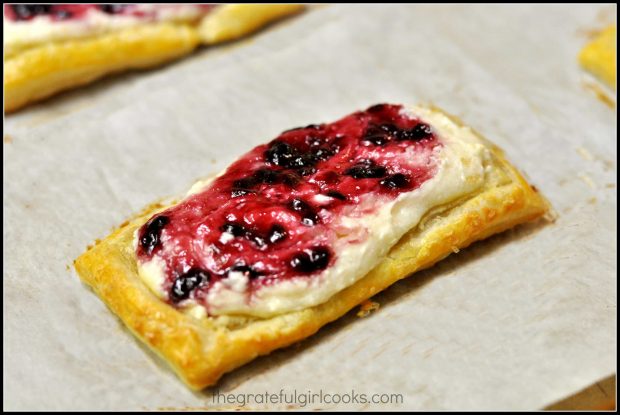
An up close look at a boysenberry fruit and cheese danish.
Once the pastries have cooled, they are drizzled with a simple powdered sugar/lemon glaze. When the glaze has firmed up, they are ready to eat!
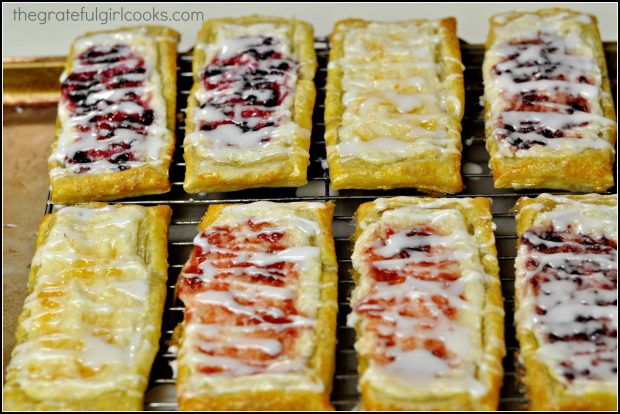
A vanilla glaze is drizzled over the baked fruit and cheese pastries before serving.
Dig in… and enjoy! We thought the fruit and cheese danish pastries were wonderful, and I really hope you do, too! If you enjoy this pastry, be sure and check out my recipe for Orange Cheese Danish Pastry (my very first recipe posted on the blog).

Looking For More BREAKFAST PASTRY Recipes?

You can find all of my recipes in the Recipe Index, located at the top of the page. I have some delicious pastry recipes you might enjoy, including:

Interested In More Recipes?

Thank you for visiting this website. I appreciate you using some of your valuable time to do soIf you’re interested, I publish a newsletter 2 times per month (1st and 15th) with all the latest recipes, and other fun info. I would be honored to have you join our growing list of subscribers, so you never miss a great recipe!
There is a Newsletter subscription box on the top right side (or bottom) of each blog post, depending on the device you use, where you can easily submit your e-mail address (only) to be included in my mailing list.

You Can Also Find Me On Social Media:

Facebook page: The Grateful Girl Cooks!
Pinterest:
The Grateful Girl Cooks!
Instagram:
jbatthegratefulgirlcooks

Author's signature

Original recipe source: https://sites.google.com/site/oakcottagerecipes/easy-fruit-and-cheese-danish
0 from 0 votes
Fruit and Cheese Danish Pastry
Prep Time
25 mins
Cook Time
13 mins
Total Time
38 mins
 

Fruit and Cheese Danish Pastry is an easy to make treat using puff pastry dough, topped with cream cheese filling, assorted fruit jams, and icing.

Category: Pastry
Cuisine: American
Keyword: fruit and cheese danish
Servings: 8
Calories Per Serving: 308 kcal
Author: JB @ The Grateful Girl Cooks!
Ingredients
For the pastry:
  • 1 sheet of frozen puff pastry
  • 4 ounces cream cheese , room temp.
  • 1/4 cup granulated sugar
  • 1/2 teaspoon vanilla extract
  • 1 Tablespoon heavy whipping cream (or half n' half)
  • 2 Tablespoons jam (of your choice)
  • 1 egg yolk , beaten with 1 teaspoon water
  • Turbinado sugar (to sprinkle on pastries before baking)
For the drizzle on the baked pastries:
  • 1 cup powdered sugar
  • 2-3 Tablespoons lemon juice
Instructions
  1. Preheat your oven to 400 degrees F.
  2. While oven is pre-heating, remove one sheet of puff pastry from freezer. Let it slightly thaw before unfolding dough (15 minutes or so).
  3. While dough is slightly thawing, prepare the cream cheese "filling". In a medium sized bowl, beat the cream cheese, granulated sugar, vanilla extract and whipping cream together, using an electric mixer. Mix for several minutes until mixture is smooth and spreadable. Set mixture aside.
  4. Unroll the puff pastry carefully, and try to press dough together where the fold lines were. Cut dough into 8 rectangles (dough is cut in half, then in half again, then each of the 4 squares is cut in half once more).
  5. Cover 2 baking sheets with parchment paper. Place 4 dough rectangles on each baking sheet, leaving ample space in between each piece. Take a sharp knife, and score a border all the way around the dough. Make sure to NOT cut all the way through to the bottom! (by cutting a border, the edges will rise up and hold the filling in better!-don't leave this step out!)
  6. Evenly distribute the cream cheese filling onto the middle of each dough rectangle. Use a knife or spatula to spread it out over the top of the pastry dough, but stay inside the cut border!
  7. Place a very small dollop of your favorite jam onto the cream cheese mixture. Use a toothpick and gently swirl the jam across the top of the pastry.
  8. Mix the egg yolk and water in a small bowl. Using a pastry brush, brush the egg yolk mixture around the outer border of each pastry. While the dough is still "wet", sprinkle the border lightly with turbinado sugar.
  9. Put the baking sheets into the oven and bake at 400 degrees F. for 13-14 minutes. The pastries should be golden around the edges. The dough should have also risen a bit. Take the pans from the oven and place them on a wire rack to cool completely.
  10. Once the pastries are cool, mix the powdered sugar and lemon juice in a small bowl. (if too thick to drizzle, just add a bit more lemon juice!). Use a spoon, and drizzle the glaze over the cooled pastries (I went side to side). Let the glaze firm up, then pastries are ready to be served.
  11. Enjoy!
Nutrition Facts
Fruit and Cheese Danish Pastry
Amount Per Serving (1 g)
Calories 308 Calories from Fat 135
% Daily Value*
Fat 15g23%
Saturated Fat 4g25%
Cholesterol 34mg11%
Sodium 146mg6%
Potassium 53mg2%
Carbohydrates 40g13%
Sugar 24g27%
Protein 3g6%
Vitamin A 140IU3%
Vitamin C 1.9mg2%
Calcium 27mg3%
Iron 0.9mg5%
* Percent Daily Values are based on a 2000 calorie diet.

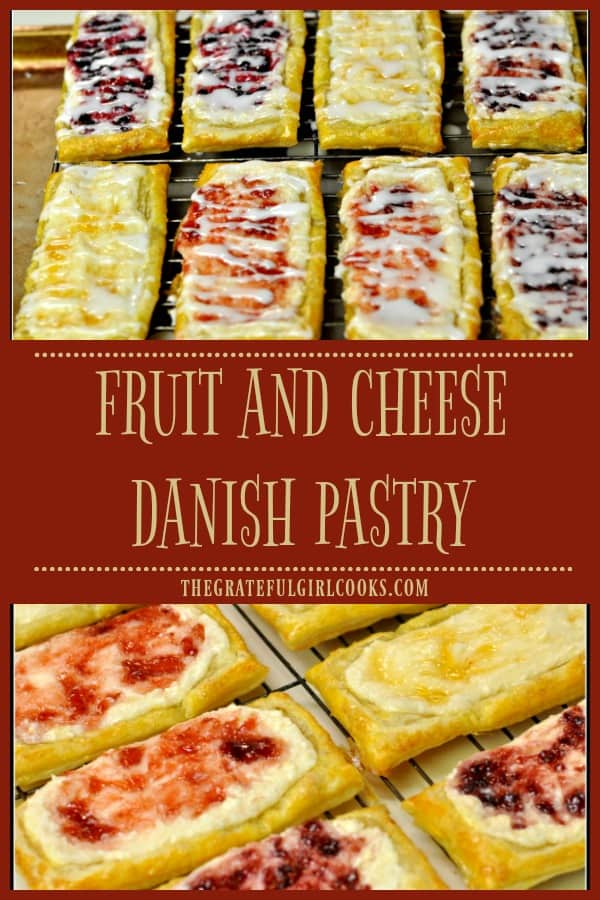
Here’s one more to pin on your Pinterest boards!Fruit and Cheese Danish Pastry is an easy to make treat using puff pastry dough, topped with cream cheese filling, assorted fruit jams, and icing.
 

Save

Save

Save

Save

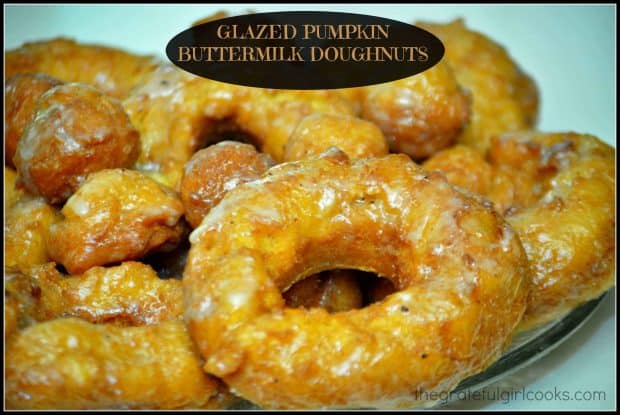
Glazed Pumpkin Buttermilk Doughnuts

Make a dozen yummy glazed pumpkin buttermilk doughnuts (and doughnut holes) in about 30 minutes! No rising time involved for this easy recipe.Make a dozen yummy glazed pumpkin buttermilk doughnuts (and doughnut holes) in about 30 minutes! No rising time involved for this easy recipe.
Don’t you just love Fall? I love this season of the year, when my thoughts turn to cool mornings, brilliantly colored tree leaves, and pumpkins! Which brings up today’s recipe for Glazed Pumpkin Buttermilk Doughnuts!

Oh boy, are these glazed pumpkin buttermilk doughnuts GOOD! They taste perfect on a cool Fall morning, accompanied by a strong cup of coffee. Now THAT tastes like Fall should, right? Right!

Scroll Down For A Printable Recipe Card At The Bottom Of The Page

Do Pumpkin Buttermilk Doughnuts Take A Lot Of Time To Make?

No, this recipe is pretty easy and straightforward. These doughnuts are very easy to make, because there is no rising time involved (no yeast is used).

You can make a dozen delicious pumpkin buttermilk doughnuts, as well as a dozen doughnut holes, in about 30 minutes! If you’ve never made doughnuts before, have no fear.

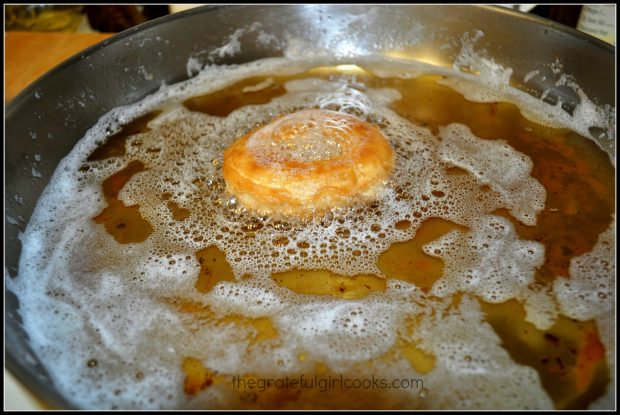
The dough is mixed, doughnut shapes are cut out, and then they are quickly fried in hot oil. Here’s one cooking away in my electric skillet in the hot oil. It’s almost done, and is looking good.

The pumpkin buttermilk doughnuts are fried in oil to cook.

When Do You Glaze The Doughnuts?

After cooking (while the pumpkin buttermilk doughnuts are still hot), they are dipped into a simple, sweet glaze.

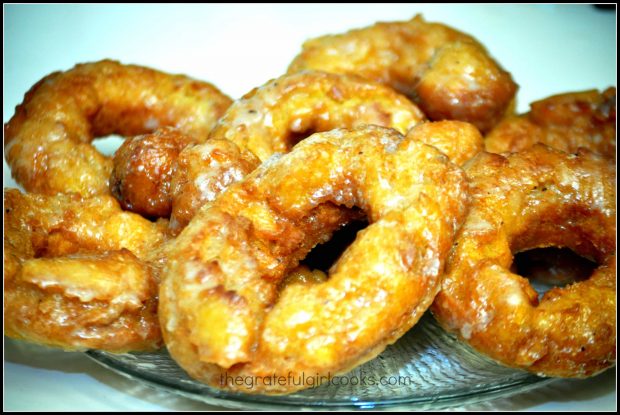
The glazed pumpkin buttermilk doughnuts cool on a wire rack, and then they are ready to gobble up!

Glazed Pumpkin Buttermilk Doughnuts are done cooking, are glazed, and ready to eat!

It’s really not hard at all to make these doughnuts! Before you even know it, you can have a big plate of delicious glazed pumpkin buttermilk doughnuts ready to feed a hungry family!

Hope you enjoy these delicious pumpkin flavored doughnuts! You might also enjoy my glazed lemon poppy seed doughnuts or glazed chocolate doughnuts! They’re yummy!

Here’s how to make these glazed pumpkin buttermilk doughnuts.

Looking For More Recipes Using PUMPKIN?

You can find ALL of my recipes in the Recipe Index, which is located at the top of the page. I have quite a few recipes featuring pumpkin you might enjoy, including:

Want More Recipes? Get My FREE Newsletter!

I publish a newsletter 2 times per month (1st and 15th) with lots of recipes, tips, etc..
Would you like to join our growing list of subscribers?

There is a Newsletter subscription box on the top right (or bottom) of each blog post, depending on the device you use.
You can submit your e-mail address there, to be added to my mailing list.

Find Me On Social Media:

Facebook page: The Grateful Girl Cooks!
Pinterest:
The Grateful Girl Cooks!
Instagram:
jbatthegratefulgirlcooks

Author's signatureOriginal recipe source: http://barefootandbaking.blogspot.com/2011/10/glazed-pumpkin-buttermilk-donuts.html

↓↓ PRINTABLE RECIPE BELOW ↓↓

0 from 0 votes
Glazed Pumpkin Buttermilk Doughnuts
Prep Time
15 mins
Cook Time
15 mins
Total Time
30 mins
 

Make a dozen yummy glazed pumpkin buttermilk doughnuts (and doughnut holes) in about 30 minutes! No rising time involved for this easy recipe.

Category: Breakfast
Cuisine: American
Keyword: pumpkin buttermilk doughnuts
Servings: 12 doughnuts (+ holes)
Calories Per Serving: 182 kcal
Author: JB @ The Grateful Girl Cooks!
Ingredients
For doughnuts:
  • 1 3/4 cup all purpose flour
  • 2 teaspoons baking powder
  • 1/2 teaspoon salt
  • 1 teaspoon pumpkin pie spice
  • 1/2 cup granulated sugar
  • 1 Tablespoon butter , melted
  • 1 egg
  • 1 teaspoon vanilla
  • 1/4 cup buttermilk
  • 1/2 cup pumpkin puree
  • Vegetable or canola oil (for frying)
For Glaze:
  • 1 1/2 cups powdered sugar
  • 1/4 cup buttermilk
  • 1/4 teaspoon vanilla extract
Instructions
  1. In a large bowl, whisk together the flour, baking powder, salt, pumpkin pie spice, and sugar. Set aside.
  2. In a separate large bowl, whisk together the melted butter, egg, vanilla, buttermilk, and pumpkin puree until well combined. Set aside.
  3. Make a well in the center of the dry ingredients. Add the wet ingredients and mix well to combine fully. The dough will be somewhat sticky.
  4. Turn the dough out onto a lightly floured work surface. Using a rolling pin lightly coated with flour, roll the dough out until it is about 1/2 inch thick. Cut dough into circles with a doughnut cutter (or a biscuit cutter or canning jar lid). Cut out a small center circle with a medicine jar lid or a very small cap. (these cutouts will become the doughnut holes). Now your dough circles should look like thin doughnuts.
  5. Prepare the glaze for the doughnuts by mixing the powdered sugar, buttermilk and vanilla in a small bowl. Set aside until doughnuts have been cooked.
  6. To cook the doughnuts: In a large skillet, pour oil until it reaches a depth of 2 inches. Heat on medium-high (about 350 degrees). To test whether oil is hot enough, place a very tiny piece of dough into the oil to see if it bubbles. When hot enough, carefully place 2-3 doughnuts into oil (doughnuts should not touch each other). Cook doughnuts until edges are lightly browned, then carefully flip to the other side (I use 2 chopsticks to turn!). Cook the other side of the doughnut until lightly browned (about 2-3 minutes per side). Remove doughnuts to a paper towel lined plate to drain, and continue to cook the other doughnuts until done. Repeat process with doughnut holes.
  7. While doughnuts are still hot, dip the top side into the doughnut glaze. Let excess glaze drip off back into bowl. Place glazed doughnut onto a wire rack (glaze side UP) over a cookie sheet (to collect any drips), and let the doughnut glaze slightly dry and firm up before serving (just a few minutes).
  8. Once glaze is firmed up, serve doughnuts and enjoy!
Recipe Notes

Recipe will make at least 12 doughnuts and 12 doughnut holes.

Nutrition Facts
Glazed Pumpkin Buttermilk Doughnuts
Amount Per Serving (1 doughnut)
Calories 182 Calories from Fat 9
% Daily Value*
Fat 1g2%
Cholesterol 17mg6%
Sodium 122mg5%
Potassium 126mg4%
Carbohydrates 39g13%
Sugar 23g26%
Protein 2g4%
Vitamin A 1655IU33%
Vitamin C 0.4mg0%
Calcium 49mg5%
Iron 1.1mg6%
* Percent Daily Values are based on a 2000 calorie diet.

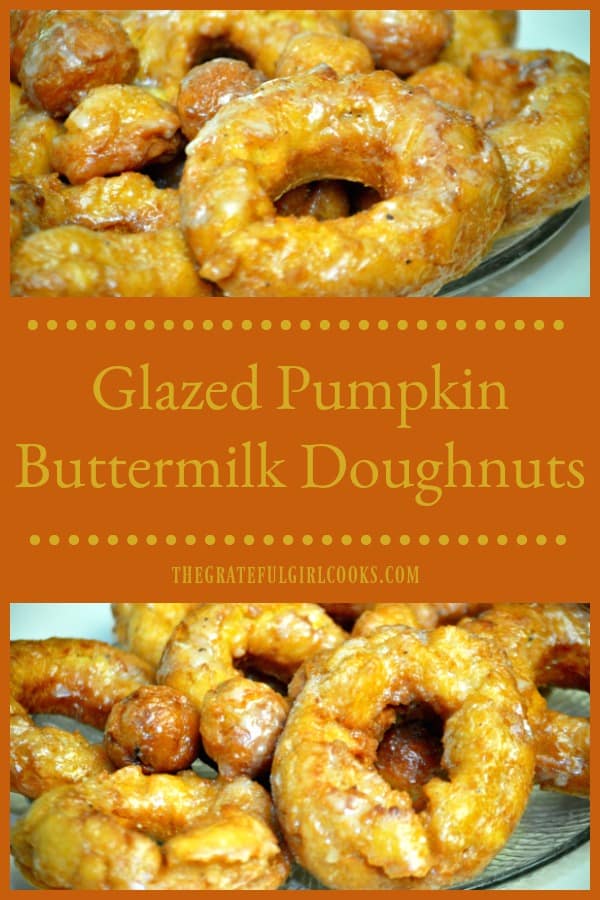
Here’s one more to pin on your Pinterest boards!Make a dozen yummy glazed pumpkin buttermilk doughnuts (and doughnut holes) in about 30 minutes! No rising time involved for this easy recipe.


Save

Save

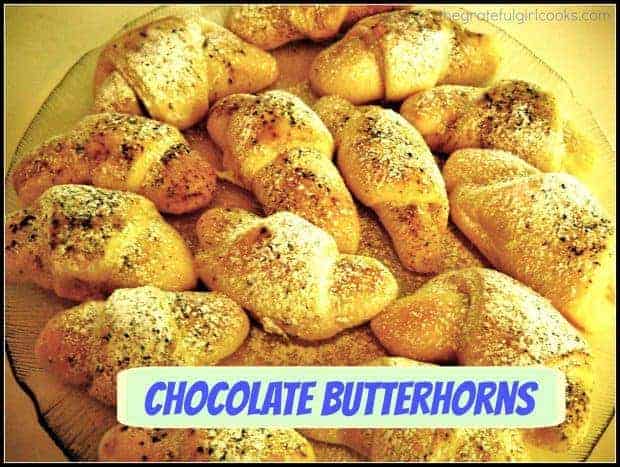
Chocolate Butterhorns

Chocolate butterhorns are made from scratch yeast rolls, with a delicious chocolate filling. Recipe yields 32, using a bread machine or made by hand.Chocolate butterhorns are made from scratch yeast rolls, with a delicious chocolate filling. Recipe yields 32, using a bread machine or made by hand.
Well, after almost a week of insane “busy-ness”, I am back to taking time out of my day to add a new recipe to this blog.  Today’s recipe is for Chocolate Butterhorns. I found this recipe online a couple of years ago from Jessica Fisher (at Life As Mom.com). After looking at the recipe, I thought these rolls sounded pretty good, so I gave them a try. Delicious!

The butterhorns are filled with chocolate chips (so how bad can that be?), are easy to make, and freeze well. This chocolate butterhorns recipe makes 32 rolls, so freezing some for another time is a perfect option for busy families!

Scroll Down For A Printable Recipe Card At The Bottom Of The Page

Making Chocolate Butterhorns

The recipe (as written) utilizes a bread machine. The dough is mixed and rises in the bread machine. The dough is then removed, rolled out, cut into portions, then chocolate pieces are added. Chocolate butterhorns are then rolled, rise again, and then are baked. That’s the instructions in a nutshell.

Do I Have To Have A Bread Machine To Make Chocolate Butterhorns?

The answer is NO. If you don’t have a bread machine, there are a couple other options, shown below.

Option #1: You can mix the dough in a stand mixer, with a dough hook.
Option # 2: You can also mix the dough by using your muscles and mixing the dough by hand.

Once Dough Is Mixed By Hand

If making the dough by hand (or stand mixer), once your dough has been mixed, place it in a lightly greased mixing bowl. Cover the dough, and place in a warm spot. Let the dough rise until it has doubled in size.

Once the dough has doubled in size, simply follow the remaining instructions in the recipe card for rolling them up, filling, baking, etc.

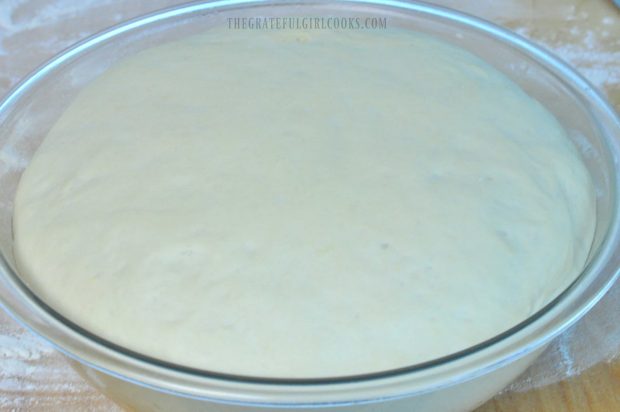
The dough for chocolate butterhorns in a large bowl has doubled in size.

The dough is rolled into a circle, then cut into individual rolls. Once cut, the dough is topped with semi-sweet chocolate, rolled into crescent shapes, and baked.

To Serve

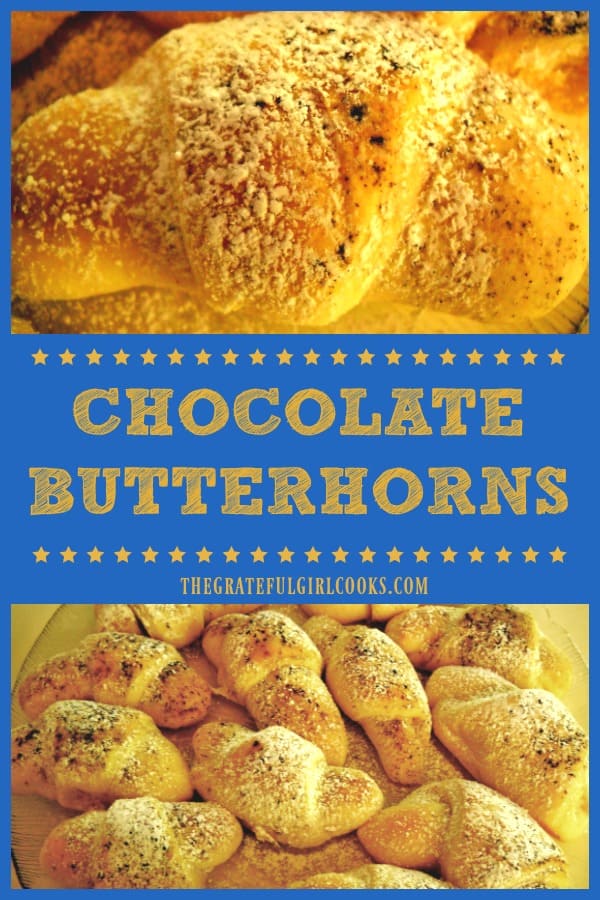
Once done, the warm butterhorns are lightly dusted with sifted powdered sugar and cocoa powder before serving.

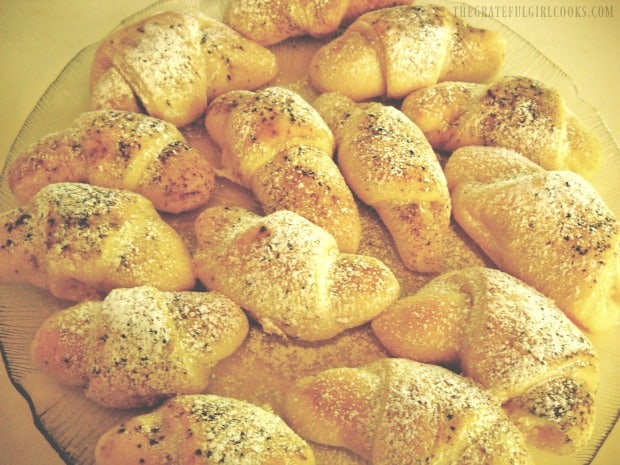
Platter of chocolate butterhorns, ready to eat!

Here is a picture of the rolls, fresh from the oven. They sure look good enough to eat!!!!

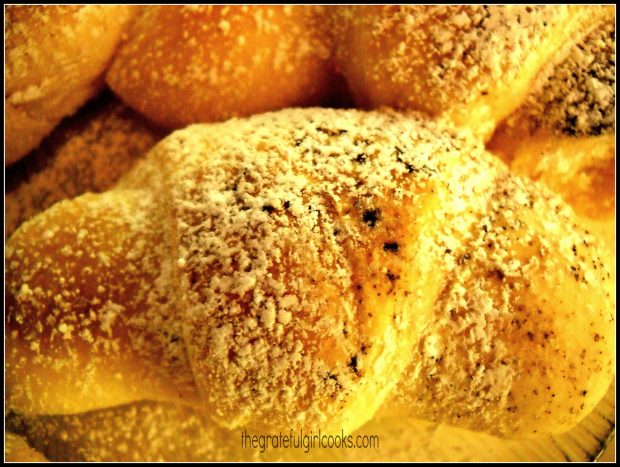
Close up photo of chocolate butterhorns.

I hope you will give these soft, chocolate butterhorns a try…we really enjoyed them! I think they would also taste fantastic with seedless raspberry jam added to the chocolate chip filling! Wouldn’t THAT be decadent to sink your teeth into??? YUM.

Looking For More “From Scratch” Bread Recipes?

All of my homemade bread recipes are located in the Recipe Index, which can be found at the top of the page. A few favorites you might enjoy include:

Interested In More Recipes?

Thank you for visiting this website. I appreciate you using some of your valuable time to do soIf you’re interested, I publish a newsletter 2 times per month (1st and 15th) with all the latest recipes, and other fun info. I would be honored to have you join our growing list of subscribers, so you never miss a great recipe!
There is a Newsletter subscription box on the top right side (or bottom) of each blog post, depending on the device you use, where you can easily submit your e-mail address (only) to be included in my mailing list.

You Can Also Find Me On Social Media:

Facebook page: The Grateful Girl Cooks!
Pinterest:
The Grateful Girl Cooks!
Instagram:
jbatthegratefulgirlcooks

Author's signatureRecipe Source: http://lifeasmom.com/2010/04/chocolate-butterhorns-perfect-for-freezing-perfect-for-anytime.html

↓↓ PRINTABLE RECIPE BELOW ↓↓

0 from 0 votes
Chocolate Butterhorns
Prep Time
1 hr 30 mins
Cook Time
12 mins
Total Time
1 hr 42 mins
 
Chocolate butterhorns are made from scratch yeast rolls, with a delicious chocolate filling. Recipe yields 32, using a bread machine or made by hand.
Category: Bread/Breakfast
Cuisine: American
Keyword: chocolate butterhorns
Servings: 32
Calories Per Serving: 145 kcal
Author: JB @ The Grateful Girl Cooks!
Ingredients
For dough:
  • 1 cup milk
  • 1/2 cup butter , melted
  • 2 eggs
  • 1/2 cup granulated sugar
  • 4 cups all-purpose flour
  • 1 teaspoon salt
  • 1 Tablespoon (heaping) dry active yeast
For rolls:
  • 1 - 2 cups chocolate chips (how much you add is up to you, depending on taste preference)
For Garnish: (optional-not included in caloric calculation)
  • 1/4 cup powdered sugar
  • 1 Tablespoon cocoa powder
Instructions
  1. Place the dough ingredients in a bread machine cannister. Set controls for dough cycle and start machine. Once dough cycle has completed, remove dough from pan. Place on lightly floured work surface and divide into 4 equal parts.
  2. Roll each section of dough into a 12 inch circle. Cut each circle into 8 pie shaped wedges. Place a small amount of chocolate chips over the surface of each individual wedge. Roll up each of the wedges, beginning at the wide part of the triangle and rolling up, ending at the point. Roll up each of the wedges, beginning at the wide part of the triangle and rolling up, ending at the point.

  3. Place rolls on greased baking sheet or parchment paper lined baking sheet. Let rise in a warm place until doubled in size.
  4. Bake rolls in a preheated 375 degree oven for 12-15 minutes (until golden brown). Remove from oven and cool on wire racks.
  5. TO PREPARE AHEAD FOR FREEZING: Once you roll up the rolls, place them (point side down) on a baking sheet. Place in freezer. Once frozen, remove rolls and store them in freezer bags in freezer until you want to prepare them. To prepare the frozen rolls: Remove from bag, place on greased or parchment paper lined baking sheet. Let thaw and rise for approximately 5 hours (until rolls are doubled in size). Bake in 375 degree oven for 12-15 minutes or until golden brown.
  6. TO GARNISH: Once rolls are baked, lightly sift cocoa powder and powdered sugar over the top of each butterhorn.  Serve warm, and enjoy!

Recipe Notes

No Bread Machine Available? Here are two options to prepare the dough:  Lightly spray a large mixing bowl with spray. Option #1: Mix the dough in a stand mixer, with a dough hook. Option # 2: Mix the dough by hand (really takes muscles!). Once dough is mixed, transfer to the greased mixing bowl. Cover the bowl, place in a warm spot, and let dough rise until doubled in size. One doubled in size, continue with Step #2 in recipe.

Nutrition Facts
Chocolate Butterhorns
Amount Per Serving (1 butterhorn)
Calories 145 Calories from Fat 45
% Daily Value*
Fat 5g8%
Saturated Fat 3g19%
Cholesterol 19mg6%
Sodium 111mg5%
Potassium 35mg1%
Carbohydrates 21g7%
Sugar 8g9%
Protein 2g4%
Vitamin A 135IU3%
Vitamin C 0.1mg0%
Calcium 24mg2%
Iron 0.9mg5%
* Percent Daily Values are based on a 2000 calorie diet.

Here’s one more to pin on your Pinterest boards!Chocolate butterhorns are made from scratch yeast rolls, with a delicious chocolate filling. Recipe yields 32, using a bread machine or made by hand.


Save

Save

Save

Glazed Chocolate Doughnuts

These delicious glazed chocolate doughnuts are baked, not fried! Make fresh doughnuts from scratch in the comfort of your own home in under 20 minutes!These delicious glazed chocolate doughnuts are baked, not fried! Make fresh doughnuts from scratch in the comfort of your own home in under 20 minutes!

Who wants Glazed Chocolate Doughnuts? Me, Me, Me…Every now and then I can’t help myself…I want a doughnut! Now I know all about how “unhealthy” they are, but truth is, sometimes I just want a doughnut! The End. That’s why I enjoy making doughnuts from home. No need to run out in my pajamas to buy some. Nope… I can make them at home, fairly quickly!

I found a very simple and delicious chocolate doughnut recipe on Pinterest (where else?), thanks to Karly at Buns In My Oven, and made some of these doughnuts to stare at…I mean wolf down. These doughnuts were very dense with chocolate flavor and delicious.

Scroll Down For A Printable Recipe Card At The Bottom Of The Page

Making Doughnuts

In the past I have made doughnuts the “traditional way”, fried in oil. I made some delicious Glazed Pumpkin Buttermilk Doughnuts and Amish Apple Fritters (my second most-pinned recipe) using that method and they tasted amazing!

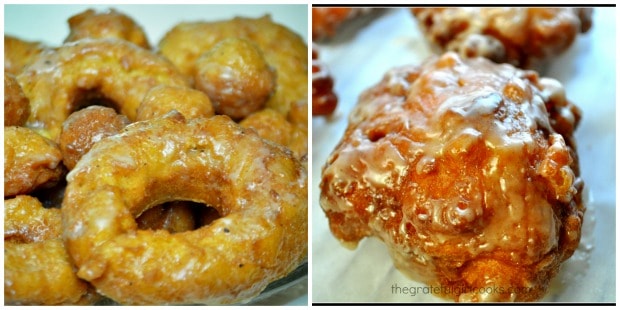
Collage of glazed pumpkin buttermilk doughnuts (L) and Amish apple fritters (R).

Baking Glazed Chocolate Doughnuts Instead Of Frying Them

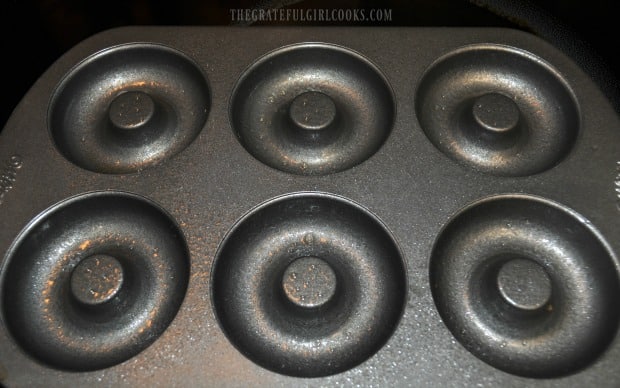
Last year I bought an inexpensive doughnut pan on Amazon for about $7.50 (with a gift card I received for my birthday…SCORE!).

Pan used for baking glazed chocolate doughnuts.

The doughnut pan was not too expensive, but it gave me the option of BAKING doughnuts instead of FRYING them. Baking doughnuts is a very simple way to make this breakfast treat.

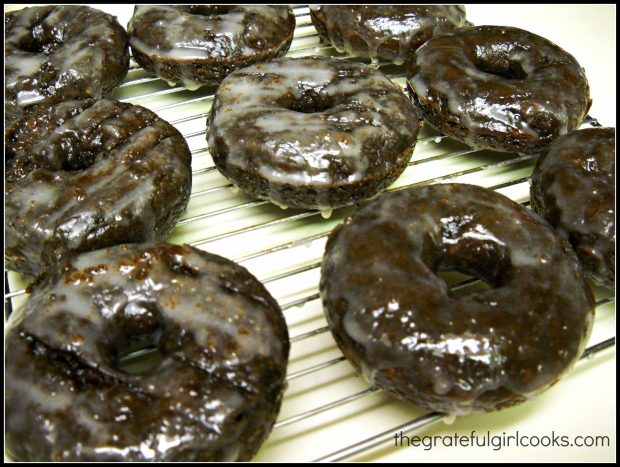
Doughnut batter is mixed, then poured into individual “wells” in a  doughnut pan. The doughnuts are then baked, and covered with icing once done! Baking glazed chocolate doughnuts instead of frying them is my way to enjoy a decadent treat occasionally! Cooking them in the oven helps to slightly reduce the number of calories in each doughnut!

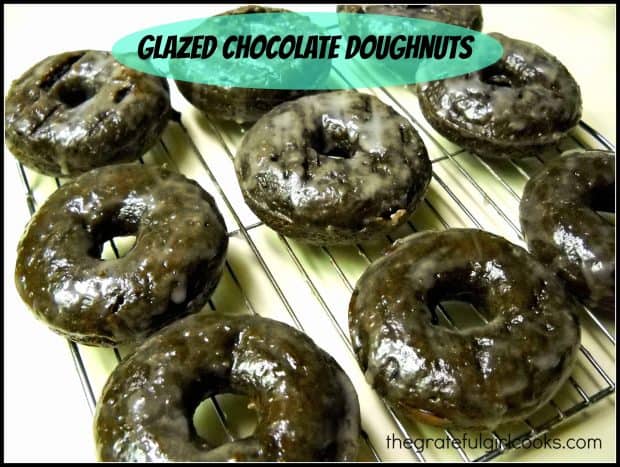
Glazed chocolate doughnuts cooling on wire rack after being iced.
Another Benefit To Making Homemade Glazed Chocolate Doughnuts

Another added benefit to making the doughnuts at home is I saved money by making the glazed chocolate doughnuts myself! I was also quite proud I didn’t have to put on an evening gown and pumps to go to the doughnut shop or grocery store to buy them when the mood struck.

This recipe makes 10 glazed chocolate doughnuts, so I made them in 2 batches (since my doughnut pan only has 6 spots). I hope you will give these breakfast treats a try.  You can find all of my recipes in the Recipe Index, located at the top of the page. If you enjoy making BAKED doughnuts, you might also want to check out my recipe for Glazed Lemon Poppy Seed Doughnuts.

Interested In More Recipes?

Thank you for visiting this website. I appreciate you using some of your valuable time to do soIf you’re interested, I publish a newsletter 2 times per month (1st and 15th) with all the latest recipes, and other fun info. I would be honored to have you join our growing list of subscribers, so you never miss a great recipe!
There is a Newsletter subscription box on the top right side (or bottom) of each blog post, depending on the device you use, where you can easily submit your e-mail address (only) to be included in my mailing list.

You Can Also Find Me On Social Media:

Facebook page: The Grateful Girl Cooks!
Pinterest:
The Grateful Girl Cooks!
Instagram:
jbatthegratefulgirlcooks

Author's signatureRecipe Source: http://www.bunsinmyoven.com/2013/04/01/glazed-chocolate-donuts/

↓↓ PRINTABLE RECIPE BELOW ↓↓

0 from 0 votes
Glazed Chocolate Doughnuts
Prep Time
10 mins
Cook Time
8 mins
Total Time
18 mins
 
These delicious glazed chocolate doughnuts are baked, not fried! Make fresh doughnuts from scratch in the comfort of your own home in under 20 minutes!
Category: Breakfast
Cuisine: American
Keyword: glazed chocolate doughnuts
Servings: 10
Calories Per Serving: 255 kcal
Author: JB @ The Grateful Girl Cooks!
Ingredients
For the doughnuts:
  • 1 cup all purpose flour
  • 1/2 cup granulated sugar
  • 1/4 cup cocoa powder
  • 1/4 cup mini chocolate chips (Optional)
  • 1/2 teaspoon baking soda
  • 1/2 teaspoon vanilla extract
  • 1 egg
  • 6 Tablespoons sour cream
  • 1/4 cup milk
  • 1/4 cup vegetable oil
For the glaze:
  • 1 1/2 cups powdered sugar
  • 6 Tablespoons milk
  • 1 teaspoon vanilla extract
Instructions
  1. Preheat the oven to 375 degrees.
  2. Make the doughnuts: In a medium sized bowl, mix the flour, sugar, cocoa, chocolate chips, and baking soda together.
  3. In another bowl, beat the vanilla, egg, sour cream, milk, and oil until well incorporated. Add the wet ingredients to the bowl of dry ingredients. Stir only until combined.

  4. Spoon the batter (or pipe it) into a greased doughnut pan. Fill each "well" about 3/4 of the way full with batter. Bake doughnuts at 375 degrees for 8 minutes, or until the top of the doughnut springs back when touched.

  5. Remove doughnut pan from oven when done, and let the doughnuts cool IN THE PAN for 2-3 minutes before you remove them to wax paper. Repeat with another batch to finish batter. Let doughnuts cool before icing.

  6. Make The Glaze: Mix the powdered sugar, milk and vanilla in a small pan over low heat. Mix well to combine. Remove the pan from the heat. Pour glaze into a large bowl. Carefully hold a cooled doughnut and "dunk" it in the glaze to coat it; set glazed doughnut on a wire rack to let the glaze harden. Enjoy!

Nutrition Facts
Glazed Chocolate Doughnuts
Amount Per Serving (1 doughnut)
Calories 255 Calories from Fat 72
% Daily Value*
Fat 8g12%
Saturated Fat 6g38%
Cholesterol 21mg7%
Sodium 76mg3%
Potassium 87mg2%
Carbohydrates 43g14%
Fiber 1g4%
Sugar 31g34%
Protein 3g6%
Vitamin A 80IU2%
Calcium 40mg4%
Iron 1mg6%
* Percent Daily Values are based on a 2000 calorie diet.

Here’s one more to pin on your Pinterest boards!These delicious glazed chocolate doughnuts are baked, not fried! Make fresh doughnuts from scratch in the comfort of your own home in under 20 minutes!


Save

Save

Chocolate And Strawberry Napoleons

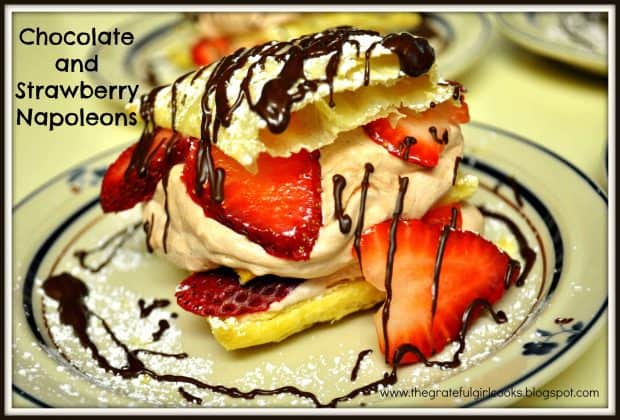
Chocolate Strawberry Napoleons are delicious layered desserts, with strawberries, creamy chocolate filling, puff pastry, and a chocolate drizzle. Chocolate Strawberry Napoleons are delicious layered desserts, with strawberries, creamy chocolate filling, puff pastry, and a chocolate drizzle.

A couple of years ago, my husband and I were having our sons and their girlfriends over for dinner. I was a bit stumped by what to serve for dessert, because I didn’t want to prepare the same old desserts I usually make. I ended up making Chocolate and Strawberry Napoleons!

This dessert was created, because I knew I wanted to try something different. My DEEP CONTEMPLATION of WHAT that could be lasted about 4 minutes. I decided to make something using puff pastry, and we ended up with… Chocolate and Strawberry Napoleons!

Several changes were made to a recipe I found on the box, tried to make it look “fancy pants”…and voila! A beautiful, classy looking dessert was made, that we all enjoyed! The recipe actually looks harder to make than it really is, and with only 7 or 8 ingredients, it’s not too expensive, either!   Here’s how to make this delicious dessert!

Scroll Down For A Printable Recipe Card At The Bottom Of The Page

Prepare Strawberries

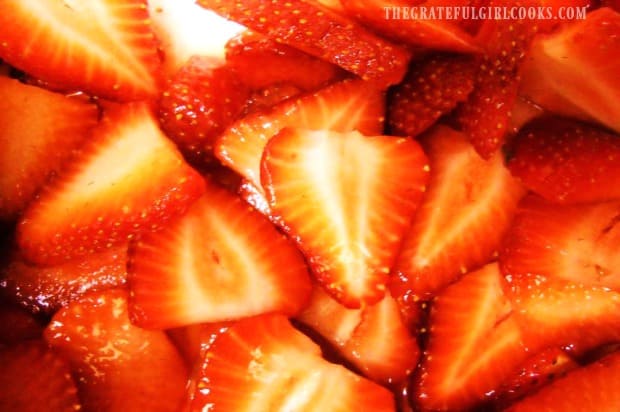
In a small bowl, mix the sliced strawberries with granulated sugar and water. Stir until the sugar dissolves and ingredients are fully combined.

Set the strawberries aside, and let them sit for about 30 minutes, then drain off the juice. This process is called “macerating” the berries, and helps to sweeten them.

Fresh strawberries are mascerated in sugar and water for chocolate strawberry napoleons.

Make The Chocolate Filling

In a large mixing bowl, beat the heavy cream, confectioner’s sugar, cocoa powder and vanilla on high speed until soft peaks form. This “chocolate mousse” type mixture will become the filling for the chocolate strawberry napoleons! Cover and place in refrigerator, until ready to use.

Prepare The  Puff Pastry For Chocolate Strawberry Napoleons

Take the thawed pastry sheet and gently unfold it onto a lightly floured work surface. Cut the pastry (along the fold marks) into 3 strips. Now cut each of the strips into 4 rectangles.

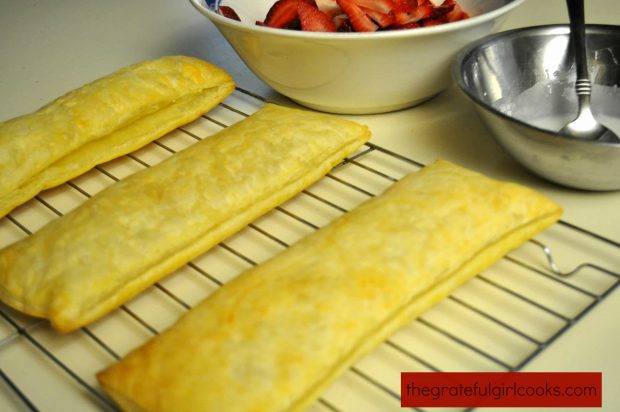
NOTE: You will notice (in the photo below) that I FORGOT to cut the three strips of puff pastry into 4 rectangles each until AFTER I baked them.  TRUST ME – they are much easier to cut BEFORE you bake them and they get all nice and crispy!

Bake The Puff Pastry

Put the 12 pastry rectangles onto 2 baking sheets. Bake at 400 degrees for 10 minutes, or until the pastries turn golden brown. Remove pastries from oven and place on wire racks. Let these cool for about 10 minutes.

Once cooled, take a sharp knife and carefully split each pastry into 2 layers (horizontally, of course!). You should now have 24 pastry rectangles (you will use 3 for each serving). **See NOTE above, regarding photo below.

Baked puff pastry, ready to slice and fill for chocolate strawberry napoleons dessert.

Serving Chocolate Strawberry Napoleons

Place a bottom pastry layer onto each individual serving plate (8 total). Divide HALF of the chocolate filling between all 8 portions. Spoon chocolate filling, to cover (and kind of spill over sides).

Divide and spoon HALF of the strawberries over the chocolate filling on each portion. Top each dessert with another pastry layer. Repeat process with an additional layer of chocolate and strawberries for each dessert. Top each dessert off with another pastry rectangle (use an original “top” piece).

Dust the pastry and plate with sifted powdered sugar. Decoratively drizzle each portion with chocolate syrup (or melted and slightly cooled semi-sweet chocolate chips) and serve!

To serve, chocolate strawberry napoleons are dusted with powdered sugar and drizzled with chocolate.

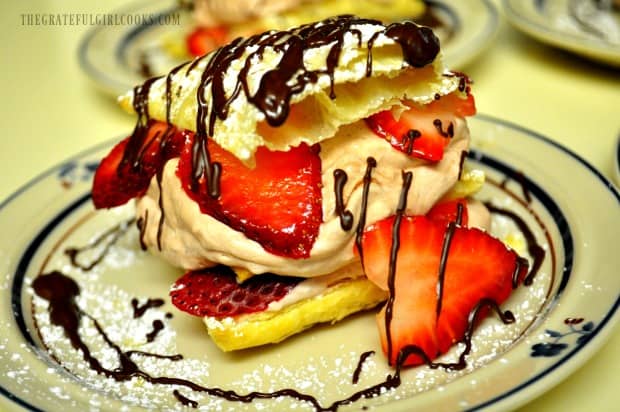
Fresh strawberries, plus creamy chocolate filling, in between layers of flaky puff pastry, and drizzled with chocolate is so good. Yummm…what’s NOT to like?

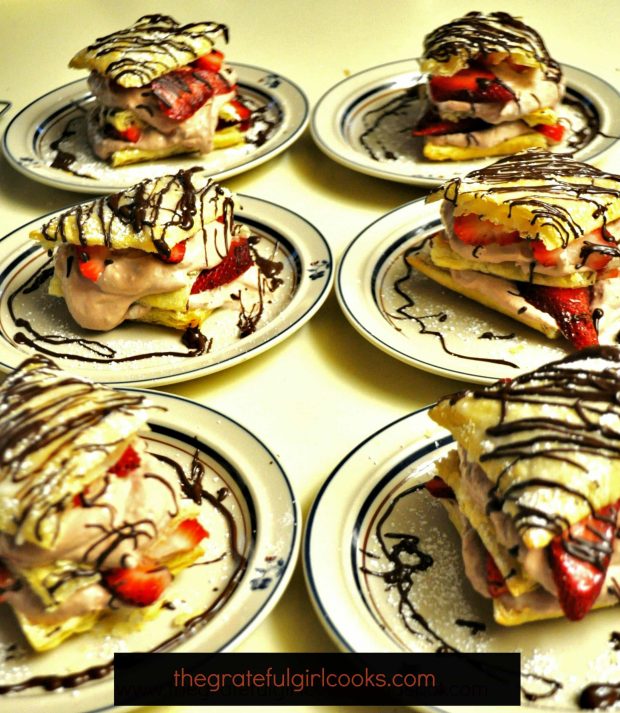
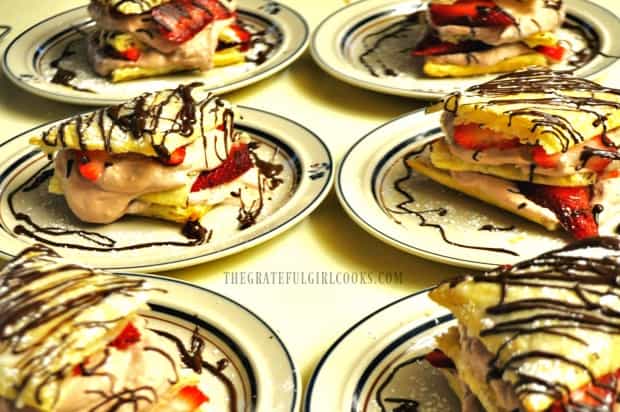
Chocolate strawberry napoleons on plates, ready to serve to guests!

We REALLY enjoyed these chocolate strawberry napoleons for dessert! They are at their very best when served on the same day you made them!

Close up photo of a chocolate strawberry napoleon on a serving plate.

Sure hope you will give it a try. This easy to make dessert will be a treat for your guest’s eyes AND taste buds! Have a GREAT day!
Looking For More DESSERT Recipes?

You can find ALL my recipes in the Recipe Index, located at the top of the page. A few of our favorite dessert recipes include:

Interested In More Recipes?

Thank you for visiting this website. I appreciate you using some of your valuable time to do soIf you’re interested, I publish a newsletter 2 times per month (1st and 15th) with all the latest recipes, and other fun info. I would be honored to have you join our growing list of subscribers, so you never miss a great recipe!
There is a Newsletter subscription box on the top right side (or bottom) of each blog post, depending on the device you use, where you can easily submit your e-mail address (only) to be included in my mailing list.

You Can Also Find Me On Social Media:

Facebook page: The Grateful Girl Cooks!
Pinterest:
The Grateful Girl Cooks!
Instagram:
jbatthegratefulgirlcooks

Chocolate and Strawberry Napoleons

Recipe Adapted From: The back of the box of Pepperidge Farm Puff Pastry Sheets (☺)

↓↓ PRINTABLE RECIPE BELOW ↓↓

0 from 0 votes
Chocolate And Strawberry Napoleons
Prep Time
40 mins
Cook Time
10 mins
Total Time
50 mins
 
A delicious chocolate, strawberry, and cream-filled pastry sure to impress your guests!
Category: Desserts
Cuisine: American
Keyword: chocolate strawberry napoleons
Servings: 8
Calories Per Serving: 296 kcal
Author: JB @ The Grateful Girl Cooks!
Ingredients
  • 1 sheet Puff Pastry (1/2 of a 17.3 oz. box) , thawed
  • 1 cup heavy whipping cream (very cold)
  • 3 Tablespoons confectioner's (powdered) sugar
  • 1 teaspoon vanilla extract
  • 1/4 cup unsweetened cocoa powder
  • 2 cups fresh , sliced strawberries (do not use frozen for this recipe)
  • 1 Tablespoon granulated sugar
  • 1 teaspoon water
  • *Optional: Confectioner's Sugar and Chocolate Syrup (or melted and slightly cooled chocolate chips) for garnish (you know...to make it purdy!!!)
Instructions
  1. Preheat the oven to 400 degrees F.
  2. Prepare strawberries: In a small bowl, mix the sliced strawberries with the granulated sugar and the water. Stir until combined. Set aside and let them sit quietly for approx. 30 minutes, then drain off the juice. This process is called "mascerating" the berries. Set asdide , until ready to use.

  3. Prepare Chocolate Filling: In a large mixing bowl, beat the heavy cream, confectioner's sugar, cocoa powder and vanilla on high speed until soft peaks form. Cover and refrigerate, until ready to use.

  4. Take the thawed pastry sheet and gently unfold it onto a lightly floured work surface. Cut the pastry (along the fold marks) into 3 strips. Now cut each of the strips into 4 rectangles. Put the 12 pastry rectangles onto 2 baking sheets. Bake at 400 degrees for 10 minutes, or until the pastries turn golden brown. Remove pastries from oven and place on wire racks. Let these cool for about 10 minutes.

  5. Once cooled, take a sharp knife and carefully split each pastry into 2 layers (horizontally, of course!). You should now have 24 pastry rectangles (you will use 3 for each serving).

To Make The Napoleons:
  1. Place a bottom pastry layer onto each individual serving plate (8 total). Divide HALF of the chocolate filling between all 8 portions. Spoon chocolate filling, to cover (and kind of spill over sides).

  2. Divide and spoon HALF of the strawberries over the chocolate filling on each portion. Top each dessert with another pastry layer. Repeat process with an additional layer of chocolate and strawberries for each dessert. Top each dessert off with another pastry rectangle (use an original "top" piece).

To Garnish and Serve:
  1. Dust pastry and plate with sifted powdered sugar. Decoratively drizzle with chocolate syrup (or melted and slightly cooled semi-sweet chocolate chips-that's what I did) and serve! ENJOY!
Recipe Notes

Caloric calculation does not include optional chocolate and powdered sugar used to garnish finished dish.

Nutrition Facts
Chocolate And Strawberry Napoleons
Amount Per Serving (1 g)
Calories 296 Calories from Fat 207
% Daily Value*
Fat 23g35%
Saturated Fat 10g63%
Cholesterol 40mg13%
Sodium 88mg4%
Potassium 137mg4%
Carbohydrates 26g9%
Fiber 2g8%
Sugar 3g3%
Protein 3g6%
Vitamin A 435IU9%
Vitamin C 21.4mg26%
Calcium 32mg3%
Iron 1.3mg7%
* Percent Daily Values are based on a 2000 calorie diet.

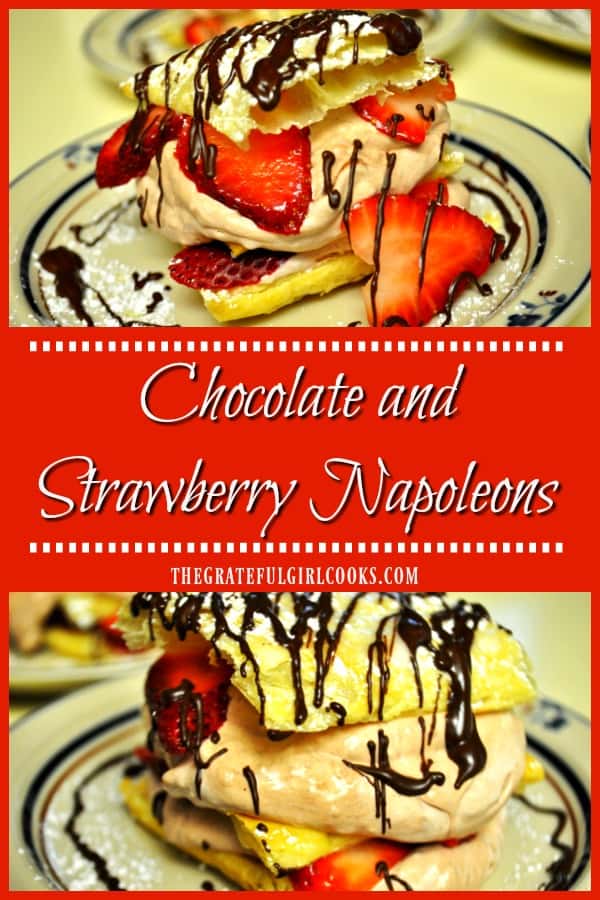
Here’s one more to pin on your Pinterest boards!Chocolate Strawberry Napoleons are delicious layered desserts, with strawberries, creamy chocolate filling, puff pastry, and a chocolate drizzle.


Save

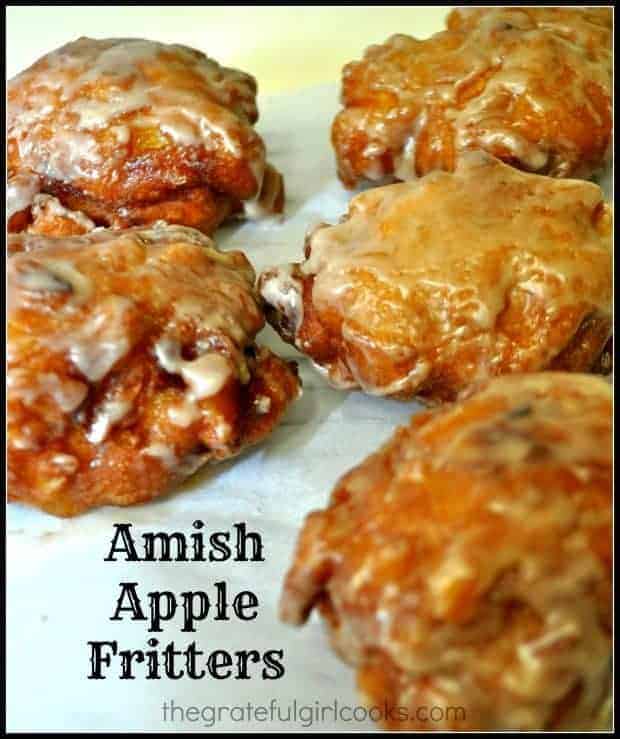
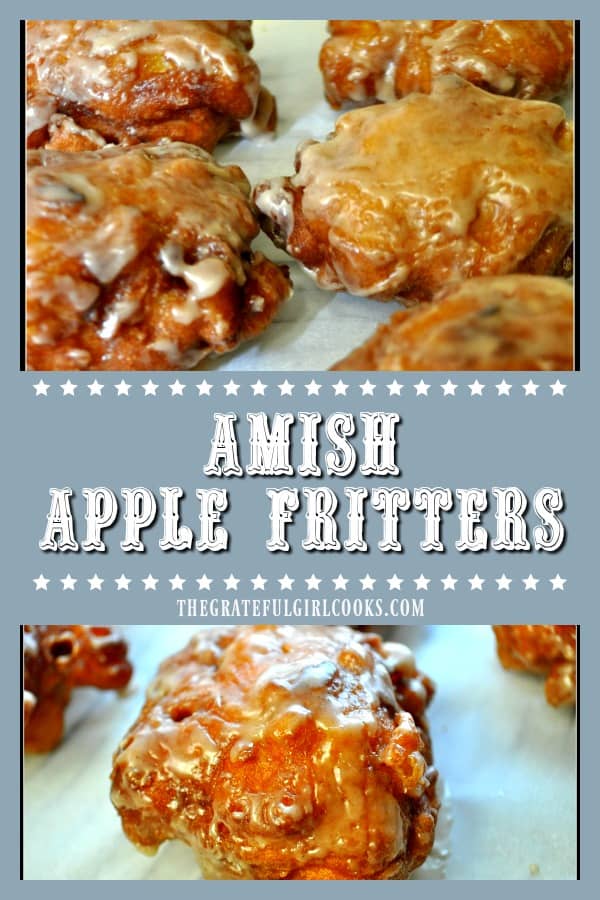
Amish Apple Fritters

Amish Apple Fritters are delicious fried doughnuts, made from scratch with a simple batter, fresh apple chunks, cinnamon, and a sweet glaze. They are SO GOOD!Amish Apple Fritters are delicious crunchy fried doughnuts made from scratch with fresh apple chunks and cinnamon, and covered with a sweet glaze.

I have two little secrets… I am a “Morning Person”, and Apple Fritters are my favorite doughnuts! I LOVE these delicious, crunchy friend doughnuts! They’re made easily from scratch with a simple batter containing fresh apple chunks, cinnamon, and are covered with a sweet glaze.

For over 20 years, I had to be up at 5:30 A.M. every workday to leave by 6:30 to be in my office at 7:00 A.M., ready for a day’s work. Not entirely convenient for making apple fritters! Ha Ha. These days I find myself in a different season of life…no children at home to get up and out of bed before leaving…AND my commute to the office these days is no more than walking upstairs to my home office, where I work for my husband’s company.  My world has changed drastically!

My” new normal” is… instead of grabbing a large mug of coffee and shoving toast in my mouth while heading out the door as I did while working full-time, I now seem to revert to “boring” breakfasts such as oatmeal or toast and eggs. HOWEVER… I do love a great apple fritter, doughnut or pastry occasionally. I mean, really, who doesn’t??? (if we’re truth-telling here).

Scroll Down For A Printable Recipe Card At The Bottom Of The Page

How I Found This Recipe For Amish Apple Fritters

I love to try new recipes and learn new cooking techniques in the kitchen, AND my favorite doughnut of all time is the humble, yet glorious Apple Fritter. One day, while looking at recipes on Pinterest,  I saw one for these doughnuts, written by a great-grandmother named Polly.

I could tell I would like this easy recipe from the very beginning (aren’t ALL recipes written by great-grandmothers wonderful?)… so I made them, and sure enough…these fritters were amazing! Sometimes, a warm apple fritter and a strong cup of coffee are exactly what this old girl wants. Please notice I did not say what this old girl needs… now THAT’S another story, *cough, cough!

Hope you enjoy them…occasionally (wink wink)! Here’s how easy they are to make…you’ll be a doughnut maker in no time!

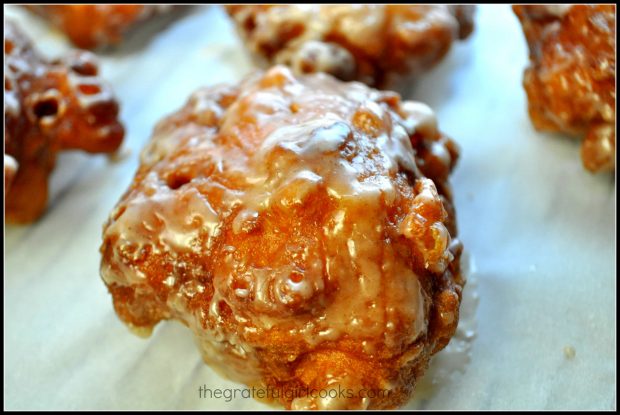
Apple fritter close up
 

How To Make Amish Apple Fritters

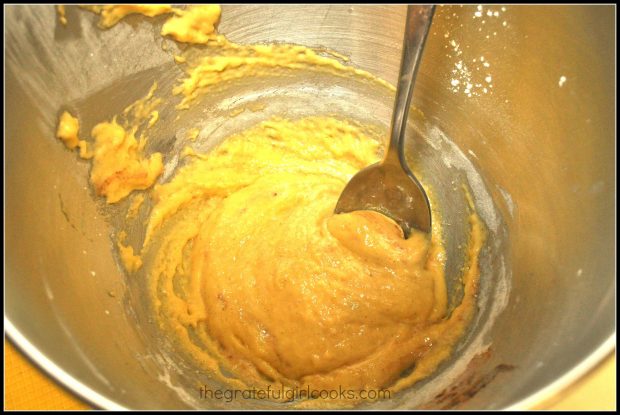
First, mix up the batter. In a large bowl (or the bowl to a stand mixer), cream the sugar and eggs for 1-2 minutes with an electric mixer. To this batter, add the flour, baking powder, cinnamon, salt and  milk. Mix these ingredients together well.

Mixing the batter for apple fritters

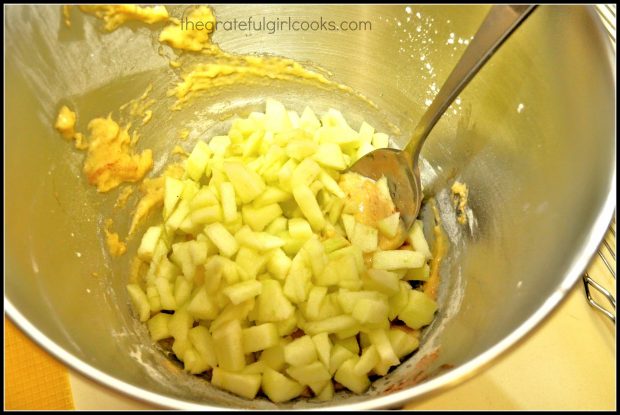
In a separate bowl, mix the chopped apples with the lemon juice. Using a spoon, add the apple mixture to the batter and stir well, to combine.

Apples being added to mixing bowl

Cooking Amish Apple Fritters

Heat vegetable oil to 375° F. in a large skillet or electric skillet. You will need a deep-fry thermometer or an electric skillet with temperature control. NOTE: It is very important to make sure the temperature is hot enough to fry the fritters correctly.

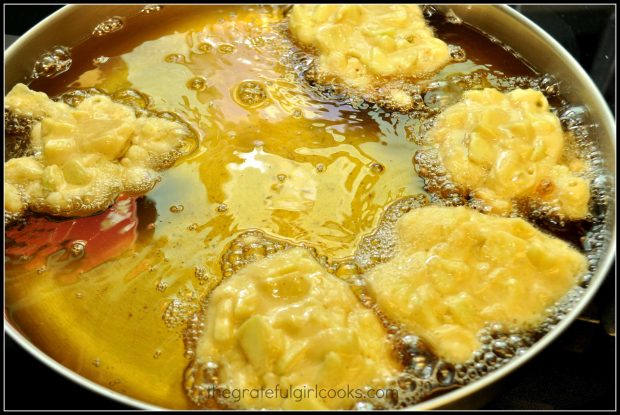
Once the oil is at 375° F, scoop out really large spoonfuls of the fritter batter (as big as you can get ’em!). Carefully slide the fritter into the hot oil, because that oil is HOT!

Dough being fried in oil in skillet

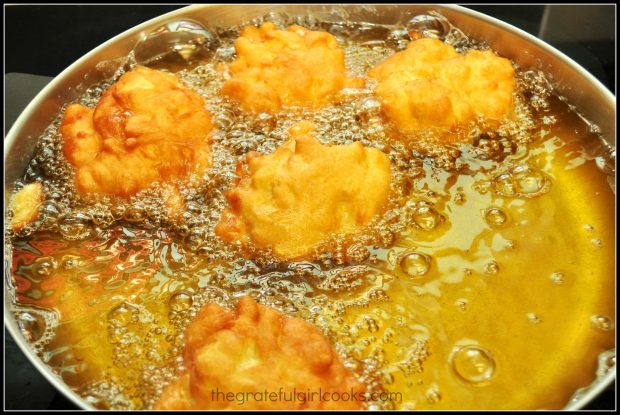
See in the photo below how the apple fritters are starting to turn golden brown? This is a GOOD thing. When they get to a true golden brown color, carefully turn the fritters over to the other side. This usually takes about 2-3 minutes for the first side.

I found it helpful to use two spoons to carefully flip the Amish apple fritters over.  Once they have been flipped over, continue cooking.

Fritters turned over to brown in the oil

How Long Do You Cook The Amish Apple Fritters?

The total cooking time for the Amish apple fritters is approximately 2-3 minutes on each side. NOTE: The cooking time may vary a bit, based on two things: the SIZE of the fritters you cook, and having the proper oil temperature to cook in.

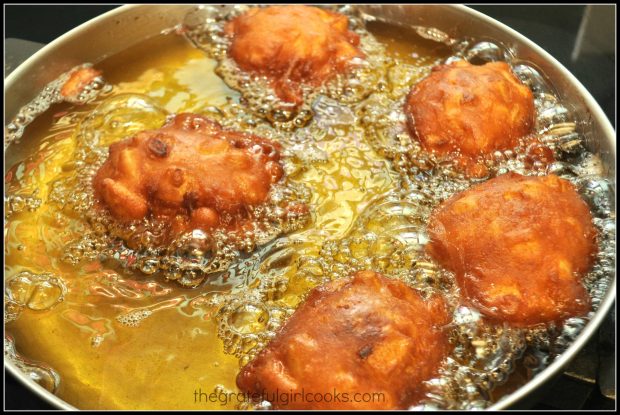
When the fritters become nice and brown (see photo below) on both sides, then you know they will be ready and cooked through. You might need to flip them over again to make sure both sides are deeply browned.

Golden brown Amish Apple Fritters in hot oil almost done

IMPORTANT TIP: Once fritters are done, make sure that the oil temperature returns back to 375° F, before adding the next batch of Amish Apple Fritters to cook!

Once each batch of apple fritters are done, use a slotted spoon to remove them, one at a time, to a paper towel lined platter or wire rack to cool. You will need several layers of paper towels to absorb any remaining oil on the fritters.

Glazing Amish Apple Fritters

Now all you need to do is make the quick and easy glaze for the finished apple fritters! It is important to let ALL the fritters cool completely, before adding the glaze to them!

Mix up the glaze in a medium sized bowl. Use a pastry brush to “paint” it onto top and bottom of the cooled fritters. Let the icing firm up a bit, then these delicious Amish apple fritters are ready to eat, and enjoy!

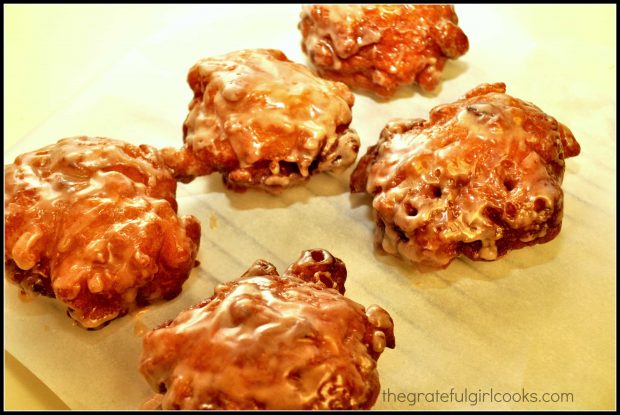
Fritters coated with a glaze, resting on parchment paper

The Amish Apple Fritters Are Ready To Enjoy!

Pour yourself a great cup of hot coffee or tea… and take a bite out of one of those yummy Amish Apple Fritters!

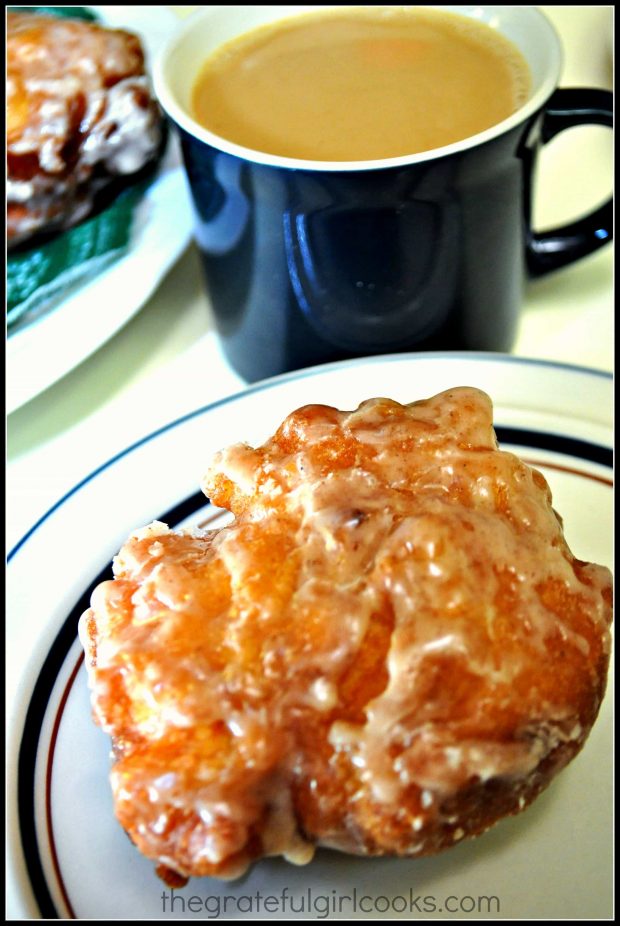
Cup of coffee with one apple fritter on a plate

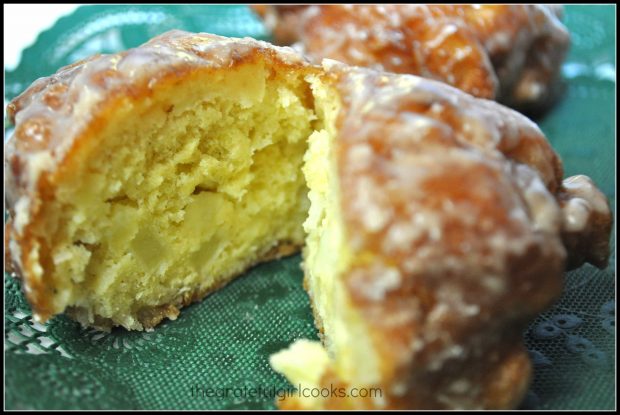
You can see the chunks of apples inside the fritter! The Amish apple fritters are crunchy on the outside, and nice and soft on the inside!

A fritter cut open to show the inside apples

Sure hope you enjoy these Amish apple fritters! We LOVED them. Have a GREAT day!

Looking For More DOUGHNUT Recipes?

You can find all of my recipes in the Recipe Index, located at the top of the page. A few of our favorite doughnut recipes are there, including:

Interested In More Recipes?

Thank you for visiting this website. I appreciate you using some of your valuable time to do soIf you’re interested, I publish a newsletter 2 times per month (1st and 15th) with all the latest recipes, and other fun info. I would be honored to have you join our growing list of subscribers, so you never miss a great recipe!
There is a Newsletter subscription box on the top right side (or bottom) of each blog post, depending on the device you use, where you can easily submit your e-mail address (only) to be included in my mailing list.

You Can Also Find Me On Social Media:

Facebook page: The Grateful Girl Cooks!
Pinterest:
The Grateful Girl Cooks!
Instagram:
jbatthegratefulgirlcooks

Author's signatureRecipe Adapted From: www.angelsinmygarden.blogspot.com/2011/06/amish-apple-fritters.html
 
4 from 3 votes
Amish Apple Fritters
Prep Time
15 mins
Cook Time
15 mins
Total Time
30 mins
 
Amish Apple Fritters are delicious fried doughnuts, made easily from scratch with a simple batter and fresh apple chunks, cinnamon, and a sweet glaze.
Category: Breakfast
Cuisine: American
Keyword: Amish apple fritters
Servings: 6 fritters
Calories Per Serving: 238 kcal
Author: JB @ The Grateful Girl Cooks!
Ingredients
For fritters:
  • 2 Tablespoons granulated sugar
  • 2 large eggs
  • 1 cup all-purpose flour
  • 2 tsp. baking powder
  • 1/2 tsp. cinnamon
  • 1/2 tsp. salt
  • 1/4 cup milk
  • 2 tsp. fresh lemon juice
  • 2-3 cups peeled , cored and chopped Granny Smith or Gravenstein apples (firm pie apples!)
  • Vegetable oil for deep-frying (approx. 4-5 cups- enough to come halfway up sides of pan or skillet)
For glaze:
  • 1 1/4 cups powdered sugar
  • 1/4 tsp. vanilla
  • 3-4 tsp. warm water (thin enough to make the glaze "paintable")
Instructions
  1. In a large bowl (or the bowl to a stand mixer), cream the sugar and eggs for 1-2 minutes with a mixer.
  2. To this, add the flour, baking powder, cinnamon, salt and milk. Mix these ingredients well.
  3. In a separate bowl, mix the chopped apples with the lemon juice. Using a spoon, add the apple mixture to the batter and stir well, to combine.
  4. Heat vegetable oil to 375 degrees (use a deep-fry thermometer or use an electric skillet with a temperature control). It is very important to make sure the temperature is hot enough to fry the fritters correctly.
  5. Once the oil is at 375 degrees, scoop out really large tablespoonfuls of the fritter batter (as big as you can get 'em!) and carefully and gently slide the fritter into the hot oil.
  6. When they get to a true golden brown color, carefully turn the fritters over to the other side (I used two spoons to carefully flip them) and continue cooking. (This should take approx. 2-3 minutes on each side).
  7. When the fritters become brown on both sides (you might have to flip them over again to make sure both sides are brown), then you know they will be ready and cooked through.
  8. Using a slotted spoon, remove the fritters, one at a time, to a paper-towel lined (several thicknesses) plate to drain and cool.
  9. To make a glaze for the tops of the fritters, mix together the powdered sugar, vanilla and water in a small bowl until you have a nice "paintable" glaze.
  10. Using a pastry brush, brush this glaze over the entire top of the fritter. Let glaze harden slightly, turn it over and "paint" the glaze on the bottom. Place glazed fritters on wire rack; let glaze harden, then serve.
Recipe Notes

If you do not like glaze on your fritters, the author of this recipe also suggests sprinkling the hot "right out of the fryer" fritters with powdered sugar and cinnamon. For mine, I used the glaze option and they were perfect.
Tip #1: These apple fritters are at their very best the first day you make them!
Tip #2: If using self-rising flour as substitute for all purpose flour, omit baking powder and salt from the recipe.
Tip #3: Once oil cools, strain it, store it in a container in refrigerator to use on another batch!

Nutrition Facts
Amish Apple Fritters
Amount Per Serving (1 fritter)
Calories 238 Calories from Fat 9
% Daily Value*
Fat 1g2%
Cholesterol 55mg18%
Sodium 187mg8%
Potassium 267mg8%
Carbohydrates 52g17%
Fiber 1g4%
Sugar 33g37%
Protein 4g8%
Vitamin A 120IU2%
Vitamin C 2.6mg3%
Calcium 101mg10%
Iron 1.4mg8%
* Percent Daily Values are based on a 2000 calorie diet.

Here’s one more to pin on your Pinterest boards!Amish Apple Fritters are delicious fried doughnuts, made easily from scratch with a simple batter and fresh apple chunks, cinnamon, and a sweet glaze.

Save

Save

Save

Save

Save

Save

Save

Orange Cheese Danish Pastry

Enjoy a delicious Orange Cheese Danish Pastry, a buttery, orange-glazed treat filled with orange-flavored cream cheese and ricotta. Recipe makes 2 pastries!Enjoy a delicious Orange Cheese Danish Pastry, a buttery, orange-glazed treat filled with orange-flavored cream cheese and ricotta. Recipe makes 2!
SERIOUSLY- Some mornings you just don’t want a nutritious, healthy breakfast. Period. I know that’s how it is for me some days…I want to eat a healthy breakfast, but… you know how it is. That’s how this recipe for Orange Cheese Danish Pastry came about.

You know how it is at times when you wake up and all you want is a humongous cup of steaming hot coffee and something sweet and “not so good for you”?

It was that way for me one morning, so I went on a search for something tasty that would rock my world (in a “breakfast-y” kind of way), and found this recipe.

Scroll Down For A Printable Recipe Card At the Bottom Of The Page

How This Orange Cheese Danish Pastry Is Made

I don’t have a lot of photos (sorry-my bad), but the process for making this delicious pastry is fairly simple. An orange-flavored cream cheese and ricotta cheese filling is mixed with other ingredients.

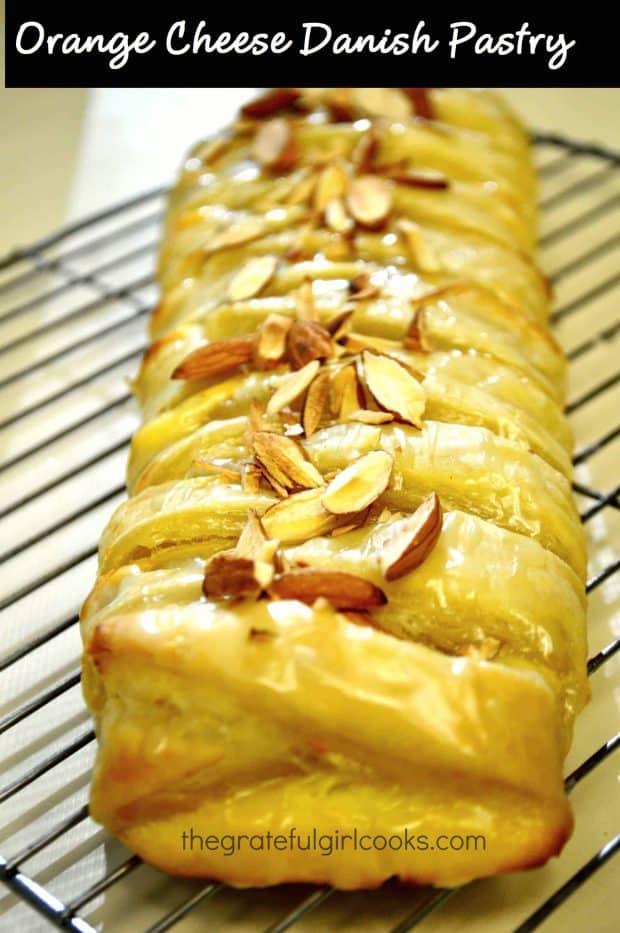
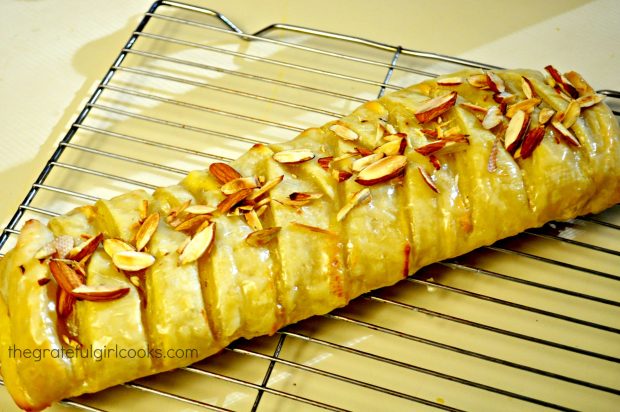
This creamy mixture is then spread down the middle of puff pastry sheets. The pastry dough is sliced and “decoratively draped over the filling in a cross-wise “weaving” sort of way.

The pastries (the recipe make TWO) are then baked until golden brown, and then glazed with an orange-flavored icing. Sliced almonds are also sprinkled over the top! Once the glaze firms up, this incredible tasting breakfast treat is ready to slice and EAT!

The orange cheese danish pastry is topped with glaze and sliced almonds when done.

This orange cheese danish pastry is fairly easy to make, and is really tasty! Why not give it a try…I think you will be surprised at how delicious it is! Hope you enjoy this Orange Cheese Danish Pastry! Have a great day.

Looking For More PASTRY Recipes?

You can find all of my recipes in the Recipe Index, located at the top of the page. A few favorite pastry recipes include:

Interested In More Recipes?

Thank you for visiting this website. I appreciate you using some of your valuable time to do soIf you’re interested, I publish a newsletter 2 times per month (1st and 15th) with all the latest recipes, and other fun info. I would be honored to have you join our growing list of subscribers, so you never miss a great recipe!
There is a Newsletter subscription box on the top right side (or bottom) of each blog post, depending on the device you use, where you can easily submit your e-mail address (only) to be included in my mailing list.

You Can Also Find Me On Social Media:
Facebook page: The Grateful Girl Cooks!
Pinterest: The Grateful Girl Cooks!
Instagram: jbatthegratefulgirlcooks

Author's signature

Recipe adapted from: https://sites.google.com/site/thecomfortofcookingrecipes/orange-cheese-danish-pastry

0 from 0 votes
Orange Cheese Danish Pastry
Prep Time
30 mins
Cook Time
25 mins
Total Time
55 mins
 

Enjoy a delicious Orange Cheese Danish Pastry, a buttery, orange-glazed treat filled with orange-flavored cream cheese and ricotta. Recipe makes 2!

Category: Breakfast
Cuisine: American
Keyword: orange cheese danish
Servings: 10
Calories Per Serving: 428 kcal
Author: JB @ The Grateful Girl Cooks!
Ingredients
  • 4 ounces ricotta cheese
  • 4 ounces cream cheese
  • 1/3 cup sugar
  • 1 large egg
  • 2 Tablespoons butter , softened
  • 1 Tablespoons all-purpose flour
  • 2 teaspoons grated orange rind
  • 1/2 teaspoon vanilla
  • 2 sheets frozen puff pastry , thawed (1 lb.)
ICING:
  • 1/2 cup confectioners sugar (powdered)
  • 1 Tablespoon orange juice
GARNISH:
  • 2 Tablespoon sliced almonds (or you can use walnuts or pecans)(optional)
Instructions
  1. Combine cheeses, sugar, egg, butter, flour, orange rind and vanilla in a large bowl. Beat with a whisk, or an electric mixer on medium speed, until well blended.
  2. Carefully unfold the pastry sheet into a rectangle; place it on a baking sheet.
  3. With a sharp knife make 2-inch deep cuts at 1-inch intervals on the long sides of the pastry. Spread 1/2 of the cheese mixture down the center 3 inches of the pastry.
  4. Crisscross strips over the filling, alternating sides and bringing the strips all the way across the filling.
  5. Repeat process for the second pastry.
  6. Bake in a preheated 400 degree oven approximately 25 minutes or until the bottom of the pastry is golden brown. Remove from oven and cool on a wire rack.
  7. While pastry is cooling down, sift confectioners sugar into the orange juice in a bowl. Mix until the icing is smooth.
  8. Drizzle the mixture over the pastries, then sprinkle with sliced almonds.
  9. Serve and Enjoy!
Nutrition Facts
Orange Cheese Danish Pastry
Amount Per Serving (1 slice (1/10 of total))
Calories 428 Calories from Fat 252
% Daily Value*
Fat 28g43%
Saturated Fat 10g63%
Cholesterol 41mg14%
Sodium 195mg8%
Potassium 85mg2%
Carbohydrates 37g12%
Fiber 1g4%
Sugar 14g16%
Protein 7g14%
Vitamin A 300IU6%
Vitamin C 2.1mg3%
Calcium 53mg5%
Iron 1.6mg9%
* Percent Daily Values are based on a 2000 calorie diet.

Here’s one more to pin on your Pinterest boards!Enjoy a delicious Orange Cheese Danish Pastry, a buttery, orange-glazed treat filled with orange-flavored cream cheese and ricotta. Recipe makes 2!


Save

Save

Save

Save

Save