Category: Breakfast

Raspberry Lemon Crumb Cake

You will LOVE this easy, delicious Raspberry Lemon Crumb Cake, which can be served as a dessert (yummy with a scoop of ice cream) OR a breakfast coffeecake.
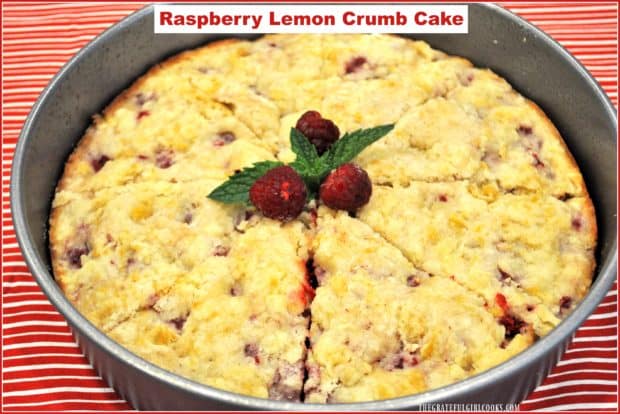

This time of the year is the PERFECT time to find ripe raspberries at local farms or in the local produce section at the grocery store. Then you can make this absolutely yummy raspberry lemon crumb cake!

This past weekend I took my sister and brother-in-law raspberry picking at a local U-Pick farm. They were visiting Oregon from Southern CA for several days, and this is one of the activities my sister really enjoys when she comes up here to visit.

Scroll Down For A Printable Recipe Card At The Bottom Of The Page

Where I Go To Pick Fresh Berries Every Summer

Rowell Brothers Berry Farm has been around since 1853, is about 15 minutes from our home, and is one of the scenic places I LOVE to pick raspberries, blueberries, and boysenberries each summer (plus the fact that you can eat berries for free while you pick is always fun!).

We got to the farm early in the morning, picked raspberries for half an hour and then we were done! Over eight pounds of raspberries picked in half an hour, and we only paid a little over $10, which is a real deal, compared to what they sell for at the grocery store.

A couple days later I used the berries to make homemade raspberry jam , froze a lot of them to use another time, and then also made this delicious raspberry lemon crumb cake with the remaining berries!

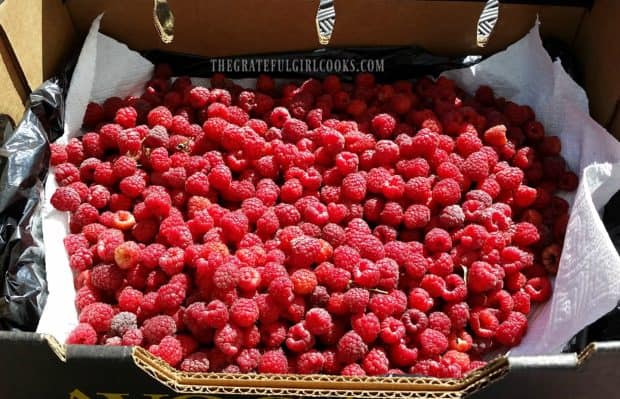
Raspberries ready to pick at local U-Pick farm!Fresh picked raspberries are so delicious!

How I Got This Recipe For Raspberry Lemon Crumb Cake

I received this recipe from a friend from Southern California 3 years ago.  Diane and I grew up together in the youth group at church, and ran into each other once again at a music group reunion we both attended. I hadn’t seen her in over 40 years! It was fun catching up with her, and I learned she had attended culinary school in the past.  Ooh… how fun!

Once I returned home to Oregon, Diane sent me this recipe via e-mail and suggested I might enjoy trying it!  I saved the recipe in a basket which contains a HUGE pile of recipes I want to try (too many recipes, never enough TIME), and just this week finally hunted it down and pulled it out to use with these fresh picked raspberries! So glad I did – this is a delicious recipe!

The recipe is incredibly EASY, and the fruit-filled crumb cake tastes wonderful.  We enjoy a slice for breakfast, accompanied by a good, strong cup of coffee! My husband said his favorite way to eat this would be with a big ol’ scoop of vanilla ice cream on the side!  It’s that versatile – it can be either a breakfast coffeecake or a dessert cake!

Here’s How To Make Raspberry Lemon Crumb Cake

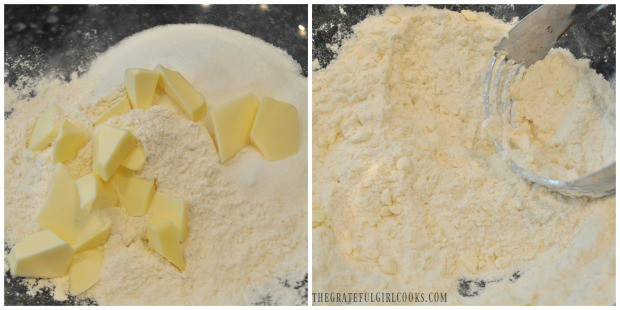
Very cold chunks of butter are cut into flour sugar and salt, using a pastry blender. The butter is worked into the dry ingredients until mixture is crumbly and butter is about the size of a pea. One half of a cup of the crumbly mixture is set aside to use for a crumb topping for the cake later on.

Butter is cut into flour and sugar for cake

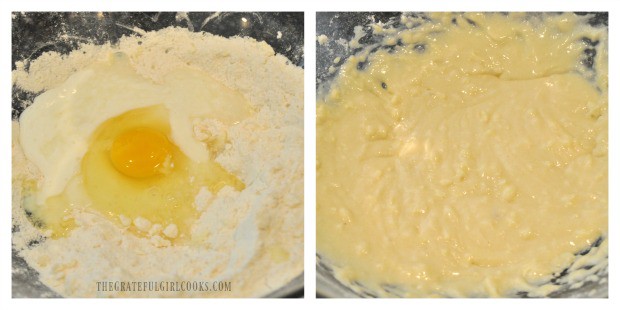
The remaining flour mixture is combined with baking powder, baking soda, egg, buttermilk and fresh lemon juice, and blended until fully combined.

Egg, lemon juice and buttermilk are blended into dry ingredients for cake

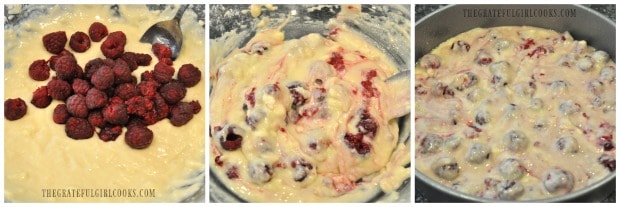
Fresh raspberries are gently stirred into cake batter.  The batter is then placed into a cake pan that has been coated (bottom and sides) with non-stick cooking spray.

Raspberries are gently stirred into batter, then batter is placed in cake pan

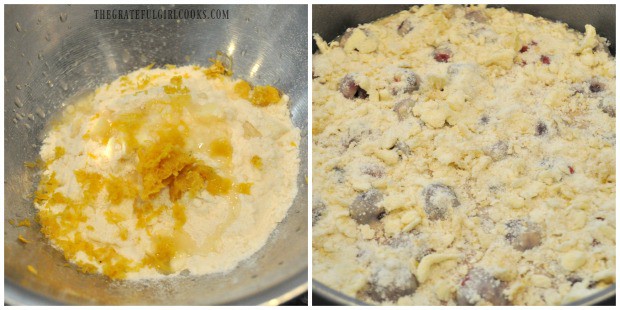
Lemon zest and juice are then added to the reserved flour mixture that was set aside earlier. This crumb topping is mixed until combined, then sprinkled over the top of the cake batter in cake pan.

Lemon zest and juice added to crumb topping, then sprinkled onto cake batter

Time To Bake The Cake!

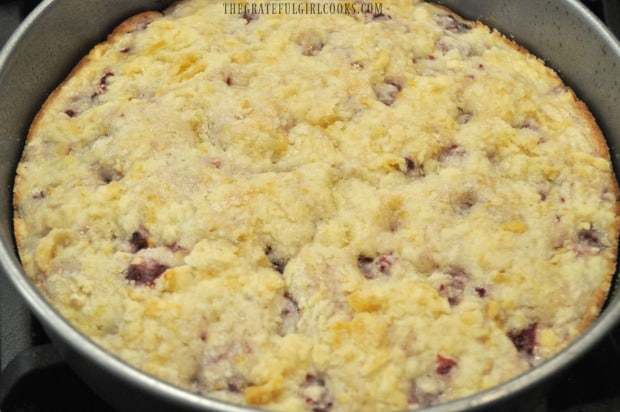
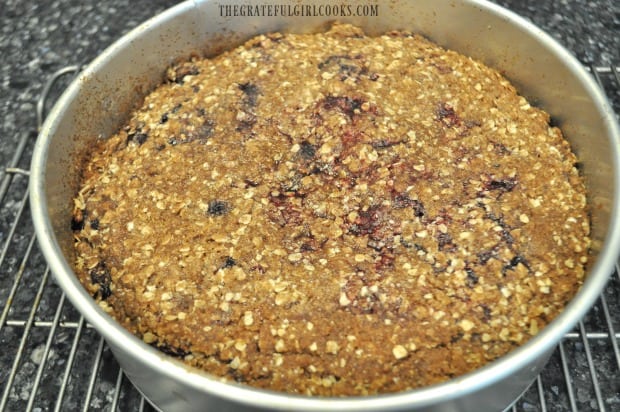
The raspberry lemon crumb cake is baked in a preheated 350°F oven for 25-30 minutes, or until the cake springs back when touched lightly in the center. This picture below shows how it looked straight out of the oven.

Raspberry lemon crumb cake, right out of the oven.

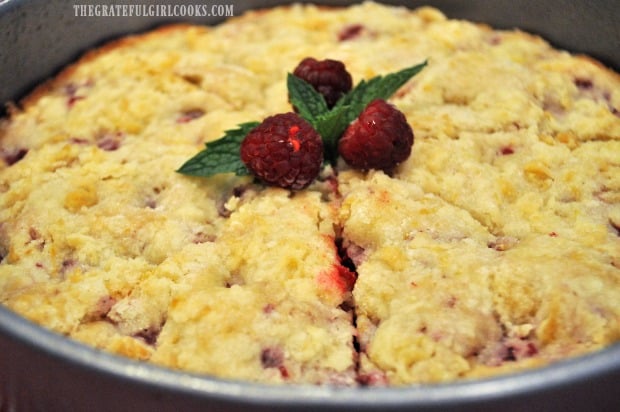
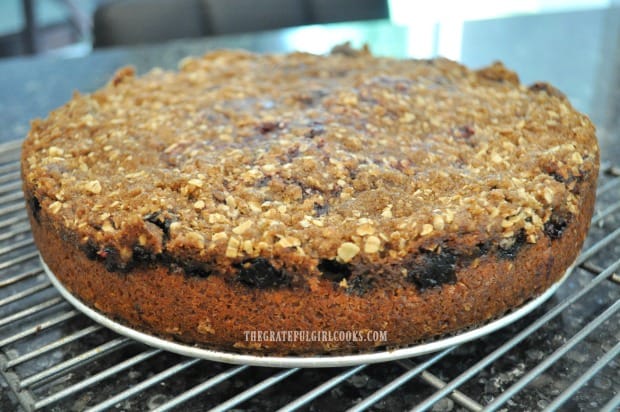
Once the cake cooled to room temperature, it was cut into 8 wedges. The top was garnished with a few raspberries and a sprig of fresh mint (from my garden!).

Raspberry lemon crumb cake cut in 8 wedges, garnished with raspberries and mint leaf.

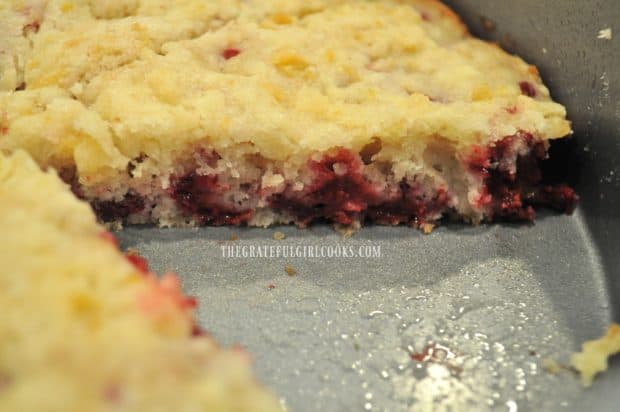
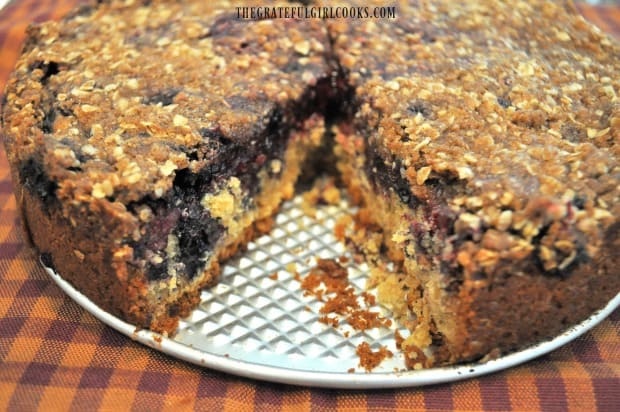
The inside look at a slice of this raspberry cake in pan.

Time To EAT!

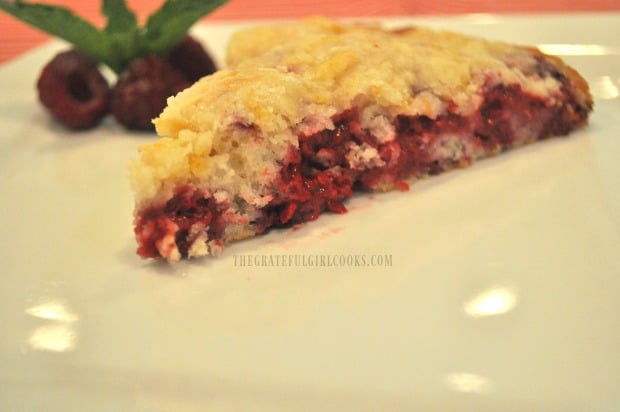
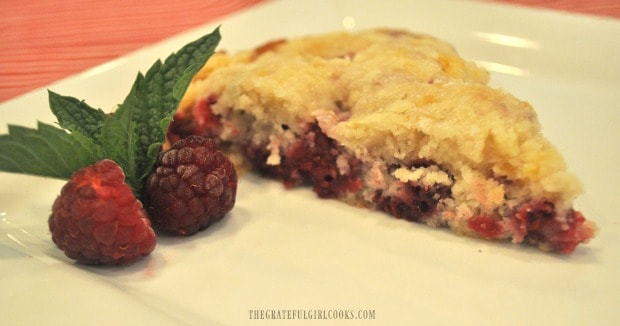
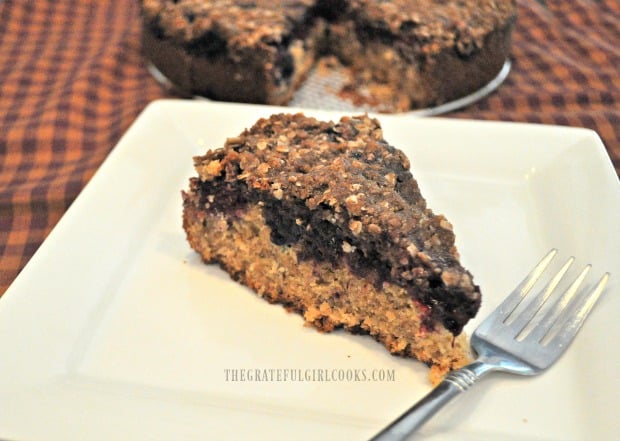
You can see what the raspberry lemon crumb cake looks like on the plate. It’s LOADED with raspberries! The cake is not dry at all, and the combination of raspberry and lemon flavors are absolutely perfect!

A slice of raspberry lemon crumb cake, served on a white plate

Slice of raspberry lemon crumb cake, with fresh raspberries and mint garnish.

We truly enjoyed this simple, yet delicious raspberry lemon crumb cake!  I really hope you will consider trying this cake for yourself… you will be surprised just how easy it is to make, and hope you will enjoy it, as well!

Looking For More CAKE Recipes?

You can find ALL my recipes in the Recipe Index, located at the top of the page. I have a nice variety of delicious cake recipes, including:

Interested In More Recipes?

Thank you for visiting this website. I appreciate you using some of your valuable time to do soIf you’re interested, I publish a newsletter 2 times per month (1st and 15th) with all the latest recipes, and other fun info. I would be honored to have you join our growing list of subscribers, so you never miss a great recipe!
There is a Newsletter subscription box on the top right side (or bottom) of each blog post, depending on the device you use, where you can easily submit your e-mail address (only) to be included in my mailing list.

You Can Also Find Me On Social Media:

Facebook page: The Grateful Girl Cooks!
Pinterest:
The Grateful Girl Cooks!
Instagram:
jbatthegratefulgirlcooks

Have a wonderful day!

Author's signature

Recipe Source: Diane Schultz O’Brien

0 from 0 votes
Raspberry Lemon Crumb Cake
Prep Time
10 mins
Cook Time
30 mins
Total Time
40 mins
 
You will LOVE this easy, delicious Raspberry Lemon Crumb Cake, which can be served as a dessert (yummy with a scoop of ice cream) OR a breakfast coffeecake. 
Category: Dessert or Coffeecake
Cuisine: American
Keyword: raspberry lemon crumb cake
Servings: 8 slices
Calories Per Serving: 207 kcal
Author: JB @ The Grateful Girl Cooks!
Ingredients
  • cups all purpose flour
  • 2/3 cup granulated sugar
  • 1/8 teaspoon salt
  • 1/4 cup butter (very cold)
  • 1/2 teaspoon baking powder
  • 1/4 teaspoon baking soda
  • 1/3 cup buttermilk (low-fat)
  • 2 Tablespoons lemon juice (fresh)
  • 1 egg
  • 1 cup fresh raspberries
  • 2 teaspoons lemon zest (finely grated lemon rind)
  • 3/4 teaspoon lemon juice (fresh)
Instructions
  1. Preheat oven to 350°F. Coat an 8" round cake pan with non-stick cooking spray (bottom and sides).

  2. Place flour, granulated sugar and salt in a large mixing bowl. Cut in chunks of COLD butter, using a pastry blender or 2 knives or forks, until the butter/crumbs are about the size of peas.  Measure out 1/2 cup of this crumb mixture and set aside to use as crumb topping later (set aside).

  3. To the mixing bowl with remaining flour mixture add the baking powder, baking soda, buttermilk, lemon juice, and egg. Beat on medium speed with a mixer until well blended. Gently STIR in fresh raspberries until fully combined with batter. Spoon batter into the prepared (sprayed) cake pan. Gently spread to cover bottom of pan.

  4. Take the reserved flour/crumb mixture and add lemon zest and juice to it. Combine these ingredients with a fork until crumbly.  Sprinkle this mixture over the top of the cake batter, until top of cake is covered.

  5. Bake cake on center rack of preheated 350°F oven for 25-30 minutes or until it is light golden brown on top and cake springs back with touched lightly in the center (mine took 30 minutes). Remove cake pan to a wire rack to cool to room temperature. Slice into 8 wedges, and garnish cake with fresh raspberries and a mint sprig, if desired. ENJOY!

Nutrition Facts
Raspberry Lemon Crumb Cake
Amount Per Serving (1 slice)
Calories 207 Calories from Fat 54
% Daily Value*
Fat 6g9%
Saturated Fat 3g19%
Cholesterol 36mg12%
Sodium 140mg6%
Potassium 91mg3%
Carbohydrates 34g11%
Fiber 1g4%
Sugar 17g19%
Protein 3g6%
Vitamin A 205IU4%
Vitamin C 6.2mg8%
Calcium 34mg3%
Iron 1.1mg6%
* Percent Daily Values are based on a 2000 calorie diet.

Here’s one more to pin on your Pinterest boards!You will LOVE this easy, delicious Raspberry Lemon Crumb Cake, which can be served as a dessert (yummy with a scoop of ice cream) OR a breakfast coffeecake.

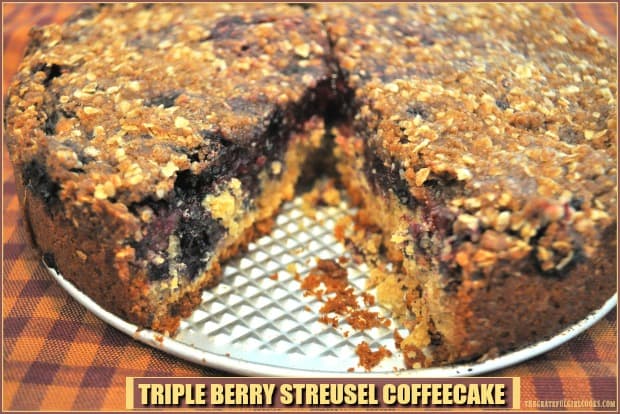
Triple Berry Streusel Coffeecake

Triple Berry Streusel Coffeecake with blackberries, raspberries and blueberries, and topped with a buttery crumb topping is a perfect breakfast or brunch treat!

I found the recipe for this triple berry streusel coffeecake while searching for breakfast ideas in my old trusty recipe card file box.  I’ve had these old recipes for many, many years, and quite literally just happened upon this one. I thought it sounded like a great coffeecake for a breakfast or brunch with a crowd, so decided to give it a try.

Scroll Down For A Printable Recipe Card At The Bottom Of The Page

Where Did This Recipe Originate?

The original recipe was called “Hawthorne Street Cafe Coffeecake”, and I believe it originated with a small restaurant in Portland that has since gone out of business. This coffeecake was one of their most requested dishes!

The recipe was cut from a newspaper and I had taped it to a 3×5 card years ago, but no source was given. The recipe “might” have come from The Oregonian newspaper, but my search of their recipes turned up nothing by this name. I decided to make this breakfast cake, but where the original recipe only used Marionberries, I substituted three berries: blackberry, raspberry and blueberry!

The recipe uses FROZEN berries (to ensure a moist cake), and I just happened to have a large bag of all three in my freezer (thanks to my husband buying them at the store).  The recipe is very easy, and the results? OUTSTANDING! Here’s how to make this treat that serves 12.

How To Make Triple Berry Streusel Coffeecake

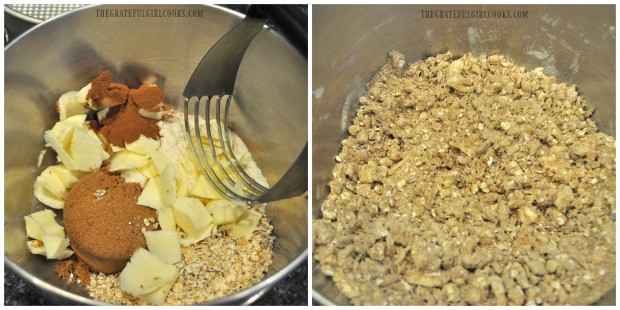
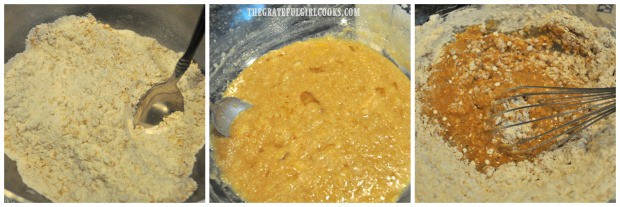
To make the streusel topping, place brown sugar, quick cooking oats, flour, cold butter and cinnamon in a medium sized bowl. Using a pastry blender, cut butter into the other ingredients until mixture is crumbly (and butter becomes about the size of peas). Set aside. NOTE: You can also blend these ingredients until crumbly in a food processor, if desired. 

Mixing the streusel ingredients together for topping.

Make the coffeecake batter in a separate bowl by first combining flour, quick cooking oats and baking powder. In a separate bowl, blend melted butter, brown sugar, egg, vanilla and milk.  Add the flour mixture to the butter mixture, and stir until ingredients are fully combined.

Making the batter for the berry coffeecake.

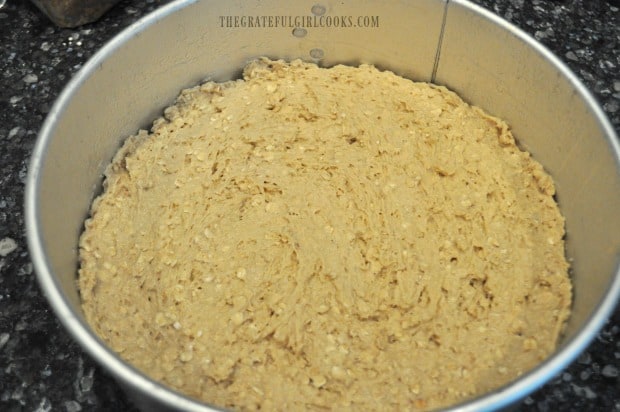
Spoon the coffeecake batter into a very well greased (bottom and sides) 10 inch springform pan.  Spread the batter out, to completely cover the bottom of the pan.

Batter is spread on the bottom of a springform pan.

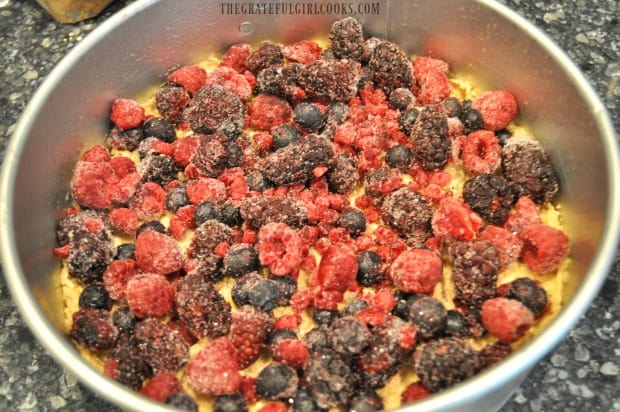
Place the FROZEN (not thawed) berries on top of the batter, and spread out to evenly cover batter. (Why use FROZEN berries? Frozen berries help ensure the triple berry streusel coffeecake is moist).

Frozen berries are placed on top of the coffeecake batter in pan.

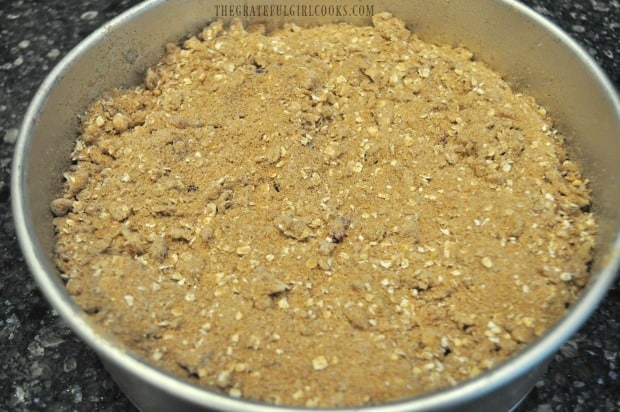
Sprinkle the fruit with the streusel topping, dispersing evenly over the top of the coffeecake to cover.

Streusel topping is sprinkled all over the top of the coffeecake.

Baking The Triple Berry Streusel Coffeecake

Bake the coffeecake in a preheated 350° F. oven for 1 hour, or until completely done in the center.  You can test its doneness by inserting a toothpick into the center of coffeecake. If it comes out clean, it is done.

When done, transfer coffeecake to a wire rack, and let it cool in the pan for 30 minutes. Once cooled, run a butter knife around the edges of pan, then carefully open the pan by releasing latch and remove pan.

Cooling down coffeecake, still in springform pan.

The triple berry streusel coffeecake is baked and cooling on a wire rack.

Time To EAT!

After the triple berry streusel coffeecake has completely cooled, it is ready to serve.  See that layer of berries? They taste so fresh, and really help keep this coffeecake moist! Grab a knife, cut yourself a big ol’ slice, sit back and enjoy this delicious treat!

A piece of the coffeecake on a white plate.

You can see all the berries inside the triple berry streusel coffeecake.

I wrapped several pieces up really well and put them in our freezer to enjoy another day. I am happy to report that even on Day 3 after making this triple berry streusel coffeecake, the pieces were still moist and absolutely delicious!

By the way… if you enjoy coffeecake, be sure to check out my recipes for Pumpkin Streusel Coffeecake, Old Fashioned Crumb Coffeecake, or Hummingbird Cake.  Throw in a good strong cup of coffee to drink, for good measure, and you’ve got yourself a yummy breakfast!

A slice of the triple berry streusel coffeecake, ready to eat!

I hope you really enjoy this triple berry streusel coffeecake. It TRULY is delicious!  I’m looking forward to making it again in a few weeks when my sister and brother-in-law come up for a visit!

Thank you for stopping by, and I hope you will come back again soon for more delicious recipes. Don’t forget, you can check out ALL of my recipes in the Recipe Index, located at the top of the page. Have a wonderful day.

Looking For More COFFEECAKE Recipes?

You can find ALL of my recipes in the Recipe Index, which is located at the top of the page. I have some really delicious coffeecake recipes for you to check out, including:

Interested In More Recipes?

Thank you for visiting this website. I appreciate you using some of your valuable time to do soIf you’re interested, I publish a newsletter 2 times per month (1st and 15th) with all the latest recipes, and other fun info. I would be honored to have you join our growing list of subscribers, so you never miss a great recipe!
There is a Newsletter subscription box on the top right side (or bottom) of each blog post, depending on the device you use, where you can easily submit your e-mail address (only) to be included in my mailing list.

You Can Also Find Me On Social Media:

Facebook page: The Grateful Girl Cooks!
Pinterest:
The Grateful Girl Cooks!
Instagram:
jbatthegratefulgirlcooks

Have a wonderful day… make it a GOOD one!

Author's signature

Original Recipe Source: unknown (possibly The Oregonian newspaper)

↓↓ PRINTABLE RECIPE BELOW ↓↓

0 from 0 votes
Triple Berry Streusel Coffeecake
Prep Time
15 mins
Cook Time
1 hr
Total Time
1 hr 15 mins
 
Triple Berry Streusel Coffeecake with blackberries, raspberries and blueberries, and topped with a buttery crumb topping is a perfect breakfast or brunch treat!
Category: Breakfast
Cuisine: American
Keyword: triple berry streusel coffeecake
Servings: 12 servings
Calories Per Serving: 348 kcal
Author: JB @ The Grateful Girl Cooks!
Ingredients
  • 1 cup brown sugar , firmly packed, divided use
  • 2 cups all purpose flour , divided use
  • cups quick cooking oats , uncooked, divided use
  • 1 cup butter (2 sticks) , divided use
  • 2 Tablespoons baking powder
  • 1 egg
  • 1 teaspoon vanilla extract
  • 3/4 cup milk
  • 3 cups frozen blackberries, blueberries, raspberries (or 3 cups blackberries)
Instructions
To Make Streusel Topping:
  1. Place ½ cup brown sugar, ½ cup oats, ½ cup flour, ½ cup cold butter and cinnamon in a medium sized bowl. Using a pastry blender, cut butter into the other ingredients until mixture is crumbly (and butter becomes about the size of peas).  NOTE: You may also choose to blend these ingredients until crumbly in a food processor, if desired. Set aside.

To Make Coffeecake Batter:
  1. Make coffeecake batter in a separate large bowl by combining remaining flour, oats and baking powder. In another bowl, blend melted (remaining) butter, brown sugar, egg, vanilla and milk.  Add flour mixture to the butter mixture, and stir until ingredients are fully combined.

To Assemble Coffeecake:
  1. Spoon the coffeecake batter into a very well greased (bottom and sides) 10 inch springform pan.  Spread batter out to completely cover the bottom of the pan. Place the FROZEN (not thawed) berries on top of the batter, and spread out to evenly cover batter. Sprinkle the fruit with the streusel topping, dispersing evenly over the top of the coffeecake to cover.

  2. Bake coffeecake in a preheated 350° F. oven for 1 hour, or until done in the center. You can test doneness by inserting a toothpick into the center of coffeecake. If it comes out clean, it is done. When done, transfer coffeecake to a wire rack, and let it cool in the pan for 30 minutes. Once cooled, run a butter knife around inside edge of pan, then carefully open pan by releasing latch to remove outside form. After coffeecake has completely cooled, it is ready to serve. Slice into 12 pieces, and enjoy!

Nutrition Facts
Triple Berry Streusel Coffeecake
Amount Per Serving (1 slice)
Calories 348 Calories from Fat 144
% Daily Value*
Fat 16g25%
Saturated Fat 10g63%
Cholesterol 55mg18%
Sodium 154mg7%
Potassium 374mg11%
Carbohydrates 45g15%
Fiber 3g13%
Sugar 20g22%
Protein 5g10%
Vitamin A 600IU12%
Vitamin C 7.6mg9%
Calcium 145mg15%
Iron 2mg11%
* Percent Daily Values are based on a 2000 calorie diet.

Here’s one more to pin on your Pinterest boards!Triple Berry Streusel Coffeecake with blackberries, raspberries and blueberries, and topped with a buttery crumb topping is a perfect breakfast or brunch treat!

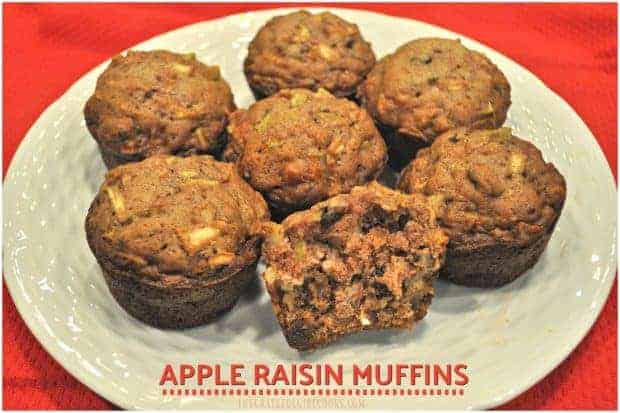
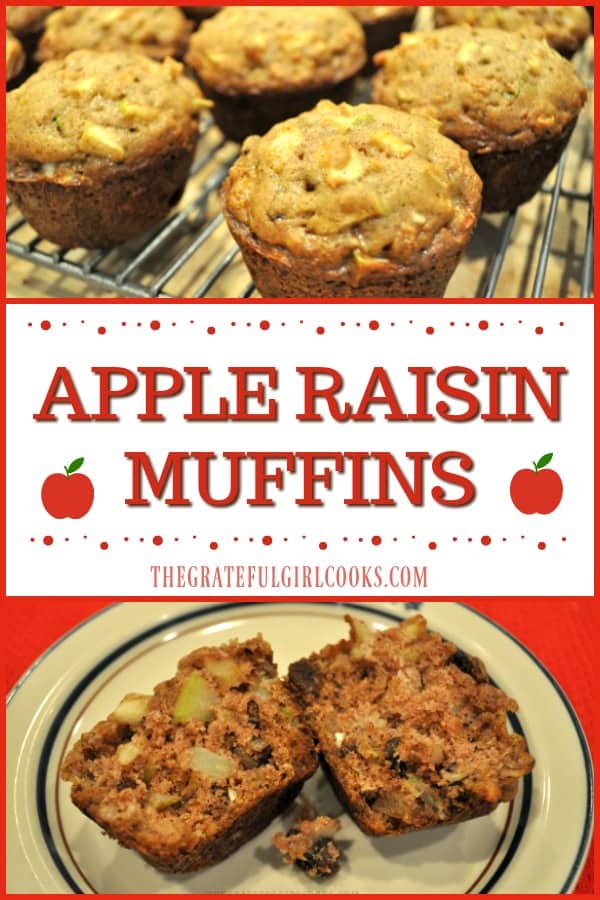
Apple Raisin Muffins

These moist and delicious apple raisin muffins, full of fresh apples, raisins, cinnamon and pecans, are an easy to make treat for breakfast or brunch!
The recipe makes 18 incredible tasting muffins that you and your family will LOVE!

The recipe makes 18 incredible tasting muffins that you and your family will LOVE! We first tried these delicious apple raisin muffins many years ago, and I recently re-discovered the old battered 3×5 index card with the handwritten recipe, in my old recipe box.

I did not write on the index card where I got the recipe from, so I truly have NO CLUE what the original source was… but I DID write GREAT!!! on the recipe card the very first time I made them, so I could remember how GOOD they were. They really DO taste GREAT, and are also very easy to make!

The recipe is very easy to follow, and seriously, the only “slightly time consuming” thing about is chopping up the apples.  No biggie.

Everything else is really just adding ingredients, stirring, and baking! Oh yeah… and EATING (they are ridiculously delicious)! Here’s how to make a dozen and a half of these fabulous breakfast or brunch treats!

Scroll Down For A Printable Recipe Card At The Bottom Of The Page

How To Make These Apple Raisin Muffins

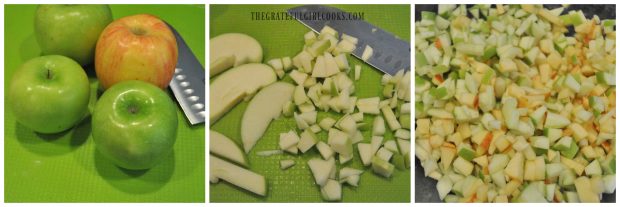
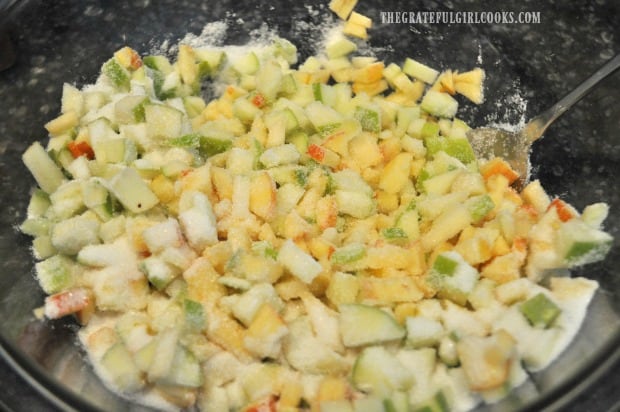
Start by preheating your oven to 325° F.  The next thing is dicing the apples into small chunks.  You will need a total of 4 cups diced apples.

I used 3 Granny Smith apples and 1 Gala apple (but 4 cups of any firm apple will do just fine!).  Make sure to leave the peel ON the apples!

Apples diced into small pieces for muffins

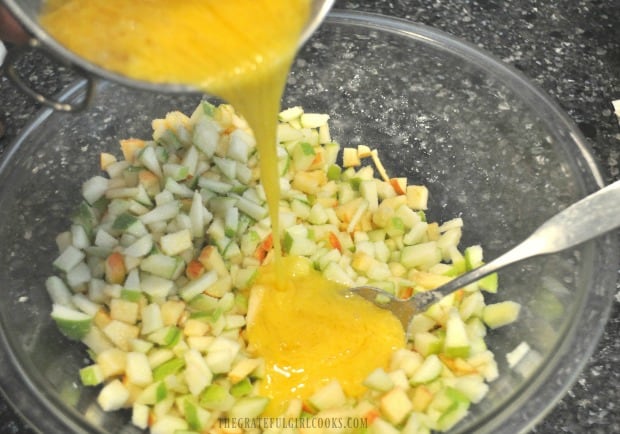
Place the diced apples in a large mixing bowl.  Add granulated sugar, and stir to combine. Mix slightly beaten eggs, oil and vanilla extract in separate bowl; add to apples, and stir.

Diced apples for muffins are coated with sugar in bowl

Egg, oil and vanilla added to apple muffin mixture in bowl

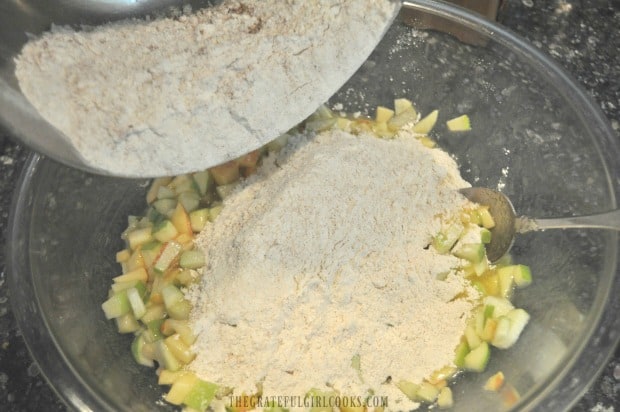
In a separate bowl, combine flour, baking soda, cinnamon and salt.  Add this dry mixture to the apple mixture; stir well, to combine ingredients.

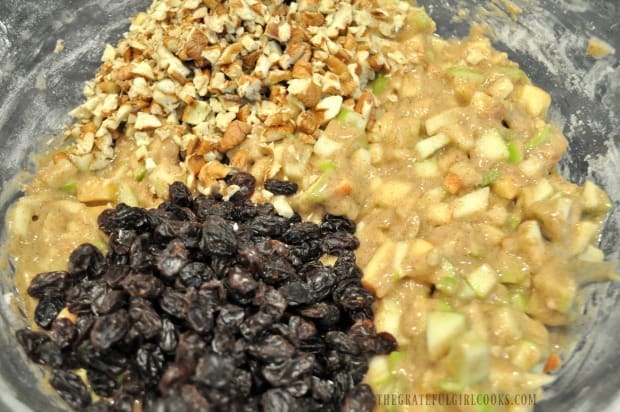
Once combined, add raisins and chopped walnuts (or pecans), and stir until batter is completely blended.

Flour and spices added to muffin mixture in bowl

Raisins and pecans are added to apple muffin batter in bowl

Coat sides and bottom of muffin tins with non-stick spray; the recipe makes 18 muffins, so you will need two 12-cup muffin tins, (or bake these in two batches if you only have one muffin tin). 

Spoon the batter into muffin tins until each cup is about 3/4 full. Now they are ready to bake.

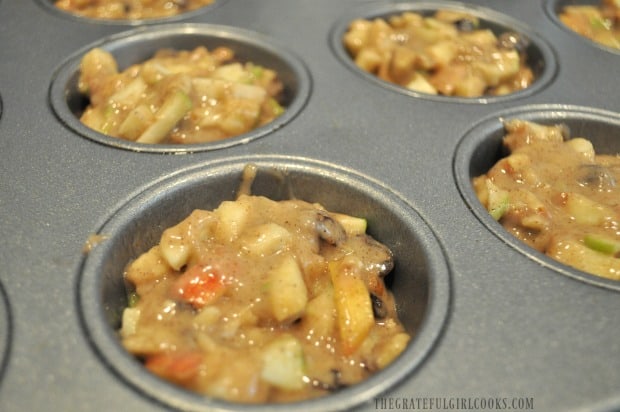
Apple raisin muffin batter in metal muffin tin

Bake The Apple Raisin Muffins

Bake muffins at 325° F. for approximately 23-25 minutes. Apple raisin muffins should be golden brown on the outside when done, and a toothpick inserted into middle should come out clean.

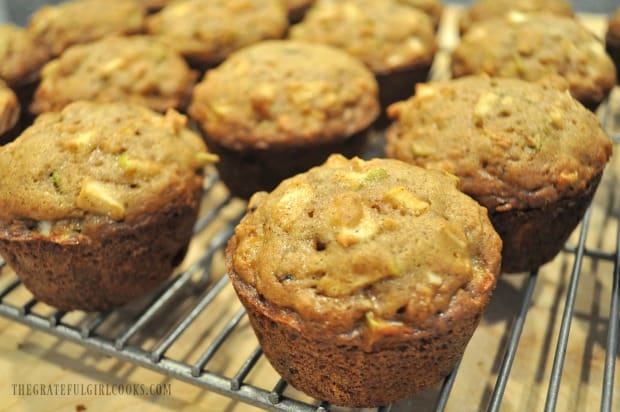
Remove muffins from muffin tin to a wire rack to cool.  Don’t they look GOOD? See those apple chunks? YUM. These apple raisin muffins taste best at room temperature!

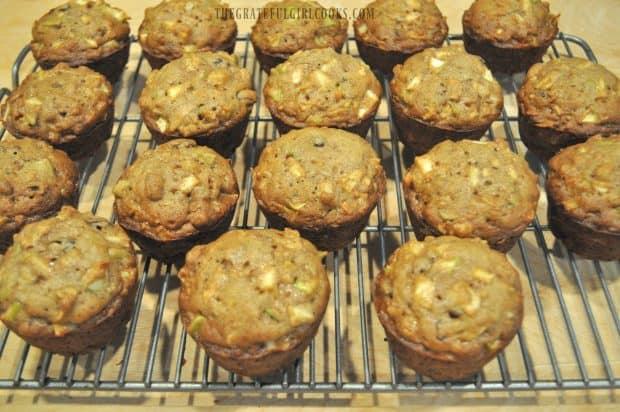
Eighteen baked apple raisin muffins on wire rack

Close up photo of muffins with apples, raisins, and pecans

Time To Eat!

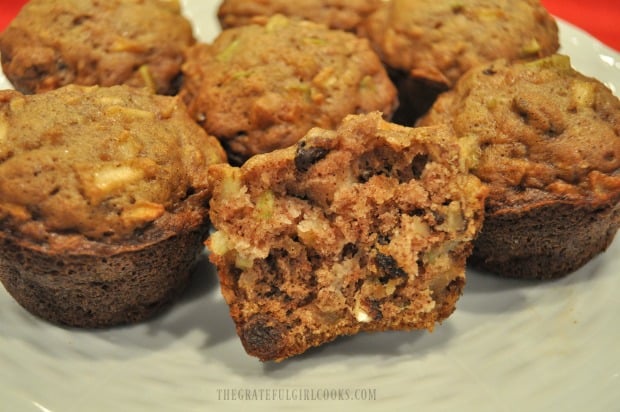
Here’s a close up picture of the INSIDE of one of the muffins… you can see it is filled with raisins, apples and nuts!

Inside photo of muffin with apples inside

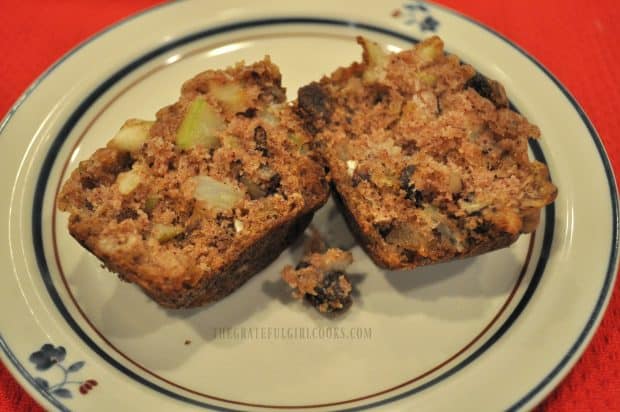
Apple raisin muffin cut in half, on a plate

And there you have it! Delicious apple raisin muffins! When baked correctly, the muffins are not dry (due in part to the natural juices released from the apples).

They also freeze very well, so it makes sense to make the whole batch at once, then put a few away in the freezer in a food storage bag or container to save for another day!

Interested In More MUFFIN Recipes?

By the way, if you enjoy muffins as much as we do, I hope you will also check out these muffin recipes from my blog for Apple Crumb, Banana Crumb, Cranberry Orange, Carrot Cake, Dark Chocolate Almond Chia, Chocolate Chip, Blueberry Crumble, and many others. 

A complete list is available to search in the Recipe Index at the top of the page!  Have a GREAT day!

Want More Recipes? Get My FREE Newsletter!

I publish a newsletter 2 times per month (1st and 15th) with lots of recipes, tips, etc..
Would you like to join our growing list of subscribers?

There is a Newsletter subscription box on the top right (or bottom) of each blog post, depending on the device you use.
You can submit your e-mail address there, to be added to my mailing list.

Find Me On Social Media:

Facebook page: The Grateful Girl Cooks!
Pinterest:
The Grateful Girl Cooks!
Instagram:
jbatthegratefulgirlcooks

Author's signature

Original Recipe Source: Unknown

↓↓ PRINTABLE RECIPE BELOW ↓↓

4 from 1 vote
Apple Raisin Muffins
Prep Time
15 mins
Cook Time
25 mins
Total Time
40 mins
 

These moist and delicious apple raisin muffins, full of fresh apples, raisins, cinnamon and pecans, are an easy to make treat for breakfast or brunch!

Category: Breakfast
Cuisine: American
Keyword: apple raisin muffins
Servings: 18 muffins
Calories Per Serving: 235 kcal
Author: JB @ The Grateful Girl Cooks!
Ingredients
  • 4 cups apples diced small (leave peel ON)
  • 1 cup granulated sugar
  • 2 eggs , slightly beaten
  • 1/2 cup vegetable oil
  • 2 teaspoons vanilla extract
  • 2 cups all purpose flour
  • 2 teaspoons baking soda
  • 2 teaspoons cinnamon
  • 1 teaspoon salt
  • 1 cup raisins
  • 1 cup walnuts (or pecans) , chopped
Instructions
  1. Preheat oven to 325° F.  Dice apples into small chunks.  You will need a total of 4 cups diced apples. Make sure to leave the peel ON the apples! Place diced apples in a large mixing bowl.  Add granulated sugar, and stir to combine. Mix slightly beaten eggs, oil and vanilla extract in separate bowl; add to apples, and stir. 

  2. In a separate bowl, combine flour, baking soda, cinnamon and salt.  Add this dry mixture to the apple mixture; stir well, to combine ingredients. Once combined, add raisins and chopped walnuts (or pecans), and stir until batter is completely blended.
  3. Coat sides and bottom of muffin tins with non-stick spray; the recipe makes 18 muffins, so you will need two 12-cup muffin tins, (or bake in two batches if you only have one muffin tin).  Spoon batter in muffin tins until each cup is about 3/4 full.

  4. Bake muffins at 325° F. for approximately 23-25 minutes. Muffins should be golden brown on the outside when done, and a toothpick inserted into middle of muffin should come out clean.  Remove muffins from muffin tin to a wire rack to cool. Best served at room temperature. Enjoy! 

Recipe Notes

These muffins freeze well. Wrap each muffin in plastic wrap, then insert in a freezer storage bag, and freeze until ready to thaw and eat.

Nutrition Facts
Apple Raisin Muffins
Amount Per Serving (1 muffin)
Calories 235 Calories from Fat 90
% Daily Value*
Fat 10g15%
Saturated Fat 5g31%
Cholesterol 18mg6%
Sodium 260mg11%
Potassium 146mg4%
Carbohydrates 33g11%
Fiber 2g8%
Sugar 14g16%
Protein 3g6%
Vitamin A 40IU1%
Vitamin C 1.8mg2%
Calcium 17mg2%
Iron 1.2mg7%
* Percent Daily Values are based on a 2000 calorie diet.

Here’s one more to pin on your Pinterest boards!These moist and delicious apple raisin muffins, full of fresh apples, raisins, cinnamon and pecans, are an easy to make treat for breakfast or brunch!

Peach Cobbler Overnight Oats

Enjoy creamy peach cobbler overnight oats that taste like peach cobbler! Made in 5 minutes, chill overnight, and they’re ready at breakfast!
Enjoy creamy peach cobbler overnight oats that taste like peach cobbler! Made in 5 minutes, chill overnight, and they're ready at breakfast!

Peach Cobbler Overnight Oats are as simple to make as mixing up the ingredients, putting the mixture in a couple jars (in 5 minutes or less), chilling them overnight, and BOOM! They’ll be ready to go for a quick, creamy, filling and delicious breakfast the next morning!

I am having fun trying different flavors of overnight oats… there are so many possibilities! So far I have made and posted the recipes for Apple Cinnamon, Chocolate Banana, Strawberry Coconut, and Banana Coconut.  I love the convenience and taste of this filling breakfast food!

Scroll Down For A Printable Recipe Card At The Bottom Of The Page

Yes, But do You Eat Overnight Oats HOT or COLD?

I recently read a comment on another blog where a visitor was wondering HOW on earth were they supposed to cook the oats once they are in the jar with all the other ingredients, and it made me giggle, but then I realized that someone who has never made overnight oats before actually might want the answer to that question.

Guess what? YOU DON’T COOK THE OATS!  The oats become thick (kind of like a creamy pudding) overnight, and you eat them cold. That’s right! COLD, right outta the fridge, right outta the jar… and they taste wonderful! AMEN… and pass me a spoon!

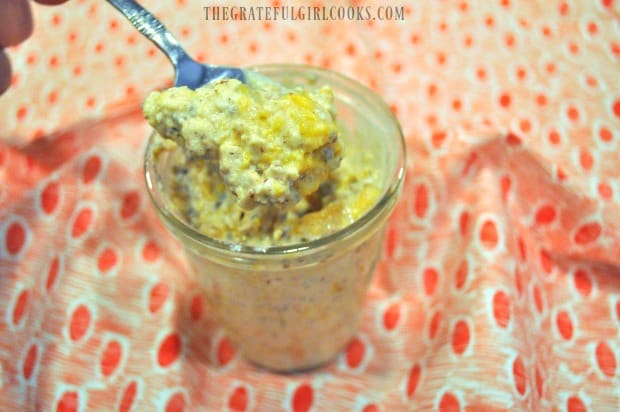
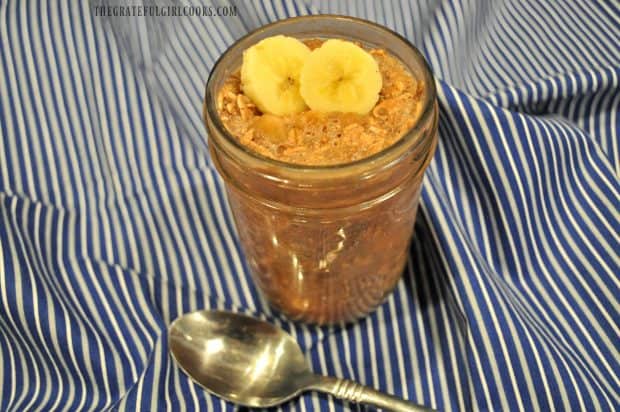
Cold and creamy peach flavored overnight oats are ready to eat!

There is Flaxseed In These Overnight Oats… What On Earth Is Flaxseed?

This recipe includes flaxseed (which I keep on hand), but isn’t an absolute necessity, in case you don’t have access to it!  However, I heartily recommend it for it’s health benefits!

Did you know that ground flaxseed is touted for being high in Omega 3 essential fatty acids (the “good fats”), is high in fiber (yet easily digestible), and has antioxidants?  Yep… flaxseed apparently been around since as early as 3,000 B.C. (grown in Babylon), and is nice to have handy in the kitchen, and in this yummy recipe!

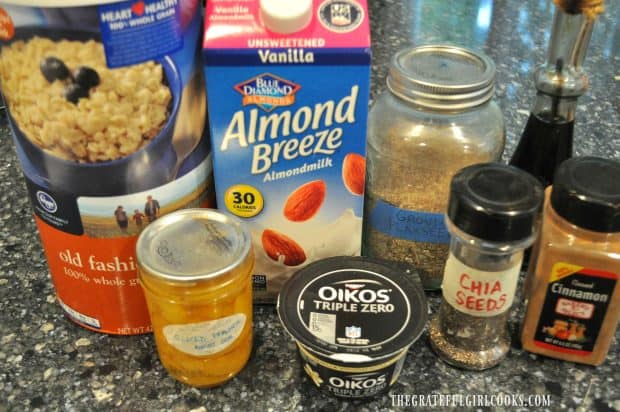
Here’s a peek at the “cast of characters” used to make peach cobbler overnight oats in the photo below. I even was able to use some of the canned peaches from our pantry, that I had!

Ingredients for peach overnight oats

So HOW Do You Make These Overnight Oats?

If you’ve made overnight oats before, you are probably familiar with the “process”.  You can either dump all ingredients in a bowl and mix, then transfer to individual containers, OR layer the ingredients into resealable containers, then mix them.

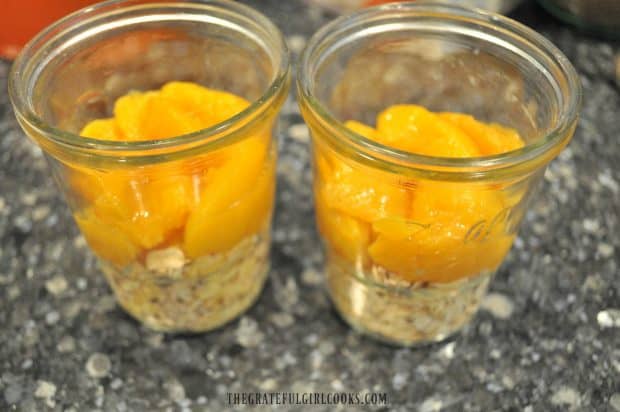
I like to layer them (especially for the pictures AND for one less bowl to wash (*cough, cough), so here’s how I assembled them. The oats are on the bottom of the jar, followed by the canned, drained peaches.

Peaches are added to oats in glass jars

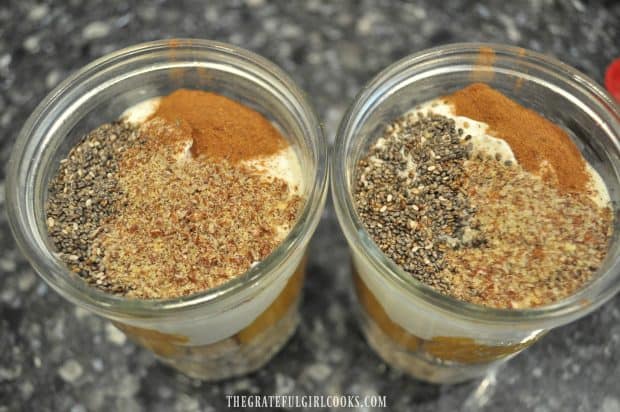
Top the peaches with low-fat vanilla yogurt, vanilla extract, salt, chia seeds, flaxseeds, and ground cinnamon. Give them a good stir to mix all together.

Yogurt, chia seeds, cinnamon and flaxseed added to oats in jar

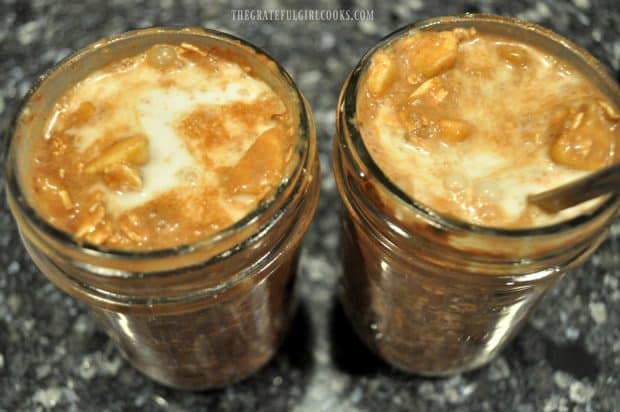
Milk is then poured over all, to cover. I used almond milk, but any milk will do just fine.  Ingredients were stirred again, to thoroughly combine. Check to make sure there is enough milk to cover the top of the oats… if not, add just a bit more milk, and stir again to combine. See those pretty pieces of peaches in the mix? YUM. Good flavor, right there!

Almond milk added to overnight oats and stirred in

Refrigerate The Jars Of Overnight Oats

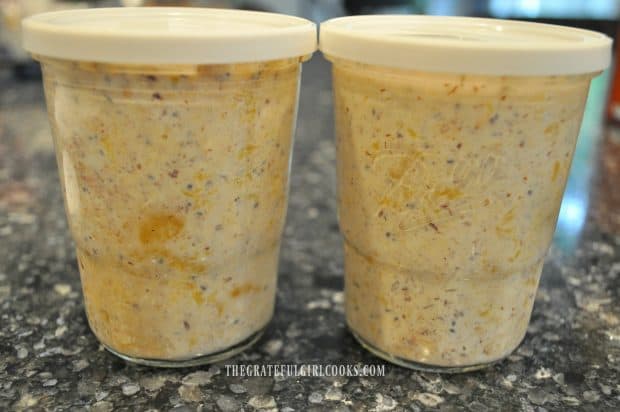
Once all of the ingredients are fully blended, cover the containers and refrigerate overnight, or for at least 8 hours.

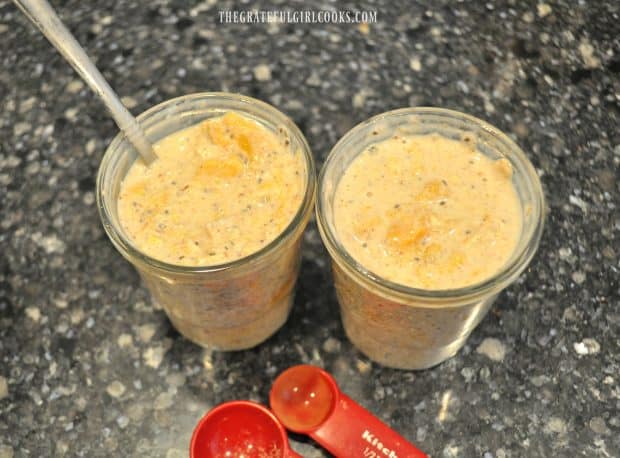
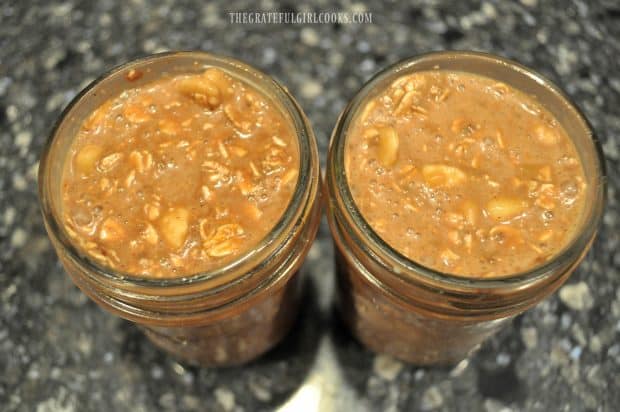
Two jars of peach overnight oats, ready to refrigerate

Time To EAT!

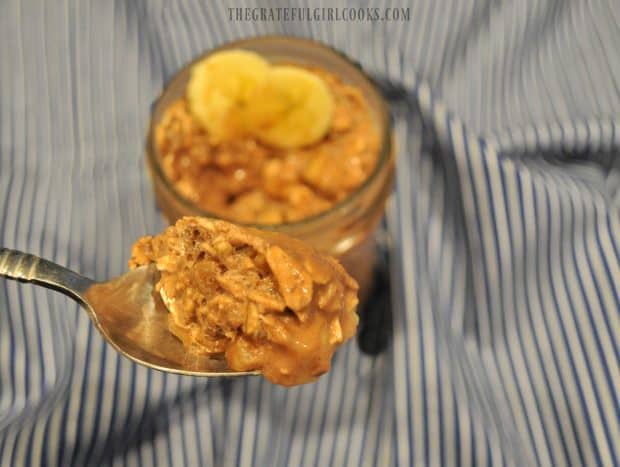
In the morning, you will notice that the oats have thickened considerably. Give them a stir, and dig in, to enjoy this delicious, cold and creamy breakfast treat! If you’ve ever eaten a bite of peach cobbler or crisp the morning after it has been made and refrigerated overnight, you will find an amazing similarity in taste to these oats! YUM!

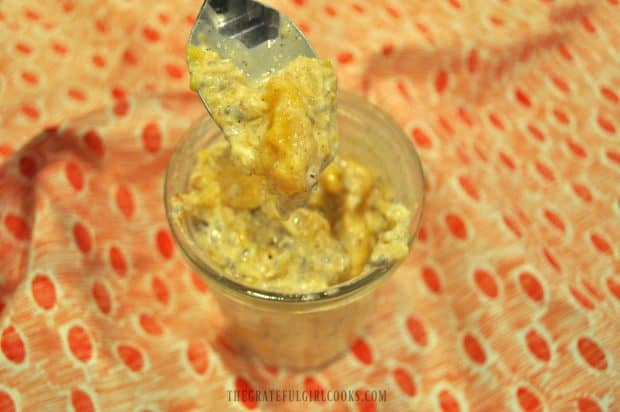
A spoonful of peach cobbler overnight oats ready to eat!

I hope you will consider making this delicious breakfast treat, and trust you will enjoy them! I know I sure did! Have a wonderful day, and may God bless you in all you do!

Thanks for stopping by, and I sincerely hope you will come back again soon for more delicious recipes. You can find ALL of my recipes in the Recipe Index, which is located at the top of the page. 

Interested In More Recipes?

Thank you for visiting this website. I appreciate you using some of your valuable time to do soIf you’re interested, I publish a newsletter 2 times per month (1st and 15th) with all the latest recipes, and other fun info. I would be honored to have you join our growing list of subscribers, so you never miss a great recipe!
There is a Newsletter subscription box on the top right side (or bottom) of each blog post, depending on the device you use, where you can easily submit your e-mail address (only) to be included in my mailing list.

You Can Also Find Me On Social Media:

Facebook page: The Grateful Girl Cooks!
Pinterest:
The Grateful Girl Cooks!
Instagram:
jbatthegratefulgirlcooks

Author's signature

Recipe Adapted From: https://www.ladybehindthecurtain.com/overnight-peach-cobbler-oatmeal/

0 from 0 votes
Peach Cobbler Overnight Oats
Prep Time
5 mins
Cook Time
0 mins
Total Time
5 mins
 
You'll love the convenience of creamy overnight oats that taste like a peach cobbler! Make them in 5 minutes, chill overnight, and they're ready at breakfast!
Category: Breakfast
Cuisine: American
Keyword: overnight oats
Servings: 2 servings
Calories Per Serving: 254 kcal
Author: JB @ The Grateful Girl Cooks!
Ingredients
  • 2/3 cup old fashioned oats
  • 8 ounces canned sliced peaches , drained and chopped
  • 5.3 ounces vanilla yogurt (I used Oikos Triple Zero)
  • 1/2 teaspoon vanilla extract
  • 1/4 teaspoon salt
  • 1/2 Tablespoon flaxseeds (optional, but recommended)
  • 1/2 Tablespoon chia seeds
  • 1/2 teaspoon ground cinnamon
  • 2/3 cup almond milk
Instructions
METHOD 1
  1. The EASIEST way to make these oats is to combine all ingredients in a medium sized mixing bowl. Stir well, to fully combine.  Transfer the oat mixture into 2 half-pint sized containers (with lids). Cover, and refrigerate overnight. When ready to eat, stir and enjoy!

METHOD 2
  1. To make (with one less bowl to wash!), as shown in photos... Place oats in each jar or container. Add peaches, then top with vanilla yogurt, vanilla extract, salt, flaxseeds, chia seeds and cinnamon. Stir. Top with milk. Stir to fully combine. Add additional milk if necessary, to ensure oats are fully covered. Cover container. Refrigerate overnight; stir, serve and enjoy!

Recipe Notes

NOTE: Overnight oats will keep for 3-4 days (covered), in refrigerator.

Nutrition Facts
Peach Cobbler Overnight Oats
Amount Per Serving (1 serving)
Calories 254 Calories from Fat 45
% Daily Value*
Fat 5g8%
Saturated Fat 1g6%
Cholesterol 3mg1%
Sodium 451mg20%
Potassium 498mg14%
Carbohydrates 42g14%
Fiber 6g25%
Sugar 20g22%
Protein 9g18%
Vitamin A 400IU8%
Vitamin C 8.1mg10%
Calcium 275mg28%
Iron 1.8mg10%
* Percent Daily Values are based on a 2000 calorie diet.

Here’s one more to pin on your Pinterest boards!Enjoy creamy peach cobbler overnight oats that taste like peach cobbler! Made in 5 minutes, chill overnight, and they're ready at breakfast!

Chocolate Caramel Pecan Scones

Grab some hot coffee, tea or a cold glass of milk… and enjoy these absolutely delicious chocolate caramel pecan scones, filled with milk chocolate chips, caramel and pecans, for a special treat at breakfast or a simple snack in the middle of the day!Grab some coffee or tea and enjoy these absolutely delicious scones, filled with milk chocolate chips, caramel and pecans, for breakfast or a simple snack.
I LOVE scones! Do you?  I’ve been making them for years, and have included many of my favorite recipes on my blog.

The scones I’ve made include Apple Cinnamon, Cinnamon Chip, White Chocolate Raspberry, Blackberry, Banana Nut, Chocolate Chip Orange, Lemon Cream, Gingerbread, Cranberry Orange, and several others.

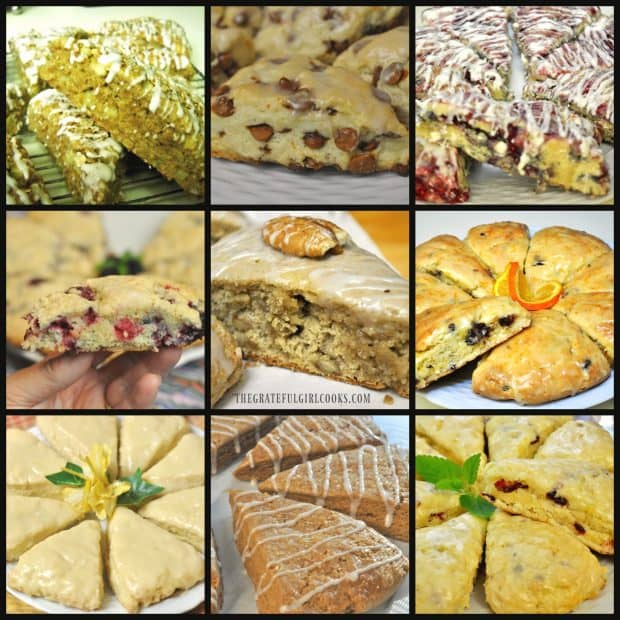
Collage showing 9 different scones from The Grateful Girl Cooks!

When I saw a recipe recently for these chocolate caramel pecan scones, I just KNEW I wanted to try them… I couldn’t help myself!  I made a batch for Easter this year, and guess what? They are GOOD, and easy to prepare, even if you’ve never made scones before! Here’s how:

Scroll Down For A Printable Recipe Card At The Bottom Of The Page

How To Make Chocolate Caramel Pecan Scones

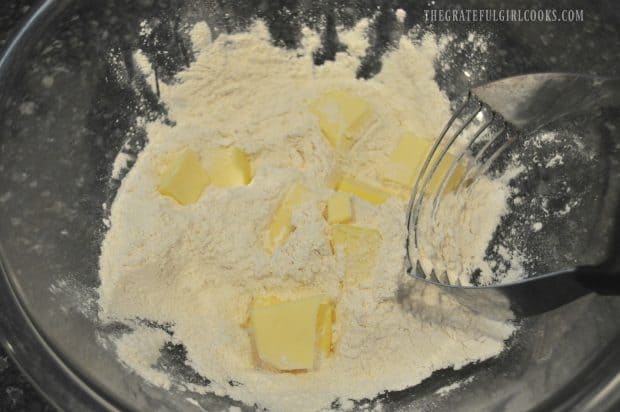
Preheat oven to 400 degrees before beginning.  Place parchment paper or a silicone mat onto a large cookie sheet.  Place flour, baking powder, granulated sugar, and salt into a large mixing bowl.  Cut VERY COLD butter into small chunks and add to the flour.

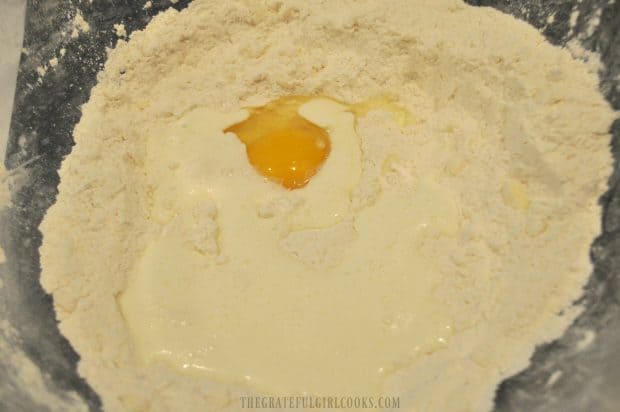
Cut the butter into the dry ingredients, using a pastry cutter (shown), or 2 forks, or by using your fingers to pinch the ingredients together. Do this until crumbs resemble small peas, and butter is incorporated into mixture. Add the egg and whipping cream to the bowl. Stir to combine.

Butter is cut into flour for scone doughEgg and whipping cream is added to dry ingredients for scones
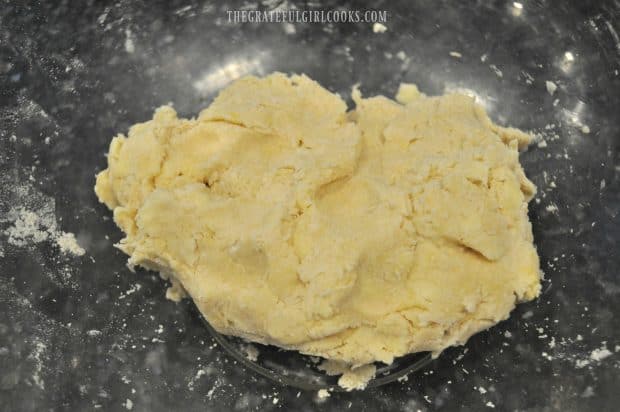
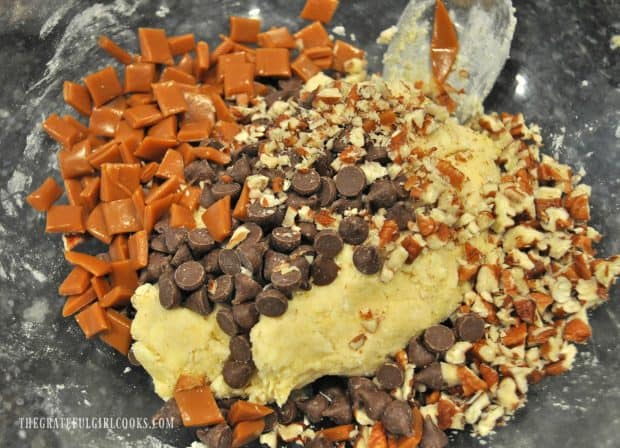
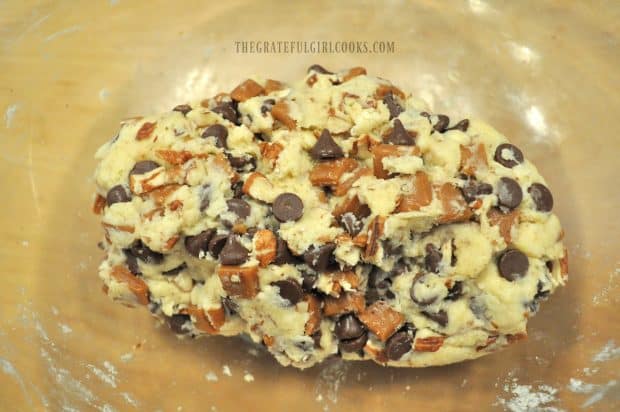
Continue mixing with spoon or lightly knead the dough in the bowl (with clean hands) until a soft dough ball is formed. Add chocolate chips, caramel pieces, and chopped pecans (or walnuts) to dough.

Scone dough, in a ball in glass mixing bowlChocolate chips, caramel pieces and pecans added to scone dough
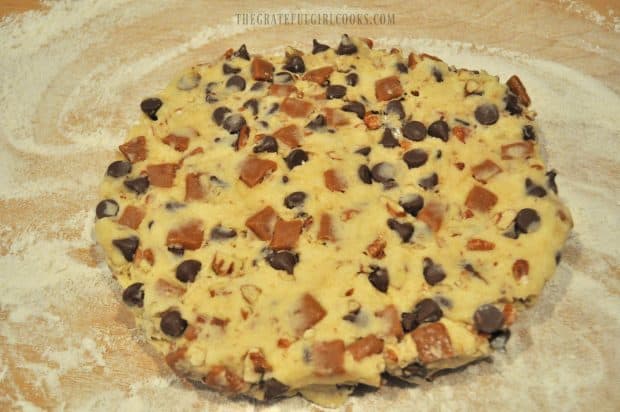
Mix the chocolate chips, caramels and pecans gently into dough, until fully blended. Place the dough ball onto a lightly floured work surface, and form dough into a circle, by pressing down and shaping with hands.

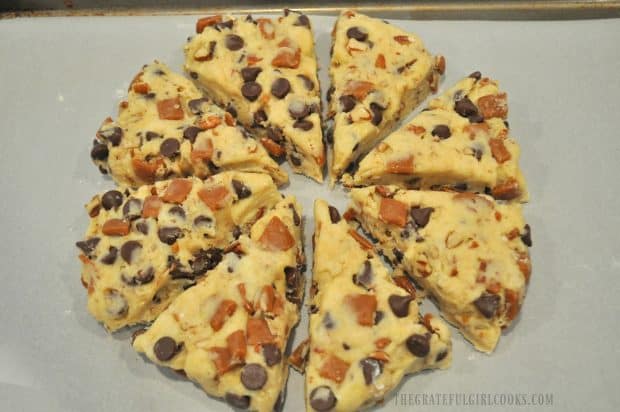
Circle should be about 8-9 inches wide and about 2 inches high (approx.). Once formed, cut dough into 8 equal sized wedges using a sharp knife or a pizza cutter.

Scone dough is filled with chocolate, pecans and caramel pieces
Scone dough is shaped into a circle on floured surface
Bake The Chocolate Caramel Pecan Scones

Place wedges onto a parchment paper lined baking sheet (or onto a silicone mat). Place them in a circle, but separate each piece slightly from the others (as shown below). Bake at 400 degrees for 18-10 minutes (check them at 18 minutes- mine were done!).  The scones should be golden brown.

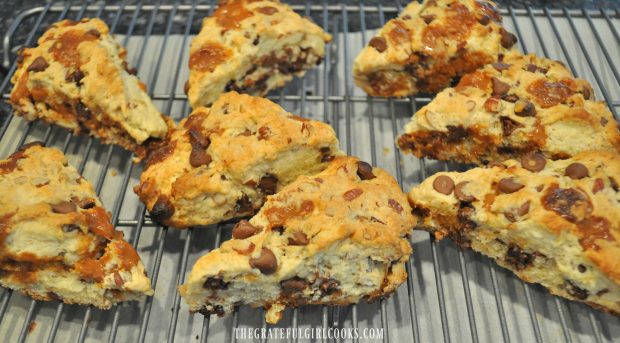
Remove baking sheet from oven. Let scones rest for a couple minutes, then transfer them to a wire rack to finish cooling.

Eight baked chocolate caramel scones, cooling on wire rack
Ready To Serve!

Let the scones cool to room temperature so the chocolate can firm up. Transfer to a serving platter, serve and enjoy!

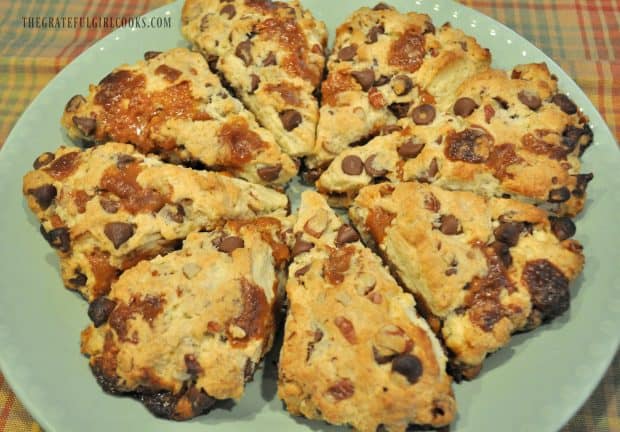
Baked chocolate caramel pecan scones on green serving plate
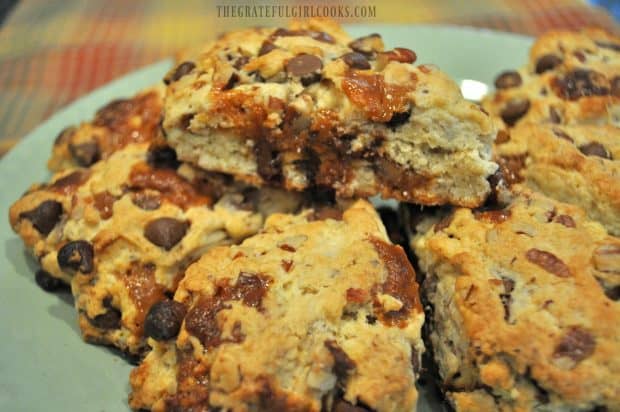
See all that chocolate, caramel, and pecan yumminess? Yep. These scones are GOOD! Make sure to store any leftover scones in an airtight container, or wrap them really well in plastic wrap.

Baked scones, with one sitting on top
Now all that’s left to do is grab a cold glass of milk, or a hot mug of tea or coffee, and enjoy a tasty treat!  Be sure to check out ALL of my recipes in the Recipe Index, located at the top of the page. Have a great day!

Interested In More Recipes?

Thank you for visiting this website. I appreciate you using some of your valuable time to do soIf you’re interested, I publish a newsletter 2 times per month (1st and 15th) with all the latest recipes, and other fun info. I would be honored to have you join our growing list of subscribers, so you never miss a great recipe!
There is a Newsletter subscription box on the top right side (or bottom) of each blog post, depending on the device you use, where you can easily submit your e-mail address (only) to be included in my mailing list.

You Can Also Find Me On Social Media:

Facebook page: The Grateful Girl Cooks!
Pinterest:
The Grateful Girl Cooks!
Instagram:
jbatthegratefulgirlcooks

Author's signature

Recipe Source: http://justaboutbaked.com/turtle-scones/

0 from 0 votes
Chocolate Caramel Pecan Scones
Prep Time
10 mins
Cook Time
20 mins
Total Time
30 mins
 
Grab some coffee or tea and enjoy these absolutely delicious scones, filled with milk chocolate chips, caramel and pecans, for breakfast or a simple snack.
Category: Breakfast, Snack
Cuisine: American
Keyword: chocolate caramel pecan scones
Servings: 8 scones
Calories Per Serving: 447 kcal
Author: JB @ The Grateful Girl Cooks!
Ingredients
  • 2 cups flour (all purpose)
  • 1 Tablespoon baking powder
  • 2 Tablespoons granulated sugar
  • 1/4 teaspoons salt
  • 5 Tablespoons butter , VERY cold
  • 1 large egg
  • 1/2 cup heavy whipping cream
  • 12 caramels , chopped into small pieces
  • 3/4 cup milk chocolate chips
  • 3/4 cup pecans (or walnuts) , chopped
Instructions
  1. Preheat oven to 400 degrees before beginning.  Place parchment paper or a silicone mat onto a large cookie sheet.  

  2. Place flour, baking powder, granulated sugar, and salt into a large mixing bowl. Cut VERY COLD butter into small chunks and add to the flour. Cut the butter into the dry ingredients, using a pastry cutter, 2 forks, or by using your fingers to pinch the ingredients together. Do this until crumbs resemble small peas in size, and butter is incorporated into mixture. Add egg and whipping cream to the bowl. Stir with spoon, or lightly knead the dough in the bowl (with clean hands) until a soft dough ball is formed.

  3.  Add chocolate chips, caramel pieces, and chopped pecans (or walnuts) to dough.  Mix well (using your hands is easiest), until fully blended.

  4. Place the dough ball onto a lightly floured work surface, and form dough into a circle, by pressing down and shaping with hands. Circle should be about 8-9 inches wide and about 2 inches high (approx.). Once formed, cut dough into 8 equal sized wedges using a sharp knife or a pizza cutter.

  5. Place wedges onto a parchment paper or silicone mat lined baking sheet . Place wedges in a circle, separating each piece slightly from the others. Bake at 400 degrees for 18-10 minutes (check them at 18 minutes- mine were done!).  The scones should be golden brown.  Remove baking sheet from oven. Let scones rest for a couple minutes, then transfer them to a wire rack. Let scones cool to room temperature so chocolate can firm up. Serve... and enjoy!

Nutrition Facts
Chocolate Caramel Pecan Scones
Amount Per Serving (1 scone)
Calories 447 Calories from Fat 216
% Daily Value*
Fat 24g37%
Saturated Fat 11g69%
Cholesterol 42mg14%
Sodium 191mg8%
Potassium 266mg8%
Carbohydrates 52g17%
Fiber 2g8%
Sugar 23g26%
Protein 5g10%
Vitamin A 480IU10%
Calcium 128mg13%
Iron 2mg11%
* Percent Daily Values are based on a 2000 calorie diet.

Here’s one more to pin on your Pinterest boards!Grab some coffee or tea and enjoy these absolutely delicious scones, filled with milk chocolate chips, caramel and pecans, for breakfast or a simple snack.

Apple Cinnamon Overnight Oats

You’ll love this easy, delicious recipe for creamy apple cinnamon overnight oats, with cinnamon and pecans! Make them in 10 minutes, refrigerate the filled jars overnight, and enjoy a wonderfully creamy breakfast treat waiting for you in the morning!
You'll enjoy these easy, delicious Apple Cinnamon Overnight Oats with pecans! Make them in 10 minutes, refrigerate, and enjoy in the morning!

I’ve been really having fun trying different flavor combinations for overnight oats recently, and have already made Banana Coconut, Strawberry Coconut, and Chocolate Banana.  All of them are so good! I love the convenience of taking a few minutes at night to mix them up, and then waking up to, and eating, a creamy jar of deliciously flavored apple overnight oats that’s ready first thing in the morning!

I decided to make one of my favorite combinations… apple overnight oats with cinnamon (the TYPICAL way I eat oatmeal)! YUM.  This recipe was adapted from a few of the other oatmeal recipes I’ve made, and just added the ingredients I wanted to it.

I also added a few chopped pecans (you can substitute walnuts), for extra crunch, and some chia seeds which really help to fill you up… and they turned out REALLY good! Here’s how easy it is to make them:

Scroll Down For A Printable Recipe Card At The Bottom Of The Page

How To Make Apple Cinnamon Overnight Oats

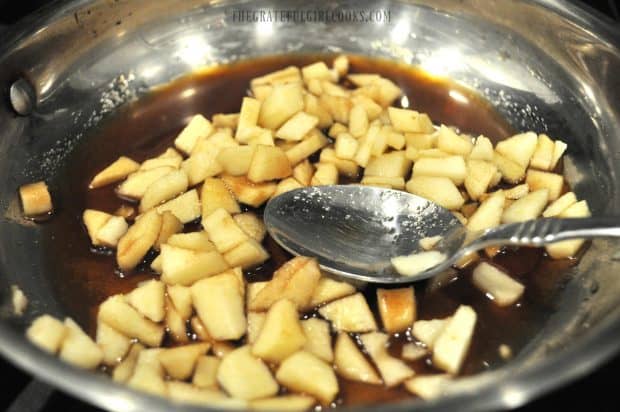
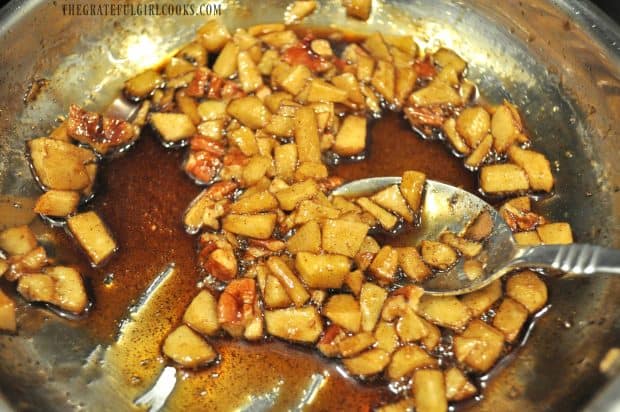
Start by cooking diced apples in a bit of water, brown sugar, and cinnamon in a skillet on medium heat, until apples have slightly softened, and the liquid has reduced slightly in volume (about 5 minutes). Stir occasionally.

During the last minute of cooking, add the chopped pecans. Once apples have softened slightly, remove skillet from heat.

Diced apples cooking with brown sugar, cinnamon and water in skillet

Apples, pecans, cinnamon and brown sugar, in skillet

Time To Fill the Jars!

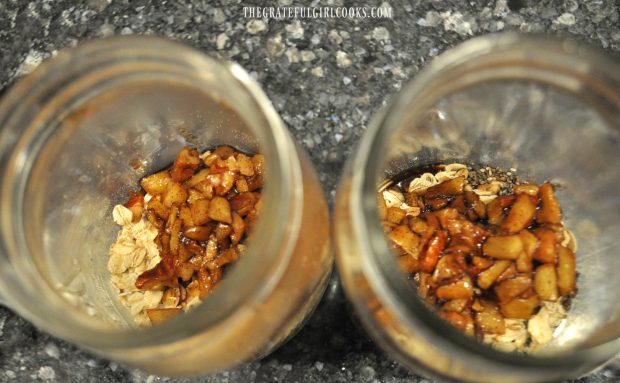
Divide rolled oats, vanilla, and chia seeds evenly into two containers (I used canning jars). Divide and add apple cinnamon overnight oats evenly (plus any syrup left in skillet) into jars.

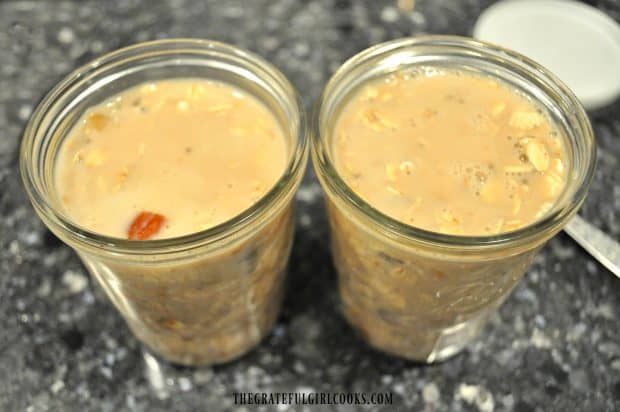
Fill the jars with almond milk (or milk of your choice), until oat mixture is covered.

Oats, apples, chia seeds added to canning jars

Almond milk added to overnight oats in two jars

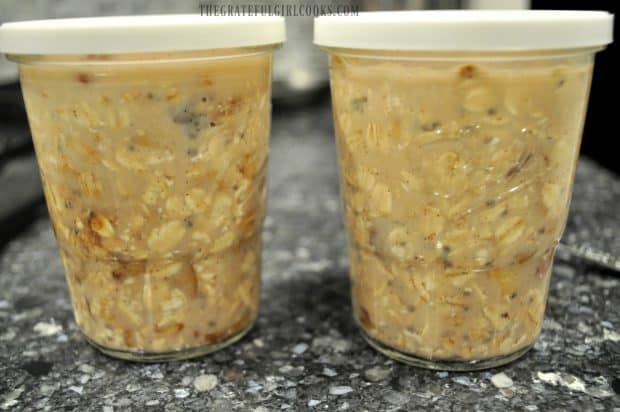
Stir each jar well, to fully incorporate all of the ingredients. Place a cover on each jar, and place jars in refrigerator and chill overnight.

Two covered jars with overnight oats inside

After refrigerating the apple cinnamon overnight oats while you slept, remove them from the refrigerator when ready to eat.

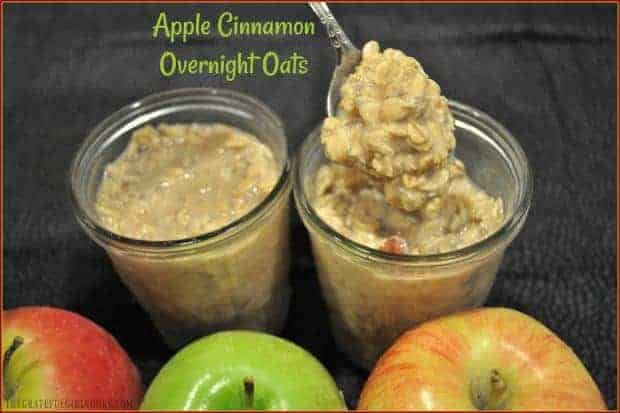
Grab a spoon, and dig into this creamy, flavor-filled, filling breakfast! Unopened jars of apple cinnamon overnight oats will keep for up to 3-4 days in refrigerator.

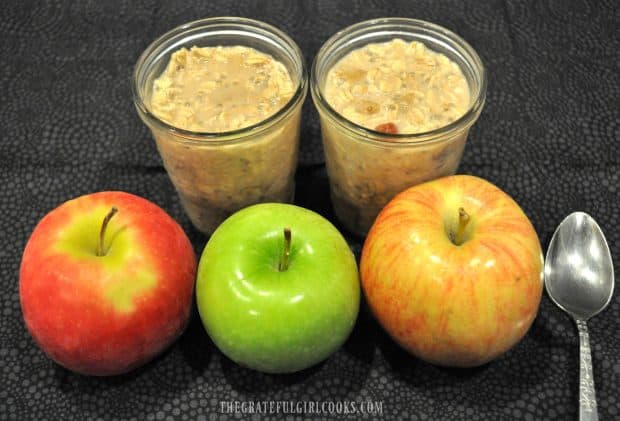
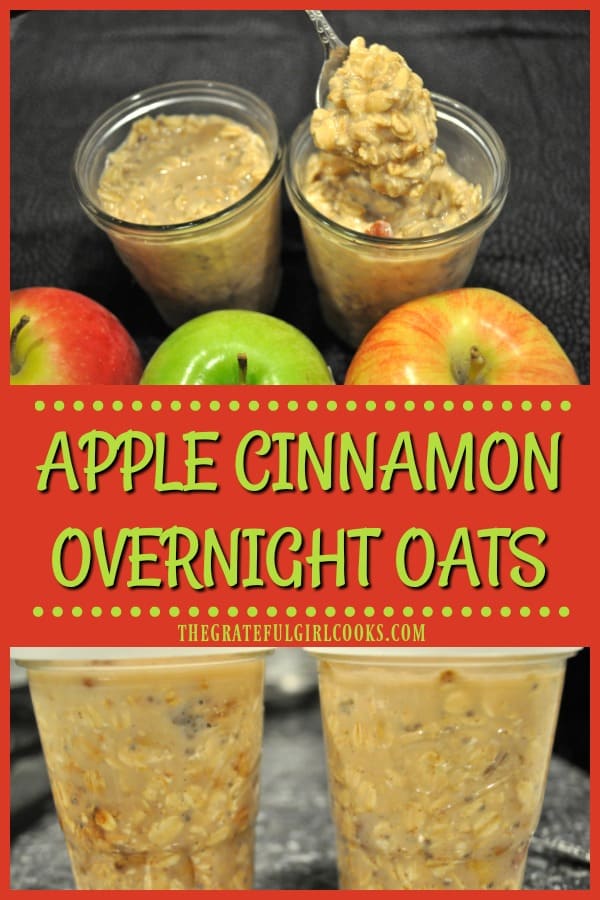
Two jars of overnight oats with a spoon and three apples in front
Hope you will consider making these delicious apple cinnamon overnight oats for a quick breakfast! The recipe is easily doubled or tripled, and I am confident you’ll enjoy this yummy treat. Have a GREAT day!

Looking For More Recipe Using Oatmeal?

If you enjoy oatmeal in other forms, you might also enjoy trying my recipes for Peach Cobbler Overnight Oats, Banana Bread Baked Oatmeal, Healthy Chocolate Oatmeal, Maple Nut Oatmeal, or Apple Cinnamon Steel Cut Oats with Pecans! Have a great day!

Interested In More Recipes?

Thank you for visiting this website. I appreciate you using some of your valuable time to do soIf you’re interested, I publish a newsletter 2 times per month (1st and 15th) with all the latest recipes, and other fun info. I would be honored to have you join our growing list of subscribers, so you never miss a great recipe!
There is a Newsletter subscription box on the top right side (or bottom) of each blog post, depending on the device you use, where you can easily submit your e-mail address (only) to be included in my mailing list.

You Can Also Find Me On Social Media:

Facebook page: The Grateful Girl Cooks!
Pinterest:
The Grateful Girl Cooks!
Instagram:
jbatthegratefulgirlcooks

Author's signature

0 from 0 votes
Apple Cinnamon Overnight Oats
Prep Time
10 mins
Cook Time
0 mins
Total Time
10 mins
 
You'll enjoy these easy, delicious Apple Cinnamon Overnight Oats with pecans! Make them in 10 minutes, refrigerate, and enjoy in the morning!
Category: Breakfast
Cuisine: American
Keyword: apple cinnamon overnight oats
Servings: 2
Calories Per Serving: 304 kcal
Author: JB @ The Grateful Girl Cooks!
Ingredients
  • 1/2 large apple , peeled, diced
  • Tablespoons brown sugar
  • 3/4 teaspoon cinnamon
  • 6 pecans , chopped
  • Tablespoons water
  • 1 cup old fashioned rolled oats , (not instant)
  • 1/2 teaspoon vanilla extract
  • 2 teaspoon chia seeds
  • 1 cup unsweetened almond milk , (approximate)
Instructions
  1. Cook diced apples in water, brown sugar, and cinnamon in a skillet on medium heat, until apples have slightly softened, and the liquid has reduced slightly in volume (about 5 minutes). Stir occasionally. During the last minute of cooking, add the chopped pecans. Once apples have softened slightly, remove skillet from heat.

  2. Divide rolled oats, vanilla, and chia seeds evenly into two containers (I used canning jars). Divide and add apple mixture evenly (plus any syrup left in skillet) into jars. Fill jars with almond milk, until oat mixture is covered. Stir each jar well, to fully incorporate ingredients. 

  3. Place a cover on each jar, and place jars in refrigerator overnight. In morning, serve and enjoy! Unopened jars can be stored in refrigerator for 3-4 days.

Nutrition Facts
Apple Cinnamon Overnight Oats
Amount Per Serving (1 serving)
Calories 304 Calories from Fat 72
% Daily Value*
Fat 8g12%
Sodium 170mg7%
Potassium 215mg6%
Carbohydrates 51g17%
Fiber 7g29%
Sugar 20g22%
Protein 7g14%
Vitamin C 2.1mg3%
Calcium 216mg22%
Iron 2.3mg13%
* Percent Daily Values are based on a 2000 calorie diet.

Here’s one more to pin on your Pinterest boards!You'll enjoy this easy, delicious breakfast of creamy Apple Cinnamon Overnight Oats with pecans! Make them in 10 minutes, refrigerate, and enjoy in the morning!

Blueberry and Cream Cheese-Stuffed French Toast

Blueberry Cream Cheese Stuffed French Toast is a delicious, flavor-filled, decadent breakfast treat you will really enjoy!
I’m “typically” an eggs, English muffin or oatmeal kind of girl for my breakfast choices, BUT… every now and then I do love a decadent, over the top breakfast. A real gut-buster, but oh soooo good! This one definitely fits the bill for DECADENT!

My husband and I had the opportunity to have a weekend getaway on the Oregon coast (the town of Newport) several years ago. We especially enjoyed a breakfast out at one particular restaurant.

I ordered this dish, and was blown away with how amazing it tasted (French toast calories aside… *cough cough). I’ve remembered that yummy breakfast ever since, and last Fall I decided to try making my own version of it at home, and it was delicious! Here’s how to make it:

Scroll Down For A Printable Recipe Card At The Bottom Of The Page

How To Make Blueberry and Cream Cheese-Stuffed French Toast

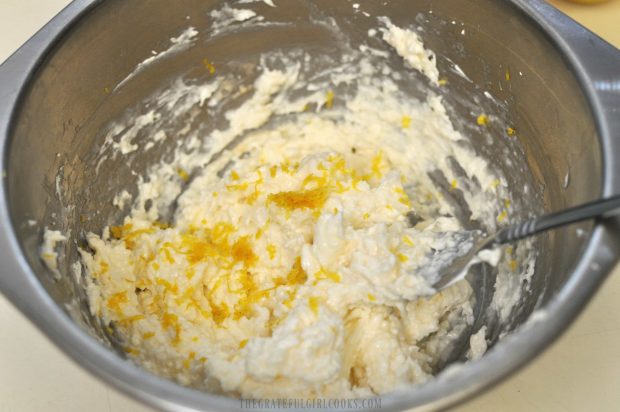
In medium sized bowl, combine cream cheese filling ingredients (with lemon zest for added flavor). Use a mixer or fork to blend well, until smooth. Set aside.

Cream cheese filling for french toast, mixed together in small bowl

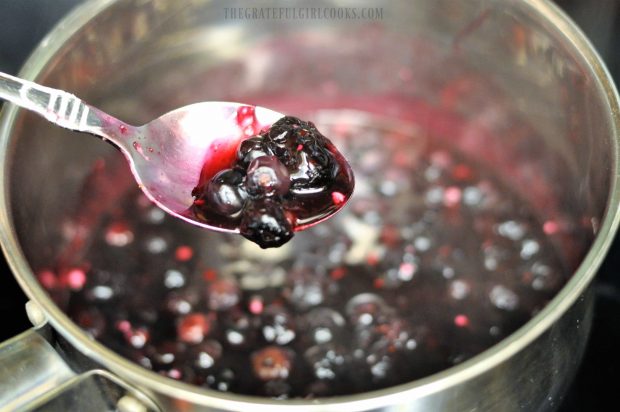
In a medium sized saucepan, place blueberries, water, cornstarch and granulated sugar. Cook on low heat, stirring occasionally, until blueberries “pop” (burst), and mixture has thickened. (approx. 5-6 minutes). Set aside; stir occasionally to cool.

Thickened blueberries on spoon over saucepan

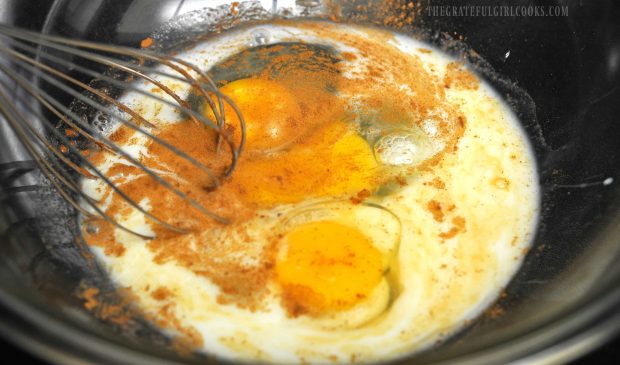
In a large bowl, whisk together the eggs, milk, vanilla, and cinnamon.

Whisking milk, eggs and cinnamon for french toast

Layering The French Toast For Cooking

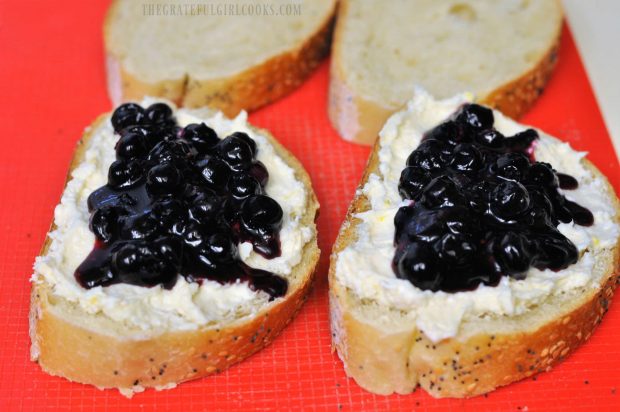
To prepare, divide the cream cheese mixture evenly and spread on two pieces of French bread. Evenly top with some of the blueberry mixture. DO NOT USE ALL OF IT- SAVE SOME BLUEBERRY MIXTURE SEPARATELY TO SPOON OVER TOP OF FINISHED DISH.

Try hard to not place the blueberries all the way to the edge of the bread, or the sauce will run out while cooking. Place a piece of French bread on top of blueberries.

Blueberries and cream cheese filling on French bread slices

Time To Cook The Blueberry And Cream Cheese-Stuffed French Toast

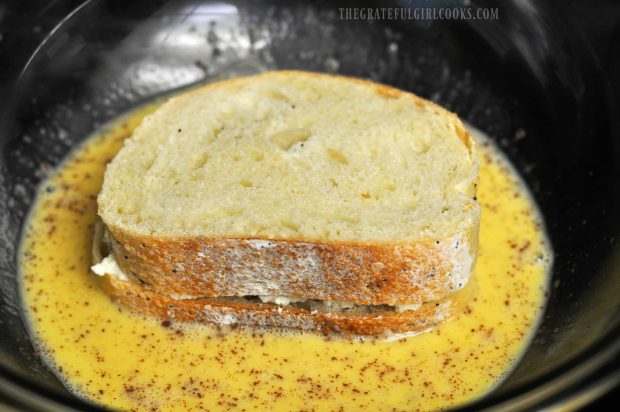
Heat a large non-stick skillet (or grill pan) on medium heat. Melt butter in skillet.  Place each “sandwich” into egg mixture, one at a time, to soak up the egg mixture. Turn, to coat each side in the egg mixture.  Shake off excess, then place the French toast into a hot skillet.

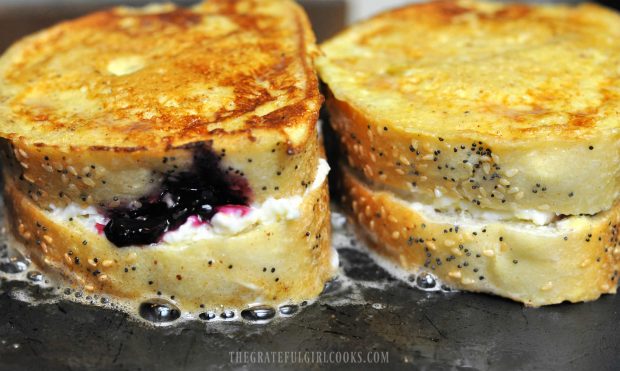
Repeat with the other serving. Cook until bottom side is browned nicely, then very carefully turn the French toast to other side. Continue to cook until both sides are crispy and browned. This will take a few minutes.

Stuffed French toast soaking up egg mixture before cooking

Stuffed French Toast cooking on the grill

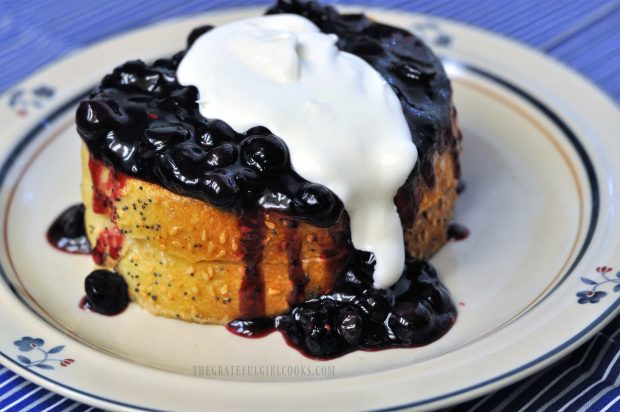
Once cooked/browned, transfer French toast to serving plate. Spoon some of the reserved blueberry sauce over the top of the blueberry and cream cheese-stuffed French toast, then add a dollop of whipped cream, if desired. You’ll notice my whipped cream on this serving melted from the heat by the time I finally got a photo… oh well… you get the idea, right?

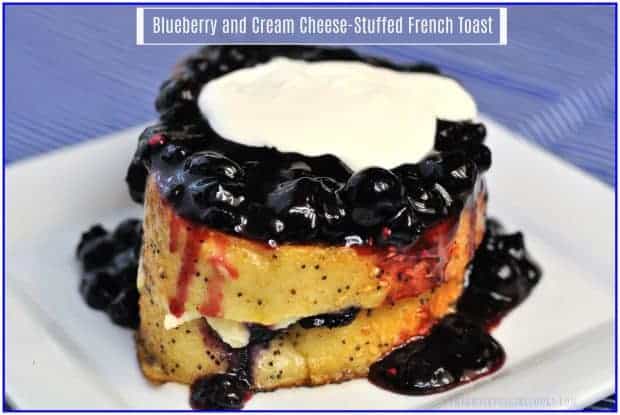
Blueberry and cream cheese stuffed french toast with whipped cream, on small plate

Serve and enjoy every bit of this decadent breakfast, THEN go for a long walk to work it off! I totally recommend that, by the way… ha ha! It’s all about BALANCE!

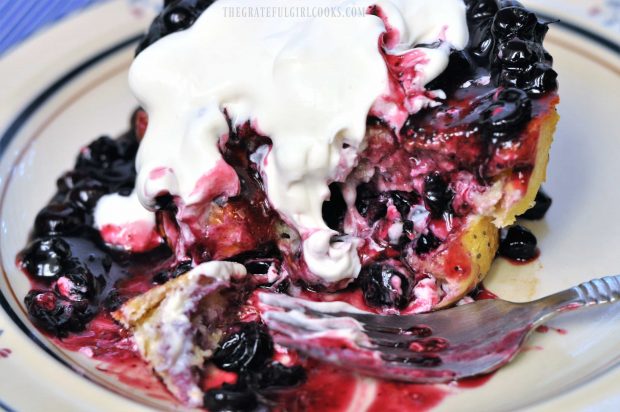
The stuffed French toast is high in calories (the equivalent of one large Cinnabon, by the way – yikes!). If you want to consume less calories but still enjoy this dish, cut it in half once you’re done cooking it, THEN add the blueberry topping! It will be messy, but GOOOOOD!

Blueberry french toast, half eaten, on plate with fork

Have a great day! Make it a good one! And get those walking shoes out… you’re gonna need a walk after this scrumptious stuffed French toast breakfast!

Looking For More Decadent BREAKFAST Recipes?

You can find all of my recipes in the Recipe Index, located at the top of the page. I have some wonderfully decadent breakfast recipes, including:

Interested In More Recipes?

Thank you for visiting this website. I appreciate you using some of your valuable time to do soIf you’re interested, I publish a newsletter 2 times per month (1st and 15th) with all the latest recipes, and other fun info. I would be honored to have you join our growing list of subscribers, so you never miss a great recipe!
There is a Newsletter subscription box on the top right side (or bottom) of each blog post, depending on the device you use, where you can easily submit your e-mail address (only) to be included in my mailing list.

You Can Also Find Me On Social Media:

Facebook page: The Grateful Girl Cooks!
Pinterest:
The Grateful Girl Cooks!
Instagram:
jbatthegratefulgirlcooks

Author's signature

0 from 0 votes
Blueberry and Cream Cheese-Stuffed French Toast
Prep Time
15 mins
Cook Time
8 mins
Total Time
23 mins
 

Blueberry Cream Cheese Stuffed French Toast is a delicious, flavor-filled, decadent breakfast treat you will really enjoy!

Category: Breakfast
Cuisine: American
Keyword: blueberry stuffed french toast
Servings: 2 servings
Calories Per Serving: 803 kcal
Author: JB @ The Grateful Girl Cooks!
Ingredients
For Cream Cheese Filling
  • 1 teaspoon lemon zest
  • 4 ounces cream cheese , low fat
  • 1/4 cup powdered sugar
  • 1/4 teaspoon vanilla extract
For Blueberry Sauce
  • cups fresh blueberries
  • 1 teaspoon cornstarch
  • 2 Tablespoons granulated sugar
  • 2 Tablespoons water
For French Toast
  • 4 slices French bread , approx. 1" thick per slice
  • 3 eggs
  • 1/4 cup milk , low-fat
  • 1/2 teaspoon vanilla extract
  • 1/4 teaspoon cinnamon
  • 2 teaspoons butter
  • Whipped cream , OPTIONAL for topping
Instructions
  1. In medium sized bowl, combine cream cheese filling ingredients. Use a mixer to blend until smooth. Set aside.

  2. In a medium sized saucepan, place blueberries, cornstarch and granulated sugar.  Cook on low heat, stirring occasionally, until blueberries "pop" (burst), and mixture has thickened. (approx. 5-6 minutes). Set aside; stir occasionally to cool.

  3. In a large bowl, whisk together the eggs, milk, vanilla, and cinnamon.

  4. To prepare, divide the cream cheese mixture evenly and spread on two pieces of french bread. Evenly top with some of the blueberry mixture (DO NOT USE ALL OF IT-SAVE SOME BLUEBERRY MIXTURE SEPARATELY TO SPOON OVER TOP OF FINISHED DISH).  Try hard to not place the blueberries all the way to the edge of the bread, or the sauce will run out while cooking. Place a piece of french bread on top of blueberries.  

  5. Heat a large non-stick skillet (or grill pan) on medium heat. Melt butter in skillet.  Place each "sandwich" into egg mixture, one at a time, to soak up the egg mixture. Turn, to coat each side in the egg mixture.  Shake off excess, then place french toast onto hot skillet. Repeat with other serving.  Cook until bottom side is browned nicely, then very carefully turn french toast to other side and continue to cook until both sides are crispy and browned. This will take a few minutes.

  6. Once cooked/browned, transfer french toast to serving plate.  Spoon some of the reserved blueberry sauce over the top of the dish, then add a dollop of whipped cream, if desired. Serve and enjoy, THEN go for a long walk to work it off! (ha ha) 

Recipe Notes

NOTE: Caloric calculation does not include whipped cream topping (as it is optional).
TIP: If you wish to have less calories, cut the french toast in half after removing it from skillet, THEN cover the top with the blueberry filling, etc. Still all the taste, but half the calories!

Nutrition Facts
Blueberry and Cream Cheese-Stuffed French Toast
Amount Per Serving (2 slices)
Calories 803 Calories from Fat 189
% Daily Value*
Fat 21g32%
Saturated Fat 10g63%
Cholesterol 288mg96%
Sodium 1067mg46%
Potassium 524mg15%
Carbohydrates 123g41%
Fiber 5g21%
Sugar 46g51%
Protein 29g58%
Vitamin A 910IU18%
Vitamin C 12mg15%
Calcium 221mg22%
Iron 6.2mg34%
* Percent Daily Values are based on a 2000 calorie diet.

Here’s one more to pin on your Pinterest boards!Blueberry cream cheese stuffed French toast is a delicious, flavor-filled, decadent breakfast treat you will really enjoy!

Save

Save

Save

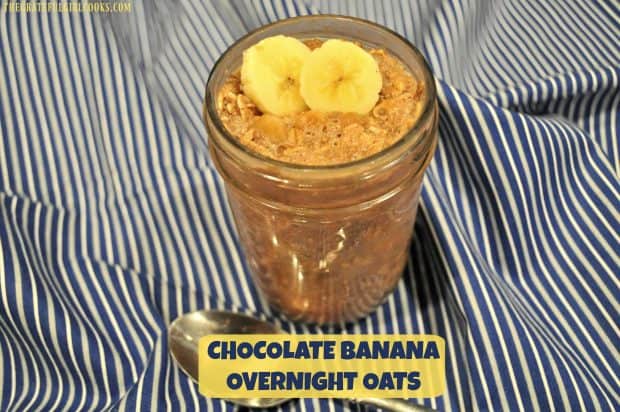
Chocolate Banana Overnight Oats

Creamy, filling, and absolutely delicious, Chocolate Banana Overnight Oats are a convenient, quick and satisfying breakfast that can be made ahead of time!Chocolate Banana Overnight Oats are creamy, filling, absolutely delicious, and a convenient, quick and satisfying breakfast that can be made ahead of time!

If you appreciate having a “ready to eat breakfast” waiting for you when you stumble sleepy-eyed into the kitchen in the morning, you will enjoy the convenience of Chocolate Banana Overnight Oats! Simply make them before you go to bed, and BOOM… they will be ready and waiting for you… thick, creamy and delicious in the morning!

I’ve made overnight oats many times, and really like the convenience of this filling, delicious breakfast item! I think you will enjoy them, too, so I’m sharing this recipe here today.

Scroll Down For A Printable Recipe Card At The Bottom Of The Page 

How Do I Make These Chocolate Banana Overnight Oats?

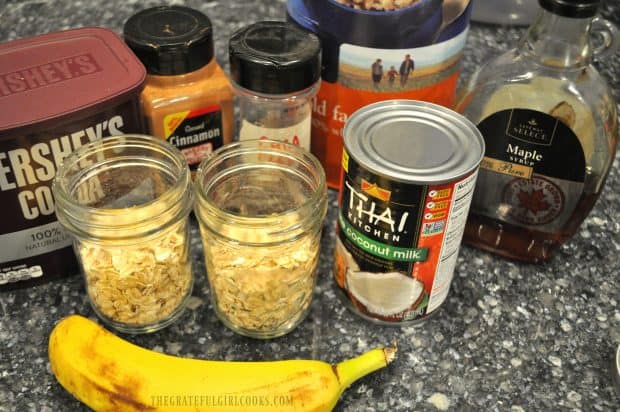
Here are the cast of characters for this flavorful version: You will need old fashioned oats, cocoa powder, cinnamon, chia seeds, vanilla extract, lite coconut milk, a banana, and pure maple syrup.

It only takes a couple of minutes to mix everything together. Once mixed, all you will need to do is cover and refrigerate them overnight. That’s it! All that’s left to do is enjoy them the next morning!

Ingredients for overnight oats on counter

The recipe, as written below, below makes 1 serving. I doubled the recipe to have two of these pint jars of creamy oats ready to eat, so my photos reflect that. These yummy chocolate banana overnight oats are so easy to make!

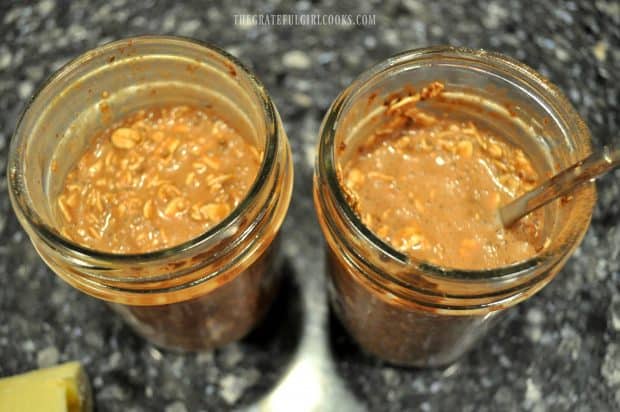
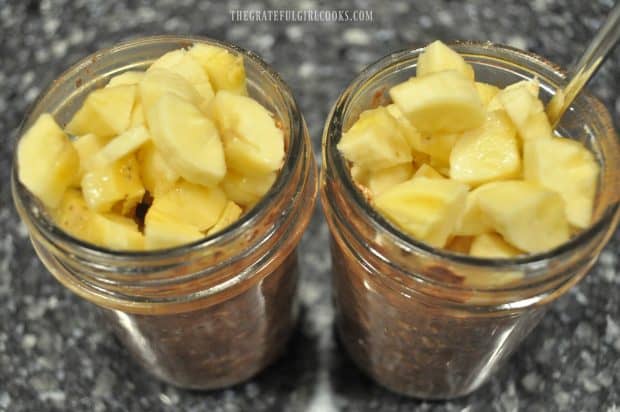
Begin by adding all ingredients, except for banana and maple syrup to jar. You will need to give the ingredients a good stir, to fully mix them together. Once mixed, You can add the banana slices. Drizzle with maple syrup, if using. NOTE: maple syrup is optional; use only if a sweeter taste is desired.

2 pint jars containing oats mixed with coconut milk

Chopped bananas in jars with chocolate oats

Once ALL ingredients are mixed, add a tiny bit more coconut milk (about a Tablespoon) to loosen up the oats a bit, then give it another good stir. You can see that the chocolate banana overnight oats mixture came right up to the top of the cute little pint jars!

Coconut milk in jars of chocolate oats

2 jars of overnight chocolate banana oats

Ready To Eat Some Chocolate Banana Overnight Oats?

Now you will need to cover containers tightly with plastic wrap! Place jars in the refrigerator overnight.  In the morning, the chocolate banana overnight oats will have firmed up quite a bit (almost to a pudding consistency) by the time you’re ready to eat!

If desired, garnish each jar with a couple fresh slices of banana, then dig in and enjoy this simple, yet filling breakfast!

Jar of chocolate oats with banana sliceschocolate overnight oats on a spoon

That’s how easy it is to make this simple dish for a scrumptious, quick and convenient breakfast. If you enjoy this recipe you might enjoy my other overnight oat recipes for Blueberry Cinnamon Overnight OatsBanana Coconut, Apple Cinnamon, Peach Cobbler, or Strawberry Coconut Overnight Oats!

The jars of chocolate banana overnight oats will keep in the refrigerator for 2-3 days after making them. You can make several jars ahead of time to conveniently grab when you are hungry! Sure hope you will consider trying these Chocolate Banana Overnight Oats! They’re really good!  Have a wonderful day, friends. Don’t forget to check out ALL of my recipes in the Recipe Index, which is located at the top of the page.

Interested In More Recipes?

Thank you for visiting this website. I appreciate you using some of your valuable time to do soIf you’re interested, I publish a newsletter 2 times per month (1st and 15th) with all the latest recipes, and other fun info. I would be honored to have you join our growing list of subscribers, so you never miss a great recipe! 

There is a Newsletter subscription box on the top right side (or bottom) of each blog post, depending on the device you use, where you can easily submit your e-mail address (only) to be included in my mailing list.

You Can Also Find Me On Social Media:

Facebook page: The Grateful Girl Cooks!
Pinterest:
The Grateful Girl Cooks!
Instagram:
jbatthegratefulgirlcooks

Author's signature

Recipe Source: https://www.organizeyourselfskinny.com/2015/07/02/banana-chocolate-overnight-oats/

0 from 0 votes
Chocolate Banana Overnight Oats
Prep Time
5 mins
Cook Time
0 mins
Overnight Refrigeration
8 hrs
Total Time
5 mins
 
Chocolate Banana Overnight Oats are creamy, filling, absolutely delicious, and a convenient, quick and satisfying breakfast that can be made ahead of time!
Category: Breakfast
Cuisine: American
Keyword: chocolate banana overnight oats
Servings: 1 serving
Calories Per Serving: 318 kcal
Author: JB @ The Grateful Girl Cooks!
Ingredients
  • 1/2 cup old fashioned rolled oats
  • 1/2 Tablespoon cocoa powder
  • 1/2 teaspoon chia seeds
  • 1/8 teaspoon cinnamon
  • 1/4 teaspoon vanilla extract
  • 1/2 cup lite coconut milk , unsweetened
  • 1/2 banana , peeled/chopped
  • 1 teaspoon pure maple syrup (OPTIONAL) , plus more if desired
Instructions
  1. Place all ingredients, except for banana and maple syrup into pint sized jar or container. Give the ingredients a good stir, to fully mix together. 

  2. Once mixed together, add banana slices. Drizzle with maple syrup, if using, (maple syrup is optional, use if a sweeter taste is desired) to jars. Stir. Once ALL ingredients are mixed together, add additional milk (if desired) to loosen up the oats a bit, then stir well, to blend.

  3. Cover jars with plastic wrap, and refrigerate overnight.  When ready to serve, garnish with additional banana slices (if desired).  Oats will keep for 2-3 days when stored tightly covered in refrigerator.

Recipe Notes

Maple syrup is optional, if a sweeter taste is desired. It is not calculated in the caloric count.

Nutrition Facts
Chocolate Banana Overnight Oats
Amount Per Serving (1 serving)
Calories 318 Calories from Fat 99
% Daily Value*
Fat 11g17%
Saturated Fat 8g50%
Sodium 98mg4%
Potassium 395mg11%
Carbohydrates 47g16%
Fiber 7g29%
Sugar 7g8%
Protein 6g12%
Vitamin C 5.1mg6%
Calcium 34mg3%
Iron 2.1mg12%
* Percent Daily Values are based on a 2000 calorie diet.

Here’s one more to pin on your Pinterest boards!Chocolate Banana Overnight Oats are creamy, filling, absolutely delicious, and a convenient, quick and satisfying breakfast that can be made ahead of time!Long pin for Chocolate Banana Overnight Oats

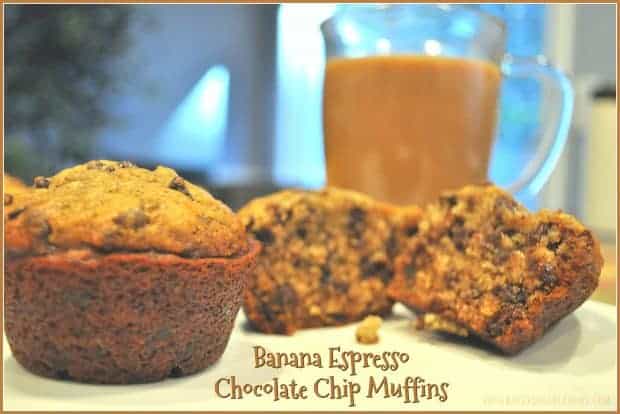
Banana Espresso Chocolate Chip Muffins

You’ll LOVE these delicious Banana Espresso Chocolate Chip Muffins! EASY to make, flavorful treat for a family friendly breakfast, brunch, or snack!You'll LOVE these delicious Banana Espresso Chocolate Chip Muffins! EASY to make, flavorful treat for a family friendly breakfast, brunch, or snack!

If you are the kind of person who enjoys banana muffins, coffee, and chocolate chips, then you will LOVE these absolutely delicious Banana Espresso Chocolate Chip Muffins! 

They’re packed with flavor, incredibly SIMPLE to make, and will be a perfect treat for a breakfast, brunch buffet, or afternoon snack!

I love banana muffins of all kinds… but if you add in some chocolate chips, and just a smidge of espresso powder giving them an extra level of flavor… whoa… those sounded like muffins I wanted to try!

I found the original recipe on Pinterest and decided to whip up a batch to have around for breakfast or a yummy snack!

The muffins have excellent flavor, and were super EASY to prepare!  The tiny bit of espresso powder in this recipe enhances the chocolate flavor, and does NOT overpower the muffins, by the way! Here’s how to make them:

Scroll Down For A Printable Recipe Card At The Bottom Of The Page

How To Make Banana Espresso Chocolate Chip Muffins

First thing to do (try not to break a sweat!) is preheat your oven to 350 degrees, and spray a standard size 12 cup muffin tin with non-stick spray.

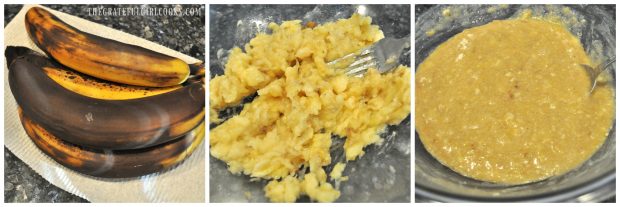
Next, place some really ripe peeled bananas in a large mixing bowl, and mash them “silly” with a fork (use really ripe bananas, cause they are much sweeter!).

Add granulated and brown sugars, melted butter, milk, and then the egg. Stir the ingredients really well together until blended. (No need for a mixer, just use a spoon!)

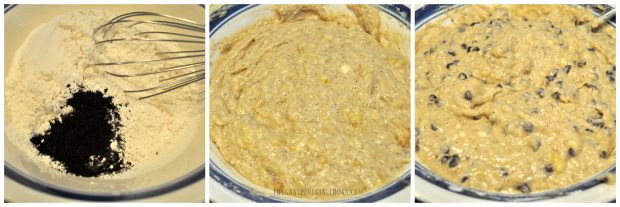
3 photos: ripe bananas, mashed bananas, and muffin batterIn a large separate bowl, combine the flour, baking soda, salt, and espresso powder. Whisk them together. Create a well right in the middle of the dry ingredients, then carefully pour in the banana mixture, and stir to combine.

Add the chocolate chips (I used mini chips), and fold them into the batter, stirring only until ingredients are combined.

3 photos: flour with espresso powder, muffin batter, batter with chocolate chips

Bake The Muffins

Divide the muffin batter equally between the muffin cups. The mixture should fill each cup about 3/4 of the way full. Place the muffins in a preheated 350 degree oven on the middle rack.

Bake them for between 20 and 25 minutes (oven temps very greatly- mine were ready at 22 minutes).

Test their doneness by inserting a toothpick into center of muffin.  If it comes out clean, the muffins are ready to remove from oven! The muffin tops should be golden brown in color.

Once the banana muffins are out of the oven, let them cool for about 15 minutes (still in the muffin tin) on a wire rack.

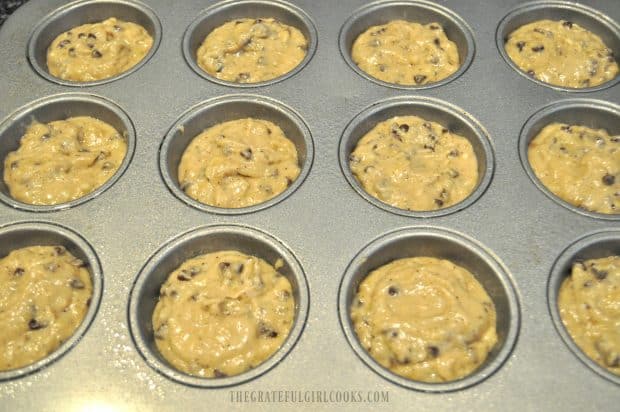
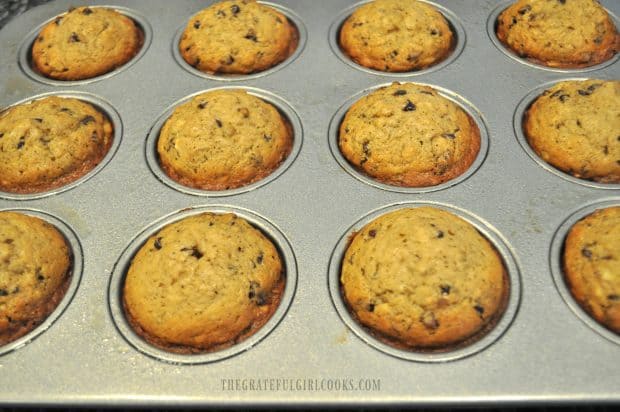
Muffin batter in metal muffin tin cup holdersBanana muffins baked and golden brown in muffin tinAfter 15 minutes, transfer the banana muffins from the pan to the wire rack, and let them finish cooling down.

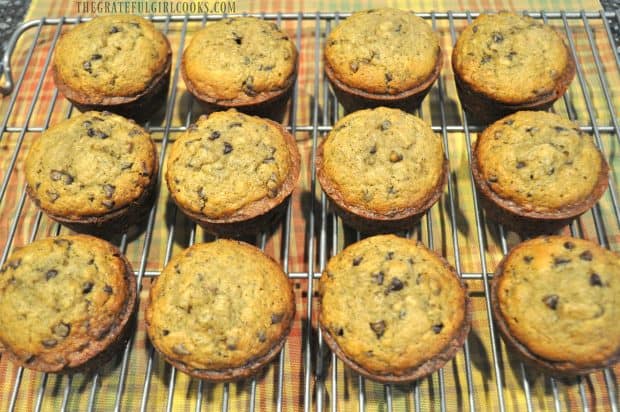
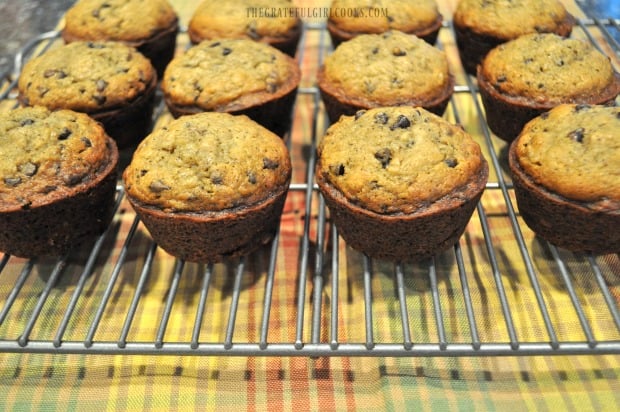
Banana chocolate chip muffins cooling on wire rack12 muffins on a wire rackWhen you’re ready to enjoy these truly tasty banana muffins, pour yourself a big mug of coffee or tea, or even a tall glass of cold milk, and sink your teeth into them! I really think you’re gonna LOVE ’em!

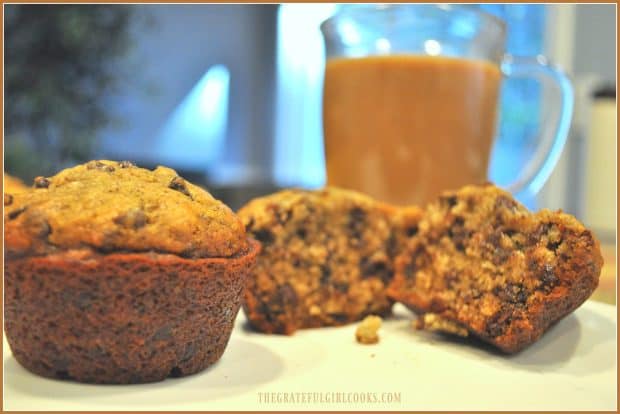
Inside look at banana espresso chocolate chip muffin with coffee behind itIf you enjoy muffins like we do, I’m confident you’ll like these yummy, unique muffins for breakfast or a quick snack.

Thanks for stopping by, and I invite you to come back soon for more family-friendly recipes. Have a blessed day! May it be filled with JOY!

Looking For More MUFFIN Recipes?

You can find ALL of my recipes in the Recipe Index, which is located at the top of the page. I have lots of delicious muffin recipes to check out, including:

Want More Recipes? Get My FREE Newsletter!

I publish a newsletter 2 times per month (1st and 15th) with lots of recipes, tips, etc..
Would you like to join our growing list of subscribers?

There is a Newsletter subscription box on the top right (or bottom) of each blog post, depending on the device you use.
You can submit your e-mail address there, to be added to my mailing list.

Find Me On Social Media:

Facebook page: The Grateful Girl Cooks!
Pinterest:
The Grateful Girl Cooks!
Instagram:
jbatthegratefulgirlcooks

Author's signature

Recipe Source: Tessa, at https://www.handletheheat.com/banana-espresso-chocolate-chip-muffins/

↓↓ PRINTABLE RECIPE BELOW ↓↓

0 from 0 votes
Banana Espresso Chocolate Chip Muffins
Prep Time
10 mins
Cook Time
25 mins
Total Time
35 mins
 
You'll LOVE these delicious Banana Espresso Chocolate Chip Muffins! EASY to make, flavorful treat for a family friendly breakfast, brunch, or snack!
Category: Bread/Breakfast
Cuisine: American
Keyword: banana espresso chocolate chip muffins
Servings: 12 muffins
Calories Per Serving: 304 kcal
Author: JB @ The Grateful Girl Cooks!
Ingredients
  • 4 medium bananas , very ripe (approx. 1.5 cups)
  • 1/2 cup granulated sugar
  • 1/4 cup brown sugar , firmly packed
  • 1/2 cup butter ,(1 cube) melted
  • 1/4 cup whole milk
  • 1 egg (large)
  • cups all purpose flour
  • 1 teaspoon instant espresso powder , see Tip
  • teaspoons baking soda
  • 1 teaspoon salt
  • 1 cup semi-sweet chocolate chips
Instructions
  1. Preheat your oven to 350 degrees, and spray a standard size 12 cup muffin tin with non-stick spray. Place really ripe bananas in a large mixing bowl, and mash them "silly" with a fork. Add granulated and brown sugars, melted butter, milk, and then the egg. Stir the ingredients really well together until blended. (No need for a mixer; use a spoon!)

  2. In a separate, large bowl, combine flour, baking soda, salt, and espresso powder. Whisk together. Create a well right in the middle of the dry ingredients, then pour in the banana mixture, and stir to combine. Next add the chocolate chips (I used mini chips), and fold them into the batter, only until ingredients are combined.

  3. Divide the muffin batter equally between prepared muffin cups. The mixture should fill each cup about 3/4 of the way. Place muffins in preheated oven on the middle rack. Bake them for 20 to 25 minutes (oven temps very greatly- mine were ready at 22 minutes). Test their doneness by inserting a toothpick into center of muffin. If it comes out clean, the muffins are ready to remove from oven! The muffin tops should be golden brown in color. Once the muffins are out of the oven, let them cool for about 15 minutes (still in the muffin tin) on a wire rack. After 15 minutes, transfer muffins from the pan to the wire rack, and let them finish cooling down. Serve... and ENJOY!
Recipe Notes

TIP: If you don't have access to instant espresso powder, you can substitute 2 teaspoons of very finely ground dark roast coffee.

Nutrition Facts
Banana Espresso Chocolate Chip Muffins
Amount Per Serving (1 muffin)
Calories 304 Calories from Fat 126
% Daily Value*
Fat 14g22%
Saturated Fat 8g50%
Cholesterol 35mg12%
Sodium 409mg18%
Potassium 263mg8%
Carbohydrates 41g14%
Fiber 2g8%
Sugar 23g26%
Protein 3g6%
Vitamin A 295IU6%
Vitamin C 3.4mg4%
Calcium 27mg3%
Iron 1.9mg11%
* Percent Daily Values are based on a 2000 calorie diet.

Here’s one more to pin on your Pinterest boards!You'll LOVE these delicious Banana Espresso Chocolate Chip Muffins! EASY to make, flavorful treat for a family friendly breakfast, brunch, or snack!
Chocolate Chip Muffins

Chocolate Chip Muffins are easy to make, amazingly delicious, and will be a family favorite for breakfast or a light snack!Chocolate Chip Muffins will be a family favorite for breakfast or a light snack, and they're easy to make!

Do you enjoy a great tasting treat for breakfast or a snack?  If so, then you will want to read on and will need to make these delicious Chocolate Chip Muffins, bursting with miniature chocolate chips! Grab a cup of coffee or tea and read on.

I found the recipe on Pinterest and whipped up a batch for our family several weeks ago. WOW!!! They are wonderful, and were difficult to stay out of! 

The recipe made 12 standard sized muffins, which were packed with chocolate chips and were NOT dry!  Absolutely DELICIOUS! As an added bonus… they are super easy to make, too! Here’s how:

Scroll Down For A Printable Recipe Card At The Bottom Of The Page

How To Make Chocolate Chip Muffins

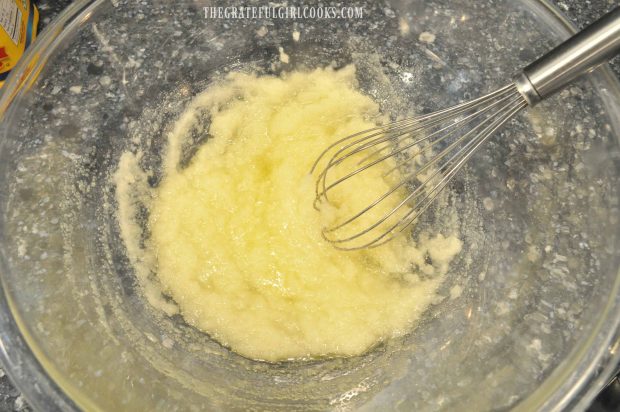
In a large bowl, mix together butter and oil, until well blended. Add sugar, egg, egg white and vanilla extract.

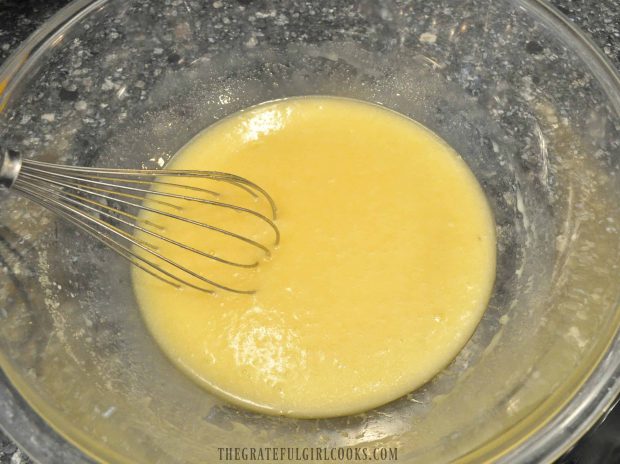
Stir or whisk ingredients very well, until completely combined and smooth. Add the buttermilk, and stir until combined.

Whisking eggs and butter together

Yellow muffin batter in clear mixing bowl with whisk

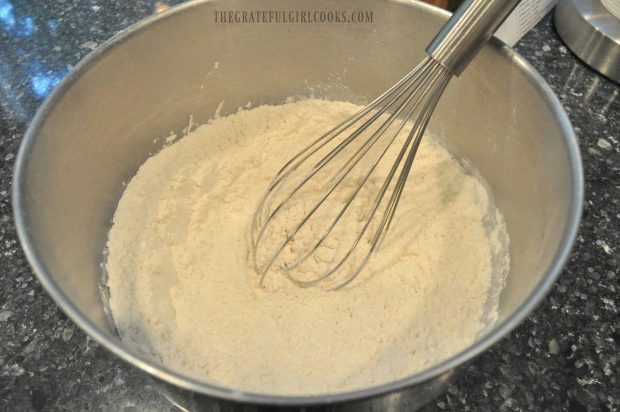
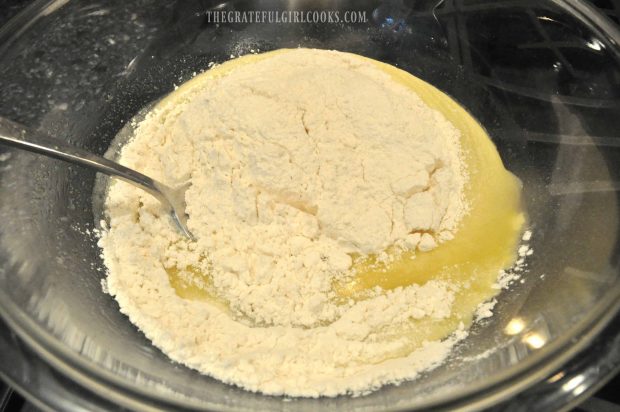
Whisk together flour, corn starch, baking powder and salt in a separate mixing bowl.  Add the dry ingredients to the bowl with the wet ingredients.

Fold or gently stir dry ingredients into batter, making sure NOT to overmix.

Whisk with flour in metal bowl

Yellow egg mixture added to flour in bowl

About half way through folding dry ingredients into wet ingredients, stir in the chocolate chips. Once combined, cover the bowl and let the batter sit at room temperature for at least 15 minutes (trust me-this will help the muffins to rise higher).

While batter is “resting”, preheat oven to 425 degrees. Line a standard sized muffin tin with paper cupcake liners and spray bottom of each paper liner with non-stick baking spray (I learned this trick from a friend whose husband was a baker).

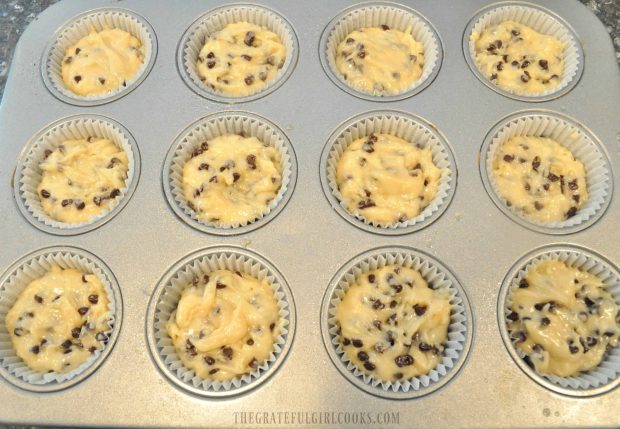
Once batter has “rested”,  fill each paper liner with batter (about 3/4 full), distributing evenly between muffin cups.

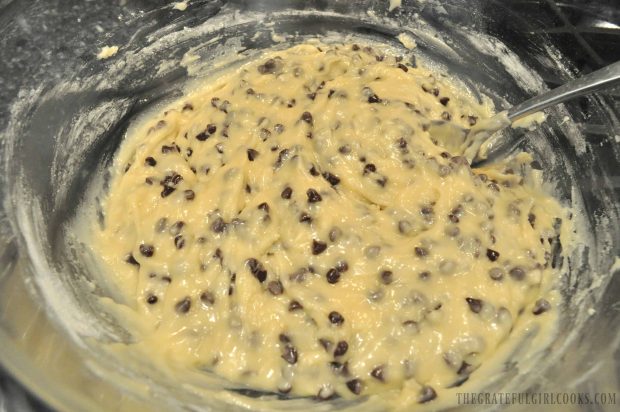
Muffin batter with chocolate chips in clear mixing bowl

12 chocolate chip muffins in muffin pan

Bake The Chocolate Chip Muffins

Sprinkle the top of each muffin with coarse granulated sugar.  Bake at 425 degrees for 8 minutes, then turn down the oven to 350 degrees and cook for another 7-8 minutes.

Check muffins for doneness (they should be light golden brown on top and a toothpick inserted into middle of muffin should come out dry). When done, remove muffins from oven to a wire rack, and let muffins cool.

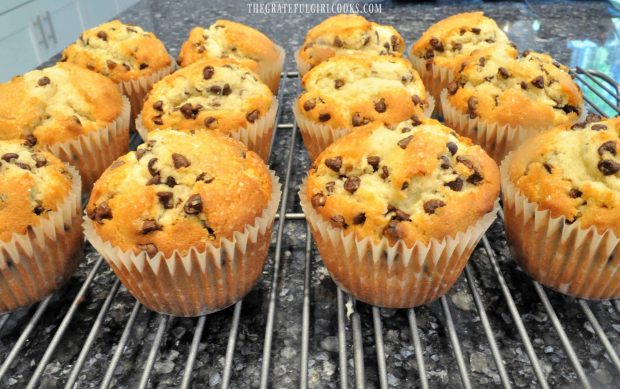
Baked muffins cooling on wire rack

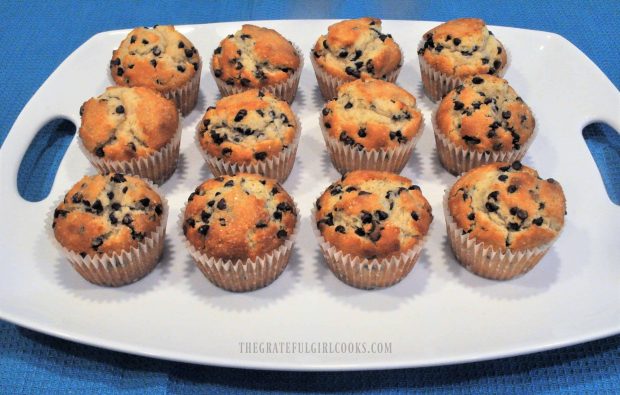
12 muffins on white serving tray with blue background

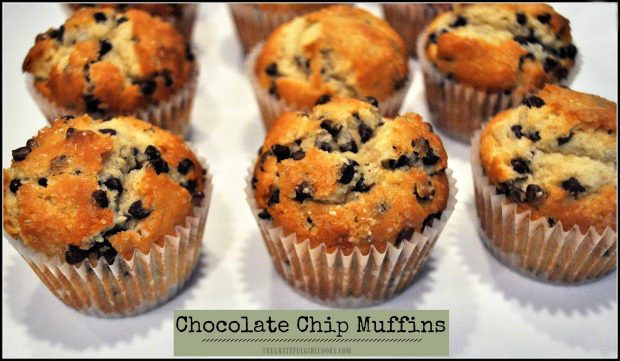
And that’s how easy it is to make these wonderful treats!  Don’t they LOOK good?  Each muffin rose well above the top of the paper liner!  And just look at all those mini chocolate chips inside… YUM!

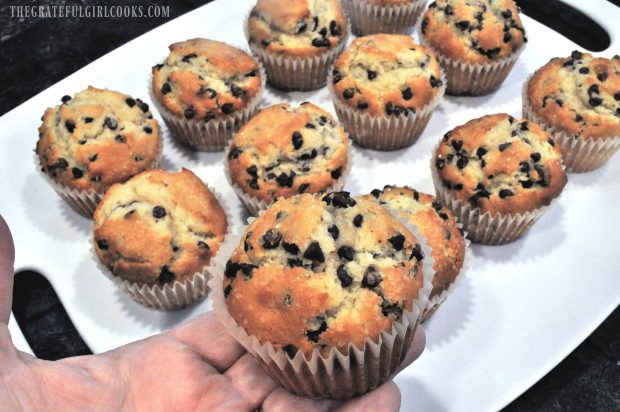
One muffin held in hand over other muffins

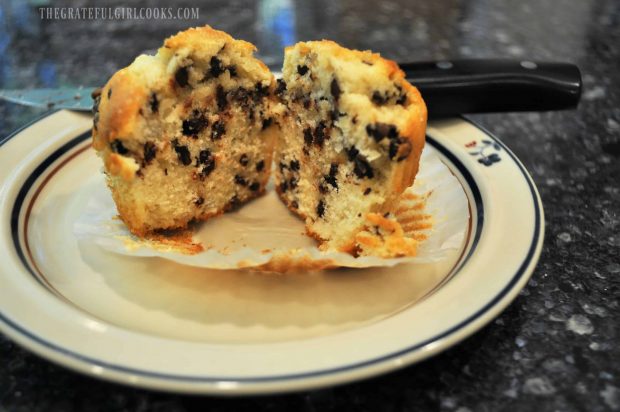
One muffin cut in half on a small plate

These chocolate chip muffins tasted FANTASTIC!  We loved them. I sent some of them home with one of our sons, and he loved them, too.

I hope you will consider trying this recipe, and trust that you, and those you love will enjoy them as much as we did. Have a GREAT day!

Looking For More MUFFIN Recipes?

You can find all of my recipes in the Recipe Index, located at the top of the page. Some of our favorite muffins include:

Interested In More Recipes?

Thank you for visiting this website. I appreciate you using some of your valuable time to do soIf you’re interested, I publish a newsletter 2 times per month (1st and 15th) with all the latest recipes, and other fun info. I would be honored to have you join our growing list of subscribers, so you never miss a great recipe!
There is a Newsletter subscription box on the top right side (or bottom) of each blog post, depending on the device you use, where you can easily submit your e-mail address (only) to be included in my mailing list.

You Can Also Find Me On Social Media:

Facebook page: The Grateful Girl Cooks!
Pinterest:
The Grateful Girl Cooks!
Instagram:
jbatthegratefulgirlcooks

Chocolate Chip Muffins / The Grateful Girl Cooks!

Recipe Source: Samantha Merritt, at https://sugarspunrun.com/bakery-style-chocolate-chip-muffins/

↓↓ PRINTABLE RECIPE BELOW ↓↓

0 from 0 votes
Chocolate Chip Muffins
Prep Time
20 mins
Cook Time
15 mins
Total Time
35 mins
 

Chocolate Chip Muffins will be a family favorite for breakfast or a light snack, and they're easy to make!

Category: Breakfast
Cuisine: American
Keyword: chocolate chip muffins
Servings: 12 muffins
Calories Per Serving: 279 kcal
Author: JB @ The Grateful Girl Cooks!
Ingredients
  • 4 Tablespoons butter (melted, cooled to room temp.)
  • 1/4 cup vegetable (or canola) oil
  • 1 cup granulated sugar
  • 1 large egg (at room temp. is best)
  • 1 egg white
  • teaspoons vanilla extract
  • 1/2 cup buttermilk (see NOTES for substitute)
  • cup all purpose flour
  • 2 teaspoons baking powder
  • 2 teaspoons corn starch
  • 1/2 teaspoon salt
  • 1 cup chocolate chips (I used mini-chips!)
  • 1/3 cup granulated or coarse sugar (for sprinkling on muffins before baking)
Instructions
  1. In a large bowl, mix together butter and oil, until well blended. Add sugar, egg, egg white and the vanilla extract. Stir or whisk ingredients very well, until completely combined and smooth. Add buttermilk; stir until combined.
  2. Whisk together flour, corn starch, baking powder and salt in a separate mixing bowl. Add the dry ingredients to the bowl with the wet ingredients. Fold or gently stir dry ingredients into batter, making sure NOT to overmix. About half way through folding dry ingredients into wet ingredients, stir in the chocolate chips. Once combined, cover the bowl and let the batter sit at room temperature for at least 15 minutes (this will help the muffins to rise higher).
  3. While batter is "resting", preheat oven to 425 degrees. Line a standard sized muffin tin with paper cupcake liners and spray bottom of each paper liner with non-stick baking spray (I learned this trick from a friend whose husband was a baker). Once batter has "rested", divide batter evenly, and fill each paper liner with batter (about 3/4 full), distributing evenly between muffin cups.
  4. Sprinkle the top of each muffin with coarse granulated sugar. Bake at 425 degrees for 8 minutes, then turn down oven to 350 degrees and cook for another 7-8 minutes (without removing muffins from oven). At the 7 minute mark, check muffins for doneness (they should be light golden brown and a toothpick inserted into middle should come out dry). When done, remove muffins from oven to a wire rack, and let muffins cool. Serve, and enjoy!
Recipe Notes

!No buttermilk? Use this as a substitute: Put 1½ tsp. white vinegar OR lemon juice into a measuring cup. Fill to 1/2 cup marking with milk. Stir. Let sit 5 minutes before using.
!Want to make 6 JUMBO sized muffins? Follow exact recipe and use jumbo sized muffin tins - bake at 425° for 8 mins., reduce heat to 350°, then bake an additional 15 mins. before checking for doneness.

Nutrition Facts
Chocolate Chip Muffins
Amount Per Serving (1 muffin)
Calories 279 Calories from Fat 72
% Daily Value*
Fat 8g12%
Saturated Fat 4g25%
Cholesterol 27mg9%
Sodium 163mg7%
Potassium 117mg3%
Carbohydrates 48g16%
Fiber 1g4%
Sugar 32g36%
Protein 3g6%
Vitamin A 380IU8%
Vitamin C 0.5mg1%
Calcium 65mg7%
Iron 1.2mg7%
* Percent Daily Values are based on a 2000 calorie diet.

Here’s one more to post on your Pinterest boards!Chocolate Chip Muffins will be a family favorite for breakfast or a light snack, and they're easy to make!