Category: Candy

Maple Bacon Pecan Truffles

Maple Bacon Pecan Truffles are a decadent treat! They’re creamy & maple flavored, w/ nuts & crisp bacon, coated in melted chocolate and butterscotch.Maple Bacon Pecan Truffles are a decadent treat! They're creamy & maple flavored, w/ nuts & crisp bacon, coated in melted chocolate and butterscotch.
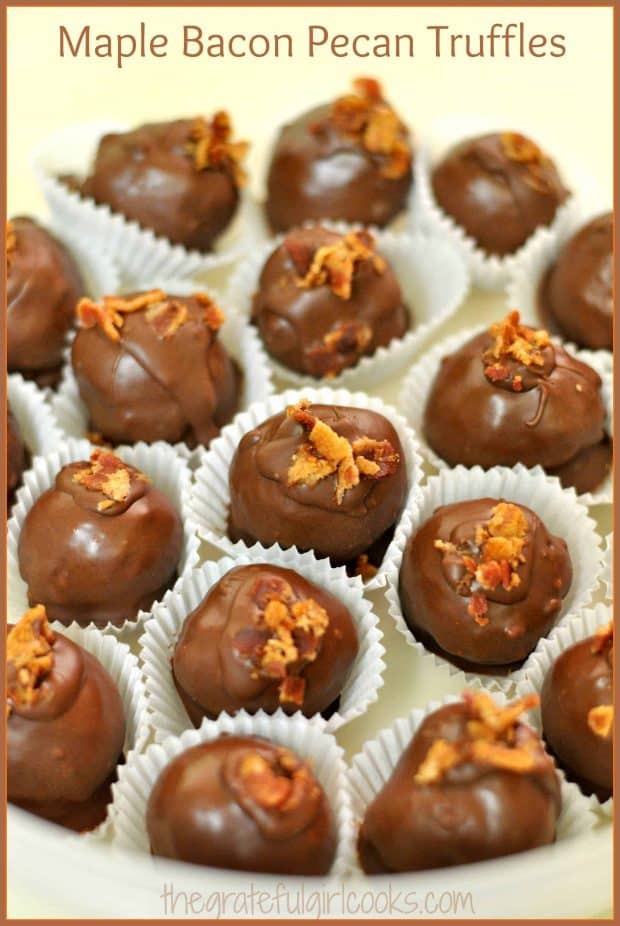
This morning I am posting a recipe for Maple Bacon Pecan Truffles that I made for a bacon-themed dinner we enjoyed with dear friends a couple months ago. They’re so good, and decadent!

In Memory Of Our Friend, Richard

This was an extremely hard post to write, because I began to write this post over a week ago, but then tragedy struck. The host for that dinner (my husband’s best friend) passed away very suddenly this past weekend, and we have been in shock ever since, grieving his loss.

He and his wife were two of our very best friends so we grieve for her, as well. Our comfort comes because our dear friend Richard believed in and knew Jesus, so we know this is a “temporary” loss, because we trust in God’s Word that we will see him again in heaven. How we long for that great reunion!

Richard… this one’s in your honor today, as I know you tried these maple bacon pecan truffles the last time we shared a meal together. We loved you… with all our hearts, and miss you terribly already.

Scroll Down For A Printable Recipe Card At The Bottom Of The Page

How To Make Maple Bacon Pecan Truffles

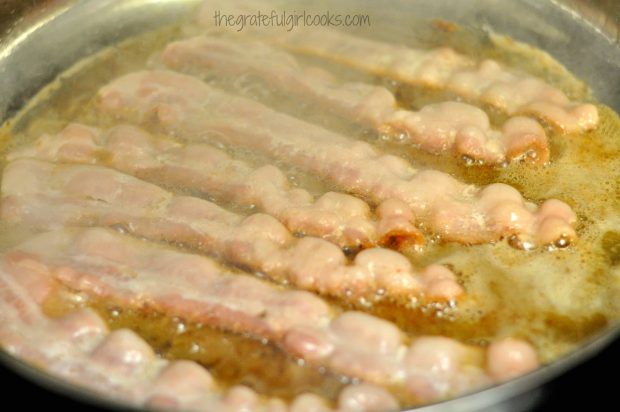
Here’s how to make these really delicious truffles, (which I adapted from my recipe for Maple Cream Bon Bons) for our Bacon Themed dinner. I figured bacon makes everything better, so that was my inspiration. Here’s what I did: First, cook 6-7 slices of bacon until VERY crisp.

Frying the bacon until crisp to add to the truffles.

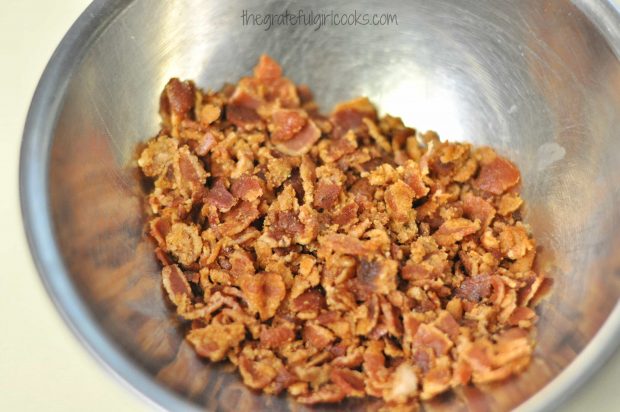
When bacon is crisp, drain, cool, then crumble or chop it up into very small pieces. Set aside a small amount to be used for garnishing the finished truffles later.

Crisp bacon crumbles will be added to the truffle dough.

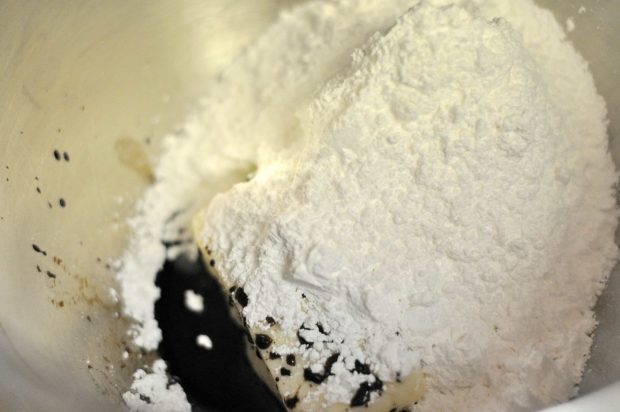
Place the butter, powdered sugar and maple flavoring in a large bowl or base of an electric stand mixer.

Butter, powdered sugar and maple extract are beaten together to make dough for truffles.

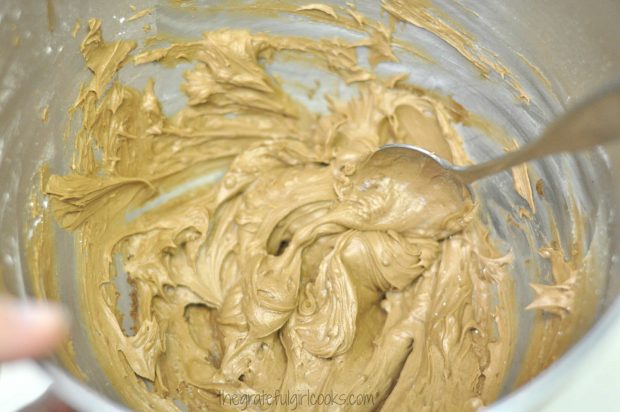
Using an electric mixer, cream these ingredients until fully combined and creamy.

Creamy batter for the maple bacon pecan truffles is prepared.

Add Pecans And Bacon Crumbles To The Truffle Mixture

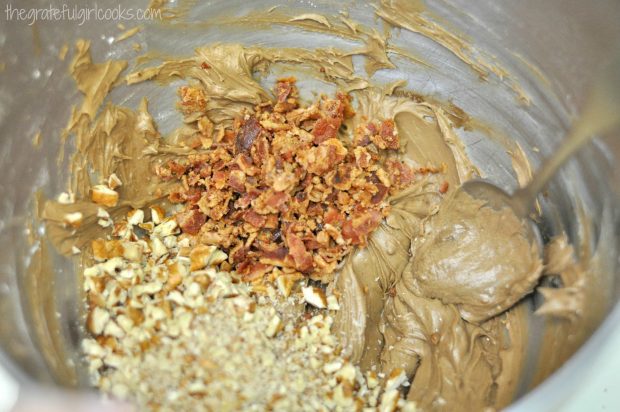
Add the chopped pecans and most of the bacon crumbles to the truffle mixture. NOTE: Set some of the bacon crumbles aside for garnishing the truffles later. Mix well until combined. Refrigerate the dough for maple bacon pecan truffles for a while to let it chill and firm up.

Crisp bacon and chopped pecans are added to the truffle dough.

Shape The Maple Bacon Pecan Truffles

Once mixture is chilled, shape the mixture into 1″ balls, by rolling them between your hands. Place dough balls onto a wax paper covered cooking sheet. Once all of the maple bacon pecan truffles have been formed, place them into freezer for 1/2 an hour to firm up again.

Coat The Maple Bacon Pecan Truffles With Chocolate

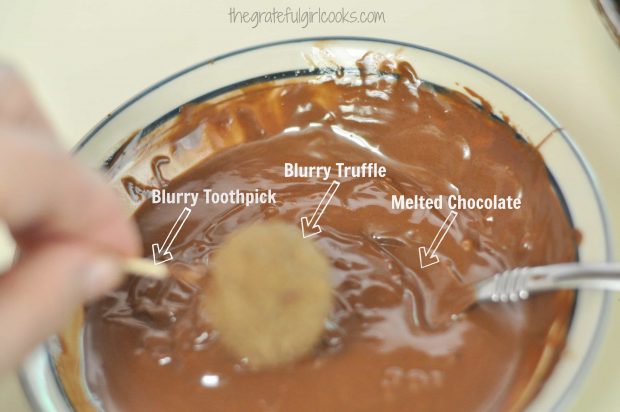
Remove truffles from freezer and carefully dip each one into the melted chocolate butterscotch coating. Let excess chocolate drip back into the bowl. NOTE: My picture turned out blurry (sorry), but I use a toothpick inserted into truffle to dip into the chocolate, and a spoon to help cover each one.

The maple bacon pecan truffles are dipped in chocolate, to cover.

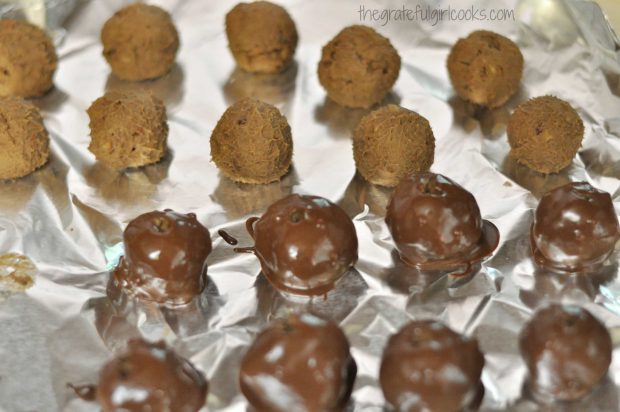
Dip each truffle completely in chocolate, then place it onto wax paper or aluminum foil. Use another toothpick to help pull the first toothpick out of the truffle. See the little holes on top of the chocolate covered truffles? You will fill those later. Repeat until all the truffles are coated in chocolate.

Some of the truffles have been covered with melted chocolate.

Finish The Truffles

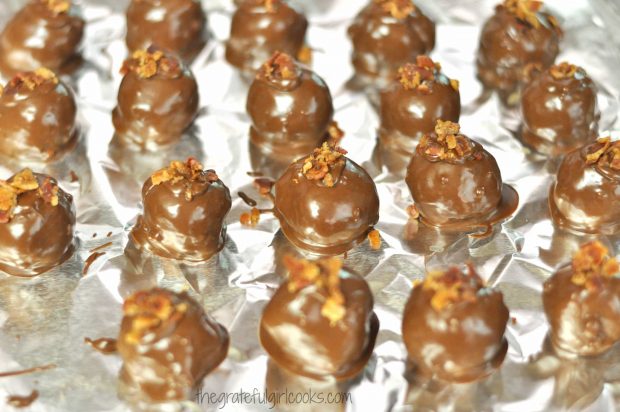
Spoon a little melted chocolate over each of the holes created by the toothpick to cover them up. Then sprinkle a few of the reserved bacon crumbles over the top of each of the maple bacon pecan truffles as a garnish.

Lots of maple bacon pecan truffles, garnished with crisp bacon crumbles.

Refrigerate Finished Truffles To Firm Them Up

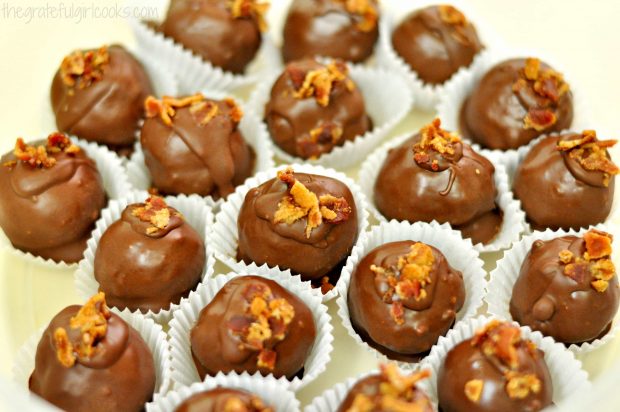
Let the finished truffles sit for a while (at least half an hour), to allow the chocolate to firm up, then place them into little candy sized paper wrappers, as shown. Keep truffles in a covered container in the refrigerator until you are ready to serve.

To serve, the maple bacon pecan truffles are placed into paper candy wrappers.

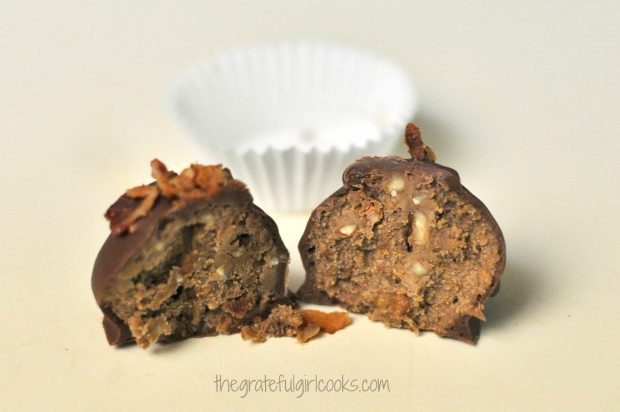
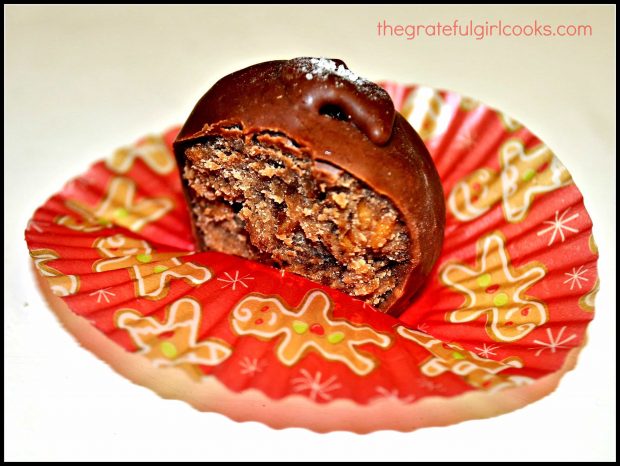
Here’s an inside view of one of the maple bacon pecan truffles. They taste their very best when served chilled!

A look at the inside of one of the truffles.

Hope you enjoy these maple bacon pecan truffles. The maple, pecans, bacon, chocolate and butterscotch flavors make this an INCREDIBLY delicious treat, and they really aren’t too hard to make, either! God Bless You. Have a great day. Hold your family and friends close. Let them KNOW you love and care for them. Life IS short.

Looking For More TRUFFLE or BON BON Recipes?

You can find all of my recipes in the Recipe Index, located at the top of the page. You might also enjoy these yummy treats!

Interested In More Recipes?

Thank you for visiting this website. I appreciate you using some of your valuable time to do soIf you’re interested, I publish a newsletter 2 times per month (1st and 15th) with all the latest recipes, and other fun info. I would be honored to have you join our growing list of subscribers, so you never miss a great recipe!
There is a Newsletter subscription box on the top right side (or bottom) of each blog post, depending on the device you use, where you can easily submit your e-mail address (only) to be included in my mailing list.

You Can Also Find Me On Social Media:

Facebook page: The Grateful Girl Cooks!
Pinterest:
The Grateful Girl Cooks!
Instagram:
jbatthegratefulgirlcooks

Author's signature

0 from 0 votes
Maple Bacon Pecan Truffles
Prep Time
1 hr
Cook Time
0 mins
Total Time
1 hr
 
Maple Bacon Pecan Truffles are a decadent treat! They're creamy & maple flavored, w/ nuts & crisp bacon, coated in melted chocolate and butterscotch.
Category: Dessert
Cuisine: American
Keyword: truffles
Servings: 48
Calories Per Serving: 158 kcal
Author: JB @ The Grateful Girl Cooks!
Ingredients
For Truffles:
  • 1 cup butter (2 cubes)
  • 3 1/2 cups powdered sugar
  • 3 Tablespoons Maple flavoring
  • 1 1/2 cups pecans , chopped (may substitute walnuts)
  • 6-7 slices bacon , cooked crisp, and crumbled (reserve some to garnish finished truffles)
For Truffle Coating:
  • 2 cups semi-sweet chocolate chips
  • 1 cup butterscotch chips
Instructions
  1. Cook bacon slices until very crisp. Drain, then crumble or chop into small pieces once cooled. Set aside.
  2. In a large bowl, use an electric mixer to cream the butter, powdered sugar, and maple flavoring until smooth.
  3. Stir in chopped pecans and most of the bacon crumbles (remember to save some for garnishing the finished truffles!)
  4. Place bowl in refrigerator for half an hour to let it firm up a bit.
  5. When chilled, shape the dough into 1 inch balls, by rolling the dough between your hands (yes, it might be a bit messy...) Place the dough balls onto a wax paper or foil lined baking sheet and place into freezer for about half an hour or so. (You want the dough to be very chilled before dipping in chocolate).
  6. While dough is in freezer, make the chocolate/butterscotch coating. In a microwavable bowl, melt the chocolate and butterscotch chips (30 seconds on HIGH. Stir. 30 seconds on HIGH. Stir again. Watch carefully so that you don't burn the chocolate. At this point the chips should be melted and smooth after stirring the second time; if not, microwave an additional 15 seconds, then stir again.
  7. Dip dough balls into coating mixture one at a time (I insert a toothpick into the dough ball, dip, cover with coating then remove, allowing the excess to drip back into the bowl. You may find it helpful to use a spoon to help coating the truffle. Place each coated truffle onto wax paper or foil-lined baking sheets. Remove the toothpick after each one, and re-use on the next truffle.
  8. When all have been coated, hide the toothpick hole with a small bit of chocolate coating, then sprinkle (while it is still wet) with a few bacon crumbles for garnish.
  9. Let truffles sit until chocolate firms up. Place each truffle in a candy paper wrapper, if desired. Store in a covered container in refrigerator until chocolate has hardened and is ready to serve. These truffles are at their best when completely chilled.
Nutrition Facts
Maple Bacon Pecan Truffles
Amount Per Serving (1 truffle)
Calories 158 Calories from Fat 90
% Daily Value*
Fat 10g15%
Saturated Fat 4g25%
Cholesterol 12mg4%
Sodium 66mg3%
Potassium 61mg2%
Carbohydrates 16g5%
Sugar 14g16%
Protein 1g2%
Vitamin A 125IU3%
Calcium 8mg1%
Iron 0.6mg3%
* Percent Daily Values are based on a 2000 calorie diet.

Here’s one more to pin on your Pinterest boards!Maple Bacon Pecan Truffles are a decadent treat! They're creamy & maple flavored, w/ nuts & crisp bacon, coated in melted chocolate and butterscotch.


Save

Save

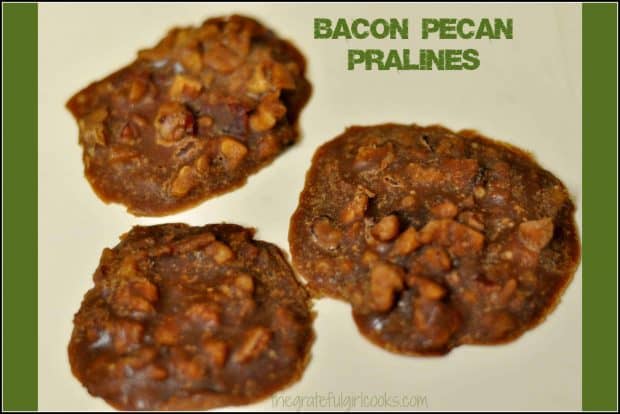
Bacon Pecan Pralines

Bacon Pecan Pralines are a delightful twist on traditional pralines. These sweet treats include BACON, which gives them a sweet and salty flavor – a great combination! Bacon Pecan Pralines are a twist on traditional pralines. These sweet treats include BACON, which gives them a sweet and salty flavor - a great combination!
I recently made these Bacon Pecan Pralines for a “BACON” themed dinner my husband and I went to, with two other couples. Every course of the dinner had to include some type of bacon.

Since I was in charge of desserts, I made several. Included were these yummy pralines, which included salty bacon. Sweet and salty… a great combination! They were really good! Remember… everything is better with bacon. Even bacon pecan pralines, right?

I had never made Pralines before this, but I plunged right in, and managed to pull this one off!

Scroll Down For A Printable recipe Card At The Bottom Of The Page

Important Tip When Making Bacon Pecan Pralines

The only thing I would do different next time when making these pralines is to use a larger cooking pan. The one I used was medium sized.

I THOUGHT the medium sized pan was big enough, but I was wrong. There were a couple moments of near panic as the mixture nearly boiled up and out of my pan.

The hot praline mixture never did boil over, but please, listen to my advice here. Use a LARGE and DEEP saucepan when you prepare this recipe. You won’t have to frantically stir to keep the candy from boiling over the top of the pan… and yes, you will thank me for this important tip!

How To Make Bacon Pecan Pralines

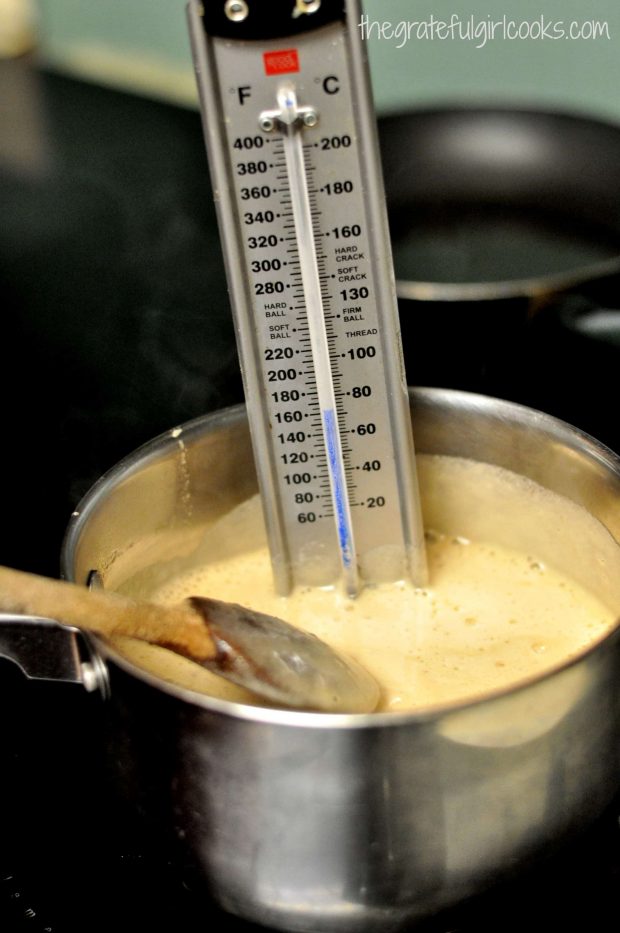
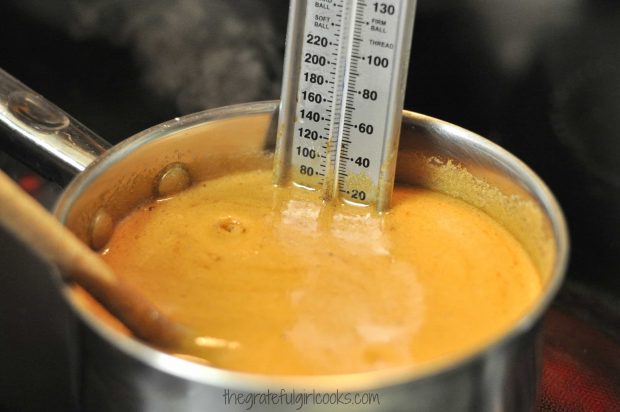
In a LARGE and DEEP saucepan, mix together granulated sugar, brown sugar, buttermilk, corn syrup, baking soda and salt. Insert a candy thermometer into the mixture.

Cook mixture on medium heat, until it reaches 235 degrees on a candy thermometer.

This will take about 20 minutes or so. Mixture will be VERY hot. Stir mixture often while it cooks to prevent it from burning on the bottom of the pan. The mixture will turn a rich caramel color near the end of the cooking time.

Candy thermometer in boiling sauce for bacon pecan pralines.Candy thermometer in saucepan full of bacon pecan pralines sauce.
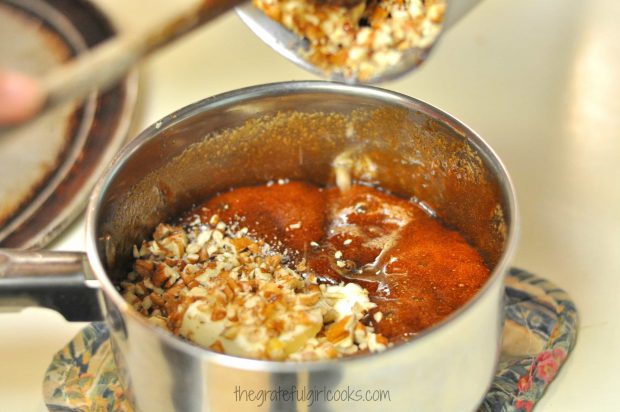
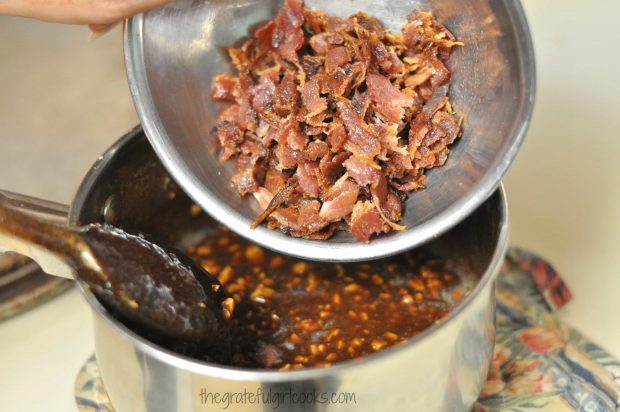
Once mixture reaches 235 degrees, remove pan from heat. Immediately add the butter, vanilla, chopped pecans, orange zest, and cooked bacon crumbles.

Adding chopped pecans for bacon pecan pralines to saucepan

Crumbled, cooked bacon pieces are added to praline mixture in pan.

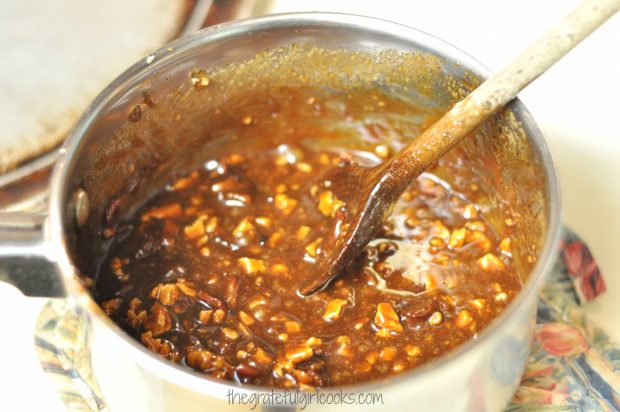
Beat the bacon pecan praline mixture with a wooden spoon until the mixture is thoroughly combined. WARNING: The praline mixture will be very, very hot. Be very careful so you don’t burn yourself!

Hot bacon pecan pralines mixture, in saucepan after cooking.

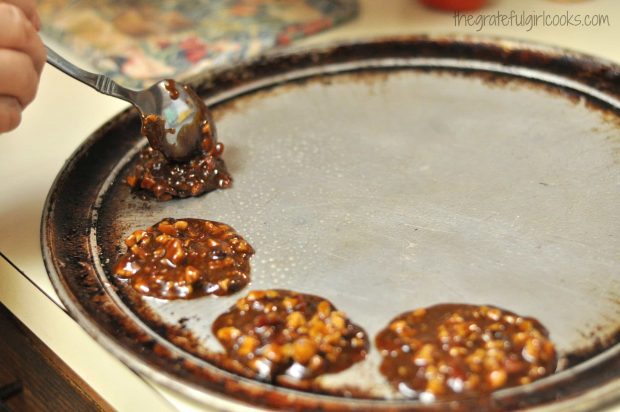
Drop pralines by teaspoonfuls onto a sprayed baking sheet , a silicone mat, OR onto buttered parchment paper. Leave space between each of the pralines, as they will spread a bit while hot.

Dropping spoonfuls of bacon pecan pralines onto round baking pan, to cool.
Let the bacon pecan pralines sit and cool at room temperature for at least 30 minutes. The pralines will firm up as they cool. When completely firm, they are ready to be served. Carefully remove from pan.

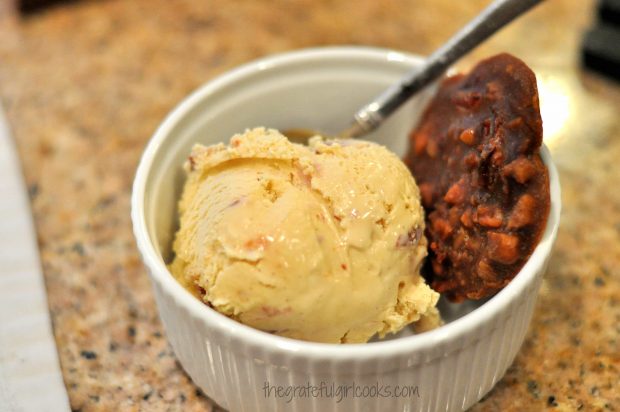
Serve pralines by themselves, as a small treat, or as I did for our Bacon Night, on the side of a scoop of Candied Bacon Ice Cream. YEP! Bacon overload!

Bacon pecan pralines were served with a scoop of candied bacon ice cream!
If you’re looking for an interesting, yet amazingly good dessert treat, I hope you will consider making these yummy bacon pecan pralines! Have a great day!

Interested In More Recipes?

Thank you for visiting this website. I appreciate you using some of your valuable time to do soIf you’re interested, I publish a newsletter 2 times per month (1st and 15th) with all the latest recipes, and other fun info. I would be honored to have you join our growing list of subscribers, so you never miss a great recipe! 

There is a Newsletter subscription box on the top right side (or bottom) of each blog post, depending on the device you use, where you can easily submit your e-mail address (only) to be included in my mailing list.

You Can Also Find Me On Social Media:

Facebook page: The Grateful Girl Cooks!
Pinterest:
The Grateful Girl Cooks!
Instagram:
jbatthegratefulgirlcooks

Author's signatureRecipe Source: http://www.framedcooks.com/2011/06/buttermilk-bacon-pralines.html

0 from 0 votes
Bacon Pecan Pralines
Prep Time
10 mins
Cook Time
20 mins
Total Time
30 mins
 

Bacon Pecan Pralines are a twist on traditional pralines. These sweet treats include BACON, which gives them a sweet and salty flavor - a great combination!

Category: Candy
Cuisine: American
Keyword: bacon pecan pralines, pralines
Servings: 20
Calories Per Serving: 142 kcal
Author: JB @ The Grateful Girl Cooks!
Ingredients
  • 1 cup granulated sugar
  • 1/2 cup brown sugar (packed)
  • 1/2 cup buttermilk
  • 1 Tablespoon light corn syrup
  • 1/2 teaspoon baking soda
  • 1/4 teaspoon salt
  • 4 Tablespoons butter
  • 1/2 teaspoon vanilla extract
  • 1 cup chopped pecans
  • 1/2 teaspoon orange zest
  • 4 bacon slices , pre-cooked crisp, then crumbled
Instructions
  1. Place the granulated sugar, brown sugar, buttermilk, corn syrup, baking soda and salt into a large and deep heavy saucepan. Stir to combine. Insert a candy thermometer into mixture, attaching it to the side of pan. Heat on medium heat until the mixture reaches 235 degrees F on the candy thermometer, stirring often to prevent candy from burning on the bottom of pan.
  2. Once thermometer reads 235 degrees, carefully remove pan from heat. Be careful... it will be HOT!
  3. Add butter, vanilla extract, chopped pecans, orange zest, and bacon to the hot praline mixture. Beat ingredients together, using a wooden spoon, until all is combined.
  4. Drop by rounded teaspoonfuls onto a sprayed baking sheet, a silicone mat, OR onto buttered parchment paper. Leave space between each praline, as mixture will spread while hot.
  5. Let the pralines cool at room temperature for at least 30 minutes, until totally cooled and firm all the way through. Serve and enjoy! (Pralines may be stored in refrigerator).
Nutrition Facts
Bacon Pecan Pralines
Amount Per Serving (1 serving)
Calories 142 Calories from Fat 72
% Daily Value*
Fat 8g12%
Saturated Fat 2g13%
Cholesterol 9mg3%
Sodium 114mg5%
Potassium 46mg1%
Carbohydrates 17g6%
Sugar 16g18%
Protein 1g2%
Vitamin A 85IU2%
Vitamin C 0.2mg0%
Calcium 16mg2%
Iron 0.2mg1%
* Percent Daily Values are based on a 2000 calorie diet.

Here’s one more to pin on your Pinterest boards!Bacon Pecan Pralines are a twist on traditional pralines. These sweet treats include BACON, which gives them a sweet and salty flavor - a great combination!


Save

Save

Save

Chocolate-Covered Bacon

Chocolate-covered bacon is both sweet and salty, incredibly easy to make, and is a very unique, but DELICIOUS crispy treat you will LOVE!Chocolate-covered bacon is both sweet and salty, incredibly easy to make, and is a very unique, but DELICIOUS crispy treat you will LOVE!!
A couple years ago, my husband tried a piece of Chocolate-Covered Bacon at a little bakery, while out of our area on business. He said it was fantastic (I had my doubts). Now, don’t get me wrong… I love bacon, but chocolate covered bacon seemed a bit wonky to me. That is, UNTIL I MADE MY OWN! Wowzers! It’s fantastic, and EASY to make!

Scroll Down For A Printable Recipe Card At The Bottom Of The Page

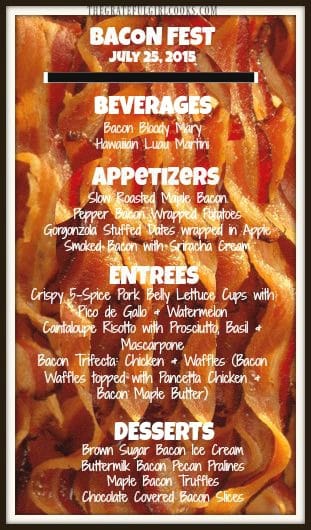
My husband and I recently attended a THEMED dinner party with dear friends. The theme this time was BACON. All parts of the meal had to include some form of bacon. Everything. Beverages, appetizers, entrees (3), and desserts. All bacon inspired. Here’s our menu for the bacon-themed dinner:

Menu for bacon-themed dinner

Here’s a collage of some of the bacon dishes we enjoyed… everything from prosciutto risotto to candied bacon ice cream!

Collage of bacon themed dishes from our bacon themed dinner

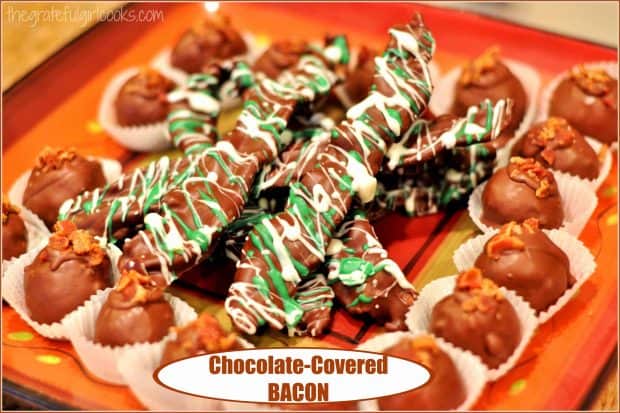
I was in charge of the desserts, (as I typically am). One of the desserts I made was chocolate covered bacon strips. YUM! Even after being coated in semi-sweet chocolate, the bacon was crispy inside. The chocolate actually is a perfect counter balance to the saltiness of the bacon.  You can also see my Bacon Pecan Pralines, Maple Bacon Pecan Truffles, and Candied Bacon Ice Cream in the collage photo above.

It really was easy to make this chocolate-covered bacon. I didn’t have a “recipe”; I just used the technique I use for dipping truffles in chocolate. My fingers got a bit messy, but that’s no big deal. Here’s what I did.

How To Make Chocolate-Covered Bacon

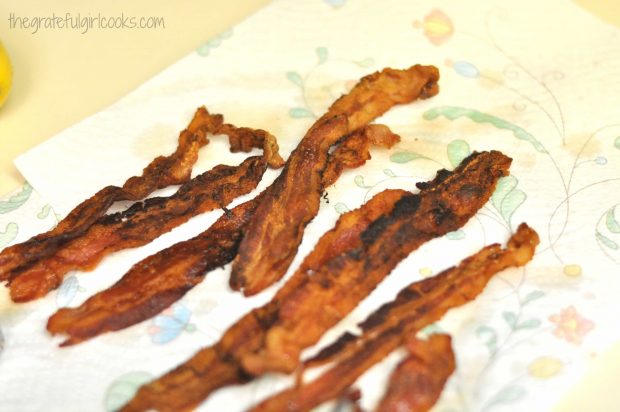
First I fried the number of bacon strips I wanted. This recipe is for 8, but you can easily alter recipe to accommodate the number of strips you want to make.  I cooked the bacon strips until they were very crispy, then drained them on a paper towel to absorb the grease.

Bacon is fried until crisp.
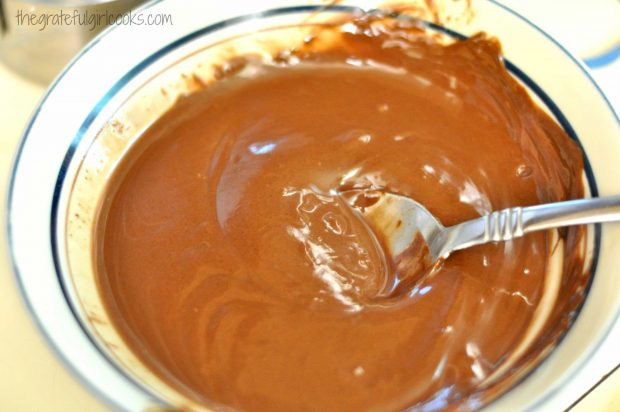
I let the bacon cool completely. Then I melted semi-sweet chocolate chips with a heaping Tablespoon of vegetable shortening in my microwave. (30 seconds, stir. 30 seconds stir).

Chocolate chips and shortening are melted together to coat baconDipping the Bacon

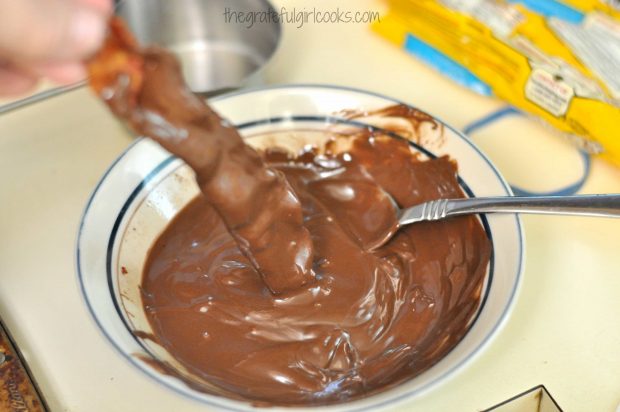
The next thing I did was carefully (the bacon is crisp, remember?) dip one piece of bacon at a time in the chocolate.  I used a spoon to help cover about 3/4 of the piece on both sides with chocolate, then carefully flipped it over and did the remaining bit on both sides.

I used a spoon to spoon the chocolate into nooks and crannies that needed help to be covered. I let the excess chocolate drip back into the bowl.

Crisp bacon is dipped in melted chocolate until fully covered.
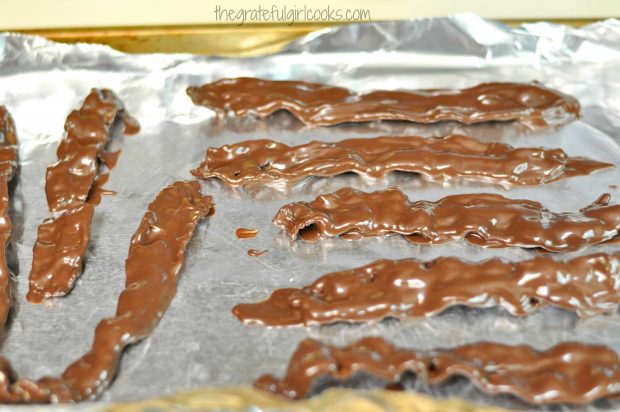
After each piece was completely covered in chocolate, it was carefully placed on a piece of aluminum foil to let the chocolate firm up.

Chocolate dipped bacon is left to dry until chocolate firms up
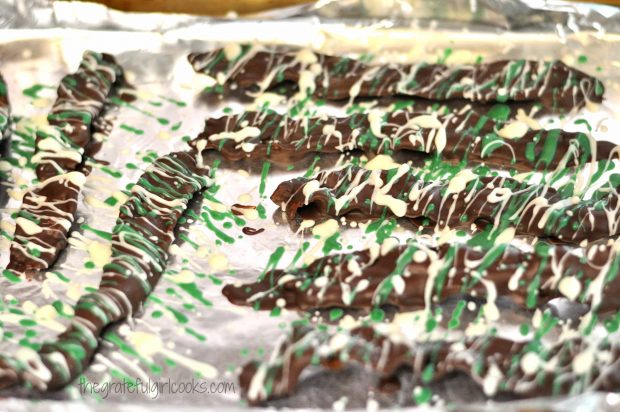
Once the chocolate had firmed up, I melted some white chocolate chips (about 1/2 cup) with a small amount of shortening (1 teaspoon), then decoratively drizzled it over the bacon slices. I even had some green colored chocolate chips from a bag of Christmas colored ones, so I also drizzled that over, for contrast (optional).

Ready For Some Chocolate-Covered Bacon!

At our bacon dinner that evening, one of my friends wondered if I had put mint flavored drizzle (the GREEN chips) on the bacon. No way… just used a different colored semi-sweet chocolate chip!

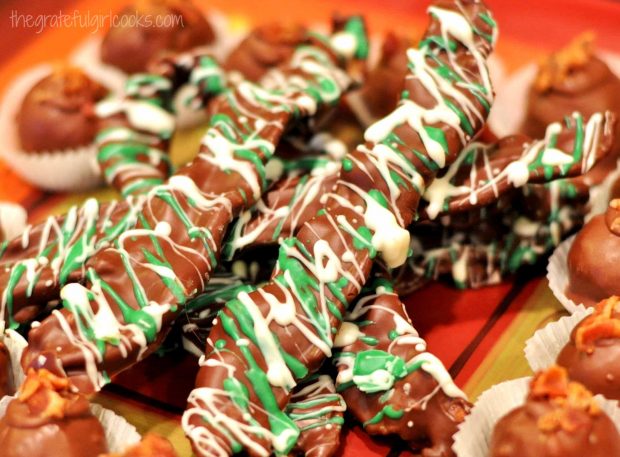
Chocolate covered bacon is drizzled with white and green chocolate
When I was done being “creative” (ha ha), I let the chocolate-covered bacon slices firm up completely before attempting to remove them from the aluminum foil. I then placed them in a single layer in a sealed plastic container, and kept them in the refrigerator until ready to serve later that evening.

The truffles you see in the picture (with the bacon strips) are another creation I made for bacon night. Here’s the recipe for these Maple Bacon Pecan Truffles. (they were yummy, too!)

Close up photo of chocolate-covered bacon strips
That’s it! It’s really not hard to make chocolate-covered bacon, at all! Hope you will give it a try. Bacon just seems to make everything better… even chocolate! Thanks for stopping by, and come back soon. Don’t forget to check out ALL of my recipes in the Recipe Index, located at the top of the page.

Interested In More Recipes?

Thank you for visiting this website. I appreciate you using some of your valuable time to do soIf you’re interested, I publish a newsletter 2 times per month (1st and 15th) with all the latest recipes, and other fun info. I would be honored to have you join our growing list of subscribers, so you never miss a great recipe!
There is a Newsletter subscription box on the top right side (or bottom) of each blog post, depending on the device you use, where you can easily submit your e-mail address (only) to be included in my mailing list.

You Can Also Find Me On Social Media:

Facebook page: The Grateful Girl Cooks!
Pinterest:
The Grateful Girl Cooks!
Instagram:
jbatthegratefulgirlcooks

Have a GREAT day!

Chocolate Covered Bacon / The Grateful Girl Cooks!

0 from 0 votes
Chocolate-Covered Bacon
Prep Time
25 mins
Cook Time
0 mins
Total Time
25 mins
 
Chocolate-covered bacon is both sweet and salty, incredibly easy to make, and is a very unique, but DELICIOUS crispy treat you will LOVE!!
Category: Candy
Cuisine: American
Keyword: chocolate covered bacon
Servings: 8 servings
Calories Per Serving: 301 kcal
Author: JB @ The Grateful Girl Cooks!
Ingredients
  • Bacon (I used 8 strips)
  • 1 1/2 cups semi-sweet chocolate chips
  • 1 HEAPING tablespoon vegetable shortening
  • 1/2 cup white chocolate chips + 1 teaspoon vegetable shortening (for drizzle)
  • 1/2 cup colored chocolate chips + 1 teaspoon vegetable shortening (for drizzle... totally optional!)
Instructions
  1. Cook bacon until very crisp. Remove from skillet to paper towels to absorb extra grease. Let cool completely.
  2. Place 1 1/2 cups chocolate chips in a microwave safe bowl. Add the shortening. Cook on high power for 30 seconds. Remove. Stir. Place bowl back in microwave. Cook on high power for 30 seconds. Stir well, to fully combine. If mixture is not fully smooth, place it back in microwave on medium high power for 15 seconds (I usually don't have to do this, but you might, depending on the wattage of your microwave). DO NOT BURN THE CHOCOLATE!
  3. Carefully coat all sides of the bacon strips with melted chocolate. Using a spoon to help get the chocolate onto the bacon works great! Place coated bacon strips onto aluminum foil, and let sit, undisturbed until chocolate has set.
  4. Melt white chocolate chips and shortening in the exact same way as described above. Decoratively drizzle the mixture over the chocolate covered strips. Let sit until chocolate is completely firmed up, then place bacon strips in a covered container and refrigerate until ready to serve. Enjoy!
Nutrition Facts
Chocolate-Covered Bacon
Amount Per Serving (1 slice)
Calories 301 Calories from Fat 207
% Daily Value*
Fat 23g35%
Saturated Fat 10g63%
Cholesterol 16mg5%
Sodium 149mg6%
Potassium 234mg7%
Carbohydrates 17g6%
Fiber 2g8%
Sugar 12g13%
Protein 4g8%
Vitamin A 25IU1%
Calcium 21mg2%
Iron 2.2mg12%
* Percent Daily Values are based on a 2000 calorie diet.

Here’s one more to pin on your Pinterest boards!Chocolate-covered bacon is both sweet and salty, incredibly easy to make, and is a very unique, but DELICIOUS crispy treat you will LOVE!!


Save

Save

Cranberry Cashew Clusters

Make delicious Cranberry Cashew Clusters, with only 3 ingredients (dried cranberries, white chocolate and cashews)! Easy to make, and perfect for gift giving!Make delicious Cranberry Cashew Clusters, with only 3 ingredients (dried cranberries, white chocolate and cashews)! Easy to make, and perfect for gift giving!

Easy. Quick. Yummy. That explains this recipe for Cranberry Cashew Clusters, in a nutshell. Well… not really IN a nutshell, but you know what I mean, right?

This recipe is made with only 3 ingredients. They are white chocolate chips, dried cranberries and cashew pieces! Semi-sweet chocolate OR white chocolate can be used, depending on your taste. I love using white chocolate, because the cranberries show up a little bit better in the candy!

Scroll Down For A Printable Recipe Card At The Bottom Of The Page

Making Cranberry Cashew Clusters Is EASY!

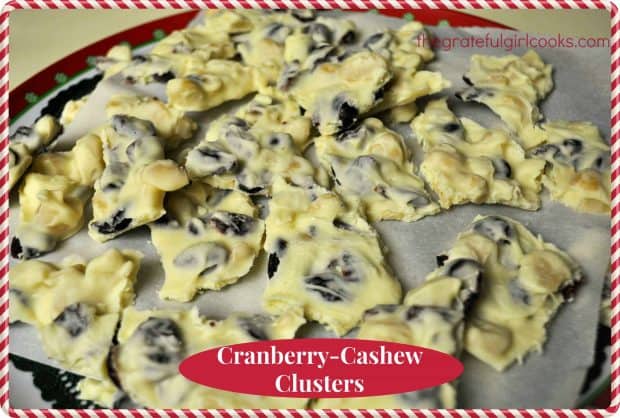
Anyways… this cranberry cashew clusters recipe is as simple as melting the chocolate, and stirring in the dried cranberries and cashews. The you can place this mixture by spoonfuls (or spreading it out) onto wax paper. If you spread the mixture out, then the cranberry cashew clusters can be broken into bite-sized pieces once it has hardened.

The recipe makes approximately 2 dozen of these delicious cranberry cashew clusters. You should store them in an airtight container in the refrigerator, to keep the chocolate firm.

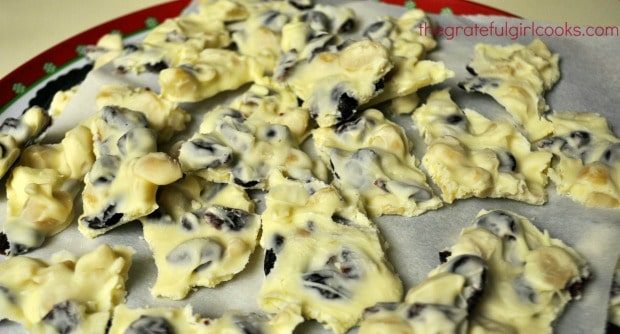
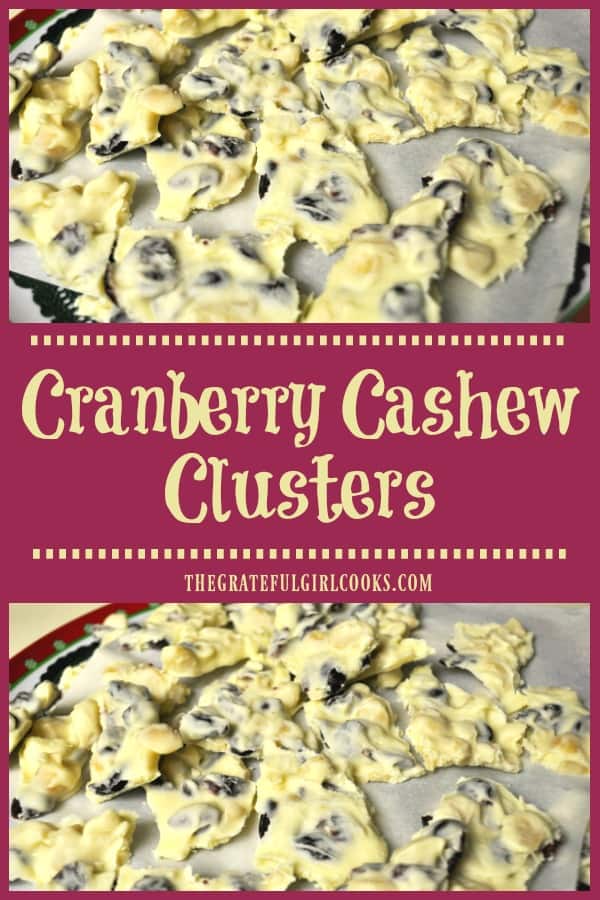
Cranberry cashew clusters on wax paper lined Christmas platter.

Cranberry Cashew Clusters are perfect little goodies to make when you are pressed for time! It’s so easy to make these delicious goodies to give to others, or have on hand for your ravenous family.

The chewy cranberries, crunchy cashews, and the sweet chocolate coating combine to make cranberry cashew clusters a wonderful treat! Sure hope you will give them a try! Have a great day, and please come back soon for more recipes

Looking For More CANDY Recipes?

You can find all of my recipes in the Recipe Index, located at the top of the page. I have lots of yummy candy recipes you might want to check out, including:

Interested In More Recipes?

Thank you for visiting this website. I appreciate you using some of your valuable time to do soIf you’re interested, I publish a newsletter 2 times per month (1st and 15th) with all the latest recipes, and other fun info. I would be honored to have you join our growing list of subscribers, so you never miss a great recipe! 

There is a Newsletter subscription box on the top right side (or bottom) of each blog post, depending on the device you use, where you can easily submit your e-mail address (only) to be included in my mailing list.

You Can Also Find Me On Social Media:

Facebook page: The Grateful Girl Cooks!
Pinterest:
The Grateful Girl Cooks!
Instagram:
jbatthegratefulgirlcooks

Author's signatureRecipe Source: http://www.tasteofhome.com/recipes/cranberry-clusters

↓↓ PRINTABLE RECIPE BELOW ↓↓

0 from 0 votes
Cranberry Cashew Clusters
Prep Time
15 mins
Cook Time
0 mins
Total Time
15 mins
 
Make delicious Cranberry Cashew Clusters, with only 3 ingredients (dried cranberries, white chocolate and cashews)! Easy to make, and perfect for gift giving!
Category: Candy, Dessert
Cuisine: American
Keyword: cranberry cashew clusters
Servings: 24 clusters (approx.)
Calories Per Serving: 90 kcal
Author: JB @ The Grateful Girl Cooks!
Ingredients
  • 1.5 cups (12 oz.) white chocolate chips (or semi-sweet chocolate chips)
  • 2/3 cup dried cranberries
  • 2/3 cup cashew pieces
Instructions
  1. Melt the chocolate chips in a double boiler or in the microwave. If microwaving, heat on high for 30 seconds. Stir. Heat on high for an additional 30 seconds. Stir. If not completely smooth, heat on medium power for 15 seconds more, then stir until smooth. Do not burn the chocolate!
  2. Stir the cranberries and cashews into the melted chocolate and stir well, to coat.
  3. Drop mixture by teaspoonfuls (OR spread out into a solid piece, then break up into bite sized pieces later) onto wax paper lined baking sheet. Let stand until they set up (firm).
  4. Serve and enjoy. Keep leftover candies refrigerated.
Nutrition Facts
Cranberry Cashew Clusters
Amount Per Serving (1 cluster)
Calories 90 Calories from Fat 45
% Daily Value*
Fat 5g8%
Saturated Fat 2g13%
Cholesterol 2mg1%
Sodium 10mg0%
Potassium 55mg2%
Carbohydrates 10g3%
Sugar 9g10%
Protein 1g2%
Vitamin A 5IU0%
Vitamin C 0.1mg0%
Calcium 24mg2%
Iron 0.3mg2%
* Percent Daily Values are based on a 2000 calorie diet.

Here’s one more to pin on your Pinterest boards!Make delicious Cranberry Cashew Clusters, with only 3 ingredients (dried cranberries, white chocolate and cashews)! Easy to make, and perfect for gift giving!


Save

Save

Chocolate Orange Truffles

Do you enjoy Christmas goodies?  Some of my favorite Christmas goodies to make are Chocolate Orange Truffles. Creamy orange flavored chocolate centers, covered with more chocolate… oh my goodness! They taste wonderful, and are perfect for gift giving!Chocolate Orange Truffles / The Grateful Girl Cooks! Chocolate Orange Truffles are delicious treats to enjoy during the holidays! Creamy orange flavored chocolate centers, dipped in chocolate to cover. YUM!
Rich, creamy, chocolate truffles infused with just the right amount of orange flavor…YUM… what a taste treat! These delicious truffles are wonderful to give as gifts over the holidays, or simply to enjoy any time of the year.

The pairing of chocolate and orange remains one of my top flavor combos… it’s so GOOD! These truffles are easy to make (really… trust me!), and are a delicious and pretty treat or homemade gift for friends or family. They are absolutely delicious, and I think you will LOVE them!

I’ve been making these for as long as I can remember (over 30 years). I don’t even remember where I found the original recipe. I copied it down on a 3×5 card many, many years ago and have been making these for family and friends ever since!

Scroll Down For A Printable Recipe Card At The Bottom Of The Page

Many Ways To Decorate the Chocolate Orange Truffles

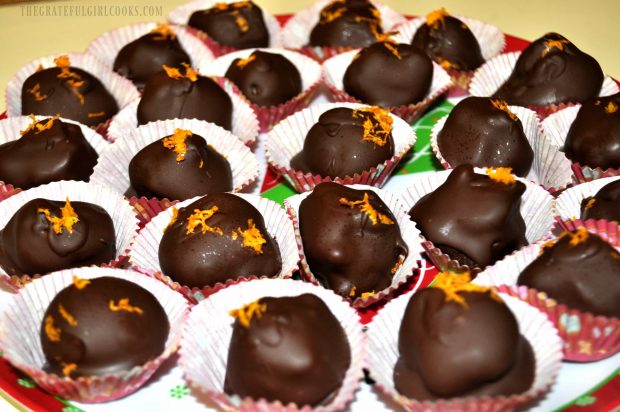
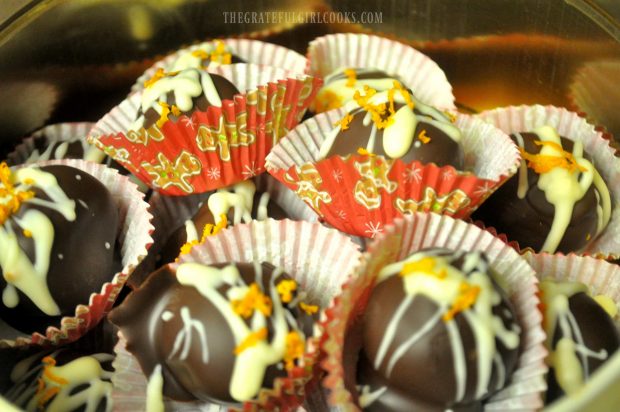
I’ve made these chocolate orange truffles with semi-sweet chocolate topping with just a little bit of grated orange zest for a garnish. Once they are placed in cute little candy paper liners, they look so festive, especially for gift-giving. 

Chocolate-Orange Truffles / The Grateful Girl Cooks!
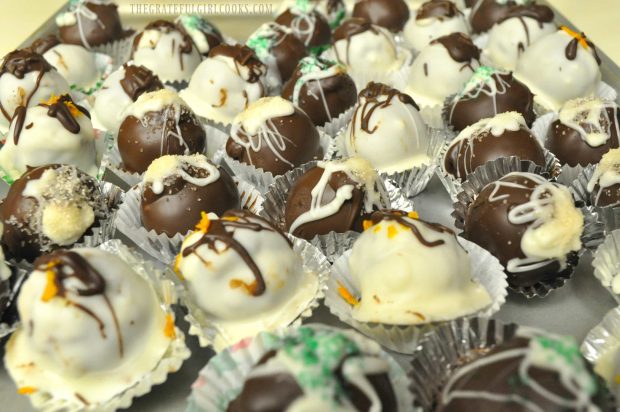
Another option is to dip the chocolate orange truffles in white chocolate, and then drizzle them with semi-sweet chocolate on top.

Chocolate-Orange Truffles / The Grateful Girl Cooks!
My favorite way is to dip them in semi-sweet chocolate and garnish each truffle with a melted white chocolate drizzle. Trust me, you really can’t go wrong with any of these dipping methods! Any way you make them, these chocolate orange truffles are delicious!

Chocolate-Orange Truffles / The Grateful Girl Cooks!

Don’t let the Prep Time scare you away from making these… most of the prep time is not active prep time… it’s just letting the truffles cool off in the refrigerator before dipping them in melted chocolate coating! Go wrap presents or put Aunt Edna’s fruitcake by the front door to use as a doorstop… whatever YOU like to do with some “hurry up and wait” time!

Thanks for stopping by today, and I hope you will come back soon. Have a wonderful day.

Looking For More TRUFFLE OR BON BON Recipes?

You can find all of my recipes in the Recipe Index, located at the top of the page. I have some delicious truffle and bon bon recipes you might enjoy, including:

Interested In More Recipes?

Thank you for visiting this website. I appreciate you using some of your valuable time to do soIf you’re interested, I publish a newsletter 2 times per month (1st and 15th) with all the latest recipes, and other fun info. I would be honored to have you join our growing list of subscribers, so you never miss a great recipe!
There is a Newsletter subscription box on the top right side (or bottom) of each blog post, depending on the device you use, where you can easily submit your e-mail address (only) to be included in my mailing list.

You Can Also Find Me On Social Media:

Facebook page: The Grateful Girl Cooks!
Pinterest:
The Grateful Girl Cooks!
Instagram:
jbatthegratefulgirlcooks

Chocolate-Orange Truffles / The Grateful Girl Cooks!Original recipe source: unknown

↓↓ PRINTABLE RECIPE BELOW ↓↓

0 from 0 votes
Chocolate Orange Truffles
Prep Time
2 hrs 30 mins
Cook Time
3 mins
Total Time
2 hrs 33 mins
 
Rich and creamy, these delicious chocolate and orange truffles are sure to delight friends and family!
Category: Dessert
Cuisine: American
Keyword: chocolate orange truffles
Servings: 24 truffles
Calories Per Serving: 117 kcal
Author: JB @ The Grateful Girl Cooks!
Ingredients
For Truffles:
  • 4 Tablespoons butter (1/2 stick)
  • 3 Tablespoons heavy whipping cream
  • 4 oz. semi-sweet chocolate chips , finely chopped
  • 2 Tablespoons orange liqueur (I use liqueur, but orange juice may be substituted)
  • 1 teaspoon finely grated orange peel (I use a zester for smaller pieces)
For coating the truffles:
  • 1 cup semi-sweet chocolate chips
  • 2 Tablespoons vegetable shortening
  • 1/4 cup white chocolate chips (for drizzling over the truffles... this is optional)
  • Additional orange peel zest (for sprinkling on top of truffles... this is optional)
Instructions
  1. To make the truffles: Bring the butter and the cream to a boil in a small saucepan. Remove from heat. Immediately add the chocolate chips, orange liqueur, and grated orange peel. Stir well until mixture is completely smooth.
  2. Place saucepan in refrigerator and chill chocolate mixture for 2 hours. When totally chilled, remove pan from refrigerator. Using a teaspoon (mixture will be semi-hard by now), remove chocolate and shape into 3/4 inch balls by rolling the mixture between your hands. Your hands will get a bit messy...don't worry about it! Place chocolate ball onto aluminum foil or wax paper covered baking sheet once formed. Once you have the chocolate balls (approx. 24) formed, place baking sheet back into the fridge for 30 minutes to re-harden the chocolate. When chocolate has firmed up again, make the chocolate coating.
  3. To make the chocolate coating: Place 1 cup chocolate chips and the vegetable shortening in a microwave-safe bowl. Microwave on high for 30 seconds. Remove. Stir. Put back in microwave and repeat for 30 seconds. Remove. Stir. The mixture should be smooth after stirring, but if it still has some lumps, place back into microwave for 15 seconds. Remove and stir. Do not overcook the chocolate chips or they will burn.
  4. Remove truffles from refrigerator, and one at a time, place them into the warm chocolate. You may use two forks to hold the truffle. I like to use a toothpick stuck down into the middle of the truffle to coat them. Once coated, let excess drip off back into chocolate, then place onto foil to dry. Carefully remove toothpick, cover hole with a bit of chocolate, to cover, and continue coating the rest of the truffles in the same way, until done.
  5. Allow chocolate coating to harden, then if you want, drizzle some melted white chocolate over the top of each truffle to pretty them up. Garnish with a tiny bit of orange zest onto the white chocolate before it firms up. Once chocolate toppings have hardened, place truffles into individual decorative paper wrappers, then place into a sealed container.
  6. Keep truffles refrigerated. Enjoy!
Recipe Notes

Most of the prep time listed is not active "cooking time"... it's just letting the chocolate truffles cool off in the refrigerator before finishing them off with the coating.

Nutrition Facts
Chocolate Orange Truffles
Amount Per Serving (1 truffle)
Calories 117 Calories from Fat 72
% Daily Value*
Fat 8g12%
Saturated Fat 4g25%
Cholesterol 8mg3%
Sodium 20mg1%
Potassium 74mg2%
Carbohydrates 7g2%
Sugar 6g7%
Vitamin A 90IU2%
Vitamin C 0.1mg0%
Calcium 13mg1%
Iron 0.8mg4%
* Percent Daily Values are based on a 2000 calorie diet.

Here’s one more to pin on your Pinterest boards!Chocolate Orange Truffles are delicious treats to enjoy during the holidays! Creamy orange flavored chocolate centers, and covered in chocolate. YUM!


Save

Save

Save

Save

Candied Citrus Peels

Candied citrus peels (orange and lemon), dipped in chocolate are a unique, sweet treat to make and give to friends and family during the holidays!Candied citrus peels (orange and lemon), dipped in chocolate are a unique, sweet treat to make and give to friends and family during the holidays!
Over the years, I’ve made chocolate drizzled, Candied Citrus Peels, made from oranges and lemons during the holidays, to add to the gift baskets of Christmas goodies I give to friends and family.  They are delicious and are a unique treat!

Candied citrus peels are easy to make and require only a few ingredients. I found these to be quite a unique gift idea, and they are delicious, too! I’ve made this recipe using both orange AND lemon peels. Both are wonderful, but my personal favorite is definitely the candied orange peels, because I might possibly have a genetic weakness for chocolate and orange… oh mercy!

Scroll Down For A Printable Recipe Card At The Bottom Of The Page

Making Candied Citrus Peels Is Fairly Simple But Has a Few Steps

These take a bit of prep work (nothing hard at all, though), and involves several hours of drying time, but the results are worth it, especially when you consider how inexpensive these are to make, when contrasted with how expensive they are to BUY!

The process is pretty simple. Basically you repeat the cooking process three times to rid the citrus peels of bitterness. then the peels are cooked in a simple sugar syrup. The peels are then fully dried, then decorated the next day with a chocolate coating or drizzle (to fancy them up)! That’s it! You can make as many, or as few as you like.

How Candied Citrus Peels Are Made

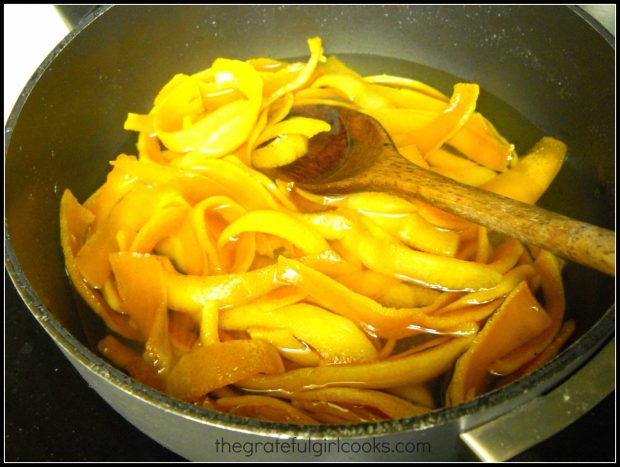
Boil citrus peel strips in water, then drain and boil again two more times. This process is done, because it softens the peels and removes some of the bitterness.

Boiling strips of orange peels in water in saucepan, for candied citrus peels.

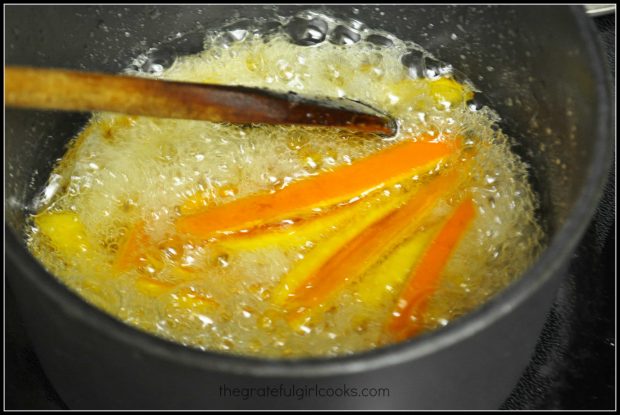
After boiling the peels 3 times, cook the candied citrus peels in a sugar/water mixture for 15 minutes.

Citrus peels are cooked in a boiling sugar and water mixture for 15 minutes.

Dry Candied Citrus Peels Overnight

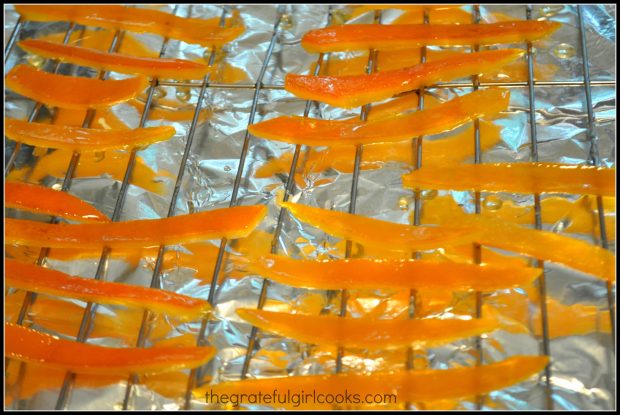
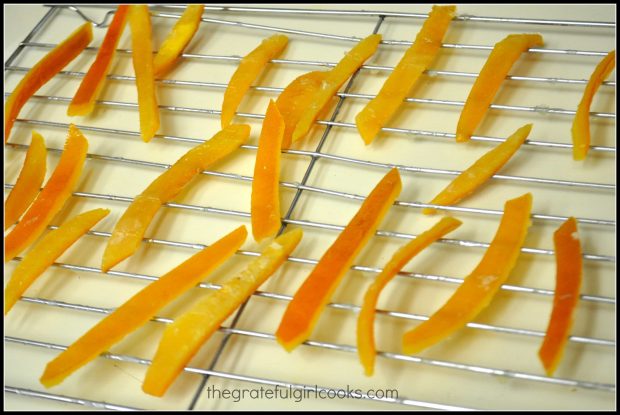
Dry the cooked candied citrus peels on wire racks overnight or until completely dry.

Cooked candied citrus peels dry on a wire rack overnight.

After drying completely overnight, the peels are now completely dried, and are not as shiny. The candied citrus peels can be eaten now, as is, or they can be decorated with white or dark chocolate.

Candied Citrus Peels have completely dried on a wire rack, and are ready to eat!

Decorating Citrus Peels With Chocolate Makes Them Look Fancy

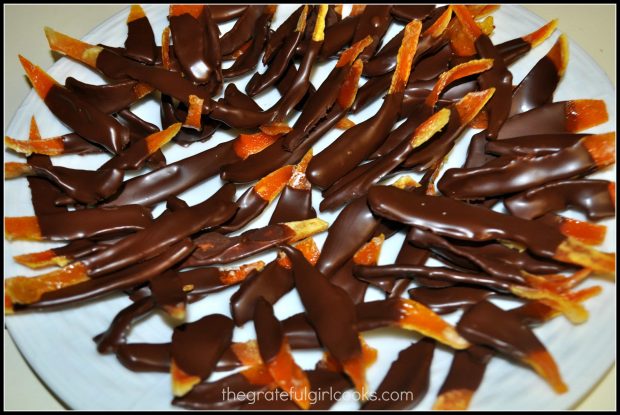
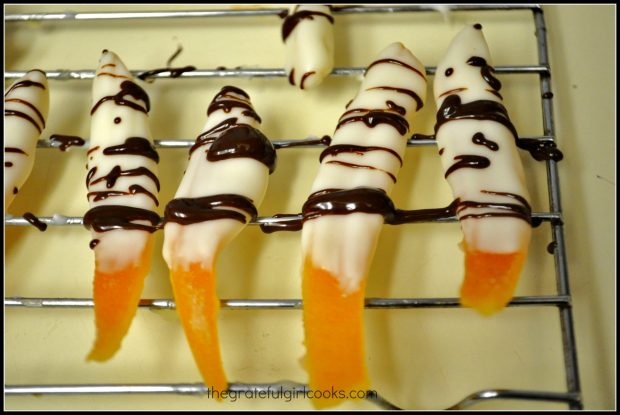
Here are some  of the candied citrus peels (orange), dipped 3/4 of the way in melted semi-sweet chocolate. Chocolate and orange is a favorite flavor combination for me.

Candied Citrus Peels that have been dipped in melted chocolate.

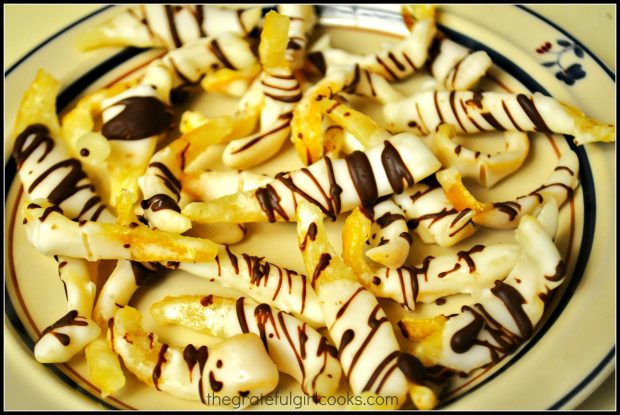
Below are the candied citrus peels (lemon), dipped in white chocolate and drizzled with melted semi-sweet chocolate.

Candied Citrus Peels from lemons, dipped in white chocolate then drizzled with semi-sweet chocolate.

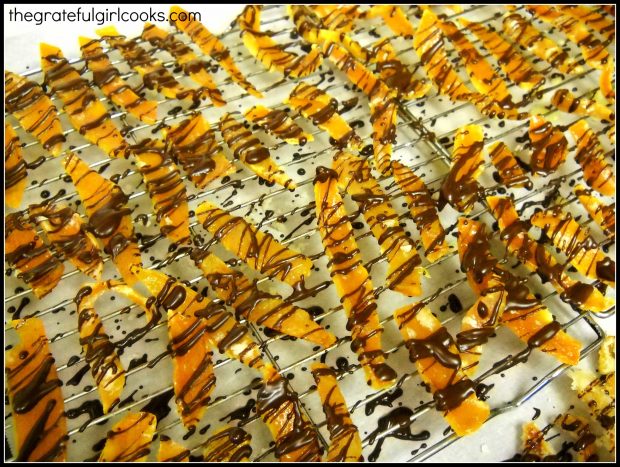
Here are more of the orange candied citrus peels, but these have been drizzled with semi-sweet chocolate.

Orange Candied Citrus Peels drizzled with semi-sweet melted chocolate.

And last but not least, here are some of the orange peel slices, dipped in white chocolate, then drizzled with semi-sweet chocolate. See how many ways you can decorate candied citrus peels?

Candied Citrus Peels (orange), with white and semi-sweet chocolate.

Hope you will give these candied citrus peels a try this holiday season (remember citrus is in season during this time of year), and enjoy! Thank you for stopping by, and I hope you will come back soon for more delicious recipes.

Looking For More Christmas Goodies?

You can find ALL of my Christmas candies and goodies in the Recipe Index, located at the top of the page. A few favorites include:

Interested In More Recipes?

Thank you for visiting this website. I appreciate you using some of your valuable time to do soIf you’re interested, I publish a newsletter 2 times per month (1st and 15th) with all the latest recipes, and other fun info. I would be honored to have you join our growing list of subscribers, so you never miss a great recipe!
There is a Newsletter subscription box on the top right side (or bottom) of each blog post, depending on the device you use, where you can easily submit your e-mail address (only) to be included in my mailing list.

You Can Also Find Me On Social Media:

Facebook page: The Grateful Girl Cooks!
Pinterest:
The Grateful Girl Cooks!
Instagram:
jbatthegratefulgirlcooks

Author's signature

The original recipe source is unknown. I copied it down onto a 3×5 card over 15 years ago, but have no record of where I got the recipe from

↓↓ PRINTABLE RECIPE BELOW ↓↓

0 from 0 votes
Candied Citrus Peels
Prep Time
1 hr 5 mins
Cook Time
15 mins
Inactive Drying time
4 hrs
Total Time
5 hrs 15 mins
 
Candied citrus peels (orange and lemon), dipped in chocolate are a unique, sweet treat to make and give to friends and family during the holidays!
Category: Candy
Cuisine: American
Keyword: candied citrus peels
Servings: 72 (Approximately 6 dozen pieces)
Calories Per Serving: 13 kcal
Author: JB @ The Grateful Girl Cooks!
Ingredients
  • Oranges or lemons (Enough to make 2 cups of sliced peels. I used 6.)
  • Water
  • 1 cup sugar (for syrup)
  • 1/4 cup sugar (for rolling cooked peels in, (IF NOT DIPPING IN CHOCOLATE)
  • Semi-sweet chocolate
  • White chocolate
Instructions
  1. Score your orange or lemons with sharp knife. Cut peel into thin strips. Remove as much of the white "pith" as possible (it's really bitter).
  2. Put the peel strips into a medium saucepan. Cover the peel with cold water. Bring to a boil over medium high heat. Once it begins boiling, reduce heat and simmer for 8 minutes. Drain water.
  3. **Repeat the above process with the peels 2 more times.**
  4. Once you have boiled the peels 3 times, wash the pan and set peels aside.
  5. In medium saucepan, bring 1/2 cup water and 1 cup granulated sugar to a boil, stirring twice. Once water is boiling and sugar is dissolved, add the peels to the pan. Simmer peels in syrup on low heat for about 15 minutes (most of the syrup will be absorbed).
  6. Remove peels with tongs to wire rack. **IF YOU ARE NOT PLANNING TO DIP FINISHED SLICES IN CHOCOLATE, THEN ROLL THEM IN SUGAR AFTER THEY HAVE DRIED FOR ABOUT AN HOUR** Place sugar coated peels back on rack to dry at least 4 hours, but preferably overnight. IF YOU ARE DIPPING OR DRIZZLING THESE IN CHOCOLATE, THIS STEP IS NOT NECESSARY!
  7. To decorate, melt semi-sweet chocolate or white chocolate (or both in separate batches) in a double boiler or in the microwave, depending on how you choose to decorate the peels. Be careful not to burn the chocolate. If melting them in microwave, cook in 30 second intervals, stirring after each 30 seconds, until smooth. Dip or drizzle melted chocolate over peels and place back on wire rack to completely dry. Keep peels stored in a cool place to prevent chocolate from melting. Enjoy
Recipe Notes

The cook time indicated INCLUDES approximately 4 hours of drying time...don't freak out and think these take that long to actually prepare. The whole cooking process takes about an hour and a half to get them to the point of being ready to dry.

Caloric calculation does NOT include optional chocolate drizzle.

Nutrition Facts
Candied Citrus Peels
Amount Per Serving (1 piece (without choc. drizzle)
Calories 13
% Daily Value*
Carbohydrates 3g1%
Sugar 3g3%
* Percent Daily Values are based on a 2000 calorie diet.

Here’s one more to pin on your Pinterest boards!Candied citrus peels (orange and lemon), dipped in chocolate are a unique, sweet treat to make and give to friends and family during the holidays!

Save

Save

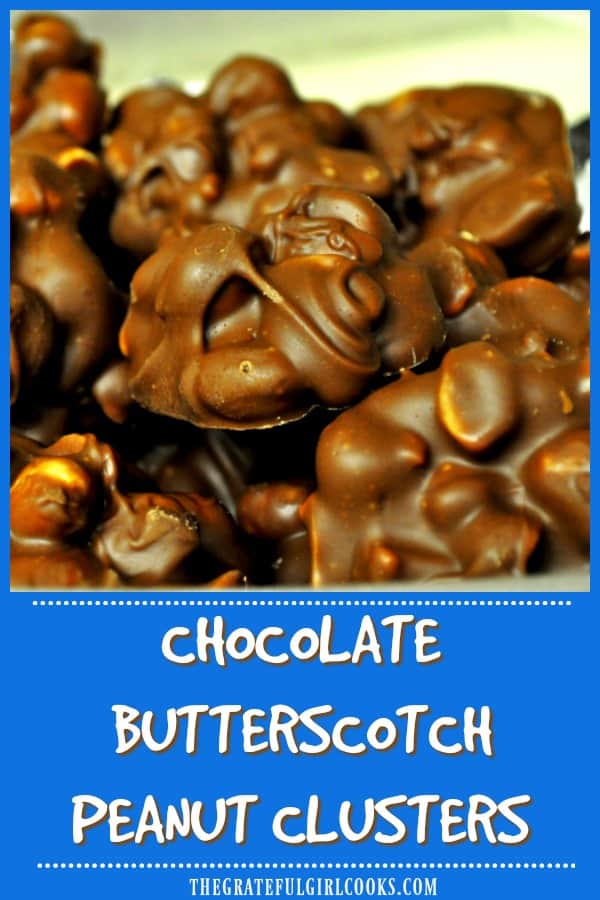
Chocolate Butterscotch Peanut Clusters

Chocolate Butterscotch Peanut Clusters are so yummy and EASY to make, using only 3 ingredients! Recipe makes 4 dozen- perfect for gift giving and holidays!Chocolate Butterscotch Peanut Clusters are so yummy and EASY to make, using only 3 ingredients! Recipe makes 4 dozen- perfect for gift giving and holidays!

If you’re looking for a totally easy “chocolate candy” recipe to have around the house to munch on OR give to friends…here ya go! Chocolate Butterscotch Peanut Clusters for the win! This is truly one of the easiest recipes ever!

Are Chocolate Butterscotch Peanut Clusters Easy To Make?  

YES!  These chocolates are ridiculously simple to make, but they sure taste GREAT! This is truly one of the easiest recipes you can find! These chocolate butterscotch peanut clusters only have 3 ingredients.

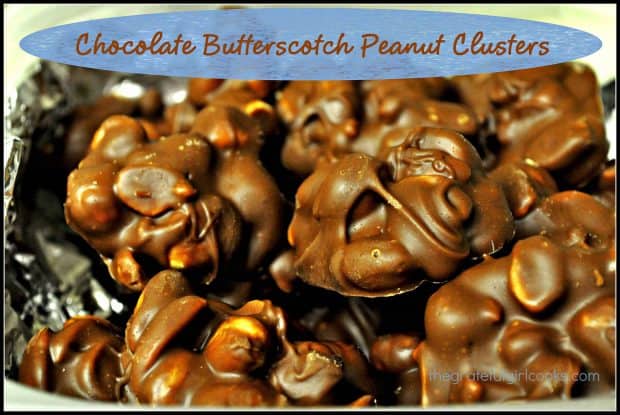
The ingredients are chocolate chips, butterscotch chips, and peanuts. Since this recipe makes approximately 4 dozen, there will be plenty to share with family and friends (we wouldn’t dare eat them all by ourselves, would we????)!

How Are They Made?

Chocolate chips and butterscotch chips are melted in a double boiler, and then combined with peanuts until coated. The chocolate butterscotch peanut clusters are then dropped by spoonfuls onto wax paper or aluminum foil, and allowed to firm up before eating.

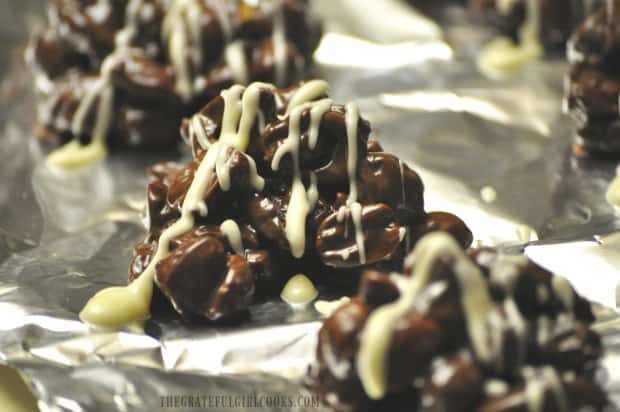
If you can pour and stir…you can make these! It’s THAT easy.  I’ve been making chocolate butterscotch peanut clusters for years, and have always enjoyed how quick to make and delicious they are. You can even get “fancy” and drizzle the chocolate butterscotch peanut clusters with a simple vanilla/powdered sugar icing, if desired (but not necessary). I’ve done that a couple times!

Chocolate butterscotch peanut clusters drizzled with icing.

The addition of butterscotch chips to “standard” chocolate covered peanut clusters takes these to the next level of awesomeness!  Hope you will give them a try! Have a great day, and come back soon for more family-friendly recipes.

Looking For More Candy or Chocolate Recipes?

You can find all of my recipes in the Recipe Index, located at the top of the page. In case you are searching for MORE chocolate covered candy to make for the holidays, etc., be sure to check out my recipes for Christmas Tree “Gumdrops”, Chocolate Covered Bacon, Mocha Truffles, Chocolate Orange Truffles. There’s more in the recipe index, and they are all are delicious!

Interested In More Recipes?

Thank you for visiting this website. I appreciate you using some of your valuable time to do soIf you’re interested, I publish a newsletter 2 times per month (1st and 15th) with all the latest recipes, and other fun info. I would be honored to have you join our growing list of subscribers, so you never miss a great recipe!
There is a Newsletter subscription box on the top right side (or bottom) of each blog post, depending on the device you use, where you can easily submit your e-mail address (only) to be included in my mailing list.

You Can Also Find Me On Social Media:
Facebook page: The Grateful Girl Cooks!
Pinterest: The Grateful Girl Cooks!
Instagram: jbatthegratefulgirlcooks
Author's signatureRecipe Source: Unknown

Here’s one more to pin on your Pinterest boards!Chocolate Butterscotch Peanut Clusters are so yummy and EASY to make, using only 3 ingredients! Recipe makes 4 dozen- perfect for gift giving and holidays!

5 from 3 votes
Chocolate Butterscotch Peanut Clusters
Prep Time
10 mins
Cook Time
5 mins
Total Time
15 mins
 
Chocolate Butterscotch Peanut Clusters are so yummy and EASY to make, using only 3 ingredients! Recipe makes 4 dozen- perfect for gift giving and holidays!
Category: Candy, Desserts
Cuisine: American
Keyword: chocolate butterscotch peanut clusters
Servings: 48 chocolates (approx.)
Calories Per Serving: 89 kcal
Author: JB @ The Grateful Girl Cooks!
Ingredients
  • 6 ounces semi-sweet chocolate chips
  • 2 cups butterscotch chips
  • 12 ounces salted cocktail peanuts
Instructions
  1. Melt the chocolate and butterscotch chips in a double boiler (chips in small pot, which is sitting on top of a pot of boiling water-be careful not to get any water into chocolate or chocolate will seize up).
  2. When chips have melted, remove from heat and stir in peanuts until coated.
  3. Drop peanut clusters by rounded spoonfuls onto wax paper.
  4. Let the chocolate butterscotch covering harden before serving. Enjoy!

Nutrition Facts
Chocolate Butterscotch Peanut Clusters
Amount Per Serving (1 chocolate)
Calories 89 Calories from Fat 45
% Daily Value*
Fat 5g8%
Saturated Fat 1g6%
Sodium 58mg3%
Potassium 75mg2%
Carbohydrates 9g3%
Sugar 7g8%
Protein 2g4%
Vitamin A 10IU0%
Calcium 10mg1%
Iron 0.4mg2%
* Percent Daily Values are based on a 2000 calorie diet.

Save

Save

Save

Save

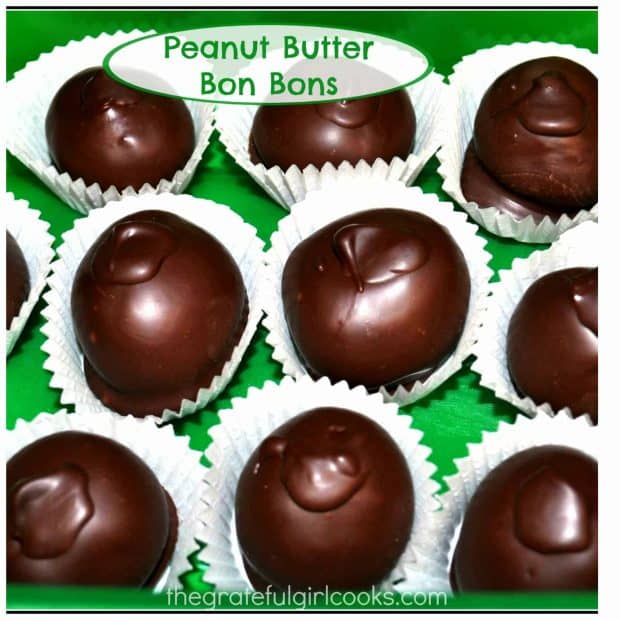
Peanut Butter Bon Bons

Chocolate dipped peanut butter bon bons (truffles) are creamy, rich and decadent. With only 5 ingredients, and so easy to make, what’s not to love?Chocolate dipped peanut butter bon bons (truffles) are creamy, rich and decadent. With only 5 ingredients, and so easy to make, what's not to love?

The quick and easy recipe for Peanut Butter Bon Bons (truffles) is one of our family’s favorites!  These chocolate covered treats are a tradition in our home over the Holidays!

I don’t know about you, but I love peanut butter!  Ever since I was a little girl, I’ve enjoyed eating peanut butter bon bons, peanut butter crunch cookies, peanut butter and jelly sandwiches, and many other dishes featuring peanut butter. I come by this love of peanut butter honestly, because one of my biggest memories of my old grandma was always seeing her eating peanut butter and banana sandwiches.

Scroll Down For A Printable Recipe Card At The Bottom Of The Page

Making Peanut Butter Bon Bons Is A Tradition

These simple bon bons (also known as truffles) are one of the goodies I almost always make at Christmas time for family and friends. These tasty peanut butter treats (whatever you want to call them) are so delicious, it’s hard to eat only one!

I’ve been making peanut butter bon bons (sometimes called “buckeyes”) for years and years. I don’t even know where I got the original recipe! My recipe is written out on an old, stained 3×5 index card – aren’t all the GOOD ones like that?

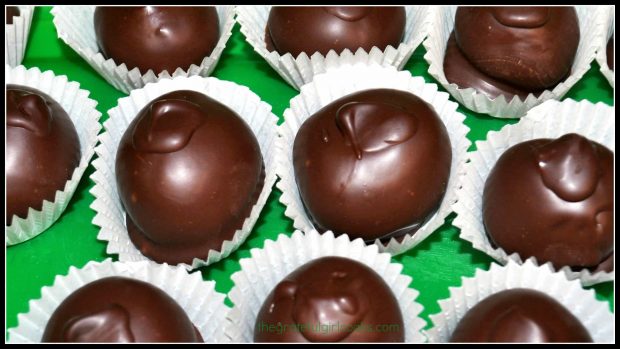
Chocolate covered peanut butter bon bons in paper wrappers, ready to eat!

How Are Peanut Butter Bon Bons Made?

The peanut butter bon bons are easy to make. A creamy peanut butter filling is blended, rolled into balls, and refrigerated until firm. They are coated in a chocolate covering, and refrigerated again, until the chocolate firms up. That’s it!

Sure do hope you will give the peanut butter bon bons a try. I tend to make them at Christmas time, but I think you will find them wonderfully delicious any time of the year!

Looking For Other Recipes For BON BONS or TRUFFLES?

You can find all of my recipes in the Recipe Index, located at the top of the page. A few bon bon or truffle recipes you might also enjoy include:

Interested In More Recipes?

Thank you for visiting this website. I appreciate you using some of your valuable time to do soIf you’re interested, I publish a newsletter 2 times per month (1st and 15th) with all the latest recipes, and other fun info. I would be honored to have you join our growing list of subscribers, so you never miss a great recipe!
There is a Newsletter subscription box on the top right side (or bottom) of each blog post, depending on the device you use, where you can easily submit your e-mail address (only) to be included in my mailing list.

You Can Also Find Me On Social Media:
Facebook page: The Grateful Girl Cooks!
Pinterest: The Grateful Girl Cooks!
Instagram: jbatthegratefulgirlcooks

Author's signature

Original Recipe Source: Unknown…handed down recipe from many years ago

0 from 0 votes
Peanut Butter Bon Bons
Prep Time
30 mins
Cook Time
0 mins
Refrigeration (inactive time)
2 hrs
Total Time
2 hrs 30 mins
 
Chocolate dipped peanut butter bon bons (truffles) are creamy, rich and decadent. With only 5 ingredients, and so easy to make, what's not to love?
Category: Candy, Desserts
Cuisine: American
Keyword: peanut butter bon bons
Servings: 30 bon bons (approx.)
Calories Per Serving: 239 kcal
Author: JB @ The Grateful Girl Cooks!
Ingredients
For bon bons:
  • 12 Tablespoons butter (1½ sticks) (or margarine-whatever floats your boat!)
  • 18 oz. creamy peanut butter (small jar)
  • 16 ounces powdered sugar (16 oz. box) (confectioner's)
For chocolate coating:
  • 6 ounces semi-sweet chocolate chips
  • 2 Tablespoons vegetable shortening
Instructions
  1. Using an electric mixer, cream the butter and peanut butter together in a large bowl until thoroughly mixed and creamy. Add powdered sugar; mix until smooth. Mixture will be thick.

  2. Using a spoon, scoop out mixture and roll/shape into (approx.) 1 inch balls between your hands. Place rolled bon bons onto a wax or parchment paper lined baking sheet. Store in refrigerator to chill for a couple of hours.

  3. Right before the bon bons are done "chilling", prepare chocolate coating mixture to dip them in: Place the chocolate chips and the vegetable shortening in a microwave-safe bowl. Microwave on high for 30 seconds. Remove. Stir chocolate and shortening. Place back in microwave and microwave for 30 additional seconds. Remove and stir. (You do it this way to prevent the chocolate from burning). By now the chocolate and shortening should be completely melted and smooth. If not (some microwave temps vary), put it back in for 15 seconds and stir. Remove from microwave. *Tip: If the chocolate is still too thick for dipping, just add a tiny bit more shortening and microwave for a few seconds.* (If you prefer, you can also prepare the chocolate and shortening in a double-boiler...again...whatever works for you).

  4. Remove bon bons from refrigerator and dip each one completely in melted chocolate. I use a toothpick inserted into bon bons to dip into chocolate, then remove the toothpick and fill in the small hole on top of bon bon with additional chocolate. As each bon bon is dipped, place on wax or parchment paper to allow chocolate time to "harden".

  5. When chilled, place each bon bon in a small paper candy holder, and refrigerate! Enjoy.

Nutrition Facts
Peanut Butter Bon Bons
Amount Per Serving (1 bon bon)
Calories 239 Calories from Fat 144
% Daily Value*
Fat 16g25%
Saturated Fat 6g38%
Cholesterol 12mg4%
Sodium 118mg5%
Potassium 143mg4%
Carbohydrates 21g7%
Fiber 1g4%
Sugar 18g20%
Protein 4g8%
Vitamin A 145IU3%
Calcium 12mg1%
Iron 0.7mg4%
* Percent Daily Values are based on a 2000 calorie diet.

Here’s one more to pin on your Pinterest boards!Chocolate dipped peanut butter bon bons (truffles) are creamy, rich and decadent. With only 5 ingredients, and so easy to make, what's not to love?


Save

Save

Mocha Truffles

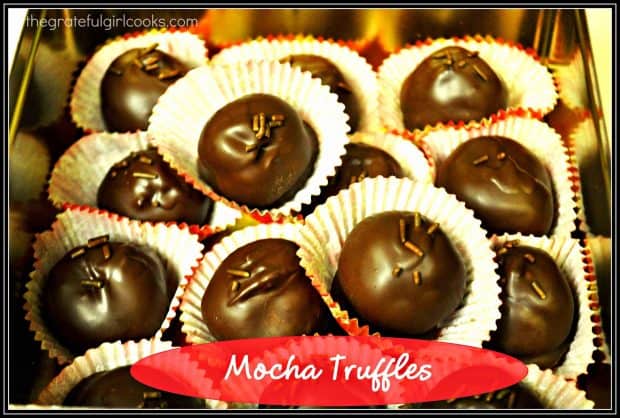
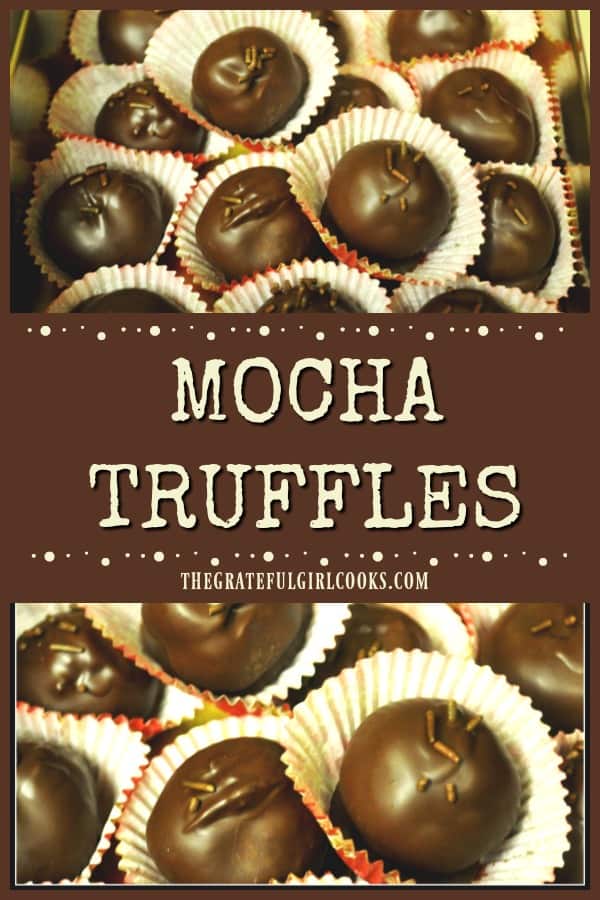
You’ll love these easy to prepare mocha truffles, chocolate covered creamy treats that are perfect for eating or gift giving! Recipe makes 5 dozen!You'll love these easy to prepare mocha truffles, chocolate covered creamy treats that are perfect for eating or gift giving!
I LOVE to make truffles for our family and friends to enjoy any old time of the year. One of my “traditions” is to make Mocha Truffles each year at Christmas time, along with a couple other kinds of truffles.

I found this amazingly simple truffle recipe in one of my old “Taste of Home” magazines almost 20 years ago. They taste wonderful, and are surprisingly easy to make.

I’ve made good old mocha truffles countless times over the years, and they always are a big hit! Here’s how to make them.

Scroll Down For A Printable Recipe Card At The Bottom Of The Page

Do You Enjoy Truffles Or Bon Bons?

Do you enjoy truffles or bon bons? We sure do, and I try to make a new flavor every year at Christmas!

You can find all of my truffle and bon bon recipes in the Recipe Index at the top of the page. A few favorites include chocolate orange truffles, peanut butter bon bons, and maple cream bon bons.

Mocha truffles are some of my absolute favorite decadent treats! The rich chocolate and coffee flavor combination is the reason I have made these truffles so many times over the years.

They are so good, and so creamy… sigh. If only they were calorie-free! Oh well, it’s a good thing they are so DELICIOUS!

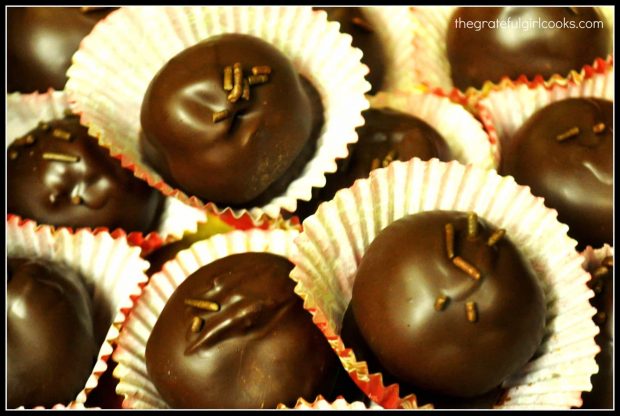
Close up photo of a few of the mocha truffles.
 

Even though I don’t have photos of the “process” for making these truffles, it is a fairly simple process. Creamy chocolate mocha filling is mixed, shaped into balls, refrigerated, then dipped into chocolate to cover. That’s basically it! Anyone can make mocha truffles… really!

I hope you will give these mocha truffles a try. They are great ANY time of the year, and are a wonderful “sweet” gift to give a friend or colleague. Trust me. Have a wonderful day!

Looking For More CHRISTMAS GOODIES?

You can find all of my recipes in the Recipe Index, which is located at the top of the page. I have lots of recipes for yummy treats, especially Christmas Goodies, including:

Want More Recipes? Get My FREE Newsletter!

I publish a newsletter 2 times per month (1st and 15th) with lots of recipes, tips, etc..
Would you like to join our growing list of subscribers?

There is a Newsletter subscription box on the top right (or bottom) of each blog post, depending on the device you use.
You can submit your e-mail address there, to be added to my mailing list.

Find Me On Social Media:

Facebook page: The Grateful Girl Cooks!
Pinterest:
The Grateful Girl Cooks!
Instagram:
jbatthegratefulgirlcooks

 
Author's signature
Original recipe source: Stacy Abell, via Taste of Home Magazine, Dec./Jan. 1995 issue, pg. 25
 

↓↓ PRINTABLE RECIPE BELOW ↓↓

0 from 0 votes
Mocha Truffles
Prep Time
2 hrs
Cook Time
0 mins
Total Time
2 hrs
 
You'll love these easy to prepare mocha truffles, chocolate covered creamy treats that are perfect for eating or gift giving! Recipe makes 5 dozen!
Category: Candy, Dessert
Cuisine: American
Keyword: mocha truffles
Servings: 60 truffles (approx.)
Calories Per Serving: 122 kcal
Author: JB @ The Grateful Girl Cooks!
Ingredients
  • 2 packages (12 oz. each) semi-sweet chocolate chips
  • 1 package (8 oz.) cream cheese, softened
  • 3 Tablespoons instant coffee granules
  • 2 teaspoon water
  • 1 lb. dark chocolate confectionery coating * (see note at end of recipe)
  • White confectionery coating for decorative "drizzle" (Optional)
Instructions
  1. To make the truffles: Melt the chocolate chips in a microwave-safe bowl (or in a double boiler). Add cream cheese, coffee granules and water to the chocolate and mix well. Cover bowl and refrigerate until chocolate is firm enough to shape.

  2. Shape the chilled chocolate mixture into 1 inch balls (Scoop chocolate out of bowl with spoon; use your hands to roll them-yes...it is a bit messy, but fun!). Place the chocolate balls onto a wax paper lined baking sheet, then refrigerate for 1-2 hours or until very firm.
  3. To make the chocolate coating: Melt the chocolate confectionery coating in a microwave-safe bowl or double boiler. Dip the truffles, one at a time in the chocolate to completely cover and then place covered truffle on waxed paper to let the chocolate harden. *I usually use a toothpick inserted into the chocolate ball to dip them. When dipped, I remove the toothpick and cover the hole where the toothpick was with additional chocolate. Once finished dipping and "drizzling" the truffles, let harden on waxed paper. Once hardened, I love to place them in individual mini-candy papers for a festive look! Keep the finished truffles refrigerated!
  4. **If desired, you can melt the white confectionery coating to decoratively "drizzle" over the truffles, or you can drizzle additional chocolate coating or sprinkles.
Recipe Notes

**Recipe creator says these truffles may be frozen for several months BEFORE dipping in chocolate. Thaw un-dipped truffles in the refrigerator before dipping.
**Chocolate or white confectionery coating can be found in the baking section of most grocery stores. Sometimes it is called "almond bark" or "candy coating". If you can't find it, a great substitute would be 1 cup semi-sweet or dark chocolate chips, plus 1 TBSP shortening, melted together (can double this amount). (I have done this...works like a charm!)

Nutrition Facts
Mocha Truffles
Amount Per Serving (1 truffle)
Calories 122 Calories from Fat 63
% Daily Value*
Fat 7g11%
Saturated Fat 5g31%
Cholesterol 4mg1%
Sodium 15mg1%
Potassium 78mg2%
Carbohydrates 11g4%
Sugar 9g10%
Vitamin A 55IU1%
Calcium 11mg1%
Iron 0.7mg4%
* Percent Daily Values are based on a 2000 calorie diet.

Here’s one more to pin on your Pinterest boards!You'll love these easy to prepare mocha truffles, chocolate covered creamy treats that are perfect for eating or gift giving! Recipe makes 5 dozen!


Save

Save

Save

Maple Cream Bon Bons

Decadent, creamy chocolate covered Maple Cream Bon Bons are a perfect gift for family and friends during the holidays! You’ll love these maple flavored treats!Decadent, creamy chocolate covered Maple Cream Bon Bons are a perfect gift for family and friends during the holidays! You'll love these maple flavored treats!
Every year during the holidays, I pick a couple of new recipes to make (especially chocolate covered truffles or bon bons!), to add to our family’s “tried and true” traditional Christmas treats. One of this year’s new recipes is Maple Cream Bon Bons. AMAZING!

Scroll Down For A Printable Recipe Card At The Bottom Of The Page

Homemade Food Gifts At Christmas? Yes, Please!

I enjoy making a variety of “homemade Christmas goodies”, which I LOVE to give to my friends and neighbors. Inevitably I end up making a couple kinds of chocolate-dipped truffles (in this recipe they are called “bon bons”).

I tend to make such a mess in my kitchen each Christmas, with cookbooks, recipes and ingredients scattered everywhere, but I find great JOY in giving to others this time of year!

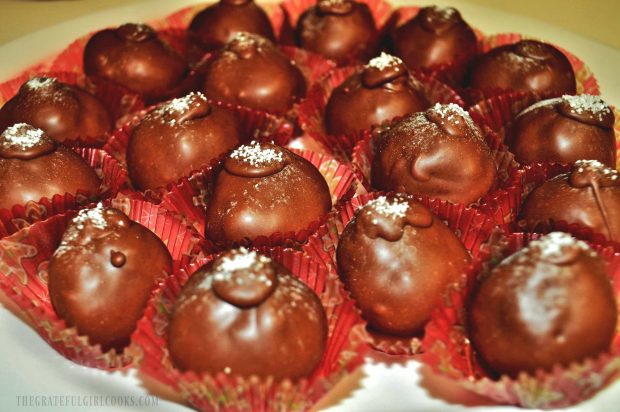
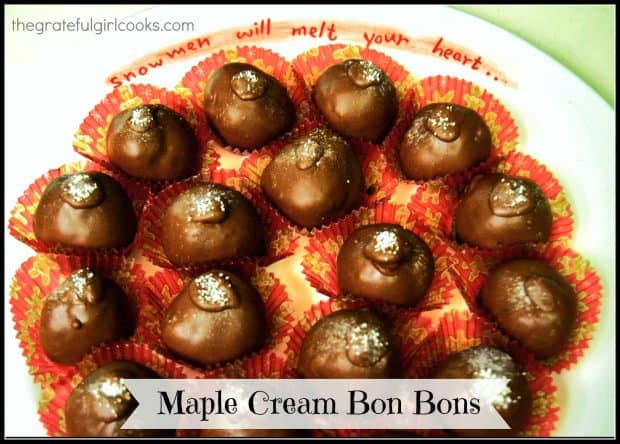
Maple Cream Bon Bons / The Grateful Girl Cooks!

This past Christmas I found this delicious sounding recipe for maple cream bon bons during a search online at Taste of Home. These creamy, chocolate covered treats were very easy to make (with only a few ingredients… a big plus!) and the maple flavor SHINES!

Delicious Creamy Maple Bon Bons

They are so cute when placed in a decorative candy wrapper… perfect for gift giving! Who wouldn’t like to receive a plate of these delicious maple cream bon bons?

Maple Cream Bon Bons / The Grateful Girl Cooks!

The recipe makes about 5 dozen maple cream bon bons, so there are plenty to take to work, give away as gifts, or plenty to save and stash away in the refrigerator for a late night craving…they are SO GOOD!

A look at the inside of a maple cream bon bon.
Sure hope you give these little bites of yumminess a try. Maple cream bon bons are very, very good! Thanks for stopping by, and please come back again soon.

Looking For More BON BON OR TRUFFLE Recipes?

You can find ALL my recipes in the Recipe Index, located at the top of the page. I have a nice variety of bon bon and truffle recipes you might enjoy, including:

Interested In More Recipes?

Thank you for visiting this website. I appreciate you using some of your valuable time to do soIf you’re interested, I publish a newsletter 2 times per month (1st and 15th) with all the latest recipes, and other fun info. I would be honored to have you join our growing list of subscribers, so you never miss a great recipe!
There is a Newsletter subscription box on the top right side (or bottom) of each blog post, depending on the device you use, where you can easily submit your e-mail address (only) to be included in my mailing list.

You Can Also Find Me On Social Media:
Facebook page: The Grateful Girl Cooks!
Pinterest: The Grateful Girl Cooks!
Instagram: jbatthegratefulgirlcooks

Author's signatureRecipe Source: http://www.tasteofhome.com/recipes/maple-cream-bonbons

↓↓ PRINTABLE RECIPE BELOW ↓↓

0 from 0 votes
Maple Cream Bon Bons
Prep Time
1 hr
Cook Time
0 mins
Total Time
1 hr
 
Decadent, creamy chocolate covered Maple Cream Bon Bons are a perfect gift for family and friends during the holidays! You'll love these maple flavored treats!
Category: Candy
Cuisine: American
Keyword: maple cream bon bons
Servings: 5 dozen
Calories Per Serving: 125 kcal
Author: JB @ The Grateful Girl Cooks!
Ingredients
For bonbons:
  • 1 cup butter , softened (2 cubes)
  • 3 1/2 cups confectioner's sugar (powdered)
  • 3 Tablespoons maple flavoring
  • 2 cups walnuts (I used pecans), chopped
For coating:
  • 2 cups semi-sweet chocolate chips
  • 1 cup butterscotch chips
Instructions
  1. In a large bowl, with an electric mixer, cream the butter, powdered sugar, and maple flavoring till smooth. Stir in chopped walnuts (or pecans).

  2. Shape mixture into 1" balls. Place dough balls onto a wax paper covered baking sheet and put into freezer for 1/2 an hour.

  3. In a microwaveable bowl, melt the chocolate and butterscotch chips **(30 seconds on high. Stir. 30 seconds on high. Stir. Watch carefully so that you don't burn the chocolate. Should be melted and smooth after stirring the second time, but microwave an additional 15 seconds or so, then stir, if not.).
  4. Dip dough balls into chocolate mixture one at a time (I insert a toothpick into the dough ball, then dip, cover with chocolate then remove, allowing excess chocolate to drip off. You may want to use a spoon to finish coating the bonbon. Place each covered bonbon on wax paper-lined baking sheets, removing the toothpick and hiding the "hole" with a touch of melted chocolate. Place bonbons in refrigerator when done. Refrigerate till set...then ENJOY!
Nutrition Facts
Maple Cream Bon Bons
Amount Per Serving (1 bon bon)
Calories 125 Calories from Fat 72
% Daily Value*
Fat 8g12%
Saturated Fat 3g19%
Cholesterol 8mg3%
Sodium 38mg2%
Potassium 52mg1%
Carbohydrates 13g4%
Sugar 11g12%
Vitamin A 100IU2%
Vitamin C 0.1mg0%
Calcium 8mg1%
Iron 0.5mg3%
* Percent Daily Values are based on a 2000 calorie diet.

Here’s one more to pin on your Pinterest boards!Decadent, creamy chocolate covered Maple Cream Bon Bons are a perfect gift for family and friends during the holidays! You'll love these maple flavored treats!


Save

Save