Category: Holidays!

Peppermint Mocha Coffee Creamer

Make delicious, homemade Peppermint Mocha Coffee Creamer to brighten the holidays (or ANY time)! Easy to make recipe only has 4 ingredients!Make delicious, homemade Peppermint Mocha Coffee Creamer to brighten the holidays (or ANY time)! Easy to make recipe only has 4 ingredients!
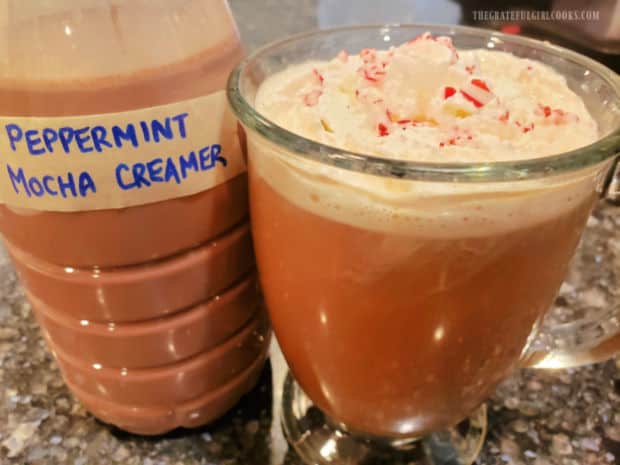
Do you like making your own homemade coffee creamers? If you do, I would love to share with you today how to make this delicious coffee creamer! Peppermint Mocha Coffee Creamer is the flavor of the day!

It is SO SIMPLE to make, and tastes wonderful  when added to a big ol’ mug of hot coffee. I scribbled the recipe on the bottom of a piece of paper many years ago, but don’t know where I got it from, so I’m not sure who to give credit to for this recipe. 

The creamer only has 4 ingredients and can be ready to pour into a cup of coffee in less than 5 minutes. It will yield almost 3 cups of creamer. How’s that for convenient?

If you enjoy the flavors of chocolate and mint, then I’ll bet you will enjoy this coffee creamer. Here’s how to make it!

Scroll Down For A Printable Recipe Card At The Bottom Of The Page

What Ingredients Will I Need?

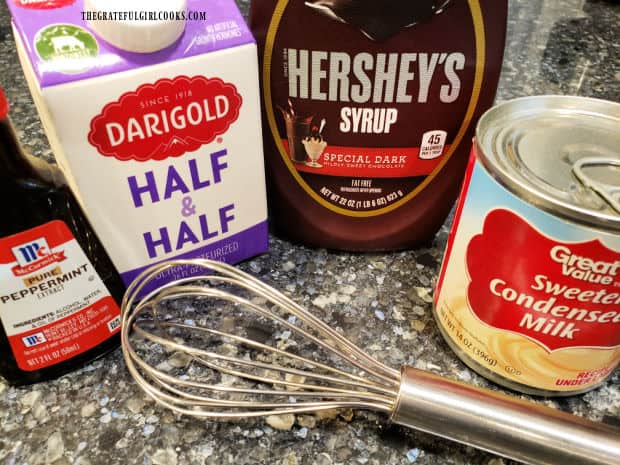
You need peppermint extract, 2 cups half and half, several Tablespoons of chocolate syrup, and a can of sweetened condensed milk to make this coffee creamer. These ingredients are all you will need, and can be found in most grocery stores.

If you want to “fancy the coffee up” for serving, you will also want to have whipped cream and some crushed peppermint sticks. You can garnish each steaming hot mug of coffee with them, but that is completely optional!

Ingredients are half and half, peppermint extract, chocolate syrup and sweetened condensed milk.

Preparing The Creamer

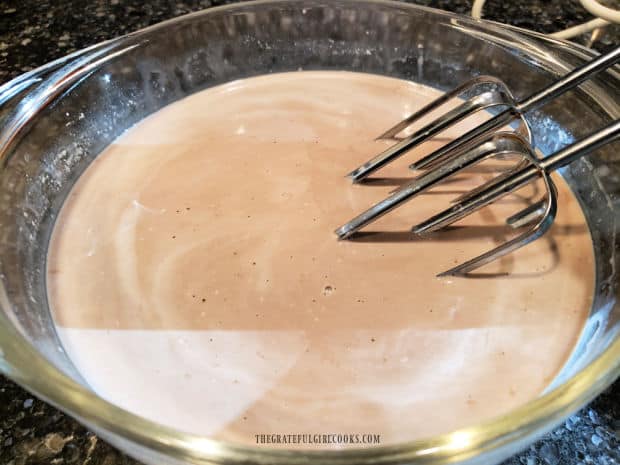
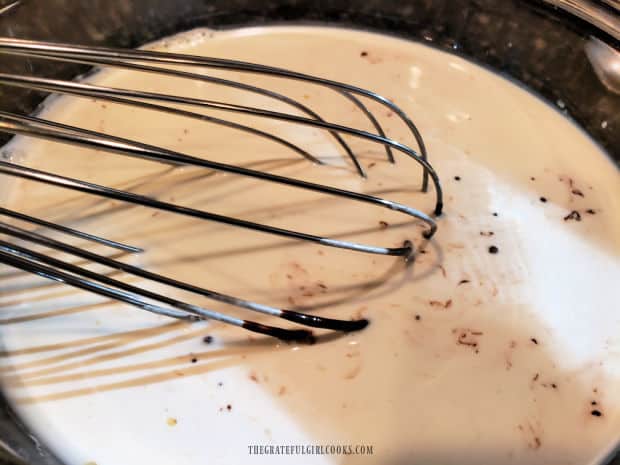
Measure all of the creamer ingredients into a large bowl. The only thing you need to do to prepare the creamer is to thoroughly combine the ingredients.

You can use a wire whisk for this OR an electric mixer. I have used both, but because the sweetened condensed milk is very thick, I find that using an electric mixer works best.

NOTE: If using an electric mixer, blend, using the LOWEST setting, so the liquid doesn’t splatter everywhere, ok? Whisk or blend the creamer only until everything is completely blended.

Using a whisk to combine all the ingredients for the coffee creamer.Electric mixer can also be used (on LOW) to combine coffee creamer ingredients.

Storing The Peppermint Mocha Coffee Creamer

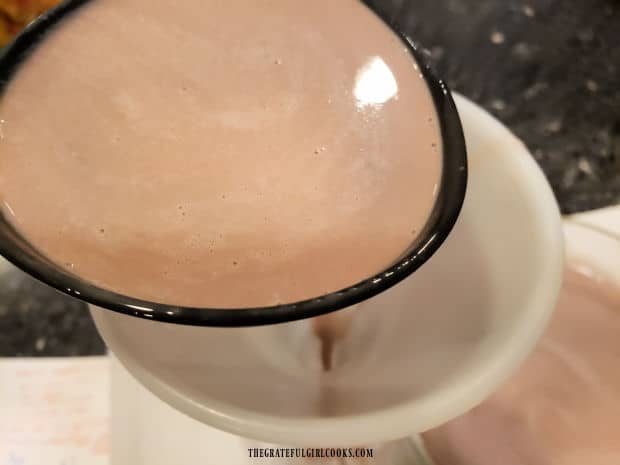
Once the peppermint mocha coffee creamer is fully combined, place a funnel into the neck of an airtight jar or bottle you’re using for the creamer. You can either POUR or LADLE the liquid creamer into the funnel in the jar.

I make a lot less mess when I use the funnel instead of just pouring the liquid in the bottle… just sayin’. Now the creamer is ready to enjoy! See how easy that was?

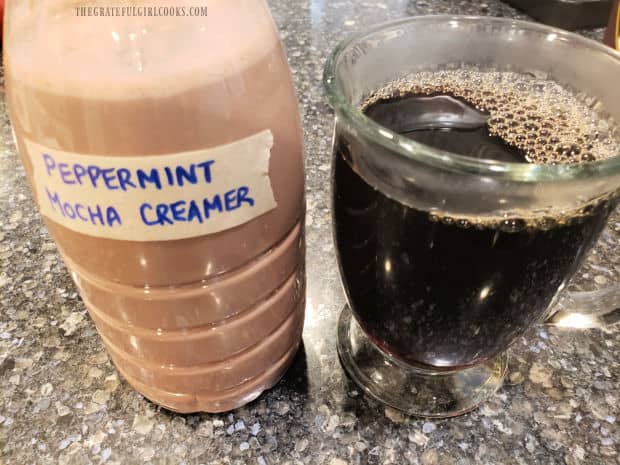
TIP: To store creamer, I remove the label from an old, empty creamer container. After washing and draining it well, I can re-use the container for homemade coffee creamers! The creamer should last approximately the same amount of time as the expiration date on the half and half carton, if stored in an airtight container.

Peppermint Mocha Coffee Creamer is ladled into a funnel on top of a storage bottle.A container of peppermint mocha coffee creamer and a cup of hot, black coffee, ready for creamer.

Enjoy Your Coffee With Peppermint Mocha Coffee Creamer!

Most of the time, I simply add the peppermint mocha coffee creamer straight into my coffee, give it a stir and drink it up! But sometimes… I can’t help myself and try to make my coffee more fancy!

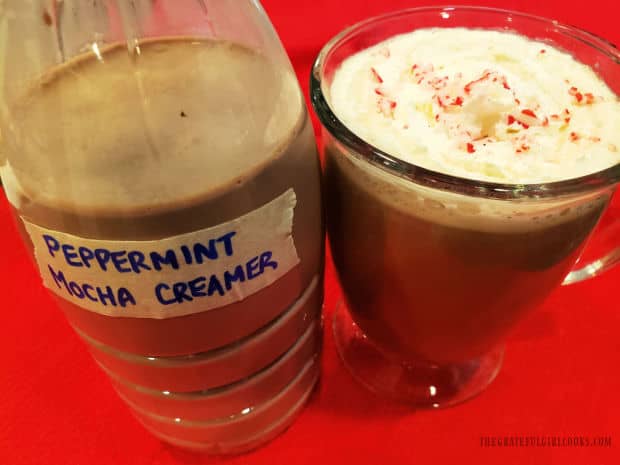
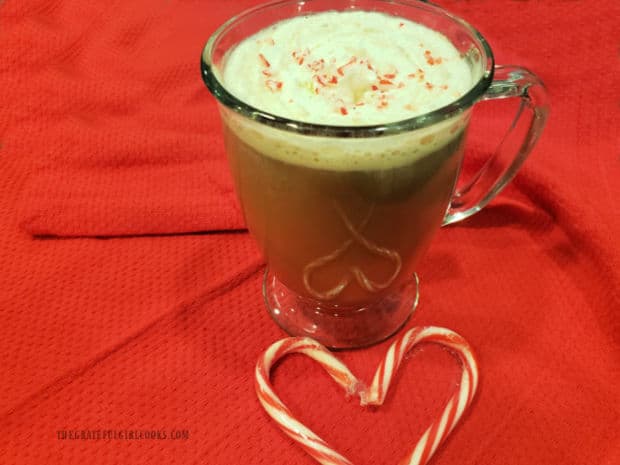
To do this, stir creamer into the coffee, then top with aerosol whipped cream, and sprinkle with crushed peppermint, right off of a candy cane!

This coffee creamer has a soothing, yet subtle peppermint and chocolate flavor, which I really enjoy in my strong, hot morning coffee! YUM! It’s a delicious coffee creamer any old time of the year, not just during the holidays!

Whipped cream and peppermint top a cup of coffee with peppermint mocha creamer.A mug of whipped cream topped coffee sweetened with peppermint mocha coffee creamer.

I hope you have the chance to make this simple, yet yummy coffee creamer, and trust you’ll enjoy it. I make it every year for Christmas, and love it a lot!

Thanks so much for taking time out of your day to visit my blog. I invite you to come back again soon, for more family-friendly recipes. Take care, and have a GREAT day!

Looking For More COFFEE CREAMER Recipes?

You can find ALL of my recipes in the Recipe Index, which is located at the top of the page. I have several delicious coffee creamer recipes to check out, including:

Want More Recipes? Get My FREE Newsletter!

I publish a newsletter 2 times per month (1st and 15th) with lots of recipes, tips, etc..
Would you like to join our growing list of subscribers?

There is a Newsletter subscription box on the top right (or bottom) of each blog post, depending on the device you use.
You can submit your e-mail address there, to be added to my mailing list.

Find Me On Social Media:

Facebook page: The Grateful Girl Cooks!
Pinterest:
The Grateful Girl Cooks!
Instagram:
jbatthegratefulgirlcooks

Author's signature

Original recipe source: unknown

↓↓ PRINTABLE RECIPE BELOW ↓↓

0 from 0 votes
Peppermint Mocha Coffee Creamer
Prep Time
4 mins
Cook Time
0 mins
Total Time
4 mins
 

Make delicious, homemade Peppermint Mocha Coffee Creamer to brighten the holidays (or ANY time)! Easy to make recipe only has 4 ingredients!

Category: Beverages, Condiments
Cuisine: American
Keyword: peppermint mocha coffee creamer
Servings: 48 (1 T. per serving)
Calories Per Serving: 46 kcal
Author: JB @ The Grateful Girl Cooks!
Ingredients
  • 2 cups half and half
  • 14 ounces sweetened condensed milk canned
  • 5 Tablespoons chocolate syrup
  • 1 teaspoon peppermint extract
Instructions
  1. Measure all ingredients into a large bowl. Use a wire whisk OR an electric mixer to fully combine ingredients. NOTE: I have used both, but because sweetened condensed milk is thick, using an electric mixer works best. If using an electric mixer, use on LOWEST setting, so liquid doesn't splatter.

  2. Pour creamer through funnel into an airtight jar or bottle for storage. Store in refrigerator for approx. as long as expiration date on the half and half carton. Enjoy!

Recipe Notes

Recipe will yield approximately 3 cups of liquid creamer. Caloric calculation is made based on using 1 Tablespoon per serving.
Nutrition Facts
Peppermint Mocha Coffee Creamer
Amount Per Serving (1 1 Tablespoon)
Calories 46 Calories from Fat 18
% Daily Value*
Fat 2g3%
Saturated Fat 1g6%
Polyunsaturated Fat 0.1g
Monounsaturated Fat 1g
Cholesterol 6mg2%
Sodium 18mg1%
Potassium 49mg1%
Carbohydrates 6g2%
Fiber 0.1g0%
Sugar 6g7%
Protein 1g2%
Vitamin A 58IU1%
Vitamin C 0.3mg0%
Calcium 35mg4%
Iron 0.1mg1%
* Percent Daily Values are based on a 2000 calorie diet.

Here’s one more to pin on your Pinterest boards!Make delicious, homemade Peppermint Mocha Coffee Creamer to brighten the holidays (or ANY time)! Easy to make recipe only has 4 ingredients!

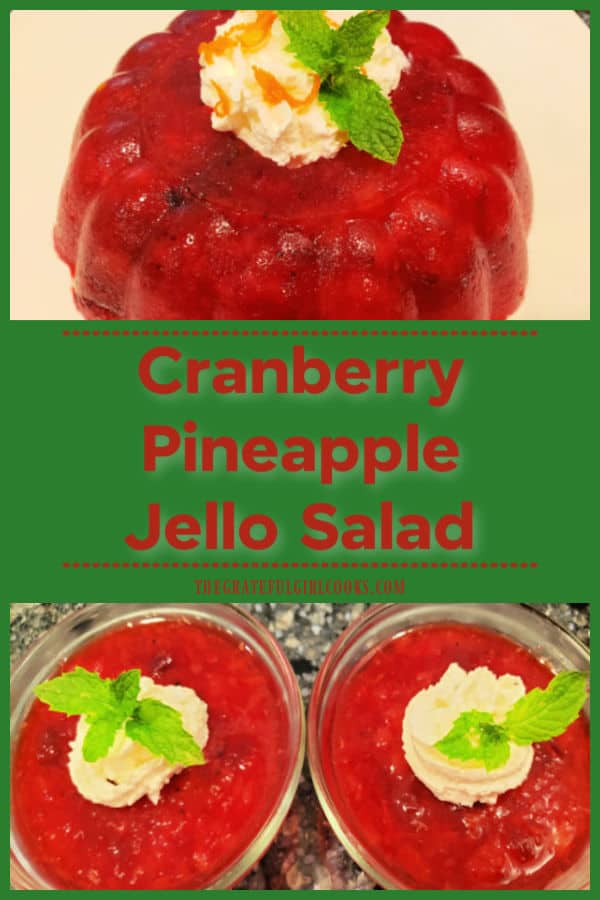
Cranberry Pineapple Jello Salad

Cranberry Pineapple Jello Salad is a delicious dish for the holidays or any time! Only 4 ingredients and minimum prep time are needed to make it!
Cranberry Pineapple Jello Salad is a delicious dish for the holidays or any time! Only 4 ingredients and minimum prep time needed to make it!

Looking for a fantastic tasting salad to serve for the holidays (or anytime)? This cranberry pineapple Jello salad can be made in advance with very little prep time, and is full of vibrant color and flavor! Best of all… it’s EASY to make, which is wonderful during such a busy time of year, right?

I found the recipe online several years ago, and added it to our holiday favorites rotation! You can make it up to a couple days ahead of time, then top it with whipped cream, mint and orange zest before serving time. You can even prepare it in a Jello salad mold, individual custard cups, or in a 9″ square dish, so you can make this salad your own! Here’s how to make it.

Scroll Down For A Printable Recipe Card At The Bottom Of The Page

Making This Salad Is EASY!

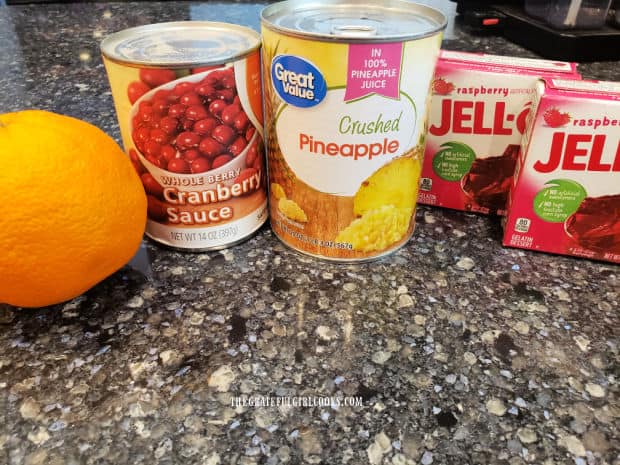
You only need 4 ingredients to make this cranberry pineapple Jello salad. They are 6 ounces raspberry gelatin mix, a large can of crushed pineapple, a can of whole berry cranberry sauce, and the grated zest of an orange. That’s all, and it only takes about 10 minutes or less to prepare! You can choose to garnish the finished salad, of course, but these 4 ingredients are all you will need to make this delicious salad.

Orange zest, whole cranberry sauce, crushed pineapple and raspberry gelatin are the ingredients needed.

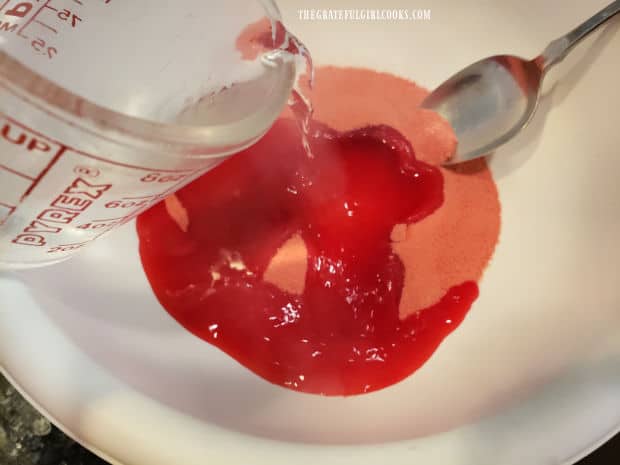
Place the raspberry gelatin powder in a large mixing bowl. Add a cup of boiling water, and stir these two ingredients for 2 minutes, to allow time for the gelatin to fully dissolve. Once dissolved, pour in a half cup of very cold water, and stir to combine.

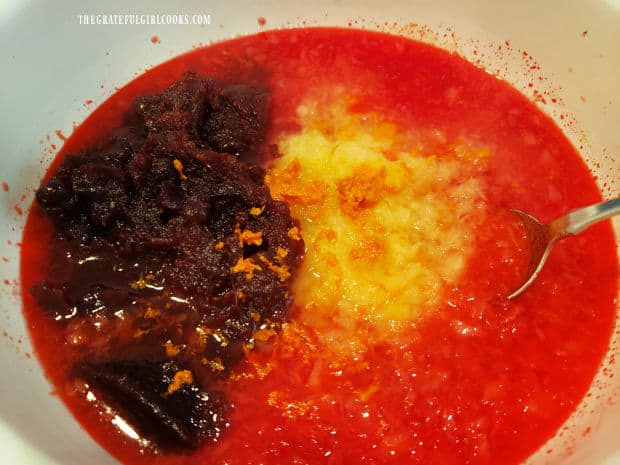
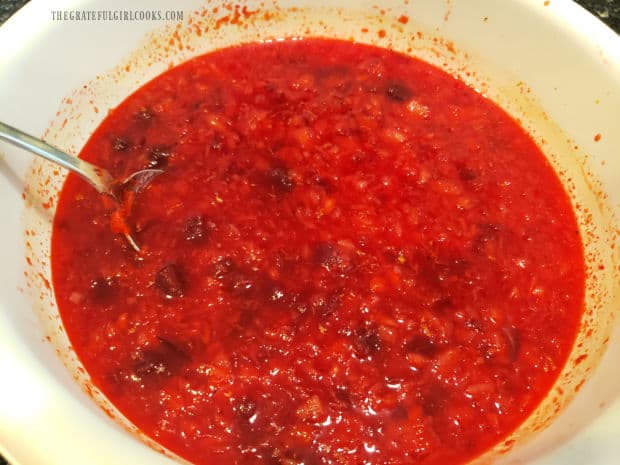
Add the canned pineapple (including juice), whole berry cranberry sauce, and the finely grated zest of an orange. Stir well, until all the jello salad ingredients have been well combined. Hot water is stirred into the raspberry gelatin powder and stirred to dissolve powder.Whole berry cranberry sauce, orange zest and crushed pineapple are added to jello mixture.The cranberry pineapple jello salad mixture is combined and ready to pour into serving dish.

Prepare The Gelatin Salad Mold Or Other Dishes

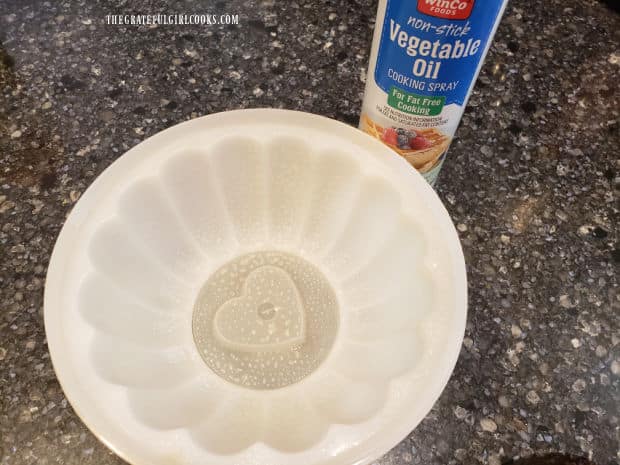
You have three options for dishes to use to hold the Jello. Lightly coat the bottom and sides of the dish(es) you use with non-stick baking spray before adding the Jello salad. For this recipe you can use either a 6 cup Jello mold, individual custard cups (4 ounce), or a 9″ square pan. NOTE: using small custard cups will yield aprox.16 servings, rather than 8 using the other options).

NOTE: I’ve also successfully used a 5 cup gelatin mold (as seen in the photo below). You will have extra jello left over, but can pour the extra into individual custard cups. I did this to show you another option for serving this salad in individual portions.

After spraying the dish you will be using, pour the Jello mixture into the dish. Lightly cover the dish(es) with plastic wrap, and refrigerate for at least 6 hours until well-chilled and firm. You can also make the salad a couple days ahead of serving time, if necessary, for convenience.

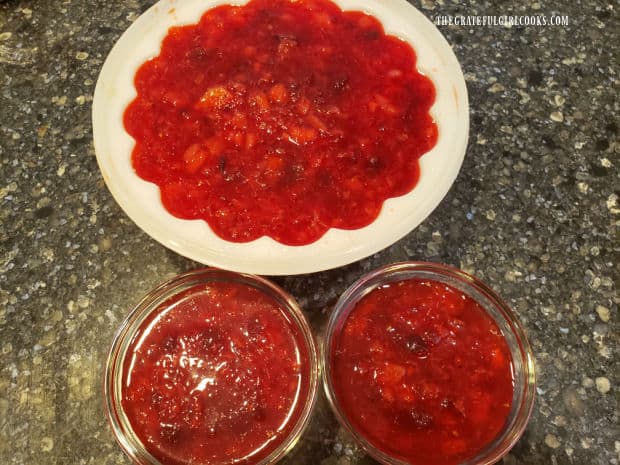
Jello salad mold (or other dishes) is coated with non-stick spray before adding jello.Jello mold and 2 custard cups, filled with cranberry pineapple jello salad, ready to refrigerate.

Releasing The Jello From The Salad Mold For Serving

If using a 9″ square pan or individual custard dishes, you can simple serve the cranberry pineapple Jello salad after it has been refrigerated for at least 6 hours. If you’re using a Jello mold, you will need to carefully unmold it before serving.

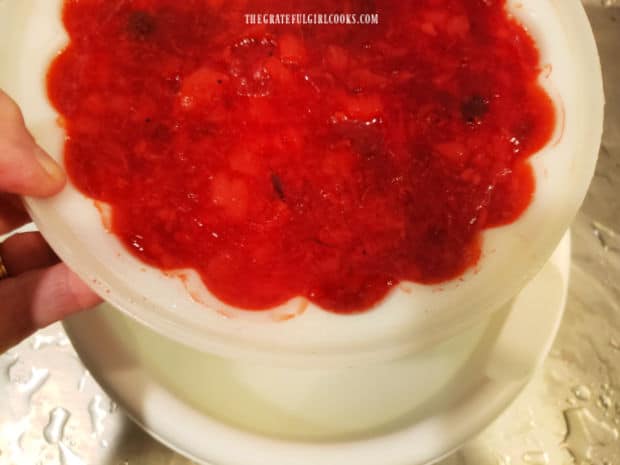
To unmold the salad, place very hot water in a large bowl. Holding the Jello mold with both hands, gently submerge it about 2/3 of the way into the hot water. Be careful to not let any water go over the top edge of the Jello mold. Hold the salad mold in the hot water for approximately 30 seconds, then remove it from the water.

Place your serving platter upside down on top of the open part. Hold the platter and Jello mold together with both hands, and carefully flip it over. The salad should release and invert onto the platter. If for some reason it doesn’t come out of the Jello mold immediately, repeat the hot water immersion and try again until it comes out.

Jello salad mold is submerged 2/3 of the way in hot water to help release jello from sides.

Serve The Cranberry Pineapple Jello Salad

The cranberry pineapple Jello salad should be served immediately after it’s been removed from the mold. Slice the salad into pie-shaped wedges, or if using a 9″ square pan, cut into squares for serving.

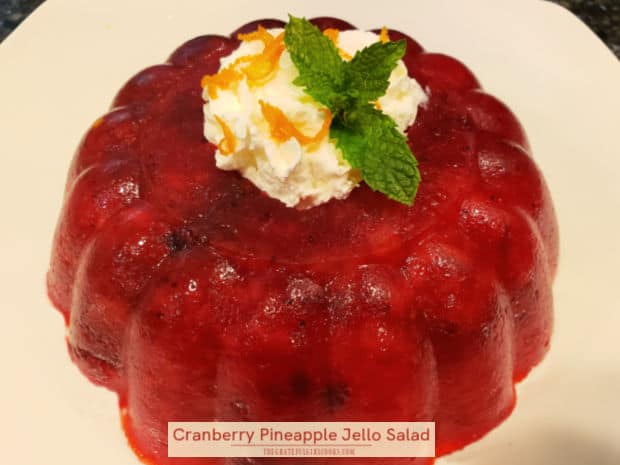
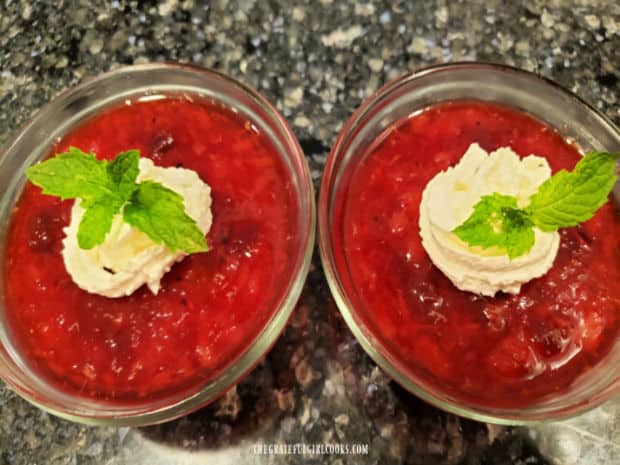
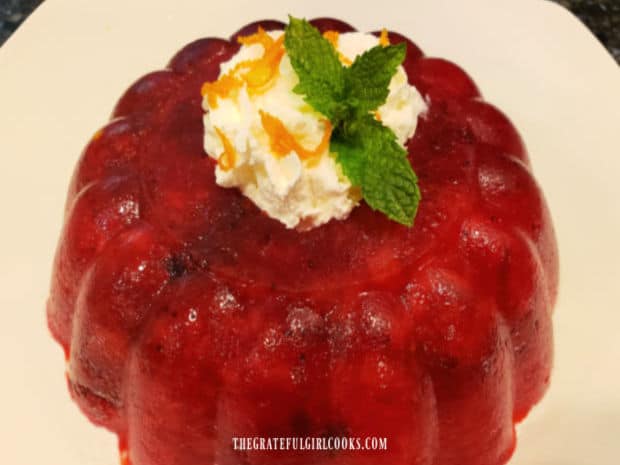
If you choose to serve this salad with a beautiful garnish, top the salad (or each portion) with whipped cream, a mint sprig and additional orange zest. The garnish will add extra color and flavor to the presentation of this tasty Jello salad!

Two custard cups of jello salad, topped with whipped cream, mint and orange zest.Cranberry Pineapple Jello Salad, out of plastic mold, topped with whipped cream, mint and orange zest.

I’m confident you’re going to enjoy this cranberry pineapple Jello salad for the holidays or any ol’ time of year! It’s so simple to make, and truly does taste wonderful! Thanks for taking the time to stop by, and I hope you’ll come back soon. Take care, may God bless you, and have a GREAT day!

Looking For More HOLIDAY SIDE DISH Recipes?

You can find ALL of my recipes in the Recipe Index, which is located at the top of the page. I have lots of delicious side dish recipes that are perfect holiday recipes (or any day, for that matter). They include:

Interested In More Recipes?

Thank you for visiting this website. I appreciate you using some of your valuable time to do soIf you’re interested, I publish a newsletter 2 times per month (1st and 15th) with all the latest recipes, and other fun info. I would be honored to have you join our growing list of subscribers, so you never miss a great recipe!
There is a Newsletter subscription box on the top right side (or bottom) of each blog post, depending on the device you use, where you can easily submit your e-mail address (only) to be included in my mailing list.

You Can Also Find Me On Social Media:

Facebook page: The Grateful Girl Cooks!
Pinterest:
The Grateful Girl Cooks!
Instagram:
jbatthegratefulgirlcooks

Author's signature

Original recipe source: Sara, at http://www.dinneratthezoo.com/cranberry-pineapple-gelatin-mold/

↓↓ PRINTABLE RECIPE BELOW ↓↓

0 from 0 votes
Cranberry Pineapple Jello Salad
Prep Time
10 mins
Cook Time
0 mins
Inactive Refrigeration Time
6 hrs
Total Time
6 hrs 10 mins
 

Cranberry Pineapple Jello Salad is a delicious dish for the holidays or any time! Only 4 ingredients and minimum prep time needed to make it!

Category: Salad/Side Dish
Cuisine: American
Keyword: cranberry pineapple jello salad
Servings: 8
Calories Per Serving: 204 kcal
Author: JB @ The Grateful Girl Cooks!
Ingredients
  • 6 ounces raspberry gelatin 1 large box or 2 small boxes
  • 20 ounce can crushed pineapple do not drain!
  • 14 ounce can whole berry cranberry sauce
  • 1 zest of one orange
OPTIONAL GARNISHES: whipped cream, orange zest, fresh mint sprig
    Instructions
    1. Place jello mix in large mixing bowl. Add 1 cup boiling water; stir for 2 minutes, to allow time for gelatin to fully dissolve. Pour in ½ cup cold water; stir to combine.

    2. Add pineapple (including juice), cranberry sauce, and grated orange zest. Stir well, until all ingredients have been well-combined.

    3. Lightly coat bottom and sides of the dish(es) you use with non-stick baking spray. Pour jello into prepared dish(es). Lightly cover with plastic wrap; refrigerate at least 6 hours until well-chilled and firm. TIP: You can make this salad a couple days in advance, if necessary.

    4. To unmold jello: Place hot water in a large bowl. Holding jello mold with both hands, gently submerge salad mold about ⅔ of the way in the water. Be careful to not let water go over top edge of salad mold. Hold salad mold in hot water for approx. 30 seconds, then remove. Place serving platter upside down on top of the open part of mold. Hold platter and jello mold tightly together with both hands; carefully flip it over. Salad should release and invert onto the platter. If it doesn't come out of salad mold right away, repeat hot water immersion and try again until it comes out.

    5. If desired, garnish salad with whipped cream, a mint sprig and additional orange zest. Cut into slices and serve. Cover/refrigerate leftovers.

    Recipe Notes

    Caloric calculation does NOT include optional garnishes and is based on eight total servings. If using only 4 ounce custard cups, you will have approx. 16 servings.

    Nutrition Facts
    Cranberry Pineapple Jello Salad
    Amount Per Serving (1 slice (1/8 of total))
    Calories 204 Calories from Fat 2
    % Daily Value*
    Fat 0.2g0%
    Saturated Fat 0.01g0%
    Polyunsaturated Fat 0.04g
    Monounsaturated Fat 0.01g
    Sodium 102mg4%
    Potassium 106mg3%
    Carbohydrates 51g17%
    Fiber 2g8%
    Sugar 44g49%
    Protein 2g4%
    Vitamin A 63IU1%
    Vitamin C 9mg11%
    Calcium 16mg2%
    Iron 0.4mg2%
    * Percent Daily Values are based on a 2000 calorie diet.

    Here’s one more to pin on your Pinterest boards!Cranberry Pineapple Jello Salad is a delicious dish for the holidays or any time! Only 4 ingredients and minimum prep time needed to make it!

    Classic Turkey Croquettes

    Use leftover turkey to make Classic Turkey Croquettes! An old diner favorite, with turkey, potatoes and spices, baked and topped with gravy.
    Use leftover turkey to make Classic Turkey Croquettes! An old diner favorite, with turkey, potatoes and spices, baked and topped with gravy.

    After Thanksgiving has come and gone, and all the turkey sandwiches have been enjoyed, do you ever glance at the remaining turkey meat leftover and wonder what to do with the rest of it?

    Well, today I want to share with you a recipe for classic turkey croquettes, that are a perfect solution for that leftover turkey!

    What Is A CROQUETTE?

    First let’s talk about what a “croquette” is, ok? Many countries have their own version, but the word “croquette” has French origins, and comes from the word “croquer” which means “to crunch”. There are recipes for croquettes that date back to the 17th century!

    Croquettes typically contain meat, seafood or veggies, mixed with a thick “binder” to hold it all together, like potatoes, bread or sauces. They can be shaped into balls or oval disks, and are usually breaded and then deep fried. *Info source credit here.*

    Apparently, croquettes started becoming popular in the U.S. in the early 1900’s and were a common, but popular diner meal.

    I originally found this printed recipe taped onto an index card in an old recipe box. There was no mention on the card of the source, so I am grateful for whoever came up with this yummy recipe originally.

    These turkey croquettes are good old comfort food at its best! Here’s how to make classic turkey croquettes.

    Scroll Down For A Printable Recipe Card At The Bottom Of The Page

    Prepare Potatoes For The Filling

    The first thing I do when preparing this recipe is to preheat the oven to  350°F. and cook the potatoes. Now… if you just happen to have 2 cups of mashed potatoes lying around, by all means use them! I typically don’t, so I make them from scratch.

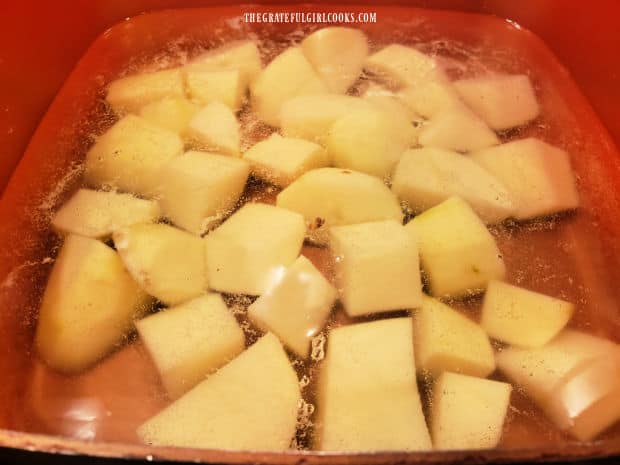
    You’ll need 2 cups of mashed potatoes for this recipe, which is the equivalent of about 3 medium-sized russet potatoes. Peel the potatoes, then cut them into small chunks. Place them in a large saucepan and cover them with water.

    Bring the water to a full boil on medium-high heat, and then cook the potatoes until they’re tender. This usually takes about 15 minutes, and you can check for tenderness by inserting a knife into a potato chunk. It should glide right into the potato, if tender.

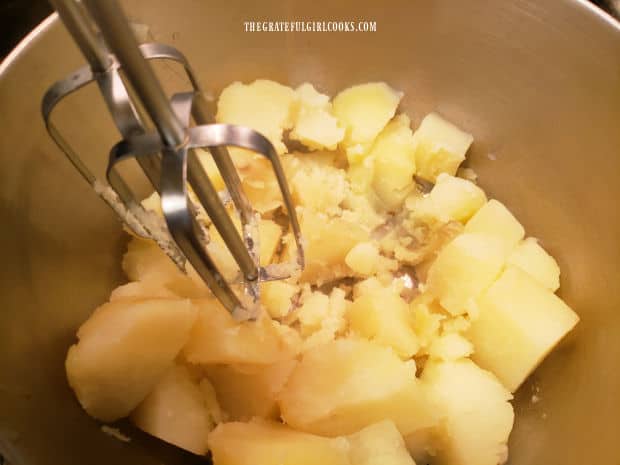
    Drain the potatoes, then mash them, without adding any butter or milk. Mash by hand or by using an electric mixer until the potatoes are lump-free. Set aside.

    Peeled and cubed potatoes are boiled until tender.The cooked potatoes are mashed with an electric mixer until lump-free.

    Prepare The Croquette Ingredients

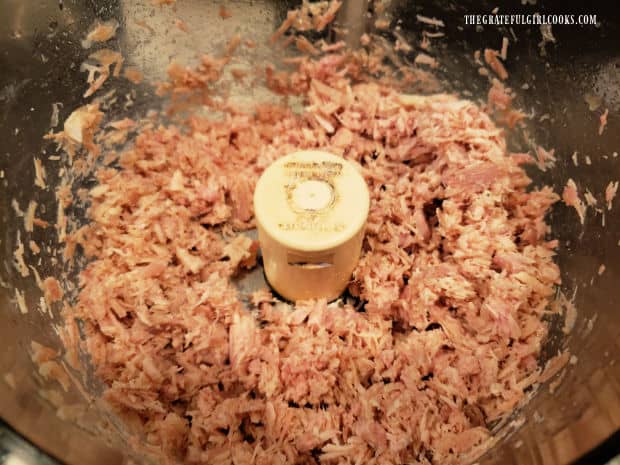
    Place the leftover pieces of turkey into a food processor and pulse about 6-8 times or until the meat become minced into very small pieces.

    If you do not have access to a food processor, finely mince the turkey meat by hand with a sharp knife. Place 2 cups of the minced turkey in a large mixing bowl. 

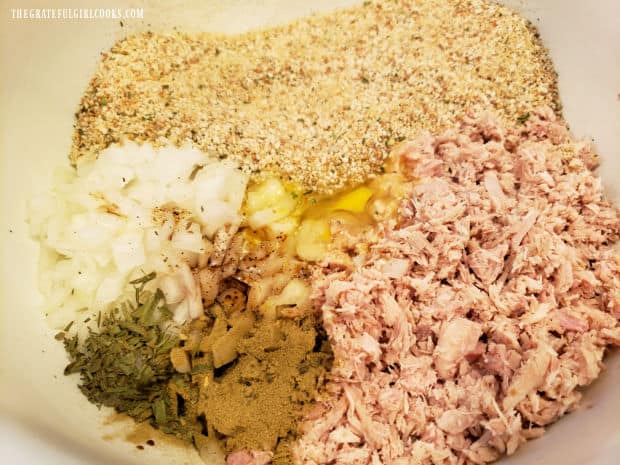
    Add chopped onions, Italian bread crumbs (reserving part for later), salt, pepper, tarragon, sage, Worcestershire sauce and an egg to the turkey.

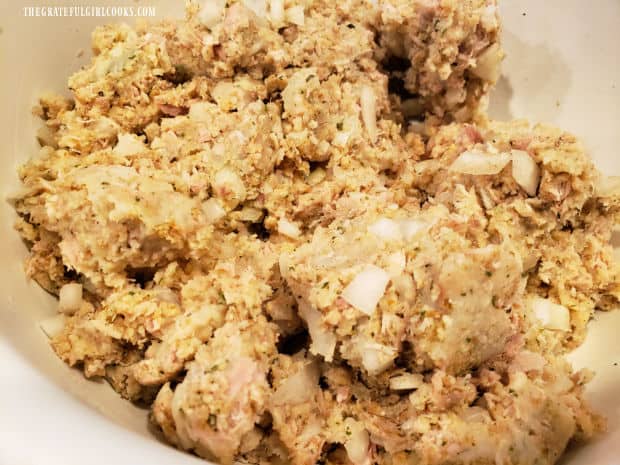
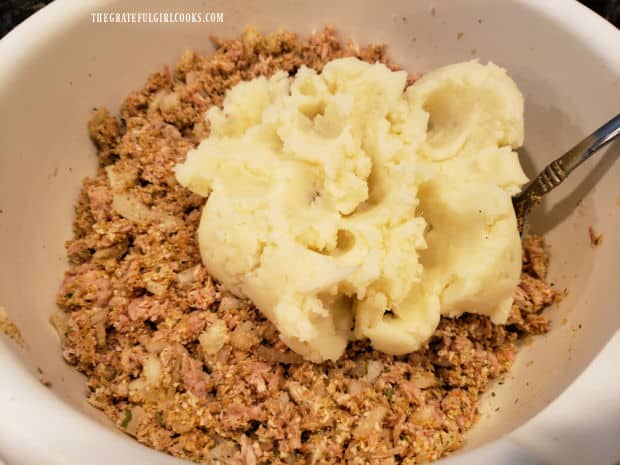
    Stir these ingredients well, to fully combine them. Once combined, add the mashed potatoes to the mixture, and fold (or gently stir) them in, until fully incorporated.

    Pieces of leftover turkey are minced, using a food processor.Turkey, bread crumbs, egg, onions and spices are placed in large mixing bowl and combined.Mashed potatoes are added and folded in to the meat mixture for turkey croquettes.

    Final Step

    After folding in the mashed potatoes, the turkey croquette mixture will be mostly “bound together”, but might still be a bit crumbly. This is where you need to add a small amount of turkey or chicken stock, ONLY UNTIL THE MIXTURE BINDS TOGETHER.

    The recipe calls for 1/2 cup of stock, but it usually does not take all of it to bind the ingredients together.

    Add a little bit of the stock at a time, and stir after each addition. You need the meat mixture to easily be formed into a meatball shape, where the ingredients will hold together.

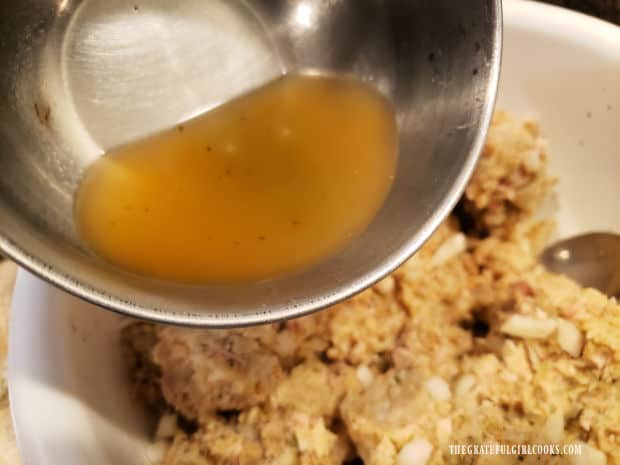
    Potatoes have been added to the turkey croquette mixture and combined.A small amount of turkey or chicken stock is added to help bind the turkey mixture together.

    Shape The Turkey Croquettes

    Form the turkey croquettes into a meatball shape, by scooping out a generous heaping Tablespoon of the meat mixture and shape it into a ball using your hands to roll and form it.

    Place each croquette onto wax paper, and continue until all the turkey mixture is used. The recipe, as written, will yield somewhere between 16-20 meatballs, but I usually get 19!

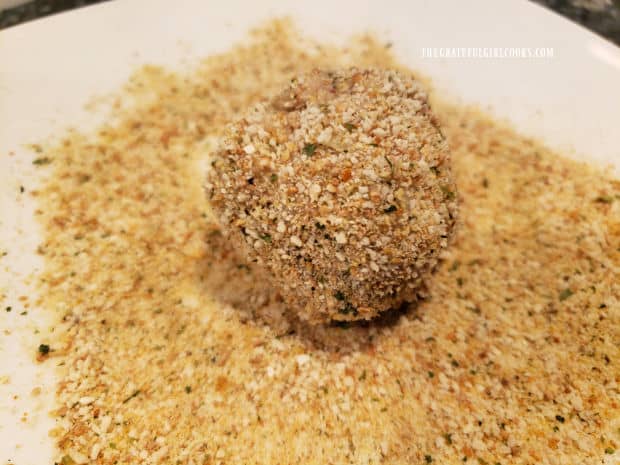
    Place the reserved bread crumbs on a small plate, and roll each of the turkey croquettes around in it, until all sides are coated with the bread crumbs. 

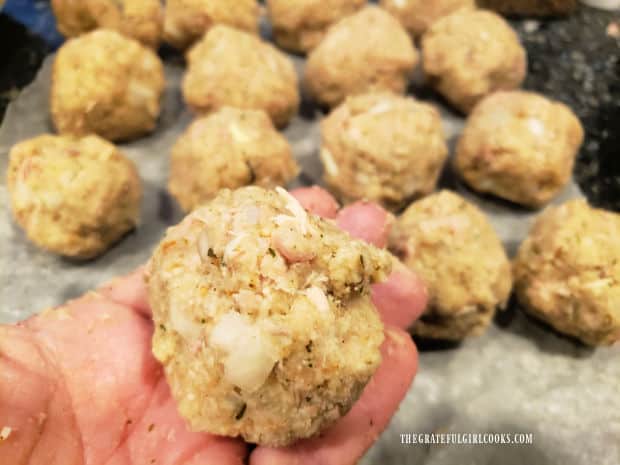
    Heaping Tablespoons of turkey mixture is shaped into round balls.Each of the classic turkey croquettes are rolled in Italian bread crumbs before baking.

    Ready To Bake

    Place the bread crumb-coated turkey croquettes onto an ungreased baking sheet, leaving a little space between each one.

    Bake the croquettes at 350°F. for 28-30 minutes (mine usually take 30 minutes!) Please note that the baked croquettes will not brown a lot, so don’t expect that!

    TIP: If you want to freeze some of the classic turkey croquettes for later use, do this BEFORE baking. Place the bread crumb-coated croquettes on a baking sheet and freeze for several hours until solidly frozen.

    Remove them from the baking sheet and place them in a freezer bag, label with oven temps, etc., and save for another day!

    Bread crumb-coated turkey croquettes are placed on baking sheet to cook in the oven.One of the baked classic turkey croquettes after coming out of the oven.

    Serving Classic Turkey Croquettes

    Classic turkey croquettes are always topped with hot chicken or turkey gravy to serve. Please note that I have not included a gravy recipe in the written recipe below.

    You can use your own homemade chicken or turkey gravy, OR you can use purchased bottled gravy or mix at the grocery store. The type of gravy you use is entirely YOUR CHOICE, but just know that you really will want that delicious, hot gravy on top!

    Place the hot croquettes on each plate, then spoon gravy over the top of each one, to serve. If you prefer store bought or making your own, by all means, use it! Whatever is the most convenient and the easiest for you, is the best plan! No judgement here.

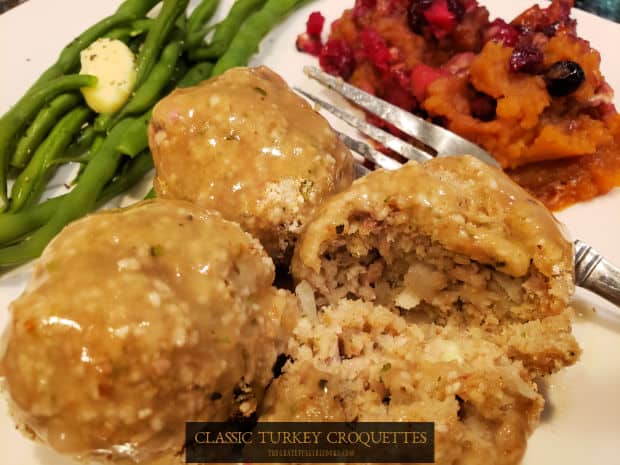
    We enjoy eating classic turkey croquettes served with fresh green beans (from our garden!), and Cranberry Caramel Apple Yams on the side. This meal “felt” like Thanksgiving, with all those great colors and flavors. YUM YUM!

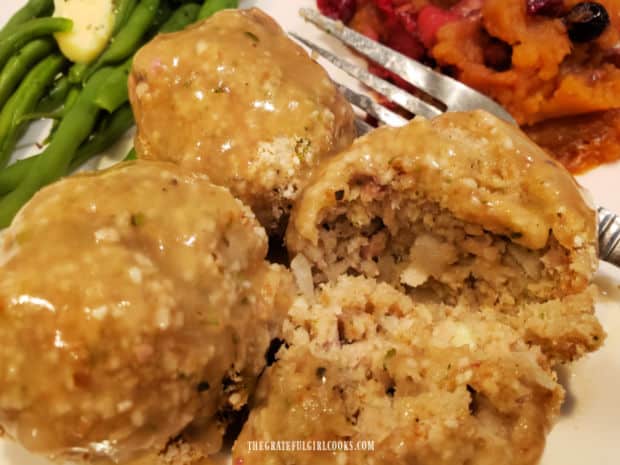
    Classic turkey croquettes are covered with gravy, and served with green beans and yams on the side.One of the classic turkey croquettes is cut in half to reveal the inside.

    I hope you will consider trying these classic turkey croquettes, and trust you will enjoy them like we do! They can easily be reheated in the microwave, which makes perfect for a quick lunch the next day or two!

    We eat part of them for dinner, have a few leftovers for lunch the next day or two, plus I freeze about half of them (before baking) to use for later meals. It’s really easy on the ol’ budget that way, too!

    Thank you so much for stopping by, and I hope you will come back soon for more family-friendly recipes. Take care, may God bless you with much to be thankful for, and have a GREAT day!

    Looking For More TURKEY Recipes?

    You can find ALL of my recipes in the Recipe Index, which is located at the top of the page. I have some truly delicious recipes using turkey, including:

    Want More Recipes? Get My FREE Newsletter!

    I publish a newsletter 2 times per month (1st and 15th) with lots of recipes, tips, etc..
    Would you like to join our growing list of subscribers?

    There is a Newsletter subscription box on the top right (or bottom) of each blog post, depending on the device you use.
    You can submit your e-mail address there, to be added to my mailing list.

    Find Me On Social Media:

    Facebook page: The Grateful Girl Cooks!
    Pinterest:
    The Grateful Girl Cooks!
    Instagram:
    jbatthegratefulgirlcooks

    Author's signature

    Original recipe source: unknown

    ↓↓ PRINTABLE RECIPE BELOW ↓↓

    0 from 0 votes
    Classic Turkey Croquettes
    Prep Time
    25 mins
    Cook Time
    30 mins
    Total Time
    55 mins
     

    Use leftover turkey to make Classic Turkey Croquettes! An old diner favorite, with turkey, potatoes and spices, baked and topped with gravy.

    Category: Main Course
    Cuisine: American
    Keyword: classic turkey croquettes
    Servings: 6 (3 per serving)
    Calories Per Serving: 277 kcal
    Author: JB @ The Grateful Girl Cooks!
    Ingredients
    • 2 cups cooked turkey meat minced
    • 1 cup yellow onions chopped
    • 2 cups Italian bread crumbs (or plain) DIVIDED USE!
    • 2 teaspoons Worcestershire sauce
    • ½ teaspoon poultry seasoning (or ground sage)
    • ½ teaspoon dried tarragon
    • 1 large egg lightly beaten
    • ¼ teaspoon salt and pepper (EACH)
    • 2 cups mashed russet potatoes approx. 3 medium
    • ½ cup turkey or chicken stock use only enough to bind meat
    Top croquettes with your choice of homemade or purchased turkey or chicken gravy (heated)
      Instructions
      1. Preheat oven to  350°F.

      2. Peel potatoes; cut into small chunks; place them in a large saucepan/cover with water. Bring to full boil on medium-high heat. Cook until they're tender (approx. 15 min.). Check tenderness by inserting knife into potato (should glide right into potato). Drain potatoes, then mash, by hand or mixer until lump-free. Set aside.

      3. Place cooked turkey into food processor; pulse 6-8 times or until turkey is minced into small pieces, OR mince turkey by hand with a sharp knife. Put turkey in large bowl. Add onions, 1½ cups bread crumbs (reserving ½ cup for later), salt, pepper, tarragon, sage, Worcestershire and egg to bowl. Stir well, to combine. Add mashed potatoes; fold (or gently stir) them in, until fully incorporated.

      4. Add turkey/chicken stock a little bit at a time, stirring it into turkey mixture ONLY until turkey mixture binds together (usually doesn't take all of it to bind the ingredients together.

      5. Scoop a generous heaping Tablespoon of turkey mixture and shape it into a ball using hands to roll/form it. Place croquette onto wax paper; continue until all turkey mixture is gone. **Recipe (as written) yields between 16-20 croquettes.

      6. Place reserved ½ cup bread crumbs on a small plate. Roll each turkey croquette in it, until coated on all sides with bread crumbs.

      7. Put croquettes on ungreased baking sheet, leaving space between each one. Bake at 350°F. for 28-30 minutes. Note that baked croquettes will not brown a lot. **TIP: If you want to freeze some croquettes for later use, do this BEFORE baking. Place bread crumb-coated croquettes on foil-lined baking sheet. Freeze several hours until solidly frozen. Remove croquettes from foil; place in a freezer bag, label with oven temps, etc., and save for another day!

      8. To serve: Classic turkey croquettes should be topped with turkey or chicken gravy to serve. Use your own homemade or purchased gravy for this. Place baked croquettes on serving plates. Spoon hot gravy over each croquette to serve.

      Recipe Notes

      Caloric calculation was made using 3 croquettes per serving. Gravy to top croquettes was not included in the Caloric calculation, as different varieties may be used.
      Nutrition Facts
      Classic Turkey Croquettes
      Amount Per Serving (1 (3 croquettes))
      Calories 277 Calories from Fat 36
      % Daily Value*
      Fat 4g6%
      Saturated Fat 1g6%
      Trans Fat 0.01g
      Polyunsaturated Fat 1g
      Monounsaturated Fat 1g
      Cholesterol 63mg21%
      Sodium 756mg33%
      Potassium 504mg14%
      Carbohydrates 40g13%
      Fiber 3g13%
      Sugar 4g4%
      Protein 19g38%
      Vitamin A 151IU3%
      Vitamin C 6mg7%
      Calcium 102mg10%
      Iron 3mg17%
      * Percent Daily Values are based on a 2000 calorie diet.

      Here’s one more to pin on your Pinterest boards!Use leftover turkey to make Classic Turkey Croquettes! An old diner favorite, with turkey, potatoes and spices, baked and topped with gravy.

      Pumpkin Cream Cheese Roll

      Make a delicious Pumpkin Cream Cheese Roll for the holidays (or any time)! This classic dessert has sweet cream cheese filling rolled inside!
      Make a delicious Pumpkin Cream Cheese Roll for the holidays (or any time)! This classic dessert has sweet cream cheese filling rolled inside!

      I don’t know about you, but I LOVE the classic Fall flavors of pumpkin, cinnamon, nutmeg and cloves! This dessert takes those flavors and imports them into a thin cake that is spread with sweet cream cheese filling and rolled into a long “log” of sorts. After chilling, the pumpkin roll is sliced, revealing the spiral shaped cream cheese filling.

      This pumpkin cream cheese roll not only LOOKS good, it tastes WONDERFUL! NOTE: Don’t be scared off by the amount of photos or the long recipe card instructions! I only want to give you explicit instructions so you, too, can be confident in making this recipe! Today I want to share all this so you see how simple it actually is to make this lip-smackin’ dessert!

      My youngest sister Joni recently visited us in Oregon from her home in Georgia. I asked her before she got here to email me the recipe she’s used for years to make pumpkin rolls, and told her we’d make it together (and photograph the steps), so I could share it here on my blog. We had fun making this pumpkin roll, and shared it with our extended family at a dessert night. So… here’s how to make a delicious pumpkin cream cheese roll for holidays, Fall, or any time of year!

      Scroll Down For A Printable Recipe Card At The Bottom Of The Page

      First Things First

      Preheat your oven to 350°F. while you prepare the pumpkin roll. Grease and flour a 10″ by 15″ cookie sheet or jelly roll pan GENEROUSLY. I can’t say this enough. You need to generously grease then generously flour the bottom and sides of the pan, so the cake will release easier when you flip it out of the pan later. This is the method I used in the photos below.

      Another option for preparing the baking sheet is to lightly grease the pan, then place a large sheet of parchment paper in the pan (to fit). Use softened butter to then generously “grease” the parchment paper (all of it) before adding the pumpkin batter to the pan.

      Make The Pumpkin Batter

      Beat eggs and granulated sugar using an electric mixer on High speed in a large bowl (or stand mixer bowl). Continue beating these two ingredients for about 1-2 minutes until well-combined and the sugar has dissolved.

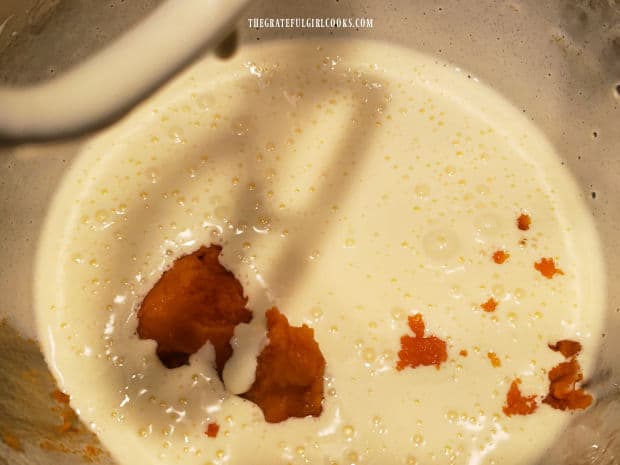
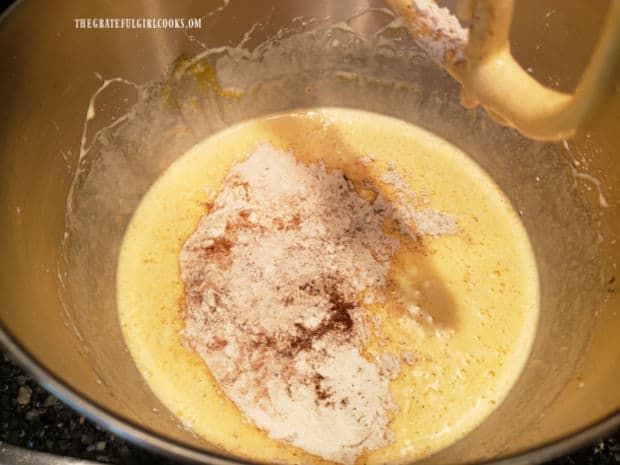
      Mix in pumpkin puree and lemon juice on Low speed only until they have been incorporated into the egg mixture. In a separate medium bowl, whisk together flour, baking powder, salt, nutmeg, cinnamon and cloves. STIR the dry ingredients into the pumpkin batter until combined.

      Eggs and sugar are beaten with an electric mixer until sugar dissolves.Pumpkin puree and lemon juice are mixed into the egg mixture for the pumpkin roll batter.Flour, cinnamon, nutmeg, cloves and other ingredients are added to the pumpkin batter.

      Time To Bake!

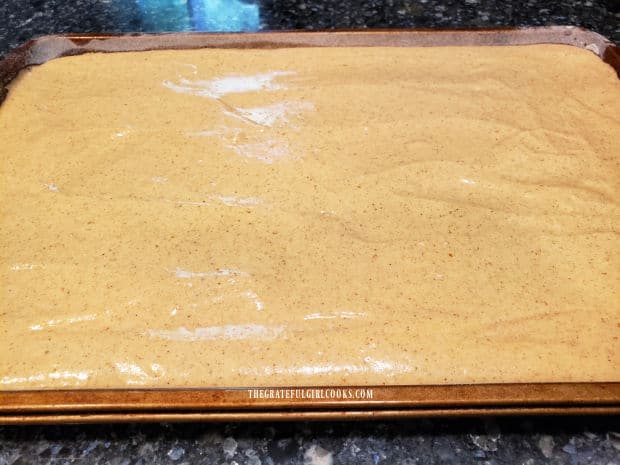
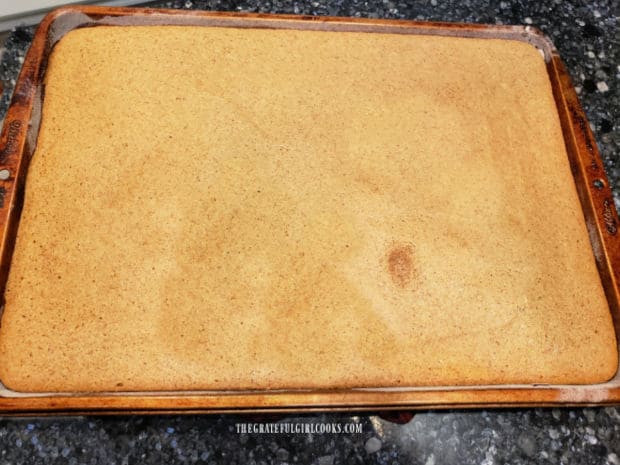
      Pour the pumpkin batter into the prepared baking pan, and spread it out, evenly filling the pan. Place the pan into a preheated 350° oven. Bake for 12-15 minutes, or until a toothpick inserted into the top/middle comes out clean. Another way to test for doneness is by lightly touching the surface of the cake with a finger. If the “cake” springs back, it should be done.

      Pumpkin roll batter is spread in a large greased/floured cookie sheet.

      Prepare Damp Towel For Cake While It’s Baking

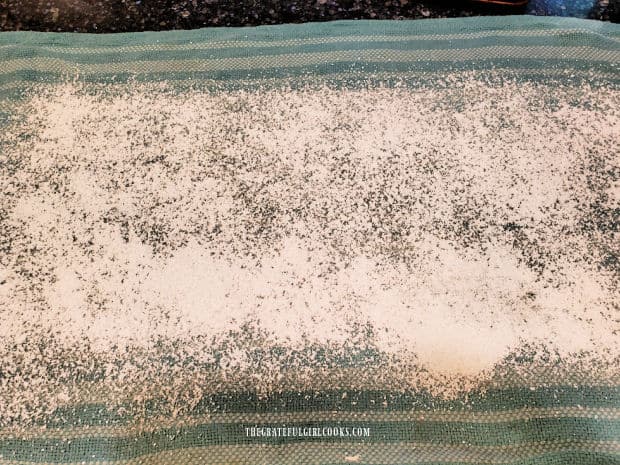
      A few minutes before the cake is done baking, wet a large kitchen dish towel with water and then wring the excess water out. Lay the very damp towel on the kitchen counter and GENEROUSLY sift powdered sugar over the surface. You want enough powdered sugar to be the same size/shape as the baking pan. The cake will be turned out onto the towel, and the powdered sugar will help the cake to not stick.

      Sifted powdered sugar is used to cover a damp kitchen towel where the baked cake will go.

      Remove Cake From Pan Immediately After Baking

      As soon as the cake is finished baking, check for doneness, and remove the pan from the oven. Use an offset spatula (or regular long one) to loosen all the edges (sides and under) the cake. You may find you need to really get the spatula under that pumpkin roll to loosen it from the pan. Carefully slide the spatula around under the cake, trying not to cut up the cake with the spatula as much as possible. NOTE: If using the alternative parchment paper method, simply go around the edges of the cake to loosen from the sides.

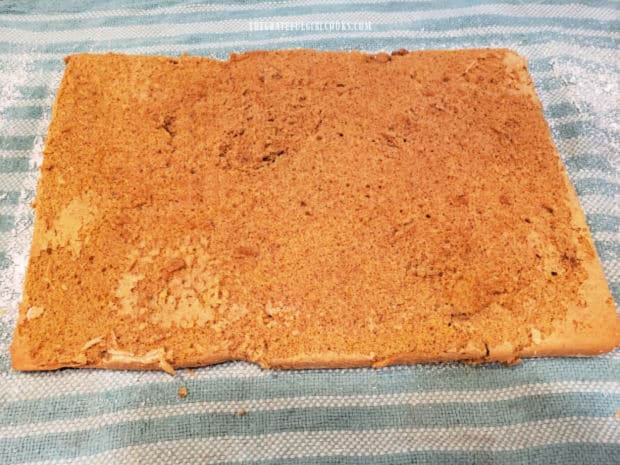
      Using oven mitts, hold the pan on both of the short sides of the pan, and immediately invert (flip over) the pan of “loosened” cake onto the powdered sugar on the damp towel. It may not look perfect, but remember that this “top surface” will be covered with the cream cheese filling later! NOTE: Remove the parchment paper carefully (if you used that method). NOW it’s time to roll the cake up while it is still hot.

      The pumpkin cake is removed from the oven after baking, and edges are loosened from pan.Pumpkin cake is inverted onto the powdered sugar lined damp dish towel while still hot.

      Rolling Up The Cake With The Towel Inside

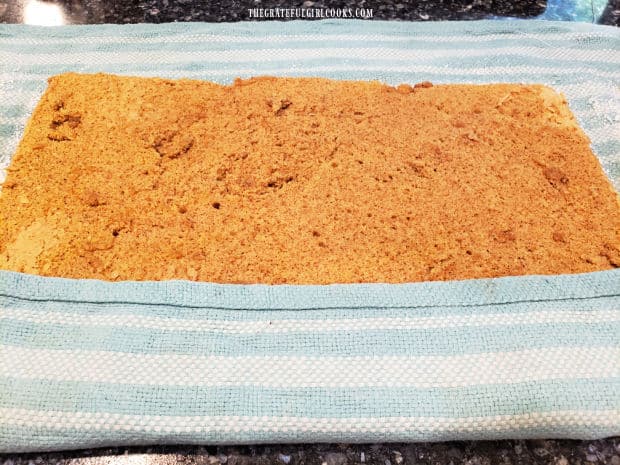
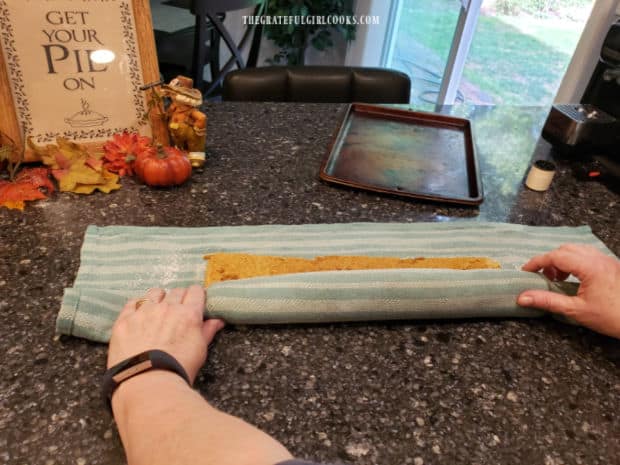
      Beginning with the LONG side of the pumpkin roll, fold the still damp towel over the bottom edge of the cake (about 2″ or so). Carefully and tightly roll the towel INTO the cake as you go. Roll until it is completely rolled up and the “seam” side is on the bottom.

      Once rolled (with the towel inside), let the pumpkin roll sit and rest/cool on the counter for 30 minutes, before proceeding to the next step.

      The damp dish towel is rolled up into the pumpkin cake to form a long roll.Finishing rolling up the damp dish towel and pumpkin cake into a log shape, before it rests.

      Fill the Pumpkin Roll And Roll Again

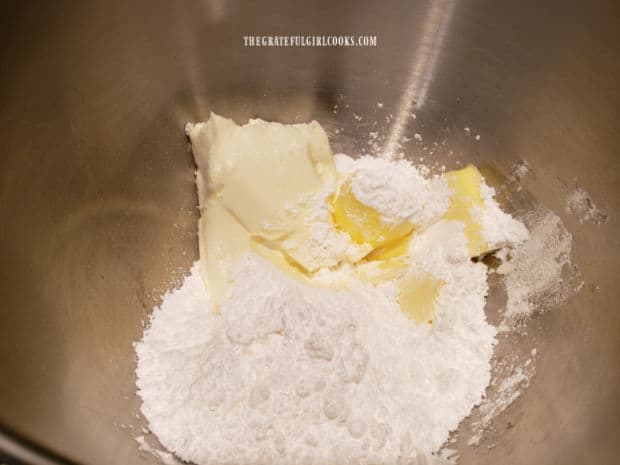
      Okay… once the cake is rolled in the towel and “resting”, it’s time to make the simple cream cheese filling! Place cream cheese, butter, a cup of powdered sugar and vanilla extract in a medium bowl. Use an electric mixer to beat these ingredients until smooth, fully combined and lump-free.

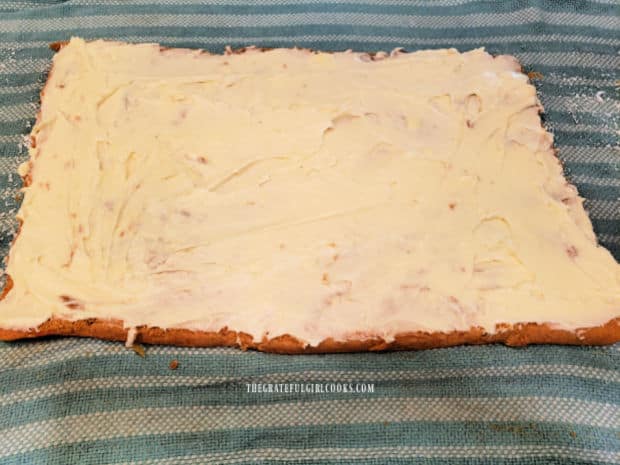
      After the pumpkin roll has cooled (rolled in the towel) for 30 minutes, carefully unroll the cake. Evenly spread the cream cheese filling over the surface of the cake, all the way to the edges.

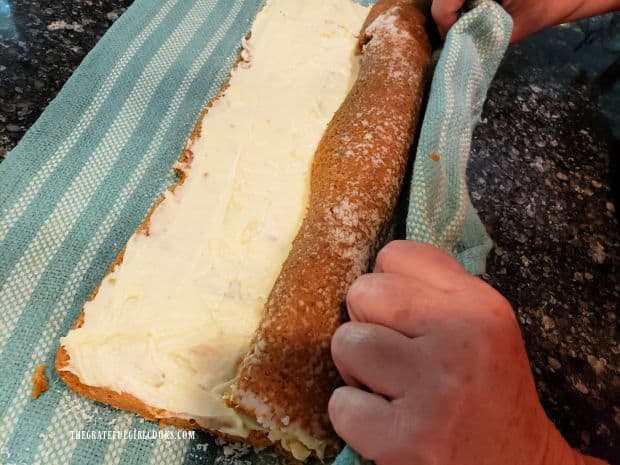
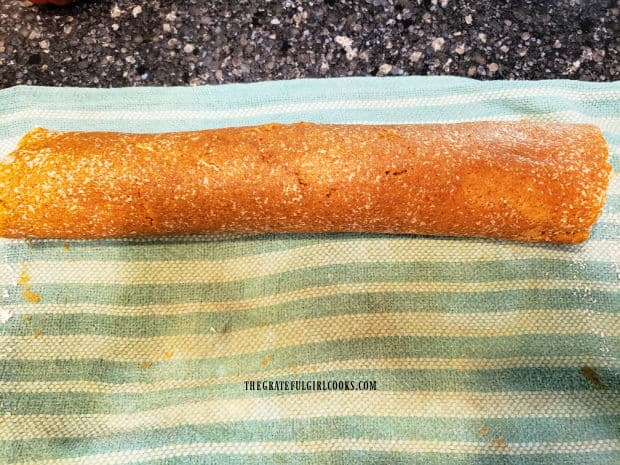
      Now you need to re-roll the cake, but this time only use the towel to help guide the rolling. You will now roll the cream cheese covered cake up tightly, starting again on the long side, but rolling the cake by itself (no towel IN the cake). The towel is simply used to help roll the cake as one long unit (see 3rd photo of my sister rolling it below). Your pumpkin roll should now be fully rolled up only as cake and filling.

      Cream cheese, butter, powdered sugar and vanilla are combined for pumpkin roll filling.The cream cheese filling is spread on the unrolled pumpkin cake after it has rested.Now the pumpkin cream cheese roll is re-rolled without the dish towel rolled up inside.

      Wrap And Chill for Best Results

      Carefully transfer the finished pumpkin roll to a large sheet of parchment paper and carefully seal the cake. Place the parchment paper-wrapped roll onto a large sheet of aluminum foil, and wrap and seal the package. At this point, you can either freeze the pumpkin roll to be thawed later OR refrigerate it to serve it chilled that same day.

      This pumpkin cream cheese roll freezes well, and only needs to thaw for 15-25 minutes before slicing and serving it.  This makes it very convenient to make this dessert ahead of time if that works best for you! When you want to enjoy the pumpkin roll, just pull it out of the freezer, unwrap, and let it thaw slightly! The pumpkin roll tastes best when served slightly chilled.

      The pumpkin cream cheese roll will now be well-wrapped and refrigerated or frozen before serving.
      Serve The Pumpkin Cream Cheese Roll

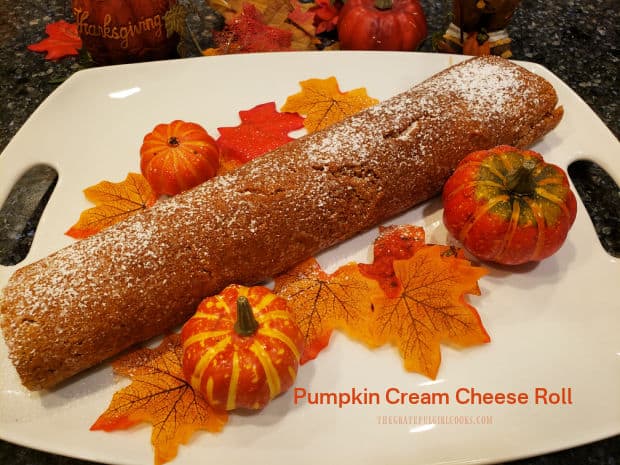
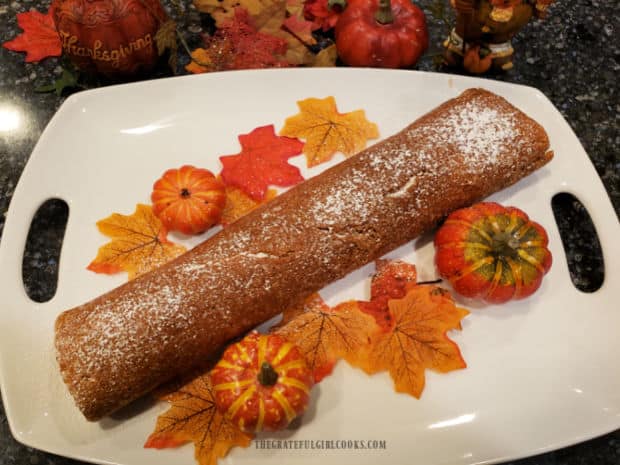
      Transfer the pumpkin cream cheese roll to a large serving platter, and give it a good dusting of sifted powdered sugar right before slicing. The cake may absorb some of the powdered sugar, so if you see that, simply sift a bit more on top for a light dusting! It’s so pretty to decorate the platter with some Autumn colors or garnishes of your choice to add to the Fall theme!

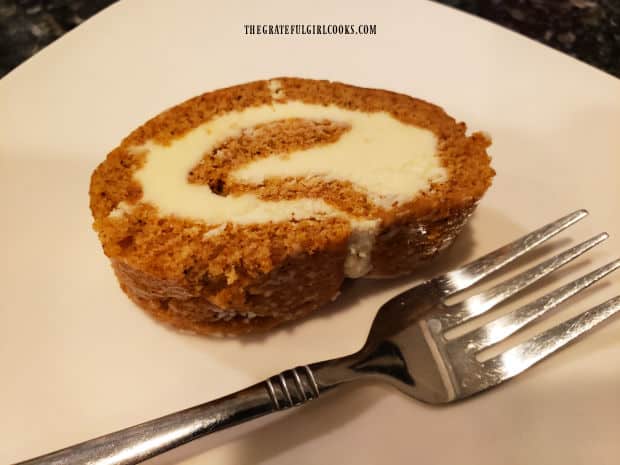
      Cut the pumpkin roll with a sharp knife into 10 slices, then serve, sliced side up! Once sliced, you will be able to see the spiraled cream cheese filling inside the pumpkin roll. The combination of the pumpkin flavored cake (seasoned with cinnamon, nutmeg and cloves) screams “Fall”, and the cream cheese filling sends it over the top! It’s so yummy, and we think it’s a perfect Fall or Thanksgiving dessert! Be sure to store any leftovers (wrapped well) in the refrigerator.

      The pumpkin cream cheese roll is sprinkled with powdered sugar before slicing to serve.A slice of the pumpkin cream cheese roll reveals the spiraled cream cheese filling inside.

      I hope you have the opportunity to make this fabulous pumpkin cream cheese roll for those you love, and trust you enjoy it’s great flavor! Thanks for taking time out of your busy day to stop by! I invite you to come back again soon for more family-friendly recipes. Take care, may God bless you, and have a GREAT day!

      Looking for More PUMPKIN Recipes?

      You can find ALL of my recipes in the Recipe Index, which is located at the top of the page. I have some delicious recipes featuring pumpkin to enjoy, including:

      Interested In More Recipes?

      Thank you for visiting this website. I appreciate you using some of your valuable time to do soIf you’re interested, I publish a newsletter 2 times per month (1st and 15th) with all the latest recipes, and other fun info. I would be honored to have you join our growing list of subscribers, so you never miss a great recipe!
      There is a Newsletter subscription box on the top right side (or bottom) of each blog post, depending on the device you use, where you can easily submit your e-mail address (only) to be included in my mailing list.

      You Can Also Find Me On Social Media:

      Facebook page: The Grateful Girl Cooks!
      Pinterest:
      The Grateful Girl Cooks!
      Instagram:
      jbatthegratefulgirlcooks

      Author's signature

      Original recipe source: my sister Joni (she does not remember where she got the recipe from, many years ago)

      ↓↓ PRINTABLE RECIPE BELOW ↓↓

      0 from 0 votes
      Pumpkin Cream Cheese Roll
      Prep Time
      10 mins
      Cook Time
      14 mins
      Resting Time (cooling)
      30 mins
      Total Time
      54 mins
       

      Make a delicious Pumpkin Cream Cheese Roll for the holidays (or any time)! This classic dessert has sweet cream cheese filling rolled inside!

      Category: Dessert, Holidays
      Cuisine: American
      Keyword: pumpkin cream cheese roll
      Servings: 10 slices
      Calories Per Serving: 272 kcal
      Author: JB @ The Grateful Girl Cooks!
      Ingredients
      For Pumpkin Roll:
      • 3 large eggs
      • 1 cup granulated sugar
      • cup pumpkin puree NOT pie filling!
      • 1 teaspoon lemon juice
      • ¾ cup all purpose flour
      • 1 teaspoon baking powder
      • ½ teaspoon salt
      • 1 teaspoon ground cloves
      • 1 teaspoon ground cinnamon
      • 1 teaspoon ground nutmeg
      • **damp dish towel and powdered sugar for dusting
      For Filling:
      • 8 ounces cream cheese softened
      • 4 Tablespoons butter softened
      • 1 cup powdered sugar
      • 1 teaspoon vanilla extract
      • powdered sugar for dusting
      Instructions
      1. Preheat oven to 350°F. Option #1: Generously grease/flour a 10" x 15" cookie sheet or jelly roll pan. Option#2: Lightly grease pan; place parchment paper in pan (to fit). Use butter to generously "grease" parchment paper (all of it).

      2. Beat eggs and sugar in large bowl with electric mixer on High. Continue beating for 1-2 minutes until well-combined/sugar dissolves. Add pumpkin and lemon juice. Beat on Low only until incorporated into egg mixture. In a separate bowl, whisk together flour, baking powder, salt, nutmeg, cinnamon and cloves. STIR this into pumpkin mixture until combined.

      3. Pour batter into prepared pan; spread it evenly in pan. Place in oven. Bake at 350°F for 12-15 minutes, or until a toothpick inserted into the top/middle comes out clean, OR lightly touching the cake surface with a finger. If cake springs back, it should be done.

      4. 3-4 minutes before cake is done, soak a kitchen dish towel with water; wring excess water out. Lay damp towel on counter; GENEROUSLY sift powdered sugar over towel in same size/shape as the baking pan. Cake will be turned out onto the towel; powdered sugar will help it to not stick.

      5. When cake is done, remove from oven and immediately use an offset or regular metal spatula to loosen all edges (sides and under) the cake. Carefully slide spatula around under cake, to loosen it as much as possible. NOTE: If using alternative parchment paper method, simply run spatula around edges of cake to loosen. Using oven mitts, hold pan on both short sides; immediately invert (flip over) pan of "loosened" cake onto powdered sugar on towel. It may not look perfect, but this will be covered with cream cheese filling later! NOTE: Peel parchment paper carefully off cake (if you used that method).

      6. Roll the cake while it's still hot. Beginning with the LONG side, fold damp towel over bottom edge of the cake (about 2"). Carefully and tightly roll towel INTO the cake, forming a log-shaped roll. Continue until fully rolled and "seam" side is on the bottom. Once rolled (with towel inside), let it cool for 30 minutes.

      7. While cake cools, place cream cheese, butter, a powdered sugar and vanilla in a medium bowl. Beat with electric mixer until combined/lump-free. After pumpkin roll has cooled for 30 minutes, carefully unroll cake. Evenly spread cream cheese filling over the top of the cake, all the way to the edges.

      8. Re-roll the cake, but this time only use the towel to help guide the rolling. Starting rolling again on the long side, but roll cake into itself (no towel IN the cake). Use the towel to help roll cake as one long unit, with seam on bottom.

      9. Carefully transfer pumpkin roll to parchment paper and wrap it, then cover with aluminum foil and seal. You can freeze the pumpkin roll at this point OR refrigerate it to serve later the same day. Note; If freezing, frozen roll needs to be thawed for 15-20 minutes before slicing.

      10. To serve: Place unwrapped chilled pumpkin roll on serving platter. Sift powdered sugar on top just before slicing. Cut pumpkin roll into 10 slices, then serve, with the sliced side up! Wrap any leftovers well, and store in refrigerator. Enjoy!

      Recipe Notes

      NOTE: Caloric calculation does not include additional powdered sugar used to sprinkle on the damp dish towel or dust the finished cake, as the amounts may vary per cook.

      Nutrition Facts
      Pumpkin Cream Cheese Roll
      Amount Per Serving (1 slice (1/10 of total))
      Calories 272 Calories from Fat 90
      % Daily Value*
      Fat 10g15%
      Saturated Fat 6g38%
      Trans Fat 0.2g
      Polyunsaturated Fat 1g
      Monounsaturated Fat 3g
      Cholesterol 80mg27%
      Sodium 257mg11%
      Potassium 154mg4%
      Carbohydrates 42g14%
      Fiber 1g4%
      Sugar 34g38%
      Protein 5g10%
      Vitamin A 1872IU37%
      Vitamin C 1mg1%
      Calcium 69mg7%
      Iron 1mg6%
      * Percent Daily Values are based on a 2000 calorie diet.

      Here’s one more to pin on your Pinterest boards!Make a delicious Pumpkin Cream Cheese Roll for the holidays (or any time)! This classic dessert has sweet cream cheese filling rolled inside!


      Cranberry Caramel Apple Yams

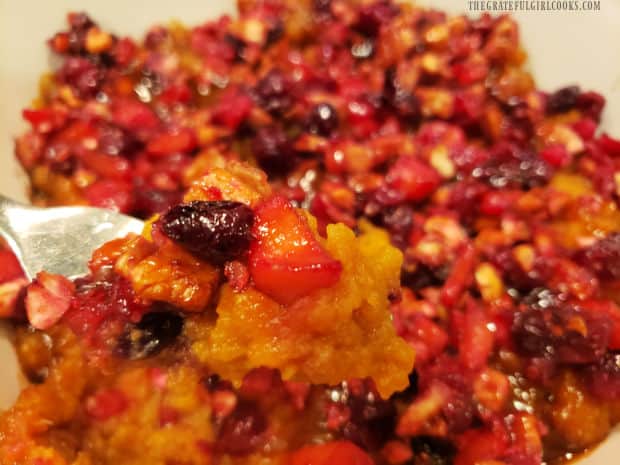
      Baked Cranberry Caramel Apple Yams are amazing! Canned yams are mashed, topped with cranberries, apples & pecans, then drizzled with caramel.Baked Cranberry Caramel Apple Yams are amazing! Canned yams are mashed, topped with cranberries, apples & pecans, then drizzled with caramel.

      Looking for an amazing side dish that is delicious enough to serve for the holidays? Or are you looking for a side dish recipe that goes well with a chicken, beef or pork dinner, any time of year?

      Guess what? I think you will LOVE this recipe for cranberry caramel apple yams! This recipe will make 8 small servings or 6 slightly larger servings.

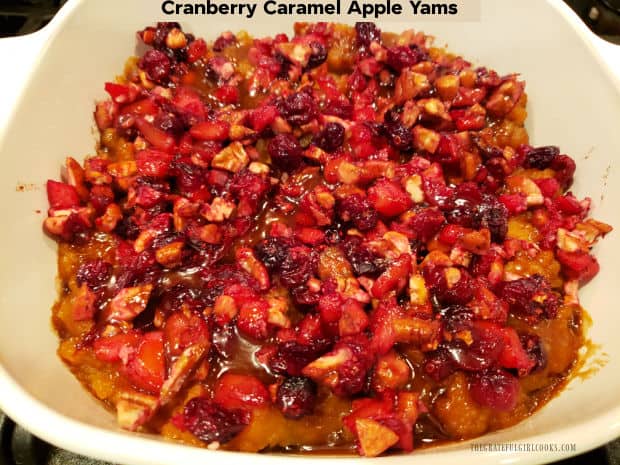
      This is an easy to prepare layered side dish that tastes wonderful! The bottom layer is creamy mashed yams (with brown sugar), the middle layer is cranberries, apples, walnuts or pecans, and the top is drizzled with caramel sauce!

      This recipe uses canned yams, which makes it convenient, practically effortless to make, and saves a lot of preparation time, too!

      Put those layers of goodness together and you have a colorful, lip-smackin’ delicious side dish! The recipe for cranberry caramel apple yams originated in an old cookbook I had, and now I can’t wait to share it with you. Here’s how to make this dish.

      Scroll Down For A Printable Recipe Card At The Bottom Of The Page

      Prepare The Yams (Layer #1)

      Before beginning, preheat your oven to 350°F., and lightly spray or grease the bottom and sides of a 2 quart baking dish.

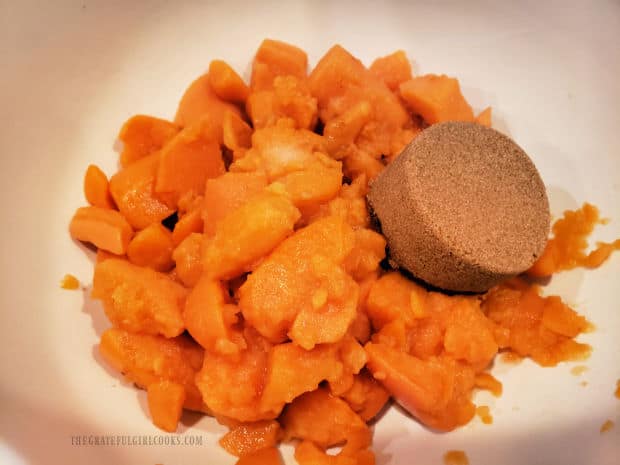
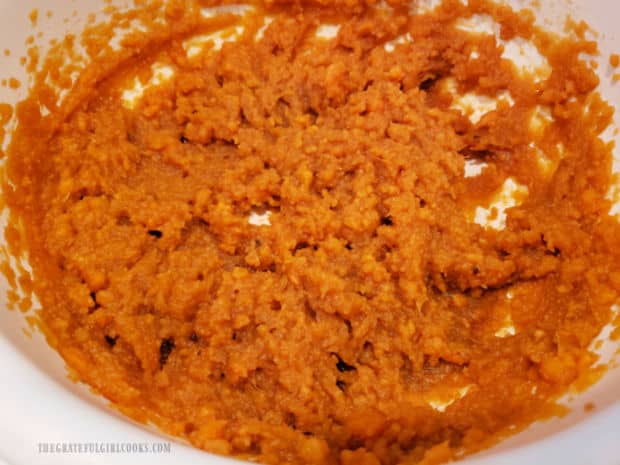
      Drain the liquid from a large can of yams, then place them in a mixing bowl, along with packed brown sugar and salt. Use an electric mixer to combine these ingredients until thoroughly “mashed” and smooth in texture.

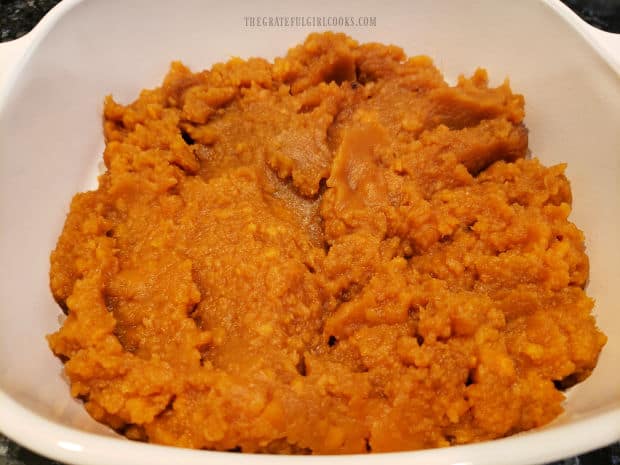
      Spread the mashed yam mixture evenly in the prepared baking dish. Set the dish aside while you prepare the cranberry apple layer.

      Drained canned yams, salt and brown sugar are combined in a medium bowl.An electric mixer is used to mash the yams until smooth in texture.Mashed brown sugar yams are spread in a greased 2 quart baking dish.

      Cook The Cranberry Apple Mixture (Layer #2)

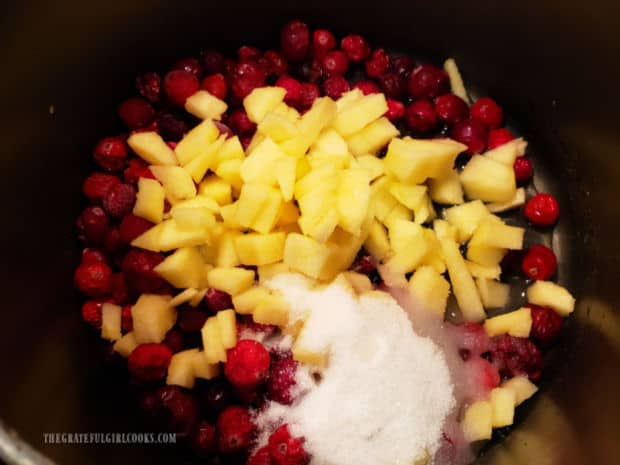
      Place fresh or frozen (unthawed) cranberries, chopped apple, granulated sugar and water in a medium saucepan.

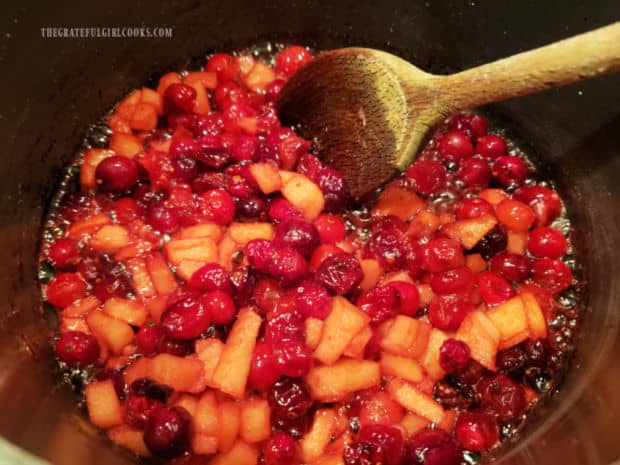
      Cook the fruit mixture on Medium heat for about 7-10 minutes, stirring often, until most of the cranberries have popped and burst open. As the cranberries “pop”, this fruit mixture will thicken slightly.

      Cranberries, chopped apple, granulated sugar and water are placed in a medium saucepan.Cranberry/apple mixture is cooked 7-10 minutes or until cranberries pop or burst open.

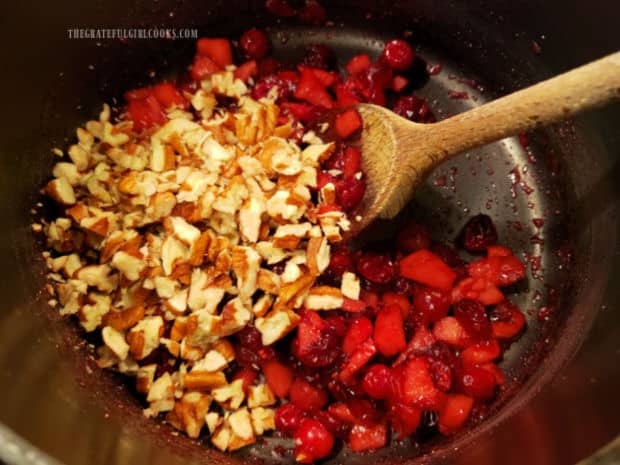
      Remove the saucepan from the heat source and stir in chopped walnuts or pecans (whichever you prefer or have available).

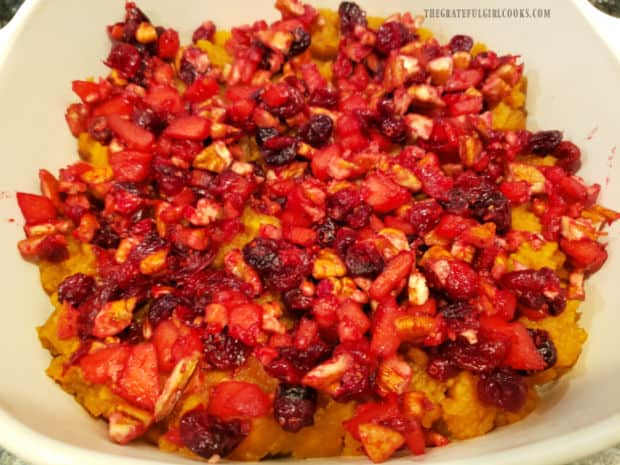
      Spoon the cranberry/apple mixture over the top of the yams in the baking dish, covering as much of the surface as possible.

      Chopped nuts (walnuts or pecans) are stirred into cranberry/apple mixture in pan.The cranberry/apple/nut mixture is spread on top of the mashed yams in baking dish.

      Make The Simple Caramel Topping (Layer #3)

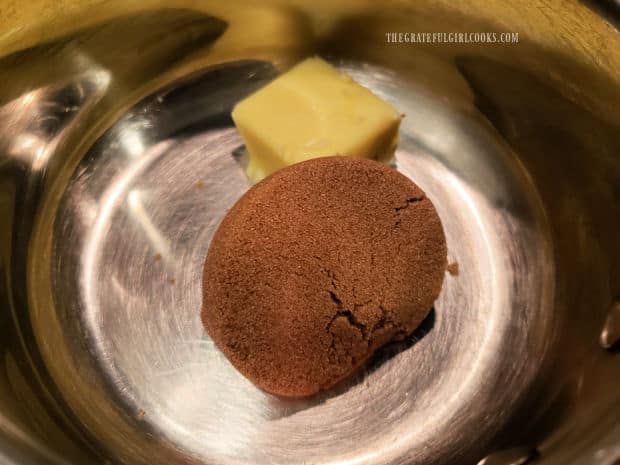
      Now it’s time to make a simple caramel sauce to drizzle over the top of this dish! It’s EASY! Stir brown sugar, butter and 1 Tablespoon water together in a small saucepan. Bring this mixture to a boil on medium-low heat.

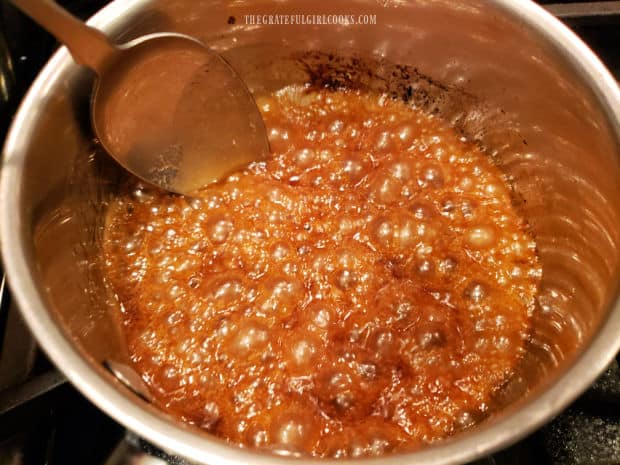
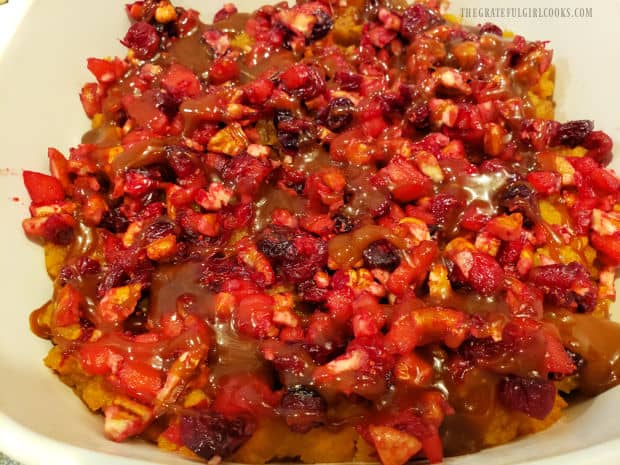
      Continue to let the sauce boil for 2 minutes, stirring constantly while it cooks. After it has boiled for two minutes, remove the pan from the heat. IMMEDIATELY drizzle the caramel sauce evenly over the top of the cranberry/apple layer. Now the cranberry caramel apple yams are ready to bake!

      Butter, brown sugar and a Tablespoon of water are placed in pan to make caramel sauce.Caramel sauce is boiled for two minutes before being removed from heat.Hot caramel sauce is drizzled over the top of the cranberry/apple/nut layer.

      Time To Enjoy The Cranberry Caramel Apple Yams

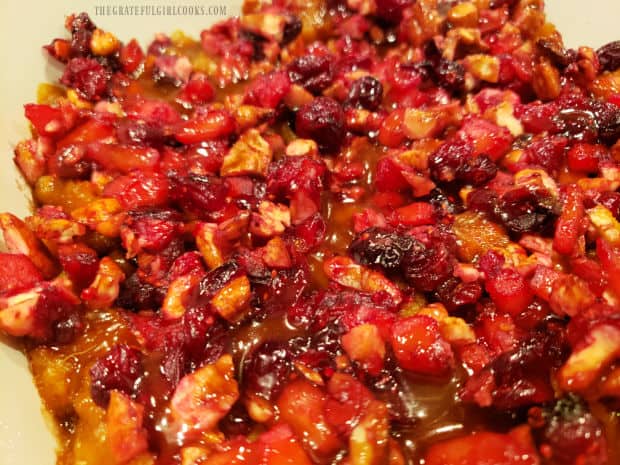
      Bake the yams (uncovered) at 350°F. for 15-17 minutes. They are done when fully heated through! Serve the cranberry caramel apple yams while hot, and enjoy the creamy yams, tangy and sweet fruit, crunchy nuts, and sweet caramel sauce on top.

      This dish goes GREAT with chicken, beef and pork, and would be a great addition to any holiday feast! The recipe can easily be doubled or tripled, and is truly a delicious yet simple dish to prepare.

      YUM! I even enjoy grabbing a spoonful of the leftovers at room temperature. This dish is so good I can’t help myself. We enjoyed the yams this time, served alongside Classic Turkey Croquettes!

      The cranberry caramel apple yams are baked for 15 minutes to fully heat them through.A fork, holding a bite of the cranberry caramel apple yams, ready to be eaten.

      I really hope you’ll give these cranberry caramel apple yams a try, and am confident you’ll enjoy them as much we do! We love the colors, flavors, and textures of this wonderful side dish!

      Thanks so much for stopping by, and please come back soon for more family-friendly recipes. Take care, and have a GREAT day!

      Looking For More YAM OR SWEET POTATO Recipes?

      You can find ALL of my recipes in the Recipe Index, which is located at the top of the page. I have some wonderful yam and sweet potato recipes for you to choose from, including:

      Want More Recipes? Get My FREE Newsletter!

      I publish a newsletter 2 times per month (1st and 15th) with lots of recipes, tips, etc..
      Would you like to join our growing list of subscribers?

      There is a Newsletter subscription box on the top right (or bottom) of each blog post, depending on the device you use.
      You can submit your e-mail address there, to be added to my mailing list.

      Find Me On Social Media:

      Facebook page: The Grateful Girl Cooks!
      Pinterest:
      The Grateful Girl Cooks!
      Instagram:
      jbatthegratefulgirlcooks

      Author's signature

      Original recipe source:  Gooseberry Patch “Big Book Of Holiday Cooking”, page 245, published in 2012 by Time Home Entertainment, Inc.

      ↓↓ PRINTABLE RECIPE BELOW ↓↓

      0 from 0 votes
      Cranberry Caramel Apple Yams
      Prep Time
      15 mins
      Cook Time
      15 mins
      Total Time
      30 mins
       

      Baked Cranberry Caramel Apple Yams are amazing! Canned yams are mashed, topped with cranberries, apples & pecans, then drizzled with caramel.

      Category: Side Dish, Vegetable Dish
      Cuisine: American
      Keyword: cranberry caramel apple yams
      Servings: 8 small servings
      Calories Per Serving: 273 kcal
      Author: JB @ The Grateful Girl Cooks!
      Ingredients
      • 29 ounces canned yams drained
      • cup brown sugar packed
      • teaspoon salt
      For Fruit Layer:
      • 1 cup fresh or frozen cranberries
      • ½ large apple (any variety) cored/peeled/chopped
      • 3 Tablespoons granulated sugar
      • cup water
      For Caramel Drizzle:
      • ½ cup chopped walnuts or pecans
      • ¼ cup brown sugar packed
      • 1 Tablespoon butter
      • 1 Tablespoon water
      Instructions
      1. Preheat oven to 350°F. Lightly spray/grease bottom/sides of a 2 qt. baking dish.

      2. Drain liquid from canned yams, then place yams in a large bowl, with packed brown sugar and salt. Use electric mixer to combine, until mashed/smooth in texture. Spread yams evenly in baking dish. Set aside.

      3. Place cranberries, apple, granulated sugar and water in a medium saucepan. Cook on Medium heat 7-10 minutes, stirring often, until most cranberries have popped/burst open. As it cooks, fruit mixture will thicken slightly. Remove pan from heat; stir in chopped walnuts or pecans. Spoon cranberry/apple mixture evenly over yams in baking dish. Set aside.

      4. Combine brown sugar, butter and 1 T. water in a small saucepan. Bring to a boil on medium-low heat. Continue to let sauce boil for 2 minutes, stirring constantly. Remove pan from the heat. IMMEDIATELY drizzle caramel evenly over cranberry/apple layer.

      5. Bake (uncovered) at 350°F. for 15-17 minutes. The yams are done when fully heated through. Serve hot, and enjoy!

      Nutrition Facts
      Cranberry Caramel Apple Yams
      Amount Per Serving (1 (1/8 of total))
      Calories 273 Calories from Fat 54
      % Daily Value*
      Fat 6g9%
      Saturated Fat 1g6%
      Trans Fat 0.1g
      Polyunsaturated Fat 4g
      Monounsaturated Fat 1g
      Cholesterol 4mg1%
      Sodium 62mg3%
      Potassium 918mg26%
      Carbohydrates 53g18%
      Fiber 5g21%
      Sugar 23g26%
      Protein 3g6%
      Vitamin A 202IU4%
      Vitamin C 20mg24%
      Calcium 40mg4%
      Iron 1mg6%
      * Percent Daily Values are based on a 2000 calorie diet.

      Here’s one more to pin on your Pinterest boards!Baked Cranberry Caramel Apple Yams are amazing! Canned yams are mashed, topped with cranberries, apples & pecans, then drizzled with caramel.

      Irish Cream Layered Brownies

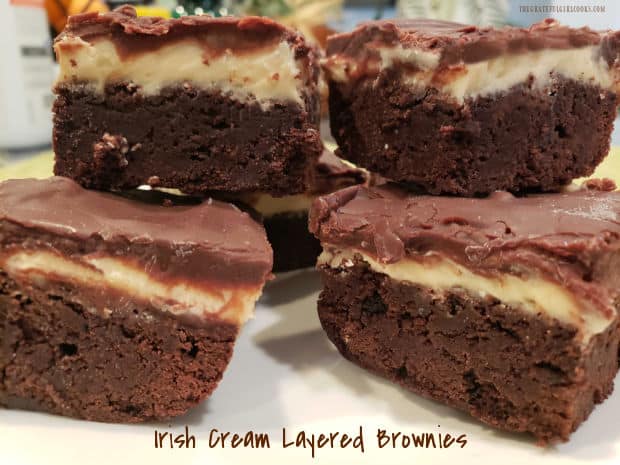
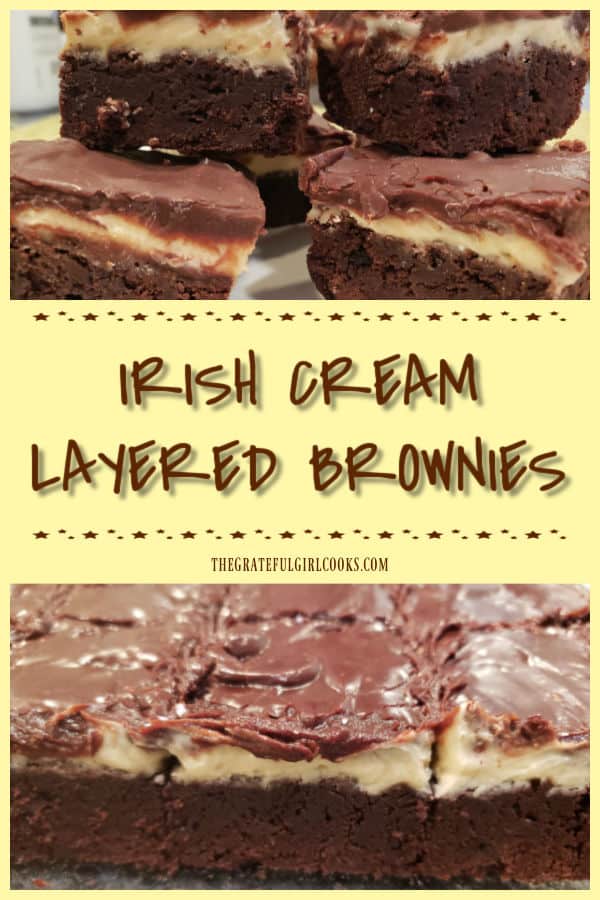
      Irish Cream Layered Brownies are a decadent treat! Fudgy brownies with 2 layers of Irish cream-infused chocolate ganache and buttercream! YUM!Irish Cream Layered Brownies are a decadent treat! Fudgy brownies with 2 layers of Irish cream-infused chocolate ganache and buttercream! YUM!

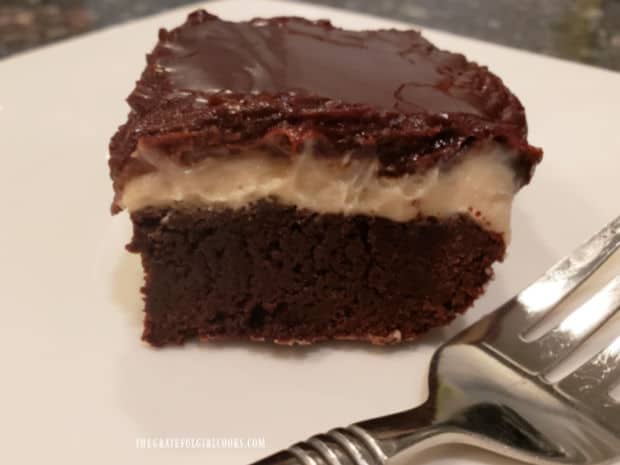
      Top o’ the morning to ya! Isn’t that we’re “supposed” to say as it nears St. Patrick’s Day? Today I want to share an absolutely scrumptious recipe for Irish Cream Layered Brownies. Thee brownies are made of three distinct layers: a mocha brownie, topped with an Irish Cream frosting, which is topped with Irish cream chocolate ganache.

      Yes… you might detect an “Irish” theme here. One of our sons gave me a cookbook for Christmas to add to my collection. I found this recipe for these sweet treats in it, and we were thrilled with the results! Perfect for St. Patrick’s Day or any time you want a yummy dessert to serve, I’m confident you’re gonna enjoy them. These brownies are chewy and full of flavor, and I can guarantee you no leprechauns were harmed in the making of this recipe.

      Irish cream liqueur is used (sparingly, but it’s in there) to flavor the frosting and the chocolate ganache, giving it a distinctive flavor.  The recipe, as written below will yield 16 delicious Irish Cream Layered Brownies. Here’s how to make them:

      Scroll Down For A Printable Recipe Card At The Bottom Of The Page

      Make The Brownie Batter

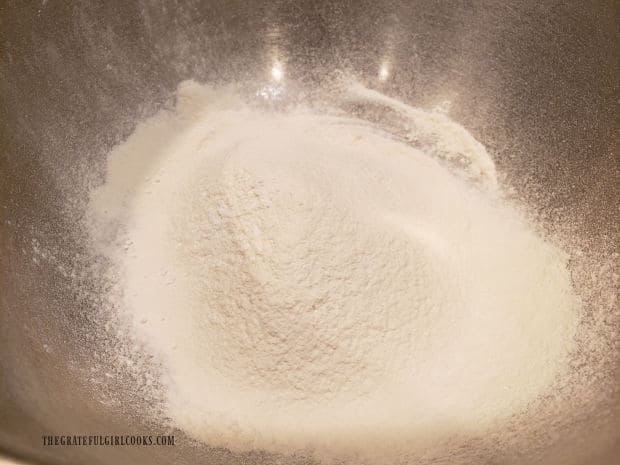
      Before mixing the batter, preheat your oven to 350°F and grease the bottom and sides of an 8″ x 8″ square baking pan. Set the pan aside while you make the brownie batter. To make the batter, first sift flour, baking powder and salt into a mixing bowl, then set the bowl aside. 

      Flour, baking powder and salt are sifted together for the brownie batter.

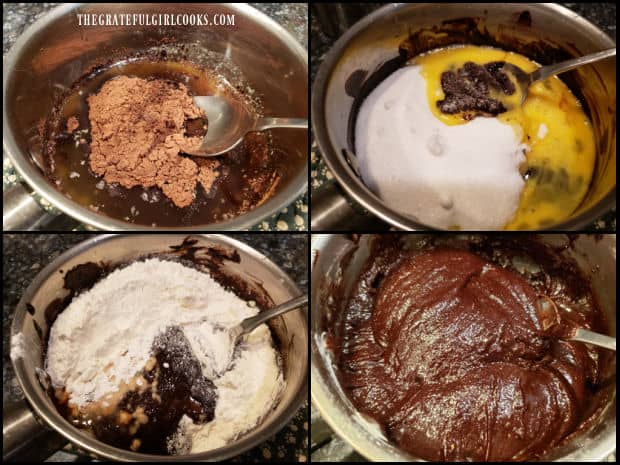
      Melt butter in a small saucepan on low heat, then remove the pan from the heat source. Immediately stir in cocoa, oil, and instant coffee powder. Stir well, to combine, then let the mixture cool a bit (4-5 minutes).

      After it’s cooled, stir in granulated sugar, then beaten eggs, stirring well as the eggs are added. Add the flour mixture and vanilla extract, adding the flour mixture a little at a time. Stir well, between additions, to incorporate the dry ingredients into the batter. 

      A four photo collage showing the steps for making the brownie batter in a saucepan.

      Layer #1- Bake The Brownies

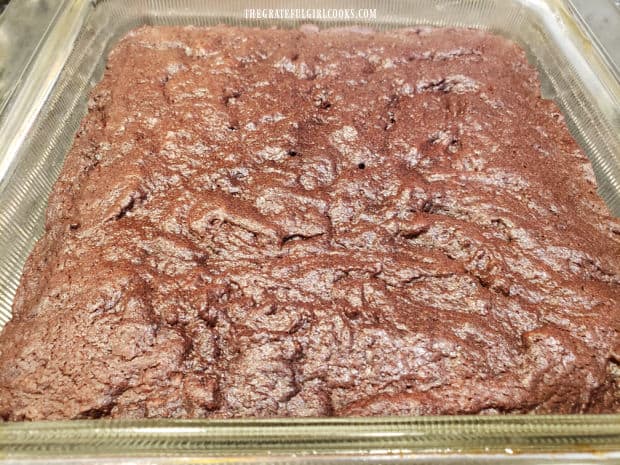
      Spread the brownie batter evenly into the prepared baking pan. Bake at 350°F. for 23-25 minutes, or until the center is set, being careful to NOT overcook the brownies. Test by inserting a toothpick into the top center of the brownies. It should come out free of batter. Transfer the pan to a wire rack to cool until the brownies are just barely warm.

      Brownies are baked in a greased 8"x8" pan until set on top.

      Layer #2- Make The Irish Cream Frosting

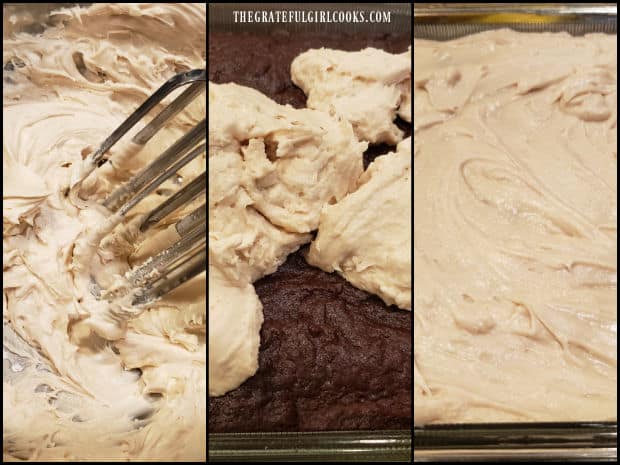
      While the brownies cool, mix together the Irish cream frosting. Beat powdered sugar and softened butter together with an electric mixer on Low setting. Add Irish cream liqueur, and beat the frosting until it becomes smooth.

      Spread the frosting over the entire surface of the slightly warm brownies (if they’re too hot, it will melt frosting). Place the pan in a refrigerator and let the chill for 1 hour. This allows the frosting to firm up before adding the top layer of ganache.

      Irish cream flavored frosting is mixed together, then spread on cooled brownies.

      Layer #3- Make The Chocolate Ganache Topping

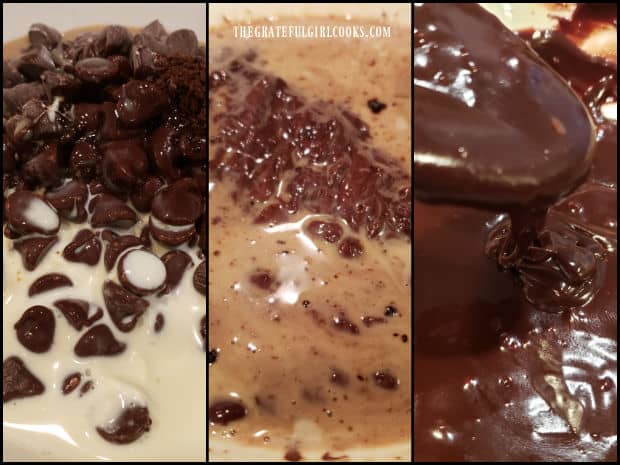
      About 15 minutes before the brownies finish chilling, make the chocolate ganache topping. Place chocolate chips, Irish cream liqueur, heavy whipping cream and instant coffee powder in a microwave-safe bowl.

      Microwave on High temperature for 1 minute, then stir. Place bowl back into the microwave, and heat it on High another 30-45 seconds. Remove and stir the ganache until smooth. Let the ganache cool slightly (3-4 minutes), or until it is warm and spreadable.

      Three photo collage showing chocolate ganache made by microwaving ingredients & stirring until smooth.

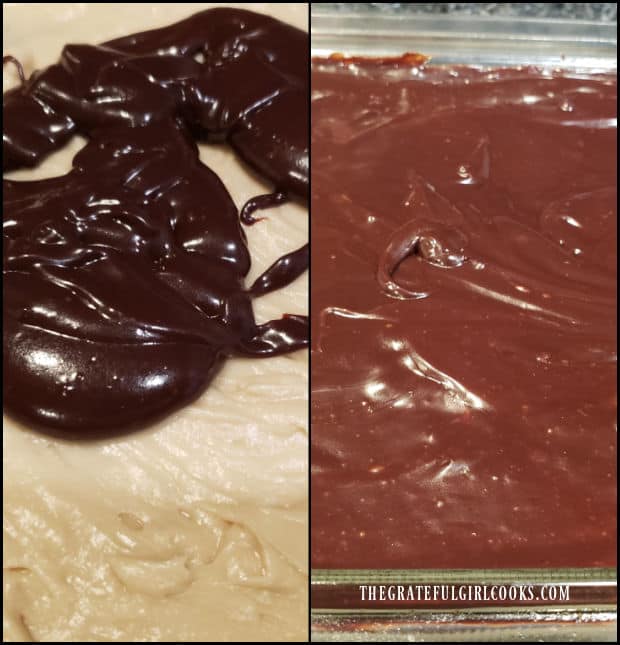
      Spread the ganache evenly over the entire frosting layer. By the way… the photo below is the same ganache. Different lighting, perhaps? Weird! Cover the pan with plastic wrap, and refrigerate the Irish Cream Layered Brownies until the chocolate is firmly set. This usually takes about an hour or less.

      Irish cream chocolate ganache is spread on top of the frosting layer on the brownies.

      The Irish Cream Layered Brownies Are Ready To Eat!

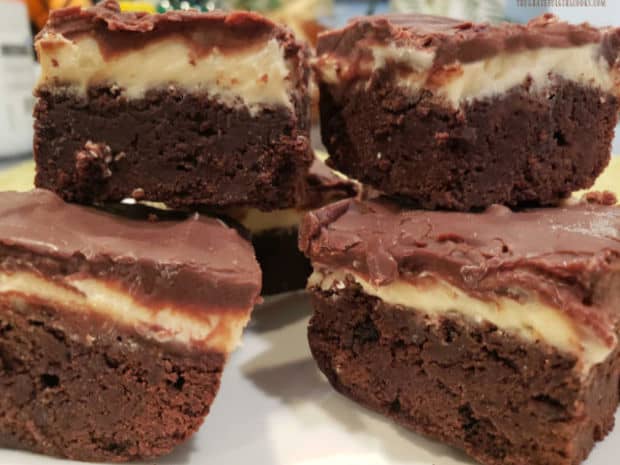
      After the Irish Cream Layered Brownies have been fully chilled, they’re ready to cut, serve, and enjoy! Cut the brownies into 16 pieces, and dig in. They taste wonderful! Store any leftovers covered in the fridge, or give some to friends and family. We gave extra Irish Cream Layered Brownies to both of our sons so they could enjoy them, too!

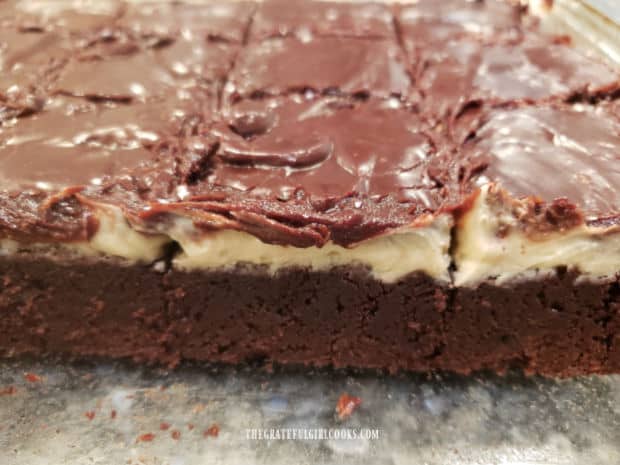
      The brownies have a light mocha taste, and are chewy and yummy. Those two layers of frosting and ganache will taste awesome, thanks to the Irish cream liqueur infused flavor. Put all three layers together and you’ve got terrific dessert treats for St. Patrick’s Day OR any other day, for that matter! They are dense, rich tasting and oh so good!

      Photo showing all three layers: brownie layer, frosting layer, and chocolate ganache layer on top.A stack of Irish cream layered brownies, ready to eat on a white plate.One of the Irish cream layered brownies on a white plate, ready to be eaten.

      I really hope you will give these delicious fudgy brownies a try. Remember to plan ahead, to allow for chilling two of the three layers, okay? Thanks for stopping by, and I hope you’ll come back soon for more yummy recipes. Take care, and have a wonderful day.

      Looking For More BAR COOKIE Recipes?

      You can find ALL of my recipes in the Recipe Index, located at the top of the page. I have some really wonderful bar cookie recipes you’ll enjoy, including:

      Interested In More Recipes?

      Thank you for visiting this website. I appreciate you using some of your valuable time to do soIf you’re interested, I publish a newsletter 2 times per month (1st and 15th) with all the latest recipes, and other fun info. I would be honored to have you join our growing list of subscribers, so you never miss a great recipe!
      There is a Newsletter subscription box on the top right side (or bottom) of each blog post, depending on the device you use, where you can easily submit your e-mail address (only) to be included in my mailing list.

      You Can Also Find Me On Social Media:

      Facebook page: The Grateful Girl Cooks!
      Pinterest:
      The Grateful Girl Cooks!
      Instagram:
      jbatthegratefulgirlcooks

      Author's signature

      Original Recipe Source: recipe submitted by Sue Gronholz in “The Taste Of Home Cookbook”, page 486,  published by RDA Enthusiast Brands, LLC, 2019

      ↓↓ PRINTABLE RECIPE BELOW ↓↓

      0 from 0 votes
      Irish Cream Layered Brownies
      Prep Time
      35 mins
      Cook Time
      25 mins
      Additional refrigeration time
      2 hrs
      Total Time
      3 hrs
       

      Irish Cream Layered Brownies are a decadent treat! Fudgy brownies with 2 layers of Irish cream-infused chocolate ganache and buttercream!

      Category: Bar Cookies, Dessert
      Cuisine: American
      Keyword: Irish cream layered brownies
      Servings: 16 brownies
      Calories Per Serving: 296 kcal
      Author: JB @ The Grateful Girl Cooks!
      Ingredients
      For Batter (Layer #1):
      • cup all purpose flour
      • ½ teaspoon baking powder
      • ¼ teaspoon salt
      • cup butter
      • 6 Tablespoons cocoa powder
      • 2 Tablespoons canola oil or vegetable oil
      • ¾ teaspoon instant coffee powder
      • 1 cup granulated sugar
      • 2 large eggs slightly beaten, at room temp.
      • 1 teaspoon vanilla extract
      Frosting (Layer #2)
      • 2 cups powdered sugar (confectioners sugar)
      • ¼ cup butter softened
      • 3 Tablespoons Irish Cream Liqueur
      Chocolate Ganache (Layer #3)
      • 1 cup semisweet chocolate chips
      • 3 Tablespoons Irish Cream Liqueur
      • 2 Tablespoons heavy whipping cream
      • ½ teaspoon instant coffee powder
      Instructions
      1. Preheat oven to 350°F. Grease bottom/sides of 8" x 8" square baking pan. Set pan aside.

      2. MAKE BROWNIE BATTER (Layer #1): Sift flour, baking powder and salt into mixing bowl; set aside.

      3. Melt butter in a saucepan on low heat. Remove pan from heat. Stir in cocoa, oil, and instant coffee powder. Stir well; let cool 4-5 minutes. Add sugar and eggs, stirring constantly as they're added. Gradually add flour mixture and vanilla, a little at a time. Stir well, to fully mix into batter. 

      4. Spread brownie batter evenly in greased pan. Bake at 350°F. about 23-25 minutes, or until center is set. Don't overcook brownies. Test by inserting toothpick into top of brownies. Toothpick should come out free of batter. Transfer pan to wire rack to cool.

      5. MAKE FROSTING (Layer #2): While brownies cool, mix frosting. Beat powdered sugar and soft butter with electric mixer on low setting. Add Irish cream liqueur; beat until frosting becomes smooth. Spread over brownies that are only barely warm. Put pan in refrigerator; chill brownies 1 hour.

      6. MAKE CHOCOLATE GANACHE (Layer #3): Approx. 15 minutes before brownies finish chilling, make ganache. Place chocolate chips, Irish cream liqueur, whipping cream and coffee powder in microwave-safe bowl. Heat in microwave on High for 1 minute, then stir. Put back in microwave; heat another 30-45 seconds. Remove; stir ganache until smooth. Let cool 3-4 minutes until warm and spreadable.

      7. Spread ganache over frosting layer. Cover pan; refrigerate until ganache is set (45-60 minutes). Cut into 16 pieces; serve. Store (covered) in fridge.

      Nutrition Facts
      Irish Cream Layered Brownies
      Amount Per Serving (1 brownie)
      Calories 296 Calories from Fat 135
      % Daily Value*
      Fat 15g23%
      Saturated Fat 8g50%
      Trans Fat 1g
      Polyunsaturated Fat 1g
      Monounsaturated Fat 5g
      Cholesterol 44mg15%
      Sodium 107mg5%
      Potassium 126mg4%
      Carbohydrates 39g13%
      Fiber 2g8%
      Sugar 32g36%
      Protein 3g6%
      Vitamin A 274IU5%
      Vitamin C 1mg1%
      Calcium 23mg2%
      Iron 1mg6%
      * Percent Daily Values are based on a 2000 calorie diet.

      Here’s one more to pin on your Pinterest boards!Irish Cream Layered Brownies are a decadent treat! Fudgy brownies with 2 layers of Irish cream-infused chocolate ganache and buttercream! YUM!


      Chocolate Mint Cookie Bites

      Chocolate Mint Cookie Bites are shortbread-like cookies, with peppermint flavoring in the cookie and the frosting! They’re easy and delicious!
      Chocolate Mint Cookie Bites are shortbread-like cookies, with peppermint flavoring in the cookie and the frosting! They're easy and delicious!

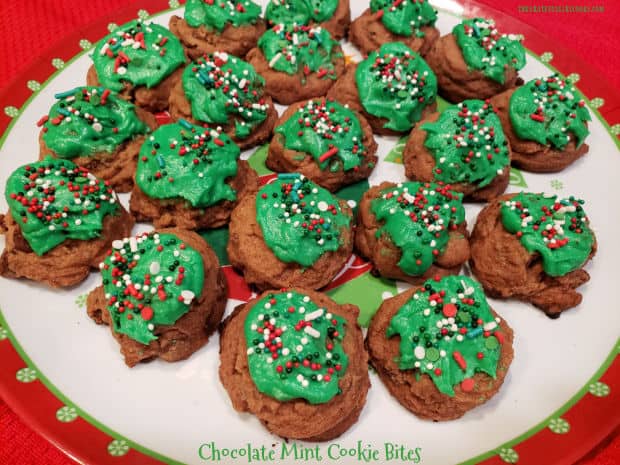
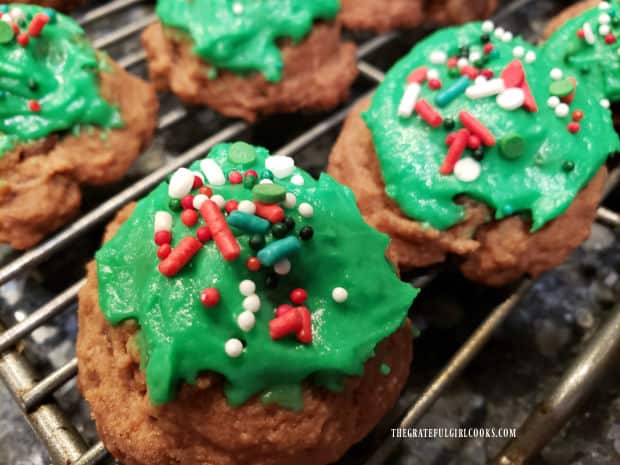
      Okay… these yummy cookies are probably not the fanciest cookies you will ever eat, but they sure taste good! Who needs PERFECT looking cookies anyways? Chocolate mint cookie bites are so easy to make, and when topped with pretty green frosting and some sparkly sprinkles, they are amazing! I adapted the recipe from an old cooking magazine I’ve had for years, and want to share it with you today.

      The combination of flavor from chocolate AND peppermint shines in these shortbread-like little cookies! These cookies are light in texture and big in flavor, and I think you will really enjoy them. Kids can help with the frosting and sprinkles, because they really don’t have to be fancy! Let me show you how easy these little cookies are to make, in practically no time at all!

      Scroll Down For A Printable Recipe Card At The Bottom Of The Page

      Make The Cookie Dough

      Before starting to make the cookie dough, remember to preheat your oven to 375°F. It only takes a few minutes to make the dough, so to save time, you will want your oven preheated and ready to go!

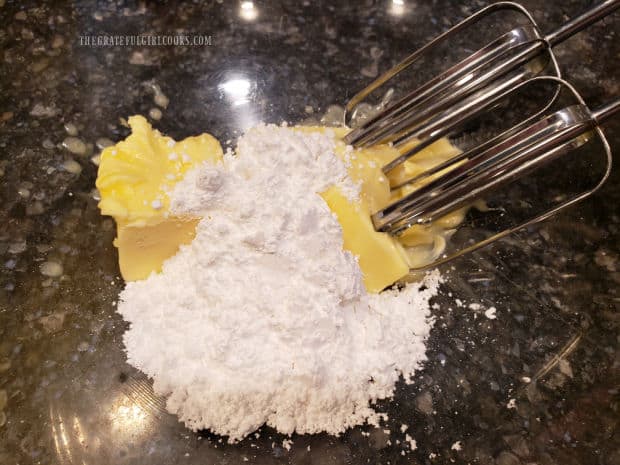
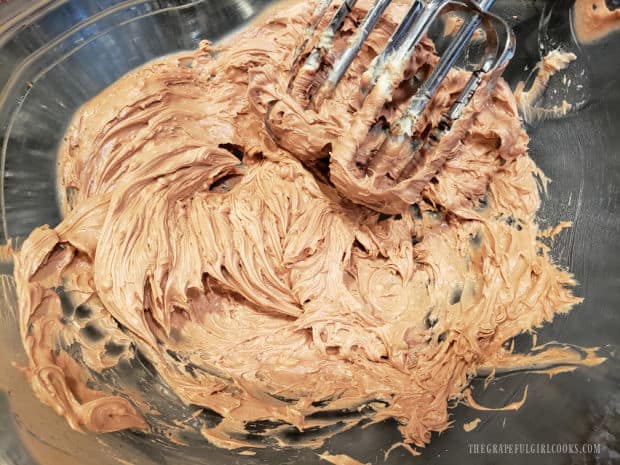
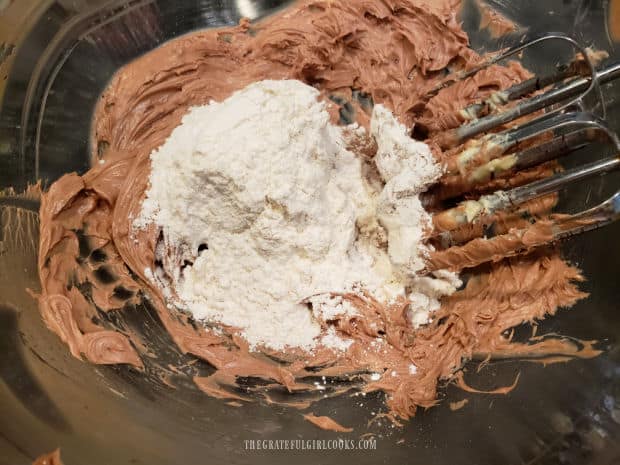
      Using an electric mixer (or stand mixer), cream together softened butter and powdered sugar (confectioners sugar) until smooth. Add melted (but cooled) unsweetened chocolate and peppermint extract to the bowl and beat again, until fully combined. Beat in the all purpose flour, adding 1/3 cup at a time, until all the flour is incorporated into the dough.

      Butter is creamed with powdered sugar for the cookie dough.Melted chocolate and peppermint extract are mixed into the cookie dough.All purpose flour is gradually beaten into the cookie dough mixture in the bowl.

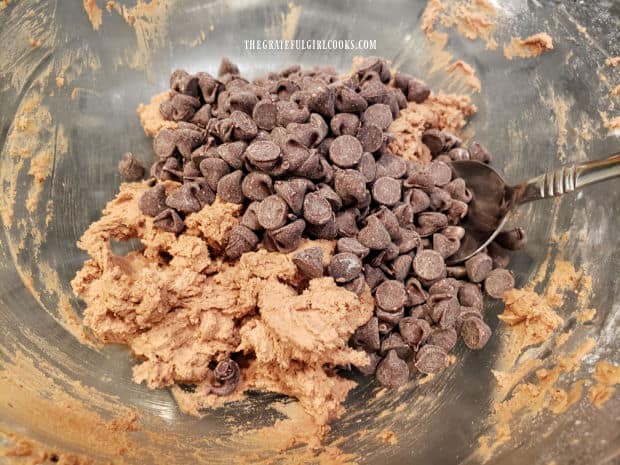
      Now add regular sized (or miniature-sized) semi-sweet chocolate chips to the batter. STIR the chocolate chips into the batter until fully combined. This cookie dough is now ready and it will be quite thick.

      Semi-sweet chocolate chips are stirred into the cookie dough until combined.

      Ready To Bake The Chocolate Mint Cookie Bites!

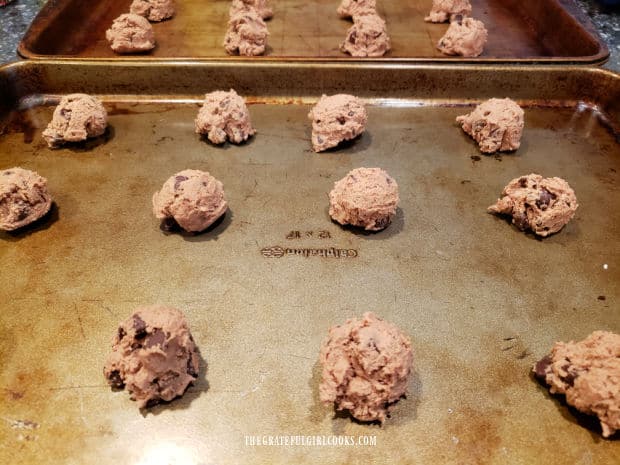
      Drop the dough for the chocolate mint cookie bites by Tablespoonfuls onto ungreased baking sheets. Leave a couple inches of space between each cookie. I usually try to use a small cookie scoop for this, so the cookies are all about the same size. You should have enough cookie dough for about 30 cookies, so you need a couple baking sheets or you will need to cook them in batches.

      Bake the cookies at 375°F. for 6-8 minutes or until the cookies are firm and set. Oven temps can vary quite a bit, and in our oven this takes 7 minutes, so keep an eye on them. They don’t spread out too much, either. Once done, let the cookies cool (on the pan) for 3-4 minutes before transferring them to a wire rack to finish cooling completely.

      Tablespoons of dough for the chocolate mint cookie bites are placed on baking sheets to cook.

      Time To Make The Frosting For The Cookies

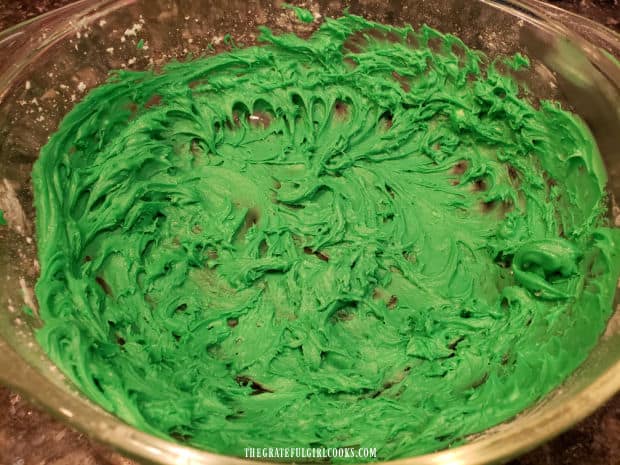
      While the cookies are baking OR cooling, make the green peppermint frosting. In a medium bowl, beat together softened butter, powdered sugar, milk, peppermint extract and a couple drops of green food coloring. Mix until the frosting is a beautiful green color and is completely smooth, with no lumps!

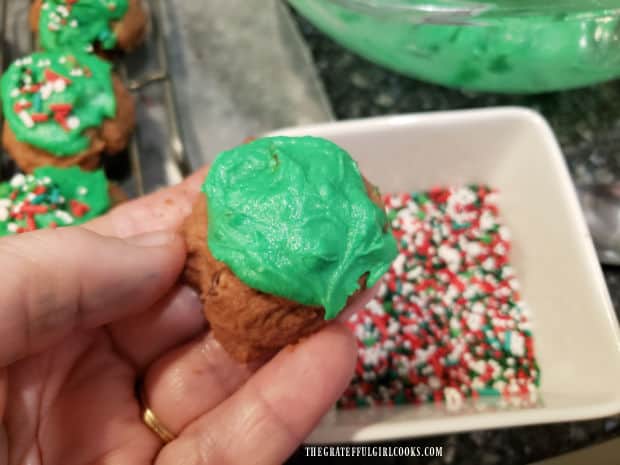
      Once the chocolate mint cookie bites have completely cooled, it’s time to frost them. I frost the cookies one at a time, so the frosting is still a bit “wet” and the sprinkles can adhere to it. Spread a small amount of frosting onto the top of each cookie, and them immediately add a pinch of sprinkles on top. I hold the cookie in one hand, and add the frosting with a small knife. Then, holding the cookie over a small bowl of sprinkles with one hand, I add the sprinkles using my other hand. That way, any “wayward” sprinkles fall back into the bowl of sprinkles!

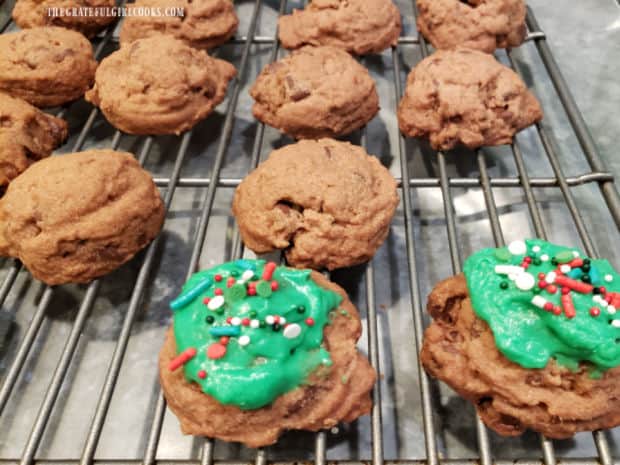
      Place the frosted/sprinkled cookie back on the wire rack, and repeat with the next cookie, continuing until all cookies are frosted and sprinkled. Let the frosting set tp (firm up) slightly before serving the cookies.

      Green peppermint flavored frosting is mixed together in a bowl while cookies bake.After the cookies cool, they are topped with some of the peppermint green frosting.Colorful sprinkles are added to the top of the frosted chocolate mint cookie bites.

      Ready to Eat Some Chocolate Mint Cookie Bites?

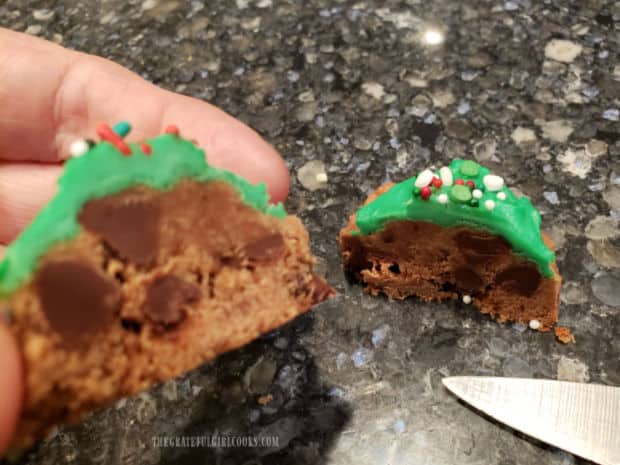
      Once the frosting has firmed up, the cookies are ready to be enjoyed. The insides are light in texture, and each of the chocolate mint cookie bites is filled with chocolate chips! The frosting AND the cookies themselves, have a wonderful chocolate mint flavor, which I think you’ll enjoy!

      Chocolate mint cookie bites rest on wire racks while frosting firms up.A look at the inside of one of the chocolate mint cookie bites, which has been cut in half.

      I really hope you enjoy these delicious cookies! At Christmas time red, green and white sprinkles are the way to go, but you can also highlight these for St. Patrick’s Day, and use only green and white sprinkles. However you make them, I think you’ll enjoy the quick, easy recipe, and their great taste! Thanks for stopping by, and I hope you will come back soon for more family-friendly recipes. Have a great day.

      Looking For More COOKIE Recipes?

      You can find all of my recipes in the Recipe Index, which is located at the top of the page. I have lots of yummy cookie recipes for you to enjoy, including:

      Interested In More Recipes?

      Thank you for visiting this website. I appreciate you using some of your valuable time to do soIf you’re interested, I publish a newsletter 2 times per month (1st and 15th) with all the latest recipes, and other fun info. I would be honored to have you join our growing list of subscribers, so you never miss a great recipe!
      There is a Newsletter subscription box on the top right side (or bottom) of each blog post, depending on the device you use, where you can easily submit your e-mail address (only) to be included in my mailing list.

      You Can Also Find Me On Social Media:

      Facebook page: The Grateful Girl Cooks!
      Pinterest:
      The Grateful Girl Cooks!
      Instagram:
      jbatthegratefulgirlcooks

      Author's signature

      Recipe adapted from: “Taste of Home” magazine, December/January issue, 2004, pages 27-28, contributed by Anne Revers, published by Reiman Publications

      0 from 0 votes
      Chocolate Mint Cookie Bites
      Prep Time
      10 mins
      Cook Time
      7 mins
      Total Time
      17 mins
       

      Chocolate Mint Cookie Bites are shortbread-like cookies, with peppermint flavoring in the cookie and the frosting! They're easy and delicious!

      Category: Dessert
      Cuisine: American
      Keyword: chocolate mint cookie bites
      Servings: 30 cookies (approx.)
      Calories Per Serving: 138 kcal
      Author: JB @ The Grateful Girl Cooks!
      Ingredients
      For Cookie Dough:
      • ¾ cup butter (no substitutes) softened (room temp.)
      • ½ cup powdered sugar (confectioners sugar)
      • 2 ounces unsweetened chocolate (2 squares) melted, cooled
      • ¼ teaspoon peppermint extract
      • cups all purpose flour
      • 1 cup semi-sweet chocolate chips (regular or mini)
      For Frosting:
      • 2 Tablespoons butter softened (room temp.)
      • 1 cup powdered sugar (confectioners sugar)
      • 1 Tablespoon milk
      • ¼ teaspoon peppermint extract
      • 2 drops green food coloring
      • COLORED SPRINKLES (approx. 2-3 Tablespoons)
      Instructions
      1. Preheat oven to 375°F.

      2. Make Dough: Using electric mixer (or stand mixer), cream softened butter and powdered sugar until smooth. Add melted, cooled unsweetened chocolate and peppermint extract; mix until combined. Beat in flour gradually, adding 1/3 cup at a time, until all flour is incorporated into dough. STIR in the chocolate chips, until combined. Dough will be thick.

      3. Drop the dough by Tablespoonfuls onto ungreased baking sheets. Leave 2" between each cookie. There's enough dough for approx. 30 cookies, so you need to use a couple baking sheets or bake the cookies in batches.

      4. Bake at 375°F. for 6-8 minutes or until cookies are firm and set. Oven temps can vary, so keep an eye on them. When done, let cookies cool (on the pan) for 3-4 minutes before transferring them to a wire rack to finish cooling.

      5. Make frosting while cookies bake or cool: In a medium bowl, using an electric mixer, beat together softened butter, powdered sugar, milk, peppermint extract and a couple drops of green food coloring. Mix until frosting is a beautiful green color and is completely smooth (no lumps).

      6. Once cookies have completely cooled, it's time to frost them, one at a time, while frosting is a bit "wet" and sprinkles can adhere to it. Spread a small amount of frosting onto the top of a cookie; immediately add a pinch or two of sprinkles on top. Place frosted/sprinkled cookie back on wire rack. Repeat process, continuing until all cookies are frosted/sprinkled. Let the frosting set up (firm up) slightly before serving the cookies. Enjoy!

      Nutrition Facts
      Chocolate Mint Cookie Bites
      Amount Per Serving (1 cookie)
      Calories 138 Calories from Fat 81
      % Daily Value*
      Fat 9g14%
      Saturated Fat 5g31%
      Trans Fat 1g
      Polyunsaturated Fat 1g
      Monounsaturated Fat 2g
      Cholesterol 15mg5%
      Sodium 49mg2%
      Potassium 59mg2%
      Carbohydrates 15g5%
      Fiber 1g4%
      Sugar 8g9%
      Protein 1g2%
      Vitamin A 169IU3%
      Vitamin C 1mg1%
      Calcium 9mg1%
      Iron 1mg6%
      * Percent Daily Values are based on a 2000 calorie diet.

      Here’s one more to pin on your Pinterest boards!Chocolate Mint Cookie Bites are shortbread-like cookies, with peppermint flavoring in the cookie and the frosting! They're easy and delicious!

      Classic Pizzelle Cookies

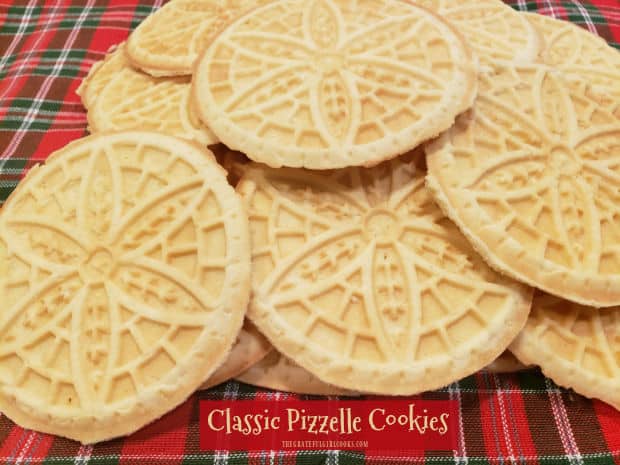
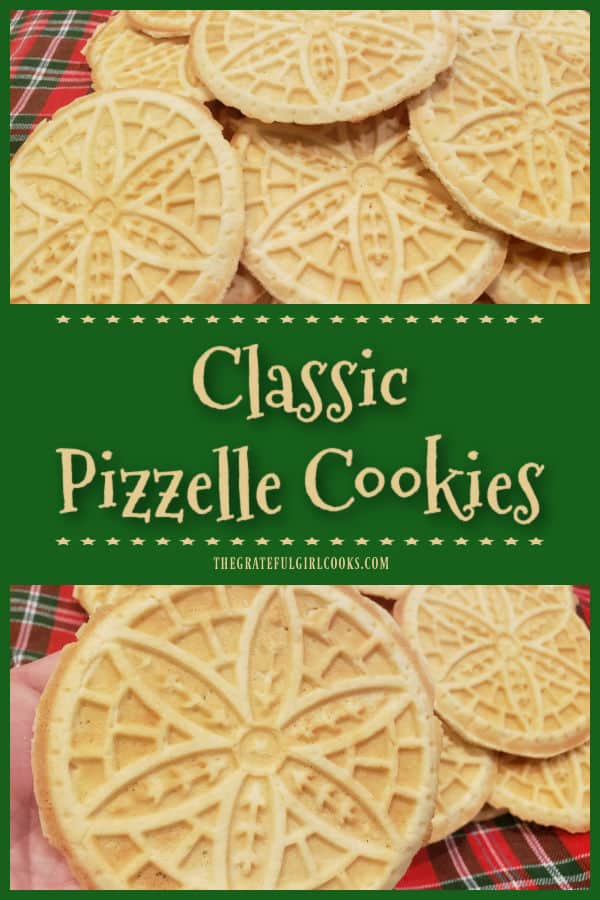
      Classic pizzelle cookies are beautiful, delicious treats made in a pizzelle press. They are light, crisp, and imprinted with amazing designs!
      Classic pizzelle cookies are beautiful, delicious treats made in a pizzelle press. They are light, crisp, and imprinted with amazing designs!

      A couple of years ago I got a pizzelle press using a gift card I was given. I had been “looking” at them for quite some time, and was thrilled to be able to get one online (without using my own money-yay!). The very first recipe I made using this appliance was this one for classic pizzelle cookies. YUM!

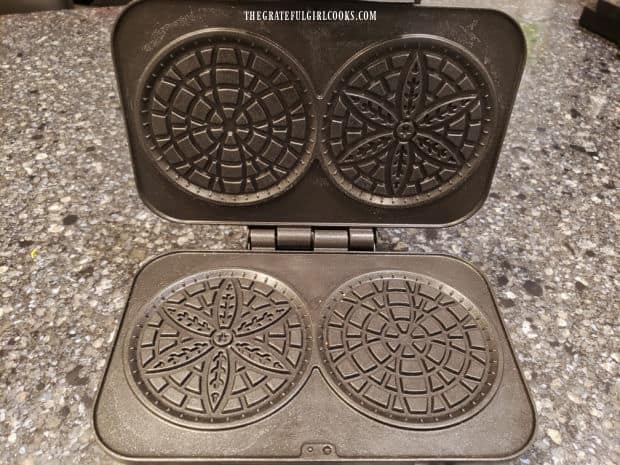
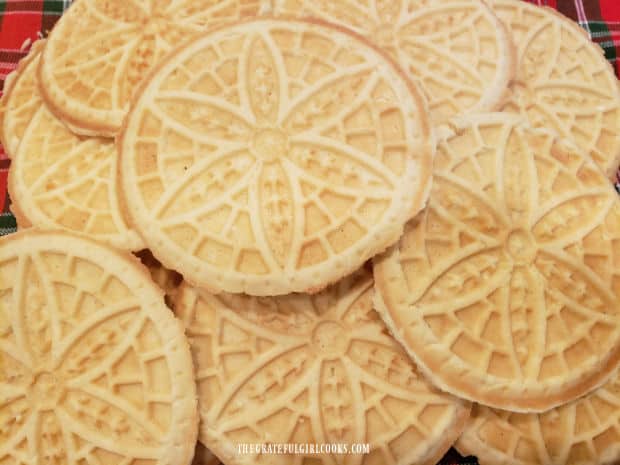
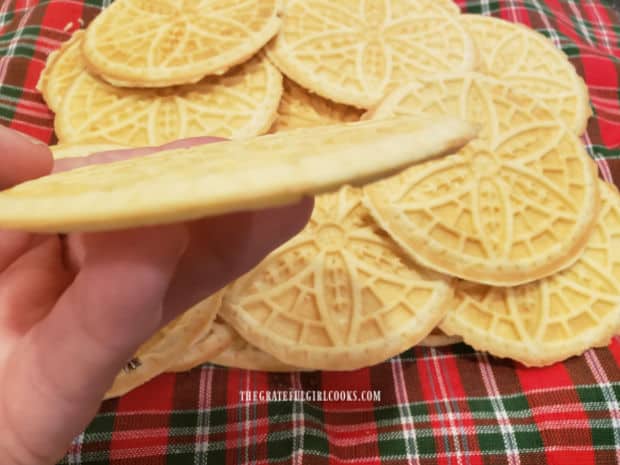
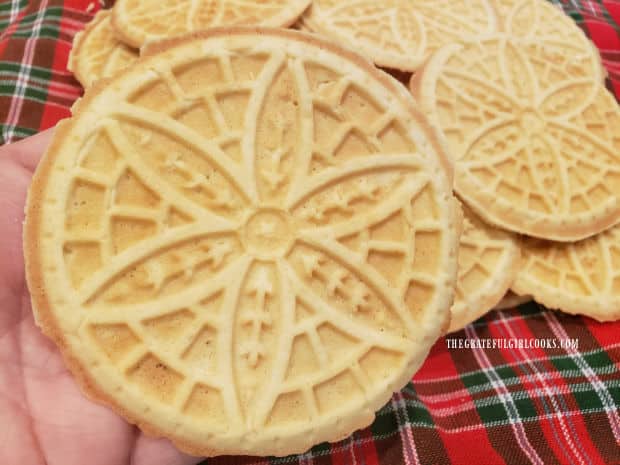
      Pizzelle cookies are known for their beautiful, intricate designs which are cooked onto both sides of a thin round cookie. We enjoy their crispness and uniqueness, too! Pizzelle press appliances are very reasonable and there are a variety of models (and price ranges) available online. There’s many flavors and types (sweet and savory) of pizzelle recipes available, but today I want to show you how to make basic pizzelle cookies.

      Scroll Down For A Printable Recipe Card At The Bottom Of The Page

      Make The Pizzelle Cookie Dough

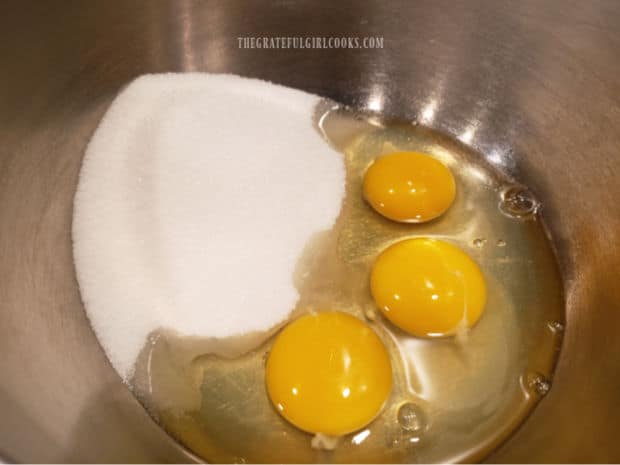
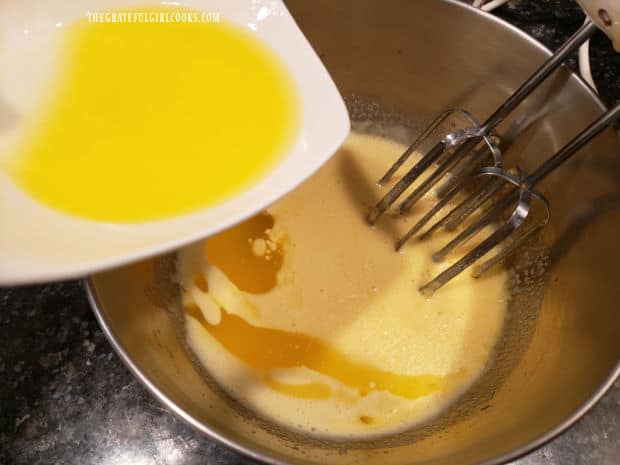
      Place the eggs and granulated sugar in a large mixing bowl. Beat well on low speed, using a hand mixer, until well combined and slightly thickened. Add melted (but cooled) butter and vanilla extract to the bowl, and mix only until just combined (about 15 seconds).

      Three eggs and granulated sugar are placed in mixing bowl.Cooled, melted butter and vanilla extract are added to the pizzelle batter and combined.

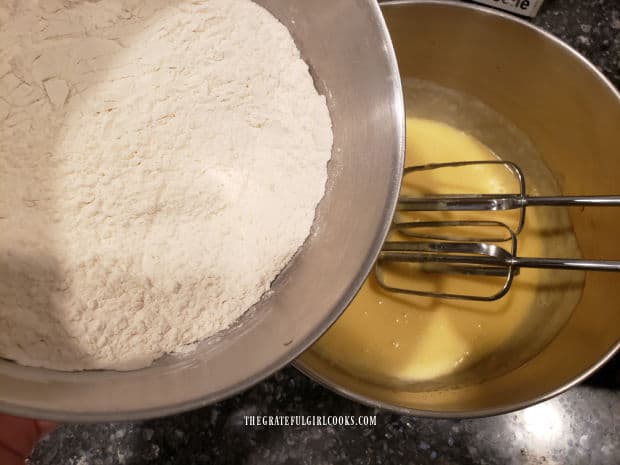
      In a large separate bowl, whisk together all purpose flour and baking powder. Add these “dry” ingredients to the “wet” ingredients and mix only until the ingredients are combined. Be careful NOT to overmix the batter.

      All purpose flour and baking powder are whisked together in bowl.

      Dry ingredients are added to the bowl of wet ingredients and combined.

      Time To Cook Classic Pizzelle Cookies!

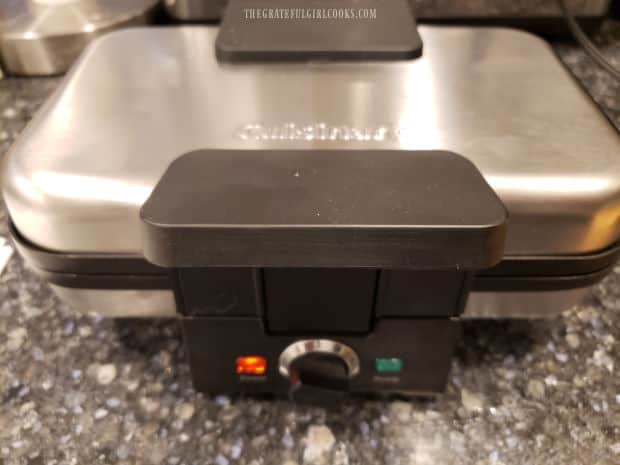
      Preheat your pizzelle press (lid closed) following the manufacturer’s instructions for your model. Once the machine has thoroughly preheated, place a dollop (about a Tablespoon) of the thick cookie batter onto the center of each circle. Remember to follow the instructions for your particular appliance as to the quantity of batter to add! Once the lid has closed, the batter will spread out onto the gridded design, much like a waffle.

      Cook classic pizzelle cookies for the time specified in the directions for your particular appliance (usually only a couple minutes). When done, remove the cookies immediately from the machine. Bring the machine back to heat before continuing to cook the remaining cookies.

      A pizzelle press being preheated before adding batter.Pizzelle cookie batter will be added to the center of each circle and then will be cooked.

      Trim And Cool The Cookies

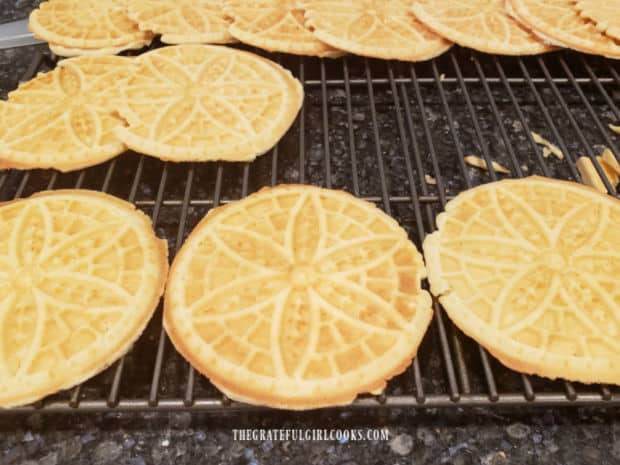
      When you take the pizzelle cookies off the press, place them on a wire rack to cool. If there are any extra bits of cookie around the edges, simply use kitchen scissors or a knife to remove them while still warm. Think of it as giving these cookies a little trim around the edges, if necessary. As the cookies cool, they will become crisper.

      Continue cooking until you have used all the batter up. Don’t fret if some of your classic pizzelle cookies aren’t perfect… it happens. If it is your first time making these delicious cookies, know that they still taste absolutely delicious!

      Classic pizzelle cookies cooling on wire rack after being removed from machine after cooking.

      Time To Enjoy Some Classic Pizzelle Cookies!

      The beautiful imprint of the patterns on the pizzelle cookies is what gives them their charm! Crisp, light and delicious, they are a perfect food gift for the holidays (or any time). Who wouldn’t enjoy receiving a Christmas plate stacked with these little beauties! YUM!

      Beautiful designs are imprinted on both sides of classic pizzelle cookies.A side view of how thin the classic pizzelle cookies are.Holding up one of the crisp, classic pizzelle cookies, which is ready to be enjoyed!

      I hope you have the opportunity to make these unique, yummy, classic pizzelle cookies for those you love! Thank you for stopping by, and I hope you’ll come back again soon. Take care, and enjoy your day!

      Looking For More COOKIE Recipes?

      You can find ALL of my recipes in the Recipe Index, which is located at the top of the page. I have lots of yummy cookie recipes for you to enjoy, including:

      Interested In More Recipes?

      Thank you for visiting this website. I appreciate you using some of your valuable time to do soIf you’re interested, I publish a newsletter 2 times per month (1st and 15th) with all the latest recipes, and other fun info. I would be honored to have you join our growing list of subscribers, so you never miss a great recipe!
      There is a Newsletter subscription box on the top right side (or bottom) of each blog post, depending on the device you use, where you can easily submit your e-mail address (only) to be included in my mailing list.

      You Can Also Find Me On Social Media:

      Facebook page: The Grateful Girl Cooks!
      Pinterest:
      The Grateful Girl Cooks!
      Instagram:
      jbatthegratefulgirlcooks

      Author's signature

      Original recipe source: Cuisinart Pizzelle Press instruction manual (came with the appliance), page 5, published by Cuisinart, 2017

      0 from 0 votes
      Classic Pizzelle Cookies
      Prep Time
      10 mins
      Cook Time
      3 mins
      Total Time
      13 mins
       

      Classic pizzelle cookies are beautiful, delicious treats made in a pizzelle press. They are light, crisp, and imprinted with amazing designs!

      Category: Dessert
      Cuisine: American
      Keyword: classic pizzelle cookies
      Servings: 24 cookies (approx.)
      Calories Per Serving: 101 kcal
      Author: JB @ The Grateful Girl Cooks!
      Ingredients
      • 3 large eggs
      • ¾ cup granulated sugar
      • 8 Tablespoons butter (1 stick) melted, and cooled
      • 1 teaspoon vanilla extract
      • cups all purpose flour
      • 2 teaspoons baking powder
      Instructions
      1. Place eggs and sugar in a large mixing bowl. Beat on low speed, using a hand mixer, until combined/slightly thickened. Add melted (but cooled) butter and vanilla to bowl; mix only until just combined (about 15 seconds).

      2. In a large separate bowl, whisk together flour and baking powder. Add to egg/sugar mixture. Mix only until combined. Do NOT overmix.

      3. Preheat pizzelle press (lid closed) following manufacturer's instructions. Once preheated, place about a Tablespoon of batter onto the center of each circle. Follow instructions for your appliance as to quantity of batter to add. Cook for time specified for your particular appliance (usually a couple minutes). When done, remove cookies immediately from machine. Bring machine back to heat before continuing to cook remaining cookies.

      4. When you take cookies off the press, place them on a wire rack to cool. If there are any extra bits of cookie around the edges, use kitchen scissors or a knife to remove them while still warm. As cookies cool, they will become crisp. Enjoy!

      Nutrition Facts
      Classic Pizzelle Cookies
      Amount Per Serving (1 g)
      Calories 101 Calories from Fat 36
      % Daily Value*
      Fat 4g6%
      Saturated Fat 3g19%
      Trans Fat 1g
      Polyunsaturated Fat 1g
      Monounsaturated Fat 1g
      Cholesterol 33mg11%
      Sodium 43mg2%
      Potassium 54mg2%
      Carbohydrates 13g4%
      Fiber 1g4%
      Sugar 6g7%
      Protein 2g4%
      Vitamin A 150IU3%
      Calcium 21mg2%
      Iron 1mg6%
      * Percent Daily Values are based on a 2000 calorie diet.

      Here’s one more to pin on your Pinterest boards!Classic pizzelle cookies are beautiful, delicious treats made in a pizzelle press. They are light, crisp, and imprinted with amazing designs!

      Easy Smoky Almonds

      Need a simple, delicious appetizer, snack or food gift? Make a batch of Easy Smoky Almonds, covered in sauce, and roasted to perfection!
      Need a simple, delicious appetizer, snack or food gift? Make a batch of Easy Smoky Almonds, covered in sauce, and roasted to perfection!

      Years ago I found a recipe for smoked almonds and jotted the recipe down on a 3×5″ index card. I’m not sure of the source for the original recipe, since I didn’t write it down at the time. The recipe card was put into my old, well-worn recipe box, where it sat for years.  After re-discovering it, I knew I had to make these yummy snacks again (and take photos).

      The recipe is simple. Unblanched almonds are mixed with a simple mixture of Liquid Smoke, water, and vegetable oil. After being covered with flavoring, they are roasted in the oven for 20-25 minutes. They come out of the oven wonderfully browned and crunchy! After roasting, the almonds are then lightly salted. They come out of the oven wonderfully browned and crunchy! YUM!

      It really is super simple to make this recipe. The recipe as written will make one cup of Easy Smoky Almonds. However, the recipe is super easy to double or triple, depending on the amount of almonds you want.

      They’re a great snack (we love to munch on them)! It’s also fun to put out a bowl of the smoky almonds with other appetizers. You can also put them in a cute container and give them as a tasty food gift for celebrations or holidays.

      Scroll Down For A Printable Recipe Card At The Bottom Of The Page

      Prepare The Almonds For Roasting

      First, you will need to preheat your oven to 300°F. You will want the oven nice and hot, since it hardly takes any time to prepare the almonds for roasting.

      In a small bowl, combine the liquid smoke and water. Most grocery stores sell Liquid Smoke. It is a highly concentrated liquid that is quite smoky flavored. This mixture is what will flavor the almonds well.

      Water and liquid smoke are combined to help flavor almonds.

      Place unblanched, unsalted almonds in a bowl, and pour the Liquid Smoke and water mixture over them. Stir well, to ensure all the almonds are coated.

      Once they are covered with the smoky flavoring, add a teaspoon of vegetable oil. Stir the almonds again, to fully coat them with oil.

      A mixture of liquid smoke and water is poured onto the unblanched almonds in a bowl.A teaspoon of vegetable oil is added to the smoky flavored almonds.

      Ready For The Oven

      Cover a baking sheet with a piece of parchment paper (or aluminum foil). Spread the almonds out on the paper in a single layer, and put the almonds into a preheated oven.

      Bake at 300°F. for 20-25 minutes. STIR THE ALMONDS A COUPLE TIMES DURING THE ROASTING TIME!

      When done, the almonds will be crunchy and nicely browned. Remove the baking sheet of almonds from the oven.

      Almonds are placed in a single layer on a parchment paper-lined baking sheet for roasting.Nicely browned and crunchy, the easy smoky almonds are removed from the oven.

      A Little Salt For Added Flavor!

      Lightly sprinkle the roasted almonds with salt, to taste. Let them cool to room temperature before serving.
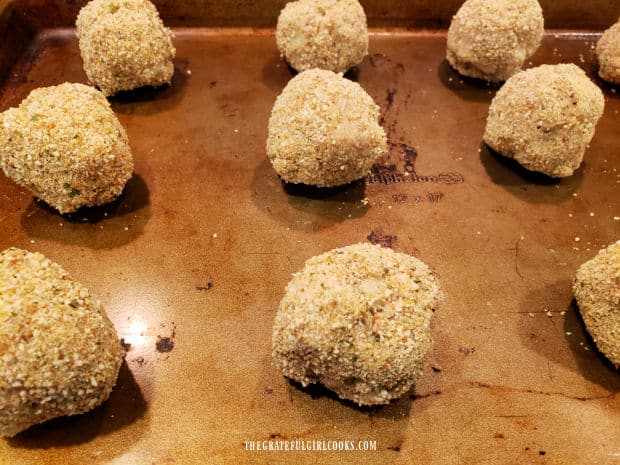
      Roasted almonds are sprinkled with salt before serving.
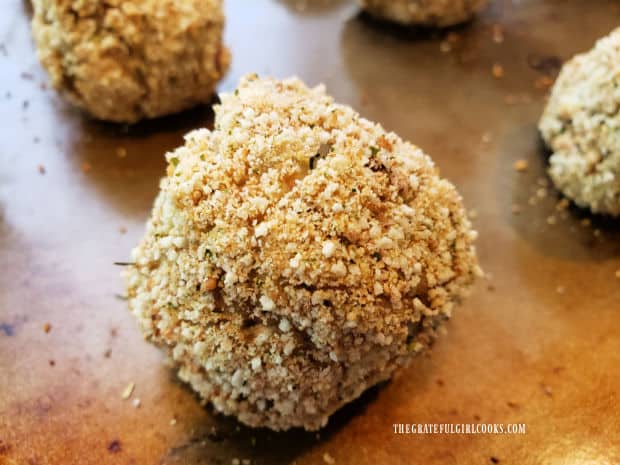
      Time To Enjoy Some Easy Smoky Almonds

      Once the almonds have cooled, they are ready to eat, OR you can package them up for gift giving! That’s it! See how EASY they were to make? I hope you enjoy them as much as we do.

      Easy Smoky Almonds are served in a pretty bowl.

      Thank you for stopping by today. I appreciate your time, and trust you will have the opportunity to make these delicious easy smoky almonds. Please come back soon for more family-friendly recipes. Take care, and have a great day!

      Looking For More APPETIZER Recipes?

      You can find ALL of my recipes in the Recipe Index, which is located at the top of the page. I have quite a few delicious appetizers you might enjoy checking out, including:

      Want More Recipes? Get My FREE Newsletter!

      I publish a newsletter 2 times per month (1st and 15th) with lots of recipes, tips, etc..
      Would you like to join our growing list of subscribers?

      There is a Newsletter subscription box on the top right (or bottom) of each blog post, depending on the device you use.
      You can submit your e-mail address there, to be added to my mailing list.

      Find Me On Social Media:

      Facebook page: The Grateful Girl Cooks!
      Pinterest:
      The Grateful Girl Cooks!
      Instagram:
      jbatthegratefulgirlcooks

      Author's signature


      ↓↓ PRINTABLE RECIPE BELOW ↓↓

      0 from 0 votes
      Easy Smoky Almonds
      Prep Time
      3 mins
      Cook Time
      20 mins
      Total Time
      23 mins
       

      Need a simple, delicious appetizer, snack or food gift? Make a batch of Easy Smoky Almonds, covered in sauce, and roasted to perfection!

      Category: Appetizer/Snack
      Cuisine: American
      Keyword: easy smoky almonds
      Servings: 4 (serving = 1/4 cup)
      Calories Per Serving: 214 kcal
      Author: JB @ The Grateful Girl Cooks!
      Ingredients
      • 1 teaspoon Liquid Smoke
      • 2 teaspoons water
      • 1 cup almonds
      • 1 teaspoon vegetable oil
      • salt to taste
      Instructions
      1. Preheat oven to 300°F.

      2. In a small bowl, combine the liquid smoke and water.

      3. Place unblanched, unsalted almonds in a bowl, and pour the Liquid Smoke/water mixture over them. Stir well, to fully coat. Once covered with smoky flavoring, add vegetable oil. Stir again, to fully cover almonds with oil. Spread almonds on a parchment paper (or foil) lined baking sheet in a single layer.

      4. Bake at 300°F. for 20-25 minutes. STIR ALMONDS A COUPLE TIMES DURING THE ROASTING TIME! When done, the almonds will be crunchy/nicely browned. Remove from oven. Lightly sprinkle with salt, to taste. Let almonds cool to room temperature, then serve. Enjoy!

      Nutrition Facts
      Easy Smoky Almonds
      Amount Per Serving (1 g)
      Calories 214 Calories from Fat 171
      % Daily Value*
      Fat 19g29%
      Saturated Fat 2g13%
      Trans Fat 1g
      Polyunsaturated Fat 4g
      Monounsaturated Fat 11g
      Sodium 3mg0%
      Potassium 252mg7%
      Carbohydrates 8g3%
      Fiber 4g17%
      Sugar 1g1%
      Protein 8g16%
      Vitamin A 1IU0%
      Calcium 94mg9%
      Iron 1mg6%
      * Percent Daily Values are based on a 2000 calorie diet.

      Here’s one more to pin on your Pinterest boards!Need a simple, delicious appetizer, snack or food gift? Make a batch of Easy Smoky Almonds, covered in sauce, and roasted to perfection!

      Parmesan Garlic Cheese Ball

      Make a Parmesan Garlic Cheese Ball for a snack, party or potluck! Simple to make, this yummy appetizer is spread on a variety of crackers!
      Make a Parmesan Garlic Cheese Ball for a snack, party or potluck! Simple to make, this yummy appetizer is spread on a variety of crackers!

      If you’re on the lookout for a simple appetizer or snack, I hope you will give this Parmesan garlic cheese ball a try! It only takes a few minutes to mix together and shape, and then it is refrigerated before serving. YES… it is THAT EASY! I’m not sure where or who I got the original recipe from because I found it written on a 3×5 card in one of my old recipe boxes I’ve had for years.
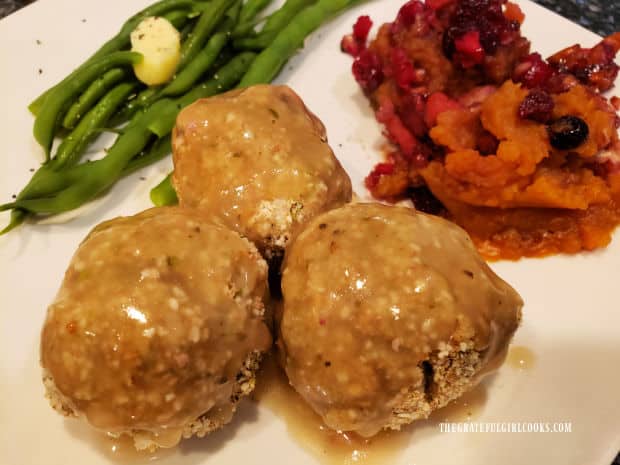
      This is a wonderful recipe to share at a a party, potluck or just to have around for a quick snack with crackers. It has a lot of flavor, and is easy to spread on your favorite crackers. Guess what? It is super simple to give as a delicious food gift, too, for a treat made (especially by you) for someone you love.

      The recipe as written makes one cheese ball (approx. 8 servings), but can easily be doubled to make a larger cheese ball or a second one the same size. Here’s how to make it:

      Scroll Down For A Printable Recipe Card At The Bottom Of The Page

      Let’s Make This Easy Parmesan Garlic Cheese Ball!

      Place softened cream cheese, chopped pimientos, minced garlic, grated Parmesan cheese, and sliced green onions in a mixing bowl. Use a fork to mix these ingredients together (until fully combined). **NOTE: The reason the cream cheese needs to be softened is so it will mix much easier with the other ingredients.

      Cream cheese, pimientos, Parmesan, garlic and green onions are combined in bowl.

      Line a small ramekin with plastic wrap, leaving the plastic extended far past the edges of the dish. Place the cheese ball mixture firmly into the ramekin, and pack it down with a spoon. Once filled, cover it tightly with the remaining plastic wrap, then press down to flatten and compact the top of the cheese mixture.

      Place the Parmesan garlic cheese ball into the refrigerator and let it chill for at least two hours, for best results.

      Cheese ball mixture is molded into a container before being refrigerated.Covered with plastic and pressure applied, the cheese ball is ready for the refrigerator.

      Serving The Parmesan Garlic Cheese Ball

      After the Parmesan garlic cheese ball has been refrigerated for at least two hours, it is ready to serve! Unwrap the cheese ball, and carefully invert it (turn upside down) onto a serving plate (so the flat side is facing down).

      Serve the cheese ball with an assortment of crisp crackers, a knife to spread it with, and enjoy the great flavor of this appetizer or snack!

      Parmesan garlic cheese ball on a plate, ready to be spread on crackers.A close up of the Parmesan garlic cheese ball next to crackers on a plate.

      I saved this bite of the Parmesan garlic cheese ball on a cracker just for you! Go ahead… take a bite! It is delicious, and I’ll bet you will want another one. I am confidant you will enjoy each bite!

      The Parmesan garlic cheese ball is spread onto a cracker for eating.
      Thank you so much for visiting this blog today. I hope you enjoy making and eating this Parmesan garlic cheese ball. Please come back soon for more family-friendly recipes. Take care, and have a wonderful day, friends.
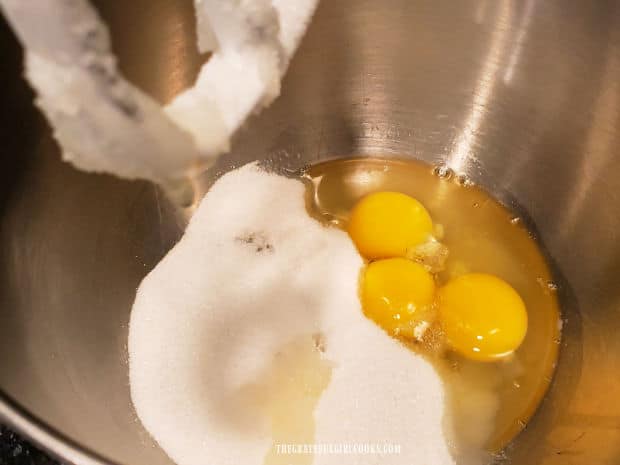
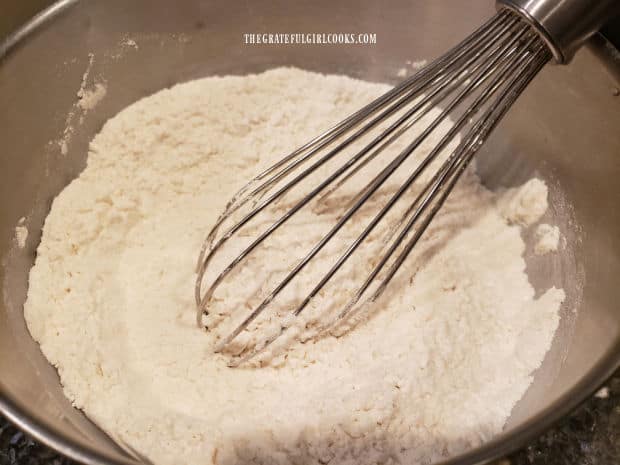
      Looking For More APPETIZER Recipes?

      You can find ALL of my recipes in the Recipe Index, which is located at the top of the page. I have some wonderful appetizers you might want to check out, including:

      Interested In More Recipes?

      Thank you for visiting this website. I appreciate you using some of your valuable time to do soIf you’re interested, I publish a newsletter 2 times per month (1st and 15th) with all the latest recipes, and other fun info. I would be honored to have you join our growing list of subscribers, so you never miss a great recipe!
      There is a Newsletter subscription box on the top right side (or bottom) of each blog post, depending on the device you use, where you can easily submit your e-mail address (only) to be included in my mailing list.

      You Can Also Find Me On Social Media:

      Facebook page: The Grateful Girl Cooks!
      Pinterest:
      The Grateful Girl Cooks!
      Instagram:
      jbatthegratefulgirlcooks

      Author's signature

      Original recipe source: unknown

      0 from 0 votes
      Parmesan Garlic Cheese Ball
      Prep Time
      5 mins
      Cook Time
      0 mins
      Total Time
      5 mins
       

      Make a Parmesan Garlic Cheese Ball for a snack, party or potluck! Simple to make, this yummy appetizer is spread on a variety of crackers!

      Category: Appetizer/Snack
      Cuisine: American
      Keyword: Parmesan garlic cheese ball
      Servings: 8 (approx. 1 oz. per serving)
      Calories Per Serving: 77 kcal
      Author: JB @ The Grateful Girl Cooks!
      Ingredients
      • 8 ounces cream cheese ,softened (light or regular cream cheese)
      • cup grated Parmesan cheese
      • ¼ cup thinly sliced green onion ,green stem and white bulb
      • 2 Tablespoons chopped Pimiento
      • ½ clove garlic ,finely minced
      Instructions
      1. Line a 4" wide ramekin (or very small container) with plastic wrap, leaving plastic extended well past the edges of the dish.

      2. Place softened cream cheese, pimientos, garlic, grated Parmesan and sliced green onions in a mixing bowl. Use a fork to mix together until fully combined.

      3. Place mixture into lined ramekin; pack it down firmly with a spoon. Once filled, cover tightly with remaining plastic wrap. Press down to flatten and compact the top of the cheese mixture. Place covered, cheese-filled ramekin in refrigerator; chill at least two hours, for best results.

      4. To serve: Unwrap cheese ball; carefully invert it (turn upside down) onto a serving plate (flat side down). Serve with an assortment of crackers, a knife to spread it with, and enjoy the great flavor of the cheese ball! Store leftover cheese ball, (covered) in refrigerator.

      Recipe Notes

      Caloric calculation made using light cream cheese.

      Nutrition Facts
      Parmesan Garlic Cheese Ball
      Amount Per Serving (1 ounce (1/8 of total))
      Calories 77 Calories from Fat 54
      % Daily Value*
      Fat 6g9%
      Saturated Fat 3g19%
      Polyunsaturated Fat 1g
      Monounsaturated Fat 1g
      Cholesterol 19mg6%
      Sodium 198mg9%
      Potassium 91mg3%
      Carbohydrates 3g1%
      Fiber 1g4%
      Sugar 2g2%
      Protein 4g8%
      Vitamin A 323IU6%
      Vitamin C 4mg5%
      Calcium 91mg9%
      Iron 1mg6%
      * Percent Daily Values are based on a 2000 calorie diet.

      Here’s one more to pin on your Pinterest boards!Make a Parmesan Garlic Cheese Ball for a snack, party or potluck! Simple to make, this yummy appetizer is spread on a variety of crackers!