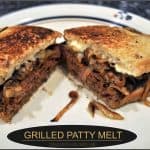
Make a classic grilled patty melt from the comfort of home! Seasoned beef, rye bread, caramelized onions, and gooey cheese create a delicious grilled sandwich!
Do you enjoy a good Patty Melt? I sure do – YUM! Sometimes when we go out for hamburgers, I opt for a grilled patty melt, because I love the simplicity of this sandwich and I LOVE the taste! Did you know it’s EASY to make them from the comfort of your own home?
Seriously… I love grilled onions, I love cheese and I love burgers, so how could I not enjoy this simple classic grilled sandwich? A patty melt features all of those ingredients, and is a popular menu item at diners and Mom and Pop restaurants around the country!
Now, please note that I didn’t say they are the HEALTHIEST meal option, but I do believe life (including food choices) is all about balance. Every now and then, a grilled patty melt with perfectly caramelized onions and gooey cheese on buttered rye bread makes me deliriously HAPPY.
I enjoyed eating this grilled patty melt. Every single bite… THEN I went for a 237 mile walk to work off the calories… Ha Ha!
Scroll Down for A Printable Recipe Card At The Bottom Of The Page
How To Make A Grilled Patty Melt
Patty melts are easy to make. They do take a little bit of prep time, because you need to caramelize and brown the sliced onions really well!
Slice the onions thin, then cook low and slow in a little butter for 20-25 minutes, stirring occasionally. If you are a multi-tasker, you can grill the patties at the same time.
You can also prepare the onions for the patty melt ahead of time, if you want. This could save you time later on when everyone is ravenous and starving.

Lightly season the ground beef with salt, pepper, a touch of garlic powder and some Worcestershire sauce, then shape the meat into patties.
Make the patties slightly oblong to fit better on a piece of Rye bread (the “traditional” bread used to make this sandwich).
Cooking The Beef For A Patty Melt
Grill the beef patties on both sides on medium-high heat until they reach the desired doneness (I am a medium-well gal, myself). I cook the meat on an indoor cast iron grill, but they are just as easily cooked on a BBQ grill.
Make sure the grill or pan you use is very hot before adding the meat. This helps to create a crusty “sear” on the outside.

Once ready to cook the grilled patty melt, spread butter on one side of each slice of bread (like making a grilled cheese sandwich).
Place the cooked meat patty onto the non-buttered side, then pile on the caramelized onions.

NOTE: If you want a LOT of cheese, place a piece of Swiss cheese on the bread before placing the patty on, then add another one to the top. I wanted just a small amount of cheese, so I put it only on top of the onions.

Top With Another Slice Of Bread
Place another slice of bread on top of the cheese (buttered side out). If you wish to add Thousand Island dressing (a lot of restaurants serve it with this), spread it onto the unbuttered side of the top slice of bread.
Cook the patty melt as you would a grilled cheese sandwich. Once the bottom slice of bread is golden brown and toasty, carefully flip the sandwich to the other side.
Continue cooking the grilled patty melt until the bread is crusty and golden brown, the cheese has melted, and the sandwich is heated through.

Time to EAT!
Once done, carefully slice the patty melt in half, and serve with additional Thousand Island dressing or ketchup for dunking!
And, if you want MORE calories (cough, cough), add some fries! French fries are VEGETABLES, right?

That’s it! See how easy it is to make this classic sandwich? Now you can make a delicious grilled patty melt in the comfort of your own home!
The secret is getting the onions cooked just right, along with crispy rye bread, a well-seared beef patty, and ooey gooey melted cheese! This simple meal always make me happy!
I hope you will consider making these yummy sandwiches for lunch or dinner for friends or family! Have a fantastic day!
Looking For More SANDWICH Recipes?
You can find all my recipes in the Recipe Index, located at the top of the page. I have quite a few delicious sandwich recipes you might enjoy, including:
- Black Bean Burgers
- Grilled Pork Tenderloin Sandwich with Mozzarella and Caramelized Onions
- Grilled “Thai” PB&J Sandwich
- Chicken Pineapple Bacon Burger
- Egg Salad For Sandwiches
Interested In More Recipes?
Thank you for visiting this website. I appreciate you using some of your valuable time to do so. If you’re interested, I publish a newsletter 2 times per month (1st and 15th) with all the latest recipes, and other fun info. I would be honored to have you join our growing list of subscribers, so you never miss a great recipe!
There is a Newsletter subscription box on the top right side (or bottom) of each blog post, depending on the device you use, where you can easily submit your e-mail address (only) to be included in my mailing list.
You Can Also Find Me On Social Media:
Facebook page: The Grateful Girl Cooks!
Pinterest: The Grateful Girl Cooks!
Instagram: jbatthegratefulgirlcooks

- 2 onions , peeled, sliced thin
- 1 Tablespoon butter
- 1½ pounds ground beef
- 1 teaspoon salt
- 1 teaspoon black pepper
- 1/4 teaspoon garlic powder
- 4-5 dashes Worchestershire sauce
- 2 Tablespoons butter
- 8 slices rye bread (can substitute sourdough)
- 4 slices Swiss cheese (use more, if desired- can also substitute American cheese)
- Thousand Island dressing (optional, if desired)
- Trim ends off onions, peel, then slice thin. Melt 1 Tablespoon butter in skillet. Cook onions slices on medium heat for 20-25 minutes, stirring occasionally. When done, the caramelized onions should be softened and light brown. Set aside.
- Season ground beef with salt, pepper, garlic powder and Worchestershire sauce. Mix well. Shape meat into 4 slightly oblong patties (to fit shape of rye bread). Grill beef patties on grill or in skillet on medium-high heat (spray skillet with non-stick spray or use melted butter) until cooked through to your preferred done-ness. Make sure the grill or pan you use is very hot before adding the meat. This helps to create a quick, crusty "sear" on the outside. When done, set beef patties on paper towel to drain excess grease.
- When ready to cook sandwich, spread butter on one side of each slice of bread. Place cooked meat patty onto the non-buttered side, then piled on the caramelized onions. Top with slice of Swiss cheese. NOTE: If you want a LOT of cheese, place a piece of Swiss cheese on the bread before placing the patty on, then add another slice to the top.
- Place a slice of buttered bread on top of the cheese (butter side out). If you wish to add Thousand Island dressing, spread it onto the unbuttered side of the top slice of bread. Cook patty melt on low heat as you would a grilled cheese sandwich. Once the bottom is golden brown and toasty, carefully flip the sandwich (with a spatula) to the other side, and continue cooking until golden brown, cheese has melted, and sandwich is heated through. Once done, carefully slice patty melt in half, and serve with additional Thousand Island dressing or ketchup for dunking! Enjoy!
Here’s one more to pin on your Pinterest boards!


 is an easy, inexpensive, Southwestern flavored dish, and can be served as a first course or an entree! / The Grateful Girl Cooks!")


 is an easy, inexpensive, Southwestern flavored dish, and can be served as a first course or an entree! / The Grateful Girl Cooks!")
, using only one pound of ground beef! / The Grateful Girl Cooks!")


, using only one pound of ground beef! / The Grateful Girl Cooks!")