Category: Seafood

Air Fryer Crusted Mahi Mahi

Air Fryer Crusted Mahi Mahi is a delicious, easy dish! Mahi Mahi fillets are coated in seasoned Panko breadcrumbs and air fried until crispy!
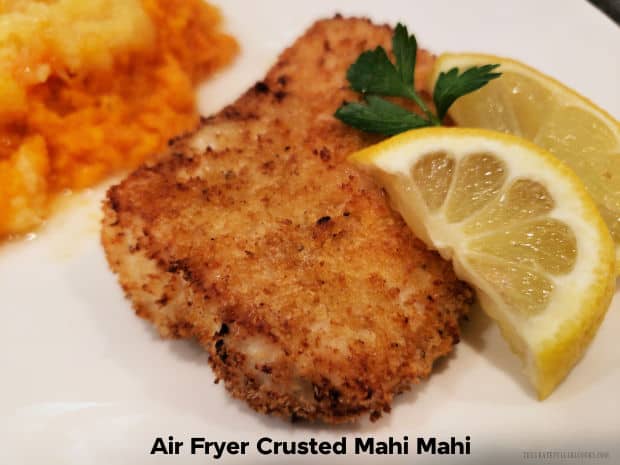

Today I want to share a recipe for air fryer crusted mahi mahi (its Hawaiian name) that we really enjoy! Boneless fillets of this firm white fish are covered with a seasoned panko breadcrumb topping, and then cooked in an air fryer until browned and crispy!

The recipe could not be more simple, and if you happen to own an air fryer you’ll appreciate how easy is to prepare this crispy fish.

We love mahi mahi! It does not have a “fishy taste”, but is a mild flavored piece of fish. Frozen individually wrapped fillets can be found in the frozen food department of many grocery stores (or Costco), and whole fillets can often be found at a local fish market.

The prep time for this is only about 5 minutes, then the mahi mahi cooks in the air fryer, with only a quick flip over, about halfway through the cooking. That’s it! 

Perhaps you are unfamiliar with this delicious piece of seafood. If you’re interested in learning more about this type of fish, be sure to check out the information HERE, which tells you the origins of this fish, where it is commonly found, and lots of other cool facts! Here’s how to make air fryer crusted mahi mahi.

Scroll Down For A Printable Recipe Card At The Bottom Of The Page

Prepare The Panko And Spice Topping

NOTE: Before making the topping for the fish, preheat your air fryer to 400°F. The prep for this dish only takes a few minutes, so you want the air fryer hot, in order to save time!

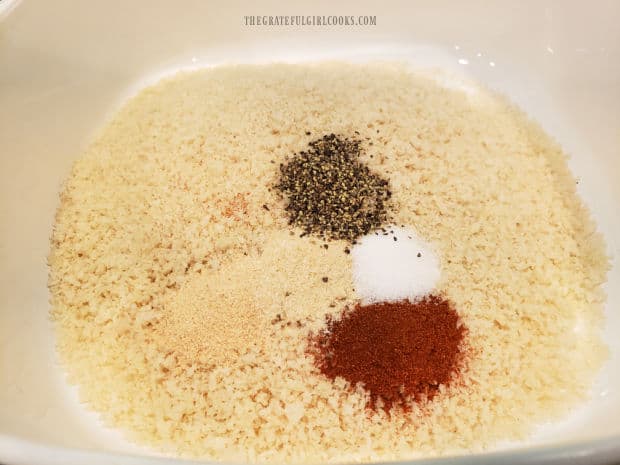
Combine panko breadcrumbs, paprika, garlic powder, onion powder, salt and black pepper in a shallow bowl or dish. Stir to fully combine these ingredients.

This is the panko topping that will coat and season the mahi mahi. The crispy panko breadcrumbs are what will give the fish its crunchy texture on the outside!

Panko breadcrumbs are combined with a variety of spices to coat the fish fillets.

Prepare The Fish Fillets

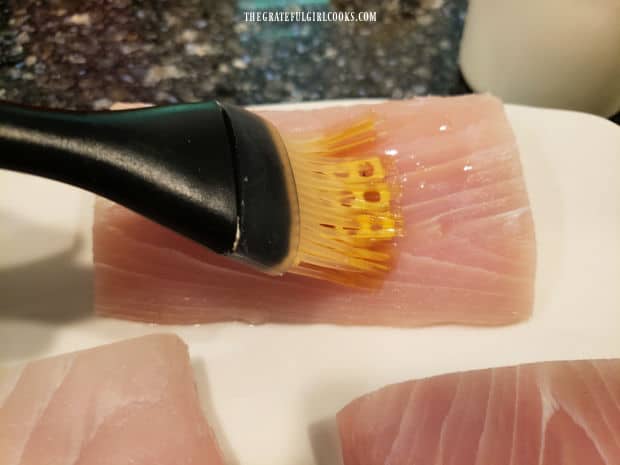
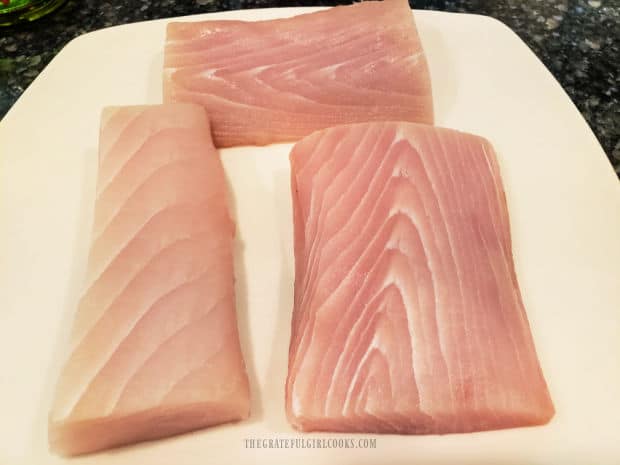
Use several paper towels to pat each of the mahi mahi fillets dry. Use a pastry brush to coat all sides of each piece of fish with olive oil.

Please note that we only used three fillets this time instead of four, as the recipe calls for. 

Mahi Mahi fillets are dried off with paper towels then wait to be breaded.Each fish fillet is brushed on all sides with olive oil.

Add Breadcrumb Seasoning To The Mahi Mahi

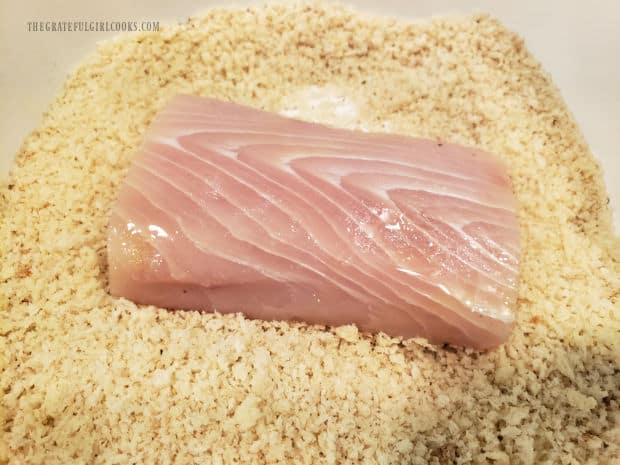
Place the mahi mahi fillets (one at a time) onto the breadcrumb seasoning mixture. Press the breadcrumbs on gently, to help adhere them to the fish. Coat all sides of the fish with the seasoned panko.

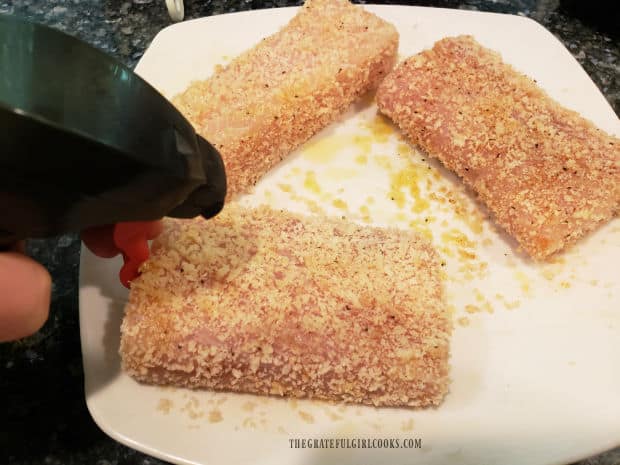
Place each coated fillet onto a large plate, then lightly spritz the top and bottom of each piece of fish with additional olive oil. This will help the panko breadcrumb coating to become very crisp on both sides.

The oiled Mahi Mahi fillets are coated, one at a time in seasoned panko breadcrumbs.Panko coated fish fillets are spritzed with olive oil before being put into air fryer to cook.

Cooking The Mahi Mahi Fillets

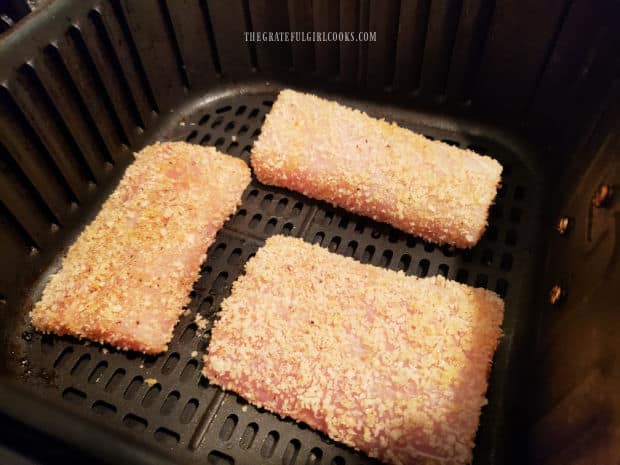
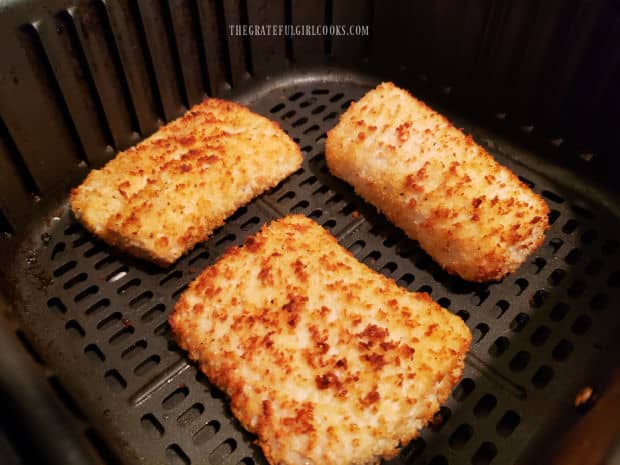
Place the breaded/sprayed mahi mahi fillets (in a single layer) in the basket of the air fryer. Cook at 400°F. for 6-7 minutes, then gently turn the fish fillets over to the other side.

They should be nicely browned on the surface. Continue cooking for an additional 6-8 minutes until cooked through. The panko crust on the fish should be nicely browned and crispy, as well.

Be careful to not overcook the fish. Because mahi mahi is a very lean fish, if overcooked, it runs the risk of being dry, and we don’t want that, do we?

Three crusted mahi mahi fillets are placed in the air fryer basket to be cooked.Halfway through the air frying time, the fillets are flipped to cook the other side.

Serve The Air Fryer Crusted Mahi Mahi

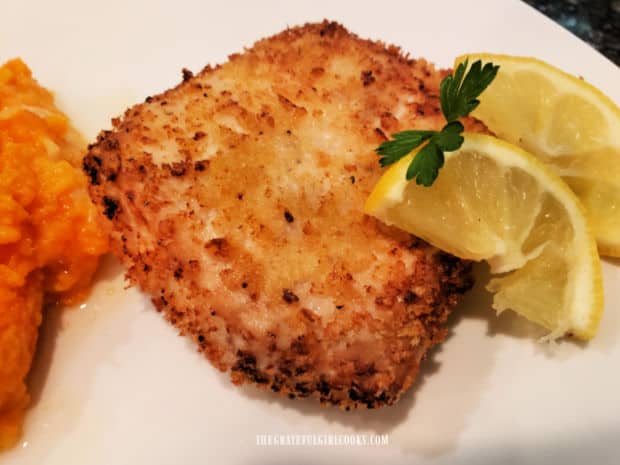
Transfer the air fryer crusted mahi mahi to individual serving plates. Garnish each piece of fish with a lemon wedge or two (for squeezing) and fresh parsley for additional color and flavor.

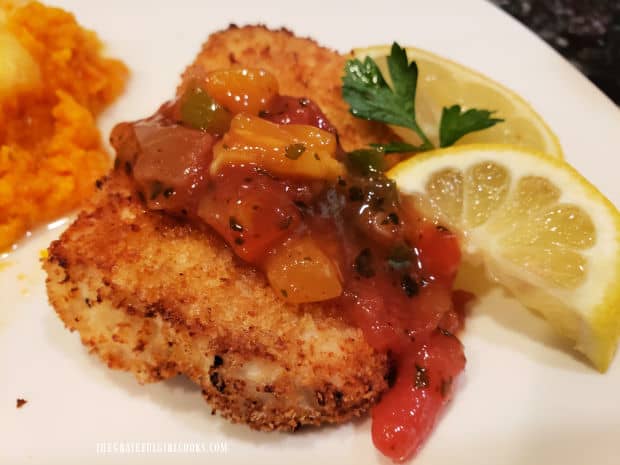
We also love to add peach/mango salsa (which we get at Costco), and lightly spoon it over the top of each piece. That is optional, but oh so good!

The air fryer crusted mahi mahi pairs well with a great variety of side dishes. When I made the dish this time, I served it with Pineapple Topped Sweet Potato Puff. That was a unique pairing, but they actually ended up complimenting each other very well!

An Air fryer crusted mahi mahi filet is served with a lemon wedge on the side.This piece of air fryer crusted mahi mahi is served with fruit salsa on top and lemon on the side.

I hope you have the chance to try this delicious seafood recipe, and trust you’ll enjoy it as much as we do. If you enjoy mahi mahi, be sure to try Easy Baked Mahi Mahi, or Mahi Mahi with Corn & Avocado Salsa,too!

Thanks for stopping by, and I invite you to come back again soon for more family-friendly recipes. Take care, may God bless you, and have a GREAT day!

Looking For More AIR FRYER Recipes?

You can find ALL of my recipes in the Recipe Index, which is located at the top of the page. I have some delicious air fryer recipes for you to enjoy, including:

Interested In More Recipes?

Thank you for visiting this website. I appreciate you using some of your valuable time to do soIf you’re interested, I publish a newsletter 2 times per month (1st and 15th) with all the latest recipes, and other fun info. I would be honored to have you join our growing list of subscribers, so you never miss a great recipe!
There is a Newsletter subscription box on the top right side (or bottom) of each blog post, depending on the device you use, where you can easily submit your e-mail address (only) to be included in my mailing list.

You Can Also Find Me On Social Media:

Facebook page: The Grateful Girl Cooks!
Pinterest:
The Grateful Girl Cooks!
Instagram:
jbatthegratefulgirlcooks

Author's signature

Recipe adapted from Samantha at: everydayfamilycooking.com/air-fryer-mahi-mahi

↓↓ PRINTABLE RECIPE BELOW ↓↓
0 from 0 votes
Air Fryer Crusted Mahi Mahi
Prep Time
5 mins
Cook Time
13 mins
Total Time
18 mins
 

Air Fryer Crusted Mahi Mahi is a delicious, easy dish! Mahi Mahi fillets are coated in seasoned Panko breadcrumbs and air fried until crispy!

Category: Entree-Seafood, Main Dish
Cuisine: American
Keyword: air fryer crusted mahi mahi
Servings: 4
Calories Per Serving: 285 kcal
Author: JB @ The Grateful Girl Cooks!
Ingredients
  • pounds Mahi Mahi fillets (4 fillets)
  • 2 Tablespoons extra virgin olive oil + additional for spritzing
  • cups panko breadcrumbs
  • 1 teaspoon paprika
  • ½ teaspoon garlic powder
  • ½ teaspoon onion powder
  • ½ teaspoon salt
  • ½ teaspoon black pepper
OPTIONAL: Lemon wedges, fresh parsley sprigs, and/or salsa, to serve
    Instructions
    1. Preheat air fryer to 400°F.

    2. Combine panko breadcrumbs, paprika, garlic powder, onion powder, salt and pepper in shallow bowl or dish. Stir to combine.

    3. Pat mahi mahi fillets dry with paper towels. Use a pastry brush to coat all sides of each fillet with olive oil.

    4. Lay fillets (one at a time) on breadcrumbs. Press breadcrumbs onto fish to adhere and coat each with breadcrumbs on all sides. Place each coated fillet onto a large plate; lightly spritz top and bottom sides of each fillet with additional olive oil. This helps panko breadcrumb coating to become very crisp.

    5. Place fish in a single layer in air fryer basket. Cook at 400°F. for 6-7 minutes, then gently turn fish over to the other side. Continue cooking for 6-8 minutes. Fish should be fully cooked; breadcrumb crust should be crisp and browned when done. Be careful to not overcook the fish (or it can become dry).

    6. Transfer mahi mahi to individual serving plates. Garnish each piece with lemon wedges (for squeezing) and fresh parsley., if desired. Also can spoon salsa over the top of each piece, for additional flavor (optional). Enjoy!
    Nutrition Facts
    Air Fryer Crusted Mahi Mahi
    Amount Per Serving (1 fillet (1/4 of total))
    Calories 285 Calories from Fat 81
    % Daily Value*
    Fat 9g14%
    Saturated Fat 2g13%
    Polyunsaturated Fat 1g
    Monounsaturated Fat 6g
    Cholesterol 124mg41%
    Sodium 579mg25%
    Potassium 766mg22%
    Carbohydrates 14g5%
    Fiber 1g4%
    Sugar 1g1%
    Protein 34g68%
    Vitamin A 554IU11%
    Vitamin C 0.1mg0%
    Calcium 64mg6%
    Iron 3mg17%
    * Percent Daily Values are based on a 2000 calorie diet.

    Here’s one more to pin on your Pinterest boards!Air Fryer Crusted Mahi Mahi is a delicious, easy dish! Mahi Mahi fillets are coated in seasoned Panko breadcrumbs and air fried until crispy!

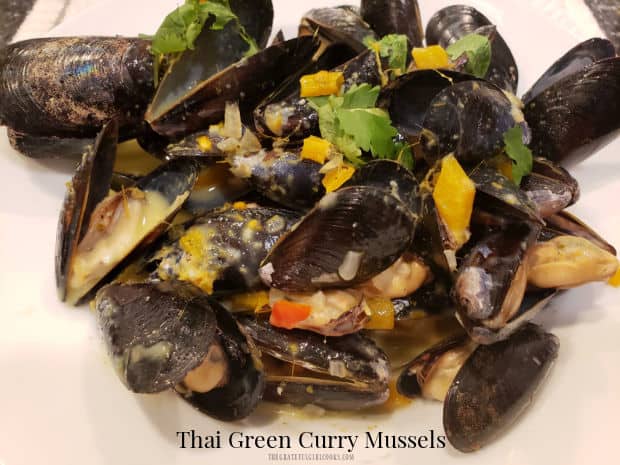
    Thai Green Curry Mussels

    Thai Green Curry Mussels are a delicious dish! Mussels are served in a coconut curry sauce, with ginger, garlic, lime, shallots and peppers.
    Thai Green Curry Mussels are a delicious dish! Mussels are served in a coconut curry sauce, with ginger, garlic, lime, shallots and peppers.

    Do you enjoy eating fresh steamed mussels? If so, you may enjoy this slight twist on traditional mussels! Today I want to share with you a recipe I developed for Thai Green Curry Mussels. The flavor palette is slightly spicy from the green curry paste, but is balanced well with coconut milk and other veggies.

    The sauce tastes wonderful not only on the steamed mussels, but it’s a perfect dipping sauce for crusty slices of hot sourdough or French bread. We always try to have hot bread on the side to use to dip in the sauce from the bowls! YUM! This recipe is fairly simple to prepare, but has the look and taste of a meal you could get at a nice seafood restaurant! Here’s how to make Thai Green Curry Mussels:

    Scroll Down For A Printable Recipe Card At The Bottom Of The Page

    Before Starting

    Please Note: Before cooking fresh mussels it is very important to check them. If any of the shells have already opened, discard them, as they are not safe to eat. You want those shells CLOSED before cooking! The mussel shells will open on their own, once they have been successfully cooked.

    Prepare The Veggies For The Sauce

    Heat coconut oil in a LARGE skillet (one that also has a lid) on medium heat. When the oil is hot, add 1/3 cup (total) of chopped red/yellow bell peppers, minced shallot, and a grated 1″ piece of fresh ginger. Add a small pinch of red chili pepper flakes, then season lightly with a couple pinches of salt and pepper.

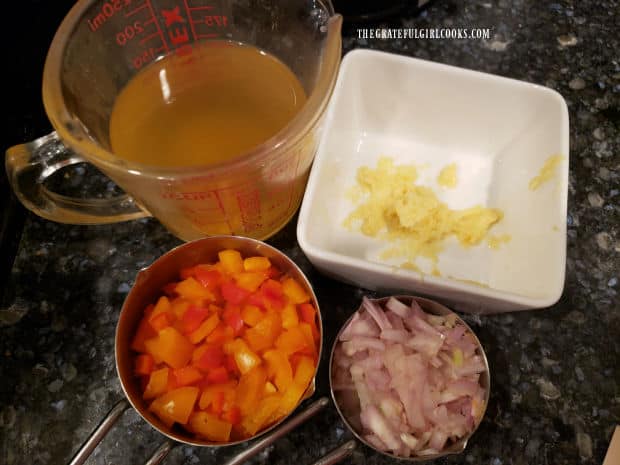
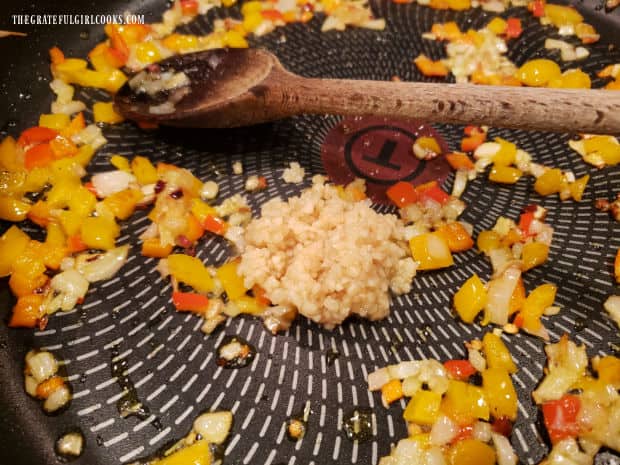
    Stir to combine, and cook these veggies on Medium heat for a couple minutes until they begin to become tender. Add minced garlic and cook for another 30 seconds, stirring often so the garlic doesn’t burn. Pour in 1/2 cup of chicken broth, and stir again, to combine these ingredients.

    Chicken broth, ginger, red peppers and shallots ready to season the mussels.Minced garlic is added to the sauteed veggies in the skillet.

    Cook The Mussels

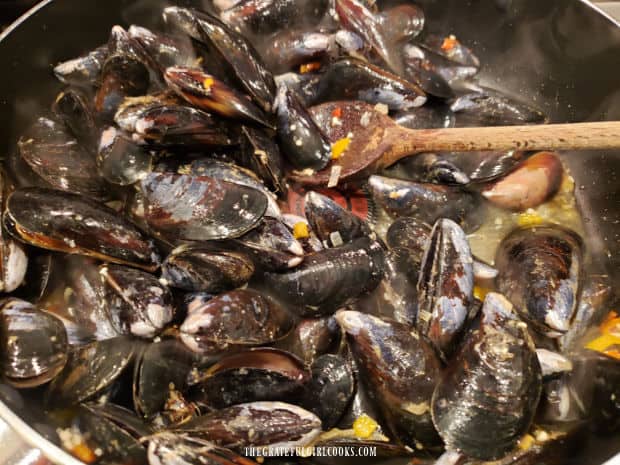
    Now it’s time to cook the mussels. You will cook the mussels in the same skillet. Add the mussels to the skillet, and quickly stir to cover them with the “veggies” and broth. Put a lid on the skillet, and let the mussels steam for 4-5 minutes on Medium heat or until all the mussel shells have opened. Give the cooked mussels another stir to coat with the broth.

    Remove the skillet from the heat. Discard any mussels that did NOT open while cooking, as they’re not safe for consumption. Cover the skillet again (off heat) and keep the mussels warm.

    Mussels are added to skillet with veggies and steamed for 4-5 minutes.

    Make The Green Curry Sauce

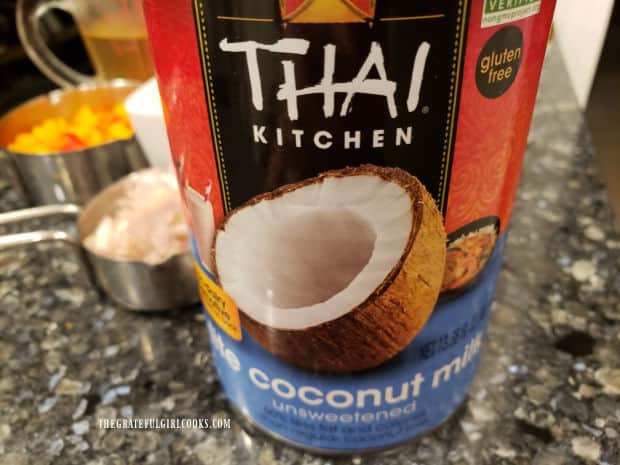
    TIP: Make the green curry sauce while the mussels are cooking, because they take about the same time to cook. To make the green curry sauce you will need a can of unsweetened coconut milk (NOT coconut cream). Use either lite or regular canned coconut milk, whichever you prefer. You can typically find this in the Asian foods section at the grocery store.

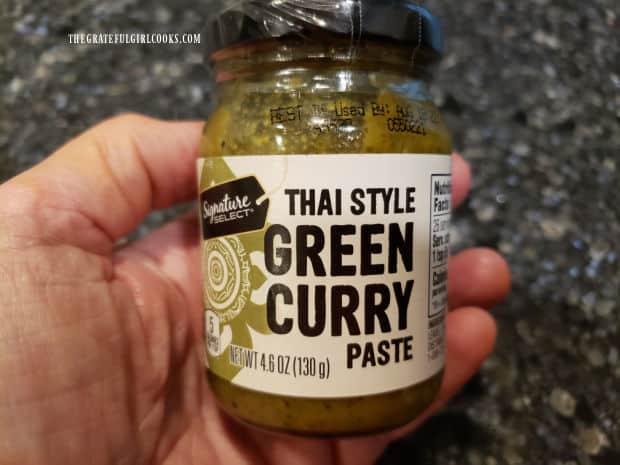
    You will also need Thai style green curry paste, which is usually found in the Asian foods section. I have found various brands available at our local Safeway, Kroger and Wal Mart. This recipe uses 3 Tablespoons GREEN curry paste, so buy a small jar and refrigerate the leftover paste. If you happen to prefer a really hot and spicy green curry sauce, feel free to add another Tablespoon.

    Canned coconut milk is used in the green curry sauce for the mussels.Thai green curry paste is used to season the sauce for the steamed mussels.

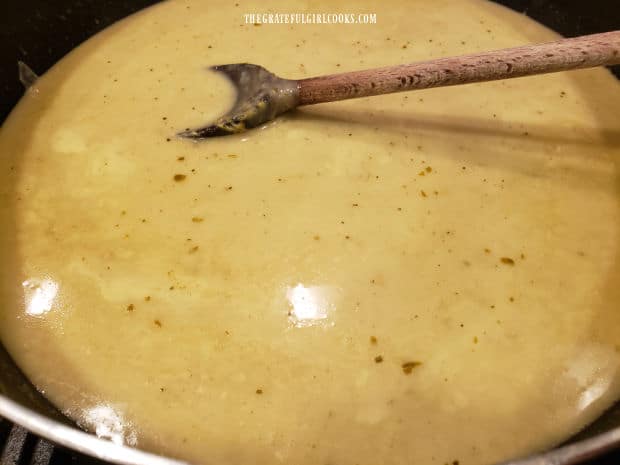
     To make the curry sauce, add 3 Tablespoons of green curry paste into a separate large skillet. Cook the sauce on low heat for two minutes, stirring occasionally.

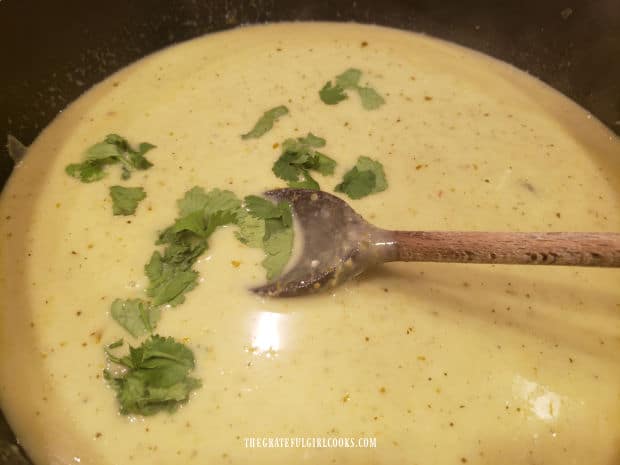
    Open the can of coconut milk, and stir it until mixture is well blended. Add the canned coconut milk and the juice of one lime to the curry sauce. Stir again, then let the sauce simmer on low heat 2-3 minutes, or until heated through. Stir in half of the total amount of cilantro leaves.

    The green curry sauce cooks in a large skillet before pouring over cooked mussels.Cilantro leaves are added to the green curry sauce in the skillet.

    Serve The Thai Green Curry Mussels

    To serve, evenly divide the cooked mussels (and veggies) into individual serving bowls. Pour the hot green curry sauce over the mussels, dividing all the sauce evenly between the portions. Garnish each serving with the remaining cilantro leaves, then serve and enjoy! Be sure to serve some warm crusty bread on the side to dip up some of that curry sauce out of the bowl.

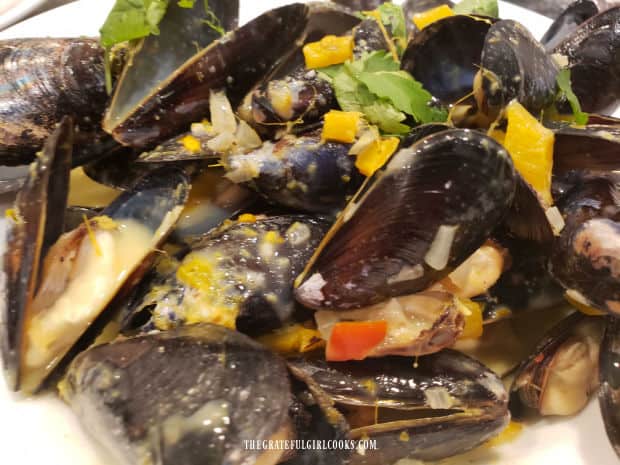
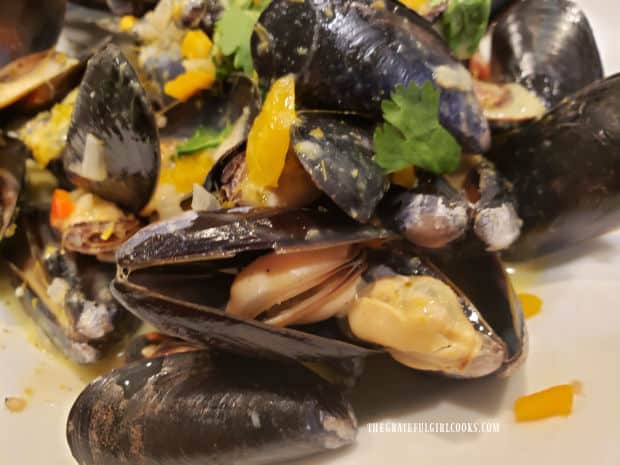
    Thai green curry mussels are served in a large white bowl.One of the cooked Thai green curry mussels shown inside its open shell.

    I hope you enjoy this tasty recipe for Thai green curry mussels. Thanks for taking the time to visit my blog today, and I invite you to come back soon for more delicious recipes. Take care, and have a great day!

    Looking for More SEAFOOD Recipes?

    You can find ALL of my recipes in the Recipe Index, which is located at the top of the page. I have a great variety of seafood recipes for you to enjoy, including:

    Interested In More Recipes?

    Thank you for visiting this website. I appreciate you using some of your valuable time to do soIf you’re interested, I publish a newsletter 2 times per month (1st and 15th) with all the latest recipes, and other fun info. I would be honored to have you join our growing list of subscribers, so you never miss a great recipe!
    There is a Newsletter subscription box on the top right side (or bottom) of each blog post, depending on the device you use, where you can easily submit your e-mail address (only) to be included in my mailing list.

    You Can Also Find Me On Social Media:

    Facebook page: The Grateful Girl Cooks!
    Pinterest:
    The Grateful Girl Cooks!
    Instagram:
    jbatthegratefulgirlcooks

    Author's signature

    ↓↓ PRINTABLE RECIPE BELOW ↓↓

    0 from 0 votes
    Thai Green Curry Mussels
    Prep Time
    20 mins
    Cook Time
    5 mins
    Total Time
    25 mins
     

    Thai Green Curry Mussels are a delicious dish! Mussels are served in a coconut curry sauce, with ginger, garlic, lime, shallots and peppers.

    Category: Main Dish
    Cuisine: American, Thai
    Keyword: Thai green curry mussels
    Servings: 3
    Calories Per Serving: 365 kcal
    Author: JB @ The Grateful Girl Cooks!
    Ingredients
    • 1 Tablespoon coconut oil
    • cup red/orange bell peppers combined/chopped
    • ¼ cup shallot minced
    • 1 inch piece of fresh ginger finely grated
    • 1 pinch red pepper flakes
    • ¼ teaspoon salt and pepper ¼ tsp. EACH
    • 4 cloves garlic minced
    • ½ cup low sodium chicken broth
    • pounds fresh mussels
    • 3 Tablespoons green curry paste
    • 13.7 ounces lite coconut milk (canned)
    • 1 lime (juice only)
    • 4 Tablespoons cilantro leaves Divided Use
    Instructions
    1. *Note: Before cooking fresh mussels it is very important to check them. If any of the shells have already opened, discard them, as they are not safe to eat. You want shells CLOSED before cooking! The mussel shells will open on their own, once they've been cooked.

    2. Heat coconut oil in large skillet on Medium heat. When oil is hot, add chopped red/yellow peppers, shallot, and grated ginger. Add a pinch of red pepper flakes; season with salt/pepper. Stir to combine; cook on Medium for a couple minutes until veggies begin to soften. Add minced garlic; cook another 30 seconds, stirring often. Pour in chicken broth; stir again to combine ingredients.

    3. Add mussels to the same skillet; quickly stir to coat mussels with veggies/broth. Put a lid on the skillet. Steam mussels for 4-5 minutes on Medium heat or until you see the shells have opened. Give mussels another stir to coat with broth. Remove skillet from heat. Discard any mussels (if there are any) that did NOT open while cooking. Cover skillet (off heat); keep mussels warm.

    Make Curry Sauce While Mussels Are Steaming To Save Time!
    1. Place curry paste into separate skillet. Cook on Low heat for two minutes, stirring occasionally. Open can of coconut milk; stir until contents are well blended. Add coconut milk and lime juice to skillet. Stir again; let simmer on Low 2-3 minutes, or until heated through. Stir in ½ of the cilantro leaves, then serve.

    2. To serve, evenly divide cooked mussels (and veggies) into serving bowls. Pour hot green curry sauce over mussels, dividing all the sauce evenly between portions. Garnish each serving with remaining cilantro. Serve and enjoy!

    Nutrition Facts
    Thai Green Curry Mussels
    Amount Per Serving (1 (1/3 of total))
    Calories 365 Calories from Fat 171
    % Daily Value*
    Fat 19g29%
    Saturated Fat 14g88%
    Polyunsaturated Fat 2g
    Monounsaturated Fat 2g
    Cholesterol 54mg18%
    Sodium 870mg38%
    Potassium 792mg23%
    Carbohydrates 20g7%
    Fiber 2g8%
    Sugar 4g4%
    Protein 25g50%
    Vitamin A 3241IU65%
    Vitamin C 44mg53%
    Calcium 91mg9%
    Iron 9mg50%
    * Percent Daily Values are based on a 2000 calorie diet.

    Here’s one more to pin on your Pinterest boards!Thai Green Curry Mussels are a delicious dish! Mussels are served in a coconut curry sauce, with ginger, garlic, lime, shallots and peppers.

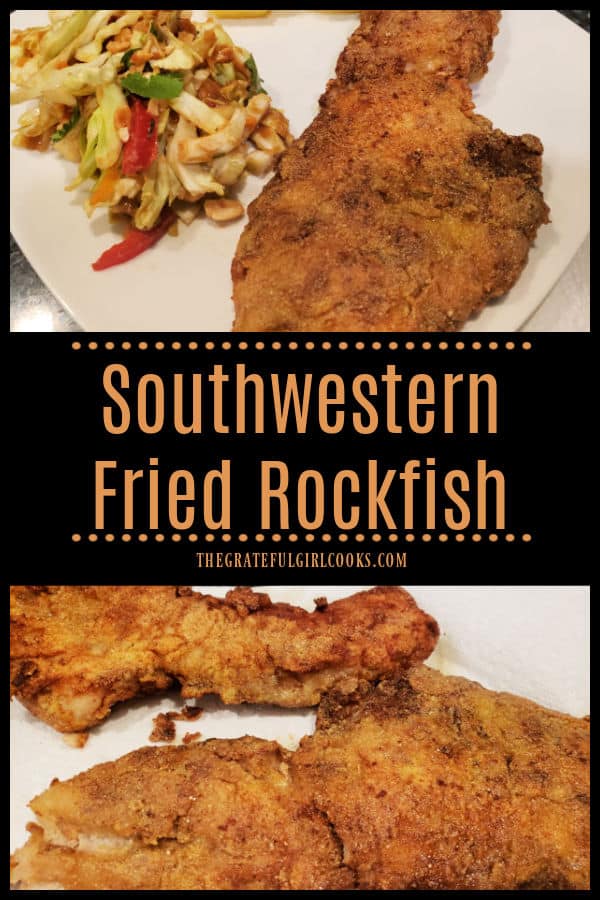
    Southwestern Fried Rockfish

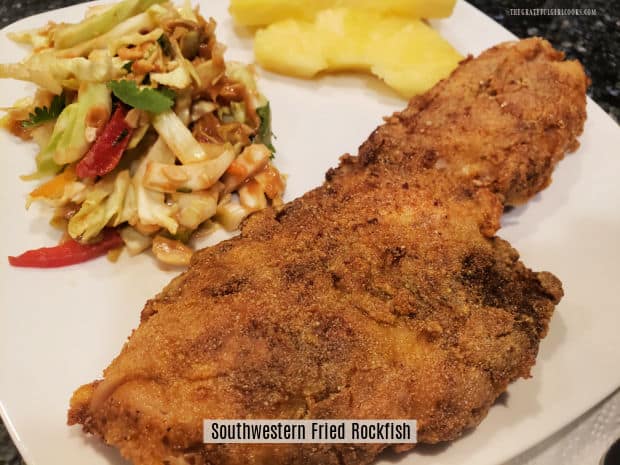
    Southwestern Fried Rockfish is an easy, delicious seafood dish! Taco mix seasoned fillets, coated in cornmeal and flour are fried until crunchy.
    Southwestern Fried Rockfish is an easy, delicious seafood dish! Taco mix seasoned fillets, coated in cornmeal/flour are fried until crunchy.

    Today I want to share a recipe for a simple, but tasty way to cook rockfish fillets. Since I began cooking rockfish several years ago, I have enjoyed trying various recipes for this type of fish, which is fairly common on the west coast. This recipe comes from a cooking magazine I have subscribed to for years, and I discovered it many years ago (yes, I keep my old cooking magazines!).

    Rockfish is also called Pacific Red Snapper, Striped Bass or Rock Cod in North America (there are a LOT of varieties). Most types of this mild-flavored fish are typically found in the northern Pacific ocean. A simple 5 ounce serving provides nearly 2/3 of a typical adult’s daily protein requirements, and is very low in calories!

    This recipe for Southwestern fried rockfish is simple to prepare, and has good flavor, too. Fish fillets are coated with Taco seasoning mix, dipped in egg and then covered with a cornmeal and flour mixture before cooking. From start to finish it takes about 30 minutes to make this dish, and that INCLUDES 15 minutes of “chillin’ time” in the refrigerator. Here’s how to make this easy recipe: 

    Scroll Down For A Printable Recipe Card At The Bottom Of The Page

    Prepare The Rockfish

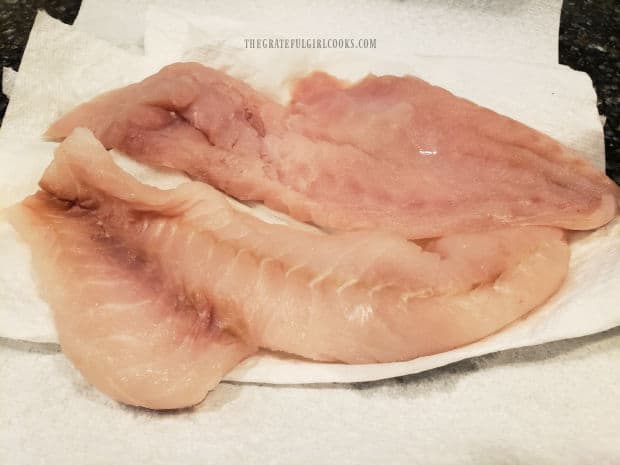
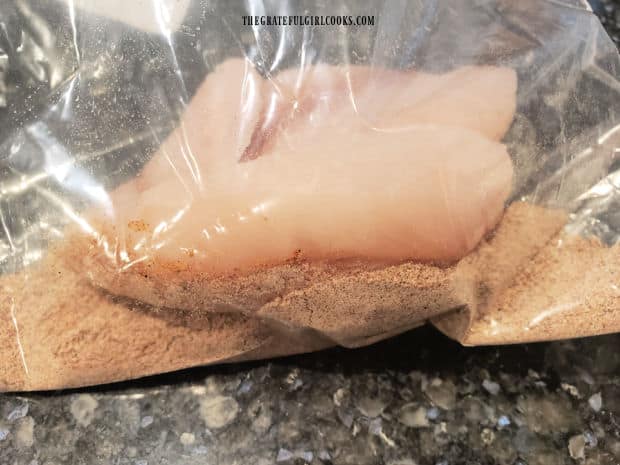
    Pat the rockfish fillets dry on layers of paper towels. Place one envelope of taco seasoning mix into a large re-sealable plastic bag, and add the fish, one at a time, until coated with the spices. Shake off any excess spices back into the bag.

    NOTE: In the printable recipe card at the bottom of the page, I have included a “make it yourself” taco seasoning mix to use if you don’t have taco seasoning mix at home. It will coat the pound of rockfish used for this recipe.

    Rockfish fillets are patted dry with paper towels before seasoning.Each fish fillet is covered with taco mix seasoning in a large plastic bag.

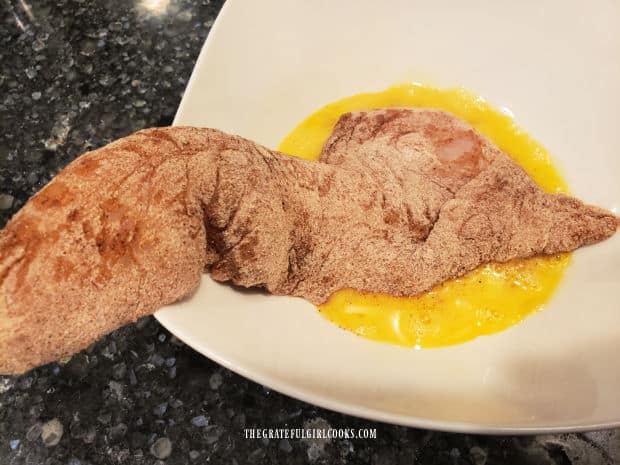
    Dip the seasoned fish fillets in a lightly beaten egg in a shallow bowl until covered on all sides, then let the excess egg drip back into the bowl. Place the egg-covered fillet into a separate bowl filled with a cornmeal/flour mixture, turning to fully coat the surface of the fish with the dry mixture on all sides. Place fish on platter or baking sheet, and repeat process with remaining fillets.

    Refrigerate the coated rockfish in the refrigerator for 15 minutes before frying. The slight moisture from the fish will help the seasoning adhere and the seasoning will have time to bring flavor to the fish.

    Seasoned rockfish fillets are dipped in beaten egg until covered on all sides.Cornmeal and flour is combined to coat the outside of fish fillets.

    Time To Cook The Rockfish

    Remove the rockfish from the refrigerator. Heat oil on Medium-High heat in a large skillet until it is really hot, but not smoking. If you have a large cast iron skillet, I recommend that for extra crispiness, but if not, use a large, non-stick skillet. Add the seasoned fish to the hot oil, and fry them for 3-4 minutes, without moving them in the pan.

    Carefully turn the rockfish over and continue to cook the second side an additional 3-4 minutes or until the fish flakes easily with a fork. The coating should be wonderfully golden brown and crispy on the fish.

    Seasoned rockfish fillets are fried in a large skillet in very hot oil.Southwestern fried rockfish is browned and crispy after frying in hot oil.

    Serve The Southwestern Fried Rockfish

    Once the fish is cooked through and crisp on the outside, carefully remove the fish from the skillet. Put the fish on layers of paper towels to absorb any excess oil. Place the Southwestern Fried Rockfish on dinner plates, and serve with your favorite sides.

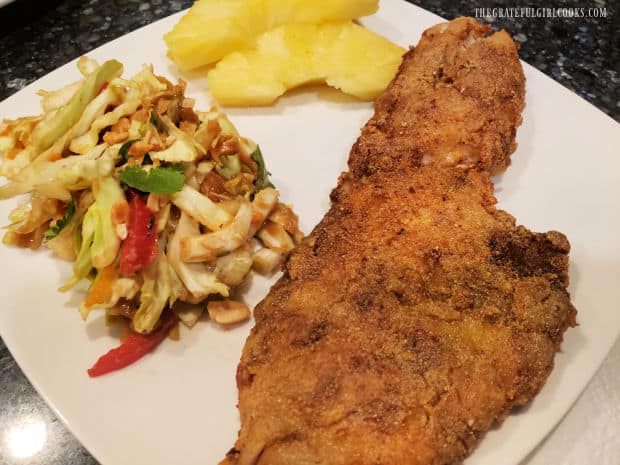
    This time the rockfish was served with fresh pineapple slices and Thai coleslaw in Peanut Sauce on the side. It was kind of our own “fusion-type meal” – Southwestern seasoned rockfish and Thai-Inspired coleslaw. Sounds odd, but it worked!
    The Southwestern fried rockfish is drained on paper towels to absorb oil after frying.A white plate with coleslaw, pineapple, and a piece of Southwestern fried rockfish.

    I hope you have the chance to make this rockfish recipe, and trust you will enjoy it, as well. Thanks for stopping by, and please come back again soon for more family-friendly recipes. Take care, and have a wonderful day.

    Looking For More ROCKFISH Recipes?

    You can find ALL of my recipes in the Recipe Index, located at the top of the page. I have lots of delicious seafood recipes for you to choose from, including these (and more) featuring rockfish:

    Interested In More Recipes?

    Thank you for visiting this website. I appreciate you using some of your valuable time to do soIf you’re interested, I publish a newsletter 2 times per month (1st and 15th) with all the latest recipes, and other fun info. I would be honored to have you join our growing list of subscribers, so you never miss a great recipe!
    There is a Newsletter subscription box on the top right side (or bottom) of each blog post, depending on the device you use, where you can easily submit your e-mail address (only) to be included in my mailing list.

    You Can Also Find Me On Social Media:

    Facebook page: The Grateful Girl Cooks!
    Pinterest:
    The Grateful Girl Cooks!
    Instagram:
    jbatthegratefulgirlcooks

    Author's signature

    Original recipe source: “Taste of Home” magazine, June/July 2006 edition, page 60, published by Reiman Publications.

    ↓↓ PRINTABLE RECIPE BELOW ↓↓

    0 from 0 votes
    Southwestern Fried Rockfish
    Prep Time
    7 mins
    Cook Time
    8 mins
    Inactive refrigeration time
    15 mins
    Total Time
    30 mins
     

    Southwestern Fried Rockfish is an easy, delicious seafood dish! Taco mix seasoned fillets, coated in cornmeal/flour are fried until crunchy.

    Category: Main Dish
    Cuisine: Southwestern
    Keyword: Southwestern fried rockfish
    Servings: 4
    Calories Per Serving: 283 kcal
    Author: JB @ The Grateful Girl Cooks!
    Ingredients
    • 1 pound rockfish fillets (4) 4 fillets total (approx. 4 oz. each)
    • 1 ounce taco seasoning mix (1 envelope) *see NOTE below for making homemade
    • 1 large egg lightly beaten
    • ½ cup yellow cornmeal
    • ¼ cup all purpose flour
    • 3 Tablespoons vegetable oil
    Instructions
    1. Pat rockfish dry on layers of paper towels. Put taco seasoning mix into large resealable plastic bag. Add fillets, one at a time, shaking until fish is coated with spices. Shake excess spices back into bag.

    2. Light beat egg in a shallow bowl. In separate bowl, combine cornmeal and flour. Dredge seasoned fillets in egg until covered, letting then let the excess egg drip back into bowl. Next coat fish in cornmeal/flour mixture, covering all sides. Place fish on large platter; repeat process with remaining fillets. Refrigerate rockfish for 15 minutes before frying.

    3. Heat oil on Medium-High heat in a large cast iron skillet (or non-stick) until oil is really hot, but not smoking. Carefully add fillets to hot oil; fry fish for 3-4 minutes, without moving fish in the pan. Carefully turn fish over; cook second side 3-4 minutes or until cooked through and fish flakes easily with a fork. Coating should be browned and crisp when done. Remove fish from skillet; transfer to layers of paper towels to absorb oil. Serve immediately, and enjoy.

    Recipe Notes

    Taco Seasoning Mix For this Recipe (if you don't have pre-made):Stir to combine.

    1 T. Flour// 1 t. chili powder// 1 t. paprika// 3/4 t. salt// 1/2 t. onion powder// 1/2 t. cumin// 1/4 t. cayenne pepper// 1/4 t. garlic powder// 1/8 t. ground oregano//

    **Caloric Calculation made using HALF of the oil in recipe because at least half remains in the skillet (used for frying).

    Nutrition Facts
    Southwestern Fried Rockfish
    Amount Per Serving (1 fillet)
    Calories 283 Calories from Fat 81
    % Daily Value*
    Fat 9g14%
    Saturated Fat 2g13%
    Trans Fat 1g
    Polyunsaturated Fat 4g
    Monounsaturated Fat 2g
    Cholesterol 103mg34%
    Sodium 674mg29%
    Potassium 527mg15%
    Carbohydrates 25g8%
    Fiber 3g13%
    Sugar 2g2%
    Protein 25g50%
    Vitamin A 749IU15%
    Vitamin C 3mg4%
    Calcium 25mg3%
    Iron 2mg11%
    * Percent Daily Values are based on a 2000 calorie diet.

    Here’s one more to pin on your Pinterest boards!Southwestern Fried Rockfish is an easy, delicious seafood dish! Taco mix seasoned fillets, coated in cornmeal/flour are fried until crunchy.

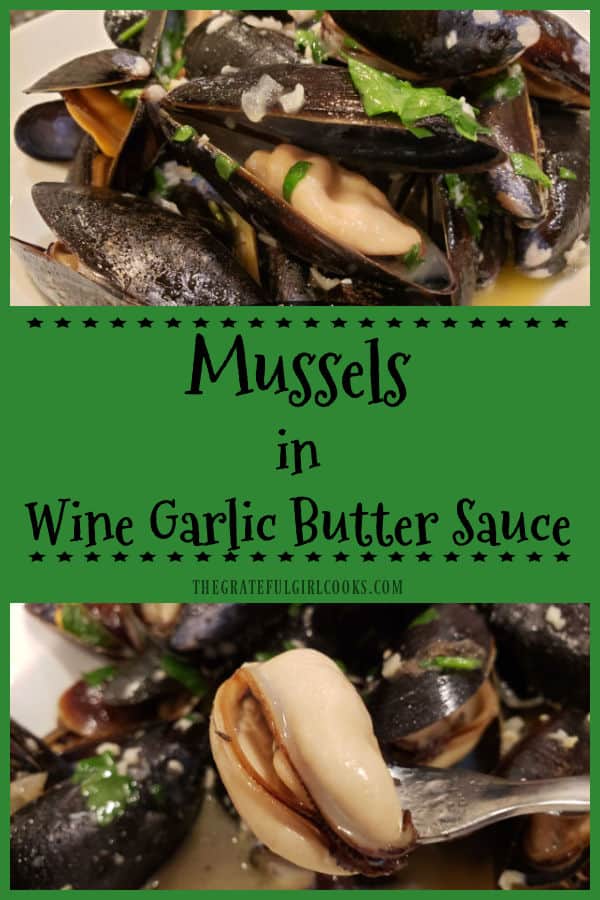
    Mussels in Wine Garlic Butter Sauce

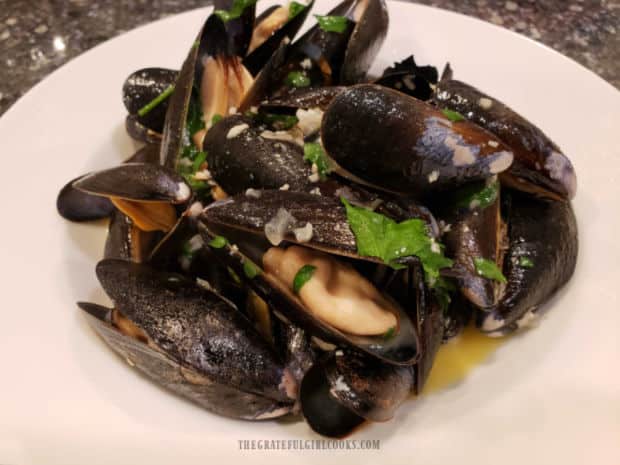
    Mussels in Wine Garlic Butter Sauce are a delicious, decadent main course to serve, and are easier to make than you might think.
    Mussels in Wine Garlic Butter Sauce are a delicious, decadent main course to serve, and are easier to make than you might think.

    My husband surprised me by bringing home a large bag of fresh Penn Cove (Washington state) mussels a couple of months ago, after a shopping trip to Costco. My first thought was… “I’ve EATEN them in restaurants and enjoyed them, but how on earth do you COOK them”? True story. I had never, in our 45 years of marriage COOKED mussels before. Gulp.

    I immediately started a crazed internet search, and realized it wasn’t as complicated as I thought. Now if you’ve been cooking mussels for years, you’re probably giggling at this, but it’s true. I was on a mission. Here I was, looking at a HUGE (Costco sized) bag of fresh seafood that I had to use within a few days, so they wouldn’t go to waste. I ended up using part of the mussels for this recipe, and then adapted another recipe for Thai-inspired green curry mussels to use the rest a couple days later (also fabulous)!

    The recipe I found was actually in the form of a video I discovered on YouTube. After watching it a few times, and frantically scribbling down the recipe as a restaurant chef prepared them, I decided to GO FOR IT! My husband and I helped each other make this dish, and we had lots of fun cooking together in the process. The results far exceeded my expectations! These mussels in wine garlic butter sauce taste fantastic, and were so much easier to prepare than I anticipated. Here’s how to make this dish:

    Scroll Down For A Printable Recipe Card At The Bottom Of The Page

    Preparing To Cook The Mussels

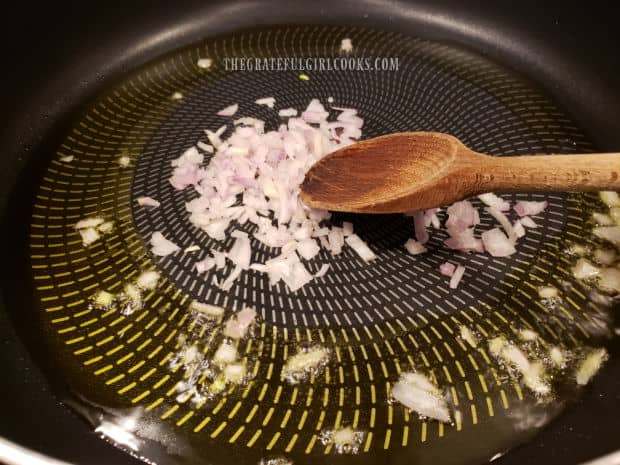
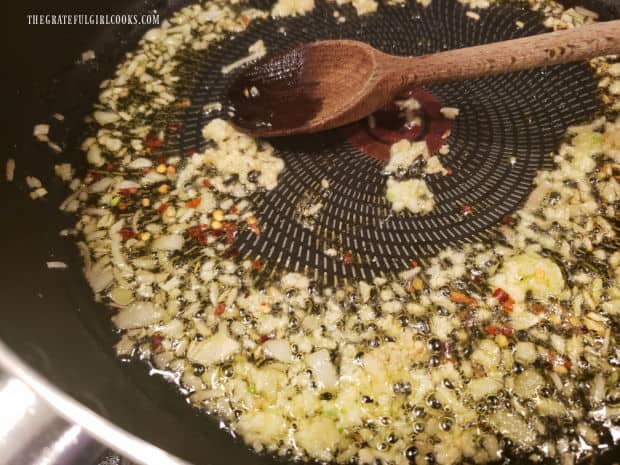
    Heat 2 Tablespoons of olive oil on medium-high heat in a large skillet (one that has a LID). Once the oil is hot, but not smoking, add minced shallot, and cook for 2 minutes, stirring often. Add minced garlic and a pinch of red chili flakes. Continue to cook, stirring often, for 30 seconds, being careful to not burn the garlic (or it becomes bitter). 

    Minced shallots, cooking in olive oil in large skillet.Garlic and red chili flakes are added to cooked shallots in skillet.

    Cooking The Mussels

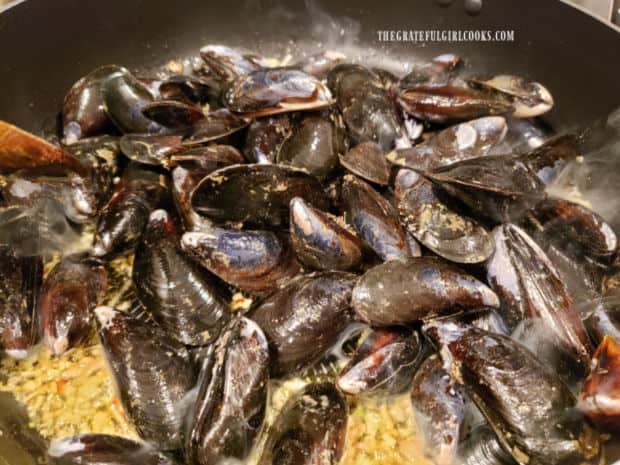
    Add the rinsed, drained closed shell mussels to the skillet and toss, to coat them with the shallots and garlic in the pan. Pour white wine into the skillet, stir quickly to incorporate, then cover the skillet. Let the mussels steam (covered) for about 3-4 minutes, or until most or all of the shells have opened. Keep an eye on the pan, and check them after 2-3 minutes to see if the shells have opened. 

    The mussels are done cooking when their shells have opened, revealing the meat inside. Use a slotted spoon to remove the mussels from the skillet, letting any accumulated juices drain back into the pan. This liquid in the skillet will be used to make the sauce.

    Mussels are added to the skillet with white wine, shallots and garlic.The mussels are steamed in a covered skillet until they have opened.

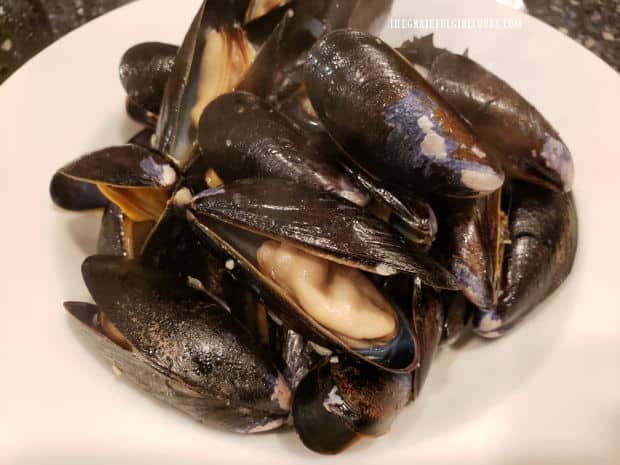
    Transfer the mussels to serving bowls and keep them warm while you make the sauce. Discard any mussels that didn’t open while cooking.Cooked, opened mussels are placed in serving bowls and kept warm until sauce is made.

    Make The Wine Garlic Butter Sauce

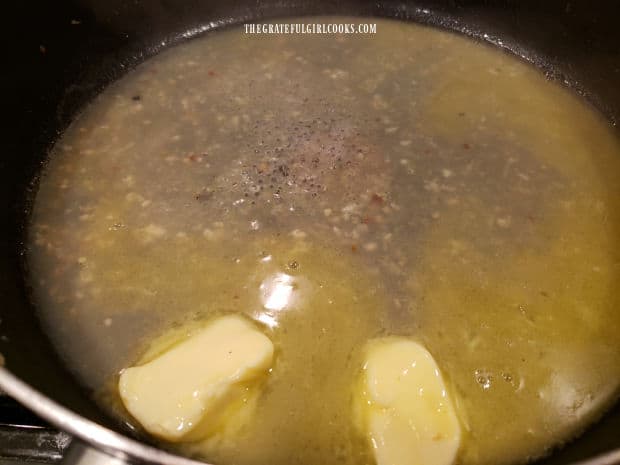
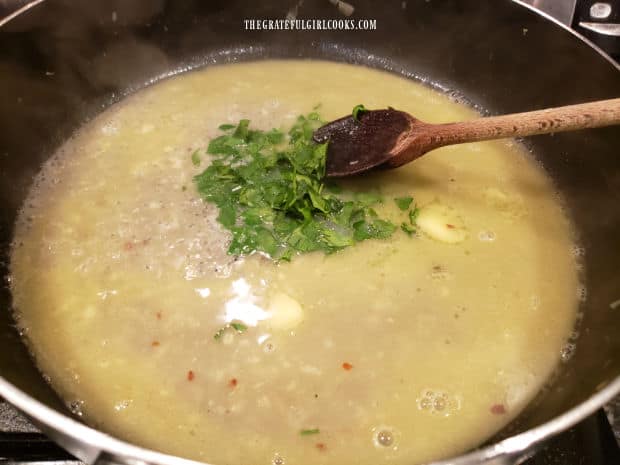
    Immediately add butter to the liquid in the skillet after removing the mussels. Cook until the butter has melted, stirring to combine, then add chopped parsley to the sauce.

    Butter is added and melted into liquids remaining in skillet after removing mussels.Chopped parsley is added to the hot wine garlic butter sauce in skillet.

    Serve The Mussels In Wine Garlic Butter Sauce

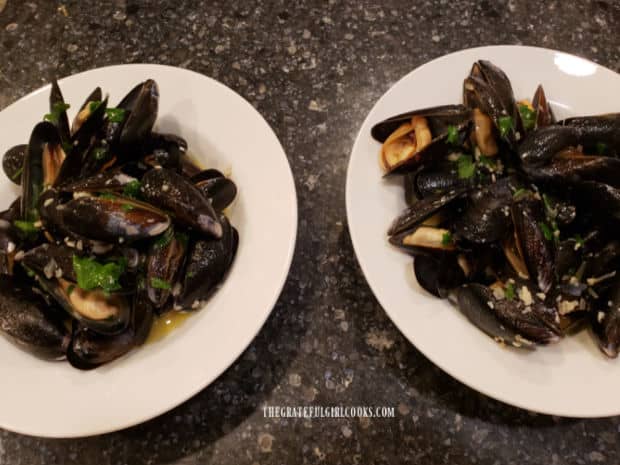
    Pour the sauce over the mussels, evenly dividing it between the bowls and serve immediately, while hot. I recommend a nice piece of crusty garlic bread on the side, because it tastes delicious dipped in the sauce. My husband and I put a large extra bowl in the middle of the table to put our discarded shells in as we eat them.

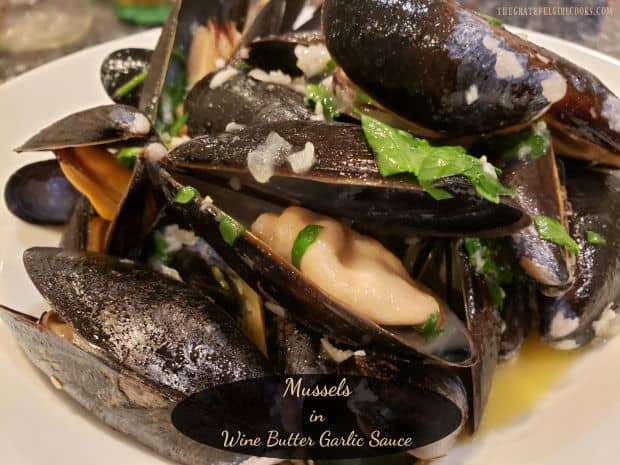
    Mussels in Wine Garlic Butter Sauce in a bowl, and are ready to be eaten.Two bowls full of mussels in wine garlic butter sauce, ready to be served.

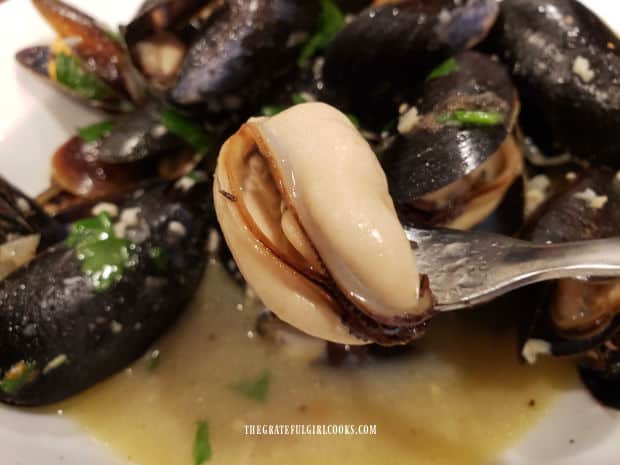
    Here is a close up of one of the mussels in wine garlic butter sauce. It sure tastes great, flavored with that yummy sauce!

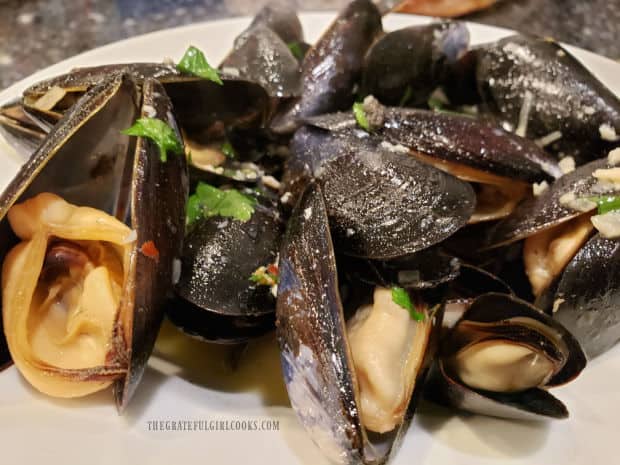
    A close up of one of the mussels, on a fork, ready to be eaten.A bowl, full of the mussels in wine garlic butter sauce.

    These delicious mussels are really a lot easier to make than you might have imagined. My husband and I had fun cooking this meal together, and we truly love this dish! I hope you enjoy this recipe, and have the opportunity to make it soon! Thank you for stopping by and I hope you will come back again. Take care, and may God bless you.

    Looking for More SEAFOOD Recipes?

    You can find ALL of my recipes in the Recipe Index, located at the top of the page. I have a wonderful variety of seafood recipes for you to enjoy, including:

    Interested In More Recipes?

    Thank you for visiting this website. I appreciate you using some of your valuable time to do soIf you’re interested, I publish a newsletter 2 times per month (1st and 15th) with all the latest recipes, and other fun info. I would be honored to have you join our growing list of subscribers, so you never miss a great recipe!
    There is a Newsletter subscription box on the top right side (or bottom) of each blog post, depending on the device you use, where you can easily submit your e-mail address (only) to be included in my mailing list.

    You Can Also Find Me On Social Media:

    Facebook page: The Grateful Girl Cooks!
    Pinterest:
    The Grateful Girl Cooks!
    Instagram:
    jbatthegratefulgirlcooks

    Author's signature

    Original recipe source: YouTube video from Aqua El Gaucho in the Revelers Club Collection

    ↓↓ PRINTABLE RECIPE BELOW ↓↓

    0 from 0 votes
    Mussels in Wine Garlic Butter Sauce
    Prep Time
    10 mins
    Cook Time
    4 mins
    Total Time
    14 mins
     

    Mussels in Wine Garlic Butter Sauce are a delicious, decadent main course to serve, and are easier to make than you might think.

    Category: Main Course, Seafood
    Cuisine: American
    Keyword: mussels in wine garlic butter sauce
    Servings: 2
    Calories Per Serving: 583 kcal
    Author: JB @ The Grateful Girl Cooks!
    Ingredients
    • 2 Tablespoons extra virgin olive oil
    • 2 teaspoons minced shallots
    • teaspoons minced garlic
    • 1 pinch red chili flakes
    • 2 pounds mussels rinsed, drained
    • ½ cup dry white wine
    • 4 Tablespoons unsalted butter
    • ¼ cup chopped flat leaf parsley
    Instructions
    1. Rinse mussels in a strainer, then drain. Set aside.

    2. Heat olive oil on medium-high heat in a large skillet (one that has a LID). When oil is hot, add minced shallot; cook 2 minutes, stirring often. Add garlic and a pinch of red chili flakes. Continue cooking, stirring often, for 30 seconds. 

    3. Add mussels; toss or stir to combine with shallot/garlic mixture, then add wine. Stir to incorporate, then cover skillet. Steam mussels (covered) for about 3-4 minutes. Keep an eye on the pan; check them after 3 minutes to see if they shells have opened, revealing meat inside. They are finished cooking once the shells have opened.

    4. Use a slotted spoon to remove mussels from skillet, letting any accumulated juices drain back into the pan. This liquid in the skillet will be used to make the sauce. Transfer mussels to serving bowls; keep them warm while you make sauce. Discard any mussels that didn't open while cooking.

    5. Immediately add butter to liquid remaining in the skillet. Cook only until the butter melts, stirring to incorporate it into the sauce. Add chopped parsley and stir.

    6. Pour the sauce over the mussels, evenly dividing between bowls. Serve immediately, and enjoy!

    Recipe Notes

    NOTE: The butter used in the sauce contains the most calories in this dish. The calorie calculation was made assuming ALL of the sauce for each portion is consumed. If all of the broth in the bowl is not consumed, the calorie count will be considerably less than stated.

    Nutrition Facts
    Mussels in Wine Garlic Butter Sauce
    Amount Per Serving (1 (1/2 of total))
    Calories 583 Calories from Fat 378
    % Daily Value*
    Fat 42g65%
    Saturated Fat 17g106%
    Trans Fat 1g
    Polyunsaturated Fat 4g
    Monounsaturated Fat 17g
    Cholesterol 125mg42%
    Sodium 674mg29%
    Potassium 854mg24%
    Carbohydrates 12g4%
    Fiber 1g4%
    Sugar 1g1%
    Protein 28g56%
    Vitamin A 1717IU34%
    Vitamin C 30mg36%
    Calcium 90mg9%
    Iron 10mg56%
    * Percent Daily Values are based on a 2000 calorie diet.

    Here’s one more to pin on your Pinterest boards!Mussels in Wine Garlic Butter Sauce are a delicious, decadent main course to serve, and are easier to make than you might think.

    Honey Garlic Shrimp

    Honey Garlic Shrimp is a one-pan meal that can be prepared and served in about 15 minutes! It’s a simple to prepare, yet delicious recipe!
    Honey Garlic Shrimp is a one-pan meal that can be prepared and served in about 15 minutes! It's a simple to prepare, yet delicious recipe!

    Sometimes all I want at the end of a long day is a quick and easy dinner to enjoy, without a lot of effort! This recipe for honey garlic shrimp is just that! The recipe is incredibly easy to make, and the end result is a tasty shrimp entree covered in a delicious (and did I mention EASY) sauce?

    Ready to serve in about 15 minutes. it’s a perfectly yummy meal choice for busy days, and my husband and I really enjoy it. I’m confident you will, too. Here’s how simple it is to make honey garlic shrimp:

    Scroll Down For A Printable Recipe Card At The Bottom Of The Page

    Prepare The Honey Garlic Sauce

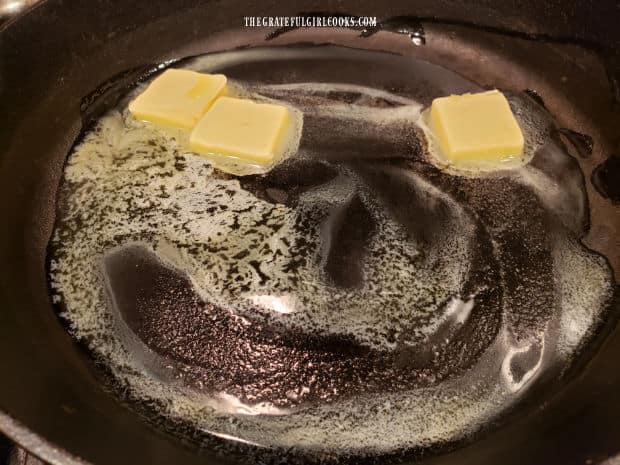
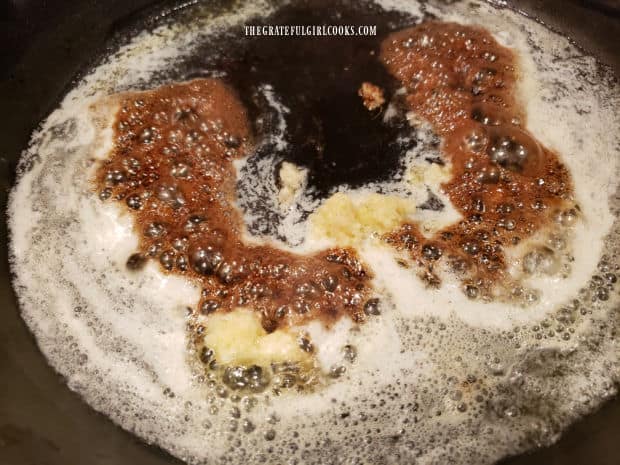
    The first thing you will need to do is make the sauce that will cover the shrimp later on. Heat a large skillet (I recommend cast iron if you have it) on Medium-High heat. Once it is hot, add 2 T. butter  and let it melt.

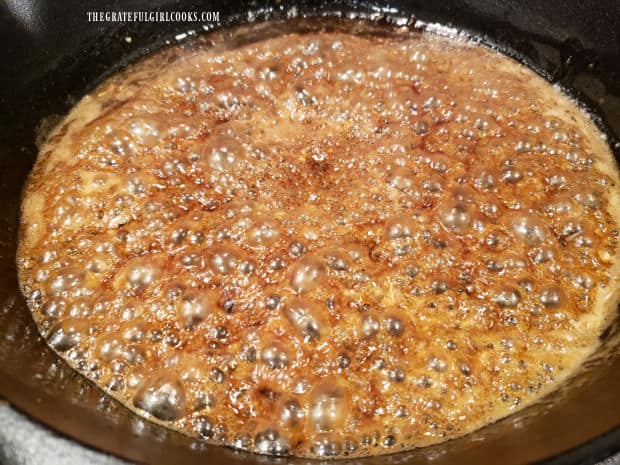
    Now add soy sauce, honey and minced garlic to the melted butter. Cook for 1-2 minutes, stirring so the garlic does not burn (and become bitter in taste). Once the sauce has thickened a bit, transfer it from the skillet into a bowl, and set aside. 

    Butter is first melted in a cast iron skillet, to begin making sauce for shrimp.Soy sauce, honey, and minced garlic are added to melted butter in the skillet.Garlic honey sauce for the shrimp, cooking in a cast iron skillet.

    Cook The Shrimp

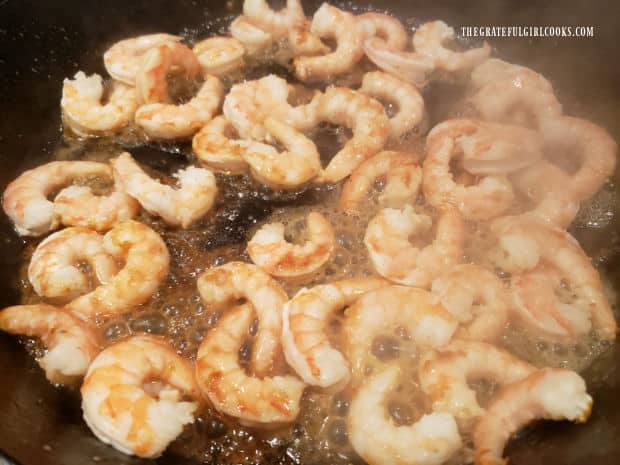
    Now it’s time to quickly cook the shrimp.  Melt 1 Tablespoon butter in the same skillet you cooked the sauce in. Add the shrimp to the skillet, in a single layer. Let them cook for 2 minutes, then flip them to the other side using tongs. Cook for 1-2 more minutes on medium-high heat, being careful to not overcook the shrimp or they will become “rubbery” in texture. When done, the shrimp will have turned slightly pink in color.

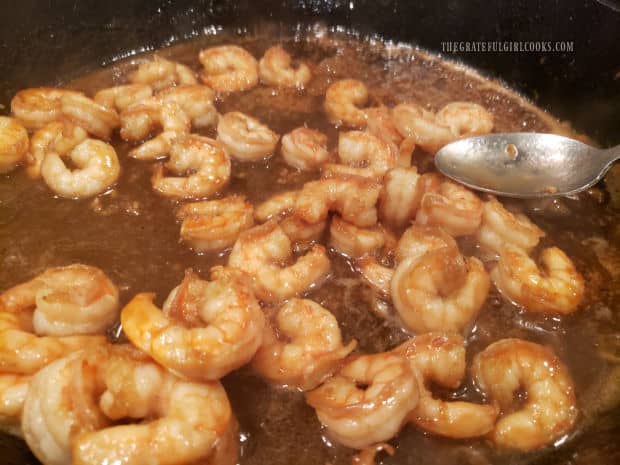
    Immediately add the reserved sauce back into the skillet and stir to cover the shrimp with the honey garlic sauce. Heat only until the sauce is reheated, stirring often to coat shrimp ( about 30 seconds to a minute), then remove the skillet from the heat.

    Shrimp are cooked in a cast iron skillet for only a few minutes.Honey garlic shrimp are covered in sauce and heated through before serving.

    Serve The Honey Garlic Shrimp

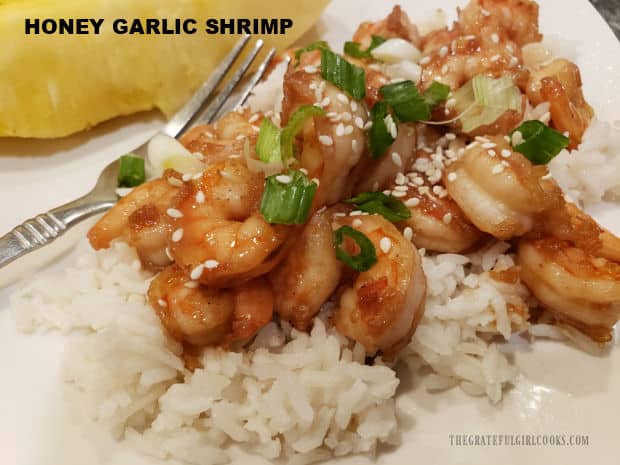
    Place the honey garlic shrimp on top of a bed of rice on individual serving plates. Drizzle each portion with lime juice, then sprinkle with sliced green onions and sesame seeds. The sesame seeds, green onions and lime juice provide extra flavor, color and texture to the shrimp.

    I also definitely recommend serving this dish on top of rice, because it provides a nice (bland) balance to the shrimp and sauce. Once the honey garlic shrimp has been garnished, serve immediately while hot… and ENJOY this yummy meal!

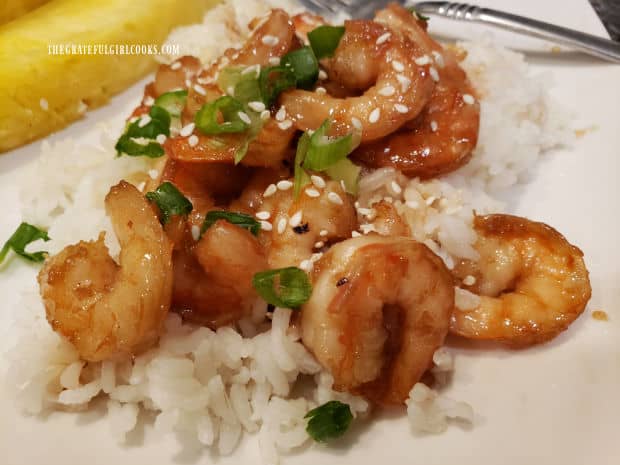
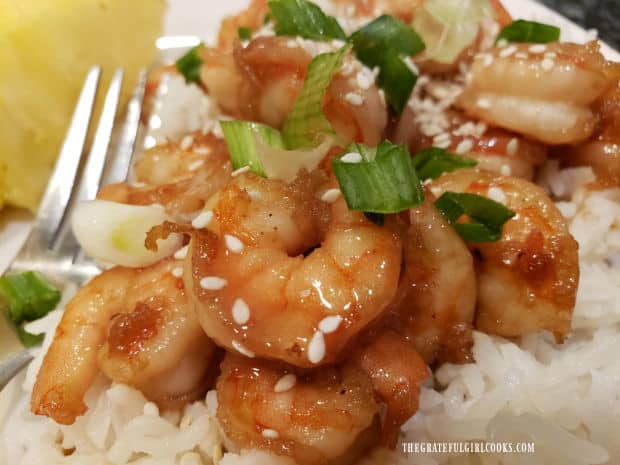
    Honey garlic shrimp on rice, drizzled with lime juice, and sprinkled with sesame seeds and green onions.Sesame seeds and green onions top a serving of honey garlic shrimp on rice.

    See how simple and quick this delicious shrimp dish is to make? I really hope you have the opportunity to try it, and trust you and yours will enjoy it as much as we do. Thanks for stopping by, and I hope you will come back soon for more family-friendly recipes. Take care, and have a GREAT day!

    Looking For More SEAFOOD Recipes?

    You can find ALL of my recipes in the Recipe Index, located at the top of the page. I have a wonderful variety of seafood recipes for you to choose from, including:

    Interested In More Recipes?

    Thank you for visiting this website. I appreciate you using some of your valuable time to do soIf you’re interested, I publish a newsletter 2 times per month (1st and 15th) with all the latest recipes, and other fun info. I would be honored to have you join our growing list of subscribers, so you never miss a great recipe!
    There is a Newsletter subscription box on the top right side (or bottom) of each blog post, depending on the device you use, where you can easily submit your e-mail address (only) to be included in my mailing list.

    You Can Also Find Me On Social Media:

    Facebook page: The Grateful Girl Cooks!
    Pinterest:
    The Grateful Girl Cooks!
    Instagram:
    jbatthegratefulgirlcooks

    Author's signature

    Recipe adapted from: Denise Browning, at easyanddelish.com/

    ↓↓ PRINTABLE RECIPE BELOW ↓↓

    0 from 0 votes
    Honey Garlic Shrimp
    Prep Time
    5 mins
    Cook Time
    10 mins
    Total Time
    15 mins
     

    Honey Garlic Shrimp is a one-pan meal that can be prepared and served in about 15 minutes! It's a simple to prepare, yet delicious recipe!

    Category: Entree-Seafood, Main Dish
    Cuisine: American
    Keyword: honey garlic shrimp
    Servings: 3
    Calories Per Serving: 184 kcal
    Author: JB @ The Grateful Girl Cooks!
    Ingredients
    • 3 Tablespoons butter divided use
    • Tablespoons low-sodium soy sauce
    • 3 Tablespoons honey
    • 4 cloves garlic, minced
    • 1 pound shrimp cleaned/deveined/tail removed
    For Garnish:
    • ½ lime (juice of)
    • 2 Tablespoons green onion (scallions) thinly sliced
    • 1 teaspoon sesame seeds
    Instructions
    Make Sauce:
    1. Heat a large cast iron skillet on Medium-High. Once hot, add 2 T. butter; let it melt. Add soy sauce, honey and minced garlic to the melted butter. Cook 1-2 minutes, stirring so garlic does not burn. Once sauce has thickened a bit, transfer it from skillet into a bowl; set aside. 

    Cook Shrimp:
    1. Melt remaining 1 T. butter in the same skillet on medium-high heat. Add shrimp in a single layer. Let them cook for 2 minutes, then flip them to the other side. Cook 1-2 more minutes, being careful to not overcook the shrimp or they will become "rubbery" in texture. When done, the shrimp will have turned slightly pink in color. Immediately add sauce back into skillet; stir to cover shrimp with sauce, only till reheated (under a minute). Remove skillet from heat, and serve immediately.

    2. Serve shrimp on a bed of steamed rice. Drizzle shrimp with lime juice, and sprinkle with green onions/sesame seeds. Serve hot, and enjoy!

    Nutrition Facts
    Honey Garlic Shrimp
    Amount Per Serving (1 (1/3 of total))
    Calories 184 Calories from Fat 108
    % Daily Value*
    Fat 12g18%
    Saturated Fat 7g44%
    Trans Fat 1g
    Polyunsaturated Fat 1g
    Monounsaturated Fat 3g
    Cholesterol 30mg10%
    Sodium 572mg25%
    Potassium 97mg3%
    Carbohydrates 20g7%
    Fiber 1g4%
    Sugar 18g20%
    Protein 2g4%
    Vitamin A 393IU8%
    Vitamin C 4mg5%
    Calcium 26mg3%
    Iron 1mg6%
    * Percent Daily Values are based on a 2000 calorie diet.

    Here’s one more to pin on your Pinterest boards!Honey Garlic Shrimp is a one-pan meal that can be prepared and served in about 15 minutes! It's a simple to prepare, yet delicious recipe!

    Krispy Rockfish Fillets

    Pan-seared Krispy Rockfish Fillets have a seasoned flour/cornmeal/puffed rice coating, creating an easy, delicious main dish to enjoy.
    Pan-seared Krispy Rockfish Fillets have a seasoned flour/cornmeal/puffed rice coating, creating an easy, delicious main dish to enjoy.

    If you’re looking for a delicious, seafood main dish that doesn’t take too much time or effort to make, check out this recipe for Krispy Rockfish Fillets! This recipe can also be used to cook other types of “whitefish”. My husband and I became fans of rockfish several years ago, after the first time we tried it. I made Pan-Seared Rockfish with Fresh Herbs , wrote about that experience and shared the recipe on this blog.

    Since that time, I’ve share quite a few recipes featuring rockfish, and we’ve enjoyed each one. I found this particular recipe in a 20 year old food magazine in my collection, made a few changes to suit our taste, and want to share the recipe here today. It’s simple and delicious, and I truly hope you enjoy it:

    Scroll Down For A Printable Recipe Card At The Bottom Of The Page

    Prepare The Egg Wash And Crumb Coating For The Fish

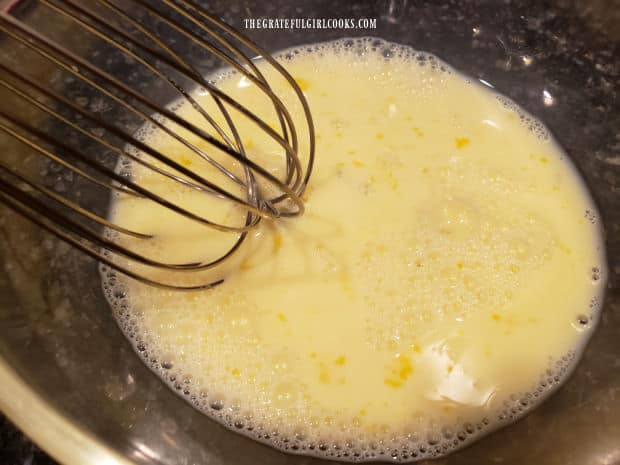
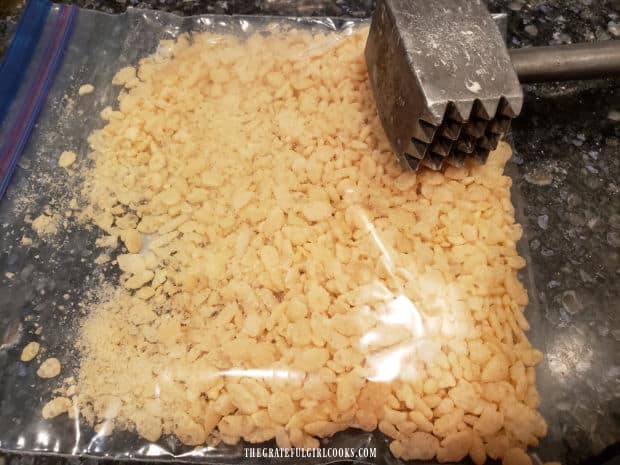
    Whisk one egg and ¾ cup of milk in a shallow medium-sized bowl. Once combined, set the bowl aside. Place puffed rice cereal (we use Rice Krispies) in a re-sealable plastic bag, and use the flat side of a meat mallet (or a rolling pin) to finely crush the cereal.

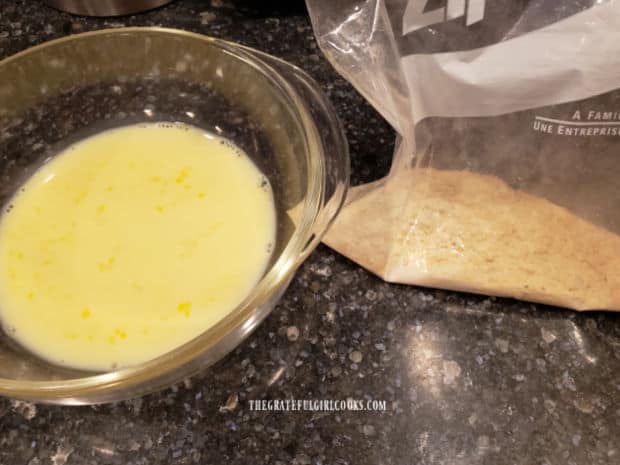
    In a large re-sealable bag, combine the crushed rice cereal, flour, cornmeal and seasonings (lemon pepper, seasoning salt, onion and garlic powders). Now you should have a bowl of egg/milk mixture AND a large bag containing the seasoning/coating mix. Time to prepare the rockfish for cooking!

    Egg and milk are whisked together as an egg wash for rockfish fillets.Puffed rice cereal in plastic bag is crushed using the flat side of a meat mallet.The egg wash and seasoning mixture is ready to coat the fish fillets before cooking.

    Time To Coat the Rockfish With Seasoning

    This recipe as written is for 4 rockfish fillets (my photos only show 3), since it was only my husband and I eating this meal (he ate two). Pat the rockfish fillets dry with paper towels, then coat them, one at a time in egg wash on all sides. Let any excess egg mixture drip off back into the bowl, then place the fillet into the bag with the seasoning mix.

    Repeat this with remaining fillets. Once all are in the seasoning mixture, seal the bag and shake well to fully cover all sides of each piece of fish with the flour/seasoning mix.

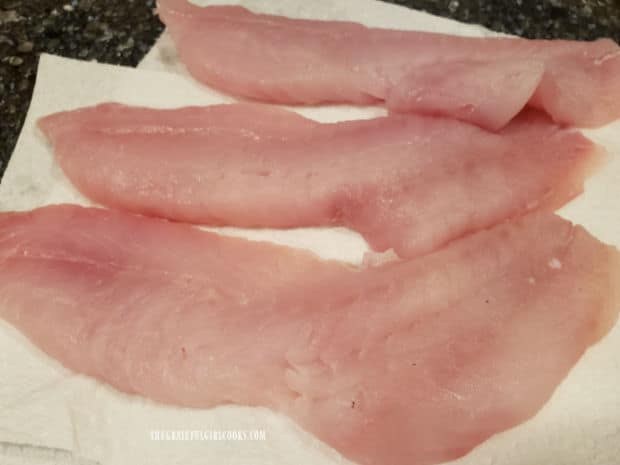
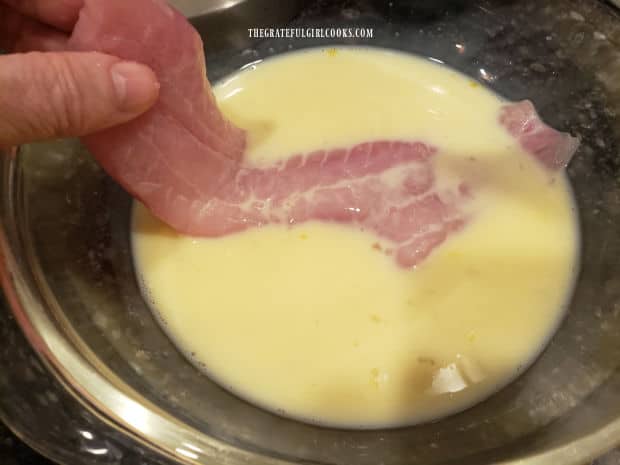
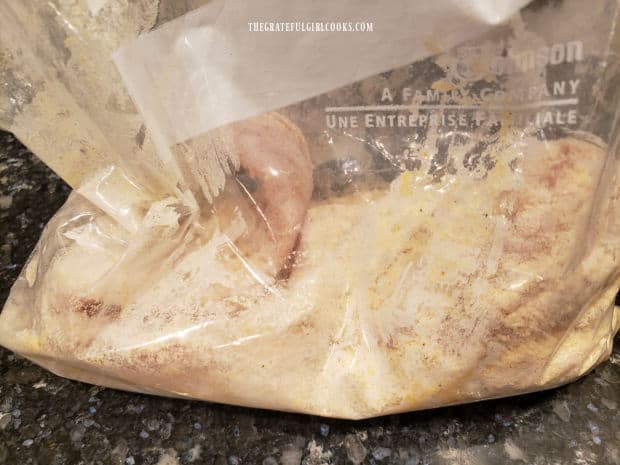
    Paper towels are used to dry the rockfish before covering with coating.Each piece of fish is dipped into the egg wash to completely cover.Fish fillets are placed into seasoning mix bag after being covered in egg wash.

    Cooking The Krispy Rockfish Fillets

    Pour oil into a large skillet at a depth of about 1/4″. Heat the oil on medium-high heat until very hot, but not smoking. Carefully add the rockfish fillets to the hot oil in a single layer. They should sizzle when they hit the hot oil!

    Try not to move the fish once they go into the oil. Let the Krispy rockfish fillets cook for 6-7 minutes, then carefully turn the fish over to the other side. The bottom side should be crispy and golden brown in color. Cook second side an additional 5-6 minutes, until fish is cooked through and flakes easily with a fork. Remove the skillet from the heat, and carefully transfer fish to individual plates for serving.

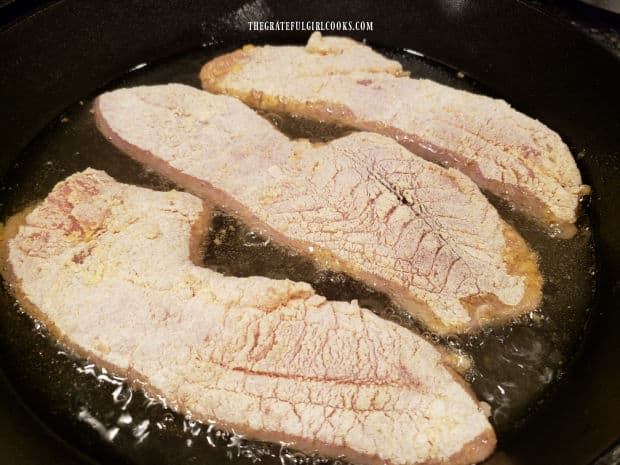
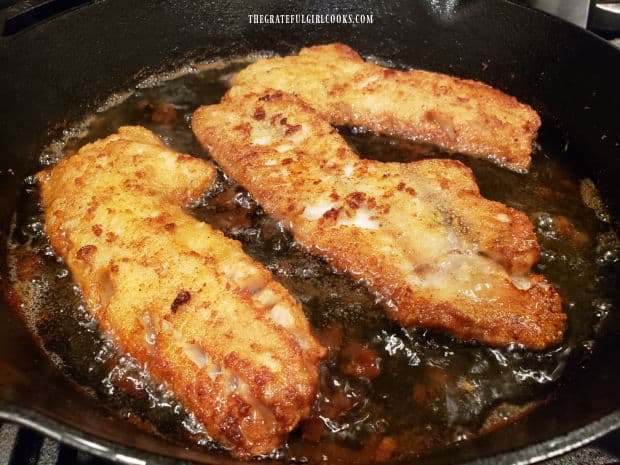
    The Krispy rockfish fillets are fried in hot oil for 6-7 minutes before flipping to other side.Golden brown Krispy rockfish fillets frying in hot oil.

    Time To Eat!

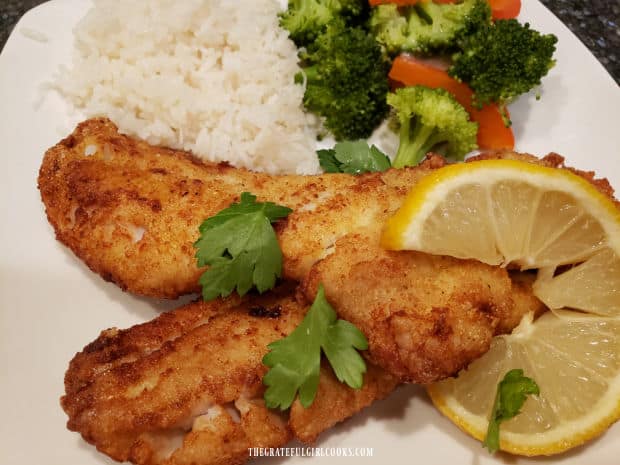
    If desired, garnish each of the Krispy rockfish fillets with chopped fresh parsley and a lemon slice. These garnishes are optional, but add color and flavor, especially when the lemon is squeezed over the fish. Serve immediately while hot! 

    The fish has a nice coating, good flavor, and should flake easily, if cooked well. We also enjoy the fish served with malt vinegar (drizzle it on the fish), or tartar sauce on the side . YUM!

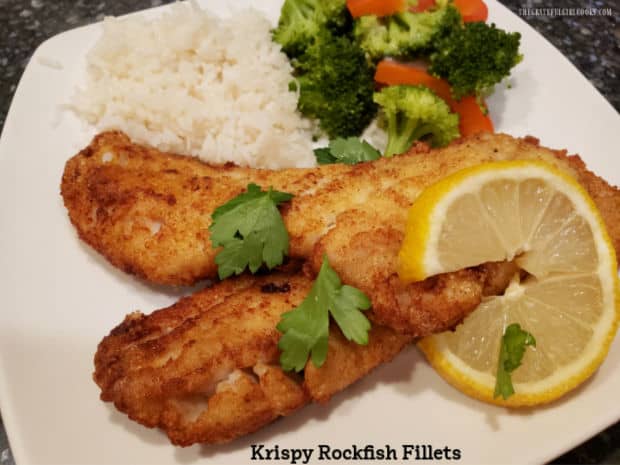
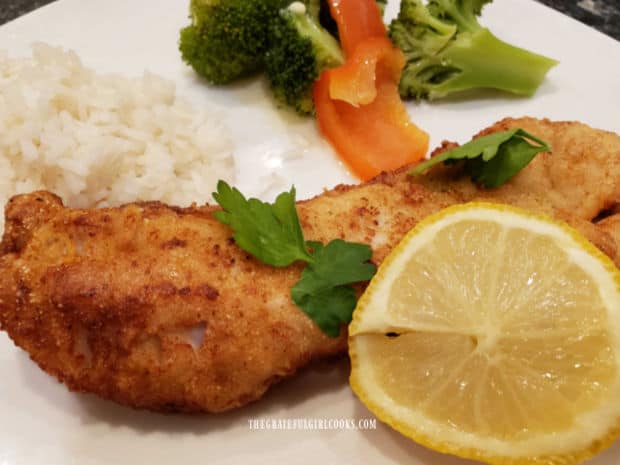
    Krispy rockfish fillets are served, garnished with parsley and a lemon slice.One of the rockfish fillets, served with broccoli and rice on the side.

    I hope you have a chance to try this yummy recipe, and trust you’ll enjoy it like we do! Thanks for stopping by, and I hope you come back soon for more family-friendly recipes. Take care, and have a wonderful day, friend.

    Looking For More ROCKFISH Recipes?

    You can find ALL of my recipes in the Recipe Index, which is located at the top of the page. I have a nice selection of rockfish recipes for you to enjoy, including:

    Interested In More Recipes?

    Thank you for visiting this website. I appreciate you using some of your valuable time to do soIf you’re interested, I publish a newsletter 2 times per month (1st and 15th) with all the latest recipes, and other fun info. I would be honored to have you join our growing list of subscribers, so you never miss a great recipe!
    There is a Newsletter subscription box on the top right side (or bottom) of each blog post, depending on the device you use, where you can easily submit your e-mail address (only) to be included in my mailing list.

    You Can Also Find Me On Social Media:

    Facebook page: The Grateful Girl Cooks!
    Pinterest:
    The Grateful Girl Cooks!
    Instagram:
    jbatthegratefulgirlcooks

    Author's signature

    Original Recipe Source: “Taste of Home Magazine”, February-March 2002 edition (pages 27-28), published by The Reiman Corporation

    ↓↓ PRINTABLE RECIPE BELOW ↓↓

    0 from 0 votes
    Krispy Rockfish Fillets
    Prep Time
    10 mins
    Cook Time
    12 mins
    Total Time
    22 mins
     

    Pan-seared Krispy Rockfish Fillets have a seasoned flour/cornmeal/puffed rice coating, creating an easy, delicious main dish to enjoy.

    Category: Main Dish, Seafood
    Cuisine: American
    Keyword: krispy rockfish fillets
    Servings: 4
    Calories Per Serving: 285 kcal
    Author: JB @ The Grateful Girl Cooks!
    Ingredients
    • 1 medium egg
    • ¾ cup milk
    • 1 cup puffed rice cereal crushed
    • ¼ cup yellow cornmeal
    • ¼ cup all purpose flour
    • ½ teaspoon seasoning salt
    • ¼ teaspoon ground black pepper
    • teaspoon garlic powder
    • teaspoon onion powder
    • 4 rockfish fillets (approx. 6 ounces each) can sub. other whitefish fillets
    • oil for frying (approx. 1/4" deep in skillet)
    • lemon slice and parsley (OPTIONAL garnish)
    Instructions
    1. Whisk egg and milk in medium-sized bowl. Set bowl aside.

    2. Place puffed rice cereal in large re-sealable plastic bag and seal; use flat side of meat mallet or rolling pin to finely crush cereal. Add flour, cornmeal and remaining seasonings (lemon pepper, seasoning salt, onion and garlic powders) to bag.

    3. Pat fish dry with paper towels. Coat one fillet at a time in egg wash (on all sides). Let excess egg mixture drip back into bowl; place fillet into bag of flour/seasoning. Repeat with other fillets. Once all fillets are in bag with seasoning, seal bag; shake well to fully cover each fillet on all sides with flour/seasoning.

    4. Pour oil into a large skillet at a depth of 1/4". Heat oil on medium-high heat until very hot, but not smoking. Carefully add rockfish fillets to hot oil in a single layer. They should sizzle when they hit oil! Try not to move fish once they're in oil. Cook 6-7 minutes; carefully turn fish over. Bottom side should be crispy/golden brown. Cook second side 5-6 minutes, until fish is cooked through, golden brown and flakes easily with a fork. Remove skillet from heat; transfer fish to individual plates for serving. Serve hot.

    5. OPTIONAL: Garnish each fillet with chopped fresh parsley and a lemon slice, if desired.

    Recipe Notes

    NOTE: The oil used for frying the fish is not added into the caloric calculation as the majority of it remains in the skillet and not on the fish.

    Nutrition Facts
    Krispy Rockfish Fillets
    Amount Per Serving (1 fillet)
    Calories 285 Calories from Fat 45
    % Daily Value*
    Fat 5g8%
    Saturated Fat 2g13%
    Trans Fat 1g
    Polyunsaturated Fat 1g
    Monounsaturated Fat 2g
    Cholesterol 130mg43%
    Sodium 491mg21%
    Potassium 786mg22%
    Carbohydrates 22g7%
    Fiber 1g4%
    Sugar 3g3%
    Protein 36g72%
    Vitamin A 596IU12%
    Vitamin C 5mg6%
    Calcium 86mg9%
    Iron 4mg22%
    * Percent Daily Values are based on a 2000 calorie diet.

    Here’s one more to pin on your Pinterest boards!Pan-seared Krispy Rockfish Fillets have a seasoned flour/cornmeal/puffed rice coating, creating an easy, delicious main dish to enjoy.

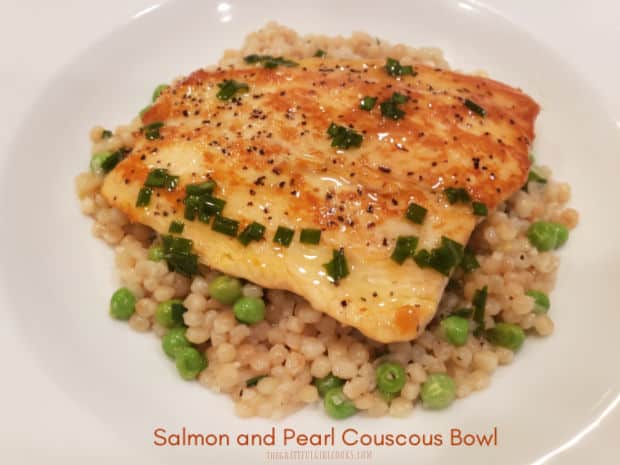
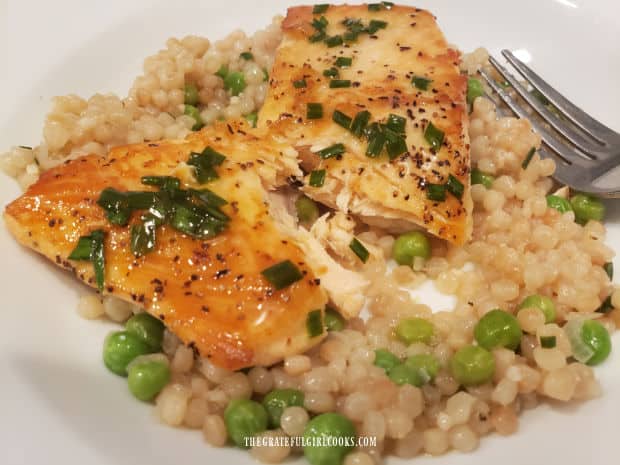
    Salmon and Pearl Couscous Bowl

    Looking for quick dinner ideas? Try a delicious Salmon and Pearl Couscous Bowl, with chives, lemon and peas, and on the table in 30 minutes!
    Looking for quick dinner ideas? Try a delicious Salmon and Pearl Couscous Bowl, with chives, lemon and peas, and on the table in 30 minutes!

    We happen to love salmon in our home. Years ago I didn’t like it… in fact we almost never had it. Then a switch was flipped with my taste buds, and I began to enjoy it. Now for the past 10-15 years we try to eat salmon about once a week, and I LOVE it! Who knew that your taste buds can really change, after all? I even have lots of salmon recipes on my blog now, to prove it!

    Today I want to share a really yummy all-in-one meal that features salmon fillets and pearl couscous, topped with a drizzling oil with lemon and chives. Throw in some peas, garlic and shallots for more flavor, and this is a great meal that’s ready to serve in 30 minutes. I found the recipe in one of my beloved cookbooks, and knew I had to share the recipe on my blog. Here’s how to make this delicious 30-minute meal:

    Scroll Down For A Printable Recipe Card At The Bottom Of The Page

    TIP: Before beginning- preheat your oven to 200°F. Place an empty, oven-proof baking dish (large enough for 4 salmon fillets) in the oven (on a middle rack) while it preheats.

    NOTE: The recipe (as written in recipe card below) makes 4 servings. My photos reflect only the amounts used for 2 servings, just so you know. 

    Cook The Salmon Fillets

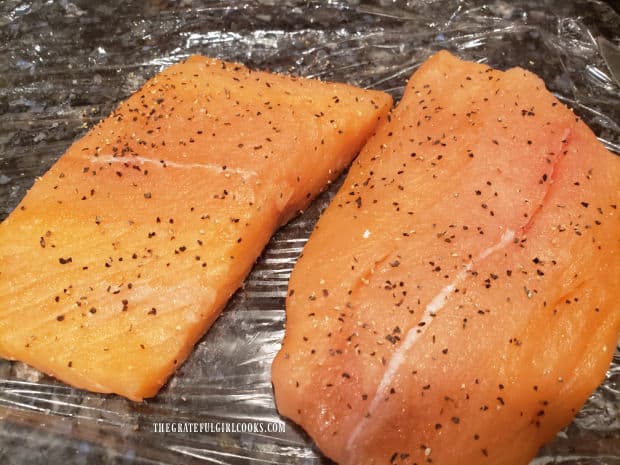
    Okay… while the oven preheats, prepare the salmon fillets. Pat each one dry using paper towels, and then lightly season the top with salt and pepper. NOTE: The reason to pat the salmon dry is because excess moisture tends to “steam” the salmon. You want them dry so the salmon can be pan-seared and crispy brown.

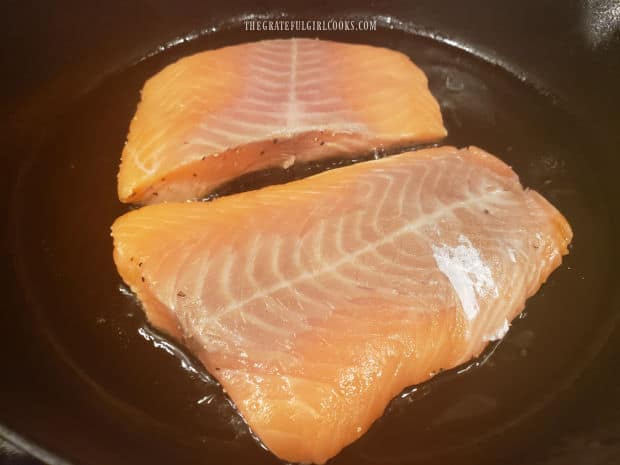
    Heat 1 Tablespoon of the oil in a large non-stick skillet on medium-high heat. When the skillet is really hot, but not smoking, carefully place salmon, seasoned side down into the hot skillet. Cook the salmon (without moving them) in the skillet for about 5 minutes, until the bottom side is nicely browned.

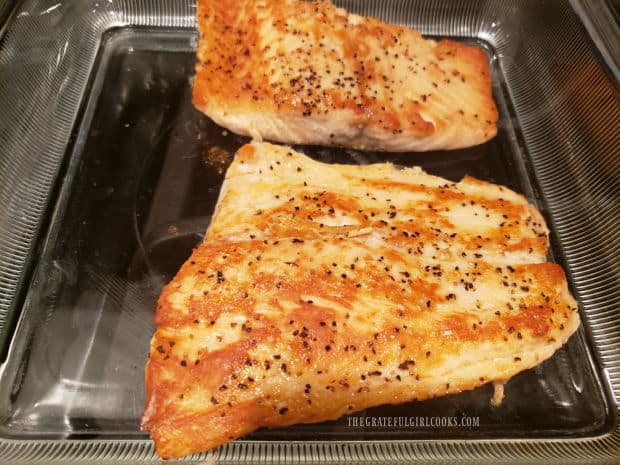
    Once the bottom has browned well, transfer the fish into the baking dish that has been heating in the oven, with the browned side of the salmon facing up. Bake the salmon (uncovered) at 200°F. for approx. 15 minutes. When done, the salmon will turn a bit opaque, and will flake easily.

    Salmon fillets are patted dry, then seasoned with salt and pepper before cooking.The salmon fillets are pan-seared, seasoned side down in hot oil in a skillet.Browned salmon fillets are baked in the oven after pan-searing.

    Cook The Pearl Couscous While Salmon Bakes

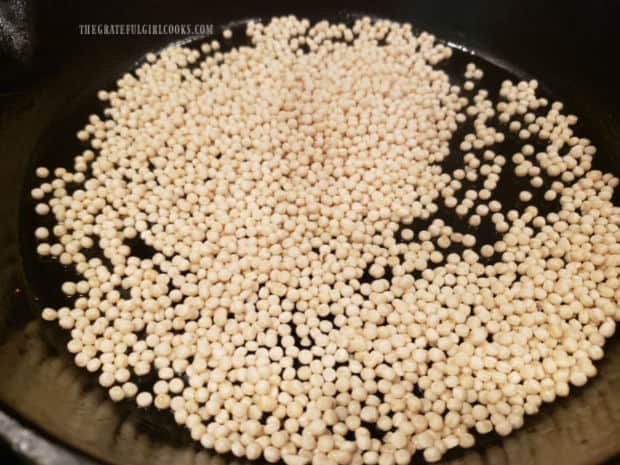
    While the salmon bakes, prepare the couscous. Wipe the skillet (you used for the salmon) clean with paper towels. Put another 1 Tablespoon of oil in the skillet, and heat it on medium-high. Measure the pearl couscous into the hot oil in the skillet. Lightly cook, stirring often, until the couscous turns a light golden brown color. This usually takes only a couple minutes.

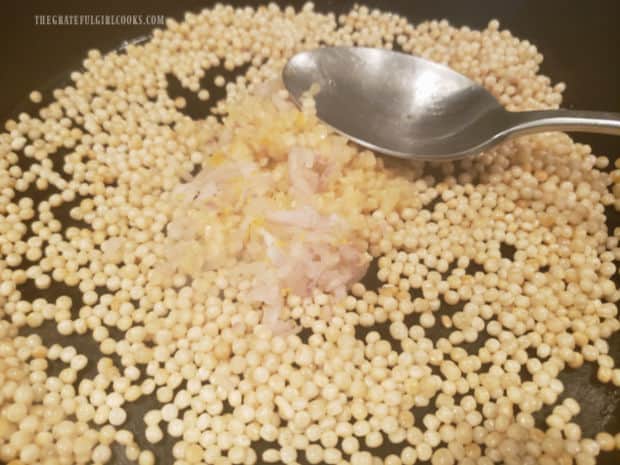
    Add the lemon zest, minced shallot and garlic to the couscous. Stir and cook for about 30 seconds (don’t burn that garlic!).

    Pearl couscous is lightly "toasted" in a hot skillet until golden.Shallots, garlic and lemon zest are added to the skillet with toasted pearl couscous.

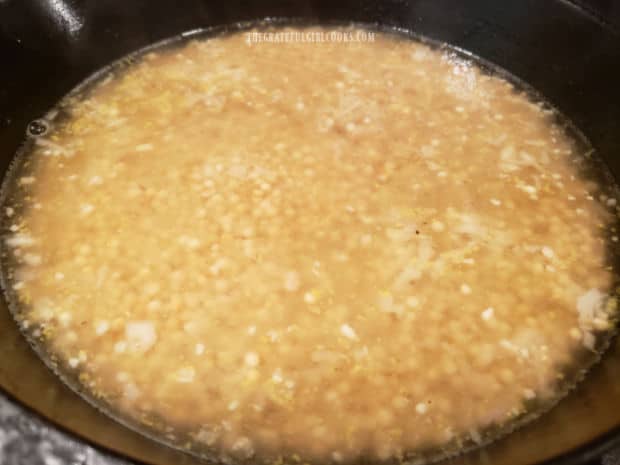
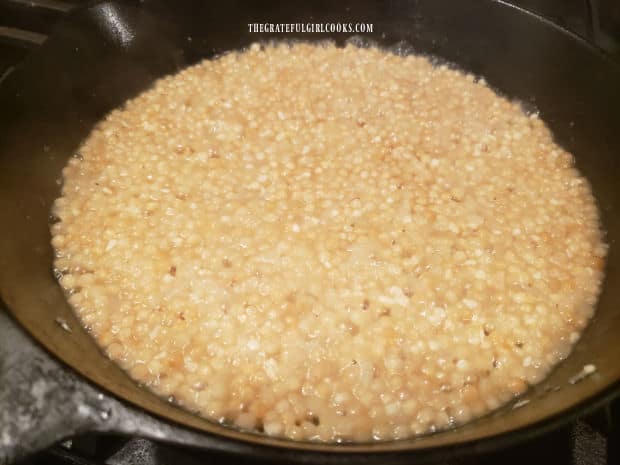
    Immediately add 3 cups of water to the couscous, and stir to combine. Continue to cook on medium-high heat, stirring often, until the couscous becomes soft, tender to the bite, and the liquid has been absorbed (approx. 11-12 minutes).

    Water is added to the pearl couscous and it begins cooking in skillet.Water has been absorbed into the pearl couscous in the skillet.

    Make The Lemon Chive Drizzling Oil While The Couscous Cooks

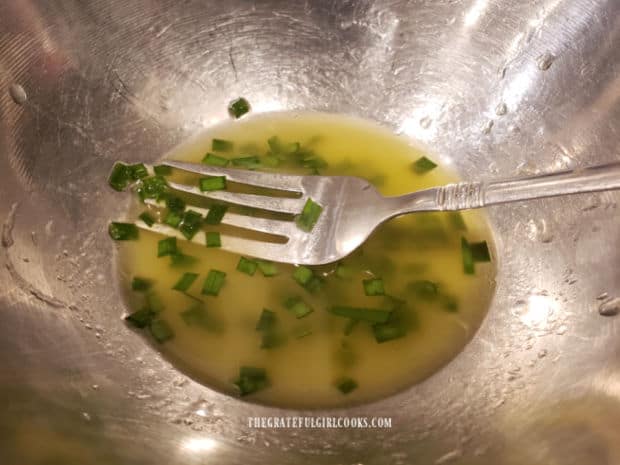
    While the couscous is cooking, make the quick and easy drizzling oil for the finished salmon. Place the remaining 2 Tablespoons of oil in a small bowl, then add 1 Tablespoon of lemon juice and 2 Tablespoons of chopped chives. Whisk well, to fully combine these simple ingredients. Set aside.

    A small bowl, holding the lemon chive drizzling oil to top the salmon fillets.

    Final Steps To Finish This Dish

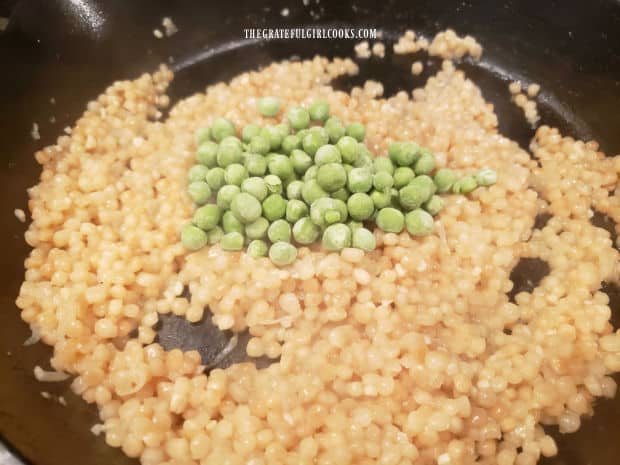
    Now we’re ready for the final steps! As soon as the couscous is tender and the liquid is absorbed, remove the skillet from the heat source. Add frozen peas to the couscous, put a lid on the skillet, and allow to remain undisturbed for 2 minutes. The heat from the couscous will heat the frozen peas through!

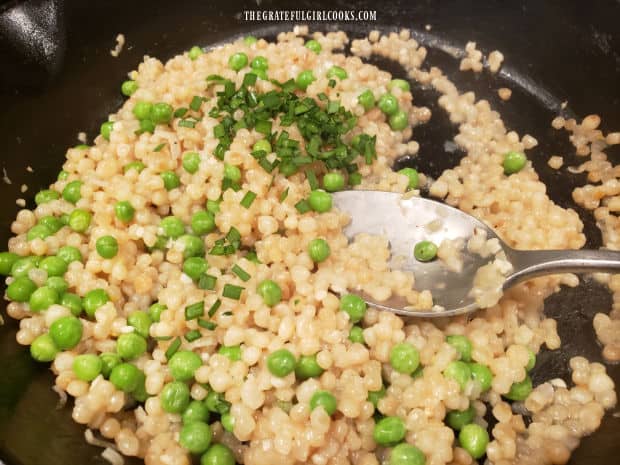
    After 2 minutes, take off the skillet lid. Stir in the rest of the chopped chives (2 Tablespoons) and lemon juice (1 Tablespoon). Toss gently, to combine these ingredients with the hot couscous. Season to taste with additional salt and pepper, if desired.

    Frozen peas are added to the skillet of hot pearl couscous.Chopped chives and lemon juice are added to the peas and pearl couscous for seasoning.

    Serving The Salmon and Pearl Couscous Bowl

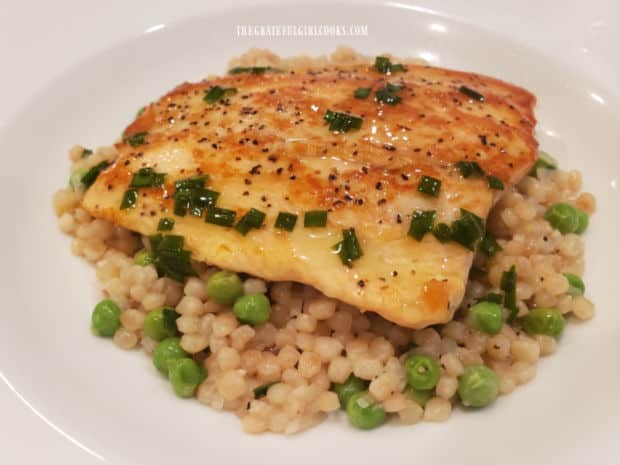
    To serve, spoon about one fourth of the couscous into each serving bowl. Carefully place a salmon fillet on top of the couscous, re-stir and then drizzle one fourth of the lemon chive oil over the top of the salmon. Repeat for each serving.

    Serve the salmon and pearl couscous bowl while all ingredients are hot, and enjoy this delicious, all-in-one meal! The salmon is nicely browned and should be flaky all the way through. The pearl couscous has a nice light flavor, and the lemon/chive drizzling oil brings it all together in every bite! Hope you enjoy it!

    A Salmon and Pearl Couscous Bowl is served with lemon chive drizzling oil on top.The salmon fillet in the Salmon and Pearl Couscous Bowl is fully cooked and flaky.

    Thank you for stopping by today. I sincerely hope you will come back again soon, to discover more family-friendly recipes to make for those you love. Take care, and have a wonderful day, friends.

    Looking For More SALMON Recipes?

    You can find ALL of my recipes in the Recipe Index, which is located at the top of the page. I have lots of yummy salmon recipes you can check out, including:

    Interested In More Recipes?

    Thank you for visiting this website. I appreciate you using some of your valuable time to do soIf you’re interested, I publish a newsletter 2 times per month (1st and 15th) with all the latest recipes, and other fun info. I would be honored to have you join our growing list of subscribers, so you never miss a great recipe!
    There is a Newsletter subscription box on the top right side (or bottom) of each blog post, depending on the device you use, where you can easily submit your e-mail address (only) to be included in my mailing list.

    You Can Also Find Me On Social Media:

    Facebook page: The Grateful Girl Cooks!
    Pinterest:
    The Grateful Girl Cooks!
    Instagram:
    jbatthegratefulgirlcooks

    Author's signature

    Original recipe source: “The Best 30-Minute Recipe” cookbook, page 129, published in 2006, by the Editors of Cooks Illustrated

    0 from 0 votes
    Salmon and Pearl Couscous Bowl
    Prep Time
    15 mins
    Cook Time
    15 mins
    Total Time
    30 mins
     

    Looking for quick dinner ideas? Try a delicious Salmon and Pearl Couscous Bowl, with chives, lemon and peas, and on the table in 30 minutes!

    Category: Main Dish, Seafood
    Cuisine: American
    Keyword: salmon pearl couscous bowl
    Servings: 4
    Calories Per Serving: 551 kcal
    Author: JB @ The Grateful Girl Cooks!
    Ingredients
    • 4 salmon fillets (approx. 4 ounces per fillet) , 1¼" thick, skinless
    • salt and pepper , to lightly season salmon
    • 4 Tablespoons olive oil , DIVIDED USE
    • cups Israeli pearl couscous , uncooked
    • 1 shallot , peeled/finely minced
    • 3 garlic cloves , peeled/finely minced
    • ½ teaspoon grated lemon zest , = finely grated lemon peel
    • 3 cups water
    • ¼ cup chopped chives , DIVIDED USE
    • 2 Tablespoons fresh lemon juice , DIVIDED USE
    • ½ cup frozen peas , frozen, NOT thawed
    Instructions
    1. TIP: **Before beginning recipe... preheat oven to 200°F. Place an empty, oven-proof baking dish (large enough for salmon fillets) in the oven on the middle rack while the oven preheats.

    2. COOK SALMON- Pat salmon dry with paper towels; season top lightly with salt/pepper. Heat 1 Tablespoon oil on medium-high heat in a large, non-stick skillet. When oil is really hot, but not smoking, carefully place salmon, seasoned side down into skillet. Cook (without moving fillets) about 5 minutes, until bottom side is well browned. Transfer salmon into heated baking dish with browned side facing up. Bake salmon (uncovered) at 200°F. for 15 minutes.

    3. PREPARE COUSCOUS- While salmon bakes, make the couscous. Wipe salmon skillet clean with paper towels. Add 1 Tablespoon of oil to skillet; heat on medium-high. Measure couscous into skillet. Cook, stirring often, until couscous turns golden brown (2-3 minutes). Add lemon zest, minced shallot and garlic. Stir/cook only about 30 seconds (don't burn garlic!). Immediately add 3 cups of water; stir to combine. Cook on medium-high heat, stirring often, until couscous is tender to the bite, and liquid has been absorbed (approx. 11-12 minutes).

    4. MAKE DRIZZLING OIL- While couscous cooks, make drizzling oil. Put remaining 2 Tablespoons oil in small bowl. Add 1 T. of lemon juice and 2 Tablespoons of chopped chives. Whisk well, to fully combine Set aside.

    5. TO FINISH- When couscous is tender and liquid absorbed, remove skillet from heat. Add frozen peas; put a lid on skillet; let sit undisturbed for 2 minutes (heat from couscous will heat frozen peas through). After 2 minutes, remove skillet lid. Stir in remaining chives (2 T.) and lemon juice (1 Tablespoon). Toss gently, to combine with couscous. Season to taste with salt and pepper, if desired.

    6. TO SERVE- Spoon ¼ of the couscous into each bowl. Carefully place a salmon fillet on top of the couscous. Re-stir lemon/chive/oil mixture; drizzle ¼ of it over top of salmon. Repeat for each serving. Serve hot, and enjoy!

    Nutrition Facts
    Salmon and Pearl Couscous Bowl
    Amount Per Serving (1 (1/4 of total))
    Calories 551 Calories from Fat 198
    % Daily Value*
    Fat 22g34%
    Saturated Fat 3g19%
    Polyunsaturated Fat 5g
    Monounsaturated Fat 13g
    Cholesterol 62mg21%
    Sodium 68mg3%
    Potassium 752mg21%
    Carbohydrates 55g18%
    Fiber 4g17%
    Sugar 2g2%
    Protein 32g64%
    Vitamin A 294IU6%
    Vitamin C 13mg16%
    Calcium 48mg5%
    Iron 2mg11%
    * Percent Daily Values are based on a 2000 calorie diet.

    Here’s one more to pin on your Pinterest boards!Looking for quick dinner ideas? Try a delicious Salmon and Pearl Couscous Bowl, with chives, lemon and peas, and on the table in 30 minutes!

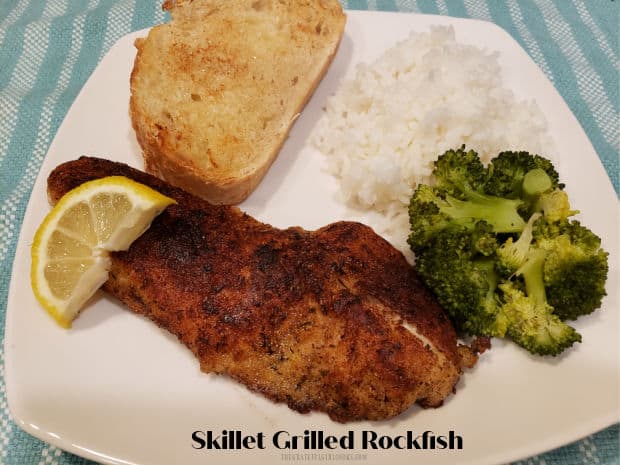
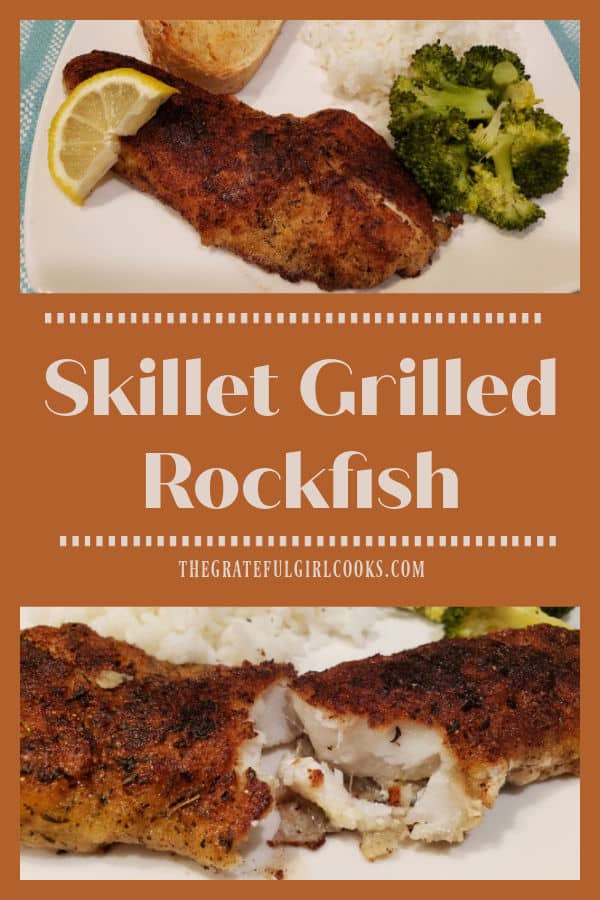
    Skillet Grilled Rockfish

    Skillet Grilled Rockfish is an easy, tasty dish that’s ready in 15 minutes! Well-seasoned fish fillets are cooked in butter until browned.
    Skillet Grilled Rockfish is an easy, tasty dish that's ready in 15 minutes! Well-seasoned fish fillets are cooked in butter until browned.

    A couple of years ago, my husband brought home some rockfish from the grocery store. Since we had never ever had rockfish before, it took a few minutes to come up with a plan on how to fix it. My recipe for pan-seared rockfish with fresh herbs was my first try, and we really loved it! We are big fans of rockfish, and love it’s delicate, mild flavor.

    Nowadays we keep a package or two in our freezer, and have found it be be delicious, versatile, perfect for grilling, stovetop cooking or baking, and yummy on fish tacos! This recipe (as printed below) is for two servings, but the recipe can EASILY be doubled or tripled. Let me show you how easy it is to make this version of skillet grilled rockfish!

    Scroll Down For A Printable Recipe Card At The Bottom Of The Page

    Make The Spice Mix For The Fish

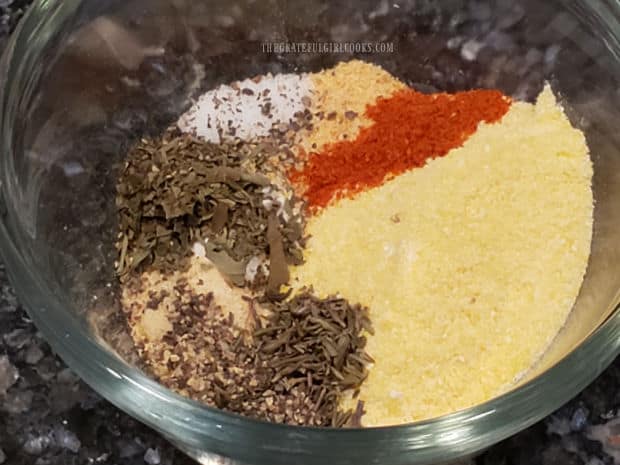
    The spice mix for the rockfish is made using several common ingredients. They are flour, cornmeal, onion powder, basil, garlic powder, thyme, cayenne pepper, salt & pepper. You can combine them in a small bowl or place the ingredients directly into a re-sealable plastic bag (and mix them together).

    The spice mix gives the fish a nice flavor, but it’s not overpowering AT ALL. The flour and cornmeal help to form a nice crust on the fish after cooking in melted butter (it browns nicely), and the variety of spices make it taste good!

    A seasoning mix for the rockfish is mixed in a small bowl.

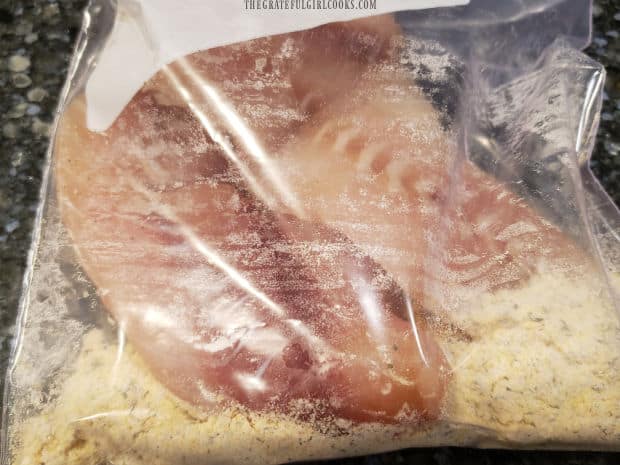
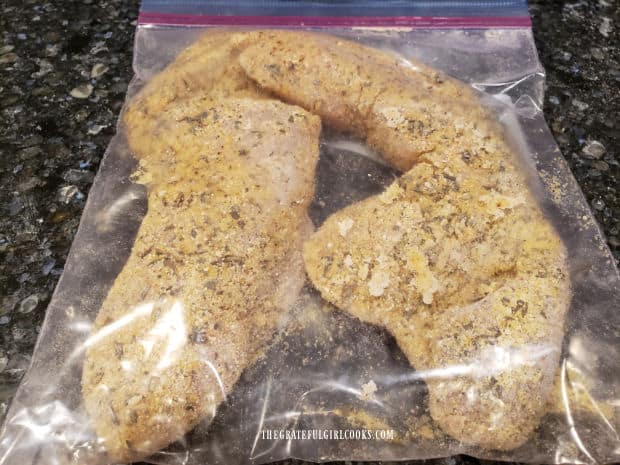
    Lightly pat the rockfish fillets semi-dry on paper towels, then place them into a plastic re-sealable bag with the spice mixture inside. Gently shake or flip the bag over several times until the fish has been coated with the spices.

    Rockfish fillets are combined with the spice mix in a re-sealable bag.After the rockfish fillets are coated with spice mix, they're ready to cook.

    Time To Make Skillet Grilled Rockfish!

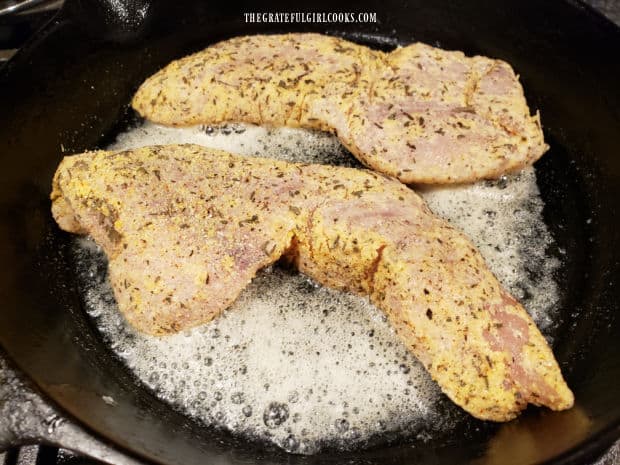
    Now that the rockfish has been seasoned, it’s time to cook them. Melt butter in a large skillet (preferably cast iron) on medium heat. Once the butter has melted and the skillet is really hot (but not smoking), place the rockfish into the skillet. Let the fish cook for 5-6 minutes, without moving them in the pan. This will allow it time to form a nicely browned crust on the bottom.

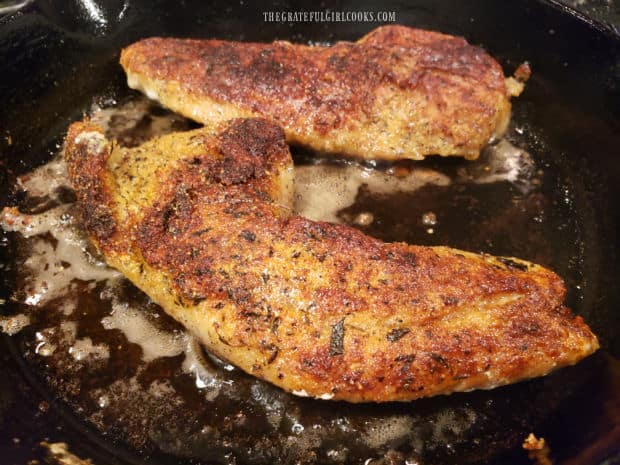
    Skillet grilled rockfish fillets are cooked in melted butter in a skillet.

    Once you can see that the bottom of the fish has a nice browned color to it, carefully turn the fish over to the other side. Continue to cook for another 5-6 minutes.

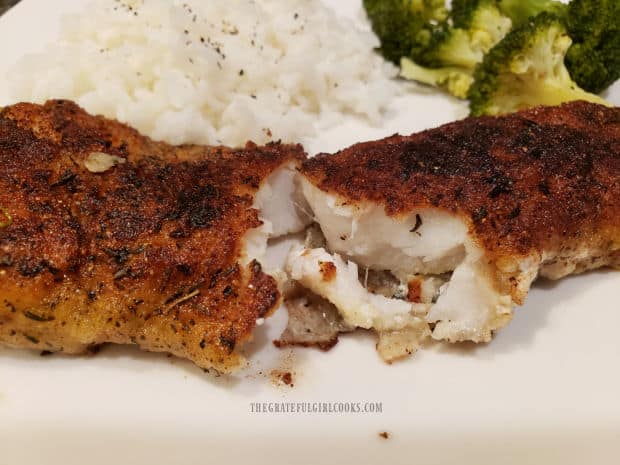
    NOTE: The cooking time may vary a tiny bit, due to varying thicknesses of fish being used. Once done cooking, both sides of the fish should be crusty and browned. The fish should also flake easily with a fork.

    The skillet grilled rockfish fillets are flipped over halfway through cooking time.

    Time To Eat The Skillet Grilled Rockfish!

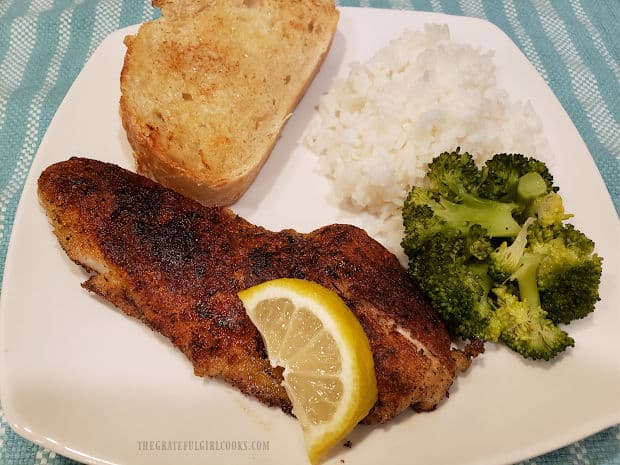
    And just like that… the skillet grilled rockfish is done, and ready to eat! See how easy this dish is to make? Transfer the fish to serving plates, and garnish with a lemon wedge, if desired. Serve immediately, and enjoy your easy, delicious seafood dinner!

    A serving of skillet grilled rockfish on a plate with broccoli, rice and garlic bread.When done cooking, the crusty, browned rockfish should flake easily.

    I really hope you will have the opportunity to make skillet grilled rockfish for yourself or your family. We sure enjoy it, and hope you will, too. Thanks for stopping by, and have a wonderful day.

    Looking For More ROCKFISH Recipes?

    You can find all of my seafood recipes in the Recipe Index, which is located at the top of the page. I have several recipes featuring rockfish, including:

    Interested In More Recipes?

    Thank you for visiting this website. I appreciate you using some of your valuable time to do soIf you’re interested, I publish a newsletter 2 times per month (1st and 15th) with all the latest recipes, and other fun info. I would be honored to have you join our growing list of subscribers, so you never miss a great recipe!
    There is a Newsletter subscription box on the top right side (or bottom) of each blog post, depending on the device you use, where you can easily submit your e-mail address (only) to be included in my mailing list.

    You Can Also Find Me On Social Media:

    Facebook page: The Grateful Girl Cooks!
    Pinterest:
    The Grateful Girl Cooks!
    Instagram:
    jbatthegratefulgirlcooks

    Author's signature

    Recipe adapted from: “Taste of Home” magazine, June/July 2005 edition, page 40, published by Reiman Publications, Inc.

    0 from 0 votes
    Skillet Grilled Rockfish
    Prep Time
    5 mins
    Cook Time
    10 mins
    Total Time
    15 mins
     

    Skillet Grilled Rockfish is an easy, tasty dish that's ready in 15 minutes! Well-seasoned fish fillets are cooked in butter until browned.

    Category: Entree-Seafood, Main Dish
    Cuisine: American
    Keyword: skillet grilled rockfish
    Servings: 2
    Calories Per Serving: 331 kcal
    Author: JB @ The Grateful Girl Cooks!
    Ingredients
    For Spice Mix:
    • cup all purpose flour
    • cup cornmeal
    • ½ teaspoon garlic powder
    • ½ teaspoon onion powder
    • ½ teaspoon dried basil
    • ¼ teaspoon dried thyme
    • teaspoon (EACH) salt and pepper
    • teaspoon cayenne pepper
    For Fish:
    • 12 ounces rockfish fillets (two 6 ounce fillets)
    • 2 Tablespoons butter
    • 2 lemon wedges (for garnish-optional)
    Instructions
    1. Combine spice mix ingredients in a small bowl OR place directly into a re-sealable plastic bag (and mix them together).

    2. Lightly pat fish dry on paper towels; place fish into bag with spice mix. Gently shake/flip bag several times until fish is covered with spices. Tip: only season TWO pieces of fish at a time.

    3. Melt butter in large skillet (preferably cast iron) on medium heat. Once melted, and skillet is hot (but not smoking), put rockfish in skillet. Let fish cook for 5-6 minutes, without moving them in the pan. This allows time to form a nicely browned crust on the bottom. When bottom of fish is nicely browned, carefully turn fish to other side. Continue to cook for 5-6 more minutes. NOTE: Cooking time may vary a bit, due to different thicknesses of fish. When done, both sides of fish should be crusty/browned, and should flake easily with a fork.

    4. Transfer fish to plates. Serve immediately, with a lemon wedge on top of fish, if desired. Enjoy!
    Nutrition Facts
    Skillet Grilled Rockfish
    Amount Per Serving (1 fillet)
    Calories 331 Calories from Fat 126
    % Daily Value*
    Fat 14g22%
    Saturated Fat 8g50%
    Trans Fat 1g
    Cholesterol 115mg38%
    Sodium 373mg16%
    Potassium 749mg21%
    Carbohydrates 16g5%
    Fiber 2g8%
    Sugar 1g1%
    Protein 34g68%
    Vitamin A 438IU9%
    Vitamin C 10mg12%
    Calcium 44mg4%
    Iron 2mg11%
    * Percent Daily Values are based on a 2000 calorie diet.

    Here’s one more to pin on your Pinterest boards!Skillet Grilled Rockfish is an easy, tasty dish that's ready in 15 minutes! Well-seasoned fish fillets are cooked in butter until browned.


    Sweet Spicy Salmon

    Sweet Spicy Salmon is an easy-to-make, delicious seafood dish! Seasoned fillets are covered with a pineapple/Asian-inspired sauce and baked.
    Sweet Spicy Salmon is an easy-to-make, delicious seafood dish! Seasoned fillets are covered with a pineapple/Asian-inspired sauce and baked.

    I really think you’re gonna love this totally EASY salmon dish. It is so simple to prepare in only a few minutes, and then into the oven it goes.

    The end result is a flaky and delicious, baked salmon fillet, covered in a “not too sweet and not too spicy” delicious sauce. YUM! This recipe as written serves two, but can easily be doubled or tripled.

    Basically you will lightly season the salmon, cover it with a simple flavorful sauce, bake it, and then put it under the broiler to crisp it before serving. Truly, it could not be any more simple than that!

    We love salmon, and love this recipe for it, too, so I wanted to share it with you. Here’s how easy it is to make sweet spicy salmon:

    Scroll Down For A Printable Recipe Card At The Bottom Of The Page

    Prepare The Salmon For Baking

    Preheat your oven to 425° F. Line a baking dish (or small cookie sheet) with a large piece of aluminum foil. You will want the piece of foil to be much larger than the pan, so the edges can be turned up to “hold the sauce in” later.

    Spray the foil lightly with non-stick baking spray. **NOTE: If doubling the recipe, you can use a rimmed cookie sheet to have room for the additional pieces of salmon.

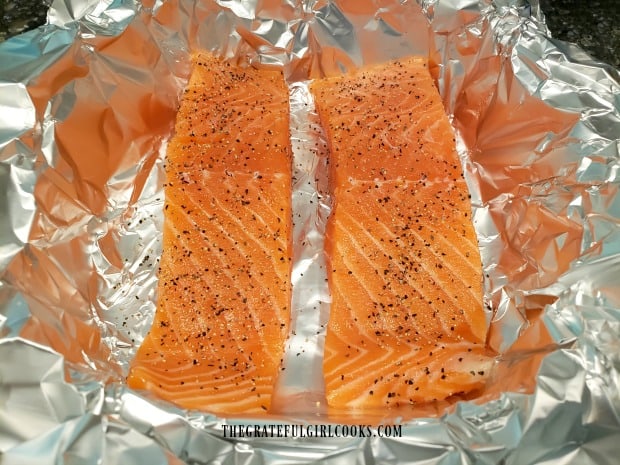
    Place skinless salmon fillets in the prepared dish, leaving about an inch between each one. Lightly sprinkle the top of the salmon fillets with salt and black pepper.

     Drain pineapple rings, RESERVING THE JUICE FOR LATER. Slice pineapple rings in half. Place the halved rings around the long sides of the fillets, and in between the pieces.

    Pull the foil up to “snuggle” the salmon so that any “runaway” sauce will be “held captive” in the pan, once added. Set the salmon aside while you make the sauce.

    Skinless salmon fillets are lightly seasoned with salt and pepper.Pineapple rings (cut in half) are wedged around the salmon fillets in pan.

    Make The Sauce 

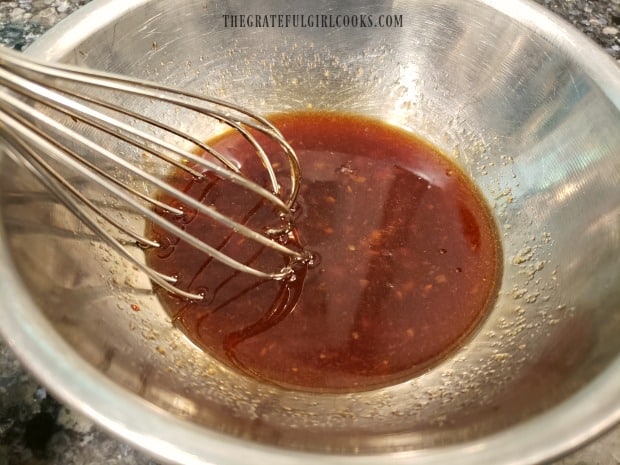
    The sauce is a cinch to make. Place sweet Thai chili sauce (I use Mae Ploy), rice vinegar, soy sauce, brown sugar and pineapple juice (reserved from the can) in a small bowl. Whisk well, to combine the ingredients.

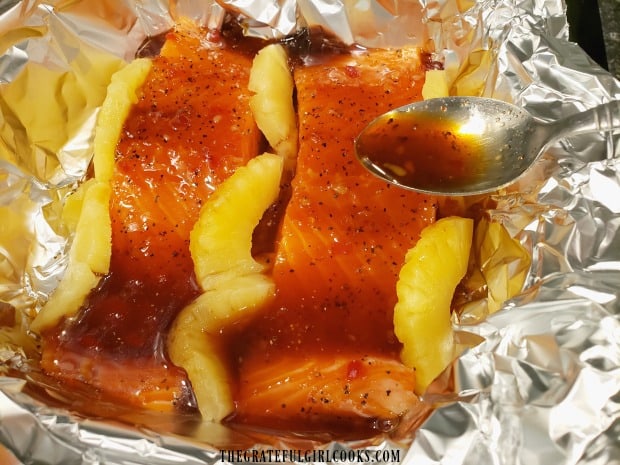
    Spoon or pour the sauce over the top of each piece of salmon, to fully cover the surface of the fish. The foil will help “catch” any runoff sauce. Now the sweet spicy salmon is ready to bake!

    An Asian-inspired sauce is whisked together to pour over salmon before baking.The seasoned salmon fillets are covered with a sauce before baking.

    Cooking The Sweet Spicy Salmon

    BAKE the sweet spicy salmon, uncovered, at 425°F. for 12-15 minutes. This amount of time will vary due to the thickness of the fish YOU use. Check it at 12 minutes. The fish should be easily flaked with a fork when finished baking. Immediately switch your oven to the BROIL setting.

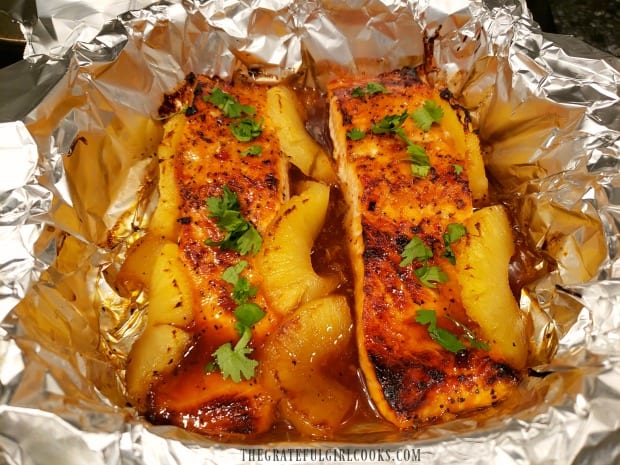
    Place the pan under the broiler heating element. Broil the fish for 2-3 minutes or just until the top and edges begin to blacken and crisp up slightly. Remove the pan from the broiler.

    If desired, garnish the salmon with chopped cilantro before transferring to serving plates. I recommend this, as the cilantro not only adds color, but additional flavor to this dish, as well.

    Baked then broiled salmon is garnished with chopped cilantro before serving.

    Time To Serve The Sweet Spicy Salmon

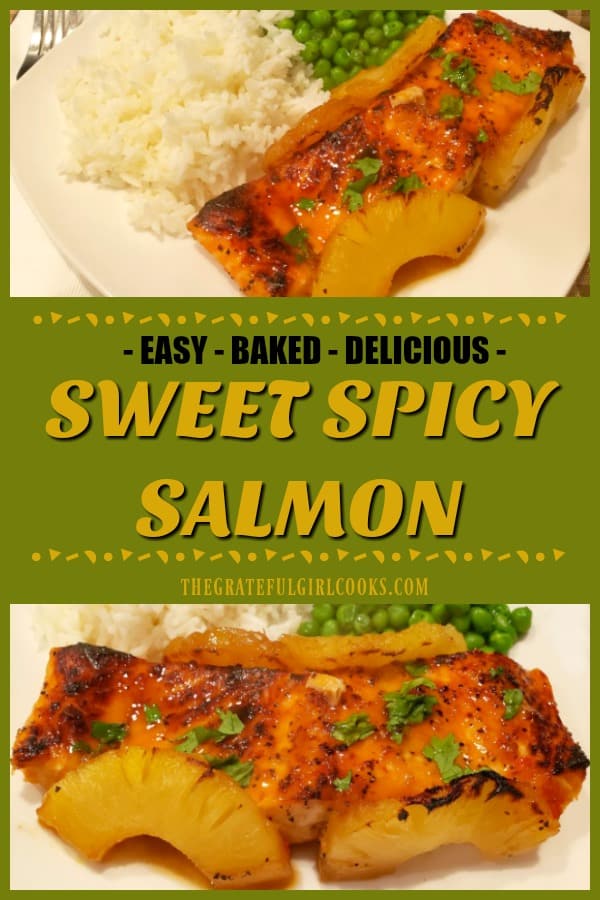
    Carefully transfer the sweet spicy salmon fillets (use a spatula) to serving plates when ready to serve. Place pineapple rings around the edges of the salmon. Spoon some of the sauce from the pan over each piece of salmon.

    The salmon will be nice and flaky, and is so yummy I think you will gobble it up! You will also find that the fish (with the sauce) isn’t too spicy, after all.

    The first time I made this dish, I thought it would be really spicy… NOPE! It’s perfect, and the sweet/spicy sauce compliments the salmon very well.

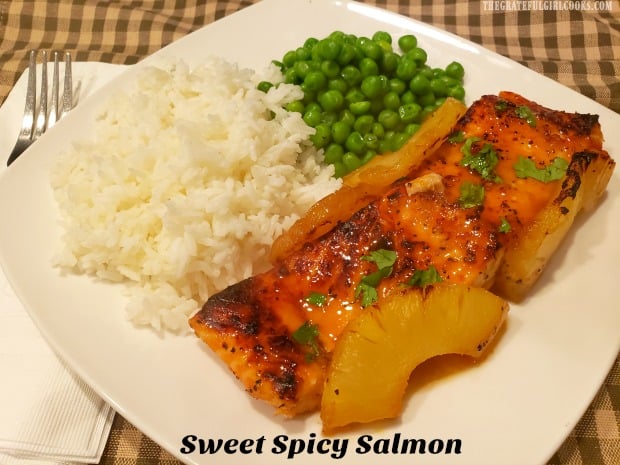
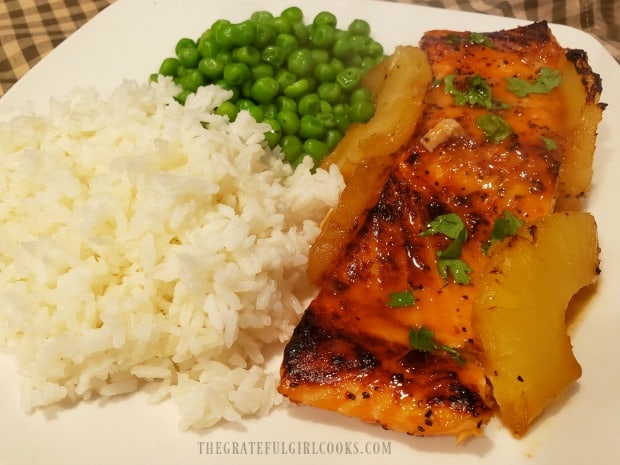
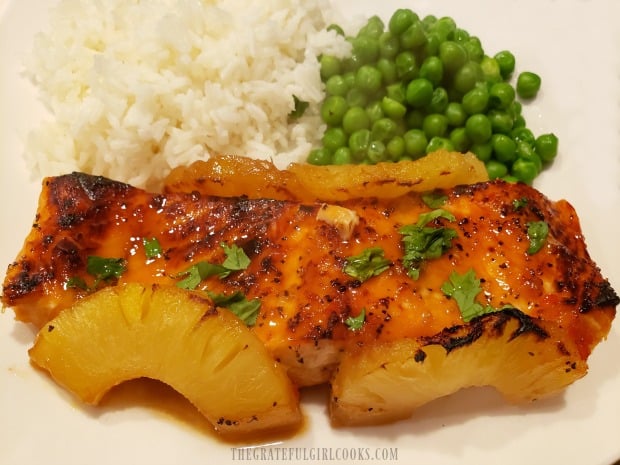
    Sweet Spicy Salmon, served on a white plate with steamed rice and green peas.Chopped cilantro is a colorful garnish when serving Sweet Spicy Salmon fillets.

    I really hope you have the opportunity to try this recipe for sweet spicy salmon. The recipe can be EASILY DOUBLED, and has a wonderful flavor.

    Thanks for stopping by today. Have a wonderful day, and I sincerely hope you will come back again soon. Take care, and may God bless you and those you love.

    Looking For More SALMON Recipes?

    You can find all of my salmon recipes in the Recipe Index, which is located at the top of the page. I have quite a few (we love salmon!), including:

    Want More Recipes? Get My FREE Newsletter!

    I publish a newsletter 2 times per month (1st and 15th) with lots of recipes, tips, etc..
    Would you like to join our growing list of subscribers?

    There is a Newsletter subscription box on the top right (or bottom) of each blog post, depending on the device you use.
    You can submit your e-mail address there, to be added to my mailing list.

    Find Me On Social Media:

    Facebook page: The Grateful Girl Cooks!
    Pinterest:
    The Grateful Girl Cooks!
    Instagram:
    jbatthegratefulgirlcooks

    Author's signature

    Original Recipe Source: Danelle, at: https://letsdishrecipes.com/sweet-and-spicy-pineapple-salmon/

    ↓↓ PRINTABLE RECIPE BELOW ↓↓

    0 from 0 votes
    Sweet Spicy Salmon
    Prep Time
    5 mins
    Cook Time
    15 mins
    Total Time
    20 mins
     

    Sweet Spicy Salmon is an easy-to-make, delicious seafood dish! Seasoned fillets are covered with a pineapple/Asian-inspired sauce and baked.

    Category: Entree, Main Dish, Seafood
    Cuisine: All Cuisines
    Keyword: sweet spicy salmon
    Servings: 2
    Calories Per Serving: 335 kcal
    Author: JB @ The Grateful Girl Cooks!
    Ingredients
    • 2 6 ounce salmon fillets , no skin
    • salt/pepper, to season
    • 4 canned pineapple rings , cut in half (JUICE RESERVED)
    • chopped cilantro (Optional, for garnish)
    For Sauce:
    • ¼ cup sweet Thai chili sauce (I used Mae Ploy)
    • 1 Tablespoon rice vinegar
    • ½ Tablespoon low sodium soy sauce
    • 2 teaspoons brown sugar
    • cup reserved pineapple juice (from can)
    Instructions
    1. Preheat oven to 425° F. Line a baking dish (or small cookie sheet) with a large piece of aluminum foil (larger than pans so edges can be turned. Spray lightly with non-stick baking spray. **NOTE: If doubling recipe, use rimmed cookie sheet to have room for additional pieces.

    2. Place salmon in prepared dish; leave 1" between each one. Lightly sprinkle salmon with salt/pepper. Drain pineapple rings, RESERVING JUICE FOR LATER. Slice rings in half. Place halved rings around long edges of fillets, and in between. Pull foil up to "snuggle" salmon so that any "runaway" sauce will be "held captive" in foil, once added. Set aside.

    3. Make sauce: Place sweet chili sauce, rice vinegar, soy sauce, brown sugar and pineapple juice (reserved from can) in a small bowl. Whisk well, to combine the ingredients. Spoon or pour sauce over the top of each salmon fillet, to cover surface.

    4. BAKE, uncovered, at 425°F. for 12-15 minutes. Cooking time may vary slightly, due to thickness of fillets used. Check it at 12 minutes. The fish should easily flake with a fork when done. Immediately switch oven to the BROIL setting. Broil salmon for 2-3 minutes or just until the top and edges begin to blacken and crisp up slightly. Remove pan from oven. If desired, garnish each piece with chopped cilantro before transferring to serving plates.

    5. Carefully transfer salmon (use a spatula) to plates to serve. Place pineapple rings around the edges. Spoon sauce from the pan over each piece. Serve, and enjoy!
    Nutrition Facts
    Sweet Spicy Salmon
    Amount Per Serving (1 fillet)
    Calories 335 Calories from Fat 99
    % Daily Value*
    Fat 11g17%
    Saturated Fat 2g13%
    Cholesterol 94mg31%
    Sodium 529mg23%
    Potassium 853mg24%
    Carbohydrates 22g7%
    Fiber 1g4%
    Sugar 21g23%
    Protein 34g68%
    Vitamin A 68IU1%
    Vitamin C 1mg1%
    Calcium 20mg2%
    Iron 1mg6%
    * Percent Daily Values are based on a 2000 calorie diet.

    Here’s one more to pin on your Pinterest boards!Sweet Spicy Salmon is an easy-to-make, delicious seafood dish! Seasoned fillets are covered with a pineapple/Asian-inspired sauce and baked.
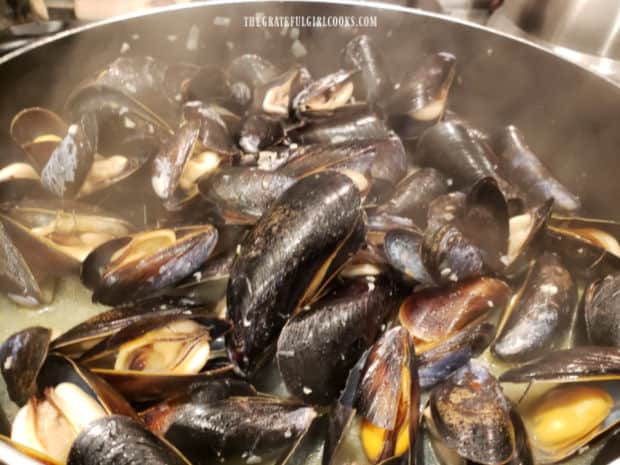
    Herbed Shrimp Broccoli Pasta

    Herbed Shrimp Broccoli Pasta is a delicious, Italian-inspired meal of pan-seared shrimp, broccoli, and pasta noodles w/ Parmesan, olive oil & spices.
    Herbed Shrimp Broccoli Pasta is a delicious, Italian-inspired meal of pan-seared shrimp, broccoli, and pasta noodles w/ Parmesan, olive oil & spices.

    If you enjoy shrimp and pasta dishes, may I suggest trying this delicious recipe for Herbed Shrimp Broccoli Pasta? My husband and I love this dish, and truly hope you will enjoy it, as well! I’ve been making it without any recipe, in one form or another for years, improvising as I went along with spices, ingredients, etc. This is the final version of this recipe from all my kitchen “experimenting”, and it sure is GOOD!
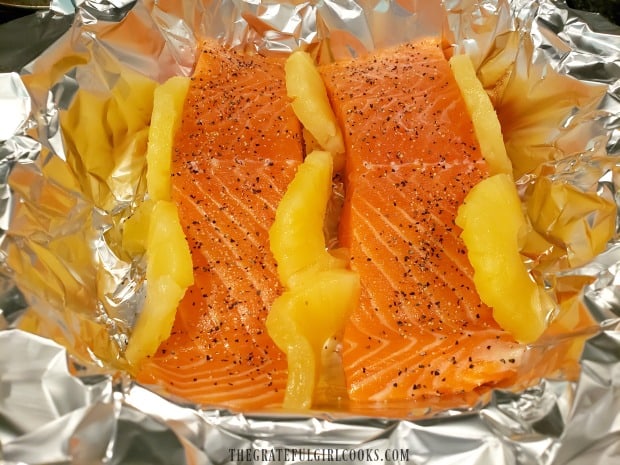
    Lightly seasoned, pan-seared shrimp are complimented with pasta, coated with olive oil, butter, Parmesan cheese and Italian-inspired spices. Toss in some healthy broccoli, and you’ve got a wonderful, all-in-one meal I am confident you will enjoy.

    Basically you will cook shrimp, cook broccoli, cook pasta, and then mix it all together with spices, cheese, butter and olive oil. It’s pretty easy to make (in just a few steps), so I want to share this yummy recipe with you.

    Scroll Down For A Printable Recipe Card At The Bottom Of The Page

    Season And Pan-Sear The Shrimp

    The first step is to make sure your medium shrimp are peeled, and deveined. Place the shrimp in a medium sized bowl, and lightly season with Italian seasoning and garlic powder. The link is to my recipe for making Italian seasoning at home, if you do not have any.

    Melt butter in a large skillet. Add the seasoned shrimp, and cook in a single layer for 2-3 minutes, and then turn the shrimp over to the other side. The shrimp should be golden brown. Cook for 1-2 additional minutes, until the shrimp are cooked through.

    Set the skillet with the shrimp aside, and cover, to keep the shrimp warm. Do not clean the skillet out, because you will use all the browned butter and leftover “crispy bits” later for added flavor!

    Shrimp are lightly seasoned, then pan-seared in butter in a skillet.

    Cook Pasta, Steam Broccoli, And Mix Pasta Seasoning

    Okay… now you need to prepare the pasta in boiling water, according to package directions (approx. 12-13 minutes). TIP: Typically I start the pot of water heating while I cook the shrimp. That way, when I’m done cooking the shrimp, the water will already be boiling for the pasta (which saves time).

    Fettucine pasta is cooked until al dente in boiling water.

    While the pasta is cooking, quickly steam the broccoli. Place the broccoli florets in a steamer basket over 2 inches of boiling water in a saucepan, and cover. Steam the broccoli for 4 minutes. Remove the florets from the basket, and add to the cooked shrimp set aside in the skillet (and keep warm).

    Broccoli florets are quickly steamed before adding to the pasta.

    While the pasta is still cooking, take a minute to also mix together the spice ingredients for the pasta in a small bowl. The spices are onion powder, Italian seasoning, parsley, garlic powder, red pepper flakes, salt and pepper.

    Spices are mixed together before adding to the pasta.

    Putting The Herbed Shrimp Broccoli Pasta Together

    Now it’s time to put this meal together! As soon as the pasta is fully cooked, quickly drain it in a colander (but don’t rinse!). Place the butter and olive oil in the bottom of the empty pasta pan, and then pour the HOT drained pasta back in, on top. This will help to melt the butter underneath. Quickly add the spice mixture and grated Parmesan cheese to the pasta.

    The herb mixture, butter, oil and Parmesan cheese are added to cooked pasta.

    Now add the cooked shrimp and broccoli to the hot pasta, and gently toss it all together. The melted butter, olive oil, spices and Parmesan will flavor the pasta, along with the broccoli and seasoned shrimp. Give the pasta a quick taste, and add additional salt and pepper, if desired. Now the herbed shrimp broccoli pasta is ready to be served.

    Cooked shrimp and broccoli are added to the pasta, then gently mixed together.The herbed shrimp broccoli pasta is gently tossed before serving.

    Time To Serve Herbed Shrimp Broccoli Pasta!

    Place portions of pasta onto individual serving plates or bowls (I use tongs). Try to position the shrimp on top of each portion to make it look appealing. Add additional grated Parmesan cheese for garnish, if desired.

    Note: Because this pasta dish is not fully coated with a thick sauce (like spaghetti sauce, for example), it will tend to lose heat rapidly . This is why it is important to serve it up fairly quickly… just sayin’.

    A serving dish of herbed shrimp broccoli pasta, ready to enjoy!A close up of herbed shrimp broccoli pasta, with a fork on the side.

    Hope you enjoy this delicious all-in-one pasta dinner! We always do and trust you will, too. Thanks for stopping by, and hope you will visit again soon. Take care, and have a great day.

    Looking for more PASTA recipes?

    You can find all of my recipes in the Recipe Index, located at the top of the page. I have quite a few, including:

    Interested In More Recipes?

    Thank you for visiting this website. I appreciate you using some of your valuable time to do soIf you’re interested, I publish a newsletter 2 times per month (1st and 15th) with all the latest recipes, and other fun info. I would be honored to have you join our growing list of subscribers, so you never miss a great recipe!
    There is a Newsletter subscription box on the top right side (or bottom) of each blog post, depending on the device you use, where you can easily submit your e-mail address (only) to be included in my mailing list.

    You Can Also Find Me On Social Media:
    Facebook page: The Grateful Girl Cooks!
    Pinterest:
    The Grateful Girl Cooks!
    Instagram:
    jbatthegratefulgirlcooks

    Author's signature

    0 from 0 votes
    Herbed Shrimp Broccoli Pasta
    Prep Time
    25 mins
    Cook Time
    0 mins
    Total Time
    25 mins
     

    Herbed Shrimp Broccoli Pasta is a delicious, Italian-inspired meal of pan-seared shrimp, broccoli, and pasta noodles w/ Parmesan, olive oil & spices.

    Category: Dinner, Entree
    Cuisine: Italian
    Keyword: herbed shrimp broccoli pasta
    Servings: 3
    Calories Per Serving: 600 kcal
    Author: JB @ The Grateful Girl Cooks!
    Ingredients
    For Shrimp:
    • 18-20 medium shrimp , peeled, deveined
    • 2 Tablespoons butter
    • ½ teaspoon Italian seasoning
    • ¼ teaspoon garlic powder
    For Pasta:
    • 7 ounces fettucine pasta , cooked according to pkg. directions
    • cups broccoli florets , lightly steamed
    • ¼ cup extra virgin olive oil
    • 2 teaspoons butter , room temp.
    • 1 Tablespoon Italian seasoning
    • 1 teaspoon dried parsley
    • ½ teaspoon garlic powder
    • teaspoon onion powder
    • ¼ teaspoon salt and pepper (EACH)
    • 1 pinch (generous) red pepper flakes
    • ¼ cup fresh grated Parmesan cheese , plus more for garnish, if desired
    Instructions
    1. Prepare shrimp: Place shrimp in a bowl; sprinkle with Italian seasoning and garlic powder; toss to coat. Melt butter in a large skillet on medium heat. Add shrimp in a single layer. Cook 2-3 minutes; turn shrimp over and cook other side for 1-2 more minutes until cooked through. Set skillet of shrimp aside; cover, to keep warm. Don't clean skillet- you will use browned butter and leftover "crispy bits" later for added flavor!

    2. Prepare pasta according to package directions. TIP: Start pot of water heating while cooking shrimp in Step #1. When done cooking shrimp, water should be boiling for pasta (which saves time).

    3. While Pasta Cooks: #1: Steam broccoli. Place broccoli florets in a steamer basket over 2 inches of boiling water in a saucepan and cover. Steam for 4 minutes. Remove broccoli from steamer; add to shrimp set aside in skillet. #2: Mix together spices for the pasta (Italian seasoning, parsley, garlic powder, onion powder, salt, pepper, and red pepper flakes) in a small bowl. Set aside.

    4. When pasta is done, immediately drain it in a colander (but don't rinse!). Place butter and olive oil on the bottom of the empty pasta pan, and then pour HOT drained pasta back in, on top. This melts the butter underneath. Add spice mix, Parmesan cheese, shrimp and broccoli to pasta.

    5. Gently toss all ingredients together until fully combined. Taste pasta; add additional salt and pepper, if desired. Immediately serve (while still hot), and enjoy.

    Nutrition Facts
    Herbed Shrimp Broccoli Pasta
    Amount Per Serving (1 (1/3 of total))
    Calories 600 Calories from Fat 306
    % Daily Value*
    Fat 34g52%
    Saturated Fat 11g69%
    Cholesterol 181mg60%
    Sodium 727mg32%
    Potassium 355mg10%
    Carbohydrates 53g18%
    Fiber 4g17%
    Sugar 2g2%
    Protein 22g44%
    Vitamin A 840IU17%
    Vitamin C 42mg51%
    Calcium 221mg22%
    Iron 3mg17%
    * Percent Daily Values are based on a 2000 calorie diet.

    Here’s one more to pin on your Pinterest boards!Herbed Shrimp Broccoli Pasta is a delicious, Italian-inspired meal of pan-seared shrimp, broccoli, and pasta noodles w/ Parmesan, olive oil & spices.