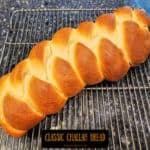
Make a loaf of beautiful braided classic challah bread to enjoy! It can be eaten freshly sliced, or used for sandwiches, French toast, etc.

Have you ever made challah bread before? This delicious bread is widely associated with Jewish culture and cuisine and enjoyed on Jewish holidays or Shabbat.
This delicious, well-loved bread is found throughout the United States and is commonly eaten sliced (as is), used for sandwiches, or used to make French Toast (YUM!)
Challah bread dough is made in various braided loaf shapes and is beautifully browned, thanks to an egg wash on the dough before baking.
It is a yeast bread, so it does require a bit of time for the rising of the dough, but in my opinion, it’s well worth your time!
Here’s how to make this absolutely scrumptious classic challah bread, step by step.
Scroll Down For A Printable Recipe Card At The Bottom Of The Page
Let The Yeast “Bloom”
Sprinkle 2¼ teaspoons of active dry yeast (= 1 envelope) over ¼ cup of lukewarm water (approx.110°F.) in a large mixing bowl.
Stir well and then set the bowl aside for about 10 minutes, until the yeast has “bloomed” and formed bubbles on the surface.
NOTE: The foamy bubbles on top indicate the yeast is “viable, good and active”. Make sure this bubbling occurs before adding any of the remaining ingredients.

Once the yeast has “bloomed”, add vegetable oil, granulated sugar, salt and 1/3 cup of lukewarm water to the yeast mixture. Whisk these ingredients together until combined.
Add 3 large egg yolks to this mixture and then use an electric mixer to beat the ingredients together well.


Make The Challah Dough
Add about 1¼ cups of all-purpose flour and continue to use the beaters to mix the dough well. Remove the beaters from the mixture.
Stir in enough additional flour a little at a time, until the dough becomes thick and firm enough to handle.
This typically takes about ¾ -1 cup additional flour, but the amount can vary, so just add a little of the flour at a time until the dough reaches the correct texture.


The challah dough should be thick and slightly “shaggy” when done and it should be fairly easy to handle. Cover the dough and let it rest for 10 minutes before the next step.

Knead Dough Then Let It Rise
After the dough has rested, turn it out onto a floured work surface and dust it lightly with flour. Knead the dough for 8-10 minutes, adding additional flour, as needed until the dough becomes shiny and smooth.
Put the challah dough ball in a large, oiled or greased bowl and turn the dough once, to coat it with the oil. Cover the bowl with plastic wrap and set the bowl in a warm place (free of drafts).
Let the dough rise for 45-60 minutes OR until you can see it has doubled in size/volume.

Divide And Braid The Challah Dough
Divide the challah dough into three equally sized portions, cover them with plastic wrap and let them rest and rise again for 10 minutes.
On a floured surface, shape each piece of dough (one at a time) into a rectangular shape. Roll each piece with your palms into a rope shape, each about 18″ long.
Place the dough ropes either back on the floured surface OR on a greased baking sheet to braid the dough.
Lay all three “ropes” next to each other (a small space in between each one), then pinch all 3 ropes together at the top to tightly join them.

Brush Challah With Oil And Let It Rest
Braid the 3 ropes of dough by crossing the left rope over the middle rope, then crossing the right rope over the middle.
Continue util the loaf is fully braided, then pinch the bottom ends together to seal and tuck them under the loaf.
Carefully place the loaf in the center of a greased baking sheet. Use a pastry brush to lightly brush the loaf with 1 Tablespoon of vegetable oil.
Cover the braided, oiled loaf with plastic wrap, and let it rest and rise for 30-40 minutes. This time the dough will rise slightly but will NOT double in size.


Apply Egg Wash Before Baking
Now it’s time for the final step! Preheat your oven to 375°F. In a small bowl whisk together the remaining 1 large egg yolk and 2 Tablespoons of water until combined. This is an egg wash.
Use a pastry brush to lightly brush the loaf with the egg wash (the egg wash gives the bread its beautiful colored crust)! Now the loaf of classic challah bread is ready for baking.

Bake The Classic Challah Bread
Bake the classic challah bread at 375°F. for about 23-25 minutes. When done, the loaf should be beautifully golden brown and baked through.
TIP: Another way to know the loaf is finished baking is to tap on the bottom of the loaf. It should sound hollow when you tap it!
Transfer the challah bread to a wire rack and allow it to cool. This loaf slices the “best” when it is not blazing hot!

The challah bread tastes amazing, sliced and served warm (we add a bit of butter to the slices). Challah bread can also be used to make sandwiches.

One of my favorite ways to enjoy challah bread is using it for French Toast! I have recently published a recipe for Crunchy Air Fryer French Toast (using challah bread). It’s fantastic! Here’s a peek!

I hope you have the chance to make this delicious, classic challah bread sometime soon, because I’m sure you’re going to enjoy it!
Thank you so much for stopping by, and I invite you to come back soon for more family-friendly recipes. Take care, may God bless you, and have a wonderful day!
Looking for More YEAST BREAD Recipes?
You can find ALL of my recipes in the Recipe Index, which is located at the top of the page. I have a nice variety of yeast bread recipes to choose from, including:
- Butter-Topped Homemade White Bread
- Oatmeal Molasses Dinner Rolls
- Cranberry Pecan Bread (no-knead)
- Honey Oat Bread
- Garlic Focaccia Bread
Want More Recipes? Get My FREE Newsletter!
I publish a newsletter 2 times per month (1st and 15th) with lots of recipes, tips, etc.
Would you like to join our growing list of subscribers?
There is a Newsletter subscription box on the top right (or bottom) of each blog post, depending on the device you use.
You can submit your e-mail address there, to be added to my mailing list.
Find Me On Social Media:
Facebook page: The Grateful Girl Cooks!
Pinterest: The Grateful Girl Cooks!
Instagram: jbatthegratefulgirlcooks

Original recipe source: “The New Red Lion Inn Cookbook”, published in 1992 by Berkshire House Publishers
↓↓ PRINTABLE RECIPE BELOW ↓↓
Make a loaf of beautiful braided classic challah bread to enjoy! It can be eaten freshly sliced, or used for sandwiches, French toast, etc.
- 2¼ teaspoons active dry yeast = 1 envelope/pkg.
- ¼ cup lukewarm water (approx. 110℉.)
- 2 Tablespoons vegetable oil
- 1 Tablespoon granulated sugar
- 1 teaspoon salt
- ⅓ cup water (at room temperature)
- 3 large egg yolks lightly beaten
- 2¼ cups all-purpose flour *plus more if needed
- 1 Tablespoon vegetable oil
- 1 large egg yolk
- 2 Tablespoons water (at room temperature)
Sprinkle yeast over ¼ C. lukewarm water (approx.110°F.) in large bowl. Stir well; set bowl aside for 10 minutes, until yeast is bubbly/foamy on top. NOTE: Bubbles indicate the yeast is "viable, good and active". Make sure this occurs before adding remaining ingredients.
Add oil, sugar, salt and ⅓ C. water to yeast mixture. Whisk until combined. Add 3 egg yolks; use electric mixer to beat ingredients together. Add about 1¼ cups flour; beat well.
Stir in enough add'l. flour (a little at a time), until dough becomes thick and firm enough to handle. *This typically takes about ¾ -1 cup more flour, just add a little bit at a time until dough reaches correct texture (thick/slightly "shaggy" and fairly easy to handle). Cover dough; let it rest 10 minutes.
Turn dough out onto a floured surface, dust dough lightly with flour. Knead dough 8-10 minutes, adding flour as needed, until dough is shiny/ smooth. Put dough in a large, oiled/greased bowl; turn dough once, to coat it with oil. Cover bowl with plastic wrap; set in a warm place (free of drafts). Let dough rise 45-60 minutes OR until it has doubled in size.
Divide dough into 3 equal portions; cover with plastic wrap; let rest 10 minutes. On a floured surface, shape each piece of dough (one at a time) into a rectangular. Roll each piece with your palms into a rope shape, 18" long. Lay 3 "ropes" next to each other (a small space in between), then pinch all 3 ropes together at the top to tightly join them.
Braid 3 dough "ropes" by crossing left rope over middle rope, then crossing right rope over the middle. Continue until fully braided; pinch bottom ends together to seal; tuck them under the loaf. Carefully place loaf on greased baking sheet. Use a pastry brush to lightly brush loaf with 1 T. oil. Cover loaf with plastic wrap; let rest/rise for 30-40 minutes. Dough will rise slightly but won't double in size.
Preheat oven to 375°F.
In a small bowl whisk together remaining 1 egg yolk and 2 T. water until combined. Use a pastry brush to lightly brush loaf with the egg wash.
Bake at 375°F. for about 25 minutes. When done, bread should be golden brown and baked through. Another way to know the loaf is done is to tap on the bottom of the loaf. It should sound hollow when you tap it! Transfer the challah bread to a wire rack; let it cool before slicing and serving. Enjoy!
Here’s one more to pin on your Pinterest boards! 