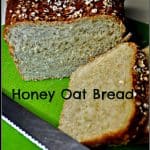
Honey Oat Bread is easy to make from scratch, without a bread machine! It’s a delicious loaf of bread topped with honey & oats- great for toast or sandwiches!
I tried a new homemade bread recipe… twice! Yes, this recipe for homemade Honey Oat Bread is THAT good, and you do not need a bread machine to make it from scratch!
I found the recipe a couple of weeks ago but have already made it twice…yum! It has a great texture (light and fluffy-NOT dense), with just a tiny trace of sweetness (from the honey).
This honey oat bread was absolutely perfect! We ate it warm, straight from the oven with some butter, but we also enjoyed using it for toast and sandwiches. My husband and I loved it and know I will be making this honey oat bread often.
Hope you will give it a try…it’s really not that hard, but it sure is satisfying to smell the aroma of fresh, baked bread filling the house!
It really is a wonderful homemade loaf of bread. I know you will love it! Here’s a few pics of the “process”:
Scroll Down For A Printable Recipe Card At The Bottom Of The Page
Making Honey Oat Bread
In the bowl of a stand mixer (or in a large bowl if making by hand), mix together the flour, oats, yeast and salt.

In a small separate bowl or pan, warm the milk so it’s hot enough to melt butter, but IS NOT boiling. Add the butter to the warm milk; stir it until melted.
Stir in the water and the honey. Mix well to combine them into the milk. Here’s a picture (below) of when I added the honey to the melted butter.

Beat the dough well using a stand mixer (or beat very well by hand). Once dough is done (kneaded fully into a dough ball), place it in a large, lightly oiled bowl. Turn the dough over to make sure both sides are lightly coated.
Let The Dough Rise
Place a dish towel over the top of the bowl and set the honey oat bread dough aside in a warm place. Allow the dough to rise until doubled in size. This will take approximately half an hour to 1 hour.
At this point, the dough has been fully mixed and is now rising.

Once the dough has doubled in size, remove it from bowl and place dough on a clean, lightly floured work surface. Using your fingers, flatten the dough out into a 9×12 inch rectangle.

Form The Honey Oat Loaf
Tightly roll the dough (beginning from the long end) into a loaf shape. Tuck the ends of the loaf in. The honey oat bread dough is now rolled up into a loaf shape and is ready to go into a loaf pan.

Layer a 9×5 inch bread pan with parchment paper, (First position one piece that goes widthwise and overlaps the top edges of the pan.
See photo below- adding the parchment paper sling will help you lift the bread from the pan when done. Put another piece of parchment paper on top of that which goes the length of the pan.
Carefully pick up the floppy loaf of dough and gently place it into the parchment-lined bread pan. Cover the bread pan with a dish towel and set in a warm place.
Let the honey oat bread dough rise again until doubled in size (about an hour).

Brush The Honey Oat Bread With Butter
When the dough has finished its second rise, brush the top of the loaf with the warmed honey. Completely brush the entire top of the loaf but brush it gently!

Sprinkle oats over the entire top surface of the loaf of honey oat bread. Place the bread pan on the middle rack in the preheated oven.

Bake The Bread
Bake the bread for 40-50 minutes, or until the bread is deep, golden brown. Here is the honey oat bread, straight out of the oven, and out of the pan. Isn’t it gorgeous?

Let the bread cool on a wire rack before slicing it! Here’s what the slices of the honey oat bread look like, once they have been cut. YUM!

Hope you will consider making this absolutely delicious homemade honey oat bread for yourself! I am confident you and those you love are going to LOVE it!
Thanks for stopping by, and I invite you to come back again soon for more family-friendly recipes. Take care, may God bless you, and have a wonderful day.
Looking For More Bread Baking Recipes?
You can find ALL of my recipes in the Recipe Index, which is located at the top of the page. I have lots of great bread recipes (sweet and savory) to choose from, including:
- Butter Topped Homemade White Bread
- Homemade Dinner Rolls
- Cinnamon Raisin Bread
- French Baguettes
- Miracle Bread
Want More Recipes? Get My FREE Newsletter!
I publish a newsletter 2 times per month (1st and 15th) with lots of recipes, tips, etc.
Would you like to join our growing list of subscribers?
There is a Newsletter subscription box on the top right (or bottom) of each blog post, depending on the device you use.
You can submit your e-mail address there, to be added to my mailing list.
Find Me On Social Media:
Facebook page: The Grateful Girl Cooks!
Pinterest: The Grateful Girl Cooks!
Instagram: jbatthegratefulgirlcooks
 Recipe Source: http://bakingdom.com/2011/09/homemade-honey-oat-bread.html
↓↓ PRINTABLE RECIPE BELOW ↓↓
- 3 cups all-purpose flour
- 3/4 cup oats (instant or old-fashioned will work-I used old-fashioned for my loaves)
- 2 1/4 teaspoons. instant active yeast
- 1 1/2 teaspoon salt
- 1 cup milk (If you're vegan or dairy-free, use almond or soy milk-*Note* I have not tried this)
- 1/4 cup lukewarm water
- 2 Tablespoons unsalted butter (or margarine, if desired)
- 1/4 cup honey (if vegan, use agave)
- 2 Tablespoons honey (or agave), warmed
- 2 Tablespoons oats (uncooked)
- In the bowl of a stand mixer (or in a large bowl if making by hand), mix together the flour, oats, yeast and salt.
- In a small separate bowl or pan, warm the milk so it's hot enough to melt butter, but IS NOT boiling. Add the butter to the warm milk; stir it until melted. Stir in the water and the honey. Mix well to combine.
- Pour the warm milk mixture into the flour mixture.
- Using the dough hook on your stand mixer, mix these ingredients until they come together to form a soft dough. Knead the dough in the mixer (still using the dough hook attachment) for approx. 10 minutes. If the dough is still really sticky after 5 minutes, then add in additional flour 1 TABLESPOON AT A TIME, mixing well after each addition until the dough is barely "tacky". (*NOTE: I found that I needed to add 5-6 additional TBSP of flour to get the right consistency...just be sure to only add one tablespoonful at a time. If by some chance you get the bread too dry, simply add 1 tsp. warm water at a time to remedy this).
- **If you are not using a stand mixture and are going to be kneading this by hand, just know that you will really have to keep your hands and work surface well-floured...dough will be VERY sticky at first).
- Once dough is "done", place it in a large, lightly oiled bowl. Turn the dough over to make sure both sides are lightly coated. Place a dish towel over the top of the bowl and set aside in a warm place. Allow the dough to rise until doubled in size (this will take approx. 1/2 - 1 hour).
Once the dough has doubled in size, remove it from bowl and place dough on a clean, lightly floured work surface. Using your fingers, flatten the dough out into a 9x12 inch rectangle. Tightly roll the dough (beginning from the long end) into a loaf shape; tuck the ends of the loaf in.
- Layer a 9x5 inch bread pan with parchment paper (First position one piece that goes width-wise and overlaps the top edges of the pan (see photo on blog-this will help you lift the bread from the pan when done), then put one piece on top of that which is the length of the pan.
Carefully pick up the floppy loaf of dough and gently place it into the parchment-lined bread pan. Cover the bread pan with a dish towel; let it rise again until doubled in size (about an hour).
Toward the end of the rising time, preheat your oven to 350 degrees. While the oven is preheating, place an empty loaf pan (or casserole dish) on the bottom rack of the oven. In a small saucepan. bring 2 cups of water to a boil on your stove top.
When the dough has finished it's second rise, brush the top of the loaf with the warmed honey. Completely brush the entire top of the loaf...gently! Sprinkle oats over the entire top surface of the loaf. Place the bread pan on the middle rack in the oven.
Pour the boiling water into the empty pan on the bottom rack of the oven. Bake the bread for 40-50 minutes, or until the bread is deep, golden brown. (The internal temperature will be about 190 degrees, in case you're checking). Once done, carefully remove bread (and water pan) from oven. Let bread cool on a wire rack before slicing. Enjoy!
Here’s one more to pin on your Pinterest boards!