Month: March 2026

Ground Beef Empanadas

Make a dozen delicious Ground Beef Empanadas with meat, potatoes, Mexican spices and peas stuffed inside a fried, flaky pastry dough crust.
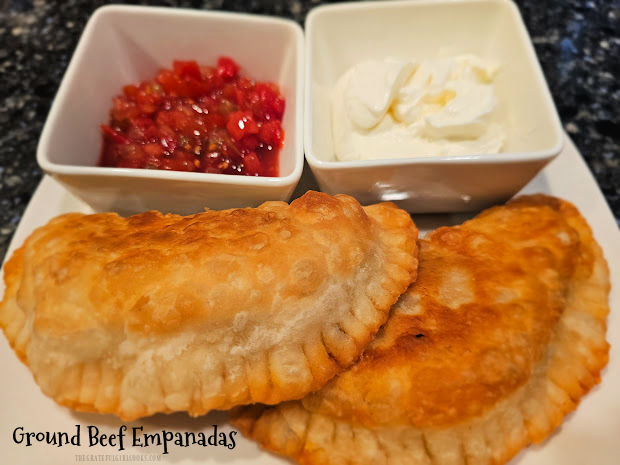

Today I want to share a great recipe for ground beef empanadas with you. This recipe will yield 12 beautiful empanadas, perfect for lunch or dinner!

I found this recipe online a while ago and decided to give it a try. I have made fruit empanadas quite a few times but decided to make some with ground beef and Mexican-inspired spices.

My husband and I both LOVED them! We froze several of the empanadas and then reheated them in our air fryer a couple weeks later. They were still just as amazing!

I hope you enjoy trying these ground beef empanadas, too! Here’s how to make them.

Scroll Down For A Printable Recipe Card At The Bottom Of The Page

Prepare The Pastry Dough

Put a blade attachment on a food processor, then add all-purpose flour, salt and chunks of very cold butter. Pulse these ingredients several times until the butter has been reduced to about the size of peas in the flour.

Add one large egg and cold water into the food processor. Pulse these ingredients again, continuing only until everything comes together into a cohesive ball of dough.

Remove the dough ball from the processor and shape it with your hands into a flat round circle. Wrap the dough tightly in plastic wrap and refrigerate it for one hour (at least!).
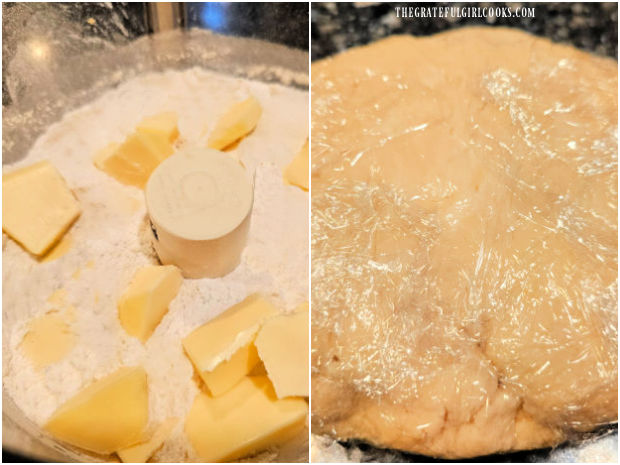
Dry ingredients and cold butter are processed until crumbly, then dough is refrigerated.

Make The Ground Beef Filling

While the dough chills, make the meat filling. Heat olive oil on medium in a large skillet. Once the oil is hot, add chopped red onion, chopped jalapeños and chopped green chiles.

Sauté them for a couple of minutes until they have softened slightly. Stir in salt, chili powder, paprika and ground cumin and stir to combine.

The next thing you will do is stir tomato paste into this veggie/spice mixture until it has been incorporated. Sauté these ingredients for another couple of minutes.

Add ground beef to the spice mixture and cook the beef until it is no longer pink. Break up the meat as it browns. This usually takes about 4-5 minutes.

When the meat is done cooking, take the skillet off of the heat and let the ground beef filling cool slightly.
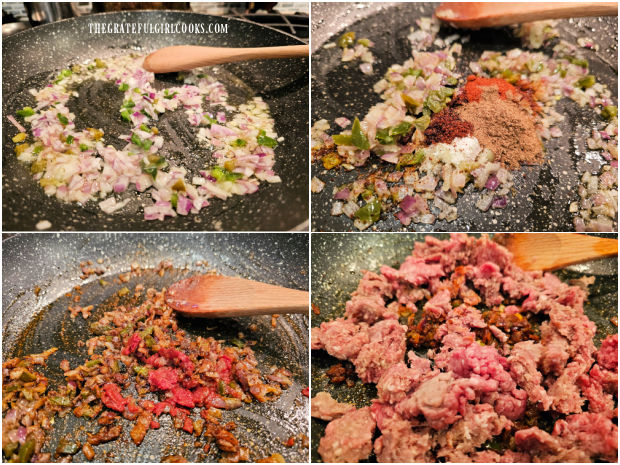
Chopped veggies and spices are cooked with ground beef in this 4-photo collage.

After the filling has had the chance to cool a bit, add pre-cooked potato cubes, frozen peas, fresh chopped green onion and parsley to the meat filling.

Stir until all of these filling ingredients are well-combined. Now let’s make some ground beef empanadas!
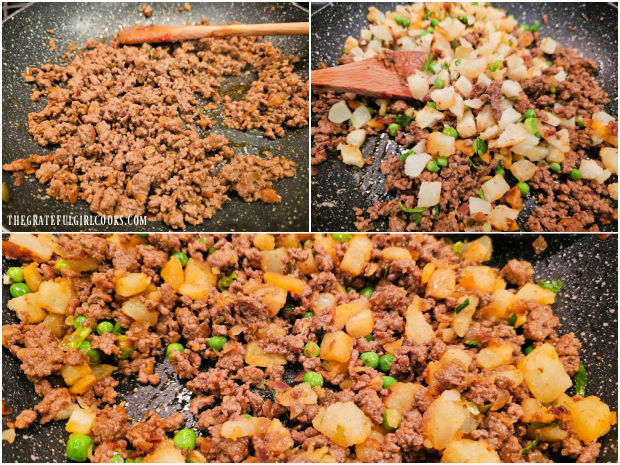
Cubed boiled potatoes, peas and herbs are added to the ground beef filling.

Cut Out Pastry Dough

Remove and unwrap the refrigerated pastry dough and place it on a floured work surface. Roll the dough out until it is about ¼” thick.

Use a biscuit cutter, small bowl or a ring cutter that is approximately 4½”- 5″ in diameter. I ended up using a 4½” plastic jar lid for my empanadas, which worked great!

Cut out 12 circles of dough, approximately 5″ in diameter. Gather and re-roll leftover dough and cut out additional circles, until you have 12 total.
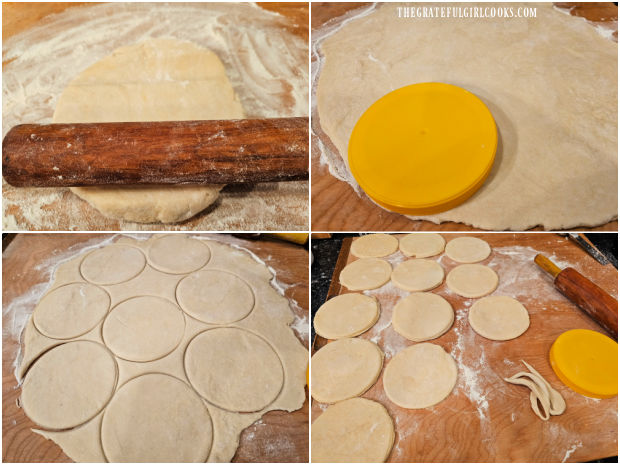
Chilled empanada dough is rolled out and then cut into 5" circles.

Fill The Empanadas

Use a rolling pin to roll the dough circles out just a little bit more to make them slightly larger (shown below). Spoon about ¼ cup of the filling in the center of each pastry round.

Avoid overfilling the empanada or it will make it a little bit harder to fully enclose and seal the filling with the pastry dough.
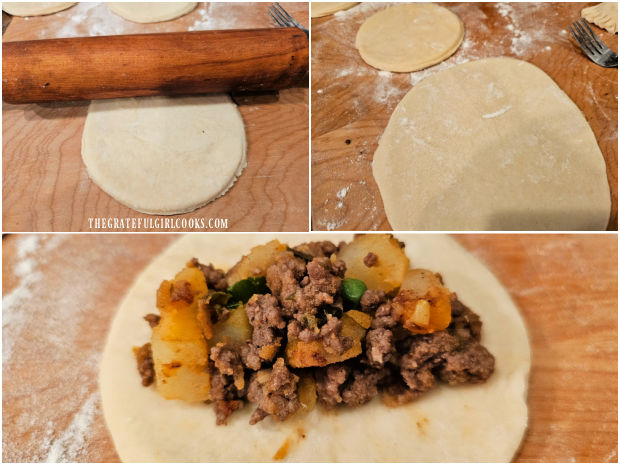
The empanada dough is rolled out more, then beef filling is added.

Seal The Empanadas

After filling the dough, fold each empanada in half by bringing one edge of the dough up and over the filling until it reaches the other edge. The empanadas should be in a half-moon shape now.

Pinch the edges together to lightly seal the edges, then crimp the outer edges of the dough with the tines of a fork (shown below), to tightly seal the filling inside the pastry dough.

Be careful not to puncture the dough with the fork and make sure the empanadas are fully sealed to prevent the filling from leaking out while frying them. 
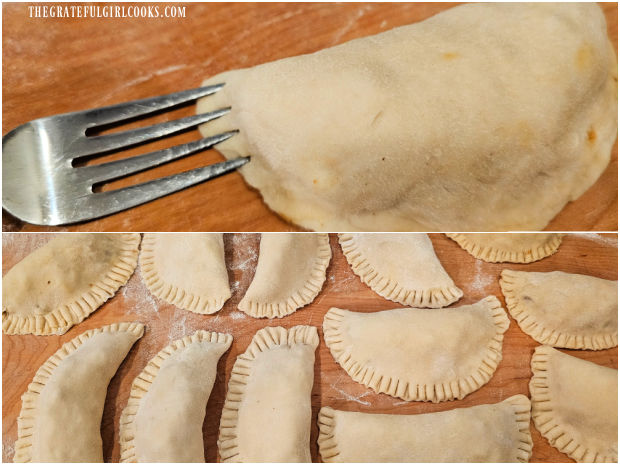
Empanada dough is sealed over the filling, then edges are crimped with a fork.

Fry The Empanadas

Fill an electric skillet OR a large, deep skillet or a large saucepan with enough vegetable oil until it is about 1″ in depth. Heat the oil until it registers between 360°-375°F. on a digital thermometer.

For best results do NOT add the empanadas to the hot oil until it has reached that temperature or level of heat.

Once the oil is at temperature, add 2-3 empanadas to the skillet at a time. Fry them for about 2-3 minutes, then carefully turn them over and cook the other side for the same amount of time.

When done, they should be lightly browned and crispy on both sides. Transfer them out of the skillet and onto a wire rack (on top of paper towels to absorb any dripping oil).

IMPORTANT: After cooking a batch, it is really important to let the oil come back again to the correct temperature before frying the next batch!
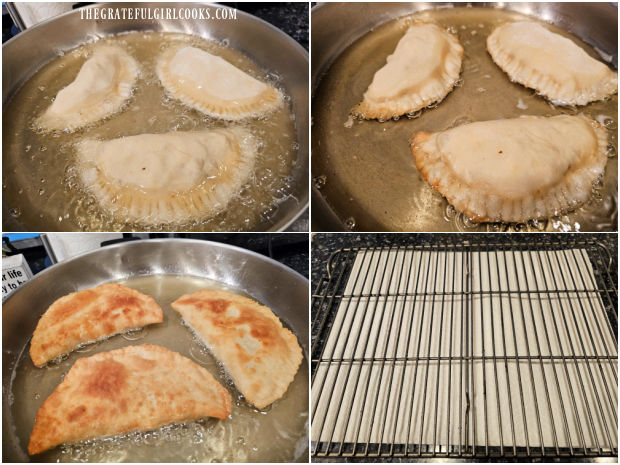
Ground beef empanadas fry in oil, then are cooled on a wire rack.

Let the hot empanadas cool slightly on the wire rack (for a minute or two) before you serve them. See how pretty and golden brown they are on the outside?

When they come out of the hot oil in the fryer the pastry crust is nice and flaky, too! Now it’s almost time to serve and enjoy them.
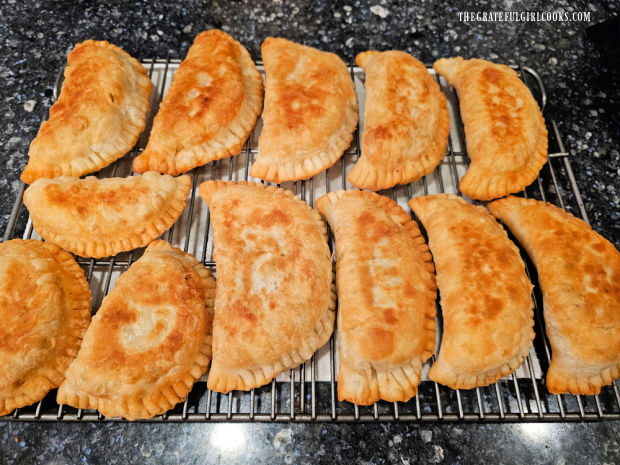
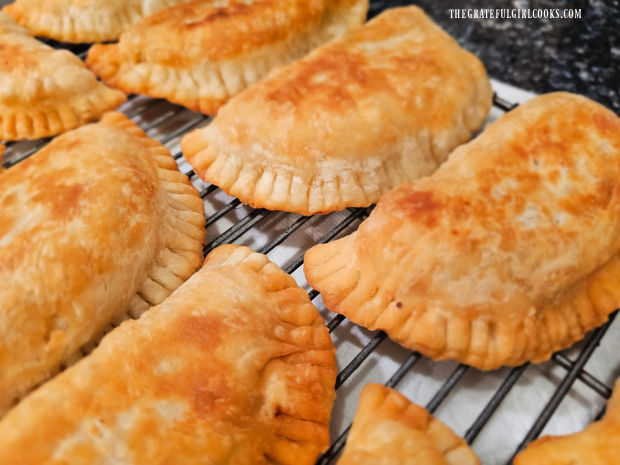
A dozen ground beef empanadas cooling on a wire rack.Close up of a few of the golden-brown beef empanadas on a wire rack cooling.

Serve The Ground Beef Empanadas

Serve the ground beef empanadas while they are hot. We serve them with sour cream and salsa on the side to dip each bite in, because they add even more flavor!

Taco sauce and guacamole are two more delicious toppings or dips for the empanadas, so serve them with whatever toppings you prefer.
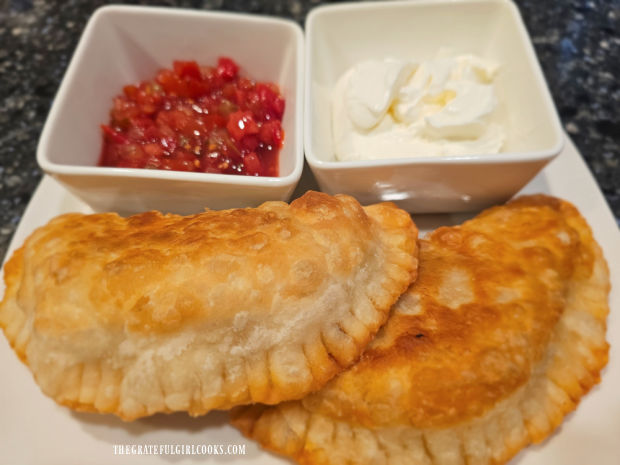
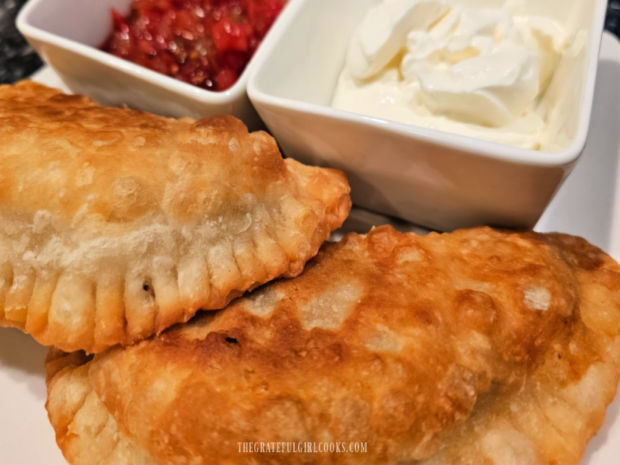
Two ground beef empanadas on a white plate, with sour cream and salsa for dipping.A couple of the empanadas, ready to be eaten.

Dip or spoon some sour cream and salsa on the empanadas and take a big bite. YUM! We think these ground beef empanadas are amazing!

The empanadas freeze very well (after they have cooled completely) if wrapped well. We reheat them (thawed) in our air fryer at 340°F. for about 3-4 minutes.
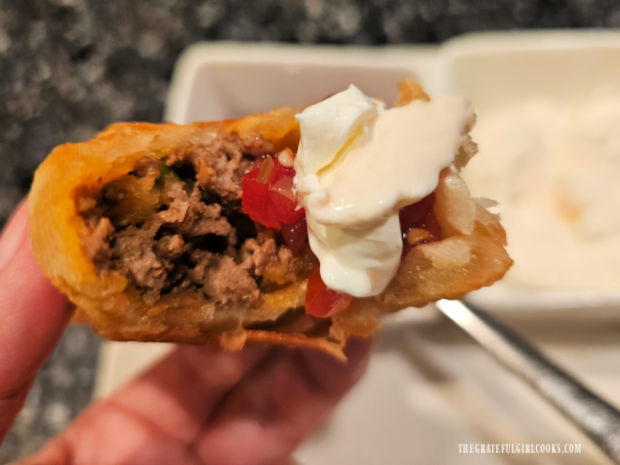
An inside peek at one of the ground beef empanadas with salsa and sour cream on it.

I hope you have the opportunity to make this delicious recipe and trust you and those you love will enjoy these empanadas as much as we do.

Thanks for stopping by, and I invite you to come back again soon for more family-friendly recipes. Take care, may God bless you, and have a wonderful day.

Looking For More Recipes Using GROUND BEEF?

You can find ALL of my recipes in the Recipe Index, which is located at the top of the page. I have a nice variety of ground beef recipes to choose from, including:

Want More Recipes? Get My FREE Newsletter!

I publish a newsletter 2 times per month (1st and 15th) with lots of recipes, tips, etc.
Would you like to join our growing list of subscribers?

There is a Newsletter subscription box on the top right (or bottom) of each blog post, depending on the device you use.
You can submit your e-mail address there, to be added to my mailing list.

Find Me On Social Media:

Facebook page: The Grateful Girl Cooks!
Pinterest:
The Grateful Girl Cooks!
Instagram:
jbatthegratefulgirlcooks

Author's signature

Original recipe source and with thanks to: Alyssa Rivers at: https://therecipecritic.com/empanadas

↓↓ PRINTABLE RECIPE BELOW ↓↓
0 from 0 votes
Ground Beef Empanadas
Prep Time
30 mins
Cook Time
20 mins
Resting Time (dough chilling)
1 hr
Total Time
1 hr 50 mins
 

Make a dozen delicious Ground Beef Empanadas with meat, potatoes, Mexican spices and peas stuffed inside a fried, flaky pastry dough crust.

Category: Main Dish
Cuisine: Spanish
Keyword: ground beef empanadas
Servings: 12 empanadas
Calories Per Serving: 278 kcal
Author: JB @ The Grateful Girl Cooks!
Ingredients
For The Dough:
  • 3 cups all-purpose flour
  • ½ teaspoon salt
  • ½ cup COLD butter cubed (=one stick or 8 Tbl.)
  • 1 large egg
  • ¾ cup cold water
For The Beef Filling:
  • 2 Tablespoons olive oil
  • ½ cup chopped red onion* *finely chopped
  • 1 Tablespoon fresh jalapeño pepper seeded/finely chopped
  • 1 Tablespoon diced green chiles
  • 1 teaspoon chili powder
  • 1 teaspoon paprika
  • ½ teaspoon ground cumin
  • ½ teaspoon salt
  • 1 Tablespoon tomato paste
  • 12 ounces ground beef (90% lean)
  • 6 ounces russet potato (pre-boiled and diced)
  • ¼ cup frozen peas (do not thaw)
  • 1 Tablespoon chopped green onions
  • 1 Tablespoon chopped fresh parsley
  • OIL, for frying empanadas enough for a 1" depth in skillet
Instructions
Make Dough:
  1. Put blade attachment on food processor. Add flour, salt and cold butter chunks. Pulse several times until butter is reduced to the size of peas, then add egg and cold water. Pulse again, continuing only until mixture comes together in a cohesive ball of dough. Remove dough; shape it with your hands into a flat round circle. Wrap tightly in plastic wrap; refrigerate dough one hour (at least!).

Make Beef Filling (while dough is refrigerated):
  1. Heat olive oil on medium in a large skillet. Once hot, add red onion, jalapeños and green chiles. Sauté until they've softened slightly (2-3 minutes). Stir in salt, chili powder, paprika and cumin. Add tomato paste; stir until combined. Sauté 2 more minutes. Add ground beef. Cook until meat is browned/fully cooked, breaking up the meat as it cooks (about 4-5 minutes). When done, take skillet off the heat; let the filling cool slightly (3-4 minutes). Stir in cooked diced potato, frozen peas, green onion and parsley until combined.

Make and Fill Empanadas:
  1. Unwrap cold pastry dough; put dough on floured work surface. Roll dough out until it is about ¼" thick. Use a biscuit cutter, small bowl or ring cutter that is approx. 5" in diameter. Cut dough into 12 circles, approximately 5" in diameter. Gather/re-roll leftover dough; cut additional circles until you have 12 total. Roll dough circles out just a little bit more to make them slightly larger.

  2. Spoon about ¼ cup of the filling in the center of each dough round. Avoid overfilling or it will be harder to fully enclose and seal in the filling. Fold empanadas in half by bringing one half of the dough up and over the filling until it reaches the other edge (half-moon shape). Pinch edges together to seal, then carefully crimp edges with the tines of a fork to tightly seal filling inside. Make sure empanadas are fully sealed to prevent filling from leaking out while cooking. 

Cooking The Empanadas:
  1. Fill an electric skillet OR a large skillet or large saucepan with vegetable oil until oil reaches 1" in depth. Heat oil until it registers between 360°-375°F. on a digital thermometer. Do NOT add empanadas to the oil until it has reached the correct temp. (for best results). Once oil is at temp, add 2-3 empanadas to the oil at a time. Fry for 2-3 minutes, then turn them over; cook the other side 2-3 minutes. When done, both sides should be lightly browned and crispy. Transfer them from the oil onto a wire rack (over paper towels to absorb any oil drips). IMPORTANT: After cooking a batch, it is really important to let oil re-heat to the correct temperature again before frying the next batch!

  2. Let empanadas cool slightly before serving. Serve with favorite condiments (guacamole/sour cream/salsa, etc.). Enjoy!

Nutrition Facts
Ground Beef Empanadas
Amount Per Serving (1 empanada)
Calories 278 Calories from Fat 126
% Daily Value*
Fat 14g22%
Saturated Fat 7g44%
Trans Fat 0.5g
Polyunsaturated Fat 1g
Monounsaturated Fat 5g
Cholesterol 54mg18%
Sodium 301mg13%
Potassium 239mg7%
Carbohydrates 28g9%
Fiber 2g8%
Sugar 1g1%
Protein 10g20%
Vitamin A 483IU10%
Vitamin C 5mg6%
Calcium 21mg2%
Iron 3mg17%
* Percent Daily Values are based on a 2000 calorie diet.

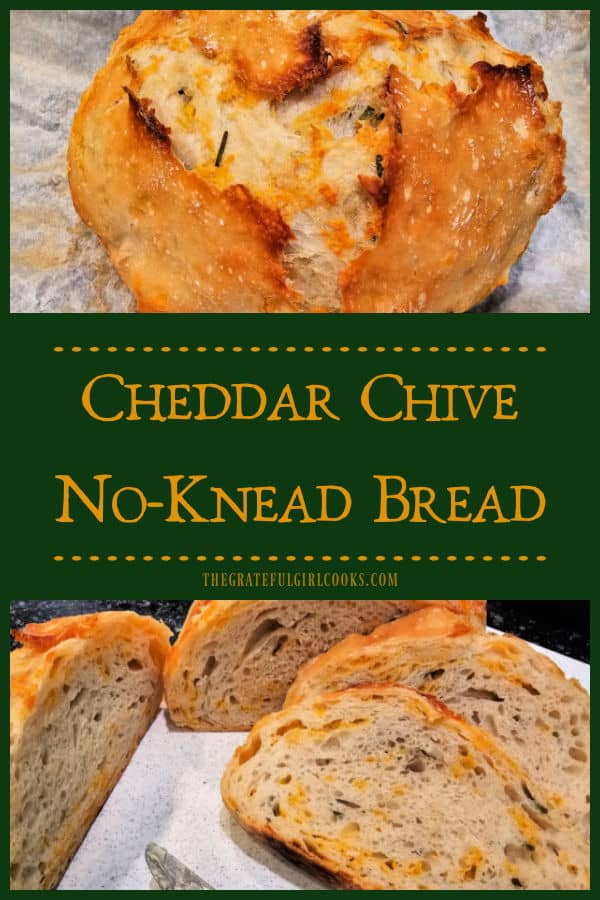
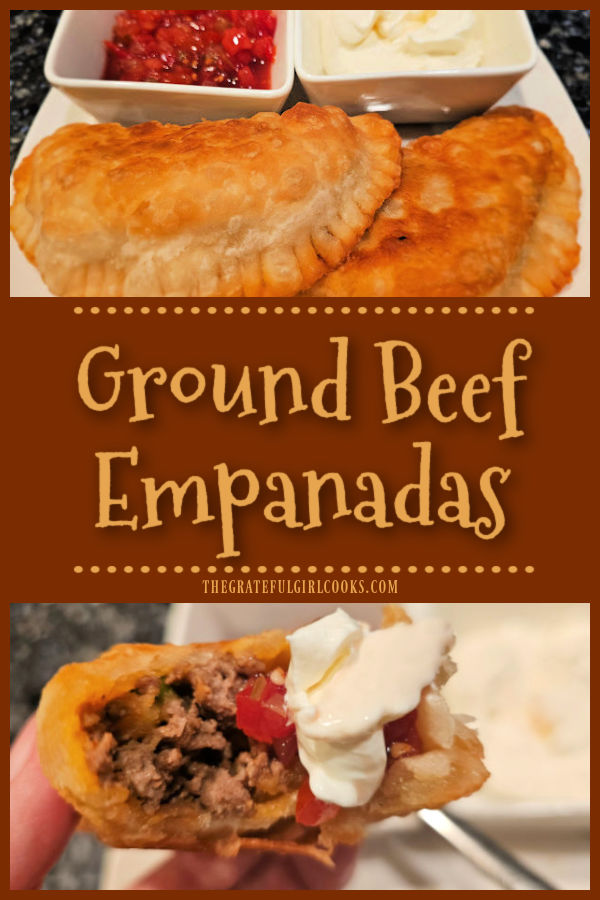
Here’s one more to pin on your Pinterest boards! Make a dozen delicious Ground Beef Empanadas with meat, potatoes, Mexican spices and peas stuffed inside a fried, flaky pastry dough crust.


Cheddar Chive No-Knead Bread

Cheddar Chive No-Knead Bread is a large, no-knead savory loaf filled and flavored with chives and sharp cheddar cheese. It is delicious!

Today I want to share with you a delicious recipe for cheddar chive no-knead bread. I modified a couple recipes I use for no-knead bread and added cheese and chives to try this flavor combination.

The result is a great loaf of bread! Crispy and golden-brown on the outside and soft and delicious on the inside, just the way we love it!

I am confident you are going to love it, too. Here’s how to make a beautiful loaf of cheddar chive no-knead bread.

Make The Bread Dough

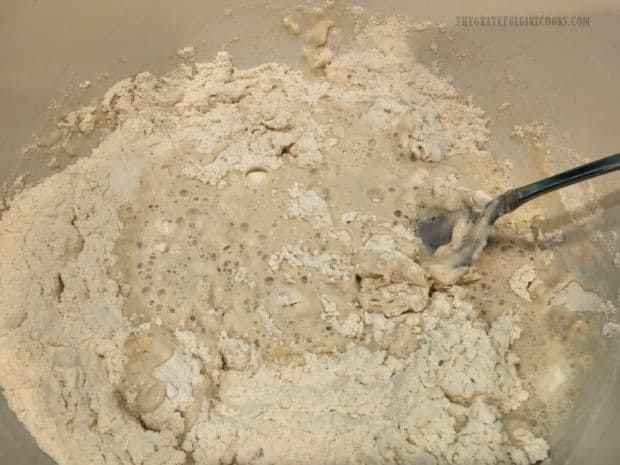
Combine flour, salt and instant yeast in a large mixing bowl. Add lukewarm water (about 80°F.) to the dry ingredients and then stir very well, until it comes together and forms a “shaggy” mound of dough. 

Flour, salt, yeast and warm water are combined in a large bowl.

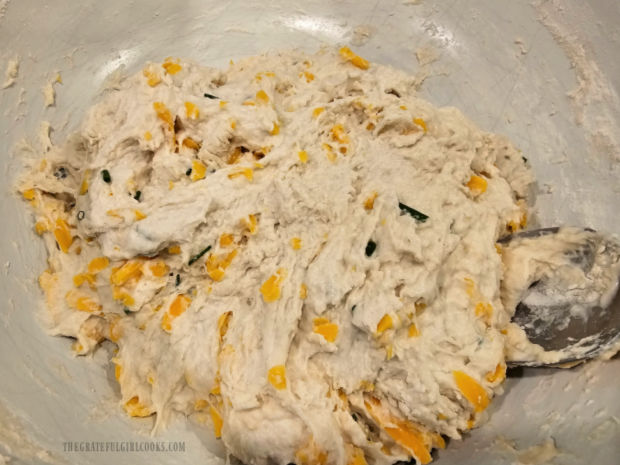
When the dough has come together, add grated sharp cheddar cheese and chopped chives and stir well to fully incorporate them into the dough.

Grated cheese and chopped chives are stirred into the bread dough.

Let The Dough Rise

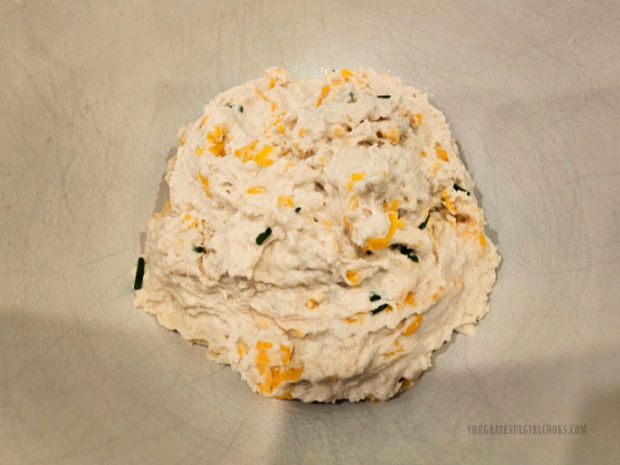
Cover the bowl tightly with plastic wrap; let the dough rest in a warm place (free from drafts) at room temperature for 8-12 hours. I usually let mine sit about 12 hours (overnight).

Bread dough is a slightly "shaggy or tacky" textured dough before rising.

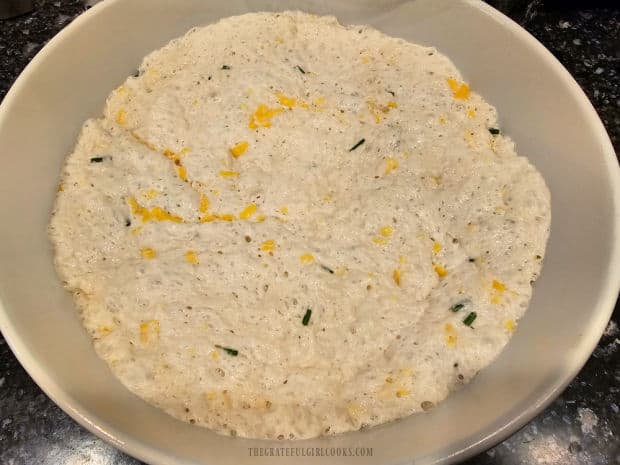
This lengthy rising time helps develop a nice sourdough flavor for the bread. After this rising time, the “tacky” dough should have doubled in size.

Bread dough has doubled in size after resting 8-12 hours in a warm spot.

Shape the Dough Into A Loaf

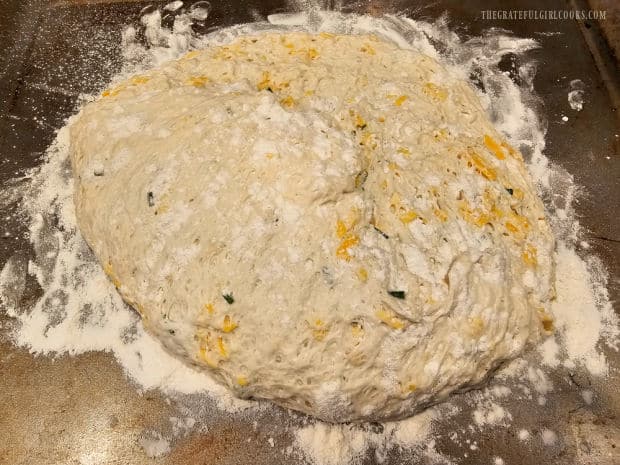
Lay a large piece of parchment paper on a large baking sheet and sprinkle it with flour. Turn the dough out of the bowl onto the floured parchment paper.

NOTE: The parchment paper should be larger than the loaf on ALL sides, to make it easier to lift the loaf out of the pan after baking.

Gently shape the dough into a round loaf, sprinkling the dough with additional flour, if necessary, to prevent sticking. In the first photo below, I shaped the loaf on a floured surface, then transferred the loaf to parchment paper for baking (both methods work).

Cover the dough loosely (again) with plastic wrap. Let it rest in a warm place while you pre-heat the pan used to bake the bread.

Round loaf is shaped and extra flour is used to make it non-sticky.

Preheat Dutch Oven And Then Bake Bread

Place a Dutch oven (with oven-safe lid and handles) in your oven on a middle rack. Turn the heat to 450°F. and let the oven pre-heat (with the pan in there the entire time).

Once the oven has reached 450°F., keep the covered Dutch oven in there for 30 more minutes.

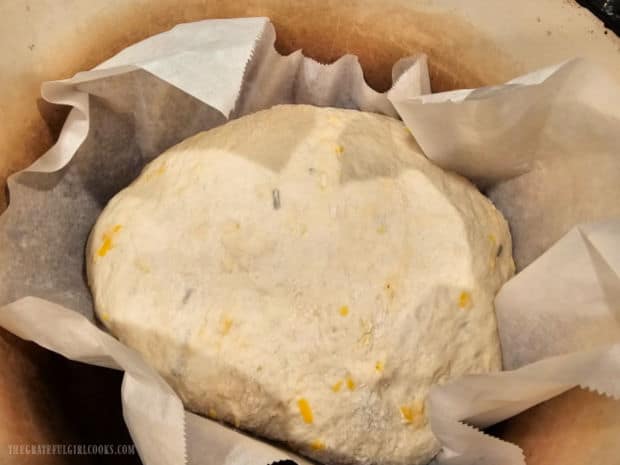
After the additional 30 minutes of pre-heating, pick up the loaf using the parchment paper to lift it up and place it in the VERY HOT Dutch oven. Make sure all the parchment paper is INSIDE the pan, then put the cover back on the Dutch oven

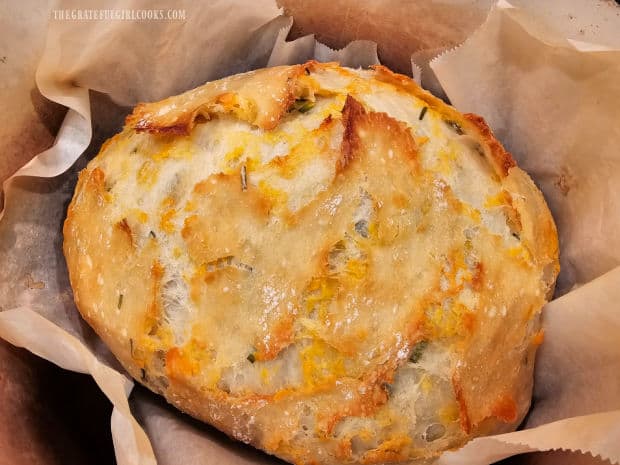
Bake the cheddar chive no-knead bread for 30 minutes (at 450°F.). After 30 minutes, remove the lid from the pan and continue baking for 5 more minutes (uncovered).

Round loaf on parchment paper is added to a very hot Dutch oven for baking.

Remove the pan from the oven and carefully lift the parchment paper and the loaf up and out of the HOT pan. Place the hot bread on a wire rack to cool.

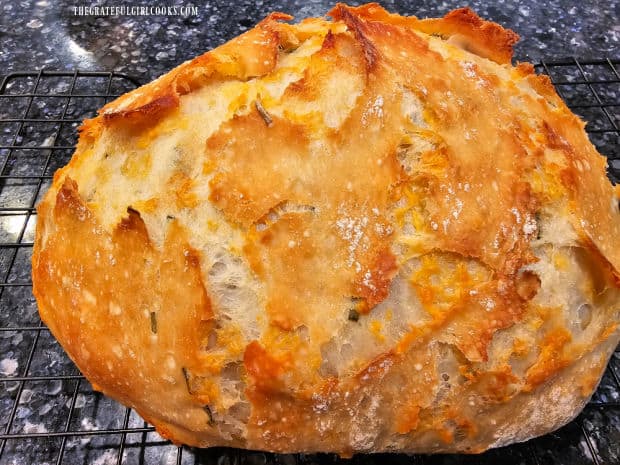
The cheddar chive no-knead bread should be beautifully golden browned on all sides and should smell really good!

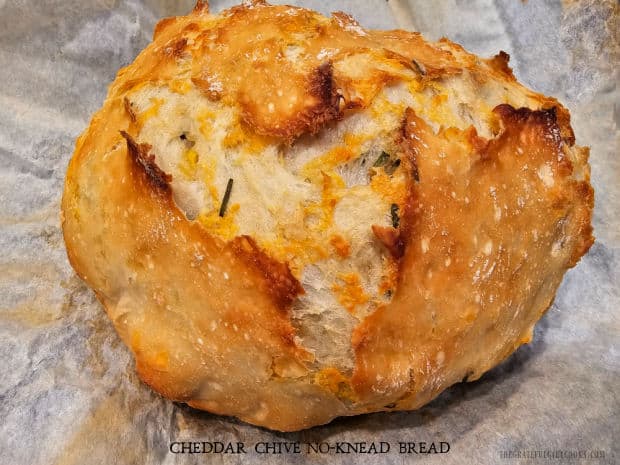
A golden-brown loaf of cheddar chive no-knead bread after baking.

Slice And Serve Cheddar Chive No-Knead Bread

This bread will slice the easiest when the bread has had the chance to cool a bit. While it cools, use a pastry brush to remove any excess flour from the bread.

The no-knead bread cools slightly on wire rack before being sliced.

Use a serrated knife to slice the cheddar chive no-knead bread into thin slices and serve warm with soft butter for a de3licious treat!

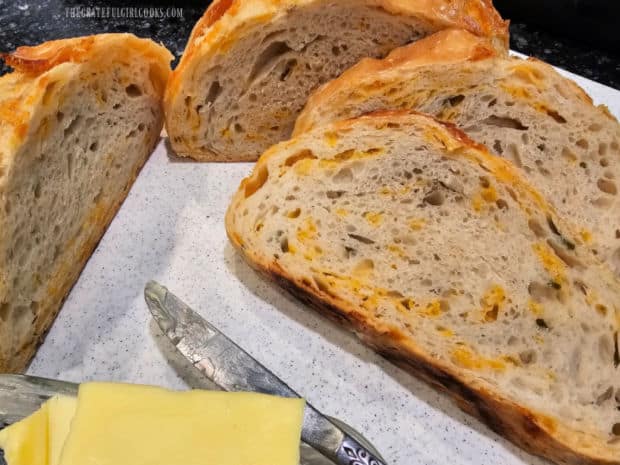
You can see in the photo below the cheddar cheese and chives distributed throughout each slice. We always love a warm slice with melted butter on it. YUM!

Slices of cheddar chive no-knead bread, ready to be enjoyed warm.

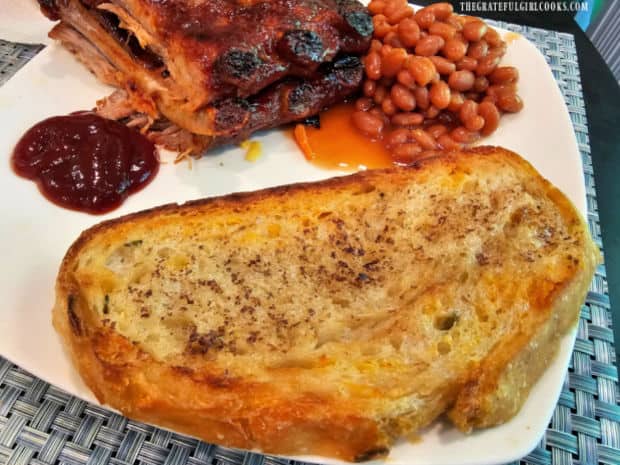
The bread can also be broiled (or toasted) for a nice crispy slice, too! Shown below is a broiled piece of cheddar chive no-knead bread, served with BBQ ribs and baked beans!

Toasted or broiled bread slice served along with BBQ ribs and baked beans.

I hope you have the opportunity to make a loaf of this tasty no-knead bread and trust you (and those you love) will enjoy it as much as we do!

Thanks for stopping by, and I invite you to come back again soon for more family-friendly recipes. Take care, may God bless you, and have a wonderful day.

Looking for More BREAD Recipes?

You can find ALL of my recipes in the Recipe Index, which is located at the top of the page. I have lots of bread recipes (savory and sweet) to choose from, including:

Want More Recipes? Get My FREE Newsletter!

I publish a newsletter 2 times per month (1st and 15th) with lots of recipes, tips, etc.
Would you like to join our growing list of subscribers?

There is a Newsletter subscription box on the top right (or bottom) of each blog post, depending on the device you use.
You can submit your e-mail address there, to be added to my mailing list.

Find Me On Social Media:

Facebook page: The Grateful Girl Cooks!
Pinterest:
The Grateful Girl Cooks!
Instagram:
jbatthegratefulgirlcooks

Author's signature

↓↓ PRINTABLE RECIPE BELOW ↓↓

0 from 0 votes
Cheddar Chive No-Knead Bread
Prep Time
10 mins
Cook Time
35 mins
Rising/Dutch oven preheat (inactive)
8 hrs
Total Time
8 hrs 45 mins
 

Cheddar Chive No-Knead Bread is a large, no-knead savory loaf filled and flavored with chives and sharp cheddar cheese. It is delicious!

Category: Bread, Side Dish
Cuisine: All Cuisines
Keyword: cheddar chive no-knead bread
Servings: 16 half slices
Calories Per Serving: 158 kcal
Author: JB @ The Grateful Girl Cooks!
Ingredients
  • cups all-purpose flour + more for dusting
  • teaspoons salt
  • ½ teaspoon instant yeast* *or same amount of active dry yeast
  • 2 cups lukewarm water (about 80℉.)
  • 1 cup sharp cheddar cheese (grated)
  • cup chopped chives
Instructions
  1. Combine flour, salt and instant yeast in a large mixing bowl. Add lukewarm water to the dry ingredients and then stir very well, until it comes together and forms a "shaggy" mound of dough. Add grated cheese and chopped chives and stir well, to incorporate them into the dough.

  2. Cover the bowl with plastic wrap; let the dough rest in a warm place (free from drafts) at room temperature for 8-12 hours. The dough should double in size.

  3. Lay a large piece of parchment paper on a large baking sheet. The paper should be larger than the loaf on all sides. Lightly dust the paper with additional flour, then turn the dough out of the bowl onto the floured paper. Gently shape the dough into a round loaf, dusting with extra flour, if necessary, to prevent sticking. Cover the bread dough loosely with plastic wrap.

  4. Place a Dutch oven (with oven-safe lid/handles) in the oven. Set the heat for 450℉. Once the oven reaches the temperature (450℉.), keep the Dutch oven in there for 30 more minutes before adding the bread.

  5. Carefully pick up the parchment paper (with loaf) and place it into the VERY HOT DUTCH OVEN. Make sure all the parchment paper fits inside the Dutch oven and put the lid back on. Bake the bread at 450℉. for 30 minutes. After 30 minutes, remove the lid and continue baking 5 more minutes (uncovered).

  6. Remove the pan from the oven. Carefully lift paper (and loaf) out of the hot pan and onto a wire rack to cool. Use a pastry brush to dust off any excess flour remaining on loaf. Cheddar Chive No-Knead Bread slices best when it has cooled a bit before cutting and serving. TIP: Try slicing it in thin slices, then cut each large piece in half for the most servings. Enjoy.

Nutrition Facts
Cheddar Chive No-Knead Bread
Amount Per Serving (1 half slice)
Calories 158 Calories from Fat 27
% Daily Value*
Fat 3g5%
Saturated Fat 1g6%
Polyunsaturated Fat 0.2g
Monounsaturated Fat 1g
Cholesterol 7mg2%
Sodium 267mg12%
Potassium 49mg1%
Carbohydrates 27g9%
Fiber 1g4%
Sugar 0.1g0%
Protein 5g10%
Vitamin A 107IU2%
Vitamin C 0.5mg1%
Calcium 57mg6%
Iron 2mg11%
* Percent Daily Values are based on a 2000 calorie diet.

Here’s one more to pin on your Pinterest boards!  Cheddar Chive No-Knead Bread is a large, no-knead savory loaf filled and flavored with chives and sharp cheddar cheese. It is delicious!
Instant Pot Pork Tenderloin And Gravy

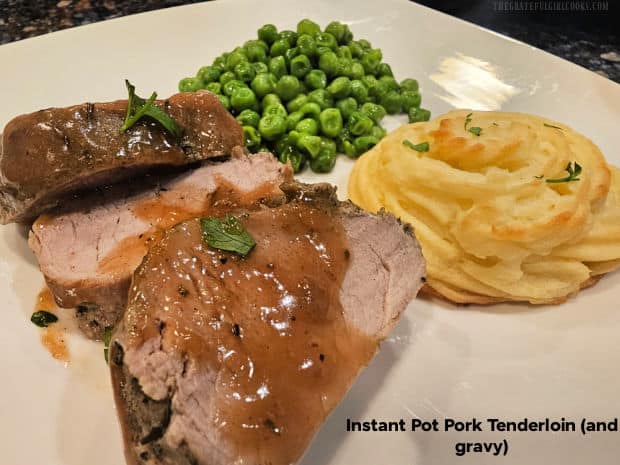
Instant Pot Pork Tenderloin (and gravy) is a delicious dish that serves 4! Juicy pork slices are drizzled with a maple syrup and Dijon gravy.

Today I want to share with you a great recipe for Instant Pot Pork Tenderloin and Gravy (4 servings). I found the original recipe on Pinterest a while ago, tried it, and it was a hit!

So, I decided to post the recipe here on the old blog in the hopes that others out there would enjoy making it, as well.

All in all, this is not a difficult recipe, and the result is wonderfully tender pork slices, coated in a delicious and flavorful gravy. It is delicious! Here’s how to make it.

Scroll Down For A Printable Recipe Card At The Bottom Of The Page

A Little Bit Of Prep

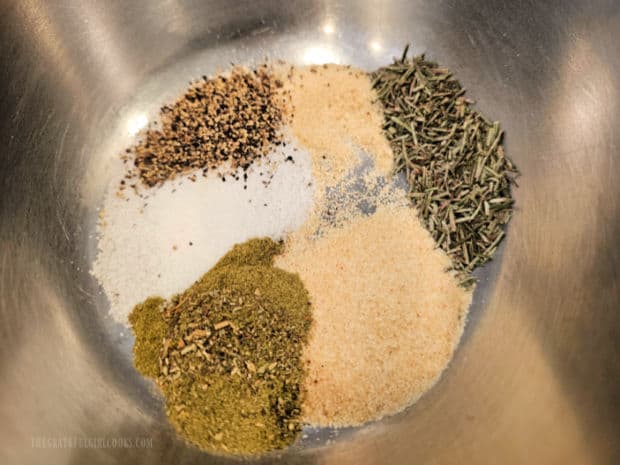
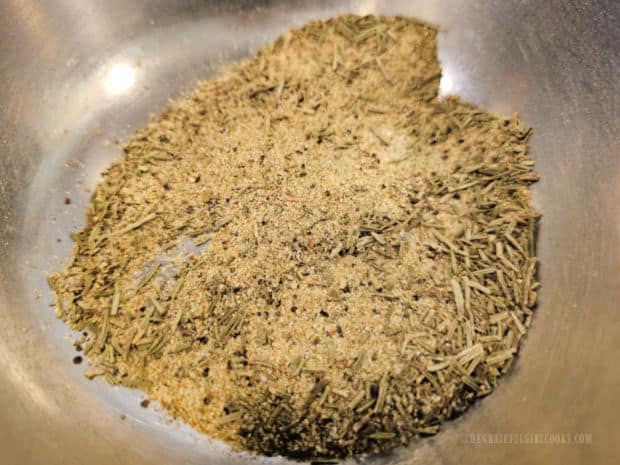
In a small bowl, whisk together dried garlic powder, rosemary, thyme, onion powder, salt and black pepper until they have been fully combined.

These dry ingredients are the spice mixture that will be used to season the pork tenderloin. Set the spices aside once combined.

A variety of dried spices are measured into a small bowl.The dried spices form a spice rub which is used to season a pork tenderloin.

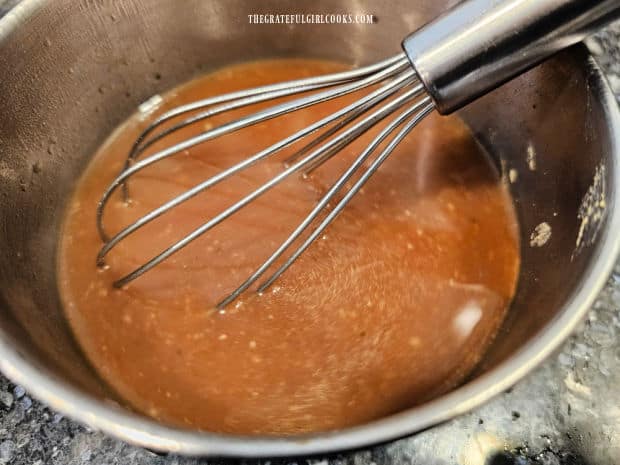
In a separate bowl, whisk chicken broth, low sodium soy sauce, pure maple syrup (or honey) and Dijon mustard together until smooth.

Broth, soy sauce, maple syrup and Dijon are whisked together in a bowl.

Pan-Sear The Seasoned Pork Tenderloin

Prepare the tenderloin by patting it dry with paper towels, then cutting away and discarding any extra silver skin on the meat.

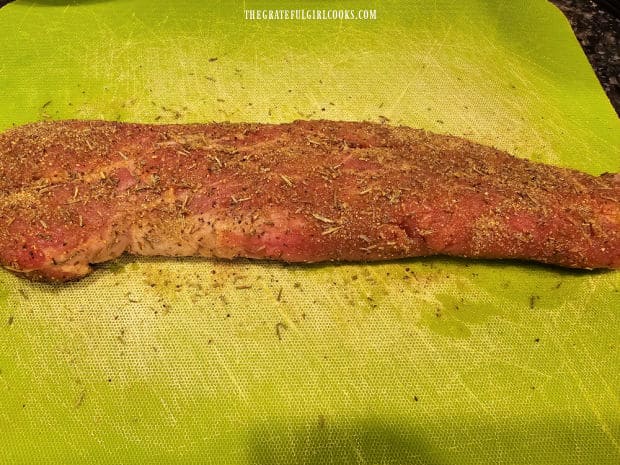
Brush or rub all sides of the pork with ½ Tablespoon of extra virgin olive oil. Sprinkle both sides of a pork tenderloin with the dry spices, pressing them into the meat so they adhere.

The recipe (as written) calls for using a 1½ to 2-pound pork tenderloin, but I have included cooking times for a smaller sized tenderloin further below.

Pork tenderloin is seasoned on all sides with a dry spice rub.

Press the SAUTÉ button on the Instant Pot and let the machine heat up for 1 minute. Add ½ Tablespoon of extra virgin olive oil and let it get hot.

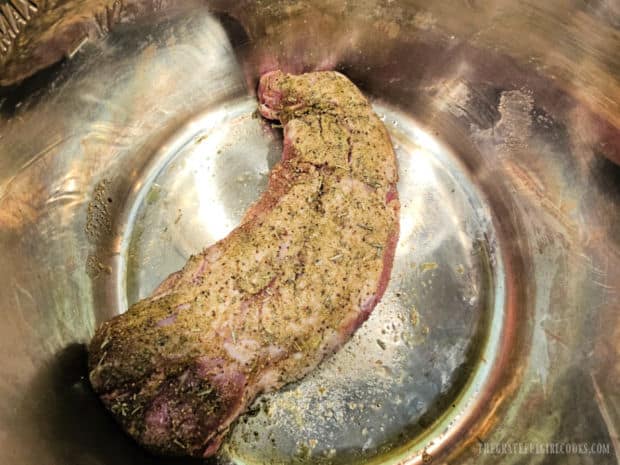
Place the seasoned pork tenderloin in the hot oil and sauté it only until it is lightly browned on ALL sides. Do NOT cook it all the way through!

Once the tenderloin has been pan-seared and browned on all sides, take it out of the Instant Pot and let it rest onto a plate for a couple minutes.

Seasoned pork tenderloin is seared on all sides in oil in the Instant Pot.

Time To Cook The Pork Tenderloin

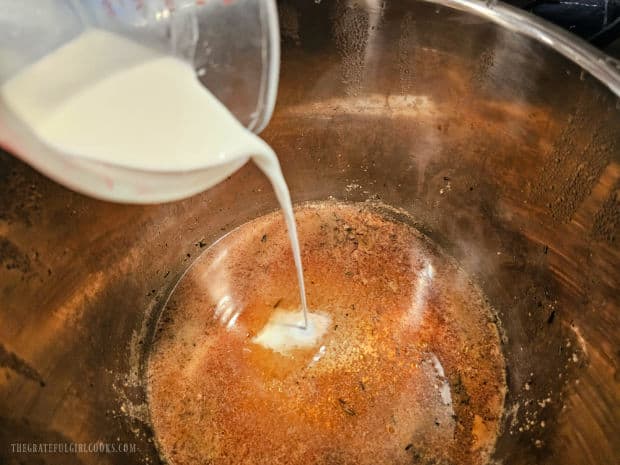
Pour the broth mixture into the Instant Pot inner cannister. The Instant Pot should still be on the SAUTÉ setting.

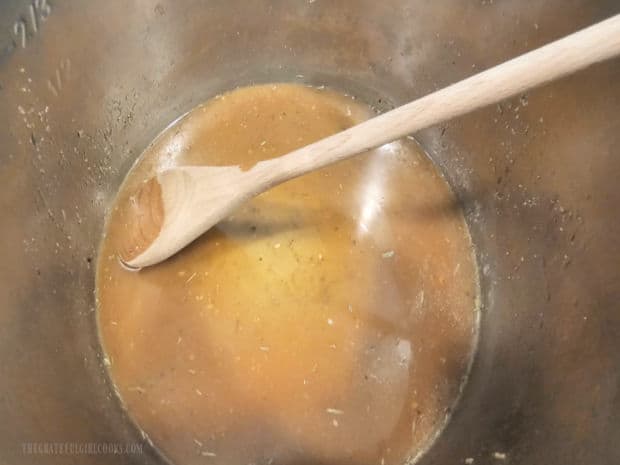
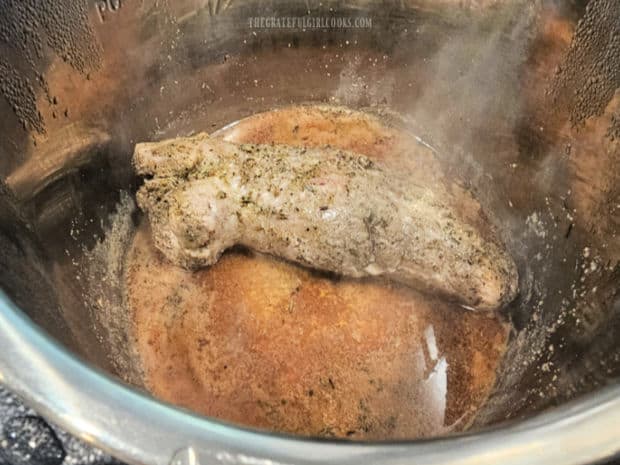
As the broth begins to heat up, use a wooden spoon to scrape the bottom of the pot to deglaze it as it cooks.

Continue heating and scraping until no browned bits of food are left stuck to the bottom of the pot. This will help prevent the Instant Pot from giving you the dreaded BURN warning later!

Scraping up the little browned bits from the bottom of the pot that are left over after sautéing the tenderloin will also add more flavor to this dish.

Tenderloin is removed and the Instant Pot is deglazed.

Cook The Pork Tenderloin

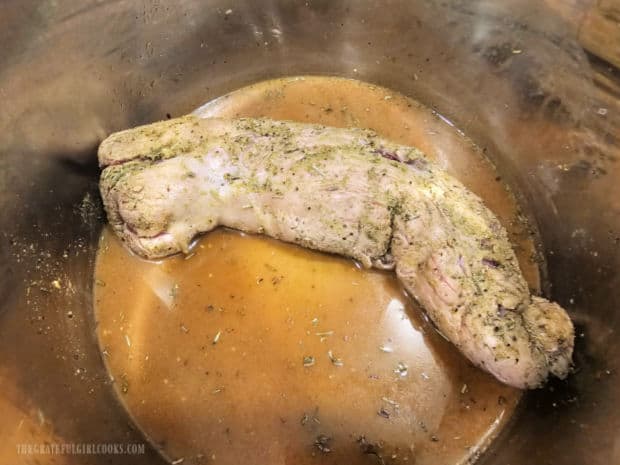
Press the CANCEL button to stop the sauté feature. Place the browned pork tenderloin on top of the broth mixture in the Instant Pot.

You may find you will need to curve or coil the meat slightly in the pot to help it fit comfortably on top of the broth. Lock the Instant Pot lid in place. Flip the toggle switch to SEALING.

Press the MANUAL (High pressure) button and cook the pork tenderloin for 3 minutes. If your pork tenderloin is smaller, you may find that less cooking time is necessary (see below).

NOTE: Cook a tenderloin with a weight between 1½-2 pounds for 3 minutes (then 12-minute Natural release time). If the tenderloin weighs 1¼ pounds or less, cook it for 1 minute (then 12-minute Natural release time)

The Instant Pot will gradually begin to heat and build pressure inside (about 10 minutes). Once it has reached full pressure, the pressure gauge on top of the machine will pop up, and the cooking program timer will begin.

The tenderloin is added to the broth and cooked in the Instant Pot until done.

Once The Pork Tenderloin Is Done Cooking

When done, let the pressure release NATURALLY (do nothing) for 12 minutes. The timer on the Instant Pot will begin counting the time and will show it on the display panel.

Once the internal pressure has been fully released, the pressure gauge (on top) will drop down, indicating it is now safe to open the lid.

Check the internal temperature of the pork using an instant-read digital thermometer. It should have a safe internal temperature of 145°F. (See below for instructions on what to do if the meat is at least 10 degrees or more below 145°F).

If you find it needs only a little more heat to reach 145°F, re-lock the lid and let the meat rest for 2-3 minutes in the residual heat remaining inside the Instant Pot. Unlock the lid and check the temp again.

What If Pork Hasn’t Reached The Correct Temperature?

NOTE: If the meat (after cooking and Natural 12-minute release) is more than 10 degrees less than 145°F., re-lock the lid and cook the meat for one more minute on HIGH PRESSURE, then do a quick release.of the remaining pressure.

Try not to over-cook the pork because that can make it dry! Transfer the pork tenderloin onto a plate, cover it tightly with foil, and let the meat rest for about 8-10 minutes.

After it's cooked, the tenderloin is removed from the Instant Pot.

Make The Gravy

While the meat rests, make the gravy using the liquid remaining in the Instant Pot. First, press the CANCEL button, then press the SAUTÉ button.

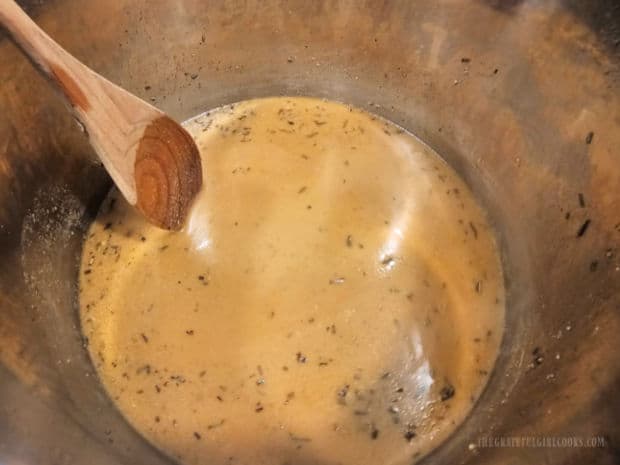
Whisk together 2 Tablespoons of cornstarch and 2 Tablespoon of water until it is lump-free. This is called a “slurry”, and it is used to thicken the broth.

Pour the slurry into the hot broth, and bring this liquid mixture to a simmer, stirring it often with a wooden spoon until it begins to thicken slightly.

Press the CANCEL button to turn off the heat and continue to stir as this gravy thickens. Once done, it is time to serve the Instant Pot pork tenderloin and gravy!

A cornstarch slurry is added to the remaining broth to help it to thicken.Gravy is cooked until it slightly thickens in the Instant Pot.

Serve The Instant Pot Pork Tenderloin And Gravy

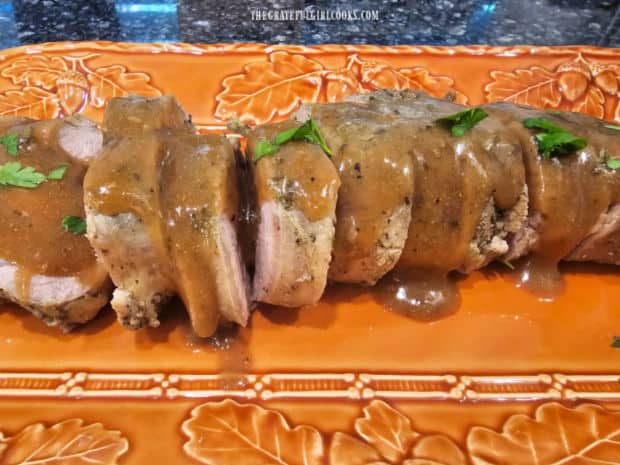
Unwrap the pork tenderloin and place it on a cutting board. Cut it into ½” slices and then transfer those slices to a serving platter (shown below).

Spoon the hot gravy over the top, making sure each slice is covered with the hot gravy. Garnish with fresh parsley, if desired and serve immediately.

Instant Pot Pork Tenderloin and Gravy is sliced and served on a platter.

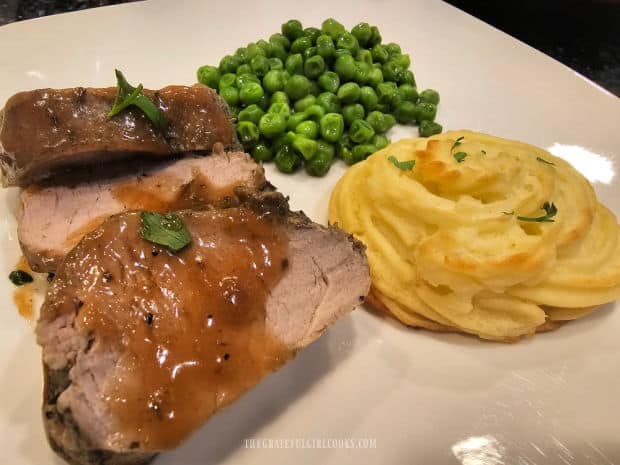
My husband and I enjoyed the Instant Pot Pork Tenderloin and Gravy served with peas and homemade Duchess Potatoes on the side. It was a wonderful meal!

Duchess potatoes and peas are served along with Instant Pot Pork Tenderloin and Gravy.

I hope you have the opportunity to make this delicious Instant Pot recipe and trust you and those you love will enjoy it, too! It’s DELICIOUS!

Thanks for stopping by, and I invite you to come back again soon for more family-friendly recipes. Take care, may God bless you, and have a wonderful day.

Looking for More INSTANT POT Recipes?

You can find ALL of my recipes in the Recipe Index, which is located at the top of the page. I have a nice variety of Instant Pot recipes to choose from, including:

Want More Recipes? Get My FREE Newsletter!

I publish a newsletter 2 times per month (1st and 15th) with lots of recipes, tips, etc.
Would you like to join our growing list of subscribers?

There is a Newsletter subscription box on the top right (or bottom) of each blog post, depending on the device you use.
You can submit your e-mail address there, to be added to my mailing list.

Find Me On Social Media:

Facebook page: The Grateful Girl Cooks!
Pinterest:
The Grateful Girl Cooks!
Instagram:
jbatthegratefulgirlcooks

Author's signature

Original recipe source: Erin Clarke (wellplated.com): Instant Pot Pork Tenderloin

↓↓ PRINTABLE RECIPE BELOW ↓↓

0 from 0 votes
Instant Pot Pork Tenderloin (and gravy)
Prep Time
15 mins
Cook Time
20 mins
Total Time
45 mins
 

Instant Pot Pork Tenderloin (and gravy) is a delicious dish that serves 4! Juicy pork slices are drizzled with a maple syrup and Dijon gravy.

Category: Main Dish
Cuisine: All Cuisines
Keyword: instant pot pork tenderloin
Servings: 4
Calories Per Serving: 295 kcal
Author: JB @ The Grateful Girl Cooks!
Ingredients
  • pounds pork tenderloin 1½ - 2 pounds can be used
  • 1 Tablespoon extra virgin olive oil ** **DIVIDED USE
Seasoning Mix:
  • 2 teaspoons dried crushed rosemary
  • 1 teaspoon garlic powder
  • 1 teaspoon dried thyme
  • 1 teaspoon kosher salt
  • ½ teaspoon black pepper
  • ½ teaspoon onion powder
For Gravy:
  • ¾ cup low sodium chicken broth
  • 2 Tablespoons low sodium soy sauce
  • 2 Tablespoons pure maple syrup (or honey)
  • 2 teaspoons Dijon mustard
For Gravy "Slurry":
  • 2 Tablespoons cornstarch
  • 2 Tablespoons water
Instructions
  1. In a small bowl, whisk garlic powder, rosemary, thyme, onion powder, salt and pepper until combined. Set aside.

  2. In a separate bowl, whisk chicken broth, soy sauce, maple syrup (or honey) and Dijon together until smooth.

  3. Pat tenderloin dry. Cut away (and discard) silver skin on the meat. Brush or rub all sides of the pork with ½ Tablespoon. olive oil. Season all sides of the pork with spice mix, pressing them into the meat to adhere.

  4. Press SAUTÉ button; let Instant Pot heat for 1 minute. Add ½ Tablespoon of olive oil; let it get hot. Add tenderloin; sauté on all sides until browned Do NOT cook it all the way through! Transfer pork to a plate; let it rest.

  5. Put broth, soy sauce, maple syrup and Dijon into the Instant Pot. Instant Pot should still be on SAUTÉ setting. Use a wooden spoon to scrape the bottom of the pot often to deglaze it as it cooks. Continue until no browned bits are left stuck to the bottom of the pot (to avoid the BURN warning later).

  6. Press CANCEL button. Put the tenderloin back in the Instant Pot. If needed, curve the meat slightly in the pot to help it fit. Lock the lid in place. Flip the toggle switch to SEALING. Press MANUAL (High pressure) button; set cook timer for 4 minutes. It should take about 10 minutes to reach full pressure (gauge will pop up) and the cooking program begins. (See NOTE section below cook time for smaller tenderloins).

  7. When done, let pressure release NATURALLY (do nothing) for 12 minutes. Once the internal pressure has been fully released, the pressure gauge (on top) will drop down, indicating it is safe to open the lid. Check the internal temperature of the tenderloin using a digital thermometer. It should be 145°F. If you find it needs just a tiny bit more time to reach 145℉, re-lock the lid; let it "rest" for 2-3 minutes in the residual heat remaining inside the Instant Pot. Check the temp again. Try not to over-cook the pork because that makes it dry! Transfer the pork tenderloin onto a plate, cover tightly with foil; let meat rest for 7-8 minutes.

  8. While meat rests, make gravy with liquid remaining in the Instant Pot. Press CANCEL button, then press SAUTÉ button. Whisk 2 Tablespoons cornstarch and 2 Tablespoon of water until smooth. Pour the cornstarch slurry into the hot broth. Heat liquid to a simmer, stirring often with a wooden spoon until it begins to thicken. Press CANCEL button to turn off heat; continue to stir until a thickened gravy forms.

  9. Place tenderloin on a cutting board. Cut it into ½" slices, transfer slices to a serving platter. Spoon gravy over the top. Garnish with fresh parsley (optional). Serve immediately.

Recipe Notes

NOTE: If tenderloin weighs 1¼ pounds or less, cook it for only 1 minute (then do the regular 12-minute Natural release time)

Nutrition Facts
Instant Pot Pork Tenderloin (and gravy)
Amount Per Serving (4 g)
Calories 295 Calories from Fat 90
% Daily Value*
Fat 10g15%
Saturated Fat 3g19%
Trans Fat 0.1g
Polyunsaturated Fat 1g
Monounsaturated Fat 5g
Cholesterol 111mg37%
Sodium 1001mg44%
Potassium 778mg22%
Carbohydrates 13g4%
Fiber 0.5g2%
Sugar 6g7%
Protein 37g74%
Vitamin A 18IU0%
Vitamin C 0.2mg0%
Calcium 36mg4%
Iron 2mg11%
* Percent Daily Values are based on a 2000 calorie diet.

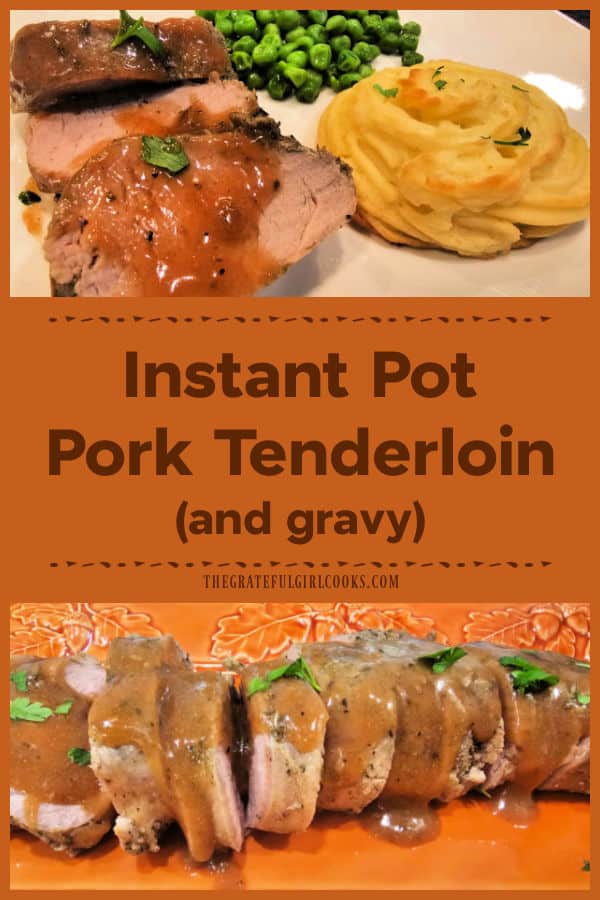
Here’s one more to pin on your Pinterest boards!Instant Pot Pork Tenderloin (and gravy) is a delicious dish that serves 4! Juicy pork slices are drizzled with a maple syrup and Dijon gravy.

Baked Homemade Tortilla Chips

Baked homemade tortilla chips are simple to make in under 15 minutes, using only 3 ingredients. They are crispy and delicious! 
Baked homemade tortilla chips are simple to make in under 15 minutes, using only 3 ingredients. They are crispy and delicious!

Today I want to show you how easy it is to make your own homemade tortilla chips, right in the comfort of your own kitchen!

This simple recipe is very budget friendly. It’s also an EASY way to make a quick snack to gobble up OR to enjoy the chips served with salsa or other dips.

This recipe for baked homemade tortilla chips only requires corn tortillas, oil and salt to create crispy lightly salted homemade tortilla chips. Here’s how to make them.

Scroll Down For A Printable Recipe Card At The Bottom Of The Page

Prepare The Corn Tortillas

Before beginning, preheat your oven to 400°F. This will save you time, because your oven will be hot as soon as you finish preparing the tortillas.

To make a batch of these crunchy chips, begin with 6 corn tortillas. The recipe as written below will yield 48 tortilla chips, but it is very easy to double or triple the recipe to meet your needs.

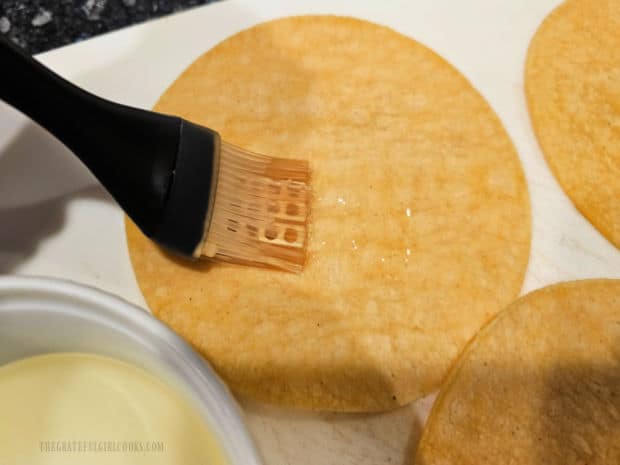
Lay the tortillas out on paper towels. Brush one side of each tortilla lightly with vegetable oil. I find that using a pastry brush works well for this.

A pastry brush is used to brush each tortilla with oil.

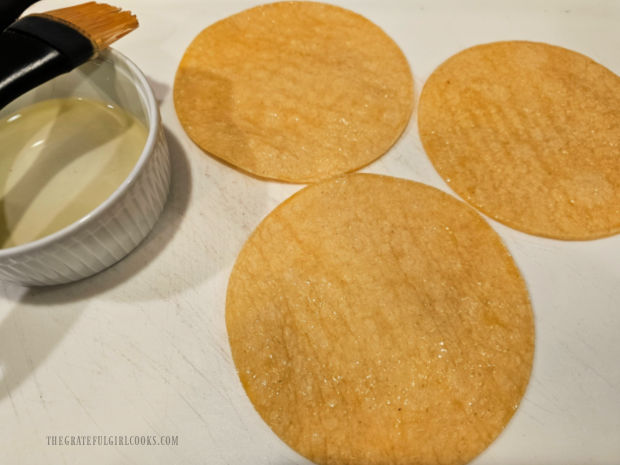
Once each tortilla is brushed with oil, lightly sprinkle each tortilla with salt (oiled side only).

Lightly coated with oil and sprinkled with salt, the tortillas are ready to be sliced.

Slice The Tortillas Into Wedges

Once the tortillas have been brushed with oil and salted (on 1 side only), stack 3 of the tortillas together on top of each other.

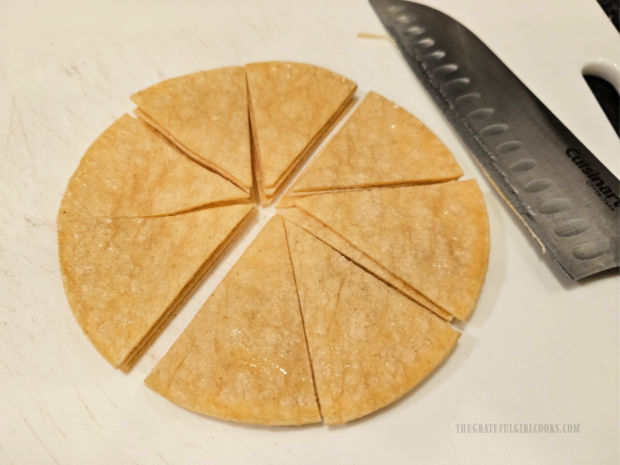
Use a sharp knife (or a pizza cutter) to slice through the stack, cutting the tortillas into 8, “pie-shaped” wedges.

Repeat this “stacking and slicing” with the remaining 3 tortillas. Now you should have a final total of 48 tortilla wedges.

The tortillas are stacked together, then cut into 8 wedges each.

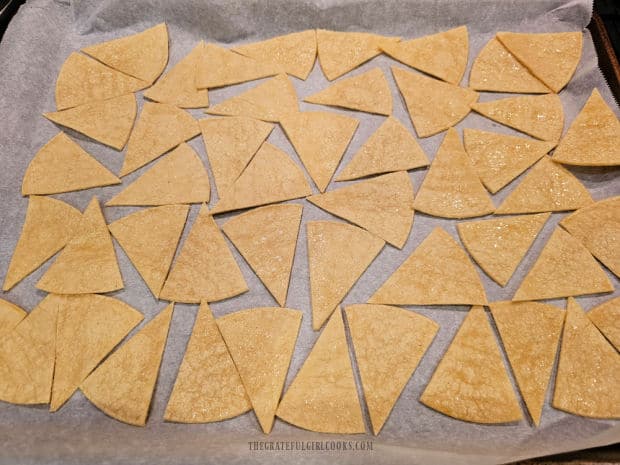
Lay the tortilla pieces in a single layer on top of a parchment paper-lined large baking sheet. Position them so all of the tortilla wedges fit in the pan.

Once they are all positioned on the baking sheet, they’re ready to be baked in your preheated 400°F. oven.

Tortilla wedges are placed on parchment paper in a single layer for baking.

Bake The Tortilla Chips

Bake the tortilla chips on a middle rack in the oven at 400°F. for about 4 minutes. Open the oven and rotate the pan to ensure even distribution of heat for best crispness.

After rotating the baking sheet, continue to bake the tortilla chips for about 4-5 more minutes OR until they are lightly browned around the edges and CRISP!

Oven temperatures can vary quite a bit, so try to keep an eye on the tortilla chips during the second part of the baking time.

When they’re done baking, transfer the parchment paper and chips off of the hot baking sheet, and let them cool to room temperature. They will crisp up a bit more as they cool.

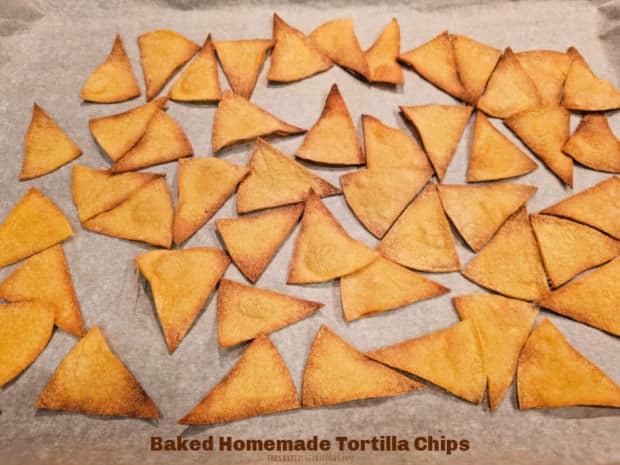
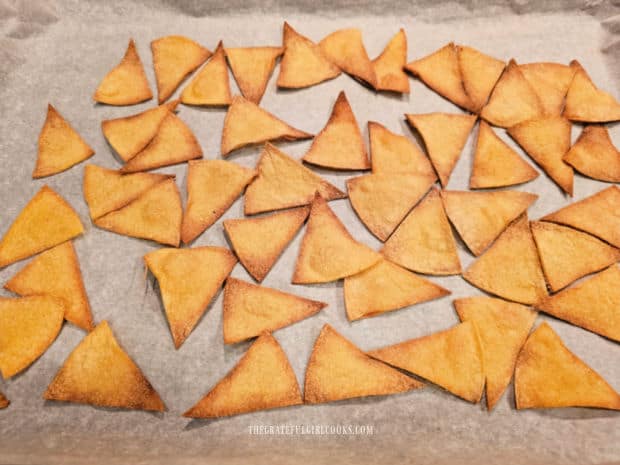
After baking, the homemade tortilla chips are lightly browned and very crispy.

Serve The Baked Homemade Tortilla Chips

The baked homemade tortilla chips can be enjoyed as tortilla chips, or they can be used to scoop up copious amounts of salsa or dip!

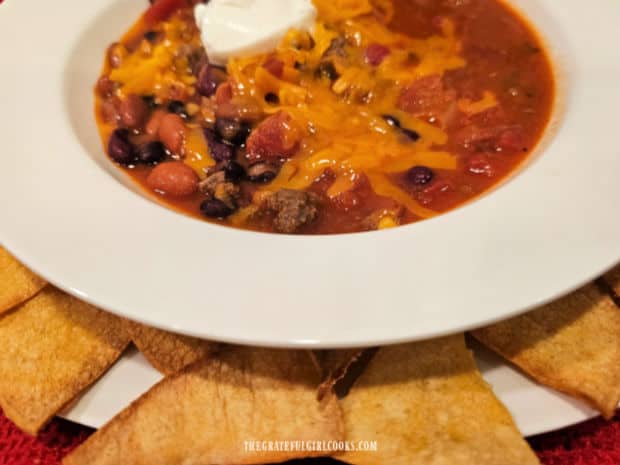
They are wonderful when served as a side with a big bowl of chili because they are sturdy enough to scoop up big old bites. YUM!

The baked homemade tortilla chips can be used for dipping up chili.

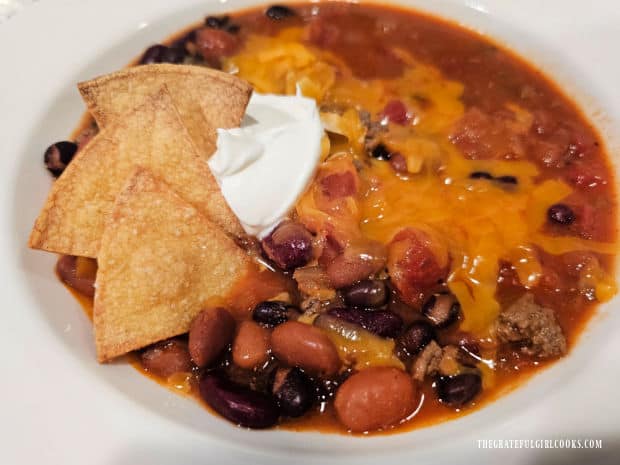
I also like to use them as a garnish for bowls of chili, as shown below. Doesn’t that bowl of chili look nice with the tortilla chip and sour cream garnish?

Baked homemade tortilla chips not only taste good, but they also look good, too (who knew?). Store any leftover chips in a resealable, airtight storage bag to maintain their crunch.

Baked Homemade Tortilla Chips served as a garnish in a bowl of chili.

I hope you have the opportunity to make some baked homemade tortilla chips for yourself and for those you love. I’m confident you will enjoy them.

Thank you for stopping by, and I invite you to come back again soon for more family-friendly recipes. Take care, may God bless you, and have a wonderful day.

Looking For Some More CRUNCHY SNACK Recipes?

You can find ALL of my recipes in the Recipe Index, which is located at the top of the page. I have lots of crunchy snack recipes to choose from, including:

Want More Recipes? Get My FREE Newsletter!

I publish a newsletter 2 times per month (1st and 15th) with lots of recipes, tips, etc.
Would you like to join our growing list of subscribers?

There is a Newsletter subscription box on the top right (or bottom) of each blog post, depending on the device you use.
You can submit your e-mail address there, to be added to my mailing list.

Find Me On Social Media:

Facebook page: The Grateful Girl Cooks!
Pinterest:
The Grateful Girl Cooks!
Instagram:
jbatthegratefulgirlcooks

Author's signature

↓↓ PRINTABLE RECIPE BELOW ↓↓

0 from 0 votes
Baked Homemade Tortilla Chips
Prep Time
5 mins
Cook Time
9 mins
Total Time
14 mins
 

Baked homemade tortilla chips are simple to make in under 15 minutes, using only 3 ingredients. They are crispy and delicious!

Category: Snack
Cuisine: Mexican
Keyword: baked homemade tortilla chips
Servings: 48 chips
Author: JB @ The Grateful Girl Cooks!
Ingredients
  • 6 corn tortillas
  • 1 Tablespoon vegetable oil
  • 1 teaspoon salt** **(or more-season lightly to taste)
Instructions
  1. Preheat oven to 400°F. Line a large baking sheet with parchment paper.

  2. Lay tortillas in single layer on paper towels. Brush 1 side only of the tortillas with oil (cover surface lightly) using a pastry brush. Lightly sprinkle tortillas with salt (oiled side only). NOTE: Amount of oil/salt may vary slightly for each user.

  3. Stack 3 oiled/salted tortillas together directly on top of each other. Use a sharp knife (or a pizza cutter) to cleanly slice through the stack, cutting the tortillas into 8 "pie-shaped" wedges. Repeat the "stacking and slicing" with the remaining 3 tortillas. Now you should have a total of 48 tortilla wedges.

  4. Lay the tortilla pieces in a single layer on top of the prepared baking sheet. Position them so all tortilla wedges fit in the pan.

  5. Bake on a middle rack in the oven at 400°F. for 4 minutes. Open oven; rotate the pan to ensure even chip crispness. Continue baking the tortilla chips for 4-5 more minutes OR until they're lightly browned around the edges and CRISP! NOTE: Oven temperatures can vary, so keep an eye on the chips during the last 5 minutes. When done, transfer parchment paper and chips off the hot baking sheet; let them cool to room temp. They will crisp up a bit more as they cool.

  6. Serve at room temperature and enjoy! Store chips in an airtight, re-sealable bag.

Here’s one more to pin on your Pinterest boards!  Baked homemade tortilla chips are simple to make in under 15 minutes, using only 3 ingredients. They are crispy and delicious!