It’s quick and easy to make Homemade Pico de Gallo! Serve this chunky salsa with tortilla chips or add to tacos, burritos, quesadillas, etc.

Do you enjoy salsa and chips? We sure do! When we put out a bowl of salsa and chips for any gathering it is always one of the first things to get gobbled up!
We love restaurant-style salsa AND we love this type of Pico de Gallo fresh salsa, which contains lots of fresh, chunky tomatoes, onions and other classic ingredients!
This salsa (also known as “salsa fresca”) is a variety of fresh salsa most commonly used to enhance the flavor of many Mexican dishes. I want to share my recipe for Homemade Pico de Gallo with you today.
I’ve been making Pico de Gallo this same way for over 25 years, and it never disappoints, whether it’s enjoyed as an appetizer with chips or as a topping for other Mexican dishes! Here’s how easy it is to make:
Scroll Down For A Printable Recipe Card At The Bottom Of The Page
Prepare The Pico de Gallo
Chop the tomatoes into small chunks. Place all of the chopped tomatoes, seeds and any juice produced into a small serving bowl.

Add chopped cilantro, minced garlic, diced jalapeño pepper, chopped onion and fresh lime juice to the tomatoes in the bowl and stir until combined.

Season the Pico de Gallo to suit your own personal taste with salt and black pepper, then stir to combine all ingredients.

Extract A Bit Of Juice From The Tomatoes
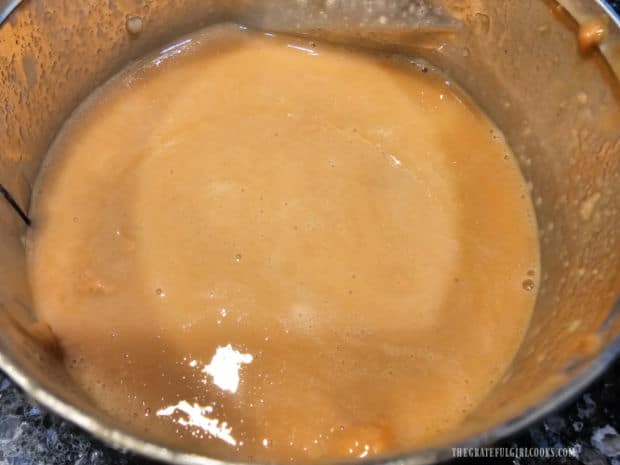
Transfer about one third (1/3) of a cup of the Pico de Gallo into a separate bowl. Use an immersion blender to break down the tomatoes, etc. a bit.
You can also use a flat-edged mallet OR a blender to smash the tomatoes if you do not have access to an immersion blender.

This blending (or pulverizing) will extract a fairly small amount of tomato juice. Add this entire mixture (salsa and juice) back into the bowl with the salsa (shown below).
Stir very well to combine all the ingredients, then cover and refrigerate the “salsa fresca” or Pico de Gallo for at least half an hour to let the flavors mingle (for best flavor).

Serve The Homemade Pico de Gallo
You might be tempted to dig right in but trust me… it will taste even better once all the flavors have had time to come together!
After the homemade Pico de Gallo has had some time to develop its flavors for a while, remove it from the refrigerator. Serve it with crispy tortilla chips on the side for dipping!

The flavor of this well-loved type of salsa is wonderful, and it will be a big hit with anyone you serve it to. I’m confident it will disappear fast!
Homemade Pico de Gallo is also a great addition to quesadillas, burritos, tacos and other types of well-loved Mexican foods.

I hope you try this recipe and trust that you and those you love will love it as much as we do! This quick, simple and delicious recipe can EASILY be doubled or tripled to meet your needs!
Thank you for stopping by, and I invite you to come back again soon for more family friendly recipes. Take care, may God bless you, and have a wonderful day.
Looking For More APPETIZER Recipes?
You can find ALL of my recipes in the Recipe Index, which is located at the top of the page. I have a nice variety of Appetizer recipes to choose from, including:
- Apricot Pineapple Kielbasa Bites
- Guinness Baked Cheese Dip
- Roasted Red Pepper Hummus
- Mexican Layer Dip
- Coconut Candied Cashews
Want More Recipes? Get My FREE Newsletter!
I publish a newsletter 2 times per month (1st and 15th) with lots of recipes, tips, etc.
Would you like to join our growing list of subscribers?
There is a Newsletter subscription box on the top right (or bottom) of each blog post, depending on the device you use.
You can submit your e-mail address there, to be added to my mailing list.
Find Me On Social Media:
Facebook page: The Grateful Girl Cooks!
Pinterest: The Grateful Girl Cooks!
Instagram: jbatthegratefulgirlcooks

↓↓ PRINTABLE RECIPE BELOW ↓↓

It's quick and easy to make Homemade Pico de Gallo! Serve this chunky salsa with tortilla chips or add to tacos, burritos, quesadillas, etc.
- 3 medium tomatoes finely chopped
- ½ cup fresh cilantro chopped
- ¼ cup yellow onion finely chopped
- 1 Tablespoon fresh lime juice
- 2 teaspoons minced garlic
- 1½ teaspoons jalapeño seeded, finely chopped
- salt and black pepper, to taste
Chop tomatoes into small chunks. Place all tomatoes, seeds and juice into a small serving bowl. Add chopped cilantro, minced garlic, diced jalapeno, onion and fresh lime juice; stir to combine. Season to taste with salt and pepper then stir.
Transfer ⅓ cup of the Pico de Gallo into a separate bowl. Use an immersion blender to break down the tomatoes, etc. a bit. *Use a meat mallet OR blender to pulverize tomatoes if you don't have an immersion blender. This blending will produce some tomato juice. Add entire mixture back into bowl of salsa.
Stir well to combine. Cover bowl; refrigerate Pico de Gallo at least 30 minutes to allow flavors to fully develop (for best taste). Serve and enjoy!
Here’s one more to pin on your Pinterest boards!