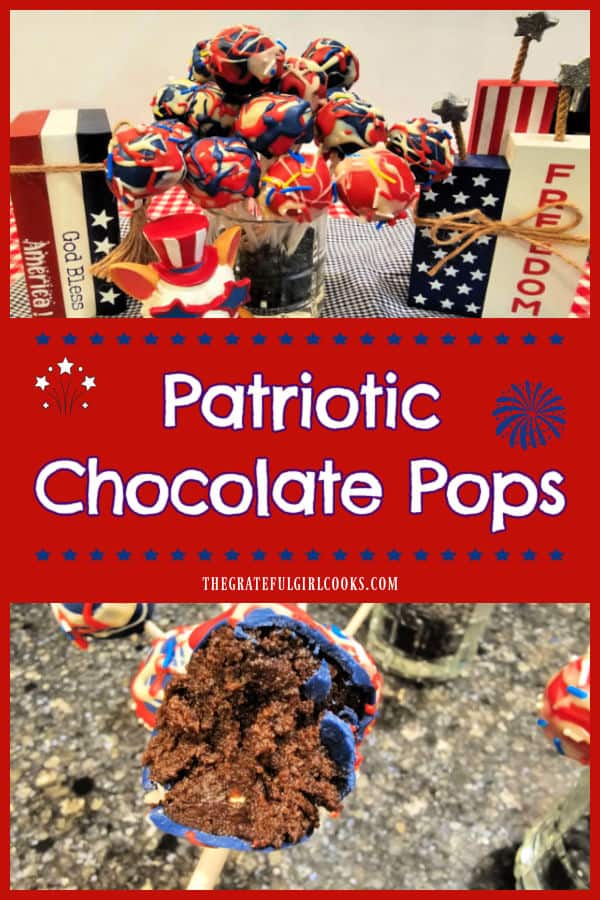
Patriotic Chocolate Pops are a great addition to your holiday celebration! They look festive and the yummy chocolate filling is delicious!
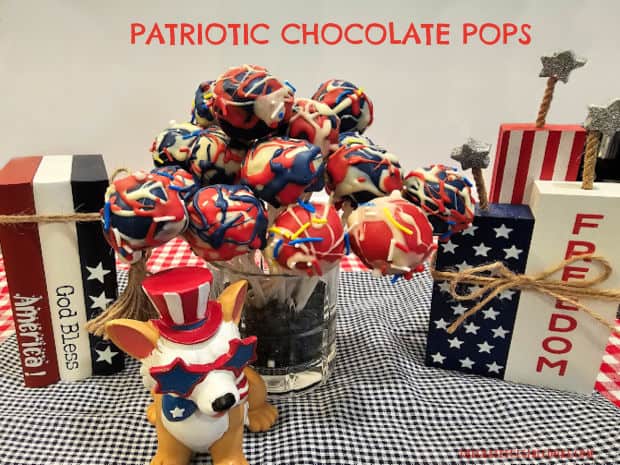
If you’re looking for a fun treat to serve at your Independence Day celebration, perhaps you would be interested in making colorful patriotic chocolate pops?
Each “pop” is filled with a simple, two ingredient chocolate filling. The outside is decorated with layers of red, white and blue chocolate that make the pops look wonderfully “patriotic”.
Set these cute treats out along with some favorite July 4th decorations and see how fast they get gobbled up by your family and friends. They are REALLY tasty and I’m sure you will love them!
They do take a little bit of a time to make (waiting for layers of colored chocolate to harden), but the results are worth every minute! Here’s how to make these patriotic chocolate pops.
Scroll Down For A Printable Recipe Card At The Bottom Of The Page
Making The Chocolate Pops
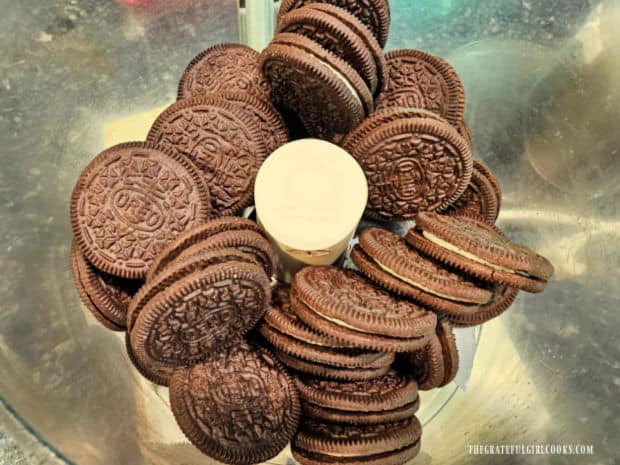
To make these patriotic chocolate pops you will need 36 Oreo (or other chocolate and creme filled cookies). See note below for important info. about the cookies.
IMPORTANT- Do NOT use double-stuffed or it will not produce the firm chocolate pop needed! Simply use good ol’ Oreo cookies, original flavor and filling. One regular sized package will contain approximately 36 cookies.
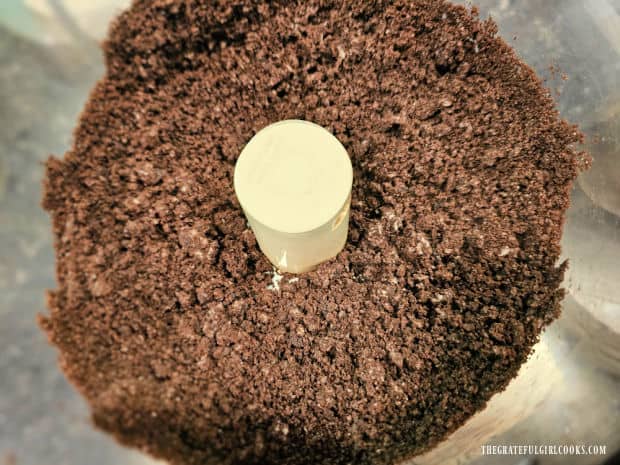
Place the cookies in a food processor with the regular blade attachment. Process the cookies until they become fine crumbs. You can use a blender to do this if you don’t have access to a food processor. TIP: Process about half of the cookies first, then add the remaining cookies for easiest and best results.
Once all the cookies have been processed into fine crumbs, add 8 ounces of softened cream cheese into the food processor. If you cut the cream cheese into chunks, it will be easier!
Shape The Chocolate Mixture Into Balls
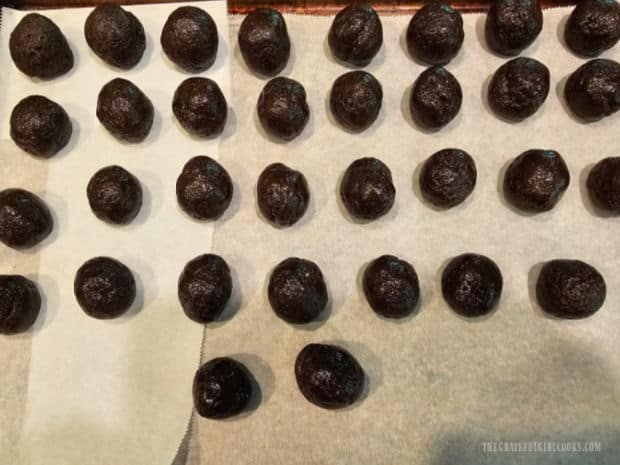
When the cookie and cream cheese mixture is fully processed, it is time to shape the chocolate into balls. Line a baking sheet with parchment paper or wax paper, because you’ll put each chocolate ball onto it once formed.
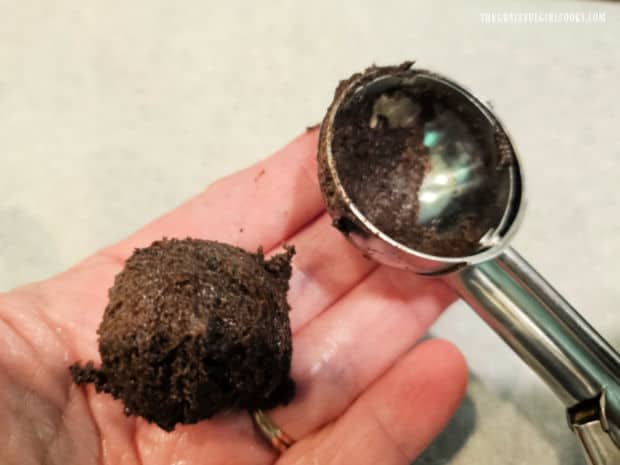
For each ball you will use 1 Tablespoon of the mixture, so use a cookie scoop if you have one that size. Place a Tablespoon of the chocolate mixture in the palm of your hand and roll it between your palms until it forms a cohesive ball.
Set the chocolate ball onto the parchment paper-lined baking sheet and continue this process until all the “dough” is gone. You should end up with approximately 32-35 chocolate balls of “dough”.
Refrigerate the chocolate pops for 1 hour OR put the baking sheet in the freezer and freeze them for 30 minutes. TIP: Don’t skip this step, because you need the chocolate pops to be really cold before you cover them with chocolate “icing”.
The Next Step
Now it’s time to think ahead to where you will hold all the chocolate pops as you put the colored chocolate layer on. It needs to be someplace where each chocolate pop (with the stick inserted) can stand up (separate from the other pops) while the chocolate sets up.
I came up with an idea for this because I didn’t know how to do this and didn’t have any fancy kitchen gadget to use. Here’s what I did, and perhaps this would work for you, as well!
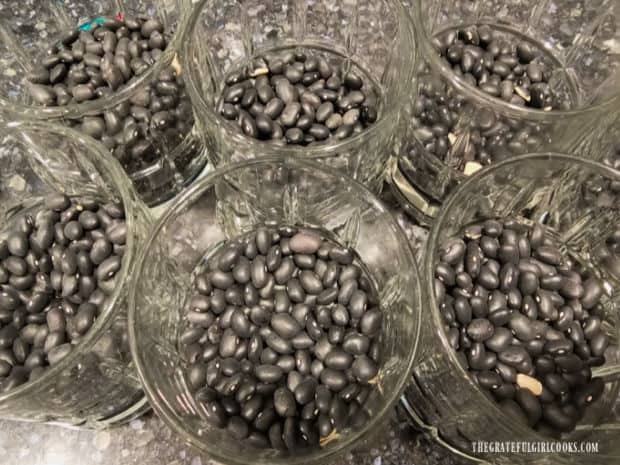
Place dried uncooked beans about halfway up in 6-7 juice glasses. I used black beans which held the pop sticks securely in the cup. This way I could add several finished pops (5-6) to each cup. I suppose you could also use rice to do this, but I haven’t tried that method.
Dipping The Chocolate Pops
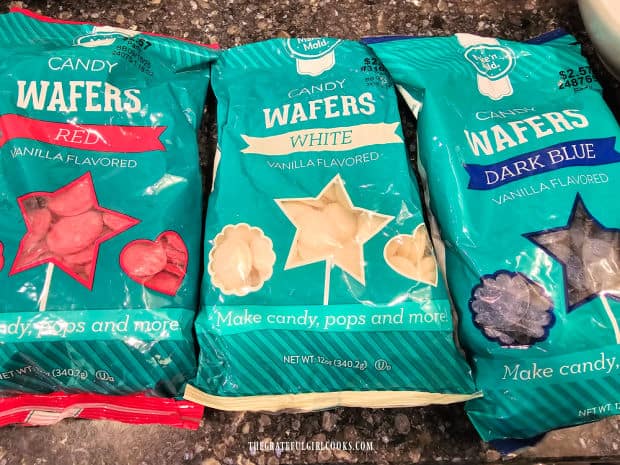
For the patriotic chocolate pops, I used red, white and blue chocolate candy wafers found in grocery stores or in some craft stores. The is also called “almond bark” in some stores.
I got these bags (shown below) at Hobby Lobby, and I know that Michael’s craft store also carries similar products. This time I used these 3 colors for July 4th but use whatever icing colors you choose any time of the year or holiday!
Each of these bags of colored candy wafers was 12 ounces, but you won’t use the entire bag. Save any remaining chocolate wafers to make more pops or use in other recipes.
When I make them, I only melt and use one color at a time (and only about ¼ bag at a time) following the package directions. NOTE: I also add a tiny bit of vegetable shortening when melting the chocolate to thin the icing a little.
Once the chocolate icing hardens for the first layer, I melt and cool another color and apply that in a drizzle or as desired, etc. It takes a while to do this, but the end result is worth it!
Dipping The Chocolate Pops
Melt the chocolate wafers (and shortening) according to pkg. instructions, then let the chocolate cool for about a minute. I usually melt the chocolate wafers with a tiny bit of shortening and microwave them for 30 seconds, then stir, then microwave them again for 30 seconds and stir again.
Continue until the chocolate is completely smooth and creamy. Let the chocolate cool for only about a minute, then remove the pops from the refrigerator (or freezer).
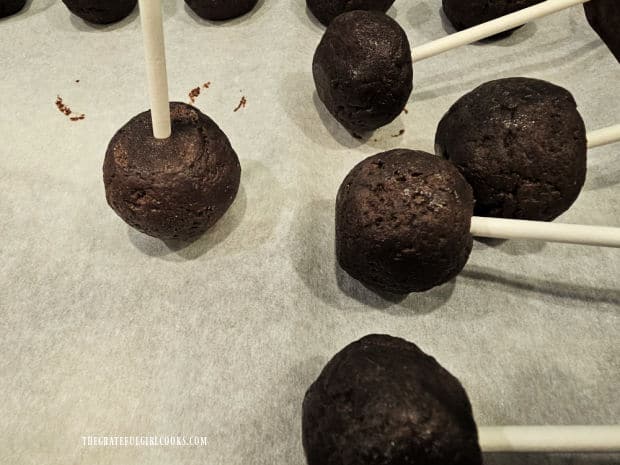
Remove about 10 pops at a time from the refrigerator or freezer so the rest can remain firm for dipping. Insert a lollipop stick into each ball, being carefully not to poke it all the way through.
You can place this first batch of pops into the bean-filled cups to hold them intact while you coat each one, which helps!
Decorating The Chocolate Pops
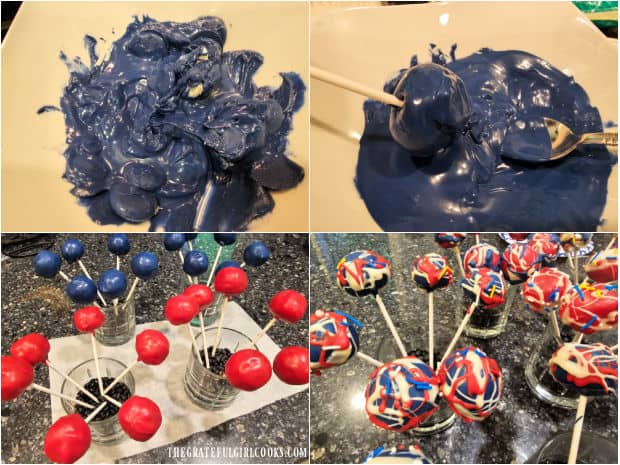
Pick a color to cover the entire pop. You can see in the photo below how the blue colored chocolate looked during the heating and how it looked when I covered the chocolate ball.
Holding the pop by the “stick” immerse it in the chocolate and rotate it until fully covered. Use a spoon if necessary to ensure the entire ball is covered.
Let any excess drip back into the bowl, then carefully place the stick into a bean-filled glass to hold it secure and upright while the chocolate sets or hardens. As the chocolate hardens, it will also hold the “stick” firmly in place.
Finishing The Colorful Patriotic Pops
The basic method for decorating the pops is to fully cover the pop with a chosen base color. After that, you’ll drizzle with accent colors (1 at a time) once the chocolate hardens.
Here’s how I decorated the pops (blue base and red base shown below). Once the blue pops were done, I moved on to red and white base colors, covering as many of the pops in those colors as I wanted. *Remember to only remove the number of pops needed for a certain color from the fridge.
When all the patriotic chocolate pops are covered with a base coat and the chocolate has set up, melt more of the three colors (one at a time) for drizzling and adding additional colors.
Drizzle the melted chocolate over each of the pops to decorate them, letting each color harden before adding another color. You can also add decorative sprinkles to the pops, if desired, while the final chocolate layer is still “wet”.
Serve And Enjoy Patriotic Chocolate Pops!
Once the outer layer on the finished patriotic chocolate pops have hardened, I suggest placing the pop-filled cups in the refrigerator to *fully chill them before serving (*optional but recommended).
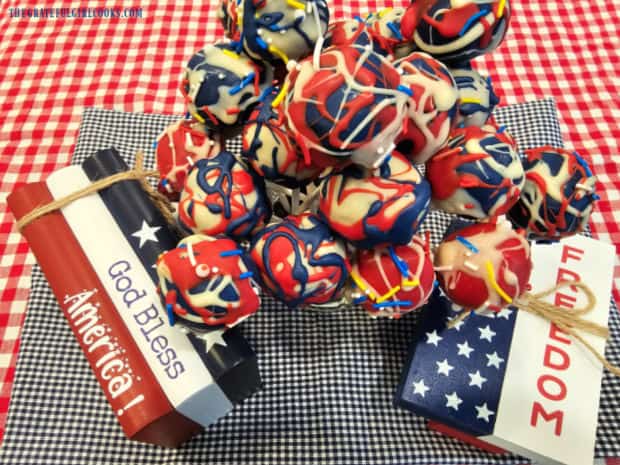
Place the patriotic chocolate pops out with a few table decorations and watch how fast they disappear! The outside is firm, and the chocolate filling is so fudge-like and crazy delicious, I’ll bet you can’t eat more than one! They’re DELICIOUS!
Give Some to Friends!
I bundled up about 6-7 of the pops with some pretty ribbon and gave a “bouquet” of patriotic chocolate pops to some of our neighbors and another one to a dear friend and got rave reviews!
Yes, making these chocolate pops is a bit time-consuming, but it’s worth it in my opinion! What a great start to our upcoming July 4th holiday celebration!
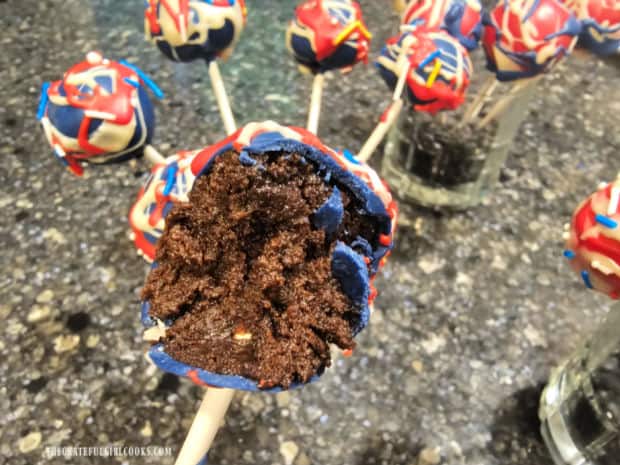
Here’s a peek at the inside of one of the patriotic chocolate pops. The outer chocolate covering “cracks” a bit as you bite into it, and then you see the delicious chocolate filling inside. Yum!
I hope you have the opportunity to make these decadent treats! Honestly, if you simply only want to make them and dip them in one color and add sprinkles, they would be just as good!
I’m confident your family and friends will really enjoy these fun little treats full of chocolatey goodness, regardless of how they are decorated!
Thanks for stopping by, and I invite you to come back soon for more family-friendly recipes. Take care, may God bless you, and have a wonderful Independence Day celebration with those you love.
Looking For More JULY 4TH Recipes?
You can find ALL of my recipes in the Recipe Index, which is located at the top of the page. I have a nice variety of recipes that are perfect for your July 4th celebration, including:
- Red, White and Blue Fruit Tarts
- Homemade Strawberry Ice Cream
- Potato Salad
- Coney Dogs
- Cookies n’ Cream Ice Cream
Want More Recipes? Get My FREE Newsletter!
I publish a newsletter 2 times per month (1st and 15th) with lots of recipes, tips, etc..
Would you like to join our growing list of subscribers?
There is a Newsletter subscription box on the top right (or bottom) of each blog post, depending on the device you use.
You can submit your e-mail address there, to be added to my mailing list.
Find Me On Social Media:
Facebook page: The Grateful Girl Cooks!
Pinterest: The Grateful Girl Cooks!
Instagram: jbatthegratefulgirlcooks
↓↓ PRINTABLE RECIPE BELOW ↓↓

Patriotic Chocolate Pops are a great addition to your holiday celebration! They look festive and the yummy chocolate filling is delicious!
- 36 Oreo cookies (regular, not double-stuffed) or chocolate-creme filled cookies
- 8 ounces cream cheese softened
- chocolate candy wafers red, white and blue
- colored decorative sprinkles, if desired
Line a baking sheet with parchment paper or wax paper. Set aside.
Place half the cookies in a food processor. Process until they become fine crumbs. Add remaining cookies, process again. Cut cream cheese in chunks; add to chocolate crumbs. Process until ingredients are fully combined.
Put 1 Tbsp. of chocolate filling in the palm of your hand. Roll it between your palms until it is a cohesive ball. Set ball onto prepared baking sheet. Continue until all "dough" is gone (approx. 32-35 chocolate balls of "dough"). Refrigerate chocolate balls for 1 hour OR freeze them for 30 minutes. TIP: Don't skip this step- chocolate pops must be cold before covering them with colored "icing".
Using one color and about ¼ bag at a time, melt colored chocolate following pkg. directions (if desired). NOTE: I also add a tiny bit of vegetable shortening when melting the chocolate to thin the icing out. I usually melt the chocolate wafers with a tiny bit (about a tsp. or so) of shortening and microwave them for 30 seconds, then stir, then microwave them again for 30 seconds and stir again. Continue until the chocolate is completely smooth, lump-free and creamy. Let the chocolate cool for about a minute.
Remove about 10 pops from the refrigerator or freezer. Leave the rest chilling so they remain firm for dipping. Insert a lollipop stick into each ball, being carefully not to poke it all the way through. Holding the pop by the "stick" immerse the entire chocolate ball in the colored chocolate, rotating until fully covered. Use a spoon if necessary to ensure the ball is covered. Let any excess chocolate drip back into the bowl, then place the stick into a bean-filled glass to hold it secure and upright while the chocolate hardens. Repeat until this first batch of chocolate balls are covered.
Repeat process using additional colors for the base, (removing only the number of pops needed for each color from the fridge). When all pops are completely covered and chocolate has hardened, melt more of the three colors to decoratively drizzle (one color at a time). Drizzle the melted color chocolate over each of the pops to decorate them, letting each color harden before adding another color. You can also add decorative sprinkles to the pops while final chocolate layer is still "wet".
Once the finished patriotic chocolate pops have hardened, place the cups holding the pops in the refrigerator to chill the pops before serving (*optional but recommended). Serve and enjoy!
IMPORTANT NOTE: The caloric calculation is for 32 chocolate pops (filling only). The amount and type of the colored chocolate "icing" used on the outside of each pop will vary widely for each home cook, so it cannot be calculated accurately.
Here’s one more to pin on your Pinterest boards!