Cranberry Pecan Tassies are delicious, buttery pastry cups full of sweet pecan filling and chopped tart cranberries! Recipe yields 2 dozen.

If you’re looking for a holiday treat, I’d like to share this wonderful recipe for cranberry pecan “tassies”. I found this recipe (torn out of a magazine almost 30 years ago) in my Mom’s recipe box.
When my mom passed away last year, I was blessed to inherit her old recipe boxes and her cookbooks, so that’s how I found this recipe.
What in the world is a TASSIE, you might ask? A “tassie” is the word Scottish people use that means “small cup”. These tassies are baked in a mini muffin tin in a “small cup” made of a buttery, shortbread-style dough, shaped into a pastry shell.
The buttery pastry dough shells are filled with chopped pecans and fresh chopped cranberries in a sweet brown sugar, vanilla and egg filling and then baked.
They are wonderful little hand-held dessert treats (can we call them “cookies”?) and I’m sure you’re going to love them! Here’s how to make cranberry pecan tassies.
Scroll Down For A Printable Recipe Card At The Bottom Of The Page
Make The Dough
Place softened cream cheese and softened butter in a mixing bowl. Beat these two ingredients together with an electric mixer until they’re fully combined.

Stir in all-purpose flour until it has been fully incorporated into the butter and cream cheese mixture. The dough will be very thick and slightly crumbly. Cover the dough and refrigerate it for 30 minutes.
NOTE: Refrigerating the dough is optional, BUT I highly recommend it because it seems to help hold the dough balls together more when shaping them. It’s YOUR choice, however.

Shape The Pastry Dough Balls
TIP: Before continuing, be sure to preheat your oven to 325°F. in order to have it fully preheated once the tassies are filled and ready to bake!
Portion the dough out into 12 equal pieces and roll them into balls between your palms. Cut each dough ball in half, to yield 24 equal sized portions. Roll each of the 24 pieces back into balls.
NOTE: If you only have one mini muffin pan that holds 12 (like me!), keep the remaining half of the dough balls covered/refrigerated until your muffin pan is ready to be used again.

Prepare The Pastry Shells
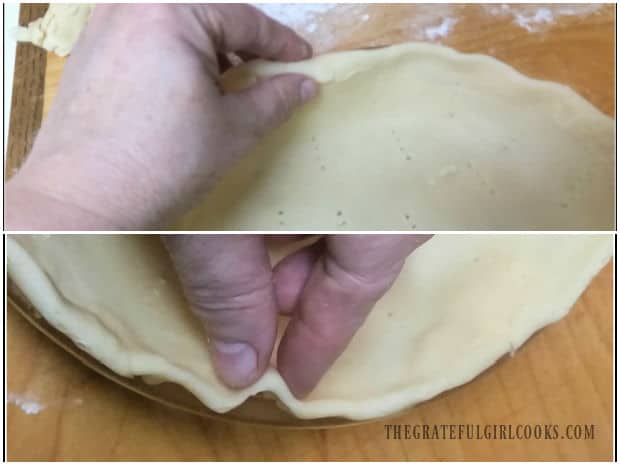
Place one of the dough balls into each ungreased muffin cup. Use your thumb (or other fingers) to firmly press the dough ball down evenly into the bottom of the muffin cup and up the sides, as well.
Continue to carefully press and shape the dough (don’t rip the dough!) until the pastry shells are created and “almost” fill the muffin cups (as shown below).

Make The Pecan And Cranberry Filling
In a mixing bowl, beat a large egg, brown sugar, vanilla extract and salt until the mixture is smooth. Add chopped pecans and finely chopped fresh cranberries.
Stir well, until this mixture is fully combined. This sweet (and tart) mixture will be the filling for the pastry shells you created in the muffin tins.

Fill The Pastry Cups And Bake
Spoon the pecan and cranberry filling into each pastry shell, filling each one about 3/4 of the way up (shown below). Be careful to not overfill the pastry shells and make sure to leave a bit of dough showing around the edges.
Bake in a preheated oven at 325°F. for 20-22 minutes OR until the pastry dough is golden brown. The filling will puff up slightly during baking, so keep an eye on the pastry crust (that you can see) to check on the color.


After Baking Is Finished
When the tassies are finished baking, let them cool for at least 15 minutes (still in the muffin pans) on a wire rack.
Once cooled, remove them from the muffin tins by running a butter knife (carefully) around the edges to separate them from the pan. The top “crust” will be a bit delicate, so take your time!
Carefully lift each one from the muffin tin by scooping each one out using the butter knife or a small spoon. If they’ve been allowed to cool long enough, the pastry cups should come out of the pan easily, and in one piece.

Let the cranberry pecan tassies finish cooling on a wire rack before serving. You can see in the first photo below how “bite-sized” they really are.
Usually, they can be eaten in only two bites! In the second photo below, you can see the pecan and cranberry filling inside!


Serve And Enjoy The Cranberry Pecan Tassies
Once the cranberry pecan tassies have cooled completely, they are ready to be served and enjoyed. They are a wonderful, sweet treat for your family or for gift-giving.
They also make a beautiful addition to any holiday dessert table! When you serve them, sift a small amount of powdered sugar over the top of the tassies.
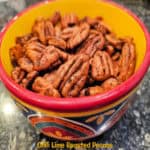
You might also want to garnish the serving platter with fresh cranberries and pecan halves (shown below).
The recipe as written will yield 24 bite-sized cranberry pecan tassies. Store any leftovers (if there are any!) in an airtight container, and they will keep at room temperature for several days.
They also freeze well, if wrapped in plastic and then stored in a freezer container or freezer bag.


I hope you have the opportunity to make these little “bites of deliciousness” for yourself and for those you love. I’m sure you will enjoy them, especially the way the tart cranberries pair so well with the sweet pecan filling. It’s a great balance of flavors!
Thanks so much for stopping by, and I invite you to come back again soon for more family-friendly recipes. Take care, may God bless you, and have a wonderful day.
Looking For More CHRISTMAS COOKIE Recipes?
You can find ALL of my recipes in the Recipe Index, which is located at the top of the page. I have some wonderful Christmas cookie recipes (and other goodies) to choose from, including:
- Peppermint Pinwheel Cookies
- Raspberry Thumbprint Cookies
- Peanut Butter Kiss Cookies
- Dipped Gingersnaps
- Lemon Meltaway Cookies
Want More Recipes? Get My FREE Newsletter!
I publish a newsletter 2 times per month (1st and 15th) with lots of recipes, tips, etc.
Would you like to join our growing list of subscribers?
There is a Newsletter subscription box on the top right (or bottom) of each blog post, depending on the device you use.
You can submit your e-mail address there, to be added to my mailing list.
Find Me On Social Media:
Facebook page: The Grateful Girl Cooks!
Pinterest: The Grateful Girl Cooks!
Instagram: jbatthegratefulgirlcooks

Original recipe source: “Better Home and Gardens” magazine, published in November 1997
↓↓ PRINTABLE RECIPE BELOW ↓↓

Cranberry Pecan Tassies are delicious, buttery pastry cups full of sweet pecan filling and chopped tart cranberries! Recipe yields 2 dozen.
- ½ cup butter = 1 stick or 8 Tbsp., softened
- 3 ounces cream cheese softened
- 1 cup all-purpose flour
- 1 large egg
- ¾ cup packed brown sugar dark or light (I use dark)
- 1 teaspoon vanilla extract
- 1 pinch salt
- ⅓ cup finely chopped cranberries
- 3 Tablespoons finely chopped pecans
Beat cream cheese and butter in a mixing bowl until fully combined, using an electric mixer. Stir in flour until fully incorporated. Dough will be thick and slightly crumbly. Cover dough; refrigerate for 30 minutes. NOTE: Refrigerating dough is optional BUT highly recommend (helps hold dough balls together better.
TIP: Before continuing, preheat oven to 325°F. so it's ready once the tassies are filled and ready to bake!
Divide chilled dough into 12 equal-sized pieces; roll into balls between your palms. Cut each ball in half, yielding 24 portions. Roll each piece into a ball. NOTE: If you only have 1 mini muffin pan that holds 12, keep the remaining half of the dough balls covered/refrigerated until muffin pan is ready to be used again.
Place 1 ball into each ungreased muffin cup. Use your thumb to press each ball down into the bottom and up the sides of the muffin cups. Carefully press/shape the dough until pastry shells "almost" reach the top of the muffin cups.
Make Filling: In a small mixing bowl, beat egg, brown sugar, vanilla and salt until smooth. Add pecans and cranberries. Stir well, until fully combined. Spoon the filling into each pastry shell, filling each about ¾ of the way up. Don't overfill the pastry shells; leave a little dough showing around the edges.
Bake at 325°F. for 20-22 minutes OR until pastry dough is golden brown. The filling will puff up slightly during baking, so keep an eye on the pastry crust (that you can see) to check on the color.
When done, let cool 15 minutes (still in the pan) on a wire rack. Remove them from muffin tins by running a butter knife around the edges to loosen them. The filling surface is delicate- take your time! Carefully lift each one out using a butter knife. If they've cooled enough, they will come out easily.
To serve (room temp.): Place tassies on serving platter. Lightly sift powdered sugar on top. Garnish platter with fresh cranberries and pecan halves (optional). Store leftovers in an airtight container for 3-4 days. They also freeze well, if wrapped in plastic and stored in a freezer container.
Here’s one more to pin on your Pinterest boards!