Month: June 2026

Air Fryer Strawberry Rhubarb Crisp

It’s easy to make delicious Air Fryer Strawberry Rhubarb Crisp! Make this dessert in an air fryer when it’s too hot to turn on the oven!
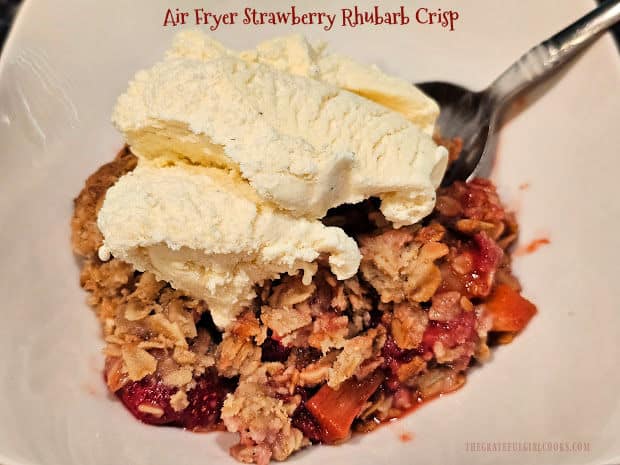
It's easy to make delicious Air Fryer Strawberry Rhubarb Crisp! Make this dessert in an air fryer when it's too hot to turn on the oven!

Recently I harvested lots of fresh strawberries and some rhubarb from our backyard raised bed garden. We ate many of the strawberries, but I still needed to use more of them and didn’t want to make more jam or freeze them.

The problem? We were right in the middle of a heat wave here in NW Oregon with temperatures close to 100°F. outside. There was no way I wanted to heat up our kitchen by using our oven, so I decided to use my air fryer!

I’ve made other crisps and cobblers in our air fryer before, so I came up with this recipe using tips from many of them for the flavors and ingredients I wanted to use.

This recipe for air fryer strawberry rhubarb crisp is the result and guess what? Our kitchen stayed cool, I used my garden produce… and we got a tasty dessert out of the deal. That’s a winning combination in my mind!

So, in case you’re interested, here is how to make Air Fryer Strawberry Rhubarb Crisp (and don’t forget to serve it with ice cream on top-yum).

Scroll Down For A Printable Recipe Card At The Bottom Of The Page

First… A Little Prep

IMPORTANT: Before beginning, make sure that the baking dish you will be using will fit inside the basket of your air fryer.

You won’t need a lid on the dish but will absolutely need to check your dish to make sure it fits inside! Spray the dish well on the bottom and sides with non-stick baking spray, then set it aside.

Prepare The Strawberry Rhubarb Filling

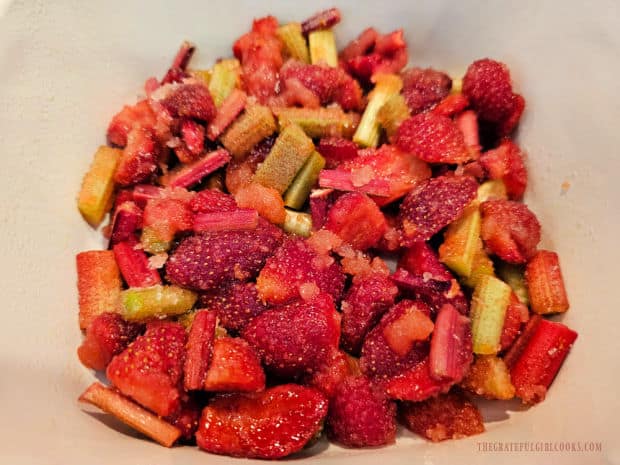
Combine sliced strawberries, rhubarb slices, granulated sugar, lemon juice and zest, a pinch of salt and vanilla extract in a medium sized bowl.

NOTE: The strawberries should have the cores removed and be cut into thirds lengthwise, and the rhubarb should be cut into about 1″ slices.

Stir the fruit filling until it is fully combined in the bowl. Set the bowl aside while you prepare the topping for the fruit crisp.
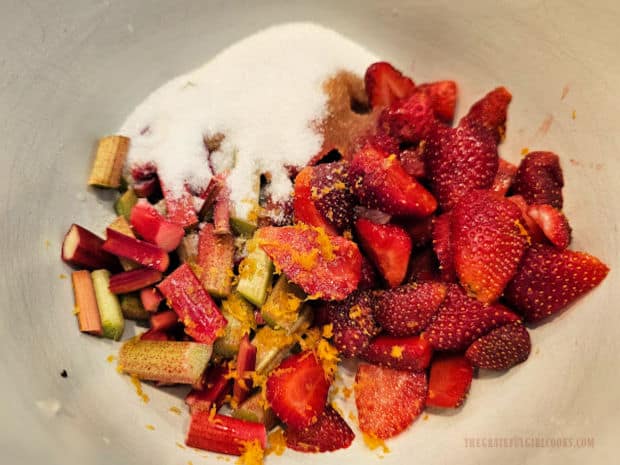
Ingredients for the strawberry rhubarb filling are mixed in a bowl.

Make The Topping for the Fruit Crisp

In a separate bowl place old-fashioned rolled oats, all-purpose flour, ground cinnamon and COLD butter chunks.
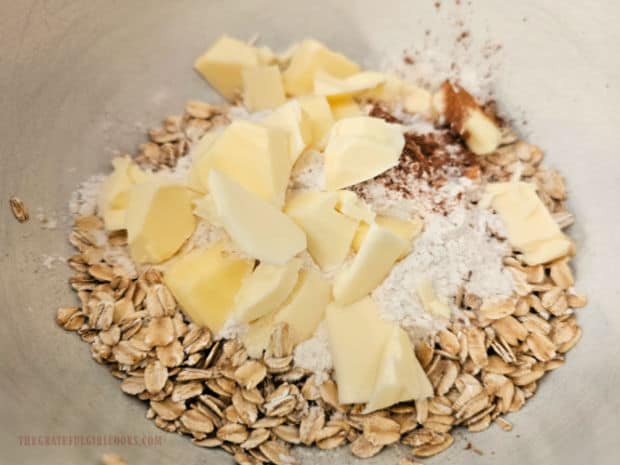
Topping mixture is made by cutting cold butter into oats and flour, etc.

Use a pastry blender to combine these ingredients until the butter is reduced to about the size of peas (shown in the first photo below).

If you don’t have access to a handheld pastry blender, no problem! Use your fingers to pinch the ingredients together and reduce the cold butter to the size of peas.

When finished, the topping should be crumbly with small pieces of butter throughout. Now it’s time to finish making the strawberry rhubarb crisp!
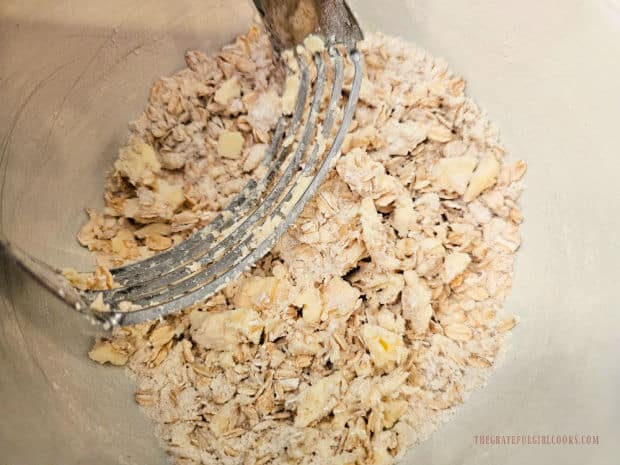
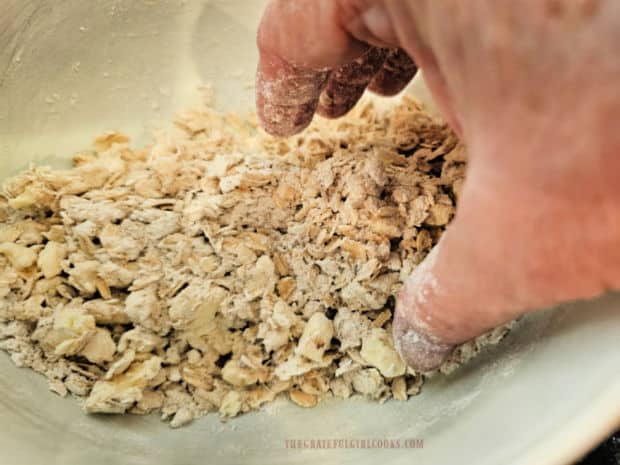
Using a handheld pastry blender to cut the butter into the topping.Topping can also be made by using your fingers to pinch ingredients together.

Create The Strawberry Rhubarb Crisp

Place the prepared strawberry-rhubarb filling into the greased baking dish, making sure to spread it out until the bottom of the dish is fully covered with the fruit.

Sprinkle the fruit filling with the crumb topping (2nd photo below).  Be sure to cover the entire surface of the fruit filling with the crumb topping (use ALL of the topping).
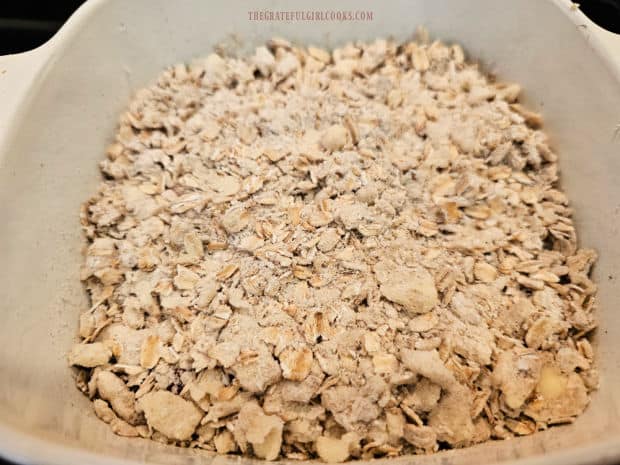
Prepared fruit filling is spread in the bottom of a baking dish.Crumbly topping is evenly sprinkled on top of the fruit until fully covered.

Cook The Crisp In The Air Fryer

Preheat your air fryer to 370°F. for 5 minutes before placing the dish in the air fryer. Cook the air fryer strawberry rhubarb crisp for 15-17 minutes at 370°F.

Various air fryer models may have slight temperature variances, so I recommend checking on the crisp after 15 minutes and then, if necessary, cook it several minutes longer until the fruit is tender, and the strawberry rhubarb crisp is browned and bubbly.
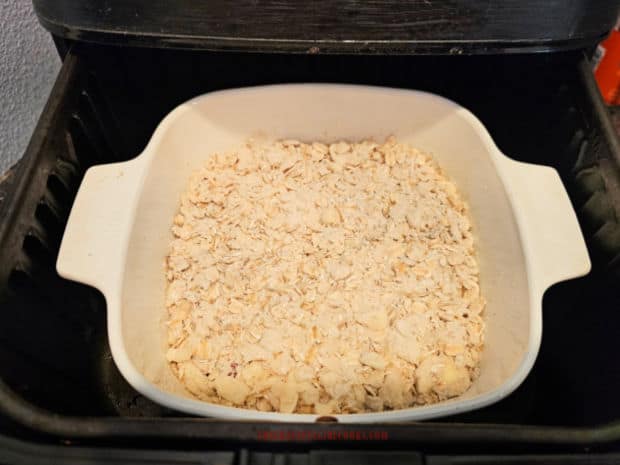
Dish holding the fruit crisp is placed in a preheated air fryer basket.

When the strawberry rhubarb crisp is done, it should be golden brown all over the top surface. Some of the fruit juices should also be bubbling up around the edges of the dish, as well.

Carefully remove the hot dish out of the air fryer and transfer the dish to a wire rack to let the fruit crisp cool slightly before digging in.
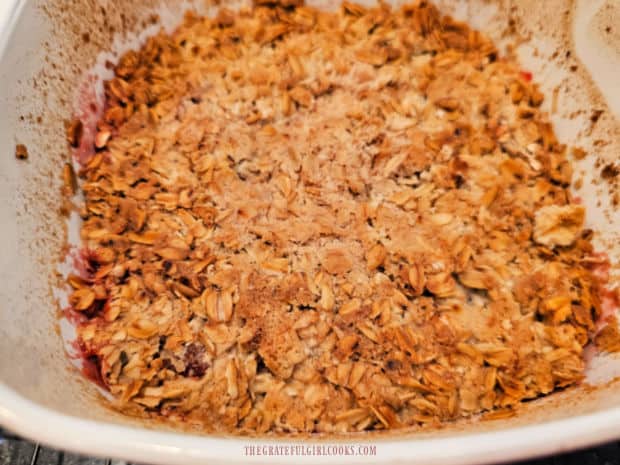
After cooking, the air fryer strawberry rhubarb crisp is golden brown and bubbly.

Serve The Air Fryer Strawberry Rhubarb Crisp

Once the strawberry rhubarb crisp has cooled slightly (but is still warm), it is ready to be served and enjoyed. This recipe can yield 4 small servings or 3 slightly larger servings (your choice).

We feel this dessert tastes best when topped with a scoop of vanilla ice cream, so you may want to open up a carton of ice cream before serving, too. 
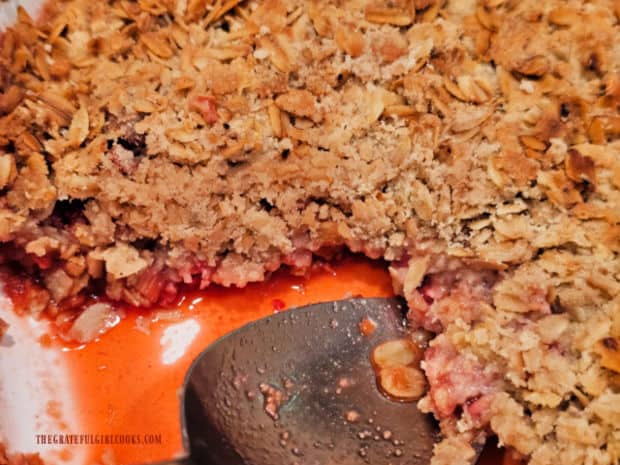
A look at the juices in the strawberry rhubarb crisp after a portion is removed.

Spoon portions of the Air Fryer strawberry rhubarb crisp into serving bowls while it is still warm and get ready to enjoy it.
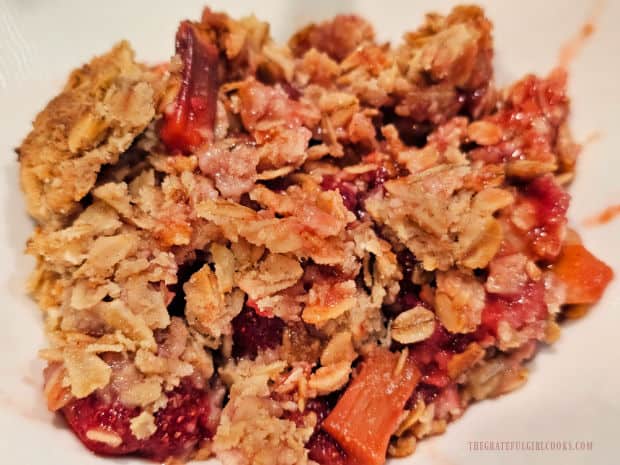
A serving of air fryer strawberry rhubarb crisp is served in a small bowl.

Don’t forget the vanilla ice cream on top of the warm fruit crisp, to make this dessert absolutely perfect! Grab a fork or spoon and dig in!
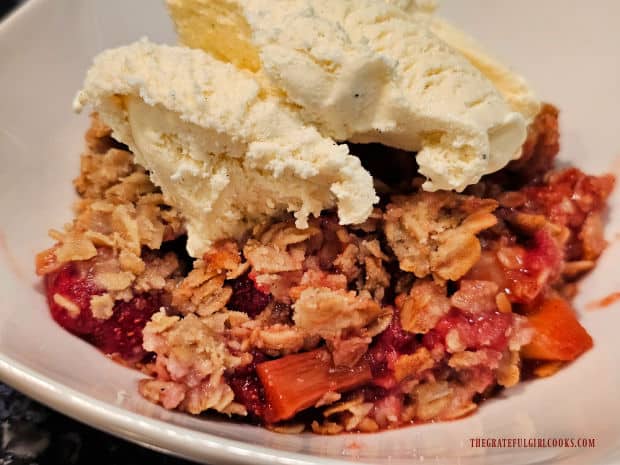
Topped with vanilla ice cream, the strawberry rhubarb crisp is served warm.

I hope you have the opportunity to make this delicious fruit crisp and trust that you and those you love will enjoy it, too!

Thank you for stopping by, and I invite you to come back soon for more family friendly recipes. Take care, may God bless you, and have a wonderful day.

Looking For More COBBLER AND CRISP Recipes?

You can find ALL of my recipes in the Recipe Index, which is located at the top of the page. I have a wonderful variety of cobbler and crisp recipes to choose from, including:

Want More Recipes? Get My FREE Newsletter!

I publish a newsletter 2 times per month (1st and 15th) with lots of recipes, tips, etc.
Would you like to join our growing list of subscribers?

There is a Newsletter subscription box on the top right (or bottom) of each blog post, depending on the device you use.
You can submit your e-mail address there, to be added to my mailing list.

Find Me On Social Media:

Facebook page: The Grateful Girl Cooks!
Pinterest:
The Grateful Girl Cooks!
Instagram:
jbatthegratefulgirlcooks

Author's signature

↓↓ PRINTABLE RECIPE BELOW ↓↓

0 from 0 votes
Air Fryer Strawberry Rhubarb Crisp
Prep Time
15 mins
Cook Time
15 mins
Total Time
30 mins
 

It's easy to make delicious Air Fryer Strawberry Rhubarb Crisp! Make this dessert in an air fryer when it's too hot to turn on the oven!

Category: Desssert
Cuisine: All Cuisines
Keyword: air fryer strawberry rhubarb crisp
Servings: 4 small servings
Calories Per Serving: 332 kcal
Author: JB @ The Grateful Girl Cooks!
Ingredients
For Fruit Filling:
  • cups fresh strawberries cored, sliced in thirds, lengthwise
  • 1 cup fresh rhubarb sliced in 1" pieces
  • cup granulated sugar
  • ½ teaspoon fresh lemon juice
  • ½ teaspoon lemon zest (finely grated yellow lemon peel)
  • ½ teaspoon vanilla extract
  • 1 pinch salt a small pinch!
For The Topping:
  • ¾ cup old fashioned rolled oats
  • ¾ cup all-purpose flour
  • ½ teaspoon ground cinnamon
  • ¼ cup COLD butter =4 Tablespoons, cut in chunks
Instructions
  1. First- make sure baking dish fits inside air fryer basket. Spray/grease bottom and sides of dish, then set aside.

  2. Stir strawberries, rhubarb, sugar, lemon juice and zest, a tiny pinch of salt and vanilla in a medium bowl until combined. Set bowl aside.

  3. In separate bowl place oats, flour, cinnamon and COLD butter chunks. Use a pastry blender or your fingers to combine the ingredients until butter is reduced to the size of peas. Topping should be crumbly with small pieces of butter throughout.

  4. Place fruit mixture in prepared dish, covering the bottom. Sprinkle the topping over the fruit until the surface is fully covered (use ALL the topping).

  5. Preheat air fryer to 370°F. for 5 minutes. Place dish in air fryer; cook the crisp for 15-17 minutes at 370°F. I recommend checking the crisp after 15 minutes. If needed, cook 2-3 more minutes until browned, bubbly and fruit is tender.

  6. Carefully remove hot dish out of air fryer; transfer to a wire rack to cool slightly. Spoon warm servings into bowls. Top with vanilla ice cream (optional, but good) and serve. Enjoy!

Nutrition Facts
Air Fryer Strawberry Rhubarb Crisp
Amount Per Serving (1 ¼ of total)
Calories 332 Calories from Fat 117
% Daily Value*
Fat 13g20%
Saturated Fat 8g50%
Trans Fat 0.5g
Polyunsaturated Fat 1g
Monounsaturated Fat 3g
Cholesterol 31mg10%
Sodium 104mg5%
Potassium 243mg7%
Carbohydrates 50g17%
Fiber 4g17%
Sugar 19g21%
Protein 5g10%
Vitamin A 392IU8%
Vitamin C 29mg35%
Calcium 51mg5%
Iron 2mg11%
* Percent Daily Values are based on a 2000 calorie diet.

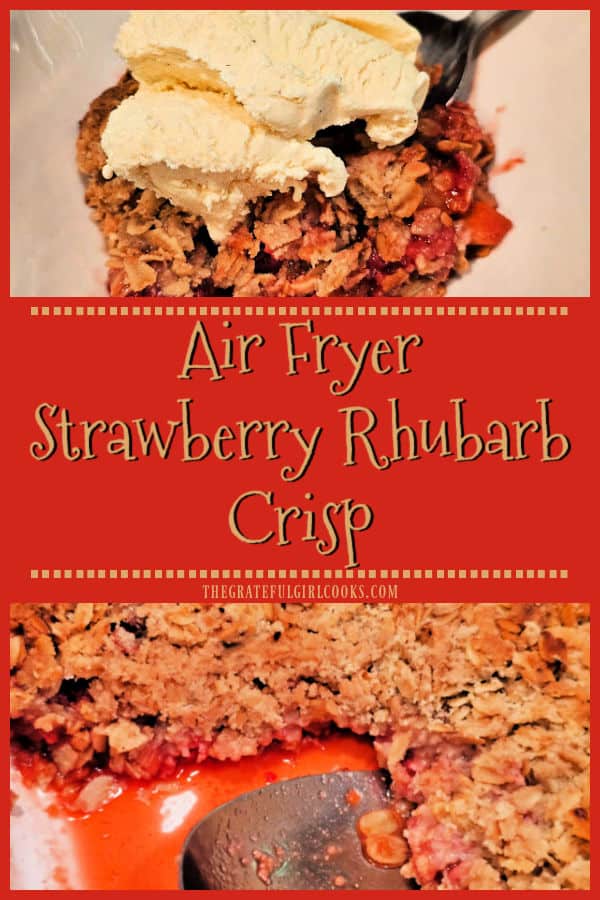
Here’s one more to pin on your Pinterest boards! It's easy to make delicious Air Fryer Strawberry Rhubarb Crisp! Make this dessert in an air fryer when it's too hot to turn on the oven!
Fajita Seasoning Mix

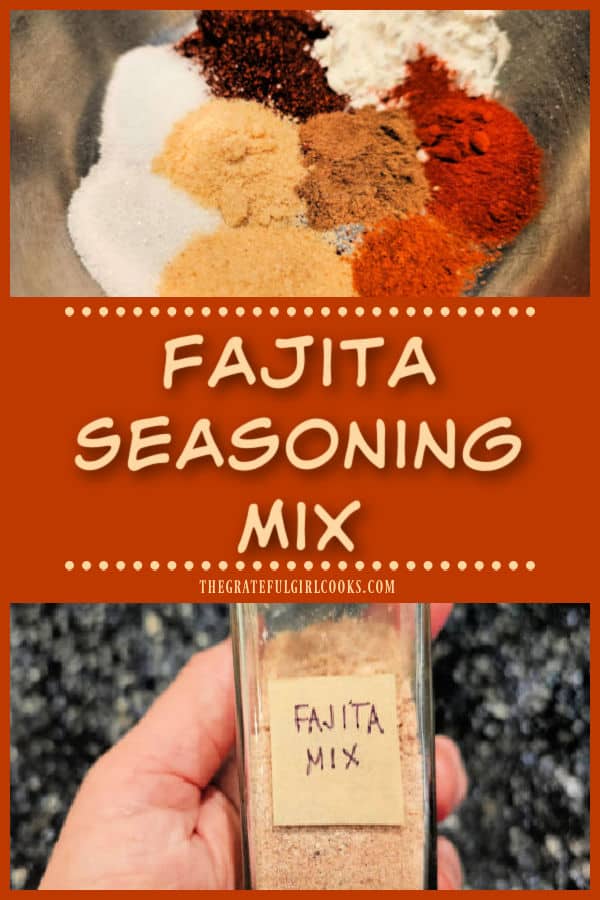
Make your own flavorful Fajita Seasoning Mix in 5 minutes! This simple recipe will yield the equivalent of 2 packets of store-bought mix.

Today I want to share a very easy and QUICK way to add a great tasting seasoning mix to your spice rack! We love fajitas, whether we get them at a Mexican restaurant OR we make them at home.

Fajitas are basically pan-seared meat (my favorite is chicken), onions and peppers, BUT the spices used make all the difference in the great FLAVOR of those wonderful ingredients!

That’s where this recipe comes in handy. The recipe I am sharing with you today makes the equivalent of 2 packets of fajita seasoning mix. It’s EASY! Here’s how to make fajita seasoning mix.

Scroll Down For A Printable Recipe Card At The Bottom Of The Page

What Ingredients Will I Need?

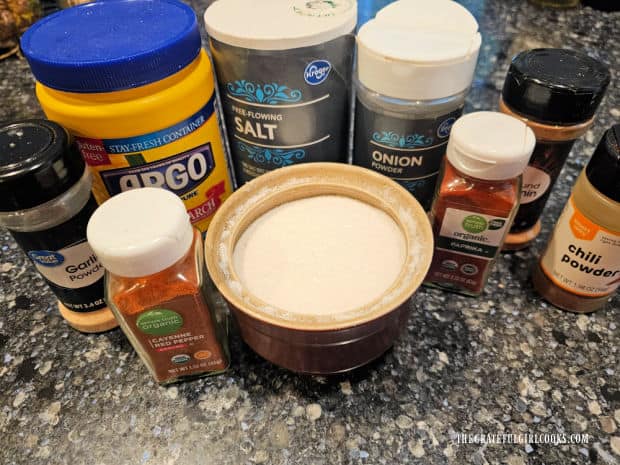
To create the fajita seasoning mix you will use garlic powder, cornstarch, salt, onion powder, paprika, cumin, chili powder, sugar and cayenne red pepper.

The recipe (as written below) will yield the equivalent of two fajita seasoning packets found in local grocery stores. Of course, this amount can be doubled or tripled to suit your needs.

We don’t have homemade fajitas too often, so I find that having just enough of the mix around to make a couple meals of fajitas is the right amount for us.

A photo of the ingredients used to make fajita seasoning mix.

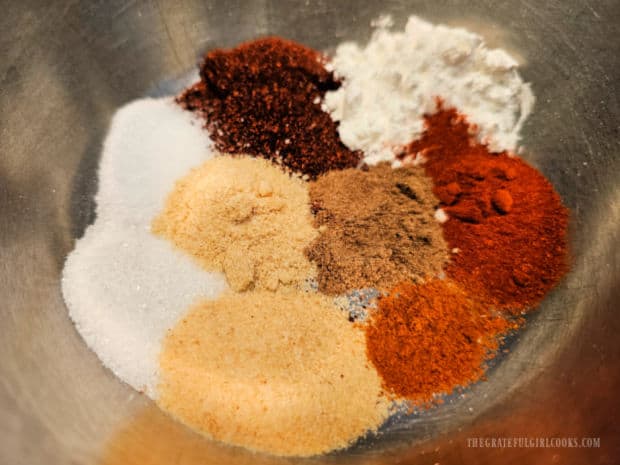
Measure all of the spice mix ingredients into a small bowl.

The spice ingredients are measured into a small bowl.

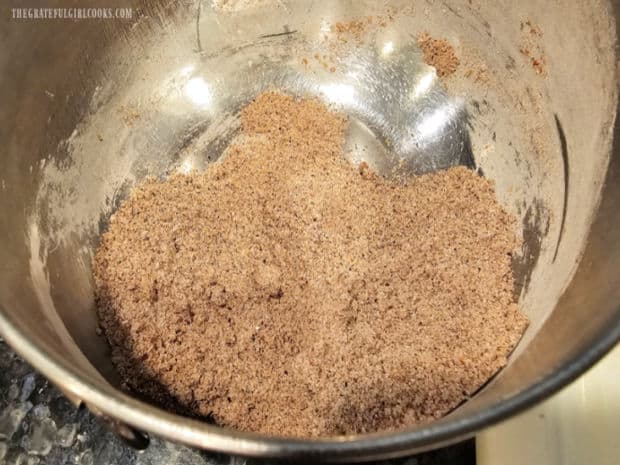
Stir the spices very well to break up any clumps that may have formed. Cornstarch will be the primary ingredient with a few “clumps”.

Spices are combined in bowl and stirred until it is lump-free.

Storing The Seasoning Mix

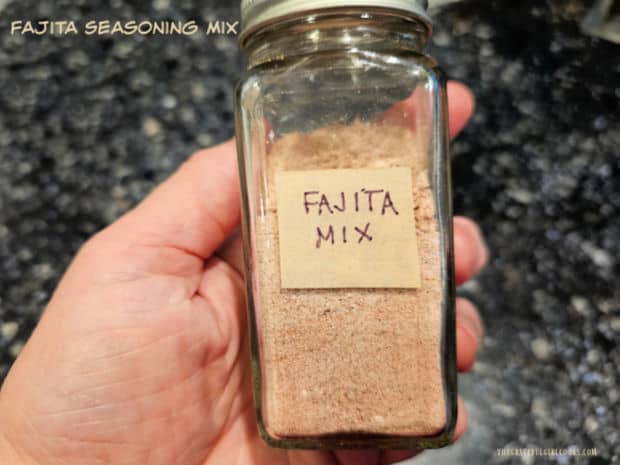
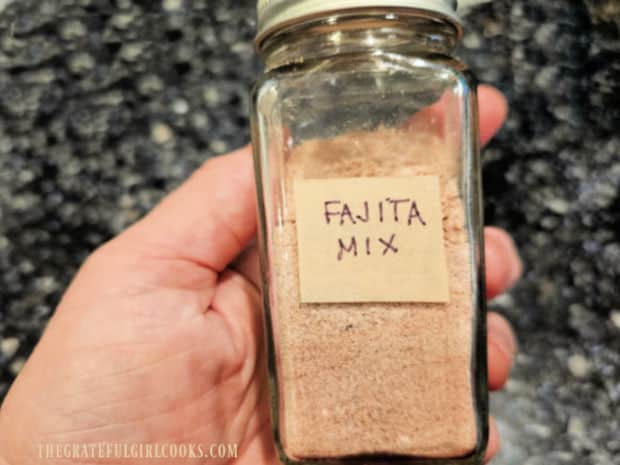
Pour the combined fajita seasoning mix into a spice jar or other airtight container. I use my old ones for this after cleaning them out and drying them.

TIP: Insert a funnel into the mouth of the jar because it makes it very easy to pour the spice mixture into the jar without spilling anything.

Label the jar and store it in your pantry for up to 6 months (for best flavor). Add more spice mix to the jar, as needed.

Fajita seasoning mix is stored in a spice jar for use.

Using The Fajita Seasoning Mix

When you make your fajitas using your favorite recipe, this handy homemade fajita seasoning mix will really come in handy to provide lots of authentic flavor!

Basically, you will pan-sear about 1 pound of meat (beef, chicken, etc.) in a very hot, oiled skillet, then add the veggies you will be using.

Traditionally these include sliced onions and bell pepper slices (green or multi-colored bell peppers). We have also seen tomato chunks added as well.

After these have cooked through, sprinkle the fajitas with 3 Tablespoons of the seasoning mix and ¾ cup of water and continue cooking, stirring well to combine everything.

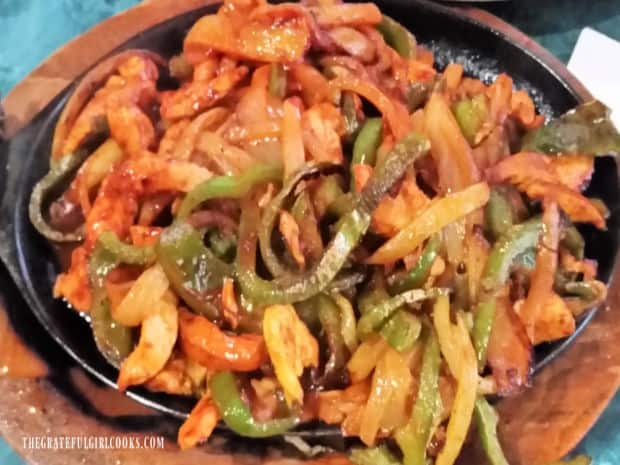
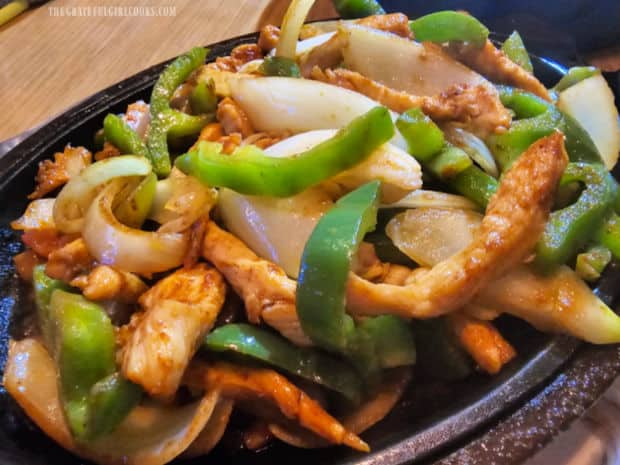
As the fajitas and sauce cook, the sauce will thicken slightly and coat the fajitas with a yummy sauce. Heat through and then serve. Shown below are two different servings of fajitas (from what we ate at restaurants we’ve visited)

A large serving of chicken and beef fajitas with onions and multi-colored peppers.Chicken fajitas served with onions and green bell peppers.

No matter how you cook fajitas for those you love, I hope you enjoy the convenience of having this easy to make fajita seasoning mix around to add great taste to the dish!

Thank you for stopping by, and I invite you to come back again soon for more family friendly recipes. Take care, may God bless you, and have a wonderful day.

Looking For More SEASONING MIX Recipes?

You can find ALL of my recipes in the Recipe Index, which is located at the top of the page. I have a variety of homemade spice mix recipes to choose from, including:

Want More Recipes? Get My FREE Newsletter!

I publish a newsletter 2 times per month (1st and 15th) with lots of recipes, tips, etc.
Would you like to join our growing list of subscribers?

There is a Newsletter subscription box on the top right (or bottom) of each blog post, depending on the device you use.
You can submit your e-mail address there, to be added to my mailing list.

Find Me On Social Media:

Facebook page: The Grateful Girl Cooks!
Pinterest:
The Grateful Girl Cooks!
Instagram:
jbatthegratefulgirlcooks

Author's signature

↓↓ PRINTABLE RECIPE BELOW ↓↓

0 from 0 votes
Fajita Seasoning Mix
Prep Time
5 mins
Cook Time
0 mins
Total Time
5 mins
 
Category: Spices
Cuisine: Mexican
Keyword: fajita seasoning mix
Servings: 2 packets (6 TBSP. total)
Calories Per Serving: 58 kcal
Author: JB @ The Grateful Girl Cooks!
Ingredients
  • 4 teaspoons corn starch
  • 4 teaspoons chili powder
  • 2 teaspoons garlic powder
  • 2 teaspoons paprika
  • teaspoons ground cumin
  • teaspoons onion powder
  • teaspoons salt
  • ½ teaspoon granulated sugar
  • ½ teaspoon cayenne pepper
Instructions
  1. Measure all ingredients into a small bowl. Stir until combined and lump-free.

  2. Transfer fajita seasoning mix into a small spice jar or other airtight container. Label jar.

  3. Store in pantry up to 6 months for best flavor. Enjoy! (See NOTE section below for how to use).

Recipe Notes

NOTE: This recipe will yield the amount of fajita seasoning mix found in 2 packets of mix (in the stores). To use with fajitas (equal to 1 seasoning packet): First, Cook meat, onions and peppers in hot oil in a large skillet until browned and tender. Add 3 TABLESPOONS FAJITA SEASONING MIX + ¾ CUP OF WATER TO THE FAJITAS. Continue to cook- the sauce will thicken slightly and coat the fajitas. Once thickened, heat through, then serve as desired. 

Nutrition Facts
Fajita Seasoning Mix
Amount Per Serving (1 (packet))
Calories 58 Calories from Fat 9
% Daily Value*
Fat 1g2%
Saturated Fat 0.2g1%
Polyunsaturated Fat 1g
Monounsaturated Fat 0.4g
Sodium 1817mg79%
Potassium 212mg6%
Carbohydrates 12g4%
Fiber 3g13%
Sugar 2g2%
Protein 2g4%
Vitamin A 2398IU48%
Vitamin C 1mg1%
Calcium 42mg4%
Iron 2mg11%
* Percent Daily Values are based on a 2000 calorie diet.

Here’s one more to pin on your Pinterest boards:Make your own flavorful Fajita Seasoning Mix in 5 minutes! This simple recipe will yield the equivalent of 2 packets of store-bought mix.

Bean and Kale Soup

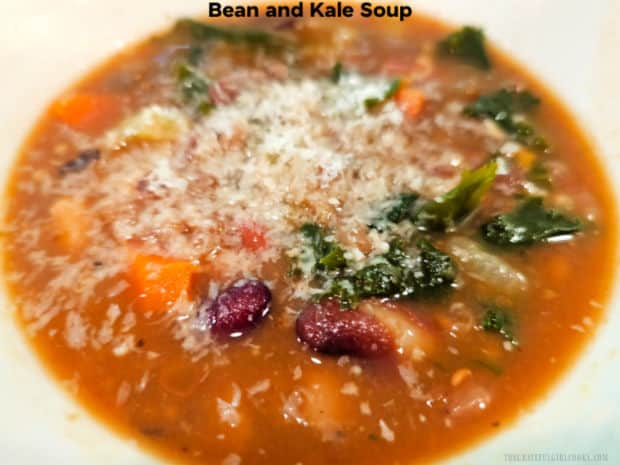
Bean and Kale Soup with carrots, celery, onion, kale and beans cooked in an Italian seasoned broth is a delicious, filling “meatless” meal!
Bean and Kale Soup with carrots, celery, onion, kale and beans cooked in an Italian seasoned broth is a delicious, filling "meatless" meal!

Today I want to share a recipe I found online a while ago and adapted to suit our taste buds. It is a delicious meal that is not only delicious, but also filling and meatless.

It is so yummy that even if you are not a vegetarian, you will enjoy it! I know we sure do (and we are meat-lovers at heart!

The recipe is versatile because you can go the easy route and use store bought canned beans OR you can pre-cook another type of dried beans in an Instant Pot. I have included both in the instructions.

All in all, this is a delicious healthy recipe to make and enjoy any time of the year! Here’s how to make bean and kale soup.

Scroll Down For A Printable Recipe Card At The Bottom Of The Page

Let’s Talk About The BEANS

For this recipe beans are one of the main stars! You can use either canned beans OR you can prepare dried beans, whichever you prefer or have available. Both are equally wonderful in this bean and kale soup!

TIP: Want the quickest and easiest way? Use two (15.5-oz.) cans of cannellini beans that have been rinsed and drained. EASY PEASY!

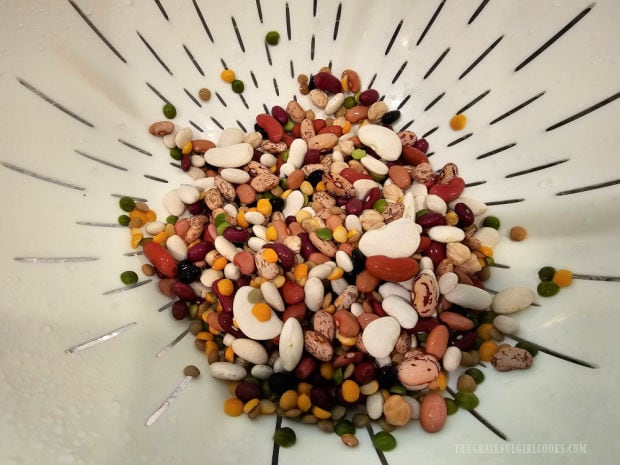
However, I LOVE using a 10-ounce bag of “15 bean soup mix” (see below), commonly found in grocery stores. It means a longer prep time, but I enjoy having different colors and varieties of beans in this soup (my photos below reflect this).

When I use this dried bean mix for the soup, I make the beans ahead of time in my Instant Pot, which make it convenient for me to add them later when needed.

15 Bean soup beans were used this time for the bean and kale soup.

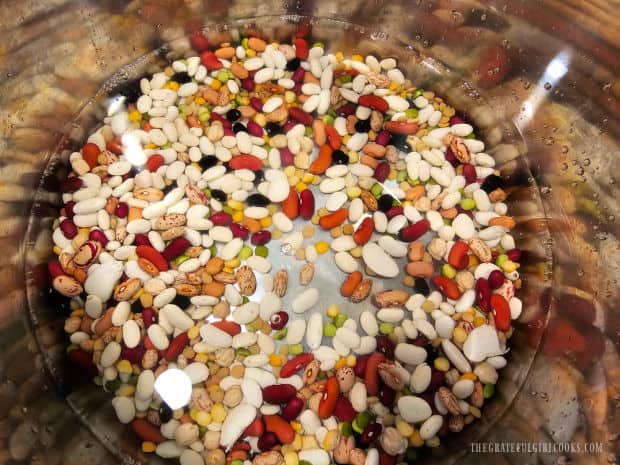
To do this, add the dry, rinsed beans to the inner pot, then cover them with 4 Cups of water. Cook on HIGH pressure for 40 minutes, then let the pressure naturally release for 15 minutes. 

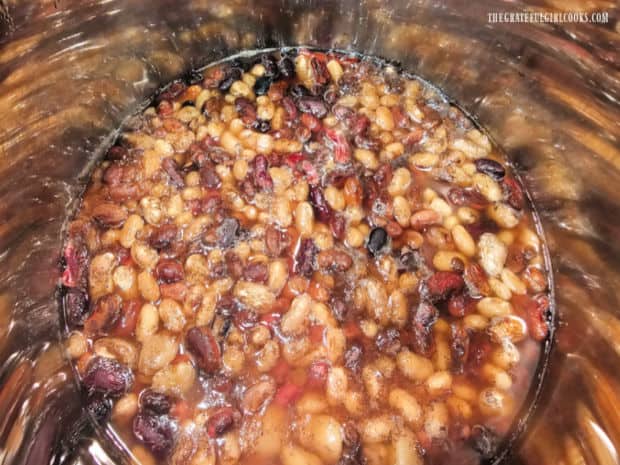
Beans were pre-cooked in water in an Instant Pot.

Once done, drain the colorful and flavorful mixture of beans and add them to the soup recipe later when they are called for. It’s pretty simple!

After cooking, the beans are drained.

Make The Soup

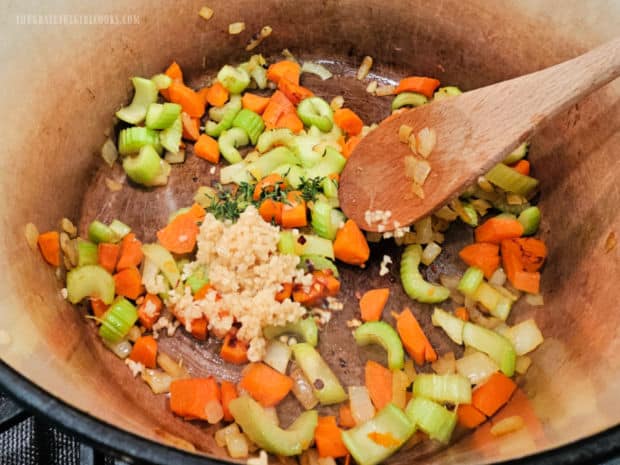
In a large soup pot, heat extra virgin olive oil on medium heat until the oil is hot, but not smoking. Add chopped onion, sliced celery and carrot. Cook the veggies for 5-6 minutes or until they have softened slightly.

Add minced garlic, thyme, Italian seasoning and red pepper flakes. Continue cooking for one more minute, stirring often so the garlic doesn’t burn. Season to taste with salt and black pepper.

Veggies, plus garlic and herbs are cooked in olive oil in a large soup pot.

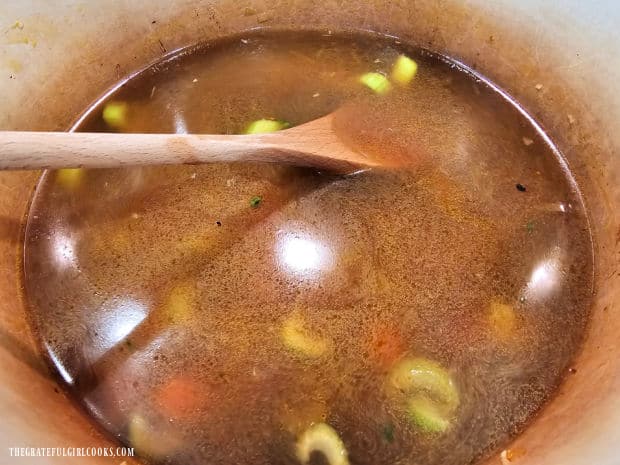
Now add vegetable broth, tomato paste, water and the drained beans (whichever kind you’re using) to the pot. Stir well to combine.

Bring the soup to a gentle simmer and cook for 15 minutes. Stir the soup every few minutes and smash some of the beans in the pot slightly, because this helps to thicken the bean and kale soup.

Veggie broth, tomato paste and water are added to the soup.

Finish Making The Soup

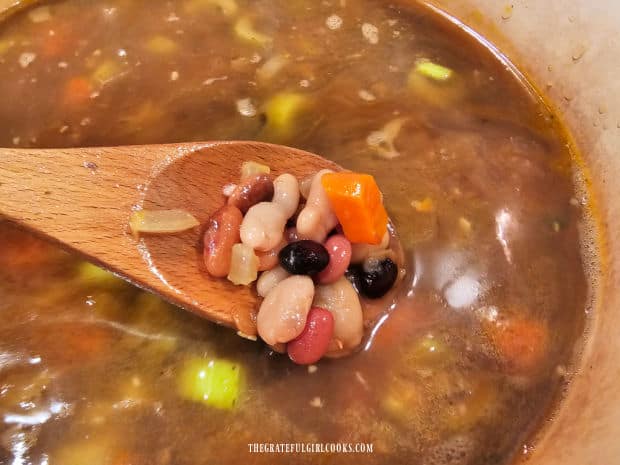
After 15 minutes, the soup should be a little bit thicker, and the veggies should be quite tender. Now it’s time for the final step for this soup.

A spoonful of the bean and kale soup before the kale is added.

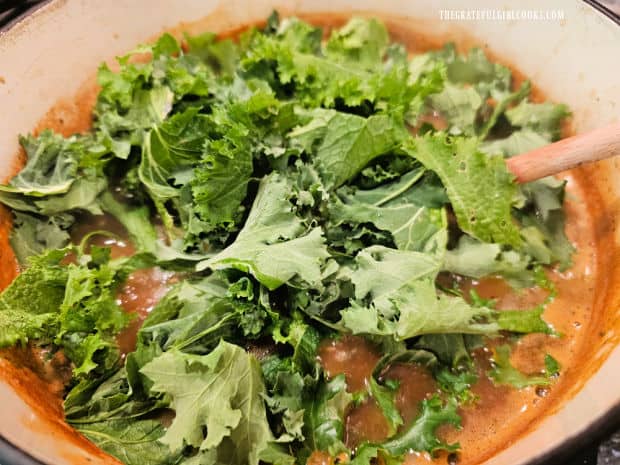
Add the juice of one lemon and a bunch of kale (de-stemmed and torn into smaller pieces) to the soup. Cook the soup for 3-4 more minutes.

Small pieces of kale and lemon juice are added to the bean and kale soup.

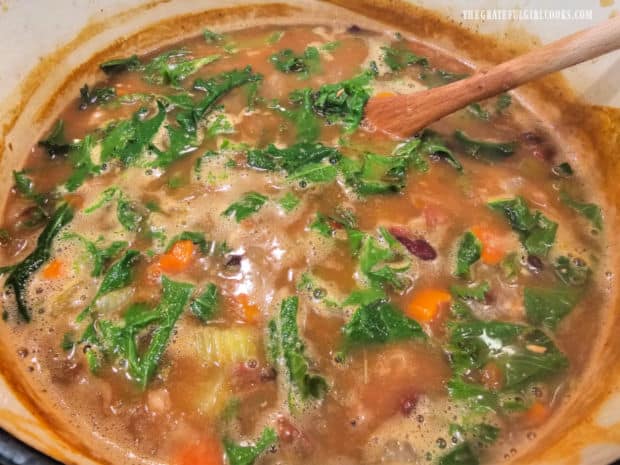
As it cooks, the kale will wilt from the heat and reduce greatly in volume. Once the kale has wilted and the soup is fully heated through, it is ready to be served.

The kale wilts as it is heated, reducing it in volume in the soup.

Serve The Bean And Kale Soup

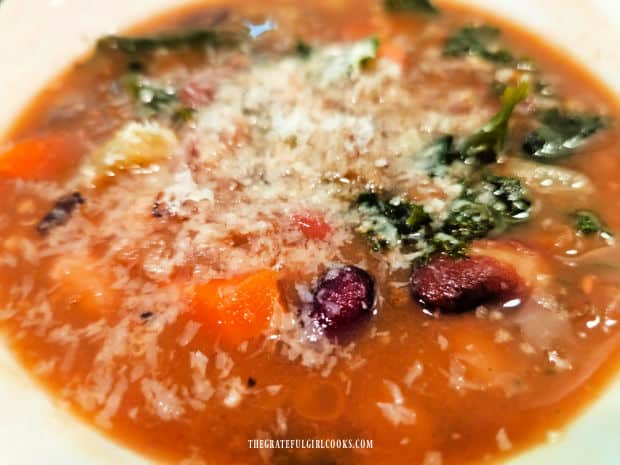
To serve, ladle the bean and kale soup into individual bowls while hot. Garnish each serving with finely grated Parmesan cheese (optional, but good) and serve immediately.

The grated Parmesan cheese will melt slightly from the heat of the soup and will add a great pop of additional flavor to the soup, so don’t skip the cheese, if possible!

Bean and Kale Soup is served hot, garnished with finely grated Parmesan cheese.

I hope you and those you love will really enjoy this delicious bean and kale soup as much as we do. It’s a great recipe I am glad to have found and trust you will feel the same way.

Thanks for stopping by, and I invite you to come back again soon for more family friendly recipes. Take care, may God bless you, and have a great day.

Looking For More SOUP Recipes?

You can find ALL of my recipes in the Recipe Index, which is located at the top of the page. I have LOTS of fantastic soup recipes to choose from, including:

Want More Recipes? Get My FREE Newsletter!

I publish a newsletter 2 times per month (1st and 15th) with lots of recipes, tips, etc.
Would you like to join our growing list of subscribers?

There is a Newsletter subscription box on the top right (or bottom) of each blog post, depending on the device you use.
You can submit your e-mail address there, to be added to my mailing list.

Find Me On Social Media:

Facebook page: The Grateful Girl Cooks!
Pinterest:
The Grateful Girl Cooks!
Instagram:
jbatthegratefulgirlcooks

Author's signature

Recipe Adapted From: Lena Abraham, via delish.com on 12-21-2018

↓↓ PRINTABLE RECIPE BELOW ↓↓

0 from 0 votes
Bean and Kale Soup
Prep Time
15 mins
Cook Time
30 mins
Total Time
45 mins
 

Bean and Kale Soup with carrots, celery, onion, kale and beans cooked in an Italian seasoned broth is a delicious, filling "meatless" meal!

Category: Meatless Main Dish, Soup
Cuisine: Italian
Keyword: bean and kale soup
Servings: 6
Calories Per Serving: 220 kcal
Author: JB @ The Grateful Girl Cooks!
Ingredients
  • 1 Tablespoon extra virgin olive oil
  • ½ medium yellow onion peeled/ finely chopped
  • 2 stalks celery thinly sliced
  • 1 medium carrot peeled, chopped small
  • 3 cloves garlic peeled, minced
  • 2 teaspoons fresh thyme leaves chopped
  • ½ teaspoon red pepper flakes
  • 1 teaspoon Italian Seasoning
  • salt and black pepper, to taste
  • 4 cups vegetable broth
  • 2 cups water
  • 1 Tablespoon tomato paste
  • 31 ounces canned cannellini beans (two 15.5 oz. cans) rinsed/drained (SEE NOTE BELOW)
  • 1 medium lemon (juice of)
  • 1 bunch kale torn in small pieces (stems discarded)
  • Parmesan cheese (OPTIONAL) for garnish
Instructions
Prep For the Beans:
  1. INSTANT POT: Rinse a bag of "15 bean soup mix" dried beans. Add beans to the inner pot. Cover beans with 4 cups of water. Cook on HIGH pressure for 40 minutes, then let pressure naturally release for 15 minutes. Drain and set aside until needed in soup.

    CANNED BEANS: Drain and rinse canned beans; set aside until needed in soup.

Make The Soup:
  1. In a large soup pot, heat olive oil on medium heat until oil is hot, but not smoking. Add onion, celery and carrot. Cook, stirring often for 5-6 minutes, or until they have softened slightly. Add minced garlic, thyme, Italian seasoning and red pepper flakes. Continue cooking for 1 minute, stirring often so garlic doesn't burn. Season to taste with salt and black pepper.

  2. Add vegetable broth, tomato paste, water and drained beans (whatever type you use) to the pot. Stir well to combine. Bring soup to a gentle simmer; cook 15 minutes, stirring occasionally. Smash some of the beans with the back of a spoon (this helps thicken the soup).

  3. Add lemon juice and kale to the soup. Cook 3-4 more minutes. As it cooks, kale will wilt and reduce in volume. Once soup is heated through, it's ready to serve.

  4. Ladle soup into bowls. Garnish each serving with finely grated fresh Parmesan cheese (optional, but good) and serve immediately. Enjoy!

Recipe Notes

NOTE: Prep time does not include the time necessary for pre-cooking dried beans in an Instant Pot (as that is optional). If you want to use the "15 bean soup mix", you will only need one, 10-ounce bag.

Caloric calculation was made using two cans of cannellini beans.

Nutrition Facts
Bean and Kale Soup
Amount Per Serving (1 g)
Calories 220 Calories from Fat 27
% Daily Value*
Fat 3g5%
Saturated Fat 1g6%
Polyunsaturated Fat 1g
Monounsaturated Fat 2g
Sodium 692mg30%
Potassium 871mg25%
Carbohydrates 38g13%
Fiber 9g38%
Sugar 3g3%
Protein 12g24%
Vitamin A 4385IU88%
Vitamin C 26mg32%
Calcium 188mg19%
Iron 5mg28%
* Percent Daily Values are based on a 2000 calorie diet.

Here’s one more to pin on your Pinterest boards!Bean and Kale Soup with carrots, celery, onion, kale and beans cooked in an Italian seasoned broth is a delicious, filling "meatless" meal!


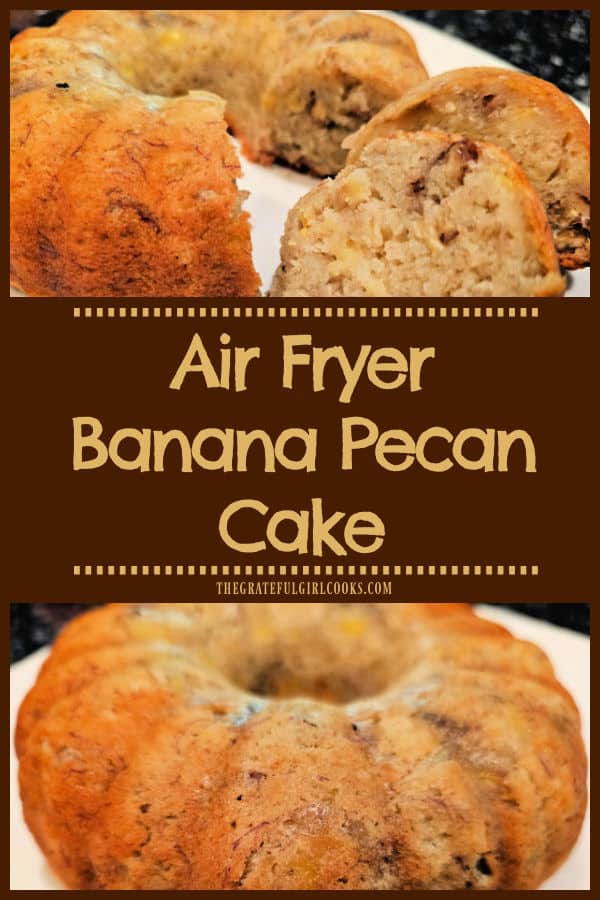
Air Fryer Banana Pecan Cake

Make a delicious Air Fryer Banana Pecan Cake to serve as a dessert, coffeecake or an afternoon snack! Serve a slice with hot tea or coffee!

Today I want to share a delicious recipe that can serve a dual purpose! This yummy air fryer banana pecan cake can be enjoyed as a coffeecake OR as a dessert cake!

It is simple to make and tastes wonderful, with crunchy pecans and small pieces of banana distributed throughout each slice.

I really think you will enjoy this recipe, because it is perfect for hot summer days when you don’t want to heat up the kitchen by baking a cake for a long amount of time.

Here’s how to make this absolutely delicious air fryer banana pecan cake.

Scroll Down For A Printable Recipe Card At The Bottom Of The Page

Prepare The Bundt Pan

For this recipe you will need a 7″ bundt cake pan. This is a slightly smaller pan than a regular-sized bundt pan (I got it on Amazon), but it’s small enough to fit in my air fryer basket AND in my Instant Pot.

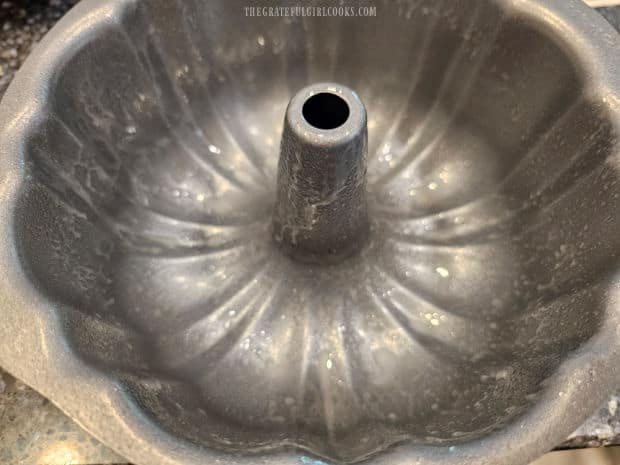
Spray the bottom, sides and center cylinder with non-stick baking spray. It’s important to spray the pan so the bundt cake won’t stick to the pan once done!

This will also make it easier for the bundt cake to separate from the pan when it’s turned upside down to remove the cake after it is finished cooking.

A small bundt pan is greased well before filling with batter.

Prepare The Batter

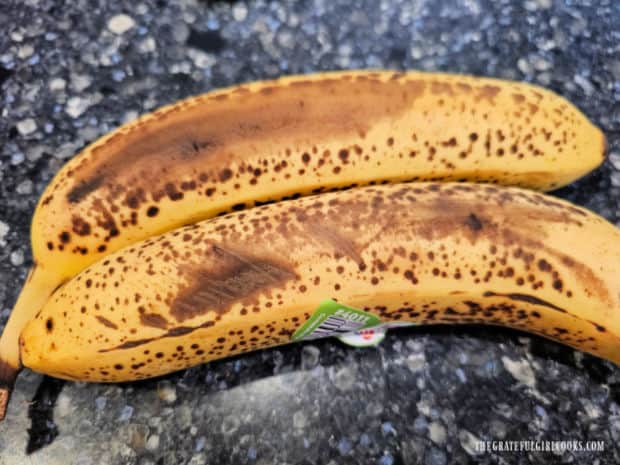
Peel two very ripe bananas and place them in a medium bowl. It’s important to use ripe bananas with brown spots on them, because this means they will be sweeter!

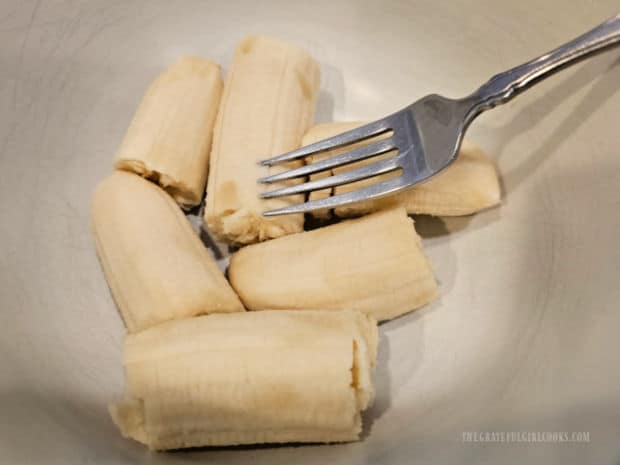
Use a fork and mash the bananas up in the bowl. The mashed bananas do not have to be fully smooth! It’s perfectly okay to leave small little pieces of banana in there, but you really don’t want “big chunks” of bananas in the batter.

Two very ripe bananas are used for the Air Fryer Banana Pecan Cake.The two ripe bananas are mashed in a bowl, using a fork.

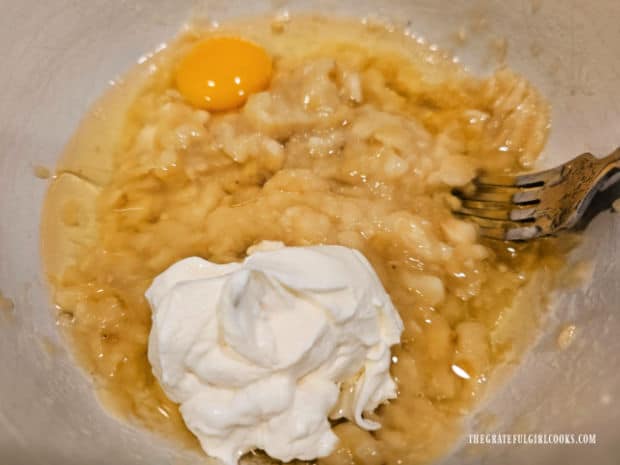
Add sour cream, vegetable oil and a large egg to the mashed banana mixture. Use a spoon or fork and stir to combine these ingredients.

NOTE: Use a spoon or fork- don’t use an electric mixer to combine the ingredients because you want small bits of banana to remain intact in the batter.

Sour cream, vegetable oil and an egg are mixed into the mashed bananas.

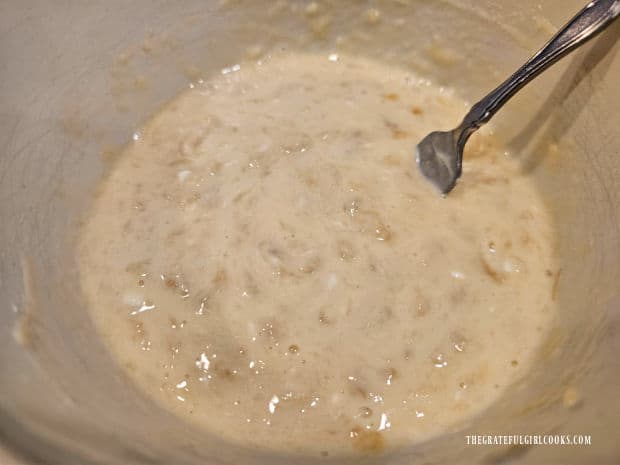
You can see in the photo below the small pieces of the banana in the batter. That is what you want! Set this mixture aside while you mix the dry ingredients in a separate bowl.

A bowl of mixed bananas, sour cream, egg and oil is ready for remaining ingredients.

Add Banana Mixture To The Dry Ingredients

In a separate bowl, stir all-purpose flour, granulated sugar, baking soda and salt together until they’ve been combined.

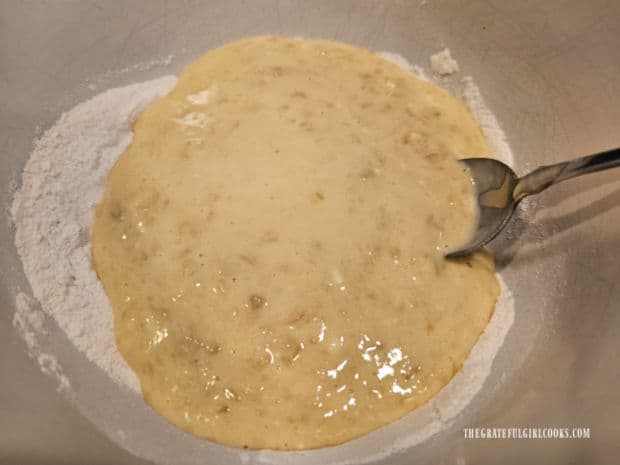
Pour the banana mixture into these dry ingredients and stir only until they have been combined (don’t over-mix).

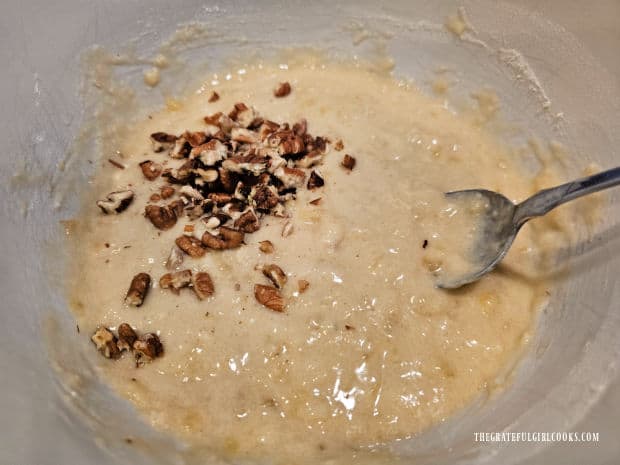
Add the chopped pecans and stir gently until they are dispersed and incorporated into the batter. You can easily substitute walnuts for the pecans, if desired.

If you do not want any nuts in the cake, simply leave them out! No problem!

Banana mixture is added to a bowl of flour, sugar, baking soda and salt and combined.Chopped pecans are added to the batter for the banana pecan cake.

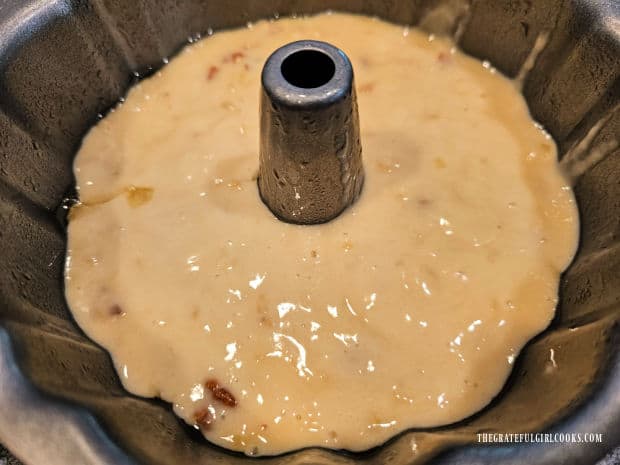
Pour the batter into the greased bundt cake pan, making sure it is evenly dispersed in the pan. Preheat your air fryer to 310° F.

the batter is poured evenly into the prepared bundt pan.

Cook The Cake In the Air Fryer

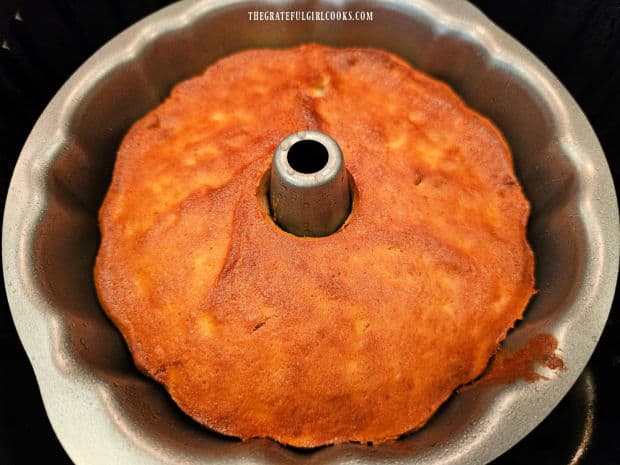
Cook the air fryer banana pecan cake in the preheated air fryer at 310°F. for 25-28 minutes OR until a skewer inserted deep into the middle of the cake comes out free of batter. Oven temps can vary widely, so please keep an eye on the cake.

The cake should look fairly brown in color when it’s done, but the most important thing is to make sure it is fully cooked through. Be sure and read my true story below!

True Story

The first time I made this I cooked the cake according to the directions. When I thought it was done, I inserted a toothpick into the middle, and it came out clean.

I went to flip the cake out of the pan, and it still had some wet batter deep down inside (my little 2″ long toothpick didn’t reach far enough down into the cake to detect not-fully cooked batter!).

Now I highly recommend using a long skewer (if you have one) so you can avoid this. By the way, I flipped that cake right back over (batter still oozing slightly out the bottom, threw it back in my air fryer and cooked it a few more minutes and it survived (thank goodness).

All that said, don’t make the same mistake I did because it was NOT fun!

The air fryer banana pecan cake rests after it is fully cooked.

Let the cake cool for about 5-10 minutes (still in the pan), after removing it from the air fryer. It should pull away slightly from the inside edges of the pan. The next step is to remove it from the pan by “inverting” the cake.

To do this, place a large plate (top side down) on top of the bundt pan. Holding both the plate and the bundt cake securely, flip the pan over.

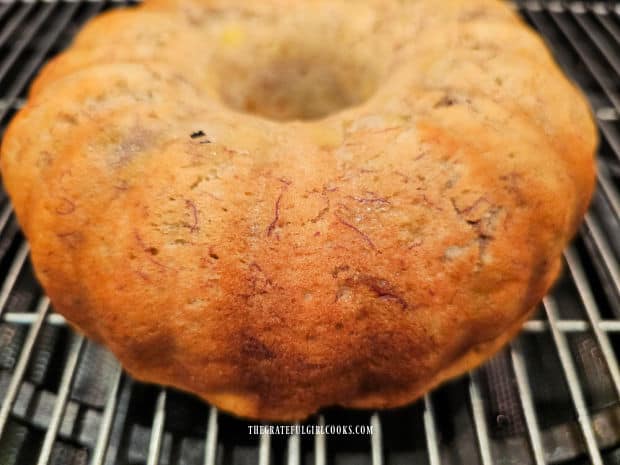
The cake should easily release from the pan onto the plate. Move the air fryer banana pecan cake to a wire rack and let it cool completely. 

TIP: The top of the cake may be very light in color compared to the other parts of the cake (it was upside down, remember?). If desired, you can put the cake on a rack about 4″-5″ away from your oven’s broiler and let it “brown” more for 1-2 minutes (keep a close eye on it). That’s not really necessary, but if you want it to be more browned on top for presentation, it is an option

The cooled cake is inverted onto a wire rack to finish cooling.

Serve And Enjoy The Air Fryer Banana Pecan Cake

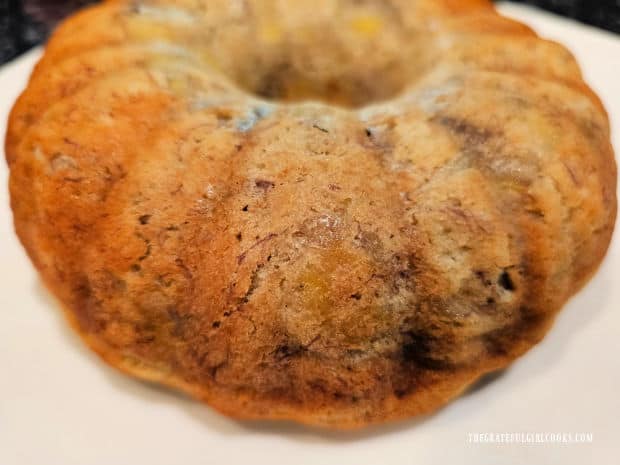
This banana pecan cake tastes best when served at room temperature! It is moist, delicious and filled with absolutely wonderful banana flavor!

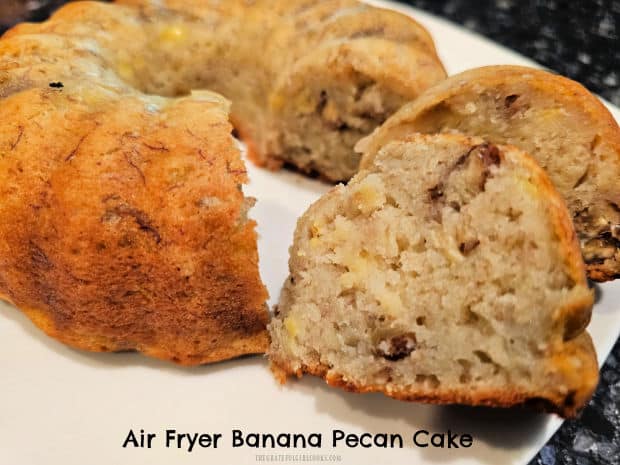
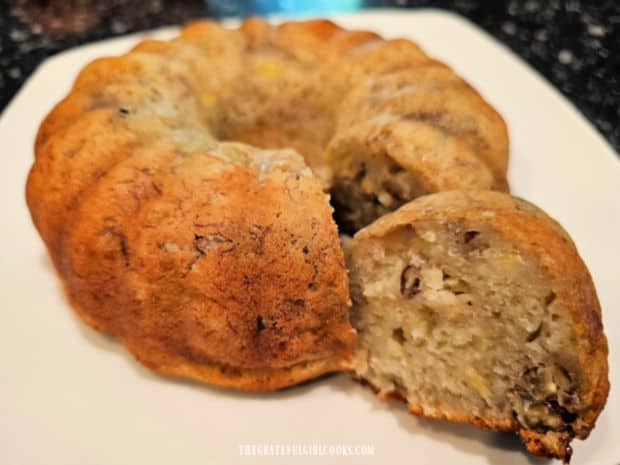
Air Fryer Banana Pecan Cake is served on a white plate after it has cooled a bit.

Cut a slice and serve this delicious air fryer banana pecan cake with a cold glass of milk or a steaming hot cup of coffee or tea.

I’m confident you’ll love this yummy treat, whether you enjoy it for breakfast, a little snack or served as dessert!

A slice of the air fryer banana pecan cake is removed from the cake and is ready to eat!

I hope you have the opportunity to make this delicious Air Fryer Banana pecan Cake for yourself and those you love. I’m positive you’ll enjoy this delicious cake (or coffeecake)!

Thank you for stopping by, and I invite you to come back again soon for more family-friendly recipes. take care, may God bless you, and have a wonderful day!

Looking For More Fun Air Fryer Recipes?

You can find ALL of my recipes in the Recipe Index, which is located at the top of the page. I have LOTS of air fryer recipes to choose from (sweet AND savory), including:

Want More Recipes? Get My FREE Newsletter!

I publish a newsletter 2 times per month (1st and 15th) with lots of recipes, tips, etc.
Would you like to join our growing list of subscribers?

There is a Newsletter subscription box on the top right (or bottom) of each blog post, depending on the device you use.
You can submit your e-mail address there, to be added to my mailing list.

Find Me On Social Media:

Facebook page: The Grateful Girl Cooks!
Pinterest:
The Grateful Girl Cooks!
Instagram:
jbatthegratefulgirlcooks

Recipe source and with thanks to Justine, at: Easy Ninja Foodi Air Fryer Banana Bread Bundt Cake Recipe

↓↓ PRINTABLE RECIPE BELOW ↓↓

0 from 0 votes
Air Fryer Banana Pecan Cake
Prep Time
15 mins
Cook Time
28 mins
Total Time
43 mins
 

Make a delicious Air Fryer Banana Pecan Cake to serve as a dessert, coffeecake or an afternoon snack! Serve a slice with hot tea or coffee!

Category: Breakfast, Dessert, Snack
Cuisine: All Cuisines
Keyword: air fryer banana pecan cake
Servings: 8
Calories Per Serving: 226 kcal
Author: JB @ The Grateful Girl Cooks!
Ingredients
  • non-stick baking spray to grease bundt pan
  • 2 large VERY RIPE bananas with brown spots on peel if possible
  • ¼ cup light sour cream
  • ¼ cup vegetable oil
  • 1 large egg
  • ¾ cup all-purpose flour
  • ½ cup granulated sugar
  • ¼ teaspoon baking soda
  • ¼ teaspoon salt
  • 3 Tablespoons chopped pecans
Instructions
  1. Spray the bottom, sides and center cylinder of a 7" mini bundt pan with non-stick baking spray. It's important so the cake won't stick to the pan once done!

  2. Peel bananas; put them in a medium bowl. TIP: use very ripe bananas with brown spots, because they're sweeter! Use a fork to mash bananas. NOTE: don't use an electric mixer; you want small bits of banana to remain intact in the batter. Add sour cream, vegetable oil and egg to banana mixture. Stir well, to combine.

  3. In a separate bowl, stir flour, sugar, baking soda and salt together until combined. Pour banana mixture into these dry ingredients; stir only until they have been combined (don't over-mix). Add chopped pecans; stir gently until incorporated. Pour batter into greased bundt cake pan; evenly spread batter.

  4. Preheat air fryer to 310° F.

  5. Cook cake at 310°F. for 25-28 minutes OR until a skewer inserted deep into the middle of the cake comes out free of batter. Oven temps can vary widely, so keep an eye on the cake. The cake should look fairly brown in color when it's done, but the most important thing is to make sure it is fully cooked through.

  6. Let cake cool for about 5 minutes (still in the pan), after removing it from the air fryer. It should pull away slightly from the edges of the pan. The next step is to remove it from the pan by "inverting" the cake. To do this, place a large plate (top side down) on top of the bundt pan. Holding both the plate and the bundt cake securely, flip the pan over. The cake should easily release from the pan onto the plate. Move the air fryer banana pecan cake to a wire rack and let it cool completely. *SEE NOTE BELOW*

  7. Once cooled to room temperature, slice and serve this delicious cake! Enjoy!

Recipe Notes

NOTE: *The top of the cake may be very light in color compared to the other parts of the cake (it was upside down, remember?). If desired, put the cake on a rack about 4"-5" away from your oven's broiler and let it "brown" more for 1-2 minutes (keep a close eye on it). That's not really necessary, but if you want it to be more browned on top for presentation, it is an option!*

Nutrition Facts
Air Fryer Banana Pecan Cake
Amount Per Serving (1 slice (1/8 of total))
Calories 226 Calories from Fat 99
% Daily Value*
Fat 11g17%
Saturated Fat 2g13%
Trans Fat 0.05g
Polyunsaturated Fat 5g
Monounsaturated Fat 4g
Cholesterol 26mg9%
Sodium 122mg5%
Potassium 174mg5%
Carbohydrates 30g10%
Fiber 2g8%
Sugar 17g19%
Protein 3g6%
Vitamin A 81IU2%
Vitamin C 3mg4%
Calcium 20mg2%
Iron 1mg6%
* Percent Daily Values are based on a 2000 calorie diet.

Here’s one more to pin on your Pinterest boards!Make a delicious Air Fryer Banana Pecan Cake to serve as a dessert, coffeecake or an afternoon snack! Serve a slice with hot tea or coffee!