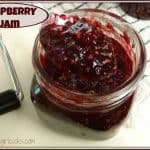
Making homemade raspberry jam and canning jars of it for long term storage is a great way to enjoy the taste of summer raspberries all year round!
It’s THAT time of year once again… I go and pick fresh berries at a local U-Pick Farm, then come home and “morph” the berries into several different recipes. This Raspberry Jam is the result of my latest berry picking adventure!
Scroll Down For A Printable Recipe Card At The Bottom Of The Page
I Love To Pick Raspberries At A Local Farm
There’s something to be said for picking your own raspberries in the cool of the morning on a gorgeous day. It’s also fun to use those fresh-picked berries to make raspberry jam!
That’s my feeling every single time I pick berries at a local U-Pick place, called Rowell Brothers Berry Farm, which has been in existence since 1853.

This time at the U-Pick farm I picked about 14 pounds of delicious Willamette Red Raspberries. Here’s a few of them shown in the photo below.

I use a lot of berries picked to make homemade raspberry jam. Jam making, once you get the “basics” down, is fairly easy and results in lots of jars of jam to store in our pantry.
Prepare Equipment and Jars For Canning
To make this recipe for raspberry jam, first wash and pre-heat the jars and lids (lids are in separate bowl). Follow all manufacturer guidelines for canning equipment.
 Prepare The Raspberry Jam
Crush the raspberries (I used my trusty potato masher), measure the exact amount of raspberries into a large cooking pot, then add one box (2 ounces) of powdered fruit pectin, and stir it in.

Bring the raspberry/pectin mixture to a full rolling boil (a “rolling boil” means it won’t stop boiling even while stirring), then add the sugar quickly, and stir it all to combine.

Bring the raspberry, pectin and sugar mixture to a full rolling boil, then continue boiling it for exactly 4 minutes, stirring constantly.

After it has boiled for 4 minutes, remove the pan from the heat and skim off any foam that has accumulated on the top of the jam mixture.
 Fill the Jars With Jam
Ladle the HOT raspberry jam into the prepared canning jars using a wide mouth canning funnel to do this, for less mess.

Add jam up to 1/8-inch headspace from the top of the jar, then follow standard canning instructions for removing the air bubbles from the jars of jam.

Adjust the headspace (if necessary), then wipe rim of the jar with a wet paper towel to remove any jam debris (so the jar can seal properly).
 Top Each Filled Jar With A Lid
Use a magnetic canning wand (if you have one) to pick up the hot lids out of the water, and place one on the top of each jar.

Screw the jar rings (screw bands) on fingertip tight, then carefully lower all the jars into the prepared water bath canner.
IMPORTANT: Make sure that the jars are completely covered by at least one inch of water above the tops of the jars. Add more hot water if necessary to ensure they are covered.
 Process The Jars Of Raspberry Jam
Cover the canner and bring the water to a gentle boil. Process the raspberry jam for 10 minutes (after the water has come to a boil).

When the processing time is done, turn off heat, wait for a couple minutes, and then remove the canner lid. Remove the jars of raspberry jam (using canning tongs) and place them on a dish towel to cool.
IMPORTANT: Do not set the boiling hot jars directly on your counter because temperature variances can cause the jars to crack. Set them on a dish towel!
 After The Jars Are Finished Canning
Let the jars sit, undisturbed on the dish towel for 24 hours, listening for the tell-tale “PING” sounds, which means the jars have sealed. Check the seal by lightly pressing on the middle of the lid with a finger.
If the jar did not seal, the lid will spring back. If that happens, you will need to refrigerate that jar of jam because that jar is not shelf stable for long term storage.
After 24 hours, label and store the jars of jam into your pantry to use throughout the year and give as gifts. This delicious raspberry jam is wonderful served on toast, biscuits (shown below), etc.

That’s it! A little bit of your time to make the jam means you will have absolutely delicious, fresh raspberry jam all year long! YAY! I sure hope you’ll give this recipe a try!
Thanks for stopping by, and I invite you to come back again soon for more family friendly recipes. Take care, may God bless you, and have a wonderful day.
Looking For More JAM Recipes?
You can find ALL of my recipes in the Recipe Index, which is located at the top of the page. I have a nice variety of jam recipes to choose from, including:
Want More Recipes? Get My FREE Newsletter!
I publish a newsletter 2 times per month (1st and 15th) with lots of recipes, tips, etc.
Would you like to join our growing list of subscribers?
There is a Newsletter subscription box on the top right (or bottom) of each blog post, depending on the device you use.
You can submit your e-mail address there, to be added to my mailing list.
Find Me On Social Media:
Facebook page: The Grateful Girl Cooks!
Pinterest: The Grateful Girl Cooks!
Instagram: jbatthegratefulgirlcooks
 Recipe Source: Instruction page for jam found in box of MCP Premium Fruit Pectin.
↓↓ PRINTABLE RECIPE BELOW ↓↓
- 6 cups of crushed raspberries (measure AFTER crushing them)
- 8 1/2 cups granulated sugar
- 2 ounces Classic powdered fruit pectin (1 box)
Fill a boiling water canner half full of water. Bring this to a simmer. (At the same time, I start a teapot with water going, so I will have boiling water for the jar lids later on). Wash jars and lids in soapy hot water. Put lids in small bowl. Fill jars with water and put in canner on a rack, while it is simmering, to keep jars warm. (Or you can set jars on dish towel on a cookie sheet and keep in oven at 250 degrees for 20 minutes for same effect).
- In a large bowl, measure out the exact amount of sugar. Set aside.
Crush the raspberries, one cup at a time, until you have 6 cups of mashed berries. Put the berries into a large stock pot. Stir the box of Pectin into the berries. Bring the raspberry mixture to a full rolling boil on high heat, stirring constantly (a rolling boil is when it is boiling hard, so that it won't stop bubbling even when stirred). Stir in all of the sugar quickly (all at once). Stir well to combine.
- At this point, I pour boiling water over the jar lids that are in the little bowl. Let them just sit in the hot water for 5 minutes while you finish the jam.
Bring the jam/pectin/sugar mixture back to a full, rolling boil. Once it is a full rolling boil, boil it for exactly 4 minutes, stirring constantly. When time is up, remove pan from heat, then skim off any accumulated foam (and discard foam). Ladle the hot jam mixture into hot, prepared jars. Fill the jars, but leave 1/8 inch headspace at the top of each jar. Insert a plastic knife into each jar a couple times to help remove air bubbles. Adjust the headspace if necessary. Use a damp cloth or paper towel to wipe down the rim and edges of the jar. You need it free of debris in order to get a good seal on the jar. Cover the jars with the hot, flat jar lid. Screw on the jar rings tightly.
- Lower each of the jars onto an elevated rack in the canner. The jars must be completely covered with water, and must have at least an inch of water over the top of the jar. Add more boiling water to canner, if necessary, to make sure.
Cover the canner; bring to a gentle boil. Once the water is boiling, process the jars for 10 minutes. When done, wait for a minute, carefully remove canner lid (lift lid away from you because of steam); carefully lift each jar out of water (with canning tongs), and place on dish towel on the counter to cool (do not put jars directly on counter cause you don't want temperature differences to possibly crack jars). You should hear "ping" sound as the jars seal properly.
After the jars cool for 24 hours, you can check to see they sealed properly by pressing the middle of the lid. The jar should NOT spring back when touched. If it does spring back, then you will need to refrigerate that particular jar. Let the sealed jars stand at room temp for 24 hours, then store unopened in a cool, dark place for up to 1 year.
FYI-The ten cups of jam this recipe produced filled the equivalent of 10 half-pint jars.
Here’s one more to pin on your Pinterest boards!
I’m wanting to print a few of reciepes so I don’t have to keep searching for them…yet I can’t find a print button..Am I blind?
Good morning, Jane. At the bottom of each post on the printable recipe card, there is a PRINT button, located just under the photo of the recipe. Hope that helps.