Category: Canning And Preserving

Refrigerator Dill Pickle Slices

Make Refrigerator Dill Pickle Slices without canning! This EASY recipe yields 1 quart of yummy pickle slices for burgers and sandwiches.
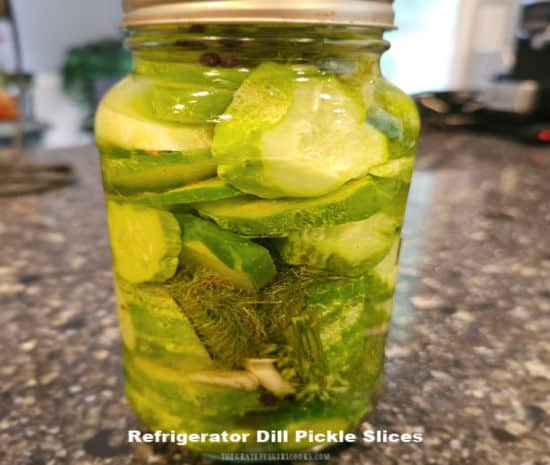
A quart sized jar full of refrigerator dill pickle slices.

Do you enjoy pickles? We sure do! Most of the time I can our homemade pickles, but sometimes I simply only need or want one jar of pickles that doesn’t require canning equipment. That’s where this recipe comes in handy!

Today I am sharing this recipe for making delicious dill pickle slices that all you do is layer pickling cucumber slices with a few other ingredients (brine, peppercorns, garlic and dill) in a jar and then refrigerate. That’s it!

After a week or two of refrigeration you will have a one-quart jar full of delicious dill pickle slices (sometimes a bit more) ready to enjoy and use for burgers, sandwiches or a quick snack!

Scroll Down For A Printable Recipe Card At The Bottom Of The Page

Pickling Cucumbers

For this recipe you will need to use “pickling cucumbers”. Unlike “regular” sized cucumbers you would buy in the store, a pickling cucumber is much shorter in size.

Pickling cucumbers also have a “drier” peel”, which allows them to absorb more of the brine when you pickle them!

I am fortunate to grow pickling cucumbers each year in our little raised bed garden, but when they are in season, they can be found at many grocery stores or farmer’s markets.

In the second photo below, you can see several pickling cucumbers (front left) I picked along with some other veggies and fruit from our backyard garden.
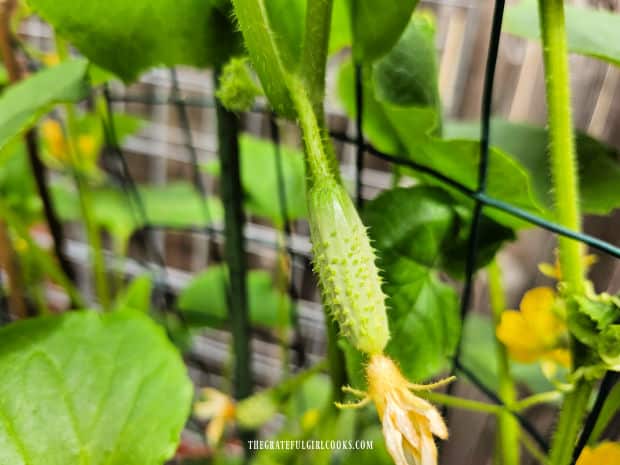
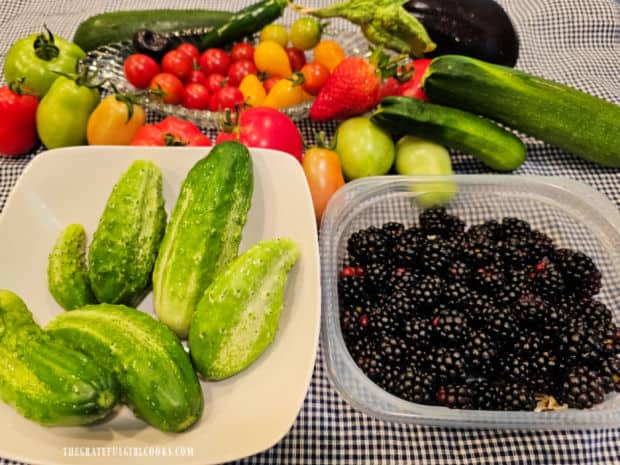
Growing pickling cucumbers in our small, raised bell garden.Fresh veggies and fruit from our garden, including some pickling cucumbers.

How Many Pickling Cucumbers Will I Need?

Today I will be sharing a recipe that will fill a one-quart jar with refrigerator dill pickle slices. To make a one quart jar of pickles you will need approximately 6 pickling cucumbers (about 5-6″ long).

NOTE: Depending on the size cucumbers you use, you might end up with enough slices to fill a small half-pint jar, as well. I always say the minimum yield will fill a one-quart jar but please know you may get more slices out of your pickling cucumbers and require a second small jar!

The number of cucumbers you use will ultimately depend on how many jars you want to make, so the recipe can easily be doubled or tripled for that purpose (as needed).

These pickle slices are refrigerated but are NOT canned, so they are very simple (and safe) to make. Since it is only my husband and I at home these days, we only need a one-quart jar of pickles every couple of months.
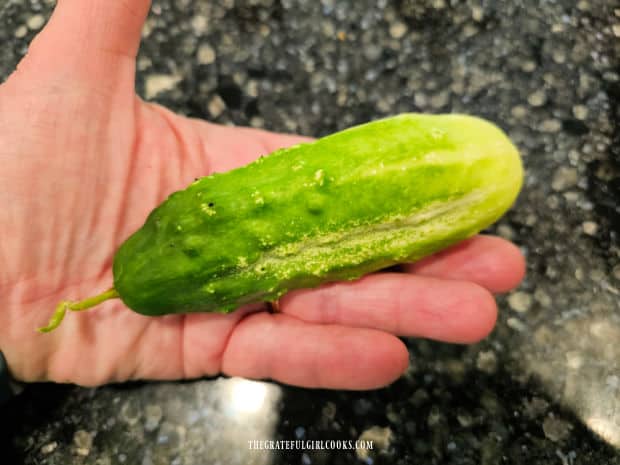
Holding one pickling cucumber to show the size they typically are at maturity.

A Little Prep First

Before you pack the jar full of cucumber slices, you will need to make the pickle brine and let it cool to room temperature before using it.

Fill a medium sized saucepan with 2 cups of water, 1 cup of white vinegar (5%), 1 Tablespoon of kosher salt and ½ teaspoon of granulated sugar.

Bring this liquid mixture quickly to a boil, stirring occasionally to make sure the salt and sugar fully dissolve. Once they are dissolved, take the pan off of the heat source and let the brine cool down until it reaches room temperature.

While the brine is cooling down, prepare the jar and the cucumber slices so they are ready to go once the brine reaches room temperature.

How To Make Refrigerator Dill Pickle Slices

Prepare a quart sized jar by washing and drying it well. Wash all of the cucumbers you will be using. Cut off and discard both ends of each cucumber. Slice each cucumber into rounds, about ¼ inch thick or so.

Fill the jar by layering the cucumber slices with fresh dill, peeled and smashed garlic cloves, and peppercorns. You will put in a few slices, add dill, garlic cloves and peppercorns, then add more, etc. until the jar is full.

IMPORTANT:  Fill the jars full but make sure you don’t pack the ingredients in too tightly, because you need room for the pickling brine to get through, okay?
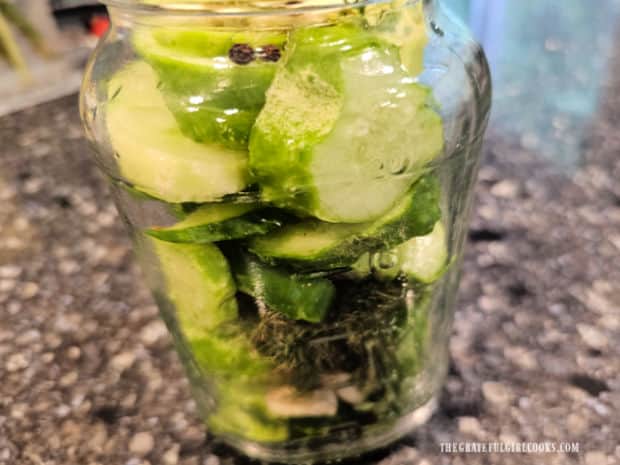
Jar is layered with cucumber slices, dill, garlic and peppercorns.

I typically top off the jar with a couple more cloves of garlic, a few peppercorns and more dill. You can see them in the photo below.

Add The Brine

Pour the room temperature brine into the jar (or jars) you are using. Cover the pickle slices and extra ingredients completely with the brine.

Gently push the pickles (and spices) down into the jar (if necessary) to ensure they are completely covered with the liquid.

IMPORTANT: Fully cover everything with brine! This is very important, so the pickles (below the surface of the brine) can soak up all the flavor they need.
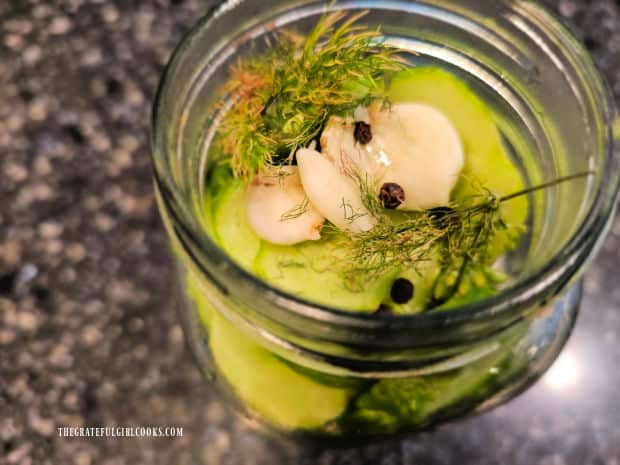
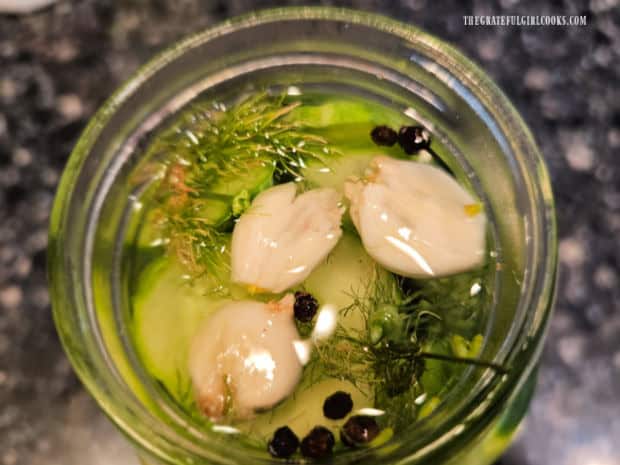
View of the garlic, dill and peppercorns on top of the pickle slices in jar.Smashed garlic cloves, dill and peppercorns add lots of flavor to the pickle brine.

Seal the jar of pickle slices with an airtight lid. Place the sealed jar in the refrigerator and let them “pickle” for AT LEAST 1-2 weeks before you ever open the jar and eat them (for best flavor).

NOTE: I usually let my refrigerator dill pickle slices sit in the fridge for about 2 weeks before we open the jar, because that’s when I personally think they’ve reached the peak of flavor!
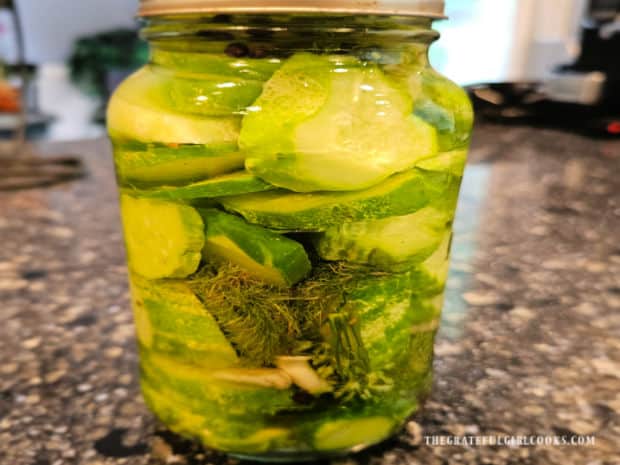
One jar of refrigerator dill pickle slices, ready to be stored in the fridge to develop flavor.

Storing The Pickles

Refrigerator dill pickle slices will typically last for several months if they remain fully covered by the brine in the jar and kept refrigerated. They are not shelf stable because they are not “canned”, so they must be refrigerated!

NOTE: I feel that these yummy pickles have their best flavor if they’re eaten within 3 months of making them! After that they’re still good (and safe) to eat but may have slightly diminished flavor.

The refrigerator dill pickle slices (shown below) are the last ones I removed from the jar (and refrigerator) about 3 months AFTER I made them. They were still absolutely delicious AND we loved using them on grilled hamburgers for dinner!

The key takeaway is to keep those pickle slices covered with brine the whole time they are refrigerated! Hope you like them!
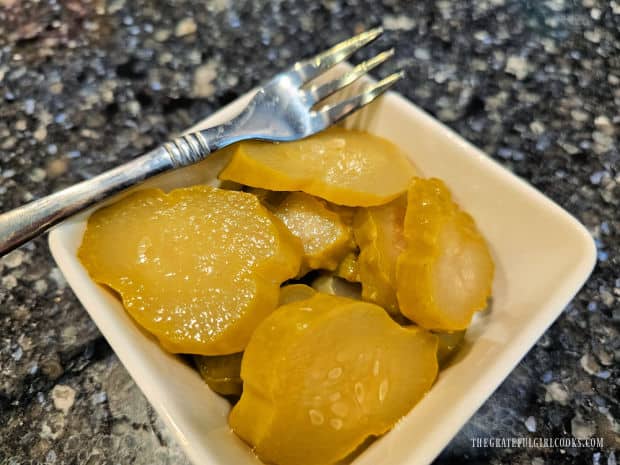
Three months after being made, refrigerator dill pickle slices still taste great!

I hope you have the opportunity to make a jar of these delicious refrigerator dill pickle slices for yourself and those you love. They really are quite GOOD!

Thanks for stopping by, and I invite you to come back again soon for more family friendly recipes. Take care, may God bless you, and have a great day.

Looking For More SIDE DISH Recipes?

You can find ALL of my recipes in the Recipe Index, which is located at the top of the page. I have LOTS of side dish recipes to choose from, including:

Want More Recipes? Get My FREE Newsletter!

I publish a newsletter 2 times per month (1st and 15th) with lots of recipes, tips, etc.
Would you like to join our growing list of subscribers?

There is a Newsletter subscription box on the top right (or bottom) of each blog post, depending on the device you use.
You can submit your e-mail address there, to be added to my mailing list.

Find Me On Social Media:

Facebook page: The Grateful Girl Cooks!
Pinterest:
The Grateful Girl Cooks!
Instagram:
jbatthegratefulgirlcooks

Author's signature

Recipe adapted from and with thanks to: Krissy, at Easy Refrigerator Dill Pickles – Self Proclaimed Foodie

↓↓ PRINTABLE RECIPE BELOW ↓↓
0 from 0 votes
Refrigerator Dill Pickle Slices
Prep Time
10 mins
Cook Time
5 mins
Total Time
15 mins
 

Make Refrigerator Dill Pickle Slices without canning! This EASY recipe yields 1 quart of yummy pickle slices for burgers and sandwiches.

Category: Condiment
Cuisine: All Cuisines
Keyword: refrigerator dill pickle slices
Servings: 1 quart jar + a ½ Pint jar
Author: JB @ The Grateful Girl Cooks!
Ingredients
For the Brine:
  • 2 cups water
  • 1 cup white vinegar (5% acidity)
  • 1 Tablespoon kosher salt
  • ½ teaspoon granulated sugar
For The Pickles:
  • 6 pickling cucumbers each approx. 5" long
  • ½ bunch fresh dill torn into pieces (most of stem removed)
  • ½ Tablespoon whole peppercorns (in spice section at most stores)
  • ½ head garlic peeled/separated into cloves/smashed
Instructions
Make Brine:
  1. Fill medium saucepan with water, white vinegar (5%), kosher salt and granulated sugar. Bring this to a boil, stirring to make sure salt and sugar fully dissolve, then take the pan off the heat source. Let brine cool to room temperature.

To Make Pickles:
  1. Wash and dry a quart sized jar. Next, wash the cucumbers. Cut off (discard) both ends of each cucumber. Slice cucumbers into rounds, approximately ¼ inch thick.

  2. Fill the jar by layering cucumber slices with fresh dill, peeled and lightly smashed garlic cloves, and peppercorns. (Example: put in a few slices, add some dill, garlic cloves and peppercorns, then repeat this until the jar is full. IMPORTANT:  Fill the jars full but don't pack ingredients in too tightly, because you need room for the pickling brine and spice to permeate the cucumbers.

  3. Pour cooled brine into the jar (or jars). Cover ingredients with brine. Press slices (and spices) down into the jar to ensure they are fully covered. IMPORTANT: Fully cover everything with brine so the pickles (below the surface of the brine) can soak up all the flavor they need.

  4. Seal the jar with an airtight lid. Place jar in the refrigerator; let them "pickle" AT LEAST 1-2 weeks before you open the jar and eat them (for best flavor).

  5. NOTE: The pickles taste BEST if eaten within 3 months of making them! After that they're still good (and safe) to eat but may have slightly diminished flavor. Enjoy!

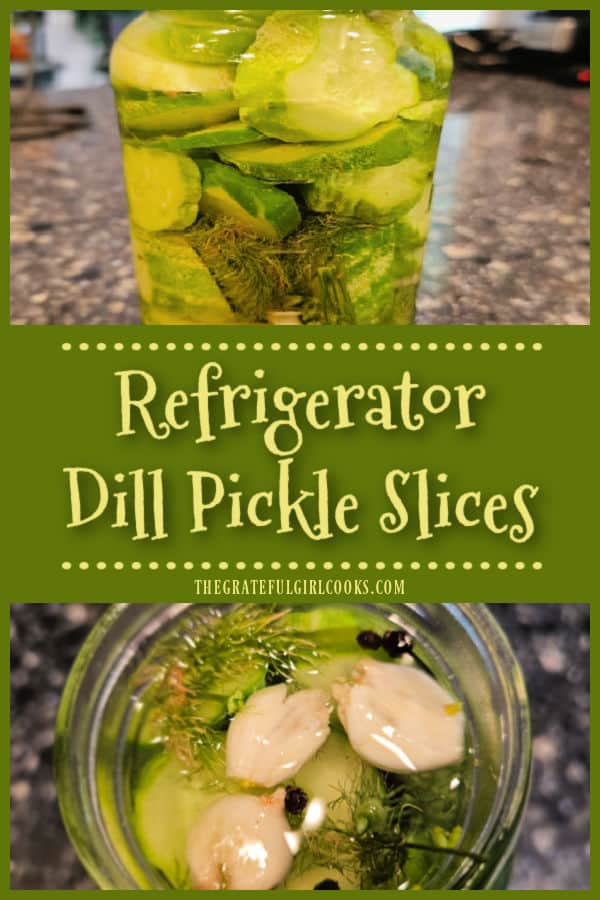
Here’s one more to pin on your Pinterest boards! Make Refrigerator Dill Pickle Slices without canning! This EASY recipe yields 1 quart of yummy pickle slices for burgers and sandwiches.
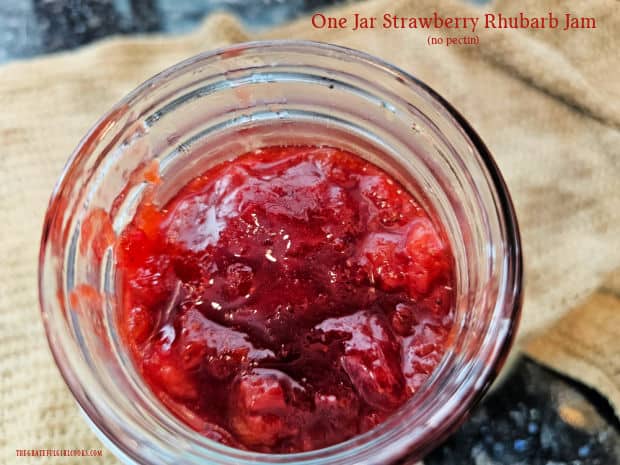
One Jar Strawberry Rhubarb Jam

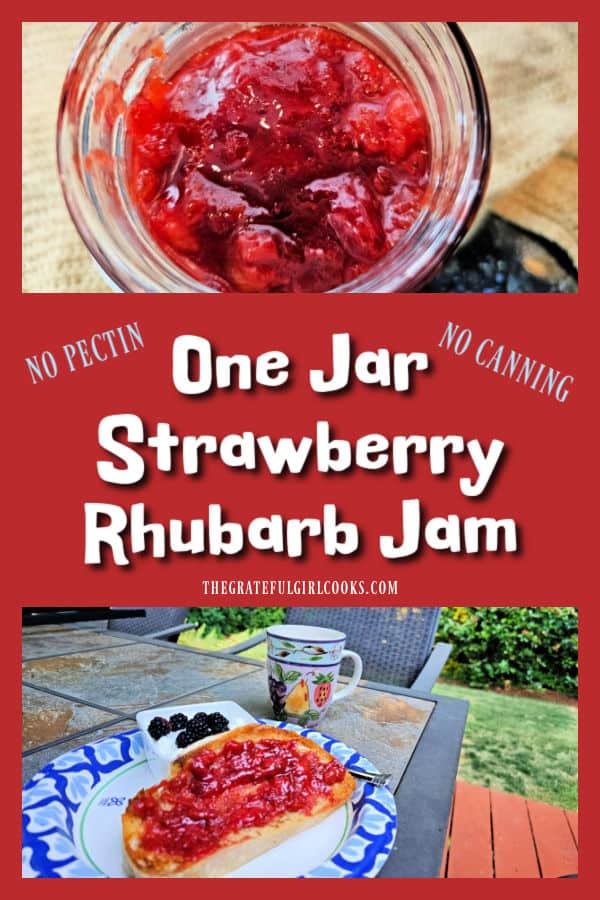
One Jar Strawberry Rhubarb Jam is a “small batch” recipe (no pectin/no canning). Make 1 pint or 2 half-pint jars of yummy jam in a saucepan!
One Jar Strawberry Rhubarb Jam is a "small batch" recipe (no pectin/no canning). Make 1 pint or 2 half-pint jars of yummy jam in a saucepan!

Today I want to share a recipe for a small batch of strawberry rhubarb jam that tastes fabulous. This jam requires no special canning experience or equipment, because it’s made in a large saucepan (instead of using a water bath canner).

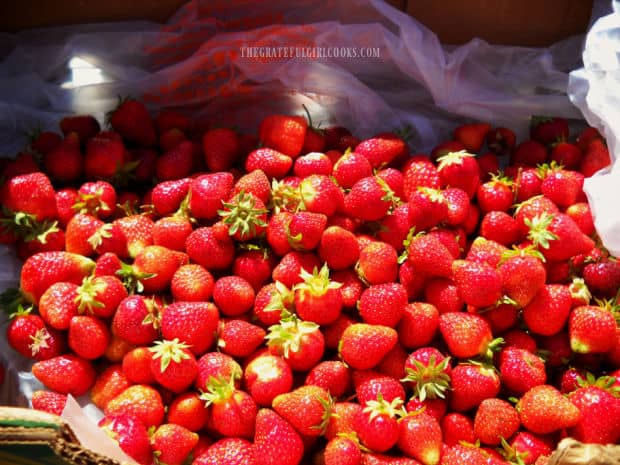
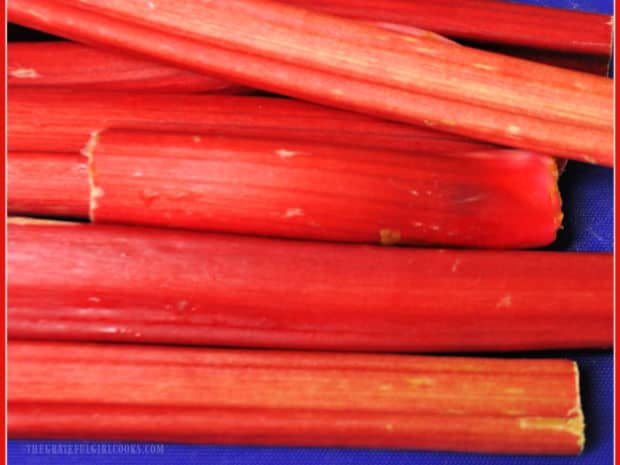
How’s that for a simple way to make only a jar or two of delicious homemade jam? I made this recipe because I’d picked a small amount of strawberries and rhubarb from our backyard garden and wanted to make a little bit of jam!

This jam does not need pectin to thicken it, because the cooking process used will achieve that on its own! That’s why I made this particular recipe, because I was out of pectin!

When done, the amount of jam produced is enough to fill a one-pint jar (2 cups) or you two smaller half-pint jars (1 cup each). Here’s how to make it.

Scroll Down For A Printable Recipe Card At The Bottom Of The Page

Cooking The Strawberry Rhubarb Jam

NOTE: Before you begin cooking, place two small plates in your freezer (they will be needed later to test the jam for readiness). Don’t skip this step!

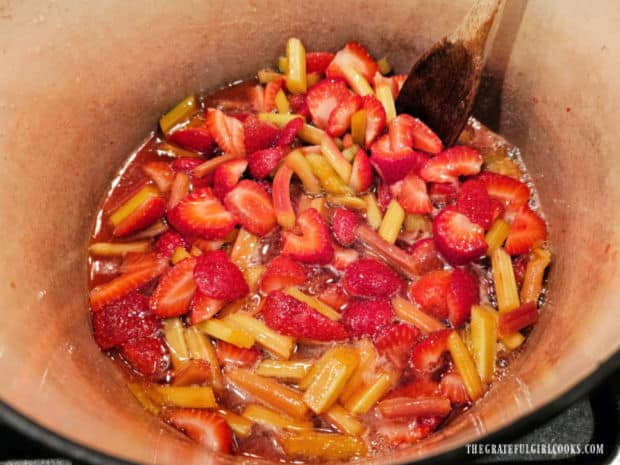
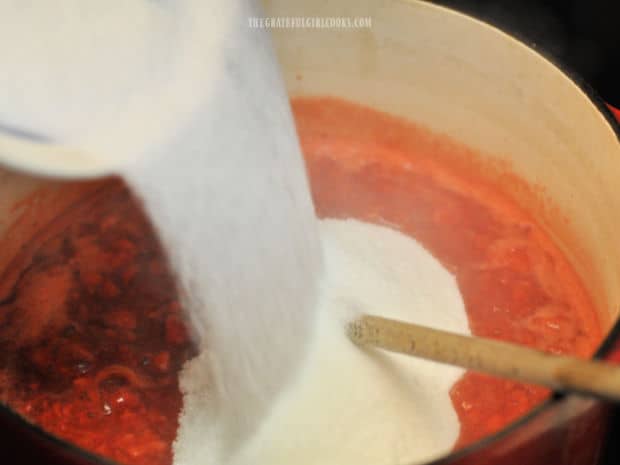
Measure sliced strawberries and rhubarb into a large saucepan (I use my Dutch Oven). Add granulated sugar, fresh lemon juice and a pinch of salt.

Stir these ingredients until they have been fully combined. Turn the heat on to Medium High heat and cook this for 3-5 minutes, stirring occasionally.

Strawberries, rhubarb, sugar, lemon juice and salt in a large pan.

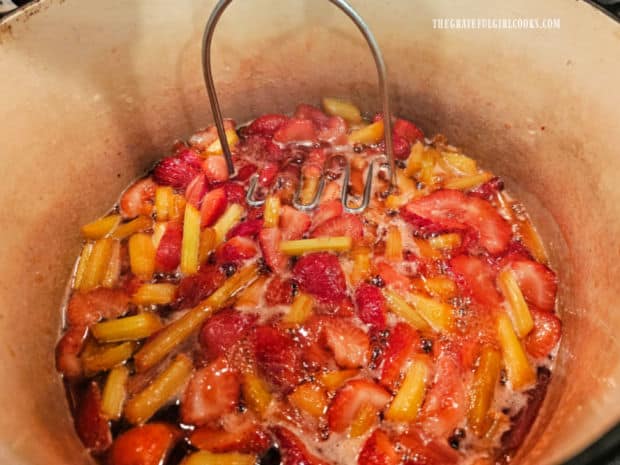
Now turn the heat down to Medium Low and simmer the jam, stirring it often until the strawberries and rhubarb begin to break down a bit.

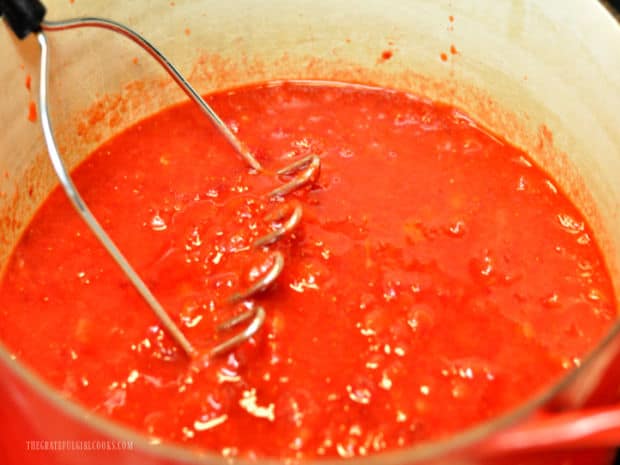
I use a potato masher to “help” break down the fruit slightly. You will want to have some nice chunks of fruit, so don’t go crazy with the masher… ha ha!

A potato masher is used to help break down the fruit as it cooks.

Continue Cooking The Jam

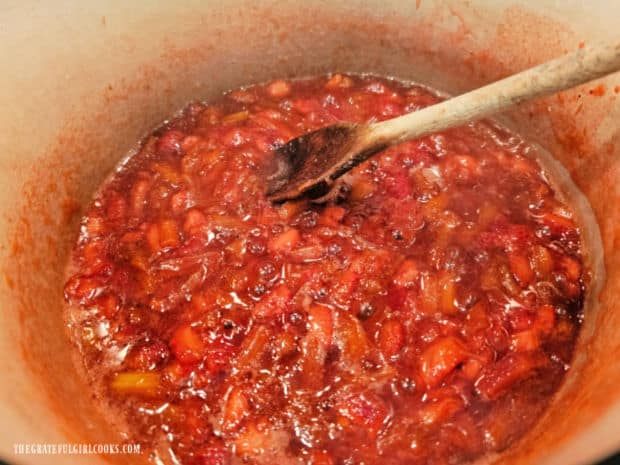
Simmer the jam for about 15 minutes, stirring it often. The fruit will continue to break down, and the jam will continue to thicken as it cooks. Just keep stirring!

One Jar Strawberry Rhubarb Jam continues to thicken and break down as it cooks.

After the jam has cooked for the 15 minutes, test the jam to see if it is ready by performing the PLATE TEST (see below). This simple test will show you if the jam is ready or if it needs to cook a bit more.

Since there is no pectin used in one jar strawberry rhubarb jam, this is the best way to know if the correct thickness for the jam has been achieved.

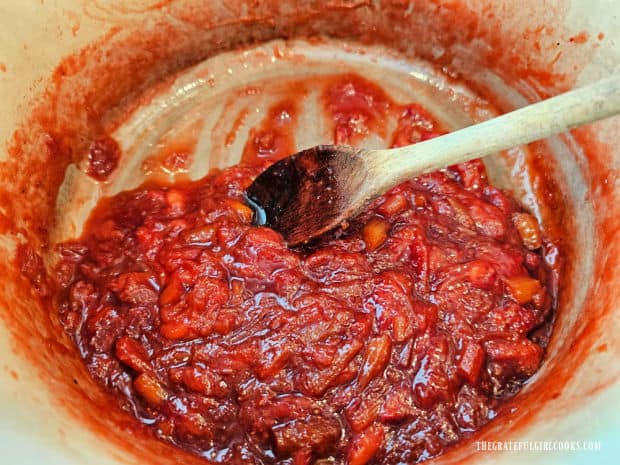
When done cooking the jam, move the pan off of the heat source. The mixture might look like it still has too much liquid, but as it cools the jam mixture will thicken even more.

The jam will thicken quite a bit as it continues to cook and then is cooled.

How To Know If The Jam Is Ready- The Plate Test!

Make sure you have removed the pan from the heat source. To test the jam to see if it is ready, remove one of the chilled plates from your freezer.

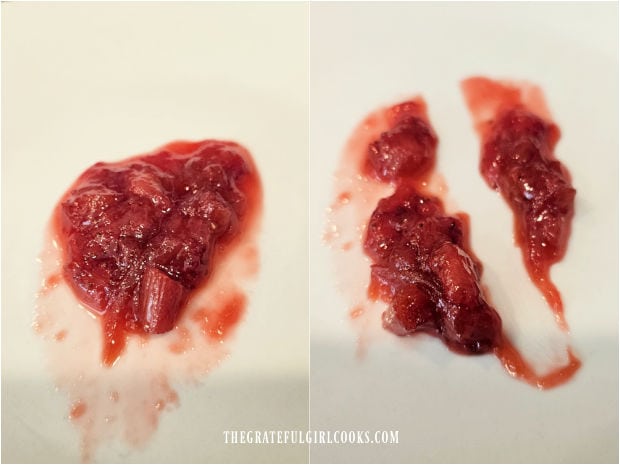
Place a small spoonful of the jam onto the COLD plate (photo on the left below). Run a finger down through the jam. If a clear trail is left and the jam holds its shape (photo on the right below), it is ready!

If it is NOT ready (“finger path” fills in with liquid or runs because of too much liquid), put the pan back on the Medium Low heat and simmer the jam a couple minutes more. Try plate test again using the second chilled plate from the freezer.

A plate test is done to determine if the jam is done cooking,

When The Jam Is Ready

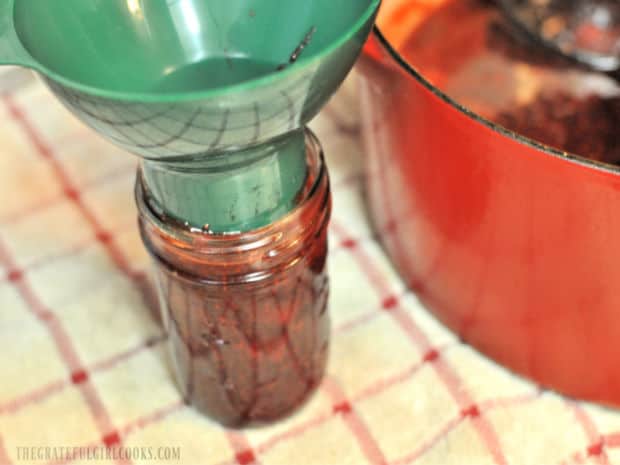
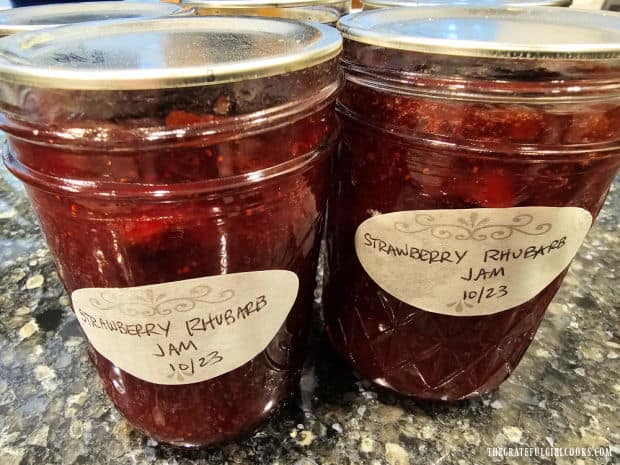
When done, let the jam sit (still in the pan) and off of the heat for about 5 minutes to cool slightly. Transfer the jam into 1 pint-sized jar (holds 2 cups) or into 2 half-pint jars (each holds 1 cup).

Let the jam cool completely before you put a lid on the jar(s). This typically takes between 35-45 minutes on average and is inactive prep time.

Attach a lid (or the flat lids and screw bands if using) and refrigerate the jam until it has fully chilled. As the jam is refrigerated it will thicken a bit more, resulting in a fabulous, dense jam ready to be enjoyed.

NOTE: If you decide to can this jam (for long time storage) rather than eating it right away, you can find my canning notes at the bottom of the printable recipe card below).

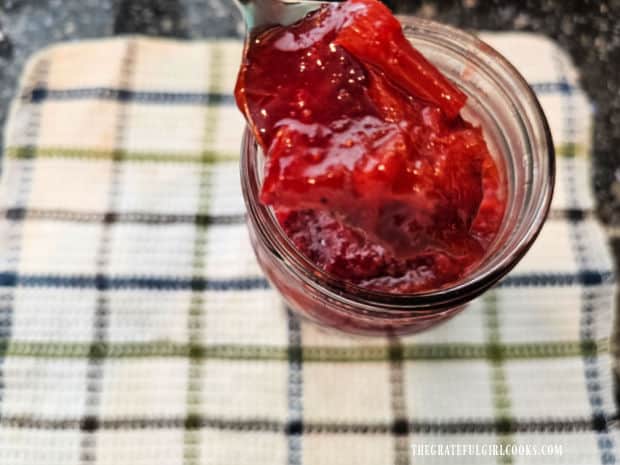
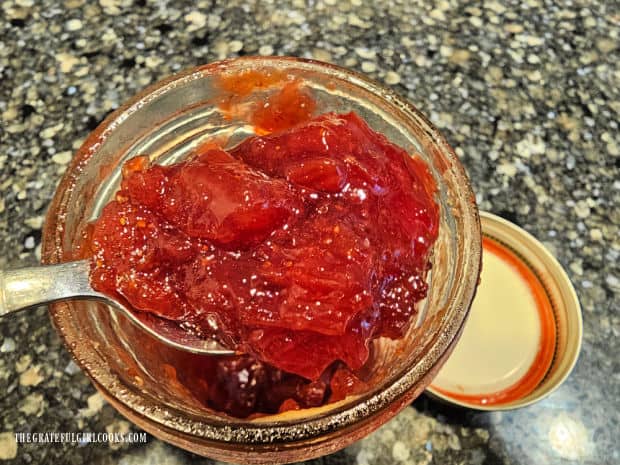
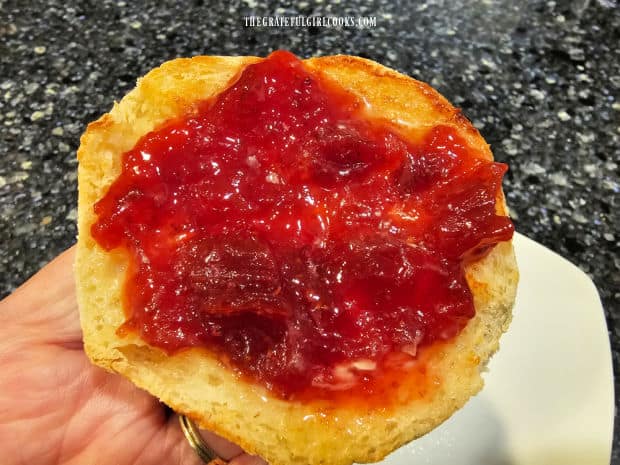
A close up of a spoonful of one jar strawberry rhubarb jam, ready to be eaten.

Serve The One Jar Strawberry Rhubarb Jam

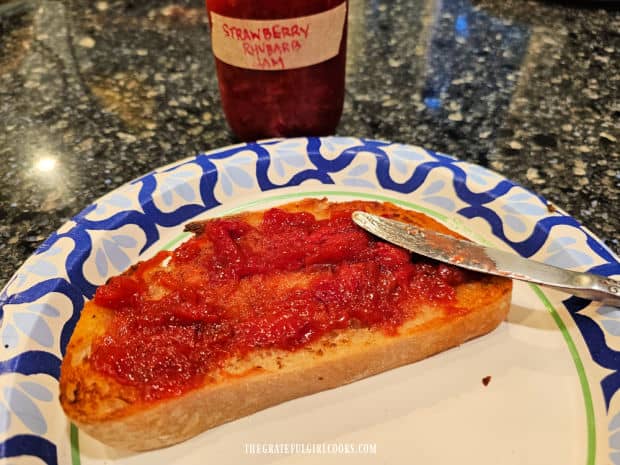
One Jar Strawberry Rhubarb Jam tastes amazing on toast, English muffins, biscuits, etc. It is even delicious used as a topping for pancakes and PB & J sandwiches, if desired.

Open your jar of jam and spread it on your choice of toast, etc. and enjoy its sweet and tangy flavor. It tastes wonderful, and because of that I am confident you’ll love it, too!

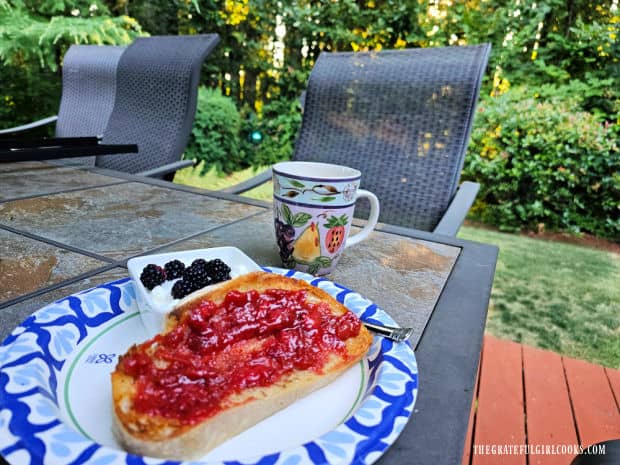
A piece of sourdough toast, covered with the strawberry rhubarb jam.Enjoying one jar strawberry rhubarb jam on toast with yogurt and coffee outside!

I hope you have the opportunity to make this delicious jam! Enjoy the convenience of making a jar of homemade jam without any special canning equipment or pectin!

However, if you already enjoy canning your jam using a traditional canning recipe, please check out my other recipe for Strawberry Rhubarb Jam (yields 9 half-pint jars using pectin, water bath canner, etc.).

Thank you for stopping by, and I invite you to come back again soon for more family-friendly recipes. Take care, may God bless you, and have a wonderful day.

Looking For More JAM Recipes?

You can find ALL of my recipes in the Recipe Index, which is located at the top of the page. I have LOTS of jam recipes to choose from, including:

Want More Recipes? Get My FREE Newsletter!

I publish a newsletter 2 times per month (1st and 15th) with lots of recipes, tips, etc.
Would you like to join our growing list of subscribers?

There is a Newsletter subscription box on the top right (or bottom) of each blog post, depending on the device you use.
You can submit your e-mail address there, to be added to my mailing list.

Find Me On Social Media:

Facebook page: The Grateful Girl Cooks!
Pinterest:
The Grateful Girl Cooks!
Instagram:
jbatthegratefulgirlcooks

Author's signature

Original recipe source: Afton, at Simple Small-Batch Strawberry Rhubarb Jam – The Reader’s Kitchen

↓↓ PRINTABLE RECIPE BELOW ↓↓

0 from 0 votes
One Jar Strawberry Rhubarb Jam
Prep Time
15 mins
Cook Time
30 mins
Cooling Time (inactive prep)
45 mins
Total Time
1 hr 30 mins
 

One Jar Strawberry Rhubarb Jam is a "small batch" recipe (no pectin/no canning). Make 1 pint or 2 half-pint jars of yummy jam in a saucepan!

Category: Jam / Canning and Preserving
Cuisine: All Cuisines
Keyword: one jar strawberry rhubarb jam
Servings: 32 Tablespoons (1 pint or 2 half pints)
Calories Per Serving: 28 kcal
Author: JB @ The Grateful Girl Cooks!
Ingredients
  • 2 cups sliced strawberries
  • cups sliced rhubarb
  • 1 cup granulated sugar
  • 2 Tablespoons lemon juice
  • 1 pinch table salt
Instructions
  1. NOTE: Before beginning, place two small plates in your freezer (needed later to test jam for readiness). Don't skip this step!

Cook The Jam:
  1. Measure strawberries, rhubarb, sugar, lemon juice and salt into a large saucepan. Stir until they are fully combined. Cook this mixture for 3-5 minutes on Medium High heat, stirring occasionally.

  2. Turn the heat down to Medium Low and cook (simmer) the jam, stirring often until strawberries and rhubarb begin to break down and soften. Use a potato masher to "help" break down the fruit slightly if desired. Simmer the jam for about 15 minutes, stirring often. The fruit will continue to break down, and the jam will continue to thicken as it cooks. Just keep stirring!

  3. After the jam has cooked for 15 minutes, test the jam to see if it is done by performing the PLATE TEST (see below). This simple test will show you if the jam is ready or if it needs to cook a bit more.

THE PLATE TEST:
  1. Take pan off the heat. Remove one chilled plate from the freezer. Place a small spoonful of jam onto the COLD plate. Run a finger through the jam. If a clear trail is left and the jam holds its shape, it is ready! NOTE: If it is NOT ready (still too much liquid), put the pan back on Medium Low heat; simmer it for 2 more minutes, then try again using the second cold plate from the freezer.

Jar The Jam And Refrigerate:
  1. When done, let the jam rest (still in the pan and off the heat) for 5 minutes to cool slightly. Transfer jam into 1 pint-sized jar (holds 2 cups) or into 2 half-pint jars (each holds one cup). Let the jam cool completely before covering the jar. Attach a lid (or flat lids/screw bands if using). Refrigerate jam until fully chilled. Serve and enjoy!

Recipe Notes

CANNING INSTRUCTIONS: Use bottled lemon juice instead of fresh lemon juice. Leave 1/8-inch headspace in each jar. Follow manufacturers water bath canning instructions for your individual canner. Process pint jars for 15 minutes. Process half-pint jars for 10 minutes.

Nutrition Facts
One Jar Strawberry Rhubarb Jam
Amount Per Serving (1 Tablespoon)
Calories 28 Calories from Fat 1
% Daily Value*
Fat 0.1g0%
Saturated Fat 0.005g0%
Polyunsaturated Fat 0.02g
Monounsaturated Fat 0.01g
Sodium 2mg0%
Potassium 31mg1%
Carbohydrates 7g2%
Fiber 0.3g1%
Sugar 7g8%
Protein 0.1g0%
Vitamin A 7IU0%
Vitamin C 6mg7%
Calcium 6mg1%
Iron 0.1mg1%
* Percent Daily Values are based on a 2000 calorie diet.

Here’s one more to pin on your Pinterest boards!  One Jar Strawberry Rhubarb Jam is a "small batch" recipe (no pectin/no canning). Make 1 pint or 2 half-pint jars of yummy jam in a saucepan!
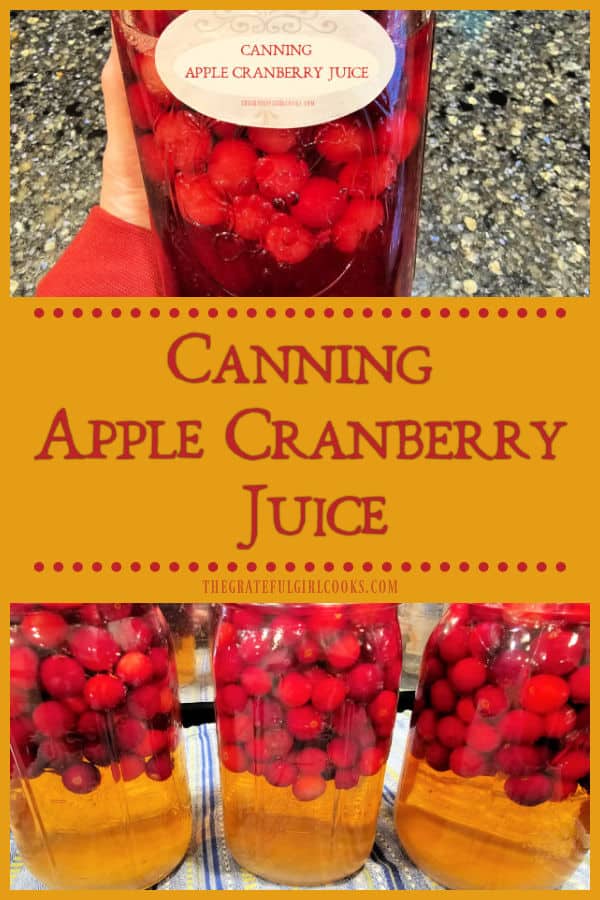
Canning Apple Cranberry Juice

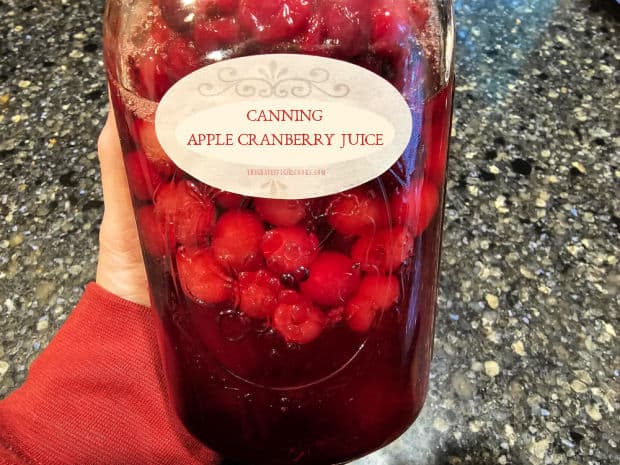
Canning Apple Cranberry Juice for long-term storage is easy to do, using only 3 ingredients, canning jars/lids and a water bath canner.

I love canning foods for long term storage. Previously I’ve enjoyed canning cranberry juice for our pantry and loved how it tasted, so it seemed only natural that I should try another flavor!

Last December I realized I still had some fresh cranberries in our refrigerator, so I decided to can some apple cranberry juice.

I only had enough cranberries left to make three, quart-sized jars of the juice, but I’m sure glad I made the juice and enjoyed having it in our pantry AND drinking it, too!

If you are a seasoned canner, then canning apple cranberry juice will be a cinch. If you are new to canning, I will show you how to do this, step by step!

Here’s how to make and can 3 quart-sized jars of apple cranberry juice, using fresh cranberries, granulated sugar and a bottle of apple juice or cider. 

Scroll Down For A Printable Recipe Card At The Bottom Of The Page

Before Beginning- A Bit Of Prep

Any time you are canning food there are a few basic canning steps you need to take before beginning. They are: *Sterilize/heat the canning jars you are using in simmering water. *Prepare the jar flat lids and screw bands according to the manufacturer’s instructions.

You will also need to fill a water bath canner with water, per the manufacturer’s directions and bring this water to a simmer on Low heat.

Heat The Apple Juice Or Cider

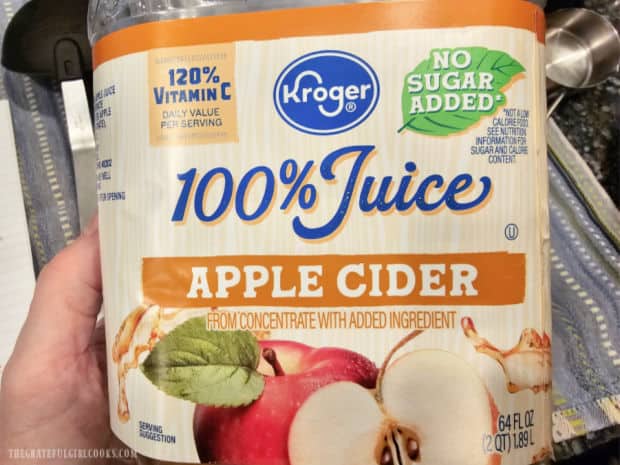
For this recipe you will need a bottle of apple juice or apple cider. I recommend using a juice or cider that has no additional sugar added, because you will be adding granulated sugar to the jars already.

Pour the juice or cider into a large saucepan. Bring the juice to a boil, then reduce the heat and keep the juice/cider warm while you are filling the jars. The amount of juice you will need depends on the number of jars you are filling.

My photos will show you how to make three quart-sized jars of apple cranberry juice, so I used one 64 oz. jug of apple cider.

This recipe can easily be doubled, so the amount of juice you will need depends on the number of jars you are filling.

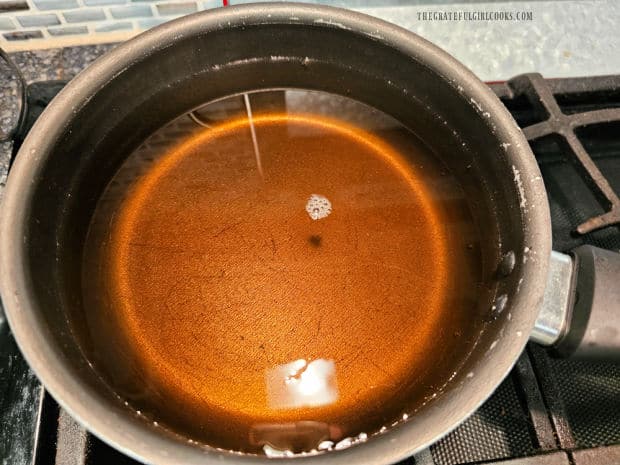
No sugar added apple cider was used in this recipe.Apple cider (or juice) is simmered in a medium saucepan.

Fill The Hot Quart Canning Jars

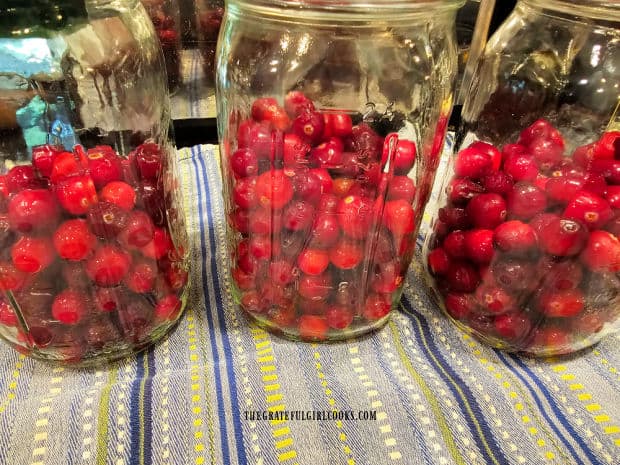
Directions For EACH Jar: Rinse and drain the fresh cranberries and then measure 1¾ cups of cranberries into each sterilized, hot, quart-sized canning jar. The canning jars will not be full.

Fresh cranberries are added to three quart-sized canning jars.

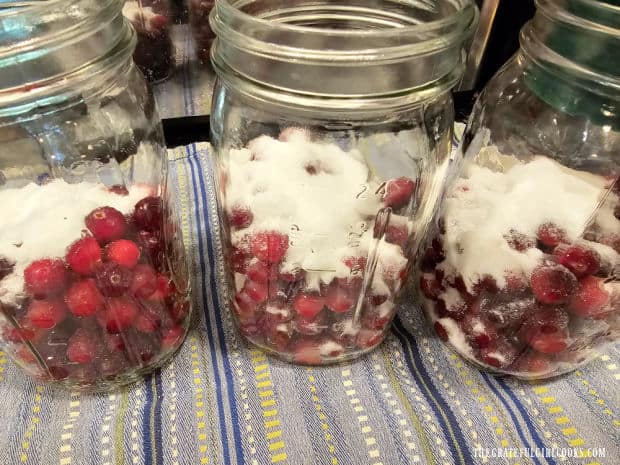
Next add ¼ cup of granulated sugar into each of the jars. There’s no need to stir the cranberries and sugar, because the sugar will dissolve and mix in, once warm apple juice or cider is added.

Granulated sugar is added to the cranberries in the quart-sized canning jars.

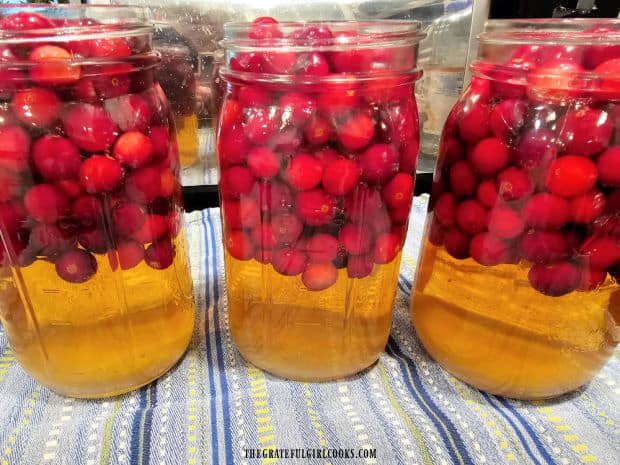
Carefully pour the warm apple juice or cider into each hot jar. I recommend using a canning funnel for less mess or drips! Fill the jars, leaving ½” headspace in each jar.

Remove the air bubbles from each jar by inserting a skewer or plastic knife into each jar around the edges. Adjust the headspace, if necessary, by removing or adding juice.

Wipe the rim of each jar clean with a damp cloth. Place a flat lid on each jar, add the screw band, then tighten until the band is fingertip tight. Repeat with all filled jars.

Warm apple cider (or juice) is poured into the jars with sugar and cranberries.

Canning Apple Cranberry Juice

Carefully place the sealed jars on a canning rack into a water bath canner (with the simmering water inside). Lower the rack into the hot water.

IMPORTANT: Make sure the jars are fully covered by 1″ of water above the jar lids, adding additional hot water, if necessary. Cover the canner with a lid.

Bring the water to a rolling boil, then set the timer for timer for processing. Process the jars for 20 minutes. Keep the jars at a gentle boil throughout the processing time (you may have to reduce the heat slightly).

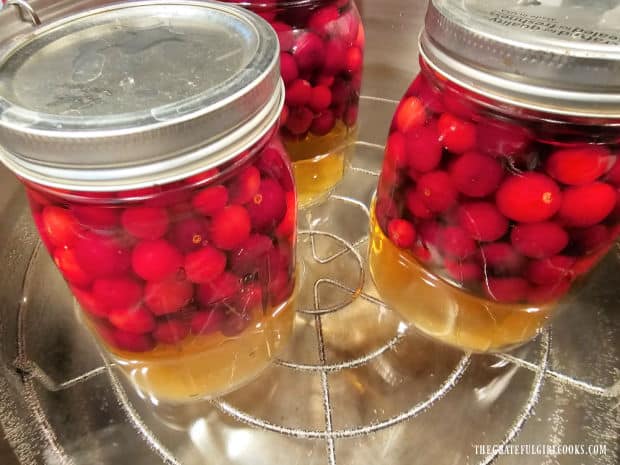
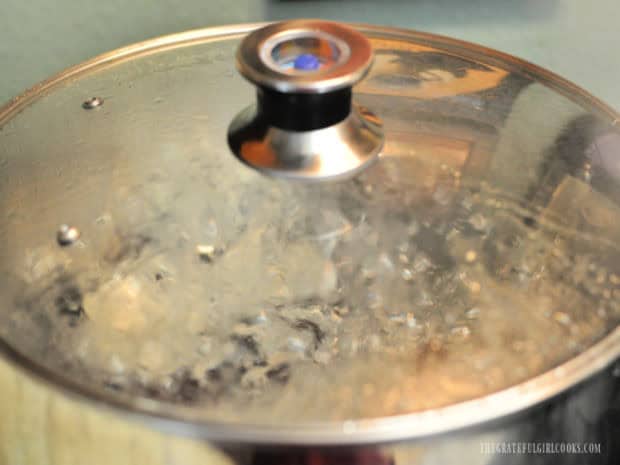
Jars of apple cranberry juice are processed in a hot water bath for 20 minutes.Water is gently boiling while the canner is processing jars of apple cranberry juice.

Cool Jars And Store In A Dark Place

Once the jars have been processed, turn off the heat. Remove the lid, then let the jars rest 1-2 minutes before removing them from the canner.

Use canning tongs to transfer the hot jars onto a dish towel to cool. IMPORTANT: Do NOT put the hot jars directly on the counter, because temperature variances could cause the jars to crack or break.

Let the jars cool to room temperature, without disturbing them (about 12 hours). You should hear the lids “pop” or “ping” as each jar seals and becomes airtight.

Once the jars have cooled completely, check to ensure each jar is sealed. The lid should have no flexibility on top when you press down on it with a finger. Gently remove the screw bands from each jar for storage.

Store The Apple Cranberry Juice While It Develops

Store the sealed jars in a dark place in the pantry for 4-6 weeks as it develops its color and flavor. You want it to be away from heat and light while the juice develops.

Once a week during this storage time, carefully flip each jar upside down and then turn the jar quickly right side up. This helps infuse the extracted cranberry juice (and red color) into the liquid.

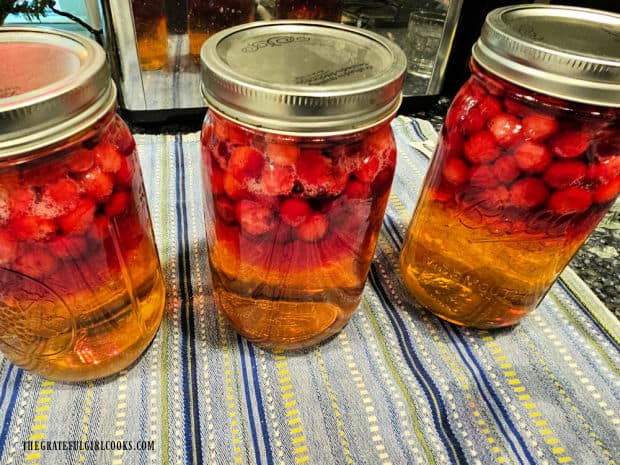
You can see in the photo below what the jars look like before storing, with the gold color of the apple juice showing.

Jars of juice out of the canner and ready to store in a dark place for 4-6 weeks.

As the jars sit (and are flipped) for the 4-6 weeks storage time, the sugar will begin to pull the juice out of those plump cranberries.

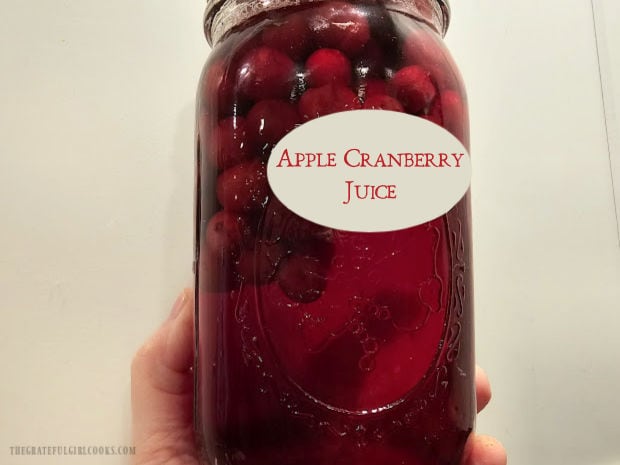
You will start to notice as time goes on, the color of the liquid will begin to darken to a beautiful red color.

Over 4-6 weeks, the apple cranberry juice turns a beautiful red color.

Enjoy A Glass Of Apple Cranberry Juice

After 4-6 weeks the jars of apple cranberry juice should be ready to be opened and enjoyed! TIP: I recommend storing the juice the full 6 weeks for best flavor!

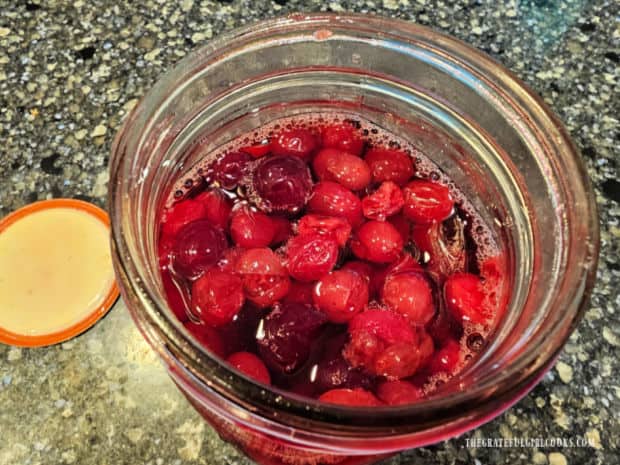
When jar is opened, cranberries are removed, leaving the delicious juice.

When you’re ready for a glass of apple cranberry juice, open a jar and remove the cranberries from the juice. Check out my tip below for what you can do with the leftover juicy cranberries as you open each jar for use! 

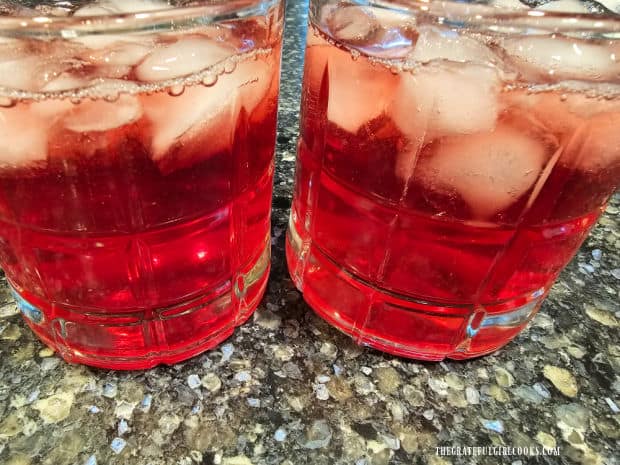
To serve, pour the juice over ice and enjoy delicious apple cranberry juice any time of year! It is really GOOD! Cover and refrigerate any open jars of juice.

TIP: If you want to make the apple cranberry juice bubbly, add a small amount of sparkling water to each glass and stir to combine.

Two glasses of apple cranberry juice, served over ice cubes.

Tip- Save And Dehydrate Leftover Cranberries!

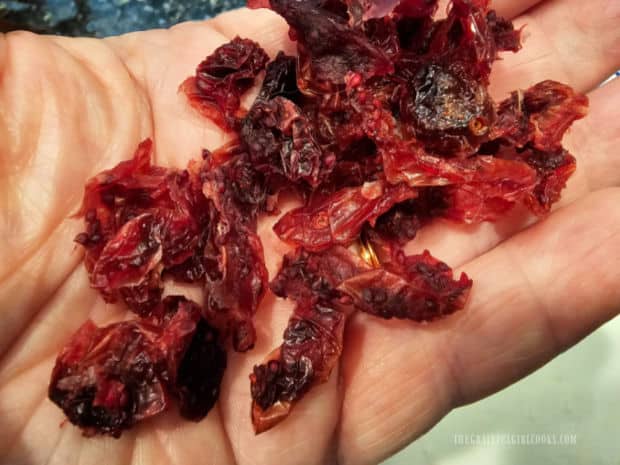
Don’t discard those cranberries after you’ve removed them from the jars! If you want to use the cranberries from inside an opened jar, consider drying them in a food dehydrator, an oven on low temps, or on a drying rack.

You will want them to be completely dried all the way through (yet pliable) in order to safely store them. This is a great way to get a second use from this recipe, in my opinion.

The cranberries are quite “plump and juicy” after soaking in the liquid for 4-6 weeks, so I recommend straining them out and laying them on paper towels to slightly dry them. Use a toothpick to poke them (to release a bit of the liquid) before dehydrating.

Once the cranberries are completely dried, they can be stored safely and used in baked goods, salads, etc. They taste similar to Craisins, due to the sweetness of the cranberry liquid they were soaking in.

Cranberries removed from the juice jars can be dehydrated to use in other recipes.

I hope you have the opportunity for canning apple cranberry juice and trust you’ll enjoy the “fruit” of your labors. The juice (if the jars have sealed properly) can be stored for 12-18 months in a dark, cool pantry.

Looking For More CANNING Recipes?

You can find ALL of my recipes in the Recipe Index, which is located at the top of the page. I have a variety of canning recipes (water bath and pressure canning) to choose from, including:

Want More Recipes? Get My FREE Newsletter!

I publish a newsletter 2 times per month (1st and 15th) with lots of recipes, tips, etc.
Would you like to join our growing list of subscribers?

There is a Newsletter subscription box on the top right (or bottom) of each blog post, depending on the device you use.
You can submit your e-mail address there, to be added to my mailing list.

Find Me On Social Media:

Facebook page: The Grateful Girl Cooks!
Pinterest:
The Grateful Girl Cooks!
Instagram:
jbatthegratefulgirlcooks

Author's signature

↓↓ PRINTABLE RECIPE BELOW ↓↓

0 from 0 votes
Canning Apple Cranberry Juice
Prep Time
15 mins
Cook Time
20 mins
Total Time
35 mins
 

Canning Apple Cranberry Juice for long-term storage is easy to do, using only 3 ingredients, canning jars/lids and a water bath canner.

Category: Beverage
Cuisine: All Cuisines
Keyword: canning, apple cranberry juice
Servings: 3 Quart Jars
Calories Per Serving: 551 kcal
Author: JB @ The Grateful Girl Cooks!
Ingredients
For 3 Quart-Sized Jars:
  • cups fresh cranberries rinsed, drained
  • ¾ cup granulated sugar
  • 64 ounces apple cider or juice (no added sugar) *may not have to use it all!
Instructions
  1. Sterilize/heat the canning jars in simmering water. Prepare jar flat lids and screw bands according to manufacturer's instructions. Fill a water bath canner with water, per manufacturer's directions; bring water to a simmer on Low heat.

  2. Pour cider (or juice) into a large saucepan. Bring juice to a boil, then reduce heat and keep it warm while you fill the jars.

Fill Each Jar:
  1. Rinse/drain fresh cranberries. Measure 1¾ cups of cranberries into EACH sterilized, hot jar. Jars will not be full. Add ¼ cup sugar into EACH jar. Carefully pour warm cider/juice into EACH jar, using a canning funnel for less drips! Fill jars, leaving a ½" headspace in each jar.

  2. Remove air bubbles from jars by inserting a skewer or plastic knife into each jar around the edges. Adjust headspace, if necessary (remove or add juice). Wipe the rim of each jar clean with a clean, damp cloth. Place a flat lid on each jar, add the screw band, then tighten until band is fingertip tight.

Process Jars In Water Bath Canner:
  1. Carefully place jars on a canning rack into a water bath canner (with simmering water inside). Lower rack into the hot water. IMPORTANT: Make sure jars are covered by 1" of water above the jar lids, adding additional hot water, if necessary. Cover canner. Bring the water to a rolling boil, THEN set timer for processing. Process quart jars for 20 minutes. Keep water at a gentle boil throughout the processing time (you may have to reduce the heat slightly).

  2. Once the jars have been processed, turn off the heat. Let jars rest 1-2 minutes, then carefully remove the lid. Use canning tongs to transfer hot jars onto a dish towel to cool. IMPORTANT: Do NOT put the hot jars directly on the counter, because temperature variances could cause jars to crack or break. Let jars cool to room temperature, undisturbed (about 12 hours). You should hear the lids "pop" or "ping" as each jar seals and becomes airtight. Once jars have cooled completely, check to ensure each jar is sealed. The lid should have no flexibility on top when you press down on it with a finger. Remove the screw band from each jar for storage.

  3. Store sealed jars in a dark place in the pantry for 4-6 weeks as the juice develops flavor and color. Once a week, carefully flip each jar upside down and then turn quickly right side up. This helps infuse the extracted cranberry juice (and red color) into the liquid. As the jars sit (and are flipped) during the 4-6 weeks, the sugar will begin to extract juice from the cranberries. You will notice the color of the juice darkening to a beautiful red color as time goes on.

  4. After the 4-6 weeks, the juice is ready. Open a jar; remove cranberries from the juice (see my blog post for how to use the cranberries!). To serve, pour juice over ice and enjoy. TIP: If you want to make the juice bubbly, add a small amount of sparkling water to each glass; stir to combine. Cover and refrigerate any open jars of juice. Canned juice (unopened jars) can be stored for 12-18 months.

Recipe Notes

NOTE: Caloric calculation is an estimate, based on the raw ingredients used in each quart-sized jar.

Nutrition Facts
Canning Apple Cranberry Juice
Amount Per Serving (1 Quart Jar)
Calories 551 Calories from Fat 9
% Daily Value*
Fat 1g2%
Saturated Fat 0.1g1%
Polyunsaturated Fat 0.3g
Monounsaturated Fat 0.1g
Sodium 28mg1%
Potassium 752mg21%
Carbohydrates 139g46%
Fiber 8g33%
Sugar 116g129%
Protein 1g2%
Vitamin A 111IU2%
Vitamin C 30mg36%
Calcium 63mg6%
Iron 1mg6%
* Percent Daily Values are based on a 2000 calorie diet.

Here’s one more to pin on your Pinterest boards!Canning Apple Cranberry Juice for long-term storage is easy to do, using only 3 ingredients, canning jars/lids and a water bath canner.


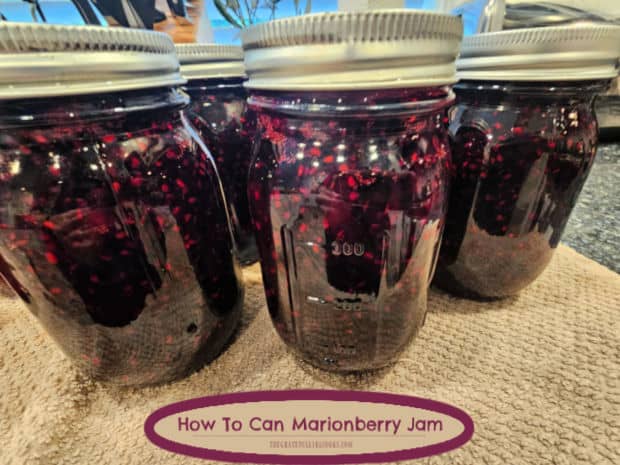
How To Can Marionberry Jam

Learn how to can Marionberry jam, a delicious fruit jam for toast, biscuits and scones. Recipe yields 5 pint-sized jars, ready for pantry storage. Learn how to can Marionberry jam, a delicious fruit jam for toast, biscuits and scones. Recipe yields 5 pint-sized jars, ready for pantry storage.

Marionberries are delicious eaten fresh AND are totally awesome used in cobblers, crisps, pies, turnovers, scones and JAM! They’re from the same “family” as blackberries but have a couple slight differences.

Marionberries are primarily grown here in Oregon (where I live). This variation of a traditional blackberry was developed in Oregon, as well.

They’re similar to a traditional blackberry but are slightly longer and larger. Marionberries also tend to be firmer in texture than a traditional blackberry.

Today I want to share how to make delicious homemade jam using this fruit, step by step. Here’s how to make Marionberry jam.

Scroll Down For A Printable Recipe Card At The Bottom Of The Page

Picking Fresh Marionberries

In late June, I went on an EARLY morning berry-picking adventure with one of my neighbors. We went to the first day a local U-Pick farm was open for the season. She wanted to get there in the cool morning air.

She picked me up at 5:45 a.m. and I truly thought we would be the only ones crazy enough to get to the farm at 6:00 a.m. when they opened.

When we arrived at about 6:05 a.m., I was shocked to see LOTS of people already out in the fields picking berries! Oregonians love their U-Pick farms, especially on a nice dry day!

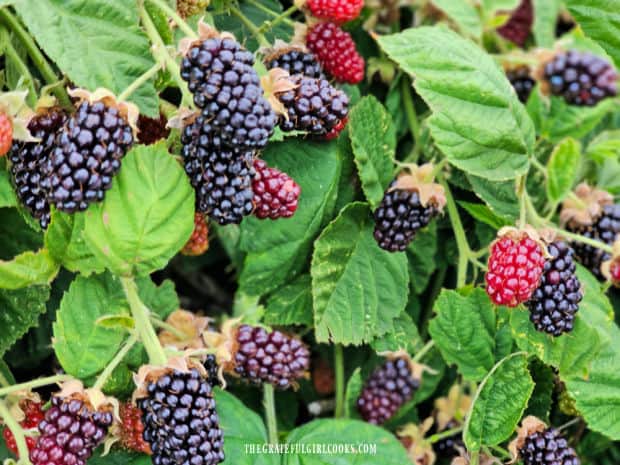
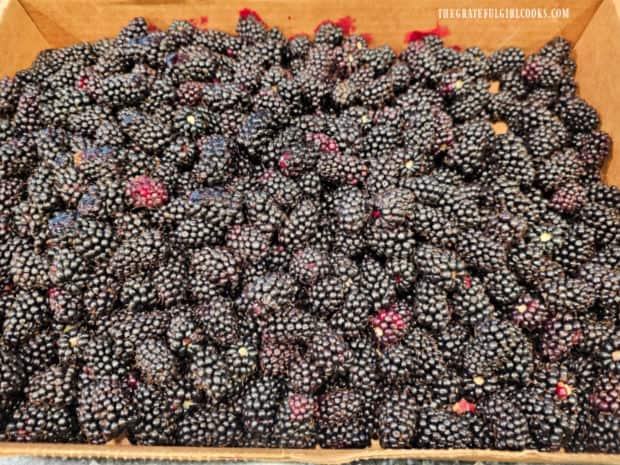
When ripe, marionberries turn from red to a deep purple in color. You can see in the 2 photos below the fresh marionberries on the vines and my marionberry haul for the morning (I also picked lots of blueberries and raspberries!).

Marionberries turn from red to a deep purple color when ripe.A full box of freshly picked marionberries, ready to go.

Making Jam Requires A Little Prep First

Before you begin cooking the jam, make sure you have all of your ingredients and equipment (canner, jars, lids, utensils, etc.) ready to go. Wash the jars in soapy hot water and drain.

Fill a water bath canner half full of water and bring the water to a low simmer. Place the jars on an elevated rack in the canner and let the low simmering water keep them warm while you make the jam.

You can also put the empty jars on a dish towel-lined cookie sheet and put them in the oven at 250°F. for 20 minutes to keep them warm.

It’s important to only fill warm or hot jars with the hot jam (cold or room temp. jars might crack or break when hot jam is added).

Before beginning I also measure out the full amount of granulated sugar into a huge bowl or pot, because it needs to be added all at once at the right stage of the jam-making process.

How To Can Marionberry Jam

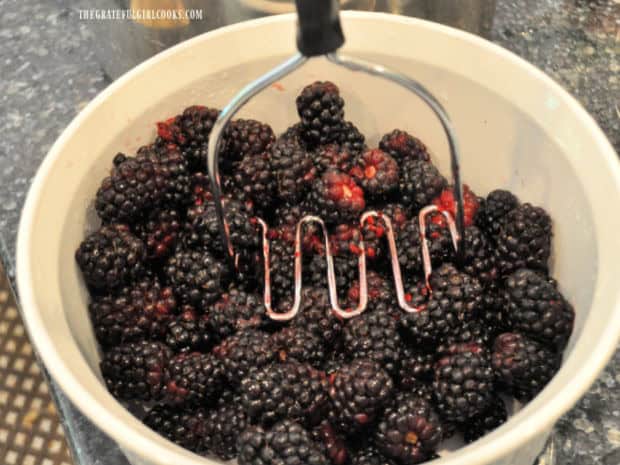
For this recipe you will need 6 cups of finely crushed ripe marionberries, which should be measured AFTER they have been crushed! I recommend crushing them one cup at a time, using a potato masher, which works very well!

After you crush the berries, measure them to make sure it is 1 full cup, then add those berries to the large water bath canner you’ll be using.

Continue crushing and measuring one cup at a time to get accurate measurements and 6 cups total of finely crushed berries, which you’ll need to make this jam.

Fresh marionberries are finely crushed using a potato masher.

Add Pectin And Sugar

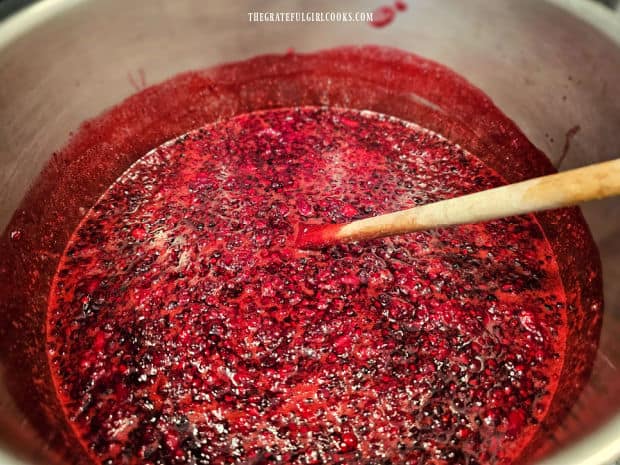
Once you have all 6 cups of crushed berries in the canner, stir in a box of powdered pectin until combined. Turn the heat to HIGH, and bring the mixture to a full rolling boil, stirring constantly.

NOTE: A full rolling boil is when it’s boiling so hard it doesn’t stop bubbling, even when it is stirred.

Once the berries reach the full rolling boil stage, stir in the granulated sugar quickly and all at once! Stir the mixture very well to combine the ingredients and dissolve all of the sugar. 

A canner full of berries, pectin and sugar is brought to a boil.

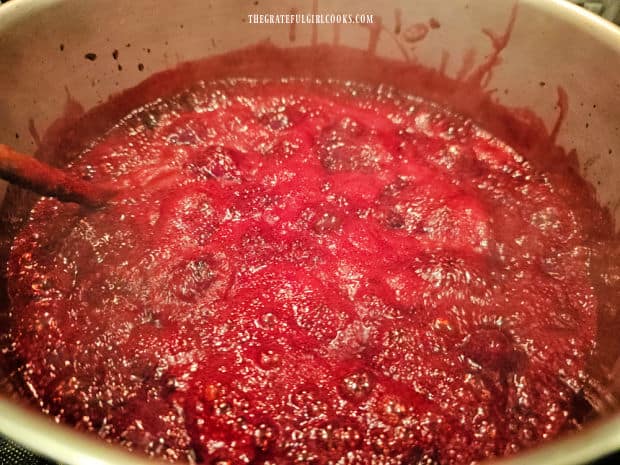
Bring the jam mixture back to a full, rolling boil. Once it has reached that stage, set a timer and boil it for EXACTLY 4 minutes, stirring constantly.

When the time is up, remove the pan from the heat, and skim off any accumulated foam that has appeared on top (discard).

Marionberry jam has to boil for exactly 4 minutes.

Filling the Jars

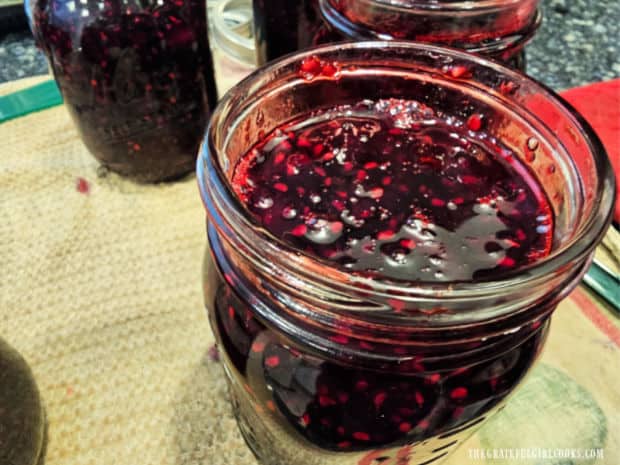
I always put a dish towel under the hot canning jars before filling, because it helps to catch any drips. Ladle the hot jam into hot drained jars, leaving 1/8″ (one-eighth inch) of headspace in each jar. I suggest using a canning funnel to do this, because it is much easier (and less messy!).

Insert a plastic knife down into each jar a couple times to help remove any air bubbles that may be present, then adjust the headspace to 1/8″ by removing or adding jam, if necessary.

Use a damp dish cloth or paper towel to wipe down the rim and edges of the jar. You need the jars to have clean edges and clean rims so the flat lids can seal properly.

Add the flat lids, then screw on the jar rings to fingertip tightness (don’t overtighten). Place the filled jars on an elevated rack in the canner with the simmering water. 

Jars are filled with hot marionberry jam before adding them to the canner.

Processing The Jars Of Marionberry Jam

Lower the elevated rack of jam jars into the simmering water. The jars will need to be fully covered by the water, with at least an inch of water above the top of the jars.

Add more boiling water, if necessary so the water line is 1″ above the top of the jars. Cover the canner.

Bring the water in the canner to a gentle boil (not a rolling boil). Once the water is boiling, process the jam for 10 minutes. When done, wait a couple minutes then remove the canner lid (lift it away from you because of steam).

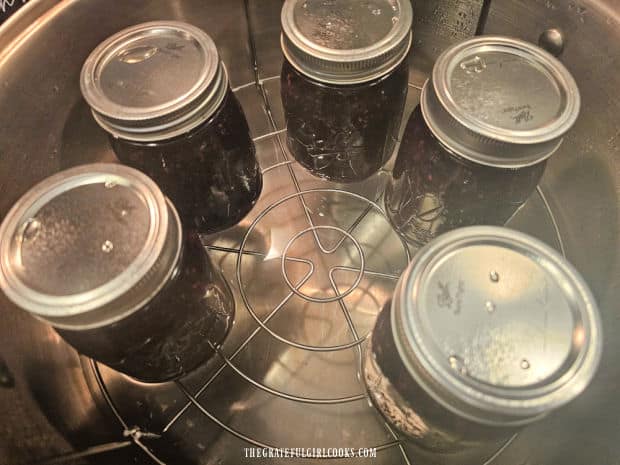
 Jars of jam are processed for 10 minutes in the canner.

Carefully lift each jar out of the water using canning tongs. Set the jars on a dish towel to cool (don’t put HOT jars directly on the kitchen counter because temperature variances could cause the jars to crack).

As the jars cool, you should hear a “ping” sound as each jar seals. Let the jam cool for 12-24 hours without disturbing the jars.

Once cool, check to ensure each jar sealed properly. The jar lid should not spring back when pressed lightly in the middle.

If you find a jar lid that did not seal (and the lid springs or pops back when pushed), you will need to refrigerate (and use) that jar of jam because it cannot be safely stored long term in a pantry. 

Learning how to can marionberry jam is a satisfying and productive way to store food.

Storing And Enjoying Homemade Marionberry Jam

Store the properly sealed (and labeled) jars of marionberry jam in a dark pantry for up to a year (or more). Remove the screw band (outer jar ring) when you store the jars.

I love to give jars of jam to our friends and family to “spread the love”, but my favorite thing to do is to eat it!

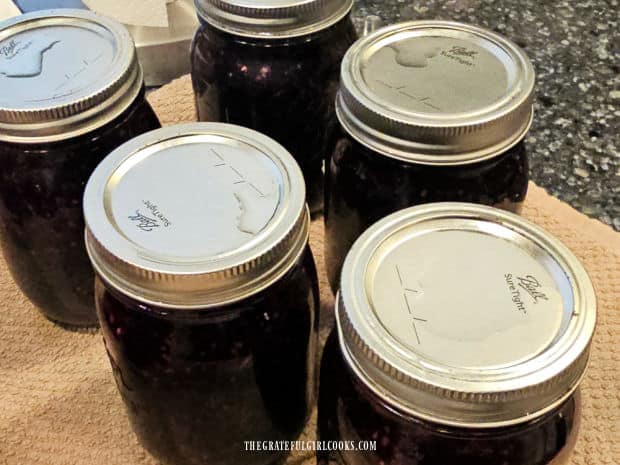
Jars of marionberry jam cool on a dish towel on the counter.

When you’re ready to enjoy some delicious marionberry jam, open a jar and serve it on toast, biscuits or English muffins, etc.

It is absolutely delicious and is a great taste and reminder of Summer that can be enjoyed even in the cold wintertime!

An open jar of marionberry jam and some spread on toast.

I hope you’ve enjoyed learning how to make marionberry jam and trust you (and those you love) will enjoy it as much as we do! It really is a delicious berry jam, and I love having jars of it available year-round in our pantry.

Thank you for stopping by, and I invite you to come back again soon for more family-friendly recipes. Take care, may God bless you, and have a wonderful day!

Looking For More HOMEMADE JAM Recipes?

You can find ALL of my recipes in the Recipe Index, which is located at the top of the page. I have a wonderful variety of jam recipes to choose from, including:

Want More Recipes? Get My FREE Newsletter!

I publish a newsletter 2 times per month (1st and 15th) with lots of recipes, tips, etc.
Would you like to join our growing list of subscribers?

There is a Newsletter subscription box on the top right (or bottom) of each blog post, depending on the device you use.
You can submit your e-mail address there, to be added to my mailing list.

Find Me On Social Media:

Facebook page: The Grateful Girl Cooks!
Pinterest:
The Grateful Girl Cooks!
Instagram:
jbatthegratefulgirlcooks

Author's signature

Recipe adapted from instructions found in a box of MCP Powdered Pectin

↓↓ PRINTABLE RECIPE BELOW ↓↓

0 from 0 votes
How To Can Marionberry Jam
Prep Time
30 mins
Cook Time
10 mins
Total Time
40 mins
 

Learn how to can Marionberry jam, a delicious fruit jam for toast, biscuits and scones. Recipe yields 5 pint-sized jars, ready for pantry storage.

Category: Canning and Preserving
Cuisine: American
Keyword: how to can marionberry jam
Servings: 5 pint jars (44 calories per Tbsp.)
Calories Per Serving: 44 kcal
Author: JB @ The Grateful Girl Cooks!
Ingredients
  • 6 cups finely crushed marionberries rinsed. **SEE NOTE BELOW)
  • 2 ounces powdered fruit pectin =1 box (some boxes are 1.75 oz.)
  • cups granulated sugar
Instructions
Make sure to have all ingredients and equipment (canner, jars, lids, utensils, etc.) ready to go.
  1. 1) Wash and drain jars. Prepare flat lids and screw bands.

    2) Fill canner ½ full of water, simmer water on Low.

    3) Get the jars warm/hot: Place jars on rack in the canner; let simmering water keep them warm while cooking jam OR put empty jars on a dish towel-lined cookie sheet; warm in oven at 250°F. for 20 minutes. *Important-only fill warm or hot jars with hot jam (cold/room temp. jars may crack when hot jam is added).

    4) Measure total amount of sugar into a huge bowl; it must be added all at once at the right stage of the jam-making process.

  2. Crush marionberries (need 6 cups finely crushed berries- measured AFTER they're crushed! Crush 1 cup at a time, using a potato masher. Add crushed berries to a large (separate) stockpot.

  3. Stir in pectin until combined. Turn heat to HIGH- bring berry mixture to a full rolling boil, stirring constantly. NOTE: A full rolling boil is when it's boiling so hard it doesn't stop bubbling, even when stirred. Once it reaches a full rolling boil, stir in sugar all at once! Stir well to combine and dissolve the sugar.

  4. Bring berry mixture back to a full, rolling boil on High. Once fully boiling, set a timer- boil jam for EXACTLY 4 minutes, stirring constantly. When time is up, remove stockpot from the heat. Skim/discard any foam on top.

  5. Put a dish towel under hot canning jars before filling (helps to catch drips). Ladle hot jam into hot, drained jars using a canning funnel, Leave1/8" (one-eighth inch) headspace in each jar. Insert a plastic knife down into each jar a couple times to remove air bubbles, then adjust headspace to 1/8" (if necessary) by removing or adding jam. Use a damp cloth or paper towel to wipe down rims and edges of each jar (need to be clean so flat lids can seal properly). Add flat lids, then screw on jar rings to fingertip tightness (don't overtighten). Place jars on elevated rack in the canner. 

  6. Lower rack of jars into the simmering water. Jars must be fully covered with water, with at least 1" of water above the top of the jars. Add more boiling water, if necessary so water line is 1" above the top of the jars. Cover the canner. Bring water in canner to a gentle boil. Once water is gently boiling, process jam for 10 minutes. When done, wait 2-3 minutes then remove canner lid (lift it away from you because of steam).

  7. Carefully lift jars out of the water with canning tongs. Set jars on a dish towel to cool (don't put HOT jars directly on the kitchen counter because temperature variances could cause the HOT jars to crack). As jars cool, you should hear a "ping" sound as each jar seals. Let jam cool for 12-24 hours without disturbing. Once cool, check to ensure each jar sealed properly. The jar lid should not spring back when pressed lightly in the middle. If a jar did not seal properly (lid springs or pops back when pushed), you need to refrigerate (and use) that jar of jam because it cannot be safely stored long-term.

  8. Wipe down, then label the jars. Remove the screw band before storing jars. Store jam in pantry for up to a year (or more). Enjoy!

Recipe Notes

NOTE: Plan ahead... total amount of berries needed is 6 cups CRUSHED. Make sure to have a couple cups of extra whole berries before beginning to ensure you have the correct amount of crushed berries necessary for this jam!

Nutrition Facts
How To Can Marionberry Jam
Amount Per Serving (1 Tablespoon ( 5 pint jars total))
Calories 44 Calories from Fat 1
% Daily Value*
Fat 0.1g0%
Saturated Fat 0.001g0%
Polyunsaturated Fat 0.02g
Monounsaturated Fat 0.003g
Sodium 1mg0%
Potassium 9mg0%
Carbohydrates 11g4%
Fiber 0.3g1%
Sugar 11g12%
Protein 0.1g0%
Vitamin A 12IU0%
Vitamin C 1mg1%
Calcium 2mg0%
Iron 0.05mg0%
* Percent Daily Values are based on a 2000 calorie diet.

Here’s one more to pin on your Pinterest boards!Learn how to can Marionberry jam, a delicious fruit jam for toast, biscuits and scones. Recipe yields 5 pint-sized jars, ready for pantry storage.

How To Can Mandarin Oranges

Learn how to can Mandarin oranges in a water bath canner for long-term storage! Recipe yields 5 half-pint jars from a 3 lb. bag of oranges.

I love keeping mandarin oranges in our pantry and use them in several dishes we eat occasionally. They add sweetness, color and flavor to green salads, a Classic 5 Cup Salad, and are a colorful addition to my recipe for Hawaiian Meatballs and Rice.

When I go shopping, canned mandarin oranges are typically not a staple ingredient on my list. That’s why I find it very convenient to can several jars at a time every 4-5 months to keep stocked in our pantry.

I assume you are still reading because you’d like to know how to can mandarin oranges if you haven’t done so before. Well… you’re in the right place!

I’ve been canning mandaring oranges for several years and am happy to walk you through the step-by-step process.

For this recipe, you will need a water bath canner, 5 half-pint canning jars and corresponding 2-piece lids.  Here’s how to can mandarin oranges for long-term storage.

Scroll Down For A Printable Recipe Card At The Bottom Of The Page

First Things First

Gather all the canning necessities together before starting. Prepare your canner, jars, lids, etc. according to manufacturer instructions before beginning and prepare the oranges and light syrup.

Prepare The Mandarin Oranges For Canning

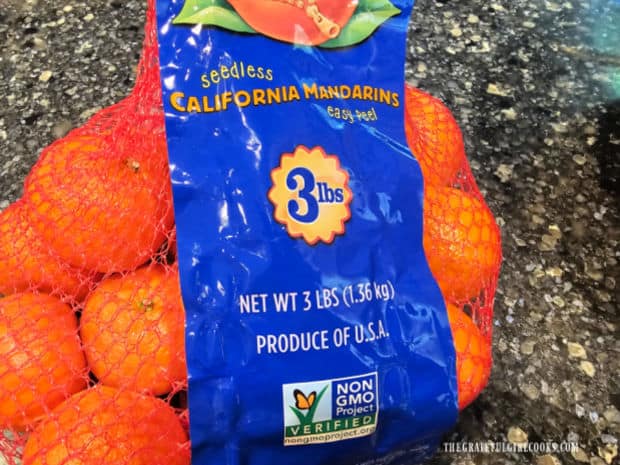
For this recipe I buy a 3-pound bag of mandarin oranges (this bag shown below contained 17 mandarin oranges). This number of oranges will be enough to yield about 5 half-pint jars of canned mandarins.

A 3-pound bag of mandarin oranges is used for this recipe.

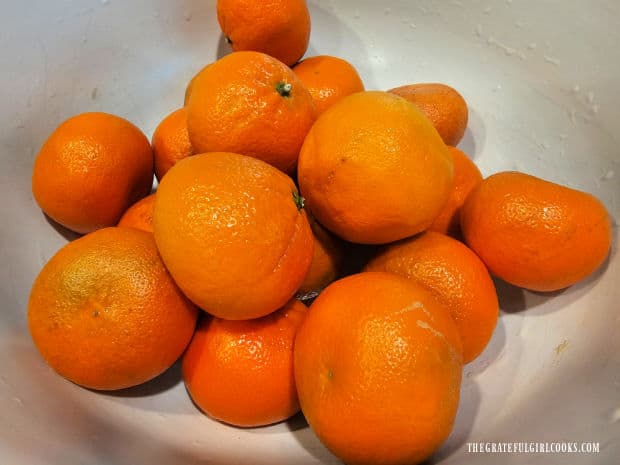
Place the oranges in a large bowl and remove all the peels (and stem ends) from them. Once you have all the peel removed, separate each mandarin orange into segments.

A bowl filled with the mandarin oranges used for canning.

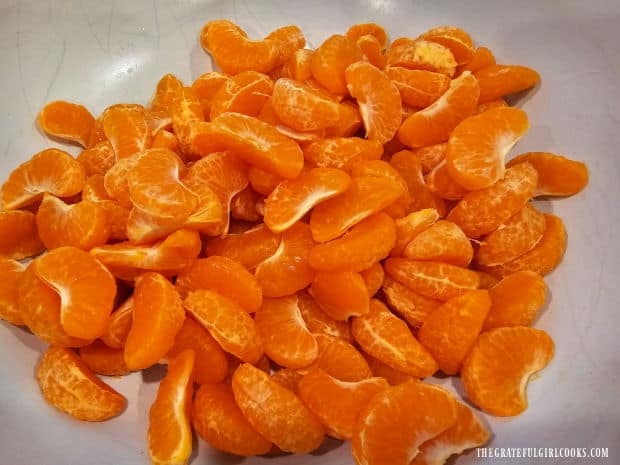
Remove any white “pith” or ” stringy pieces” you find on the segments (they have a bitter taste, and you do not want that). I sit down in front of the TV and do this while watching (or “listening”) to a show.

Yes, it takes a small amount of time to “clean up” all of the mandarin segments, but the pretty orange mandarin orange slices you end up with are the reward!

Mandarin oranges are peeled, and white "pith" areas are removed before canning.

Make A Light Syrup For Canning Mandarin Oranges

When canning mandarin oranges, I make a light sweet syrup to add to the jars which slightly sweetens the canned oranges. It only has two ingredients and is really simple to make.

NOTE: Yes, you can use plain old water instead of a syrup, but the mandarins won’t taste too sweet at all. I heartily recommend canning them in this very “lightly sweetened” syrup.

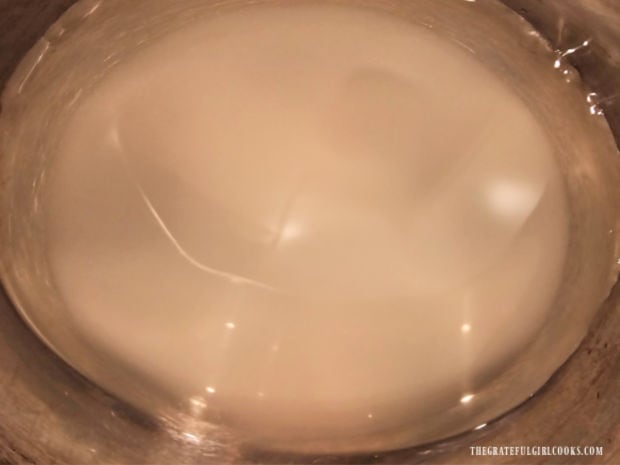
In a small saucepan, heat water and granulated sugar until the sugar has fully melted. Keep this light syrup warm while you fill the canning jars with the mandarin orange segments.

A light syrup is made to use in filling the canning jars after mandarins are added.

Fill And Cover The Jars

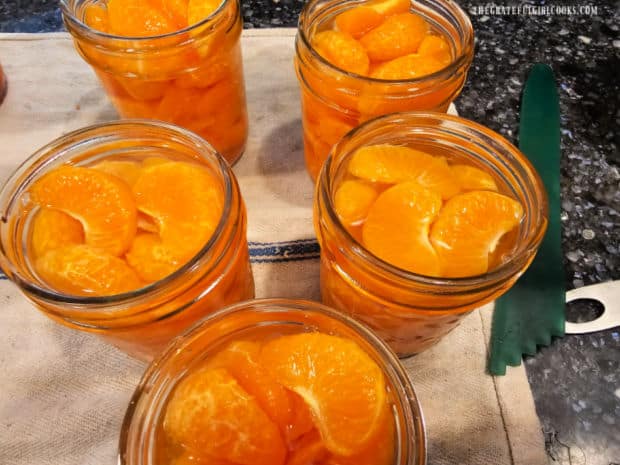
Pack the mandarin oranges tightly in sterilized, hot canning jars, leaving ½” headspace in each one. Pour the hot syrup mixture over the mandarin oranges into each jar, again leaving ½” headspace.

Use a plastic canning utensil to remove air bubbles from each jar by inserting it several times around the edges of each jar. Once you do that, check the headspace to make sure it is still ½”.

Add or remove syrup as necessary to maintain the correct headspace. Use a damp cloth to wipe the rims of each jar to remove any syrup or fruit that would prevent the jars from sealing.

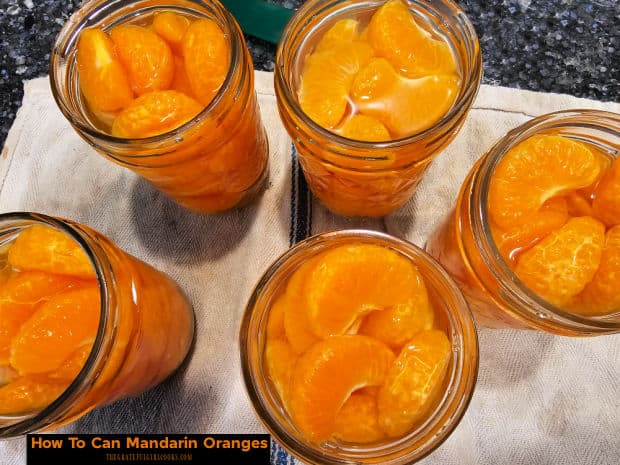
Jars are filled with mandarin orange segments, then syrup is added, to fill.

How To Can Mandarin Oranges

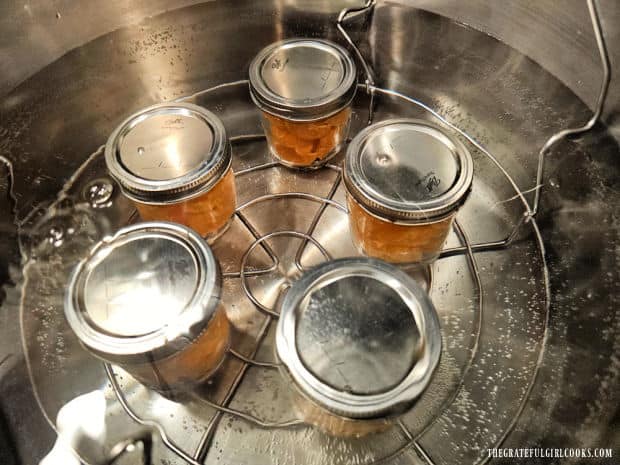
Place flat lids on top of each jar, then add the screw bands (or rings), and screw them on, tightening them to fingertip tightness. Position the jars onto the canning rack and carefully lower the rack into the pot of simmering water.

Make sure the water level is 1″ above the very top of the jars, and add additional water, if necessary. Turn the heat up to Medium High. If you have a lid for your water bath canner, put it on at this time.

Five pint jars full of mandarin oranges on a rack in water in the canner.

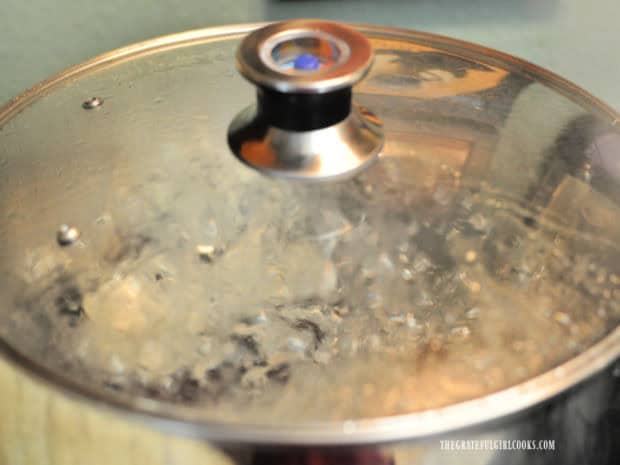
Bring the water to a gentle rolling boil, then set the timer and process the jars for 10 minutes once boiling. If you live above 1,000 feet elevation, process the jars for 15 minutes.

When done, turn off the heat and remove the lid. Let the jars sit in the hot water for 2-3 minutes then remove them from the pot, one at a time, using canning tongs.

Water bath canner processes the jars for 10 minutes.

Transfer the very HOT jars out of the canner and onto a dish towel on the countertop. NOTE: Do not put the hot jars directly on the kitchen counter because temperature variances could cause the jars to crack and you DO NOT want that!

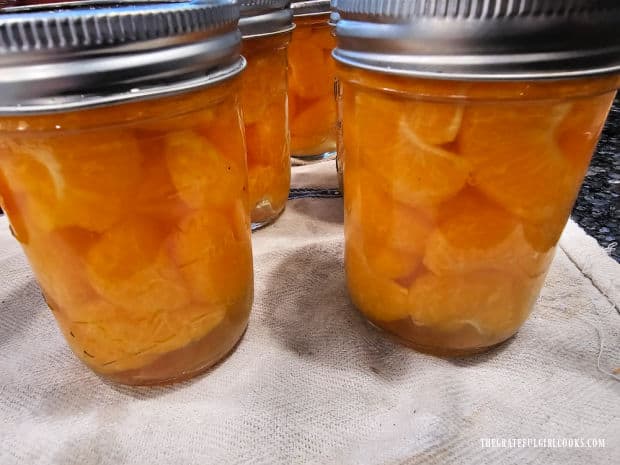
Let the jars cool completely (overnight is best). As they begin to cool, you should hear a “ping” or “popping” sound as each of the lids seal. It is best to not disturb the jars while they cool.

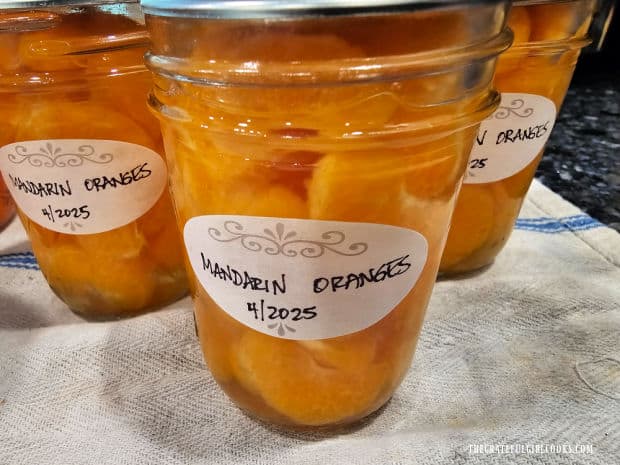
Finished jars of canned mandarin oranges cool on a dish towel on counter.

Storing Your Canned Mandarin Oranges

After the jars have cooled completely, make sure they have all successfully sealed. Use a fingertip to press down in the middle of the jar lid. If it pops back or is raised in the middle, the jar didn’t seal properly so you will need to refrigerate that particular jar and use it fairly soon.

Carefully unscrew the bands of the sealed jars (for storage), then wipe down the jars to remove any sticky residue. Label the jars and then store them in a dark closet or pantry.

That’s it! You’ve learned how to can mandarin oranges and should be very proud of yourself for stocking your cupboards with this delicious fruit!

Now that you've learned how to can mandarin oranges., label the jars and store in pantry.

I hope you’ve enjoyed learning how to can mandarin oranges and hope you will have the chance to do this, too! They are a wonderful resource to keep stocked in your pantry!

Thank you for stopping by and I invite you to come back again soon for more family-friendly recipes. Take care, may God bless you, and have a wonderful day!

Looking For More WATER BATH CANNING Recipes?

You can find ALL of my recipes in the Recipe Index, which is located at the top of the page. I have quite a few recipes using the Water Bath Canning method to choose from, including:

Want More Recipes? Get My FREE Newsletter!

I publish a newsletter 2 times per month (1st and 15th) with lots of recipes, tips, etc.
Would you like to join our growing list of subscribers?

There is a Newsletter subscription box on the top right (or bottom) of each blog post, depending on the device you use.
You can submit your e-mail address there, to be added to my mailing list.

Find Me On Social Media:

Facebook page: The Grateful Girl Cooks!
Pinterest:
The Grateful Girl Cooks!
Instagram:
jbatthegratefulgirlcooks

Author's signature

Recipe adapted from Victoria at “A Modern Homestead”: Water Bath Canning Mandarin Oranges using Sugar or Honey

↓↓ PRINTABLE RECIPE BELOW ↓↓

0 from 0 votes
How To Can Mandarin Oranges
Prep Time
25 mins
Cook Time
10 mins
Total Time
35 mins
 

Learn how to can Mandarin oranges in a water bath canner for long-term storage! Recipe yields 5 half-pint jars from a 3 lb. bag of oranges.

Category: Breakfast, Canning, Condiment
Cuisine: All Cuisines
Keyword: , water bath canning, how to can mandarin oranges
Servings: 5 half-pint jars (approx.)
Calories Per Serving: 236 kcal
Author: JB @ The Grateful Girl Cooks!
Ingredients
  • 17 mandarin oranges approx. 3-pound bag
For Light Syrup:
  • 1 cup water
  • ½ cup granulated sugar
Instructions
  1. Prepare your canning jars, water bath canner with simmering water, screw bands and flat lids per manufacturer instructions.

  2. Place oranges in large bowl; remove peels (and stems). Separate each mandarin orange into segments. Remove any white "pith" or "stringy pieces" you find on the segments (they have a bitter taste, and you do not want that). Set aside.

  3. Make syrup: In a small saucepan, heat water and sugar until sugar has melted. Keep syrup warm while you fill canning jars with mandarin orange segments.

  4. Pack orange slices tightly in sterilized, hot canning jars, leaving ½" headspace. Pour warm syrup mixture over mandarin oranges, again leaving ½" headspace. Use a plastic knife or utensil to remove air bubbles from jars by inserting it several times around inside edges. Check headspace to make sure it is still ½". Add or remove syrup as necessary to maintain correct headspace. Use a damp cloth to wipe rims of each jar to remove any residue that would prevent jars from sealing.

  5. Place flat lids on each jar, then add screw bands (or rings), and screw them on, tightening to fingertip tightness. Put jars on canning rack, then lower rack into the pot of simmering water. Make sure water level is 1" above the top of the jars. Add additional water, if necessary. Turn heat up to Medium High. Cover canner.

  6. Bring water to a gentle rolling boil, then set timer; process for 10 minutes once boiling. If you live above 1,000 feet elevation, process the jars for 15 minutes. When done, turn off the heat; remove lid. Let jars sit in the hot water for 2-3 minutes then remove them, one at a time, using canning tongs.

  7. Transfer HOT jars onto a dish towel on the countertop. NOTE: Do not put hot jars directly on countertop because temperature variances could cause jars to crack. Let jars cool completely (overnight is best). As they begin to cool, you should hear a "ping" or "popping" sound as each of the lids seal.

  8. After jars have cooled completely, make sure they have all successfully sealed. Use a fingertip to press down in the middle of the jar lid. If it pops back or is raised in the middle, that jar didn't seal properly. Refrigerate and use it fairly soon. Carefully remove screw bands off the sealed jars for long-term storage. Wipe jars to remove any sticky residue. Label jars; store in a dark closet or pantry. Enjoy!

Nutrition Facts
How To Can Mandarin Oranges
Amount Per Serving (1 half-pint jar)
Calories 236 Calories from Fat 9
% Daily Value*
Fat 1g2%
Saturated Fat 0.1g1%
Polyunsaturated Fat 0.2g
Monounsaturated Fat 0.2g
Sodium 9mg0%
Potassium 497mg14%
Carbohydrates 60g20%
Fiber 5g21%
Sugar 52g58%
Protein 2g4%
Vitamin A 2038IU41%
Vitamin C 80mg97%
Calcium 112mg11%
Iron 0.5mg3%
* Percent Daily Values are based on a 2000 calorie diet.

Here’s one more to pin on your Pinterest boards!Learn how to can Mandarin oranges in a water bath canner for long-term storage! Recipe yields 5 half-pint jars from a 3 lb. bag of oranges.

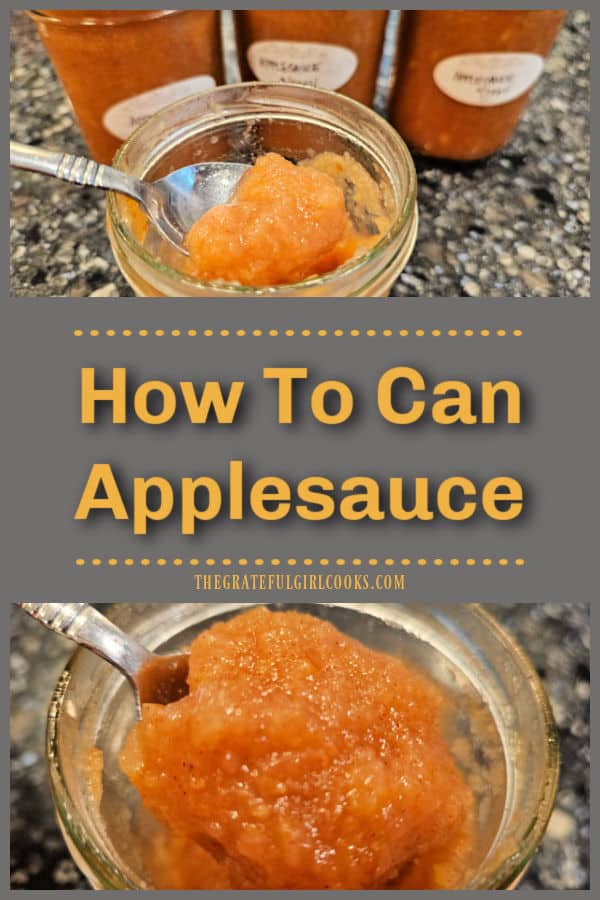
How To Can Applesauce

Learn how to can applesauce for long-term storage! A variety of sweet crisp apples, sugar, cinnamon and nutmeg provide great flavor.

Today I want to share how to can applesauce for long term storage. The recipe is fairly simple (especially if you already are familiar with water bath canning)!

You will make homemade applesauce using apples, water and sugar (if desired), and can add cinnamon and/or nutmeg to taste, for more flavor.

I’ve made several batches already and am grateful we now have many jars of delicious homemade applesauce available in our pantry to enjoy year-round.

Here’s how to can applesauce for long term storage.

Scroll Down For A Printable Recipe Card At The Bottom Of The Page

Before Beginning

Before you begin getting the apples ready, prepare a water bath canner, hot canning jars, lids and screw bands according to the manufacturer’s directions.

This will include heating the clean jars and bringing water to a simmer in the canner, and gathering items like a canning funnel, air bubble remover, labels, etc. Save yourself some time and have all these items ready to go before you start!

Prepare The Apples

I typically use a variety of sweet, crisp apples when I make applesauce (there are so many varieties available year-round). For this particular recipe the recommended amount of apples needed is 2½ – 3½ pounds of apples per QUART jar or for every two PINT jars.

I had a couple varieties of apples (about 6½ pounds) that needed to be used and decided to make four PINT jars of applesauce instead of quarts (which my photos reflect). NOTE: The processing time is the same for pint or quart jars.

Wash and drain the apples well before beginning. Cut each apple in half, then remove the seeds and core. You can leave the peel ON or you can remove it (your choice). Weigh the apples so you know the weight of the apples you are using.

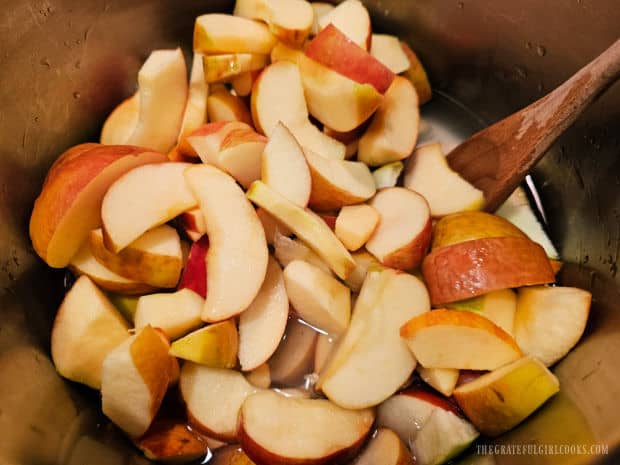
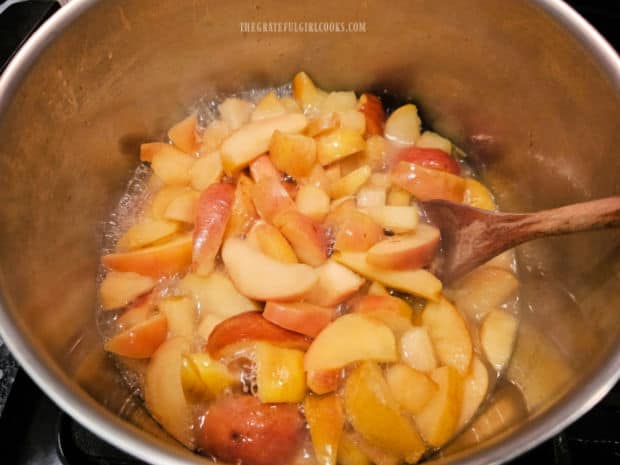
Slice each apple half into 1″ thick slices and place them into a large saucepan or soup pot that has a lid. Add just enough water (usually about ½ cup) to keep the apple slices from sticking to the pan.

Cook the apple slices (and small amount of water) on Medium-Low heat until they are soft (about 12-15 minutes), stirring often.

Two types of sliced apples cook in water in a large soup pot.The apple slices cook until they become soft.

Make Apple Purée

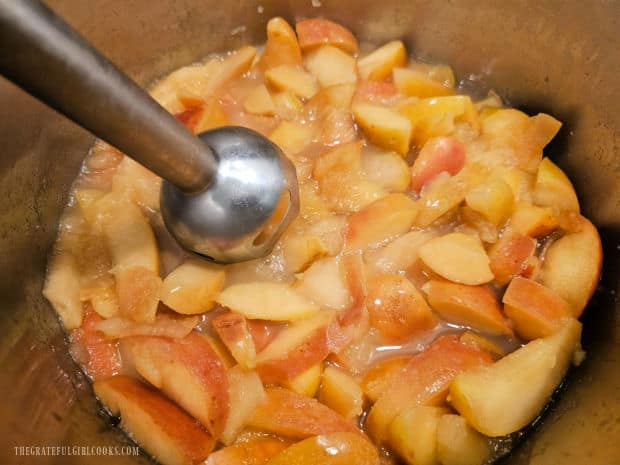
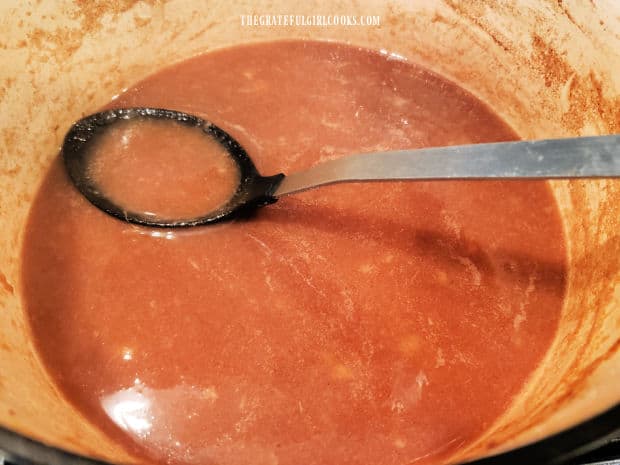
Once the apples are soft, use an immersion blender in the pan to puree the apples. The apple mixture should be fairly thick and pulp-like in texture.

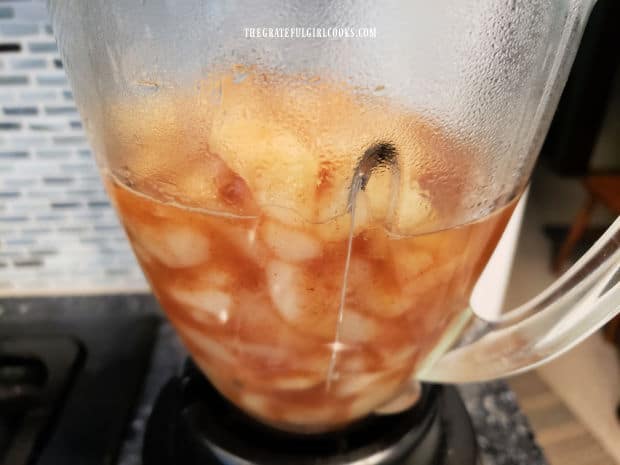
TIP: If you don’t have an immersion blender, you can use a food mill OR process the apples in a blender (in batches), then return the processed apple pulp to the saucepan.

If you prefer plain applesauce without added sugar or spice, then the applesauce is ready to be canned. If you prefer it slightly sweetened, see the note below.

An immersion blender is used to purée the apples.

Add Some Sugar And Spice!

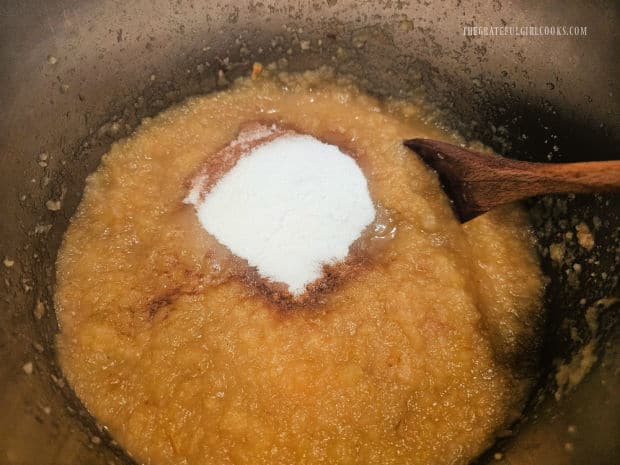
TIP: If you want to add some additional flavor and sweetness to the applesauce, stir in granulated sugar, ground cinnamon and a pinch of ground nutmeg (optional) to the puree until combined.

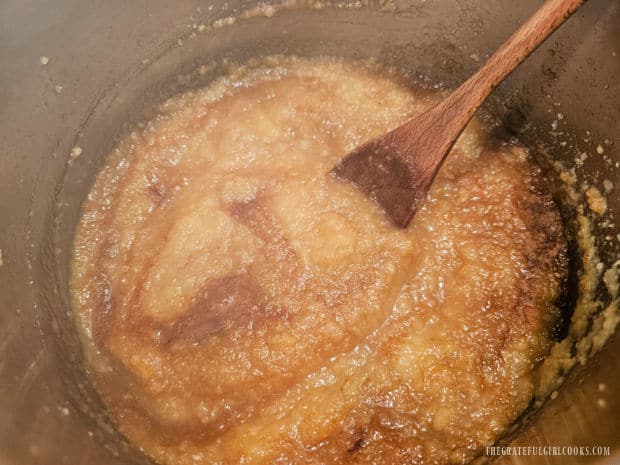
Bring the applesauce to a FULL boil (approx. 212°F.). Stir often so the apples don’t stick to the pan.

NOTE: The amount of sugar added can vary depending on how many pounds of apples you are using, but the recommended guidelines (from the Ball Blue Book of Canning) is to use about ¼ cup of sugar per pound of apples used. Add enough sugar, cinnamon and nutmeg as desired. Sometimes if you use a really sweet variety of apple, it may require less sugar overall to suit your taste.

Granulated sugar, cinnamon and nutmeg are added to the applesauce.Applesauce is stirred, then cooked for a couple minutes after adding sugar and spices.

How To Can Applesauce

Keep the temperature constant (boiling) under the apple puree while you fill each canning jar with applesauce. Use a ladle to add the applesauce into clean, hot canning jars, making sure to leave a ½” headspace. Repeat with remaining jars.

Remove the air bubbles from each jar by inserting a plastic knife or plastic spatula into each jar several times. Wipe the rims well with a wet cloth to remove any jam residue, then place flat lids and screw bands on the jars, adjusting the bands to fingertip tight.

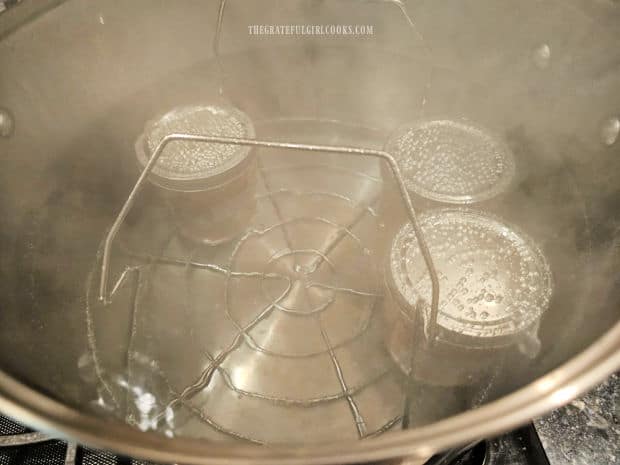
Lower jars onto a canning rack over simmering water in the canner. Make sure the hot water covers the jars by at least two inches. Bring the water to a gentle rolling boil, then process the jars for 20 minutes (once water is boiling). 

Once Done Canning

When done, turn off heat and let jars rest 4-5 minutes before removing them from the hot water. Remove jars and place them on a dish towel on the counter.

Don’t place boiling hot jars directly on the counter because temperature variances could cause the jars to crack. Let jars cool undisturbed for 12-24 hours, then wipe clean.

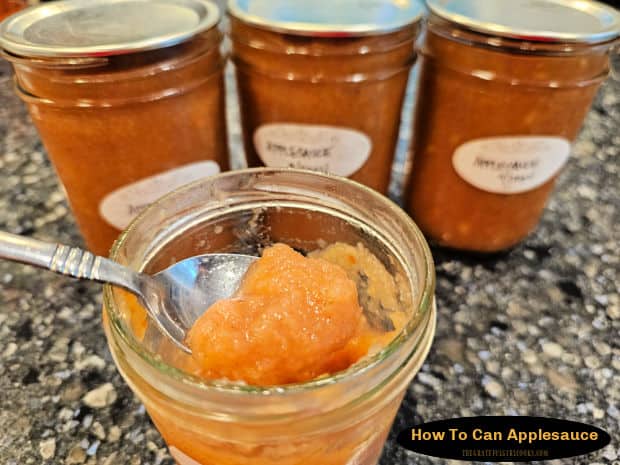
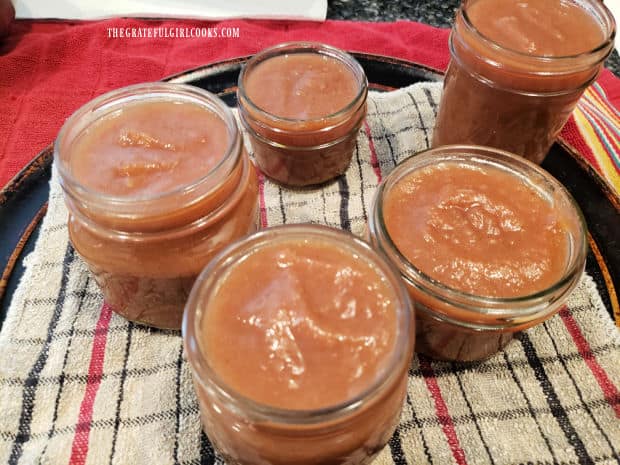
Check each jar to ensure it has sealed properly, then label and store in your pantry (remove the screw bands before storing). If a jar has not sealed properly, keep it in the refrigerator and use it within a week or so.

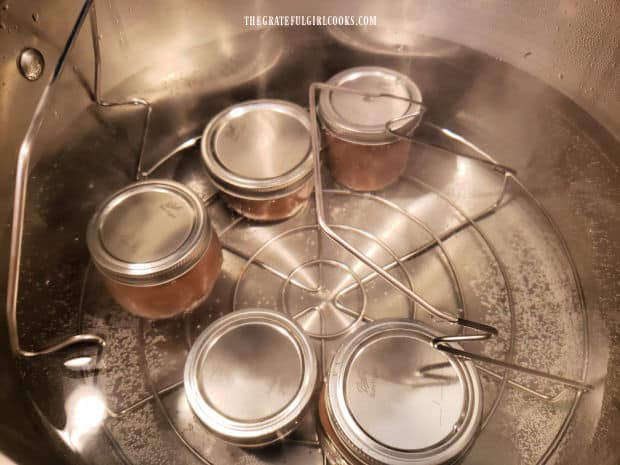
Water bath canner with three of the four total pint jars of applesauce inside.

Serve and Enjoy The Applesauce Or Store In Pantry

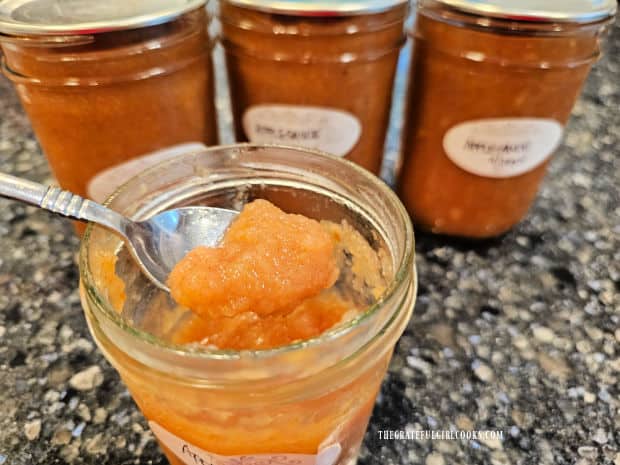
When you are ready to enjoy some home-canned applesauce, simply pop open a jar and enjoy it! I love cinnamon-flavored applesauce so much I sometimes grab a spoon and eat it right out of the jar. It is absolutely delicious!

Other ways to enjoy applesauce (besides just gobbling it up!) is to use it on top of pancakes or waffles (or even vanilla ice cream). It also tastes amazing when it’s mixed into Greek yogurt for a quick snack!

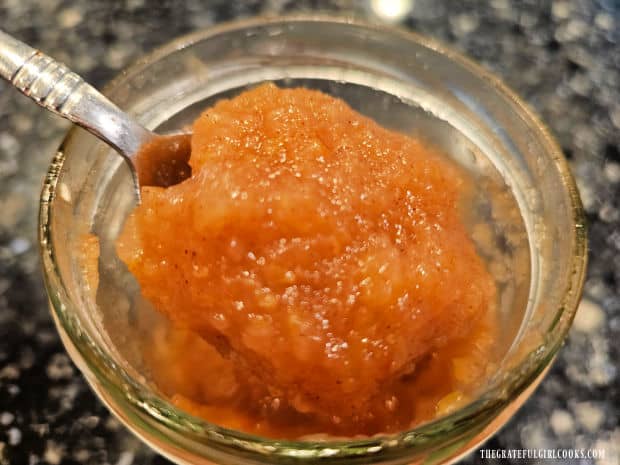
A spoonful of the applesauce after a jar has been opened.A closeup photo of a spoonful of home-canned applesauce, right out of the jar.

I really hope you have the opportunity to make homemade applesauce for yourself and those you love. It’s a great way to store lots of delicious applesauce to enjoy throughout the year!

Thanks for stopping by, and I invite you to come back again soon for more family-friendly recipes. Take care, may God bless you, and have a wonderful day.

Looking For More CANNING Recipes?

You can find ALL of my recipes in the Recipe Index, which is located at the top of the page. I have quite a few water bath AND pressure canning recipes to choose from, including:

Want More Recipes? Get My FREE Newsletter!

I publish a newsletter 2 times per month (1st and 15th) with lots of recipes, tips, etc.
Would you like to join our growing list of subscribers?

There is a Newsletter subscription box on the top right (or bottom) of each blog post, depending on the device you use.
You can submit your e-mail address there, to be added to my mailing list.

Find Me On Social Media:

Facebook page: The Grateful Girl Cooks!
Pinterest:
The Grateful Girl Cooks!
Instagram:
jbatthegratefulgirlcooks

Author's signature

Original recipe source (and adapted from): “The Ball Blue Book of Canning”, page 17, published in 2013 by Hearthmark, LLC, dba Jarden Home Brands

↓↓ PRINTABLE RECIPE BELOW ↓↓

0 from 0 votes
How To Can Applesauce
Prep Time
25 mins
Cook Time
20 mins
Total Time
45 mins
 

Learn how to can applesauce for long-term storage! A variety of sweet crisp apples, sugar, cinnamon and nutmeg provide great flavor.

Category: Canning and Preserving, Condiment
Cuisine: All Cuisines
Keyword: how to can applesauce
Servings: 64 Tablespoons (about 4 pints total)
Calories Per Serving: 42 kcal
Author: JB @ The Grateful Girl Cooks!
Ingredients
  • pounds apples (ie. Gala, Fiji, Golden Delicious, Braeburn, etc.) or combo (different types)
  • ½ cup water approx.-to prevent sticking
  • cups granulated sugar (approx.) more or less, to suit your taste
  • ground cinnamon to suit your taste
  • nutmeg (optional) to suit your taste
Instructions
  1. Before beginning, prepare water bath canner, canning jars (heated), flat lids/screw bands according to manufacturer directions.

  2. Wash and drain apples. Remove seeds and core. Leave the peel ON or OFF (your choice). Weigh apples so you know their weight (for added sugar calculation). Cut apples into 1" thick slices; put them in a Dutch oven or soup pot that has a lid. Add enough water (about ½ cup) to keep apple slices from sticking. Cover and cook on medium heat until apples become soft (12-15 minutes), stirring often.

  3. Use an immersion blender to purée apples. TIP: No immersion blender? Use a food mill OR process apples in a blender (in batches), then return applesauce to saucepan.

  4. Add sugar, cinnamon and nutmeg to taste (if using). Stir to combine; bring applesauce to a FULL boil (approx. 212°F.), stirring often. NOTE: Amount of sugar can vary depending on how many pounds of apples you are using, but recommendation from Ball Blue Book of Canning is to use ¼ cup of sugar per pound of apples. Add enough sugar, cinnamon and nutmeg as desired. If using lots of naturally sweet apples, it may require less sugar overall.

  5. Keep temperature constant under apple puree while filling each jar with applesauce (1 at a time). Use a ladle and funnel to add applesauce to hot canning jars, leaving a ½" headspace. Repeat with remaining jars.

  6. Remove air bubbles by inserting a plastic knife or spatula into each jar. Wipe the rims well with a wet cloth to remove any jam residue, then place flat lids and screw bands on the jars, adjusting bands to fingertip tight. Transfer jars to a canning rack placed in simmering water in the canner. Make sure water covers jars by 2". Bring water to a gentle rolling boil; process jars for 20 minutes (once water is boiling).

  7. When done, turn off heat; let jars rest 4-5 minutes before removing from canner. Put hot jars on a dish towel on the counter. Don't place jars directly on counter because temperature variances can cause jars to crack. Let jars cool undisturbed for 12-24 hours, then wipe clean. Check each jar to ensure it has sealed properly. Label and store in your pantry (remove screw bands before storing). If a jar has not sealed properly, refrigerate and use it within a week.

Recipe Notes

Note: The amount of sugar you use is dependent on the types of apples used and your own personal taste. The sweeter the apples are, the less sugar you may want to use. The caloric calculation per Tablespoon is an estimate and will vary depending on the type and weight of apples and the quantity of sugar used.

Nutrition Facts
How To Can Applesauce
Amount Per Serving (1 Tablespoon)
Calories 42 Calories from Fat 1
% Daily Value*
Fat 0.1g0%
Saturated Fat 0.01g0%
Polyunsaturated Fat 0.02g
Monounsaturated Fat 0.003g
Sodium 1mg0%
Potassium 49mg1%
Carbohydrates 11g4%
Fiber 1g4%
Sugar 9g10%
Protein 0.1g0%
Vitamin A 25IU1%
Vitamin C 2mg2%
Calcium 3mg0%
Iron 0.1mg1%
* Percent Daily Values are based on a 2000 calorie diet.

Here’s one more to pin on your Pinterest boards!Learn how to can applesauce for long-term storage! A variety of sweet crisp apples, sugar, cinnamon and nutmeg provide great flavor.

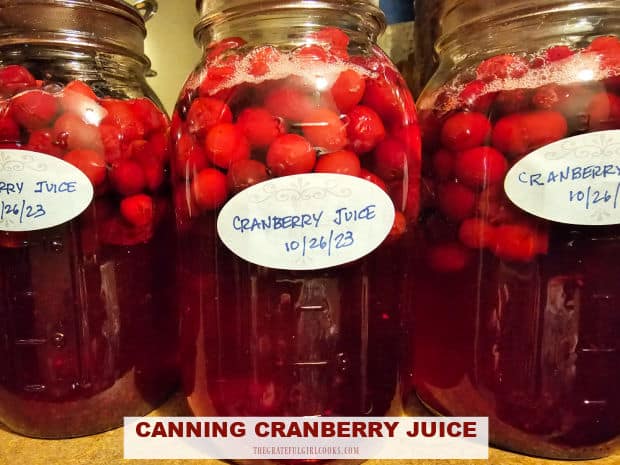
Canning Cranberry Juice

Canning Cranberry Juice is simple, using a water bath canner! This recipe will yield 7 quart jars of delicious tasting cranberry juice.

Did you know you can make homemade cranberry juice? I didn’t, until a couple of years ago, when I tried a simple “recipe” for canning cranberry juice.

The “canning process” is simple and straightforward, but then you have to wait several weeks for the juice to be ready to drink. The jars are stored in the pantry and need several weeks for the juice to be fully extracted from the cranberries!

All in all, canning cranberry juice is a cinch, and the juice tastes wonderful, once it is ready. I buy bags of fresh cranberries each Fall, and make the juice, then it’s ready to drink in about 4-6 weeks. Waiting for this delicious juice is honestly the “hardest” part… ha ha!

I even dehydrate the plump juicy, sweetened cranberries after I’ve opened a jar of juice, and use them in other recipes. Here’s the “how-to’s” on canning cranberry juice!

How To Can Cranberry Juice

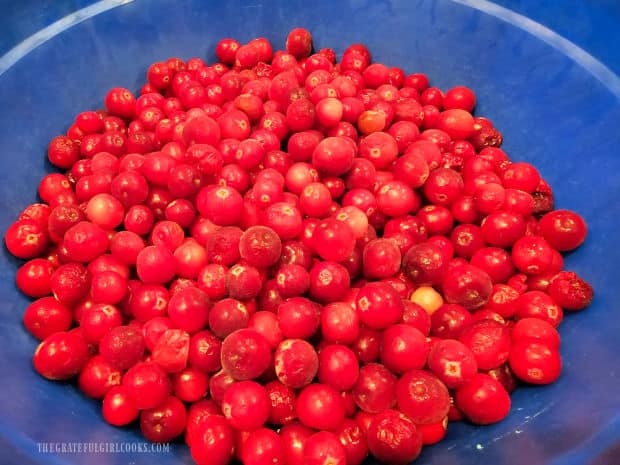
To make 7 quart sized jars of cranberry sauce you will need four 12 ounce bags of cranberries. If you are using frozen cranberries, let them thaw first.

Cranberries, ready to be turned into cranberry juice.

A Little Prep

Sterilize and heat 7 quart-sized canning jars in simmering water. You also need to have your canning lids and screwbands prepared, according to manufacturer instructions, and have boiling water (for filling the jars) ready to go.

Fill a water bath canner with water, according to manufacturer instructions and bring the water to a simmer on Low heat. You want the water simmering hot (but not boiling) when you have the jars filled and ready to go!

Before filling the jars, line up the hot jars on a dish towel, with the prepared flat lids and screwbands close by. Place a bowl full of granulated sugar nearby, as well, so it is easy to measure sugar for each jar.

Time To Fill the Jars

For EACH quart-sized jar you will need 1¾ cups of cranberries, ⅓ cup of granulated sugar, and boiling water

NOTE: If you like your juice sweeter, you can add up to ½ cup of sugar (we prefer it less sweet!)  The granulated sugar is necessary to help extract the juice from the cranberries after processing. 

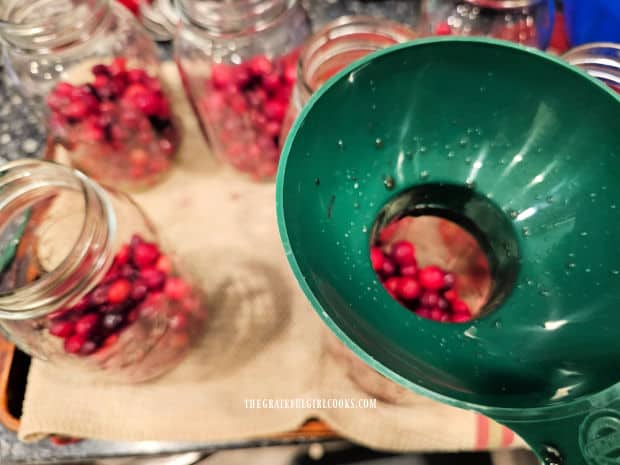
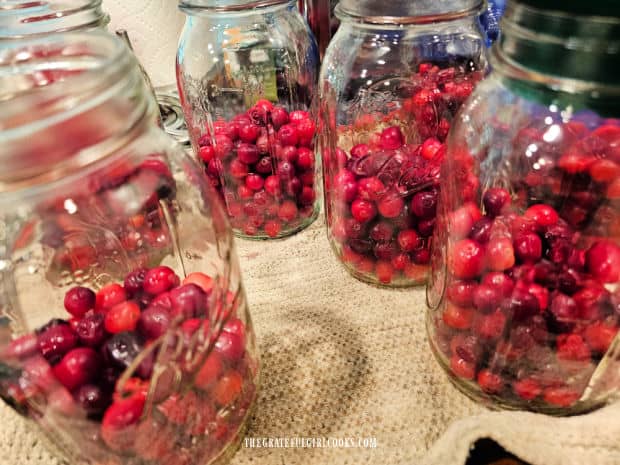
Use a canning funnel to add 1¾ cups of cranberries to each hot jar. You will notice that the jars are not completely full. That is what you want!

A canning funnel is used to add cranberries to the hot jars.Canning jars with the required amount of cranberries inside.

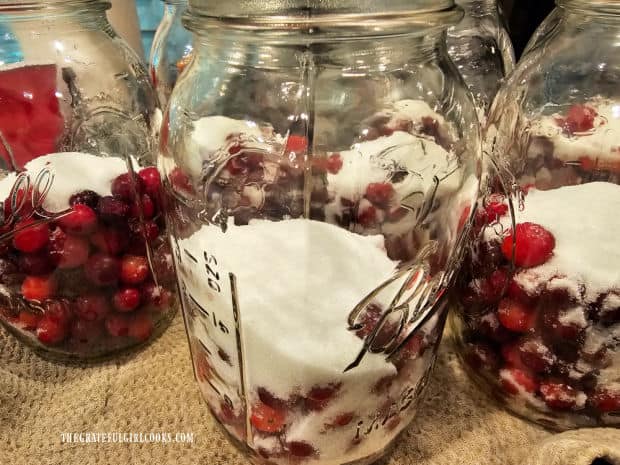
Now add ⅓ cup of granulated sugar to each hot jar. Just dump it right on top of the cranberries! Pour boiling water into the hot jars, leaving a ½” headspace in each jar.

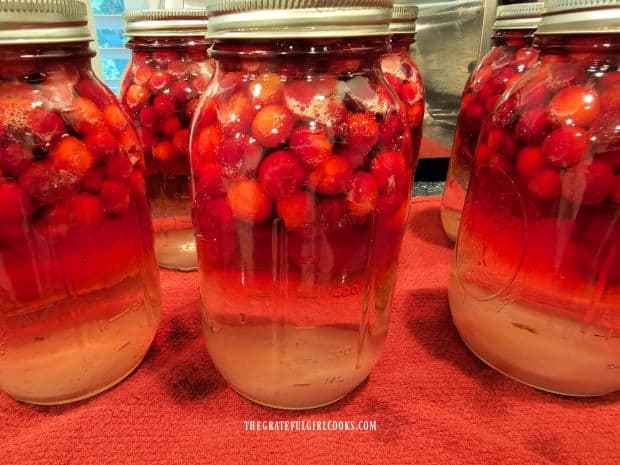
NOTE: The liquid in the jars will be fairly clear, but that is how it should be! Canned cranberry juice will darken to a deep red color as it cures in the pantry.

Remove the air bubbles from each jar, then wipe the rim of each jar clean using a damp cloth. Place the flat lid on top, then add the screwband, and tighten until the ring is fingertip tight. Now you’re ready for canning cranberry juice.

Granulated sugar is added to each jar of cranberries.

Canning Cranberry Juice

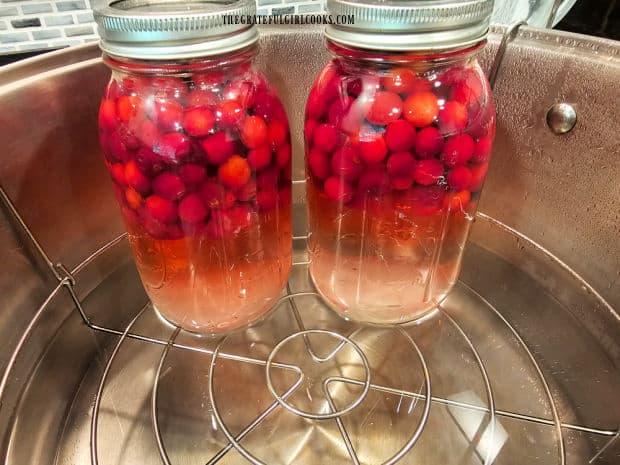
Carefully place all seven jars onto a canning rack in a water bath canner (with simmering water below). Carefully lower the rack into the simmering water.

Make sure the jars are covered by 1″ of hot water above the lids of the jars, adding additional hot water, if necessary. Put a lid on the canner.

After water is added, the jars are sealed, then placed on canning rack.7 quart jars of cranberries, etc. are lowered into the water bath canner.

Process The Jars

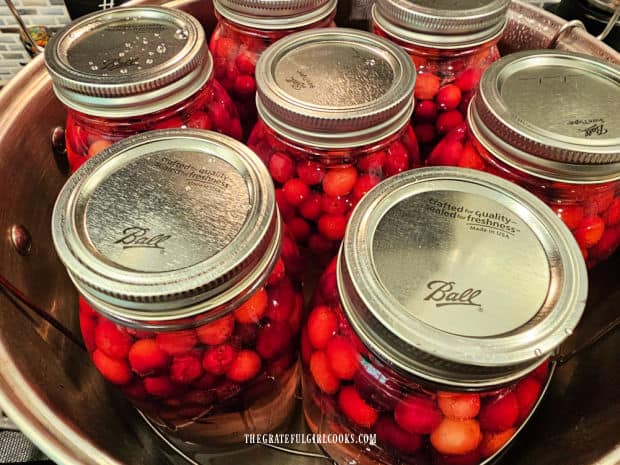
Bring the water to a full rolling boil, then set your timer for this step. Here are the processing times for different elevations:

Elevation Below 1,000 feet: 20 minutes / Above 1,000- 6,000 feet: 30 minutes / Above 6,000 feet: 35 minutes

Once the jars have gently boiled for the appropriate time for your elevation, turn off the heat. Let the jars sit for a minute, then carefully remove the lid.

Use canning tongs to remove the very hot jars from the canner onto a dish towel to cool. TIP: Do NOT place the boiling hot jars directly on the kitchen counter, because temperature variances could cause the jars to crack or break.

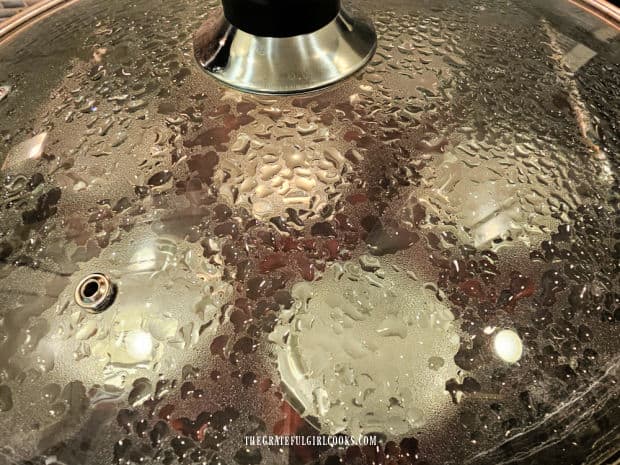
Canning cranberry juice in a water bath canner for 20 minutes.

What Now?

Once you’ve removed the jars, you’re probably going to wonder why it doesn’t LOOK like cranberry juice! That was my reaction the first time I tried canning cranberry juice, too!

You might see tinges of red or pink, but basically the liquid will still look pretty clear! Don’t worry, because that’s how it’s supposed to look at this stage!

Let the jars completely cool on the counter without disturbing them. You should hear the lids “pop or ping” as they seal and become airtight.

Once they have completely cooled, check to ensure each jar is sealed. The lid should have no flexibility on top when you gently press down on it with a finger.

Gently remove the screwband (don’t store jars with the screwband on). Wipe down the jars, and label them, if desired.

After processing, the jars cool on a dish towel. The liquid is still clear.

How To Store The Cranberry Juice

Now the magic happens! Store the sealed jars in a dark place or pantry for 4-6 weeks. About once a week, carefully flip each jar upside down and then quickly right side up). This helps to infuse/incorporate the extracted red cranberry juice into the liquid.

As they sit, the sugar, etc. will begin to pull the juice out of all those plump cranberries! You will start to notice as time goes on, the color of the liquid will begin to darken to a beautiful red color.

After 4-6 weeks the juice will be ready and can be consumed (I usually give it 6 weeks, for best flavor!).

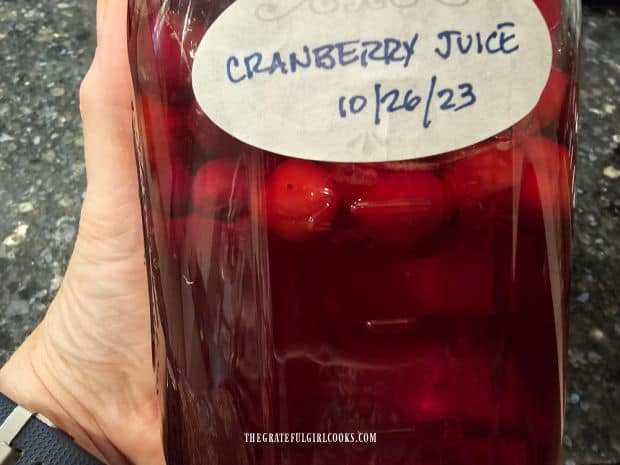
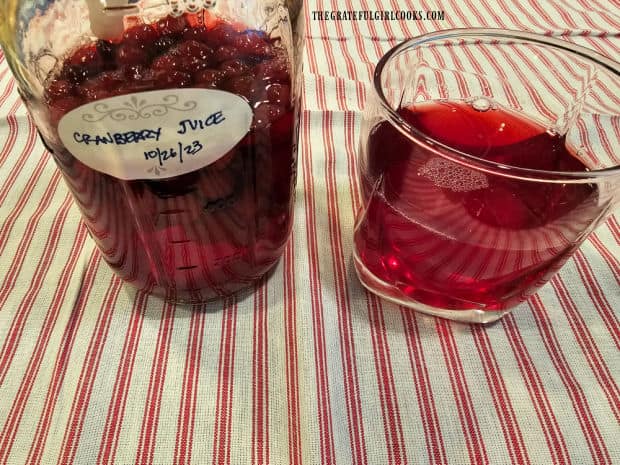
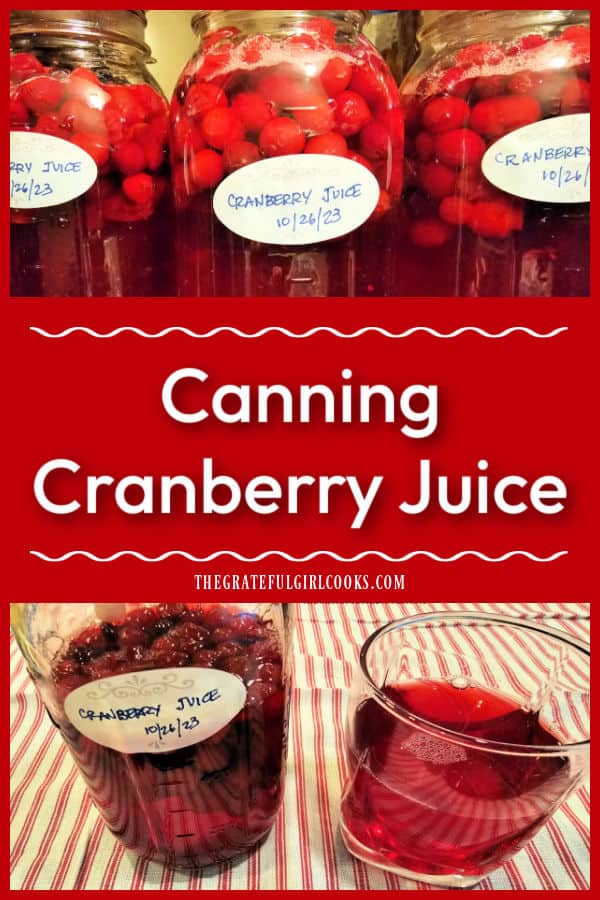
After 4-6 weeks of infusion, the cranberry juice is red and ready to enjoy!

Enjoy The Cranberry Juice

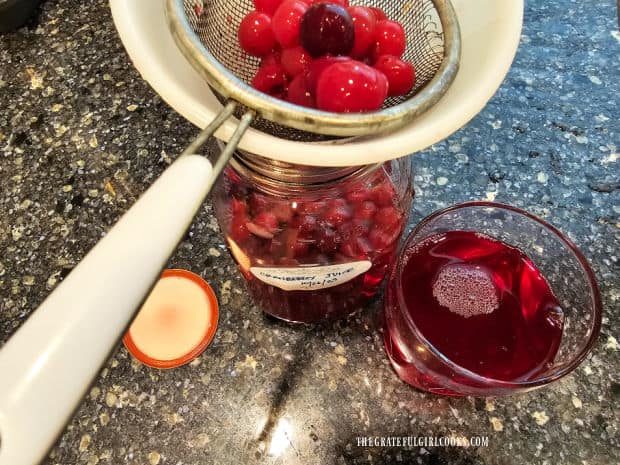
When you’re ready to enjoy a glass of homemade cranberry juice, then pop open a jar (or two). Strain the juice to separate the cranberries from the juice. Serve the cranberry juice over ice.

If you’re not drinking all of the juice in the jar, simply put the cranberries back in the remaining juice, cover and refrigerate).

TIP: When the juice is gone, don’t discard those juicy cranberries! Use a food dehydrator (or oven) to dry them, and you will be left with sweetened dried cranberries to use in other recipes!

The first time I tried this recipe, I took a sip of the juice, and said… “hey, this actually tastes like cranberry juice!” Ha Ha. Go figure!

I love the juice served cold, as is, and it’s also delicious mixed with lemon-lime soda!

Cranberries are strained from the juice before serving.A glass of the homemade cranberry juice with remaining jar on the side.

Canning cranberry juice exceeded my expectations, because the recipe yielded jars of homemade cranberry juice for our pantry AND I even got dried cranberries out of the deal, as well!

I hope you have the chance to make homemade cranberry juice, and trust you’ll enjoy it, too! If you try this recipe and like the results, be sure to check out my recipe for canning apple cranberry juice!

Thanks for stopping by, and I invite you to come back soon for more family-friendly recipes. Take care, may God bless you, and have a wonderful day!

Looking For More CANNING Recipes?

You can find all of my recipes in the Recipe Index, which is located at the top of the page. I have quite a few canning recipes to choose from, including:

Want More Recipes? Get My FREE Newsletter!

I publish a newsletter 2 times per month (1st and 15th) with lots of recipes, tips, etc.
Would you like to join our growing list of subscribers?

There is a Newsletter subscription box on the top right (or bottom) of each blog post, depending on the device you use.
You can submit your e-mail address there, to be added to my mailing list.

Find Me On Social Media:

Facebook page: The Grateful Girl Cooks!
Pinterest:
The Grateful Girl Cooks!
Instagram:
jbatthegratefulgirlcooks

Author's signature

Recipe adapted from: Ashley Adamant at: https://practicalselfreliance.com/canning-cranberry-juice/  

↓↓ PRINTABLE RECIPE BELOW ↓

0 from 0 votes
Canning Cranberry Juice
Prep Time
15 mins
Cook Time
20 mins
Curing Time (inactive)- 4-6 weeks
0 mins
Total Time
35 mins
 

Canning Cranberry Juice is simple, using a water bath canner! This recipe will yield 7 quart jars of delicious tasting cranberry juice.

Category: Beverage, Canning and Preserving
Cuisine: American
Keyword: canning cranberry juice
Servings: 7 quart-sized jars
Calories Per Serving: 337 kcal
Author: JB @ The Grateful Girl Cooks!
Ingredients
For a total of 7 quart-sized jars:
  • 12¼ cups cranberries (four 12 oz. bags)
  • 2⅓ cups granulated sugar + more, if desired for sweetness
  • boiling water enough to fill each jar
For EACH Quart-Sized Jar:
  • cup cranberries
  • cup granulated sugar
  • boiling water enough to fill the jar
Instructions
  1. Sterilize/heat canning jars in simmering water. Prepare lids/screwbands per manufacturer instructions. Have boiling water (for filling jars) ready to go. Fill water bath canner with water, per manufacturer instructions; bring water to a simmer on Low.

  2. For EACH quart jar you need 1¾ cups of cranberries, ⅓ cup of granulated sugar, and boiling waterNOTE: If you like juice sweeter, add ½ cup sugar to each jar.   Use canning funnel to add 1¾ cups cranberries to each hot jar. Jars won't be full.

  3. Add ⅓ cup sugar to each jar. Pour boiling water into the hot jars, leaving ½" headspace. Remove air bubbles from each jar, then wipe rim of each jar clean with a damp cloth. Place flat lid on; add screwband, and tighten until fingertip tight.

  4. Carefully place jars on canning rack in a water bath canner (with simmering water). Carefully lower rack into the hot water. Make sure jars are covered by 1" of water above the lids, adding additional water, if necessary. Cover canner.

  5. Bring water to a full rolling boil, then set timer. Here are the processing times:

    Elevation Below 1,000 feet: 20 minutes / Above 1,000- 6,000 feet: 30 minutes / Above 6,000 feet: 35 minutes

    Once jars have been processed for appropriate time, turn off the heat. Let jars rest for a minute, then carefully remove canner lid. Use canning tongs to transfer hot jars from the canner onto a dish towel to cool. TIP: Do NOT put hot jars directly on the counter, because temperature variances could cause jars to crack or break.

  6. Let jars completely cool to room temperature without disturbing them. You should hear lids "pop or ping" as they seal/become airtight. Once completely cooled, check to ensure each jar is sealed. The lid should have no flexibility on top when you gently press down on it with a finger. Carefully remove screwband (don't store jars with screwband on). Wipe down jars; label them, if desired.

  7. Store sealed jars in dark place or pantry for 4-6 weeks. Once a week, carefully flip each jar upside down and then quickly right side up). This helps infuse extracted red cranberry juice into the liquid. As jars sit, the sugar begins to pull the juice out of the plump cranberries! You will start to notice as time goes on, the color of the liquid will begin to darken to a beautiful red color.

  8. After 4-6 weeks (6 for best flavor), open a jar. Strain juice to separate cranberries from the juice. Serve juice over ice. Cover/refrigerate opened jar of juice.

Recipe Notes

The caloric calculation is an estimate, based on the ingredients used for ONE quart-sized jar of juice.

Nutrition Facts
Canning Cranberry Juice
Amount Per Serving (1 quart jar)
Calories 337 Calories from Fat 4
% Daily Value*
Fat 0.4g1%
Saturated Fat 0.01g0%
Polyunsaturated Fat 0.1g
Monounsaturated Fat 0.03g
Sodium 4mg0%
Potassium 141mg4%
Carbohydrates 87g29%
Fiber 6g25%
Sugar 74g82%
Protein 1g2%
Vitamin A 105IU2%
Vitamin C 25mg30%
Calcium 15mg2%
Iron 0.4mg2%
* Percent Daily Values are based on a 2000 calorie diet.

Here’s one more to pin on your Pinterest boards!Canning Cranberry Juice is simple, using a water bath canner! This recipe will yield 7 quart jars of delicious tasting cranberry juice.

Strawberry Rhubarb Jam

Learn how to can delicious Strawberry Rhubarb Jam for long term storage! The recipe will yield approx. 9 jars of yummy, sweet and tangy jam!

I love to make jars of homemade jam and fill our pantry with them! Many, many years ago I started making homemade strawberry jam and canning it as my first “project” when I learned to can. It was delicious, and I’ve been canning ever since!

Today I want to share a delicious recipe for canning strawberry rhubarb jam. I grow both of these fruits in our little backyard raise bed garden and absolutely love this sweet, tart combination of flavors!

Scroll Down For A Printable Recipe Card At The Bottom Of The Page

What Do I Need For This Jam Recipe?

For this recipe you need 4 cups of crushed strawberries, 2 cups of sliced rhubarb, lemon juice, granulated sugar and a standard sized box of powdered pectin. **You can also use ½  teaspoon of butter to reduce foam, if desired (optional).**

Place the strawberries in a large bowl (or food processor). Crush them well before measuring, but don’t puree them. I find it convenient to use a potato masher to crush them! The rhubarb should be thinly sliced before measuring, as well.

You also need a water bath canner (or large covered stockpot with a lid and a rack), canning jars, flat lids and screwbands, all prepped according to manufacturer instructions. Prep these items while you get the jam ready for canning.

Fresh strawberries are ready to be made into jam!Rhubarb stalks are thinly sliced to add to the jam mixture.

Prepare The Ingredients For Cooking

Measure the exact amount of finely crushed strawberries (4 cups) and sliced rhubarb (2 cups) into a large stockpot or Dutch oven.

Add ¼ cup fresh or bottled lemon juice and 1 standard sized box of powdered pectin. If desired, you can also add ½ teaspoon of butter to help reduce the foam as the jam cooks, but this is optional. Stir to fully combine these ingredients.

In a separate large bowl, measure out the granulated sugar. You need to have it ready to go as soon as the jam is hot and ready for it! Set this big bowl of sugar aside.

Smashed strawberries, rhubarb, lemon juice and pectin in a Dutch oven.

Cook The Strawberry Rhubarb Jam

Bring the fruit mixture to a FULL ROLLING BOIL on HIGH heat. NOTE: A full rolling boil means the fruit doesn’t stop boiling, even while stirring. Stir the fruit constantly while it cooks.

As soon as the fruit comes to a full rolling boil, dump ALL of the sugar in at once, and stir very well, to combine. Bring the jam back to a FULL ROLLING BOIL, stirring constantly, and let it boil for 4 minutes.

When done, remove the pan from the heat source. If there is any foam found on top, simply skim it off and discard.

Granulated sugar is added all at once to the boiling hot fruit mixture in pan.

Canning The Jam

Ladle the hot strawberry rhubarb jam into clean, pre-heated jars. This recipe yields enough jam to fill nine ½ pint jars. Fill each hot jar with the hot jam (using a canning funnel if possible). Leave 1/8″ headspace remaining at the top of each jar.

Remove air bubbles from the jam by inserting a non-metallic utensil down the inside walls of the jar several times. Wipe the rim of the jars very well with a wet paper towel or dishcloth to remove any jam residue that could cause the jar lids to not seal properly.

Cover the jars with prepared flat lids, add the screwband and tighten to fingertip tight.

Hot jam is ladled through a canning funnel and into jars.

Processing The Strawberry Rhubarb Jam

Once sealed, place the jars carefully on the canning rack. Lower the rack into the simmering water in the canner. Make sure the water covers the top of the jars by 1-2 inches, adding more hot water, if necessary.

Cover the canner with a lid. Bring the water in the canner to a gentle boil Once the water is gently boiling, set a timer and process the jam for 10 minutes.

When done, turn off the heat, remove the lid from the canner, and let the jars sit undisturbed in the hot water for 5 minutes before removing them.

Jars of strawberry rhubarb jam are processed in boiling water in a canner.

I’ve Canned The Jam… Now What?

Remove the hot jars carefully, and place them upright on a dish towel on the counter until they’ve cooled completely. Do NOT place the HOT jars directly on the countertop because temperature variances could cause the jars to crack.

Let the jars cool, undisturbed, for 12-24 hours. As the jars seal, you should hear a “ping” sound. Once the jars have completely cooled, make sure to test the seal on the jars before storing them in your pantry.

To test seal: press top/middle section of each lid with your index finger. If the lid springs back, the jar did not seal properly, so you will need to refrigerate the jar of jam. It is still perfectly wonderful for eating, but cannot be stored long term in a pantry.

If the jars sealed properly, wipe them clean, gently remove the screwband for storage, label the jars and place them in your pantry for long term storage.

Jars of home canned strawberry rhubarb jam are labeled after cooling.

Time To Enjoy Some Strawberry Rhubarb Jam

When you’re ready to enjoy this delicious strawberry rhubarb jam, pop open a jar! The jam should be a beautiful ruby color, with tiny pieces of strawberries and rhubarb inside. Store leftover, opened jars of jam in the refrigerator.

Enjoy the jam on toast, English muffins, peanut butter and jelly sandwiches, or even use as a topping for pancakes. It’s delicious!

A big spoonful reveals the ruby red color of the strawberry rhubarb jam.Half of an English muffin covered with the strawberry rhubarb jam.

I hope you enjoy this yummy fruit jam as much as we do. Happy canning AND eating, and thanks for visiting my blog.

I invite you to come back again soon for more family-friendly recipes. Take care, may God bless you, and have a GREAT day!

Looking For More JAM Recipes?

You can find ALL of my recipes in the Recipe Index, which is located at the top of the page. I have lots of delicious jams and marmalades to choose from, including:

Want More Recipes? Get My FREE Newsletter!

I publish a newsletter 2 times per month (1st and 15th) with lots of recipes, tips, etc.
Would you like to join our growing list of subscribers?

There is a Newsletter subscription box on the top right (or bottom) of each blog post, depending on the device you use.
You can submit your e-mail address there, to be added to my mailing list.

Find Me On Social Media:

Facebook page: The Grateful Girl Cooks!
Pinterest:
The Grateful Girl Cooks!
Instagram:
jbatthegratefulgirlcooks

Author's signature

Adapted from: “Ball Blue Book – Guide To Preserving”, page 35, published by Hearthmark, LLC in 2013

↓↓ PRINTABLE RECIPE BELOW ↓↓

0 from 0 votes
Strawberry Rhubarb Jam
Prep Time
30 mins
Cook Time
10 mins
Total Time
40 mins
 

Learn how to can delicious Strawberry Rhubarb Jam for long term storage! The recipe will yield approx. 9 jars of yummy, sweet and tangy jam!

Category: Jam / Canning and Preserving
Cuisine: American
Keyword: strawberry rhubarb jam
Servings: 144 Tablespoons (approx. 9 half-pints)
Calories Per Serving: 48 kcal
Author: JB @ The Grateful Girl Cooks!
Ingredients
  • 4 cups crushed strawberries
  • 2 cups sliced rhubarb
  • ¼ cup fresh lemon juice
  • 1 box powdered pectin
  • cups granulated sugar
  • ½ teaspoon butter (optional) to cut down on foaming
Instructions
  1. Begin heating water in canner, and prep/heat jars, lids and rings per manufacturer instructions, so they're ready when the jam is ready.

  2. Place strawberries in large bowl; crush them well before measuring. Rhubarb should be thinly sliced before measuring, as well.

  3. Measure exact amount of crushed strawberries and sliced rhubarb into a large stockpot or Dutch oven. Add fresh or bottled lemon juice and pectin. If desired, add butter to reduce foam as jam cooks (optional), Stir to combine ingredients.

  4. In a separate large bowl, put the granulated sugar. You need it ready to go as soon as the jam is boiling hot. Set aside.

  5. Bring fruit mixture to a FULL ROLLING BOIL on HIGH heat. NOTE: A full rolling boil means fruit doesn't stop boiling, even while stirring. Stir fruit constantly while it cooks. As soon as fruit comes to full rolling boil, dump ALL sugar in at once. Stir very well, to combine. Bring jam back to a FULL ROLLING BOIL, stirring constantly, and let it boil for 4 minutes. When done, remove pot from the heat. If there's any foam on top, skim it off and discard.

  6. Ladle jam into clean, pre-heated jars. Fill each with jam (using canning funnel if possible). Leave 1/8" headspace remaining at the top of each jar. Remove air bubbles from by inserting a non-metallic utensil down the sides of the jar several times. Wipe jar rims very well with a wet paper towel or dishcloth to remove any jam residue that could cause jar lids to not seal properly. Cover jars with prepared flat lids; add screwband and tighten to fingertip tight.

  7. Once sealed, place jars carefully on canning rack. Lower rack into simmering water in canner. Make sure water covers top of the jars by 1-2 inches, adding more hot water, if necessary. Cover the canner. Bring water to a gentle boil. Once gently boiling, set a timer and process jam for 10 minutes. When done, remove pan from heat, remove cover, and let jars sit for 5 minutes in the hot water.

  8. Remove hot jars; place upright on a dish towel on the counter. DON'T place HOT jars directly on countertop; temperature variances could cause jars to crack. Let cool, undisturbed, 12-24 hours. As jars seal, you should hear a "ping" sound. Once jars have cooled, test the seal before storing jars in pantry. To test seal: press center of each lid with an index finger. If lid springs back, jar did not seal properly, so you must refrigerate that jar of jam. It's fine for eating, but cannot be stored long term in pantry. If jars sealed properly, wipe clean, remove the screwband for storage; label jars. Place jars in pantry for long term storage.

Nutrition Facts
Strawberry Rhubarb Jam
Amount Per Serving (1 Tablespoon)
Calories 48 Calories from Fat 1
% Daily Value*
Fat 0.1g0%
Saturated Fat 0.01g0%
Trans Fat 0.001g
Polyunsaturated Fat 0.01g
Monounsaturated Fat 0.01g
Cholesterol 0.04mg0%
Sodium 1mg0%
Potassium 12mg0%
Carbohydrates 12g4%
Fiber 0.1g0%
Sugar 12g13%
Protein 0.04g0%
Vitamin A 3IU0%
Vitamin C 3mg4%
Calcium 2mg0%
Iron 0.04mg0%
* Percent Daily Values are based on a 2000 calorie diet.

Here’s one more to pin on your Pinterest boards!Learn how to can delicious Strawberry Rhubarb Jam for long term storage! The recipe will yield approx. 9 jars of yummy, sweet and tangy jam!

Pear Butter (no pectin)

Make several jars of pear butter for yourself or to give to friends! Delicious on toast, yogurt or ice cream! Canning instructions are included.
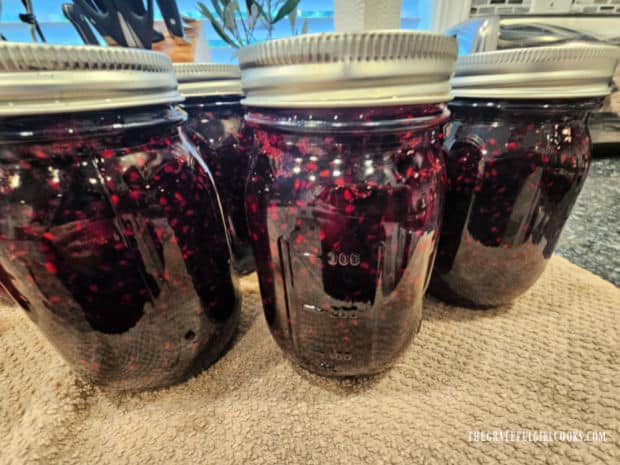
Make several jars of pear butter for yourself or to give to friends! Delicious on toast, yogurt or ice cream! Canning instructions included.
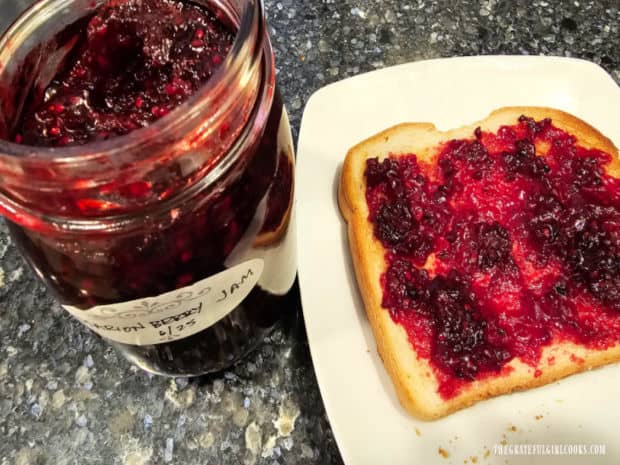
Today I want to share a recipe for making homemade pear butter and have included instructions for canning this delicious spread for storage.

One of my favorite fruit butters to make and can has always been apple butter, because I love the flavor of apples and cinnamon. Guess what? Pear butter is equally awesome, and it’s filled with cinnamon and nutmeg flavor, too!

My husband and I were blessed to receive a large bag of ripe pears last summer from one of our neighbors who grows them. I knew immediately I wanted to make pear butter, so I got my canning “stuff” together and got busy!

As a result, we’ve been enjoying it for almost a year now! Even if you don’t want to “can” it, you can make several jars to give to family or friends for immediate enjoyment. Here’s how to make it:

Scroll Down For A Printable Recipe Card At The Bottom Of The Page

Prepare The Pears For Cooking

Peel the pears and remove the core from each one (discard core). Slice the pears, then place them in a large Dutch oven or a large stockpot. 

Ripe pears are prepped by peeling and removing cores.

Twelve cups of peeled and sliced pears in a large soup pot, ready to cook.Add granulated sugar, ground cinnamon, lemon juice, and nutmeg to the pot, and stir to combine them with the pear slices.

Cook this pear mixture for 10 minutes on medium heat, stirring occasionally to prevent sticking, then remove the pan from the heat.

Sugar, cinnamon, lemon juice and nutmeg are added to the sliced pears.

Puree The Pears (Two Methods)

Now you will need to puree the soft pears in order to make the pear butter. There are two methods for pureeing the pears.

FIRST METHOD: If you have a hand-held immersion blender, you can puree the pears and juice right in the stockpot after cooking.

After pears cook for a few minutes, they are removed from the pan with a slotted spoon.After pears are removed from pan, the cinnamon sugar pear juices remain in pot.

SECOND METHOD: If you don’t have an immersion blender, you can use a standard blender. Here’s how: Use a SLOTTED spoon to remove the hot pears out of the pot and transfer them to a large bowl. Leave the bulk of the “juice” still in the stockpot.

Transfer the pears to the blender and blend. NOTE: You may need to do this in a couple batches, due to the number of pears. Fill the blender about halfway with hot pears.

Put the lid on (hold it down securely), and begin blending on low speed for a few seconds, then increase speed until the pears are pureed.

Blend just until the pears are smooth and liquified, then pour the “puree” back into the pot with the reserved juice. Repeat until all pears have been blended and added back into the pot.

Pears are pureed in a blender before cooking further.Pureed pears are blended and are now ready to cook and turn into pear butter.

Continue Cooking

 Finish cooking the pear butter in the pan on LOW heat, stirring it occasionally, for approximately 60 minutes.

How Do I Know When It Is Done?

Pear butter is done when it can be lightly mounded on a spoon (without running) OR by using the method I call the “Frozen Plate Thing”. The frozen plate method is a great way to test for doneness when no pectin has been used to thicken jams or fruit butter.

Plan ahead, because you will need to put a plate in the freezer for an hour before using this method. For this recipe I put it in the freezer when I start preparing and peeling the pears.

What Exactly Is This “No Plate Thing”?

Basically, it is a tried-and-true method to check and see if the jam has thickened enough to be ready to be consumed. To do this, grab the plate out of the freezer.

Put a teaspoon of the hot pear butter onto the frozen plate. If the pear butter “sets up” and doesn’t run on the plate within the first minute, it’s ready. If it is too runny, put the plate back in the freezer.

Continue to cook the pear butter a few more minutes. Try again, and once the pear butter will set up, it’s ready, and can be refrigerated for immediate use.

The pureed pears are added back into the cinnamon sugar and juices in pan.Pear butter is finished cooking when it can be mounded onto a spoon without running.

Canning Pear Butter For Long Term Storage

To can pear butter for long term storage, follow manufacturer instructions for preparing water bath canner, pre-heating jars, flat lids and screw bands. This recipe will typically yield between 5-6 cups of pear butter.

Use any combination of half-pint or pint-sized jars that you have. Ladle the hot pear butter into pre-heated jars, being sure to leave a ¼” headspace.

Insert a plastic knife several times to remove air bubbles, then wipe the rims of the jars until clean with a damp cloth. Add the flat lid and screwband (ring) to each jar, and tighten the ring to fingertip tightness.

Place jars on wire rack and lower rack carefully into simmering water in canner. Make sure the water level is 1″ OVER the top of the jars (add more hot water if necessary). Turn the heat up and bring to a gentle, rolling boil.

Process the jars for 10 minutes after the water comes to a boil. When done, use canning tongs to safely remove jars from the canner, and set jars on a dish towel (not directly on counter) to cool.

Pear butter is added to canning jars before adding to the water bath canner.Jars of pear butter on canning rack are processed for 20 minutes in boiling water.

Storing And Using Home-Canned Pear Butter

Let the jars cool for at least 12 hours (or overnight) without moving them. You should hear the jars “pop” as each jar seals. If they’ve sealed properly, there should be no give when you press on the middle of the lid with a finger after jars have cooled.

Test the seal on each jar and if there is a “good seal”, then the pear butter can be stored safely long-term.  Any jars that do not properly seal are not safe to store long-term but can be refrigerated and used as needed.

Several jars of canned pear butter cooling on a dish towel.A piece of toast with some of the homemade pear butter spread on it.

Pear butter is delicious as a spread for toast and biscuits, and it also tastes WONDERFUL served on plain yogurt or vanilla ice cream! The cinnamon flavor really makes this topping shine, and I believe you will love it as much as we do.

Thanks for stopping by, and I invite you to come back again soon for more family-friendly recipes. Take care, may God bless you, and have a great day!

Looking For More JAM or FRUIT BUTTER Recipes?

You can find ALL of my recipes in the Recipe Index, located at the top of the page. I have lots of jam recipes for you to enjoy, including:

Want More Recipes? Get My FREE Newsletter!

I publish a newsletter 2 times per month (1st and 15th) with lots of recipes, tips, etc.
Would you like to join our growing list of subscribers?

There is a Newsletter subscription box on the top right (or bottom) of each blog post, depending on the device you use.
You can submit your e-mail address there, to be added to my mailing list.

Find Me On Social Media:

Facebook page: The Grateful Girl Cooks!
Pinterest:
The Grateful Girl Cooks!
Instagram:
jbatthegratefulgirlcooks

Author's signature

Recipe adapted from: https://chasingvibrance.com/old-fashioned-pear-butter/

↓↓ PRINTABLE RECIPE BELOW ↓↓

0 from 0 votes
Pear Butter (no pectin)
Prep Time
20 mins
Cook Time
1 hr
Canning Time
10 mins
Total Time
1 hr 30 mins
 

Make several jars of pear butter for yourself or to give to friends! Delicious on toast, yogurt or ice cream! Canning instructions included.
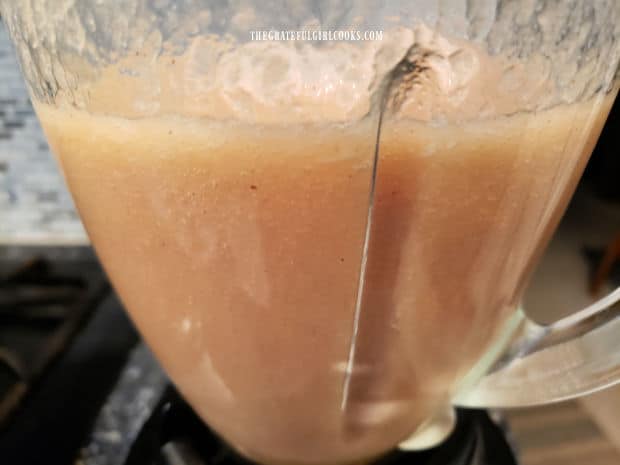
Category: Jam
Cuisine: American
Keyword: pear butter
Servings: 80 Tablespoons (5 cups total)
Calories Per Serving: 24 kcal
Author: JB @ The Grateful Girl Cooks!
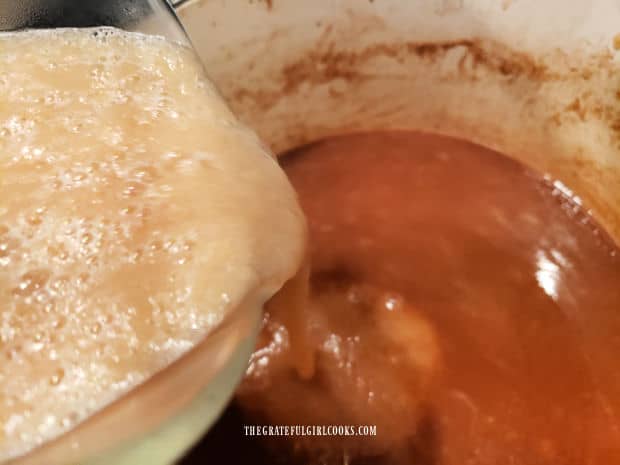
Ingredients
  • 12 cups sliced fresh pears (RIPE!) peeled, cored & sliced
  • 1 cup granulated sugar
  • 2 Tablespoons fresh lemon juice
  • 1 Tablespoons ground cinnamon
  • ¼ teaspoon ground nutmeg
Instructions
  1. Peel, core and slice pears; place them in large Dutch oven or stockpot. Add sugar, cinnamon, lemon juice, and nutmeg; stir to combine. Cook 10 minutes on medium heat, stirring occasionally; remove pan from heat.

  2. Use slotted spoon to remove pears from pan; transfer to large bowl. Leave "juice" in the stockpot.

  3. Fill blender halfway with hot pears (do this in batches). Hold the lid on securely; blend on low speed for a few seconds, then increase speed just until pears are pureed and smooth. Pour "puree" back into the pot with the juice. Repeat until all pears are blended and added back to pot. Continue cooking on LOW heat, stirring occasionally, for approx. 60 minutes.

  4. Pear butter is done when it can be mounded on a spoon (without running) OR by using a method I call the "Frozen Plate Thing". Frozen plate method is a way to test thickness when no pectin has been added. Plan ahead, as you need to put a plate in the freezer for an hour before you need it. After cooking pea butter, grab the plate out of the freezer. Put a teaspoon of hot pear butter onto frozen plate. If pear butter "sets up" and doesn't run on the plate within the first minute, it's ready. If it's too runny, put plate back in the freezer; Continue to cook pear butter a few more minutes. Try again- once pear butter will set up, it's ready, and can be refrigerated in airtight containers or jars for immediate use.

CANNING INSTRUCTIONS FOR LONG-TERM STORAGE
  1. To can pear butter for long term storage, follow manufacturer instructions for preparing water bath canner, heating jars, flat lids and screwbands. This recipe will yield between 5-6 cups of pear butter.

    Use any combination of half-pint or pint sized jars that you have. Ladle hot pear butter into pre-heated jars, being sure to leave a ¼" headspace. Insert a plastic knife or utensil several times to remove air bubbles. Wipe rims of jars until clean with a damp cloth. Add flat lid and screwband (ring) to each jar; tighten ring to fingertip tightness.

    Place jars on wire rack; lower rack carefully into simmering water in canner. Make sure water level is 1" OVER the top of the jars (add more hot water if necessary). Turn heat up; bring to a gentle, rolling boil. Process jars for 10 minutes after water comes to a boil. When done, use canning tongs to remove jars from canner. Set hot jars on a dish towel (not directly on counter) to cool.

  2. Let jars cool for 12 hours (or overnight) without moving them. You should hear jars "pop" as they seal. If sealed properly, there should be no give when you press down on the middle of the lid with a finger after jars have cooled. Test seal on each jar- if there is a "good seal", then jars can be stored safely long-term.  Any jars that do not properly seal are not safe to store long-term, but can be refrigerated and used as needed.

Recipe Notes

NOTE: Caloric calculation was made assuming 5 cups is total quantity of pear butter made, with each serving equal to one Tablespoon.

Nutrition Facts
Pear Butter (no pectin)
Amount Per Serving (1 Tablespoon)
Calories 24
% Daily Value*
Fat 0.05g0%
Saturated Fat 0.01g0%
Polyunsaturated Fat 0.02g
Monounsaturated Fat 0.02g
Sodium 0.3mg0%
Potassium 29mg1%
Carbohydrates 6g2%
Fiber 1g4%
Sugar 5g6%
Protein 0.1g0%
Vitamin A 6IU0%
Vitamin C 1mg1%
Calcium 3mg0%
Iron 0.1mg1%
* Percent Daily Values are based on a 2000 calorie diet.

Here’s one more to pin on your Pinterest boards!Make several jars of pear butter for yourself or to give to friends! Delicious on toast, yogurt or ice cream! Canning instructions included.
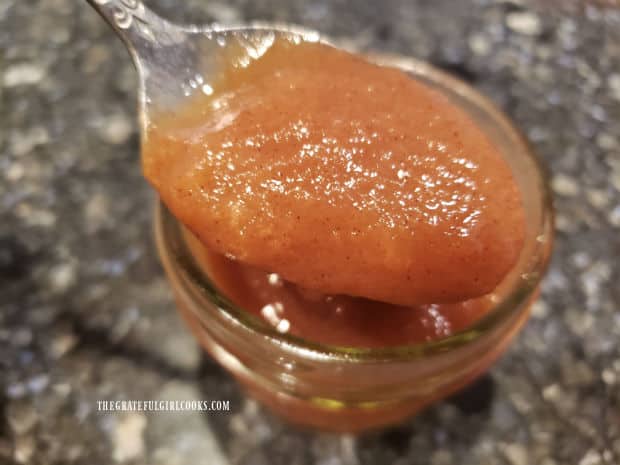
Italian Plum Jam

Make yummy, pectin-free Italian Plum Jam with prune plums! Small batch recipe makes about 3 half pints, and canning directions are included.

A good friend of our family brought us an incredibly HUGE number of Italian plums last summer. He had been given so many by one of his neighbors there was no way he could eat them all. So he blessed us with them!

We ate some, and I made several jars of this delicious jam AND used the rest to bake an incredible Italian Plum Shortbread Tart!

I’ve made literally HUNDREDS of jars of jam over the years but had never tried making plum jam until I tried this recipe. It is so very good!

The small batch recipe is convenient, especially if you don’t eat lots of jam! This way, you can just try it, and you won’t be overwhelmed with prep work or make “too many to eat” jars of jam!

It is a pectin-free jam made with only THREE ingredients! I’ve also included the instructions to safely can this jam, if you don’t plan on eating it right away, or want to make a few jars for storage in your pantry.

Scroll Down For A Printable Recipe Card At The Bottom Of The Page

Prepare The Italian “Prune” Plums

Behold… the humble Italian prune plum. Black/grey in color, oblong shaped, and typically harvested in late August, they’re very unassuming, as far as fruit goes.

But let me tell you… they taste wonderful! NOTE: Plan ahead to make this jam, because the prepared plums need to be refrigerated overnight!

To prepare the plums for jam, begin by cutting each one into quarters, and removing and discarding the seeds. Place the quartered, pitted plums into a large bowl.

You will need a total of 2 pounds of plums for this small batch recipe, so get cutting! The insides of the plums are a brilliant golden hue (before cooking). 

Italian prune plums are oblong in shape, and black and grey in color.Italian plums are cut into quarters, pitted, and the flesh is golden in color before cooking.

Add granulated sugar and the juice of a lemon to the plums, and stir well, to combine these ingredients. Once combined, cover the bowl with plastic wrap, and place in the refrigerator.

Allow the plums to refrigerate overnight or at least 8 hours for the very best results.

Granulated sugar and fresh lemon juice are stirred into the plums, then they're refrigerated overnight.

After being refrigerated overnight, the plum mixture is ready to be cooked into jam.

Cooking The Italian Plum Jam

Since this Italian plum jam is being made without pectin, before you begin cooking the plums, place a small plate into your freezer to get it really cold. NOTE: You will use the freezing cold plate to test the jam for doneness later on, so this is an important step!

Pour the refrigerated plum mixture into a medium-sized saucepan. Turn the heat to MEDIUM and bring this mixture to a boil.

Once boiling, continue to cook the plums for about 2 minutes, stirring often. As they cook, the plums will perform magic and turn into a bright red color… isn’t that awesome?

Now turn the heat down to LOW and continue to cook, stirring often for another 15- 20 minutes. Skim off and discard any white foam that rises to the surface as it cooks

While the Italian plum jam cooks, the plums turn from golden in color to red.

How Do I Know If It Is Done?

To check to see if the jam is ready, grab the plate out of the freezer. Put a teaspoon of hot jam onto the frozen plate. If the jam “sets up” within the first minute, the Italian plum jam is ready.

If the jam is too runny, put the plate back in the freezer and continue to cook the jam a few more minutes. Try again, and once the jam will set up, it’s ready. Remove the saucepan from the heat.

To test for doneness, a spoonful of hot jam is placed on a frozen plate to see if the jam sets up.

Canning Italian Plum Jam

Canning jars and lids will need to be clean, sterilized and hot, following recommended USDA guidelines for safe canning. The total amount of jam (as written) this small batch yields is approximately 3 cups.

Because this is a small batch, I usually get about 3 half pint jars for canning (sometimes a little extra for the refrigerator), but you can easily double or triple the recipe.

Spoon or pour jam through a canning funnel into sterilized jars, leaving a headspace of 1/8″. Use a plastic utensil to remove air bubbles in the jars, then wipe the rims of the jars clean with a damp towel.

Attach prepared flat lids and add screw bands, then tighten to fingertip tightness. Process the jars of Italian plum jam (in boiling water at least 1″ above the top of the jars) in a water bath canner for 10 minutes.

When The Canning Process Is Done

Remove hot jars with tongs and place on a dish towel on the counter. NOTE: Do not place boiling hot jars directly on countertops because differences in temps. could cause jars to crack.

Let the jars sit undisturbed for about 12 hours. The jam will thicken slightly as it cools, and jars should seal during this time (you should hear a pinging sound as they seal).

If sealed correctly, lids should have no give when tested by gently pressing down on the lid with a finger after jam cools. Any jars that do not correctly seal should be refrigerated. Label sealed jars, and store in pantry (or refrigerator, if desired).

Jars of jam being processed in a water bath canner.

Italian Plum Jam Is Ready To Enjoy!

Keep jam refrigerated, once the jar has been opened. Italian Plum Jam tastes fantastic straight out of the jar or spread on toast or English muffins.

It is also really yummy mixed into plain Greek yogurt for breakfast or a snack, and it can also be enjoyed as a warmed topping for vanilla ice cream. YUM!

The recipe as written is estimated to yield about 48 Tablespoons (or servings) of jam, so even this small batch should last for a little while.

A pint jar of Italian Plum Jam, only half full after a lot of jam has been gobbled up.A toasted English muffin, covered with Italian Plum Jam, and ready to enjoy.

I hope you have the opportunity to make a small batch of this Italian plum jam for yourself and those you love. It is delicious and I’m confident you’ll enjoy it, too!

Thanks for stopping by today, and I invite you to come back soon for more family-friendly recipes. Take care, may God bless you… and have a GREAT day!

Looking for More JAM Recipes?

You can find ALL of my recipes in the Recipe Index, which is located at the top of the page. I have lots of delicious homemade jam recipes to choose from, including:

Want More Recipes? Get My FREE Newsletter!

I publish a newsletter 2 times per month (1st and 15th) with lots of recipes, tips, etc.
Would you like to join our growing list of subscribers?

There is a Newsletter subscription box on the top right (or bottom) of each blog post, depending on the device you use.
You can submit your e-mail address there, to be added to my mailing list.

Find Me On Social Media:

Facebook page: The Grateful Girl Cooks!
Pinterest:
The Grateful Girl Cooks!
Instagram:
jbatthegratefulgirlcooks

Author's signature

Original recipe source: Lora at: savoringitaly.com/italian-plum-jam/

↓↓ PRINTABLE RECIPE BELOW ↓↓

5 from 1 vote
Italian Plum Jam (small batch)
Prep Time
10 mins
Cook Time
30 mins
Refrigeration Time (inactive-overnight)
8 hrs
Total Time
8 hrs 40 mins
 

Make yummy, pectin-free Italian Plum Jam with prune plums! Small batch recipe makes about 3 half pints, and canning directions are included.

Category: Condiment
Cuisine: American
Keyword: Italian plum jam
Servings: 48 Tablespoons (approx. 3 cups total)
Calories Per Serving: 33 kcal
Author: JB @ The Grateful Girl Cooks!
Ingredients
  • 2 pounds Italian prune plums pitted, quartered
  • cups granulated sugar
  • 1 lemon, JUICE only
Instructions
Prepping The Plums:
  1. NOTE: Plan ahead- prepared plums need to be refrigerated overnight!

    Cut each plum into quarters: remove/discard pits. Put plums into large bowl. Add sugar and lemon juice; stir well, to combine. Cover bowl with plastic wrap, and place in refrigerator. Refrigerate overnight or at least 8 hours for best results.

Cooking Jam:
  1. Before you cook the plums, place a small plate into your freezer. NOTE: You will use freezing cold plate to test jam for doneness later, so this is an important step!

    Pour refrigerated plums into medium-sized saucepan. Turn to MEDIUM eat; bring mixture to a boil. Once boiling, continue cooking plums for 2 minutes, stirring often. Turn heat down to LOW. Continue to cook, stirring often, for 15- 20 minutes (plums will turn red). Skim off/discard white foam that rises to surface,

  2. To see if jam is ready, remove plate from freezer. Put a teaspoon of hot jam on plate. If jam "sets up" within first minute, jam is ready. If jam is too runny, put plate back in freezer; continue to cook jam 2-4 more minutes. Try again, and once jam will set up, it's ready. Remove saucepan from the heat.

Canning Instructions:
  1. Canning jars and lids need to be clean, sterilized and hot, following recommended USDA guidelines for safe canning. This small batch will yield approx. 3 cups ( about 3 half pint jars), but you can easily double or triple recipe.

    Spoon or pour jam (using a a canning funnel) into sterilized jars, leaving a headspace of 1/8". Use a plastic utensil to remove air bubbles in jars, then wipe rims of jars clean with a damp towel. Attach prepared flat lids and add screw bands; tighten to fingertip tightness. Process jam (in boiling water at least 1" above top of jars) in a water bath canner for 10 minutes.

    Remove jars with tongs; place on a dish towel on counter. NOTE: Do not place boiling hot jars directly on countertop because temperature variations could cause jars to crack. Let jars sit undisturbed for about 12 hours. Jam will thicken as it cools, and jars should seal; (you hear a pinging sound as they seal). If sealed correctly, lids should have no give when tested by gently pressing down on the lid with a finger after jam cools. Any jars that don't seal should be refrigerated. Label sealed jars; store in pantry. After opening jar, keep refrigerated.

Nutrition Facts
Italian Plum Jam (small batch)
Amount Per Serving (1 Tablespoon)
Calories 33 Calories from Fat 1
% Daily Value*
Fat 0.1g0%
Saturated Fat 0.003g0%
Polyunsaturated Fat 0.01g
Monounsaturated Fat 0.03g
Sodium 0.1mg0%
Potassium 30mg1%
Carbohydrates 8g3%
Fiber 0.3g1%
Sugar 8g9%
Protein 0.1g0%
Vitamin A 65IU1%
Vitamin C 2mg2%
Calcium 1mg0%
Iron 0.04mg0%
* Percent Daily Values are based on a 2000 calorie diet.

Here’s one more to pin on your Pinterest boards!Make yummy, pectin-free Italian Plum Jam with prune plums! Small batch recipe makes about 3 half pints, and canning directions are included.