Did you know you can make Homemade Decorative Sprinkles from scratch? They’re easy to make (in any color you want) to top your baked treats!

Last year I went on the hunt for colored “Halloween or Fall-inspired decorative sprinkles” to use for a treat I was making. I went to 3 different stores and couldn’t find any sprinkles in the colors I needed. Nothing!
After my relentless search, I came home and decided to research online to see if anyone out there knew how to make decorative sprinkles from scratch in custom colors.
Guess what? They CAN be made at home! I discovered a great blog where I learned how to do this and it WORKS (thank you John, at Preppy Kitchen).
So, I made my own decorative sprinkles in the colors I wanted! they turned out great, and I used them on my Fall treats (shown further below).
I love that cute little sprinkles are easy to make in so many colors, and the possibilities are endless! Hooray! Here’s how to make your own homemade decorative sprinkles.
Scroll Down For A Printable Recipe Card At The Bottom Of The Page
Combine The Sprinkle Ingredients
The first thing you need to do is SIFT 1 cup of powdered sugar (also known as confectioner’s sugar) into a large bowl. Make sure there are no clumps, because they will clog up the works while piping the icing later.

Add 1 Tablespoon of light corn syrup, ½ teaspoon of vanilla extract and 1½ Tablespoons of water to the sifted powdered sugar. Beat well until it becomes smooth and lump-free.
Once the icing is smooth, add the remaining ½ cup of sifted powdered sugar. Mix well until fully combined, lump free and is flowing and “pipeable”.
TIP: If necessary, add a tiny bit more water (approx. 1 teaspoon at a time) until this mixture becomes flowing and “pipeable”. Make sure the icing can be easily piped through a pastry bag tip or other piping bag.

Color The Sprinkle Mixture
Divide the icing between small bowls, with the number of bowls used based on the different number of colors you will be making.
When I photographed this last Fall, I wanted to use orange, black and white for the Halloween treats I was making. I kept some of the icing white and then divided the rest into two small bowls for the two other colors.
Add drops of food coloring, as much as necessary to achieve the color you want. Stir the food coloring into the icing mixture very well, to thoroughly distribute the color evenly.
TIP: The colored icing will lighten and fade slightly as it dries overnight and becomes hard, so add just a tiny bit more food coloring than you think you should.


Pipe Sprinkles With Pastry Bag OR Plastic Sealable Bag
Load your pastry bags with the various colors of icing. If you are planning on using a pastry bag, you will need to fit it with a size 3, 4 or 5 tip.
I own many pastry bags but photographed this “recipe” using Ziploc resealable bags, because I realize most people don’t have pastry bags.
Spoon each color of icing into the bottom corner of the Ziploc bags, release air from the bag, then seal the bag.
NOTE: Before you do anything else, line a baking sheet with parchment paper so it’s ready to go once the colored icing bags are prepared.

Squeeze the icing down into one corner of the bag, twisting the top of the bag down tightly on the icing. If using Zip-Loc bags, use scissors to cut a very small opening across the bottom corner of the bag.
This opening should only be big enough to pipe a thin line of icing through. You want those colored sprinkles to be thin!

Pipe Sprinkle Lines And Let Dry Overnight
Using each color of icing (one at a time), pipe thin lines of colored icing onto the parchment paper, continuing to squeeze the icing out of the bag as you go.
The photo below is of all three colors piped onto the parchment paper. Try and get the lines as straight as possible and make sure they don’t touch each other.
My hands were really jiggling while I did this as you can see in the photo below… ha ha! If you want to make colored DOTS instead of lines, feel free to do that, as well.
HELPFUL TIP: A tip from the original author is when you’re piping the lines, try to keep the tip about ½” above the parchment paper. Squeeze the piping bag and pull the lines forward as you pipe the icing.
Set the baking sheet full of “future” homemade decorative sprinkles aside. Let them dry (and harden) COMPLETELY overnight (about 12 hours)!

Cut The Dried Sprinkles
The dried sprinkles should be hardened and fully dry by the next day. Gather some of the colored lines by pulling them off the parchment paper (some may break off while doing this).
Use a knife to cut the colored lines into the smaller size you want for your homemade decorative sprinkles. I usually cut the sprinkles into about ¼-½ long pieces.
When done with a certain color, move them aside and repeat until all the colors of sprinkles have been cut into the desired sizes you want.

Separate Colors OR Combine Sprinkles – Your Choice!
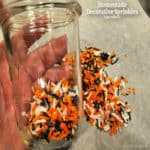
At this point, you will have small amount of homemade decorative sprinkles, made to order! Store each color in a separate airtight container in the pantry, and they’ll last for about a year.

You can also combine certain color combinations and store them together in an airtight container in the pantry, where they’ll last for about a year.

Time To Use The Homemade Decorative Sprinkles
This “recipe” is wonderful because you can easily create an endless supply of various colors of homemade decorative sprinkles to use throughout the year!
If you need more, the recipe can EASILY be doubled or tripled, to suit your needs.
Now you know how to make colored sprinkles to use for Valentines Day, Easter/Spring, Christmas, Winter, Fall, Birthdays and any other time. How cool is that!
I enjoyed using these orange, black and white homemade decorative sprinkles last Fall when I made delicious Chocolate Dipped Fall Pretzels. You can see in the photo below how cute they look!

I hope you have the opportunity to make your own colorful homemade decorative sprinkles. They really are simple to make, taste great, and can be easily custom colored!
Thank you for stopping by, and I invite you to come back again soon for more family-friendly recipes. Take care, may God bless you, and have a wonderful day!
Looking For More Interesting TIPS or HOW-TO’S?
You can find ALL of my recipes (and tips) in the Recipe Index, which is located at the top of the page. I have many handy tips to choose from, including:
- Homemade Mayonnaise
- How To Easily Remove Pomegranate Seeds
- How To Make Oat Milk
- How to Test Yeast For Viability
- How To Make Italian Seasoning
Want More Recipes? Get My FREE Newsletter!
I publish a newsletter 2 times per month (1st and 15th) with lots of recipes, tips, etc.
Would you like to join our growing list of subscribers?
There is a Newsletter subscription box on the top right (or bottom) of each blog post, depending on the device you use.
You can submit your e-mail address there, to be added to my mailing list.
Find Me On Social Media:
Facebook page: The Grateful Girl Cooks!
Pinterest: The Grateful Girl Cooks!
Instagram: jbatthegratefulgirlcooks

Original recipe source (and with thanks to John Kanell) at: https://preppykitchen.com/homemade-sprinkles/
↓↓ PRINTABLE RECIPE BELOW ↓↓
Did you know you can make Homemade Decorative Sprinkles from scratch? They're easy to make (in any color you want) to top your baked treats!
- 1½ cups powdered sugar (confectioner's sugar) DIVIDED USE
- 1½ Tablespoons water (cool not hot)
- 1 Tablespoon light corn syrup
- ½ teaspoon vanilla extract
- additional water, IF NEEDED *add 1 tsp. at a time, only if needed
- gel or liquid food coloring
Line a baking sheet with parchment paper. Set aside until later.
Sift 1 cup powdered sugar into a large bowl. Add corn syrup, vanilla extract and 1½ Tablespoons water to the powdered sugar. Beat well until smooth and lump-free. Sift and add the remaining ½ cup powdered sugar. Mix well until fully combined, flowing and "pipeable". TIP: If necessary, add a bit more water (about 1 teaspoon at a time) until mixture is smooth, thick yet flowing enough to be easily piped through a pastry bag tip.
Divide icing into small bowls based on the number of colors you're making. Add food coloring as needed to achieve the color you want. Stir food coloring into the icing to distribute color evenly. TIP: Colored icing will lighten and fade slightly as it dries and hardens overnight, so add just a tiny bit more food coloring than you think you should.
Load pastry bags with various colors of icing. If using a pastry bag, fit it with a size 3, 4 or 5 tip. **If using Ziploc-style bags, spoon each color of icing into the bottom corner of individual bags, release the air, then seal the bags. Squeeze the icing down into one corner of the bag, twisting the top of the bag down tightly on the icing. Use scissors to cut across the bottom corner of the bag. This opening should only be big enough to pipe a thin line of icing through.
Pipe thin lines of colored icing onto the parchment paper-lined baking sheet, squeezing icing out of the bag as you go. Try and get the lines as straight as possible and make sure they don't touch each other. HELPFUL TIP: When piping the lines, try to keep the pastry tip (or corner of the bag) about ½" above the parchment paper. Squeeze the piping bag and pull the lines forward as you pipe the icing. Set the baking sheet full of "future" homemade decorative sprinkles aside. Let them dry (and harden) COMPLETELY overnight (about 12 hours).
After they have dried completely (12 hours), use a knife to cut each colored line of icing into ¼"-½" long pieces. When done with each color, set them aside. Repeat until all colored lines have been cut into desired sizes. Store sprinkles in airtight containers for up to a year.
Here’s one more to pin on your Pinterest boards!