Category: Tip Of The Day

Refrigerator Dill Pickle Slices

Make Refrigerator Dill Pickle Slices without canning! This EASY recipe yields 1 quart of yummy pickle slices for burgers and sandwiches.
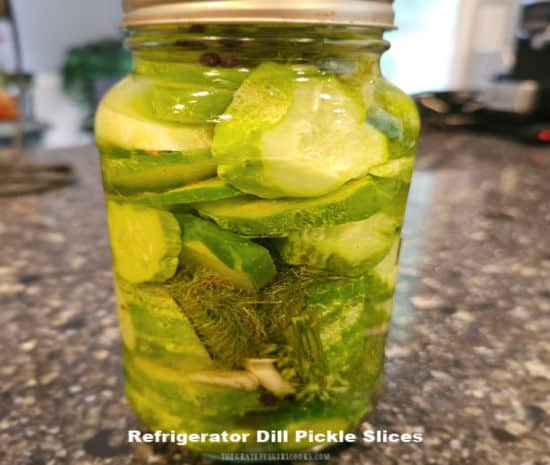
A quart sized jar full of refrigerator dill pickle slices.

Do you enjoy pickles? We sure do! Most of the time I can our homemade pickles, but sometimes I simply only need or want one jar of pickles that doesn’t require canning equipment. That’s where this recipe comes in handy!

Today I am sharing this recipe for making delicious dill pickle slices that all you do is layer pickling cucumber slices with a few other ingredients (brine, peppercorns, garlic and dill) in a jar and then refrigerate. That’s it!

After a week or two of refrigeration you will have a one-quart jar full of delicious dill pickle slices (sometimes a bit more) ready to enjoy and use for burgers, sandwiches or a quick snack!

Scroll Down For A Printable Recipe Card At The Bottom Of The Page

Pickling Cucumbers

For this recipe you will need to use “pickling cucumbers”. Unlike “regular” sized cucumbers you would buy in the store, a pickling cucumber is much shorter in size.

Pickling cucumbers also have a “drier” peel”, which allows them to absorb more of the brine when you pickle them!

I am fortunate to grow pickling cucumbers each year in our little raised bed garden, but when they are in season, they can be found at many grocery stores or farmer’s markets.

In the second photo below, you can see several pickling cucumbers (front left) I picked along with some other veggies and fruit from our backyard garden.
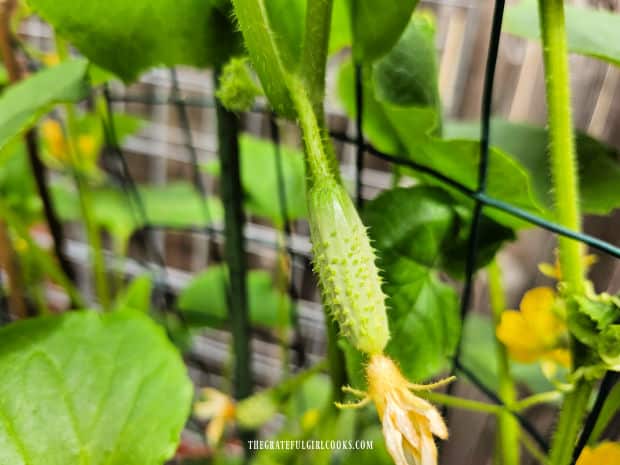
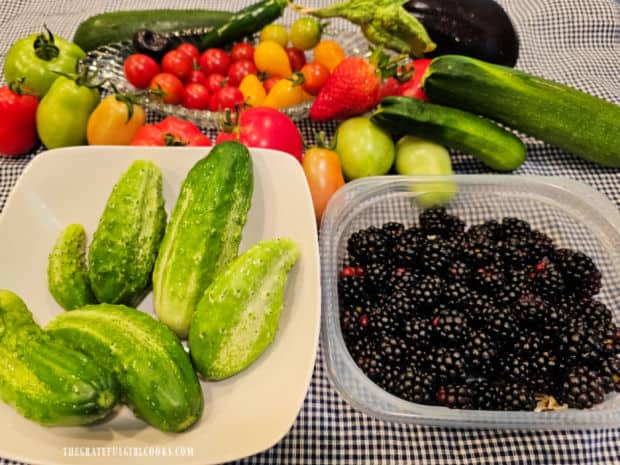
Growing pickling cucumbers in our small, raised bell garden.Fresh veggies and fruit from our garden, including some pickling cucumbers.

How Many Pickling Cucumbers Will I Need?

Today I will be sharing a recipe that will fill a one-quart jar with refrigerator dill pickle slices. To make a one quart jar of pickles you will need approximately 6 pickling cucumbers (about 5-6″ long).

NOTE: Depending on the size cucumbers you use, you might end up with enough slices to fill a small half-pint jar, as well. I always say the minimum yield will fill a one-quart jar but please know you may get more slices out of your pickling cucumbers and require a second small jar!

The number of cucumbers you use will ultimately depend on how many jars you want to make, so the recipe can easily be doubled or tripled for that purpose (as needed).

These pickle slices are refrigerated but are NOT canned, so they are very simple (and safe) to make. Since it is only my husband and I at home these days, we only need a one-quart jar of pickles every couple of months.
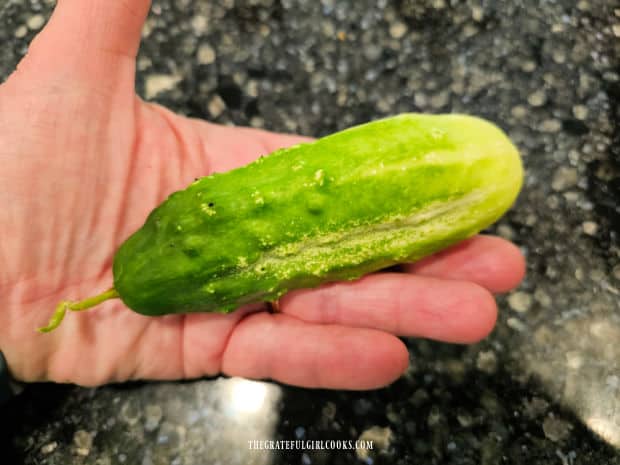
Holding one pickling cucumber to show the size they typically are at maturity.

A Little Prep First

Before you pack the jar full of cucumber slices, you will need to make the pickle brine and let it cool to room temperature before using it.

Fill a medium sized saucepan with 2 cups of water, 1 cup of white vinegar (5%), 1 Tablespoon of kosher salt and ½ teaspoon of granulated sugar.

Bring this liquid mixture quickly to a boil, stirring occasionally to make sure the salt and sugar fully dissolve. Once they are dissolved, take the pan off of the heat source and let the brine cool down until it reaches room temperature.

While the brine is cooling down, prepare the jar and the cucumber slices so they are ready to go once the brine reaches room temperature.

How To Make Refrigerator Dill Pickle Slices

Prepare a quart sized jar by washing and drying it well. Wash all of the cucumbers you will be using. Cut off and discard both ends of each cucumber. Slice each cucumber into rounds, about ¼ inch thick or so.

Fill the jar by layering the cucumber slices with fresh dill, peeled and smashed garlic cloves, and peppercorns. You will put in a few slices, add dill, garlic cloves and peppercorns, then add more, etc. until the jar is full.

IMPORTANT:  Fill the jars full but make sure you don’t pack the ingredients in too tightly, because you need room for the pickling brine to get through, okay?
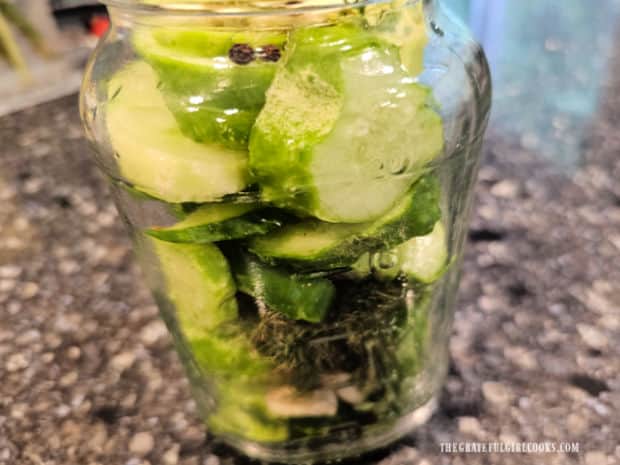
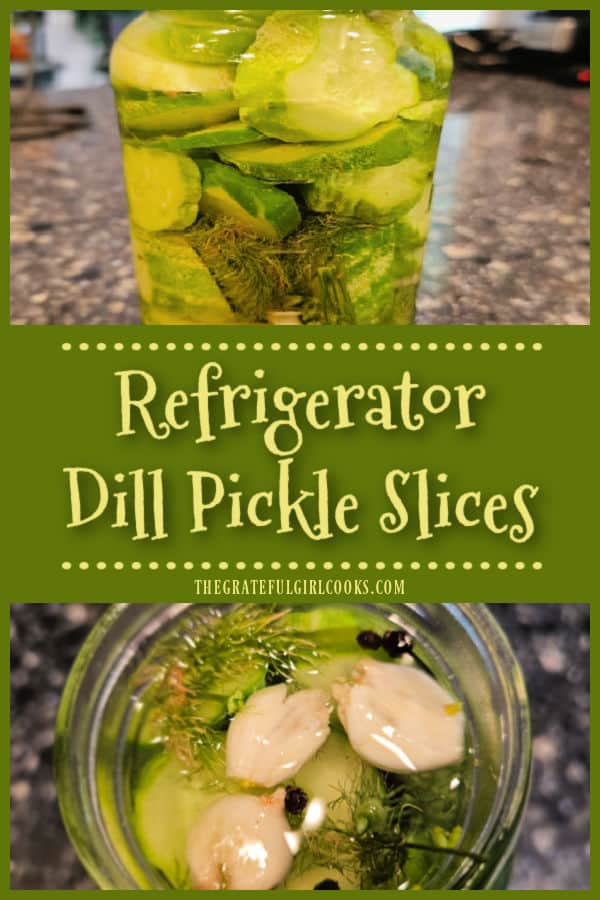
Jar is layered with cucumber slices, dill, garlic and peppercorns.

I typically top off the jar with a couple more cloves of garlic, a few peppercorns and more dill. You can see them in the photo below.

Add The Brine

Pour the room temperature brine into the jar (or jars) you are using. Cover the pickle slices and extra ingredients completely with the brine.

Gently push the pickles (and spices) down into the jar (if necessary) to ensure they are completely covered with the liquid.

IMPORTANT: Fully cover everything with brine! This is very important, so the pickles (below the surface of the brine) can soak up all the flavor they need.
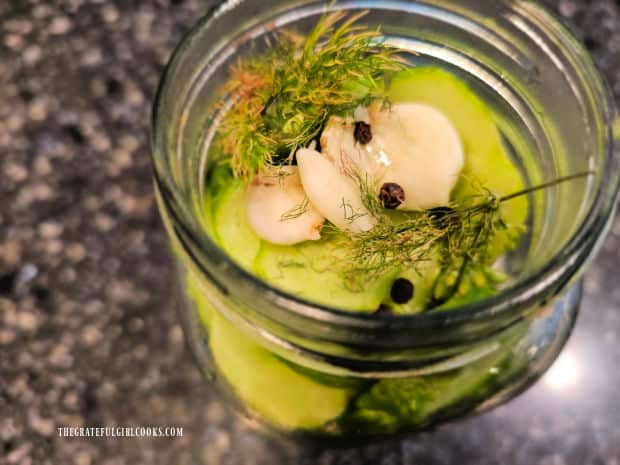
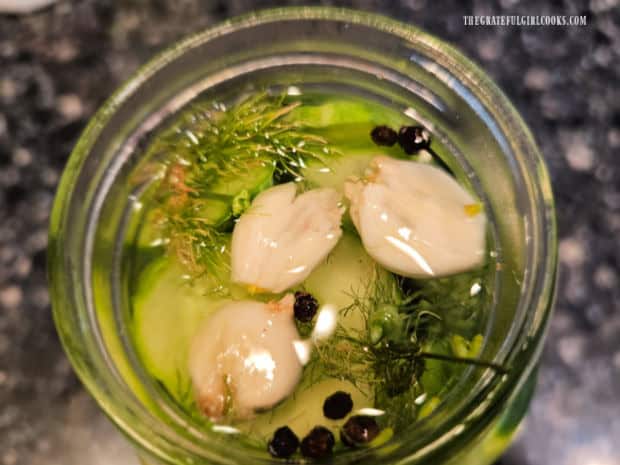
View of the garlic, dill and peppercorns on top of the pickle slices in jar.Smashed garlic cloves, dill and peppercorns add lots of flavor to the pickle brine.

Seal the jar of pickle slices with an airtight lid. Place the sealed jar in the refrigerator and let them “pickle” for AT LEAST 1-2 weeks before you ever open the jar and eat them (for best flavor).

NOTE: I usually let my refrigerator dill pickle slices sit in the fridge for about 2 weeks before we open the jar, because that’s when I personally think they’ve reached the peak of flavor!
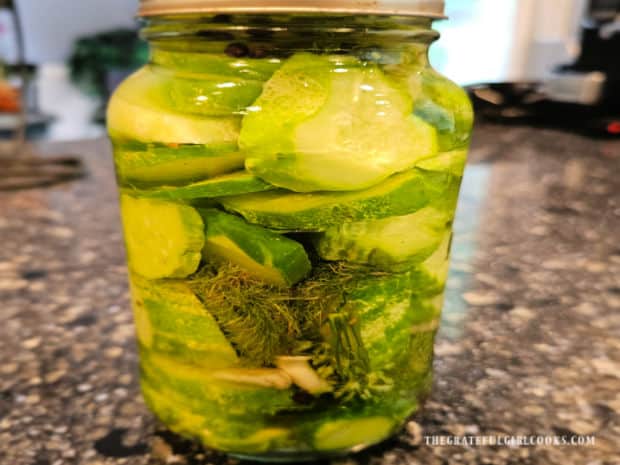
One jar of refrigerator dill pickle slices, ready to be stored in the fridge to develop flavor.

Storing The Pickles

Refrigerator dill pickle slices will typically last for several months if they remain fully covered by the brine in the jar and kept refrigerated. They are not shelf stable because they are not “canned”, so they must be refrigerated!

NOTE: I feel that these yummy pickles have their best flavor if they’re eaten within 3 months of making them! After that they’re still good (and safe) to eat but may have slightly diminished flavor.

The refrigerator dill pickle slices (shown below) are the last ones I removed from the jar (and refrigerator) about 3 months AFTER I made them. They were still absolutely delicious AND we loved using them on grilled hamburgers for dinner!

The key takeaway is to keep those pickle slices covered with brine the whole time they are refrigerated! Hope you like them!
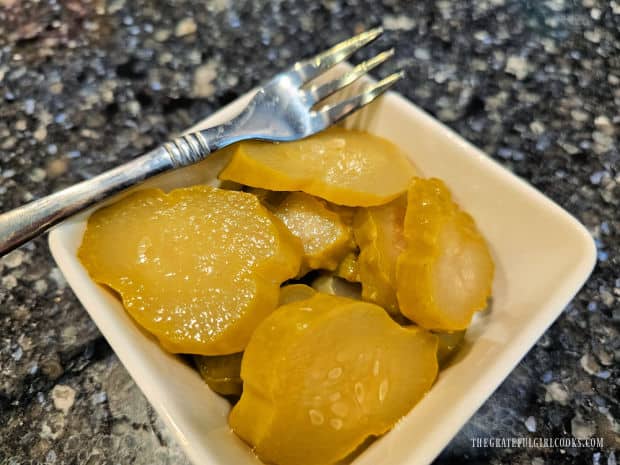
Three months after being made, refrigerator dill pickle slices still taste great!

I hope you have the opportunity to make a jar of these delicious refrigerator dill pickle slices for yourself and those you love. They really are quite GOOD!

Thanks for stopping by, and I invite you to come back again soon for more family friendly recipes. Take care, may God bless you, and have a great day.

Looking For More SIDE DISH Recipes?

You can find ALL of my recipes in the Recipe Index, which is located at the top of the page. I have LOTS of side dish recipes to choose from, including:

Want More Recipes? Get My FREE Newsletter!

I publish a newsletter 2 times per month (1st and 15th) with lots of recipes, tips, etc.
Would you like to join our growing list of subscribers?

There is a Newsletter subscription box on the top right (or bottom) of each blog post, depending on the device you use.
You can submit your e-mail address there, to be added to my mailing list.

Find Me On Social Media:

Facebook page: The Grateful Girl Cooks!
Pinterest:
The Grateful Girl Cooks!
Instagram:
jbatthegratefulgirlcooks

Author's signature

Recipe adapted from and with thanks to: Krissy, at Easy Refrigerator Dill Pickles – Self Proclaimed Foodie

↓↓ PRINTABLE RECIPE BELOW ↓↓
0 from 0 votes
Refrigerator Dill Pickle Slices
Prep Time
10 mins
Cook Time
5 mins
Total Time
15 mins
 

Make Refrigerator Dill Pickle Slices without canning! This EASY recipe yields 1 quart of yummy pickle slices for burgers and sandwiches.

Category: Condiment
Cuisine: All Cuisines
Keyword: refrigerator dill pickle slices
Servings: 1 quart jar + a ½ Pint jar
Author: JB @ The Grateful Girl Cooks!
Ingredients
For the Brine:
  • 2 cups water
  • 1 cup white vinegar (5% acidity)
  • 1 Tablespoon kosher salt
  • ½ teaspoon granulated sugar
For The Pickles:
  • 6 pickling cucumbers each approx. 5" long
  • ½ bunch fresh dill torn into pieces (most of stem removed)
  • ½ Tablespoon whole peppercorns (in spice section at most stores)
  • ½ head garlic peeled/separated into cloves/smashed
Instructions
Make Brine:
  1. Fill medium saucepan with water, white vinegar (5%), kosher salt and granulated sugar. Bring this to a boil, stirring to make sure salt and sugar fully dissolve, then take the pan off the heat source. Let brine cool to room temperature.

To Make Pickles:
  1. Wash and dry a quart sized jar. Next, wash the cucumbers. Cut off (discard) both ends of each cucumber. Slice cucumbers into rounds, approximately ¼ inch thick.

  2. Fill the jar by layering cucumber slices with fresh dill, peeled and lightly smashed garlic cloves, and peppercorns. (Example: put in a few slices, add some dill, garlic cloves and peppercorns, then repeat this until the jar is full. IMPORTANT:  Fill the jars full but don't pack ingredients in too tightly, because you need room for the pickling brine and spice to permeate the cucumbers.

  3. Pour cooled brine into the jar (or jars). Cover ingredients with brine. Press slices (and spices) down into the jar to ensure they are fully covered. IMPORTANT: Fully cover everything with brine so the pickles (below the surface of the brine) can soak up all the flavor they need.

  4. Seal the jar with an airtight lid. Place jar in the refrigerator; let them "pickle" AT LEAST 1-2 weeks before you open the jar and eat them (for best flavor).

  5. NOTE: The pickles taste BEST if eaten within 3 months of making them! After that they're still good (and safe) to eat but may have slightly diminished flavor. Enjoy!

Here’s one more to pin on your Pinterest boards! Make Refrigerator Dill Pickle Slices without canning! This EASY recipe yields 1 quart of yummy pickle slices for burgers and sandwiches.
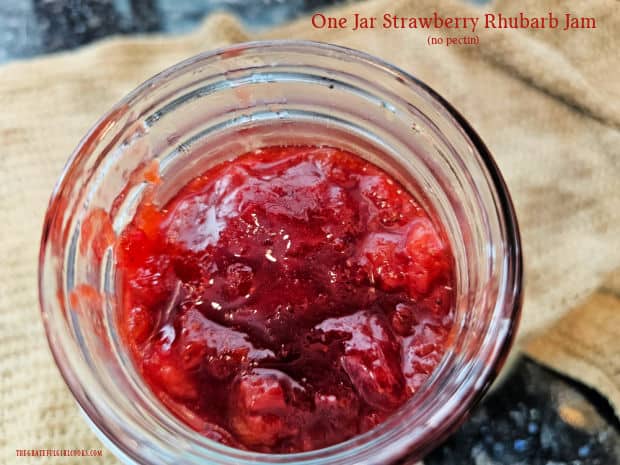
One Jar Strawberry Rhubarb Jam

One Jar Strawberry Rhubarb Jam is a “small batch” recipe (no pectin/no canning). Make 1 pint or 2 half-pint jars of yummy jam in a saucepan!
One Jar Strawberry Rhubarb Jam is a "small batch" recipe (no pectin/no canning). Make 1 pint or 2 half-pint jars of yummy jam in a saucepan!

Today I want to share a recipe for a small batch of strawberry rhubarb jam that tastes fabulous. This jam requires no special canning experience or equipment, because it’s made in a large saucepan (instead of using a water bath canner).

How’s that for a simple way to make only a jar or two of delicious homemade jam? I made this recipe because I’d picked a small amount of strawberries and rhubarb from our backyard garden and wanted to make a little bit of jam!

This jam does not need pectin to thicken it, because the cooking process used will achieve that on its own! That’s why I made this particular recipe, because I was out of pectin!

When done, the amount of jam produced is enough to fill a one-pint jar (2 cups) or you two smaller half-pint jars (1 cup each). Here’s how to make it.

Scroll Down For A Printable Recipe Card At The Bottom Of The Page

Cooking The Strawberry Rhubarb Jam

NOTE: Before you begin cooking, place two small plates in your freezer (they will be needed later to test the jam for readiness). Don’t skip this step!

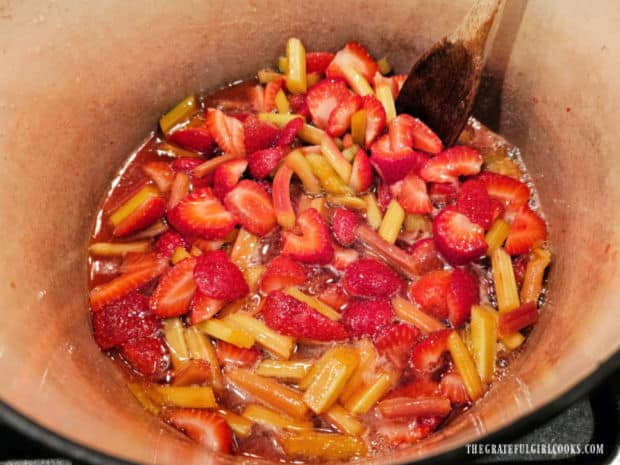
Measure sliced strawberries and rhubarb into a large saucepan (I use my Dutch Oven). Add granulated sugar, fresh lemon juice and a pinch of salt.

Stir these ingredients until they have been fully combined. Turn the heat on to Medium High heat and cook this for 3-5 minutes, stirring occasionally.

Strawberries, rhubarb, sugar, lemon juice and salt in a large pan.

Now turn the heat down to Medium Low and simmer the jam, stirring it often until the strawberries and rhubarb begin to break down a bit.

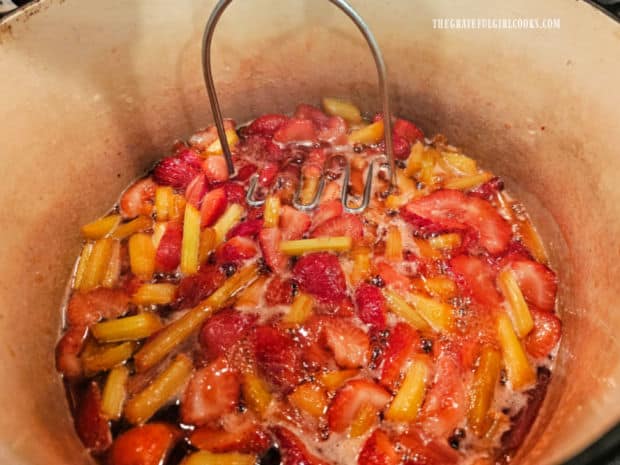
I use a potato masher to “help” break down the fruit slightly. You will want to have some nice chunks of fruit, so don’t go crazy with the masher… ha ha!

A potato masher is used to help break down the fruit as it cooks.

Continue Cooking The Jam

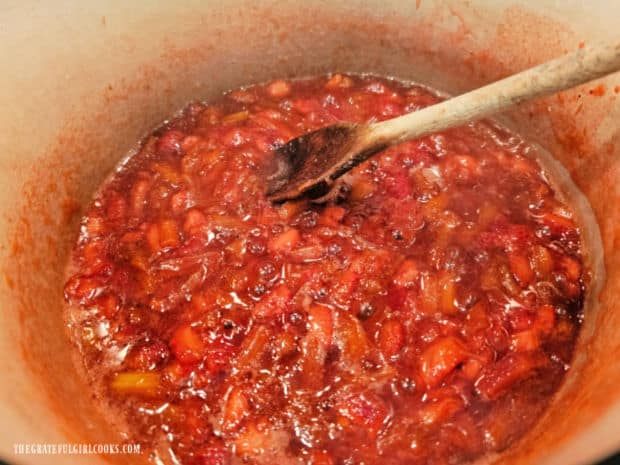
Simmer the jam for about 15 minutes, stirring it often. The fruit will continue to break down, and the jam will continue to thicken as it cooks. Just keep stirring!

One Jar Strawberry Rhubarb Jam continues to thicken and break down as it cooks.

After the jam has cooked for the 15 minutes, test the jam to see if it is ready by performing the PLATE TEST (see below). This simple test will show you if the jam is ready or if it needs to cook a bit more.

Since there is no pectin used in one jar strawberry rhubarb jam, this is the best way to know if the correct thickness for the jam has been achieved.

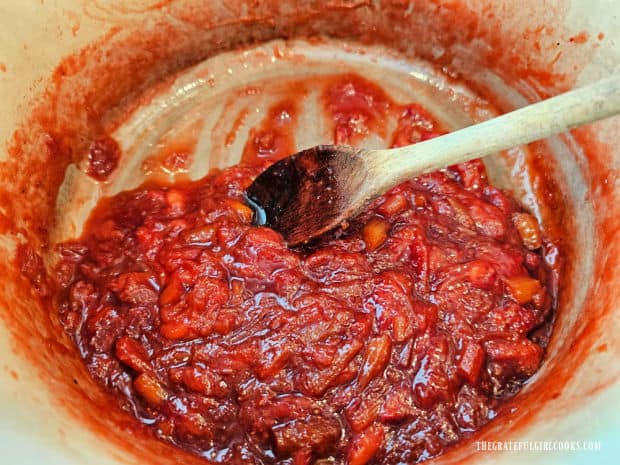
When done cooking the jam, move the pan off of the heat source. The mixture might look like it still has too much liquid, but as it cools the jam mixture will thicken even more.

The jam will thicken quite a bit as it continues to cook and then is cooled.

How To Know If The Jam Is Ready- The Plate Test!

Make sure you have removed the pan from the heat source. To test the jam to see if it is ready, remove one of the chilled plates from your freezer.

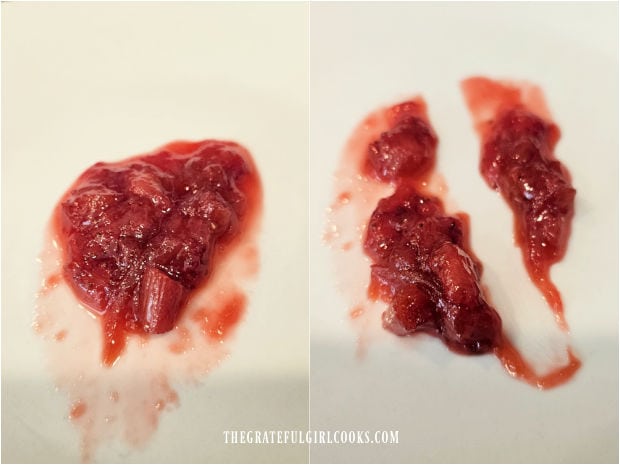
Place a small spoonful of the jam onto the COLD plate (photo on the left below). Run a finger down through the jam. If a clear trail is left and the jam holds its shape (photo on the right below), it is ready!

If it is NOT ready (“finger path” fills in with liquid or runs because of too much liquid), put the pan back on the Medium Low heat and simmer the jam a couple minutes more. Try plate test again using the second chilled plate from the freezer.

A plate test is done to determine if the jam is done cooking,

When The Jam Is Ready

When done, let the jam sit (still in the pan) and off of the heat for about 5 minutes to cool slightly. Transfer the jam into 1 pint-sized jar (holds 2 cups) or into 2 half-pint jars (each holds 1 cup).

Let the jam cool completely before you put a lid on the jar(s). This typically takes between 35-45 minutes on average and is inactive prep time.

Attach a lid (or the flat lids and screw bands if using) and refrigerate the jam until it has fully chilled. As the jam is refrigerated it will thicken a bit more, resulting in a fabulous, dense jam ready to be enjoyed.

NOTE: If you decide to can this jam (for long time storage) rather than eating it right away, you can find my canning notes at the bottom of the printable recipe card below).

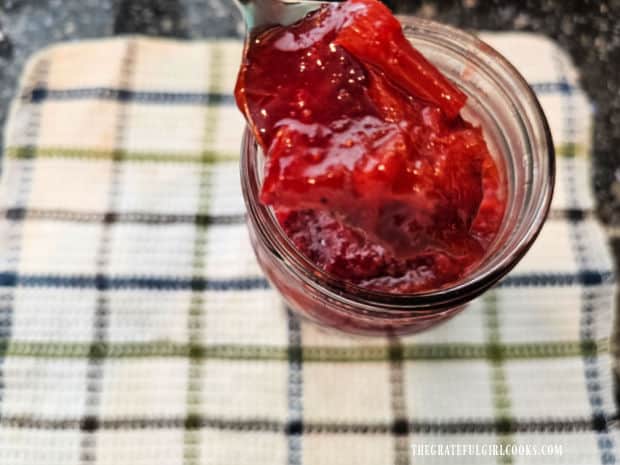
A close up of a spoonful of one jar strawberry rhubarb jam, ready to be eaten.

Serve The One Jar Strawberry Rhubarb Jam

One Jar Strawberry Rhubarb Jam tastes amazing on toast, English muffins, biscuits, etc. It is even delicious used as a topping for pancakes and PB & J sandwiches, if desired.

Open your jar of jam and spread it on your choice of toast, etc. and enjoy its sweet and tangy flavor. It tastes wonderful, and because of that I am confident you’ll love it, too!

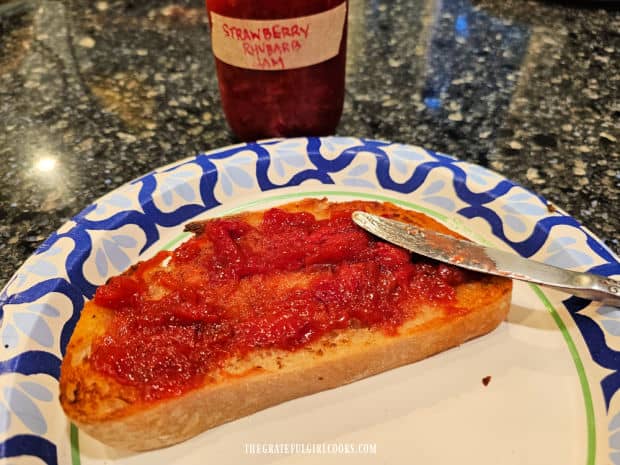
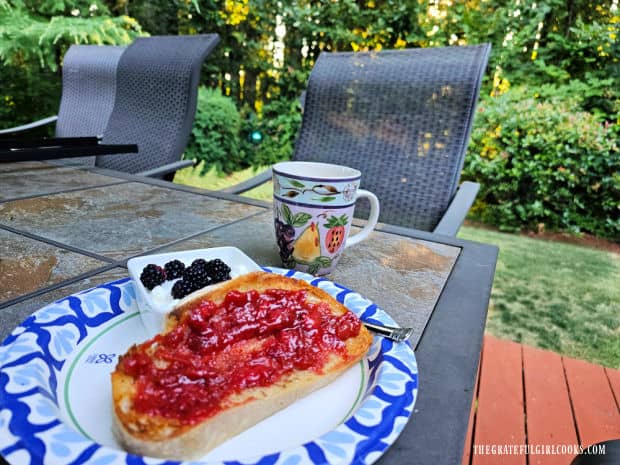
A piece of sourdough toast, covered with the strawberry rhubarb jam.Enjoying one jar strawberry rhubarb jam on toast with yogurt and coffee outside!

I hope you have the opportunity to make this delicious jam! Enjoy the convenience of making a jar of homemade jam without any special canning equipment or pectin!

However, if you already enjoy canning your jam using a traditional canning recipe, please check out my other recipe for Strawberry Rhubarb Jam (yields 9 half-pint jars using pectin, water bath canner, etc.).

Thank you for stopping by, and I invite you to come back again soon for more family-friendly recipes. Take care, may God bless you, and have a wonderful day.

Looking For More JAM Recipes?

You can find ALL of my recipes in the Recipe Index, which is located at the top of the page. I have LOTS of jam recipes to choose from, including:

Want More Recipes? Get My FREE Newsletter!

I publish a newsletter 2 times per month (1st and 15th) with lots of recipes, tips, etc.
Would you like to join our growing list of subscribers?

There is a Newsletter subscription box on the top right (or bottom) of each blog post, depending on the device you use.
You can submit your e-mail address there, to be added to my mailing list.

Find Me On Social Media:

Facebook page: The Grateful Girl Cooks!
Pinterest:
The Grateful Girl Cooks!
Instagram:
jbatthegratefulgirlcooks

Author's signature

Original recipe source: Afton, at Simple Small-Batch Strawberry Rhubarb Jam – The Reader’s Kitchen

↓↓ PRINTABLE RECIPE BELOW ↓↓

0 from 0 votes
One Jar Strawberry Rhubarb Jam
Prep Time
15 mins
Cook Time
30 mins
Cooling Time (inactive prep)
45 mins
Total Time
1 hr 30 mins
 

One Jar Strawberry Rhubarb Jam is a "small batch" recipe (no pectin/no canning). Make 1 pint or 2 half-pint jars of yummy jam in a saucepan!

Category: Jam / Canning and Preserving
Cuisine: All Cuisines
Keyword: one jar strawberry rhubarb jam
Servings: 32 Tablespoons (1 pint or 2 half pints)
Calories Per Serving: 28 kcal
Author: JB @ The Grateful Girl Cooks!
Ingredients
  • 2 cups sliced strawberries
  • cups sliced rhubarb
  • 1 cup granulated sugar
  • 2 Tablespoons lemon juice
  • 1 pinch table salt
Instructions
  1. NOTE: Before beginning, place two small plates in your freezer (needed later to test jam for readiness). Don't skip this step!

Cook The Jam:
  1. Measure strawberries, rhubarb, sugar, lemon juice and salt into a large saucepan. Stir until they are fully combined. Cook this mixture for 3-5 minutes on Medium High heat, stirring occasionally.

  2. Turn the heat down to Medium Low and cook (simmer) the jam, stirring often until strawberries and rhubarb begin to break down and soften. Use a potato masher to "help" break down the fruit slightly if desired. Simmer the jam for about 15 minutes, stirring often. The fruit will continue to break down, and the jam will continue to thicken as it cooks. Just keep stirring!

  3. After the jam has cooked for 15 minutes, test the jam to see if it is done by performing the PLATE TEST (see below). This simple test will show you if the jam is ready or if it needs to cook a bit more.

THE PLATE TEST:
  1. Take pan off the heat. Remove one chilled plate from the freezer. Place a small spoonful of jam onto the COLD plate. Run a finger through the jam. If a clear trail is left and the jam holds its shape, it is ready! NOTE: If it is NOT ready (still too much liquid), put the pan back on Medium Low heat; simmer it for 2 more minutes, then try again using the second cold plate from the freezer.

Jar The Jam And Refrigerate:
  1. When done, let the jam rest (still in the pan and off the heat) for 5 minutes to cool slightly. Transfer jam into 1 pint-sized jar (holds 2 cups) or into 2 half-pint jars (each holds one cup). Let the jam cool completely before covering the jar. Attach a lid (or flat lids/screw bands if using). Refrigerate jam until fully chilled. Serve and enjoy!

Recipe Notes

CANNING INSTRUCTIONS: Use bottled lemon juice instead of fresh lemon juice. Leave 1/8-inch headspace in each jar. Follow manufacturers water bath canning instructions for your individual canner. Process pint jars for 15 minutes. Process half-pint jars for 10 minutes.

Nutrition Facts
One Jar Strawberry Rhubarb Jam
Amount Per Serving (1 Tablespoon)
Calories 28 Calories from Fat 1
% Daily Value*
Fat 0.1g0%
Saturated Fat 0.005g0%
Polyunsaturated Fat 0.02g
Monounsaturated Fat 0.01g
Sodium 2mg0%
Potassium 31mg1%
Carbohydrates 7g2%
Fiber 0.3g1%
Sugar 7g8%
Protein 0.1g0%
Vitamin A 7IU0%
Vitamin C 6mg7%
Calcium 6mg1%
Iron 0.1mg1%
* Percent Daily Values are based on a 2000 calorie diet.

Here’s one more to pin on your Pinterest boards!  One Jar Strawberry Rhubarb Jam is a "small batch" recipe (no pectin/no canning). Make 1 pint or 2 half-pint jars of yummy jam in a saucepan!
Homemade Decorative Sprinkles

Did you know you can make Homemade Decorative Sprinkles from scratch? They’re easy to make (in any color you want) to top your baked treats!
Did you know you can make Homemade Decorative Sprinkles from scratch? They're easy to make (in any color you want) to top your baked treats!

Last year I went on the hunt for colored “Halloween or Fall-inspired decorative sprinkles” to use for a treat I was making. I went to 3 different stores and couldn’t find any sprinkles in the colors I needed. Nothing!

After my relentless search, I came home and decided to research online to see if anyone out there knew how to make decorative sprinkles from scratch in custom colors.

Guess what? They CAN be made at home! I discovered a great blog where I learned how to do this and it WORKS (thank you John, at Preppy Kitchen).

So, I made my own decorative sprinkles in the colors I wanted! they turned out great, and I used them on my Fall treats (shown further below).

I love that cute little sprinkles are easy to make in so many colors, and the possibilities are endless! Hooray! Here’s how to make your own homemade decorative sprinkles.

Scroll Down For A Printable Recipe Card At The Bottom Of The Page

Combine The Sprinkle Ingredients

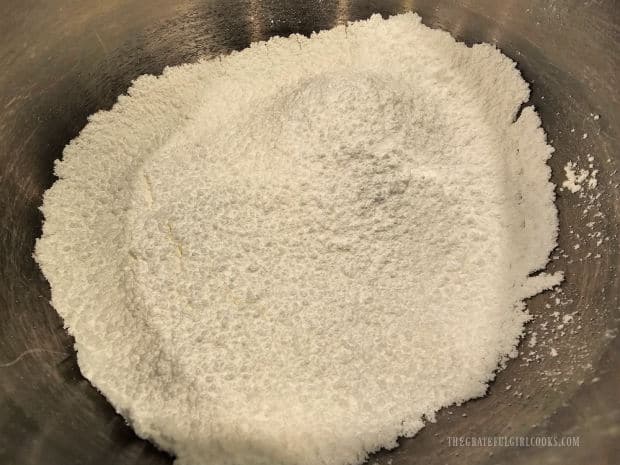
The first thing you need to do is SIFT 1 cup of powdered sugar (also known as confectioner’s sugar) into a large bowl. Make sure there are no clumps, because they will clog up the works while piping the icing later.

Powdered sugar is sifted into a large mixing bowl.

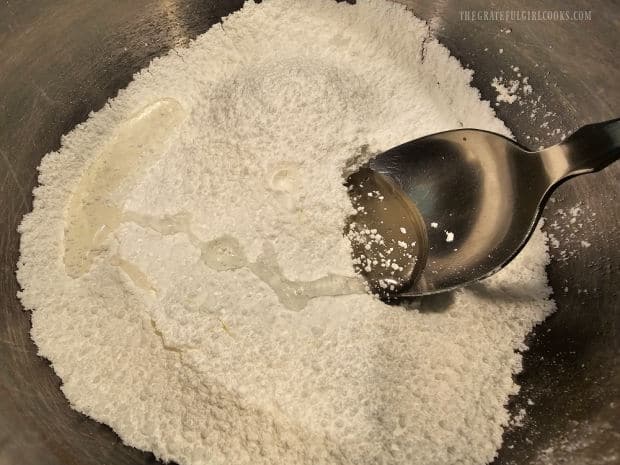
Add 1 Tablespoon of light corn syrup, ½ teaspoon of vanilla extract and 1½ Tablespoons of water to the sifted powdered sugar. Beat well until it becomes smooth and lump-free. 

Once the icing is smooth, add the remaining ½ cup of sifted powdered sugar. Mix well until fully combined, lump free and is flowing and “pipeable”.

TIP: If necessary, add a tiny bit more water (approx. 1 teaspoon at a time) until this mixture becomes flowing and “pipeable”. Make sure the icing can be easily piped through a pastry bag tip or other piping bag.

Corn syrup, vanilla extract and water is added to the powdered sugar.

Color The Sprinkle Mixture

Divide the icing between small bowls, with the number of bowls used based on the different number of colors you will be making.

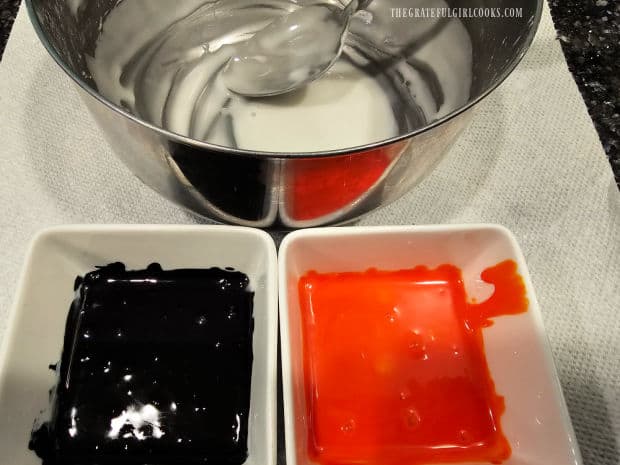
When I photographed this last Fall, I wanted to use orange, black and white for the Halloween treats I was making. I kept some of the icing white and then divided the rest into two small bowls for the two other colors.

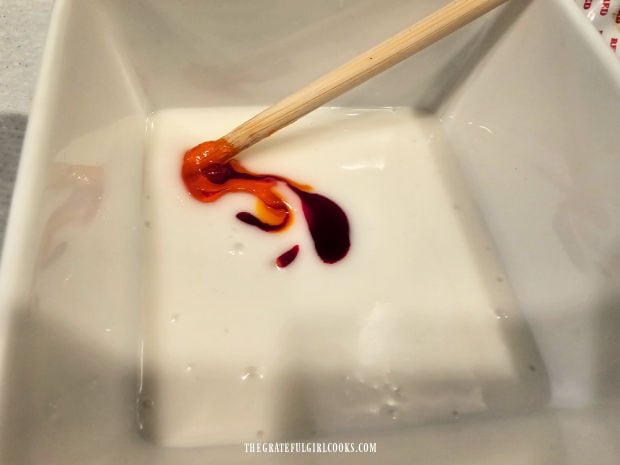
Add drops of food coloring, as much as necessary to achieve the color you want. Stir the food coloring into the icing mixture very well, to thoroughly distribute the color evenly.

TIP: The colored icing will lighten and fade slightly as it dries overnight and becomes hard, so add just a tiny bit more food coloring than you think you should.

Food coloring is added to the smooth icing in bowls.A bowl of white icing, and 2 small bowls of black and orange icing.

Pipe Sprinkles With Pastry Bag OR Plastic Sealable Bag

Load your pastry bags with the various colors of icing. If you are planning on using a pastry bag, you will need to fit it with a size 3, 4 or 5 tip.

I own many pastry bags but photographed this “recipe” using Ziploc resealable bags, because I realize most people don’t have pastry bags.

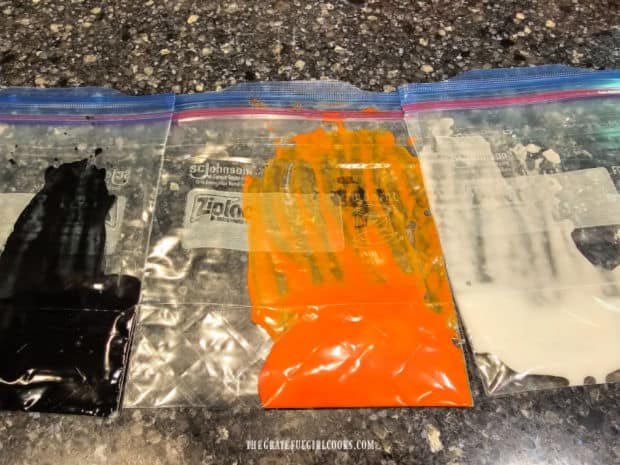
Spoon each color of icing into the bottom corner of the Ziploc bags, release air from the bag, then seal the bag.

NOTE: Before you do anything else, line a baking sheet with parchment paper so it’s ready to go once the colored icing bags are prepared.

Three bags holding black, orange and white icing for homemade decorative sprinkles.

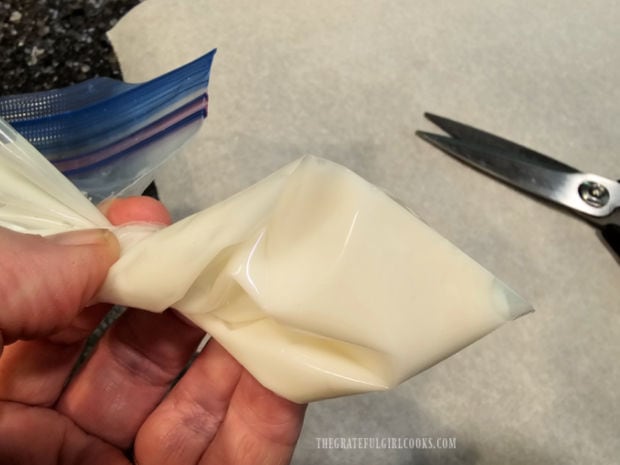
Squeeze the icing down into one corner of the bag, twisting the top of the bag down tightly on the icing. If using Zip-Loc bags, use scissors to cut a very small opening across the bottom corner of the bag.

This opening should only be big enough to pipe a thin line of icing through. You want those colored sprinkles to be thin!

A small cut is made in the corner of a piping bag filled with white icing.

Pipe Sprinkle Lines And Let Dry Overnight

Using each color of icing (one at a time), pipe thin lines of colored icing onto the parchment paper, continuing to squeeze the icing out of the bag as you go.

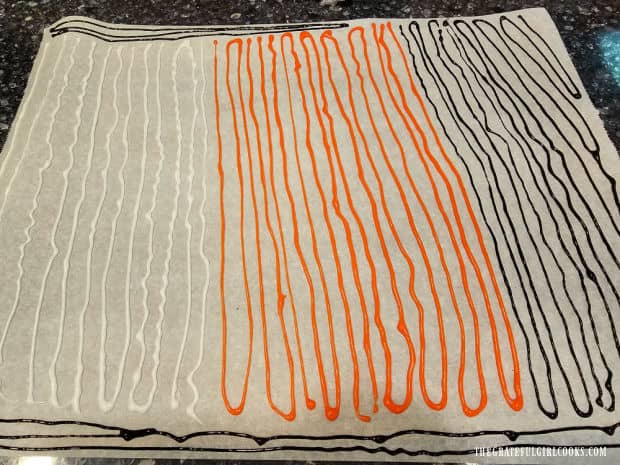
The photo below is of all three colors piped onto the parchment paper. Try and get the lines as straight as possible and make sure they don’t touch each other.

My hands were really jiggling while I did this as you can see in the photo below… ha ha! If you want to make colored DOTS instead of lines, feel free to do that, as well.

HELPFUL TIP: A tip from the original author is when you’re piping the lines, try to keep the tip about ½” above the parchment paper. Squeeze the piping bag and pull the lines forward as you pipe the icing.

Set the baking sheet full of “future” homemade decorative sprinkles aside. Let them dry (and harden) COMPLETELY overnight (about 12 hours)!

The colored icing is piped onto parchment paper in long, thin lines and dried overnight.

Cut The Dried Sprinkles

The dried sprinkles should be hardened and fully dry by the next day. Gather some of the colored lines by pulling them off the parchment paper (some may break off while doing this).

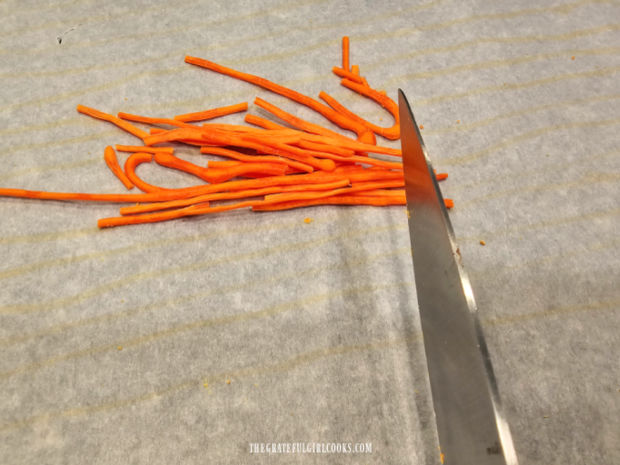
Use a knife to cut the colored lines into the smaller size you want for your homemade decorative sprinkles. I usually cut the sprinkles into about ¼-½ long pieces.

When done with a certain color, move them aside and repeat until all the colors of sprinkles have been cut into the desired sizes you want.

Fully dried orange icing is cut into small pieces using a sharp knife.

Separate Colors OR Combine Sprinkles – Your Choice!

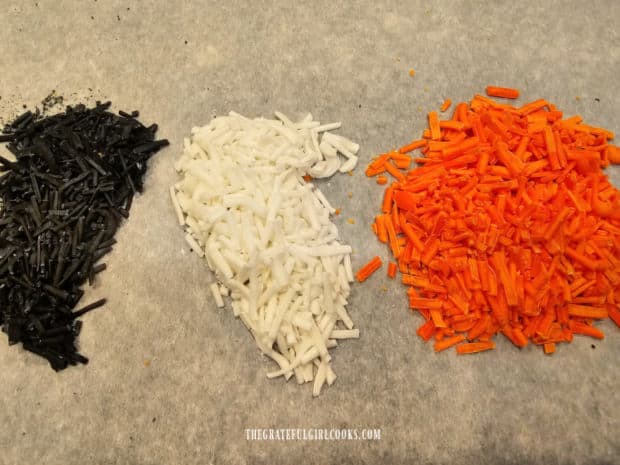
At this point, you will have small amount of homemade decorative sprinkles, made to order! Store each color in a separate airtight container in the pantry, and they’ll last for about a year.

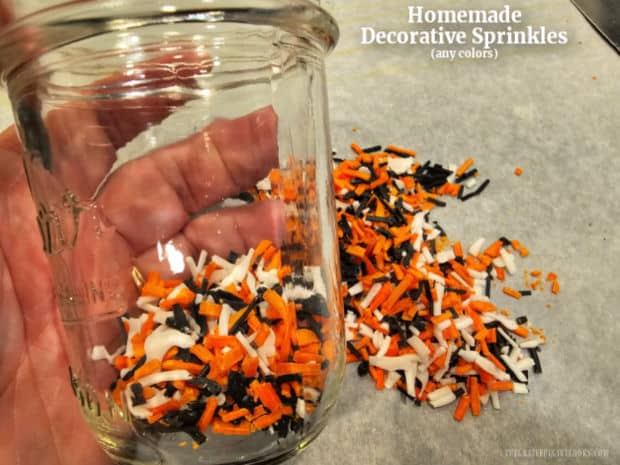
Three piles of black, white and orange homemade decorative sprinkles, ready to use.

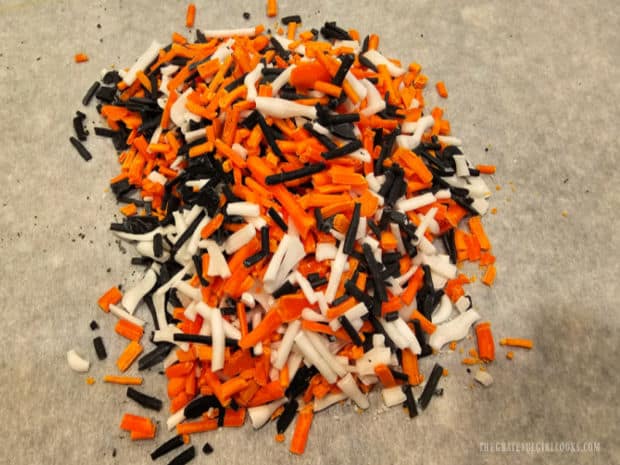
You can also combine certain color combinations and store them together in an airtight container in the pantry, where they’ll last for about a year.

Black, orange and white homemade decorative sprinkles are combined for storage.

Time To Use The Homemade Decorative Sprinkles

This “recipe” is wonderful because you can easily create an endless supply of various colors of homemade decorative sprinkles to use throughout the year!

If you need more, the recipe can EASILY be doubled or tripled, to suit your needs.

Now you know how to make colored sprinkles to use for Valentines Day, Easter/Spring, Christmas, Winter, Fall, Birthdays and any other time. How cool is that!

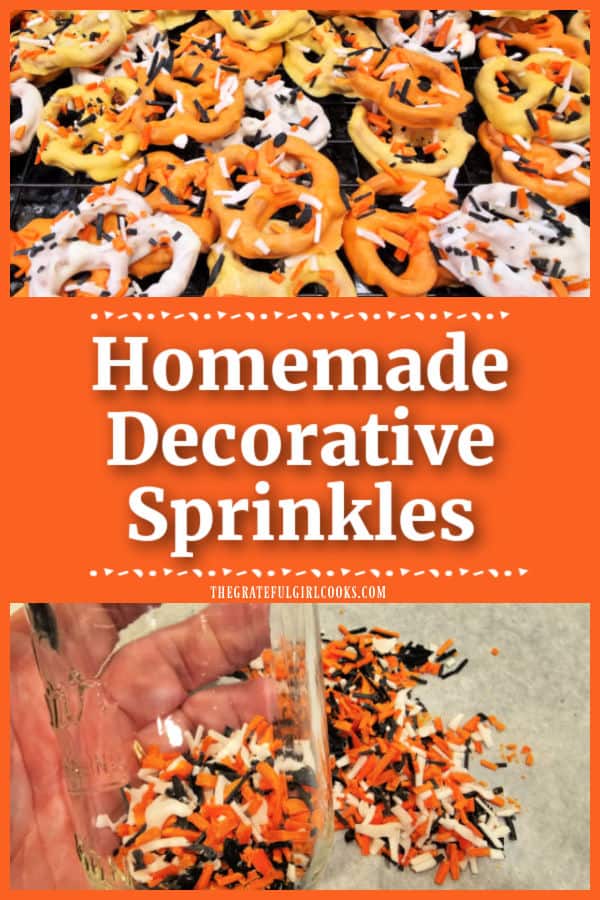
I enjoyed using these orange, black and white homemade decorative sprinkles last Fall when I made delicious Chocolate Dipped Fall Pretzels. You can see in the photo below how cute they look!

Chocolate dipped Fall pretzels topped with my homemade decorative sprinkles.

I hope you have the opportunity to make your own colorful homemade decorative sprinkles. They really are simple to make, taste great, and can be easily custom colored!

Thank you for stopping by, and I invite you to come back again soon for more family-friendly recipes. Take care, may God bless you, and have a wonderful day!

Looking For More Interesting TIPS or HOW-TO’S?

You can find ALL of my recipes (and tips) in the Recipe Index, which is located at the top of the page. I have many handy tips to choose from, including:

Want More Recipes? Get My FREE Newsletter!

I publish a newsletter 2 times per month (1st and 15th) with lots of recipes, tips, etc.
Would you like to join our growing list of subscribers?

There is a Newsletter subscription box on the top right (or bottom) of each blog post, depending on the device you use.
You can submit your e-mail address there, to be added to my mailing list.

Find Me On Social Media:

Facebook page: The Grateful Girl Cooks!
Pinterest:
The Grateful Girl Cooks!
Instagram:
jbatthegratefulgirlcooks

Author's signature

Original recipe source (and with thanks to John Kanell) at: https://preppykitchen.com/homemade-sprinkles/

↓↓ PRINTABLE RECIPE BELOW ↓↓

0 from 0 votes
Homemade Decorative Sprinkles
Prep Time
10 mins
Cook Time
0 mins
Drying Time (inactive)
12 hrs
Total Time
12 hrs 10 mins
 

Did you know you can make Homemade Decorative Sprinkles from scratch? They're easy to make (in any color you want) to top your baked treats!

Category: Condiment
Cuisine: All Cuisines
Keyword: homemade decorative sprinkles
Servings: 16 (1 Tbsp. per serving)
Calories Per Serving: 48 kcal
Author: JB @ The Grateful Girl Cooks!
Ingredients
  • cups powdered sugar (confectioner's sugar) DIVIDED USE
  • Tablespoons water (cool not hot)
  • 1 Tablespoon light corn syrup
  • ½ teaspoon vanilla extract
  • additional water, IF NEEDED *add 1 tsp. at a time, only if needed
  • gel or liquid food coloring
Instructions
  1. Line a baking sheet with parchment paper. Set aside until later.

  2. Sift 1 cup powdered sugar into a large bowl. Add corn syrup, vanilla extract and 1½ Tablespoons water to the powdered sugar. Beat well until smooth and lump-free. Sift and add the remaining ½ cup powdered sugar. Mix well until fully combined, flowing and "pipeable". TIP: If necessary, add a bit more water (about 1 teaspoon at a time) until mixture is smooth, thick yet flowing enough to be easily piped through a pastry bag tip.

  3. Divide icing into small bowls based on the number of colors you're making. Add food coloring as needed to achieve the color you want. Stir food coloring into the icing to distribute color evenly. TIP: Colored icing will lighten and fade slightly as it dries and hardens overnight, so add just a tiny bit more food coloring than you think you should.

  4. Load pastry bags with various colors of icing. If using a pastry bag, fit it with a size 3, 4 or 5 tip. **If using Ziploc-style bags, spoon each color of icing into the bottom corner of individual bags, release the air, then seal the bags. Squeeze the icing down into one corner of the bag, twisting the top of the bag down tightly on the icing. Use scissors to cut across the bottom corner of the bag. This opening should only be big enough to pipe a thin line of icing through.

  5. Pipe thin lines of colored icing onto the parchment paper-lined baking sheet, squeezing icing out of the bag as you go. Try and get the lines as straight as possible and make sure they don't touch each other. HELPFUL TIP: When piping the lines, try to keep the pastry tip (or corner of the bag) about ½" above the parchment paper. Squeeze the piping bag and pull the lines forward as you pipe the icing. Set the baking sheet full of "future" homemade decorative sprinkles aside. Let them dry (and harden) COMPLETELY overnight (about 12 hours).

  6. After they have dried completely (12 hours), use a knife to cut each colored line of icing into ¼"-½" long pieces. When done with each color, set them aside. Repeat until all colored lines have been cut into desired sizes. Store sprinkles in airtight containers for up to a year.

Nutrition Facts
Homemade Decorative Sprinkles
Amount Per Serving (1 Tablespoon)
Calories 48
% Daily Value*
Fat 0.003g0%
Sodium 1mg0%
Potassium 0.4mg0%
Carbohydrates 12g4%
Sugar 12g13%
Calcium 0.3mg0%
Iron 0.01mg0%
* Percent Daily Values are based on a 2000 calorie diet.

Here’s one more to pin on your Pinterest boards!Did you know you can make Homemade Decorative Sprinkles from scratch? They're easy to make (in any color you want) to top your baked treats!

Simple Seasoning Salt

Make homemade, simple seasoning salt in under 5 minutes! Use this easy spice mix to help season beef, pork, lamb, fish or chicken dishes.

Today I want to share a super easy and quick way to make Simple Seasoning Salt for your pantry, using a few common spices you may already have in your kitchen!

I’m grateful whenever I find a simple way to make spice blends in the convenience of my own home! I like being able to make it from scratch to have on hand, or if needed as a quick substitute when I run out of a certain seasoning mix.

If you have the ingredients, and can measure and stir, then you’ve got this! The “recipe” is THAT EASY! Here’s how to make this spice mix.

Scroll Down For A Printable Recipe Card At The Bottom Of The Page

What Is Seasoning Salt Used For?

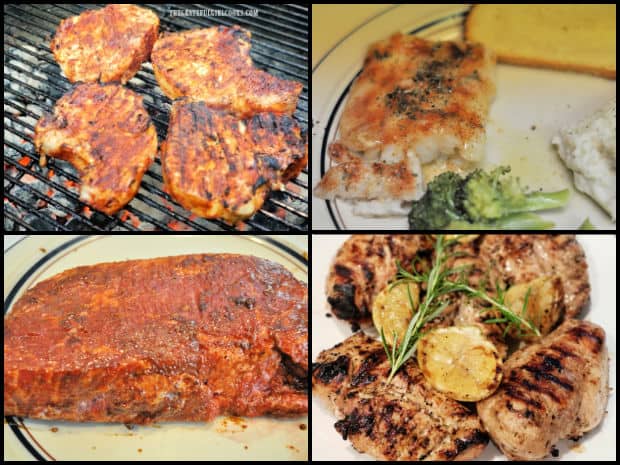
Seasoning salt is a combination of common spices that together create a flavorful seasoning for many recipes, including pork, fish, beef, and chicken dishes!

Seasoning salt can also be used to enhance the flavor of roasted vegetables, as well. The ingredients including garlic powder, onion powder and paprika (to name a few) combine to give your dishes an additional pop of flavor!

Seasoning salt can be used to season pork, fish, beef and chicken.

What Do I Need To Make Simple Seasoning Salt?

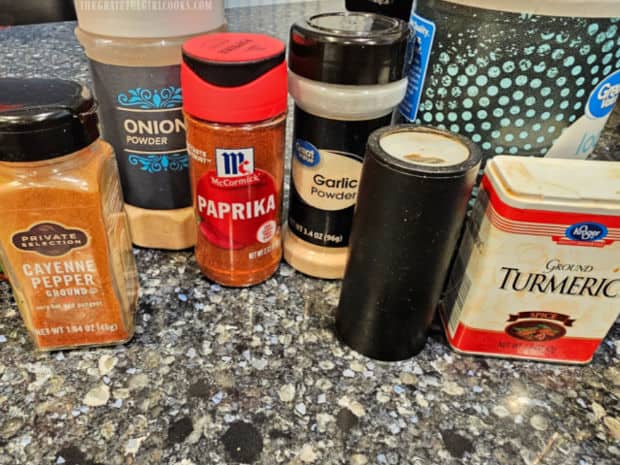
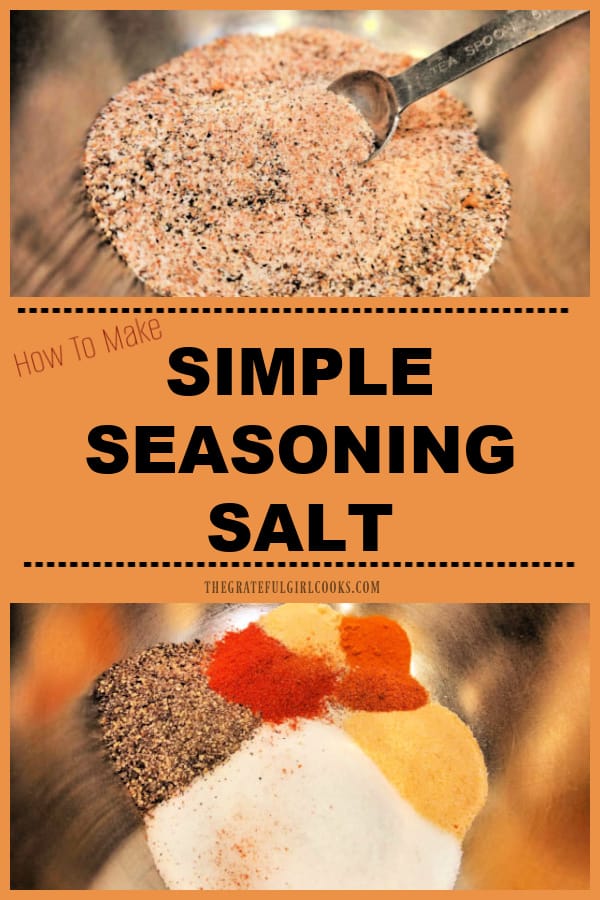
To make simple seasoning salt you will need salt, pepper, paprika, garlic powder, onion powder, cayenne pepper and ground turmeric, and that is it.

All of these spices are commonly found in most grocery stores in the spice section. I keep a supply on hand year-round, because they are pretty basic staples used in many recipes.

A photo of the ingredients used to make simple seasoning salt.

Measure And Mix!

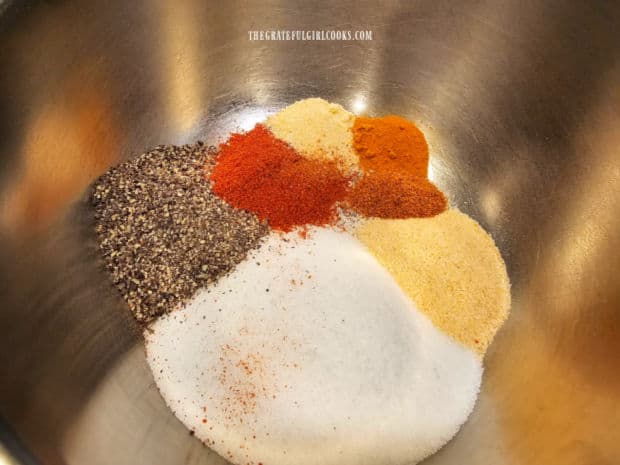
Measure the spices into a small bowl. This recipe, as it is written, will yield just over 1/3 cup of simple seasoning salt. 

This amounts to approximately 19 teaspoons, or just over 6 Tablespoons of seasoning mix, but it’s easy to double or triple the recipe, if you need or want to make a larger quantity.

Spices are measured into a small bowl before combining.

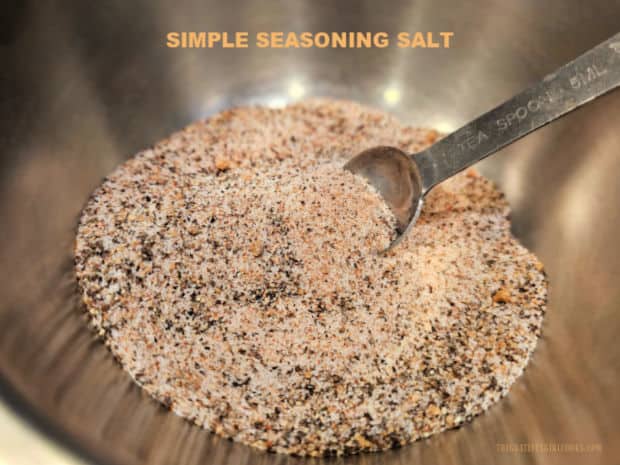
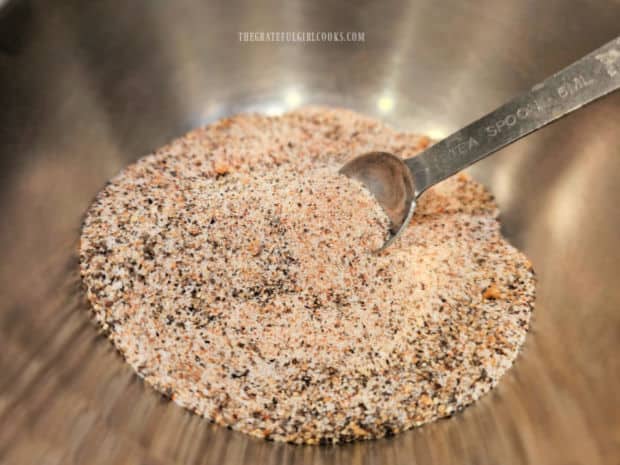
Stir the spices well, until they have been fully incorporated together. This is your simple seasoning salt! Now the question is… how should you store the spice mix?

A small bowl of simple seasoning salt, after spices are mixed together.

Storing Simple Seasoning Salt

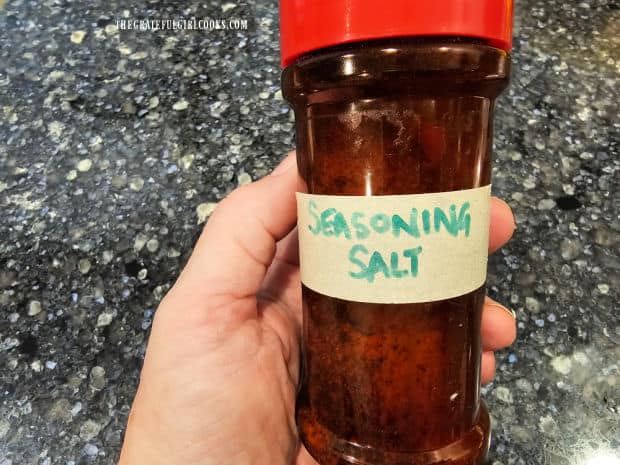
Use a funnel (if you have one) to transfer the seasoning salt into a clean, dry and airtight container. TIP: Try using old spice bottles that have been thoroughly cleaned and completely dried to store the spice mix.

Once you’ve transferred the spice mixture to the container, seal it, then slap a label on it, to identify which spice mixture is inside. That’s it!

Store the simple seasoning salt in your pantry or on a spice rack. This mixture should hold its flavor (at its peak) for 6-12 months. 

The seasoning salt is transferred to a labeled container for storage.

I hope you have the opportunity to whip up a batch of simple seasoning salt to enhance your favorite recipes. It’s so simple to make, and I am confident you’ll enjoy having it on hand!

Thank you for stopping by today, and I invite you to come back again soon for more family-friendly recipes. Take care, may God bless you, and have a wonderful day!

Looking For More Spice Mix Recipes?

You can find ALL of my recipes in the Recipe Index, which is located at the top of the page. I have several spice mixes that can easily be made in your home, including:

Want More Recipes? Get My FREE Newsletter!

I publish a newsletter 2 times per month (1st and 15th) with lots of recipes, tips, etc.
Would you like to join our growing list of subscribers?

There is a Newsletter subscription box on the top right (or bottom) of each blog post, depending on the device you use.
You can submit your e-mail address there, to be added to my mailing list.

Find Me On Social Media:

Facebook page: The Grateful Girl Cooks!
Pinterest:
The Grateful Girl Cooks!
Instagram:
jbatthegratefulgirlcooks

Author's signature

Recipe adapted from: allrecipes.com

↓↓ PRINTABLE RECIPE BELOW ↓↓

0 from 0 votes
Simple Seasoning Salt
Prep Time
3 mins
Cook Time
0 mins
Total Time
3 mins
 

Make homemade, simple seasoning salt in under 5 minutes! Use this easy spice mix to help season beef, pork, lamb, fish or chicken dishes.

Category: Seasoning Mix
Cuisine: All Cuisines
Keyword: simple seasoning salt
Servings: 19 (one teaspoon per serving)
Calories Per Serving: 2 kcal
Author: JB @ The Grateful Girl Cooks!
Ingredients
  • ¼ cup kosher salt
  • 4 teaspoons ground black pepper
  • teaspoons garlic powder
  • 1 teaspoon paprika
  • ½ teaspoon onion powder
  • teaspoon cayenne pepper
  • ¼ teaspoon turmeric
Instructions
  1. Measure all the ingredients into a small bowl. Stir well, until the ingredients are completely mixed together.

  2. Transfer spice mixture to a labeled airtight bottle or container. Store for 6-12 months (for best flavor).

  3. Use to season beef, fish, chicken, pork, or vegetable dishes, as needed.

Nutrition Facts
Simple Seasoning Salt
Amount Per Serving (1 teaspoon)
Calories 2
% Daily Value*
Fat 0.04g0%
Saturated Fat 0.01g0%
Polyunsaturated Fat 0.02g
Monounsaturated Fat 0.01g
Sodium 1489mg65%
Potassium 13mg0%
Carbohydrates 1g0%
Fiber 0.2g1%
Sugar 0.03g0%
Protein 0.1g0%
Vitamin A 69IU1%
Vitamin C 0.05mg0%
Calcium 3mg0%
Iron 0.1mg1%
* Percent Daily Values are based on a 2000 calorie diet.

Here’s one more to pin on your Pinterest boards!Make homemade, simple seasoning salt in under 5 minutes! Use this easy spice mix to help season beef, pork, lamb, fish or chicken dishes.

Easy Homemade Chocolate Syrup

Make Easy Homemade Chocolate Syrup in 5 minutes, with 4 common ingredients! Use it for chocolate milk, desserts, etc.
Make Easy Homemade Chocolate Syrup in 5 minutes, with 4 common ingredients! Use for chocolate milk, desserts, etc.

Did you know it is really EASY to make your own chocolate syrup at home with only a few ingredients that you probably already have in your kitchen?

That’s right! This recipe for easy homemade chocolate syrup can be made in about 5 minutes or less, and it truly is simple to prepare. Save a trip to the grocery store (and a little bit more of your own money) by making it yourself.

I’ve made this syrup many times over the years and decided to finally share the simple recipe on my blog. I scribbled the recipe down at least 15 years ago on a little piece of paper, but never noted the original source, so I can’t give credit where credit is due.

Here’s how to make delicious easy homemade chocolate syrup. I think you’re going to like it!

Scroll Down For A Printable Recipe Card At The Bottom Of The Page

What Ingredients Will I Need?

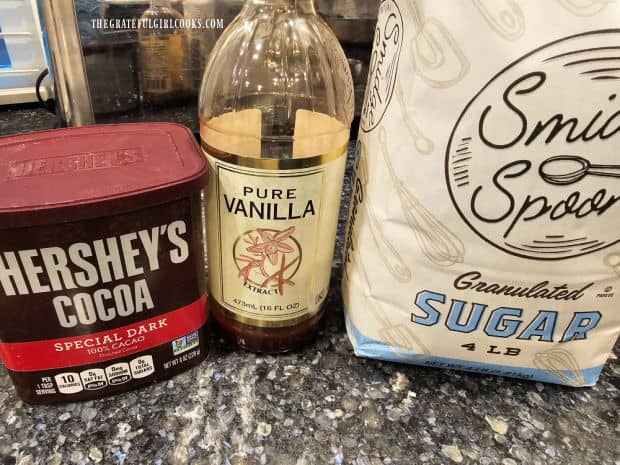
The ingredient list for the homemade chocolate syrup is quite simple. You will need granulated sugar, cocoa powder, vanilla extract and boiling water. That’s it!

Cocoa powder, vanilla, sugar (and water) are the ingredients for chocolate syrup.

Let’s Make Chocolate Syrup!

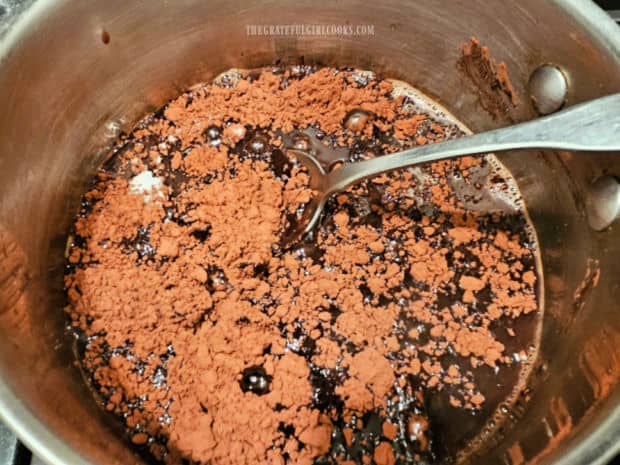
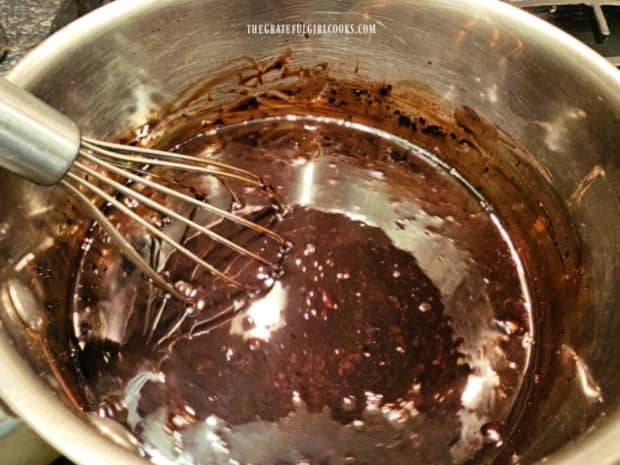
Measure 2 cups of sugar, 1/3 cup of cocoa powder, and 1 cup of boiling water in a medium-sized saucepan. Whisk or stir these ingredients well. The boiling water helps the ingredients blend together.

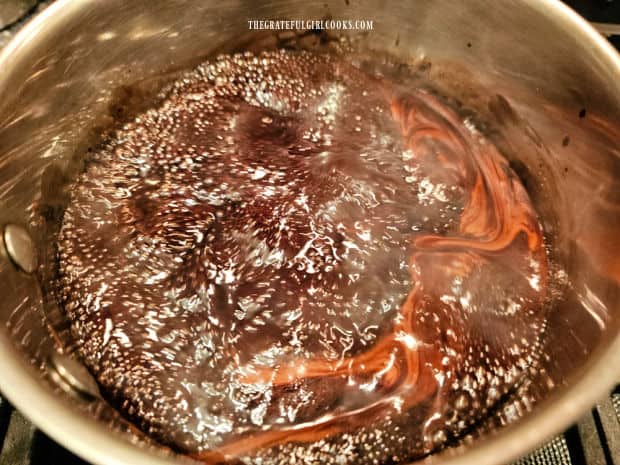
Bring them to a boil on Medium-Low heat, and then once it’s boiling, continue to boil the syrup for 2 minutes, whisking often.

Chocolate syrup ingredients are combined in a medium saucepan.A whisk is used to combine the homemade chocolate syrup ingredients.

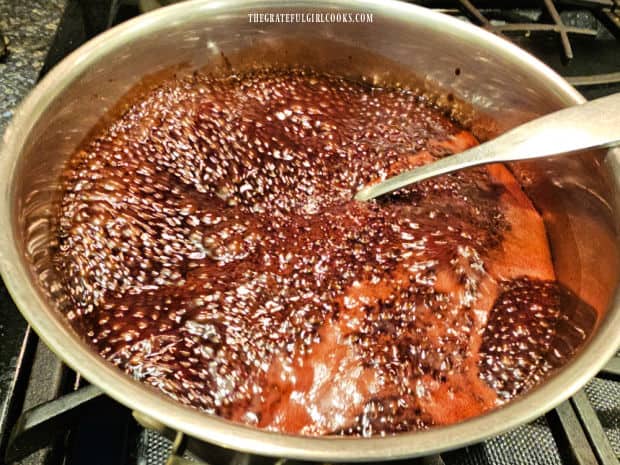
IMPORTANT: Do not step away from the stove while the syrup is boiling! When the easy homemade chocolate syrup boils, it will rise in the saucepan (which is why you need to use a MEDIUM-sized saucepan versus a small pan).

Continue to whisk or stir to keep the bubbling down in the pan. If necessary, lift the pan off the heat for a second until the liquid and bubbles go back down, then put right back on the heat!

The chocolate syrup is boiled for two minutes, stirring constantly.As the syrup boils, it rises in the pan, so it is stirred constantly.

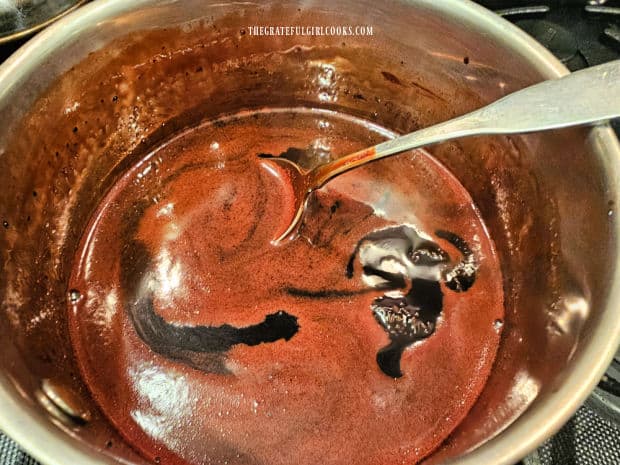
After the homemade chocolate syrup has boiled for 2 minutes, remove the pan from the heat. Stir in 1/8 teaspoon of vanilla extract and then set the pan aside to allow the syrup time to completely cool.

You can see in the photo below how far up the sides of the pan the syrup rose while boiling. That is why you have to stay right there stirring while it is boiling (unless you want a boil-over and a big mess!).

Chocolate syrup is removed from heat when done, and vanilla is added.

Transfer The Syrup To An Airtight Container

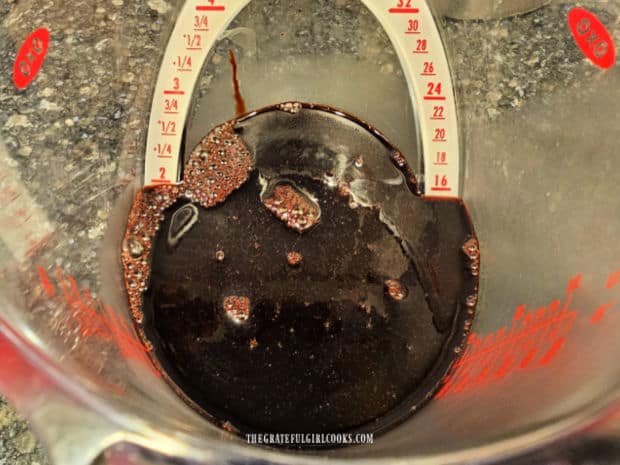
After the homemade chocolate syrup has completely cooled, it is time to transfer it to a bottle or other airtight container. The total amount of syrup should measure about 2 cups.

The recipe for easy homemade chocolate syrup yield about 2 cups total.

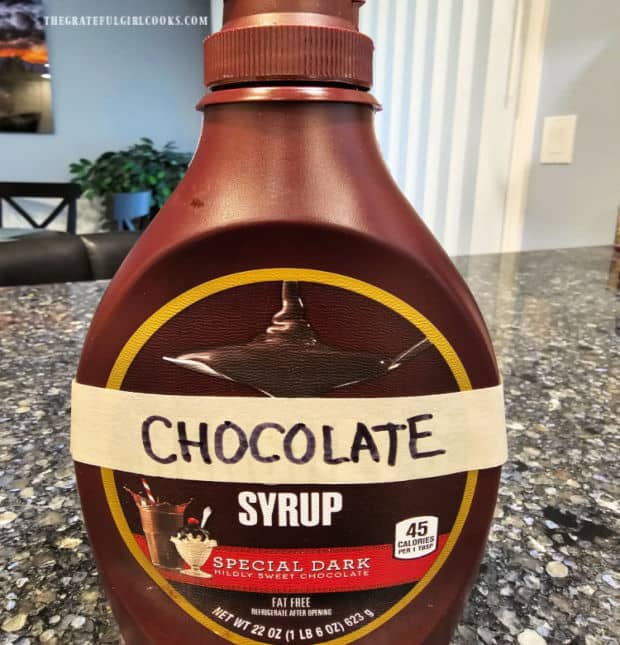
Use a funnel to pour the syrup into an airtight container. I use a leftover name-brand chocolate syrup bottle I saved a while ago for this very purpose!

Label the container and remember to store the chocolate syrup in the refrigerator.

Chocolate syrup is poured into a re-used syrup container for storage.

Enjoy Using The Easy Homemade Chocolate Syrup

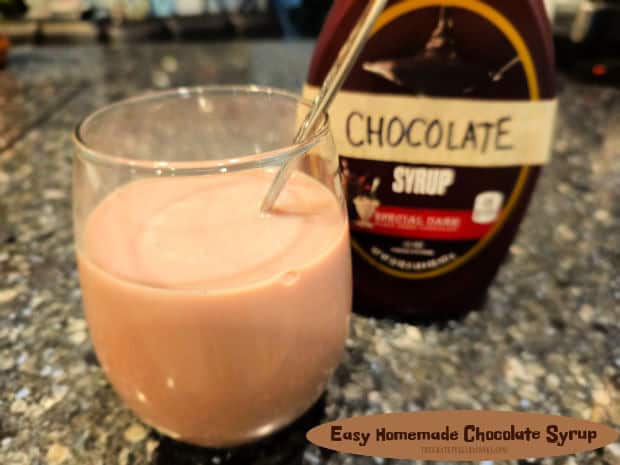
Easy homemade chocolate syrup can be used to make classic chocolate milk or hot chocolate. It can also be used as a dessert topping, by drizzling it over ice cream or other decadent desserts.

I think you’ll be surprised how good it really is, and it’s very convenient to make it from the comfort of home using only a few common pantry ingredients!

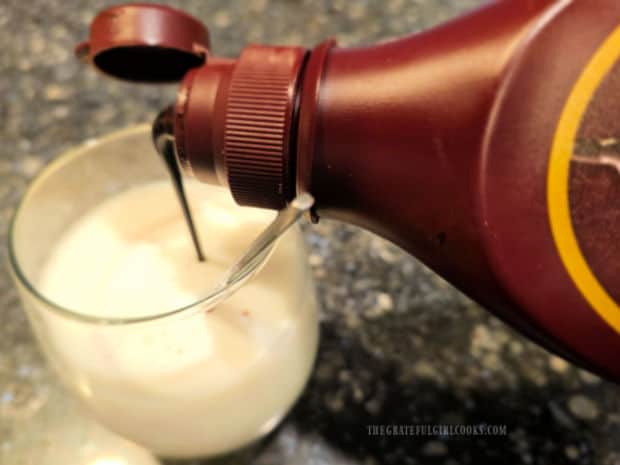
Making chocolate milk using the easy homemade chocolate syrup.The chocolate syrup can also be used to drizzle over a variety of desserts.

I hope you have the opportunity to make this delicious chocolate syrup, and trust you’ll enjoy it, too! It’s a quick, easy and delicious alternative to store bought chocolate syrup!

Thanks for stopping by today, and I invite you to come back soon for more family-friendly recipes. Take care, may God bless you… and have a GREAT day!

Looking For More DESSERT Sauce Recipes?

You can find ALL of my recipes in the Recipe Index, which is located at the top of the page. I have some wonderful dessert sauces you will enjoy, including:

Want More Recipes? Get My FREE Newsletter!

I publish a newsletter 2 times per month (1st and 15th) with lots of recipes, tips, etc.
Would you like to join our growing list of subscribers?

There is a Newsletter subscription box on the top right (or bottom) of each blog post, depending on the device you use.
You can submit your e-mail address there, to be added to my mailing list.

Find Me On Social Media:

Facebook page: The Grateful Girl Cooks!
Pinterest:
The Grateful Girl Cooks!
Instagram:
jbatthegratefulgirlcooks

Author's signature

↓↓ PRINTABLE RECIPE BELOW ↓↓

5 from 1 vote
Easy Homemade Chocolate Syrup
Prep Time
5 mins
Total Time
5 mins
 

Make Easy Homemade Chocolate Syrup in 5 minutes, with 4 common ingredients! Use for chocolate milk, desserts, etc.

Category: Dessert Sauce
Cuisine: All Cuisines
Keyword: homemade chocolate syrup
Servings: 32 Tablespoons (2 cups total)
Calories Per Serving: 50 kcal
Author: JB @ The Grateful Girl Cooks!
Ingredients
  • 2 cups granulated sugar
  • cup cocoa powder
  • 1 cup boiling water
  • teaspoon vanilla extract
Instructions
  1. Place sugar, cocoa powder, and boiling water in a Medium-sized saucepan. Whisk or stir ingredients well. Bring them to a boil on Medium-Low heat. Once boiling, continue to boil for 2 minutes, whisking often.

  2. IMPORTANT: Do not step away from the stove while the syrup is boiling! When the syrup boils, it will rise in the saucepan (this is why you need a MEDIUM-sized saucepan versus a small pan). Continue to whisk or stir to keep the bubbling down in the pan. If necessary, lift the pan off the heat for a second until the liquid and bubbles go back down, then put right back on the heat!

  3. After syrup has boiled for 2 minutes, remove the pan from the heat. Stir in vanilla, then set the pan aside to allow syrup time to cool completely.

  4. Once completely cooled, transfer syrup to a bottle or other airtight container. Store in refrigerator until ready to use. Enjoy!

Nutrition Facts
Easy Homemade Chocolate Syrup
Amount Per Serving (1 Tablespoon)
Calories 50 Calories from Fat 2
% Daily Value*
Fat 0.2g0%
Saturated Fat 0.1g1%
Polyunsaturated Fat 0.004g
Monounsaturated Fat 0.04g
Sodium 1mg0%
Potassium 14mg0%
Carbohydrates 13g4%
Fiber 0.3g1%
Sugar 12g13%
Protein 0.2g0%
Calcium 1mg0%
Iron 0.1mg1%
* Percent Daily Values are based on a 2000 calorie diet.

Here’s one more to pin on your Pinterest boards! Make Easy Homemade Chocolate Syrup in 5 minutes, with 4 common ingredients! Use for chocolate milk, desserts, etc.
 

How To Make Oat Milk

Ever wondered how to make oat milk? It’s EASY! With only 2-3 common ingredients you can make 5 cups of this non-dairy milk alternative.
Ever wondered how to make oat milk? It's EASY! With only 2-3 common ingredients you can make 5 cups of non-dairy milk alternative.

Nowadays there are new options springing up everywhere for non-dairy alternatives for milk, ice cream, etc. I am NOT dairy-free, but I do buy almond milk occasionally, and use it on my cereal or in oatmeal.

I became aware of oat milk via commercials on TV and wondered about this product. Truthfully it sounded kind of odd to me, but I was still curious about it.

I discovered a recipe for how to make oat milk in a book by celebrity chef Michael Symon and thought I’d give it a try. Wow! It was SO EASY to make, and costs a fraction of what a carton in the store costs nowadays! It only takes a couple ingredients to make, and it tastes great on my morning cereal. WHO KNEW?
I would like to show you how to make oat milk, as a cheaper alternative to buying it, or as a tasty alternative for those who don’t use dairy products. I think you’ll be surprised how easy and inexpensive it is to make.

Scroll Down For A Printable Recipe Card At The Bottom Of The Page

Soak The Oats

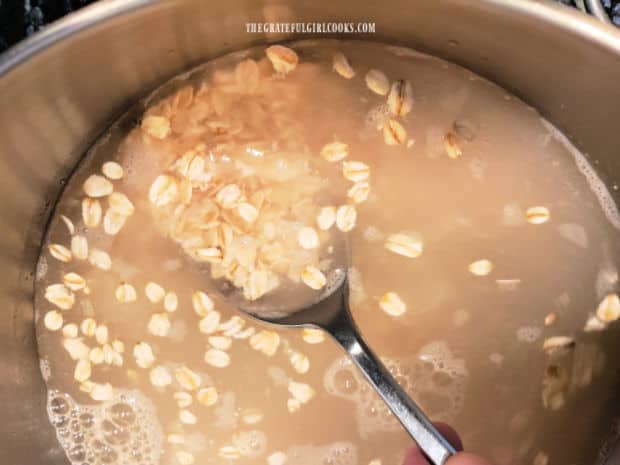
Place 1 cup of old-fashioned oats (not instant!) in a large mixing bowl, and cover with 4 cups of cold water. Stir to combine, then let the oats sit and soak in the water at room temperature for 1 hour. Think of it as a “swimming pool” for oats.

Raw old fashioned oats soak in water for one hour.

Strain The Soaked Oats

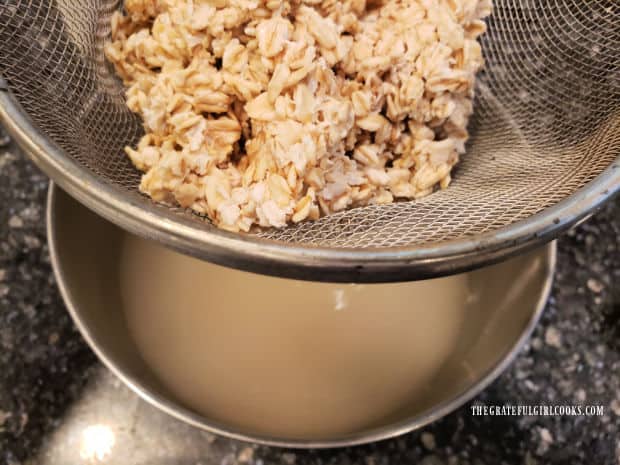
After the oats have soaked for an hour, position a fine mesh strainer over a large bowl or sink. Slowly pour the water/oat mixture into the strainer to drain the oats.

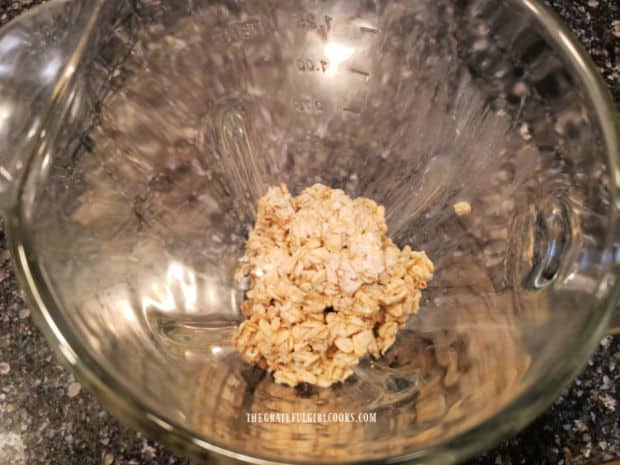
Give the oats a quick rinse (still in the strainer), then dump the accumulated water in the bowl underneath the strainer. Place the drained oats in a blender.

The water is strained off the soaked oats into a large bowl.The drained oats are placed into a blender.

Ready To Blend

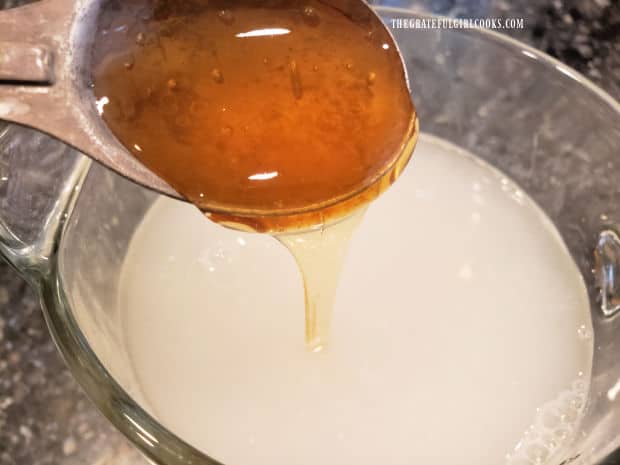
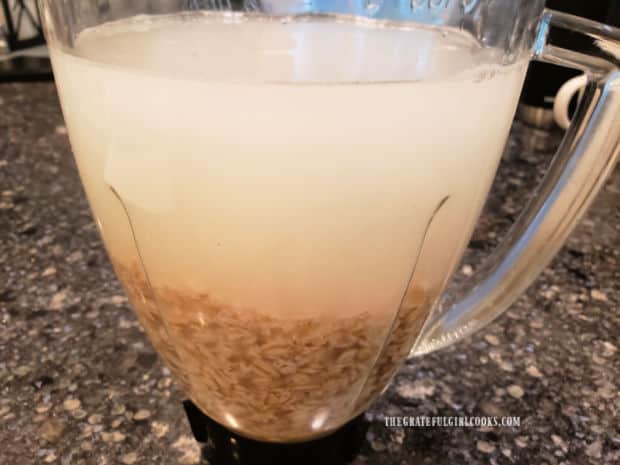
Pour 4 cups of FRESH cold water into the blender with the oats. Add a small pinch of salt and a Tablespoon of raw honey OR real maple syrup to the blender, as well.

The blender will be pretty full at this point, so make sure you have a tight-fitting lid to keep it all IN the blender.

Fresh water, honey and a pinch of salt are added to the oats in the blender.Oats, honey, salt and water in the blender before mixing.

How To Make Oat Milk

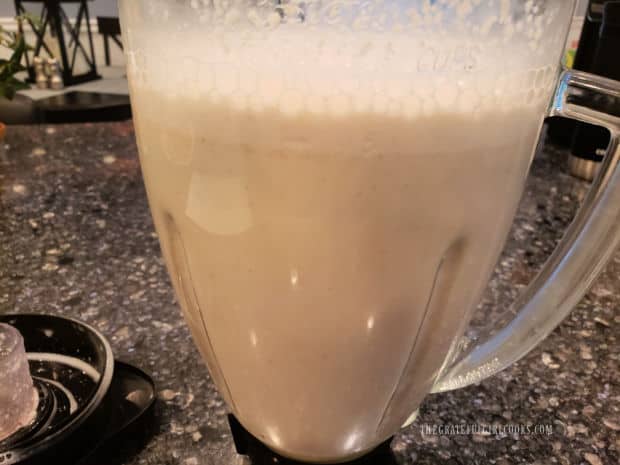
Put the lid on the blender and blend the oat milk for 2-3 minutes, until it is completely smooth. Start the blender on low speed, then increase it as you go, eventually blending it on high speed, holding the lid in place while mixing!
After mixing the oat milk is completely smooth and blended.

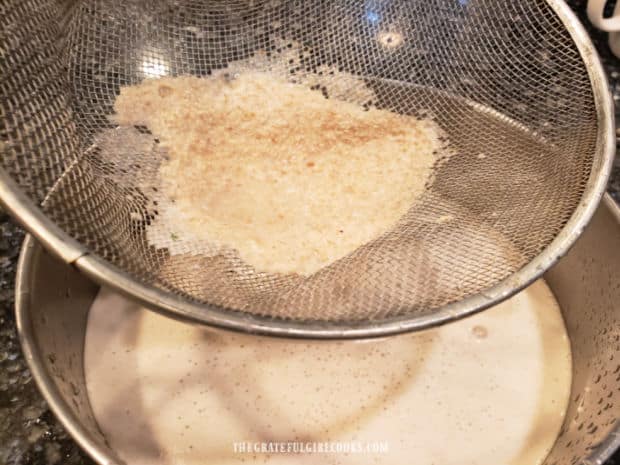
Once the oat milk is smooth and finished blending, pour it AGAIN through a fine mesh strainer positioned over a large bowl. The oat milk will collect in the bowl underneath the strainer, and any leftover “pulp” will be caught in the strainer.

Discard the pulp. Keep the oat milk! Strain the milk again, and discard any more pulp left in the strainer. Now the processing part of this is done.

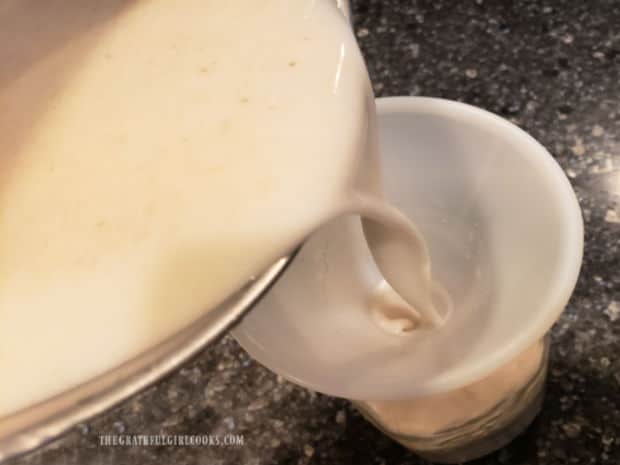
Pour the oat milk (using a funnel if you have one) into a bottle or other storage container. The recipe will make about 5 cups of oat milk. A quart jar will hold about 4 cups of the milk, so either use two jars or a larger container.

Oat milk is poured through a fine mesh strainer into bowl, leaving pulp in strainer.A funnel is inserted in a jar and oat milk is poured into the jar through the funnel.

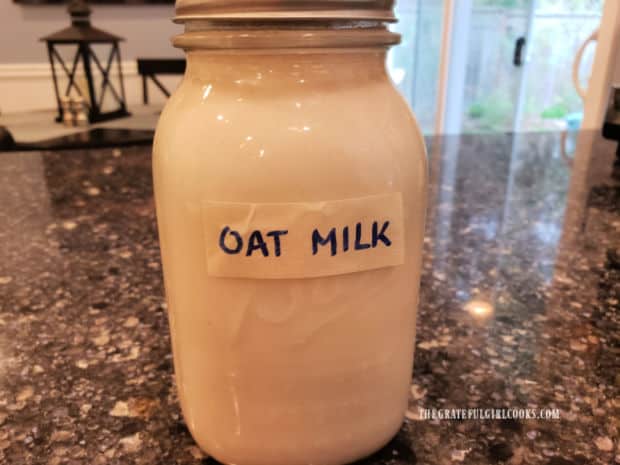
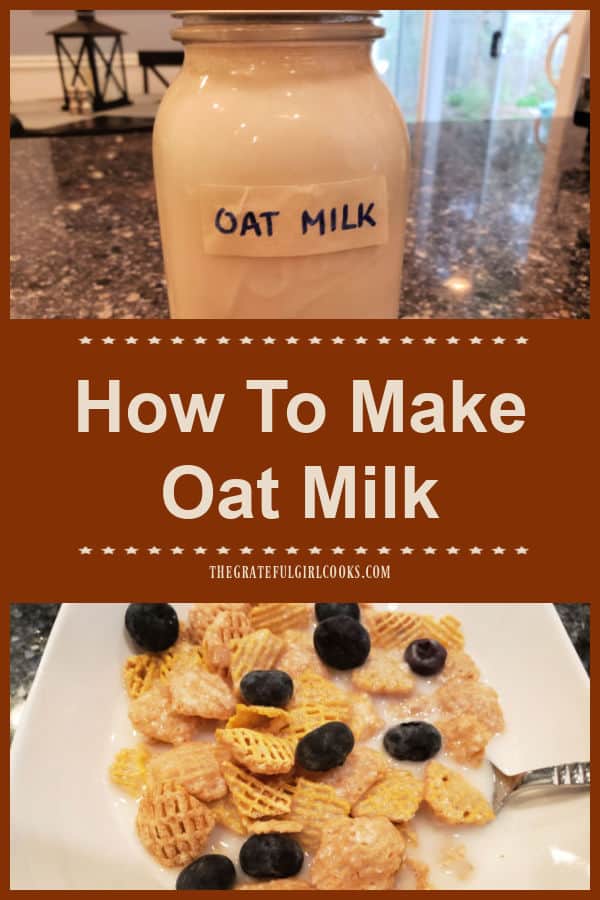
Label the container and place the oat milk in the refrigerator to fully chill. Congratulations! You’ve just learned how to make oat milk! It’s really not difficult at all to make and will keep for up to 5 days in the refrigerator. Not bad, right?

Once fully chilled, shake the oat milk well before each use to reincorporate the ingredients, as they settle a bit and separate during refrigeration.

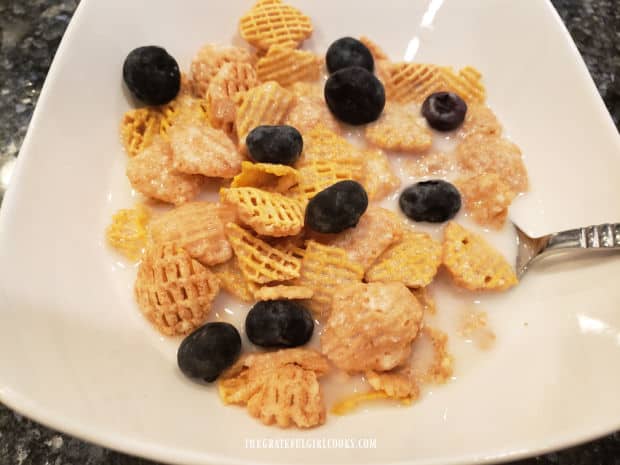
Once mixed, enjoy it over a bowl of cereal, and take pride in knowing you made it yourself, for a fraction of the price of store-bought oat milk.

It's easy to learn how to make oat milk, and you then store it in a labeled jar in refrigerator.A bowl of cereal topped with some of the oat milk is ready to eat.

I hope you will have the opportunity to try this “recipe” for oat milk and hope you will be as pleased with the results as I am.

Thanks for stopping by today, and I invite you to come back again soon for more recipes. Take care, may God bless you, and have a wonderful day!

Looking For More Tips?

You can find ALL my tips and recipes in the Recipe Index, which is located at the top of the page. I have a variety of interesting tips available to choose from, including:

Want More Recipes? Get My FREE Newsletter!

I publish a newsletter 2 times per month (1st and 15th) with lots of recipes, tips, etc.
Would you like to join our growing list of subscribers?

There is a Newsletter subscription box on the top right (or bottom) of each blog post, depending on the device you use.
You can submit your e-mail address there, to be added to my mailing list.

Find Me On Social Media:

Facebook page: The Grateful Girl Cooks!
Pinterest:
The Grateful Girl Cooks!
Instagram:
jbatthegratefulgirlcooks

Author's signature

Original recipe source: “Fix It With Food: More Than 125 Recipes to Address Autoimmune Issues and Inflammation- A Cookbook”, by Michael Symon and Douglas Trattner, page 245, published in 2019 by Clarkson Potter

↓↓ PRINTABLE RECIPE BELOW ↓↓

0 from 0 votes
How To Make Oat Milk
Prep Time
5 mins
Cook Time
0 mins
Soaking time (Inactive Prep)
1 hr
Total Time
1 hr 5 mins
 

Ever wondered how to make oat milk? It's EASY! With only 2-3 common ingredients you can make 5 cups of non-dairy milk alternative.

Category: Beverage
Cuisine: All Cuisines
Keyword: how to make oat milk
Servings: 5 cups
Calories Per Serving: 74 kcal
Author: JB @ The Grateful Girl Cooks!
Ingredients
  • 1 cup old fashioned oats
  • 4 cups water
  • 1 Tablespoon raw honey OR real maple syrup
  • 1 pinch salt
Instructions
  1. Place 1 cup of old-fashioned oats (not instant!) in a large bowl. Cover with 4 cups of cold water. Stir to combine; let oats soak at room temperature for 1 hour.

  2. Position a fine mesh strainer over a large bowl or sink. Slowly pour water/oat mixture into the strainer to drain off water. Give oats a quick rinse (still in strainer), then dump any accumulated water.

  3. Place drained oats in a blender. Add 4 cups of FRESH cold water into blender, along with salt and raw honey (or real maple syrup).

  4. Put lid on blender. Blend 2-3 minutes, until oat milk is completely smooth. Start on low speed, then increase it as you go, eventually blending it on high speed, holding lid in place while mixing!

  5. Pour oat milk through a fine mesh strainer positioned over a large bowl. Oat milk will collect in the bowl, and any leftover "pulp" will be left in the strainer. Discard pulp. Strain milk again, then pour oat milk through a funnel into bottle or other storage container, with a lid. Refrigerate until fully chilled.

  6. Once fully chilled, shake or stir oat milk well before using to re-blend, as it settles during refrigeration. Oat milk will keep up to 5 days in refrigerator.

Recipe Notes

NOTE: Caloric Calculation made using raw honey.

Nutrition Facts
How To Make Oat Milk
Amount Per Serving (1 cup (8 oz.))
Calories 74 Calories from Fat 9
% Daily Value*
Fat 1g2%
Saturated Fat 1g6%
Polyunsaturated Fat 1g
Monounsaturated Fat 1g
Sodium 18mg1%
Potassium 61mg2%
Carbohydrates 14g5%
Fiber 2g8%
Sugar 4g4%
Protein 2g4%
Vitamin C 1mg1%
Calcium 14mg1%
Iron 1mg6%
* Percent Daily Values are based on a 2000 calorie diet.

Here’s one more to pin on your Pinterest boards!Ever wondered how to make oat milk? It's EASY! With only 2-3 common ingredients you can make 5 cups of non-dairy milk alternative.

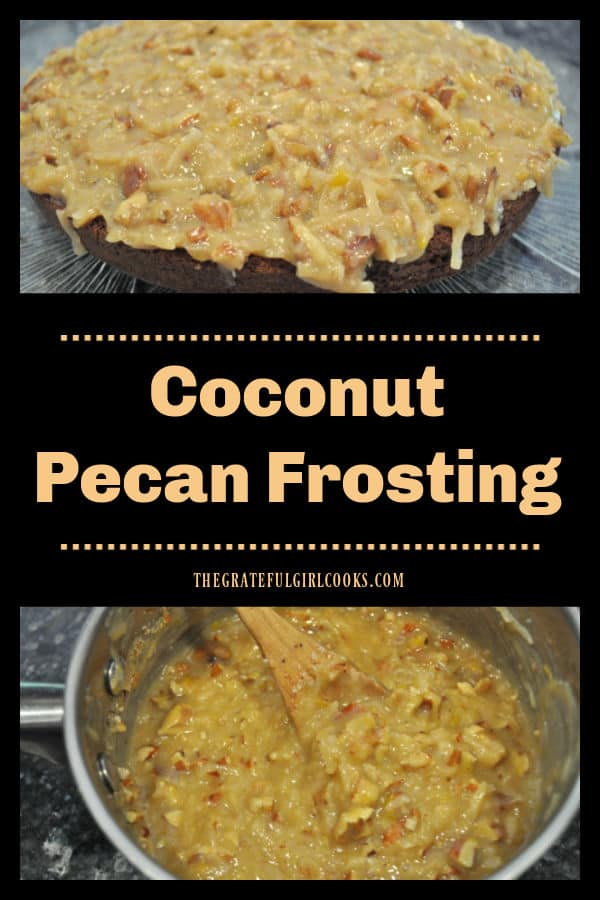
Coconut Pecan Frosting

Make yummy coconut pecan frosting from scratch in 15 minutes! This frosting tastes fantastic on German chocolate cake, cupcakes, or brownies.

If you’re searching for a delicious cake, cupcake or brownie frosting that is super easy to make, may I suggest this coconut pecan frosting?

It is incredibly simple to prepare (just cook and stir!), and it will impress you with it’s wonderful taste. Why buy it in a plastic container, when you can easily make your own from scratch?

We especially love it on German chocolate cake, but it is also awesome as a topping on chocolate brownies or cupcakes, too! My Mom has been making this frosting for as long as I can remember, and she gave me this recipe at least 30 years ago.

Here’s how to make coconut pecan frosting from scratch:

Time to Cook And Stir!

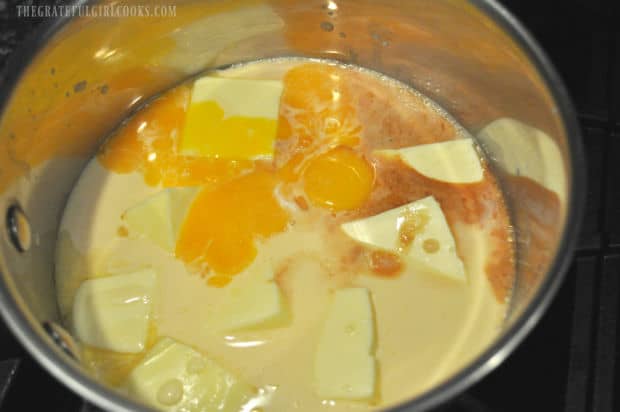
Place evaporated milk, sugar, butter, egg yolks and vanilla extract into a medium saucepan. Cook these ingredients over medium-low heat, stirring to combine.

Continue to cook for a FULL 12 minutes, stirring often, so it doesn’t stick to the bottom of the pan and burn.

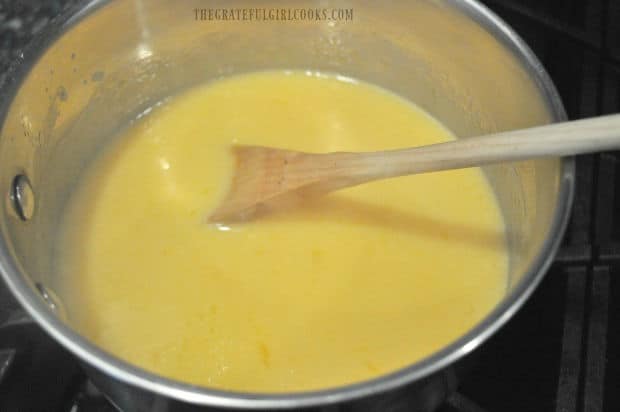
As it cooks, the mixture will begin to thicken. That is perfect, and is exactly what you want to happen! Once the 12 minutes is up, and the mixture has thickened, remove the saucepan from the direct heat.

Evaporated milk, sugar, butter, egg yolks and vanilla cook in a saucepan.After cooking, the evaporated milk, sugar, butter, egg yolks and vanilla are creamy and yellow in color.

Add Coconut And Chopped Pecans To Finish

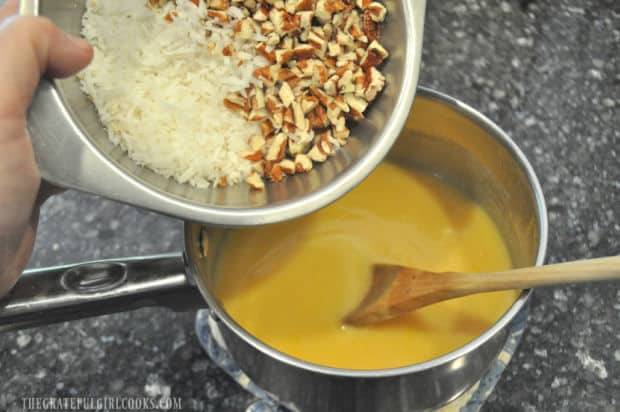
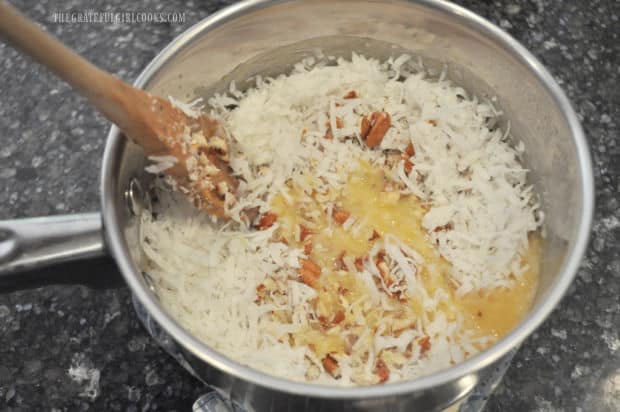
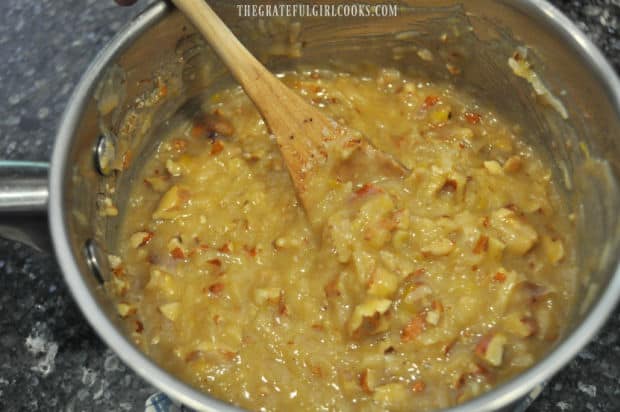
As soon as you take the pan off of the heat, add the shredded coconut and chopped pecans. Stir well, to make sure all the ingredients in the coconut pecan frosting are fully combined.

The finished frosting will be fairly thick, and still quite hot at this point. Set the pan aside and let the coconut pecan frosting cool completely before attempting to frost a cake, etc.

Shredded coconut and chopped pecans are added to saucepan.Coconut Pecan Frosting being stirred in the saucepan.

Ready To Use the Coconut Pecan Frosting!

You can stir the frosting often to help speed up the cooling process, if desired. When the coconut pecan frosting has cooled completely, you are ready to frost your cake, cupcakes or brownies!

Once the coconut pecan frosting has cooled, it is ready to use to decorate cakes, etc.

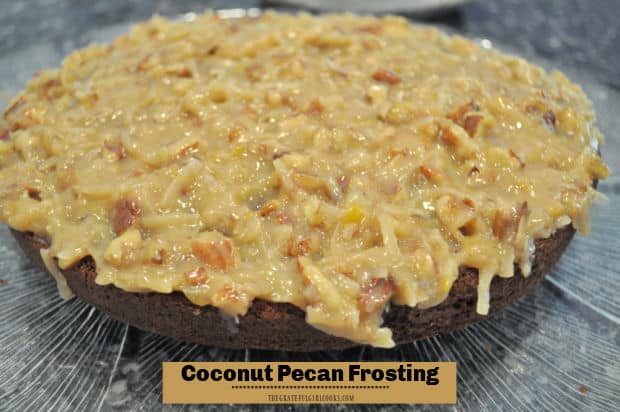
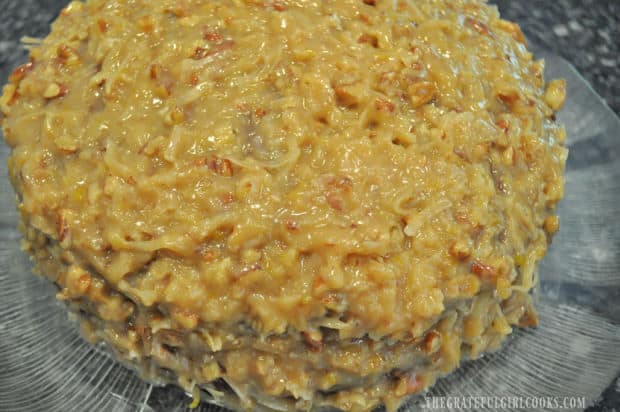
See how pretty the frosting looks on this German chocolate cake? You can see all the shredded coconut and the small pieces of pecans.

I’m not kidding, this frosting is so good you might want to just eat it by the spoonful… ha ha!

Here is a 2 layer German chocolate cake with coconut pecan frosting.

I hope you have the opportunity to make this delicious coconut pecan frosting. I am confident you’ll enjoy using it (and eating it, too)!

Thank you for stopping by today, and I sincerely hope you will come back again soon for more family friendly recipes. Take care, may God bless you, and have a wonderful day, friends.

Looking For More FROSTING Recipes?

You can find ALL of my recipes in the Recipe Index, which is located at the top of the page. I have several made from scratch frosting recipes to choose from including:

Want More Recipes? Get My FREE Newsletter!

I publish a newsletter 2 times per month (1st and 15th) with lots of recipes, tips, etc.
Would you like to join our growing list of subscribers?

There is a Newsletter subscription box on the top right (or bottom) of each blog post, depending on the device you use.
You can submit your e-mail address there, to be added to my mailing list.

Find Me On Social Media:

Facebook page: The Grateful Girl Cooks!
Pinterest:
The Grateful Girl Cooks!
Instagram:
jbatthegratefulgirlcooks

Author's signature

Original recipe source: I got this recipe from my Mom (over 30 years ago!)

↓↓ PRINTABLE RECIPE BELOW ↓↓

0 from 0 votes
Coconut Pecan Frosting
Prep Time
15 mins
Cook Time
0 mins
Total Time
15 mins
 

Make yummy coconut pecan frosting from scratch in 15 minutes! This frosting tastes fantastic on German chocolate cake, cupcakes, or brownies.

Category: Frosting, Topping
Cuisine: American
Keyword: coconut pecan frosting
Servings: 1 (total amt. for 13x9 cake or 2 layer cake)
Calories Per Serving: 3783 kcal
Author: JB @ The Grateful Girl Cooks!
Ingredients
  • 1 cup evaporated milk
  • 1 cup granulated sugar
  • ½ cup butter , equal to 1 stick
  • 3 large egg yolks , beaten slightly
  • 1 teaspoon vanilla extract
  • cups shredded coconut
  • 1 cup chopped pecans
Instructions
  1. Place evaporated milk, sugar, butter, egg yolks and vanilla into a medium saucepan. Cook on medium-low heat, stirring to combine. Continue to cook for a FULL 12 minutes, stirring often. As it cooks, it will begin to thicken. Once the 12 minutes is up, and mixture has thickened, remove pan from the heat.

  2. Immediately stir in coconut and chopped pecans. Stir well, until fully combined. Set pan aside and let frosting cool completely before attempting to frost a cake, brownies, etc. You can stir often, if desired, to "speed up" the cooling process.

  3. Once cooled to room temperature the frosting is ready to use. Enjoy!

Recipe Notes

NOTE: This amount of frosting is enough for a 13x9" cake OR a round 2 layer cake. Makes approx. 4½ cups total frosting total. Caloric calculation is for the entire amount.

Nutrition Facts
Coconut Pecan Frosting
Amount Per Serving (1 Total Amount (approx. 4½ cups))
Calories 3783 Calories from Fat 2637
% Daily Value*
Fat 293g451%
Saturated Fat 161g1006%
Trans Fat 4g
Polyunsaturated Fat 31g
Monounsaturated Fat 84g
Cholesterol 872mg291%
Sodium 1160mg50%
Potassium 2073mg59%
Carbohydrates 276g92%
Fiber 33g138%
Sugar 241g268%
Protein 46g92%
Vitamin A 4245IU85%
Vitamin C 8mg10%
Calcium 876mg88%
Iron 9mg50%
* Percent Daily Values are based on a 2000 calorie diet.

Here’s one more to pin on your Pinterest boards!Make yummy coconut pecan frosting from scratch in 15 minutes! This frosting tastes fantastic on German chocolate cake, cupcakes, or brownies.

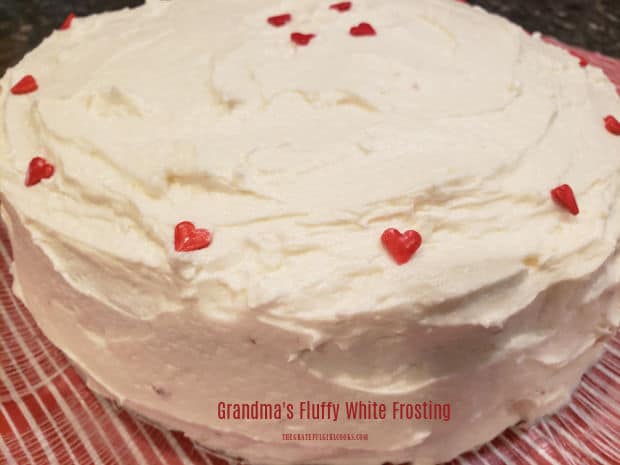
Grandma’s Fluffy White Frosting

Make my Grandma’s fluffy white frosting to decorate your favorite cakes or cupcakes! It’s a simple recipe I’ve used for over 45 years.Make my Grandma's fluffy white frosting to decorate your favorite cakes or cupcakes! It's a simple recipe I've used for over 45 years.

Today I want to share my Grandma’s recipe for fluffy white frosting, which can be used to decorate cakes and cupcakes.

This recipe was given to my Mom (her daughter-in-law) MANY years ago, who then handed down the recipe to me over 45 years ago. I feel a wonderful connection to my Grandma Grace whenever I have made this frosting over the years.

Grandma’s Fluffy White Frosting is simple to make, but it DOES take a while to beat with an electric mixer (or stand mixer) to make it fluffy and fully dissolve the sugar.

That being said, the end result is a light, fluffy frosting you will enjoy using. Here’s how to make it:

Scroll Down For A Printable Recipe Card At The Bottom Of The Page

How To Make Grandma’s Fluffy White Frosting

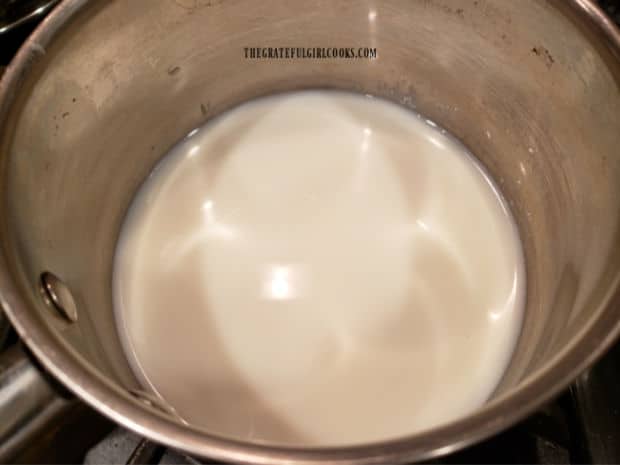
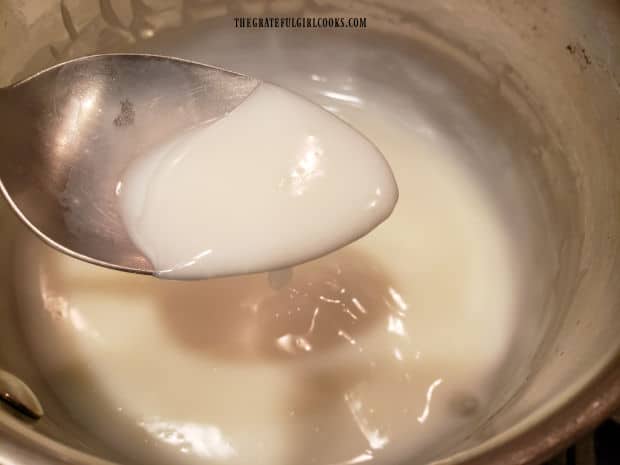
Place the milk, cornstarch and a dash of salt in a medium saucepan. Use a spoon or wire whisk to combine these ingredients, and then cook on LOW heat, stirring often, until the mixture thickens.

Once the mixture thickens, remove it from the heat and set it aside to FULLY cool. 

Milk, cornstarch and salt are cooked in saucepan until thickened.Thickened milk, cornstarch and salt mixture is set aside to cool after it is cooked.

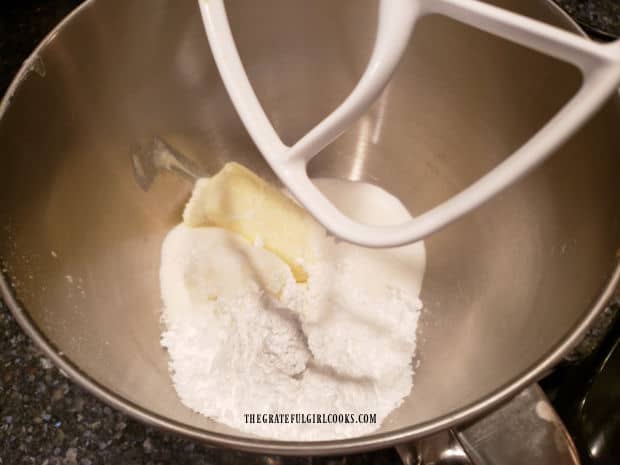
In a separate large mixing bowl (or stand mixer), use an electric mixer to cream together the vegetable shortening, butter, granulated sugar and a portion of the powdered sugar.

Mix these ingredients REALLY WELL for 15 minutes, until creamy. I use my stand mixer for this, because I can turn it on, walk away and let it mix the frosting on its own.

NOTE:  It is important to take the time to mix these ingredients really well, so the granulated sugar is dissolved and no longer “grainy”.

Shortening, butter, powdered and granulated sugar are beaten well until creamy.

Time To Finish Making Grandma’s Fluffy White Frosting

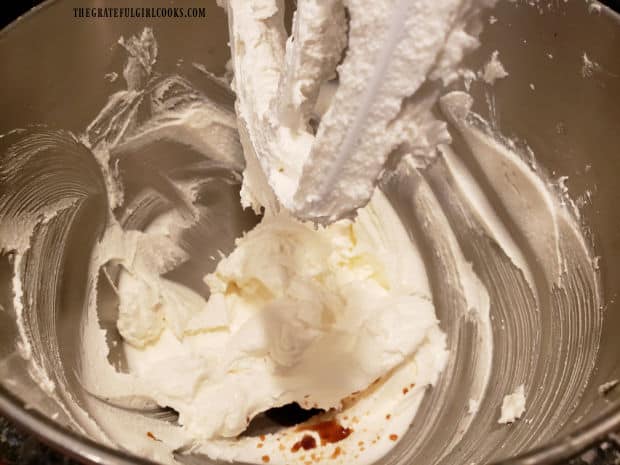
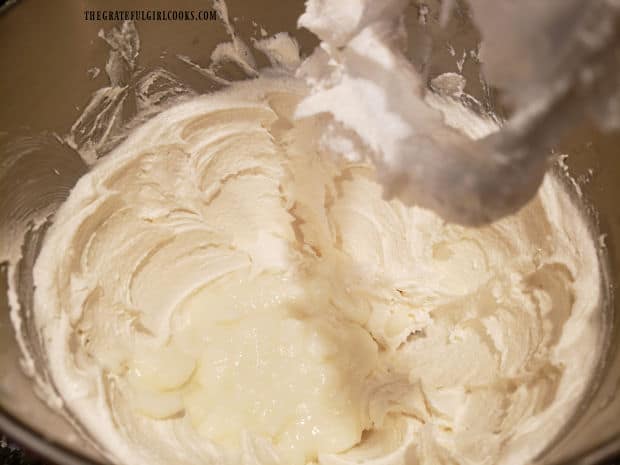
Add vanilla extract to Grandma’s Fluffy White Frosting and then add the cooled and thickened milk mixture.

Make sure the thickened milk mixture has fully cooled before adding, so it doesn’t melt the frosting! Beat these ingredients well, until fully incorporated.

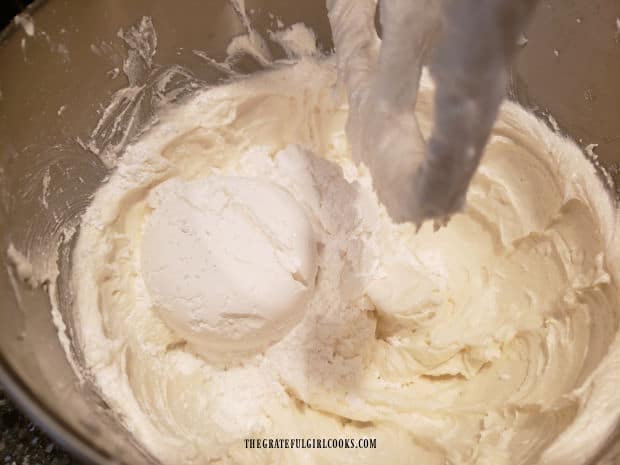
Vanilla extract is added to the frosting mixture in stand mixer.Cooled and thickened milk mixture is added to Grandma's fluffy white frosting mixture and combined.

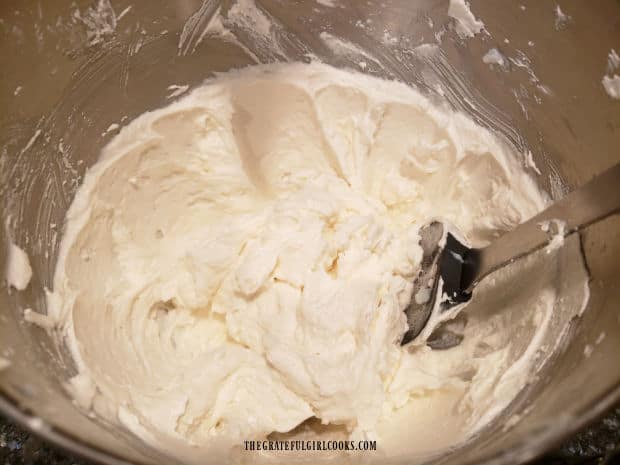
Add the remaining portion of powdered sugar to the frosting and mix well until fully combined. Now this yummy frosting is done! It should be fluffy, light in texture and ready to use.

More powdered sugar is mixed into Grandma's fluffy white frosting to finish.A bowl of Grandma's fluffy white frosting is ready to use for decorating cakes or cupcakes.

Decorating With Grandma’s Fluffy White Frosting

There will be enough frosting made to easily decorate a two-layer round cake fully with frosting or cover 2 dozen cupcakes.

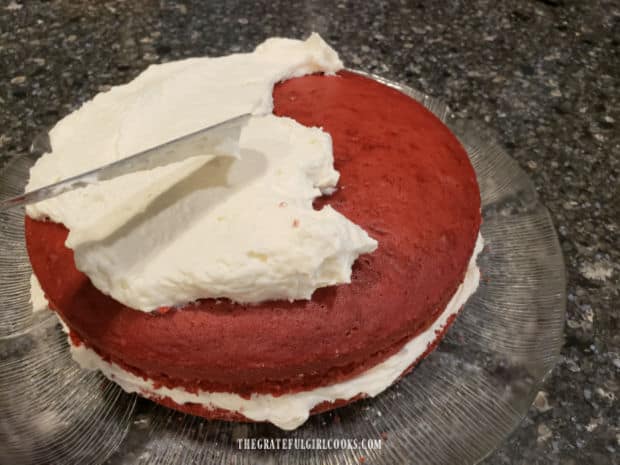
I ALWAYS use this frosting on my Grandma’s Red Velvet Cake. When I was growing up, this was my favorite birthday cake that my Mom made. This light, fluffy frosting was the perfect topping! YUM! 

Spreading Grandma's Fluffy White Frosting onto a red velvet cake.

I hope you have the opportunity to try this recipe- it’s never failed me yet after all these years. If you’re looking for other cake or cupcake frosting recipes, you will love my recipe for Mom’s Chocolate Buttercream Frosting

Thanks for stopping by, and I invite you to come back again soon for more family friendly recipes. Take care, may God bless you, and have a wonderful day.

Looking For More DESSERT Recipes?

You can find ALL of my recipes in the Recipe Index, which is located at the top of the page. I have LOTS of yummy dessert recipes to choose from, including:

Want More Recipes? Get My FREE Newsletter!

I publish a newsletter 2 times per month (1st and 15th) with lots of recipes, tips, etc.
Would you like to join our growing list of subscribers?

There is a Newsletter subscription box on the top right (or bottom) of each blog post, depending on the device you use.
You can submit your e-mail address there, to be added to my mailing list.

Find Me On Social Media:

Facebook page: The Grateful Girl Cooks!
Pinterest:
The Grateful Girl Cooks!
Instagram:
jbatthegratefulgirlcooks

Author's signature

Original recipe source: My grandma Grace

↓↓ PRINTABLE RECIPE BELOW ↓↓

5 from 4 votes
Grandma's Fluffy White Frosting
Prep Time
20 mins
Cook Time
0 mins
Total Time
20 mins
 

Make my Grandma's fluffy white frosting to decorate your favorite cakes or cupcakes! It's a simple recipe I've used for over 45 years.

Category: Dessert
Cuisine: American
Keyword: Grandma's Fluffy White Frosting
Servings: 1 (total amount)
Calories Per Serving: 3170 kcal
Author: JB @ The Grateful Girl Cooks!
Ingredients
  • 1 cup milk
  • Tablespoons cornstarch
  • 1 dash salt
  • ½ cup vegetable shortening
  • ½ cup butter (or margarine) , softened
  • cup granulated sugar
  • 1⅔ cup powdered sugar , divided use
  • 1 teaspoon vanilla extract
Instructions
  1. Place milk, cornstarch and a dash of salt in a medium saucepan. Stir or whisk to combine ingredients. Cook on LOW heat, stirring often, until mixture thickens. Once mixture thickens, remove it from the heat; set it aside to cool.

  2. In a separate large mixing bowl (or stand mixer), mix together vegetable shortening, butter, granulated sugar and a portion (2/3 cup) of the powdered sugar. Beat these ingredients REALLY WELL for about 15 minutes, until creamy. NOTE:  It is important to take the time to mix really well, so the granulated sugar is dissolved and is no longer "grainy".

  3. Add vanilla extract, and the completely cooled, thickened milk mixture. Beat ingredients well, until fully incorporated into the frosting.

  4. Add remaining cup of powdered sugar to the frosting. Mix well until fully combined. Now the frosting is done. It should be fluffy and light in texture, and ready to use. Will make enough frosting to fully cover a 2 layer round cake or 2 dozen cupcakes.

Recipe Notes

NOTE: The total amount of frosting is enough to cover two round cake layers, OR a 13x9 cake, OR 2 dozen cupcakes. * Caloric calculation is for total amount of frosting, using butter.

Nutrition Facts
Grandma's Fluffy White Frosting
Amount Per Serving (1 (TOTAL AMT.))
Calories 3170 Calories from Fat 1773
% Daily Value*
Fat 197g303%
Saturated Fat 85g531%
Trans Fat 17g
Cholesterol 256mg85%
Sodium 964mg42%
Potassium 394mg11%
Carbohydrates 356g119%
Fiber 1g4%
Sugar 342g380%
Protein 9g18%
Vitamin A 3299IU66%
Calcium 327mg33%
Iron 1mg6%
* Percent Daily Values are based on a 2000 calorie diet.

Here’s one more to pin on your Pinterest boards!Make my Grandma's fluffy white frosting to decorate your favorite cakes or cupcakes! It's a simple recipe I've used for over 45 years.


Making Stabilized Whipped Cream

Making stabilized whipped cream is easy! This sweetened cream will hold its shape for days- perfect for decorating pies, cheesecakes, etc.!

Ever baked a gorgeous pie or dessert, topped it with some piped whipped cream, only to see that whipped cream collapse or lose its shape after a few hours (or the next day)?

I have, and that’s why I make and decorate with STABILIZED whipped cream which holds its shape for days, just like the pretty pies at a bakery!

Did you know making stabilized whipped cream is EASY to make by adding a simple ingredient? Yep, that’s right! By adding unsweetened gelatin, you will be able to pipe gorgeous, whipped cream decorations onto your favorite desserts, and they will still look fantastic 3-4 days later! 

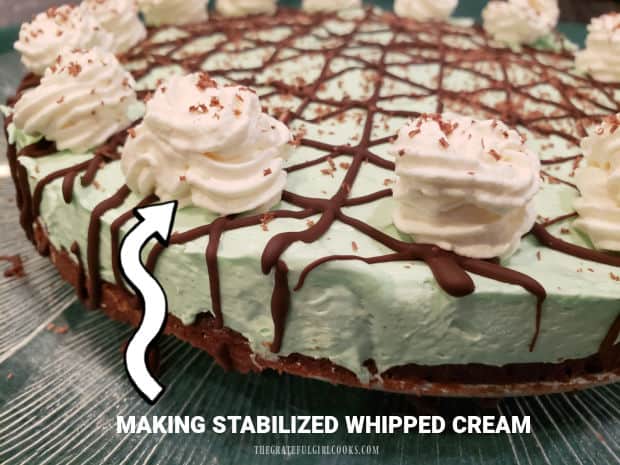
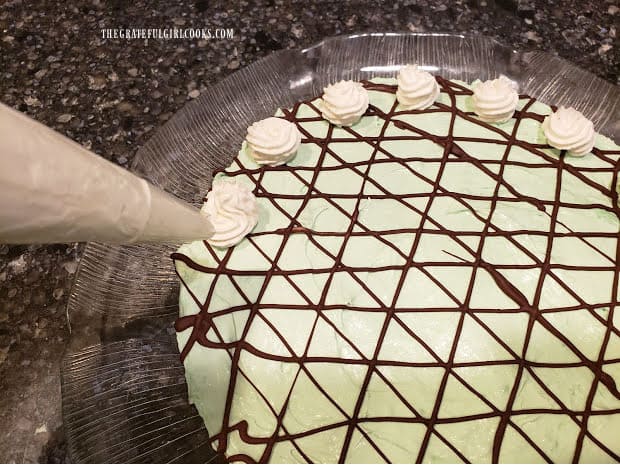
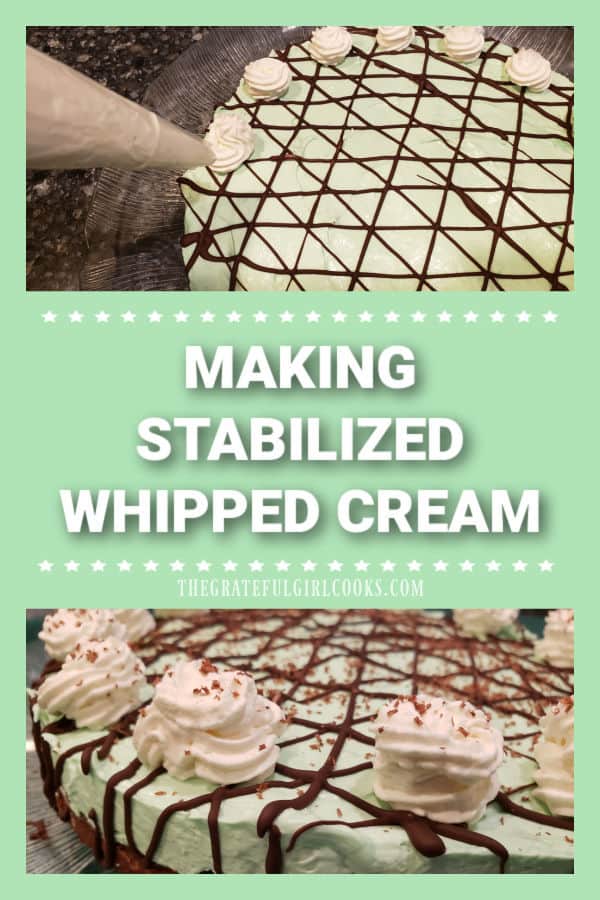
I’ve used stabilized whipped cream quite recently to decorate a Mint Brownie Pie (shown above), and on a Lemon Cream Cheese Tart.  Here’s how to make it:

Scroll Down For A Printable Recipe Card At the Bottom Of The Page

Making Stabilized Whipped Cream

TIP: Before beginning, place a large mixing bowl and a whisk attachment (for stand mixer or electric mixer) in the freezer for 5 minutes to get them chilled. This will help the whipped cream to thicken a bit quicker when you make it!

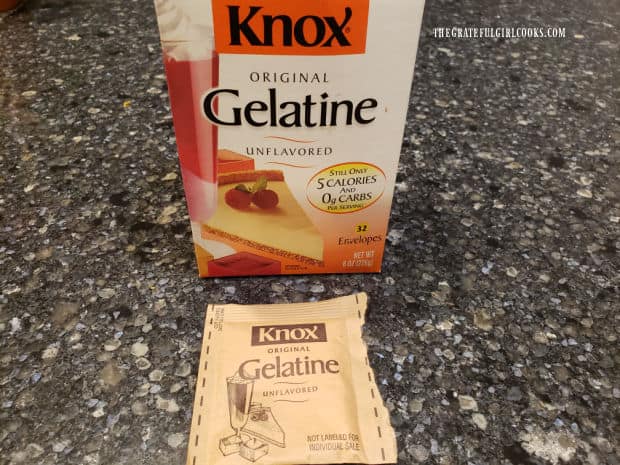
Okay… here we go. Unflavored gelatin (or gelatin) is the secret ingredient! You can find this at most grocery stores in either the baking section or the Jello section. The way I buy it is in small envelopes (see photo below).

This recipe yields two cups of whipped cream, and will only use a TEASPOON of gelatin powder, which is less than one envelope of the powder, and this stuff will last a long time, so it’s a good investment.

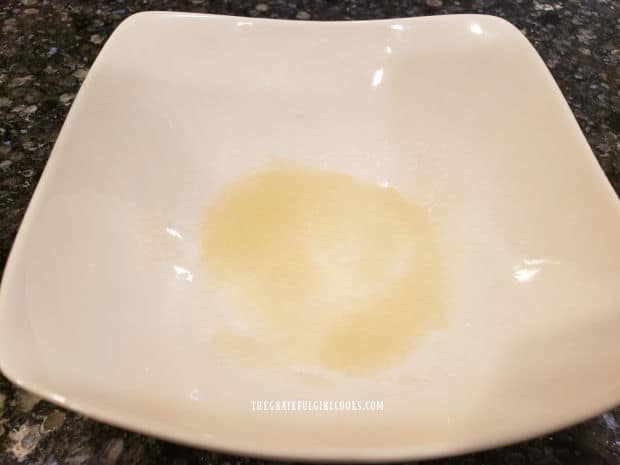
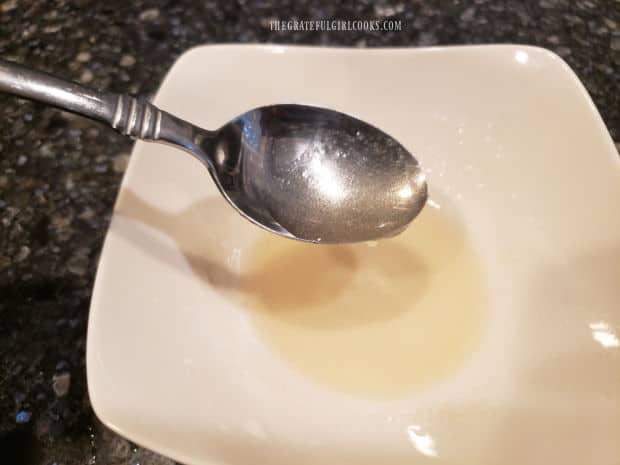
Add 4 teaspoons of water to a small, microwave-safe bowl. Sprinkle the gelatin powder on top, and let it sit, undisturbed for 3-4 minutes. After that, place the bowl of gelatin in the microwave.

Cook on high for 10 seconds… just long enough to fully dissolve the gelatin! Give it a stir, then let the gelatin cool a little before adding it to the whipped cream (as shown below).

Unflavored gelatin powder is used to make stabilized whipped cream.Gelatin powder is sprinkled on top of water and is left to sit for 3-4 minutes.

Preparing The Whipped Cream

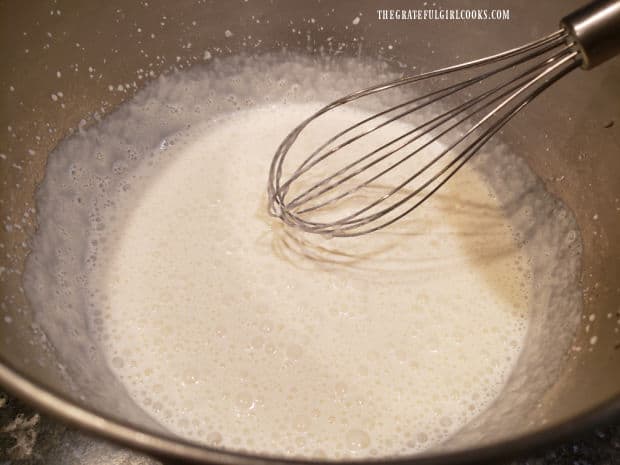
Remove the bowl and whisk attachment from the freezer. It should be nice and COLD! Whip heavy whipping cream, powdered sugar, and vanilla extract on high speed until it starts to thicken a bit and soft peaks can be formed.

Whipping cream, powdered sugar and vanilla are beaten until soft peaks form.

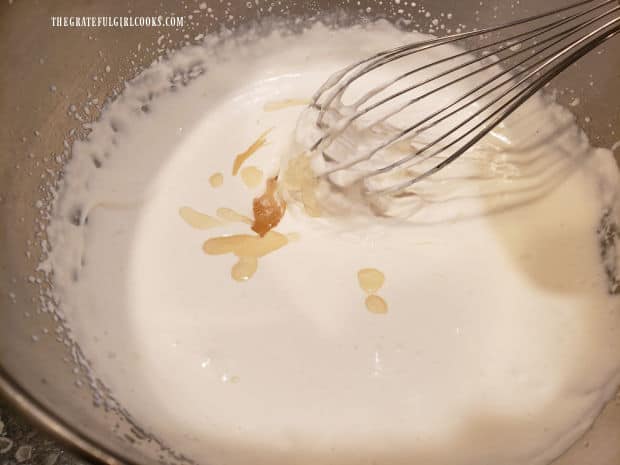
Slowly add the microwaved and cooled gelatin to the whipped cream while whipping on medium speed until stiff peaks form.

TIP: It’s important to not DUMP the gelatin all at once into the whipping cream mixture or else it might get clumpy, okay? 

Gelatin and water are microwaved until powder dissolves, then let cool.Gelatin mixture is slowly added to whipped cream, as it is being beaten.

How Do I Know When It Is Ready To Use?

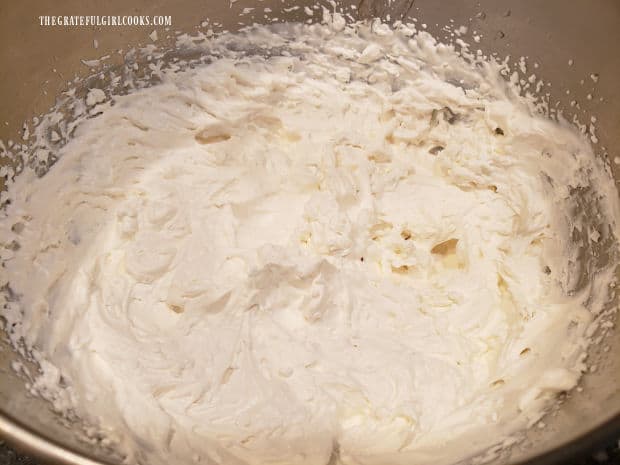
You can tell if the peaks are stiff enough by turning off the mixer and lifting the whisk attachment up from the whipping cream several times.

When “done”, stiff peaks of whipping cream will stand up firmly on their own, and they shouldn’t collapse or fall over in the bowl.

That is how you will know the stabilized whipped cream is ready! Transfer it to a pastry bag and refrigerate it until you are ready to decorate or serve your dessert.

You can store the stabilized whipped cream for several days in the pastry bag or in a sealed container. It will hold its shape for several days on a refrigerated dessert.

Whipping cream is beaten until it easily forms stiff peaks.Making stabilized whipped cream lets you pipe it onto desserts and it will hold it's shape.

That’s it! See how easy it is? Pretty soon you can be making stabilized whipped cream, too! Your beautiful desserts with their nice, whipped cream decorations will thank you for it!

Thank you for stopping by, and I invite you to come back again soon for more family friendly recipes. Take care, may God bless you, and have a wonderful day.

Looking For More Kitchen TIPS?

You can find ALL of my recipes in the Recipe Index, which is located at the top of the page. I have some fun kitchen tips to choose from, including:

Want More Recipes? Get My FREE Newsletter!

I publish a newsletter 2 times per month (1st and 15th) with lots of recipes, tips, etc.
Would you like to join our growing list of subscribers?

There is a Newsletter subscription box on the top right (or bottom) of each blog post, depending on the device you use.
You can submit your e-mail address there, to be added to my mailing list.

Find Me On Social Media:

Facebook page: The Grateful Girl Cooks!
Pinterest:
The Grateful Girl Cooks!
Instagram:
jbatthegratefulgirlcooks

Author's signature

Original recipe source: Danielle, at livewellbakeoften.com.how-to-make-stabilized-whipped-cream/

↓↓ PRINTABLE RECIPE BELOW ↓↓

0 from 0 votes
Making Stabilized Whipped Cream
Prep Time
10 mins
Cook Time
0 mins
Total Time
10 mins
 

Making stabilized whipped cream is easy! This sweetened cream will hold it's shape for days- perfect for decorating pies, cheesecakes, etc.!

Category: Dessert, Tip, Topping
Cuisine: American
Keyword: stabilized whipped cream
Servings: 1 (2 cups total)
Calories Per Serving: 957 kcal
Author: JB @ The Grateful Girl Cooks!
Ingredients
  • 4 teaspoons water
  • 1 teaspoon unflavored gelatin powder
  • 1 cup heavy whipping cream
  • ¼ cup powdered sugar (confectioner's)
  • ½ teaspoon vanilla extract
Instructions
  1. Before beginning, place a large mixing bowl and a whisk attachment (for stand mixer or electric mixer) in the freezer for 5 minutes to get them cold. This helps whipped cream to thicken quicker!

  2. Add 4 tsp. water to a small, microwave-safe bowl. Sprinkle gelatin on top; let it sit, undisturbed for 3-4 minutes. Place bowl of gelatin in microwave. Cook on high for 10 seconds... just long enough to dissolve gelatin! Stir, then let gelatin cool before adding to whipped cream

  3. Remove bowl and whisk attachment from freezer. Beat whipping cream, powdered sugar, and vanilla (using whisk attachment) on HIGH until it begins thickening and soft peaks can be formed.

  4. Slowly add cooled gelatin to whipped cream while whipping on LOW speed. Once combined, turn mixer to MEDIUM speed; beat until stiff peaks form. TIP: Don't dump gelatin all at once into whipping cream or it might clump.

  5. You can tell if the peaks are stiff by turning off the mixer. Lift up the whisk attachment from the whipping cream several times. Stiff peaks of whipping cream will stand up firmly on their own, and won't collapse or fall over. Transfer whipped cream to a pastry bag to decorate. Store stabilized whipped cream for several days in pastry bag or sealed container. It will hold it's shape for several days on a refrigerated dessert.

Recipe Notes

NOTE: Caloric total is for the entire 2 cups of prepared whipped cream.

Nutrition Facts
Making Stabilized Whipped Cream
Amount Per Serving (1 TOTAL AMOUNT (2 cups))
Calories 957 Calories from Fat 792
% Daily Value*
Fat 88g135%
Saturated Fat 55g344%
Cholesterol 326mg109%
Sodium 100mg4%
Potassium 183mg5%
Carbohydrates 37g12%
Sugar 30g33%
Protein 8g16%
Vitamin A 3499IU70%
Vitamin C 1mg1%
Calcium 158mg16%
Iron 1mg6%
* Percent Daily Values are based on a 2000 calorie diet.

Here’s one more to pin on your Pinterest boards!Making stabilized whipped cream is easy! This sweetened cream will hold its shape for days- perfect for decorating pies, cheesecakes, etc.!

Garlic-Infused Olive Oil

Need Garlic-Infused Olive Oil for a recipe? It’s easy to make your own in minutes (with 2 ingredients), for salad dressings, veggies, & other dishes.
Need Garlic-Infused Olive Oil for a recipe? It's easy to make your own in minutes (with 2 ingredients), for salad dressings, veggies, & other dishes.

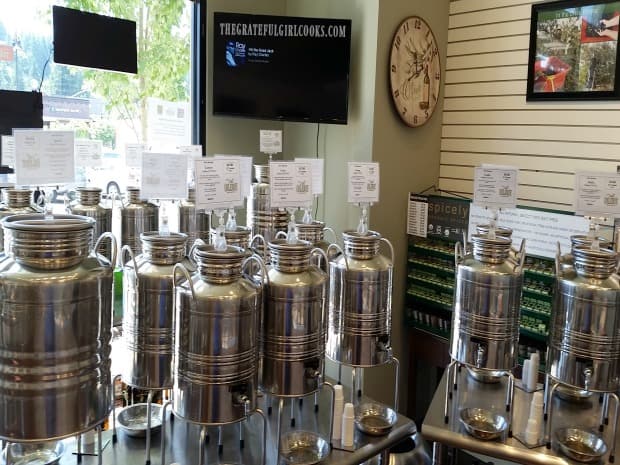
I love to use garlic-infused olive oil in various recipes, like vegetables, salad dressings, etc. For several years I have bought bottles of it from a local olive oil and balsamic vinegar tasting room near our home.

Well, I ran out of it a couple months ago and discovered my local store had gone out of business… uh oh. POOF… it is gone! That made me very sad.

I knew of no other stores close to my home (worth making a separate trip to), so I decided to make some myself. Guess what my research showed me? The process is easy, and the resulting garlic-infused olive oil tastes wonderful!

In only a few minutes, I had a great tasting copycat for the product I was used to buying, it costs a lot less AND I made it in my own kitchen. Here’s how simple it is:

Scroll Down For A Printable Recipe Card At The Bottom Of The Page

Photo showing inside of our local olive oil and vinegar tasting room.

Prepare The Fresh Garlic Cloves

To make your own garlic-infused olive oil, it’s important to use FRESH garlic, and a good quality olive oil. I do not recommend jarred or canned minced garlic for this recipe. Trust me- you want to use fresh garlic for the very best flavor!

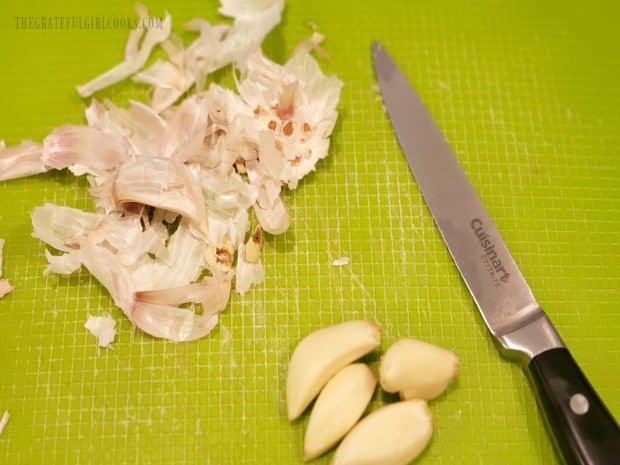
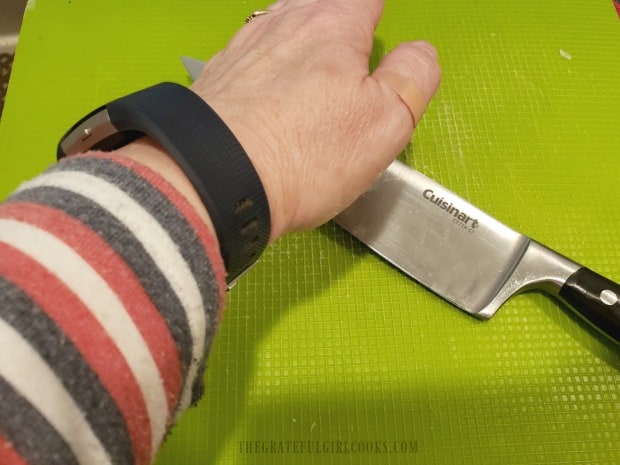
Peel all the paper peel/skin off of the garlic cloves. This recipe yields 1 cup of infused olive oil, so you will need between 6-8 large garlic cloves (I used 6). Place one peeled clove at a time under the flat, wide blade of a large kitchen knife.

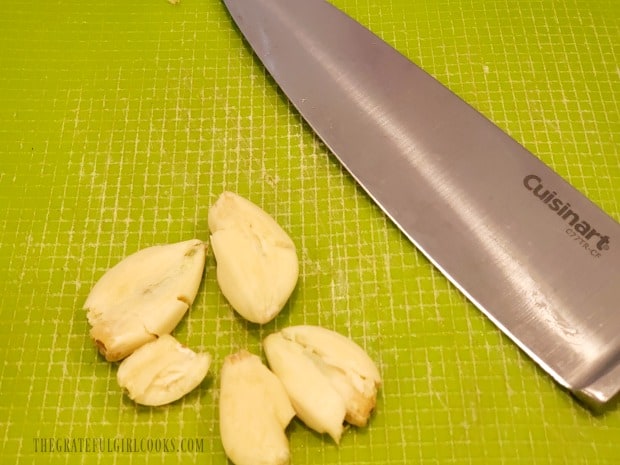
Pound the flat, broad side of the knife hard, with the ball of your hand, to smash the garlic clove underneath. It should only take one “pounding” to flatten and split the clove open.

Repeat with the other garlic cloves, smashing them one at a time. Discard all of the peels and now you’re ready to begin infusing the olive oil! 

Cloves of garlic must be stripped of the papery thin skin covering.Smashing each clove of garlic with the broad flat side of a knife.

Infusing Garlic Into The Oil

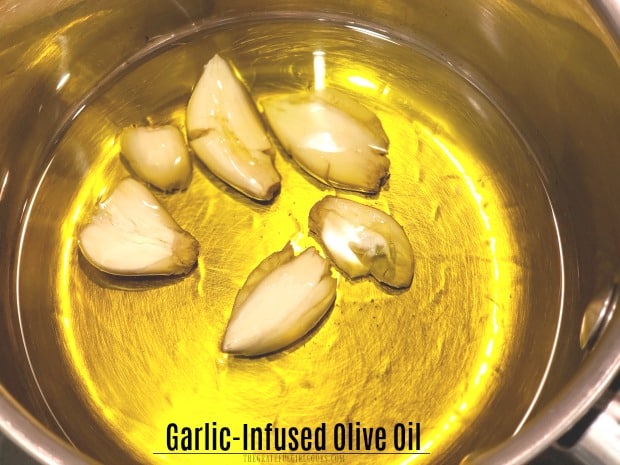
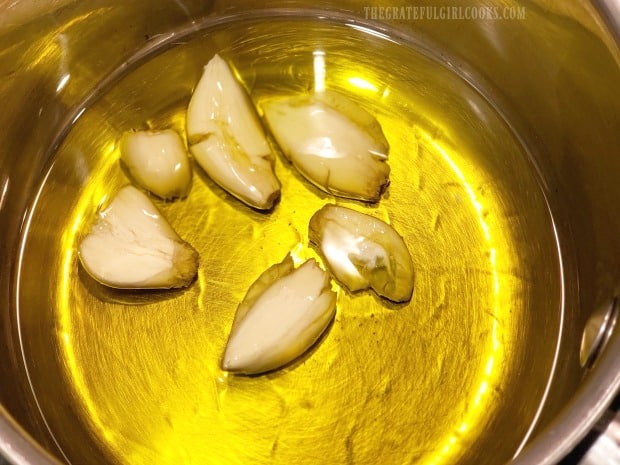
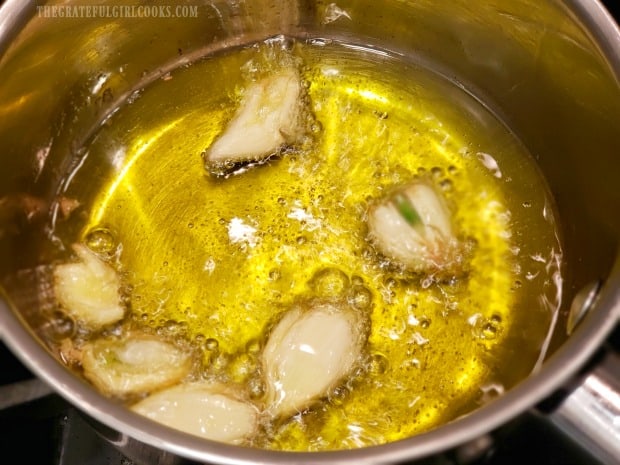
Once you have “flattened” each of the garlic cloves, place them in a small saucepan with one cup of olive oil. Turn the heat to LOW and let the oil cook for 5 minutes.

The garlic cloves have each been smashed with the knife to release the flavor.Cooking the smashed garlic cloves with olive oil.

The oil will begin to slightly boil as it is heated, and the flattened garlic cloves will release their aromatic flavor into the hot oil. This is how it becomes garlic-“infused” olive oil.

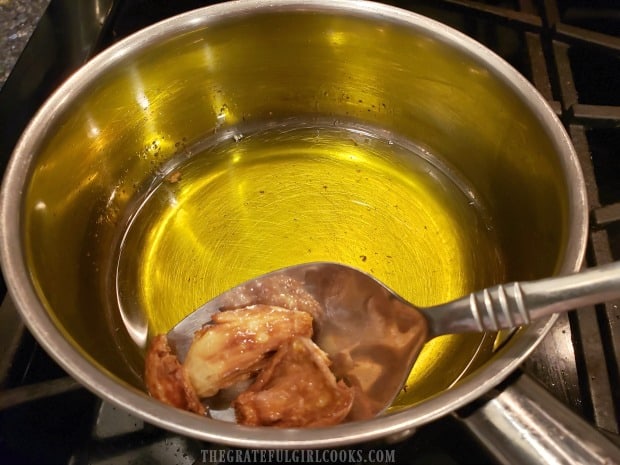
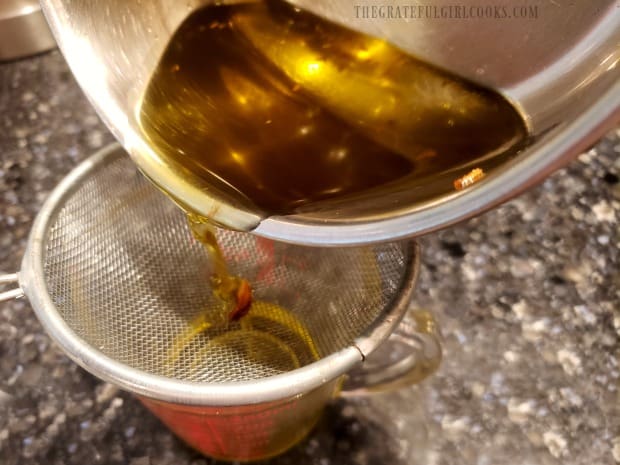
When done, use a slotted spoon to remove the browned, crispy garlic cloves from the oil because you do not want them in the oil any longer.

Discard the fried garlic cloves or use them in any other way you choose.

Garlic-infused olive oil is cooking away in the pan.The crispy garlic cloves are removed from the garlic-infused olive oil.

Finish Preparing The Garlic-Infused Olive Oil

You will probably have some leftover “crispy bits” left in the pan with the olive oil after removing the garlic. Strain the oil, once it has cooled, in order to remove them.

Place a small wire mesh strainer over a bowl or measuring cup and carefully pour the infused oil through the strainer into the container. The tiny bits of crispy garlic should now be removed from your oil.

Once the olive oil is completely cooled, pour it through a funnel into the bottle or jar that you will be storing the oil in. Olive oil should be stored (covered), away from direct sunlight, in a dark, cool location.

NOTE: There are differing opinions and research on how long a non-commercial infused olive oil can be safely stored. Homemade infused olive oil using the method I’ve described should ideally be used within 4-5 days. It can also be frozen for safe, long-term storage.

The olive oil is strained into a cup to remove any small crispy garlic pieces.A funnel is used to add the garlic-infused olive oil to a bottle for storage.

Now you have 8 ounces of delicious, garlic-infused olive oil to pan-sear meats, use in salad dressings, or stir-frys, etc. I hope you have the opportunity to try infusing olive oil and trust you will find it convenient to have in your own kitchen. 

Thank you for stopping by, and I invite you to come back again soon for more family friendly recipes. Take care, may God bless you, and have a wonderful day.

Looking for More Recipes For CONDIMENTS or SAUCES?

You can find ALL of my recipes in the Recipe Index, which is located at the top of the page. I have some great recipes for condiments or sauces to choose from, including:

Want More Recipes? Get My FREE Newsletter!

I publish a newsletter 2 times per month (1st and 15th) with lots of recipes, tips, etc.
Would you like to join our growing list of subscribers?

There is a Newsletter subscription box on the top right (or bottom) of each blog post, depending on the device you use.
You can submit your e-mail address there, to be added to my mailing list.

Find Me On Social Media:

Facebook page: The Grateful Girl Cooks!
Pinterest:
The Grateful Girl Cooks!
Instagram:
jbatthegratefulgirlcooks

Author's signature

0 from 0 votes
Garlic-Infused Olive Oil
Prep Time
3 mins
Cook Time
5 mins
Total Time
8 mins
 

Need Garlic-Infused Olive Oil for a recipe? It's easy to make your own in minutes (with 2 ingredients), for salad dressings, veggies, & other dishes.

Category: Condiments
Cuisine: All Cuisines
Keyword: garlic-infused olive oil
Servings: 1 cup
Calories Per Serving: 218 kcal
Author: JB @ The Grateful Girl Cooks!
Ingredients
  • 1 cup olive oil extra virgin or regular
  • 6-8 large FRESH garlic cloves do NOT use canned or jarred minced garlic
Instructions
  1. Remove paper/skin off garlic cloves. Place one peeled clove at a time under the flat, wide blade of a large kitchen knife. Pound the flat, broad side of the knife hard, with the ball of your hand, to smash garlic clove underneath. Repeat with remaining cloves, one at a time.

  2. Place one cup of olive oil in a small saucepan. Add smashed garlic cloves. Turn heat to LOW, and cook for 5 minutes. When done, use a slotted spoon to remove browned, crispy garlic cloves from oil. Discard cloves.

  3. Strain oil, to remove any remaining crispy bits in oil. Place a wire mesh strainer over a bowl or measuring cup; carefully pour oil through strainer into container. Once oil has completely cooled, pour it through a funnel into a bottle or jar that you will be storing the oil in. Store oil (covered), away from sunlight, in a dark, cool location. Infused olive oil made using this method should be used within 4-5 days. It can also be frozen for safe long-term storage.

Recipe Notes

Caloric calculation made using extra virgin olive oil.  One cup of oil will yield approx.16 Tablespoons. Each Tablespoon of this oil is approximately 13.62 calories. 

Nutrition Facts
Garlic-Infused Olive Oil
Amount Per Serving (1 g)
Calories 218 Calories from Fat 198
% Daily Value*
Fat 22g34%
Saturated Fat 3g19%
Sodium 3mg0%
Potassium 72mg2%
Carbohydrates 6g2%
Fiber 1g4%
Sugar 1g1%
Protein 1g2%
Vitamin C 6mg7%
Calcium 33mg3%
Iron 1mg6%
* Percent Daily Values are based on a 2000 calorie diet.

Here’s one more to pin on your Pinterest boards!Need Garlic-Infused Olive Oil for a recipe? It's easy to make your own in minutes (with 2 ingredients), for salad dressings, veggies, & other dishes.