Make Garlic Dill Pickles the “old-fashioned way” or use more current way (water bath) to can a few jars of pickles with summer’s bounty. to can a few jars of pickles with summer's bounty. / The Grateful Girl Cooks!")
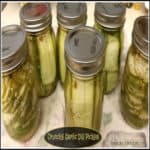
Well… here’s our new favorite pickle… these homemade Crunchy Garlic Dill Pickles! Even if you’ve never made pickles before… have no fear! You will only need a few things to make some yummy pickles. These jars of pickles, once sealed properly, will be shelf stable for quite awhile. Then when you need a new jar of pickles, just pull a jar out of your pantry, refrigerate, then enjoy! They are so good!
I grew our own pickling cucumbers this summer. I am so glad I did. Last summer my friend Sandy gave me some of her pickling cucumbers from her huge garden to make pickles. It inspired me to try growing them this year in our little backyard garden… so I did! I only grew 3 plants, but it was more than enough for about 12 or 13 jars of pickles.
Scroll Down For A Printable Recipe Card At The Bottom Of The Page

Yahoo! Of course you can always find pickling cucumbers (you know, the cute little ones grown especially for pickle-making!) at your local grocery store or a Farmer’s Market when they’re in season and plentiful during the hot summer months.
Making Garlic Dill Pickles The Old-Fashioned Way
Okay… back to the recipe. This method is the old-fashioned way to make these pickles. Basically you slice the ends off the cukes (yes, both ends), slice them into spears, chips (horizontally) or into sandwich slices (vertically), making sure you have enough cut slices to fill 6 pint-sized cleaned and hot canning jars (12 oz.). Add a bit of minced garlic and dill seed.
Let the jars sit in a 250 degree oven (I place filled jars onto a tea towel lined cookie sheet) until they are hot and ready to fill with a boiling hot brine. Then when everything is really hot (including the lids and seals heated separately), you pour the brine over the pickle slices, remove air bubbles, wipe the rims to make sure you have a good clean seal, pop the lids and rings on, and seal to fingertip tightness.
Once the lids and bands are on, invert the jars for 5 minutes, then turn right side up again. Let the jars cool on the counter (on a towel, to prevent breakage). You should hear the seals “pop” to indicate the jars have safely sealed, while they cool. If the jars do not seal properly, they must be refrigerated, as they cannot be stored safely for any length of time in a pantry.
**Then comes the hard part. You have to let the pickles “cure” for about 2 weeks before you open the jar and taste them. IT IS WORTH THE WAIT! Trust me.
NOTE: **This old-fashioned process (above) has worked on every jar I’ve made of these pickles. HOWEVER, if you wish to can the pickles using a water bath process (which is the safest, most current and recommended process for canning safety), see below.
Canning The Garlic Dill Pickles In A Water Bath Canner
For the most current and recommended method to safely can these pickles, follow USDA recommended guidelines. Pint jars of the garlic dill pickles are filled, leaving 1/2″ headspace, air bubbles are removed, rims cleaned, etc. The jars should be processed in a hot water bath canner for 15 minutes.
Follow all current safe canning guidelines to prepare, jars, rings, and flat lids, if you will be canning these pickles in a water bath.

I made pickles (using both methods) this summer, and I’ve already made several new batches as more of my cucumbers have ripened. I keep any extra brine I had leftover (if I wasn’t making the full recipe) in the refrigerator and then use it within a couple weeks for a new batch.
These pickles are really very easy to make, and I just KNOW you’re gonna love them. By the way, if you enjoy pickles, be sure to check out my recipe for delicious bread and butter pickles!
Interested In More Recipes?
Thank you for visiting this website. I appreciate you using some of your valuable time to do so. If you’re interested, I publish a newsletter 2 times per month (1st and 15th) with all the latest recipes, and other fun info. I would be honored to have you join our growing list of subscribers, so you never miss a great recipe!
There is a Newsletter subscription box on the top right side (or bottom) of each blog post, depending on the device you use, where you can easily submit your e-mail address (only) to be included in my mailing list.
You Can Also Find Me On Social Media:
Facebook page: The Grateful Girl Cooks!
Pinterest: The Grateful Girl Cooks!
Instagram: jbatthegratefulgirlcooks
 Recipe Source: unknown
↓↓ PRINTABLE RECIPE BELOW ↓↓
Make Garlic Dill Pickles the "old-fashioned way" or use more current way (water bath) to can a few jars of pickles with summer's bounty.
- 1/2 cup canning salt
- 4 1/2 cups white vinegar
- 8 cups water
- 6 teaspoons minced garlic
- 5 Tablespoons (approx.) dill seed (not dill weed, but dill seed)
- enough pickling cucumbers to fill 6 pint canning jars (depending on size, approx.18-20)
- Preheat oven to 250 degrees. Wash canning jars in hot, soapy water. Place the clean jars upside down onto a tea towel lined cookie sheet (with edges) in the oven to keep them hot.
- Place flat lid seals and rings in a small bowl. Set aside.
- Wash the cucumbers, slice a piece off of each end (stem and bottom) of the cucumber, and discard, then slice your cucumbers into spears, chips, or lengthwise into sandwich slices. Pack the pickle slices into the hot jars (be careful when removing hot jars. I recommend canning tongs to hold the jars securely). I find it helpful to turn the jar sideways and slip the sandwich slices in... it helps them to stand up better in the jar.
- Add a teaspoon of minced garlic and 3/4 Tablespoon of dill seeds to each jar.
- When jar is filled (I remove one jar at a time from oven), place filled jar back in oven while filling another jar. You want the jars to stay really hot so that when you add boiling brine, the jars will seal properly.
- In a large saucepan, heat the vinegar, canning salt and water to boiling, stirring to dissolve salt.
- While the vinegar/water/salt brine is coming to a boil, in a separate bowl pour some **almost to boiling** water (plain "not quite boiling" water, NOT the brine) over the canning lids and rings. Let them sit in the very hot water for 5 minutes to soften the rubber seals.
- Once brine is boiling, remove jars from oven (be sure to place hot jars on a tea towel to avoid breakage). Pour boiling liquid into each jar, filling to within 1/2 inch from top (pickles must be covered with brine). Remove the air bubbles in each jar by inserting a plastic knife or canning tool down the sides of each jar. Add more brine, if needed to cover pickles. Leave about 1/2 inch head space in jar. Quickly wipe the rims of each jar with a clean towel to make sure the rim is dry and clean. Place flat lid on, then screw down canning ring to finger tight. Immediately invert the jars on the towel. Let them sit for 5 minutes, then turn them right side up again. Listen for the clicking sound to know the jars have sealed.
- **If you want to water bath can the jars, once filled and jar lids and rings are tightened, place them in a water bath canner and process for 15 minutes, following USDA canning guidelines and manufacturer instructions for your canner..
- Once the jars are all processed and sealed, leave them alone on the tea towel to cool. As they cool, you should hear the "clicking sound" of the jars sealing while cooling. Once completely cooled and sealed properly, store them in a cool, dark pantry for two weeks (to let the brine fully incorporate into the pickles, then refrigerate jar and enjoy. You might want to label each jar with the date they will be "ready", so you will know when you can enjoy them!
From start to finish, the jars stay in the oven for about 20 minutes to make sure they are hot before adding the boiling brine. The last thing you want is to have the jar crack.
Once pickles have "cured" for two weeks and you are ready to bust into a jar of these, refrigerate the jar for several hours before opening...they are at their best cold!
Here’s one more to pin on your Pinterest boards! to can a few jars of pickles with summer's bounty./ The Grateful Girl Cooks!")
I can not find DILL SEED.
Can I use DILL WEED?
What is the difference?
I made some DILL slices using the dill weed. I’ve not been able to taste yet. Still waiting on the 2 weeks to go by.
Im excited to try them
If my first time ever putting up pickles.
I’ve never inverted my jars before, is this necessary?
Thankyou!
Forgot the water. Can my canned pickles be helped? The jars filled fine, with the white vinegar and salt.
So you now use the water bath method correct?
Can I cut down the pickling salt
Hands down best pickle recipe I have ever tried. I will never change it. I just made 16 pints and I’m ready to keep it going. Thank you!!!
First time trying this recipe. Mine came out very Vinegary tasting.
Hi! Is there any reason I couldn’t use this recipe for refrigerator pickles? My cukes are trickling in so I never really have enough to justify the canning process.
Hi, Megan… I have never tried making these pickles that way, so unfortunately I can’t give you a good answer!
I use this recipe all the time to make refrigerator pickles. I just bring the brine mixture to a boil and then pour over sliced cucumbers and throw them straight into the fridge. Delicious!!! My only modification is I use kosher salt instead of canning only because I always have kosher on hand. Hope this helps!!
Made these yesterday, can’t wait to try them
Can I use regular garden pickles for this recipe? Looking to use up my larger cucumbers.
What is the difference between dill weed and dill seed???
Would like to sign up for news letter
Hello, Jeanice. There is a sign up form for the newsletter either on the right side of your desktop computer screen (right at the top), or at the bottom of a blog post (for phone or tablet). You can easily sign up there. Have a wonderful day.
If I don’t water bath, do I need to keep them in the refrigerator? Or are they with the hot jars/liquid?
Thanks
Can I use fresh dill in this recipe?
I just finished making 5 pints of these garlic dills and the last jar just sealed. Thanks for the recipe. I had a lot of brine left to refrigerate.
Hi
Do these pickles end up tasting like dill because of the dill seed?
I want garlic pickles, can I just leave out the dill seed?
Hi, Christine… I’ve never tried making these pickles leaving out the dill seed. Not sure what they would taste like, as dill is a key ingredient in pickles. Sorry I can’t be of more help, but unfortunately I just don’t know.
I must be blind how much pickling salt?
Thanks Nancy
Hi, Nancy… the mount of canning salt is listed in the printable recipe card at the bottom of the page. You will need 1/2 cup. Have a great day.
In the past I’ve made dill pickles and they turned out soft. I’ve also had other people pickled with the same issue. Both mine and theirs where canned using the water bath method. Do you have any suggestions on what we did wrong?
Easiest pickle recipe ever! Glad I found your recipe as I had lost mine somewhere in my stacks of recipes and cookbooks.
These pickles are absolutely delicious and I glad I found this recipe, I sure am gonna make more and maybe add a little spice to it, thank you for sharing
What is their shelf life when they are canned?
Hi, Diane. Most recommendations suggest eating home-canned foods within the first year for best flavor/color, etc. Hope that helps.
Hi – I tried your pickle recipe and none of my lids popped….. am I able to reheat with lids on or will we be living on refrigerator pickles in 2 weeks?
How are there 12 g of sugar in these pickles? I don’t see any sugar in the brine recipe.
Had to look this one up. Pickling cucumbers have a naturally occurring sugar in their “genetic” makeup. Reports show there is approximately 1.7 grams of naturally occurring sugar per 1.0 cup. Since the recipe uses 18-20 cucumbers, this is why the calculation shows approx. 12 g. Hope that helps.
Can this recipe and procedure be used with green beans?
Thank you in advance
Hi, Susan. Unfortunately no, because green beans need to be pressure canned (extremely high heat) due to their low-acidity level, for food safety and to prevent bacterial growth.
Actually you can pickle green beans in a water bath because you’re adding acidity with the vinegar. It’s been done forever and I do it all the time. They’re delicious!
Hi there! A few of my lids didn’t pop. How long will they last if I store them in the fridge?
Hi, Jen… First off… I am so sorry it took so long for my response. Your comment got “lost” in a large batch of over 100 comments, and I just now found it as I was slowly replying to them all. I can’t give you a definitive answer because I haven’t had one of my pickle jars not seal. I have ventured away from the old-fashioned method, and typically pressure-can all my pickles now (this is an older post). I would “guess” and say it would be best to us/eat them within a week to ten days.