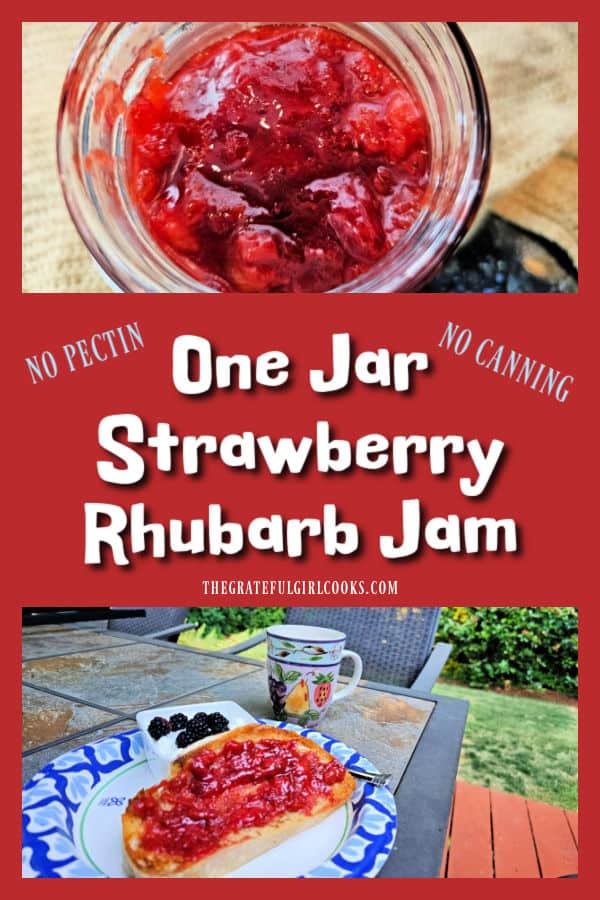
Month: April 2026

Instant Pot Hard-Boiled Eggs

Want to make Instant Pot Hard-Boiled Eggs? Using this kitchen appliance makes it very easy to hard-boil eggs to eat or use in other dishes. 
Want to make Instant Pot Hard-Boiled Eggs? Using this kitchen appliance makes it very easy to hard-boil eggs to eat or use in other dishes.
If you’re looking for a new way to cook hard-boiled eggs, have you considered cooking them in an Instant Pot? It’s a pretty easy way to do this, especially if your stove top is full of other cooking pans, etc.

Today I want to share this alternative method (as opposed to boiling them) for making beautiful, Instant Pot hard-boiled eggs! Here’s how to do it.

Scroll Down For A Printable Recipe Card At The Bottom Of The Page

Containers For Cooking Eggs In An Instant Pot

There are several ways to contain the eggs inside the Instant Pot. If desired (and they fit), you can use the small trivet that comes with the appliance.

If you have a metal steamer basket that will fit in the Instant Pot this will work for holding the eggs in place while cooking them.
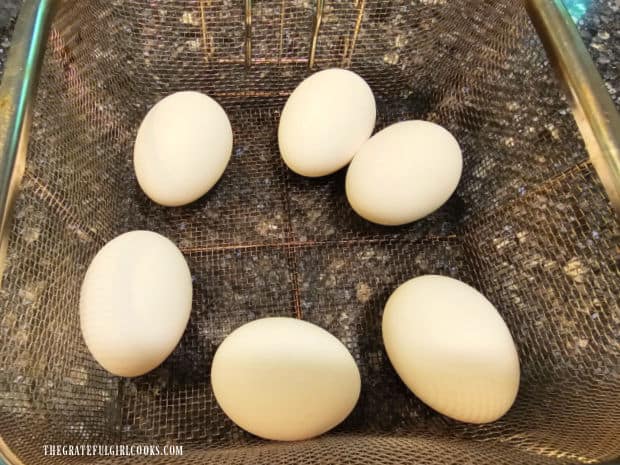
Wire mesh steamer basket can be used to hard-boil eggs in an Instant Pot.

I have also used an unfolding little steamer rack for cooking eggs in the Instant Pot.
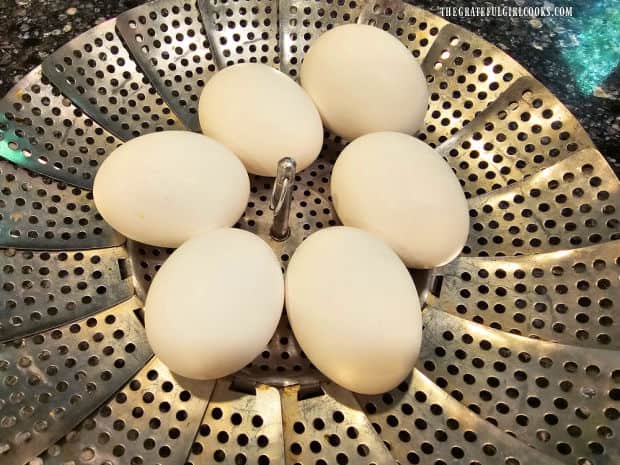
A metal steamer can also be used to hard-boil eggs in the Instant Pot.

My favorite way is to use a silicone “sling” basket I purchased fairly cheaply online. It is okay for the high temps and lifts out very easily.
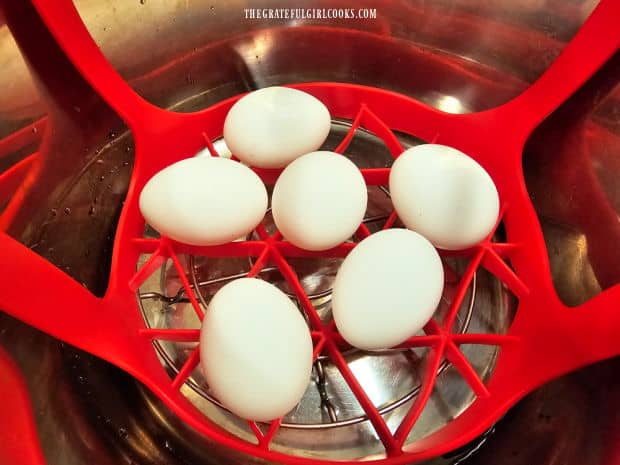
Eggs can be hard-boiled in a heat-proof sling type basket in the Instant Pot.

Cooking Instant Pot Hard-Boiled Eggs

Place the Instant Pot trivet on the bottom of the inner pot. Fill the pot with water until it reaches a depth of 1″. Carefully place the eggs on the trivet OR put the eggs in a steamer basket on top of the trivet.

Plug in the Instant Pot and lock the lid in place. Flip the steam valve to SEALING. Press the MANUAL (high pressure) button and set the timer for 5 minutes.

Once the Instant Pot has reached full internal pressure (in about 10 minutes), the cooking program will begin, and the pressure gauge button will pop up.

When finished cooking, allow the pressure to NATURALLY RELEASE (do nothing) for 5 minutes, then flip the steam valve to VENTING. This will allow all the steam to escape the Instant Pot.

When all the internal pressure has been released, the pressure gauge will drop back down, indicating it is now safe to open the lid.
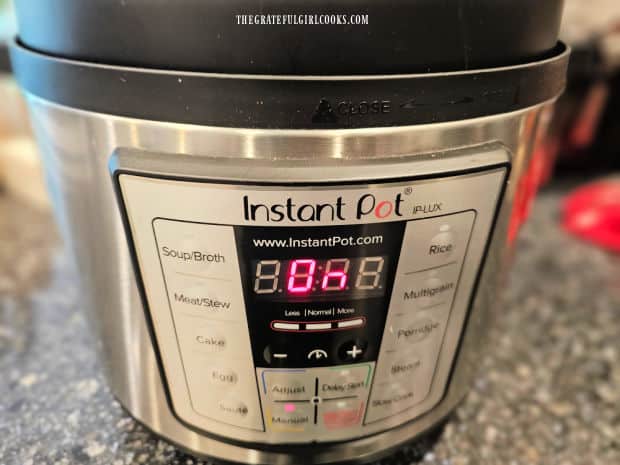
Using an Instant Pot to hard-boil eggs is very easy.

Remove Eggs And Put Them In An Ice Water Bath

Lift the basket or sling up and out of the Instant Pot being careful not to drop the hard-boiled eggs.
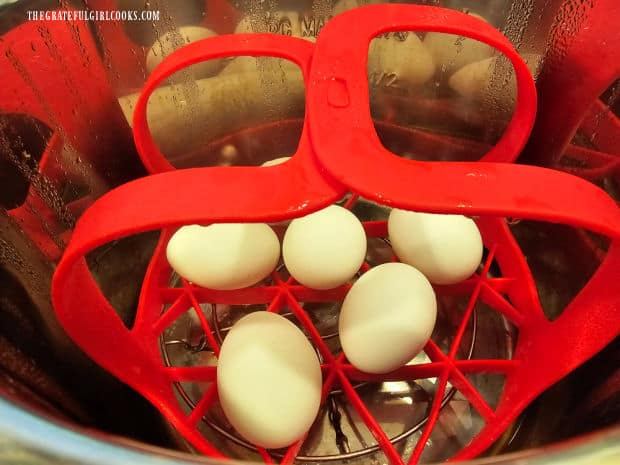
Eggs can also be cooked in the Instant Pot using a heat-proof sling for easy lifting.

After removing the eggs from the Instant Pot, immediately place them in an ice bath for 4-5 minutes. An ice bath is simply a large bowl of water filled with ice cubes.

The shock of the ice-cold water to the hot eggs is used to stop the eggs from continuing to cook.
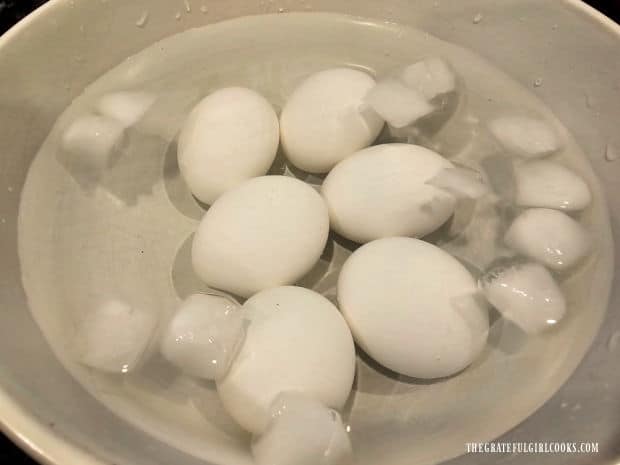
Instant Pot Hard-Boiled Eggs are plunged into an ice bath after cooking.

Peel And Enjoy!

I have found that Instant Pot hard-boiled eggs are very easy to crack, roll and peel, once I remove them from the ice water bath. Now they are ready to be used and enjoyed!
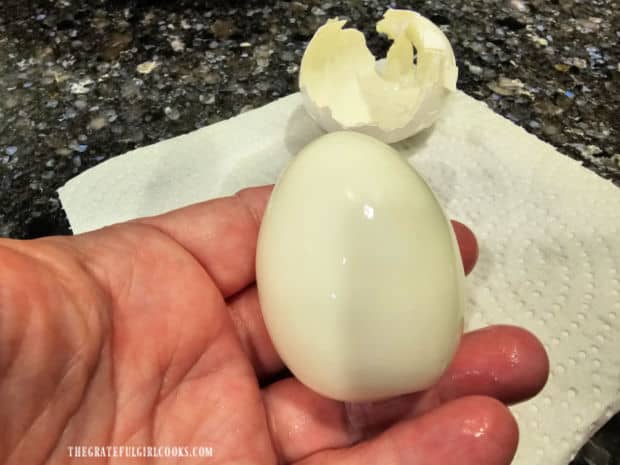
A hard-boiled egg peels easily after cooking in the Instant Pot.

Use the Instant Pot hard-boiled eggs to eat (as is) or add them to salads or other recipes, as desired. They can be used to make egg salad to keep in the refrigerator for sandwiches!
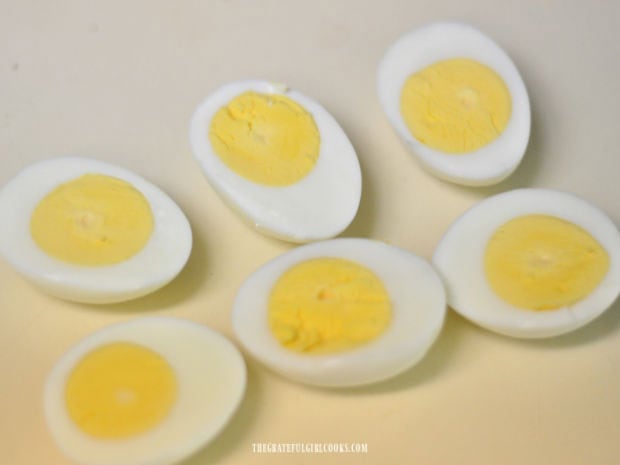
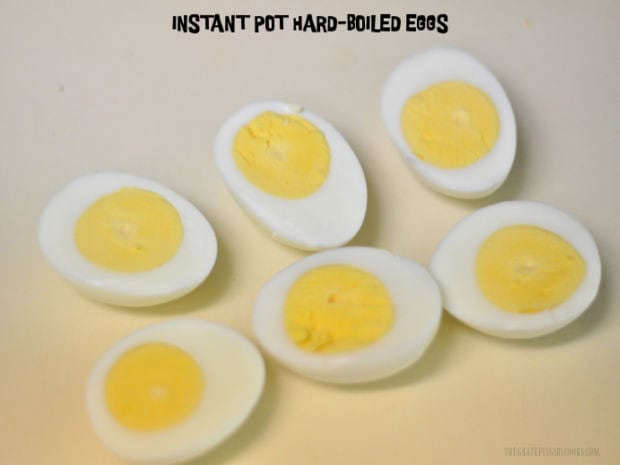
Hard-boiled eggs, cut in half after cooking and cooling.

I hope you find this method for cooking hard-boiled eggs easy to use for your own family. I love that it is pretty “hands off” cooking and sometimes that’s very convenient!

Thanks for stopping by today, and I invite you to come back soon for more family-friendly recipes. Take care, may God bless you, and have a wonderful day.

Looking For More INSTANT POT Recipes?

You can find ALL of my recipes in the Recipe Index, which is located at the top of the page. I have a nice variety of Instant Pot recipes to choose from, including:

Want More Recipes? Get My FREE Newsletter!

I publish a newsletter 2 times per month (1st and 15th) with lots of recipes, tips, etc.
Would you like to join our growing list of subscribers?

There is a Newsletter subscription box on the top right (or bottom) of each blog post, depending on the device you use.
You can submit your e-mail address there, to be added to my mailing list.

Find Me On Social Media:

Facebook page: The Grateful Girl Cooks!
Pinterest:
The Grateful Girl Cooks!
Instagram:
jbatthegratefulgirlcooks

Author's signature

↓↓ PRINTABLE RECIPE BELOW ↓↓

0 from 0 votes
Instant Pot Hard-Boiled Eggs
Prep Time
15 mins
Cook Time
5 mins
Total Time
20 mins
 

Want to make Instant Pot Hard-Boiled Eggs? Using this kitchen appliance makes it very easy to hard-boil eggs to eat or use in other dishes.

Category: Appetizer/Snack, Breakfast
Cuisine: All Cuisines
Keyword: Instant Pot, hard-boiled eggs
Servings: 6 eggs
Calories Per Serving: 72 kcal
Author: JB @ The Grateful Girl Cooks!
Ingredients
  • 6 large eggs
  • water for Instant Pot to a depth of 1-inch
Instructions
  1. Place the Instant Pot trivet on the bottom of the inner pot. Fill the pot with water until the water reaches a depth of 1".

  2. Carefully place eggs on the trivet OR put the eggs in a steamer basket on top of the trivet.

  3. Plug in the Instant Pot; lock the lid in place. Flip the steam valve to SEALING. Press the MANUAL (high pressure) button and set the timer for 5 minutes. Once the Instant Pot has reached full internal pressure (about 10 minutes), the cooking program will begin, and the pressure gauge button will pop up. When finished cooking, allow pressure to NATURALLY RELEASE (do nothing) for 5 minutes, then flip the steam valve to VENTING. This lets all the steam escape the Instant Pot. When all internal pressure has been released, the pressure gauge button will drop back down, indicating it is now safe to open the lid.

  4. Lift eggs out of the pot; immediately place them in an ice bath for 4-5 minutes. An ice bath is a large bowl of water filled with ice cubes. Once done, remove eggs from ice bath. Use and enjoy, as desired.

Recipe Notes

NOTE: Many pressure cookers have an EGG button setting. I wrote these directions based on NOT having that button, so this option is available for all readers.

Nutrition Facts
Instant Pot Hard-Boiled Eggs
Amount Per Serving (1 egg)
Calories 72 Calories from Fat 45
% Daily Value*
Fat 5g8%
Saturated Fat 2g13%
Trans Fat 0.02g
Polyunsaturated Fat 1g
Monounsaturated Fat 2g
Cholesterol 186mg62%
Sodium 71mg3%
Potassium 69mg2%
Carbohydrates 0.4g0%
Sugar 0.2g0%
Protein 6g12%
Vitamin A 270IU5%
Calcium 28mg3%
Iron 1mg6%
* Percent Daily Values are based on a 2000 calorie diet.

Here’s one more to pin on your Pinterest boards!  Want to make Instant Pot Hard-Boiled Eggs? Using this kitchen appliance makes it very easy to hard-boil eggs to eat or use in other dishes.
 

Cajun Shrimp and Cheese Grits

Cajun Shrimp and Cheese Grits are a delicious meal for 4! Cheesy grits are topped with Cajun-seasoned, pan-seared shrimp and creamy sauce.

If you’re looking for a great looking and tasting meal to serve to family or friends, may I suggest you check out this recipe for Cajun Shrimp and Cheese Grits?

A few years ago, my husband and I enjoyed a vacation in Franklin, Tennessee. We had the opportunity to try several regional foods while in the area and one of the dishes tried was shrimp and grits!

Last year I decided to come up with a recipe that is slightly similar but has its own flavor profile and this really yummy recipe is the result. We really love it. I cook grits with two kinds of cheese (sharp cheddar cheese and a small amount of goat cheese).

The grits, the shrimp and the sauce are all flavored with Cajun spices, which give the overall dish a wonderful, cohesive flavor! If you don’t have this spice mix available, you might be interested in using my recipe for Homemade Cajun Seasoning

I really think you will enjoy this delicious and decadent meal. Here’s my recipe to make Cajun Shrimp and Cheese Grits.

Scroll Down For A Printable Recipe Card At The Bottom Of The Page

Prepare The Cheese Grits

Cook 1 cup of grits with water and salt, according to the package directions. Please note that the time needed to cook the grits will depend on the type of grits you use.

TIP: Use either stone-ground grits or fast-cooking grits, according to your own personal preference or convenience. Stone-ground grits take between 30-45 minutes to cook, and Quick grits take about 5 minutes.

Grits are cooked in water and salt according to the package directions.

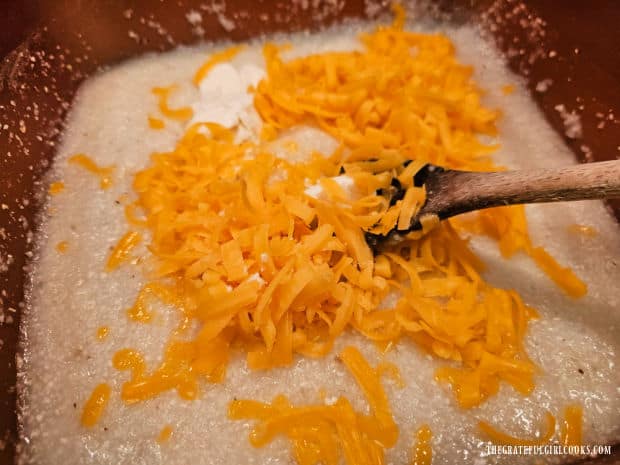
When the grits are fully cooked, add 1 cup of shredded cheddar cheese and ¼ cup of crumbled goat cheese. Stir until the two cheeses melt and are fully incorporated.

Sharp cheddar cheese and goat cheese are stirred into the hot grits.

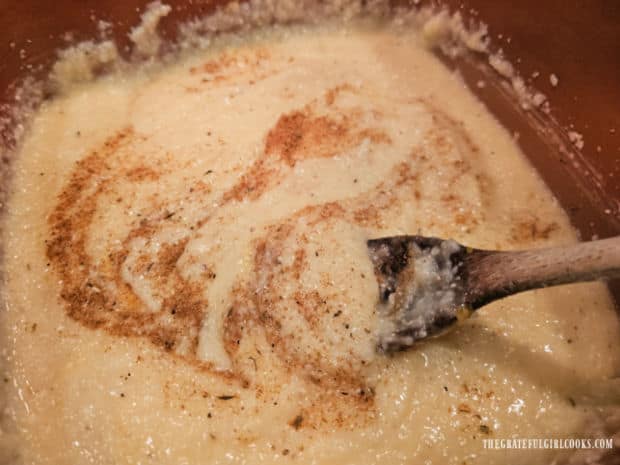
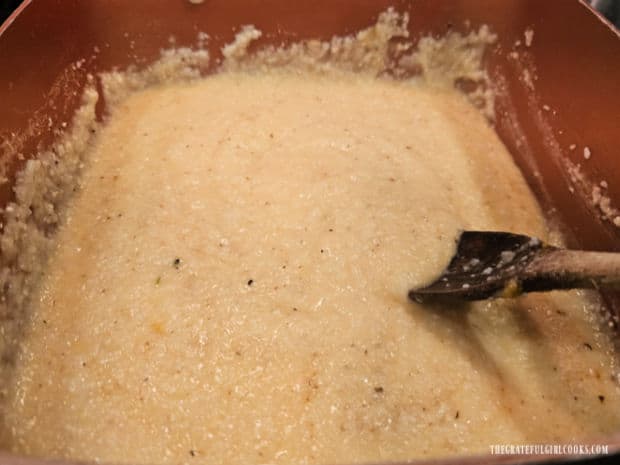
Add ½ teaspoon of Cajun (or Creole) spice mix and stir until combined. Season the cheesy grits with enough salt and black pepper to suit your personal taste.

Now you have made the creamy cheesy grits that will serve as the base layer for the cooked shrimp. Cover the pan and keep the grits hot while you quickly finish the dish.

Cajun spices are stirred into the cheesy grits.Grits are seasoned to taste with salt and black pepper.

Cook The Shrimp

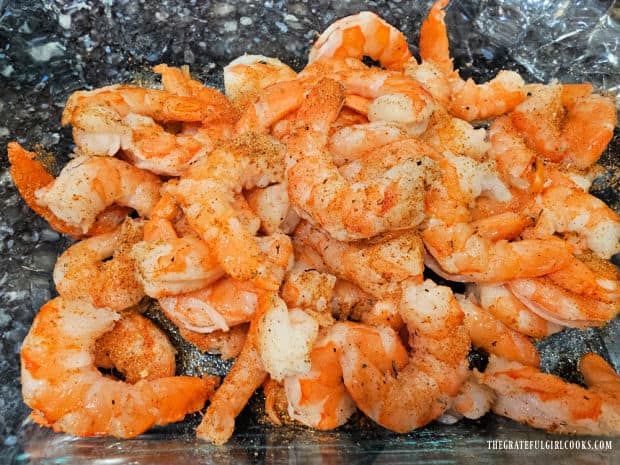
Sprinkle peeled and deveined shrimp with 2 teaspoons of Cajun (or Creole) spice mix. Toss the shrimp gently until all of them are lightly seasoned.

De-veined shrimp are seasoned with Cajun spice mix before cooking.

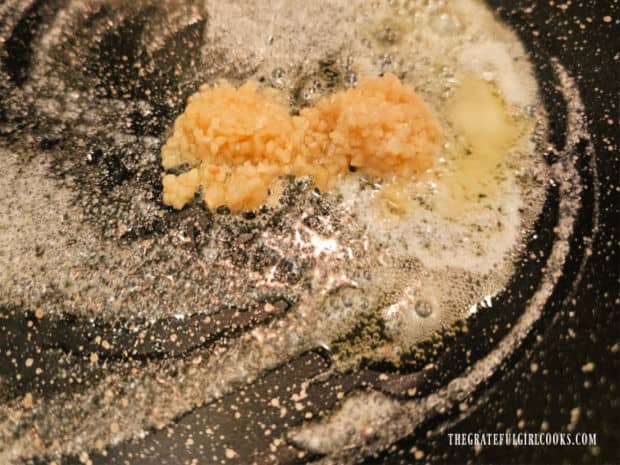
In a large skillet, melt 2 Tablespoons of butter, then stir in 2 cloves of minced garlic. Cook the butter and garlic for about 1 minute, stirring constantly so the garlic does not burn.

Butter and garlic are heated in a large skillet before cooking the shrimp.

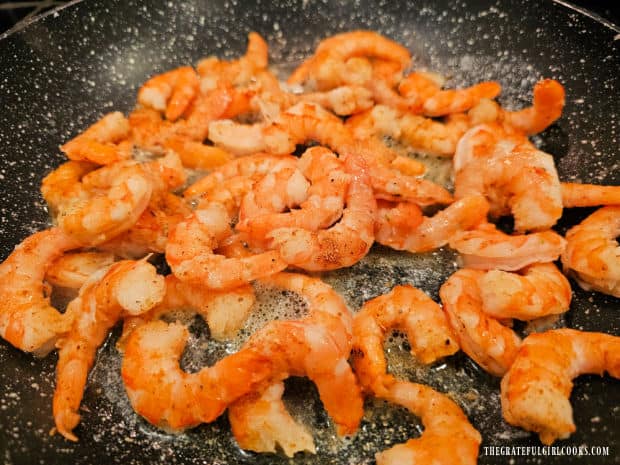
Add the seasoned shrimp and cook them for about 2-3 minutes per side and they are cooked through. Do not overcook the shrimp or they may become “rubbery” in texture.

Seasoned shrimp are pan-seared in the butter and minced garlic.

Cook The Sauce Topping

Making the sauce topping for the shrimp and grits is easy. This sauce will be spooned over the bowls of shrimp and grits right before serving and provide another layer of flavor!

TIP: To save time, you might want to make this sauce BEFORE cooking the shrimp and grits. Simply reheat it at the last minute to spoon over the shrimp and grits.

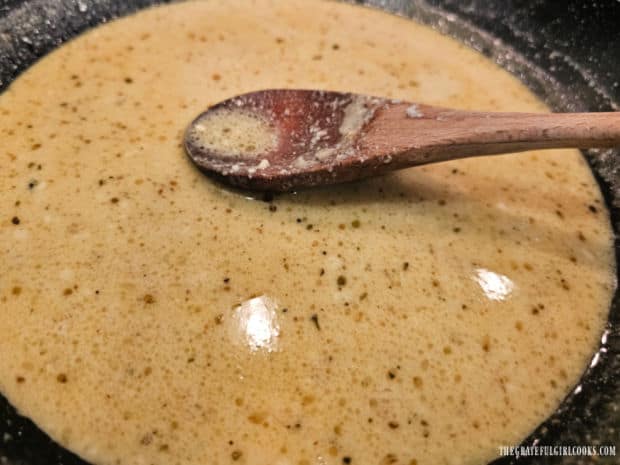
In a large skillet, melt 2 Tablespoons butter on medium-low heat. Stir in ¾ cup of milk, ½ cup of chicken broth, ½ cup of finely grated Parmesan cheese and 1 teaspoon of Cajun (or Creole) spice mix.

Heat the sauce until it is fully hot and lump-free (it will be a fairly thin sauce). Remember, you can reheat it right before serving if you want to make it a little bit ahead of time.

A sauce is made in a skillet and will be spooned over the cooked shrimp and grits.

Serve Cajun Shrimp And Cheese Grits

When all the components are hot, fully cooked and are ready to serve, this is how to plate the finished shrimp and cheese grits.

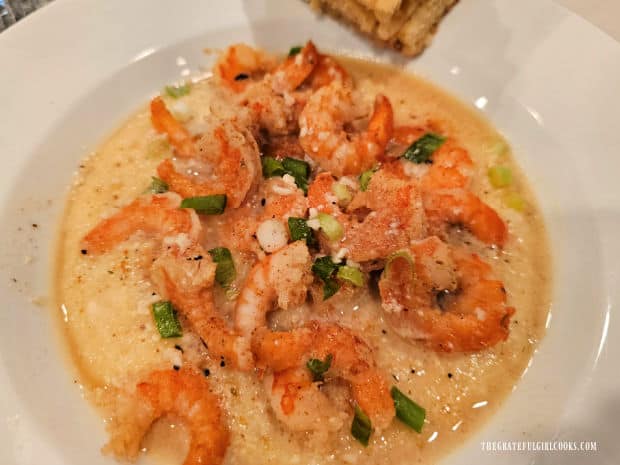
Spoon the cheese grits onto the bottom of each serving bowl (or plate). Add shrimp on top of the grits, then sprinkle the top with chopped green onions or chives.

Cajun Shrimp and Cheese Grits are garnished with chopped green onions for serving.

Spoon some of the sauce over the top of the dish. It is a fairly thin sauce, so it will coat the shrimp and then run down the sides of the bowl and encircle the grits (shown in the photo below).

All the flavors in the cheese grits, on the shrimp and in the sauce come together in every single bite of this delicious main dish!

Sauce is spooned over the Cajun Shrimp and Cheese Grits then it is served.

I hope you have the opportunity to make this yummy dish for yourself and those you love. I am confident you will all love it!

Thank you for stopping by, and I invite you to come back again soon for more family-friendly recipes. Take care, may God bless you, and have a wonderful day.

Looking for More SHRIMP Recipes?

You can find ALL of my recipes in the Recipe Index, which is located at the top of the page. I have lots of delicious shrimp recipes to choose from, including:

Want More Recipes? Get My FREE Newsletter!

I publish a newsletter 2 times per month (1st and 15th) with lots of recipes, tips, etc.
Would you like to join our growing list of subscribers?

There is a Newsletter subscription box on the top right (or bottom) of each blog post, depending on the device you use.
You can submit your e-mail address there, to be added to my mailing list.

Find Me On Social Media:

Facebook page: The Grateful Girl Cooks!
Pinterest:
The Grateful Girl Cooks!
Instagram:
jbatthegratefulgirlcooks

Author's signature

↓↓ PRINTABLE RECIPE BELOW ↓↓

0 from 0 votes
Cajun Shrimp and Grits
Prep Time
15 mins
Cook Time
15 mins
Total Time
30 mins
 

Cajun Shrimp and Cheese Grits are a delicious meal for 4! Cheesy grits are topped with Cajun-seasoned, pan-seared shrimp and creamy sauce.

Category: Entree-Seafood, Main Dish
Cuisine: Cajun
Keyword: Cajun Shrimp and Cheese Grits
Servings: 4
Calories Per Serving: 475 kcal
Author: JB @ The Grateful Girl Cooks!
Ingredients
For Cheese Grits:
  • 4 cups water
  • 1 teaspoon salt
  • 1 cup Quick Cooking Grits *OR stone-ground grits
  • 1 cup sharp cheddar cheese (grated)
  • ¼ cup goat cheese (crumbled)
  • ½ teaspoon Cajun spice mix
  • salt and black pepper enough to season to taste
For Shrimp:
  • 2 Tablespoons butter
  • 2 teaspoons minced garlic
  • 2 teaspoons Cajun spice mix to season shrimp
  • 1 pound shrimp peeled/ deveined
For Sauce:
  • 2 Tablespoons butter
  • ¾ cup low-fat milk
  • ½ cup low-sodium chicken broth
  • ½ cup finely grated Parmesan cheese
  • 1 teaspoon Cajun spice mix
Garnish dish with chopped green onions or chives, if desired (optional)
    Instructions
    Cook Cheese Grits:
    1. Cook grits with water and salt, according to pkg. directions. Note: cooking time depends on which kind of grits you use. **Stone Ground Grits take approx. 30-45 minutes, while Quick Grits take about 5 minutes. Use "Stone-Ground Grits" OR "Quick Grits", according to your own personal preference.

    2. Add grated cheddar cheese and crumbled goat cheese. Heat on medium-low stirring often until cheeses melt and are fully incorporated. Add ½ tsp. of Cajun spice mix; stir until combined. Season grits to taste with salt and black pepper. Set aside, cover pan and keep hot. If using Quick Grits, time them so they are done when the shrimp is done, to save time!

    Prepare/Cook The Shrimp:
    1. Sprinkle shrimp with 2 tsp. of Cajun spice mix; toss gently to distribute spices.

    2. Melt butter in large skillet; stir in minced garlic. Cook butter/garlic for about 1 minute, stirring often. Add shrimp; cook 2-3 minutes per side or until cooked through and pink (do not overcook!). Remove from heat.

    Make The Sauce:
    1. Melt butter in a large skillet on medium-low heat. Stir in milk, chicken broth, Parmesan cheese and 1 tsp. Cajun spice mix. Heat sauce through. TIP: To save time, you may want to make the sauce BEFORE cooking shrimp/grits. Reheat it right before serving.

    For Each Serving:
    1. Spoon hot cheese grits (divide evenly) into the bottom of serving bowls. Arrange shrimp on top, then sprinkle with chopped green onions (optional garnish). Spoon sauce over the shrimp; it will run down the sides and encircle the grits. Serve hot and enjoy!

    Recipe Notes

    Cook time shown is for using "quick grits". If using stone-ground grits, the cooking time for the grits will increase considerably (per pkg. directions).

    Nutrition Facts
    Cajun Shrimp and Grits
    Amount Per Serving (1 (1/4 of total))
    Calories 475 Calories from Fat 270
    % Daily Value*
    Fat 30g46%
    Saturated Fat 17g106%
    Trans Fat 1g
    Polyunsaturated Fat 1g
    Monounsaturated Fat 7g
    Cholesterol 262mg87%
    Sodium 1306mg57%
    Potassium 498mg14%
    Carbohydrates 15g5%
    Fiber 1g4%
    Sugar 3g3%
    Protein 39g78%
    Vitamin A 1795IU36%
    Vitamin C 1mg1%
    Calcium 475mg48%
    Iron 2mg11%
    * Percent Daily Values are based on a 2000 calorie diet.

    Here’s one more to pin on your Pinterest boards! Cajun Shrimp and Cheese Grits are a delicious meal for 4! Cheesy grits are topped with Cajun-seasoned, pan-seared shrimp and creamy sauce.



    Cherry Chocolate Chip Scones

    Enjoy delicious Cherry Chocolate Chip Scones for breakfast or as an afternoon snack with coffee or tea! The recipe makes 8 yummy scones!
    Enjoy delicious Cherry Chocolate Chip Scones for breakfast or as an afternoon snack with coffee or tea! The recipe makes 8 yummy scones!

    Today I want to share a recipe for cherry chocolate chip scones that I created using some of my other scone recipes for inspiration!

    I had wanted to try making a chocolate chip and cherry scone combination for quite a while. When my husband came home from the grocery store with a LOT of fresh cherries last year, I KNEW the time had come!

    We enjoy having scones occasionally for breakfast (with coffee) and we also love to have them around for a quick and delicious afternoon snack, too.

    They are simple to make, and so I want to share with you my recipe showing you how to make them for yourself and for those you love!

    Scroll Down For A Printable Recipe Card At The Bottom Of The Page

    Make The Dough

    Before making the dough, preheat your oven to 425°F. You’ll save time by doing this because your oven will be ready to go once the scones are ready for baking!

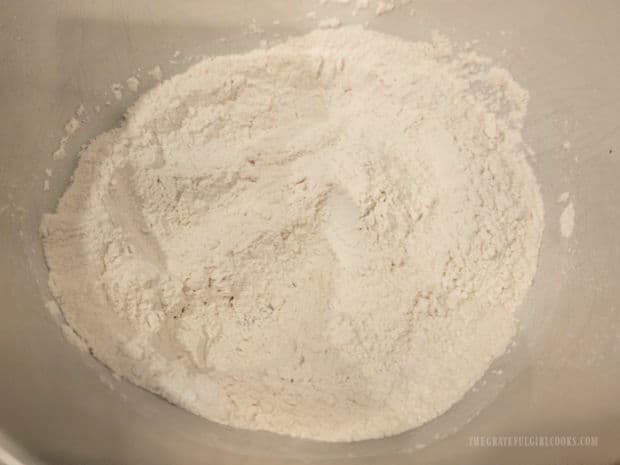
    Okay… now let’s make the dough for the scones! Place all-purpose flour, granulated sugar, baking powder and salt in a large mixing bowl and whisk until combined.

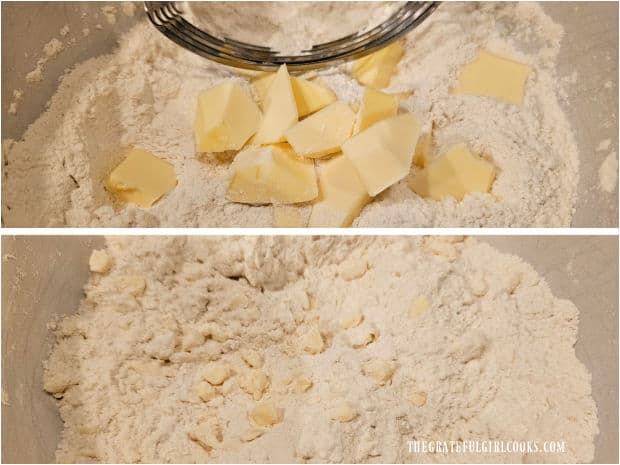
    Use a pastry blender to cut in a stick (½ cup) of very COLD butter (in small chunks) into the flour mixture until the butter has been reduced to the size of peas.

    NOTE: You can also do this step using a food processor, if desired. Simply pulse chunks of COLD butter into the dry ingredient mixture until it’s reduced to the size of peas.

    Flour, sugar, baking powder and salt are combined in a large bowl.Cold butter chunks are cut into the flour mixture until small, using a pastry blender.

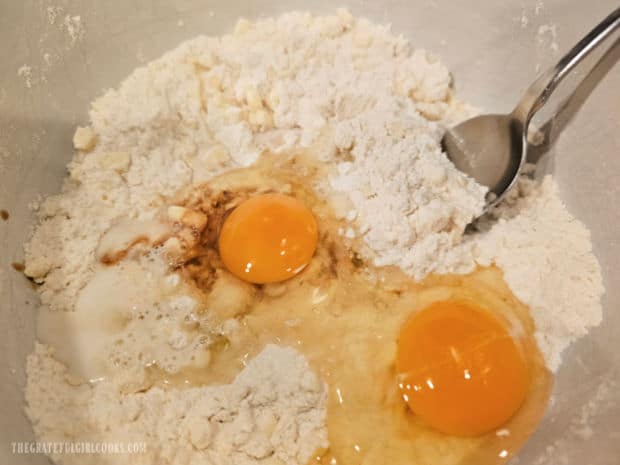
    Add two eggs and vanilla extract to the bowl. Stir them very well, until they have been fully incorporated into the flour/butter mixture and then set the bowl aside.

    Two large eggs and vanilla extract is combined with dry ingredients for the dough.

    Add Cherries And Chocolate Chips

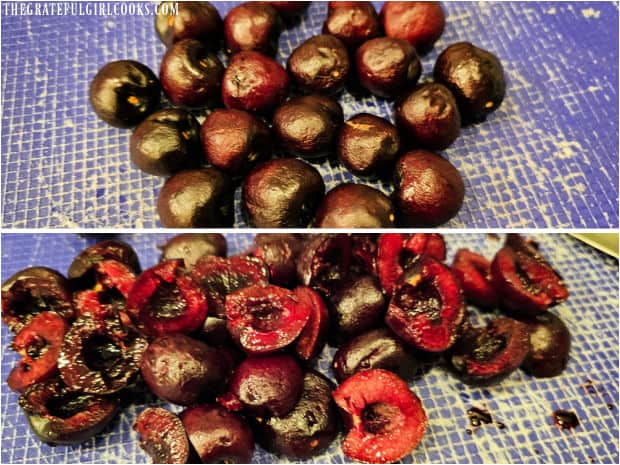
    De-stem, remove the pit and then chop approximately 15 Bing cherries (the dark red skinned ones). I use fresh cherries whenever they are available.

    Fresh cherries are pitted and then chopped into smaller pieces.

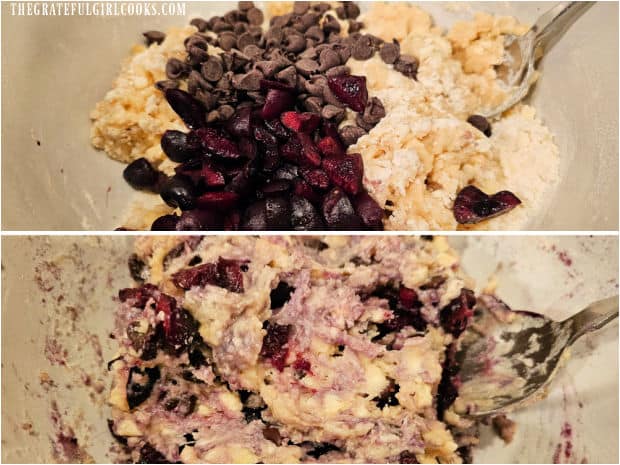
    Add the chopped cherries and semi-sweet chocolate chips to the dough mixture. Gently stir, until the chocolate chips and cherries have been incorporated into the dough.

    The cherries will cause part of the dough to turn a “pinkish” color, but that is normal. Now the dough for the scones will become very thick and “tacky” in texture. 

    Chocolate chips and chopped cherries are added to the dough mixture.

    Shape The Dough

    With lightly floured hands, shape the thick dough into a ball and place it on a floured work surface. Add a bit more flour to your hands to prevent sticking.

    Sprinkle the dough with additional flour (to prevent sticking) and knead the dough slightly with your floured hands until it comes together in a cohesive dough ball.

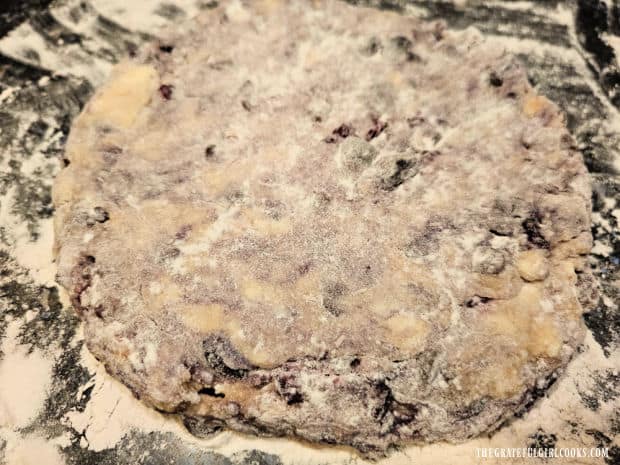
    Add additional flour as necessary so the dough is not sticky. Shape the dough into an 8″ circle, about 1 inch high. Do this by lightly flattening the dough ball and shaping the outside edges with the palms of your hands.

    Use a pizza cutter or sharp knife to cut the circle of dough into 8, equal-sized, pie-shaped wedges.

    Cherry chocolate chip scone dough is shaped into an 8" circle.

    Bake The Scones

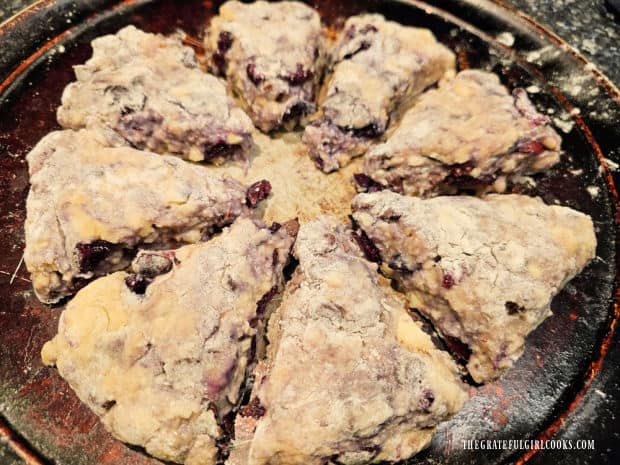
    Transfer the scones onto an ungreased baking sheet. Arrange the wedges in a circle shape with pointed tip toward the middle as shown below.

    When you put the scones on the baking sheet, make sure to leave about ½” between each wedge so the scones can rise and expand while they bake.

    Bake the cherry chocolate chip scones at 425°F. for 18-20 minutes. When done, the cherry chocolate chip scones should be beautifully golden brown on top and set.

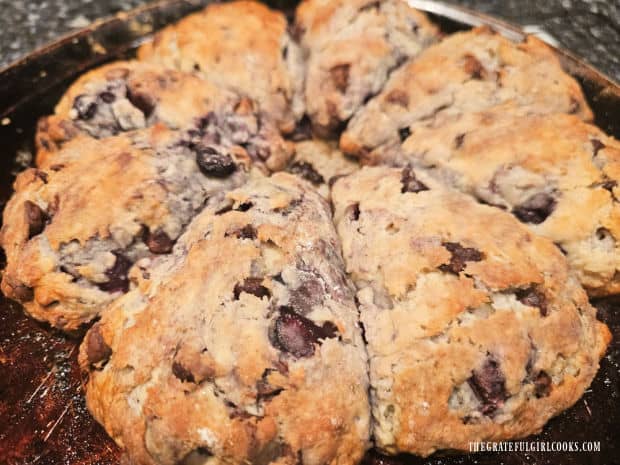
    Scone dough is sliced into 8 wedges and placed on a baking sheet.

    Remove the scones from the oven and let them cool slightly on the baking sheet for about 4-5 minutes, then separate the scones from each other using a knife to make a clean cut.

    After baking, the cherry chocolate chip scones are golden brown on top and set.

    Prepare To Glaze The Scones

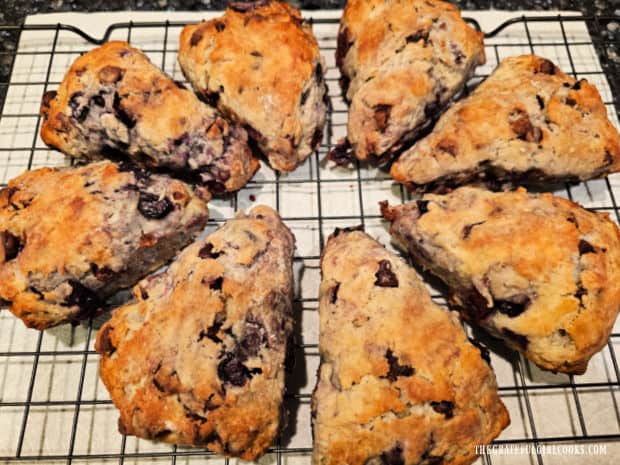
    Use a spatula to transfer the scones to a wire rack to finish cooling. Now you should have eight cherry chocolate chip scones on a wire rack (with a little bit of space between each one).

    Be sure to put paper towels, foil or parchment paper UNDER the wire rack because this will help catch any drips when you glaze the scones. Trust me, this will make your cleanup much easier.

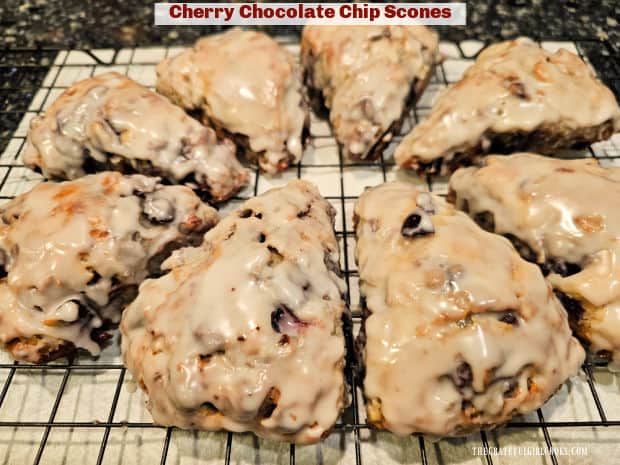
    Eight baked cherry chocolate chip scones cooling on a wire rack before glazing.

    Glaze The Scones

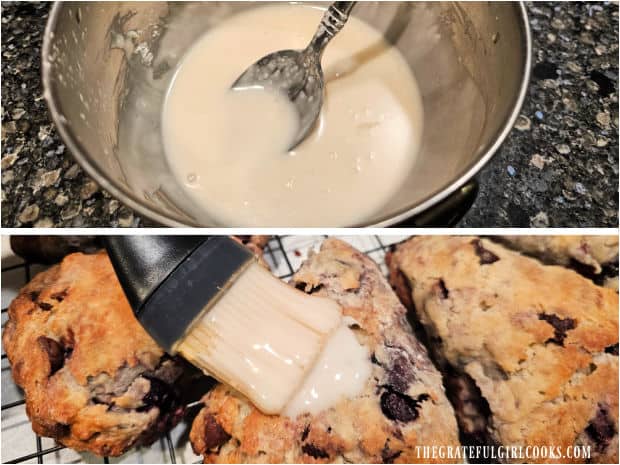
    While the scones cool, make the glaze. It is SIMPLE! First, stir together powdered sugar and vanilla in a small bowl.

    Add 3-4 teaspoons of water (one teaspoon at a time), stirring often until the glaze is lump-free and thin enough to be “painted or brushed” onto the scones. You may not need all of the water!

    You don’t want the glaze to be thin and runny, but you do want it to be about the same consistency as honey, so it can be brushed onto the scones easily.

    Use a pastry brush to “paint” the glaze over the top of the scones, covering as much of the surface as possible. Divide the glaze evenly so there is enough for all 8 scones.

    NOTE: If you have a tiny bit of extra glaze, go back and add it to the scones (use it all).

    A simple glaze is made, and it is brushed onto the surface of the scones until covered.

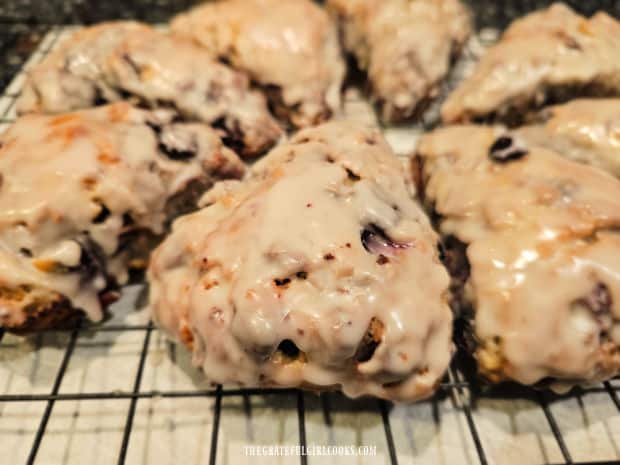
    When I glaze scones, I brush the glaze onto all visible surfaces and even let it run down the back and sides (shown below). That’s why I recommend having something under the rack to catch any drips.

    Once the scones are glazed, let them rest on the rack to continue to cool. Cherry Chocolate Chip Scones are at their very best when served at room temperature.

    Glazed scones cool until the glaze has become firm.

    Enjoy The Cherry Chocolate Chip Scones

    The glaze will harden slightly as they rest and cool more, and once it has “hardened”, the cherry chocolate chip scones are ready to be served and enjoyed.

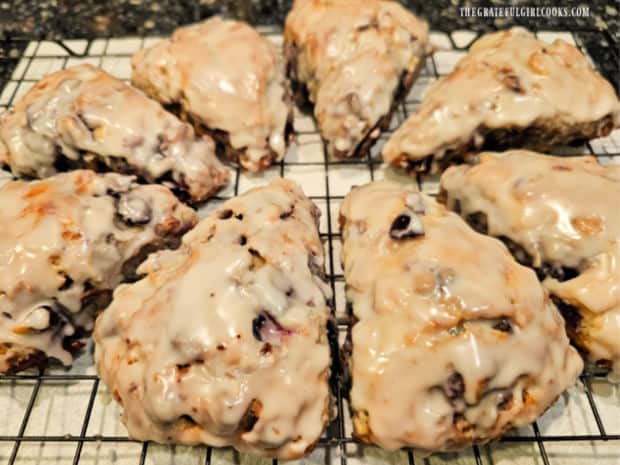
    A wire rack holds eight cherry chocolate chip scones, ready to be served.

    These scones are really quite tasty and are packed with the chopped cherries and chocolate chips, so there is lots of flavor in each and every bite.

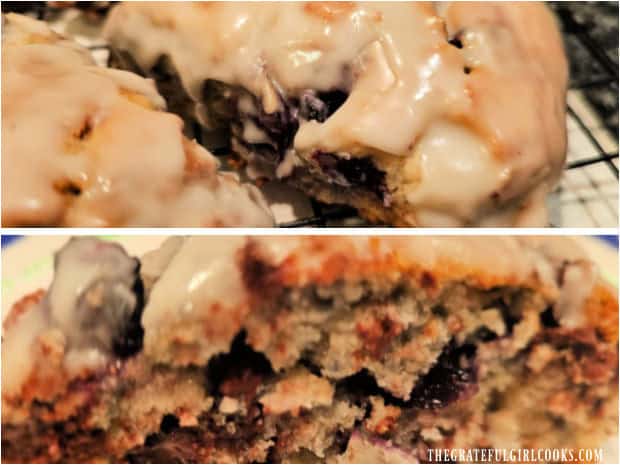
    A side view of a scone, filled with chopped cherries and chocolate chips.

    I hope you have the opportunity to make (and enjoy) these delicious scones for your family and/or friends and trust you will enjoy them as much as we do.

    Thanks for stopping by and I invite you to come back again soon for more family-friendly recipes. Take care, may God bless you, and have a wonderful day.

    Looking For More SCONE Recipes?

    You can find ALL of my recipes in the Recipe Index, which is located at the top of the page. I have LOTS of yummy scone recipes to choose from, including:

    Want More Recipes? Get My FREE Newsletter!

    I publish a newsletter 2 times per month (1st and 15th) with lots of recipes, tips, etc.
    Would you like to join our growing list of subscribers?

    There is a Newsletter subscription box on the top right (or bottom) of each blog post, depending on the device you use.
    You can submit your e-mail address there, to be added to my mailing list.

    Find Me On Social Media:

    Facebook page: The Grateful Girl Cooks!
    Pinterest:
    The Grateful Girl Cooks!
    Instagram:
    jbatthegratefulgirlcooks

    Author's signature

    ↓↓ PRINTABLE RECIPE BELOW ↓↓

    0 from 0 votes
    Cherry Chocolate Chip Scones
    Prep Time
    20 mins
    Cook Time
    20 mins
    Total Time
    40 mins
     

    Enjoy delicious Cherry Chocolate Chip Scones for breakfast or as an afternoon snack with coffee or tea! The recipe makes 8 yummy scones!

    Category: Breakfast, Snack
    Cuisine: All Cuisines
    Keyword: cherry chocolate chip scones
    Servings: 8 scones
    Calories Per Serving: 463 kcal
    Author: JB @ The Grateful Girl Cooks!
    Ingredients
    For Scones:
    • 2 cups all-purpose flour
    • cup granulated sugar
    • 2 teaspoons baking powder
    • ½ teaspoon salt
    • ½ cup COLD Butter = 1 stick or 8 Tablespoons
    • 2 large eggs
    • 1 teaspoon vanilla extract
    • ¾ cup semi-sweet chocolate chips
    • 15 Bing cherries each pitted, chopped
    For Glaze Topping:
    • cups powdered sugar (i.e. confectioner's sugar)
    • ¼ teaspoon vanilla extract
    • 3-4 teaspoons water until thin enough to brush on scones
    Instructions
    1. Preheat oven to 425°F.

    2. Whisk flour, sugar, baking powder and salt in a large bowl until combined. Use a pastry blender to cut in chunks of COLD butter until butter is the size of peas. NOTE: You can also do this in a food processor. Pulse chunks of COLD butter into flour mixture until butter is the size of peas. Now add eggs and vanilla to the bowl. Stir until they're fully incorporated.

    3. Add chopped cherries and chocolate chips to dough. Gently stir until they're mixed into the dough. Dough will be thick and sticky. 

    4. With floured hands, shape dough into a ball; transfer it to a floured work surface. Sprinkle dough with flour as needed (it's sticky). Add flour to your hands as needed to prevent sticking. Knead dough until it comes together in a cohesive ball. Sprinkle dough with more flour (as needed) until dough is not sticky. Shape dough into an 8" circle, about 1" high.

    5. Use a pizza cutter or sharp knife to cut dough into 8 pie-shaped wedges. Place wedges on an ungreased baking sheet. Arrange wedges in a circle (pointed tip toward the middle), leaving ½" between wedges.

    6. Bake scones at 425°F. for 18-20 minutes. Scones should be golden brown on top and set. Remove from oven; let cool 4-5 minutes, then separate scones with a knife. Transfer scones to a wire rack to finish cooling. TIP: Put paper towels, foil or parchment paper UNDER rack to catch drips while glazing scones.

    Make Glaze for Scones:
    1. Combine powdered sugar and vanilla in a small bowl. Add 3-4 tsp. water (one tsp. at a time), stirring until glaze is lump-free/thin enough (consistency of honey) to be "brushed" onto scones (may not need all the water). Use a pastry brush to brush glaze on scones, covering as much surface as possible, letting it run down the back and sides. Divide glaze evenly, using ALL the glaze.

    2. Let glazed scones rest/continue to cool until glaze hardens. They taste best served at room temperature. Serve and enjoy!

    Nutrition Facts
    Cherry Chocolate Chip Scones
    Amount Per Serving (1 scone + glaze)
    Calories 463 Calories from Fat 180
    % Daily Value*
    Fat 20g31%
    Saturated Fat 11g69%
    Trans Fat 0.5g
    Polyunsaturated Fat 1g
    Monounsaturated Fat 5g
    Cholesterol 78mg26%
    Sodium 258mg11%
    Potassium 286mg8%
    Carbohydrates 66g22%
    Fiber 3g13%
    Sugar 39g43%
    Protein 6g12%
    Vitamin A 440IU9%
    Vitamin C 1mg1%
    Calcium 71mg7%
    Iron 3mg17%
    * Percent Daily Values are based on a 2000 calorie diet.

    Here’s one more to pin on your Pinterest boards! Enjoy delicious Cherry Chocolate Chip Scones for breakfast or as an afternoon snack with coffee or tea! The recipe makes 8 yummy scones!
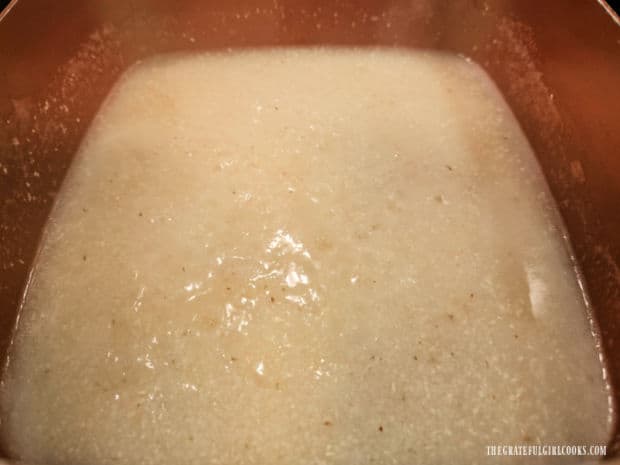
    One Jar Strawberry Rhubarb Jam

    One Jar Strawberry Rhubarb Jam is a “small batch” recipe (no pectin/no canning). Make 1 pint or 2 half-pint jars of yummy jam in a saucepan!
    One Jar Strawberry Rhubarb Jam is a "small batch" recipe (no pectin/no canning). Make 1 pint or 2 half-pint jars of yummy jam in a saucepan!

    Today I want to share a recipe for a small batch of strawberry rhubarb jam that tastes fabulous. This jam requires no special canning experience or equipment, because it’s made in a large saucepan (instead of using a water bath canner).

    How’s that for a simple way to make only a jar or two of delicious homemade jam? I made this recipe because I’d picked a small amount of strawberries and rhubarb from our backyard garden and wanted to make a little bit of jam!

    This jam does not need pectin to thicken it, because the cooking process used will achieve that on its own! That’s why I made this particular recipe, because I was out of pectin!

    When done, the amount of jam produced is enough to fill a one-pint jar (2 cups) or you two smaller half-pint jars (1 cup each). Here’s how to make it.

    Scroll Down For A Printable Recipe Card At The Bottom Of The Page

    Cooking The Strawberry Rhubarb Jam

    NOTE: Before you begin cooking, place two small plates in your freezer (they will be needed later to test the jam for readiness). Don’t skip this step!

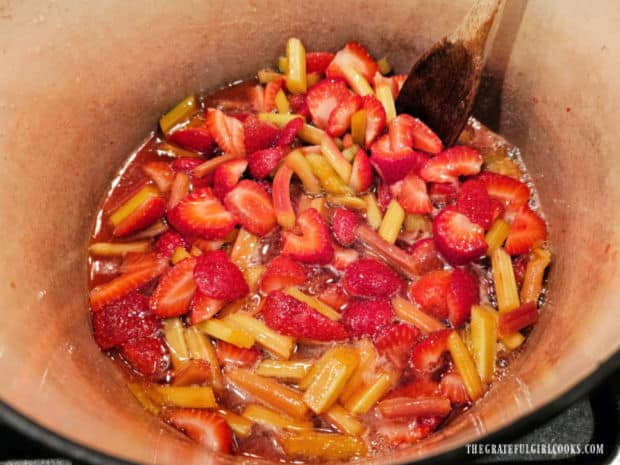
    Measure sliced strawberries and rhubarb into a large saucepan (I use my Dutch Oven). Add granulated sugar, fresh lemon juice and a pinch of salt.

    Stir these ingredients until they have been fully combined. Turn the heat on to Medium High heat and cook this for 3-5 minutes, stirring occasionally.

    Strawberries, rhubarb, sugar, lemon juice and salt in a large pan.

    Now turn the heat down to Medium Low and simmer the jam, stirring it often until the strawberries and rhubarb begin to break down a bit.

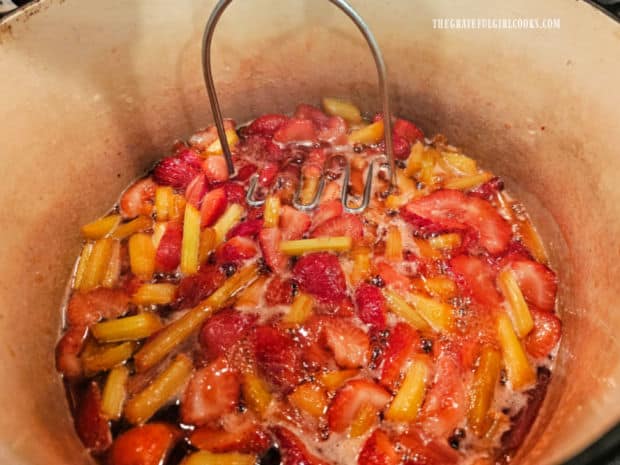
    I use a potato masher to “help” break down the fruit slightly. You will want to have some nice chunks of fruit, so don’t go crazy with the masher… ha ha!

    A potato masher is used to help break down the fruit as it cooks.

    Continue Cooking The Jam

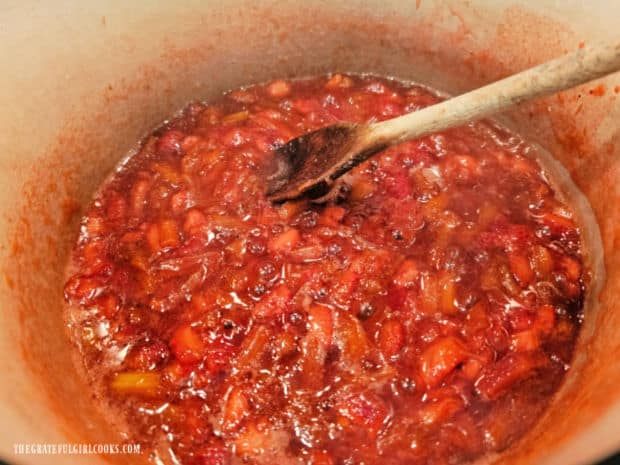
    Simmer the jam for about 15 minutes, stirring it often. The fruit will continue to break down, and the jam will continue to thicken as it cooks. Just keep stirring!

    One Jar Strawberry Rhubarb Jam continues to thicken and break down as it cooks.

    After the jam has cooked for the 15 minutes, test the jam to see if it is ready by performing the PLATE TEST (see below). This simple test will show you if the jam is ready or if it needs to cook a bit more.

    Since there is no pectin used in one jar strawberry rhubarb jam, this is the best way to know if the correct thickness for the jam has been achieved.

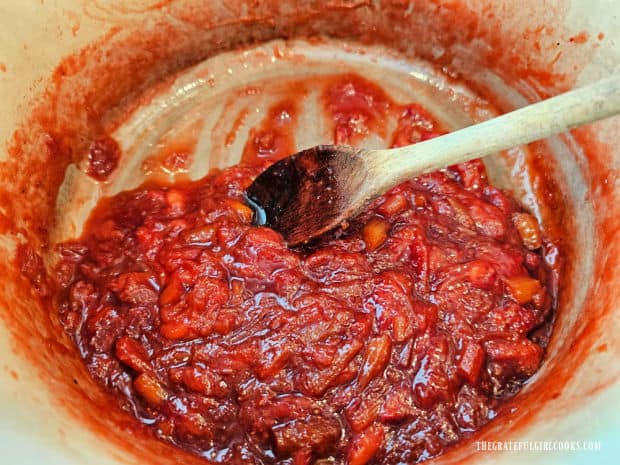
    When done cooking the jam, move the pan off of the heat source. The mixture might look like it still has too much liquid, but as it cools the jam mixture will thicken even more.

    The jam will thicken quite a bit as it continues to cook and then is cooled.

    How To Know If The Jam Is Ready- The Plate Test!

    Make sure you have removed the pan from the heat source. To test the jam to see if it is ready, remove one of the chilled plates from your freezer.

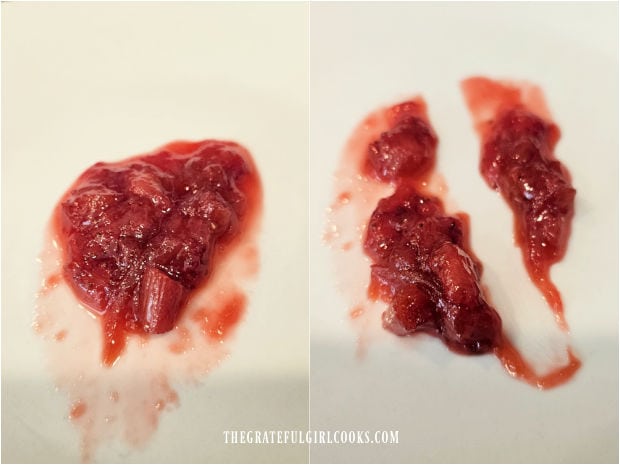
    Place a small spoonful of the jam onto the COLD plate (photo on the left below). Run a finger down through the jam. If a clear trail is left and the jam holds its shape (photo on the right below), it is ready!

    If it is NOT ready (“finger path” fills in with liquid or runs because of too much liquid), put the pan back on the Medium Low heat and simmer the jam a couple minutes more. Try plate test again using the second chilled plate from the freezer.

    A plate test is done to determine if the jam is done cooking,

    When The Jam Is Ready

    When done, let the jam sit (still in the pan) and off of the heat for about 5 minutes to cool slightly. Transfer the jam into 1 pint-sized jar (holds 2 cups) or into 2 half-pint jars (each holds 1 cup).

    Let the jam cool completely before you put a lid on the jar(s). This typically takes between 35-45 minutes on average and is inactive prep time.

    Attach a lid (or the flat lids and screw bands if using) and refrigerate the jam until it has fully chilled. As the jam is refrigerated it will thicken a bit more, resulting in a fabulous, dense jam ready to be enjoyed.

    NOTE: If you decide to can this jam (for long time storage) rather than eating it right away, you can find my canning notes at the bottom of the printable recipe card below).

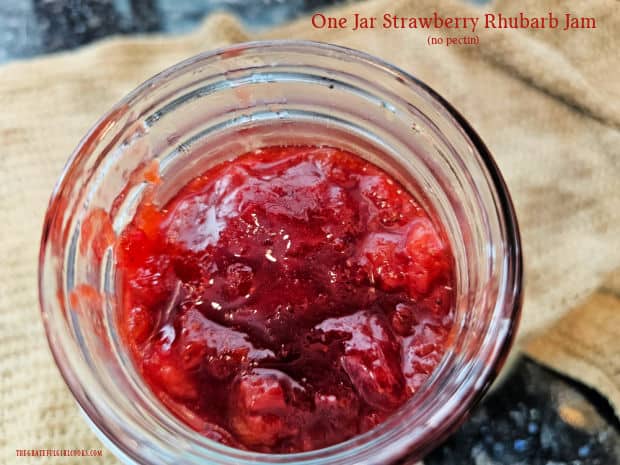
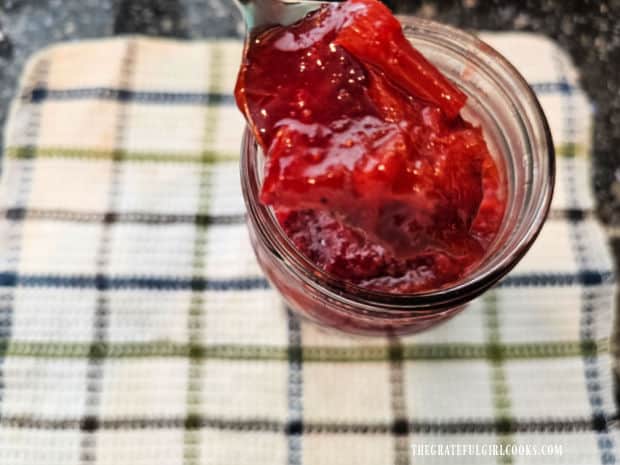
    A close up of a spoonful of one jar strawberry rhubarb jam, ready to be eaten.

    Serve The One Jar Strawberry Rhubarb Jam

    One Jar Strawberry Rhubarb Jam tastes amazing on toast, English muffins, biscuits, etc. It is even delicious used as a topping for pancakes and PB & J sandwiches, if desired.

    Open your jar of jam and spread it on your choice of toast, etc. and enjoy its sweet and tangy flavor. It tastes wonderful, and because of that I am confident you’ll love it, too!

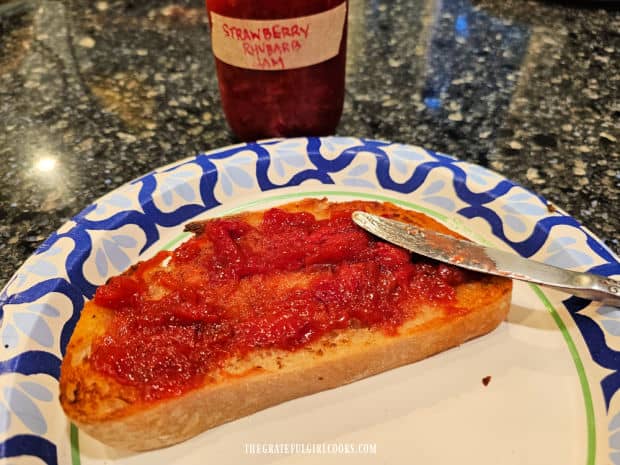
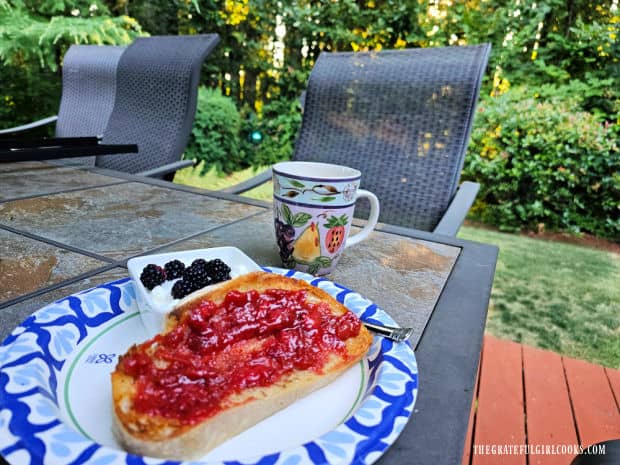
    A piece of sourdough toast, covered with the strawberry rhubarb jam.Enjoying one jar strawberry rhubarb jam on toast with yogurt and coffee outside!

    I hope you have the opportunity to make this delicious jam! Enjoy the convenience of making a jar of homemade jam without any special canning equipment or pectin!

    However, if you already enjoy canning your jam using a traditional canning recipe, please check out my other recipe for Strawberry Rhubarb Jam (yields 9 half-pint jars using pectin, water bath canner, etc.).

    Thank you for stopping by, and I invite you to come back again soon for more family-friendly recipes. Take care, may God bless you, and have a wonderful day.

    Looking For More JAM Recipes?

    You can find ALL of my recipes in the Recipe Index, which is located at the top of the page. I have LOTS of jam recipes to choose from, including:

    Want More Recipes? Get My FREE Newsletter!

    I publish a newsletter 2 times per month (1st and 15th) with lots of recipes, tips, etc.
    Would you like to join our growing list of subscribers?

    There is a Newsletter subscription box on the top right (or bottom) of each blog post, depending on the device you use.
    You can submit your e-mail address there, to be added to my mailing list.

    Find Me On Social Media:

    Facebook page: The Grateful Girl Cooks!
    Pinterest:
    The Grateful Girl Cooks!
    Instagram:
    jbatthegratefulgirlcooks

    Author's signature

    Original recipe source: Afton, at Simple Small-Batch Strawberry Rhubarb Jam – The Reader’s Kitchen

    ↓↓ PRINTABLE RECIPE BELOW ↓↓

    0 from 0 votes
    One Jar Strawberry Rhubarb Jam
    Prep Time
    15 mins
    Cook Time
    30 mins
    Cooling Time (inactive prep)
    45 mins
    Total Time
    1 hr 30 mins
     

    One Jar Strawberry Rhubarb Jam is a "small batch" recipe (no pectin/no canning). Make 1 pint or 2 half-pint jars of yummy jam in a saucepan!

    Category: Jam / Canning and Preserving
    Cuisine: All Cuisines
    Keyword: one jar strawberry rhubarb jam
    Servings: 32 Tablespoons (1 pint or 2 half pints)
    Calories Per Serving: 28 kcal
    Author: JB @ The Grateful Girl Cooks!
    Ingredients
    • 2 cups sliced strawberries
    • cups sliced rhubarb
    • 1 cup granulated sugar
    • 2 Tablespoons lemon juice
    • 1 pinch table salt
    Instructions
    1. NOTE: Before beginning, place two small plates in your freezer (needed later to test jam for readiness). Don't skip this step!

    Cook The Jam:
    1. Measure strawberries, rhubarb, sugar, lemon juice and salt into a large saucepan. Stir until they are fully combined. Cook this mixture for 3-5 minutes on Medium High heat, stirring occasionally.

    2. Turn the heat down to Medium Low and cook (simmer) the jam, stirring often until strawberries and rhubarb begin to break down and soften. Use a potato masher to "help" break down the fruit slightly if desired. Simmer the jam for about 15 minutes, stirring often. The fruit will continue to break down, and the jam will continue to thicken as it cooks. Just keep stirring!

    3. After the jam has cooked for 15 minutes, test the jam to see if it is done by performing the PLATE TEST (see below). This simple test will show you if the jam is ready or if it needs to cook a bit more.

    THE PLATE TEST:
    1. Take pan off the heat. Remove one chilled plate from the freezer. Place a small spoonful of jam onto the COLD plate. Run a finger through the jam. If a clear trail is left and the jam holds its shape, it is ready! NOTE: If it is NOT ready (still too much liquid), put the pan back on Medium Low heat; simmer it for 2 more minutes, then try again using the second cold plate from the freezer.

    Jar The Jam And Refrigerate:
    1. When done, let the jam rest (still in the pan and off the heat) for 5 minutes to cool slightly. Transfer jam into 1 pint-sized jar (holds 2 cups) or into 2 half-pint jars (each holds one cup). Let the jam cool completely before covering the jar. Attach a lid (or flat lids/screw bands if using). Refrigerate jam until fully chilled. Serve and enjoy!

    Recipe Notes

    CANNING INSTRUCTIONS: Use bottled lemon juice instead of fresh lemon juice. Leave 1/8-inch headspace in each jar. Follow manufacturers water bath canning instructions for your individual canner. Process pint jars for 15 minutes. Process half-pint jars for 10 minutes.

    Nutrition Facts
    One Jar Strawberry Rhubarb Jam
    Amount Per Serving (1 Tablespoon)
    Calories 28 Calories from Fat 1
    % Daily Value*
    Fat 0.1g0%
    Saturated Fat 0.005g0%
    Polyunsaturated Fat 0.02g
    Monounsaturated Fat 0.01g
    Sodium 2mg0%
    Potassium 31mg1%
    Carbohydrates 7g2%
    Fiber 0.3g1%
    Sugar 7g8%
    Protein 0.1g0%
    Vitamin A 7IU0%
    Vitamin C 6mg7%
    Calcium 6mg1%
    Iron 0.1mg1%
    * Percent Daily Values are based on a 2000 calorie diet.

    Here’s one more to pin on your Pinterest boards!  One Jar Strawberry Rhubarb Jam is a "small batch" recipe (no pectin/no canning). Make 1 pint or 2 half-pint jars of yummy jam in a saucepan!