Category: Seafood

Lime Brown Butter Shrimp

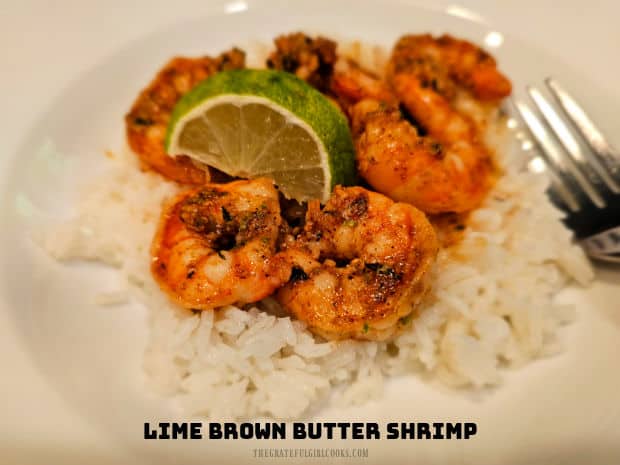
Lime Brown Butter Shrimp is a simple, yet delicious dish! Large sautéed shrimp with butter, lime zest, garlic and spices is served over rice!

Do you enjoy eating shrimp? We do, and I’ve enjoyed making many different recipes featuring shrimp over the years! Today I want to share a delicious recipe for Lime Brown Butter Shrimp I believe you’re going to love!

The recipe itself is fairly simple to make. Butter is cooked in a skillet until it becomes “browned” (with a slightly nutty flavor), then the butter is infused with the finely grated zest from one lime. This adds a pop of citrus flavor that adds great taste to this dish.

The shrimp is cooked with seasonings (garlic, chili powder, cumin, salt and pepper) and a small amount of the browned butter until done. All the remaining browned lime butter is added to the cooked shrimp and heated through, and then served over rice.

That’s it! This shrimp dish is absolutely delicious, and truly is quite simple to make. Here’s how to prepare this yummy dish.

Scroll Down For A Printable Recipe Card At The Bottom Of The Page

First Things First

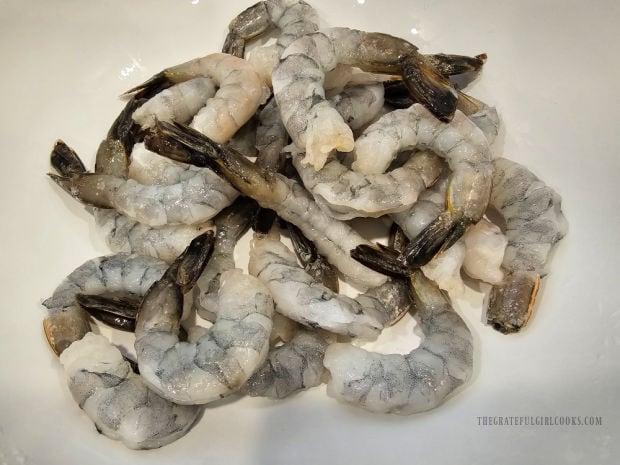
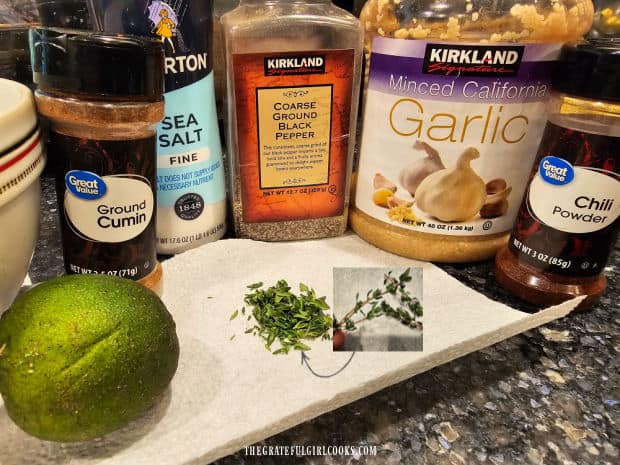
To start, get all the ingredients together. You will need butter, a pound of large shrimp, fresh thyme leaves, lime zest, minced garlic, chili powder, ground cumin, salt and pepper.

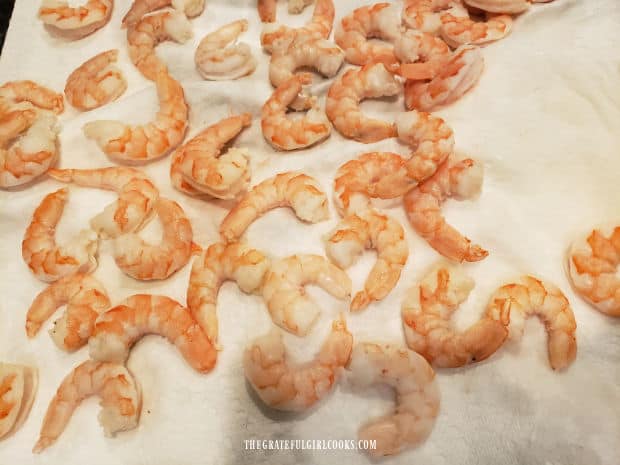
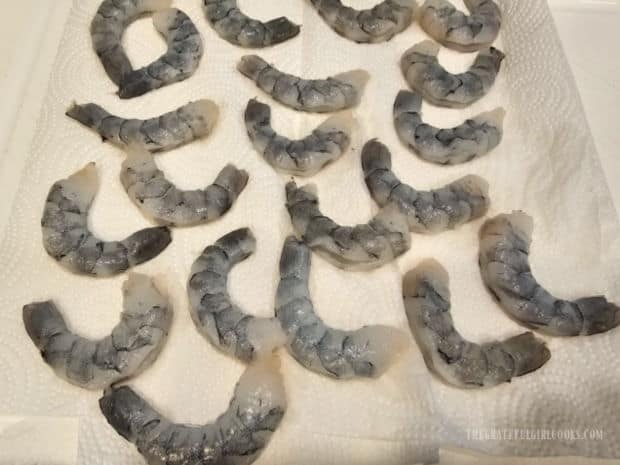
Place the shrimp on several layers of paper towels, and then blot them with another paper towel, to remove excess moisture.

Ingredients are gathered to season this shrimp recipe.Large shrimp are blotted dry on paper towels before they are cooked.

Brown The Butter

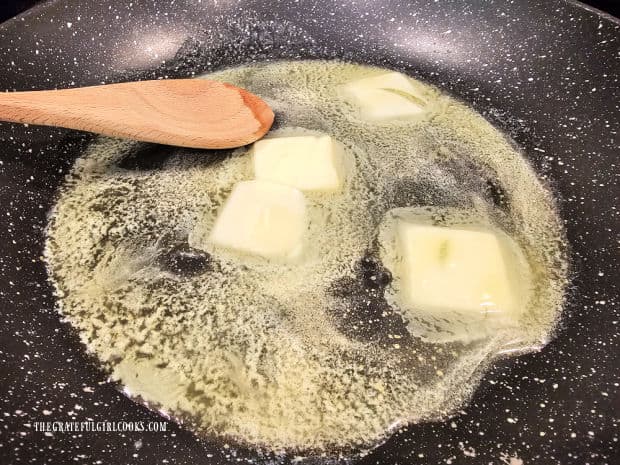
Place 4 Tablespoons of butter in a large skillet and heat it on LOW heat until it has melted. Stir in fresh thyme leaves and continue cooking on LOW heat, stirring often, for 5 minutes, or until the butter becomes light brown in color and has a nutty aroma.

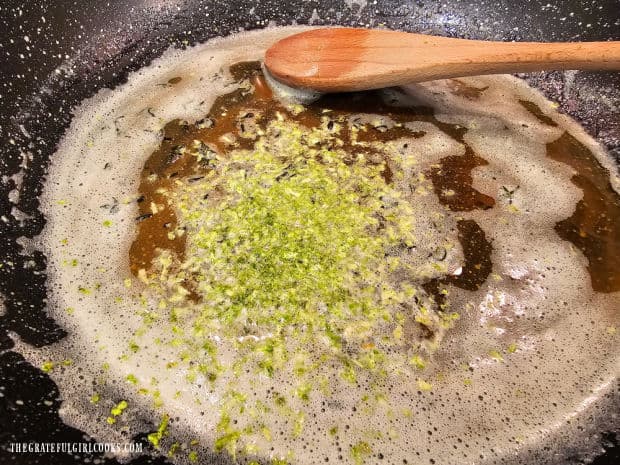
Remove the skillet from the heat and stir all of the lime zest into the browned butter mixture until incorporated. Pour the butter into a small bowl, but leaving about 2 teaspoons in the skillet.

Butter is melted in a large skillet.Once butter is browned, thyme leaves and fresh lime zest are stirred in.

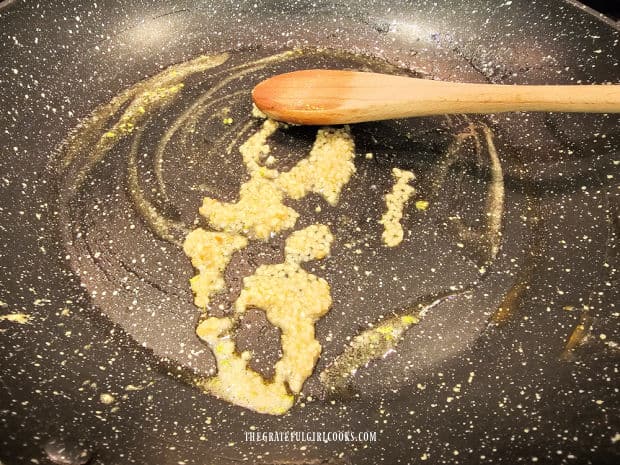
Using the same skillet (with that tiny amount of butter in it), add the minced garlic. Sauté the garlic, stirring often, for about 1 minute. Be careful to not allow the garlic to burn or it can become bitter.

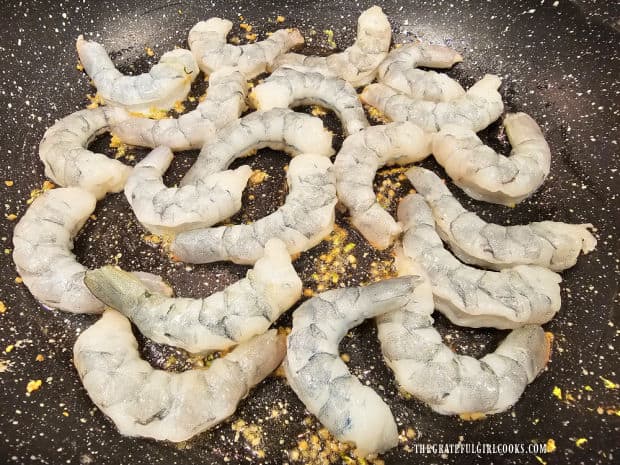
Now it’s time to cook the shrimp! Place the shrimp into the hot skillet in a single layer.

Minced garlic is cooked in a small amount of the browned butter.The shrimp are added to the cooked garlic in skillet.

Season And Cook The Shrimp

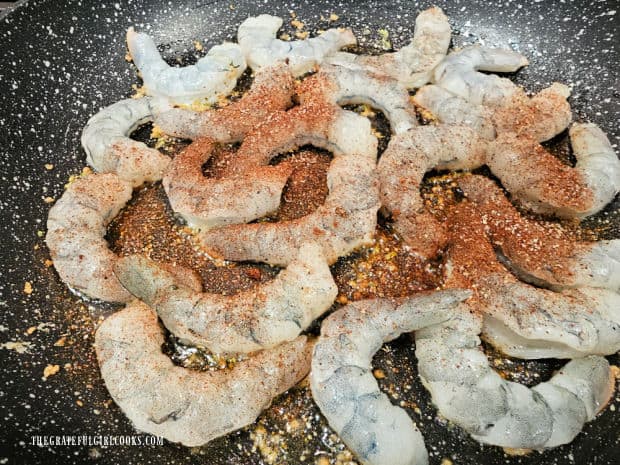
Sprinkle the shrimp with the chili powder, ground cumin, salt and pepper, then stir until each shrimp is well coated with spices.

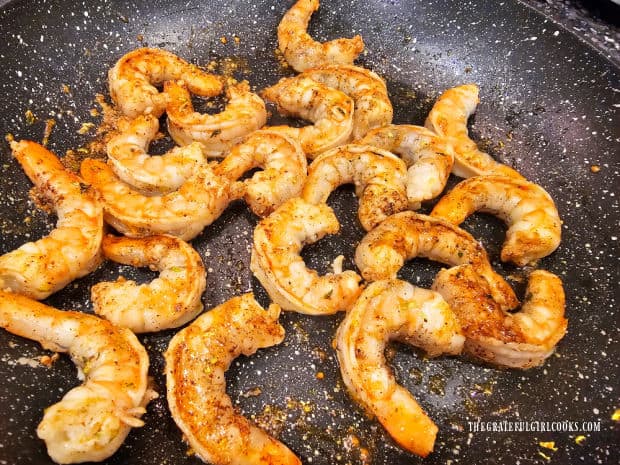
Lay the shrimp back out in a single layer and cook them for about 2 minutes, then turn the shrimp to the other side. Continue cooking until they have turned pink, are cooked through, and are no longer translucent in color.

The total cooking time will be between 3-4 minutes. Be sure to not overcook the shrimp because this can lead to them being “rubbery” in texture and you really don’t want that.

Chili powder, cumin, salt and pepper are added and stirred into the shrimp.Lime Brown Butter Shrimp are cooked on both sides for 3-4 minutes total.

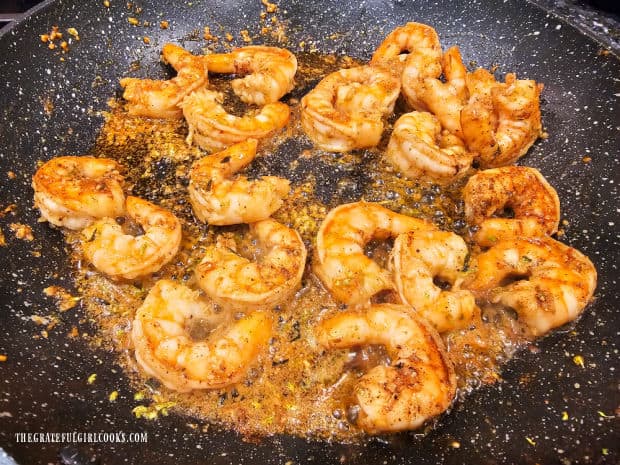
Pour the remaining browned butter lime mixture back into the skillet, and stir gently to coat the shrimp with the butter sauce.

Stir the browned butter in only until reheated (less than a minute), and then the  lime brown butter shrimp is done! Remove the skillet from the heat and serve immediately.

Remaining brown butter lime sauce is added back into the skillet of shrimp.

Serve The Lime Brown Butter Shrimp

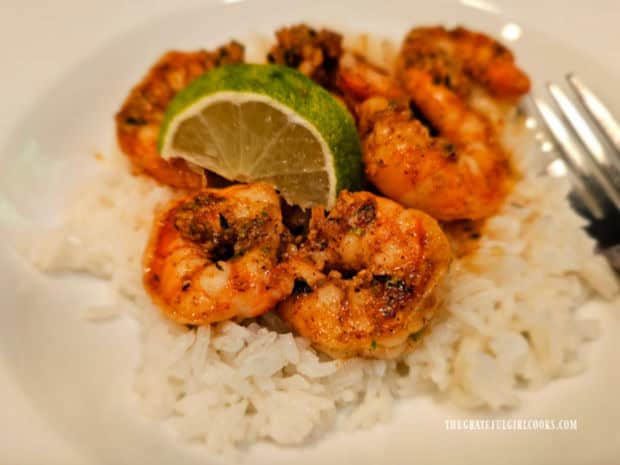
To serve, place a bed of white or brown rice on each serving plate, then top each portion with about 5-6 large shrimp. Drizzle with some of remaining sauce.

This one pound bag of large shrimp yielded 5 large shrimp per serving (four servings total), but sometimes you can end up with 6 per serving depending on the provider. 

Garnish each portion with a fresh lime wedge, which adds another pop of flavor when squeezed over the shrimp! Serve immediately while hot… and enjoy this delicious meal.

Lime Brown Butter Shrimp is served with a lime slice on top of white rice.

I hope you have a chance to enjoy some Lime Brown Butter Shrimp, and trust you’ll enjoy it as much as we do! It really is quite easy to make but it has delicious flavor!

Thanks for stopping by, and I invite you to come back again soon for more delicious recipes! Take care, may God bless you, and have a GREAT day!

Looking For More SHRIMP Recipes?

You can find ALL of my recipes in the Recipe Index, which is located at the top of the page. I have lots of delicious shrimp recipes to check out, including:

Want More Recipes? Get My FREE Newsletter!

I publish a newsletter 2 times per month (1st and 15th) with lots of recipes, tips, etc..
Would you like to join our growing list of subscribers?

There is a Newsletter subscription box on the top right (or bottom) of each blog post, depending on the device you use.
You can submit your e-mail address there, to be added to my mailing list.

Find Me On Social Media:

Facebook page: The Grateful Girl Cooks!
Pinterest:
The Grateful Girl Cooks!
Instagram:
jbatthegratefulgirlcooks

Author's signature

Recipe adapted from Lindsay, at: https://pinchofyum.com/orange-brown-butter-shrimp

↓↓ PRINTABLE RECIPE BELOW ↓↓

0 from 0 votes
Lime Brown Butter Shrimp
Prep Time
8 mins
Cook Time
12 mins
Total Time
20 mins
 

Lime Brown Butter Shrimp is a simple, yet delicious dish! Large sautéed shrimp with butter, lime zest, garlic and spices is served over rice!

Category: Main Dish, Seafood
Cuisine: All Cuisines
Keyword: lime brown butter shrimp
Servings: 4
Calories Per Serving: 199 kcal
Author: JB @ The Grateful Girl Cooks!
Ingredients
  • 4 Tablespoons butter = ½ stick
  • ½ teaspoon fresh thyme leaves
  • 1 lime zest of
  • teaspoons minced garlic
  • 1 pound large raw shrimp deveined, tail removed (about 20-25)
  • ¼ teaspoon chili powder
  • teaspoon ground cumin
  • teaspoon salt and pepper (each) + more if needed, to taste
  • 4 thin lime slices *optional garnish for each serving*
Instructions
  1. Place shrimp on paper towels; blot them with a paper towel, to remove excess moisture. Set aside.

  2. Place butter in a large skillet; heat on LOW heat until melted. Stir in fresh thyme leaves; continue cooking on LOW heat, stirring often, for 5 minutes, or until butter is light brown in color and has a nutty aroma. Remove skillet from heat; stir in lime zest until incorporated. Pour the butter into a small bowl, leaving about 2 teaspoons in the skillet.

  3. Using same skillet (with 2 t. browned butter in it), add garlic. Sauté garlic, stirring often, for 1 minute. Do not allow garlic to burn or it can become bitter.

  4. Add shrimp to the hot skillet in one layer. Sprinkle with chili powder, cumin, salt and pepper. Stir until shrimp is coated with spices. Lay shrimp in a single layer; cook for 2 minutes, then turn shrimp to the other side. Continue cooking 1-2 minutes until they've turned pink, are cooked through and no longer translucent.

  5. Pour remaining browned butter back into the skillet; stir gently to coat shrimp. Cook only until reheated (less than a minute). Remove from heat; serve on a bed of rice, garnished with a lime slice. Enjoy!

Recipe Notes

NOTE: The caloric calculation does not include the rice (served under the shrimp), as different types may be used (white, brown, etc.).

Nutrition Facts
Lime Brown Butter Shrimp
Amount Per Serving (1 g)
Calories 199 Calories from Fat 108
% Daily Value*
Fat 12g18%
Saturated Fat 7g44%
Trans Fat 0.5g
Polyunsaturated Fat 1g
Monounsaturated Fat 3g
Cholesterol 213mg71%
Sodium 300mg13%
Potassium 313mg9%
Carbohydrates 1g0%
Fiber 0.2g1%
Sugar 0.1g0%
Protein 23g46%
Vitamin A 400IU8%
Vitamin C 1mg1%
Calcium 80mg8%
Iron 1mg6%
* Percent Daily Values are based on a 2000 calorie diet.

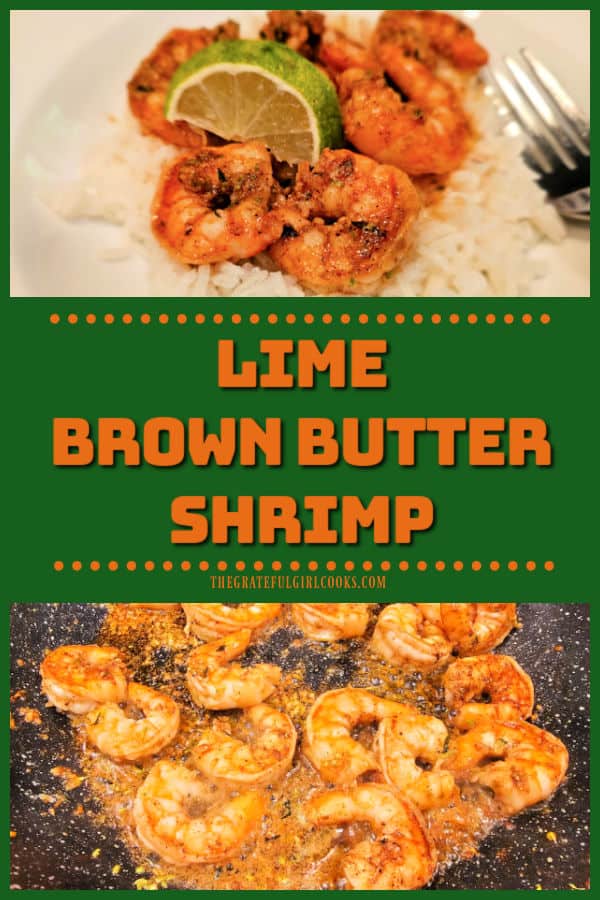
Here’s one more to pin on your Pinterest boards!Lime Brown Butter Shrimp is a simple, yet delicious dish! Large sautéed shrimp with butter, lime zest, garlic and spices is served over rice!


Teriyaki Shrimp Bowl

Teriyaki Shrimp Bowl is a delicious dish with shrimp, mushrooms, red, green and yellow bell peppers covered in an easy to make Asian sauce.

Last year I found a stir-fried shrimp recipe online and knew I had to try it! The original recipe was created using snow peas and peppers, and it looked fabulous, but I decided to “tweak” it just a little bit.

The best part of this recipe is it calls for 3 cups of fresh vegetables, which you can change to suit your taste. Even though I grow snow peas in our garden and had some available, I wanted to use some Baby bella mushrooms for this dish instead.

For this recipe, I used 1 cup of sliced mushrooms, and 2 cups of chopped bell peppers (a combination of red, green and yellow bell peppers) for great color and flavor.

You could use other veggies (total of 3 cups) like broccoli, bok choy, carrots, etc. to make this recipe “your own” and suit your personal taste. Here’s how to make this recipe for a Teriyaki Shrimp Bowl (shown served with white rice).

Scroll Down For A Printable Recipe Card At The Bottom Of The Page

Make The Teriyaki Sauce

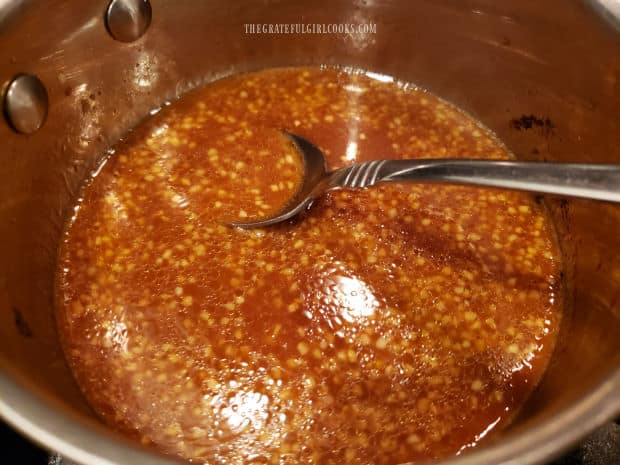
Place water, soy sauce, brown sugar, minced garlic, honey, minced ginger, and toasted sesame oil into a small saucepan.

Turn the heat under the pan to Medium-High and stir until the brown sugar has dissolved (1-2 minutes). Once the sugar dissolves, turn the heat up to High, and let the sauce come to a boil, stirring often.

Ingredients for Asian sauce in saucepan, with a spoon.

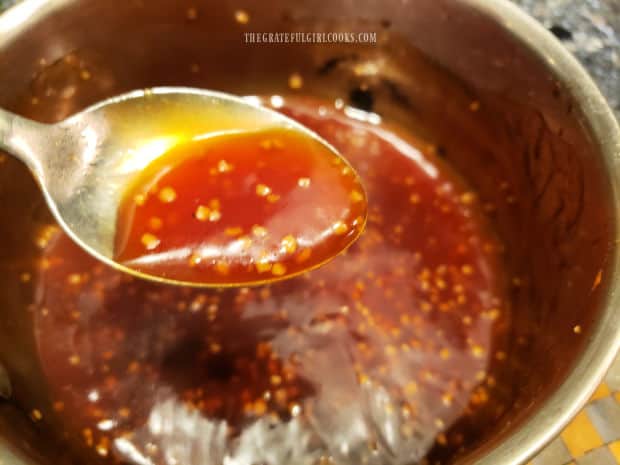
In a separate bowl, whisk a bit more cold water with cornstarch until it is lump-free. Stir the cornstarch/water mixture into the sauce.

Let the sauce boil, stirring often, for 1-2 minutes or until the sauce thickens. Remove the pan from the heat source and set the pan aside.

The Asian style sauce thickens as it cooks and is shown on a spoon.

Stir-Fry The Veggies

Now it’s time to stir-fry the vegetables. You will need to use a large skillet, because the shrimp and sauce will be added to it later, as well.

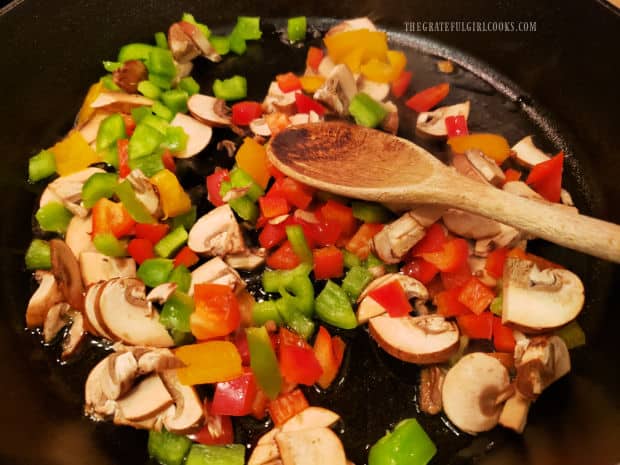
Heat vegetable oil in the skillet on Medium-High. Once the oil is hot (but not smoking), add the chopped red, green and yellow bell peppers and sliced mushrooms. Stir to combine.

Season the veggies lightly with salt and black pepper (to suit your taste). Cook the veggies for 3-4 minutes, stirring often, until they begin to soften.

Baby Bella mushroom, and red, green and yellow bell peppers are stir-fried.

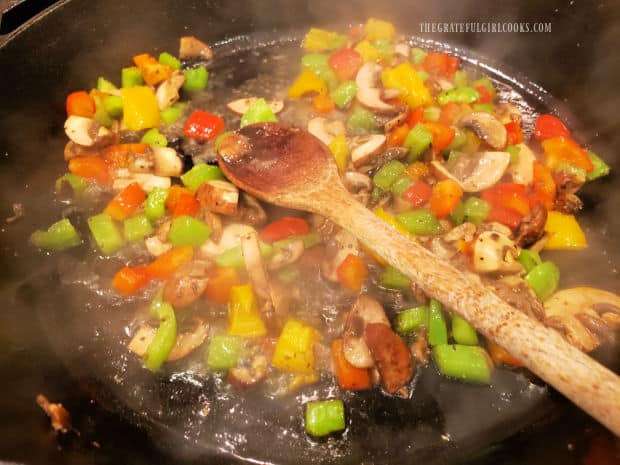
Now add a couple Tablespoons of water to the skillet, and continue to cook the veggies, stirring occasionally, until the water evaporates.

Transfer all the tender-crisp vegetables out of the skillet and into a bowl. Cover the bowl to keep the veggies warm, and set aside.

Water is added to the stir-fried veggies in skillet with a wooden spoon.

Cook The Shrimp

The shrimp I use when I make this recipe is one pound of large shrimp (approx. 31-40 count per pound). De-vein the shrimp and remove the shells but leave the tails on (to prevent shrimp from curling too much). If you prefer, you can easily remove the tails before cooking the shrimp (I’ve done both).

Grab some paper towels and give the skillet a quick wipe to clean it out. Pour in the remaining 2 teaspoons of vegetable oil and turn the heat to High.

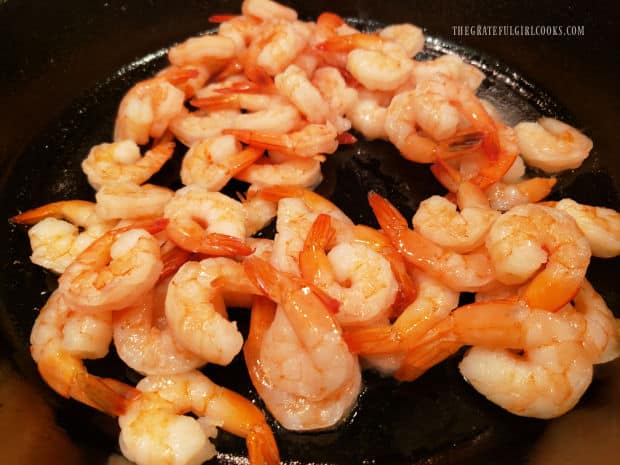
Pat the shrimp dry with paper towels before adding them to the hot oil. When the oil is hot (but not smoking), add the shrimp to the skillet.

Season the shrimp well with salt and black pepper, then cook 2-3 minutes, stirring often, until they’ve turned pink in color, and are cooked through. NOTE: Don’t overcook them as overcooked shrimp can become “rubbery” in texture. 

Large shrimp are stir-fried in hot oil in a black skillet.

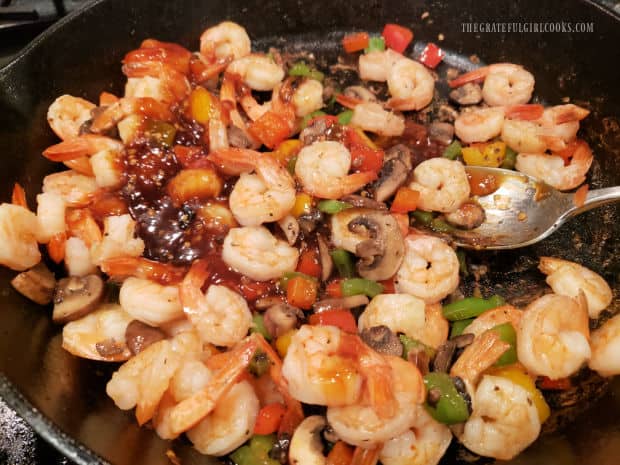
Place the cooked veggies back into the skillet with the shrimp. Pour the sauce on top, and stir to fully combine these ingredients.

Cook on Medium High heat only until the dish is re-heated (1-2 minutes, max). Stir, to ensure all veggies and shrimp are coated with the sauce. Remove the skillet from the heat source and serve immediately.

Cooked sauce and veggies are added back into skillet with the shrimp.

Garnish And Serve The Teriyaki Shrimp Bowl

The Teriyaki Shrimp Bowl is delicious and can be eaten “as is”, BUT I highly recommend serving it on top of steamed white or brown rice OR Asian noodles!

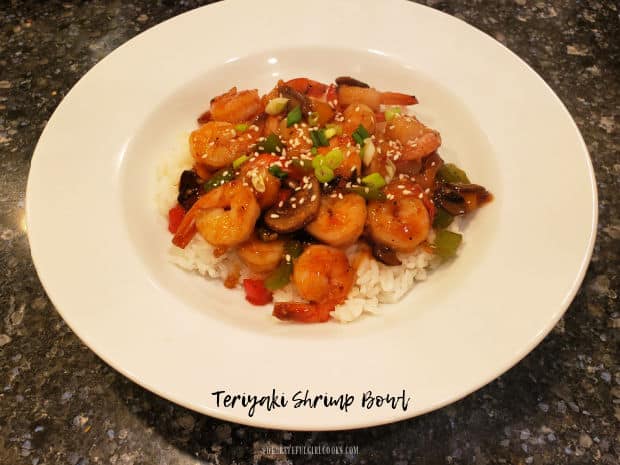
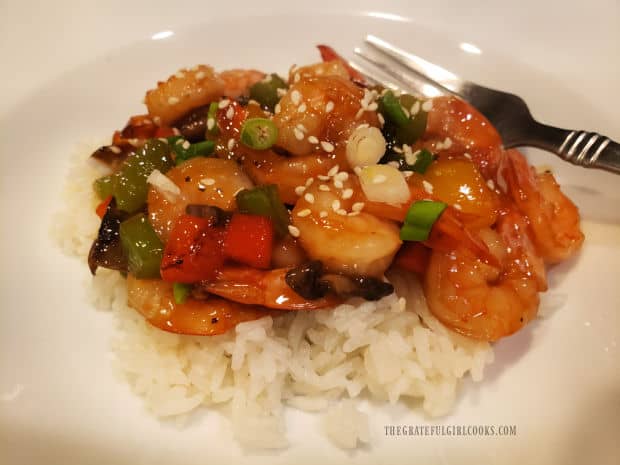
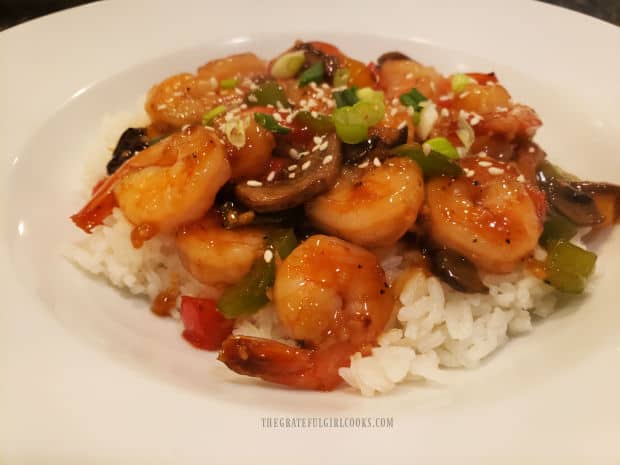
Garnish each serving with sliced green onions and sesame seeds for even more color and flavor. This garnish is optional, but we think it finishes this dish perfectly!

Our family enjoys the shrimp and veggies served on a bed of steamed white rice. The bland rice pairs very well with the teriyaki shrimp and veggies, and helps turn this into a very filling meal.

Teriyaki shrimp bowl is served on rice, with green onion/sesame seed garnish.A serving of Teriyaki Shrimp Bowl, served on a bed of rice in a white bowl.

I hope you (and those you love) enjoy eating Teriyaki Shrimp Bowls, and trust you’ll like them as much as we do! They are delicious, and full of great flavor.

Thanks for stopping by, and please come back soon for more family-friendly recipes. Take care, may God bless you, and I sincerely hope you have a GREAT day!

Looking For More SHRIMP Recipes?

You can find ALL of my recipes in the Recipe Index, which is located at the top of the page. I have some delicious recipes featuring shrimp  you might enjoy, including:

Interested In More Recipes? Get My FREE Newsletter!

I publish a newsletter 2 times per month (1st and 15th) with recipes, tips, etc..
 I would be honored to have you join our growing list of subscribers!

There is a Newsletter subscription box on the top right (or bottom) of each blog post, depending on the device you use, where you can submit your e-mail address to be added to my mailing list.

Find Me On Social Media:

Facebook page: The Grateful Girl Cooks!
Pinterest:
The Grateful Girl Cooks!
Instagram:
jbatthegratefulgirlcooks

Author's signature

Recipe adapted from (and with thanks to) Sara Welch, at: https://www.dinneratthezoo.com/shrimp-stir-fry/

↓↓ PRINTABLE RECIPE BELOW ↓↓

0 from 0 votes
Teriyaki Shrimp Bowl
Prep Time
10 mins
Cook Time
10 mins
Total Time
20 mins
 

Teriyaki Shrimp Bowl is a delicious dish with shrimp, mushrooms, red, green and yellow bell peppers covered in an easy to make Asian sauce.

Category: Main Dish
Cuisine: Asian
Keyword: teriyaki shrimp bowl
Servings: 4
Calories Per Serving: 208 kcal
Author: JB @ The Grateful Girl Cooks!
Ingredients
For Sauce:
  • 3 Tablespoons low-sodium soy sauce
  • 6 Tablespoons water
  • 2 Tablespoons brown sugar
  • 2 teaspoons honey
  • teaspoons minced garlic
  • teaspoons minced ginger
  • ¾ teaspoon toasted sesame oil
  • 1 Tablespoon cornstarch
  • Tablespoons cold water
For Stir-Fry:
  • 1 pound large shrimp (31-40 count per lb.) peeled/de-veined
  • 2 cups bell peppers (red, yellow and green) any combination making 2 cups total
  • 1 cup sliced mushrooms (I use baby bella)
  • salt and pepper, to taste
  • 2 Tablespoons water
  • 1 Tablespoon vegetable oil **DIVIDED USE**
Optional Garnish: sliced green onions and sesame seeds
    Instructions
    1. Heat soy sauce, 6 T. water, brown sugar, garlic, honey, ginger, and sesame oil on Medium-High in a small saucepan. Stir until brown sugar has dissolved (1-2 minutes); turn heat up to High. Let sauce come to a boil, stirring often.

    2. In separate bowl, whisk 1½ T. cold water with cornstarch until smooth. Stir cornstarch mixture into the sauce. Let sauce boil 1-2 minutes or until sauce thickens, stirring often. Remove pan from heat; set aside.

    3. Heat 1 t. vegetable oil in large skillet on Medium-High. Once oil is hot (but not smoking), add peppers and mushrooms; stir to combine. Season lightly with salt and pepper (to taste). Cook 3-4 minutes, stirring often, until they begin to soften. Add 2 T. water; cook veggies until water evaporates. Transfer veggies from skillet into a bowl. Cover bowl to keep veggies warm; set aside.

    4. Wipe skillet clean with paper towels. Add remaining 2 t. vegetable oil; turn heat to High. Pat shrimp dry before adding to hot oil. Add shrimp. Season well with salt and pepper; cook 2-3 minutes until pink in color, and cooked through. NOTE: Don't overcook because overcooked shrimp can become "rubbery" in texture. 

    5. Put veggies back into the skillet with shrimp. Add the sauce; stir to combine. Cook on Medium High only until re-heated (1-2 minutes). Stir, to ensure all shrimp/veggies are coated with sauce. Remove skillet from heat.

    6. Serve over rice or noodles. Garnish with green onions/sesame seeds (optional),

    Recipe Notes

    NOTE: Caloric calculation does not include white rice, brown rice or Asian noodles, as they are recommended, but optional (type or quantity) for serving with this recipe.

    Nutrition Facts
    Teriyaki Shrimp Bowl
    Amount Per Serving (1 (1/4 of total))
    Calories 208 Calories from Fat 45
    % Daily Value*
    Fat 5g8%
    Saturated Fat 1g6%
    Trans Fat 0.03g
    Polyunsaturated Fat 3g
    Monounsaturated Fat 1g
    Cholesterol 183mg61%
    Sodium 769mg33%
    Potassium 593mg17%
    Carbohydrates 17g6%
    Fiber 2g8%
    Sugar 12g13%
    Protein 25g50%
    Vitamin A 2333IU47%
    Vitamin C 96mg116%
    Calcium 91mg9%
    Iron 1mg6%
    * Percent Daily Values are based on a 2000 calorie diet.

    Here’s one more to pin on your Pinterest boards!

    Teriyaki Shrimp Bowl is a delicious dish with shrimp, mushrooms, red, green and yellow bell peppers covered in an easy to make Asian sauce.

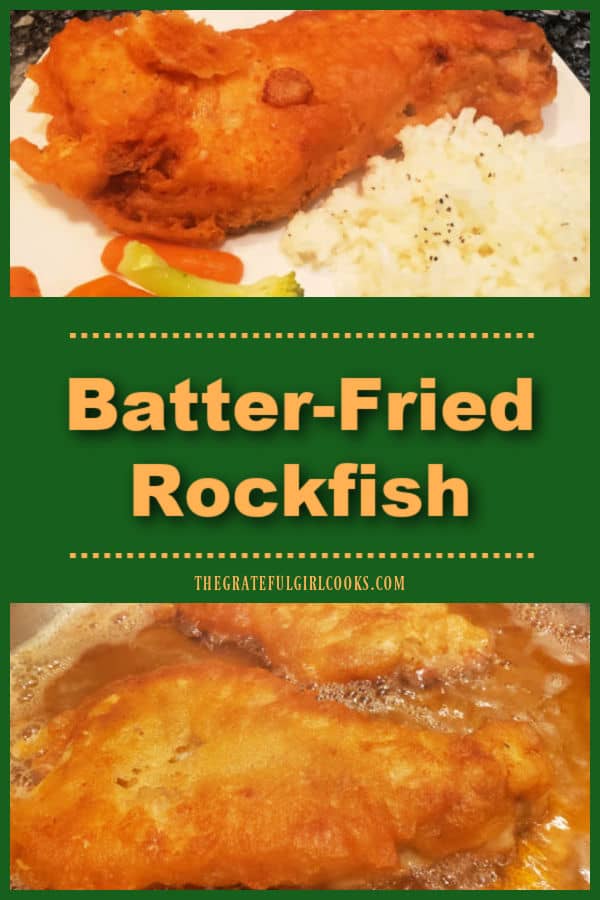
    Batter-Fried Rockfish

    Batter-Fried Rockfish for two is a simple, yet delicious dish! Fresh rockfish fillets are coated with beer batter, then cooked until crispy!
    Batter-Fried Rockfish for two is a simple, yet delicious dish! Fresh rockfish fillets are coated with beer batter, then cooked until crispy!

    Over the past several years, my husband and I have tried to eat more seafood, especially when we can find it on sale! Today I want to share a simple recipe for batter-fried rockfish.

    I try to keep this mild-flavored fish in our freezer, because it is so versatile and can be grilled, fried, baked, used in chowders and it even makes great fish tacos!

    My Inspiration For This Recipe

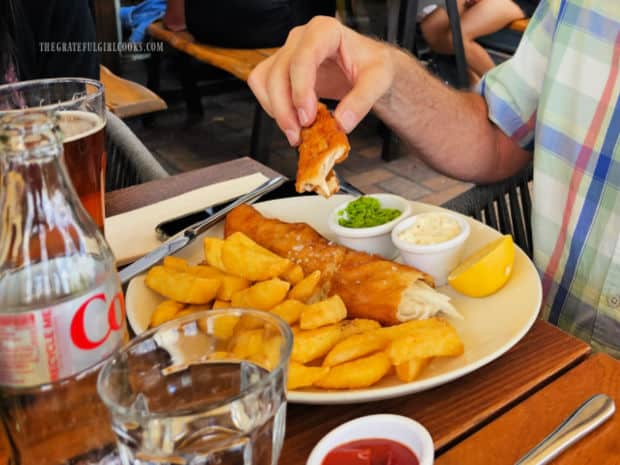
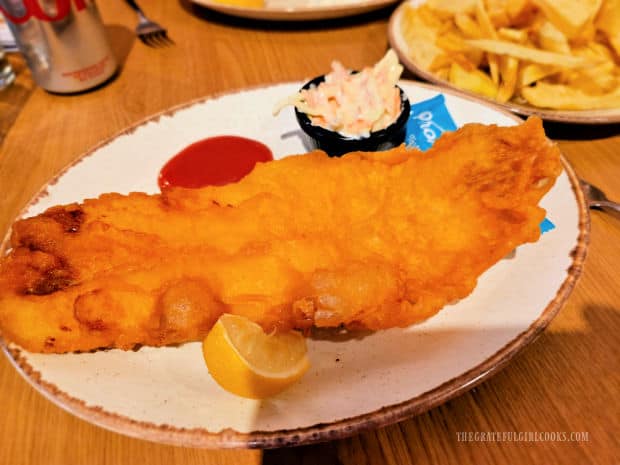
    Our family was very fortunate to be able to cruise the British Isles last summer, and my husband and I loved sampling the beer-battered fish we found everywhere in England, Scotland and Ireland! The photos below were from meals we enjoyed in England and Scotland.

    The fish and chips there are typically made using cod or haddock and they taste amazing, so I thought “why not try to make it using rockfish?”

    I’ve previously posted a recipe for beer battered fish and chips and really liked the batter used. Because I really wanted to make a seafood recipe using rockfish, I tried it, and guess what? Rockfish fillets are wonderful prepared in this way (beer-battered and fried), as well! 

    Fish and Chips (with mushy peas) for my hubby our first night in London.A piece of beer-battered fish I had in Scotland (chips/fries on the side).

    Okay… But What Is Rockfish?

    Rockfish is also known as red snapper, striped bass, or Rock Cod throughout North America. It is a mild-flavored fish typically found in the Pacific Ocean off the northern coast.

    Rockfish is also a great source of lean protein, because a serving of 5 ounces provides almost 2/3 of the daily protein requirements for adults. It’s also very low calorie, which is awesome!

    Over the years I’ve cooked rockfish many different ways, and we have enjoyed them all. Here’s how to make THIS recipe for batter-fried rockfish.

    Scroll Down For A Printable Recipe Card At The Bottom Of The Page

    Prepare The Rockfish

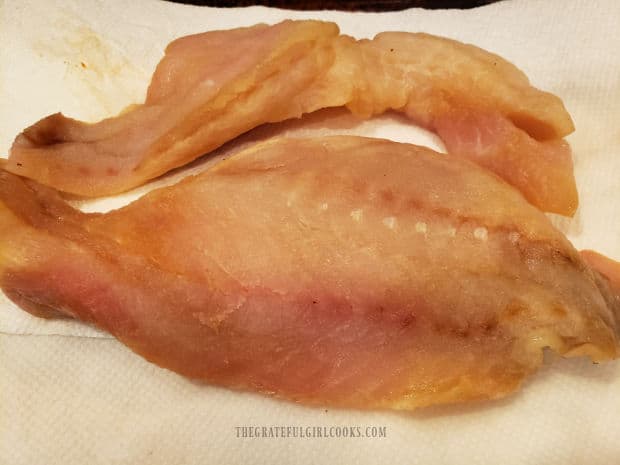
    This recipe is tailored to create two servings of batter-fried rockfish. You will need two rockfish fillets (no skin), about 5 ounces each.

    Pat the pieces of rockfish dry with paper towels to remove any excess moisture. Set aside.

    Two rockfish fillets are patted dry using paper towels.

    Make The Batter For The Fish

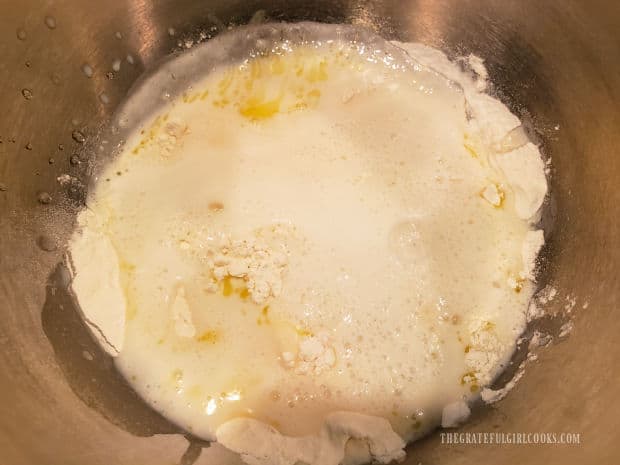
    In a medium sized bowl, whisk flour, baking powder, milk, beer (or club soda) and olive oil together until combined and lump-free. This batter will be the consistency of slightly thinned yogurt. Set aside.

    A wet, thin batter is combined to help coat the fish fillets.

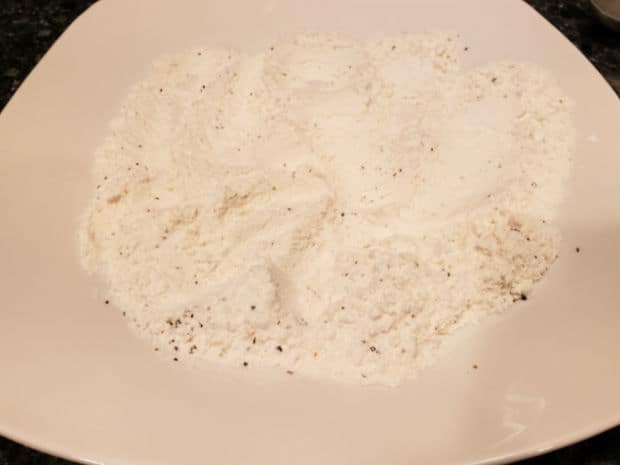
    Combine flour, salt and pepper together on a large dinner plate. These dry ingredients will be used as part of the battering process. Place the plate on the kitchen counter, then put the wet batter mixture right next to it.

    You need the plate and bowl close together, because you will be dipping fish fillets in each one, and don’t want to “drip” all over the kitchen!

    Flour, salt and pepper will coat the fish fillets before battering them.

    Time To Batter The Rockfish

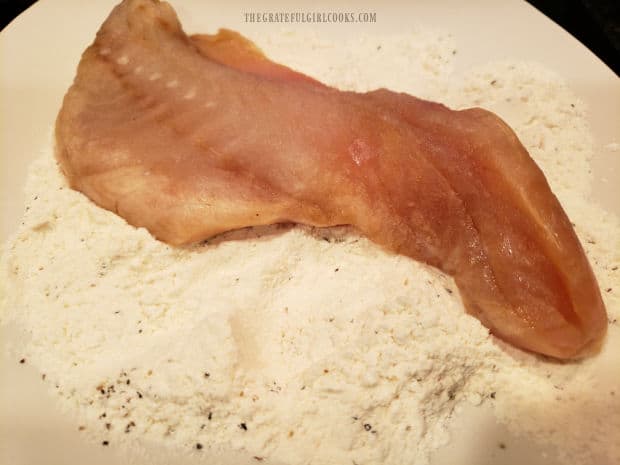
    Dip the fish fillets, one at a time into the flour mixture on the plate. Turn to coat all sides with the seasoned flour, then shake off any excess flour.

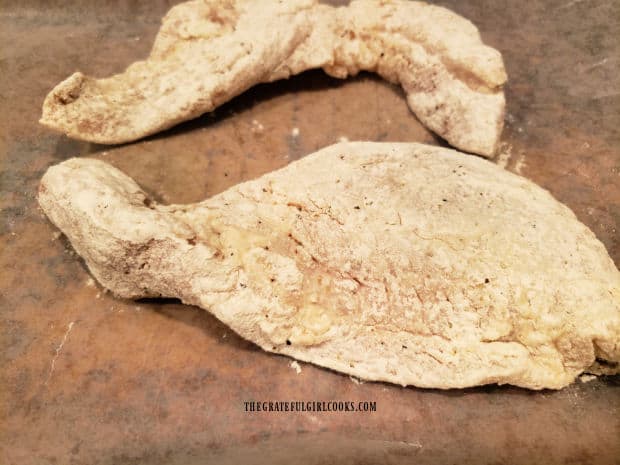
    Place the fish on a piece of wax paper or baking sheet, and then repeat the process with the other fillet.

    A rockfish fillet is coated in a seasoned flour mixture on all sides.Flour-coated fish fillets rest on baking sheet before battering.

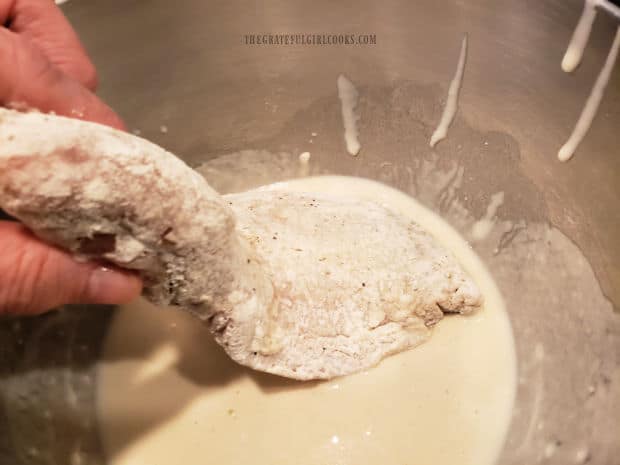
    Now dip each piece of floured fish in the wet batter, one at a time and turn, to fully coat the fish with the wet batter. Let any of the excess liquid drip back into the bowl.

    Immediately roll this piece of fish back in the flour mixture, and set back on the baking sheet (or wax paper). Repeat this with the other fillet. Once they have been coated with flour/wet batter/flour, they’re ready to be fried.

    A flour-coated rockfish fillet is covered with a wet beer batter on all sides.

    Fry The Battered Rockfish

    Heat oil (about an inch deep) in an electric skillet or large skillet on Medium-High heat until it is very hot (but not smoking!).

    Check the temp with a digital food thermometer if you have one. The oil temperature should be right at 350°F. for best frying temperature.

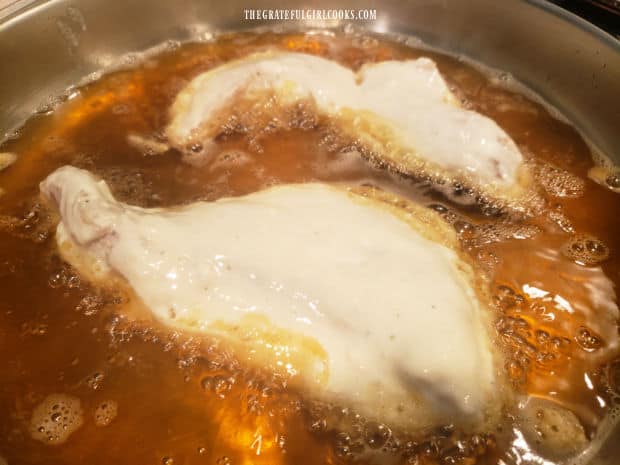
    Place each of the batter-coated fillets into the hot oil. The oil should bubble and sizzle when you add them. Be very careful when adding the fish to the oil, because it is very HOT!

    TIP: If you are making a larger quantity, be sure to not overcrowd the fillets in the skillet. You may need to cook the fish in batches for the best results.

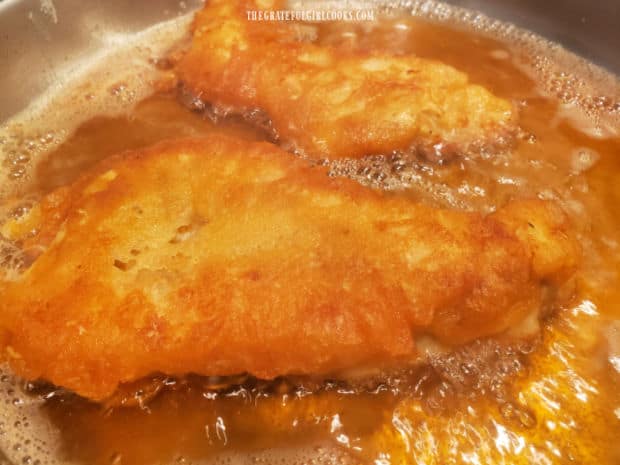
    The fillets fry in hot oil until browned on the bottom and then flipped over.

    Cook the fish without disturbing them for 4 minutes, and then carefully turn the rockfish over to the other side.

    Continue cooking for another 3-4 minutes, or until fully cooked through. NOTE: The cooking time may vary slightly depending on the thickness of the fish fillets you are using.

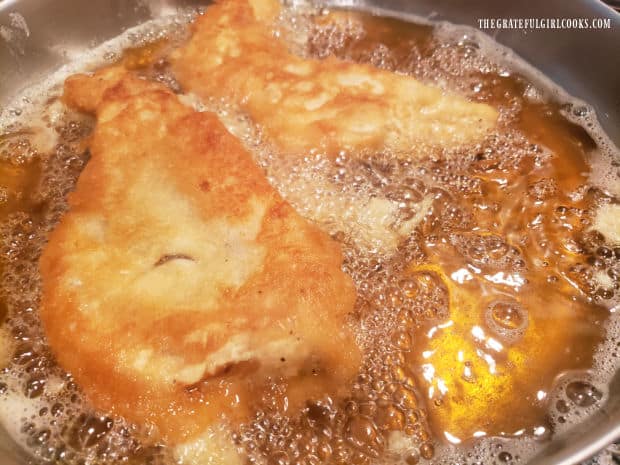
    When done, the fish should be cooked all the way through and be golden brown and crispy on both sides.

    Both sides of the rockfish cook until golden brown and crispy.When done, the batter-fried rockfish is nicely browned on all sides.

    Drain And Serve The Batter-Fried Rockfish

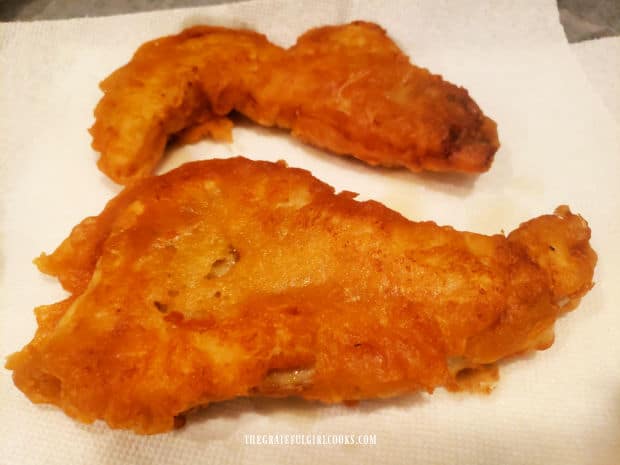
    Transfer the batter-fried rockfish to paper towels, to help absorb any excess oil remaining on the outside of the fish.

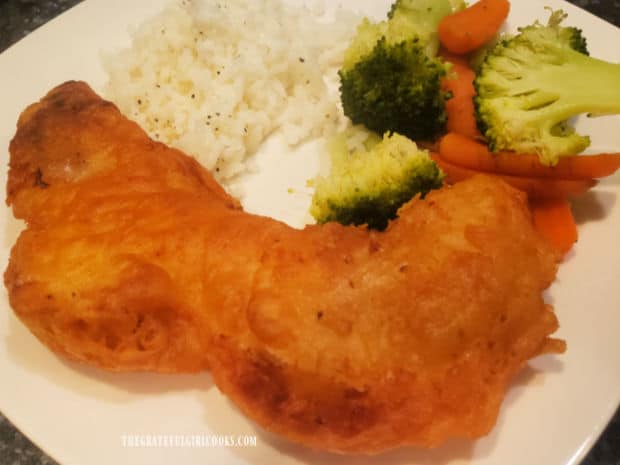
    Serve the batter-fried rockfish immediately with your favorite side dishes and enjoy this crispy dish. Add a slice of lemon to each piece of fish, to squeeze the juice on top, if desired!

    The fish can also be served with tartar sauce and/or malt vinegar on the side, for added flavor, to suit your taste. Enjoy!

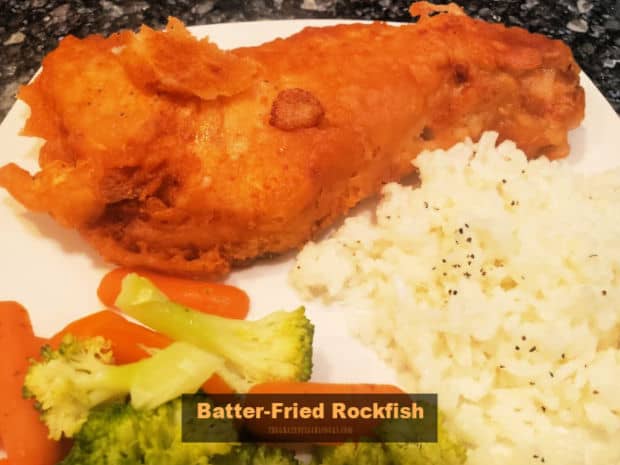
    Two batter-fried rockfish fillets drain on paper towels after cooking.A piece of batter-fried rockfish, served with rice and mixed vegetables.

    I hope you enjoy this meal for two, and trust you’ll enjoy the batter-fried rockfish as much as we do! In reality, it’s such a simple recipe, but it is really quite delicious.

    Thanks for stopping by, and I invite you to come back again soon for more delicious recipes. Take care, may God bless you, and have a GREAT day!

    Looking For More ROCKFISH Recipes?

    You can find ALL of my recipes in the Recipe Index, which is located at the top of the page. I have a great variety of delicious rockfish recipes for you to choose from, including:

    Want More Recipes? Get My FREE Newsletter!

    I publish a newsletter 2 times per month (1st and 15th) with lots of recipes, tips, etc..
    Would you like to join our growing list of subscribers?

    There is a Newsletter subscription box on the top right (or bottom) of each blog post, depending on the device you use.
    You can submit your e-mail address there, to be added to my mailing list.

    Find Me On Social Media:

    Facebook page: The Grateful Girl Cooks!
    Pinterest:
    The Grateful Girl Cooks!
    Instagram:
    jbatthegratefulgirlcooks

    Author's signature

    ↓↓ PRINTABLE RECIPE BELOW ↓↓

    0 from 0 votes
    Batter-Fried Rockfish
    Prep Time
    10 mins
    Cook Time
    8 mins
    Total Time
    18 mins
     

    Batter-Fried Rockfish for two is a simple, yet delicious dish! Fresh rockfish fillets are coated with beer batter, then cooked until crispy!

    Category: Main Dish, Seafood
    Cuisine: American
    Keyword: batter-fried rockfish
    Servings: 2
    Calories Per Serving: 382 kcal
    Author: JB @ The Grateful Girl Cooks!
    Ingredients
    • 10 ounces rockfish fillets = 2 fillets, about 5 oz. each
    For Dry Ingredients:
    • ½ cup all purpose flour
    • ½ teaspoon salt
    • ½ teaspoon pepper
    For Wet Batter:
    • ½ cup all purpose flour
    • ¾ teaspoon baking powder
    • 4 Tablespoons beer (can substitute club soda)
    • Tablespoons low-fat milk (1%)
    • ¼ teaspoon extra virgin olive oil
    • vegetable oil for frying about 1" deep in skillet
    Instructions
    1. Pat rockfish fillets dry with paper towels to remove excess moisture. Set aside.

    2. Whisk flour, baking powder, milk, beer (or club soda), olive oil in medium bowl until combined/lump-free. Batter will be consistency of thin yogurt. Set aside.

    3. Combine then spread flour, salt and pepper on large dinner plate. Set plate on kitchen counter, with bowl of wet batter mixture next to it.

    4. Dip fish fillets (1 at a time) into the flour mixture on plate. Turn to coat all sides. Place fish on wax paper or baking sheet; repeat with other fillet.

    5. Dip floured fillets in wet batter in bowl (1 at a time). Turn to fully coat all sides. Let any excess batter drip back into the bowl. Immediately roll battered fillet back in flour mixture then put back on baking sheet (or wax paper). Repeat with other fillet. Once coated with flour/wet batter/flour, they're ready to be fried.

    6. Heat oil (1" deep) in an electric skillet (350℉) or a large skillet on Medium-High until very hot (but not smoking). Check oil temp with food thermometer. Oil temp. should be 350°F. for best frying conditions. Place batter-coated fillets into hot oil. Oil should bubble/sizzle when fish is added (it's HOT!).

    7. Cook fish (without disturbing) for 4 minutes; carefully flip fillet to the other side. Continue cooking another 3-4 minutes, or until fully cooked through. NOTE: Cooking time may vary slightly depending on thickness of fillets you use. When done, fish should be cooked all the way through and golden brown on all sides.

    8. Drain fish on paper towels, then serve immediately with lemon slices, tartar sauce and/or malt vinegar on the side, if desired. Enjoy!

    Recipe Notes

    NOTE: The oil used to fry the fish in is not calculated in the caloric calculation, because the amount used may vary depending on the size skillet used.

    Nutrition Facts
    Batter-Fried Rockfish
    Amount Per Serving (1 five oz. fillet)
    Calories 382 Calories from Fat 27
    % Daily Value*
    Fat 3g5%
    Saturated Fat 1g6%
    Trans Fat 0.03g
    Polyunsaturated Fat 1g
    Monounsaturated Fat 1g
    Cholesterol 72mg24%
    Sodium 700mg30%
    Potassium 820mg23%
    Carbohydrates 51g17%
    Fiber 2g8%
    Sugar 2g2%
    Protein 33g66%
    Vitamin A 75IU2%
    Calcium 131mg13%
    Iron 4mg22%
    * Percent Daily Values are based on a 2000 calorie diet.

    Here’s one more to pin on your Pinterest boards!Batter-Fried Rockfish for two is a simple, yet delicious dish! Fresh rockfish fillets are coated with beer batter, then cooked until crispy!


    Dover Sole Mediterranean Style

    Dover Sole Mediterranean Style is a delicious dish with fillets baked on zucchini, and topped with tomatoes, capers, olives and Parmesan.
    Dover Sole Mediterranean Style is a delicious dish with fillets baked on zucchini, and topped with tomatoes, capers, olives and Parmesan.

    A lot of information has been published lately on social media explaining why a Mediterranean-inspired way of eating (or typical diet) is often a very healthy choice.

    While I do not follow a Mediterranean diet, I have found many delicious low-fat recipes from this region in my cookbooks and food magazines, and we like them very much!

    This recipe for Dover Sole Mediterranean Style is one we really, truly love. I found the original recipe in one of my cookbooks, made several ingredient changes, and ended up with this recipe we enjoy a lot!

    Overall it is a very simple recipe to make, and the fish has GREAT flavor, thanks to zucchini, garlic, tomatoes, onions, kalamata olives, capers, lemon juice, green bell peppers and Parmesan cheese! Here’s how to make it.

    Scroll Down for A Printable Recipe Card At The Bottom Of The Page

    Pat The Dover Sole Dry

    The first thing you will need to do is preheat your oven to 400°F. ( 204.4°C.). After that, pat the Dover sole fillets very dry using paper towels.

    For this recipe you will need four boneless, skinless fillets, each weighing between 4-6 ounces each. Once dry, set the fish aside.

    Four Dover sole fillets are patted dry using paper towels.

    Sauté The Veggies

    Heat 2 teaspoons olive oil in a large skillet on Medium-Low heat (can use baking spray as a substitute, if desired). Add sliced zucchini, onion, green pepper, and minced garlic to the skillet once the oil is hot.

    Cook the veggies on Medium-Low heat, stirring often, until they become crisp-tender (approx. 3-4 minutes).

    Zucchini slices, onions, garlic and green peppers are cooked in olive oil.When the zucchini becomes crisp-tender, they are done cooking.

    Prepare The Fish And Veggies For Baking

    Transfer the zucchini mixture out of the skillet and place them in a 9″ x 13″ baking dish, spacing them evenly in a single layer.

    Lay the fish fillets on top of the zucchini (again in a single layer) in the baking dish. Set the baking dish aside.

    The zucchini mixture is placed in baking dish, in a single layer.Dover sole fillets are placed on top of the zucchini slices in pan.

    Make A Mediterranean Topping For The Dover Sole

    Now it’s time to make the topping for the fish! Place sliced kalamata olives, a can of diced tomatoes, capers, and fresh lemon juice in a small bowl, and stir to combine.

    Evenly spoon the sauce on top of each of the Dover sole fillets in the baking dish. Cover the fish as much as possible with the sauce.

    A sauce is made with diced tomatoes, olives, capers, sugar and lemon juice.Sauce is divided evenly over the top of each piece of fish in the baking dish.

    Bake The Dover Sole Then Add Parmesan Cheese

    Cover the pan tightly with aluminum foil and bake at 400°F. ( 204.4°C.) for 22-25 minutes, OR until the fish flakes easily with a fork. Remove the baking dish from the oven.

    Discard the foil. Sprinkle the top of each of the fillets with finely grated Parmesan cheese, and put the pan back into the oven (uncovered) for 5 more minutes.

    The Dover Sole Mediterranean Style is done cooking when the Parmesan cheese has fully melted. Remove the pan from the oven. 

    Grated Parmesan cheese is sprinkled on top of the baked fish.The Parmesan has melted on top of the Dover Sole Mediterranean Style.

    Time To Serve Dover Sole Mediterranean Style

    Use a large slotted spatula to transfer the fish (and the zucchini mixture underneath each piece) to individual serving plates.

    TIP: Quite a bit of liquid will cook out of the zucchini while baking. Using a slotted spatula to remove the fish and zucchini from the pan lets that extra liquid drip back into the pan!

    Serve and enjoy the Dover Sole Mediterranean Style! It tastes delicious and we usually serve it alongside steamed rice!

    One serving of Dove Sole Mediterranean Style on a plate, with rice on the side.

    I hope you will give this delicious seafood recipe a try, and trust you’ll enjoy it as much as we do. It has a lot of flavor, and is fairly low in calories, too!

    Thank you for stopping by, and I invite you to come back soon for more family-friendly recipes. Take care, may God bless you, and have a GREAT day!

    Looking For More DOVER SOLE Recipes?

    You can find ALL of my recipes in the Recipe Index, which is located at the top of the page. I have  some delicious recipes featuring Dover Sole, including:

    Want More Recipes? Get My FREE Newsletter!

    I publish a newsletter 2 times per month (1st and 15th) with lots of recipes, tips, etc..
    Would you like to join our growing list of subscribers?

    There is a Newsletter subscription box on the top right (or bottom) of each blog post, depending on the device you use.
    You can submit your e-mail address there, to be added to my mailing list.

    Find Me On Social Media:

    Facebook page: The Grateful Girl Cooks!
    Pinterest:
    The Grateful Girl Cooks!
    Instagram:
    jbatthegratefulgirlcooks

    Author's signature

    Recipe adapted from: “The Essential 450 Best Mediterranean Diet Recipes” (Kindle edition), published in 2016 by TopFlight Cookbooks

    ↓↓ PRINTABLE RECIPE BELOW ↓↓

    0 from 0 votes
    Dover Sole Mediterranean Style
    Prep Time
    15 mins
    Cook Time
    30 mins
    Total Time
    45 mins
     

    Dover Sole Mediterranean Style is a delicious dish with fillets baked on zucchini, and topped with tomatoes, capers, olives and Parmesan.

    Category: Main Dish, Seafood
    Cuisine: Mediterranean
    Keyword: dover sole, Mediterranean
    Servings: 4
    Calories Per Serving: 257 kcal
    Author: JB @ The Grateful Girl Cooks!
    Ingredients
    • 2 teaspoons extra virgin olive oil
    • 2 medium zucchini cut in ½" thick, round slices
    • 2 Tablespoons green bell pepper (finely chopped)
    • 1 Tablespoon yellow onion (finely chopped)
    • 1 teaspoon minced garlic
    • 20 ounces Dover sole fillets (4 fillets about 5 oz. each)
    • 7 ounces diced tomatoes (canned)
    • 3 ounces sliced kalamata olives *approx. 25 pitted olives, sliced
    • 2 teaspoons capers drained/rinsed
    • ½ teaspoon granulated sugar
    • 1 teaspoon fresh lemon juice
    • ¾ cup freshly grated Parmesan cheese
    Instructions
    1. Preheat oven to 400°F. ( 204.4°C.). Pat fish fillets dry using paper towels. Set aside.

    2. Heat olive oil in large skillet on Medium-Low heat. Add zucchini, onion, green pepper and garlic once oil is hot. Cook on Medium-Low heat, stirring often, until the veggies are crisp-tender (approx. 3-4 minutes).

    3. Transfer zucchini mixture out of skillet; lay them evenly in a 9" x 13" baking dish in a single layer. Lay the fish fillets on top of the zucchini (in single layer) in the baking dish. Set dish aside.

    4. Place olives, tomatoes, capers, and lemon juice in a small bowl; stir to combine. Spoon sauce on top of each fish fillet. Cover fish as much as possible with sauce.

    5. Cover dish tightly with aluminum foil. Bake at 400°F. ( 204.4°C.) for 22-25 minutes, OR until fish flakes easily with a fork. Remove from oven. Discard foil. Sprinkle each fillet with Parmesan cheese. Put pan back in oven (uncovered) for 5 more minutes, or until Parmesan has melted. Remove pan from the oven. 

    6. Use a large slotted spatula to transfer fillets (and zucchini mixture underneath) to plates. TIP: Liquid will cook out of the zucchini while baking. Using a slotted spatula to remove fish and zucchini from the pan lets extra liquid drip back into the pan! Serve hot, and enjoy.

    Nutrition Facts
    Dover Sole Mediterranean Style
    Amount Per Serving (1 fillet with sauce)
    Calories 257 Calories from Fat 126
    % Daily Value*
    Fat 14g22%
    Saturated Fat 4g25%
    Trans Fat 0.01g
    Polyunsaturated Fat 1g
    Monounsaturated Fat 6g
    Cholesterol 80mg27%
    Sodium 802mg35%
    Potassium 636mg18%
    Carbohydrates 9g3%
    Fiber 2g8%
    Sugar 5g6%
    Protein 25g50%
    Vitamin A 565IU11%
    Vitamin C 27mg33%
    Calcium 240mg24%
    Iron 1mg6%
    * Percent Daily Values are based on a 2000 calorie diet.

    Here’s one more to pin on your Pinterest boards!Dover Sole Mediterranean Style is a delicious dish with fillets baked on zucchini, and topped with tomatoes, capers, olives and Parmesan.


    Szechuan Shrimp Stir-Fry

    Szechuan Shrimp Stir-Fry is a delicious meal for four, featuring shrimp, a variety of fresh vegetables, cooked in an Asian-inspired sauce.
    Szechuan Shrimp Stir-Fry is a delicious meal for four, featuring shrimp, a variety of fresh vegetables, cooked in an Asian-inspired sauce.

    If you’re looking for an absolutely delicious Asian main dish, may I suggest this one for Szechuan Shrimp Stir-Fry? I use a sauce from another of my recipes, then added my own touch using lots of fresh veggies to make a delicious stir-fry.

    Yes, the ingredient list is fairly long, but please don’t let that stop you from making this dish. Most of the ingredients are the variety of fresh veggies used and the ingredients for the sauce which gives everything its great flavor!

    The recipe itself is very straightforward to make: You stir the sauce ingredients together (super-easy), cook veggies, cook shrimp, combine all, heat and serve.

    Your prep work (chopping veggies, mostly) will result in an amazing Asian-inspired dinner I truly believe you’re gonna LOVE! Here’s how to make this yummy meal.

    Scroll Down For A Printable Recipe Card At The Bottom Of The Page

    Make The Szechuan Sauce

    The homemade Szechuan sauce is the powerhouse flavor for this entire dish, and it is incredibly simple to make.

    Stir dry sherry (or cooking sherry), soy sauce, sugar, salt, ketchup, sweet chili sauce, and red pepper flakes together in a bowl until the sugar dissolves. Set the bowl aside. That’s it… I told you it was EASY!

    A Szechuan sauce is made by combining several ingredients in a bowl.

    Cook The Vegetables

    Heat olive oil on Medium-High heat in a large skillet or wok. Once the oil is really hot (but not smoking) add the vegetables.

    For this recipe I use broccoli, celery, cauliflower, carrot, and red and yellow bell peppers. All of them are prepared ahead of time by separating into small florets, slicing and/or or chopping, which can be done ahead of time!

    Stir-fry the veggies for 4-5 minutes, stirring often until they become crisp-tender. Once done, transfer them out of the pan and into a bowl. Set aside.

    Don’t rinse off the pan (or wok). This is the same pan you will finish the entire stir-fry in, so keep it handy on the stove top.

    A variety of chopped vegetables are stir-fried in hot oil in a pan.Stir-fried vegetables are cooked until slightly tender in pan.

    About The Shrimp

    I use frozen, tail-off, peeled and deveined pre-cooked large shrimp for this recipe, and thaw them. This is a very convenient way to save time and effort in preparing the shrimp!

    Once the shrimp have thawed, drain off any accumulated liquid, then pat them dry with paper towels before proceeding with the recipe.

    Frozen pre-cooked shrimp are thawed, then patted dry before cooking.

    On Your Mark, Get Set… And Go!

    Get all the ingredients ready to go before beginning to make the whole stir-fry. Once you’re at this point, the cooking will go very quickly, so it’s important to have everything ready to go!

    All ingredient components are ready to make the Szechuan shrimp stir-fry.

    Time To Make The Stir-Fry

    Heat olive oil on Medium-High in the large skillet (or wok). Add the shrimp, green onions, and minced ginger and cook, stirring often for 2-3 minutes.

    Add minced garlic to the shrimp, and continue to cook for another minute, stirring often so the garlic doesn’t burn and become bitter.

    Now add the previously cooked veggies back into the skillet, and stir to combine these ingredients. Cook until heated through (1-2 minutes).

    Shrimp are stir-fried with green onions, fresh ginger, and garlic.The cooked vegetables are added back into the stir-fried shrimp.

    Pour the Szechuan sauce into the skillet, and stir, to fully coat all the shrimp and vegetables with sauce. Continue to cook for about 1-2 minutes, or until everything is fully heated through.

    Once heated through, the Szechuan Shrimp Stir-Fry is ready to serve and be enjoyed!

    Szechuan sauce is added to the vegetables and shrimp in pan.Once heated through, the Szechuan Shrimp Stir-Fry is ready to serve.

    Serve The Szechuan Shrimp Stir-Fry

    Serve the stir-fry over hot steamed rice OR cooked noodles, whichever you prefer. There is enough stir-fry for four servings, so divide it evenly between four bowls or plates.

    OPTIONAL GARNISH: If desired, garnish each portion with white sesame seeds and/or additional sliced green onions before serving.

    We enjoy Szechuan shrimp stir-fry served over steamed white rice. The well-seasoned stir-fry pairs well with bland white rice, which also soaks up some of the sauce!

    A white bowl with white rice, topped with the Szechuan Shrimp Stir-Fry.

    I really hope you enjoy this recipe… we sure do! It will keep for 1-2 days in the refrigerator after cooking, and can easily be reheated in a microwave.

    Thank you for stopping by, and I invite you to come back soon for more family-friendly recipes. Take care, may God bless you, and have a GREAT day!

    Looking For More SHRIMP Recipes?

    You can find ALL of my recipes in the Recipe Index, located at the top of the page. I have a nice variety of recipes featuring shrimp, including:

    Want More Recipes? Get My FREE Newsletter!

    I publish a newsletter 2 times per month (1st and 15th) with lots of recipes, tips, etc..
    Would you like to join our growing list of subscribers?

    There is a Newsletter subscription box on the top right (or bottom) of each blog post, depending on the device you use.
    You can submit your e-mail address there, to be added to my mailing list.

    Find Me On Social Media:

    Facebook page: The Grateful Girl Cooks!
    Pinterest:
    The Grateful Girl Cooks!
    Instagram:
    jbatthegratefulgirlcooks

    Author's signature

    ↓↓ PRINTABLE RECIPE BELOW ↓↓

    0 from 0 votes
    Szechuan Shrimp Stir-Fry
    Prep Time
    15 mins
    Cook Time
    10 mins
    Total Time
    25 mins
     

    Szechuan Shrimp Stir-Fry is a delicious meal for four, featuring shrimp, a variety of fresh vegetables, cooked in an Asian-inspired sauce.

    Category: Main Dish, Seafood
    Cuisine: Asian
    Keyword: Szechuan shrimp stir-fry
    Servings: 4
    Calories Per Serving: 237 kcal
    Author: JB @ The Grateful Girl Cooks!
    Ingredients
    For Szechuan Sauce:
    • 2 Tablespoons dry sherry or sherry cooking wine
    • 2 Tablespoons soy sauce
    • Tablespoons ketchup
    • 2 Tablespoons sweet chili sauce (i.e. Mae Ploy)
    • 2 teaspoons granulated sugar
    • 1 teaspoon red chili pepper flakes
    • ½ teaspoon salt
    For Vegetables:
    • 1 Tablespoon olive oil
    • ¾ cup broccoli florets
    • ½ cup cauliflower florets
    • ½ cup sliced celery
    • 1 medium carrot peeled, thinly sliced
    • ½ red bell pepper chopped
    • ½ yellow bell pepper chopped
    For Shrimp:
    • 1 pound large cooked shrimp peeled, deveined, tail off
    • 1 Tablespoon olive oil
    • ¼ cup sliced green onion (stem and bulb, thinly sliced)
    • 2 Tablespoons fresh minced ginger
    • 2 teaspoons minced garlic
    For Optional Garnish: sesame seeds/ additional green onion slices
      Instructions
      1. Stir sherry, soy sauce, sugar, salt, ketchup, sweet chili sauce, and red pepper flakes together in a bowl until sugar dissolves. Set aside.

      2. Heat oil on Medium-High heat in large skillet or wok. Once hot (but not smoking) add vegetables. Stir-fry 4-5 minutes, stirring often until they're crisp-tender. Transfer veggies out of skillet into a bowl. Set aside. Don't rinse pan (or wok).

      3. Pat thawed, drained shrimp dry with paper towels.

      4. Heat oil on Medium-High in large skillet (or wok). Add shrimp, green onions, and minced ginger; cook, stirring often, for 2-3 minutes. Stir in minced garlic; continue to cook for 1 minute, stirring often so garlic doesn't burn. Add cooked veggies, stirring until combined. Cook until ingredients are heated through (1-2 minutes).

      5. Pour sauce into skillet and stir, to coat shrimp/vegetables with sauce. Continue to cook 1-2 minutes, or until everything is heated through. Remove from heat.

      6. Serve over hot rice OR cooked noodles. OPTIONAL: If desired, garnish each serving with sesame seeds and/or additional sliced green onions. Enjoy!

      Recipe Notes

      NOTE: Caloric calculation does not include rice or noodles, as the type or quantity you use may vary.
      Nutrition Facts
      Szechuan Shrimp Stir-Fry
      Amount Per Serving (1 (1/4 of total))
      Calories 237 Calories from Fat 72
      % Daily Value*
      Fat 8g12%
      Saturated Fat 1g6%
      Trans Fat 0.01g
      Polyunsaturated Fat 1g
      Monounsaturated Fat 5g
      Cholesterol 183mg61%
      Sodium 925mg40%
      Potassium 643mg18%
      Carbohydrates 17g6%
      Fiber 2g8%
      Sugar 10g11%
      Protein 25g50%
      Vitamin A 3465IU69%
      Vitamin C 71mg86%
      Calcium 110mg11%
      Iron 1mg6%
      * Percent Daily Values are based on a 2000 calorie diet.

      Here’s one more to pin on your Pinterest boards!Szechuan Shrimp Stir-Fry is a delicious meal for four, featuring shrimp, a variety of fresh vegetables, cooked in an Asian-inspired sauce.

      Stuffed Dover Sole For Two

      Stuffed Dover Sole For Two features rolled fillets filled with rice, cheese and broccoli, covered with a lemon butter sauce and baked. Yummy!
      Stuffed Dover Sole For Two features rolled fillets filled with rice, cheese and broccoli, covered with a lemon butter sauce and baked. Yummy!

      Do you enjoy Dover sole? We like the Dover sole fillets, because they are mild in flavor, inexpensive to buy, and are very adaptable to the many ways they can be prepared.

      Today I want to share a simple, but delicious recipe for Stuffed Dover Sole For Two, and hope you enjoy it like we do. With a little bit of pre-planning, this can be a very quick meal to get on the table, and it tastes and looks great, too!

      The recipe makes four rolled and stuffed pieces of Dover sole. We usually serve two fillets per person because once rolled, the fish fillets are small, but you could serve four people (1 fillet per person) if you want smaller servings. Here’s how to make this dish.

      Scroll Down For A Printable Recipe Card At The Bottom Of The Page

      Make The Simple Lemon Butter Sauce

      Preheat your oven to 350°F. before beginning, because the prep for the fish only takes a few minutes. Grease or spray a medium baking dish on the bottom, and set aside. 

      Now let’s make the sauce. In a small bowl, stir lemon juice, melted butter, salt and black pepper together until fully combined. Set the bowl aside while you prepare the stuffing for the fish.

      You will use part of this sauce in the filling and then use the remaining sauce to drizzle on the fish roll-ups before they are baked.

      Lemon juice, melted butter, salt and pepper combine to make the sauce.

      Combine The Stuffing Ingredients

      Now you’re ready to make the filling for the fish fillets. This rice, cheese, and broccoli stuffing will be rolled up in each of the fish fillets before baking.

      In a separate medium-sized bowl, combine cooked broccoli, cooked brown (or white) rice, grated cheese, salt, pepper, and ½ TABLESPOON of the lemon butter sauce. Stir gently until these ingredients have been combined.

      TIP: If possible, pre-cook the broccoli and rice for the dish early in the day (or the night before). I like to do that, so when I’m ready to make our dinner, they’re already cooked, and this dish takes less prep time.

      Cooked rice, broccoli, grated cheese and spices for stuffing, in a metal bowl.After mixing, the stuffing ingredients are ready to add to the fish.

      Prepare The Dover Sole For Baking

      Lay the fish fillets out on several thicknesses of paper towels, and blot the fish on both sides, to remove excess moisture.

      Divide the rice/broccoli/cheese mixture evenly down the middle of each fillet, covering the entire length of the piece of fish. It typically averages out to approximately ½ cup of filling per piece of fish.

      Dover sole fillets on paper towels, to absorb excess moisture.Broccoli, cheese and rice mixture is used to top the Dove sole filets.

      Into The Baking Dish They Go

      Carefully roll up each piece of fish starting with the short end, then place them into the prepared baking dish, with the seam side DOWN.

      If any of the stuffing falls out while transferring the fish to the baking dish, just pick it up and put it back inside! Place the fish roll-ups side by side in the dish, because they will give support and hold together better while baking.

      Evenly divide and pour (or brush) the remaining butter mixture over the top of the fish fillets. Now the Stuffed Dover Sole for Two is ready for the oven!

      Fish fillets are rolled around the stuffing and placed in greased baking dish.Lemon butter sauce is drizzled over Stuffed Dover Sole For Two before baking.

      Bake The Fish

      Bake the fish at 350°F for 20-25 minutes (uncovered) OR until the fish flakes easily with a fork. Check the fish for “doneness” at 20 minutes.

      Depending on the thickness of the fillets used, it may take 3-5 more minutes to finish cooking all the way through. The fish will be pale and opaque on the surface once fully cooked.

      Remove the baking dish from the oven. Lightly sprinkle the top of each piece with paprika. The paprika adds extra color and flavor to the Dover sole, so don’t skip this final step.

      Paprika is sprinkled over the Stuffed Dover Sole For Two, once baked.

      Serve The Stuffed Dover Sole For Two

      Use a spatula to transfer the Stuffed Dover Sole For Two onto serving plates. We serve two fillets per person for a filling meal (they’re fairly small once rolled and baked), but the serving size is your choice.

      Serve with lemon slices on the side, so the juice can be squeezed over each piece, and then enjoy this simple, delicious dish.

      Stuffed Dover Sole For Two has a simple, classic flavor I believe you’ll appreciate. The small amount of rice, cheese, broccoli, etc. in the filling adds additional color, texture, nutrients and flavor to the fish.

      Lemon slices are used to garnish the Stuffed Dover Sole For Two on the plate.

      I really hope you have the opportunity to try this recipe or Stuffed Dover Sole For Two. If you choose to pre-cook the rice and broccoli ahead of time, this is a really quick meal to pull together at the last minute!

      Thank you for stopping by, and I invite you to come back again soon for more family-friendly recipes. Take care, may God bless you, and have a GREAT day!

      Looking For More SEAFOOD Recipes?

      You can find ALL of my recipes in the Recipe Index, which is located at the top of the page. I have a wonderful variety of seafood recipes to choose from, including:

      Want More Recipes? Get My FREE Newsletter!

      I publish a newsletter 2 times per month (1st and 15th) with lots of recipes, tips, etc..
      Would you like to join our growing list of subscribers?

      There is a Newsletter subscription box on the top right (or bottom) of each blog post, depending on the device you use.
      You can submit your e-mail address there, to be added to my mailing list.

      Find Me On Social Media:

      Facebook page: The Grateful Girl Cooks!
      Pinterest:
      The Grateful Girl Cooks!
      Instagram:
      jbatthegratefulgirlcooks

      Author's signature

      Recipe adapted from: https://www.lovetoknow.com/food-drink/recipes/filet-sole-recipes

      ↓↓ PRINTABLE RECIPE BELOW ↓↓

      0 from 0 votes
      Stuffed Dover Sole For Two
      Prep Time
      10 mins
      Cook Time
      20 mins
      Total Time
      30 mins
       

      Stuffed Dover Sole For Two features rolled fillets filled with rice, cheese and broccoli, covered with a lemon butter sauce and baked. Yummy!

      Category: Main Course
      Cuisine: American
      Keyword: stuffed Dover sole
      Servings: 2 (two fillets per serving)
      Calories Per Serving: 396 kcal
      Author: JB @ The Grateful Girl Cooks!
      Ingredients
      For Butter Sauce:
      • 1 Tablespoon butter, melted **DIVIDED USE**
      • ½ Tablespoon fresh lemon juice
      • ½ teaspoon salt
      • ¼ teaspoon ground black pepper
      For Fish:
      • 16 ounces Dover sole fillets = four (4 oz. each) boneless, skinless fillets
      • 1 cup cooked broccoli florets chopped, cooked, drained
      • ½ cup cooked brown rice can substitute white rice
      • ½ cup grated cheddar cheese
      • paprika to lightly sprinkle on baked fish.
      • 2 thin slices lemon each cut in half, for garnish
      Instructions
      1. Preheat oven to 350°F. Grease/spray a medium baking dish on the bottom; set aside. 

      2. In a small bowl, stir lemon juice, melted butter, salt and pepper until combined. Set bowl aside.

      3. In a separate medium-sized bowl, combine broccoli, rice, cheddar cheese, salt, pepper, and HALF (½)Tablespoon (only) of the lemon/butter sauce; stir until combined. TIP: If possible, pre-cook broccoli and rice early in the day (or the night before), for less prep time.

      4. Lay fish fillets out on paper towels; blot fish on both sides, to remove excess moisture. Divide rice/broccoli/cheese mixture evenly down the middle of each fillet, covering length of the fish. It should be about ½ cup filling per fillet.

      5. Carefully roll up each fillet starting with the short end. Place in prepared baking dish seam side DOWN. If any stuffing falls out while transferring the fillets, just pick it up and put it back inside! Place fish roll-ups side by side in dish, because they will support and hold together better while baking. Evenly divide and pour (or brush) remaining butter mixture over the top of the fish.

      6. Bake (uncovered) at 350°F for 20-25 minutes OR until fish flakes easily with a fork. Check it at 20 minutes, then cook more, if necessary (depending on thickness of the fish). The fish will still be pale/opaque once fully cooked. Remove from the oven. Lightly sprinkle the top of each piece with paprika.

      7. Use a spatula to transfer fish to serving plates. Serve immediately, with lemon slices on the side, and enjoy!

      Nutrition Facts
      Stuffed Dover Sole For Two
      Amount Per Serving (2 fillets)
      Calories 396 Calories from Fat 180
      % Daily Value*
      Fat 20g31%
      Saturated Fat 10g63%
      Trans Fat 0.3g
      Polyunsaturated Fat 2g
      Monounsaturated Fat 5g
      Cholesterol 145mg48%
      Sodium 1010mg44%
      Potassium 577mg16%
      Carbohydrates 16g5%
      Fiber 2g8%
      Sugar 1g1%
      Protein 37g74%
      Vitamin A 818IU16%
      Vitamin C 43mg52%
      Calcium 277mg28%
      Iron 1mg6%
      * Percent Daily Values are based on a 2000 calorie diet.

      Here’s one more to pin on your Pinterest boards!Stuffed Dover Sole For Two features rolled fillets filled with rice, cheese and broccoli, covered with a lemon butter sauce and baked. Yummy!

      Salmon In Spinach Cream Sauce

      Salmon In Spinach Cream Sauce is a simple, decadent seafood dish you’ll LOVE! This recipe can be made in 15 minutes (using only 1 skillet).
      Salmon In Spinach Cream Sauce is a simple, decadent seafood dish you'll LOVE! This recipe can be made in 15 minutes (using only 1 skillet).

      If you’re looking for a simple salmon recipe that is easy, pretty quick to prepare, AND tastes wonderful, here it is!

      Boneless, skinless salmon fillets are pan-seared in hot oil until browned on both sides. They are served on top of (and garnished with) a easy-to-make creamy, garlic, spinach and sun-dried tomato sauce.

      The convenient thing is this entire dish can be made using only ONE skillet, which also makes for easy clean up. YES!!! I found the original recipe on the Harry and David blog, made a few changes, and we really have enjoyed this lovely meal.

      The salmon is super delicious, and it’s perfect for serving on a busy night, without investing a lot of time or trouble making it! That a winning combination in my book.

      The recipe as written below makes two servings, but is VERY EASY to adapt for more servings. Here’s how to make it.

      Scroll Down For A Printable Recipe Card At The Bottom Of The Page

      Prepare The Salmon Fillets

      Pat the salmon fillets dry using paper towels to absorb the moisture. Sprinkle seasoning salt on top of each piece, dividing it evenly between the fillets.

      Boneless, skinless salmon fillets are patted dry, then seasoned lightly.

      Heat olive oil in a skillet on Medium heat until it is very hot, but not smoking. Lay the salmon fillets in the hot skillet with the seasoned side down.

      Cook the salmon for 3-4 minutes without moving, then carefully turn the fillets to the other side, using a spatula. The salmon should be nicely browned.

      Continue to cook the salmon for another 3-4 minutes or until it is fully cooked through, and flakes easily. Transfer the salmon fillets to a platter and cover with foil, to keep them warm.

      Two salmon fillets cook, seasoned side down, in hot oil in a skillet.The salmon fillets are flipped over to cook the other side.

      Make The Spinach Cream Sauce

      Use the same skillet (without rinsing) to make the spinach cream sauce. Turn the heat down to LOW. Stir minced garlic into the hot skillet, and cook it for 30 seconds, stirring often so it doesn’t burn.

      Add baby spinach, heavy whipping cream, and chopped, sun-dried tomatoes. NOTE: The sun-dried tomatoes should be the type that are packed in olive oil. Lightly drain them and chop before adding them to the sauce.

      Toss gently until these ingredients are combined. Stir often and cook on LOW heat only until the spinach has wilted. This will only take 2-3  minutes (don’t let the cream boil).

      Sauce is made with garlic, whipping cream, spinach and sun-dried tomatoes.The sauce is done when the spinach has wilted in the skillet.

      Transfer the salmon fillets back into the skillet on top of the spinach cream sauce, and then cover the skillet with a lid or foil.

      Heat on LOW only until the salmon is re-heated through (1-2 minutes), being careful to not let the cream sauce boil.

      Cooked salmon fillets are put back into skillet on top of the spinach sauce.

      Serve The Salmon In Spinach Cream Sauce

      To serve the salmon in spinach cream sauce, spoon a small amount of the spinach sauce on the serving plate.

      Place a salmon fillet on top of the sauce, and then spoon additional spinach cream sauce on top of the fish. Repeat this with the other fillet (or fillets) and serve immediately.

      Serve the salmon in spinach cream sauce with your favorite sides while hot, and enjoy this wonderful, decadent looking main dish!  

      Salmon In Spinach Cream Sauce, served with rolls and peas on the side.A serving of salmon in spinach cream sauce, served on a white plate.

      I’m confident you’re going to like salmon in spinach cream sauce, because it not only LOOKS good, it IS good! I hope you (and those you love) really enjoy it!

      Thank you for taking time out of your busy day to stop by. I invite you to come back again soon for more family-friendly recipes. Take care, may God bless you, and have a GREAT day!

      Looking For More SALMON Recipes?

      You can find ALL of my recipes in the Recipe Index, which is located at the top of the page. I have many delicious salmon recipes you might enjoy checking out, including:

      Want More Recipes? Get My FREE Newsletter!

      I publish a newsletter 2 times per month (1st and 15th) with lots of recipes, tips, etc..
      Would you like to join our growing list of subscribers?

      There is a Newsletter subscription box on the top right (or bottom) of each blog post, depending on the device you use.
      You can submit your e-mail address there, to be added to my mailing list.

      Find Me On Social Media:

      Facebook page: The Grateful Girl Cooks!
      Pinterest:
      The Grateful Girl Cooks!
      Instagram:
      jbatthegratefulgirlcooks

      Author's signature

      Recipe adapted from: Christina Lane, via The Table, at https://www.harryanddavid.com/blog/cast-iron-salmon-recipe/

      ↓↓ PRINTABLE RECIPE BELOW ↓↓

      0 from 0 votes
      Salmon In Spinach Cream Sauce
      Prep Time
      5 mins
      Cook Time
      10 mins
      Total Time
      15 mins
       

      Salmon In Spinach Cream Sauce is a simple, decadent seafood dish you'll LOVE! This recipe can be made in 15 minutes (using only 1 skillet).

      Category: Entree-Seafood, Main Dish
      Cuisine: All Cuisines
      Keyword: salmon, spinach, cream sauce
      Servings: 2
      Calories Per Serving: 364 kcal
      Author: JB @ The Grateful Girl Cooks!
      Ingredients
      For Salmon:
      • 8 ounces boneless, skinless salmon fillets approx. 4 ounces per fillet
      • ½ teaspoon seasoning salt
      • 1 Tablespoon olive oil
      For Spinach Cream Sauce:
      • 1 teaspoon minced garlic
      • cups baby spinach (fresh)
      • ¼ cup sun-dried tomatoes (packed in oil) drained slightly and chopped
      • ¼ cup heavy whipping cream (OR half and half)
      • 1 pinch salt and pepper (1 pinch each) , to season sauce to taste
      Instructions
      1. Pat salmon dry with paper towels. Sprinkle salmon (top only) with seasoning salt.

      2. Heat olive oil in a skillet on Medium heat until very hot, but not smoking. Put salmon in skillet, seasoned side down. Cook 3-4 minutes, then carefully turn the fillets to the other side. Salmon should be nicely browned. Cook other side 3-4 minutes until fully cooked through, and flakes easily. Transfer salmon to a platter; cover with foil, to keep them warm.

      3. Use same skillet (without rinsing) to make spinach cream sauce. Turn heat down to LOW. Stir garlic into hot skillet; cook for 30 seconds, stirring often. Add spinach, whipping cream, and chopped, sun-dried tomatoes. Toss gently until combined. Stirring often, cook on LOW heat only until spinach has wilted. This takes 2-3  minutes (don't let cream boil).

      4. Carefully transfer salmon back into the skillet (on top of spinach cream sauce). Cover skillet with a lid or foil. Heat on LOW only until salmon is re-heated through (1-2 minutes), being careful to not let cream sauce boil.

      5. To serve, spoon a small amount of spinach sauce on a plate. Place a salmon fillet on top of the sauce. Spoon additional spinach cream sauce on top of the fish. Repeat with other fillet (or fillets); serve immediately while hot. Enjoy!

      Nutrition Facts
      Salmon In Spinach Cream Sauce
      Amount Per Serving (1 fillet + sauce)
      Calories 364 Calories from Fat 243
      % Daily Value*
      Fat 27g42%
      Saturated Fat 9g56%
      Polyunsaturated Fat 4g
      Monounsaturated Fat 11g
      Cholesterol 96mg32%
      Sodium 725mg32%
      Potassium 1015mg29%
      Carbohydrates 6g2%
      Fiber 2g8%
      Sugar 1g1%
      Protein 25g50%
      Vitamin A 4176IU84%
      Vitamin C 25mg30%
      Calcium 80mg8%
      Iron 2mg11%
      * Percent Daily Values are based on a 2000 calorie diet.

      Here’s one more to pin on your Pinterest boards!Salmon In Spinach Cream Sauce is a simple, decadent seafood dish you'll LOVE! This recipe can be made in 15 minutes (using only 1 skillet).

      Grilled Garlic Butter Halibut

      Grilled Garlic Butter Halibut is a simply seasoned, delicious dish cooked on a BBQ, and topped with mango peach salsa for serving.
      Grilled Garlic Butter Halibut is a simply seasoned, delicious dish cooked on a BBQ, and topped with mango peach salsa for serving.

      Today I want to share a delicious halibut dish that we love. Now… given the price of halibut these days, I must tell you we don’t have this too often, but when we do… it is fantastic!

      We love halibut, but unfortunately we don’t live in Alaska or go deep sea fishing to get it, so we must buy it at the store. Lately it is a fairly expensive piece of fish. My husband buys it at Costco (when we do buy it).

      I cut a big piece into smaller portions, which are perfect for this dish. That way it becomes less expensive per serving, and ends up costing per portion about the same as getting a sub sandwich or burger these days!

      It’s a treat to enjoy this delicious, firm and mild tasting white fish occasionally, and this is my favorite way I’ve come up with, to prepare it! We grill it outside, so summer is our favorite time to make grilled garlic butter halibut, especially if it’s NOT raining here in Oregon!

      The cooking method is easy and the garlic butter seasoning sauce is simple. Fresh chunky salsa topping and fresh lime juice add color and flavor to this wonderful dish! Here’s how to make it.

      Scroll Down For A Printable Recipe Card At The Bottom Of The Page

      Sauce And Salsa

      Melt butter in a small saucepan, then add garlic powder, seasoning salt, and black pepper. Stir to combine, then set the sauce aside. This will be used to season the fish on the grill.

      Melted butter, garlic powder, seasoning salt, and pepper are combined for sauce.

      You will also need a chunky salsa to garnish the fish for serving. I use store bought mango peach salsa to garnish the grilled halibut, because it has a mild, slightly fruity sweet taste.

      It tastes fantastic on the fish, and is incredibly convenient (and quick) to have it already made. We can find mango peach salsa at our local Fred Meyer store (Kroger). If you can find it, use it, because it’s absolutely delicious!

      You can also use your own favorite chunky homemade salsa or purchased chunky salsa, if desired, to garnish the fish. You will only need about 4 Tablespoons to spoon over the two halibut fillets.

      TIP: The salsa garnish adds a pop of color and flavor to this dish, so don’t skip this step, even if you prefer a spicy, traditional salsa.

      Mango peach salsa is used to garnish cooked halibut for serving.

      Prepare The Halibut And BBQ Grill For Cooking

      Pat the halibut fillets dry with a paper towel, to absorb any excess moisture. We use two boneless fillets, weighing a total of about 5 ounces each. They were also about 1″ thick.

      Two halibut fillets on a white plate, after being patted dry.

      Oil the BBQ grill grates to help keep the fish from sticking to the grill. My husband uses a wad of paper towels dipped in oil and tongs to quickly do this.

      The BBQ should be heated to medium-high If using a gas grill) and the briquettes (if using) should be red hot before adding the halibut fillets.

      The BBQ grill grates are lightly oiled before putting the halibut on the hot grill.

      Time To Grill The Halibut

      Lay the halibut fillets on the oiled, hot grill grates. Brush half the garlic butter sauce over the top of each fillet, then immediately cover the grill.

      Two halibut fillets are placed over hot coals on the BBQ.Two halibut fillets, brushed with garlic butter sauce, cooking on BBQ.

      Cook the halibut for 6-7 minutes without disturbing, then open the lid of the BBQ. Carefully turn the fish to the other side, using a spatula.

      The surface should now be golden brown. Immediately brush the fish with the remaining sauce. Cover the BBQ again.

      Cook the halibut for 3-5 more minutes, OR until the fish reaches an internal temperature of 145°F. Check the temperature after 3 minutes. Don’t overcook the halibut, as it can become dry.
      The halibut fillets are flipped halfway through cooking, and brushed with sauce.
      Serve The Grilled Garlic Butter Halibut

      To serve Grilled Garlic Butter Halibut, transfer the cooked fillets to serving plates. Spoon salsa over the top of each piece, and add a lime wedge on the side, to squeeze the juice over the fish.

      We enjoyed the grilled garlic butter halibut with fresh corn on the cob and Parmesan Crumb Sugar Snap Peas (from our garden) on the side.

      It all tastes FABULOUS, and the flaky halibut is colorful, flavorful and amazing!

      Grilled Garlic Butter Halibut served with mango peach salsa, and a lime wedge.Corn and snap peas served with Grilled Garlic Butter Halibut topped with salsa.

      I hope you will consider trying this delicious grilled garlic butter halibut. We absolutely LOVE this way to prepare halibut, when we have the opportunity to make it.

      Thanks for stopping by today, and I invite you to come back soon for more family-friendly recipes. Take care, may God bless you, and have a GREAT day!

      Looking For More SEAFOOD Recipes?

      You can find ALL of my recipes in the Recipe Index, which is located at the top of the page. I have some absolutely delicious seafood recipes you may enjoy, including:

      Want More Recipes? Get My FREE Newsletter!

      I publish a newsletter 2 times per month (1st and 15th) with lots of recipes, tips, etc..
      Would you like to join our growing list of subscribers?

      There is a Newsletter subscription box on the top right (or bottom) of each blog post, depending on the device you use.
      You can submit your e-mail address there, to be added to my mailing list.

      Find Me On Social Media:

      Facebook page: The Grateful Girl Cooks!
      Pinterest:
      The Grateful Girl Cooks!
      Instagram:
      jbatthegratefulgirlcooks

      Author's signature

      ↓↓ PRINTABLE RECIPE BELOW ↓↓

      0 from 0 votes
      Grilled Garlic Butter Halibut
      Prep Time
      5 mins
      Cook Time
      11 mins
      Total Time
      16 mins
       

      Grilled Garlic Butter Halibut is a simply seasoned, delicious dish cooked on a BBQ, and topped with mango peach salsa for serving.

      Category: Main Dish
      Cuisine: All Cuisines
      Keyword: grilled garlic butter halibut
      Servings: 2
      Calories Per Serving: 221 kcal
      Author: JB @ The Grateful Girl Cooks!
      Ingredients
      • 2 (5 ounce) halibut fillets 5 ounces each
      • Tablespoons butter
      • ¼ teaspoon garlic powder
      • ¼ teaspoon seasoning salt
      • teaspoon black pepper
      To Serve:
      • 4 Tablespoons mango peach salsa to garnish cooked halibut
      • 2 lime wedges to squeeze juice on halibut
      Instructions
      1. Oil BBQ grill grates to help keep the fish from sticking. My husband uses tongs and a wad of paper towels dipped in oil to quickly do this. BBQ should be heated to medium-high (If using gas grill), and briquettes (if using) should be red hot before adding halibut.

      2. Melt butter in a small saucepan; stir in garlic powder, seasoning salt, and black pepper until combined. Set sauce aside.

      3. Pat halibut fillets dry with a paper towel. Lay halibut on oiled, hot grill grates. Brush ½ the sauce over top of fillets; cover the grill.

      4. Cook for 6-7 minutes without disturbing, then open the lid. Carefully turn fish to other side, using a spatula. Brush surface with remaining sauce. Cover BBQ again. Cook 3-5 more minutes, OR until fish reaches an internal temperature of 145°F. Check temp. after 3 minutes; don't overcook halibut, (it becomes dry). When done, remove from grill for serving.

      5. To serve, transfer grilled fillets to plates. Spoon salsa over the top of each piece. Add a lime wedge on the side, to squeeze the juice over the fish. Serve, and enjoy!

      Nutrition Facts
      Grilled Garlic Butter Halibut
      Amount Per Serving (1 fillet + salsa garnish)
      Calories 221 Calories from Fat 99
      % Daily Value*
      Fat 11g17%
      Saturated Fat 6g38%
      Trans Fat 0.3g
      Polyunsaturated Fat 1g
      Monounsaturated Fat 3g
      Cholesterol 92mg31%
      Sodium 665mg29%
      Potassium 726mg21%
      Carbohydrates 4g1%
      Fiber 1g4%
      Sugar 2g2%
      Protein 27g54%
      Vitamin A 521IU10%
      Vitamin C 6mg7%
      Calcium 28mg3%
      Iron 1mg6%
      * Percent Daily Values are based on a 2000 calorie diet.

      Here’s one more to pin on your Pinterest boards!Grilled Garlic Butter Halibut is a simply seasoned, delicious dish cooked on a BBQ, and topped with mango peach salsa for serving.


      Parmesan Herb Baked Salmon

      Parmesan Herb Baked Salmon is an easy, delicious main dish you’ll love! Salmon fillets are topped with cheese, spices and garlic, then baked!
      Parmesan Herb Baked Salmon is an easy, delicious main dish you'll love! Salmon fillets are topped with cheese, spices and garlic, then baked!

      If you’re looking for an easy main dish that doesn’t take a lot of time to prepare, then Parmesan Herb Baked Chicken might be a recipe you’ll want to check out!

      We love salmon in our home, and make it about once a week, using various recipes and methods of cooking. It’s SO GOOD!

      Making this yummy dish is as simple as stirring up a cheesy herb topping, spreading it on pieces of salmon, wrapping them in foil, then baking until done. That’s it!

      The salmon fillets are covered with a topping that is made of Italian seasoning, Parmesan cheese, butter, lemon juice, garlic, salt, pepper, and fresh parsley. Cooking the salmon in foil pouches really helps to seal in flavor!
      The topping ingredients give the baked salmon lots of deliciousness! Here’s how to make this easy main dish.
      Scroll Down For A Printable Recipe Card At The Bottom Of The Page

      Prepare The Salmon Fillets

      Pat the salmon fillets dry, using paper towels to absorb excess moisture. I use skinless fillets when I make this recipe, but if you only have “skin-on”, that will be perfectly fine, too!

      Set the “dried” fillets aside while you make the herb and cheese topping.

      Two skinless salmon fillets laying on paper towels to absorb moisture.Using more paper towels to blot the excess moisture off the salmon fillets.

      Make The Parmesan Herb Topping

      To make the topping, place softened butter, lemon juice, minced garlic, Parmesan cheese, Italian seasoning, salt, pepper, and fresh chopped parsley in a small bowl.

      TIP: You want to use butter that is really soft (but NOT melted!), to bind all the ingredients together EASILY!

      Use a fork to mix these ingredients together. It should be easy to mix these ingredients together, thanks to the soft butter.

      Soft butter, parsley, parmesan, garlic and spices are placed in a small bowl.A fork is used to fully combine all the topping ingredients in the bowl.

      Keep combining the ingredients together until the butter has been completely blended in. The mixture will be thick and “slightly” crumbly.

      Parmesan cheese, garlic herb topping is combined and ready for the salmon.

      Add The Seasoned Topping To The Salmon 

      Place a large sheet of aluminum foil on a baking sheet, then spray the foil lightly with non-stick baking spray.

      NOTE: The foil will need to be large enough to completely cover and seal the fish inside when it’s time to bake.

      Lay the pieces of salmon on the foil, leaving a little bit of space between the pieces. Cover the top of the fish with the cheesy herb topping, dividing the mixture evenly between the two fillets.

      Two salmon fillets, laying on aluminum foil, covered with cheese herb topping.

      Cooking The Parmesan Herb Baked Salmon

      Bring the edges of the foil up and over the salmon, and crimp all edges tightly closed, to prevent air from escaping. 

      Foil pouch, with herb topped salmon fillets inside is sealed before baking.

      Place the baking sheet in a preheated oven. Bake the salmon at 425°F (218.3°C) for about 10-12 minutes.

      When done, carefully open the foil pouch, fully exposing the parmesan herb baked salmon.

      Turn the oven to BROIL, place the baking sheet about 6 inches from the broiler element, and broil for 1-2 minutes, to give the fish a nice light brown color.

      Keep an eye on the salmon as it broils, to ensure it doesn’t burn or overcook. Remove the salmon from the oven, and serve immediately.

      Two pieces of parmesan herb baked salmon, after baking.After broiling 1-2 minutes, the parmesan herb baked salmon is lightly browned.

      Serve The Parmesan Herb Baked Salmon

      Serve the parmesan herb baked salmon immediately after removing it from the oven. Transfer the salmon to individual plates. Drizzle with melted butter remaining in the foil pouch.

      If desired, garnish each piece with a sprinkle of Parmesan cheese, fresh parsley, and a lemon wedge. We enjoy this pop of citrus flavor when we squeeze lemon juice on the salmon!

      Parmesan herb baked salmon, served with rice and peas, on a white plate.

      I really hope you have the chance to try this simple, delicious main dish, and trust you’ll enjoy it as much as we do.

      The recipe (as written below) makes two servings, but can EASILY be doubled or tripled, to suit your needs.

      Thanks for stopping by today, and I invite you to come back soon for more family-friendly recipes. Take care, may God bless you, and have a GREAT day!

      Looking For More SALMON Recipes?

      You can find ALL of my recipes in the Recipe Index, which is located at the top of the page. I have a nice variety of delicious salmon recipes for you to check out, including:

      Want More Recipes? Get My FREE Newsletter!

      I publish a newsletter 2 times per month (1st and 15th) with lots of recipes, tips, etc..
      Would you like to join our growing list of subscribers?

      There is a Newsletter subscription box on the top right (or bottom) of each blog post, depending on the device you use.
      You can submit your e-mail address there, to be added to my mailing list.

      Find Me On Social Media:

      Facebook page: The Grateful Girl Cooks!
      Pinterest:
      The Grateful Girl Cooks!
      Instagram:
      jbatthegratefulgirlcooks

      Author's signature

      Recipe adapted from (and with thanks to) Alyssa Rivers at: https://therecipecritic.com/baked-parmesan-garlic-herb-salmon-in-foil/

      ↓↓ PRINTABLE RECIPE BELOW ↓↓

      0 from 0 votes
      Parmesan Herb Baked Salmon
      Prep Time
      10 mins
      Cook Time
      14 mins
      Total Time
      24 mins
       

      Parmesan Herb Baked Salmon is an easy, delicious main dish you'll love! Salmon fillets are topped with cheese, spices and garlic, then baked!

      Category: Entree-Seafood
      Cuisine: American
      Keyword: parmesan herb baked salmon
      Servings: 2
      Calories Per Serving: 335 kcal
      Author: JB @ The Grateful Girl Cooks!
      Ingredients
      • 10 ounces salmon fillets (2 fillets- 5 oz. each) with or without skin
      • Tablespoons butter (softened)
      • ¼ cup grated Parmesan cheese
      • teaspoons fresh lemon juice
      • teaspoons minced garlic
      • ¼ teaspoon salt
      • ¼ teaspoon Italian seasoning
      • teaspoon black pepper
      • Tablespoons fresh chopped Italian flat leaf parsley
      For Garnish: (additional Parmesan cheese, parsley, and/or lemon wedge)
        Instructions
        1. Preheat oven to 425℉ (218.2℃). Place a large piece of foil on a baking sheet, and coat it with non-stick spray.

        2. Pat the salmon fillets dry, using paper towels to absorb moisture.

        3. Place softened butter, parmesan cheese, lemon juice, garlic, Italian seasoning, salt, pepper, and fresh chopped parsley in a small bowl. Use a fork to combine these ingredients well.

        4. Lay both salmon fillets in the middle of prepared foil, leaving space between the pieces. Cover top of fish with cheese/herb topping, dividing evenly between fillets. Bring edges of the foil up and over the salmon; crimp all edges closed, to prevent air from escaping. 

        5. Bake at 425°F (218.3°C) for 10-12 minutes. When done, carefully open foil pouch, exposing salmon. Turn oven to BROIL, place fish about 6 inches from the broiler element (still in foil on baking sheet). Broil 1-2 minutes, to lightly brown. Keep an eye on salmon as it broils, to ensure it doesn't burn.

        6. To serve, transfer salmon to serving plates. Drizzle with melted butter left in foil pouch. Serve immediately. If desired, garnish each piece with Parmesan cheese, fresh parsley, and a lemon wedge. Enjoy!

        Nutrition Facts
        Parmesan Herb Baked Salmon
        Amount Per Serving (1 g)
        Calories 335 Calories from Fat 189
        % Daily Value*
        Fat 21g32%
        Saturated Fat 9g56%
        Trans Fat 0.3g
        Polyunsaturated Fat 4g
        Monounsaturated Fat 6g
        Cholesterol 111mg37%
        Sodium 642mg28%
        Potassium 754mg22%
        Carbohydrates 3g1%
        Fiber 0.3g1%
        Sugar 0.2g0%
        Protein 32g64%
        Vitamin A 685IU14%
        Vitamin C 6mg7%
        Calcium 143mg14%
        Iron 2mg11%
        * Percent Daily Values are based on a 2000 calorie diet.

        Here’s one more to pin on your Pinterest boards!Parmesan Herb Baked Salmon is an easy, delicious main dish you'll love! Salmon fillets are topped with cheese, spices and garlic, then baked!

        Garlic Lime Baked Salmon

        Garlic Lime Baked Salmon is simple to make, and tastes amazing! Only 5 minutes prep is needed before baking this flavorful, low-calorie dish.
        Garlic Lime Baked Salmon is simple to make, and tastes amazing! Only 5 minutes prep is needed before baking this flavorful, low-calorie dish.

        If you’re looking for a delicious, low-calorie dinner that only takes a few minutes to pull together, I think you’ll love this recipe for garlic lime baked salmon!

        This meal is perfect for those days when you’re too tired from work or school to expend a lot of energy trying to come up with dinner! The prep time is minimal (about 5 minutes), and then into the oven goes the salmon. Whoo Hoo!

        A big resounding plus is how delicious this simple meal really is… we could eat it over and over, because it tastes so good.

        Pair the garlic lime baked salmon with a favorite side dish, and you’ve got a great meal in under 30 minutes. Here’s how to make it.

        Scroll Down For A Printable Recipe Card At The Bottom Of The Page

        Prepare And Season The Salmon

        Preheat your oven to 400°F. (204° C.) before beginning. Prep takes only a few minutes, so to save time, you will that oven preheated and ready to go!

        For this recipe, you will need two skinless salmon fillets, approximately 4 ounces each. Pat the salmon dry using paper towels to blot the moisture.

        Place a layer of parchment paper onto a baking sheet, then place the salmon fillets on top. Lightly sprinkle Cajun seasoning mix on the top surface only, then set the pan aside.

        Salmon fillets are patted dry with paper towels to absorb moisture.The salmon fillets are sprinkled lightly on top with Creole seasoning mix.

        Make The Garlic Lime Baking Sauce

        For the garlic lime sauce that will bake on top of the salmon, you will need fresh lime juice (and the zest from the peel). You will also use minced garlic, extra virgin olive oil and fresh chopped parsley.

        Garlic, olive oil, parsley, lime juice and zest are used as topping for fish.

        Mix the lime juice, lime zest, minced garlic, olive oil and chopped parsley together in a medium sized bowl. Stir until these ingredients are fully combined.

        NOTE: Lime zest is the outer green peel of the lime, grated very finely using a microplane or the very tiny holes in a box grater. The lime peel contains oils which are released, and provide amazing flavor. Be careful to only grate the GREEN peel, NOT the white inner part. The white part of the inner peel is bitter, and you do not want that!

        Using a microplane to extract lime zest from outer peel of the lime.

        Parsley, EVOO, lime juice, garlic and lime zest in a medium bowl.After being combined, this is the topping for garlic lime baked salmon.

        Bake The Salmon

        Spoon the sauce evenly over the two salmon fillets, spreading the ingredients evenly, and dividing the mixture between the two pieces of fish. Use all of the sauce!

        Bake in a preheated 400°F (204°C) oven for 18-20 minutes, or until the salmon is cooked through and flakes easily.

        Since oven temperatures can fluctuate with different models, I suggest checking on the fish at about the 17 minute mark, to check for doneness. When done, remove the garlic lime baked salmon from the oven.

        Garlic lime sauce is divided evenly on top of salmon fillets before baking.Garlic lime baked salmon is cooked and ready to transfer to plates.

        Serve The Garlic Lime Baked Salmon

        Serve the garlic lime baked salmon while hot. Transfer the fillets to individual plates, and garnish with more chopped parsley and/or a couple of lime wedges (to squeeze juice over the fish).

        These are optional garnishes, of course, but really add to the color, flavor, and presentation of the finished dish. I don’t think you will regret adding these ingredients, ESPECIALLY the lime wedges.

        Serve the fish with a couple of your favorite side dishes, and enjoy this delicious garlic lime baked salmon! 

        Garlic lime baked salmon served with lime wedges, rice and broccoli on the side.

        I hope you have the opportunity to try this yummy recipe, and hope you will enjoy it as much as we do. It is such an easy main dish to make, and it really does taste great!

        Thanks for stopping by, and please come back again soon. Take care, may God bless you, and have a wonderful day!

        Looking For More SALMON Recipes?

        You can find ALL of my recipes in the Recipe Index, which is located at the top of the page. I have lots of delicious salmon recipes to enjoy, including:

        Want More Recipes? Get My FREE Newsletter!

        I publish a newsletter 2 times per month (1st and 15th) with lots of recipes, tips, etc..
        Would you like to join our growing list of subscribers?

        There is a Newsletter subscription box on the top right (or bottom) of each blog post, depending on the device you use.
        You can submit your e-mail address there, to be added to my mailing list.

        Find Me On Social Media:

        Facebook page: The Grateful Girl Cooks!
        Pinterest:
        The Grateful Girl Cooks!
        Instagram:
        jbatthegratefulgirlcooks

        Author's signature

        Recipe adapted from: New Life Promise-Live Smart Online Edition, Volume 10, page 32, by Isabel D. Price.

        ↓↓ PRINTABLE RECIPE BELOW ↓↓

        0 from 0 votes
        Garlic Lime Baked Salmon
        Prep Time
        5 mins
        Cook Time
        18 mins
        Total Time
        23 mins
         

        Garlic Lime Baked Salmon is simple to make, and tastes amazing! Only 5 minutes prep is needed before baking this flavorful, low-calorie dish.

        Category: Entree
        Cuisine: American
        Keyword: garlic lime baked salmon
        Servings: 2 fillets
        Calories Per Serving: 203 kcal
        Author: JB @ The Grateful Girl Cooks!
        Ingredients
        • ½ pound skinless salmon fillets (2 fillets) approx. 4 oz. per fillet
        • ½ teaspoon creole seasoning to sprinkle lightly on fish
        • 2 teaspoons fresh lime juice
        • 1 teaspoon lime zest
        • cloves garlic minced
        • 2 teaspoons extra virgin olive oil
        • 2 teaspoons chopped fresh parsley
        Optional: additional chopped parsley and/or lime wedges for garnish
          Instructions
          1. Preheat oven to 400°F. (204° C.) before beginning. Prep time is minimal, so preheating oven will save time. Lay piece of parchment paper on baking sheet.

          2. Pat salmon fillets dry using paper towels, then place fillets on prepared baking sheet. Lightly sprinkle top of fish with Creole seasoning; set pan aside.

          3. Mix the lime juice, lime zest, minced garlic, olive oil and chopped parsley together in a medium sized bowl. Stir until fully combined.

          4. Spoon sauce evenly over salmon fillets, spreading evenly, and dividing mixture between both pieces. Use all of the sauce.

          5. Bake at 400°F (204°C) oven for 18-20 minutes, or until salmon is cooked through and flakes easily. When done, remove pan from the oven.

          6. Transfer salmon fillets to individual plates. OPTIONAL: Garnish with additional chopped parsley and/or a couple lime wedges (to squeeze juice on salmon). Serve immediately, and enjoy!

          Nutrition Facts
          Garlic Lime Baked Salmon
          Amount Per Serving (1 fillet (4 oz.))
          Calories 203 Calories from Fat 99
          % Daily Value*
          Fat 11g17%
          Saturated Fat 2g13%
          Polyunsaturated Fat 3g
          Monounsaturated Fat 5g
          Cholesterol 62mg21%
          Sodium 51mg2%
          Potassium 582mg17%
          Carbohydrates 2g1%
          Fiber 0.2g1%
          Sugar 0.2g0%
          Protein 23g46%
          Vitamin A 265IU5%
          Vitamin C 3mg4%
          Calcium 20mg2%
          Iron 1mg6%
          * Percent Daily Values are based on a 2000 calorie diet.

          Here’s one more to pin on your Pinterest boards!Garlic Lime Baked Salmon is simple to make, and tastes amazing! Only 5 minutes prep is needed before baking this flavorful, low-calorie dish.