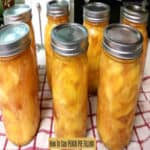
Learn how to can peach pie filling for long term storage in this tutorial. Enjoy the convenience of having jars of pie filling stored away in your pantry, to use year round!

Do you enjoy peach pie? We sure do, and this recipe will teach you how to can peach pie filling, to enjoy year round, long after fresh peaches are out of season!
Scroll Down For A Printable Recipe Card At The Bottom Of The Page
I LOVE To Use Freshly Picked Peaches In My Recipes!
There is a local U-Pick peach farm a few miles from our home, and I love to pick fresh peaches every summer! The peaches have been used to make peach jam, peach pie, streusel topped galettes, canned peaches, peach turnovers, and this canned pie filling!
I have also enjoyed making peach salsa, old-fashioned peach crisp, canned peach salsa, and even peach smoothies and ice cream using fresh-picked peaches! There’s just no end to what you can do with a delicious, ripe peach!

Before beginning, make sure you have all your canning supplies ready! Prepare jars, lids, and a water bath canner according to manufacturer instructions, and safe canning guidelines.
Canning peach pie filling requires some work to get the peaches (and the pie filling) ready! It takes a bit of time to work through each step, but the end result is absolutely worth your time! Stick with it, read the directions thoroughly before beginning, and then go for it!
Peeling All Those Peaches Is Easy Using This Method
A lot of people use a knife to hand peel all the peaches needed, and that is perfectly okay, but I’d like to show you another option! There’s a slightly quicker method for peeling large amounts of peaches quickly. Bring a large pot of water to a full boil. Place peaches (whole) 3-4 at a time into the boiling water for 45 seconds to 1 minute.
Immediately remove and place them into large bowl full of ice water, to stop the cooking. After this, the peels should come off the peaches very easily with a gentle rub! Repeat process, making sure water is boiling, and bowl of water is ice cold for each batch. Continue until all peaches are peeled.

Slice, Treat, And Heat Peach Slices
I didn’t take a photo of this (oops), but remove the peach pits, and then slice the peeled peaches into 1/2″- 3/4″ slices. You will want to drop the slices as you cut them into a large bowl of a light syrup (see NOTE below), or use a product like Fruit Fresh, to prevent the slices from browning. Because there is such a large amount of peaches necessary for canning, you definitely don’t want to skip this step!
NOTE: If using a light syrup, heat 1/2 cup sugar into 5 cups of water only until sugar is dissolved. Pour into bowl, and then toss in the peach slices as you cut them. If using Fruit Fresh, follow package instructions.
Heat The Treated Peach Slices
Bring a large pot of water to a full boil.Drain the treated peach slices, and then place them in the boiling water (about 6-7 cups at a time). Bring the water back to a boil, and then let the peaches cook for only 1 minute.
Remove, and then drain peaches (and keep them warm), and continue process until all peaches have been cooked for 1 minute. You will end up needing a total of about 6 quarts worth of cooked peaches.
Prepare Thickener For The Pie Filling
In another separate large pan, mix the granulated sugar, Clear Jel and water. Heat on medium-high heat, stirring often, until it begins to thicken, and gets bubbly. **In case you are curious, Clear Jel is a powdered, safe thickening agent that can be purchased online. It is preferred in canning pie fillings using high heat, over the use of flour or cornstarch**.
Add the cinnamon and the bottled lemon juice to the pan, and let it boil for 1 more minute. Yes… use all that bottled lemon juice (it’s for long term preservation). It will not affect the taste of your pie filling. Now add all of the warm peach slices, and give it all a good stir to fully combine ingredients. Continue to cook for 3 minutes, stirring the peach pie filling constantly (sorry, no photo).


Time To Add The Peach Pie Filling To The Canning Jars
Whew… we are almost ready to finally can some peach pie filling! Okay… here’s what you need to do!
Fill each of the hot, prepared canning jars (I use quart size), being sure to leave a 1″ headspace. Remove the air bubbles, and then using a wet cloth or paper towel, clean the rims of the jars, so they are free of sticky residue (for a good seal). Add the flat lids and twist the screw bands on, until they are fingertip tight.

Can The Peach Pie Filling
Place the jars of canned peach pie filling onto an elevated canning rack and place the rack with jars carefully into simmering water in the canner. The hot water needs to be about an inch ABOVE the tops of the jars once jars are in the canner before processing. Bring the water in the canner to a gentle boil, and then process jars (both pints or quarts) for 30 minutes after the water comes to a boil.


Once Processing Is Finished
Once fully processed, carefully remove the HOT jars of peach pie filling from the canner using canning tongs, and place them onto a dish towel. Do NOT place the hot jars directly onto your kitchen counter, because they could crack due to temperature variances (hot jars/cold counter).

Let the jars cool, undisturbed for 12-24 hours. You should hear them “ping” as the jars seal. Once cooled, check the seal on each jar to ensure they have sealed properly and are ready (and safe) for long term storage. Wipe down the cooled jars, label them, and add them to your pantry! Now you can make peach pie any time you want!


Yes, it IS a bit of work to can peach pie filling, but it sure is nice to have several jars put away for a quick pie months later (long after summer peaches have disappeared from stores). I hope you will give this recipe a try! Thanks for visiting, and have a great day!
Looking For More CANNING Recipes?
You can find all of my canning recipes in the Recipe Index, located at the top of the page. I have many canning recipes, with instructions, for foods and jams. A few of the canned items you might want to try include:
Interested In More Recipes?
Thank you for visiting this website. I appreciate you using some of your valuable time to do so. If you’re interested, I publish a newsletter 2 times per month (1st and 15th) with all the latest recipes, and other fun info. I would be honored to have you join our growing list of subscribers, so you never miss a great recipe!
There is a Newsletter subscription box on the top right side (or bottom) of each blog post, depending on the device you use, where you can easily submit your e-mail address (only) to be included in my mailing list.
You Can Also Find Me On Social Media:
Facebook page: The Grateful Girl Cooks!
Pinterest: The Grateful Girl Cooks!
Instagram: jbatthegratefulgirlcooks

Original Recipe Source: https://www.simplycanning.com/peach-pie-recipes.html
↓↓ PRINTABLE RECIPE BELOW ↓↓
Learn how to can peach pie filling for long term storage in this tutorial. Enjoy the convenience of having jars of pie filling stored in your pantry.
- 6 quarts fresh peaches , enough to make 6 quarts sliced)
- 7 cups granulated sugar
- 2 cups + 3 Tbsp. Clear Jel
- 5¼ cups cold water
- 1½ teaspoons cinnamon
- 1¾ cups bottled lemon juice
Before beginning, make sure to have all your canning supplies ready! Prepare jars, lids, and a water bath canner according to manufacturer instructions, and safe canning guidelines.
Peel peaches with a knife OR bring a large pot of water to a boil. Place peaches (whole) 3-4 at a time into boiling water for 45 seconds to 1 minute. Immediately remove and place them into large bowl full of ice water, to stop cooking. After this, the peel should come off easily with a gentle rub! Repeat process, making sure water is boiling, and bowl of water is ice cold for each batch. Continue until all peaches are peeled. Remove peach pits, and slice peaches into 1/2"- 3/4" slices. Drop the slices as you cut them into a large bowl of a light syrup (see NOTE below), or use a product like Fruit Fresh, to prevent slices from browning. NOTE: If using a light syrup, heat 1/2 cup sugar into 5 cups of water only until sugar is dissolved. Pour into bowl, and then toss in the peach slices as you cut them. If using Fruit Fresh, follow package instructions.
Bring a large pot of water to a full boil. Drain treated peach slices, and place them in the boiling water (6-7 cups at a time). Bring water back to a boil, and then let peaches cook for 1 minute. Remove, and drain peaches (and keep them warm). Continue until all peaches have been cooked. You need a total of 6 quarts of cooked peach slices.In a separate large pan, mix granulated sugar, Clear Jel and water. Heat on medium-high heat, stirring often, until it begins to thicken, and gets bubbly. Add cinnamon and bottled lemon juice to the pan; let it boil for 1 more minute. Yes... use all that bottled lemon juice (it's for long term preservation). It will not affect the taste of your pie filling. Now fold in warm peach slices, to fully combine ingredients. Continue to cook for 3 minutes, stirring the peach pie filling constantly.
Fill each of the hot, prepared canning jars, being sure to leave a 1" headspace. Remove air bubbles by inserting a plastic knife several times into jars, adjust headspace if necessary, and use a wet cloth or paper towel to clean the rims of the jars, so they are free of sticky residue (for a good seal). Add the flat lids and twist screwbands on, until fingertip tight. Place jars onto an elevated canning rack and place rack carefully into simmering water in the canner. The hot water needs to be about an inch ABOVE the tops of the jars once jars are in the canner before processing. Bring the water in the canner to a gentle boil, and then process jars (both pints or quarts) for 30 minutes after water comes to a gentle boil.
Once fully processed, carefully remove HOT jars of peach pie filling from the water bath using canning tongs, and place them on a dish towel on counter. Do NOT place hot jars directly onto kitchen counter, because they could crack due to temperature variances (hot jars/cold counter). Let jars cool, undisturbed for 12-24 hours. Once cooled, check the seal on each jar to ensure they have sealed properly and are ready and safe for long term storage. Wipe jars clean, label, and store in pantry. Enjoy!
Here’s one more to pin on your Pinterest boards!
Can the pie filling be preserved in a pressure canner vs a water bath canner?
I had to freeze my peaches before they went bad but now that I have my clear jel I’m ready to can. Should I just thaw my frozen peaches and start the process? Also I may not have 6 quarts. Could I cut this recipe in half?
Not sure what happened. The filling was nice and thick, when I took the jars out of the water bath the filling was like a runny syrup. What happened?
Just came across your post, going to start this tomorrow. I love making peach cobbler and this will be a great addition. Thanks for sharing
Hi, I made this for the first time today. The Clear Jel clumped up a bit as it was initially cooking (but I mistakenly had the temp on high instead of medium-high), and the cinnamon didn’t fully dissolve. Have you tried adding the cinnamon to the sugar mix first? Why would the Clear Jel clump? Juices from the peaches seeped out as I was waiting for all the batches to cook for the one minute, so I added the juices in with the peaches to the sugar-Clear Jel mix. I can’t wait to make a pie with this, do I just add it to a pie crust and bake? Thank you!