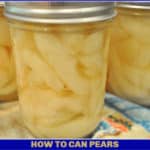
Preserve summer’s fruit bounty for long term storage in the pantry by learning how to can pears (fresh and ripe) using a water bath canner!

Do you know how to can pears? It’s a great skill to learn, especially when you find yourself with a wonderful surplus of delicious home-grown pears!
Canning pears is a very economical way to stock up the pantry with jars of delicious ripe summer fruit, to enjoy year-round!
All About the PEARS
Some of our neighbors recently blessed us with some fresh picked Anjou pears from their backyard pear tree. Wow. Free pears! Aren’t they gorgeous?
I received twice as many as shown in this photo, and made several spinach pear salads, dehydrated some pear slices, and canned several jars of pears for our pantry!

Several years ago, another friend blessed us with lots of Asian pears (much crisper than a traditional pear, like an apple), from their yard. I used this same processing method to can those pears, as well.


In order to learn how to can pears, you will need to have a piece of equipment called a water bath canner, which is a very large, covered pot, with an elevated rack inside to hold jars off the bottom of the pot. You will also need canning jars, with flat lids and screw bands.
You can purchase water bath canners, jars and lids online. Some grocery stores and department stores sell them, as well.
How To Can Pears
Prepare the pears by peeling. Cut the pears in half and remove the core. I like to use a small melon baller scoop to remove the core.

Treat the pears with a product like Fruit Fresh to prevent browning. I use another option, typically, because I tend to not have any Fruit Fresh laying around. I use this option on apples, as well.
Another Option To Prevent Pears From Browning
Another option (my preferred method) is to place the cored, halved pears into a large bowl of water and lots of salt (that has dissolved). I put about 1/4 cup salt into the water and let it dissolve.
Once finished peeling and coring pears, add them to the water. This salty water bath will keep them from browning too much.
When ready to place in jars, drain water and rinse pears very well, to remove salt. You won’t taste the salt, honest! If canning pear halves, they will look like the photo below before rinsing.

Make A Light Syrup For The Pears
A light canning syrup is made with granulated sugar and water which is brought to a boil in a large pot, to dissolve the sugar.
Once pears (halves or slices) have been completely rinsed free of salt, they are placed into the warm syrup (single layer at a time) and heated through on low heat (about 5 minutes). The pears will need to be done in batches.
The photos below show both pear halves and pear slices in the light syrup (made with sugar and water). Preserving pears in a very light syrup helps preserve the fresh fruit flavor through the canning process, and long-term storage.


Prepping Jars, Lids, Etc.
While the pears are being prepped, you will also want to be simmering the canning jars in water on a rack in the canner to get them prepared for the hot fruit.
This is to prevent the jars from cracking once the hot fruit is added to them. You will also need to prepare the jar flat lids and screw bands according to package instructions.

Filling The Jars
Remove hot jars from canner. Drain. Ladle the pear halves or slices into hot jars. Using a canning funnel will help this step to be less messy!
If using pear halves, layer them cavity side down into the jar, overlapping layers. If canning pear slices, pack them into jars. Leave about 1/2 an inch or so from the top of the jar.
Ladle the hot syrup into each jar. Using a canning funnel will again help this be less messy! The pears will need to be covered with syrup. Make sure to leave a ½ inch headspace in each jar.

Use a plastic utensil and slide it down into sides of each jar a couple times to remove trapped air bubbles. If necessary, add or remove syrup, to ensure a ½ inch headspace.

Wipe the rims of each jar with a wet cloth (or paper towel) to make sure there is no syrup of food residue on jar rim. This is done to ensure a good seal.
Place a hot flat lid on top, then screw on the screw band (jar ring) to fingertip tightness.
How To Can Pears
Carefully place the jars in a upright position on the rack in the water in canner. Jars should be completely covered with water (by at least an inch over top of jars). Put lid on canner. Bring the water in canner to a gentle boil.

How Long Do I Process The Jars In The Canner?
Process pint jars for 20 minutes AFTER it reaches a boil. Process quart jars for 25 minutes AFTER water comes to a gentle boil.

Once the processing time is done, turn off heat. Remove the canner lid. Wait for 5 minutes, then carefully (with canning tongs) remove the jars to a dish towel on the counter.
TIP: Do not place boiling hot jars directly on kitchen counter, as temperature variations on surface could cause hot jars to crack.
Once Done With The Canning Process
You should hear the jars make a “pinging” sound as they seal. Let the jars cool completely (8-10 hours), then check to ensure they have properly sealed. To check, press lightly in the center of each lid. There should be NO resistance.
If jars sealed properly, wipe the outside of jars (in case any sticky syrup leaked out during processing), label jars, and store in pantry. Normal canning guidelines suggest you remove the screw bands from the jars before storing in pantry.
Do not stack jars on top of each other. If any jars do not seal properly, refrigerate, and eat within a few days. Canned pears will last a year or longer in the pantry, if properly sealed and processed.

I hope you will consider learning how to can pears with this easy recipe. It’s wonderful to have jars of this delicious fruit in the pantry year-round!
Looking For Other Canning Recipes?
If you enjoy preserving food in this way, you might also be interested in some of my other canning recipes for Apple Butter, Bread and Butter Pickles, Chocolate Raspberry Sundae Sauce, Cilantro Lime Enchilada Sauce, or Sliced Peaches.
There are a lot of canning recipes for jam listed in my Recipe Index (shown in the menu toolbar at the top of each blog post), including Boysenberry, Blackberry, Strawberry, Bing Cherry, Peach, Raspberry, Blueberry, Orange Marmalade, and more! Hope you will check them out!
Have a GREAT day! May you find beauty all around you today. Sometimes you may have to look a bit harder to find it… but it’s out there!
Want More Recipes? Get My FREE Newsletter!
I publish a newsletter 2 times per month (1st and 15th) with lots of recipes, tips, etc.
Would you like to join our growing list of subscribers?
There is a Newsletter subscription box on the top right (or bottom) of each blog post, depending on the device you use.
You can submit your e-mail address there, to be added to my mailing list.
Find Me On Social Media:
Facebook page: The Grateful Girl Cooks!
Pinterest: The Grateful Girl Cooks!
Instagram: jbatthegratefulgirlcooks

Original Recipe Source: Ball Complete Book of Home Preserving, published by Jarden Corporation, copyright 2006 and 2012. Pages 142, 145.
↓↓ PRINTABLE RECIPE BELOW ↓↓
- 8-12 pounds ripe, but firm pears
- 1¼ cups sugar
- 5½ cups water
Prepare water bath canner according to manufacturer instructions. You will need enough simmering water in canner to completely cover jars once placed on rack.
You will also want to simmer the canning jars in water on rack in canner to prepare them for adding hot fruit. This will prevent jars from cracking once hot fruit is added. You also need to prepare the jar flat lids and screwbands according to package instructions.
Bring granulated sugar and water to a boil on medium high heat until sugar has dissolved. Reduce heat to LOW, and keep syrup warm until ready to use. Do NOT let the syrup boil down.
Peel, core, and half or slice pears. Treat with Fruit Fresh OR place in large bowl with 1/4 cup salt dissolved in 6 cups water. If using salt/water method, keep pears submerged until ready to drain, rinse and pack jars.
Once pears (halves or slices) have been rinsed free of salt, place them into syrup mixture (single layer at a time). Heat pears through (about 5 minutes). This will need to be done in batches.
Remove hot jars from canner. Drain. Ladle pears into hot jars, through a canning funnel. If using pear halves, layer them cavity side down into the jar, overlapping layers. If canning pear slices, pack them into jars. Leave about 1/2 an inch or so from the top of the jar. Ladle hot syrup into each jar. Using a canning funnel will help this be less messy! The pears need to be covered with syrup. Make sure to leave 1/2 inch headspace in each jar. Use a plastic utensil and slide it down into sides of each jar a couple times to remove trapped air bubbles. If necessary, add or remove syrup, to ensure a 1/2 inch headspace.
Wipe the rims of each jar with a wet cloth (or paper towel) to make sure there is no syrup of food residue on jar rim. This is done to ensure a good seal. Place a hot flat lid on top, then screw on the screwband (jar ring) to fingertip tightness. Carefully place the jars in a upright position on the rack in the water in canner. Jars should be completely covered with water (by at least an inch over top of jars). Put lid on canner.
Bring the water in canner to a boil. AFTER water reaches a gentle boil, process pint jars for 20 minutes. Process quart jars for 25 minutes. Once processing time is done, turn off heat. Remove canner lid. Wait 5 minutes, then carefully (with canning tongs) remove hot jars to a dish towel. TIP: Do not place boiling hot jars directly on kitchen counter, as temperature variations could cause jars to crack.
You will hear the jars make a "pinging" sound as they seal. Let jars cool completely (8-10 hrs.), then check to ensure they have properly sealed. To check, press lightly in the center of each lid. There should be NO resistance. Wipe the outside of jars, label, and store in pantry. Remove screw bands from jars before storing in pantry. Do not stack jars on top of each other (this can cause lid to unseal). If any jars did not seal properly, refrigerate pears, and eat within a few days. Canned pears will last a year or longer in the pantry, if properly sealed.
Here’s one more to pin on your Pinterest boards! 
A few questions/comments:
1) are you sure these are Anjou pears? They look more like Bartlett. Did the skin turn yellow as they ripened?
2) canning processing times differ depending on your altitude. For example, I am above 4,000ft and have to add time to a standard processing time. My time is 35MIN for quarts. If people follow your instructions exactly but have a different altitude, they may over or under process their pears.
3) Asian pears have their own instructions for canning and require further acidification. See https://nchfp.uga.edu/how/can_02/asian_pears.html
This is a great recipe! I did have a little old lady tell me to use apple juice instead of making the simple syrup especially for pears but also for apples and even peaches. You won’t notice the flavor difference but pears in particular lose their flavor into the syrup, but the pears can be a little bland. The apple juice really kicks it up a notch!
I just canned my first batch of pears. How long do I have to wait before I can eat them. Thank you.
Hi, Sandy- As soon as they are cooled to room temp, go for it!
Do you have any recipes for sugar free pears?
Hi, Nannette. I’m sorry, but I do not have any recipes for sugar free pears at this time.
I use 1/2 cup of Splenda to quart jars for peaches, then fill jar with boiling water. I assume this would also work with pears. If I can find some, I plan to do just that as well as make some pear jam. Lots of good recipes here!
Renee
I just canned pears for the first time. It was pretty simple with you excellent instructions. I hope they turn out as wonderful as they look!
Awesome! Have a great day.
Thank you for the easy recipe.