Whip up a pan of Mocha Cinnamon Brownies for a quick dessert! These brownies are fudgy and delicious, with hints of cinnamon and coffee.

Do you like delicious, fudgy brownies? You know… the kind that by eating them seem to cure all the world’s problems? If you do, then I’m sure you’ll enjoy these Mocha Cinnamon brownies!
The recipe originated on a TV show called “Chopped”, and found it in a cookbook I had that was published quite a few years ago. These brownies are really good and I hope you’ll try them!
I slightly tweaked the original recipe to add a bit more coffee and cinnamon, and we loved the result! These are dense, fudgy brownies that are deeply chocolate-flavored, but with a subtle back taste of cinnamon and mocha.
Mocha Cinnamon Brownies are simple to make in a short amount of time, so be warned! Before you know it, you’ll be serving them or stuffing your face with this decadent dessert. Here’s how to make them.
Scroll Down For A Printable Recipe Card At The Bottom Of The Page
Make The Brownie Batter
This recipe is a bit unique to me because the technique used to make the batter is quite different than the way I “normally” do it for my other brownie recipes!
It’s actually quite easy, though. Place butter, sugar, cocoa powder, instant coffee, vanilla extract, cinnamon and salt into a medium-sized saucepan.
Turn the heat to MEDIUM, then cook, stirring often, until the butter melts. As the butter melts and you stir, the ingredients will all become combined.

Let It COOL
Once the mixture has been fully combined, remove the pan from the heat source. Set the pan aside and let the batter cool until it has become WARM, but not hot.
This will usually take about 10 minutes (or a little less if you keep stirring). You want the batter only slightly warm when you add the eggs.
Why? If the batter is too hot, the eggs will “scramble” as they are added, and you absolutely do NOT want that!

Finish The Brownie Batter
Stir or beat in the eggs, ONE AT A TIME. Continue mixing after each addition, until the batter is smooth with a bit of a glossy shine to it.

Add the flour to the batter and stir until it has been combined with the rest of the batter. Now the brownie batter is ready for baking!

Ready, Set… Bake!
Pour the brownie batter into the previously buttered baking pan. Place the pan of mocha cinnamon brownies on a middle rack in a preheated oven.
Bake at 325°F. for about 20-25 minutes, or until the brownies are set. Oven temps can vary widely, so keep an eye on them.
To check for doneness, insert a toothpick into the middle of the brownies. If it comes out clean, the brownies are ready.


Time For Some Mocha Cinnamon Brownies!
Remove the pan of brownies from the oven and transfer the pan to a wire rack. Let the mocha cinnamon brownies cool to room temperature in the baking pan before cutting and serving.
When cooled, cut the brownies into 12 bars, and then serve these delicious treats! Cover any leftovers well with plastic wrap or in an airtight container.
The mocha cinnamon brownies can be stored (covered) on the countertop for up to 2-3 days (if they’re not all gobbled up by then). They’re delicious, dense, and filled with chocolate flavor!


I hope you have the opportunity to make these mocha cinnamon brownies for yourself or for those you love. You’re going to like them, I’m sure!
Thanks for stopping by, and I invite you to come back again soon for more family-friendly recipes. Take care, may God bless you, and have a GREAT day!
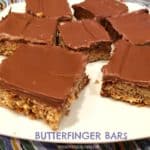
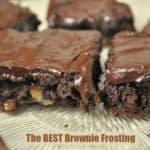
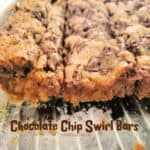
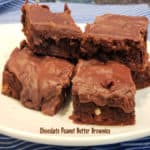
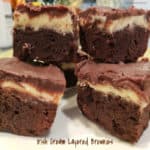
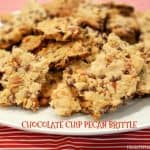
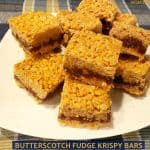
Looking For More Recipes For BAR COOKIES?
You can find ALL of my recipes in the Recipe Index, which is located at the top of the page. I have some delicious bar cookie recipes for you to enjoy, including:
Want More Recipes? Get My FREE Newsletter!
I publish a newsletter 2 times per month (1st and 15th) with lots of recipes, tips, etc..
Would you like to join our growing list of subscribers?
There is a Newsletter subscription box on the top right (or bottom) of each blog post, depending on the device you use.
You can submit your e-mail address there, to be added to my mailing list.
Find Me On Social Media:
Facebook page: The Grateful Girl Cooks!
Pinterest: The Grateful Girl Cooks!
Instagram: jbatthegratefulgirlcooks

Recipe adapted from: “The Chopped Cookbook”, page 229, published by Clarkson Potter in 2014 for Television Food Network, G. P.
↓↓ PRINTABLE RECIPE BELOW ↓↓
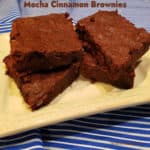
Whip up a pan of Mocha Cinnamon Brownies for a quick dessert! These brownies are fudgy and delicious, with hints of cinnamon and coffee.
- 12 Tablespoons butter =1½ sticks + more for greasing pan
- 1 cup granulated sugar
- ¾ cup unsweetened cocoa powder
- 2½ teaspoons instant coffee
- 1 teaspoon vanilla extract
- ¾ teaspoon ground cinnamon
- ¼ teaspoon salt
- 2 large eggs
- ⅓ cup all purpose flour
Preheat oven to 325℉. Use additional butter (about 1 T.) to butter bottom and sides of 9"x9" square baking pan.
Place butter, sugar, cocoa powder, instant coffee, vanilla, cinnamon and salt into a medium saucepan. Turn heat to MEDIUM. Cook, stirring often, until butter melts and ingredients are combined.
Remove pan from heat source. Set aside. Let batter cool until WARM, but not hot (about 10 minutes). You want batter only slightly warm before you add eggs.
Stir or beat in eggs, one at a time. Continue mixing until batter is smooth with a slight glossy shine. Add flour; stir until combined
Spread batter in buttered pan. Place pan on middle rack in preheated oven. Bake at 325°F. for 20-25 minutes, or until brownies are set. To check for doneness, insert a toothpick into middle of the brownies. If it comes out clean, they're done.
Remove brownies from oven; transfer pan to a wire rack. Let brownies cool to room temp. (in pan) before cutting into 12 bars and serving. ENJOY! *Store leftovers in airtight container on countertop.
Here’s one more to pin on your Pinterest boards!


 for those you love! They're moist & delicious- you're gonna love 'em! / The Grateful Girl Cooks!")


 for those you love! They're moist & delicious- you're gonna love 'em! / The Grateful Girl Cooks!")