Month: February 2016

Shrimp Tacos

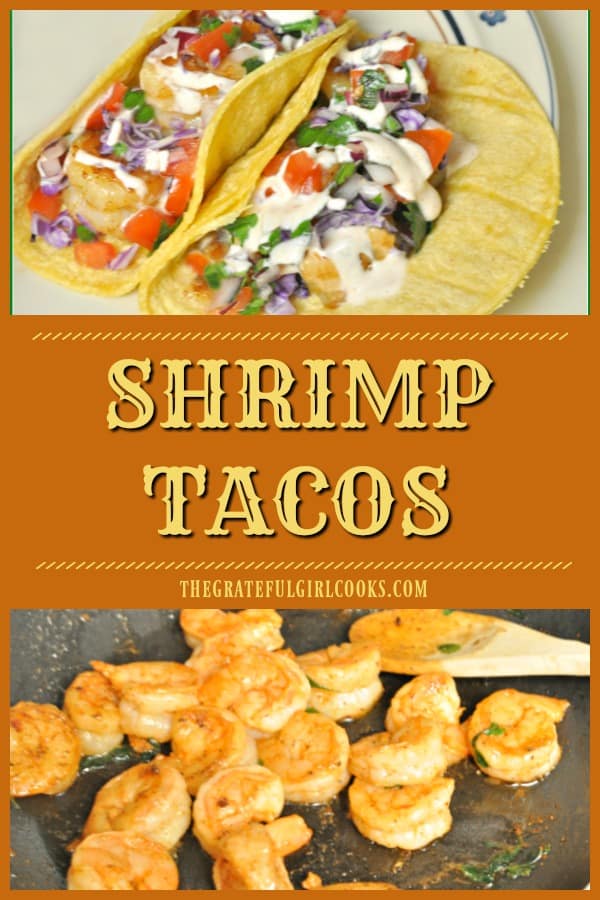
Make these delicious pan-seared shrimp tacos with homemade pico de gallo, topped with a creamy salsa verde sour cream sauce in a snap!Make these delicious pan-seared shrimp tacos with homemade pico de gallo, topped with a creamy salsa verde sour cream sauce in a snap!The other night I decided to make Shrimp Tacos for our dinner. Pretty funny, since I’d never made shrimp tacos before (it’s usually beef, shredded pork or chicken). Sooo… I knew what ingredients I wanted to include in them, love to experiment in the kitchen, and the result? Seriously, ridiculously GOOD shrimp tacos… and they were very easy to make, too!
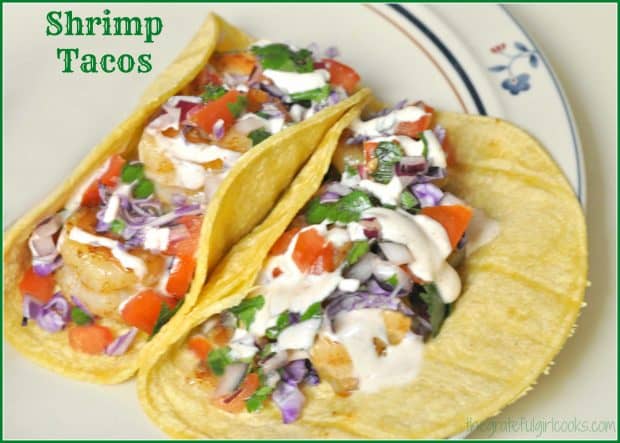
I didn’t use a recipe to make the shrimp tacos, but you really don’t need one to make these! I gather my “must have” ingredients, chop them up, and pan-sear seasoned medium sized shrimp. Then I warm the tortillas in the microwave (wrapped in paper towels), put them all together, and voila!

Shrimp tacos, with an amazing sauce, and lots of crunch and flavor from the purple cabbage and pico de gallo! As quick as you can say “Icanhardlywaittotrythese”, they were done! We LOVED them! No, really. We LOVED them, and they were done in less than 15 minutes! Now that is my kind of meal!

How I Make These Shrimp Tacos

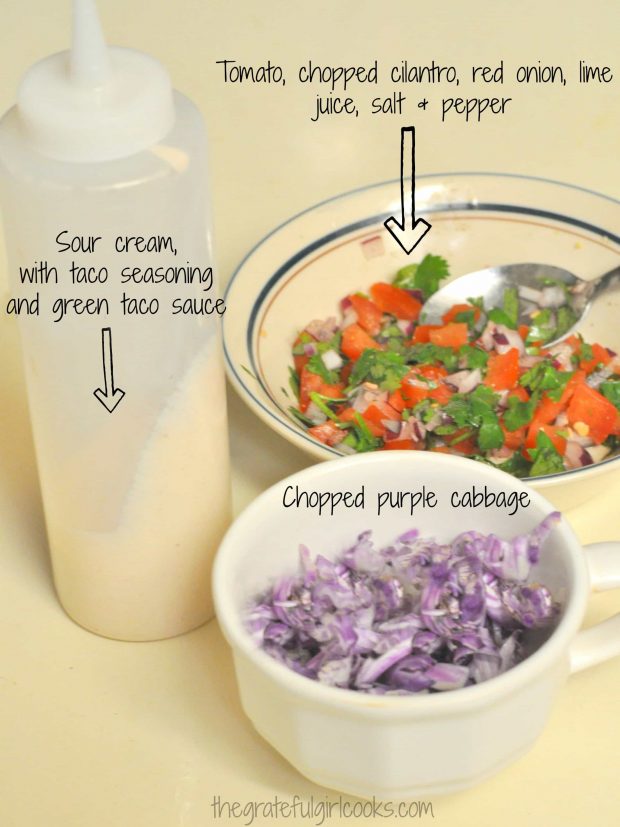
Make a quick pico de gallo, using chopped tomato, red onion, cilantro, a couple squeezes of fresh lime juice, and salt and pepper to taste, then set this aside. Next thing to do is to chop up purple cabbage and set it aside.

To make the sauce, mix sour cream with a bit of green taco sauce, then mix in some homemade taco seasoning mix and set the sauce aside. If you happen to have a squeeze bottle handy, you can put the sauce in it, then squeeze the sauce over the finished tacos. You can also just drizzle it on with a spoon.

I am not adding an “official, printable” recipe with this post, because honestly, you can tailor make as many or as few as you wish (and increase quantities to match), but here’s a picture of the basics you use, plus 3-4 cooked shrimp per taco, and corn tortillas. By the way… sliced avocado would taste great on these, also!

Cabbage, pico de gallo and sauce, ready to add to shrimp tacos!

Cook The Shrimp

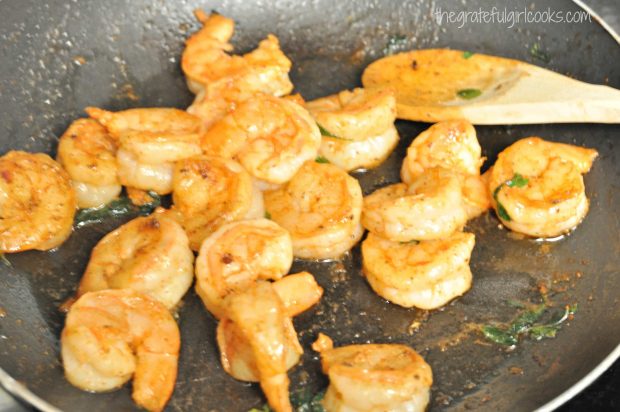
To cook the shrimp, heat a teaspoon of olive oil in skillet. Add some shelled and  de-veined shrimp with 1½ teaspoons taco seasoning mix, and stir to combine. Pan cook the seasoned shrimp on medium high heat for 2-3 minutes on each side until done. Right before they are done, add a small amount of chopped cilantro.

Pan-seared shrimp are cooked to add to the tacos.

Time To Fill The Shrimp Tacos!

Wrap the corn tortillas in paper towels, then heat them on medium temperature in the microwave just until warm (15-20 seconds). Once warm, you’re ready to finish the shrimp tacos. Fill each tortilla with 3-4 cooked shrimp, a small handful of purple cabbage, then some of the pico de gallo.

Top the tacos with a drizzle of the green sour cream sauce. That’s it!  Many restaurants use 2 tortillas for each taco to prevent them from tearing open, but to save on calories, I used one tortilla per taco. If you want to double up on tortillas, then by all means, go for it!
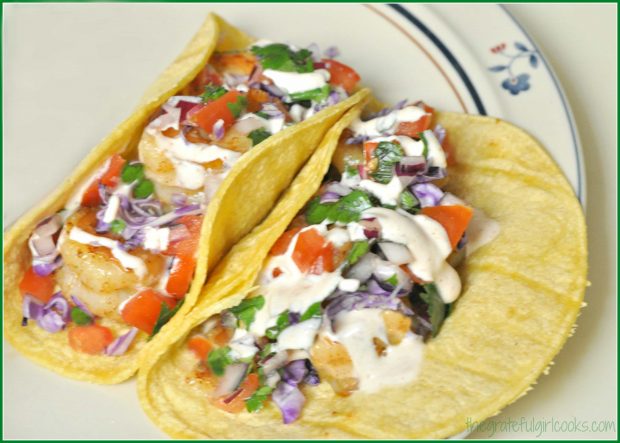
Shrimp tacos on a plate, ready to eat!I didn’t measure anything when I made these scrumptious tacos… I just “guess-timated”, and taste-tested everything. The sour cream sauce was approx. 1/3 cup sour cream, with 1/2 teaspoon taco seasoning mix, and approx. 3 Tablespoons green taco sauce (just taste it until it tastes just right for YOU!) The amounts shown made 6 tacos.

I hope you will consider trying these quick and tasty shrimp tacos! They were so delicious… I can’t wait to make them again soon. Have a fantastic weekend, friends; may you experience a deepening awareness of God’s great love for YOU!

Looking For More SHRIMP Recipes?

You can find all of my seafood recipes in the Recipe Index located at the top of the page. I have several shrimp recipes to enjoy, including:

Interested In More Recipes?

Thank you for visiting this website. I appreciate you using some of your valuable time to do soIf you’re interested, I publish a newsletter 2 times per month (1st and 15th) with all the latest recipes, and other fun info. I would be honored to have you join our growing list of subscribers, so you never miss a great recipe! 

There is a Newsletter subscription box on the top right side (or bottom) of each blog post, depending on the device you use, where you can easily submit your e-mail address (only) to be included in my mailing list.

You Can Also Find Me On Social Media:

Facebook page: The Grateful Girl Cooks!
Pinterest:
The Grateful Girl Cooks!
Instagram:
jbatthegratefulgirlcooks

Author's signature

Here’s one more to pin on your Pinterest boards!Make these delicious pan-seared shrimp tacos with homemade pico de gallo, topped with a creamy salsa verde sour cream sauce in a snap!
Save

Save

Save

Dark Chocolate Almond Chia Muffins

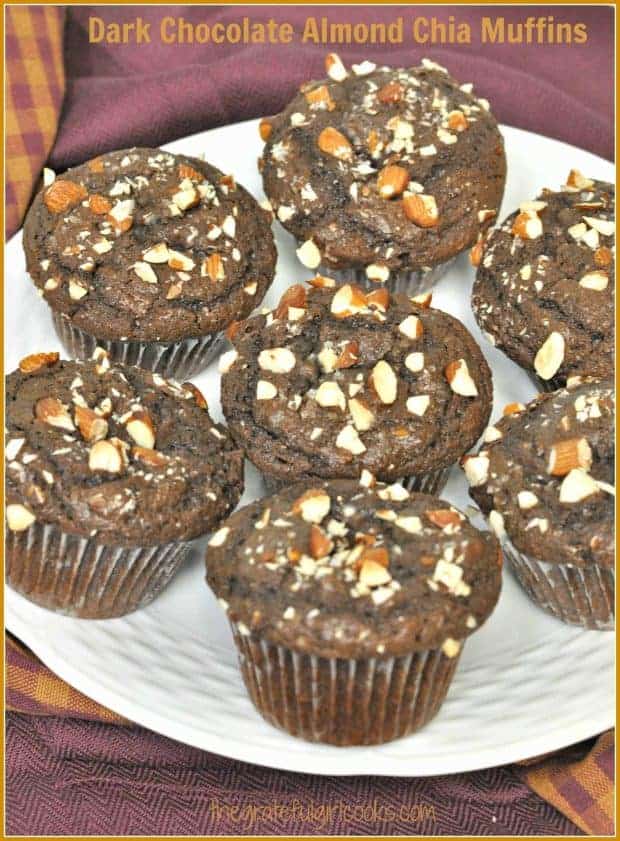
You will LOVE these easy and absolutely delicious dark chocolate almond chia muffins, loaded with dark chocolate, almonds, chia seeds, and sea salt!You will LOVE these easy and absolutely delicious dark chocolate almond chia muffins, loaded with dark chocolate, almonds, chia seeds, and sea salt!

It’s always fun when a friend gives me a recipe to try, one they really enjoy. What a great way to find NEW recipes, and get an “insider tip” from someone saying “you’ve got to try this!”. Such is the case with this AMAZING recipe for Dark Chocolate Almond Chia Muffins! I was at a Bible Study last week, and our teaching leader (my friend Fran) gave me a sticky note with the name of this recipe written on it, plus the name of the source.

The dark chocolate almond chia muffins sounded good, so less than 24 hours later, I was making these delicious muffins in my little ol’ kitchen. Let me tell you, folks… they are FABULOUS! How can you go wrong with dark chocolate, almonds, chia seeds, etc.? I’d never used chia seeds (an ancient grain) in a recipe prior to this, but did a bit of research and found out how nutritious/filling they are when added to food.

I am thrilled my friend Fran was kind enough to share this recipe with me, and I’m impressed by how ridiculously tasty these muffins are! From start to finish, it only took about 30 minutes to make a dozen. Here’s what you do:

Scroll Down For A Printable Recipe Card At The Bottom Of The Page

How To Make Dark Chocolate Almond Chia Muffins

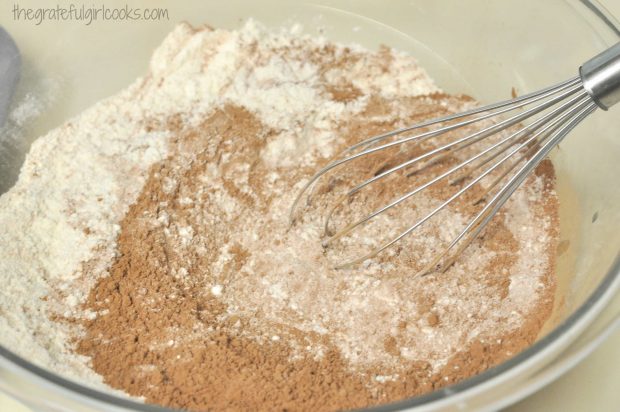
First, preheat your oven to 400° F. While the oven is preheating, put paper liners into a standard sized 12 cup muffin tin. Whisk the flour, sugar, cocoa powder, baking soda and salt together in a large mixing bowl.

Flour and cocoa for chocolate muffins in mixing bowl with whisk

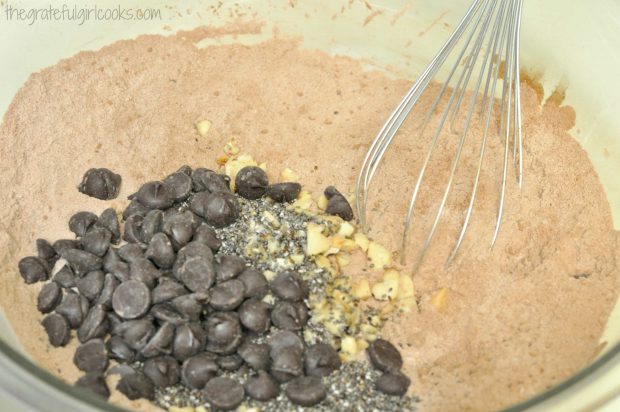
Add chia seeds to the dry ingredients (see those little bitty black seeds? So many nutritional benefits to adding these to foods). Also add 1/2 cup of the chopped almonds (reserving the rest for later), and dark chocolate chips to the flour mixture. Stir to combine.

Chocolate chips and almonds added to dry ingredients for chocolate almond chia muffins.

Make The “Wet Ingredients”

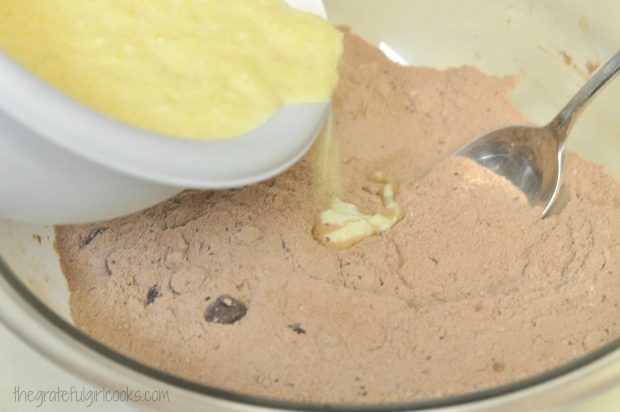
In a separate bowl, mix together buttermilk, melted butter (important – make sure melted butter has cooled to room temp. before adding, or you will get scrambled eggs!), egg, and almond extract. Add these wet ingredients to the dry ingredients in the large mixing bowl. Mix them together, only until just combined. Do not over-mix the batter.

Butter, egg and buttermilk added to chocolate almond chia muffins mix in bowl.

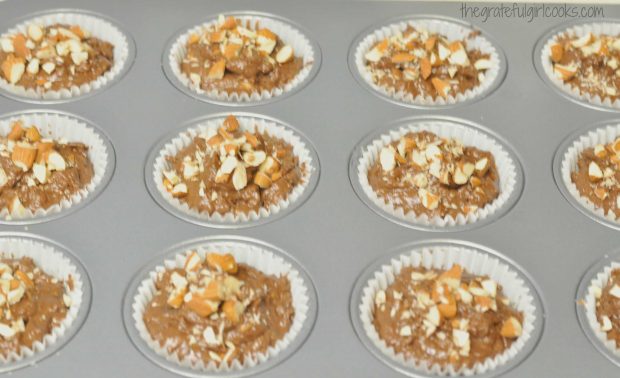
Evenly distribute the chocolate almond chia muffins batter between the 12 muffin cups. Top each of the muffins with 1½ – 2 teaspoons of the reserved chopped almonds.

Chocolate almond chia muffins batter in muffin cups, are ready to bake!

Sprinkle With Sea Salt And Then Bake

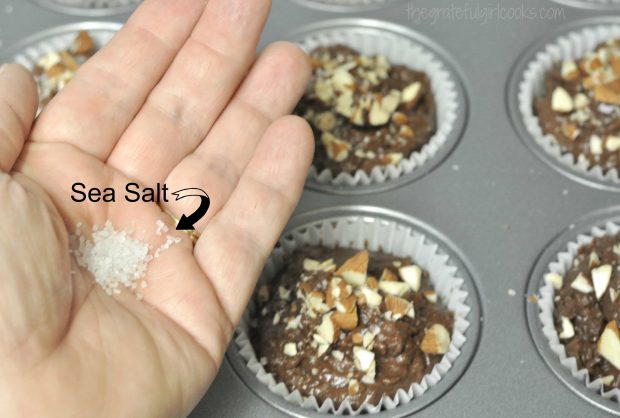
Sprinkle the top of each muffin with a pinch of coarse sea salt (trust me, this is GOOD). Bake the dark chocolate almond chia muffins at 400° F. for 18 minutes, or until the muffins spring back slightly when lightly pressed in the center.

Sea salt is sprinkled on top of chocolate almond chia muffins before baking.

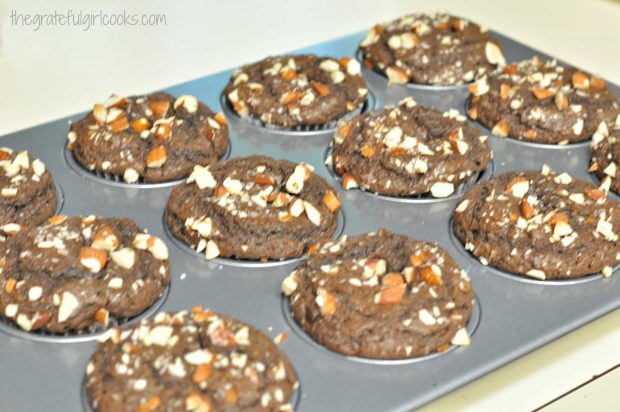
Let the baked chocolate almond chia muffins cool down (still in the pan), after removing them from oven.

A dozen chocolate almond chia muffins cooling down in pan, after baking.

Time To Enjoy A Muffin!

The dark chocolate almond chia muffins taste wonderful, served warm or at room temperature. Be sure to store them in an airtight container. They can also be frozen, if wrapped well and stored in a plastic freezer bag.

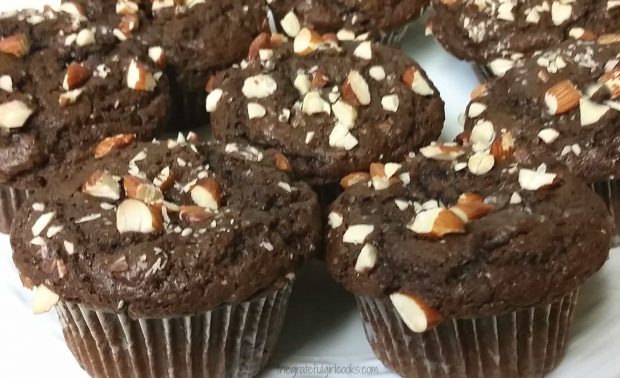
Close up of dark chocolate almond chia muffins, with almonds on top

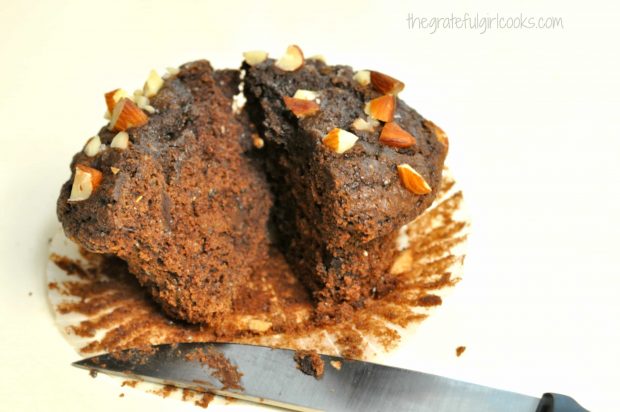
Here’s an inside peek at one of the chocolate almond chia muffins. You can see the dark chocolate chips and hints of chopped almonds inside. When warmed slightly, the chocolate chips get nice and “gooey”, which is a code word for “oh my goodness!”.

Inside look at one of the dark chocolate almond chia muffins, cut in half.

So, just as my friend passed this recipe to me, I now pass it on to you, friends. May you receive as much enjoyment out of these muffins as we did. Then… pass it on! Have a great day.

Looking For More MUFFIN Recipes?

You can find all of my recipes in the Recipe Index, located at the top of the page. I have LOTS of delicious muffin recipes, including:

Interested In More Recipes?

Thank you for visiting this website. I appreciate you using some of your valuable time to do soIf you’re interested, I publish a newsletter 2 times per month (1st and 15th) with all the latest recipes, and other fun info. I would be honored to have you join our growing list of subscribers, so you never miss a great recipe!
There is a Newsletter subscription box on the top right side (or bottom) of each blog post, depending on the device you use, where you can easily submit your e-mail address (only) to be included in my mailing list.

You Can Also Find Me On Social Media:

Facebook page: The Grateful Girl Cooks!
Pinterest:
The Grateful Girl Cooks!
Instagram:
jbatthegratefulgirlcooks

Author's signature

Recipe Source: Heather Meldrom at  http://www.realsimple.com/food-recipes/browse-all-recipes/dark-chocolate-almond-chia-muffins

0 from 0 votes
Dark Chocolate Almond Chia Muffins
Prep Time
15 mins
Cook Time
18 mins
Total Time
33 mins
 

You will LOVE these easy and absolutely delicious dark chocolate almond chia muffins, loaded with dark chocolate, almonds, chia seeds, and sea salt!

Category: Breakfast
Cuisine: American
Keyword: chocolate almond chia muffins
Servings: 12 muffins
Calories Per Serving: 383 kcal
Author: JB @ The Grateful Girl Cooks!
Ingredients
  • 2 cups all purpose flour
  • 1 cup granulated sugar
  • 1/2 cup unsweetened cocoa powder
  • 1 teaspoon baking soda
  • 1/4 teaspoon salt (table salt)
  • 5 teaspoons chia seeds (found with grains (ie. rice, quinoa) in most grocery stores)
  • 2/3 cup chopped almonds (divided)
  • 3/4 cup dark chocolate chips
  • 1 cup buttermilk
  • 3/4 cup (one and a half cubes) unsalted butter, melted and cooled to room temp.
  • 1 large egg
  • 1 teaspoon almond extract
  • Coarse sea salt , for sprinkling onto muffins before baking
Instructions
  1. Preheat oven to 400 degrees (F). Insert paper liners into a 12 cup standard sized muffin tin.
  2. Whisk the flour, sugar, cocoa powder, baking soda and table salt together in a large bowl. Add chia seeds, 1/2 cup of almonds (reserve the rest for garnish), and chocolate chips. Stir to combine.
  3. In a separate bowl, mix together the buttermilk, melted butter (at room temp!!!), egg, and almond extract. Once combined, add the wet ingredients to the bowl with the dry ingredients. Stir only until ingredients are fully combined (do not over-mix).
  4. Distribute batter equally between the 12 muffin cups. Sprinkle each muffin with 1 1/2 to 2 teaspoons of the reserved chopped almonds. Sprinkle each muffin with a pinch of coarse sea salt.
  5. Bake muffins at 400 degrees for 18 minutes, or until the muffins spring back when lightly pressed in the center. Remove pan from oven, but let muffins cool in the pan. Store in an airtight container.
Nutrition Facts
Dark Chocolate Almond Chia Muffins
Amount Per Serving (1 muffin)
Calories 383 Calories from Fat 189
% Daily Value*
Fat 21g32%
Saturated Fat 11g69%
Cholesterol 46mg15%
Sodium 374mg16%
Potassium 246mg7%
Carbohydrates 44g15%
Fiber 3g13%
Sugar 21g23%
Protein 6g12%
Vitamin A 405IU8%
Calcium 102mg10%
Iron 2.1mg12%
* Percent Daily Values are based on a 2000 calorie diet.

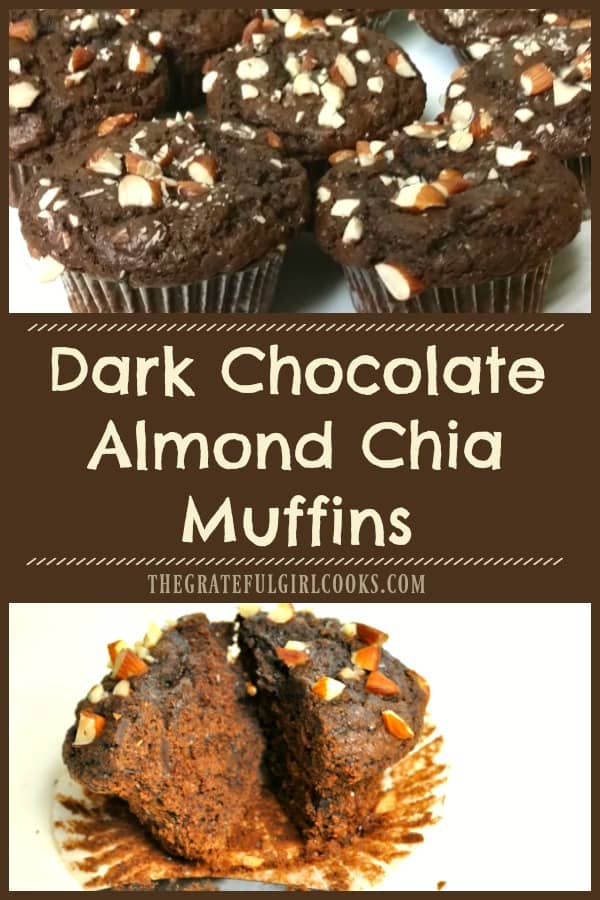
Here’s one more to pin on your Pinterest boards!
You will LOVE these easy and absolutely delicious dark chocolate almond chia muffins, loaded with dark chocolate, almonds, chia seeds, and sea salt!


Save

Save

Save

Chicken Cutlets With Pecan Sauce

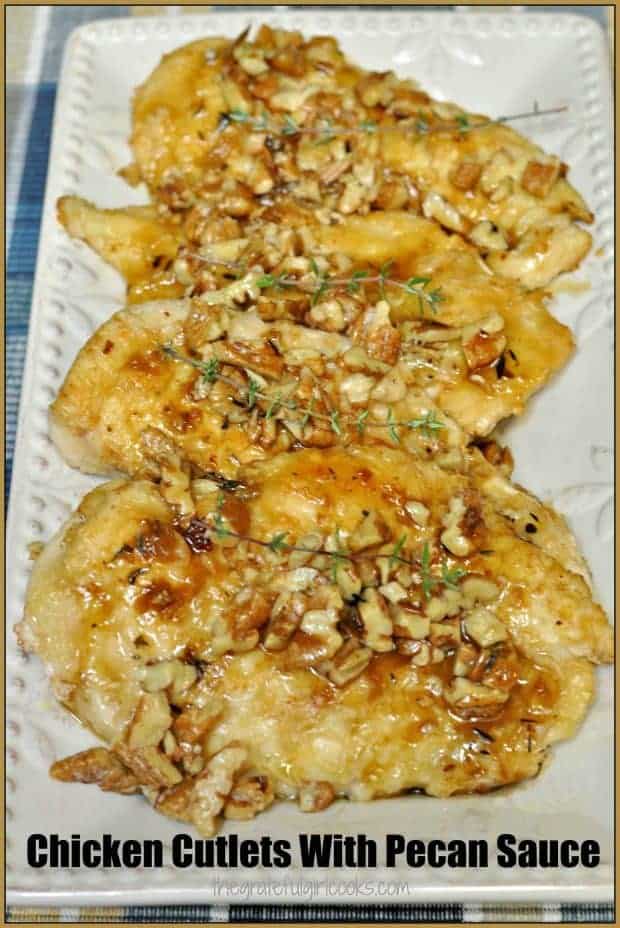
This EASY dinner of pan-seared chicken cutlets, topped with a delicious butter pecan sauce, can be prepared and on the table in 20 minutes!This EASY week-night dinner of pan-seared chicken cutlets, topped with a delicious butter pecan sauce, can be prepared and on the table in 20 minutes!
I received a gift card to use at a favorite bookstore. Since I collect cookbooks, one book I got was a Southern Living cookbook, for time saving meals. Chicken Cutlets With Pecan Sauce is the first recipe I tried, and wow… it WAS quick, inexpensive, and absolutely delicious!

This dish only took about 20 minutes, from start to finish, and my husband and I loved it! The original recipe calls for chicken cutlets, but I typically don’t buy cutlets. I ended up using 2 large chicken breasts and sliced them horizontally for this recipe, for a total of 4 servings.

Scroll Down For A Printable Recipe Card At the Bottom Of The Page

How to Make Chicken Cutlets with Pecan Sauce

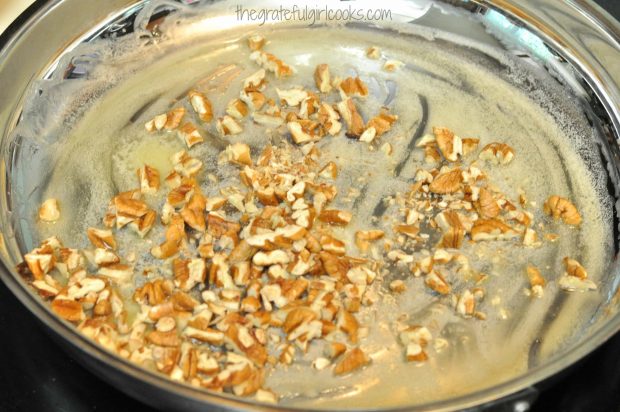
Melt butter in a large skillet, and then add and chopped pecans. Cook the pecans for 2-3 minutes. When the pecans are lightly toasted, remove them from the skillet.

Cooking chopped pecans in butter for chicken cutlets with pecan sauce.

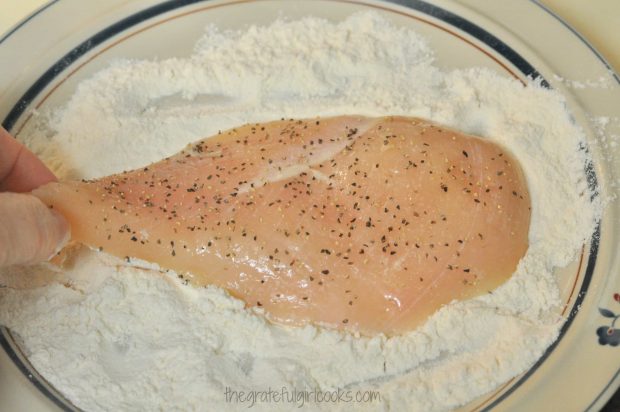
Season each of the chicken cutlets with salt and pepper, then dredge the pieces in flour to coat all sides.

Dredging chicken cutlets in flour and seasonings before cooking.

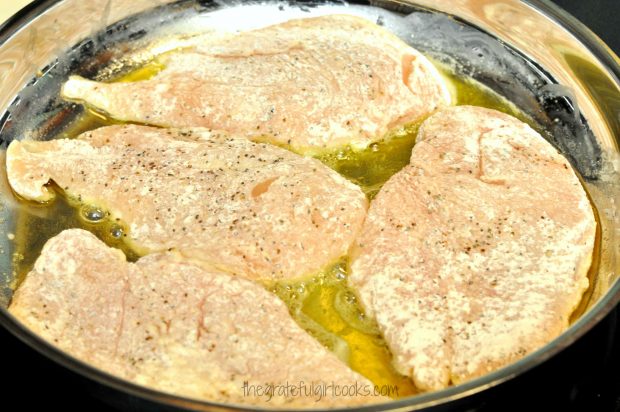
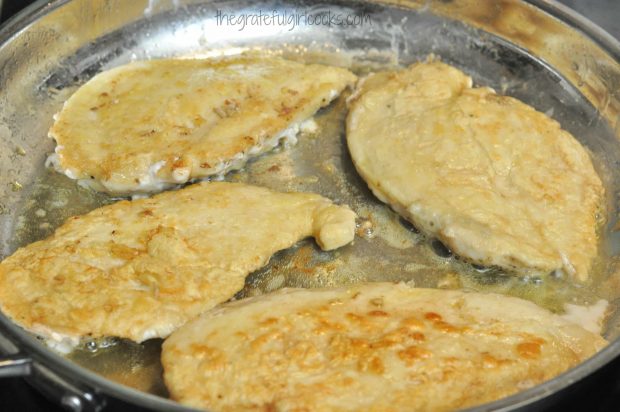
Cook the chicken breasts in hot olive oil in same skillet you used to toast the pecans. Pan-sear the chicken cutlets on medium heat, for about 4 minutes per side.

Cooking four floured chicken cutlets in hot oil in large skillet.

They should be light golden brown when done and fully cooked through. Once done, put the chicken cutlets onto a serving plate or platter, and top with the toasted pecans. Keep the chicken warm while you make the sauce, which takes about 5 minutes.

Chicken cutlets are cooked on both sides in skillet until lightly browned.

Make The Sauce For The Chicken Cutlets

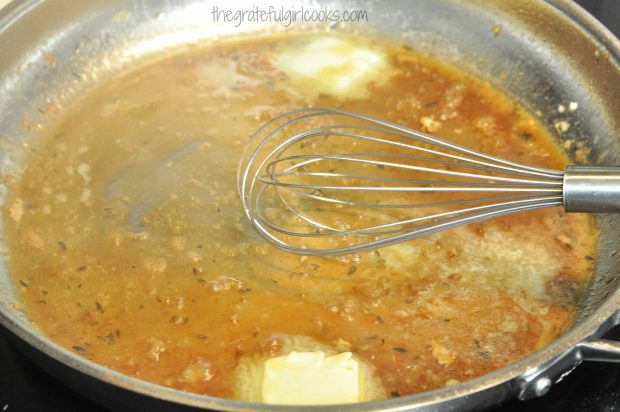
Using the same skillet (do not clean it out), add the chicken broth. Cook the broth for a couple minutes, stirring to get the little browned bits of goodness off the bottom of skillet. Add the brown sugar, apple cider vinegar, and thyme to the broth.

Cook for 3-4 minutes, until sauce has reduced a bit, and sauce has slightly thickened. Add 2 Tablespoons of butter to the pan sauce. Whisk to combine until butter has melted and is incorporated fully into the sauce. Remove the skillet from the heat, and now the sauce is ready for the chicken cutlets and toasted pecans.

Sauce is whisked and cooked in skillet for the chicken cutlets with pecan sauce.

To Serve Chicken Cutlets With Pecan Sauce

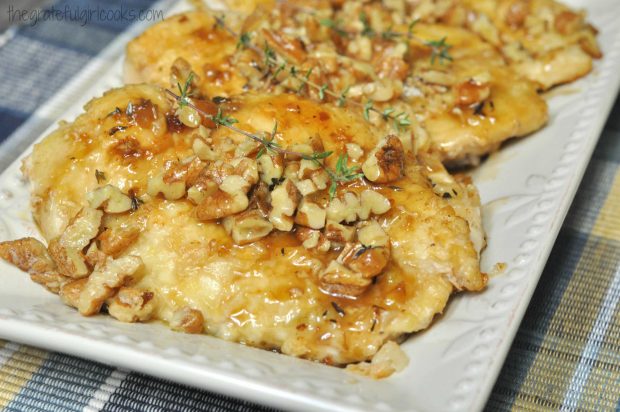
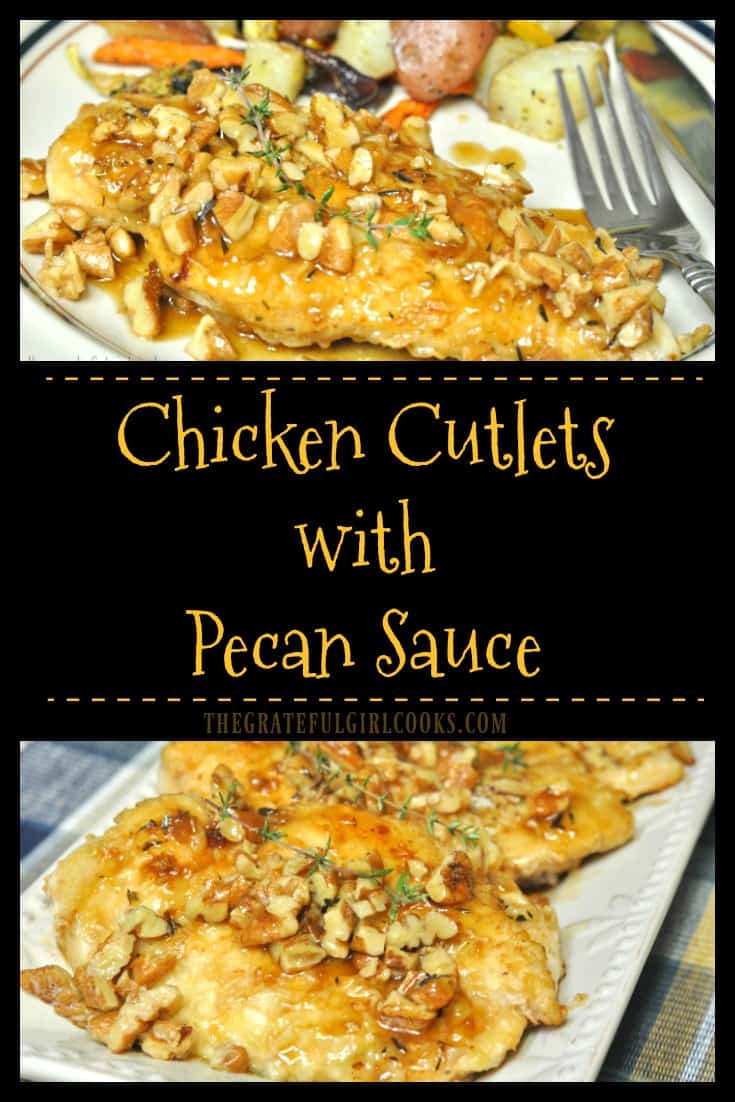
Spoon the sauce from the skillet over the chicken cutlets and toasted pecans. Serve the chicken cutlets with pecan sauce while hot! Each chicken cutlet is topped with the toasted pecans, the lovely sauce, and is garnished with a sprig of fresh thyme! Don’t they look nice? Who’s ready to eat?

Chicken cutlets with pecan sauce are served on a white platter.

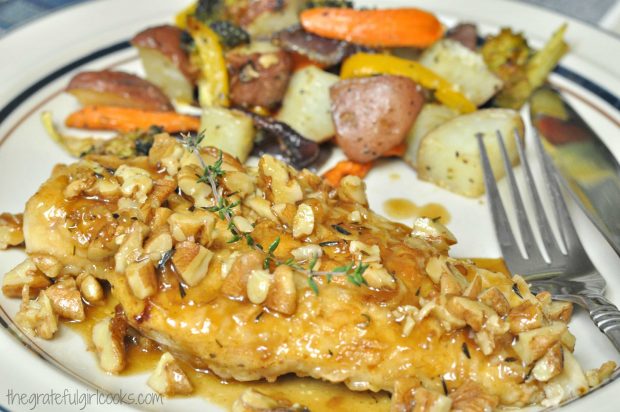
To round out the meal, I serve the chicken cutlets with oven-roasted veggies on the side. It is absolutely delicious, and the butter toasted pecans with the sauce on the chicken taste so good!

Chicken Cutlets With Pecan Sauce are served with roasted vegetables on the side.

We truly enjoyed these chicken cutlets with pecan sauce. I will definitely make this recipe again, and hope you will give it a try. It is such a quick, delicious meal to prepare… and the leftovers are good, too! Have a fantastic day! May you find someone to encourage and bless as you go through your day!

Looking For More CHICKEN Recipes?

You can find ALL of my chicken recipes in the Recipe Index at the top of the page. There are a LOT of them! Some of our favorites include:

Interested In More Recipes?

Thank you for visiting this website. I appreciate you using some of your valuable time to do soIf you’re interested, I publish a newsletter 2 times per month (1st and 15th) with all the latest recipes, and other fun info. I would be honored to have you join our growing list of subscribers, so you never miss a great recipe! 

There is a Newsletter subscription box on the top right side (or bottom) of each blog post, depending on the device you use, where you can easily submit your e-mail address (only) to be included in my mailing list.

You Can Also Find Me On Social Media:

Facebook page: The Grateful Girl Cooks!
Pinterest:
The Grateful Girl Cooks!
Instagram:
jbatthegratefulgirlcooks

Author's signatureRecipe Source: The cookbook “Southern Living Quick Start Homemade”, Published by Time Home Entertainment, 2013, page 162.

0 from 0 votes
Chicken Cutlets With Pecan Sauce
Prep Time
10 mins
Cook Time
10 mins
Total Time
20 mins
 
This EASY dinner of pan-seared chicken cutlets, topped with a delicious butter pecan sauce, can be prepared and on the table in 20 minutes!
Category: Entree
Cuisine: American
Keyword: chicken cutlets
Servings: 4 servings
Calories Per Serving: 496 kcal
Author: JB @ The Grateful Girl Cooks!
Ingredients
  • 4 Tablespoons butter , divided (1/2 cube)
  • 1/2 cup chopped pecans
  • 4 chicken cutlets (I sliced two large breasts horizontally in half to make 4 cutlets)
  • 1 teaspoon salt
  • 1/2 teaspoon black pepper
  • 3 Tablespoons olive oil
  • 1/2 cup chicken broth
  • 1 Tablespoon brown sugar
  • 2 Tablespoons apple cider vinegar
  • 1/2 teaspoon dried thyme (if using fresh thyme, use 1 1/2 teaspoons)
Instructions
  1. Melt 2 Tablespoon butter in a large skillet (nonstick works the best). Add chopped pecans and cook over medium-low heat for 2-3 minutes until pecans are lightly toasted and fragrant, stirring occasionally. Remove pecans from skillet.
  2. Sprinkle the chicken cutlets with salt and pepper. Place flour on a dinner plate, and dredge the chicken cutlets in the flour, making sure both sides are covered with flour.
  3. Cook the chicken in hot olive oil in the skillet. Cook on medium heat for about 4 minutes per side until done. When chicken is fully cooked through, and light golden brown, remove them to a serving platter. Top the chicken with the toasted pecans. Keep chicken warm while making the sauce.
  4. Using same skillet, add chicken broth. Cook for 2 minutes, scraping up the browned bits of goodness from the bottom of skillet. Add the brown sugar, vinegar and thyme. Stir to combine and cook for 3-4 minutes until sauce has reduced a bit and slightly thickened. Add remaining 2 Tablespoons of butter and whisk to combine until butter is melted and is fully combined.
  5. Spoon sauce over the chicken and pecans, and serve!
Nutrition Facts
Chicken Cutlets With Pecan Sauce
Amount Per Serving (1 cutlet + sauce)
Calories 496 Calories from Fat 324
% Daily Value*
Fat 36g55%
Saturated Fat 10g63%
Cholesterol 138mg46%
Sodium 987mg43%
Potassium 708mg20%
Carbohydrates 5g2%
Fiber 1g4%
Sugar 3g3%
Protein 37g74%
Vitamin A 400IU8%
Vitamin C 4.1mg5%
Calcium 21mg2%
Iron 1.2mg7%
* Percent Daily Values are based on a 2000 calorie diet.

Here’s one more to pin on your Pinterest boards!This EASY dinner of pan-seared chicken cutlets, topped with a delicious butter pecan sauce, can be prepared and on the table in 20 minutes!

Save

Save

Save

Save