Category: Instant Pot Recipes

Recipes for a variety of foods that can be made in an Instant Pot.

Instant Pot Boneless Pork Chops

Make Instant Pot Boneless Pork Chops for a dinner for two! These pork chops are brined, well-seasoned, easy to make, juicy and delicious!

Today I want to share a yummy recipe for Instant Pot boneless pork chops that serves two people. This fantastic recipe is very simple to make in my opinion and is perfect served any time of the year.

When I photographed the steps to make this dish it was extremely HOT outside and I appreciated being able to use my Instant Pot in order to keep our kitchen cool!

All in all, it is a very simple dish to make, however you do need to allow an extra hour (or two) to brine the pork chops (a simple salt/water mixture) before you cook them. Don’t skip this step, though, because it makes the chops so tender and juicy!

The brining is SIMPLE and involves inactive prep, so if you’ve got the time, and want to enjoy delicious boneless pork chops, then this recipe is for you! Here’s how to make Instant Pot Boneless Pork Chops.

Scroll Down For A Printable Recipe Card At The Bottom Of The Page

Brine the Pork Chops

The first thing you will need to do is brine the pork chops for 1-2 hours before you cook them. You will need to plan ahead for this step, because it makes the pork chops juicy and flavorful.

Use a shallow rimmed dish (just big enough to lay the pork chops down in a single layer). Mix a brining solution in this dish by stirring together 4 cups of water with 4 Tablespoons of salt until all the salt has dissolved. TIP: I use a glass loaf pan for this because it’s the perfect size for two large boneless chops!

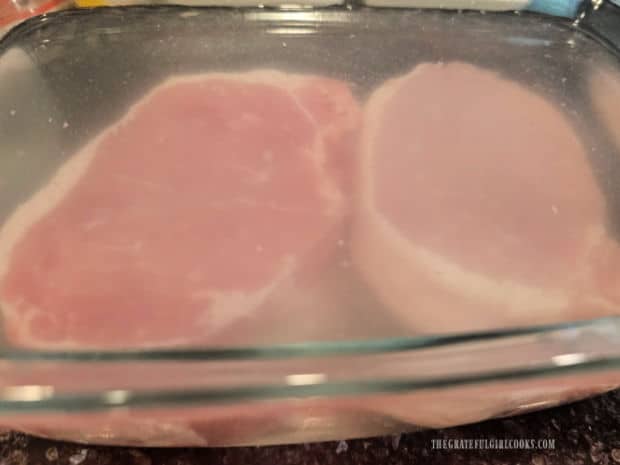
Lay the pork chops in the brine, placing them in the brine in a single layer. The brine should cover the pork chops. NOTE: If the dish you’re using is too big, you may have to turn the pork chops over halfway through the “brining” time for best results.

Place the dish in the refrigerator and let the meat “marinate” in the brine for 1-2 hours. When done, remove the pork chops and then lightly blot them with a paper towel.

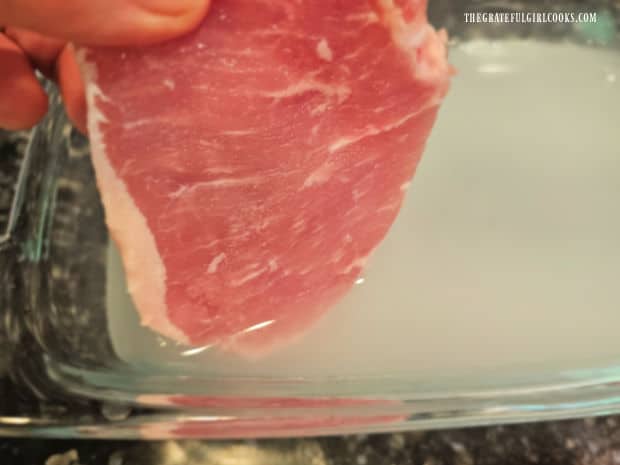
A boneless pork chop is placed in a saltwater brine for 1-2 hours before cooking.Two 1" thick boneless pork chops in saltwater brine.

Prepare The Seasoning Mix

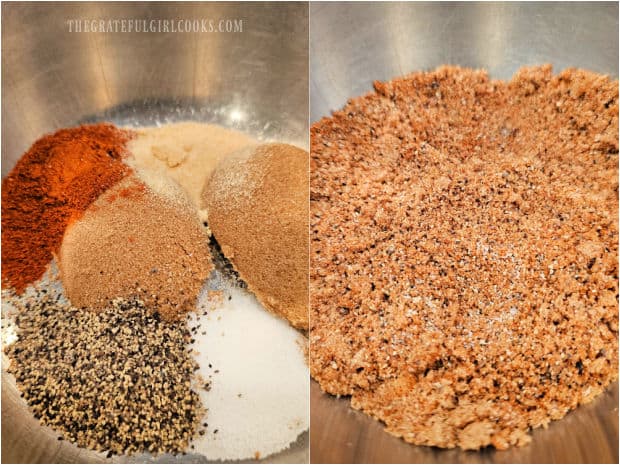
While the pork is brining, mix up the spices you’ll be using to season the meat. The spices you will use are brown sugar, paprika, salt, pepper, and onion powder.

Stir these spices in a small bowl until they’re fully combined and set them aside until the pork chops are ready to be cooked.

Spices are combined to make a seasoning mixture for the brined pork chops.

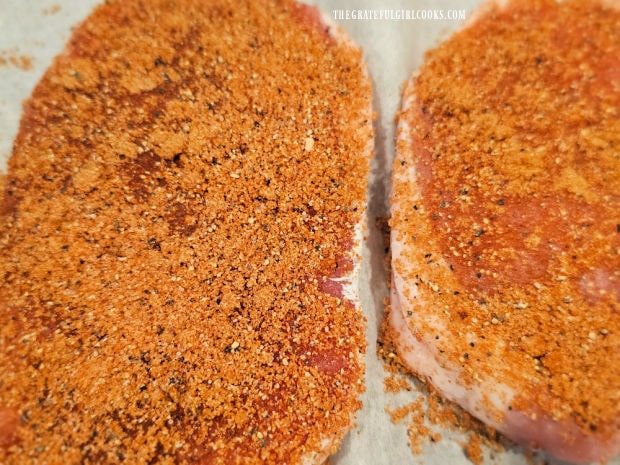
Season the two boneless pork chops with the spice mixture, covering BOTH sides of the pork chops. Press the spices into the meat to help it adhere. Once the meat is fully covered in spices, it is ready to be cooked.

Both sides of the thick pork chops are covered with the spice mixture.

Sauté The Pork Chops In the Instant Pot

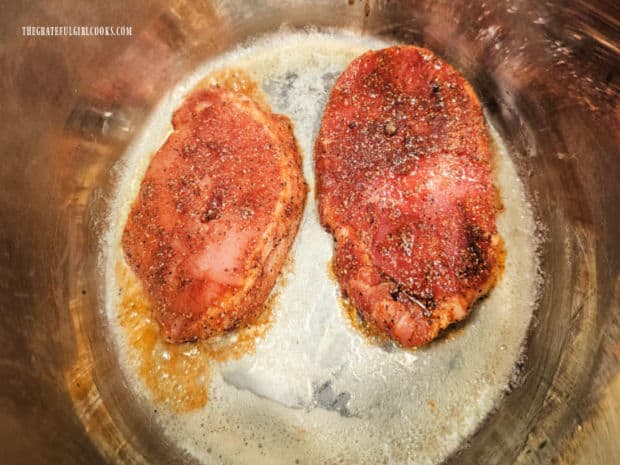
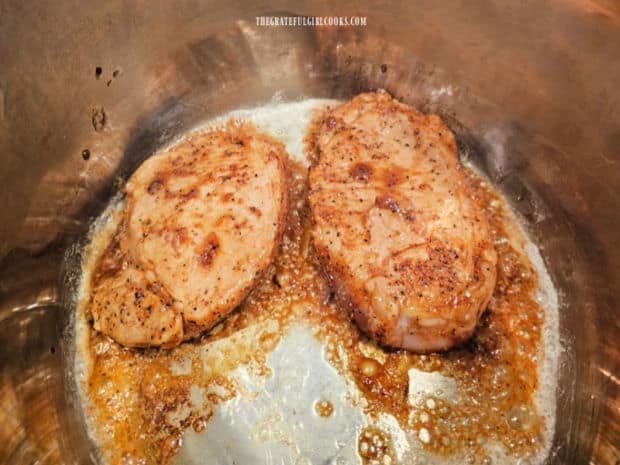
Plug in the Instant Pot and press the SAUTÉ button (High heat). Add a Tablespoon of butter and once it has melted, add the seasoned pork chops in a single layer.

Pork chops are sautéed in melted butter in the Instant Pot.

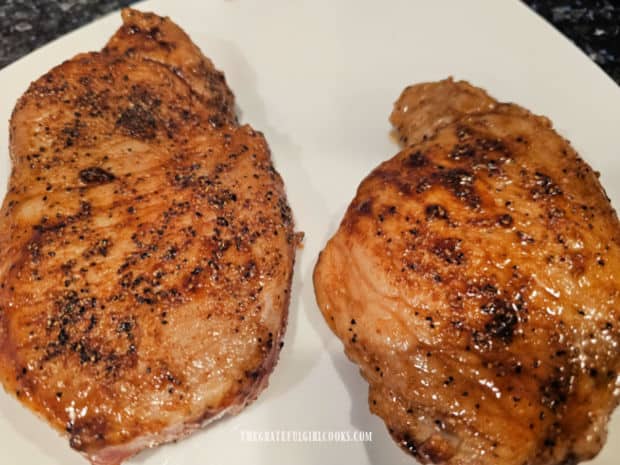
Brown the pork chops on both sides (about 1-2 minutes per side). Once they have a light brown “sear” on them, remove the pork chops from the Instant Pot and set them aside on a plate.

Both sides of the seasoned pork chops are lightly browned in the Instant Pot.Pork chops are removed from the pot to rest on a plate after they're lightly browned.

Make A Quick Cooking Sauce

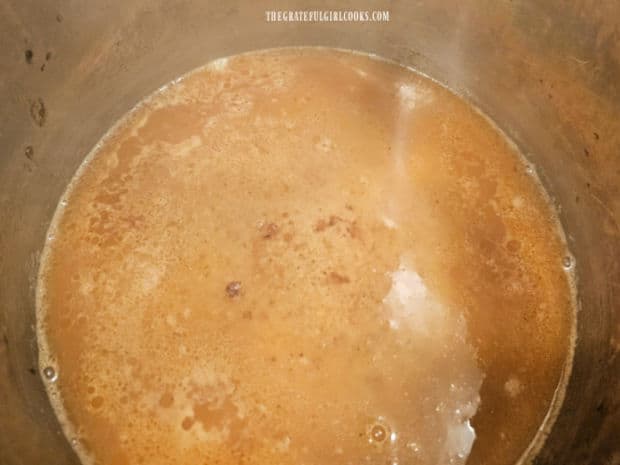
While the empty Instant Pot is still set to SAUTÉ, add 1 cup of chicken broth. Now you need to “de-glaze” the pot. De-glazing means getting any leftover browned bits from searing the pork chops scraped off the bottom of the pot. They have lots of FLAVOR to contribute to the sauce.

Stir the liquid with a wooden spoon to scrape up all the little bits left in the bottom of the pot from searing the pork chops. This will only take a minute or two.

When done, add Worcestershire sauce and Liquid Smoke to the liquid and stir to combine. Press The CANCEL button on the Instant Pot to turn off the Sauté function.

Instant Pot is deglazed with chicken broth, then Worcestershire and Liquid Smoke is added.

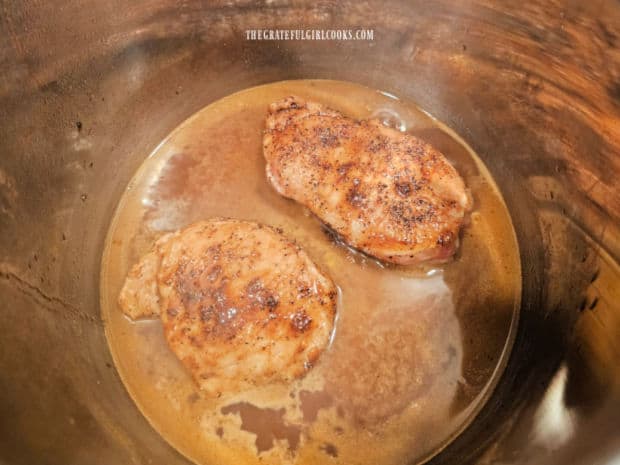
Add the seasoned, browned pork chops back into the sauce in the Instant Pot. Now it’s time to pressure cook the chops!

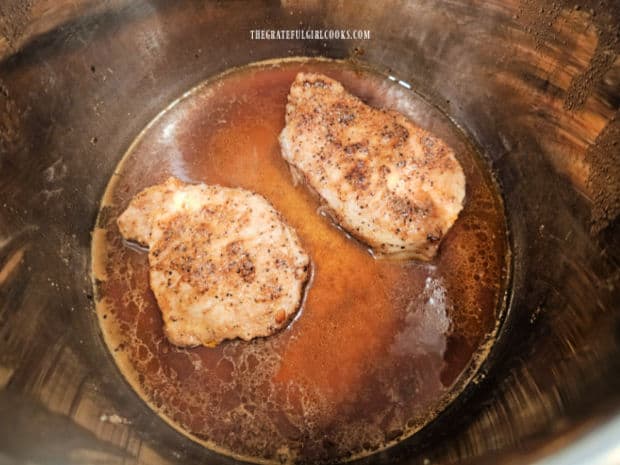
The browned pork chops are added back into the sauce in the Instant Pot.

Pressure Cook The Instant Pot Boneless Pork Chops

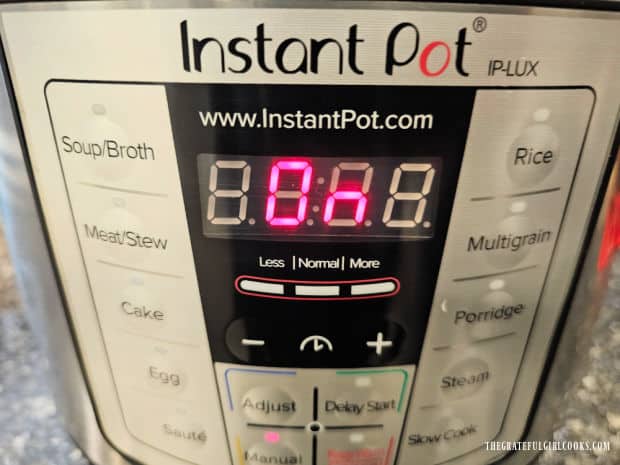
Place the lid on the Instant Pot and lock it into place. Flip the pressure valve to SEALING. Program the Instant Pot to cook on MANUAL (High Pressure) for 7 minutes.

It will take about 7-10 minutes for the Instant Pot to reach full pressure and the cooking timer to begin. When the cooking program ends, let the pressure release NATURALLY (don’t do anything) for 12 minutes, and then perform a quick release of any remaining steam by flipping the pressure release knob to VENTING. 

The Instant Pot Boneless Pork Chops cook at high pressure for 7 minutes.

When ALL of the steam has been released (and pressure gauge button drops back down), it is safe to open the lid. Unlock and remove the lid.

Let the Instant Pot boneless pork chops rest for 5 minutes before removing them from the sauce and serving them. This resting time allows to allow the internal juices time to redistribute inside the meat.

Fully cooked pork chops rest for 5 minutes after pressure cooking (and before serving).

Transfer the pork chops to individual plated and spoon some of the sauce from the Instant Pot over the meat, if desired. Serve the Instant Pot Boneless Pork Chops with veggies or other sides and dig in!

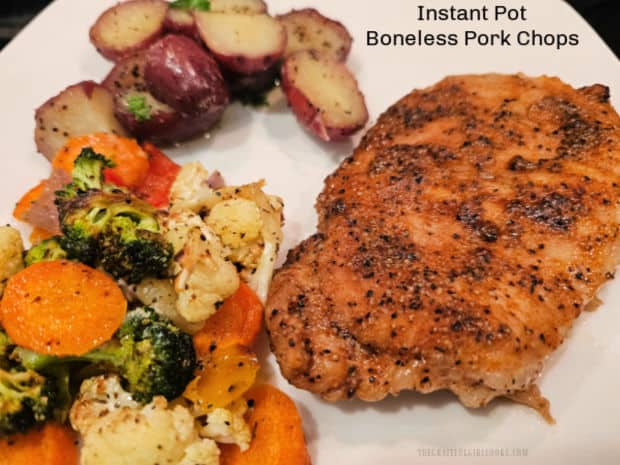
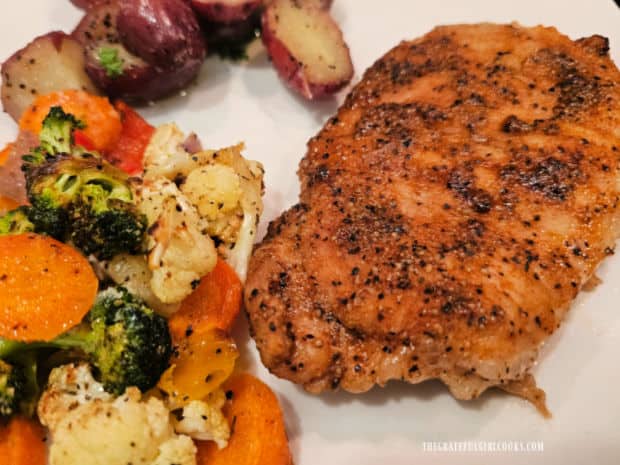
We loved these pork chops and enjoyed them served with Garlic Butter Red Potatoes and Air Fryer Veggies For Two on the side. It was a delicious dinner partly because it was so easy!

The pork chops were very juicy inside (yay!) and tasted wonderful, because of the spice mix and smoky “sauce” the meat was cooked in. I highly recommend this pork chop recipe and am confident you will enjoy it, too!

Red potatoes and veggies are served along with the Instant Pot Boneless Pork Chops.

I hope you have the opportunity to try this delicious Instant Pot recipe. It was a great main dish to make on a very HOT day outside because it didn’t require me to heat up our kitchen!

Thanks so much for stopping by, and I invite you to come back again soon for more family-friendly recipes. Take care, may God bless you, and have a wonderful day.

Looking For More INSTANT POT Recipes?

You can find ALL of my recipes in the Recipe Index, which is located at the top of the page. I have a nice variety of Instant Pot recipes to choose from, including:

Want More Recipes? Get My FREE Newsletter!

I publish a newsletter 2 times per month (1st and 15th) with lots of recipes, tips, etc.
Would you like to join our growing list of subscribers?

There is a Newsletter subscription box on the top right (or bottom) of each blog post, depending on the device you use.
You can submit your e-mail address there, to be added to my mailing list.

Find Me On Social Media:

Facebook page: The Grateful Girl Cooks!
Pinterest:
The Grateful Girl Cooks!
Instagram:
jbatthegratefulgirlcooks

Author's signature

Original recipe source, and with thanks to Jason at Best Damn Instant Pot Boneless Pork Chops – RecipeTeacher

↓↓ PRINTABLE RECIPE BELOW ↓↓

0 from 0 votes
Instant Pot Boneless Pork Chops
Prep Time
10 mins
Cook Time
7 mins
Inactive Prep Time (brining/pressure release)
1 hr 12 mins
Total Time
1 hr 29 mins
 

Make Instant Pot Boneless Pork Chops for a dinner for two! These pork chops are brined, well-seasoned, easy to make, juicy and delicious!

Category: Main Dish
Cuisine: All Cuisines
Keyword: instant pot boneless pork chops
Servings: 2
Calories Per Serving: 329 kcal
Author: JB @ The Grateful Girl Cooks!
Ingredients
For Brine: 4 cups water and 4 Tablespoons salt
  • 2 1" thick boneless pork chops (about 6 oz. each) * See Note Below
For Seasoning Mix and Remaining Ingredients:
  • 2 Tablespoons brown sugar
  • 1 teaspoon paprika
  • 1 teaspoon salt
  • 1 teaspoon black pepper
  • ½ teaspoon onion powder
  • 1 Tablespoon butter
  • 1 cup chicken broth
  • ½ Tablespoon Worcestershire sauce
  • 1 teaspoon Liquid Smoke
Instructions
  1. Brine Pork Chops: Mix brine in a loaf-sized dish by stirring water with salt until salt dissolves. Add chops in single layer (brine should cover chops). Refrigerate 1-2 hours. Remove chops; lightly blot with a paper towel.

  2. Make Spice Mix: Stir brown sugar, paprika, salt, pepper and onion powder in a small bowl until combined. Season BOTH sides of the brined pork chops with spice mixture, pressing it into the meat to adhere.

  3. Cook: Plug in the Instant Pot; press SAUTÉ button (High heat). Add butter. Once melted, add pork chops in a single layer. Lightly brown chops on both sides (1-2 minutes per side). Remove pork chops from Instant Pot; set them aside on a plate.

  4. Keep Instant Pot on SAUTÉ. Add chicken broth; stir with wooden spoon, scraping up browned bits left in the pot (from browning pork chops). Add Worcestershire sauce and Liquid Smoke; stir to combine. Press CANCEL button. Add pork chops back into the sauce in a single layer.

  5. Place lid on the Instant Pot; lock into place. Flip pressure valve to SEALING. Program Instant Pot to cook on MANUAL (High Pressure) for 7 minutes. It will take 7-10 minutes to reach full pressure before the cooking program timer begins. When done, let the pressure release NATURALLY for 12 minutes (do nothing), then perform a quick release of any remaining steam by flipping the pressure release knob to VENTING. When ALL steam has been released (and pressure gauge button drops down), it's safe to open the lid. Unlock/remove lid. Let pork chops rest 5 minutes before removing them (to redistribute internal juices in the meat).

  6. Transfer pork chops to individual plates. Drizzle some of the remaining sauce in the pot over the meat, if desired. Serve and enjoy!

Recipe Notes

Note: It is important to use 1" thick boneless pork chops for this recipe to ensure the Instant Pot cooking time used creates juicy, tender chops. If they are too thin, they may not cook properly (and be overdone).

Nutrition Facts
Instant Pot Boneless Pork Chops
Amount Per Serving (1 pork chop)
Calories 329 Calories from Fat 108
% Daily Value*
Fat 12g18%
Saturated Fat 6g38%
Trans Fat 0.3g
Polyunsaturated Fat 1g
Monounsaturated Fat 4g
Cholesterol 130mg43%
Sodium 1792mg78%
Potassium 772mg22%
Carbohydrates 15g5%
Fiber 1g4%
Sugar 13g14%
Protein 39g78%
Vitamin A 679IU14%
Vitamin C 1mg1%
Calcium 39mg4%
Iron 2mg11%
* Percent Daily Values are based on a 2000 calorie diet.

Here’s one more to pin on your Pinterest boards!Make Instant Pot Boneless Pork Chops for a dinner for two! These pork chops are brined, well-seasoned, easy to make, juicy and delicious!

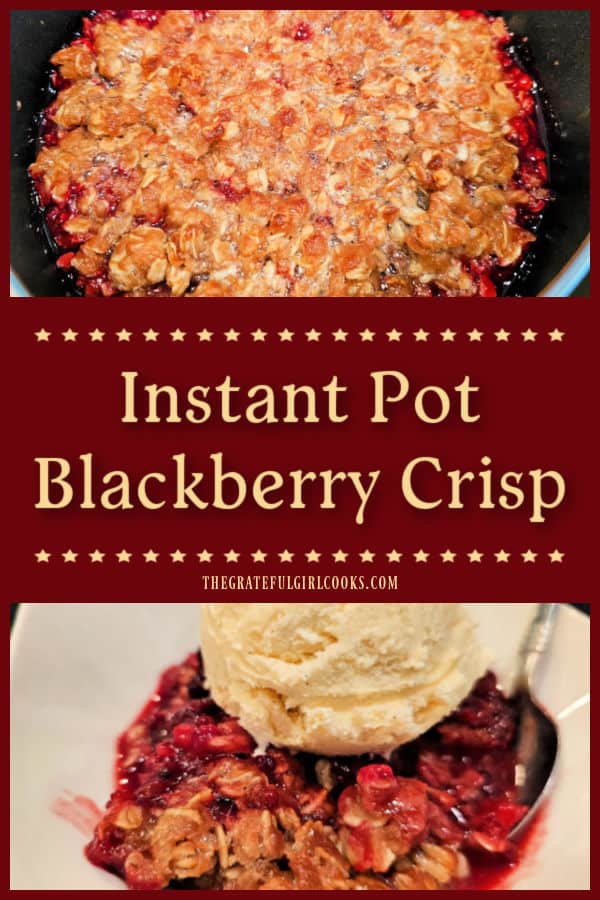
Instant Pot Blackberry Crisp

Make a scrumptious Instant Pot Blackberry Crisp using fresh or frozen berries! Topped with crisp buttery streusel, you’ll love this dessert!
Make a scrumptious Instant Pot Blackberry Crisp using fresh or frozen berries! Topped with crisp buttery streusel, you'll love this dessert!

Did you know you can use an Instant Pot to make an incredible blackberry crisp? Well… it’s TRUE! Even when it’s really hot outside (and I don’t want to heat up our kitchen), I can whip up an absolutely delicious fruit crisp in no time at all, using this handy dandy kitchen appliance!

This recipe is very versatile because, if necessary, you can use FROZEN blackberries as long as you don’t let them thaw! The good news is this means you can make Instant Pot Blackberry Crisp all year long, for a little taste of summer (even if it’s snowing outside!).

This is a very simple dessert recipe to prepare, and the end result is amazingly delicious! You’re going to love it! Here’s how to make Instant Pot Blackberry Crisp.

Scroll Down For A Printable Recipe Card At The Bottom Of The Page

Before You Start – A Little Prep

Place a trivet in the inner pot, then add 1 cup of water. Set the Instant Pot aside while you make the fruit filling and streusel topping for the blackberry crisp.

You’ll need a 7″ round baking pan or a 7″ wide oven-safe glass bowl to make the blackberry crisp, so plan accordingly (they need to fit in a 6 qt. or 8-qt. Instant Pot). Generously spray the baking pan (or oven-safe bowl) you’re using with non-stick cooking spray on the bottom and sides.

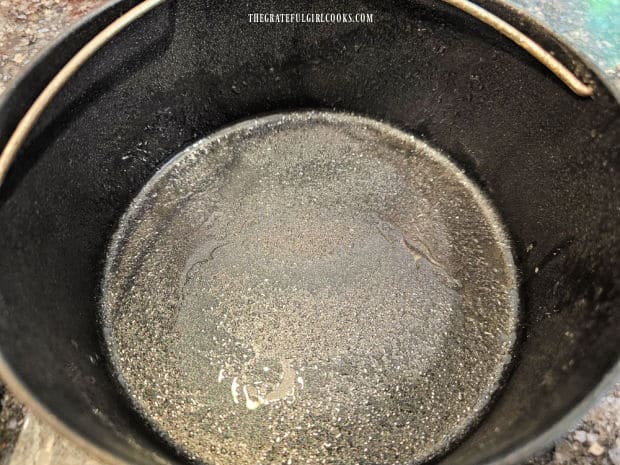
A cup of water and trivet are added to the inner pot of the Instant Pot appliance.

A 7" round baking pan is greased well before filling with blackberry mixture.

Prepare The Blackberries And Streusel Topping 

Place the blackberries in a medium-sized bowl. NOTE: If you’re using frozen blackberries, do not thaw them, but simply add them (still frozen) to the bowl.

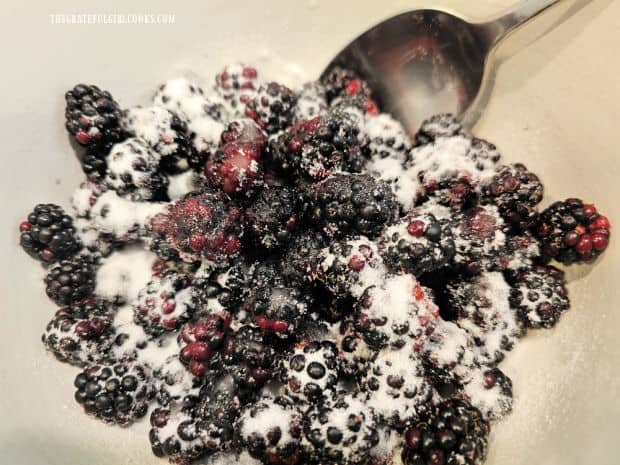
Add granulated sugar and fresh lemon juice and gently stir until all the berries are covered with the sugar mixture.

Blackberries are stirred and covered with sugar and lemon juice.

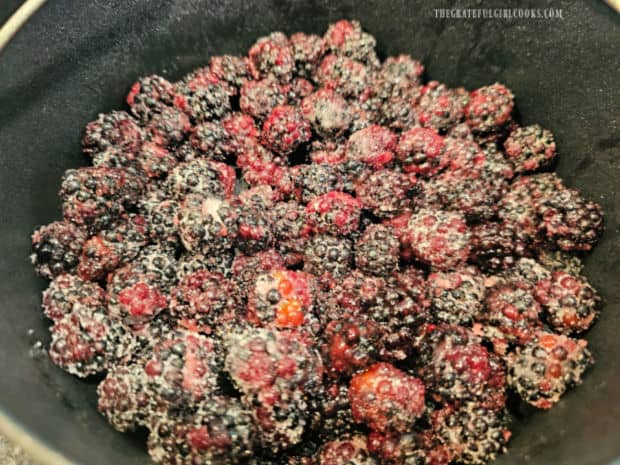
Pour or spoon the berries into the greased 7″ baking pan and spread them out until the bottom of the baking pan (or bowl) is fully covered.

The sugar-covered blackberries are placed in a 7" greased baking pan.

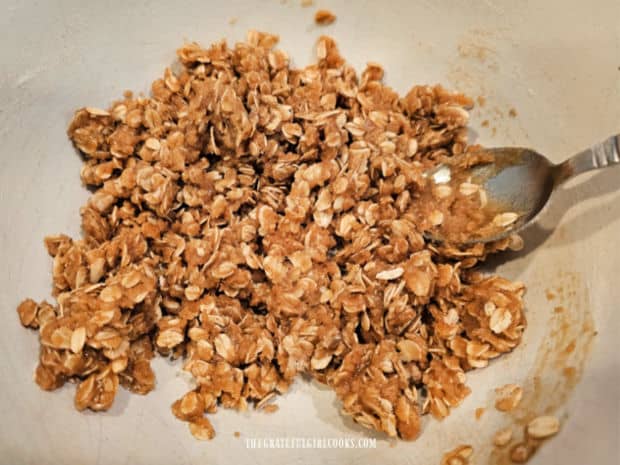
Now it’s time to make the streusel topping. In a separate bowl, stir oats, flour, brown sugar, cinnamon, nutmeg and salt together, until combined. Add melted butter and stir until the streusel becomes crumbly and can hold together when pinched.

Oats. brown sugar, flour and spices are combined with melted butter in a bowl.

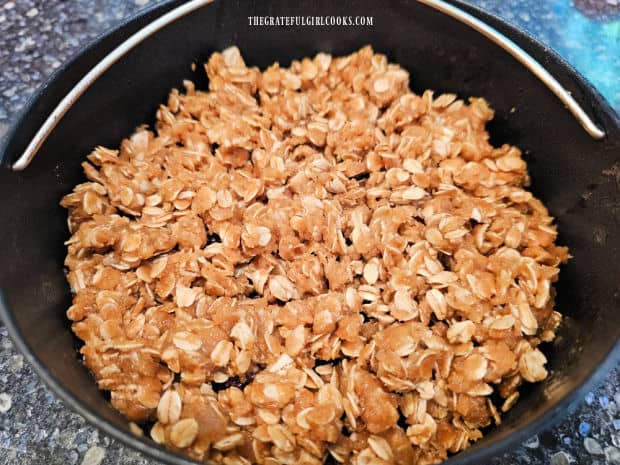
Use your fingers to pinch off and distribute the streusel topping over the blackberry filling, making sure to evenly cover the blackberries.

Crumbly streusel is added to cover the top of the blackberry fruit filling.

Prep The Crisp For Cooking

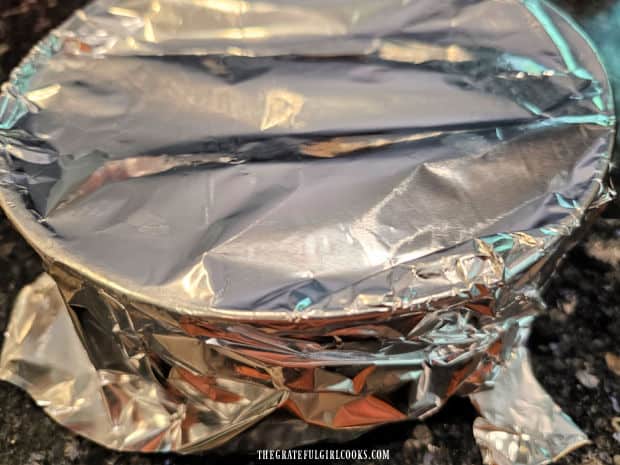
Cover the pan with aluminum foil, crimping the edges firmly around the pan to ensure a secure seal. The foil helps prevent any water (condensation) from getting on the blackberry crisp while it cooks.

Aluminum foil is used to tightly cover the baking pan before cooking.

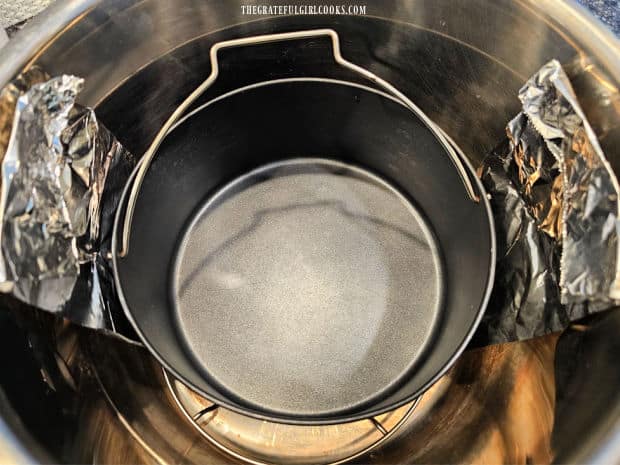
Carefully lower the covered baking pan onto the trivet (you may want to use the tip below if the baking dish you’re using doesn’t have a handle).

TIP: If needed, you can make a “sling” to help lower the baking pan into the inner pot. Do this by tearing off a long piece of foil (18″-20″), then fold it (lengthwise) into thirds so it’s thicker and stronger. Put the foil UNDER the pot with the long ends coming up both sides (shown below). Holding the ends of the foil, gently lower the pan onto the trivet. You can cook with the sling in place in the pot, then when it’s done cooking, it’s easy to lift the pan up and out of the hot inner pot.

A "sling" made from aluminum foil is shown to help lift the pan out of the pot.

Cook The Blackberry Crisp

Close the lid and lock it in place. Flip the steam release valve to SEALING. Select the MANUAL button (high pressure) and set the timer for 10 minutes.

It will take the Instant Pot about 7-9 minutes to reach full internal pressure before the cooking program (and timer) begins. The pressure gauge will pop up when it reaches full pressure. When the 10-minute cooking timer ends, the machine should alert you with a beeping sound.

Instant Pot is shown, which is used to cook the blackberry Crisp.

When the cooking program ends, let the pressure release NATURALLY (do nothing) for 5 minutes, then flip the pressure knob to VENTING to release any remaining steam still inside. The pressure gauge should drop back down once all steam has been released, indicating it is safe for you to unlock and remove the lid.

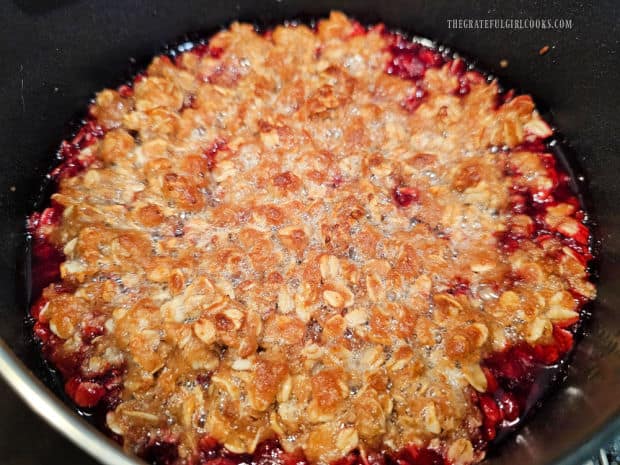
Open the lid and carefully remove the baking pan out of the Instant Pot. At this point, in reality the blackberry crisp has finished cooking and can be cooled slightly then served. For BEST RESULTS, I highly recommend doing one quick final step before serving (see NOTE below).

NOTE: If you would like the streusel to be browner (and crispier), turn on your oven broiler while the Instant Pot is venting the steam. Once removed from the Instant Pot, place the baking pan on a rack about 4″ under the broiler in your oven. Keep an eye on it, of course, but after 2-3 minutes under the broiler, the topping should be more browned in color and even more crisp!

Instant Pot Blackberry Crisp is done cooking and ready to serve.

Serve And Enjoy Instant Pot Blackberry Crisp

Let the blackberry crisp cool for several minutes (it will firm up slightly), then scoop out warm portions into serving bowls. We usually get 5 small servings from this recipe.

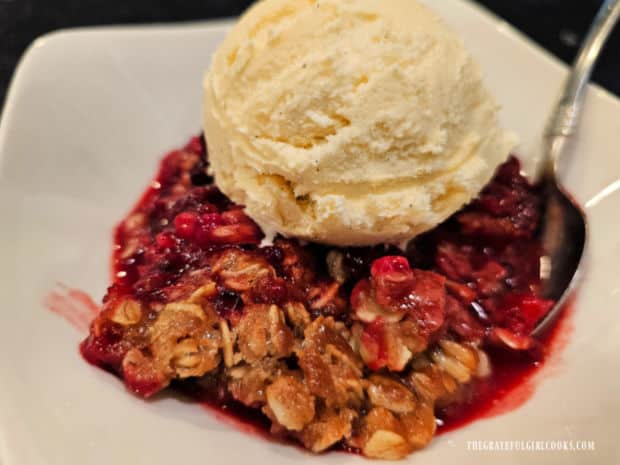
Add a scoop of vanilla ice cream on top, if desired and serve this absolutely delicious blackberry crisp. The topping is crisp and buttery, and the blackberry filling tastes wonderful!

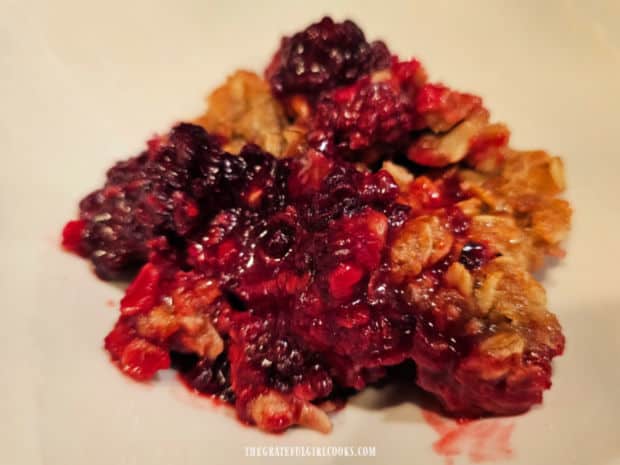
A portion of warm blackberry crisp is placed in a serving bowl.With a scoop of ice cream on top, Instant Pot Blackberry Crisp is ready to eat.

Here you go… I saved a big bite for you! You’re welcome! I’m confident you will love this delicious fruit cobbler as much as we do and will make it many times for family and friends.

I love using fresh-picked blackberries in the summertime, but it’s a wonderful option to enjoy this dessert year-round if you use frozen blackberries! Hooray!

A spoonful of blackberry crisp with ice cream is ready to enjoy!

I hope you have the opportunity to make this decadent Instant Pot Blackberry Crisp and hope you (and those you love) really enjoy it, too!

Thanks for stopping by, and I invite you to come back again soon for more family-friendly recipes. Take care, may God bless you, and have a wonderful day.

Looking For More COBBLER and CRISPS Recipes?

You can find ALL of my recipes in the Recipe Index, which is located at the top of the page. I have a wonderful variety of delicious recipes for cobblers and crisps you might enjoy, including:

Want More Recipes? Get My FREE Newsletter!

I publish a newsletter 2 times per month (1st and 15th) with lots of recipes, tips, etc..
Would you like to join our growing list of subscribers?

There is a Newsletter subscription box on the top right (or bottom) of each blog post, depending on the device you use.
You can submit your e-mail address there, to be added to my mailing list.

Find Me On Social Media:

Facebook page: The Grateful Girl Cooks!
Pinterest:
The Grateful Girl Cooks!
Instagram:
jbatthegratefulgirlcooks

Author's signature

Recipe:

↓↓ PRINTABLE RECIPE BELOW ↓↓

0 from 0 votes
Instant Pot Blackberry Crisp
Prep Time
10 mins
Cook Time
10 mins
Pressurization time-(approx. 8-10 minutes)
10 mins
Total Time
30 mins
 

Make a scrumptious Instant Pot Blackberry Crisp using fresh or frozen berries! Topped with crisp buttery streusel, you'll love this dessert!

Category: Dessert
Cuisine: All Cuisines
Keyword: Instant Pot Blackberry Crisp
Servings: 5 small servings
Calories Per Serving: 412 kcal
Author: JB @ The Grateful Girl Cooks!
Ingredients
  • 1 cup water For Instant Pot
  • cooking spray (as needed) to grease 7" baking pan
For Blackberry Crisp:
  • 12 ounces fresh or *frozen blackberries *If using frozen, DO NOT THAW
  • 3 Tablespoons granulated sugar
  • 1 teaspoon fresh lemon juice
  • 1 cup old-fashioned oats uncooked
  • ½ cup all-purpose flour
  • ½ cup brown sugar light or dark½
  • ½ teaspoon ground cinnamon
  • ¼ teaspoon ground nutmeg
  • 1 pinch salt
  • ½ cup butter MELTED (½ cup = 1 stick)
OPTIONAL: Vanilla ice cream, for serving
    Instructions
    1. Place a trivet in the inner pot; add 1 cup of water. Spray a 7" baking pan generously with cooking spray on bottom/sides.

    2. Place blackberries in a medium bowl. NOTE: If using frozen berries, do not thaw; put them (still frozen) in the bowl. Add granulated sugar and lemon juice. Gently stir until combined. Pour berries into baking pan; spread to cover the bottom.

    3. In a separate bowl, stir oats, flour, brown sugar, cinnamon, nutmeg and salt together. Add melted butter; stir until streusel is crumbly and holds together when pinched. Spread streusel over the blackberries, covering the fruit.

    4. Cover baking pan with foil, crimping the edges firmly around the pan to seal. Lower pan onto the trivet in the inner pot.

    5. Put the lid on the Instant Pot; lock it in place. Turn the steam release valve to SEALING. Select the MANUAL button (high pressure); set the timer for 10 minutes. It will take 7-10 minutes to reach full pressure before cooking program/timer begins. When cooking program ends, the machine should beep.

    6. Let the pressure release NATURALLY (do nothing) for 5 minutes, then flip pressure knob to VENTING to release all remaining steam. Pressure gauge will drop back down once all steam is gone, indicating it's safe to open the lid. Remove baking pan from the inner pot. The blackberry crisp is done cooking and can be cooled slightly then served. *I prefer to brown and "crisp up" the topping a bit more so I do 1 more step before serving. NOTE (optional): If you want streusel to be browner, turn on your oven broiler while the IP is venting. Once baking pan is removed from the IP, place it on a rack about 4" under the broiler. Keep an eye on it- after 1-2 minutes under broiler, streusel should be browner and crisper!

    7. Let blackberry crisp cool for a few minutes (it will firm up as it cools), then scoop out warm portions into bowls (5 small servings). Add a scoop of vanilla ice cream (if desired) and serve. Enjoy!

    Nutrition Facts
    Instant Pot Blackberry Crisp
    Amount Per Serving (1 (1/4 of total))
    Calories 412 Calories from Fat 180
    % Daily Value*
    Fat 20g31%
    Saturated Fat 12g75%
    Trans Fat 1g
    Polyunsaturated Fat 1g
    Monounsaturated Fat 5g
    Cholesterol 49mg16%
    Sodium 164mg7%
    Potassium 219mg6%
    Carbohydrates 56g19%
    Fiber 6g25%
    Sugar 32g36%
    Protein 5g10%
    Vitamin A 714IU14%
    Vitamin C 15mg18%
    Calcium 57mg6%
    Iron 2mg11%
    * Percent Daily Values are based on a 2000 calorie diet.

    Here’s one more to pin on your Pinterest boards!Make a scrumptious Instant Pot Blackberry Crisp using fresh or frozen berries! Topped with crisp buttery streusel, you'll love this dessert!

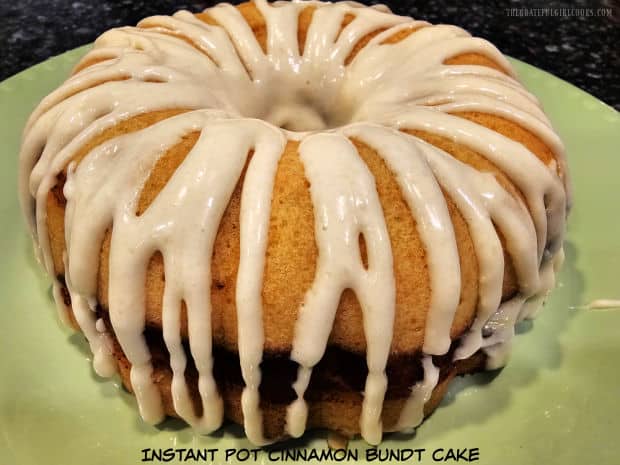
    Instant Pot Cinnamon Bundt Cake

    Instant Pot Cinnamon Bundt Cake, swirled with cinnamon sugar and topped with a sweet cream cheese icing is a yummy coffeecake or dessert!
    Instant Pot Cinnamon Bundt Cake, swirled with cinnamon sugar and topped with a sweet cream cheese icing is a yummy coffeecake or dessert!

    Looking for a delicious recipe to make for breakfast or a snack, using an Instant Pot? I’ve got a good one here for you to check out today!

    An Instant Pot Cinnamon Bundt Cake is an easy to prepare, delicious treat! A decadent cinnamon sugar layer is swirled through the batter making it look and taste wonderful, and a sweet cream cheese icing tops it off perfectly!

    This simple recipe will yield enough for 8 slices and could be enjoyed as a morning coffeecake OR as a snack or dessert, if desired. I found the recipe in one of the Instant Pot cookbooks I own and I’m happy to share it with you today. Here’s how to make an Instant Pot Cinnamon Bundt Cake.

    Scroll Down For A Printable Recipe Card At The Bottom Of The Page

    Make Cinnamon Sugar and Prepare Bundt Pan

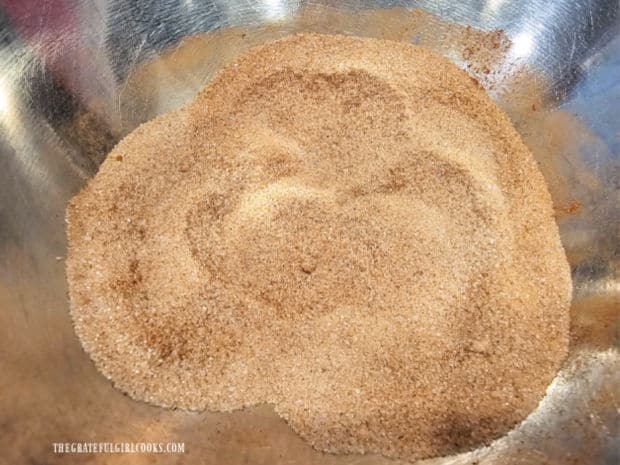
    Stir together granulated sugar and ground cinnamon in a small bowl until combined. Set this mixture aside.

    Granulated sugar and ground cinnamon are combined in a small bowl.

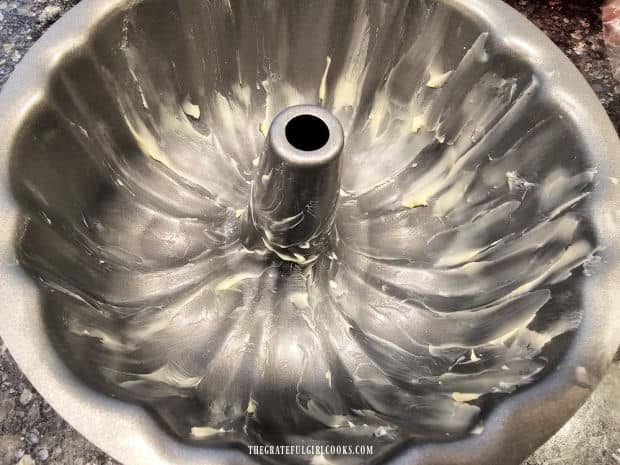
    For this Instant Pot recipe, you will need a 1-quart bundt pan OR a tube pan that fits inside your Instant Pot. Generously butter the pan all over (shown below). Set the bundt pan aside while you prepare the batter.

    A 1-quart bundt pan is generously coated with butter before filling with batter.

    Prepare The Bundt Cake Batter

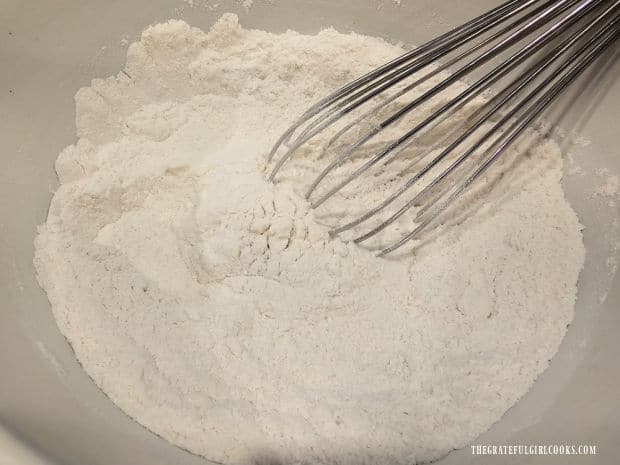
    Whisk flour, sugar, baking powder and salt together in a medium-sized bowl until combined. These are the “dry” ingredients for the bundt cake.

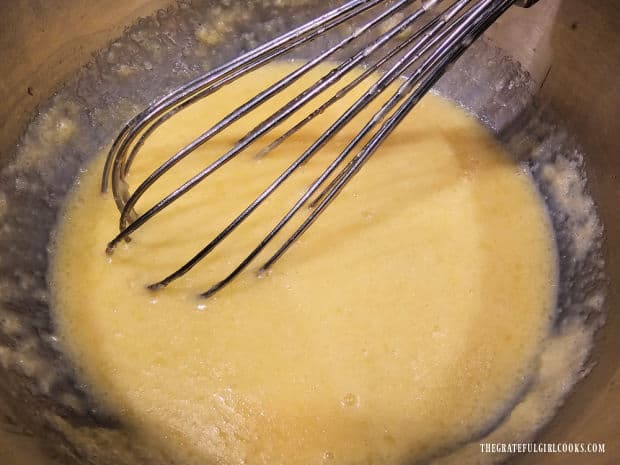
    In a SEPARATE bowl, whisk together milk, melted (cooled) butter, 2 eggs and vanilla extract. Whisk these ingredients until they are fully combined. These are the “wet” ingredients.

    Dry ingredients for the cake batter are whisked together in a medium bowl.Wet ingredients for the bundt cake batter are whisked to combine.

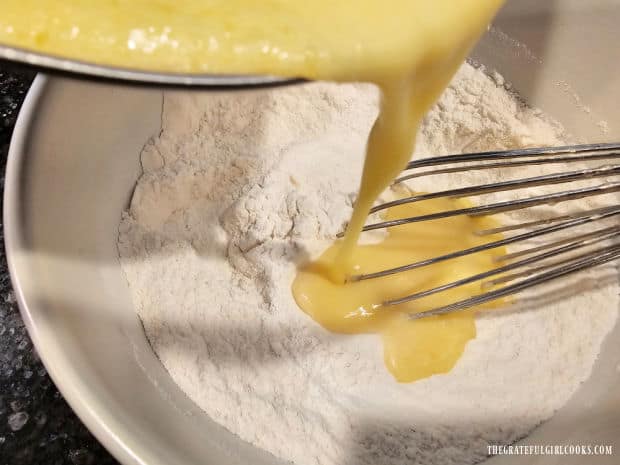
    Pour the “wet” ingredients into the bowl with the “dry” ingredients, then whisk or stir until they’ve been fully mixed together. This is the batter for the bundt cake.

    Wet ingredients are poured into and mixed with the dry ingredients until combined.

    Layer And Swirl The Batter and Cinnamon Sugar

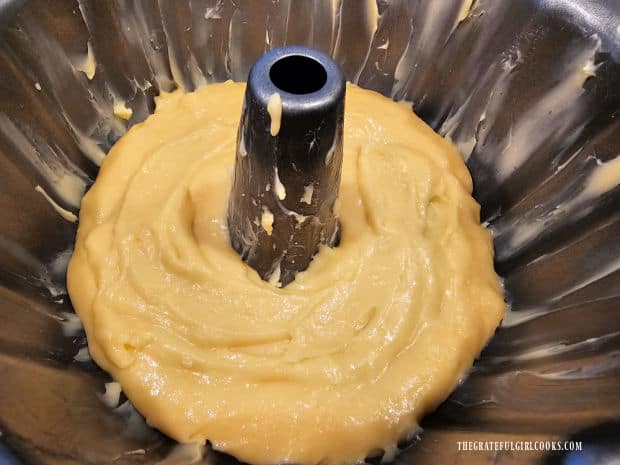
    Now it’s time to layer the batter with the cinnamon sugar mixture you made earlier. Use a large spoon and place HALF the batter in the buttered bundt pan, spreading it evenly in the pan.

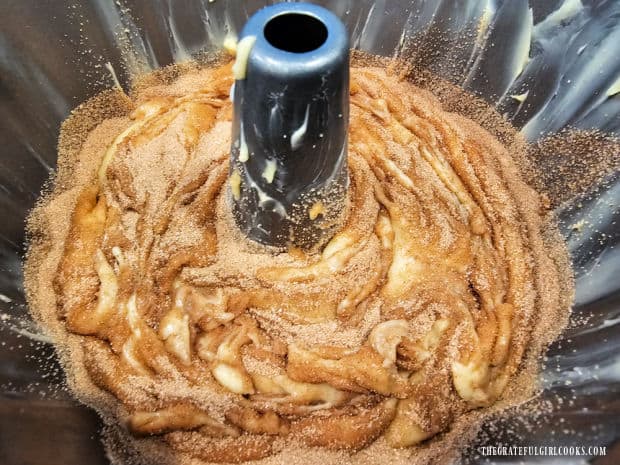
    Sprinkle the cinnamon/sugar mixture evenly over the surface of the batter until it has all been distributed. Using a butter knife or a small spatula, swirl it through the batter in a back-and-forth motion so the cinnamon sugar is decoratively intertwined with the batter (see photo #2 below).

    Half the cake batter is spread into the buttered bundt pan.Cinnamon sugar mixture is sprinkled on top of batter, then swirled into the batter.

    Prepare The Instant Pot And Bundt Cake For Cooking

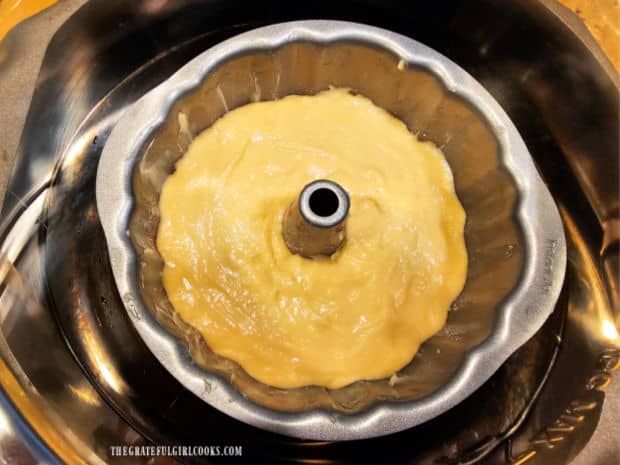
    Spoon the remaining half of the batter on top and spread it out, being careful not to mix it with the cinnamon swirl layer below. Now the Instant Pot Cinnamon bundt Cake is ready to be cooked!

    Pour 1½ cups of water into the Instant Pot inner pan. Place a trivet into the water on the bottom of the Instant Pot. Carefully lower the bundt cake pan down onto the trivet.

    Topped with more batter, the pan goes onto a trivet over water in the Instant Pot.

    Cook The Cinnamon Bundt Cake

    Lock the lid of the Instant Pot in place and flip the Pressure Release knob to SEALING. Set the MANUAL, CAKE or PRESSURE COOK setting to 35 minutes at high pressure.

    It usually takes the Instant Pot about 10 minutes or so to reach full pressure inside before it begins cooking at the time selected.

    Once the cooking program has finished, let the internal pressure release NATURALLY (do nothing) for 10 minutes. After 10 minutes, flip the Pressure Release knob to VENTING, which will allow all of the remaining steam in the appliance to be released.

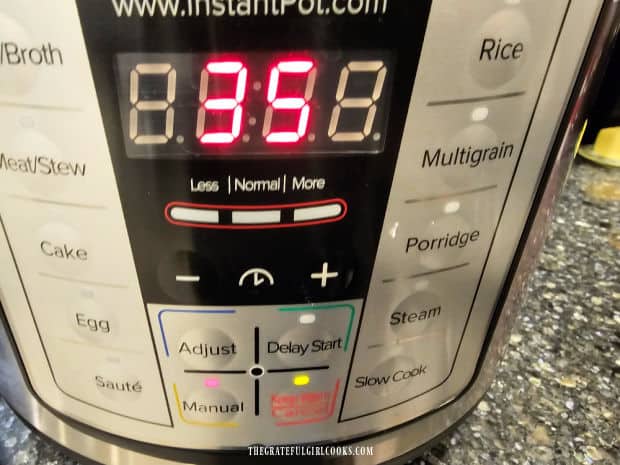
    Instant Pot Cinnamon Bundt Cake is pressure cooked for 35 minutes.

    When all steam has been released, open the Instant Pot. Carefully lift the bundt cake pan up and out of the Instant Pot, then let the cake cool (still in the pan) on a wire rack for about 5-7 minutes.

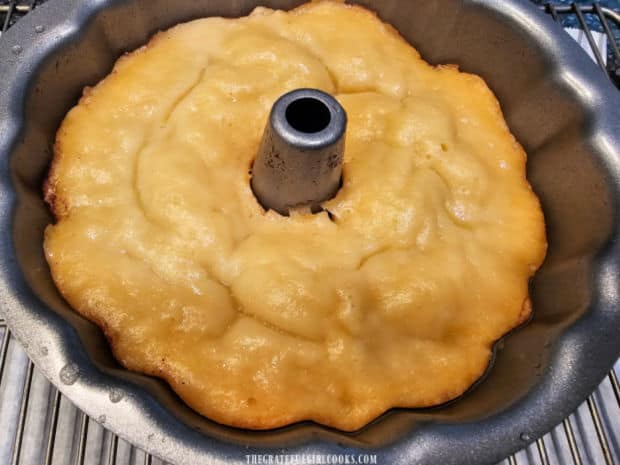
    The cooked bundt cake cools in the pan for 5 minutes, then is removed from the pan.

    Carefully run a butter knife around the inside edges of the pan to separate the cake from the pan. Invert (flip over) the bundt pan onto the wire rack, then lift the pan off of the cake.

    If you buttered the pan very well, the cake should slip out with no problem. Immediately turn the cake right side up and let it cool for several minutes before adding the icing.

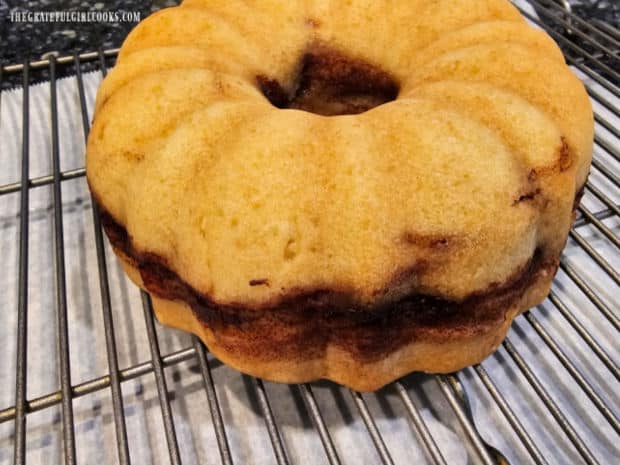
    After inverting pan to remove cake, it is turned right side up and cools on wire rack.

    Glaze And Serve Instant Pot Cinnamon Bundt Cake

    While the Instant Pot Cinnamon Bundt Cake cools, make the cream cheese icing to decorate the finished cake. Beat softened cream cheese, powdered sugar and vanilla extract in a small bowl until the icing is smooth and lump-free.

    Carefully transfer this icing to a zip lock plastic bag and then seal the bag. When the cake has cooled a bit, cut a small bottom corner off of the ziplock bag. If the cake is still too hot the icing will melt, so be patient!

    Place a piece of parchment paper, wax paper, or foil under the wire rack holding the cake. This will help catch any icing “drips”, making cleanup easier after icing the cake.

    Squeeze the bag to move the icing to the cut corner, then apply the icing in a decorative fashion to the surface of the cinnamon bundt cake.

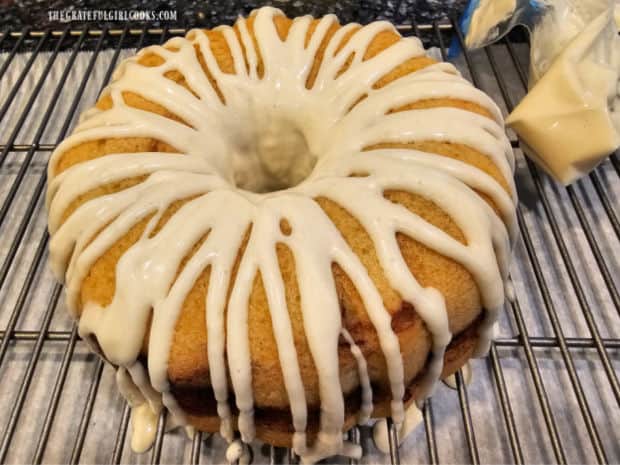
    Sweet cream cheese icing is used to drizzle over the surface of the warm bundt cake.

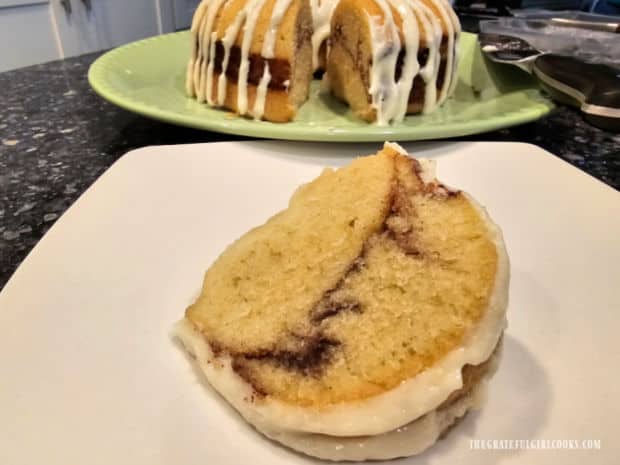
    Let the icing firm up a bit, then slice the Instant Pot cinnamon bundt cake into 8 wedges and serve it warm or at room temperature. You can see in the photo below the lovely cinnamon sugar mixture running through the middle of the slice! YUMMY!

    A slice of Instant Pot Cinnamon Bundt Cake on a white plate, with cake in the background.

    I hope you have the opportunity to make this delicious Instant Pot Cinnamon Bundt Cake! You can serve it as a coffeecake, a snack or a simple dessert, and I sincerely hope you’ll enjoy it as much as we do.

    Thank you for stopping by and I invite you to come back again soon for more family-friendly recipes. Take care, may God bless you, and have a wonderful day!

    Looking For More INSTANT POT Recipes?

    You can find ALL of my recipes in the Recipe Index, which is located at the top of the page. I have a nice variety of Instant Pot recipes to choose from, including:

    Want More Recipes? Get My FREE Newsletter!

    I publish a newsletter 2 times per month (1st and 15th) with lots of recipes, tips, etc..
    Would you like to join our growing list of subscribers?

    There is a Newsletter subscription box on the top right (or bottom) of each blog post, depending on the device you use.
    You can submit your e-mail address there, to be added to my mailing list.

    Find Me On Social Media:

    Facebook page: The Grateful Girl Cooks!
    Pinterest:
    The Grateful Girl Cooks!
    Instagram:
    jbatthegratefulgirlcooks

    Author's signature

    Original recipe source (and highly recommend): “The Ultimate Instant Pot Cookbook”, by Coco Morante, pages 40-41, published by Ten Speed Press in 2018

    ↓↓ PRINTABLE RECIPE BELOW ↓↓

    0 from 0 votes
    Instant Pot Cinnamon Bundt Cake
    Prep Time
    10 mins
    Cook Time
    45 mins
    Natural Pressure Release and Cooling
    15 mins
    Total Time
    1 hr 10 mins
     

    Instant Pot Cinnamon Bundt Cake, swirled with cinnamon sugar and topped with a sweet cream cheese icing is a yummy coffeecake or dessert!

    Category: Breakfast, Dessert or Coffeecake
    Cuisine: All Cuisines
    Keyword: Instant Pot, cinnamon bundt cake
    Servings: 8 wedges
    Calories Per Serving: 366 kcal
    Author: JB @ The Grateful Girl Cooks!
    Ingredients
    For Cinnamon Sugar:
    • 2 Tablespoons granulated sugar
    • ¾ teaspoon ground cinnamon
    For Bundt Pan:
    • softened butter (to generously grease bundt pan) AS NEEDED
    For Cake:
    • 2 cups all-purpose flour
    • cup granulated sugar
    • 2 teaspoons baking powder
    • ½ teaspoon kosher salt
    • ½ cup butter melted/cooled
    • ½ cup low-fat milk (or whole) at room temp.
    • 2 teaspoons vanilla extract
    • 2 large eggs at room temp.
    For Icing:
    • ½ cup powdered sugar (confectioner's sugar)
    • ¼ cup cream cheese at room temp.
    • ½ teaspoon vanilla extract
    Instructions
    A Little Prep:
    1. Stir together granulated sugar and cinnamon in a small bowl until combined. Set mixture aside. Generously butter a 1 qt. bundt pan or tube pan. Set pan aside.

    Make Batter:
    1. Whisk flour, sugar, baking powder and salt together in a medium-sized bowl until combined ("dry ingredients"). In a SEPARATE bowl, whisk together milk, melted (cooled) butter, eggs and vanilla ("wet ingredients"). Pour "wet" ingredients into the "dry" ingredients, then whisk or stir until the batter is fully combined.

    2. Using a large spoon, place HALF the batter in the buttered bundt pan, spreading it evenly. Sprinkle all the cinnamon/sugar mixture evenly over the batter. Using a butter knife or spatula, swirl it through the batter in a back-and-forth motion so cinnamon sugar is intertwined with the batter. Spoon remaining half of the batter on top; spread it out, being careful not to mix it with the cinnamon swirl layer.

    Cook The Cinnamon Bundt Cake:
    1. Pour 1½ cups of water into the Instant Pot inner pan, then place a trivet on the bottom. Carefully lower the bundt pan down onto the trivet.

    2. Lock the lid in place and flip the Pressure Release knob to SEALING. Set the MANUAL, CAKE or PRESSURE COOK setting to 35 minutes at high pressure. It usually takes the Instant Pot about 10 minutes to reach full pressure inside before it begins cooking at the time selected. Once cooking program has finished, let the internal pressure release NATURALLY for 10 minutes. After 10 minutes, flip the Pressure Release knob to VENTING, which releases all the remaining steam.

    3. When all steam has been released, open the Instant Pot. Carefully lift hot pan out of the Instant Pot. Let cake cool (still in pan) on a wire rack for 5-7 minutes. Carefully run a butter knife around inside edges of pan. Invert pan onto the wire rack, then lift the pan off of the cake. If you buttered the pan well, the cake should slip out with no problem. Immediately turn cake right side up; let it cool for several minutes before adding icing.

    Icing And Serving Cake:
    1. Beat softened cream cheese, powdered sugar and vanilla in small bowl until lump-free and smooth. Spoon icing into a zip lock plastic bag; seal the bag. When cake has cooled a bit, cut a small bottom corner off the ziplock bag. IMPORTANT: If cake is too hot the icing will melt, so be patient! Place parchment paper, wax paper, or foil under wire rack. This helps catch any icing "drips", making cleanup easier. Squeeze bag to move icing to the cut corner, then apply in a decorative fashion to the surface of the cinnamon bundt cake.

    2. Let icing firm up; slice cake into 8 wedges. Serve warm or at room temp. Enjoy!

    Recipe Notes

    NOTE: Low-fat milk was used for the caloric calculation. You will also need a small amount of butter to "grease" the bundt pan before filling (as needed).

    Nutrition Facts
    Instant Pot Cinnamon Bundt Cake
    Amount Per Serving (1 slice (1/8 of total))
    Calories 366 Calories from Fat 135
    % Daily Value*
    Fat 15g23%
    Saturated Fat 9g56%
    Trans Fat 0.5g
    Polyunsaturated Fat 1g
    Monounsaturated Fat 4g
    Cholesterol 82mg27%
    Sodium 290mg13%
    Potassium 198mg6%
    Carbohydrates 53g18%
    Fiber 1g4%
    Sugar 28g31%
    Protein 6g12%
    Vitamin A 479IU10%
    Vitamin C 0.04mg0%
    Calcium 90mg9%
    Iron 2mg11%
    * Percent Daily Values are based on a 2000 calorie diet.

    Here’s one more to pin on your Pinterest boards!Instant Pot Cinnamon Bundt Cake, swirled with cinnamon sugar and topped with a sweet cream cheese icing is a yummy coffeecake or dessert!

    Instant Pot Macaroni and Cheese

    Enjoy yummy Instant Pot Macaroni and Cheese, with a creamy sauce of sharp white cheddar cheese, American cheese, butter, milk and seasoning.
    Enjoy yummy Instant Pot Macaroni and Cheese, with a creamy sauce of sharp white cheddar cheese, American cheese, butter, milk and seasoning.

    I don’t know about your family, but ours LOVES macaroni and cheese! While macaroni and cheese is not known for being a really HEALTHY meal which is an understatement (*cough, cough), we still love it and have loved it since we were young kids!

    Today I want to share a recipe I make for us – Instant Pot Macaroni and Cheese, and it’s really good. The Instant Pot cooks the pasta so quickly and then everything else is simply added, stirred, melted, seasoned and then served! By the way, if you don’t own an Instant Pot, be sure to check out my recipe for delicious Easy Stovetop Macaroni and Cheese

    If you are fortunate enough to have an Instant Pot (I was given mine and am grateful for it), I hope you’ll consider trying this yummy recipe. It can be served as a side dish or as a main dish (meatless). Here’s how to make Instant Pot macaroni and cheese.

    Scroll Down For A Printable Recipe Card At The Bottom Of The Page

    Cook the Macaroni Noodles

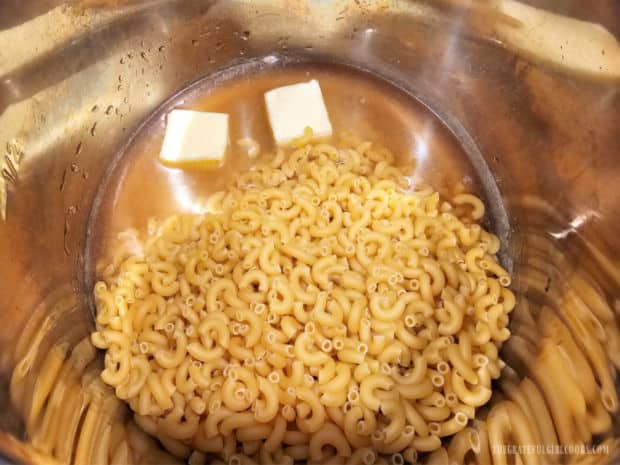
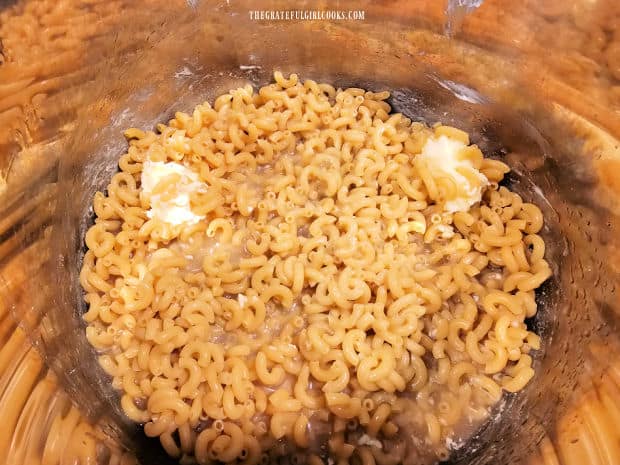
    Place uncooked macaroni noodles, chicken broth and butter in the inner cannister of the Instant Pot. Give them a good stir, then press the pasta down as much as possible into the liquid. NOTE: You can substitute water for the chicken broth, if desired. 

    Lock the lid in place, then flip the pressure release valve to SEALING. Now press the MANUAL button (high pressure) and set the timer for 4 minutes. It will take 5-10 minutes for the Instant Pot to reach full internal pressure and then the pressure gauge button will pop up.

    The cooking program (and timer) will begin pressure cooking once the machine has reached full pressure. When the cooking time is completed, the machine should beep. Perform a quick release of the steam inside the pot by flipping the pressure release valve to VENTING.

    When all steam (and pressure) has been fully released, the pressure gauge button should drop back down, indicating it is safe to open the lid of the Instant Pot. 

    Elbow macaroni, butter and chicken broth in Instant pot.Pasta is pressed down into chicken broth as much as possible before cooking.

    Add The Remaining Ingredients

    Press the CANCEL button to end the cooking program, open the lid and then press the SAUTÉ button. Add milk, Tabasco (or other hot sauce) and yellow table mustard to the cooked noodles in the pot.

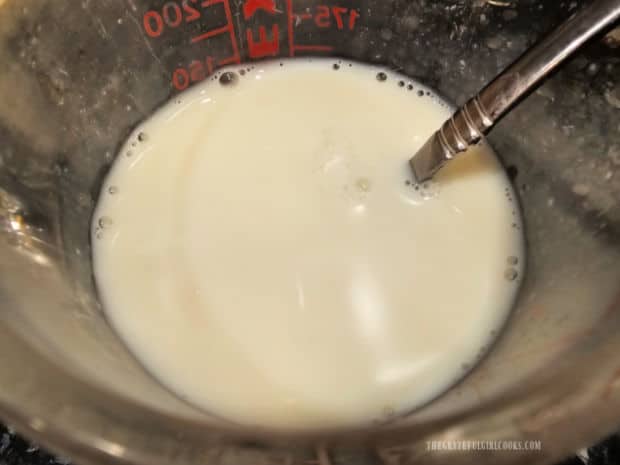
    Milk is mixed with hot sauce and yellow mustard in a measuring cup.

    Mix the milk, mustard and hot sauce into the pasta very well, to combine them with the cooked pasta. Keep stirring, so the noodles don’t stick to the bottom while heating them on Sauté.  

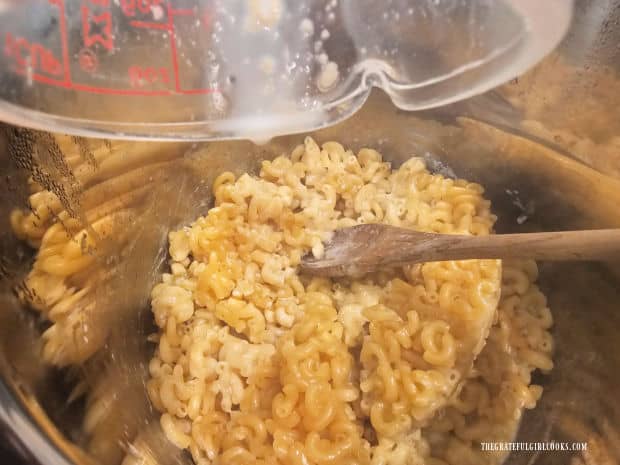
    The milk mixture is added to the cooked pasta and stirred to combine.

    Add American cheese to the pasta and give it a quick stir to combine. I cut mine into small pieces so it will melt faster. The use of American cheese gives the macaroni a nice creamy texture once it melts.

    American cheese (in pieces) is stirred into the cooked macaroni.

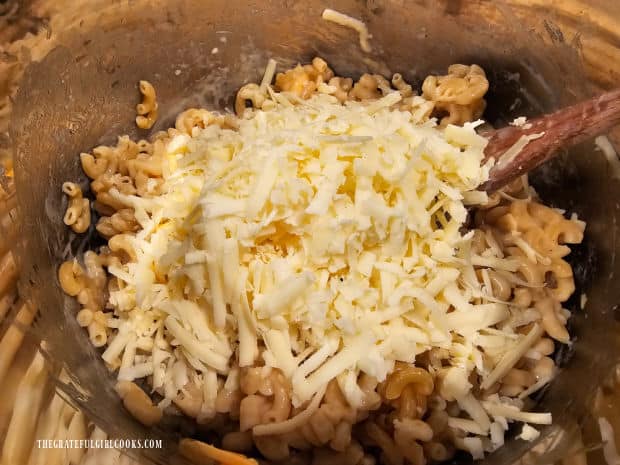
    Stir in grated sharp white cheddar cheese and continue to stir constantly until all the cheese has fully melted and been “merged” with the noodles.

    Grated white cheddar is added and stirred into the pasta, to combine and melt.

    Final Step

    The Instant Pot mac and cheese should be hot, tender, and the sauce should be quite creamy and cheesy. Stir in a teaspoon of butter and add additional milk, if desired.

    The sauce will thicken as the cheese melts, so if you want the sauce to be creamier, add more milk (a little at a time) until the sauce reaches the consistency you prefer.

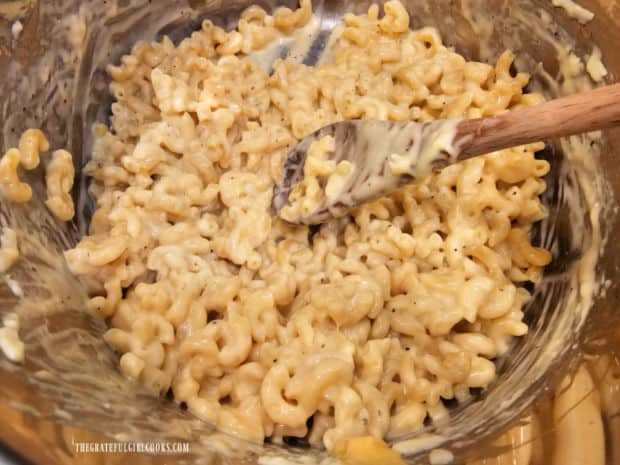
    Take a bite and then season the Instant Pot mac and cheese with salt and black pepper to suit your taste.  Continue to cook and stir, and once the pasta is fully heated through, it’s ready to serve. Remember to press CANCEL to turn off the heat for the Instant Pot.

    Butter, salt and pepper are added to Instant Pot macaroni and cheese and heated through.

    Serve The Instant Pot Macaroni And Cheese

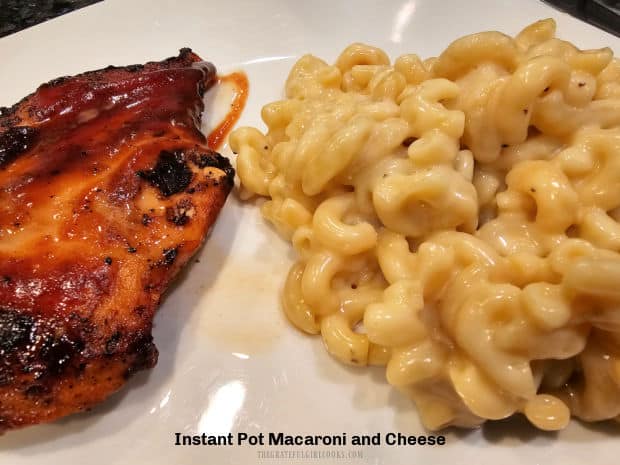
    When the Instant Pot mac and cheese is hot, either transfer it to a large serving bowl OR scoop it straight out of the inner pot onto individual plates. Serve the mac and cheese immediately while hot and enjoy it as meatless main dish or as a side dish served with a favorite entree.

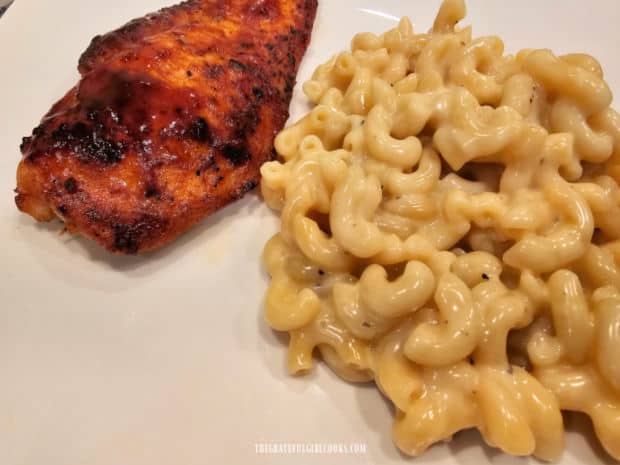
    The Instant Pot macaroni and cheese is served with BBQ chicken on a white plate.

    I hope you have the opportunity to make Instant Pot Macaroni and Cheese for those you love. It really is a tasty side dish OR meatless main dish, and I trust you’ll enjoy it occasionally as much as we do, even if it is rather high in calories.

    Thank you for stopping by, and I invite you to come back again soon for more family-friendly recipes. Take care, may God bless you, and have a wonderful day!

    Looking For More INSTANT POT Recipes?

    You can find ALL of my recipes in the Recipe Index which is located in the Menu at the top of the page. I have some wonderful Instant Pot recipes you might enjoy, including:

    Want More Recipes? Get My FREE Newsletter!

    I publish a newsletter 2 times per month (1st and 15th) with lots of recipes, tips, etc..
    Would you like to join our growing list of subscribers?

    There is a Newsletter subscription box on the top right (or bottom) of each blog post, depending on the device you use.
    You can submit your e-mail address there, to be added to my mailing list.

    Find Me On Social Media:

    Facebook page: The Grateful Girl Cooks!

    Pinterest:
    The Grateful Girl Cooks!
    Instagram:
    jbatthegratefulgirlcooks

    Author's signature

    ↓↓ PRINTABLE RECIPE BELOW ↓↓

    0 from 0 votes
    Instant Pot Macaroni and Cheese
    Prep Time
    10 mins
    Cook Time
    4 mins
    Pressurization (Instant Pot) (approx.)
    10 mins
    Total Time
    24 mins
     

    Enjoy yummy Instant Pot Macaroni and Cheese, with a creamy sauce of sharp white cheddar cheese, American cheese, butter, milk and seasoning.

    Category: Main Dish, Side Dish
    Cuisine: All Cuisines
    Keyword: Instant pot, macaroni and cheese, meatless
    Servings: 8 side dish servings (½ cup)
    Calories Per Serving: 485 kcal
    Author: JB @ The Grateful Girl Cooks!

    Ingredients
    • cups low sodium chicken broth can substitute water
    • 16 ounces elbow macaroni uncooked
    • 2 TBSP. butter
    • ¾ cup low-fat milk
    • 1 TBSP. Tabasco sauce or other hot sauce
    • tsp. yellow mustard
    • 8 ounces American cheese (or Velveeta) cut in small pieces
    • 8 ounces white sharp cheddar cheese grated
    • salt and black pepper, to taste
    • 1 tsp. butter + more milk (if desired) for creaminess
    Instructions
    1. Place macaroni, chicken broth (or water) and 2 Tbsp. butter in the Instant Pot. Stir, then press pasta down as much as possible into liquid. Lock lid; set pressure release valve to SEALING. Press MANUAL button (high pressure) and set timer for 4 minutes. It takes about 5-10 minutes to reach full pressure (pressure gauge button will pop up) and then cooking program will begin. When done cooking, perform a quick release of steam by turning pressure release valve to VENTING. When all steam (and pressure) is fully released, pressure gauge button should drop back down, indicating it's safe to open the lid. 

    2. Press CANCEL button, open lid then press the SAUTÉ button. Add milk, Tabasco and mustard to the cooked noodles. Stir well, to combine, so noodles don't stick to the bottom while heating.

    3. Add American cheese; stir to combine, then add sharp white cheddar. Continue heating, stirring constantly until all cheese is melted and incorporated.

    4. Mac and cheese should be hot, tender, and the sauce should be creamy. Stir in remaining 1 tsp. butter. Sauce thickens as the cheese melts, so if you want the sauce creamier, add more milk until it reaches the consistency you prefer. Take a bite, season with salt and pepper, to taste.  Continue to heat and stir until pasta is fully heated through. Serve hot and enjoy!
    Nutrition Facts
    Instant Pot Macaroni and Cheese
    Amount Per Serving (1 (½ cup))
    Calories 485 Calories from Fat 216
    % Daily Value*
    Fat 24g37%
    Saturated Fat 13g81%
    Trans Fat 0.5g
    Polyunsaturated Fat 1g
    Monounsaturated Fat 6g
    Cholesterol 68mg23%
    Sodium 780mg34%
    Potassium 279mg8%
    Carbohydrates 46g15%
    Fiber 2g8%
    Sugar 3g3%
    Protein 21g42%
    Vitamin A 686IU14%
    Vitamin C 1mg1%
    Calcium 540mg54%
    Iron 1mg6%
    * Percent Daily Values are based on a 2000 calorie diet.

    Here’s one more to pin on your Pinterest boards!Enjoy yummy Instant Pot Macaroni and Cheese, with a creamy sauce of sharp white cheddar cheese, American cheese, butter, milk and seasoning.

    Cheesy Chicken Rice Casserole (Instant Pot)

    Use an Instant Pot to make a delicious Cheesy Chicken Rice Casserole! Filled with chicken, cheese, rice and broccoli, this meal serves 6.
    Use an Instant Pot to make a delicious Cheesy Chicken Rice Casserole! Filled with chicken, cheese, rice and broccoli, this meal serves 6.

    About a year and a half ago our oldest son moved to Portugal after getting married (his wife is Portuguese). He gifted me with the Instant Pot that he purchased while living in his own apartment here in Oregon. On a trip back home to visit last year, he stayed with us, and I made this cheesy chicken rice casserole for dinner one night.

    We all really liked it, and it was fun to show him I had learned how to use my Instant Pot because he’d given it to me without any instructions, recipes or instruction manual! Ha Ha!

    Since that time, I’ve made quite a variety of Instant Pot recipes (Butter Chicken, Rice Pudding, Ground Beef Stroganoff , Macaroni and Cheese and others) using this convenient appliance. These and all of my recipes can be found in the Recipe Index, located at the top of each blog post.

    I adapted this recipe slightly from an original recipe I found on YouTube from “Six Sisters Stuff”. It’s easy to make and is a delicious casserole (with chicken, veggies and rice) that yields about 6 servings! Here’s how to make it.

    Scroll Down For A Printable Recipe Card At The Bottom Of The Page

    Prepare The Chicken

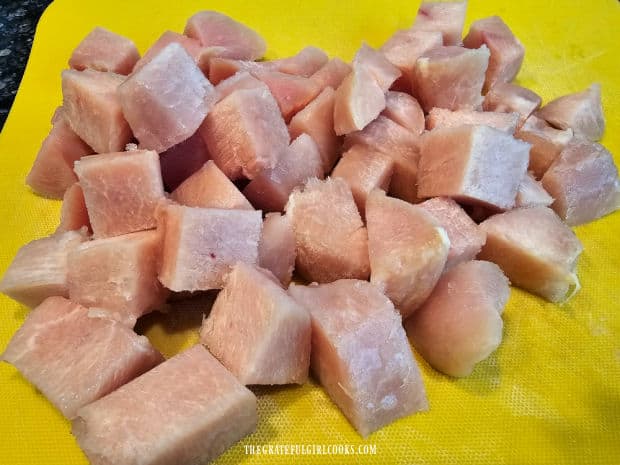
    Pat 1½ pounds of boneless, skinless chicken breasts dry with paper towels. Cut the chicken into bite-sized chunks, then set them aside.

    Boneless skinless chicken breast is patted dry, then cut into bite-sized cubes.

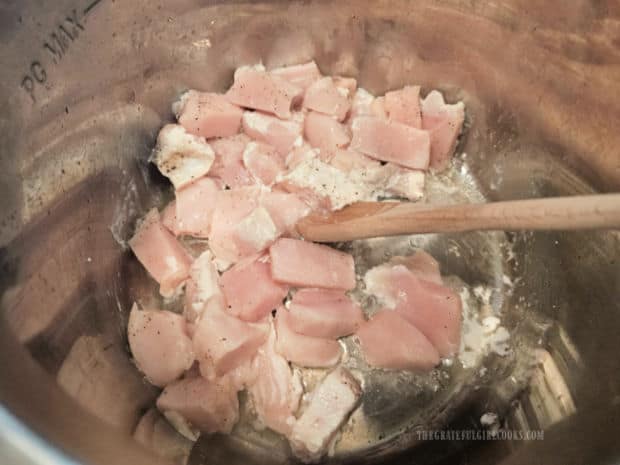
    Press the Sauté button on the Instant Pot, and heat 2 Tablespoon of extra virgin olive oil in it. Once the oil is heated (but not smoking), add the chicken pieces to the Instant Pot.

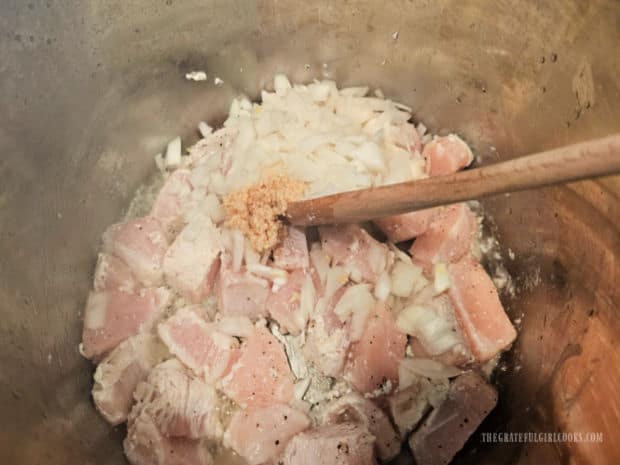
    Stir in chopped onion, curry powder, salt, pepper and minced garlic. Continue to stir as it cooks in the hot oil, so the garlic doesn’t burn, because it will become bitter if burnt.

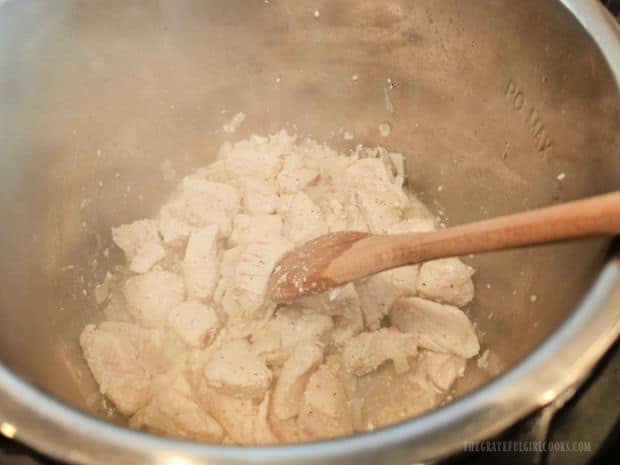
    Olive oil is heated in Instant Pot and chicken chunks are added.Chopped onion, garlic and spices are sautéed with the chicken in the Instant Pot.

    Cook, stirring often until the chicken is no longer pink and is mostly cooked through. It will finish cooking once pressure-cooked later. Press the CANCEL button to stop sautéing.

    The chicken is cooked until almost done and will finish cooking later.

    Time To Add More Ingredients

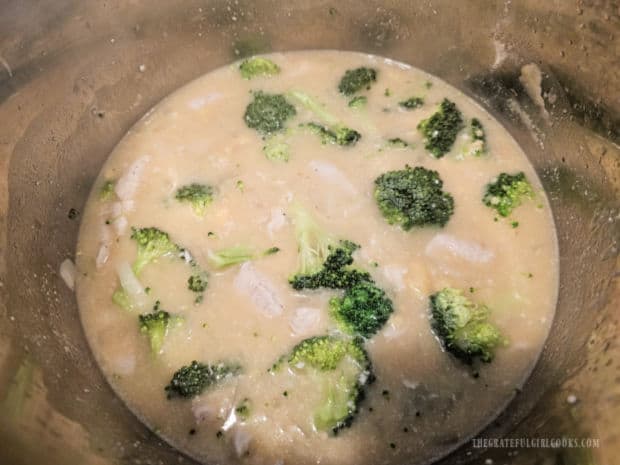
    Add rice, cream of chicken soup, low-sodium chicken broth, water, and raw broccoli florets to the Instant Pot. The broccoli will break apart a little as it is pressure-canned, so don’t make the pieces too small.

    Once all these ingredients have been added, stir the mixture until they are all incorporated and fully combined. Now it’s time to cook it all together in your Instant Pot.

    Broccoli, chicken broth, water, rice and cream of chicken soup is added to Instant Pot.

    Ready To COOK!

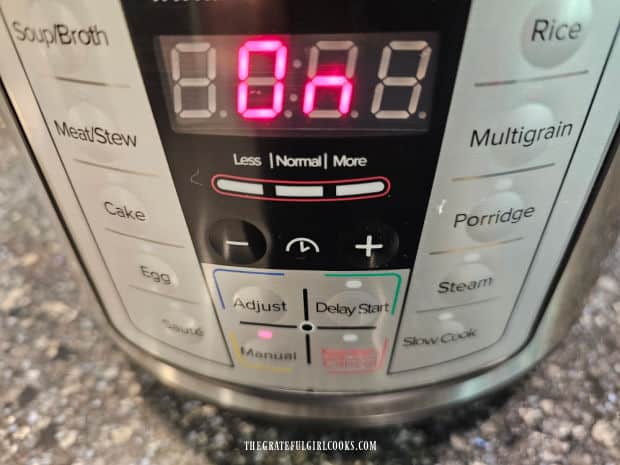
    Lock the lid of your Instant Pot in place. Flip the steam release valve to SEALING. Press the MANUAL button and set the timer for 6 minutes. The Instant Pot will take about 10 minutes or so to come to full internal pressure (the pressure button will pop up indicating full pressure), and the cooking program/timer will begin.

    When the 6-minute cooking program ends and timer indicates it’s done, flip the steam release valve to VENTING to allow a quick release of the steam inside. Once all the steam pressure has been released the pressure valve will drop back down, indicating it is safe to open the lid.

    Instant Pot is set to Manual to cook the cheesy chicken rice casserole for 6 minutes.

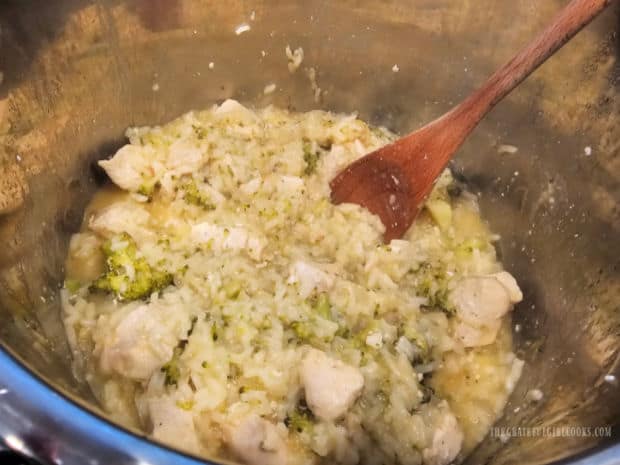
    Carefully unlock and remove the lid of the Instant Pot and give the mixture inside a very quick stir.

    After cooking, the casserole is given a quick stir in the Instant Pot.

    Sprinkle a cup of grated cheddar cheese on top of the casserole and stir it in well, until the cheese has melted and is fully mixed in.

    Grated cheddar cheese is stirred into the chicken mixture.

    Serve The Cheesy Chicken Rice Casserole

    To serve the cheesy chicken rice casserole, transfer the mixture out of the inner pot and spread it out evenly in a 2-quart baking dish. If desired, add a bit more grated cheddar cheese on top (optional, but GOOD!). 

    TIP: If adding cheese on top, put the casserole in a microwave; heat 30-45 seconds to fully melt the cheese. You do not have to do this because the heat of the casserole will slightly melt the cheese. However, if you want the cheese fully melted, use your microwave to help it along!

    Serve the casserole immediately, and enjoy this delicious, filling one dish meal, full of chicken, rice and broccoli! There’s enough for 6 servings, and leftovers can be reheated in a microwave. Store any leftovers in an airtight container in the refrigerator.

    Cheesy chicken rice casserole is transferred to baking dish and topped with more cheese.The hot cheesy chicken rice casserole is ready to be served and enjoyed.

    I hope you enjoy Instant Pot Cheesy Chicken Rice Casserole because it’s a very satisfying meal that’s simple and budget friendly to make. I am confident your friends and family will enjoy it, too!

    Thank you for stopping by, and I invite you to come back soon for more family-friendly recipes. Take care, may God bless you, and have a GREAT day!

    Looking For More CHICKEN CASSEROLE Recipes?

    You can find ALL of my recipes in the Recipe Index, which is located at the top of the page. I have a nice variety of chicken casseroles (not Instant Pot) you might enjoy, including:

    Want More Recipes? Get My FREE Newsletter!

    I publish a newsletter 2 times per month (1st and 15th) with lots of recipes, tips, etc..
    Would you like to join our growing list of subscribers?

    There is a Newsletter subscription box on the top right (or bottom) of each blog post, depending on the device you use.
    You can submit your e-mail address there, to be added to my mailing list.

    Find Me On Social Media:

    Facebook page: The Grateful Girl Cooks!
    Pinterest:
    The Grateful Girl Cooks!
    Instagram:
    jbatthegratefulgirlcooks

    Author's signature

    Recipe adapted from a: “Six Sisters Stuff” Instant Pot video I saw on YouTube

    ↓↓ PRINTABLE RECIPE BELOW ↓↓

    0 from 0 votes
    Cheesy Chicken Rice Casserole (Instant Pot)
    Prep Time
    20 mins
    Cook Time
    6 mins
    Includes Pressurization time (Instant Pot)
    10 mins
    Total Time
    36 mins
     

    Use an Instant Pot to make a delicious Cheesy Chicken Rice Casserole! Filled with chicken, cheese, rice and broccoli, this meal serves 6.

    Category: Casserole
    Cuisine: All Cuisines
    Keyword: cheesy chicken rice casserole, Instant pot
    Servings: 6
    Calories Per Serving: 548 kcal
    Author: JB @ The Grateful Girl Cooks!
    Ingredients
    • pounds boneless skinless chicken breast
    • 2 Tablespoons extra virgin olive oil
    • 1 medium yellow onion peeled, diced
    • 2 teaspoons minced garlic
    • 1 teaspoon salt
    • 1 teaspoon black pepper
    • ½ teaspoon curry powder
    • 2 cups long grain white rice
    • 2 cups low-sodium chicken broth
    • 10.5 ounces cream of chicken soup = 1 regular sized can
    • ½ cup water
    • cups raw broccoli florets
    • 1 cup grated cheddar cheese + more for topping casserole, if desired
    Instructions
    1. Pat chicken dry with paper towels. Cut into bite-sized chunks; set aside.

    2. Press SAUTÉ button on Instant Pot; heat olive oil in inner pot. Once oil is hot, add chicken. Stir in onion, curry powder, salt, pepper and garlic. Continue to stir so garlic doesn't burn. Cook until chicken is no longer pink (mostly cooked) It will finish cooking later. Press CANCEL button to stop sautéing.

    3. Add rice, cream of chicken soup, chicken broth, water, and broccoli florets. Stir the mixture until ingredients are fully combined.

    4. Lock the lid of the Instant Pot. Flip the steam release valve to SEALING. Press the MANUAL button; set the timer for 6 minutes. The Instant Pot will take about 10 minutes to come to full pressure (pressure button will pop up indicating full pressure), then cooking program begins. When cooking program ends and timer indicates it's done, flip the steam release valve to VENTING to allow a quick release of the steam inside. When all pressure has been released, pressure button will drop back down, indicating it is safe to open the lid.

    5. Carefully remove Instant Pot lid; give mixture inside a quick stir. Sprinkle 1 cup of grated cheddar on top; stir well, until cheese melts and is mixed in.

    6. Transfer mixture to a 2-quart baking dish and spread evenly in dish. OPTIONAL: Add more grated cheese on top. TIP: If adding cheese on top, put casserole in microwave; heat 30-45 seconds to melt cheese. This is not a must, but if you'd prefer the cheese fully melted, use a microwave to help it along! Serve and enjoy!

    Nutrition Facts
    Cheesy Chicken Rice Casserole (Instant Pot)
    Amount Per Serving (1 (1/6 of total))
    Calories 548 Calories from Fat 162
    % Daily Value*
    Fat 18g28%
    Saturated Fat 6g38%
    Trans Fat 0.01g
    Polyunsaturated Fat 2g
    Monounsaturated Fat 7g
    Cholesterol 95mg32%
    Sodium 1027mg45%
    Potassium 707mg20%
    Carbohydrates 58g19%
    Fiber 2g8%
    Sugar 2g2%
    Protein 37g74%
    Vitamin A 459IU9%
    Vitamin C 23mg28%
    Calcium 186mg19%
    Iron 2mg11%
    * Percent Daily Values are based on a 2000 calorie diet.

    Here’s one more to pin on your Pinterest boards!Use an Instant Pot to make a delicious Cheesy Chicken Rice Casserole! Filled with chicken, cheese, rice and broccoli, this meal serves 6.

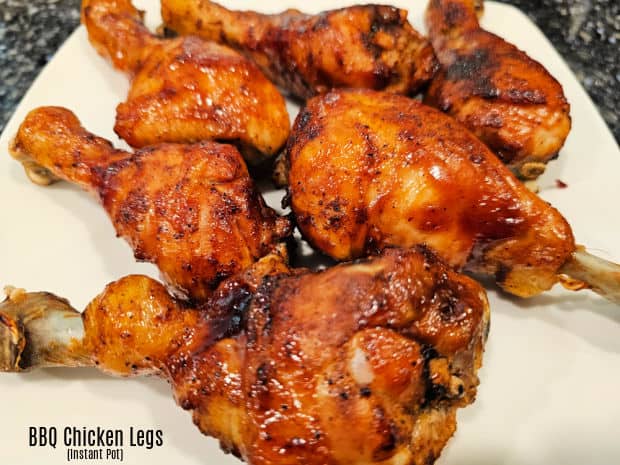
    BBQ Chicken Legs (Instant Pot)

    Make BBQ Chicken Legs in about 30 minutes using an Instant Pot! Seasoned drumsticks are cooked, coated with BBQ sauce, & broiled until crisp.
    Make BBQ Chicken Legs in about 30 minutes using an Instant Pot! Seasoned drumsticks are cooked, coated with BBQ sauce, & broiled until crisp.

    Today I want to share a tasty (and simple) recipe for BBQ Chicken Legs, made in an Instant Pot. I found the original recipe online and have really enjoyed the simplicity of this lip-smackin’ dish.

    Chicken legs are well seasoned with a homemade spice mix that takes all of a couple minutes to combine. They are cooked in the Instant Pot, then removed, basted with BBQ sauce and broiled or air-fried until nicely browned and crispy on the outside.

    The chicken legs are delicious, juicy, and this really is a pretty simple meal to prepare. Here’s how to make BBQ Chicken Legs in an Instant Pot.

    Scroll Down For A Printable Recipe Card At The Bottom Of The Page

    Make The Seasoning Mix

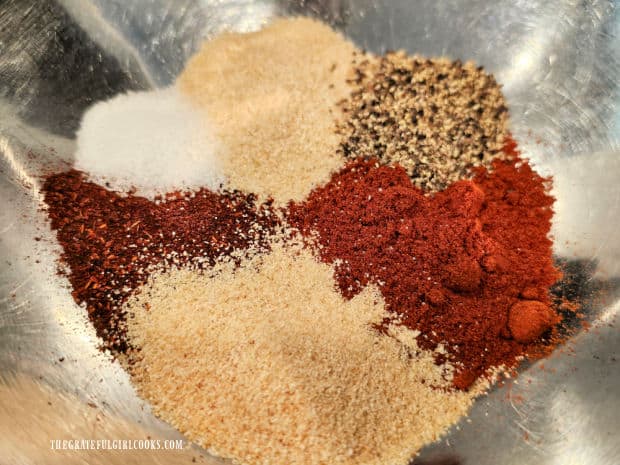
    The first thing you will need to do is whip up an easy, flavorful seasoning mix! Measure smoked paprika, garlic powder, onion powder, chili powder, black pepper and salt in a small bowl.

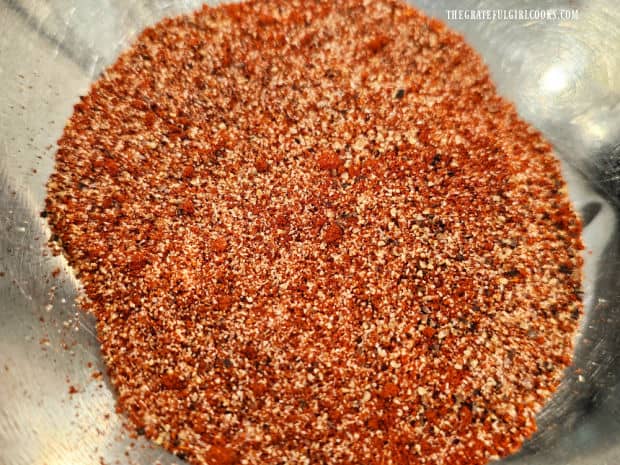
    Stir these ingredients well, until fully combined. This is the seasoning mix for the chicken legs. Set the bowl aside for a minute while you get the drumsticks ready for the spices.

    Prepare The Chicken Legs

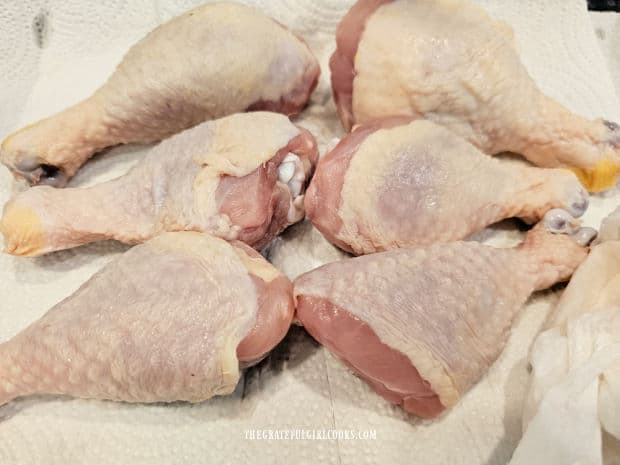
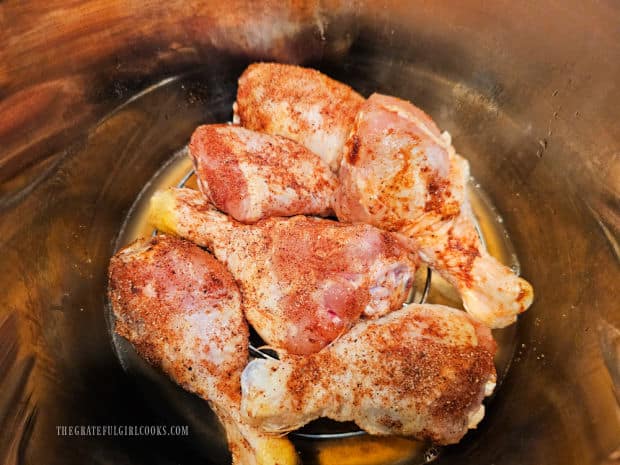
    Lightly pat the chicken legs dry on all sides using paper towels. Be sure to leave the skin on the legs for best results.

    Use all of the prepared seasoning mix to sprinkle and cover the chicken legs on all sides. Press the seasoning mix into the skin of the chicken so it adheres very well.

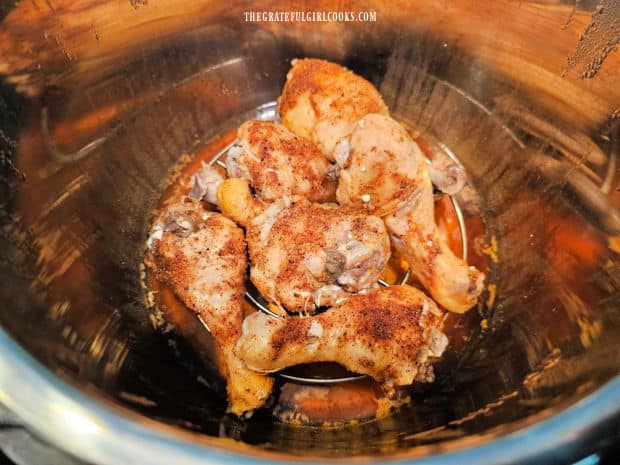
    Pour low sodium chicken broth into the bottom of the Instant Pot’s inner pot. Place a trivet on the bottom, then arrange the pieces of seasoned chicken on top of the trivet.

    Cook The BBQ Chicken Legs

    Lock the lid in place and then flip the steam release valve on top to SEALING. Program the Manual button to cook for 15 minutes at HIGH pressure.

    The instant pot will begin coming to pressure, and when it has reached full pressure, the timer for the cooking program will begin automatically (and the pressure valve on top will pop up).

    When the 15 minute programmed cooking time has finished, perform a QUICK RELEASE of steam by flipping the steam release valve to VENTING.

    When all the steam has been released, the pressure valve on top will also drop back down, indicating all pressure is released and it is safe to open the lid. Unlock and remove the lid of the Instant Pot.

    Two Ways To Crisp And Brown The Chicken, If Desired

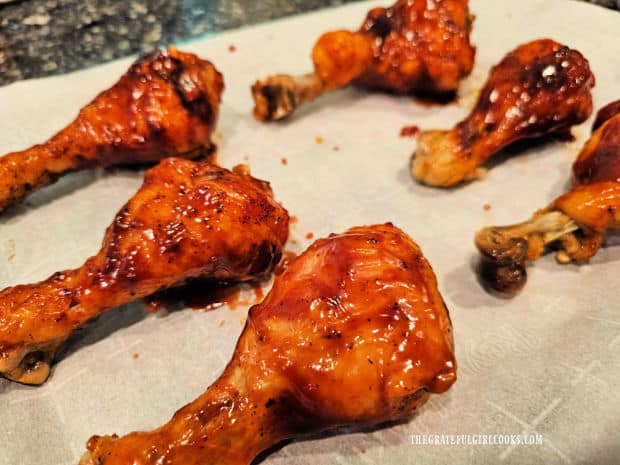
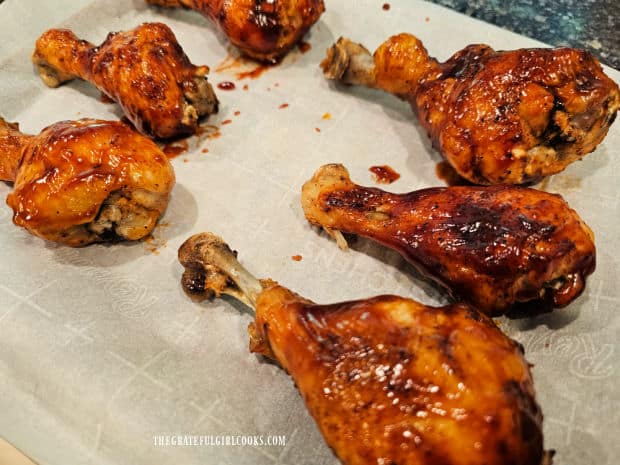
    After you remove the chicken legs from the Instant Pot, lay them on parchment paper. Brush them on all sides with a favorite BBQ sauce until each piece is fully covered.

    At this point, the BBQ chicken is now fully cooked and can be served, however I highly recommend taking one more step to take these drumsticks up a notch! It only takes a few more minutes, but it is well worth it, in my opinion.

    You have two options for crisping/browning the chicken legs and cooking the sauce onto the chicken. You can put them under a broiler OR you can use an air fryer to do this. It’s your choice. Here are the instructions for both methods.

    BROILER – Method #1: 

    Remove the chicken legs out of the Instant Pot, and place them in a single layer on an oven proof baking sheet. Place the chicken under an oven broiler (several inches away from the heat source) and broil until the drumsticks become browned and crispy.

    IMPORTANT: Keep a very close eye on the chicken when using the broiler. Remember, the chicken is already cooked through. Your chicken can go from nicely browned to burnt very quickly, and you DO NOT want to burn your dinner, right?

    AIR FRYER – Method #2:

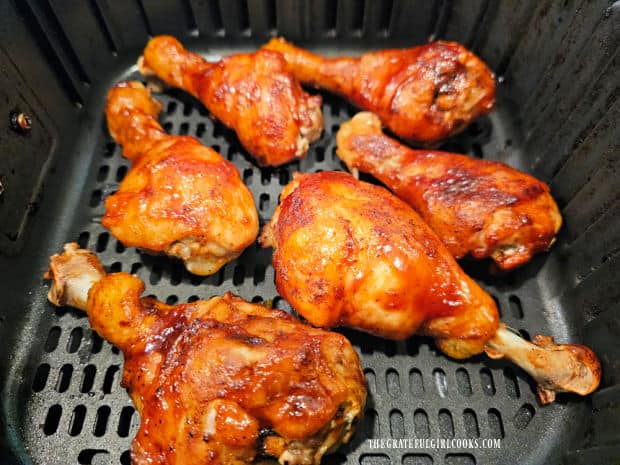
    Place the chicken legs in the basket of your air fryer in a single layer. Cook them at 400° for 6-8 minutes, turning them over halfway though this cooking time.

    I typically only cook them for about 6 minutes, because they are already fully cooked through. The purpose is simply to crisp up the outer skin, and brown the chicken legs a bit more.

    The skin of the chicken drumsticks should become crispy and browned using this method. Transfer the chicken legs out of the basket once done.

    Enjoy The BBQ Chicken Legs (Instant Pot)!

    Serve the chicken immediately after transferring them from the broiler or the air fryer. Serve with a favorite side dish or two, and enjoy these delicious BBQ chicken legs.

    This recipe, as written, will yield three servings of two chicken legs per serving. The chicken legs are well-seasoned, and taste great. Hope you enjoy them and appreciate how easy they are to make!

    I hope you get the chance to make these delicious, juicy BBQ Chicken Legs, and trust you’ll enjoy this simple, tasty dish as much as we do!

    Thanks for stopping by, and please come back again soon for more family-friendly recipes. Take care, may God bless you, and have a great day.

    Looking For More INSTANT POT Recipes?

    You can find ALL of my recipes in the Recipe Index, which is located at the top of the page. I have other delicious Instant Pot Recipes you may want to check out, including:

    Want More Recipes? Get My FREE Newsletter!

    I publish a newsletter 2 times per month (1st and 15th) with lots of recipes, tips, etc..
    Would you like to join our growing list of subscribers?

    There is a Newsletter subscription box on the top right (or bottom) of each blog post, depending on the device you use.
    You can submit your e-mail address there, to be added to my mailing list.

    Find Me On Social Media:

    Facebook page: The Grateful Girl Cooks!
    Pinterest:
    The Grateful Girl Cooks!
    Instagram:
    jbatthegratefulgirlcooks

    Author's signature

    Recipe adapted from Nicole Morissey at: preventionrd.com/instant-pot-bbq-chicken-drumsticks/

    ↓↓ PRINTABLE RECIPE BELOW ↓↓

    0 from 0 votes
    BBQ Chicken Legs (Instant Pot)
    Prep Time
    5 mins
    Cook Time
    15 mins
    Pressurization time + Broiling time
    15 mins
    Total Time
    35 mins
     

    Make BBQ Chicken Legs in about 30 minutes using an Instant Pot! Seasoned drumsticks are cooked, coated with BBQ sauce, & broiled until crisp.

    Category: Main Dish
    Cuisine: All Cuisines
    Keyword: BBQ Chicken Legs, Instant pot
    Servings: 3 (2 legs per serving)
    Calories Per Serving: 380 kcal
    Author: JB @ The Grateful Girl Cooks!
    Ingredients
    For Seasoning Mix:
    • 1 teaspoon smoked paprika
    • 1 teaspoon garlic powder
    • 1 teaspoon onion powder
    • 1 teaspoon chili powder
    • ½ teaspoon black pepper
    • ¼ teaspoon salt
    Rest of Ingredients Needed:
    • 6 chicken drumsticks skin on, patted dry
    • 1 cup low sodium chicken broth
    • ¾ cup BBQ sauce
    Instructions
    1. Stir smoked paprika, garlic powder, onion powder, chili powder, pepper and salt together in a small bowl, until combined. Set aside.

    2. Lightly pat chicken legs dry on all sides using paper towels. Be sure to leave the skin on the legs for best results. Sprinkle and cover the chicken legs on all sides with spice mix, using it all. Press spices into the chicken skin so it adheres well.

    Instant Pot Directions:
    1. Pour chicken broth into the inner pot. Place a trivet on the bottom; arrange pieces of seasoned chicken on top of the trivet.

    2. Lock lid in place; flip steam release valve on top to SEALING. Program Manual button to cook for 15 minutes at HIGH pressure. Instant pot will begin coming to pressure; when it's reached full pressure, timer for the cooking program will begin automatically (pressure valve on top will pop up). When 15 minute programmed cooking time is complete, perform a QUICK RELEASE of steam by flipping the steam release valve to VENTING. When all steam is released, pressure valve on top will drop back down, indicating it is safe to unlock and open the lid.

    Add BBQ Sauce:
    1. Remove chicken legs from Instant Pot. Lay them on parchment paper; brush BBQ sauce on all sides until fully covered. At this point, BBQ chicken is fully cooked and can be served, however I highly recommend one more step: You have 2 options for crisping/browning the chicken legs. Here are the two options.

    Final Step For Browning/Crispness:
    1. Method #1-Broiler: Place chicken legs in a single layer on baking sheet. Place chicken under an oven broiler (several inches away from heat source). Broil until drumsticks are nicely browned and crispy. IMPORTANT: Keep a close eye on the chicken when using broiler. Your chicken can go from nicely browned to burnt very quickly!

      Method #2 - Air Fryer: Place chicken legs in single layer in air fryer basket. Cook at 400° for 6-8 minutes, turning them over halfway though cooking time. The skin of the chicken should become crispy and browned. Transfer chicken out of the basket once done.

    2. Serve with a favorite side dish (or two), and enjoy!

    Nutrition Facts
    BBQ Chicken Legs (Instant Pot)
    Amount Per Serving (1 (2 legs))
    Calories 380 Calories from Fat 135
    % Daily Value*
    Fat 15g23%
    Saturated Fat 4g25%
    Trans Fat 0.1g
    Polyunsaturated Fat 3g
    Monounsaturated Fat 6g
    Cholesterol 139mg46%
    Sodium 1117mg49%
    Potassium 594mg17%
    Carbohydrates 31g10%
    Fiber 1g4%
    Sugar 24g27%
    Protein 29g58%
    Vitamin A 758IU15%
    Vitamin C 1mg1%
    Calcium 49mg5%
    Iron 2mg11%
    * Percent Daily Values are based on a 2000 calorie diet.

    Here’s one more to pin on your Pinterest boards!Make BBQ Chicken Legs in about 30 minutes using an Instant Pot! Seasoned drumsticks are cooked, coated with BBQ sauce, & broiled until crisp.


    Instant Pot Green Beans

    It’s really EASY to make perfect Instant Pot Green Beans! This recipe is enough for a small batch (two servings), but can easily be doubled.
    It's really EASY to make perfect Instant Pot Green Beans! This recipe is enough for a small batch (two servings), but can easily be doubled.

    If you’re looking for a crazy easy way to make green beans, may I suggest making them in an Instant Pot (if you have one)? After the Instant Pot comes to pressure, the beans only cook for ONE MINUTE!

    The texture and flavor of the cooked green beans comes out wonderful, every single time.  I recommend this easy, no-fuss method of cooking fresh (or frozen) green beans.

    The green beans are pressure-cooked in low sodium broth, then seasoned with butter, salt and pepper after cooking. If you want to double the recipe, simply double the amount of green beans. There is no need to double the broth amount!

    The recipe, as written, makes 2 good-sized servings (or 3 if you prefer smaller portions). Honestly… there is nothing difficult at all about preparing this veggie dish. Here’s how to make Instant Pot Green Beans.

    Scroll Down For A Printable Recipe Card At The Bottom Of The Page

    What Type Of Green Beans To Use

    For this small batch recipe, you can use fresh green beans, or if they are not readily available, use frozen green beans.

    Rinse the fresh beans, and trim the ends before they are cooked. If you are using frozen green beans, there is no need to thaw them!

    Fresh green beans, ready to be trimmed and cooked.

    How To Make Instant Pot Green Beans

    Place the fresh, trimmed green beans or the STILL FROZEN green beans in the inner cannister of the Instant Pot.

    NOTE: You can use a steamer basket to hold the green beans, if desired. I do not use one, and the beans turn out wonderful every time!

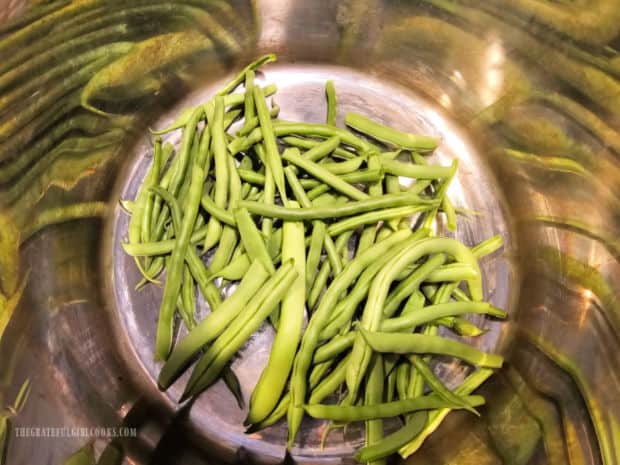
    Trimmed green beans in the inner cannister of an Instant Pot.

    Measure ½ cup of low-sodium chicken broth (or veggie broth), and then pour it over the green beans in the Instant Pot.

    Please note that the broth will not cover the green beans. It will only cover the bottom of the pot, which will provide steam while the beans cook.

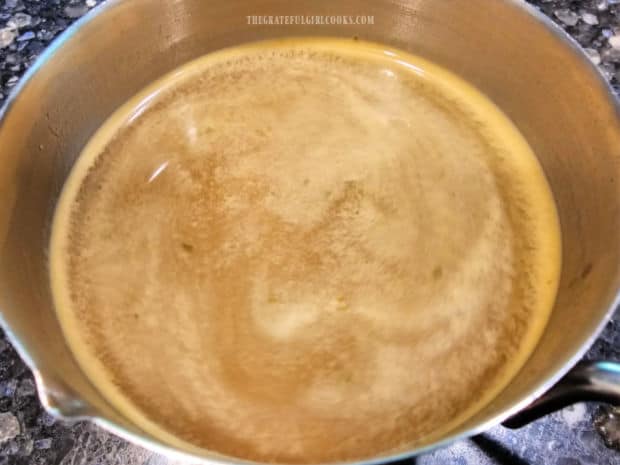
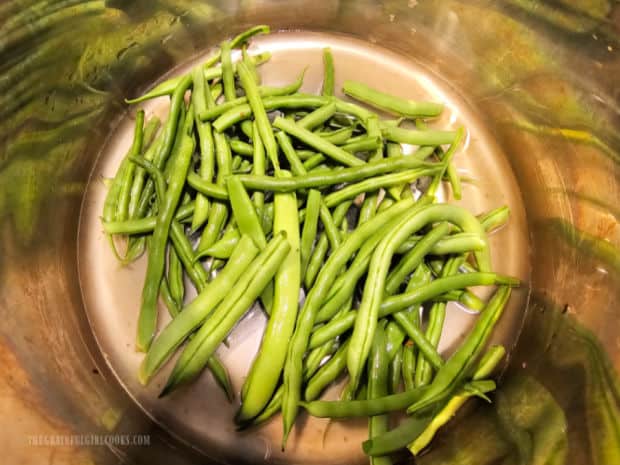
    Low-sodium chicken broth (or vegetable broth) can be used.Broth is poured over the green beans in the Instant Pot.

    Cook The Green Beans

    Lock the lid in place, then flip the top venting knob to SEALING. Program the MANUAL button for 1 minute, cooking at High Pressure. 

    It will take about 10 minutes for the Instant Pot to come to full pressure, then the pressure gauge will pop up, and the timer will come on and begin 1 minute of high pressure cooking.

    As soon as the cooking program has finished (my IP beeps), flip the top venting knob to VENTING, for a Quick Release of internal pressure. After all the steam has been released (and the pressure gauge on top has dropped back down), it is safe to open the lid of the Instant Pot.

    Instant Pot Green Beans are cooked at high pressure for 1 minute.

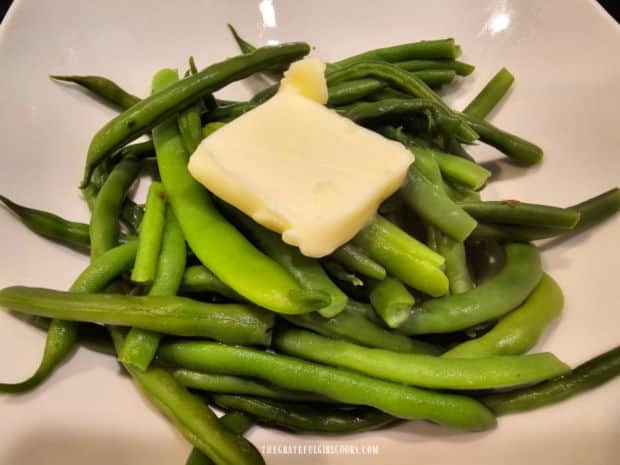
    Using a slotted spoon, transfer the green beans out of the liquid in the pot and place them in a serving bowl. Immediately top the hot green beans with butter, so it has a chance to melt from the heat.

    Hot green beans are transferred to serving bowl, then topped with butter.

    Serve The Instant Pot Green Beans

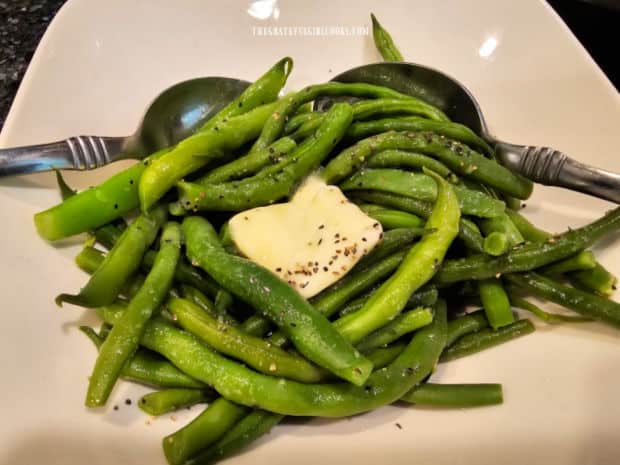
    Season the instant pot green beans with salt and black pepper, to taste, then serve them, while they are hot! This dish is so simple, yet it is very satisfying, and pairs well with a lot of main dishes.

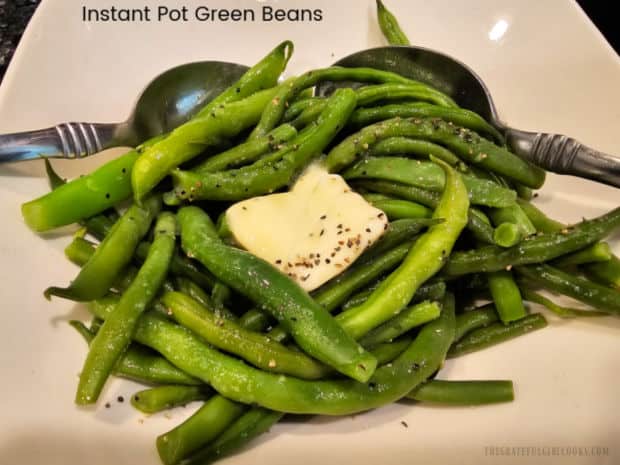
    Instant Pot Green Beans, seasoned with salt, pepper, and butter, ready to serve.

    I hope you give this simple dish a try, and trust you’ll enjoy Instant Pot Green Beans as much as we do! They taste GREAT, and I think you’ll be surprised at the result.

    Thanks for stopping by, and I invite you to come back soon for more family-friendly recipes. Take care, may God bless you, and have a great day!

    Looking For More INSTANT POT RECIPES?

    You can find ALL of my recipes in the Recipe Index, which is located at the top of the page. I have some really delicious Instant Pot recipes you may want to check out, including:

    Want More Recipes? Get My FREE Newsletter!

    I publish a newsletter 2 times per month (1st and 15th) with lots of recipes, tips, etc..
    Would you like to join our growing list of subscribers?

    There is a Newsletter subscription box on the top right (or bottom) of each blog post, depending on the device you use.
    You can submit your e-mail address there, to be added to my mailing list.

    Find Me On Social Media:

    Facebook page: The Grateful Girl Cooks!
    Pinterest:
    The Grateful Girl Cooks!
    Instagram:
    jbatthegratefulgirlcooks

    Author's signature

    ↓↓ PRINTABLE RECIPE BELOW ↓↓

    0 from 0 votes
    Instant Pot Green Beans
    Prep Time
    1 min
    Cook Time
    1 min
    Time for IP to reach full pressure
    10 mins
    Total Time
    12 mins
     

    It's really EASY to make perfect Instant Pot Green Beans! This recipe is enough for a small batch (two servings), but can easily be doubled.

    Category: Side Dish, Vegetable
    Cuisine: All Cuisines
    Keyword: instant pot, green beans
    Servings: 2 (or 3, if smaller portions)
    Calories Per Serving: 82 kcal
    Author: JB @ The Grateful Girl Cooks!
    Ingredients
    • ½ pound green beans* *can use fresh or frozen (do not thaw)
    • ½ cup low sodium chicken broth* *or veggie broth - See NOTE below
    • ¾ Tablespoon butter
    • salt and black pepper, to taste
    Instructions
    1. Place green beans (fresh or frozen)in inner cannister of the Instant Pot. Pour broth over the green beans. NOTE: Can use steamer basket for green beans, if desired.

    2. Lock IP lid in place; flip top venting knob to SEALING. Program the MANUAL button for 1 minute at High Pressure. It will take about 10 minutes for the Instant Pot to reach full pressure. Pressure gauge will pop up, and the timer will come on and begin 1 minute of high pressure cooking.

    3. As soon as cooking program has finished (my IP beeps), flip the top venting knob to VENTING, for a Quick Release of internal pressure. After all steam has been released (and pressure gauge on top has dropped down), it is safe to open the lid.

    4. Using a slotted spoon, transfer green beans out of the liquid in the pot. Place them in a serving bowl. Immediately top the hot beans with butter, so it has a chance to melt. Season to taste with salt and pepper, then serve immediately! Enjoy!

    Recipe Notes

    NOTES:
    **DOUBLING the recipe? Only use the same amount of broth indicated in ingredient list (Don't double the broth amount!).

    **You can put the green beans in a steamer basket in the inner pot, if desired.

    Nutrition Facts
    Instant Pot Green Beans
    Amount Per Serving (1 g)
    Calories 82 Calories from Fat 45
    % Daily Value*
    Fat 5g8%
    Saturated Fat 3g19%
    Trans Fat 0.2g
    Polyunsaturated Fat 0.4g
    Monounsaturated Fat 1g
    Cholesterol 11mg4%
    Sodium 58mg3%
    Potassium 291mg8%
    Carbohydrates 9g3%
    Fiber 3g13%
    Sugar 4g4%
    Protein 3g6%
    Vitamin A 914IU18%
    Vitamin C 14mg17%
    Calcium 46mg5%
    Iron 1mg6%
    * Percent Daily Values are based on a 2000 calorie diet.

    Here’s one more to pin on your Pinterest boards!It's really EASY to make perfect Instant Pot Green Beans! This recipe is enough for a small batch (two servings), but can easily be doubled.


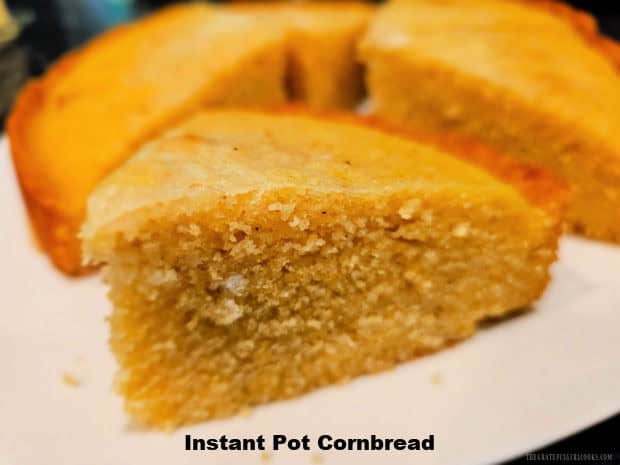
    Instant Pot Cornbread

    Have you tried Instant Pot Cornbread? It’s super easy, and yields 8 delicious slices of cornbread to serve with a favorite soup or meal.
    Have you tried Instant Pot Cornbread? It's super easy, and yields 8 delicious slices of cornbread to serve with a favorite soup or meal.

    When I was growing up, my Mom made homemade cornbread for our family a LOT! I guess she also ate a lot of cornbread while she was growing up in East Texas, and she passed her love of it on to me!

    Typically I bake many varieties of cornbread, but have also used my Instant Pot to make it, too! It is especially convenient to use an Instant Pot when it’s hot outside and I don’t want to heat up our kitchen using the oven!

    Today I want to share this simple recipe with you, and hope you enjoy it, too. If you have access to an Instant Pot (our son gave me the one I use), I’d encourage you to try this cornbread recipe, because it’s so good! Here’s how to make Instant Pot Cornbread.

    Scroll Down For A Printable Recipe Card At The Bottom Of The Page

    Make The Cornbread Batter

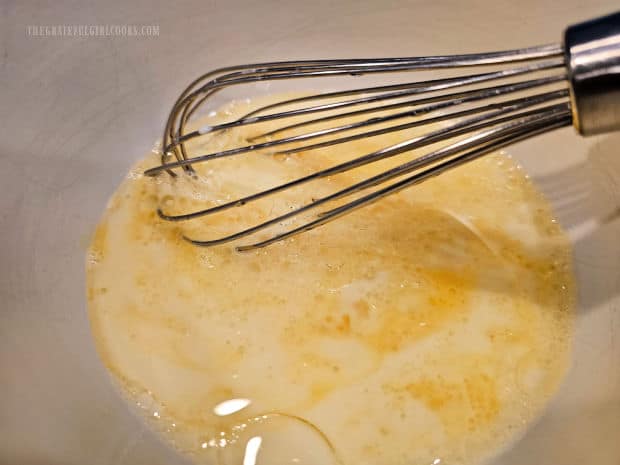
    Whisk an egg, buttermilk and vegetable oil in a medium-sized bowl until these ingredients are well-combined and lump-free.

    A whisk is used to combine egg, buttermilk and oil.

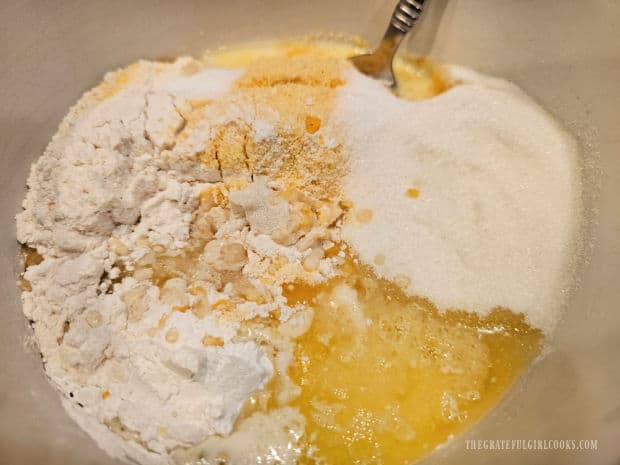
    Add yellow cornmeal, all purpose flour, granulated sugar, baking powder and salt to the egg mixture in the bowl. Stir until all ingredients are combined.

    That’s it! See how easy that was? This is your batter for the cornbread! Now it’s time to prepare the pan for the batter.

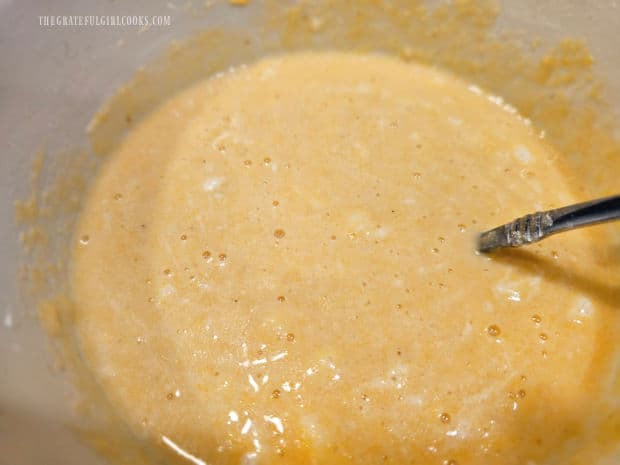
    Flour, cornmeal, sugar, baking powder, and salt are added to egg mixture.The batter for the cornbread is mixed and ready to go into the pan.

    Prepare The Pan For The Cornbread

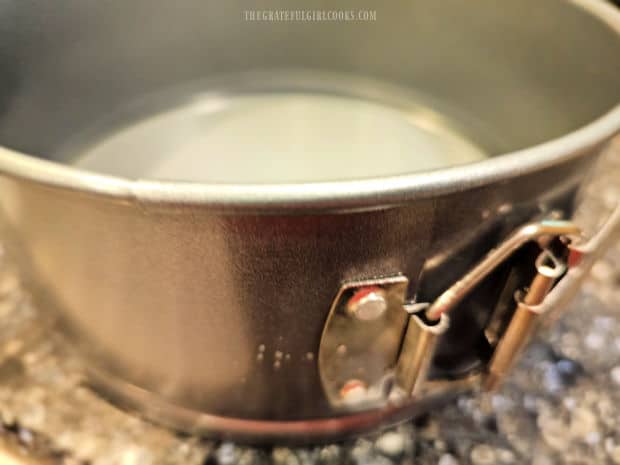
    I have an 8 quart Instant Pot, so I use a 7″ springform cheesecake pan (with removable bottom) when I make the Instant Pot cornbread. You can also use a 7″ cake pan for this recipe, if needed.

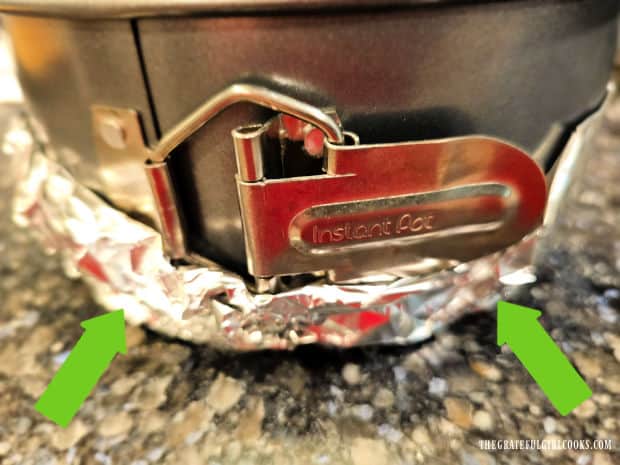
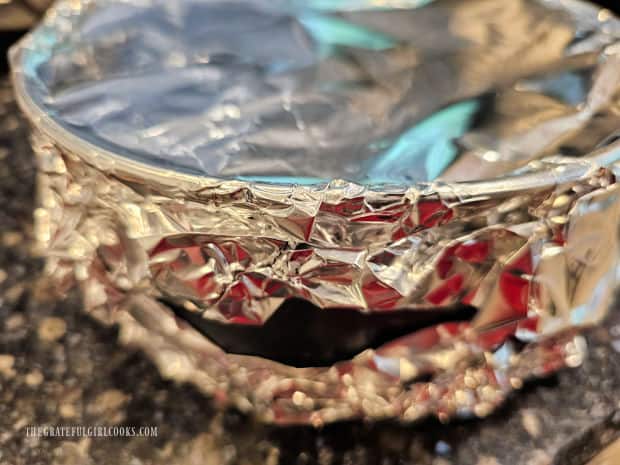
    Tightly wrap a sheet of aluminum foil around the bottom of the pan (on the OUTSIDE) to seal the pan. This helps prevent any liquid from getting in or batter leaking out while the cornbread is cooking!

    A 7" springform cheesecake pan is used for Instant Pot Cornbread.Aluminum foil is tightly wrapped around the bottom of pan, to seal.

    Spray the bottom and sides of the springform pan (on the INSIDE) with non-stick baking spray. Pour the cornbread batter into the springform pan.

    Now tightly cover the top of the springform pan with aluminum foil to seal it. You should now have tightly wrapped foil on the TOP and the BOTTOM of the batter-filled springform pan. 

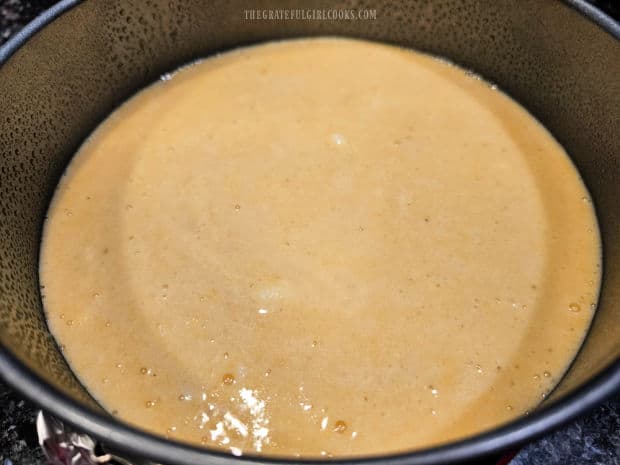
    Cornbread batter is poured into a greased springform pan.Foil is used again to tightly wrap the top of the springform pan.

    Into The Instant Pot It Goes

    Place a trivet on the bottom of the inner pot, then add 1 cup of water to the Instant Pot (the water is necessary to bring the Instant Pot to full pressure). Carefully lower the foil-covered springform pan onto the trivet.

    You should now have water, a trivet, and the foil-covered springform pan in the inner pot of your pressure cooker. Now it’s time to cook some cornbread!

    Time To Cook Your Instant Pot Cornbread

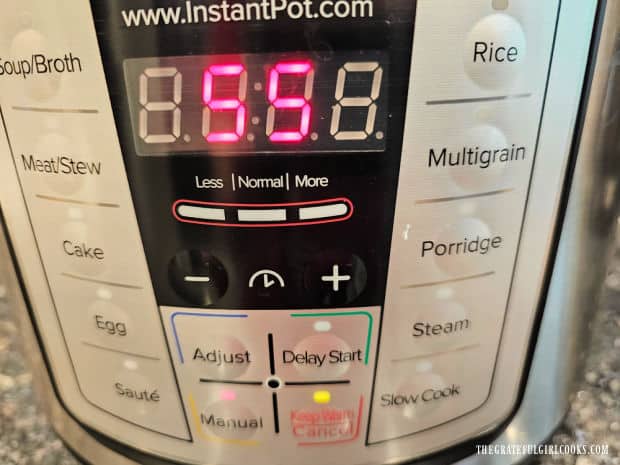
    Securely lock the lid in place, and flip the pressure release valve to SEALING. Press the MANUAL (or HIGH PRESSURE) button and program the timer for 55 minutes.

    It takes 10-15 minutes for the Instant Pot to reach full pressure, then the pressure gauge will pop up, and the timed cooking program will begin.

    Once the cooking time ends, let the pressure release NATURALLY (do nothing) for 10 minutes, then flip the pressure release knob to VENTING, to release any remaining pressure/steam from the machine.

    Once all steam has been released and the pressure gauge drops back down, the Instant Pot may be opened safely. 

    Instant Pot Cornbread cooks for 55 minutes on High pressure.

    Remove Cornbread From The Pan

    Carefully remove the cornbread pan out of the Instant Pot. Wipe off any excess moisture from the foil on top with paper towels before opening.

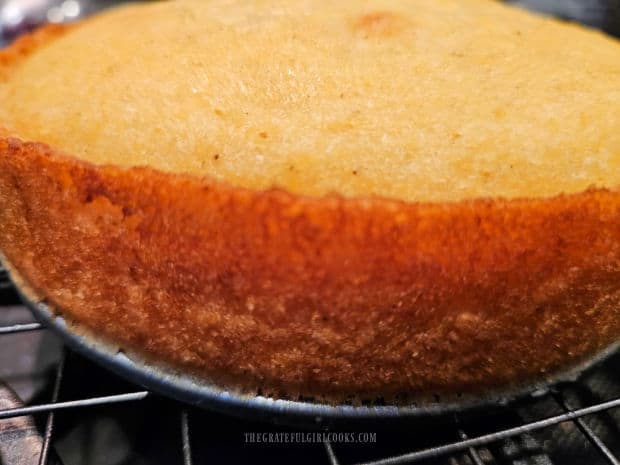
    Remove the foil completely from the pan. Release the springform latches to remove the sides of the pan and lift the cornbread out by pushing up the bottom removable piece of the pan. Let the Instant Pot Cornbread cool on a wire rack for a minute or two before slicing and serving.

    Here is the Instant Pot Cornbread after cooking, but still in the pan.The cornbread is removed from the springform pan, and cools slightly.

    Serve The Instant Pot Cornbread

    Serve the Instant Pot cornbread warm. I love a wedge of cornbread covered with softened butter, and my husband loves his cornbread slice drizzled with honey or molasses.

    This cornbread will pair nicely with a large variety of main dishes, but our favorite way to enjoy a slice is with a big steaming hot bowl of my Mom’s Old-Fashioned Chili!

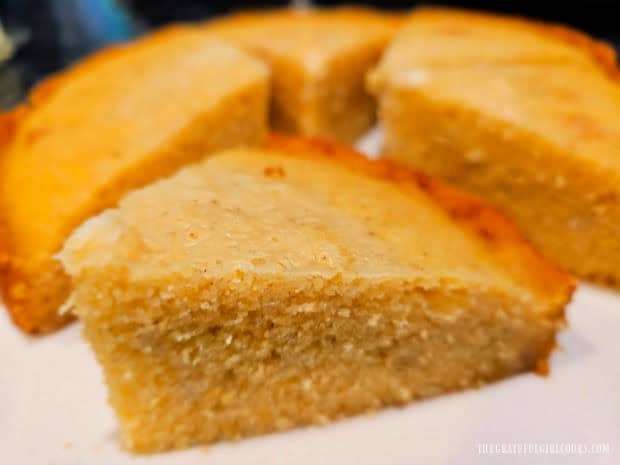
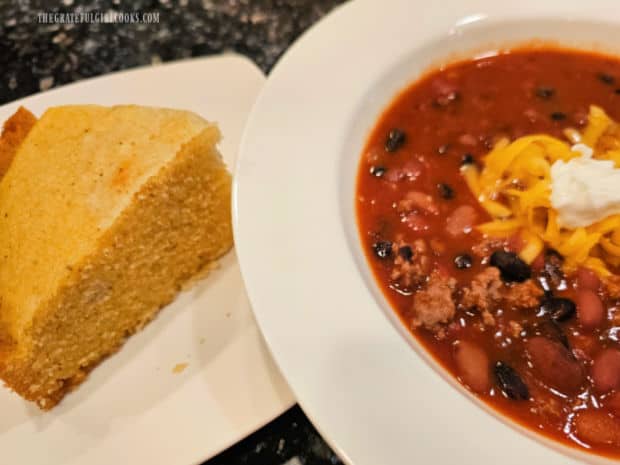
    Instant Pot Cornbread is cut into wedges and served warm.A bowl of chili, with a slice of Instant Pot Cornbread on the side.

    We love this cornbread, and I hope you have the chance to make this recipe, and trust you’ll love it, too! I appreciate how easy it is to make in my Instant Pot, and it tastes wonderful, as well.

    Thank you for stopping by, and I invite you to come back soon for more family-friendly recipes. Take care, may God bless you… and have a great day.

    Looking For More INSTANT POT Recipes?

    You can find ALL of my recipes in the Recipe Index, which is located at the top of the page. I have begun adding Instant Pot recipes to this blog over the past few months and already have a nice selection you might enjoy, including:

    Want More Recipes? Get My FREE Newsletter!

    I publish a newsletter 2 times per month (1st and 15th) with lots of recipes, tips, etc..
    Would you like to join our growing list of subscribers?

    There is a Newsletter subscription box on the top right (or bottom) of each blog post, depending on the device you use.
    You can submit your e-mail address there, to be added to my mailing list.

    Find Me On Social Media:

    Facebook page: The Grateful Girl Cooks!
    Pinterest:
    The Grateful Girl Cooks!
    Instagram:
    jbatthegratefulgirlcooks

    Author's signature

    Original recipe source: Aimee, at: https://www.shugarysweets.com/instant-pot-cornbread/

    ↓↓ PRINTABLE RECIPE BELOW ↓↓

    0 from 0 votes
    Instant Pot Cornbread
    Prep Time
    5 mins
    Cook Time
    55 mins
    Total Time
    1 hr
     

    Have you tried Instant Pot Cornbread? It's super easy, and yields 8 delicious slices of cornbread to serve with a favorite soup or meal.

    Category: Bread, Side Dish
    Cuisine: All Cuisines
    Keyword: Instant Pot, cornbread
    Servings: 8 wedges
    Calories Per Serving: 307 kcal
    Author: JB @ The Grateful Girl Cooks!
    Ingredients
    • 1 large egg
    • 1 cup buttermilk
    • cup vegetable oil
    • 1 cup yellow cornmeal
    • 1 cup all purpose flour
    • cup granulated sugar
    • 1 Tablespoon baking powder
    • 1 teaspoon kosher salt
    • 1 cup water (for the Instant Pot)
    Instructions
    1. Whisk egg, buttermilk and oil in a medium bowl until combined and lump-free. Stir in cornmeal, flour, sugar, baking powder and salt just until combined.

    2. Tightly wrap aluminum foil outside around the bottom of a 7" springform pan to seal the pan. This prevents liquid from getting in or batter leaking out while cornbread cooks! Spray the inside (bottom/sides) of the springform pan with non-stick baking spray.

    3. Pour cornbread batter into prepared springform pan. Tightly cover the top of the springform pan with more foil, to seal it. You should have tightly wrapped foil on the TOP and BOTTOM of the batter-filled springform pan.

    4. Place trivet on the bottom of the pressure cooker's inner pot; add 1 cup of water. Carefully lower the foil-covered springform pan onto the trivet.

    5. Lock the lid in place; flip pressure release valve to SEALING. Press MANUAL (or HIGH PRESSURE) button; set timer for 55 minutes. It takes 10-15 minutes for the Instant Pot to reach full pressure, then the pressure gauge will pop up, and cooking program will begin. Once done, let pressure release NATURALLY (do nothing) for 10 minutes, then flip pressure release knob to VENTING, to release any remaining pressure/steam. When all steam has been released and pressure gauge drops down, the Instant Pot can be opened safely.

    6. Carefully remove springform pan from the Instant Pot. Wipe excess moisture from the foil on top with paper towels before opening. Remove foil completely. Release latches to remove the sides of the pan. Transfer cornbread to cutting board; let it cool 1-2 minutes before slicing/serving. Enjoy!

    Nutrition Facts
    Instant Pot Cornbread
    Amount Per Serving (1 slice (1/8 of total))
    Calories 307 Calories from Fat 108
    % Daily Value*
    Fat 12g18%
    Saturated Fat 2g13%
    Trans Fat 0.1g
    Polyunsaturated Fat 6g
    Monounsaturated Fat 3g
    Cholesterol 27mg9%
    Sodium 334mg15%
    Potassium 282mg8%
    Carbohydrates 45g15%
    Fiber 2g8%
    Sugar 18g20%
    Protein 5g10%
    Vitamin A 83IU2%
    Calcium 107mg11%
    Iron 2mg11%
    * Percent Daily Values are based on a 2000 calorie diet.

    Here’s one more to pin on your Pinterest boards!Have you tried Instant Pot Cornbread? It's super easy, and yields 8 delicious slices of cornbread to serve with a favorite soup or meal.

    Turkey Black Bean Soup (Instant Pot)

    Make delicious Turkey Black Bean Soup using an Instant Pot and leftover turkey! The recipe yields six servings of this hearty, filling soup.
    Make delicious Turkey Black Bean Soup using an Instant Pot and leftover turkey! The recipe yields six servings of this hearty, filling soup.

    Today I want to share a delicious recipe for Turkey Black Bean Soup, which is made using a pressure cooker. I found the original recipe in a cookbook I own (from author Coco Morante), made a couple slight changes, and the soup is scrumptious.

    I don’t know about you, but when I make a turkey, there are always leftovers! A cooked turkey leg (drumstick) and wing are used in this recipe to provide flavor and meat for the soup, so it’s a wonderful way to use those leftovers.

    Dried black beans are cooked with the soup in the Instant Pot, so there’s no need to pre-soak them, which is a real time-saver! The soup itself takes a little longer than an hour to cook, but almost all of it is “hands-off” time!

    Here’s how to make this yummy turkey black bean soup in a pressure cooker. I’m really confident you’re going to enjoy it!

    Scroll Down For A Printable Recipe Card At The Bottom Of The Page

    Sauté The Veggies

    Measure olive oil into the inner pot and press the SAUTÉ button to heat the olive oil. Once the oil is hot (but not smoking), add diced onion, bell pepper, celery, salt, pepper, and red chili pepper flakes.

    Stir to combine these ingredients, and sauté them for about 4 minutes until they have become tender. Stir in minced garlic, and cook an additional minute, stirring often, and being careful not to burn the garlic.

    Chopped onion, bell pepper and celery are sautéed in oil in the Instant Pot.

    Add Black Beans, Turkey, And Water

    Put the dried black beans and turkey into the pot. I use a large cooked turkey drumstick and one wing, with a total weight of about 12-14 ounces (including the bones).

    Pour in 4 cups of water. This should be enough water to slightly submerge the veggies and beans. Once that is done, you are ready to cook!

    A cooked turkey leg, wing and dried black beans are added to the pot.Four cups of water is added to the pot, submerging the veggies and beans.

    Time To Cook!

    Lock the lid of the pressure cooker in place, and flip the Pressure Release knob to SEALING. Press the CANCEL button to stop the Sauté function.

    Select the MANUAL button (or the Bean/Chili or Pressure Cook button). Set the cooking timer for 1 hour and 15 minutes on HIGH pressure. Once the Instant Pot has reached full internal pressure (takes about 15 minutes), the cooking time will begin.

    Once the cooking program has ended, let the pressure release NATURALLY for 25 minutes (you do nothing!). After 25 minutes, flip the Pressure Release knob to VENTING, which will let any remaining steam escape.

    Once the pressure gauge has dropped back down (indicating no remaining internal pressure), it is safe to open the Instant Pot.

    An Instant Pot is used to prepare this recipe for turkey black bean soup.

    Shred Turkey And Finish Seasoning Soup

    Use a large slotted spoon (or tongs) to remove the turkey from the pot and onto a cutting board. It will be VERY tender, and may fall apart!

    Remove the turkey meat from the bones, discarding any skin or bones. Cut the turkey into small bite-sized pieces (or shred it, if you prefer it that way).

    Place the turkey meat back into the pot, then add apple cider vinegar and stir until it has been incorporated into the turkey black bean soup. Take a little bite of the soup, and add more salt and pepper, to suit your taste.

    After cooking, the turkey meat is removed, and bones and skin are discarded.Bite-sized pieces of turkey meat are added back into the soup.

    Enjoy A Bowl Of Turkey Black Bean Soup

    Now it’s time to enjoy a big, hot bowl of turkey black bean soup! Ladle portions of the hot soup into serving bowls, and serve immediately! If desired, garnish with cilantro and/or sour cream.

    We love this soup when served with toasted garlic bread on the side, because we can dip the bread in the hot soup… it’s so good!

    The black beans are tender, the broth is seasoned well, and the turkey helps add more protein and flavor to this delicious soup! 

    Turkey black bean soup, topped with cilantro, served with bread on the side.A bowl of the turkey black bean soup, garnished with cilantro leaves.

    I hope you have the opportunity to try this wonderful soup. It is filing and delicious, and is a fantastic way to use up leftover turkey!

    If you enjoy using an Instant Pot, be sure to check out my other recipes, including Instant Pot Beef Stew, Ground Beef Stroganoff, Pork Carnitas, and Rice Pudding!

    Thank you for stopping by, and I invite you to come back again soon for more family-friendly recipes. Take care, may God bless you… and have a great day!

    Looking For More SOUP Recipes?

    You can find ALL of my recipes in the Recipe Index, which is located at the top of the page. I have lots of delicious soups (and other Instant Pot recipes) to enjoy, including:

    Want More Recipes? Get My FREE Newsletter!

    I publish a newsletter 2 times per month (1st and 15th) with lots of recipes, tips, etc..
    Would you like to join our growing list of subscribers?

    There is a Newsletter subscription box on the top right (or bottom) of each blog post, depending on the device you use.
    You can submit your e-mail address there, to be added to my mailing list.

    Find Me On Social Media:

    Facebook page: The Grateful Girl Cooks!
    Pinterest:
    The Grateful Girl Cooks!
    Instagram:
    jbatthegratefulgirlcooks

    Author's signature

    Recipe adapted from: “The Ultimate Instant Pot Cookbook”, by Coco Morante, page 85, published by TenSpeed Press, 2018

    ↓↓ PRINTABLE RECIPE BELOW ↓↓

    0 from 0 votes
    Turkey Black Bean Soup (Instant Pot)
    Prep Time
    15 mins
    Cook Time
    1 hr 15 mins
    Natural Pressure Release Time
    25 mins
    Total Time
    1 hr 55 mins
     

    Make delicious Turkey Black Bean Soup using an Instant Pot and leftover turkey! The recipe yields six servings of this hearty, filling soup.

    Category: Main Dish, Soup
    Cuisine: All Cuisines
    Keyword: Instant pot, turkey black bean soup
    Servings: 6
    Calories Per Serving: 277 kcal
    Author: JB @ The Grateful Girl Cooks!
    Ingredients
    • 3 Tablespoons olive oil
    • 1 medium yellow onion peeled, diced
    • 1 medium green bell pepper seeded, diced
    • 2 medium celery stalks diced
    • teaspoons minced garlic
    • 1 teaspoon salt
    • ½ teaspoon black pepper
    • teaspoon red chili pepper flakes
    • cups dried black beans
    • 14 ounces cooked turkey drumstick (and 1 wing) bone in total amount = 14 ounces
    • 4 cups water
    • 1 Tablespoon apple cider vinegar
    Optional Garnish: cilantro/sour cream
      Instructions
      1. Measure olive oil into the inner pot and press SAUTÉ button to heat the olive oil. Once oil is hot (but not smoking), add onion, bell pepper, celery, salt, pepper, and red chili pepper flakes. Stir to combine; sauté for 4 minutes or until tender. Stir in garlic. Cook 1 minute, stirring often (to not burn the garlic).

      2. Put dried beans and turkey into the pot. Pour in 4 cups of water, which should slightly submerge veggies and beans.

      3. Lock the lid in place; flip Pressure Release knob to SEALING. Press the CANCEL button to stop the Sauté function. Select the MANUAL button (or the Bean/Chili or Pressure Cook button). Set cooking timer for 1 hour and 15 minutes at HIGH pressure. Once the Instant Pot has reached full pressure (takes about 15 minutes), the cooking time will begin.

      4. Once cooking program has ended, let the pressure release NATURALLY for 25 minutes (do nothing!). After 25 minutes, flip the Pressure Release knob to VENTING, which lets any remaining steam escape. Once pressure gauge has dropped back down (indicating no remaining internal pressure), it is safe to open the Instant Pot.

      5. Use a large slotted spoon (or tongs) to transfer turkey from the pot to a cutting board. Remove meat from the bones, discarding skin/bones. Cut turkey into small pieces (or shred it). Place meat back into the pot. Add apple cider vinegar; stir until incorporated. Taste soup; add more salt/pepper, if desired.

      6. Serve soup immediately; garnish portions with cilantro or sour cream, if desired.

      Nutrition Facts
      Turkey Black Bean Soup (Instant Pot)
      Amount Per Serving (1 (1/6 of total))
      Calories 277 Calories from Fat 99
      % Daily Value*
      Fat 11g17%
      Saturated Fat 2g13%
      Polyunsaturated Fat 2g
      Monounsaturated Fat 6g
      Cholesterol 31mg10%
      Sodium 443mg19%
      Potassium 821mg23%
      Carbohydrates 29g10%
      Fiber 7g29%
      Sugar 2g2%
      Protein 18g36%
      Vitamin A 155IU3%
      Vitamin C 18mg22%
      Calcium 76mg8%
      Iron 3mg17%
      * Percent Daily Values are based on a 2000 calorie diet.

      Here’s one more to pin on your Pinterest boards!Make delicious Turkey Black Bean Soup using an Instant Pot and leftover turkey! The recipe yields six servings of this hearty, filling soup.

      Instant Pot Rice Pudding

      Instant Pot Rice Pudding is an easy dessert to make! This classic recipe yields 8 yummy servings, with raisins, cinnamon and nutmeg!
      Instant Pot Rice Pudding is an easy dessert to make! This classic recipe yields 8 yummy servings, with raisins, cinnamon and nutmeg!

      Do you enjoy rice pudding? This simple dessert has been around for many centuries, and it’s origins are unclear. Many people believe it originated in China, others argue it was created in India! Others insist it was created and used by the Romans for medicinal purposes…so who really knows?

      At its very core, modern day rice pudding is typically made with rice that is combined with milk (or cream) and water. The mixture is typically sweetened before cooking it on the stovetop or in the oven, and sometimes dried fruits are added.

      Today I want to share a fantastic way to make Rice Pudding using an Instant Pot. This method is easy because there’s no need to heat the house using an oven (especially in warm months), AND there’s no need to stir it constantly on the stove while it cooks.

      Using an Instant Pot for this creamy dessert is a game-changer, for sure! If you are fortunate enough to own this kitchen appliance, I hope you will check out this simple recipe for Instant Pot Rice Pudding!

      Scroll Down For A Printable Recipe Card At The Bottom Of The Page

      Prepare The Rice Pudding

      Place one cup of Arborio rice into a fine mesh strainer. TIP: I highly recommend using Arborio rice, but if you don’t have it, you can substitute the same amount of long grain white rice.

      Rinse the rice very well, then drain the water off the rice. Place the rinsed, drained rice into the inner pot of the Instant Pot.

      The rice is rinsed and drained well before it is cooked.After rinsing, white rice is put into the inner pan of the Instant Pot.

      Add milk, water, ground cinnamon, raisins, salt, and a pinch of nutmeg to the rice in the pot. Use a whisk to combine these ingredients well.

      It will not blend perfectly (because of the raisins, rice and cinnamon!), but mix it together as best as possible.

      Milk, water, cinnamon, salt, rice and raisins are put into the Instant Pot.Ingredients for the rice pudding are whisked together before cooking.

      Cooking The Rice Pudding

      Lock the lid of the Instant Pot in place, and turn the knob on top to the SEALING position. Push the MANUAL button (High heat) and set the timer for 11 minutes.

      It will take about 15 minutes for the Instant Pot to reach full pressure, then the pressure button on top will pop up and the cooking timer will begin.

      When the rice pudding has finished cooking, let the pressure release NATURALLY for 10 minutes (do nothing while it does this!). AFTER the 10 minute natural release takes place, flip the pressure release knob to VENTING to allow any remaining steam to escape.

      Cooking the rice pudding for 11 minutes on Manual setting in the Instant Pot.

      Add Remaining Ingredients

      Once all pressure has been released (and the pressure button drops back down), it is safe to unlock and open the lid.

      The mixture inside will be quite thick, so give it a quick stir. Add a can of sweetened condensed milk and vanilla extract to the rice pudding in the pot.

      After cooking the Instant Pot Rice Pudding is very thick in the pot.Condensed milk is poured into the rice pudding in the Instant Pot.

      Stir well, until the condensed milk and vanilla have been fully combined into the rice pudding. Once combined, the rice pudding is ready to be served.

      We transfer the rice pudding out of the Instant Pot straight into small serving dishes. Rice pudding can be eaten warm or cold. If you enjoy your rice pudding warm, simply let it cool down a bit before digging in.

      Rice pudding in the Instant Pot is ready to be transferred into dishes.

      Serve The Instant Pot Rice Pudding

      If you like your rice pudding cold, cover the pudding with plastic wrap AFTER it has cooled to room temperature. Place the pudding in the refrigerator until it is fully chilled.

      Eight servings of Instant Pot Rice Pudding, ready to be eaten.

      We enjoy our Instant Pot Rice Pudding best served cold, and sometimes we top each serving with a dollop of whipped cream! This dessert is a thick and delicious treat we gobble up… any time of day!

      A serving of Instant Pot Rice Pudding with whipped cream on top.A close up photo of a spoonful of the Instant Pot Rice Pudding.

      I really hope you have the opportunity to make this simple, classic dessert for those you love. Using an Instant Pot really helps make this a very simple dessert to prepare.

      Thank you for stopping by, and I invite you to come back again soon for more family-friendly recipes. Take care, may God bless you… and have a wonderful day!

      Looking For More INSTANT POT Recipes?

      You can find ALL of my recipes in the Recipe Index, which is located at the top of the page. I have some delicious Instant Pot recipes, including:

      Want More Recipes? Get My FREE Newsletter!

      I publish a newsletter 2 times per month (1st and 15th) with lots of recipes, tips, etc..
      Would you like to join our growing list of subscribers?

      There is a Newsletter subscription box on the top right (or bottom) of each blog post, depending on the device you use.
      You can submit your e-mail address there, to be added to my mailing list.

      Find Me On Social Media:

      Facebook page: The Grateful Girl Cooks!
      Pinterest:
      The Grateful Girl Cooks!
      Instagram:
      jbatthegratefulgirlcooks

      Author's signature

      Recipe adapted from: Kelsey, at: bakemesomesugar.com/instant-pot-rice-pudding

      ↓↓ PRINTABLE RECIPE BELOW ↓↓

      0 from 0 votes
      Instant Pot Rice Pudding
      Prep Time
      5 mins
      Cook Time
      11 mins
      Inactive Instant Pot time (creating pressure)
      15 mins
      Total Time
      31 mins
       

      Instant Pot Rice Pudding is an easy dessert to make! This classic recipe yields 8 yummy servings, with raisins, cinnamon and nutmeg!

      Category: Dessert
      Cuisine: All Cuisines
      Keyword: Instant Pot, rice pudding
      Servings: 8
      Calories Per Serving: 308 kcal
      Author: JB @ The Grateful Girl Cooks!
      Ingredients
      • 1 cup Arborio rice can substitute long grain white rice
      • 2 cups low-fat milk can substitute whole milk, if desired
      • cups water
      • ½ cup raisins
      • 2 teaspoons ground cinnamon
      • ¼ teaspoon salt
      • 1 pinch ground nutmeg
      • 14 ounces sweetened condensed milk =1 can- (NOT evaporated milk!)
      • 1 teaspoon vanilla extract
      Instructions
      1. Place rice into a fine mesh strainer. Rinse it very well, then drain rice. Place rice into the inner pot of the Instant Pot.

      2. Add milk, water, cinnamon, raisins, salt, and nutmeg. Use a whisk to combine these ingredients. mixing them as much as possible.

      3. Lock lid in place; turn knob on top to SEALING position. Push MANUAL button (High heat); set timer for 11 minutes. It takes about 15 minutes to reach full pressure, then pressure button on top will pop up and cooking timer will begin. When finished cooking, let pressure release NATURALLY for 10 minutes (do nothing). AFTER 10 minute natural release takes place, flip pressure release knob to VENTING to allow remaining steam to escape.

      4. Once all pressure is released (and pressure button drops down), it's safe to unlock/open the lid. Pudding will be thick, so give it a stir. Add sweetened condensed milk and vanilla. Stir until they're fully incorporated.

      5. Transfer rice pudding into serving dishes. Serve warm or cold. If chilling, let it cool to room temperature, cover with plastic wrap; refrigerate until cold. Enjoy!

      Nutrition Facts
      Instant Pot Rice Pudding
      Amount Per Serving (1 (1/8 of total))
      Calories 308 Calories from Fat 54
      % Daily Value*
      Fat 6g9%
      Saturated Fat 4g25%
      Trans Fat 0.1g
      Polyunsaturated Fat 0.3g
      Monounsaturated Fat 2g
      Cholesterol 22mg7%
      Sodium 168mg7%
      Potassium 364mg10%
      Carbohydrates 57g19%
      Fiber 2g8%
      Sugar 30g33%
      Protein 8g16%
      Vitamin A 194IU4%
      Vitamin C 2mg2%
      Calcium 221mg22%
      Iron 1mg6%
      * Percent Daily Values are based on a 2000 calorie diet.

      Instant Pot Rice Pudding is an easy dessert to make! This classic recipe yields 8 yummy servings, with raisins, cinnamon and nutmeg!