Month: July 2026

Refrigerator Dill Pickle Slices

Make Refrigerator Dill Pickle Slices without canning! This EASY recipe yields 1 quart of yummy pickle slices for burgers and sandwiches.
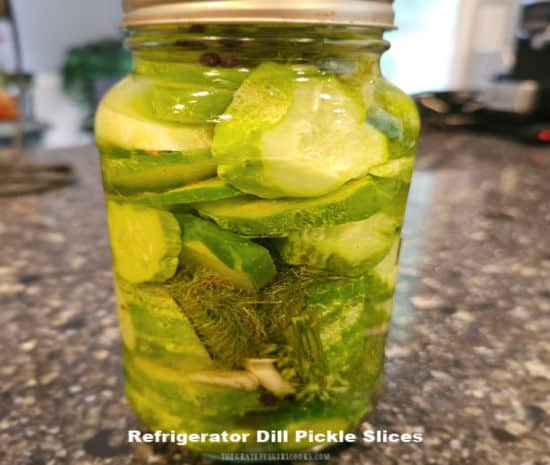
A quart sized jar full of refrigerator dill pickle slices.

Do you enjoy pickles? We sure do! Most of the time I can our homemade pickles, but sometimes I simply only need or want one jar of pickles that doesn’t require canning equipment. That’s where this recipe comes in handy!

Today I am sharing this recipe for making delicious dill pickle slices that all you do is layer pickling cucumber slices with a few other ingredients (brine, peppercorns, garlic and dill) in a jar and then refrigerate. That’s it!

After a week or two of refrigeration you will have a one-quart jar full of delicious dill pickle slices (sometimes a bit more) ready to enjoy and use for burgers, sandwiches or a quick snack!

Scroll Down For A Printable Recipe Card At The Bottom Of The Page

Pickling Cucumbers

For this recipe you will need to use “pickling cucumbers”. Unlike “regular” sized cucumbers you would buy in the store, a pickling cucumber is much shorter in size.

Pickling cucumbers also have a “drier” peel”, which allows them to absorb more of the brine when you pickle them!

I am fortunate to grow pickling cucumbers each year in our little raised bed garden, but when they are in season, they can be found at many grocery stores or farmer’s markets.

In the second photo below, you can see several pickling cucumbers (front left) I picked along with some other veggies and fruit from our backyard garden.
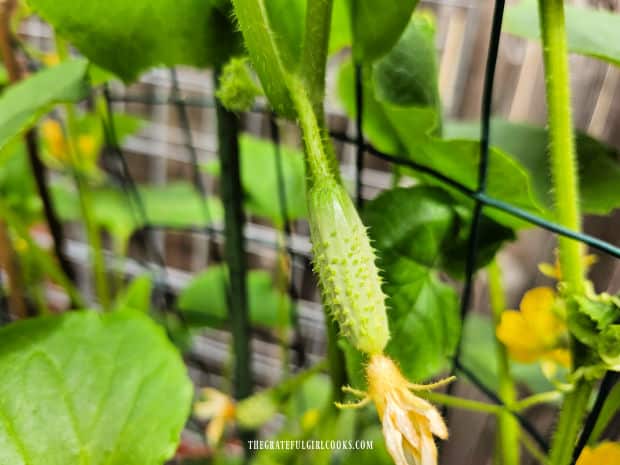
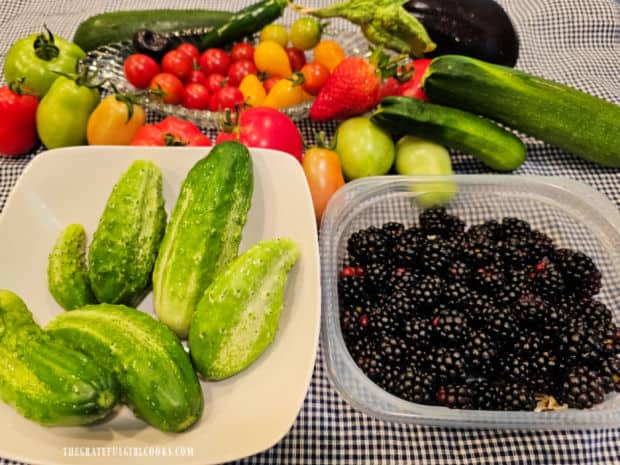
Growing pickling cucumbers in our small, raised bell garden.Fresh veggies and fruit from our garden, including some pickling cucumbers.

How Many Pickling Cucumbers Will I Need?

Today I will be sharing a recipe that will fill a one-quart jar with refrigerator dill pickle slices. To make a one quart jar of pickles you will need approximately 6 pickling cucumbers (about 5-6″ long).

NOTE: Depending on the size cucumbers you use, you might end up with enough slices to fill a small half-pint jar, as well. I always say the minimum yield will fill a one-quart jar but please know you may get more slices out of your pickling cucumbers and require a second small jar!

The number of cucumbers you use will ultimately depend on how many jars you want to make, so the recipe can easily be doubled or tripled for that purpose (as needed).

These pickle slices are refrigerated but are NOT canned, so they are very simple (and safe) to make. Since it is only my husband and I at home these days, we only need a one-quart jar of pickles every couple of months.
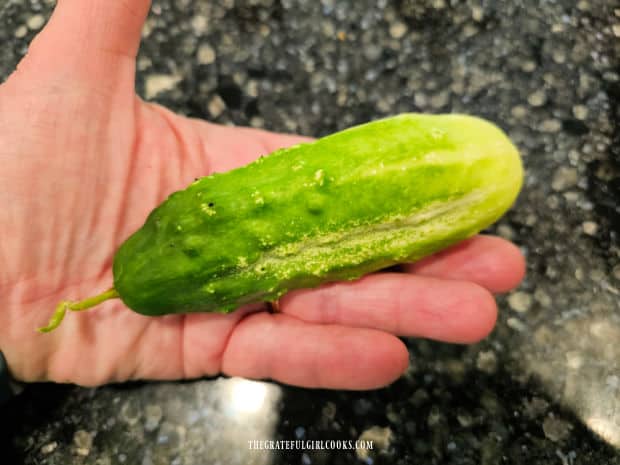
Holding one pickling cucumber to show the size they typically are at maturity.

A Little Prep First

Before you pack the jar full of cucumber slices, you will need to make the pickle brine and let it cool to room temperature before using it.

Fill a medium sized saucepan with 2 cups of water, 1 cup of white vinegar (5%), 1 Tablespoon of kosher salt and ½ teaspoon of granulated sugar.

Bring this liquid mixture quickly to a boil, stirring occasionally to make sure the salt and sugar fully dissolve. Once they are dissolved, take the pan off of the heat source and let the brine cool down until it reaches room temperature.

While the brine is cooling down, prepare the jar and the cucumber slices so they are ready to go once the brine reaches room temperature.

How To Make Refrigerator Dill Pickle Slices

Prepare a quart sized jar by washing and drying it well. Wash all of the cucumbers you will be using. Cut off and discard both ends of each cucumber. Slice each cucumber into rounds, about ¼ inch thick or so.

Fill the jar by layering the cucumber slices with fresh dill, peeled and smashed garlic cloves, and peppercorns. You will put in a few slices, add dill, garlic cloves and peppercorns, then add more, etc. until the jar is full.

IMPORTANT:  Fill the jars full but make sure you don’t pack the ingredients in too tightly, because you need room for the pickling brine to get through, okay?
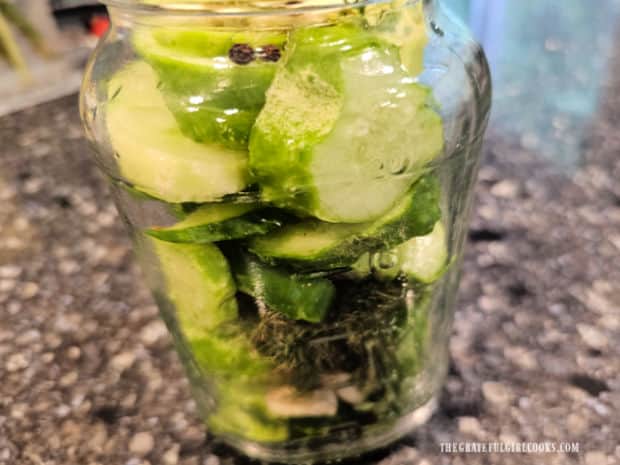
Jar is layered with cucumber slices, dill, garlic and peppercorns.

I typically top off the jar with a couple more cloves of garlic, a few peppercorns and more dill. You can see them in the photo below.

Add The Brine

Pour the room temperature brine into the jar (or jars) you are using. Cover the pickle slices and extra ingredients completely with the brine.

Gently push the pickles (and spices) down into the jar (if necessary) to ensure they are completely covered with the liquid.

IMPORTANT: Fully cover everything with brine! This is very important, so the pickles (below the surface of the brine) can soak up all the flavor they need.
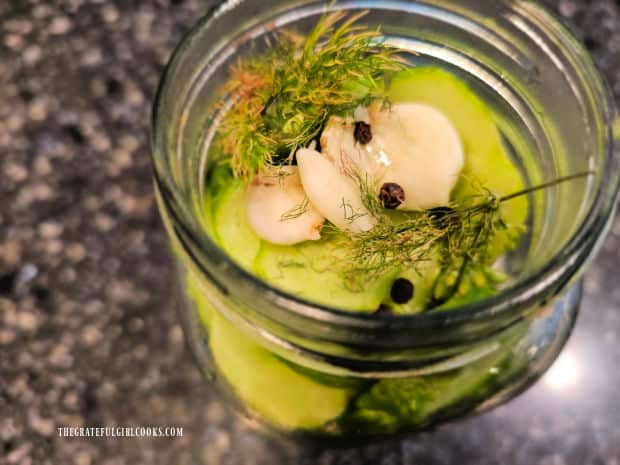
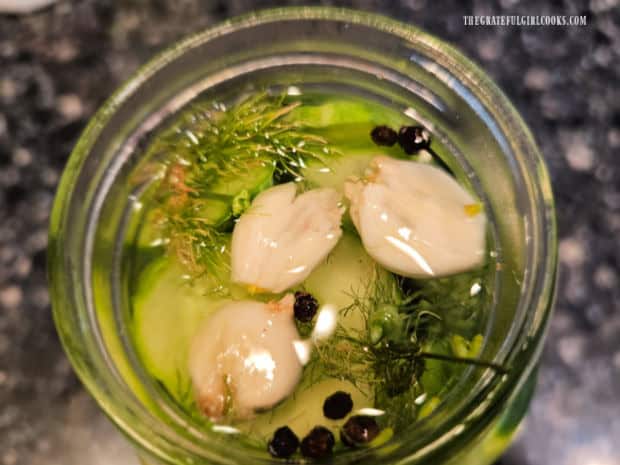
View of the garlic, dill and peppercorns on top of the pickle slices in jar.Smashed garlic cloves, dill and peppercorns add lots of flavor to the pickle brine.

Seal the jar of pickle slices with an airtight lid. Place the sealed jar in the refrigerator and let them “pickle” for AT LEAST 1-2 weeks before you ever open the jar and eat them (for best flavor).

NOTE: I usually let my refrigerator dill pickle slices sit in the fridge for about 2 weeks before we open the jar, because that’s when I personally think they’ve reached the peak of flavor!
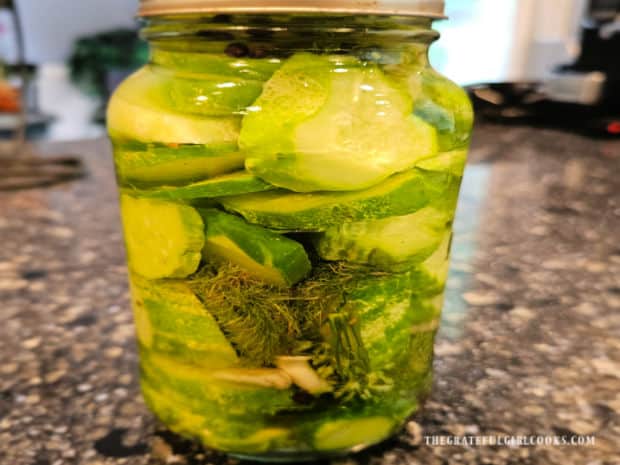
One jar of refrigerator dill pickle slices, ready to be stored in the fridge to develop flavor.

Storing The Pickles

Refrigerator dill pickle slices will typically last for several months if they remain fully covered by the brine in the jar and kept refrigerated. They are not shelf stable because they are not “canned”, so they must be refrigerated!

NOTE: I feel that these yummy pickles have their best flavor if they’re eaten within 3 months of making them! After that they’re still good (and safe) to eat but may have slightly diminished flavor.

The refrigerator dill pickle slices (shown below) are the last ones I removed from the jar (and refrigerator) about 3 months AFTER I made them. They were still absolutely delicious AND we loved using them on grilled hamburgers for dinner!

The key takeaway is to keep those pickle slices covered with brine the whole time they are refrigerated! Hope you like them!
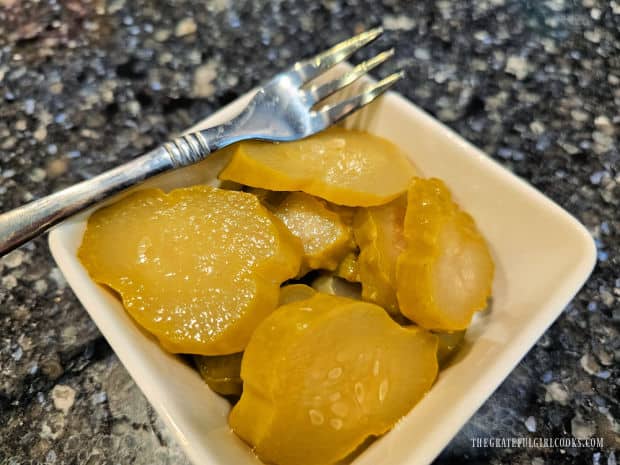
Three months after being made, refrigerator dill pickle slices still taste great!

I hope you have the opportunity to make a jar of these delicious refrigerator dill pickle slices for yourself and those you love. They really are quite GOOD!

Thanks for stopping by, and I invite you to come back again soon for more family friendly recipes. Take care, may God bless you, and have a great day.

Looking For More SIDE DISH Recipes?

You can find ALL of my recipes in the Recipe Index, which is located at the top of the page. I have LOTS of side dish recipes to choose from, including:

Want More Recipes? Get My FREE Newsletter!

I publish a newsletter 2 times per month (1st and 15th) with lots of recipes, tips, etc.
Would you like to join our growing list of subscribers?

There is a Newsletter subscription box on the top right (or bottom) of each blog post, depending on the device you use.
You can submit your e-mail address there, to be added to my mailing list.

Find Me On Social Media:

Facebook page: The Grateful Girl Cooks!
Pinterest:
The Grateful Girl Cooks!
Instagram:
jbatthegratefulgirlcooks

Author's signature

Recipe adapted from and with thanks to: Krissy, at Easy Refrigerator Dill Pickles – Self Proclaimed Foodie

↓↓ PRINTABLE RECIPE BELOW ↓↓
0 from 0 votes
Refrigerator Dill Pickle Slices
Prep Time
10 mins
Cook Time
5 mins
Total Time
15 mins
 

Make Refrigerator Dill Pickle Slices without canning! This EASY recipe yields 1 quart of yummy pickle slices for burgers and sandwiches.

Category: Condiment
Cuisine: All Cuisines
Keyword: refrigerator dill pickle slices
Servings: 1 quart jar + a ½ Pint jar
Author: JB @ The Grateful Girl Cooks!
Ingredients
For the Brine:
  • 2 cups water
  • 1 cup white vinegar (5% acidity)
  • 1 Tablespoon kosher salt
  • ½ teaspoon granulated sugar
For The Pickles:
  • 6 pickling cucumbers each approx. 5" long
  • ½ bunch fresh dill torn into pieces (most of stem removed)
  • ½ Tablespoon whole peppercorns (in spice section at most stores)
  • ½ head garlic peeled/separated into cloves/smashed
Instructions
Make Brine:
  1. Fill medium saucepan with water, white vinegar (5%), kosher salt and granulated sugar. Bring this to a boil, stirring to make sure salt and sugar fully dissolve, then take the pan off the heat source. Let brine cool to room temperature.

To Make Pickles:
  1. Wash and dry a quart sized jar. Next, wash the cucumbers. Cut off (discard) both ends of each cucumber. Slice cucumbers into rounds, approximately ¼ inch thick.

  2. Fill the jar by layering cucumber slices with fresh dill, peeled and lightly smashed garlic cloves, and peppercorns. (Example: put in a few slices, add some dill, garlic cloves and peppercorns, then repeat this until the jar is full. IMPORTANT:  Fill the jars full but don't pack ingredients in too tightly, because you need room for the pickling brine and spice to permeate the cucumbers.

  3. Pour cooled brine into the jar (or jars). Cover ingredients with brine. Press slices (and spices) down into the jar to ensure they are fully covered. IMPORTANT: Fully cover everything with brine so the pickles (below the surface of the brine) can soak up all the flavor they need.

  4. Seal the jar with an airtight lid. Place jar in the refrigerator; let them "pickle" AT LEAST 1-2 weeks before you open the jar and eat them (for best flavor).

  5. NOTE: The pickles taste BEST if eaten within 3 months of making them! After that they're still good (and safe) to eat but may have slightly diminished flavor. Enjoy!

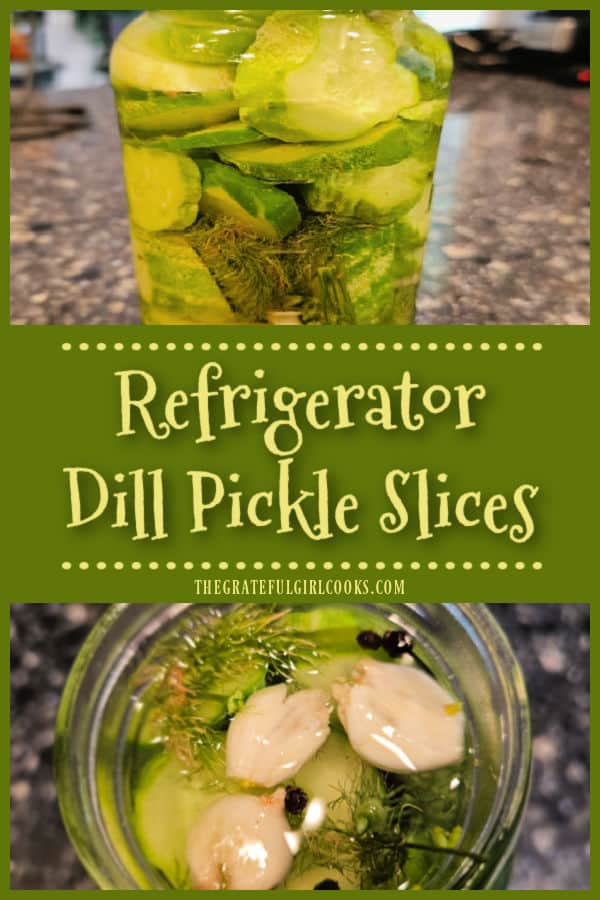
Here’s one more to pin on your Pinterest boards! Make Refrigerator Dill Pickle Slices without canning! This EASY recipe yields 1 quart of yummy pickle slices for burgers and sandwiches.
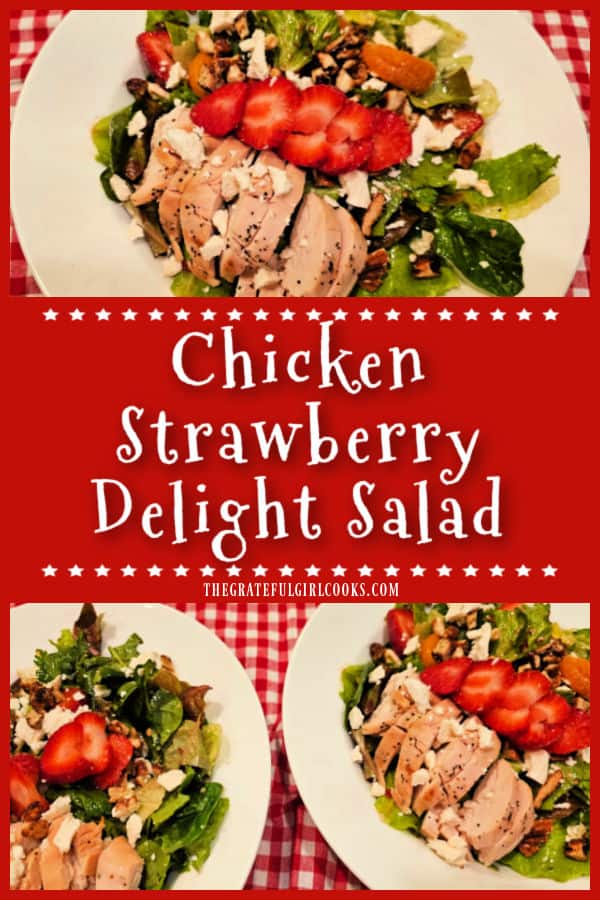
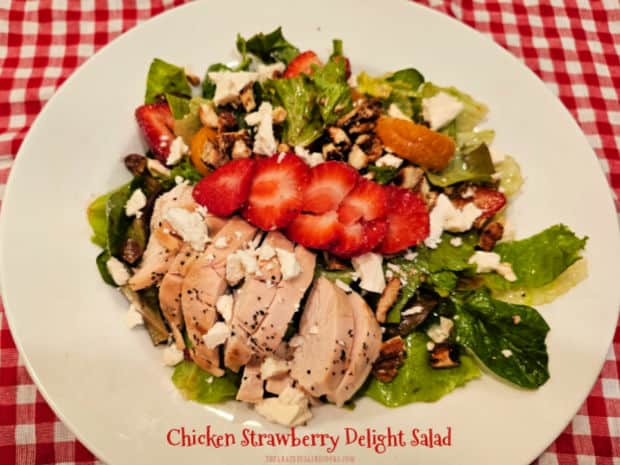
Chicken Strawberry Delight Salad

Chicken Strawberry Delight Salad is absolutely delicious with mixed greens, candied pecans, feta, mandarin oranges and balsamic dressing!

One of my favorite salads is one I order at a local restaurant, and it is amazing! A few months ago, after having it there once again, I decided to make the salad at home so my husband and I could have it any time we want!

I did a quick check of the menu description from the restaurant, then set about to create this absolutely delicious salad on my own (without a recipe).

This delicious chicken strawberry delight salad is the result, and it is scrumptious (if I do say so myself). Today I want to share the “how-to’s” so you can make this great salad, too!

You can use either grilled chicken OR you can use a rotisserie chicken breast when you want to shave off a lot of prep time. The photos below show what it looks like using a rotisserie chicken breast.

Here’s how to make a chicken delight strawberry salad, which will yield enough for two large main dish servings.

Scroll Down For A Printable Recipe Card At The Bottom Of The Page

Make The Candied Pecans

For this salad I use a very quick skillet method to lightly “candy” the pecans. If you don’t have pecans, substitute walnuts!

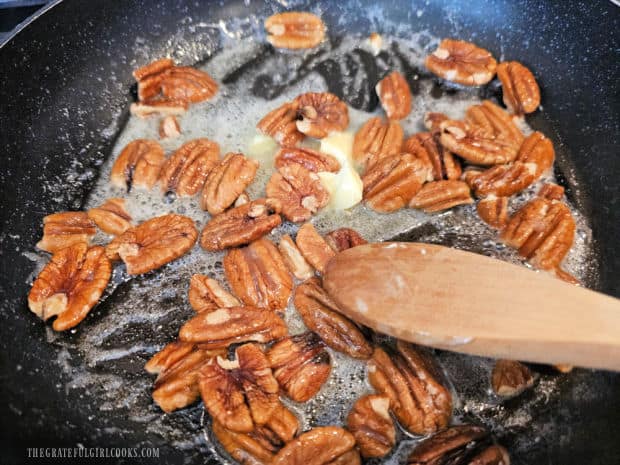
Place butter, water, a pinch of salt and some granulated sugar in a large skillet on medium heat. Stir well to combine as the butter begins to melt.

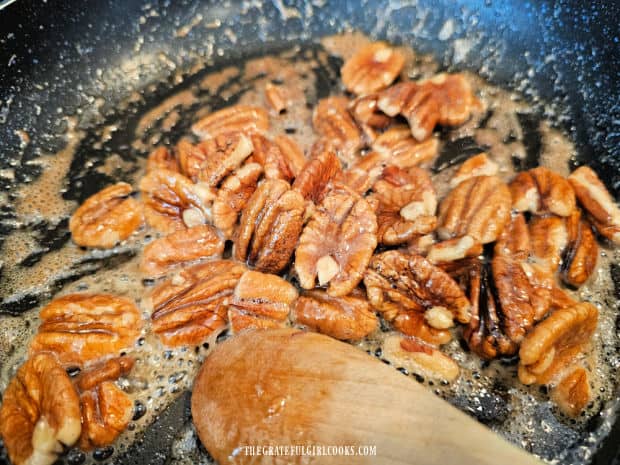
Once the butter is almost melted and the sugar has dissolved, stir in the pecan halves. Cook the pecans for about 5 minutes, stirring often so they don’t stick and burn.

The pecans are done (and “candied”) when the liquid becomes syrupy, glossy and thickened. The pecans should be fully coated with the sweet buttery glaze. 

Pecans are candied in butter, sugar, water and a pinch of salt.The buttery, sugary glaze coats the pecans while they cook.

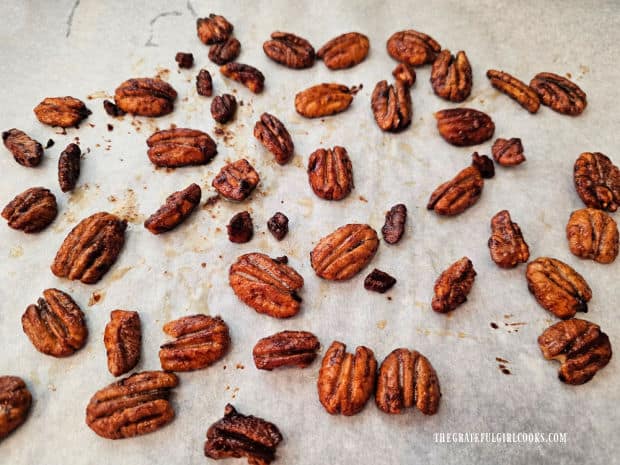
Immediately remove the skillet from the heat and transfer the candied pecans to parchment paper. Spread them out in a single layer so they are not touching each other.

Candied pecans rest on parchment paper while they dry.

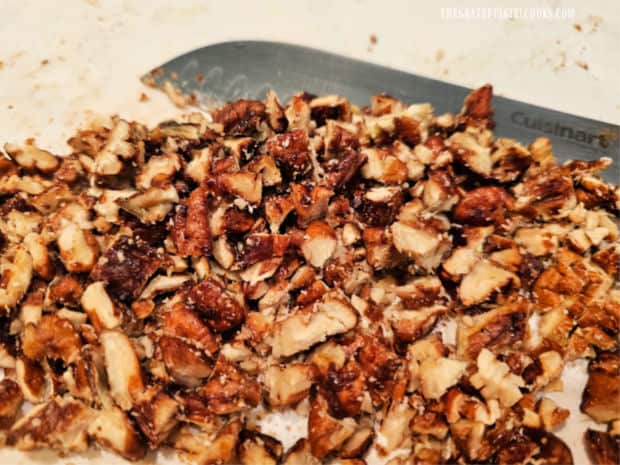
Let the pecans cool completely. The sweet glaze on them will harden in about 5-7 minutes. After they harden, separate them from the parchment paper and chop them into smaller pieces.

Set the candied chopped pecans aside until you are ready to make the salad later.

The dried candied pecans are finely chopped before adding to the salad.

Build The Salad

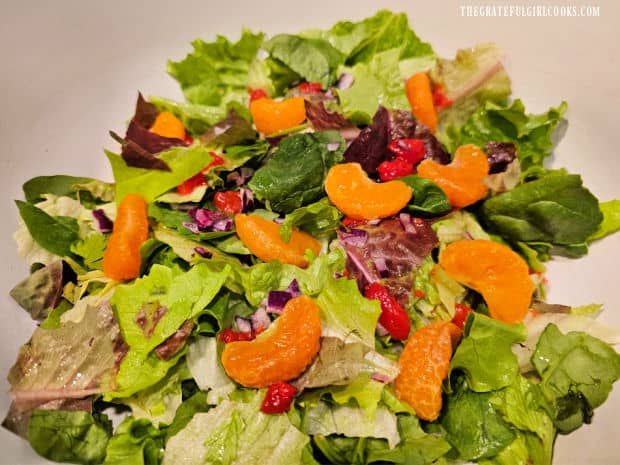
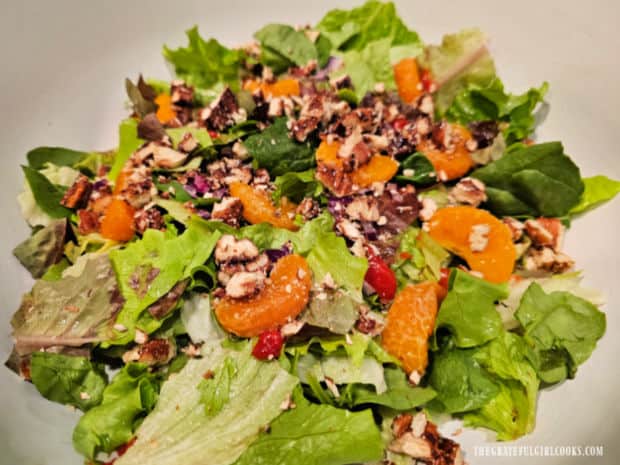
Place cold mixed salad greens in a LARGE bowl. Top the salad greens with chopped red onions, roasted red peppers (from a jar) and fresh mandarin orange wedges.

Sprinkle the salad with the cooled, chopped candied pecan pieces. Now we’re ready to finish making this yummy salad!

Mandarin oranges, roasted red peppers and red onions are added to salad.Chopped candied pecans are added to the salad.

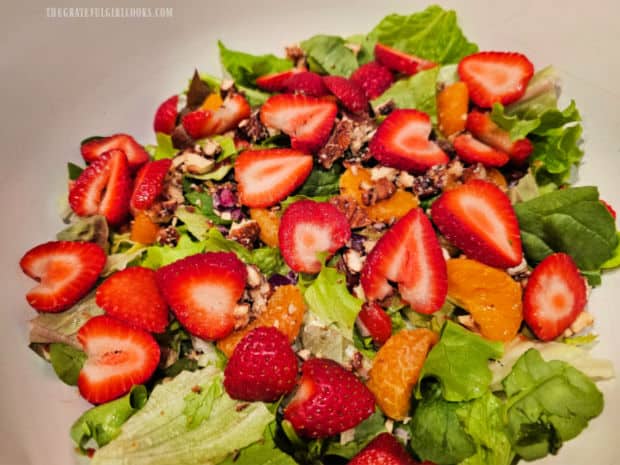
Place strawberry slices all over the top of the salad. NOTE: Set aside 8-10 slices to use as garnish on the finished salads. Now doesn’t the salad look colorful and gorgeous?

Sliced strawberries are added to the salad.

Prepare Salad Dressing And Remaining Ingredients

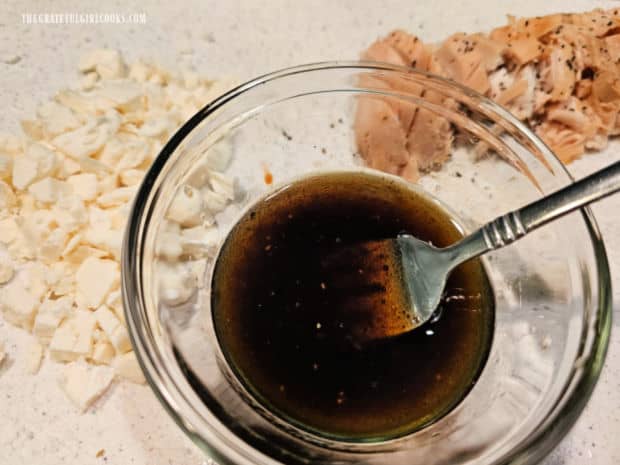
Right before serving the salad, prepare a quick and easy balsamic dressing. Combine olive oil, balsamic vinegar, lemon juice, garlic, dried basil, sugar, salt and pepper in a small bowl.

Whisk these dressing ingredients well using a small whisk or fork until they are fully combined. Set the dressing aside.

Cut pre-cooked chicken breast into small slices and crumble feta cheese (or bleu cheese) into small pieces. You will want them ready to go right after adding the salad dressing to the salad.

NOTE: Sometimes I pre-cook the chicken on a BBQ grill, but other times I simply use rotisserie chicken to make the prep much quicker! This time I am using rotisserie chicken.

Feta is crumbled, chicken is sliced and vinaigrette is mixed in a small bowl.

Sprinkle the salad with about ½ of the feta (or bleu cheese) crumbles. NOTE: You will need to reserve the remaining half of the cheese crumbles to garnish each individual salad before serving!

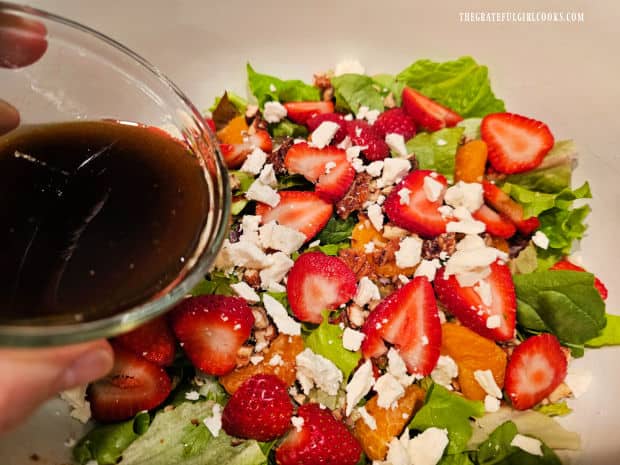
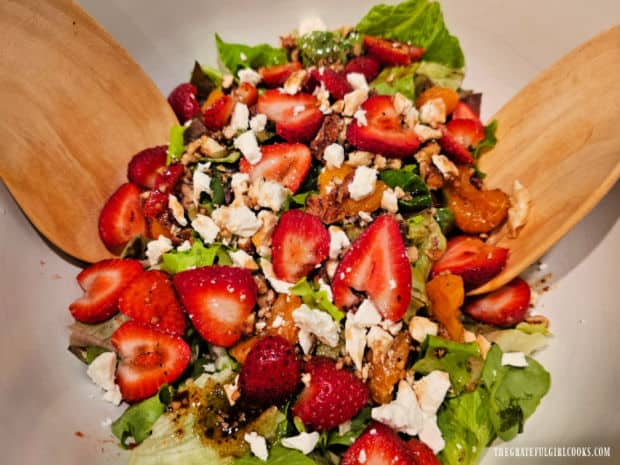
Drizzle the salad with the balsamic dressing (use all of it). Gently toss the salad to coat everything with the dressing.

Salad dressing is poured over the salad.The salad is tossed with tongs after the vinaigrette has been added.

Serve The Chicken Strawberry Delight Salad

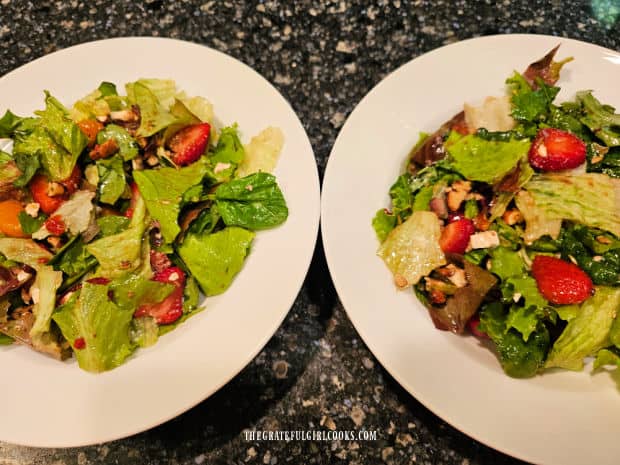
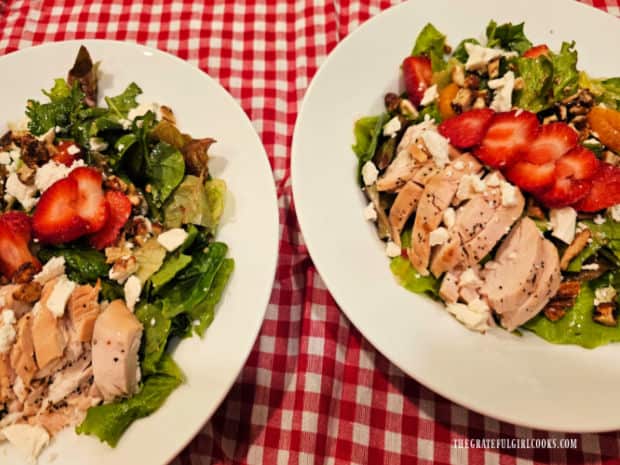
Divide the salad evenly between two serving bowls (shown below). Now it’s time to “garnish” each salad with the remaining cheese crumbles, sliced chicken breast and reserved sliced strawberries.

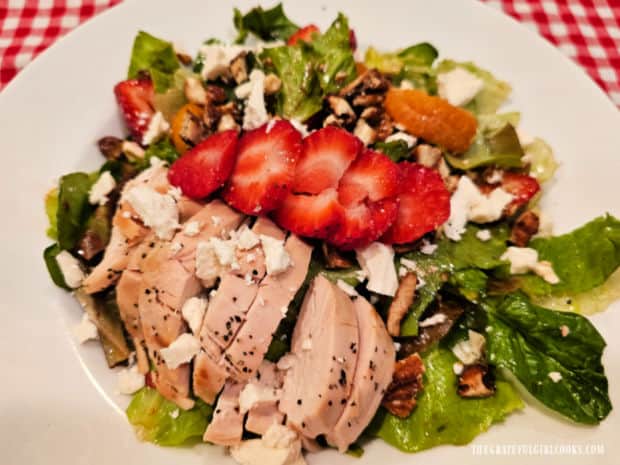
For a pretty presentation I place the chicken slices on one side of each salad and then place some of the sliced strawberries next to the chicken

Sprinkle the top of each Chicken Strawberry Delight Salad with the remaining feta (or bleu cheese) crumbles and then this delicious salad is ready to be enjoyed.

Two bowls of salad ready to be finished and served.Chicken Strawberry Delight Salad for two, ready to be enjoyed.

Doesn’t it look GOOD? I love this Chicken Strawberry Delight Salad because there are so many colors, flavor and textures! Every bite is amazing and I am confident you are going to love it, too!

Chicken slices, strawberries and feta garnish the finished salad.

I trust you will have an opportunity to make this salad for yourself and someone you love. Hopefully you will enjoy it as much as we do (I’m confident you will).

Thank you for stopping by, and I invite you to come back again soon for more family friendly recipes. Take care, may God bless you, and have a wonderful day.

Looking For More MAIN DISH SALAD Recipes?

You can find ALL of my recipes in the Recipe Index, which is located at the top of the page. I have a nice variety of main dish salad recipes to choose from, including:

Want More Recipes? Get My FREE Newsletter!

I publish a newsletter 2 times per month (1st and 15th) with lots of recipes, tips, etc.
Would you like to join our growing list of subscribers?

There is a Newsletter subscription box on the top right (or bottom) of each blog post, depending on the device you use.
You can submit your e-mail address there, to be added to my mailing list.

Find Me On Social Media:

Facebook page: The Grateful Girl Cooks!
Pinterest:
The Grateful Girl Cooks!
Instagram:
jbatthegratefulgirlcooks

Author's signature

↓↓ PRINTABLE RECIPE BELOW ↓↓

0 from 0 votes
Chicken Strawberry Delight Salad
Prep Time
20 mins
Cook Time
0 mins
Total Time
20 mins
 

Chicken Strawberry Delight Salad is absolutely delicious with mixed greens, candied pecans, feta, mandarin oranges and balsamic dressing!

Category: Main Dish, Salad
Cuisine: All Cuisines
Keyword: chicken strawberry delight salad
Servings: 2 salads
Calories Per Serving: 750 kcal
Author: JB @ The Grateful Girl Cooks!
Ingredients
For Candied Pecans:
  • 2 teaspoons butter
  • cup pecan halves* *Can substitute walnuts
  • 2 Tablespoons granulated sugar
  • 2 teaspoons water
  • 1 tiny pinch salt
For Salad (makes enough for two main dish salads):
  • 5 cups mixed salad greens chilled
  • 10 wedges mandarin oranges peeled, white pith removed
  • 3 Tablespoons roasted red peppers (from jar) chopped
  • 2 Tablespoons red onion (finely chopped)
  • 10 large fresh strawberries* *DIVIDED USE, sliced thin
  • cup low-fat feta cheese (crumbled)* *DIVIDED USE
  • 6 ounce pre-cooked chicken breast* * DIVIDED USE, thinly sliced
For Balsamic Salad Dressing:
  • cup extra virgin olive oil
  • Tablespoons balsamic vinegar
  • teaspoons fresh lemon juice
  • ½ teaspoon minced garlic
  • ¼ teaspoon granulated sugar
  • ¼ teaspoon salt
  • 1 pinch black pepper
  • 1 pinch dried basil
Instructions
Make Candied Pecans:
  1. Place butter, sugar, water, and salt in a large skillet on medium heat. Stir well to combine. Once butter is almost melted and sugar has dissolved, stir in pecans. Cook for about 5 minutes, stirring often. Pecans are "candied" when liquid is syrupy, glossy, thickened and pecans are coated with glaze. Immediately remove skillet from heat; transfer pecans to parchment paper. Spread in a single layer, not touching each other. Let pecans cool completely (glaze hardens in 5-7 minutes). Separate pecans from parchment paper; chop into smaller pieces. Set aside.

Build Salad:
  1. Place cold salad greens in a LARGE bowl. Add mandarin orange slices, roasted red peppers and red onions. Sprinkle with chopped candied pecans, then add strawberry slices (reserve 4-5 slices to garnish each finished salad). Set aside.

  2. Cut pre-cooked chicken breast into small slices; crumble feta cheese into small pieces. Sprinkle salad with ½ of the feta (or bleu cheese) crumbles. Reserve the chicken and remaining cheese crumbles to garnish each salad before serving!

Make Balsamic Dressing:
  1. Whisk olive oil, balsamic vinegar, lemon juice, garlic, dried basil, sugar, salt and pepper together until fully combined in a small bowl. Drizzle salad with dressing right before serving (use all of it). Gently toss salad to disperse the dressing.

To Serve Salad:
  1. Divide salad between two bowls. Garnish each salad with remaining feta cheese crumbles, sliced chicken breast and remaining strawberries. Serve and enjoy!

Nutrition Facts
Chicken Strawberry Delight Salad
Amount Per Serving (1 salad)
Calories 750 Calories from Fat 522
% Daily Value*
Fat 58g89%
Saturated Fat 11g69%
Trans Fat 0.2g
Polyunsaturated Fat 8g
Monounsaturated Fat 35g
Cholesterol 79mg26%
Sodium 1174mg51%
Potassium 852mg24%
Carbohydrates 35g12%
Fiber 5g21%
Sugar 23g26%
Protein 28g56%
Vitamin A 1466IU29%
Vitamin C 118mg143%
Calcium 82mg8%
Iron 3mg17%
* Percent Daily Values are based on a 2000 calorie diet.

Here’s one more to pin on your Pinterest boards! 
Chicken Strawberry Delight Salad is absolutely delicious with mixed greens, candied pecans, feta, mandarin oranges and balsamic dressing!


Thai Iced Coffee

Make 7 servings of delicious, sweet Thai Iced Coffee using dark roast coffee grounds, water, condensed milk and vanilla! Great on hot days!

Our family enjoys Thai food and one item my husband always orders is a Thai Iced Coffee when we’re able to have dinner at a favorite Thai restaurant near our home.

This icy cold, sweet coffee is a favorite of his and I became determined to make them at home last summer when it was REALLY hot in our NW part of Oregon for days at a time.

It does take a bit of time to make the brewed coffee concentrate for the drinks, so it will require you to plan ahead. I usually make it the day before serving them and let it sit out on the counter to “brew” overnight.

The resulting cold-brewed Thai Iced Coffee is delicious served over ice, and the coffee is flavored with vanilla and sweetened condensed milk. Here’s how to make it.

Scroll Down For A Printable Recipe Card At The Bottom Of The Page

Prepare The Coffee Ahead Of Time

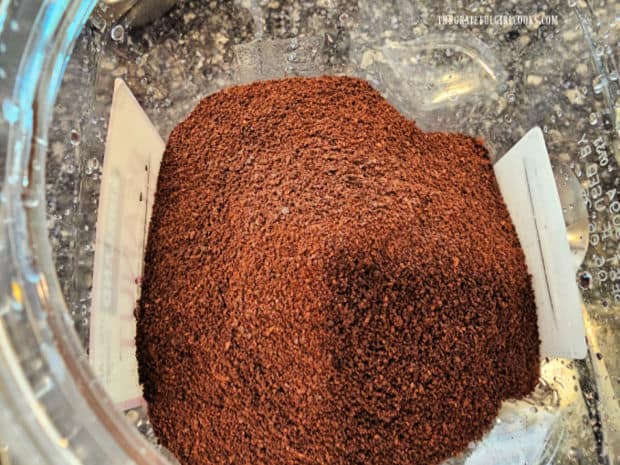
Place dark roasted ground coffee and water in a large pitcher or other container. Stir the mixture well until they are combined, then cover the pitcher.

Let the coffee grounds and water stand (at room temperature) for about 12 hours. I recommend making this mixture the afternoon before using it and let it sit on the kitchen counter overnight.

Ground coffee and water are combined in a large pitcher to steep overnight.

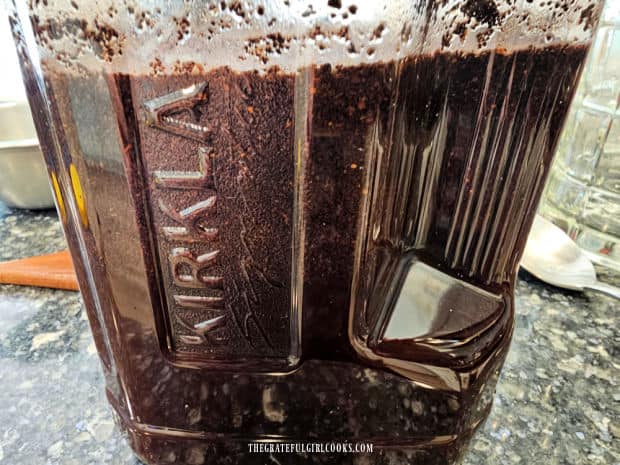
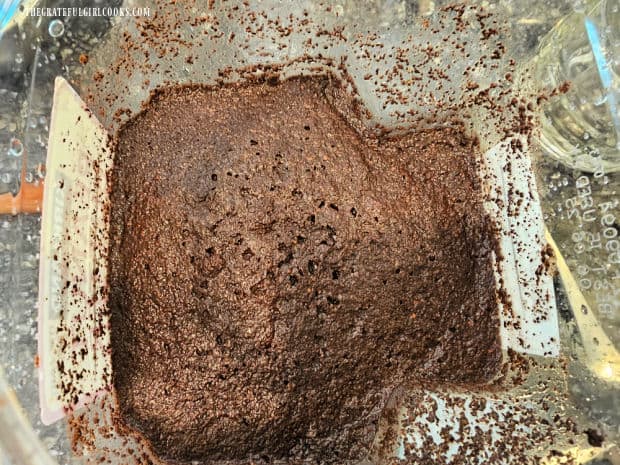
The water will absorb into the coffee grounds as it sits, and a thick, “sludge-like” mixture will remain.

The combined water and coffee grounds are thick and sludge-like after steeping.

The coffee grounds will look a lot like mud after sitting all night in the water (at least that’s what I think it looks like).

Coffee grounds are strained into a large container.

Strain Out The Coffee Grounds

Now you will need to get all the coffee grounds out of the liquid coffee concentrate. To do this, place a fine wire mesh strainer over a large container.

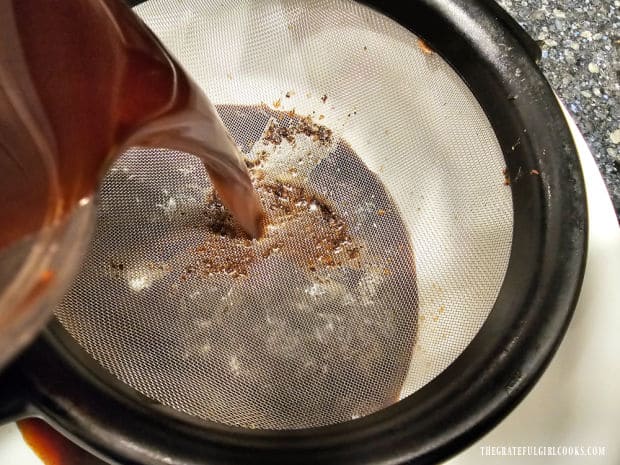
Pour the coffee mixture (sludge!) through the strainer and into the large container. the strainer should effectively separate the grounds from the liquid.

You may need to do this in small batches, discarding the grounds and rinsing the strainer between each batch.

TIP: You MAY want or need to do this step an additional time, if you find your strainer isn’t “catching” all the fine coffee grounds. 

Pouring the coffee mixture through a wire mesh strainer into a large bowl.

Once all the coffee concentrate has been strained, it’s time to do it one more time, directly into a pitcher.

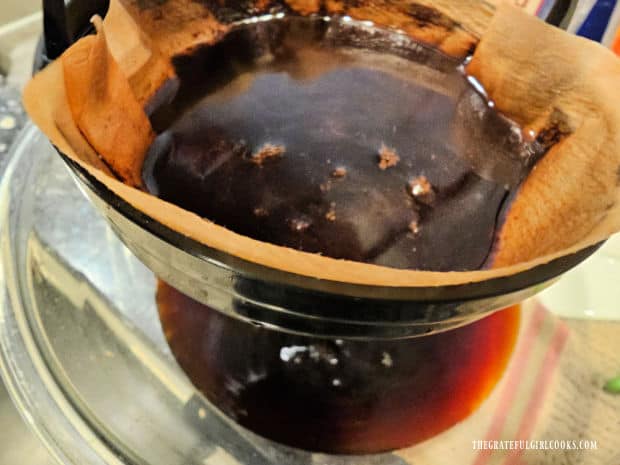
Rinse out the fine mesh wire strainer and line it with a coffee filter. Place the filter-lined strainer directly over the top of a large pitcher.

Pour all the coffee concentrate into the pitcher using the strainer to filter out any remaining coffee grounds. You may also need to do this in batches, as well.

Coffee filter in a strainer catches the remaining grounds and coffee drips through.

Once you have the coffee concentrate in a large pitcher (or other container), add vanilla extract and stir well until it has been fully incorporated.

Cover the pitcher (or container) and place the coffee concentrate in the refrigerator to chill. The coffee concentrate can be stored up to 2 weeks (covered) in the refrigerator, if desired.

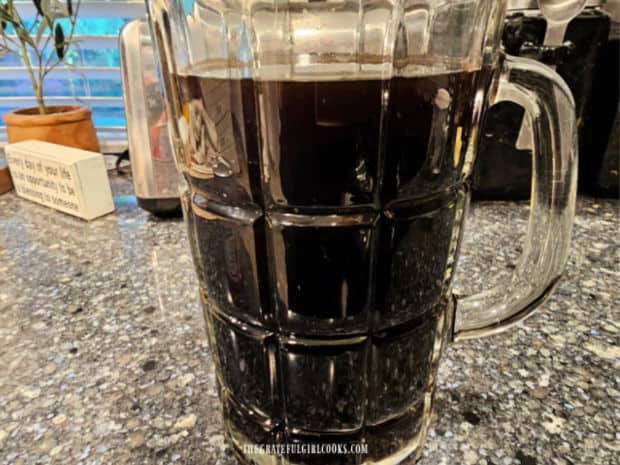
A pitcher full of really strong coffee after straining is complete.

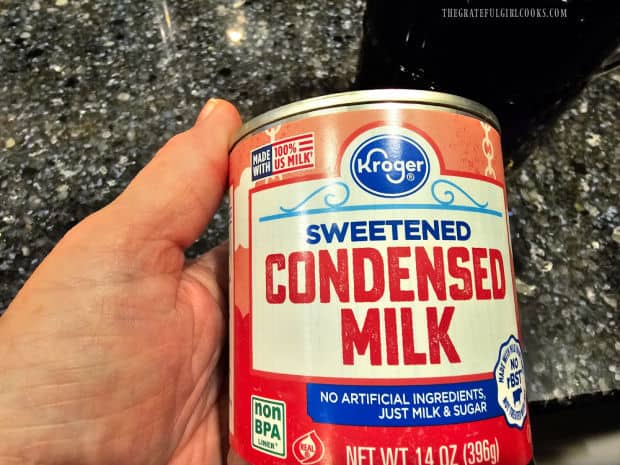
Typically, the sweetener used to make Thai Iced coffees is a 14-ounce can of sweetened condensed milk (NOT evaporated milk!). A photo is shown below.

Keep any sweetened condensed milk you don’t use immediately covered in the refrigerator until you’re ready to make another Thai Iced coffee.

Sweetened condensed milk is used in each cup of Thai Iced Coffee to sweeten it.

Serve Thai Iced Coffee Over Ice And Enjoy!

When you’re ready for an Iced Thai coffee, remove the pitcher from the refrigerator (the coffee should be very cold at this point).

Fill a glass about ¾ full of ice cubes or crushed ice. Pour in the coffee cold brew concentrate and then stir them together to combine.

Add some of the sweetened condensed milk, but only enough to sweeten the coffee to your liking. Stir well, because you will want to fully blend the coffee concentrate, ice and condensed milk together for best flavor.

If necessary, add a bit more coffee concentrate and/or sweetened condensed milk, in order to fill the glass.

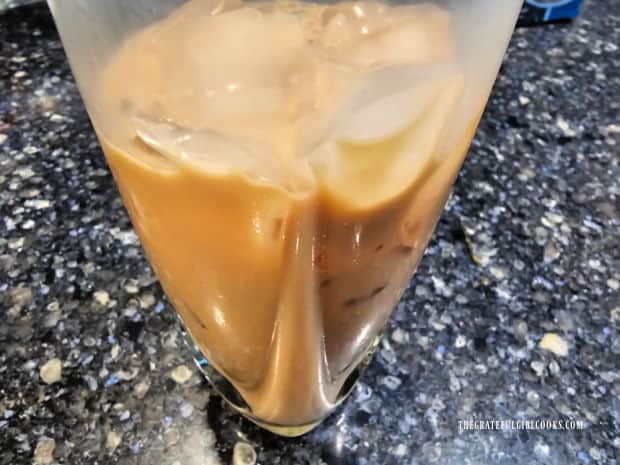
The coffee is combined with some sweetened condensed milk and served over ice.

A cup full of Thai Iced Coffee is a refreshing beverage!

Stir well until the Thai iced coffee is very cold because that’s when the iced coffee is at its very best. Serve immediately and enjoy sipping on classic Thai Iced Coffee!

Thai Iced Coffee is a sweet, robust cold drink and it's delicious.

I really hope you have the opportunity to make a batch of Thai Iced Coffee to enjoy with your family and friends and trust you will enjoy it, too!

Thank you for stopping by, and I invite you to come back again soon for more family friendly recipes. Take care, may God bless you, and have a wonderful day.

Looking For More BEVERAGE Recipes?

You can find ALL of my recipes in the Recipe Index, which is located at the top of the page. I have some delicious beverage recipes to choose from, including:

Want More Recipes? Get My FREE Newsletter!

I publish a newsletter 2 times per month (1st and 15th) with lots of recipes, tips, etc.
Would you like to join our growing list of subscribers?

There is a Newsletter subscription box on the top right (or bottom) of each blog post, depending on the device you use.
You can submit your e-mail address there, to be added to my mailing list.

Find Me On Social Media:

Facebook page: The Grateful Girl Cooks!
Pinterest:
The Grateful Girl Cooks!
Instagram:
jbatthegratefulgirlcooks

Author's signature

Original recipe source: Southern Living magazine (special section (pages150-152) published in July 2006.

↓↓ PRINTABLE RECIPE BELOW ↓↓

0 from 0 votes
Thai Iced Coffee
Prep Time
15 mins
Cook Time
0 mins
Standing Time Overnight (room temp.)
12 hrs
Total Time
12 hrs 15 mins
 

Make 7 servings of delicious, sweet Thai Iced Coffee using dark roast coffee grounds, water, condensed milk and vanilla! Great on hot days!

Category: Beverage
Cuisine: Thai
Keyword: Thai iced coffee
Servings: 7 cups
Calories Per Serving: 183 kcal
Author: JB @ The Grateful Girl Cooks!
Ingredients
  • ½ pound dark roast ground coffee
  • 8 cups cold water
  • ½ teaspoon vanilla extract
  • 14 ounces sweetened condensed milk (canned)
Instructions
  1. Place ground coffee and water in a large pitcher or other container. Stir mixture well until combined; cover pitcher. Let the mixture stand (room temperature) for about 12 hours.

  2. After 12 hours, place a fine wire mesh strainer over a large container. Pour coffee mixture through strainer and into the pitcher. You may need to do this in small batches, discarding grounds and rinsing strainer between batches. TIP: You MAY need to do this an additional time, if you find your strainer isn't "catching" all the fine coffee grounds. 

  3. Rinse out the strainer; line it with a coffee filter. Place the filter-lined strainer directly over the top of a large pitcher. Pour coffee concentrate into the pitcher using the strainer to filter out any remaining coffee grounds. You may also need to do this in batches, as well.

  4. Add vanilla extract; stir well. Cover pitcher (or container); place concentrate in refrigerator (can be stored up to 2 weeks (covered) in refrigerator, if desired.

To Serve:
  1. Fill a glass ¾ full of ice. Pour in coffee concentrate; stir to combine. Add sweetened condensed milk, (enough to sweeten coffee to your liking). Stir well, for best flavor. If necessary, add more coffee concentrate and/or sweetened condensed milk, in order to fill the glass. Stir well. Serve immediately and enjoy!

Nutrition Facts
Thai Iced Coffee
Amount Per Serving (7 g)
Calories 183 Calories from Fat 45
% Daily Value*
Fat 5g8%
Saturated Fat 3g19%
Polyunsaturated Fat 0.2g
Monounsaturated Fat 1g
Cholesterol 19mg6%
Sodium 86mg4%
Potassium 211mg6%
Carbohydrates 31g10%
Sugar 31g34%
Protein 4g8%
Vitamin A 151IU3%
Vitamin C 1mg1%
Calcium 169mg17%
Iron 0.1mg1%
* Percent Daily Values are based on a 2000 calorie diet.

Here’s one more to pin on your Pinterest boards!Make 7 servings of delicious, sweet Thai Iced Coffee using dark roast coffee grounds, water, condensed milk and vanilla! Great on hot days!

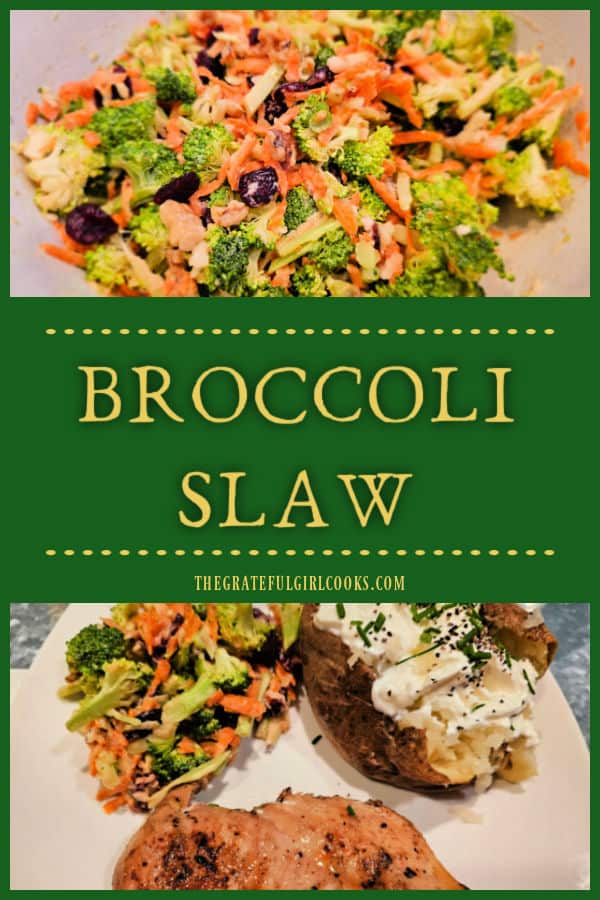
Broccoli Slaw

Broccoli Slaw is a chilled, delicious side dish with broccoli, carrot, cabbage, dried cranberries, and walnuts in a creamy salad dressing!

If you’re looking for a great tasting salad/side dish to serve along with a favorite main dish, I think you will love this cold and crunchy broccoli slaw!

It’s loaded with fresh veggies (broccoli, carrots, cabbage and green onions) and is seasoned and covered with a lovely creamy dressing!

Broccoli slaw is quite simple to make, and I am sure you are going to love this dish. Here’s how to make this slaw.

Scroll Down For A Printable Recipe Card At The Bottom Of The Page

Prepare The Broccoli

This recipe for broccoli slaw calls for using both the small broccoli florets AND the stalk of the broccoli. Yes, that’s right! You will also be using the stalk (or stem end) of the broccoli.

For many years I always cut off the stem of the broccoli and discarded it, until I discovered it actually is edible, too! Here’s how to prepare the broccoli for the slaw.

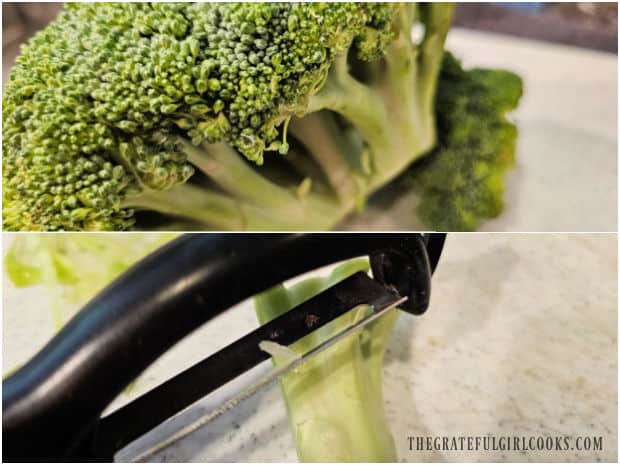
Cut off the stalk off right before the crown of the broccoli (the florets) begin. Use a vegetable peeler to peel off the outer skin on the stalk (shown below).

Broccoli florets AND stalk are used to make the broccoli slaw.

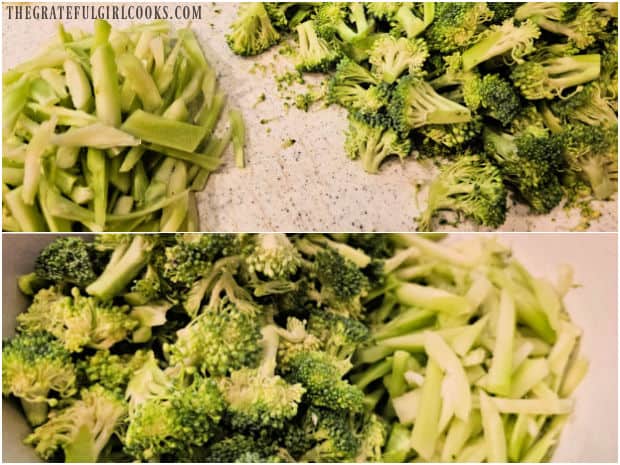
Slice the stalk in half crosswise (right in the middle) and then thinly slice each half of the stalk lengthwise (into rectangle-shaped slices).

Now cut the slices into matchstick-like slices and then put all of the slices into a mixing bowl.  You will want to cut the broccoli florets into small, 1″ pieces and add them to the bowl, as well.

Matchstick broccoli stalk slices and small florets in a bowl.

Making The Slaw

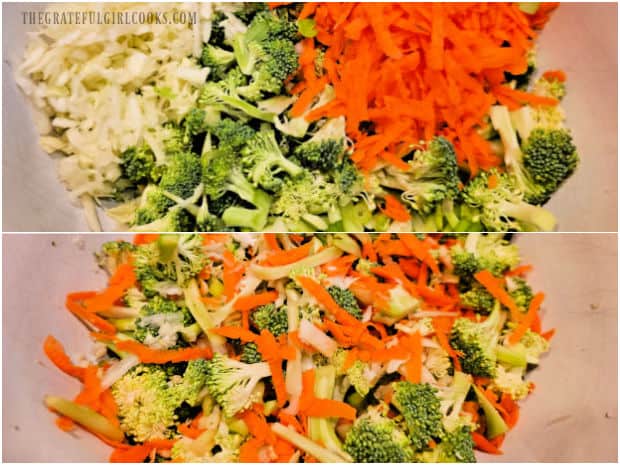
Now add two sliced green onions, shredded green cabbage, a medium-sized peeled and grated carrot and a small amount of chopped, fresh parsley leaves.

Toss all these ingredients together until the ingredients are all combined. Set the slaw aside while you “toast” some crunchy walnuts.

Shredded carrots, cabbage, green onions and parsley are added to the slaw.

Toast The Walnuts

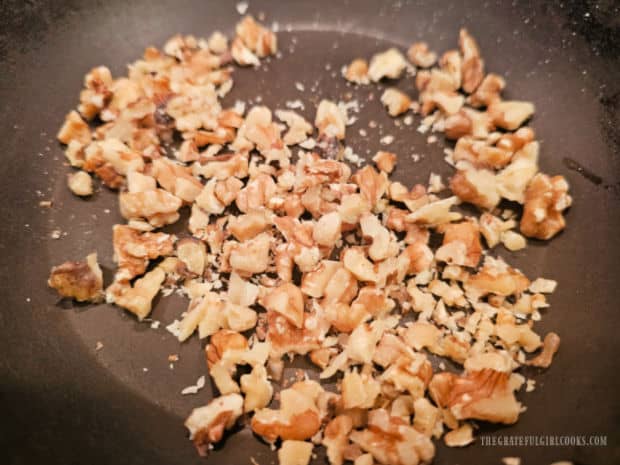
Now you will need to “toast” some walnuts for the broccoli slaw. It is easy! Chop ¼ cup of walnuts and place them in a skillet. Turn the heat to medium and begin to “toast” them.

Do not add anything else to the skillet! Stir the walnuts as they “toast” so they don’t burn. Cook them for about 3-4 minutes or until they produce a nutty aroma and have darkened slightly.

Remove them from the skillet and transfer them to paper towels or spread them out on a plate to cool for a few minutes.

Chopped walnuts are lightly "toasted" in a hot skillet.

Make And Add The Dressing For The Slaw

While the walnuts are cooling, make the creamy dressing for the broccoli slaw. It will only take a couple minutes!

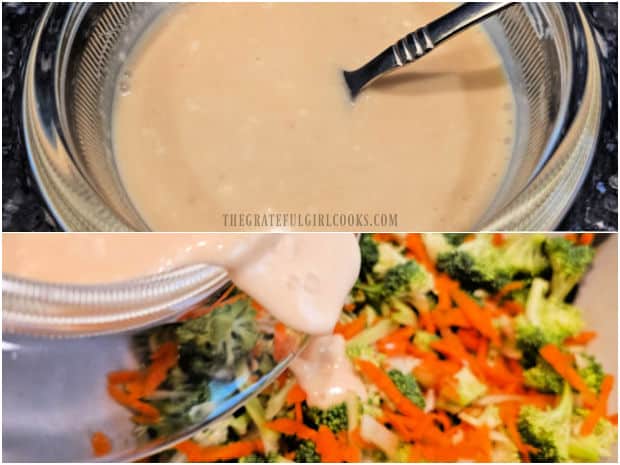
Combine mayonnaise, fresh lemon juice, maple syrup, Dijon mustard and minced garlic in a small bowl. Whisk them until the dressing is smooth and creamy.

Pour this dressing (use all of it) over the broccoli slaw and gently toss the slaw very well to cover everything with the dressing.

A creamy dressing is made to toss with the broccoli slaw.

Add The Last Ingredients

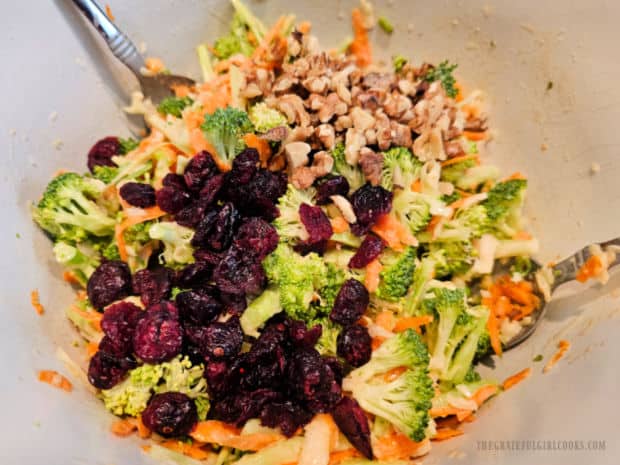
Once the broccoli slaw is covered with dressing, add dried cranberries and the cooled and toasted walnuts. Season the broccoli slaw to taste with salt.

Toasted walnuts and dried cranberries are added.

Chill The Slaw

Toss all the ingredients together until combined. Now the slaw is done and can be eaten, BUT I recommend a minimum chilling time of one hour, to ensure the slaw is fully chilled.

The chilling time is important because it also gives the flavors time to mingle and develop! Cover the slaw tightly with plastic wrap and refrigerate it until you are ready to serve this delicious dish!

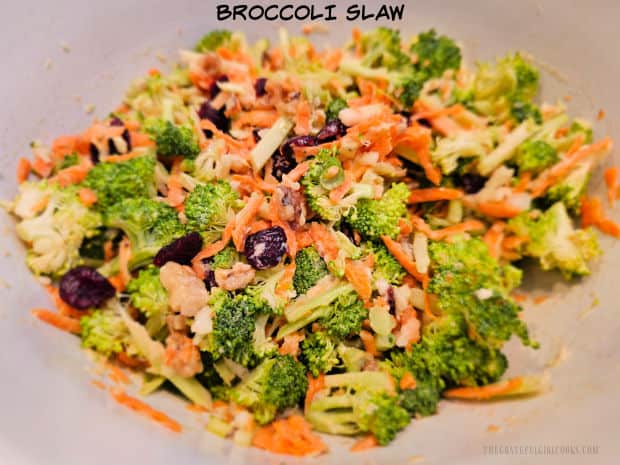
Broccoli slaw is tossed to combine, then refrigerated for best flavor.

Serve The Broccoli Slaw

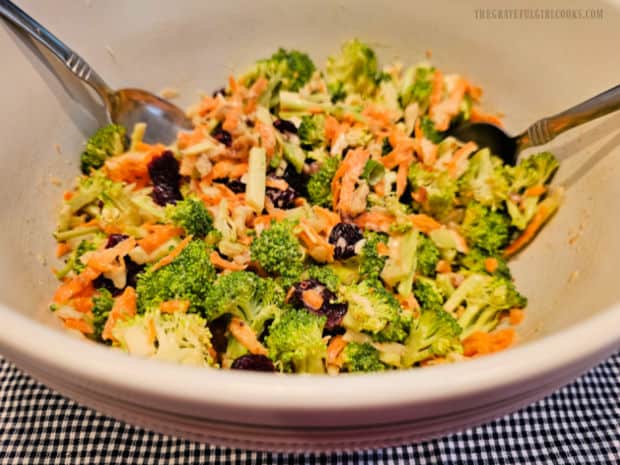
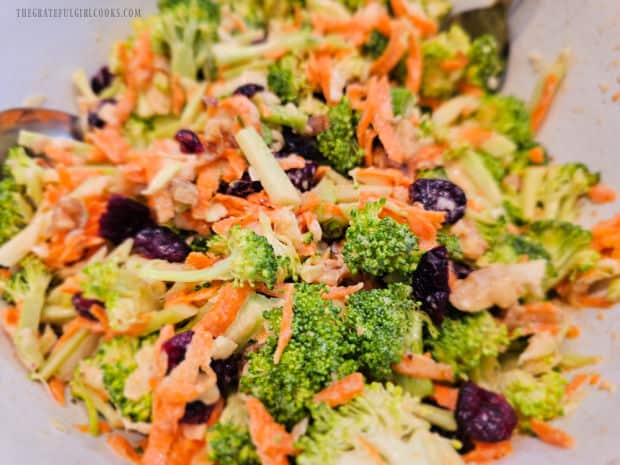
Once the slaw is very cold, it is time to serve it alongside your main dish. The broccoli slaw is cold, crunchy, and the dressing brings it wonderful flavor!

A bowl of cold broccoli slaw is served.

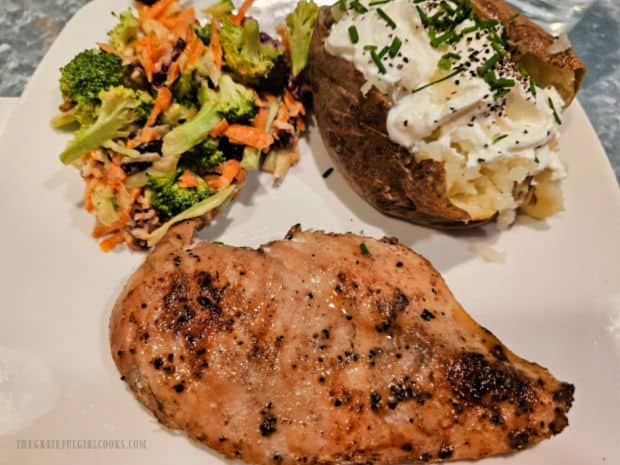
We enjoyed it served alongside grilled chicken and a baked potato with sour cream and chives (chives from our garden!). YUMMY!

It was a delicious side dish (or salad) to have with this meal, and we even had leftover broccoli slaw which we enjoyed the next day with our lunch!

Chicken and a baked potato are served along with the broccoli slaw.

I am confident you and those you love are going to love this delicious side dish to accompany many of your favorite main dishes. It is refreshing, delicious, and any leftovers will keep in your fridge in an airtight container for 2-3 days.

Thank you for stopping by, and I invite you to come back again soon for more family friendly recipes. Take care, may God bless you, and have a great day!

Looking For More COLESLAW Recipes?

You can find ALL of my recipes in the Recipe Index, which is located at the top of the page. I have other delicious slaw recipes to choose from, including:

Want More Recipes? Get My FREE Newsletter!

I publish a newsletter 2 times per month (1st and 15th) with lots of recipes, tips, etc.
Would you like to join our growing list of subscribers?

There is a Newsletter subscription box on the top right (or bottom) of each blog post, depending on the device you use.
You can submit your e-mail address there, to be added to my mailing list.

Find Me On Social Media:

Facebook page: The Grateful Girl Cooks!
Pinterest:
The Grateful Girl Cooks!
Instagram:
jbatthegratefulgirlcooks

Author's signature

Recipe adapted from Brooke Caison, via:  delish.com

↓↓ PRINTABLE RECIPE BELOW ↓↓

0 from 0 votes
Broccoli Slaw
Prep Time
15 mins
Total Time
15 mins
 

Broccoli Slaw is a chilled, delicious side dish with broccoli, carrot, cabbage, dried cranberries, and walnuts in a creamy salad dressing!

Category: Salad, Side Dish
Cuisine: All Cuisines
Keyword: broccoli slaw
Servings: 5 small servings
Calories Per Serving: 169 kcal
Author: JB @ The Grateful Girl Cooks!
Ingredients
For the Slaw:
  • 1 head broccoli
  • 1 cup green cabbage (shredded)
  • 2 stalks green onions (sliced)
  • 1 medium carrot peeled, shredded
  • cup fresh parsley chopped
  • ¼ cup walnuts toasted
  • ¼ cup dried cranberries
  • ¾ teaspoon kosher salt or season to taste
For Dressing:
  • ¼ cup mayonnaise
  • 2 Tablespoons lemon juice use fresh!
  • cup pure maple syrup
  • ¾ Tablespoon Dijon mustard
  • 1 clove garlic (minced)
Instructions
  1. Prep The Broccoli: Cut off the stalk right before the crown (the florets) begin. Use a vegetable peeler to peel outer skin off the stalk. Slice stalk in half crosswise (across the middle); thinly slice each half of the stalk lengthwise (into rectangle slices). Cut slices into matchstick-style slices; put slices in a serving bowl.  Slice broccoli florets in 1" pieces; add them to the bowl.

  2. Add green onions, cabbage, carrot and parsley to the bowl. Toss until ingredients are combined. Set aside.

Toast Walnuts:
  1. Toast Walnuts: Put chopped walnuts in a dry skillet (no other ingredients). Turn heat to medium. Stir occasionally as they "toast" so they don't burn. Cook for 3-4 minutes or until they produce a nutty aroma and have darkened slightly. Remove nuts from skillet; transfer to a paper towel or plate to cool.

Make Dressing:
  1. Combine mayonnaise, lemon juice, maple syrup, Dijon and minced garlic in a small bowl. Whisk until smooth and creamy. Pour dressing (all of it) over the broccoli slaw; toss the slaw well to cover everything. Add cranberries and cooled walnuts. Toss and season to taste with salt.

  2. Slaw is ready, BUT I recommend a minimum chilling time of one hour, to ensure slaw is cold. This is recommended because it gives flavors time to develop! Cover slaw with plastic wrap- refrigerate until you're ready to serve! Enjoy.

Nutrition Facts
Broccoli Slaw
Amount Per Serving (1 g)
Calories 169 Calories from Fat 108
% Daily Value*
Fat 12g18%
Saturated Fat 2g13%
Trans Fat 0.02g
Polyunsaturated Fat 8g
Monounsaturated Fat 2g
Cholesterol 5mg2%
Sodium 459mg20%
Potassium 146mg4%
Carbohydrates 14g5%
Fiber 2g8%
Sugar 11g12%
Protein 2g4%
Vitamin A 2238IU45%
Vitamin C 12mg15%
Calcium 34mg3%
Iron 1mg6%
* Percent Daily Values are based on a 2000 calorie diet.

Here’s one more to pin on your Pinterest boards!
Broccoli Slaw is a chilled, delicious side dish with broccoli, carrot, cabbage, dried cranberries, and walnuts in a creamy salad dressing!