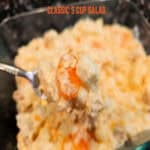
Category: Salads

Kale and Sweet Potato Salad

Kale and Sweet Potato Salad is a delicious salad! Curry-roasted sweet potatoes, kale and red onion, topped with lime jalapeño salad dressing.

If you’re looking for a healthy, new, and tasty salad recipe, I’d like to share this one for Kale And Sweet Potato Salad with you today!

If you’re anything like me, KALE isn’t high on the list of “must have” yummy ingredients (ha ha!). BUT…in this salad it is quite yummy (and did I mention it’s good for you?).

However… give this wonderful salad a chance, okay? Seasoned sweet potatoes (including curry powder!) are roasted, then added to a simple salad made with kale and red onion slices.

Top the simple salad with a lime, ginger, diced jalapeño, garlic and oil salad dressing that takes only a minute to make, and BOOM!  Just like that, this salad is ready to enjoy!

You will have a healthy, packed with flavor (and nutrients) salad I’m confident will surprise you with great flavor. Here’s how to make it:

Scroll Down for A Printable Recipe Card At The Bottom Of The Page

Prepare The Sweet Potato

To make enough salad for three servings, you will need one half pound of sweet potatoes (approx. 1½ medium-large potatoes). Peel the sweet potatoes and discard the peels.

Cut the sweet potatoes in half, length-wise. Next you will need to cut each half cross-wise into 1″ slices, then cut each of those slices down the middle, lengthwise.

This will leave you with bite-sized “quarter” pieces of the sweet potatoes. Set them aside while you whip up the seasoning mix.

The first step in this recipe is to peel sweet potatoes. Easy!Sweet potatoes are peeled, sliced, then cut into quarters before seasoning.

Make Seasoning Mix For Sweet Potatoes

Stir salt, curry powder, onion powder and black pepper together in a small bowl. Once combined, this will be the seasoning mix for the sweet potatoes.

Spice mix is made by combining salt, pepper, curry powder, and onion powder in a small bowl.

Season The Sweet Potatoes

Spray a rimmed baking sheet generously with non-stick baking spray. Lay the raw sweet potato pieces out on the sheet in a single layer.

Lightly spray the sweet potatoes with more baking spray. Sprinkle the seasoning mixture evenly over the sweet potatoes, so all pieces are seasoned.

Bake The Sweet Potatoes

Bake the sweet potatoes in a preheated 425°F. oven for 20-25 minutes. Halfway through the cooking time, give them a toss, then lay them back out in a single layer and continue baking.

When done, a butter knife should be able to be easily inserted into a potato piece with no resistance! They should also be very lightly browned.

Mine usually take 20 minutes to fully roast, but times may vary based on the size of the pieces you will have used.

Once done, transfer the sweet potato pieces to a wire rack and allow them to cool completely.

Seasoned sweet potato pieces are baked in a single layer on a greased baking sheet.Seasoned, roasted sweet potatoes cool on a wire rack.

Make Salad Dressing While Sweet Potatoes Cool

While the roasted sweet potatoes cool, you can quickly whip up the simple salad dressing. Place lime juice, oil, diced jalapeño, minced garlic and ginger in a small bowl.

Use a fork or whisk to fully combine these ingredients. This is the salad dressing you will use on the Kale and Sweet Potato Salad! Set aside.

A fork is used to whisk together the ingredients for the simple salad dressing.

Assemble The Kale And Sweet Potato Salad

When the sweet potatoes have cooled to room temperature, you can finish making the salad before serving. Place the kale, red onion and sweet potatoes in a salad bowl.

Drizzle all of the salad dressing on top, then gently toss, to coat everything with the dressing. That’s it! Now you’re ready to serve and enjoy the kale and sweet potato salad!

NOTE: The container of kale I used had small leaves. If the kale variety you’re using has large leaves, tear them into bite-sized pieces before adding them to the bowl.

Kale leaves, red onion slices and roasted sweet potatoes are placed in salad bowl.Lime salad dressing is drizzled over the top of the kale and sweet potato salad.

Serve The Kale And Sweet Potato Salad

This salad pairs very well with just about every type of meat, from fish, poultry, pork to beef! We’ve even enjoyed it as a side salad with… Hamburgers! Yum!

The light curry seasoning of the sweet potatoes, healthy kale, and the light lime, garlic, ginger and jalapeño dressing all come together in a bright, delicious salad!

If you choose not to eat meat, then this salad would be a lovely main dish, too! You might adjust the total serving size to serve two, rather than three portions, as written.

Kale and sweet potato salad is tossed to combine ingredients, then served as side dish.A white plate with a hamburger, baked beans and kale and sweet potato salad.

I hope you’ll take the opportunity to try this dish, even if you dislike kale! It has great flavor, besides the fact your home will smell great while the potatoes roast!

Thanks for taking the time to stop by today. I invite you to come back soon for more family-friendly recipes. Take care, and have a GREAT day!

Looking For More SALAD Recipes?

You can find ALL of my recipes in the Recipe Index, which is located at the top of the page. I have some fantastic tasting salads you can check out, including:

Want More Recipes? Get My FREE Newsletter!

I publish a newsletter 2 times per month (1st and 15th) with lots of recipes, tips, etc..
Would you like to join our growing list of subscribers?

There is a Newsletter subscription box on the top right (or bottom) of each blog post, depending on the device you use.
You can submit your e-mail address there, to be added to my mailing list.

Find Me On Social Media:

Facebook page: The Grateful Girl Cooks!
Pinterest:
The Grateful Girl Cooks!
Instagram:
jbatthegratefulgirlcooks

Author's signature

Recipe Adapted From: “Year-Round Fresh”, page 184, published by WW International, Inc. in 2018

↓↓ PRINTABLE RECIPE BELOW ↓↓

0 from 0 votes
Kale And Sweet Potato Salad
Prep Time
10 mins
Cook Time
20 mins
Total Time
30 mins
 

Kale and Sweet Potato Salad is a delicious salad! Curry-roasted sweet potatoes, kale and red onion, topped with lime jalapeño salad dressing.

Category: Salad
Cuisine: All Cuisines
Keyword: kale and sweet potato salad
Servings: 3
Calories Per Serving: 120 kcal
Author: JB @ The Grateful Girl Cooks!
Ingredients
For Salad:
  • ½ pound sweet potatoes , peeled, cut in 1" quarters
  • non-stick cooking spray for baking sheet and sweet potatoes
  • ½ teaspoon kosher salt
  • ¼ teaspoon curry powder
  • teaspoon onion powder
  • teaspoon ground black pepper
  • 2 cups fresh kale torn or in small leaves
  • ¼ cup red onion (cut in thin slices)
For Salad Dressing:
  • Tablespoons fresh lime juice
  • teaspoons canola oil or other neutral oil
  • ¼ small fresh jalapeño seeded, finely diced
  • ½ small garlic clove minced
  • ¼ teaspoon fresh ginger peeled/ finely grated
Instructions
  1. Preheat oven to 425℉. Generously coat large baking sheet with non-stick cooking spray.

  2. Peel sweet potatoes. Cut in half, length-wise. Slice each half cross-wise into 1" half circles, then cut each slice in half, into wedges, Set aside.

  3. Stir salt, curry powder, onion powder and black pepper together in a small bowl.

  4. Lay sweet potatoes in a single layer on prepared baking sheet. Lightly spray sweet potatoes with baking spray. Sprinkle potatoes with spice mix.

  5. Bake at 425°F. for 20-25 minutes. Halfway through cooking, give them a toss, then put back in single layer; continue baking. When done, potatoes will be lightly browned. A knife can be inserted into potatoes with no resistance! Transfer potatoes to a wire rack; cool completely.

  6. Whisk lime juice, oil, jalapeño, garlic and ginger in bowl, until fully combined.

  7. Put kale, red onion and sweet potatoes in salad bowl. Drizzle with salad dressing. Toss gently, to coat everything with dressing. Serve! NOTE: If kale you're using has large leaves, tear them into bite-sized pieces before adding.

Nutrition Facts
Kale And Sweet Potato Salad
Amount Per Serving (1 (1/3 of total))
Calories 120 Calories from Fat 36
% Daily Value*
Fat 4g6%
Saturated Fat 0.4g3%
Trans Fat 0.01g
Polyunsaturated Fat 1g
Monounsaturated Fat 2g
Sodium 475mg21%
Potassium 448mg13%
Carbohydrates 20g7%
Fiber 4g17%
Sugar 4g4%
Protein 3g6%
Vitamin A 15215IU304%
Vitamin C 47mg57%
Calcium 143mg14%
Iron 1mg6%
* Percent Daily Values are based on a 2000 calorie diet.

Here’s one more to pin on your Pinterest boards!Kale and Sweet Potato Salad is a delicious salad! Curry-roasted sweet potatoes, kale and red onion, topped with lime jalapeño salad dressing.


Cranberry Pineapple Jello Salad

Cranberry Pineapple Jello Salad is a delicious dish for the holidays or any time! Only 4 ingredients and minimum prep time are needed to make it!
Cranberry Pineapple Jello Salad is a delicious dish for the holidays or any time! Only 4 ingredients and minimum prep time needed to make it!

Looking for a fantastic tasting salad to serve for the holidays (or anytime)? This cranberry pineapple Jello salad can be made in advance with very little prep time, and is full of vibrant color and flavor! Best of all… it’s EASY to make, which is wonderful during such a busy time of year, right?

I found the recipe online several years ago, and added it to our holiday favorites rotation! You can make it up to a couple days ahead of time, then top it with whipped cream, mint and orange zest before serving time. You can even prepare it in a Jello salad mold, individual custard cups, or in a 9″ square dish, so you can make this salad your own! Here’s how to make it.

Scroll Down For A Printable Recipe Card At The Bottom Of The Page

Making This Salad Is EASY!

You only need 4 ingredients to make this cranberry pineapple Jello salad. They are 6 ounces raspberry gelatin mix, a large can of crushed pineapple, a can of whole berry cranberry sauce, and the grated zest of an orange. That’s all, and it only takes about 10 minutes or less to prepare! You can choose to garnish the finished salad, of course, but these 4 ingredients are all you will need to make this delicious salad.

Orange zest, whole cranberry sauce, crushed pineapple and raspberry gelatin are the ingredients needed.

Place the raspberry gelatin powder in a large mixing bowl. Add a cup of boiling water, and stir these two ingredients for 2 minutes, to allow time for the gelatin to fully dissolve. Once dissolved, pour in a half cup of very cold water, and stir to combine.

Add the canned pineapple (including juice), whole berry cranberry sauce, and the finely grated zest of an orange. Stir well, until all the jello salad ingredients have been well combined. Hot water is stirred into the raspberry gelatin powder and stirred to dissolve powder.Whole berry cranberry sauce, orange zest and crushed pineapple are added to jello mixture.The cranberry pineapple jello salad mixture is combined and ready to pour into serving dish.

Prepare The Gelatin Salad Mold Or Other Dishes

You have three options for dishes to use to hold the Jello. Lightly coat the bottom and sides of the dish(es) you use with non-stick baking spray before adding the Jello salad. For this recipe you can use either a 6 cup Jello mold, individual custard cups (4 ounce), or a 9″ square pan. NOTE: using small custard cups will yield aprox.16 servings, rather than 8 using the other options).

NOTE: I’ve also successfully used a 5 cup gelatin mold (as seen in the photo below). You will have extra jello left over, but can pour the extra into individual custard cups. I did this to show you another option for serving this salad in individual portions.

After spraying the dish you will be using, pour the Jello mixture into the dish. Lightly cover the dish(es) with plastic wrap, and refrigerate for at least 6 hours until well-chilled and firm. You can also make the salad a couple days ahead of serving time, if necessary, for convenience.

Jello salad mold (or other dishes) is coated with non-stick spray before adding jello.Jello mold and 2 custard cups, filled with cranberry pineapple jello salad, ready to refrigerate.

Releasing The Jello From The Salad Mold For Serving

If using a 9″ square pan or individual custard dishes, you can simple serve the cranberry pineapple Jello salad after it has been refrigerated for at least 6 hours. If you’re using a Jello mold, you will need to carefully unmold it before serving.

To unmold the salad, place very hot water in a large bowl. Holding the Jello mold with both hands, gently submerge it about 2/3 of the way into the hot water. Be careful to not let any water go over the top edge of the Jello mold. Hold the salad mold in the hot water for approximately 30 seconds, then remove it from the water.

Place your serving platter upside down on top of the open part. Hold the platter and Jello mold together with both hands, and carefully flip it over. The salad should release and invert onto the platter. If for some reason it doesn’t come out of the Jello mold immediately, repeat the hot water immersion and try again until it comes out.

Jello salad mold is submerged 2/3 of the way in hot water to help release jello from sides.

Serve The Cranberry Pineapple Jello Salad

The cranberry pineapple Jello salad should be served immediately after it’s been removed from the mold. Slice the salad into pie-shaped wedges, or if using a 9″ square pan, cut into squares for serving.

If you choose to serve this salad with a beautiful garnish, top the salad (or each portion) with whipped cream, a mint sprig and additional orange zest. The garnish will add extra color and flavor to the presentation of this tasty Jello salad!

Two custard cups of jello salad, topped with whipped cream, mint and orange zest.Cranberry Pineapple Jello Salad, out of plastic mold, topped with whipped cream, mint and orange zest.

I’m confident you’re going to enjoy this cranberry pineapple Jello salad for the holidays or any ol’ time of year! It’s so simple to make, and truly does taste wonderful! Thanks for taking the time to stop by, and I hope you’ll come back soon. Take care, may God bless you, and have a GREAT day!

Looking For More HOLIDAY SIDE DISH Recipes?

You can find ALL of my recipes in the Recipe Index, which is located at the top of the page. I have lots of delicious side dish recipes that are perfect holiday recipes (or any day, for that matter). They include:

Interested In More Recipes?

Thank you for visiting this website. I appreciate you using some of your valuable time to do soIf you’re interested, I publish a newsletter 2 times per month (1st and 15th) with all the latest recipes, and other fun info. I would be honored to have you join our growing list of subscribers, so you never miss a great recipe!
There is a Newsletter subscription box on the top right side (or bottom) of each blog post, depending on the device you use, where you can easily submit your e-mail address (only) to be included in my mailing list.

You Can Also Find Me On Social Media:

Facebook page: The Grateful Girl Cooks!
Pinterest:
The Grateful Girl Cooks!
Instagram:
jbatthegratefulgirlcooks

Author's signature

Original recipe source: Sara, at http://www.dinneratthezoo.com/cranberry-pineapple-gelatin-mold/

↓↓ PRINTABLE RECIPE BELOW ↓↓

0 from 0 votes
Cranberry Pineapple Jello Salad
Prep Time
10 mins
Cook Time
0 mins
Inactive Refrigeration Time
6 hrs
Total Time
6 hrs 10 mins
 

Cranberry Pineapple Jello Salad is a delicious dish for the holidays or any time! Only 4 ingredients and minimum prep time needed to make it!

Category: Salad/Side Dish
Cuisine: American
Keyword: cranberry pineapple jello salad
Servings: 8
Calories Per Serving: 204 kcal
Author: JB @ The Grateful Girl Cooks!
Ingredients
  • 6 ounces raspberry gelatin 1 large box or 2 small boxes
  • 20 ounce can crushed pineapple do not drain!
  • 14 ounce can whole berry cranberry sauce
  • 1 zest of one orange
OPTIONAL GARNISHES: whipped cream, orange zest, fresh mint sprig
    Instructions
    1. Place jello mix in large mixing bowl. Add 1 cup boiling water; stir for 2 minutes, to allow time for gelatin to fully dissolve. Pour in ½ cup cold water; stir to combine.

    2. Add pineapple (including juice), cranberry sauce, and grated orange zest. Stir well, until all ingredients have been well-combined.

    3. Lightly coat bottom and sides of the dish(es) you use with non-stick baking spray. Pour jello into prepared dish(es). Lightly cover with plastic wrap; refrigerate at least 6 hours until well-chilled and firm. TIP: You can make this salad a couple days in advance, if necessary.

    4. To unmold jello: Place hot water in a large bowl. Holding jello mold with both hands, gently submerge salad mold about ⅔ of the way in the water. Be careful to not let water go over top edge of salad mold. Hold salad mold in hot water for approx. 30 seconds, then remove. Place serving platter upside down on top of the open part of mold. Hold platter and jello mold tightly together with both hands; carefully flip it over. Salad should release and invert onto the platter. If it doesn't come out of salad mold right away, repeat hot water immersion and try again until it comes out.

    5. If desired, garnish salad with whipped cream, a mint sprig and additional orange zest. Cut into slices and serve. Cover/refrigerate leftovers.

    Recipe Notes

    Caloric calculation does NOT include optional garnishes and is based on eight total servings. If using only 4 ounce custard cups, you will have approx. 16 servings.

    Nutrition Facts
    Cranberry Pineapple Jello Salad
    Amount Per Serving (1 slice (1/8 of total))
    Calories 204 Calories from Fat 2
    % Daily Value*
    Fat 0.2g0%
    Saturated Fat 0.01g0%
    Polyunsaturated Fat 0.04g
    Monounsaturated Fat 0.01g
    Sodium 102mg4%
    Potassium 106mg3%
    Carbohydrates 51g17%
    Fiber 2g8%
    Sugar 44g49%
    Protein 2g4%
    Vitamin A 63IU1%
    Vitamin C 9mg11%
    Calcium 16mg2%
    Iron 0.4mg2%
    * Percent Daily Values are based on a 2000 calorie diet.

    Here’s one more to pin on your Pinterest boards!Cranberry Pineapple Jello Salad is a delicious dish for the holidays or any time! Only 4 ingredients and minimum prep time needed to make it!

    Tuscan Cannellini Tuna Salad

    Tuscan Cannellini Tuna Salad is an easy dish with albacore tuna, cannellini beans and red onion tossed in a delicious, light salad dressing!
    Tuscan Cannellini Tuna Salad is an easy dish with albacore tuna, cannellini beans and red onion tossed in a delicious, light salad dressing!

    If you’re looking for a protein-filled salad to enjoy for lunch or a simple dinner, how about Tuscan Cannellini Tuna Salad? I found the original recipe in one of my very old Weight Watcher cookbooks (from 1998), and it’s delicious.

    This salad has wonderful flavor, and is a CINCH to make! You NEED TO PLAN AHEAD, though, because for best flavor, the salad dressing needs to be made about 45 minutes ahead of time. This extra time allows the flavors to develop fully! You can always mix the salad dressing up in the morning, then it’s ready for a quick lunch later!

    The actual salad itself is made up of only 3 ingredients… a can of albacore tuna, red onion, and protein-packed cannellini beans. Cannellini beans are also called white kidney beans, and can be found in most grocery stores. The salad is then tossed with the amazing salad dressing before serving. Let me show you how to make this tasty salad, which yields enough for four portions.

    Scroll Down For A Printable Recipe Card At The Bottom Of The Page

    Make The Salad Dressing

    The salad dressing used is the source of this salads great flavor! Best part? It only takes a minute or two to make! Place dried sage, olive oil, white wine, garlic, white wine vinegar, salt and pepper in a small bowl. Use a whisk to combine these ingredients very well.

    PLAN AHEAD! For the very BEST flavor (recommended!), cover the salad dressing once it’s fully combined. Let the salad dressing sit (covered) at room temperature for 45 minutes. Plan ahead for this, because this time gives the flavors a chance to fully develop!

    Salad dressing ingredients are placed in a small bowl before combining.Tuscan Cannellini tuna Salad dressing is mixed together before adding it to the salad.

    Combine The Salad Ingredients

    It’s time to finish making the Tuscan Cannellini Tuna Salad, once the salad dressing has “rested”. Place the drained, rinsed cannellini beans, drained and flaked albacore tuna and chopped red onion into a medium bowl. Toss lightly to combine these three ingredients.

    Rinsed, drained cannellini beans, red onion, and albacore tuna are combined in a large bowl.

    Dressing The Salad

    Give the salad dressing a quick stir to re-combine the ingredients and pour it over the tuna, cannellini beans and red onion. Toss the salad, so that the dressing is coating the salad ingredients very well.

    Salad dressing is poured over the Tuscan Cannellini Tuna Salad before mixing.After mixing in the salad dressing, the salad is ready to be served.

    Time To Enjoy Tuscan Cannellini Tuna Salad!

    Transfer the Tuscan Cannellini Tuna Salad into a pretty serving bowl, if desired, and then serve. The salad has wonderful flavors, thanks to that delicious salad dressing! This recipe makes four servings, and you can store any leftovers (covered or in airtight container) in the refrigerator for several days.

    A bowl filled with Tuscan Cannellini Tuna Salad is ready to be served.A close up photo of the Tuscan Cannellini Tuna Salad.

    That’s how simple it is to make this yummy Tuscan Cannellini Tuna Salad, which can be served on its own for lunch, dinner or as a side dish. I hope you enjoy it, and trust you will come back soon for more family-friendly recipes. Take care and have a GREAT day.

    Looking For More SALAD Recipes?

    You can find ALL of my recipes in the Recipe Index, which is located at the top of the page. I have lots of yummy salad recipes for you to check out, including:

    Interested In More Recipes?

    Thank you for visiting this website. I appreciate you using some of your valuable time to do soIf you’re interested, I publish a newsletter 2 times per month (1st and 15th) with all the latest recipes, and other fun info. I would be honored to have you join our growing list of subscribers, so you never miss a great recipe!
    There is a Newsletter subscription box on the top right side (or bottom) of each blog post, depending on the device you use, where you can easily submit your e-mail address (only) to be included in my mailing list.

    You Can Also Find Me On Social Media:

    Facebook page: The Grateful Girl Cooks!
    Pinterest:
    The Grateful Girl Cooks!
    Instagram:
    jbatthegratefulgirlcooks

    Author's signature

    Original recipe source: “Weight Watchers New Complete Cookbook”, page 433, published by Wiley Publishing, Inc., 1998

    ↓↓ PRINTABLE RECIPE BELOW ↓↓

    0 from 0 votes
    Tuscan Cannellini Tuna Salad
    Prep Time
    5 mins
    Cook Time
    0 mins
    Resting Time-Salad Dressing (inactive prep)
    45 mins
    Total Time
    50 mins
     

    Tuscan Cannellini Tuna Salad is an easy dish with albacore tuna, cannellini beans and red onion tossed in a delicious, light salad dressing!

    Category: Lunch, Salads
    Cuisine: All Cuisines
    Keyword: Tuscan cannellini tuna salad
    Servings: 4
    Calories Per Serving: 235 kcal
    Author: JB @ The Grateful Girl Cooks!
    Ingredients
    For Dressing:
    • 4 teaspoons extra virgin olive oil
    • 1 Tablespoon white wine vinegar
    • 1 Tablespoon dry white wine
    • 2 teaspoons dried sage or 2 Tablespoons fresh (minced)
    • 2 cloves garlic minced
    • ¼ teaspoon salt
    • teaspoon ground black pepper
    For Salad:
    • 16 ounces cannellini beans (canned) rinsed/drained
    • 7 ounces albacore tuna (canned, in water) drained. flaked
    • 1 Tablespoon chopped red onion
    Instructions
    Make Salad Dressing (at least 45 minutes before assembling salad)
    1. Place dried sage, olive oil, white wine, garlic, white wine vinegar, salt and pepper in a small bowl. Use a whisk to combine these ingredients very well. For the very BEST flavor, cover salad dressing once combined. Let salad dressing sit (covered) at room temperature for at least 45 minutes. Plan ahead, because this time gives the flavors in the salad dressing the chance to fully develop!

    Finish Salad
    1. Place cannellini beans, tuna and red onion into a medium bowl. Toss lightly, to combine.

    2. Give salad dressing a stir to re-blend ingredients; pour it over the salad Toss gently, so that salad dressing is coating salad ingredients well. Serve, and enjoy!

    3. Any leftovers can be stored (covered or in airtight container) in refrigerator for several days.

    Nutrition Facts
    Tuscan Cannellini Tuna Salad
    Amount Per Serving (1 (1/4 of total))
    Calories 235 Calories from Fat 54
    % Daily Value*
    Fat 6g9%
    Saturated Fat 1g6%
    Polyunsaturated Fat 1g
    Monounsaturated Fat 3g
    Cholesterol 21mg7%
    Sodium 339mg15%
    Potassium 648mg19%
    Carbohydrates 25g8%
    Fiber 6g25%
    Sugar 0.5g1%
    Protein 20g40%
    Vitamin A 13IU0%
    Vitamin C 1mg1%
    Calcium 95mg10%
    Iron 4mg22%
    * Percent Daily Values are based on a 2000 calorie diet.

    Here’s one more to pin on your Pinterest boards!Tuscan Cannellini Tuna Salad is an easy dish with albacore tuna, cannellini beans and red onion tossed in a delicious, light salad dressing!


    Cannellini Bean Salad

    Cannellini Bean Salad with tomatoes, onion, olive oil, balsamic, vinegar and garlic is easy to make and delicious as a salad topper OR a dip!
    Cannellini Bean Salad with tomatoes, onion, olive oil, balsamic, vinegar and garlic is easy to make and delicious as a salad topper OR a dip!

    Today I want to share with you a recipe for cannellini bean salad. It’s SUPER EASY to make in just a couple minutes, and can be enjoyed as is, OR on top of mixed greens (delicious) OR served as a dip with pita chips, etc. However you choose to serve it, the flavors are wonderful, and I’m confident you’ll enjoy this simple salad!

    I found the original recipe in one of the cookbooks I own called “100 Days Of Real Food”, by Lisa Leake. It’s a great cookbook for those looking to cook with wholesome family-friendly foods. She serves this salad as a dip, which we love, but I’ve found I enjoy it the most served as a topper over a mixed green salad.

    The beans and the delicious dressing they are covered with make it a double whammy salad. Lots of protein and fiber is provided from the beans and tomatoes, onions, garlic, olive oil, balsamic vinegar with seasoning create a salad dressing! It’s a win-win, no matter how you serve it! Here’s how to make this delicious vegetarian and gluten-free salad:

    Scroll Down For A Printable Recipe Card At The Bottom Of The Page

    How To Make This EASY Cannellini Bean Salad

    Drain, and then rinse one can (approx. 15 oz.) of cannellini beans. After the beans are drained and rinsed well, place them into a small or medium-sized serving bowl.

    Cannellini beans are drained from the can and rinsed well before making the salad.

    Add the rest of the ingredients to the bowl of drained cannellini beans. The remaining ingredients are tomato, red onion, garlic, olive oil, balsamic vinegar, salt and black pepper. Stir, to fully combine these ingredients. 

    At this point the cannellini bean salad is finished and can be served immediately. Stir the ingredients a couple of times to keep the beans coated with the simple dressing. OPTIONAL: Cover the bowl and let the flavors “mingle” in the refrigerator for 20-30 minutes before serving, for even more flavor. Your choice!

    All the ingredients for the cannellini bean salad are combined in a bowl.

    Enjoy This Salad On Mixed Greens! 

    My favorite way to enjoy the cannellini bean salad is to place a portion on a bed of chilled mixed greens. Stir the beans before serving, and don’t forget to spoon some olive oil/balsamic dressing (from the bottom of the bowl) on top. 

    The beans provide fiber and protein, and the red onion, garlic and tomato add flavor, texture and color. Another added bonus is that the oil/balsamic mixture creates a simple, but delicious salad dressing, so there’s no need to add any. It’s delicious, just as it is!

    Cannellini bean salad is served as a topper for a mixed green salad.

    Cannellini Bean Salad Can Be Served As A DIP, Too!

    My husband enjoys the cannellini bean salad served as a dip, too! Just stir it well, and serve it with pita chips, crackers or pieces of firm, crusty bread! It’s a simple, yet tasty dip I’m sure you will enjoy! This easy salad (or dip) has a lot of flavor!

    The cannellini bean salad can be served as a dip with pita chips, crackers or crusty bread.A bowl of cannellini bean salad ready to be served as a dip or eaten as is.

    Thank you for stopping by today. I hope you’ll try this easy to prepare dish, and trust you will enjoy it as much as we do. It should keep well (covered) in the refrigerator for up to 4-5 days. Please come back again soon for more family-friendly recipes. Take care, and have a GREAT day!

    Looking For More SALAD Recipes?

    You can find ALL of my recipes in the Recipe Index, which is located at the top of the page. I have many delicious salad recipes for you to enjoy, including:

    Interested In More Recipes?

    Thank you for visiting this website. I appreciate you using some of your valuable time to do soIf you’re interested, I publish a newsletter 2 times per month (1st and 15th) with all the latest recipes, and other fun info. I would be honored to have you join our growing list of subscribers, so you never miss a great recipe!
    There is a Newsletter subscription box on the top right side (or bottom) of each blog post, depending on the device you use, where you can easily submit your e-mail address (only) to be included in my mailing list.

    You Can Also Find Me On Social Media:

    Facebook page: The Grateful Girl Cooks!
    Pinterest:
    The Grateful Girl Cooks!
    Instagram:
    jbatthegratefulgirlcooks

    Author's signature

    Original recipe source: The cookbook “100 Days Of Real Food”, by Lisa Leake, page 195, published by Harper Collins Publishers in 2014

    ↓↓ PRINTABLE RECIPE BELOW ↓↓

    0 from 0 votes
    Cannellini Bean Salad
    Prep Time
    10 mins
    Cook Time
    0 mins
    Total Time
    10 mins
     

    Cannellini Bean Salad with tomatoes, onion, olive oil, balsamic, vinegar and garlic is easy to make and delicious as a salad topper OR a dip!

    Category: Appetizer, Salad
    Cuisine: American
    Keyword: cannellini bean salad
    Servings: 4
    Calories Per Serving: 190 kcal
    Author: JB @ The Grateful Girl Cooks!
    Ingredients
    • 15 ounces cannellini beans drained/rinsed
    • 1 medium tomato chopped
    • cup red onion diced
    • 2 garlic cloves minced
    • 3 Tablespoons extra virgin olive oil
    • 2 Tablespoons balsamic vinegar
    • ¼ teaspoon salt use more if needed, to taste
    • ¼ teaspoon ground black pepper
    Instructions
    1. Drain and rinse cannellini beans. Place the beans in a small or medium-sized serving bowl.

    2. Add remaining ingredients, and stir to fully combine. Serve and enjoy! OPTIONAL: If desired, cover and refrigerate for 20-30 minutes for flavors to mingle.

    3. Can be served as a dip with pita bread, crackers or crusty slices of bread OR as a salad topper, OR eaten as is. If using as a salad topper, be sure to spoon some olive oil/balsamic dressing (from bottom of the bowl) over the salad.

    4. Store leftovers (covered) in refrigerator for up to 4-5 days.

    Recipe Notes

    NOTE: Canned cannellini beans vary in weight from 15 ounces up to 15.5 ounces. Use a whole can; the various weights will all work just fine!

    Nutrition Facts
    Cannellini Bean Salad
    Amount Per Serving (1 (1/4 of total))
    Calories 190 Calories from Fat 99
    % Daily Value*
    Fat 11g17%
    Saturated Fat 1g6%
    Polyunsaturated Fat 1g
    Monounsaturated Fat 8g
    Sodium 378mg16%
    Potassium 109mg3%
    Carbohydrates 21g7%
    Fiber 6g25%
    Sugar 3g3%
    Protein 6g12%
    Vitamin A 257IU5%
    Vitamin C 6mg7%
    Calcium 76mg8%
    Iron 3mg17%
    * Percent Daily Values are based on a 2000 calorie diet.

    Here’s one more to pin on your Pinterest boards!Cannellini Bean Salad with tomatoes, onion, olive oil, balsamic, vinegar and garlic is easy to make and delicious as a salad topper OR a dip!

    Zucchini Carrot Lime Coleslaw

    Looking for a yummy low-calorie side salad? Try Zucchini Carrot Lime Coleslaw, with grated zucchini and carrots in a lime, cumin cilantro dressing!
    Looking for a yummy low-calorie side salad? Try Zucchini Carrot Lime Coleslaw, with grated zucchini and carrots in a lime, cumin cilantro dressing!

    If you enjoy the crunch and taste of traditional coleslaw, then I believe you will really like this zucchini carrot lime coleslaw. I found this low calorie recipe in one of my old Weight Watcher cookbooks. The freshly grated zucchini and carrots give this side salad it’s crunch, and a lime cilantro and ground cumin dressing gives it a delicious flavor.

    This coleslaw is super easy to prepare, and since it makes 4 servings, it’s a quick and easy side dish for your family or friends. Basically a salad dressing is made, and then used to top the fresh grated veggies. That’s it!

    Zucchini Carrot Lime Coleslaw is easy to make, colorful, tasty, and low in calories (about 51 calories per serving)! That’s what I call a great side dish! Here’s how to make it:

    Scroll Down For A Printable Recipe Card At The Bottom Of The Page

    Prepare The Coleslaw Dressing

    The first thing you will need to do is prepare the coleslaw dressing. Before combining the ingredients, you will need to lightly “toast” the ground cumin spice. To do this, place the ground cumin in a “dry” skillet. Stir and cook, over low heat for about one minute, or until you begin to smell it’s fragrance. Transfer the cumin to a small bowl.

    To the cumin, add mayonnaise (light or regular), fresh lime juice, lime zest, chopped cilantro, salt and pepper. Stir these ingredients until they are combined well. This is the dressing for your zucchini carrot lime coleslaw.

    Ground cumin is lightly "toasted" in a skillet over low heat to enhance the flavor.Mayonnaise, cumin, cilantro, lime juice, zest, salt and pepper are used to make the coleslaw dressing.

    Prepare The Zucchini Carrot Lime Coleslaw

    Now it’s time to grate (or shred) the zucchini and carrots.  Cut off the ends of the zucchini, and grate it, using the largest size holes on a grater (can also use a food processor with a grating blade). Place the shredded zucchini on several thicknesses of paper towels. Press down firmly with more paper towels to remove as much of the natural wetness of the zucchini as possible.

    Peel the carrots, and cut off both ends of each carrot. Grate the carrots, using the largest size holes on the grater (can use a food processor with a grating blade for this, too). 

    A zucchini is shredded, then moisture is blotted out using paper towels.Two carrots are shredded to use in the zucchini carrot lime coleslaw.

    Place the shredded zucchini and carrots in a medium-sized serving bowl. Pour the coleslaw dressing over the top (using ALL the dressing). Toss the coleslaw until all ingredients are fully combined. Now your zucchini carrot lime coleslaw is ready to be served, OR you can cover the bowl and refrigerate until ready to be served.

    The dressing is combined with shredded zucchini and carrots in a mixing bowl.

    Serve The Zucchini Carrot Lime Coleslaw

    Transfer the zucchini carrot lime coleslaw to a serving dish (if desired), and garnish the top with a slice of lime, and a couple of cilantro sprigs. This side dish is best served on the same day you make it!

    This coleslaw still tastes great (and crunchy) on subsequent days, but you may have to remove a bit of liquid that accumulates on the bottom of the bowl (thanks again to those juicy zucchini!). No big deal! Store any leftovers covered in the refrigerator for 2-3 days.

    Zucchini Carrot Lime Coleslaw is garnished with lime wedge and cilantro sprigs to serve.Delicious zucchini carrot lime coleslaw is served in a white bowl, with cilantro/lime garnish.

    I really hope you enjoy this simple veggie side dish. We sure do! Thank you for stopping by today, and I sincerely hope you will come back soon for more family friendly recipes. Take care, and have a wonderful day! May God bless you with encouragement, and His peace today.

    Looking For More Coleslaw Recipes?

    You can find ALL of my recipes in the Recipe index, located at the top of the page. I have some delicious coleslaw recipes you might be interested in, including:

    Interested In More Recipes?

    Thank you for visiting this website. I appreciate you using some of your valuable time to do soIf you’re interested, I publish a newsletter 2 times per month (1st and 15th) with all the latest recipes, and other fun info. I would be honored to have you join our growing list of subscribers, so you never miss a great recipe!
    There is a Newsletter subscription box on the top right side (or bottom) of each blog post, depending on the device you use, where you can easily submit your e-mail address (only) to be included in my mailing list.

    You Can Also Find Me On Social Media:

    Facebook page: The Grateful Girl Cooks!
    Pinterest:
    The Grateful Girl Cooks!
    Instagram:
    jbatthegratefulgirlcooks

    Author's Signature

    Original recipe source: “Weight Watchers New Complete Cookbook, page 305, published in 1998 by Wiley Publishing, Inc.

    ↓↓ PRINTABLE RECIPE BELOW ↓↓

    0 from 0 votes
    Zucchini Carrot Lime Coleslaw
    Prep Time
    7 mins
    Cook Time
    0 mins
    Total Time
    7 mins
     

    Want a yummy low-calorie side salad? Try Zucchini Carrot Lime Coleslaw, with grated zucchini and carrots in a lime, cumin cilantro dressing!

    Category: Salad/Side Dish
    Cuisine: American
    Keyword: zucchini carrot lime coleslaw
    Servings: 4
    Calories Per Serving: 51 kcal
    Author: JB @ The Grateful Girl Cooks!
    Ingredients
    For Coleslaw Dressing:
    • 3 Tablespoons light mayonnaise , can substitute regular
    • 1 Tablespoon fresh lime juice
    • ½ teaspoon lime zest* , *finely grated peel
    • 1 teaspoon ground cumin
    • 1 teaspoon chopped fresh cilantro
    • ¼ teaspoon salt
    • teaspoon ground black pepper
    For Coleslaw:
    • 2 large carrots , peeled/grated
    • 1 medium zucchini , grated
    Instructions
    1. Place cumin in a "dry" skillet. Stir and cook on low heat for one minute, or until smell it's fragrance. Transfer cumin to a small bowl. Add mayonnaise, lime juice and zest, cilantro, salt and pepper. Stir until combined well. Set aside.

    2. Cut off both ends of zucchini. Grate, using large holes on a grater (or food processor with grating blade). Place shredded zucchini on several thicknesses of paper towels. Press down firmly with more paper towels to blot out as much of the natural wetness of zucchini as possible. Peel carrots; cut off both ends. Grate carrots, using large holes on grater (or food processor with grating blade).

    3. Place shredded zucchini/carrots in a medium bowl. Pour dressing over the top (use ALL the dressing). Toss until all ingredients are combined. May serve immediately, or can be covered/refrigerated for later.

    4. To serve, transfer to serving dish. Garnish with lime wedge, and 2-3 cilantro sprigs. Coleslaw is best served on the same day you make it! Coleslaw still tastes great on subsequent days, but you may have to remove liquid from bottom of bowl (thanks juicy zucchini!). Store leftovers (covered) in refrigerator for 2-3 days.

    Recipe Notes

    Caloric calculation is based on the use of light mayonnaise.

    Nutrition Facts
    Zucchini Carrot Lime Coleslaw
    Amount Per Serving (1 (1/4 of total))
    Calories 51 Calories from Fat 27
    % Daily Value*
    Fat 3g5%
    Saturated Fat 1g6%
    Trans Fat 1g
    Polyunsaturated Fat 1g
    Monounsaturated Fat 1g
    Cholesterol 2mg1%
    Sodium 253mg11%
    Potassium 261mg7%
    Carbohydrates 7g2%
    Fiber 2g8%
    Sugar 3g3%
    Protein 1g2%
    Vitamin A 6130IU123%
    Vitamin C 12mg15%
    Calcium 26mg3%
    Iron 1mg6%
    * Percent Daily Values are based on a 2000 calorie diet.

    Here’s one more to pin on your Pinterest boards!Looking for a yummy low-calorie side salad? Try Zucchini Carrot Lime Coleslaw, with grated zucchini and carrots in a lime, cumin cilantro dressing!

    Southwestern Rice Salad

    Southwestern Rice Salad is a yummy side or meatless main dish. Rice, black beans, corn, and peppers are mixed in a lightly seasoned dressing.
    Southwestern Rice Salad is a yummy side or meatless main dish. Rice, black beans, corn, and peppers are mixed in a lightly seasoned dressing.

    If you’re looking for a delicious and unique salad, side dish, or meatless main dish, I’d like to recommend this Southwestern Rice Salad. I got the original recipe about 15 years ago from one of my “Taste of Home” magazines. At the time I thought it sounded really interesting, so I saved the recipe. Guess what? It is REALLY tasty!

    The salad features cooked rice with black beans, corn, carrots, bell peppers, garlic, cilantro, red onion, tomatoes and wait for it… crunchy salted peanuts!!! The salad is dressed with a simple Southwest-inspired salad dressing, and then is served chilled. Who knew something so unusual sounding could taste so good? But it IS good!

    The entire salad can be ready in 30 minutes. If you want to save time, prep the veggies and other ingredients while the rice is cooking. That will shave some time off the preparation! I also recommend chilling the salad after it is finished and dressed (for best flavor), but that is up to you. Here’s how to make Southwestern Rice Salad:

    Scroll Down For A Printable Recipe Card At the Bottom Of The Page

    Prepare The Rice

    Place uncooked long grain rice in a saucepan with water. Bring the water to a boil, then reduce the heat to low and cover the pan. Simmer the rice (covered) on low heat for 15 minutes, then remove the pan from the heat. The rice should be tender and the water will have been absorbed.

    Let the rice sit (still covered), for 5 minutes, then rinse with cold water to cool it down. Drain the rice after rinsing and place the cooled, cooked rice in a large serving bowl.

    Long grain white rice is cooked in water until done and fluffy.Cooked rice is rinsed then drained before adding it to salad bowl.

    Time To Make The Southwestern Rice Salad

    TIP: If you want to save time, do the following steps while the rice is cooking. In a large skillet, heat vegetable oil until hot on medium heat. Add chopped green pepper, red onion, carrots, and minced garlic. Sauté these veggies until they are crisp-tender. Stir often while cooking so the garlic won’t burn in the skillet (and become bitter).This should take 4-5 minutes. 

     When done, add this veggie mixture to the cooled rice in the bowl, and stir well, to combine.

    Chopped green pepper, carrot, red onion, and garlic are cooked in oil until tender.The cooked veggies are added to the cooled rice in salad bowl.

    The next ingredients you will add to the Southwestern rice salad are corn (frozen, but thawed), black beans, tomatoes, salted peanuts and chopped fresh cilantro. Place them in the bowl with the rice and stir gently, until all the ingredients are combined. Isn’t it colorful? 

    Corn, black beans, tomatoes, cilantro and salted peanuts are added to the Southwestern rice salad.Southwestern Rice Salad is very colorful after adding all the ingredients.

    Make The Salad Dressing

    The last thing you need to prepare is the simple salad dressing to coat the Southwestern rice salad. It’s EASY! Use a wire whisk or a fork to fully mix olive oil, fresh lemon juice, cayenne pepper and ground cumin in a small bowl. Mix these salad dressing ingredients for about a minute to ensure the oil and juice are fully integrated. Now you’re ready to add it to the salad!

    Pour the salad dressing over the Southwestern rice salad, and toss well, to ensure all the salad is mixed well with the dressing. Once done, refrigerate the salad until it is time to serve. The flavors really come together the longer the salad is refrigerated, so if you have the chance to make this salad early in the day, the better. If not, you can certainly serve the salad right away, if that is your preference.

    Salad dressing for the salad is made with lemon juice, olive oil, cayenne and ground cumin.

    Ready To Serve Southwestern Rice Salad

    Once the salad is dressed and refrigerated for a bit, it is ready to enjoy! Southwestern rice salad is filling, thanks in part to the black beans and rice, so it can be enjoyed as a meatless main dish, or you can enjoy it as a side dish for chicken, beef and pork. The salad has lots of flavor, and makes enough for 12 servings, so there is plenty to go around.

    Store any leftovers, covered, in the refrigerator for up to 4-5 days. My husband keeps getting spoonfuls of leftovers out of the fridge throughout the day to eat as a snack or to have with his lunch or dinner. He definitely loves this lightly seasoned, chilled salad! The crunchy peanuts are a welcome surprise, too!

    After chilling in the refrigerator, the Southwestern Rice Salad is served in a white bowl.A close up look at the Southwestern Rice Salad, full of veggies.

    I hope you have the chance to make this yummy, filling Southwestern rice salad. I truly believe you and those you love will enjoy it! Thanks for stopping by today, and I sincerely hope you will come back again soon. Have a great day!

    Looking For More SALAD Recipes?

    You can find ALL of my recipes in the Recipe Index, which is located at the top of the page. I have lots of great tasting salad recipes for you to enjoy, including:

    Interested In More Recipes?

    Thank you for visiting this website. I appreciate you using some of your valuable time to do soIf you’re interested, I publish a newsletter 2 times per month (1st and 15th) with all the latest recipes, and other fun info. I would be honored to have you join our growing list of subscribers, so you never miss a great recipe!
    There is a Newsletter subscription box on the top right side (or bottom) of each blog post, depending on the device you use, where you can easily submit your e-mail address (only) to be included in my mailing list.

    You Can Also Find Me On Social Media:

    Facebook page: The Grateful Girl Cooks!
    Pinterest:
    The Grateful Girl Cooks!
    Instagram:
    jbatthegratefulgirlcooks

    Author's signature

    Original recipe source: “Taste of Home” magazine, June/July 2006 edition, page 8, published by Reiman Publications, Inc.

    0 from 0 votes
    Southwestern Rice Salad
    Prep Time
    15 mins
    Cook Time
    15 mins
    Total Time
    30 mins
     

    Southwestern Rice Salad is a yummy side or meatless main dish. Rice, black beans, corn, and peppers are mixed in a lightly seasoned dressing.

    Category: Main Course Salad, Salad/Side Dish
    Cuisine: Southwestern
    Keyword: Southwestern rice salad
    Servings: 12
    Calories Per Serving: 305 kcal
    Author: JB @ The Grateful Girl Cooks!
    Ingredients
    • 1⅓ cups water
    • cup long grain white rice , uncooked
    • 1 Tablespoon vegetable oil
    • ¾ cup chopped green bell pepper
    • ½ cup chopped red onion (or shallot)
    • 1 medium carrot , peeled and chopped
    • 3 large garlic cloves , minced
    • 16 ounces frozen corn , thawed
    • 15 ounces canned black beans , rinsed and drained
    • 2 medium Roma tomatoes , chopped
    • 1 cup salted peanuts
    • cup fresh cilantro , finely chopped
    For Salad Dressing:
    • cup extra virgin olive oil
    • cup fresh lemon juice
    • ¾ teaspoon ground cayenne pepper
    • ½ teaspoon ground cumin
    Instructions
    1. Place rice in a saucepan with water; bring water to a boil. Reduce heat to low, cover pan. Simmer rice (covered) on low heat for 15 minutes; remove pan from heat. Let rice sit (covered), for 5 minutes; rinse rice with cold water; drain. Put rice in large serving bowl.

    2. TIP: If you want to save time, do the following steps while rice is cooking. In large skillet, heat vegetable oil on medium. Add green pepper, red onion, carrots, and minced garlic. Sauté until crisp-tender (4-5 minutes), stirring often so garlic won't burn. Add to rice; stir.

    3. Add corn, beans, tomatoes, peanuts and cilantro to rice; stir to combine.

    4. Use a wire whisk or fork to fully mix olive oil, lemon juice, cayenne and ground cumin in a small bowl. Mix well to ensure oil and juice are fully combined. Pour dressing over salad; toss well, to coat. Cover and refrigerate salad until time to serve. Store leftovers, covered, in refrigerator up to 4-5 days. Enjoy!

    Nutrition Facts
    Southwestern Rice Salad
    Amount Per Serving (1 (1/12th of total))
    Calories 305 Calories from Fat 180
    % Daily Value*
    Fat 20g31%
    Saturated Fat 4g25%
    Sodium 198mg9%
    Potassium 410mg12%
    Carbohydrates 28g9%
    Fiber 5g21%
    Sugar 1g1%
    Protein 8g16%
    Vitamin A 1056IU21%
    Vitamin C 16mg19%
    Calcium 38mg4%
    Iron 2mg11%
    * Percent Daily Values are based on a 2000 calorie diet.

    Here’s one more to pin on your Pinterest boards!Southwestern Rice Salad is a yummy side or meatless main dish. Rice, black beans, corn, and peppers are mixed in a lightly seasoned dressing.

    Asian Cucumber Salad

    Asian Cucumber Salad is an easy side dish, with sliced cucumbers & green onions marinated in an Asian-inspired sauce, served cold and crispy!
    Asian Cucumber Salad is an easy side dish, with sliced cucumbers & green onions marinated in an Asian-inspired sauce, served cold and crispy!

    I grew up eating marinated cucumbers, because my Mom made them quite often, especially in the hot summertime. I’ve shared her basic recipe, called “Mom’s Marinated Cucumbers” here on the blog previously, and hope you will check it out, if interested. They’re really good!

    This recipe I am sharing today has a slight Asian twist to it, due in part to it’s use of rice vinegar and soy sauce. Asian Cucumber Salad is simple to make in about 10 minutes, but you will have to allow time for the cucumbers to marinate for the best flavor, so plan ahead! I like to make up a batch in the morning to be able to enjoy later in the day! Let me show you how easy this salad is to make:

    Scroll Down For A Printable Recipe Card At The Bottom Of The Page

    Prepare The Cucumbers

    Trim the ends off the cucumbers, and then use a vegetable peeler or knife to remove all the peel. Once peeled, thinly slice (about 1/4″) all of the cucumbers. You can use regular cucumbers OR English cucumbers for this salad.

    NOTE: I used one really large English cucumber for these photos, but you can also use 2 large or 3 medium sized regular cucumbers, if desired. There is enough marinade for either way you choose to fix this dish.

    The cucumbers are washed, ends trimmed off, then peeled.Cucumbers are peeled, and cut into thin slices for Asian Cucumber Salad.

    Now it’s time to get the cucumbers ready for marinating! Place the cucumber slices and chopped green onions (scallions) into a container with a lid or a large re-sealable plastic bag. You’re going to use all the white parts of each green onion, and SOME of the green tops, okay?

    NOTE: I prefer to use a large dish with a lid when marinating these, because sometimes the plastic re-sealable bags can leak (and that’s not good).

    Chopped green onions and sliced cucumbers in dish before marinating.

    Marinate The Cucumbers

    It’s EASY to make the Asian-inspired marinade for the cucumbers. Measure rice vinegar, water, reduced sodium soy sauce, granulated sugar, salt and black pepper into a small bowl. Whisk or stir well, until these ingredients are fully combined. Pour the marinade over the sliced cucumbers and green onions, and gently stir until the cucumbers are coated on all sides.

    Place a tight fitting lid on the dish (or seal the bag), and place the dish into your refrigerator. For BEST flavor, let the cucumbers marinate in the sauce for several hours to saturate them with flavor (or even overnight, if you want). Stir occasionally, to ensure the cucumbers remain coated with marinade.

    Asian sauce is mixed then poured over cucumber mix to marinate.

    Serve The Asian Cucumber Salad

    After they’ve marinated for several hours (or overnight), it’s time to serve the Asian Cucumber Salad. Remove the cucumbers with a slotted spoon, letting the marinade drain off the cucumbers before serving.

    Transfer the drained Asian Cucumber Salad to a serving dish, and lightly sprinkle with sesame seeds. Serve the salad – the cucumbers will be crisp, cold, and full of flavor! They’re so good, I find myself grabbing one or two slices out of the fridge for a quick, tasty snack any time of the day.

    Asian Cucumber Salad is served garnished with sesame seeds in a white bowl.A close up photo of the Asian Cucumber Salad in a white bowl.

    You can also use the marinated, drained cucumbers on your favorite mixed green salad, for a crunchy, tasty pop of flavor! They’re delicious when used in this way, as well.

    Marinated cucumbers are delicious and crunchy added to a mixed green salad.

    I hope you have the chance to try this simple recipe, and am positive you will enjoy it. Thanks so much for stopping by for a visit today. Have a great day, and come back soon, okay?

    Looking For More Salad Recipes?

    You can find all of my salad recipes in the Recipe Index, which is located at the top of the page. I have lots of yummy salad recipes, including:

    Interested In More Recipes?

    Thank you for visiting this website. I appreciate you using some of your valuable time to do soIf you’re interested, I publish a newsletter 2 times per month (1st and 15th) with all the latest recipes, and other fun info. I would be honored to have you join our growing list of subscribers, so you never miss a great recipe!
    There is a Newsletter subscription box on the top right side (or bottom) of each blog post, depending on the device you use, where you can easily submit your e-mail address (only) to be included in my mailing list.

    You Can Also Find Me On Social Media:

    Facebook page: The Grateful Girl Cooks!
    Pinterest:
    The Grateful Girl Cooks!
    Instagram:
    jbatthegratefulgirlcooks

    Author's signature

    Recipe Adapted From: The cookbook “What’s For Dinner?”, by Maryana Vollstedt, published in 1997 by Chronicle Books, page 99.

    0 from 0 votes
    Asian Cucumber Salad
    Prep Time
    10 mins
    Marinating Time (inactive)
    3 hrs
    Total Time
    3 hrs 10 mins
     

    Asian Cucumber Salad is an easy side dish, with sliced cucumbers & green onions marinated in an Asian-inspired sauce, served cold and crispy!

    Category: Salad, Vegetable Dish
    Cuisine: Asian
    Keyword: Asian cucumber salad
    Servings: 4
    Calories Per Serving: 34 kcal
    Author: JB @ The Grateful Girl Cooks!
    Ingredients
    • 2 large cucumbers *See Note below
    • 3 stalks green onions (scallions) sliced (white bulb and some green tops)
    For Marinade:
    • ½ cup rice vinegar
    • 2 Tablespoons water
    • 2 teaspoons reduced sodium soy sauce
    • 1 teaspoon granulated sugar
    • ¼ teaspoon salt
    • teaspoon black pepper
    Garnish:
    • 1 teaspoon sesame seeds if desired for garnish
    Instructions
    1. Trim ends off the cucumbers; peel cucumbers. Once peeled, thinly slice (about 1/4") the cucumbers. Place cucumber slices and chopped green onions into a container with a lid, or into a large re-sealable plastic bag.

    2. Measure rice vinegar, water, soy sauce, granulated sugar, salt and pepper into a small bowl. Whisk or stir well, until fully combined. Pour marinade over sliced cucumbers and green onions; gently stir until cucumbers are coated on all sides. Place a tight fitting lid on dish (or seal the bag); place in refrigerator. For BEST flavor, let cucumbers marinate in sauce for several hours to saturate with flavor (or even overnight, if you want). Stir occasionally, to ensure cucumbers remain coated with marinade.

    3. After marinating, they're ready to eat. Remove the cucumbers from the marinade with a slotted spoon, letting the marinade drain off the cucumbers before serving. Transfer to a serving dish. Sprinkle cucumbers with sesame seeds for optional garnish. Serve cold, and enjoy!

    Recipe Notes

    NOTE: This recipe yields approximately 4 servings as written. The caloric calculation is made using 2 large cucumbers (4 servings total). You can make this dish using 3 medium regular cucumbers, 2 large regular cucumbers, or 1 very large English cucumber, and will still have enough marinade for use in this recipe.

    Nutrition Facts
    Asian Cucumber Salad
    Amount Per Serving (1 (1/4 of total))
    Calories 34 Calories from Fat 9
    % Daily Value*
    Fat 1g2%
    Saturated Fat 1g6%
    Sodium 234mg10%
    Potassium 215mg6%
    Carbohydrates 5g2%
    Fiber 1g4%
    Sugar 3g3%
    Protein 1g2%
    Vitamin A 191IU4%
    Vitamin C 6mg7%
    Calcium 31mg3%
    Iron 1mg6%
    * Percent Daily Values are based on a 2000 calorie diet.

    Here’s one more to pin on your Pinterest boards!Asian Cucumber Salad is an easy side dish, with sliced cucumbers & green onions marinated in an Asian-inspired sauce, served cold and crispy!

    Bacon Lover’s Spinach Salad

    Enjoy Bacon Lover’s Spinach Salad for two! Baby spinach leaves topped with hard-boiled eggs, red onion, crisp bacon, and warm bacon dressing!Enjoy Bacon Lover's Spinach Salad for two! Baby spinach leaves topped with hard-boiled eggs, red onion, crisp bacon, and warm bacon dressing!

    I really love a good spinach salad… do you? Today I want to share a great recipe for a Bacon Lover’s Spinach Salad. I called it that, because, between the abundance of crispy crumbled bacon ON the salad, there is also a warm bacon dressing that is poured OVER the salad when serving. If you LOVE BACON and enjoy spinach salads like I do, then this simple, flavor-packed salad will be a big hit.

    The recipe as written makes two servings, and can be used as a side salad for a variety of entrees. Hard-boiled eggs on top add wonderful protein to the salad, so it can be a delicious main dish salad if you choose to enjoy it that way, as well. With just a bit of prep ahead of time, this delicious salad can be ready to enjoy! Let me show you how easy it is to make:

    Scroll Down For A Printable Recipe Card At The Bottom Of The Page

    First Things First!

    You will need to have two hard-boiled eggs cooked and cooled for this salad. Get them ready first using your favorite method, so they will have time to cool, peel, and slice before adding to the salad. I usually cover them with water in a saucepan, and bring them to a boil, cooking them for 22 minutes total, from start to finish.

    Hard-boiled eggs are used in this recipe for spinach salad.

    You will also need cooked, crispy crumbled bacon for the salad. You can also pre-cook this ingredient or make this while the eggs are cooking, if more convenient time-wise. I usually cut the bacon into small pieces with either a knife or kitchen scissors. Cook the bacon in a large skillet until very crispy. It cooks much faster when pre-chopped into small pieces!

    Once the bacon is cooked and crispy, remove it to paper towels to cool. Set aside a generous Tablespoon of the bacon crumbles to add to the warm bacon dressing later, keeping the rest set aside for the salad itself.
    NOTE:  LEAVE 1 Tablespoon of the bacon grease in the skillet for the salad dressing (discard the rest).

    Chopped bacon is quickly fried until crispy in a skillet.

    Prepare The Warm Bacon Salad Dressing

    In the same skillet, cook the chopped red onion in the reserved Tablespoon of bacon grease for 3-4 minutes on medium heat. Stir occasionally until done. Add apple cider vinegar, maple syrup, water, black pepper and Dijon mustard to the red onion mixture, and stir, to combine.

    Cook for approx. 3-4 minutes on medium heat, stirring occasionally. The dressing will thicken very slightly as the water cooks away. During the last minute of cooking, add the reserved 1 Tablespoon of the crumbled crisp bacon to the salad dressing. Make sure the salad dressing is served warm! TIP: Build the salad while the bacon dressing is heating!

    Chopped red onion is cooked in a small bit of bacon drippings.Vinegar, Dijon mustard and maple syrup is added to the cooked red onion.Warm bacon dressing is heated until sugar dissolves.

    Prepare The Bacon Lover’s Spinach Salad For Two

    Line each plate with baby spinach leaves. Evenly distribute thin slices of red onion, and the remaining bacon crumbles to each salad. Slice each hard-boiled egg, and decoratively fan them out on top of each serving.

    Spoon the warm bacon dressing over the top of each salad, and then you’re ready to enjoy this delicious dish for two. I think you will love the bacon flavor that shines in this simple, but absolutely yummy salad!

    Two plates full of the Bacon Lover's Spinach Salad, before adding salad dressing.Warm bacon dressing tops each plate full of Bacon Lover's Spinach Salad.

    The warm bacon dressing really MAKES this salad, in my opinion! Don’t leave it out! The crispy bacon pieces, combined with warm salad dressing, the tang of the red onions, and the creamy hard-boiled eggs provide taste, texture, protein, and color for this simple salad. It’s so very good!

    Crispy bacon, hard-boiled eggs, red onion, and warm bacon dressing on each salad.

    I truly hope you enjoy this Bacon Lover’s Spinach Salad. The recipe can be easily doubled, and is sure to be a favorite! Thanks for stopping by… come back soon.

    Looking For More SALAD Recipes?

    You can find all of my SALAD recipes in the Recipe Index, located at the top of the page. I have quite a few, including:

    Interested In More Recipes?

    Thank you for visiting this website. I appreciate you using some of your valuable time to do soIf you’re interested, I publish a newsletter 2 times per month (1st and 15th) with all the latest recipes, and other fun info. I would be honored to have you join our growing list of subscribers, so you never miss a great recipe!
    There is a Newsletter subscription box on the top right side (or bottom) of each blog post, depending on the device you use, where you can easily submit your e-mail address (only) to be included in my mailing list.

    You Can Also Find Me On Social Media:

    Facebook page: The Grateful Girl Cooks!
    Pinterest:
    The Grateful Girl Cooks!
    Instagram:
    jbatthegratefulgirlcooks

    Author's signature

    Original recipe source: unknown (found a handwritten recipe card-no source noted- in a really OLD recipe box.)

    0 from 0 votes
    Bacon Lover's Spinach Salad
    Prep Time
    25 mins
    Cook Time
    4 mins
    Total Time
    29 mins
     

    Enjoy Bacon Lover's Spinach Salad for two! Baby spinach leaves topped with hard-boiled eggs, red onion, crisp bacon, and warm bacon dressing!

    Category: Salad/Side Dish
    Cuisine: American
    Keyword: Bacon lover's spinach salad
    Servings: 2
    Calories Per Serving: 407 kcal
    Author: JB @ The Grateful Girl Cooks!
    Ingredients
    • 5 slices bacon cooked crisp, crumbled, divided use
    • 2 large eggs hardboiled
    • 4 cups fresh baby spinach
    • ¼ medium red onion divided use *SEE NOTE*
    • 1 Tablespoon bacon grease
    • Tablespoons apple cider vinegar
    • teaspoons Dijon mustard
    • 2 teaspoons maple syrup
    • 2 Tablespoons water
    • ¼ teaspoon ground black pepper
    Instructions
    Prep:
    1. Hard boil the eggs. Let cool, then peel. Cook bacon in large skillet until very crispy. It cooks much faster chopped into small pieces! Once the bacon is crispy, remove to paper towels to cool. Set aside a generous Tablespoon of bacon crumbles to add to warm bacon dressing later, keeping the rest set aside for the salad itself. NOTE:  LEAVE 1 Tablespoon of the bacon grease in the skillet for the salad dressing (discard the rest).

    Make Bacon Dressing:
    1. Cook chopped red onion in reserved Tablespoon of bacon grease in skillet 3-4 minutes on medium heat. Stir occasionally. Add apple cider vinegar, maple syrup, water, black pepper and Dijon mustard; stir to combine. Cook 3-4 minutes on medium heat, stirring occasionally. Dressing will thicken slightly as water cooks away. During last minute of cooking, add reserved Tablespoon of crumbled crisp bacon to salad dressing. Dressing is served warm.

    Build Salad:
    1. Line plates with baby spinach. Evenly distribute thin slices of red onion and remaining bacon crumbles over spinach. Slice each hard-boiled egg into thin rounds, and decoratively fan slices out on top of each serving. Spoon warm bacon dressing over the top of each salad, serve and enjoy!

    Recipe Notes

    NOTES:

    • Use one thin round slice of red onion to garnish salads. Cut the round slice in half, and use one half of the slice (separated) to garnish each salad.
    • Chop the remaining red onion (approx. 1/8 cup) to use in the warm bacon salad dressing.
    Nutrition Facts
    Bacon Lover's Spinach Salad
    Amount Per Serving (1 (1/2 of total))
    Calories 407 Calories from Fat 306
    % Daily Value*
    Fat 34g52%
    Saturated Fat 12g75%
    Cholesterol 229mg76%
    Sodium 538mg23%
    Potassium 533mg15%
    Carbohydrates 10g3%
    Fiber 2g8%
    Sugar 5g6%
    Protein 15g30%
    Vitamin A 5896IU118%
    Vitamin C 18mg22%
    Calcium 95mg10%
    Iron 3mg17%
    * Percent Daily Values are based on a 2000 calorie diet.

    Here’s one more to pin on your Pinterest boards!Enjoy Bacon Lover's Spinach Salad for two! Baby spinach leaves topped with hard-boiled eggs, red onion, crisp bacon, and warm bacon dressing!

    Poppyseed Apple Raisin Coleslaw

    Crisp Poppyseed Apple Raisin Coleslaw, w/ purple cabbage, carrots, Granny Smith apples, & raisins, is tossed with poppyseed dressing, and served cold.
    Crisp Poppyseed Apple Raisin Coleslaw, w/ purple cabbage, carrots, Granny Smith apples, & raisins, is tossed with poppyseed dressing, and served cold.

    Do you enjoy a cold, crisp and crunchy coleslaw? We do, especially during the warm Spring and Summer months. Coleslaw is one of those easy side dishes that just seems to compliment sandwiches, burgers, fried chicken, and other main dishes. This recipe only has 4 ingredients (plus dressing), and is super simple to make.

    I’ve posted a couple other coleslaw recipes here on the blog in the past, including Purple Coleslaw and Pineapple Peanut Coleslaw. Each one is unique and delicious side salad.

    Today’s poppyseed apple raisin coleslaw is one I created, after my husband came home from our local Farmer’s market with a big purple cabbage in tow. I asked him to bring home a couple veggies that I could have around to use for our dinners. He surprised me with a head of purple cabbage (did NOT expect that!). After straining my brain as how to use it, I decided to create something new.

    Let me tell you… this turned out to be a great tasting coleslaw. Crunchy from cabbage and carrots, slightly tart/crisp from Granny Smith apples, and chewy sweet from plump raisins, this is a coleslaw you’ll enjoy! Here’s how to make it:

    Scroll Down For A Printable Recipe Card At The Bottom Of The Page

    Plump Those Raisins!

    Many, many years ago I learned a little tip to help plump up raisins. When I make this coleslaw, I simply soak the raisins while I am doing the prep work on the other ingredients. It plumps them up a bit, and I feel it makes them more juicy. It doesn’t take any more time to do this step, if you let them soak while you grate and chop the cabbage, apples and carrots.

    Place the raisins into a medium bowl, and cover them completely with boiling water. Let them sit, undisturbed, while you chop the apples and carrots, and grate the cabbage (takes about 10 minutes). When done, place the raisins in a strainer and drain off the water, before adding to the coleslaw.

    Raisins are plumped in boiling water for 10 minutes.The raisins are drained after being plumped up in boiling hot water.

    Prepare The Poppyseed Apple Raisin Coleslaw

    Grate the cabbage into a large mixing bowl. You can do this using a box grater, or a food processor with a grating disc/blade. For this recipe (making 4-5 servings) you will need 3 cups of grated cabbage.

    Purple cabbage for the coleslaw is grated into a large bowl.Three cups of grated purple coleslaw becomes the base for this salad.

    Slice and chop the peeled carrot into small bite-sized pieces. Do the same with the Granny Smith apple, BUT LEAVE THE PEEL ON THE APPLE. It adds a pop of green color to the salad. Granny Smith apples also lend a slight tartness and crisp bite to the coleslaw, which is a great contrast to the sweet, chewy raisins.

    Pour poppyseed dressing over the coleslaw ingredients, and toss gently to fully coat the salad. I used my homemade poppyseed dressing, which tastes delish, but any store-bought poppyseed dressing will taste great, too!

    Chopped carrots, apples, and raisins are added to the grated purple cabbage.Poppyseed dressing is added, and then coleslaw is gently tossed to combine.

    Chill Then Serve The Poppyseed Apple Raisin Coleslaw

    After the poppyseed apple raisin coleslaw (dressing and slaw) is fully combined, cover the bowl, and refrigerate the coleslaw for at least one hour, or until well-chilled, for best flavor.

    Poppyseed apple raisin coleslaw is best served cold, so if you can chill it longer, go for it (up to 6 hours). When ready to serve the coleslaw, give it a quick stir, transfer the salad to a nice serving bowl (if desired), and dish it up. I think you will be surprised how delicious it is!

    The colorful poppyseed apple raisin coleslaw is served in a large white bowl.A close up view of the delicious poppyseed apple raisin coleslaw, ready to eat.

    When I first made this and told my husband what ingredients were in the coleslaw he gave me “THAT LOOK”. He said he would try “a tiny bite”, but that he “didn’t think he would like it”. Well… he was being honest with me, but he was wrong. He LOVED it, and told me he was surprised at how good it was. YEP. It tastes great!

    Hope you have the opportunity to make this dish for yourself or for those you love. It’s quick and easy to make, and is a colorful, delicious side dish, that will pair well with a number of lunch or dinner dishes! Have a great day, friends.

    Looking For More Side Dish Recipes?

    You can find all of my recipes in the Recipe Index, which is located at the top of the page. I have quite a few recipes for side dishes, including:

    Interested In More Recipes?

    Thank you for visiting this website. I appreciate you using some of your valuable time to do soIf you’re interested, I publish a newsletter 2 times per month (1st and 15th) with all the latest recipes, and other fun info. I would be honored to have you join our growing list of subscribers, so you never miss a great recipe!
    There is a Newsletter subscription box on the top right side (or bottom) of each blog post, depending on the device you use, where you can easily submit your e-mail address (only) to be included in my mailing list.

    You Can Also Find Me On Social Media:

    Facebook page: The Grateful Girl Cooks!
    Pinterest:
    The Grateful Girl Cooks!
    Instagram:
    jbatthegratefulgirlcooks

    Author's signature

    0 from 0 votes
    Poppyseed Apple Raisin Coleslaw
    Prep Time
    10 mins
    Cook Time
    0 mins
    Refrigeration (inactive prep time-minimum)
    1 hr
    Total Time
    1 hr 10 mins
     

    Crisp Poppyseed Apple Raisin Coleslaw, w/ purple cabbage, carrots, Granny Smith apples, & raisins, is tossed with poppyseed dressing, and served cold.

    Category: Salad/Side Dish, Vegetables
    Cuisine: All Cuisines, American
    Keyword: poppyseed apple raisin coleslaw
    Servings: 4
    Calories Per Serving: 95 kcal
    Author: JB @ The Grateful Girl Cooks!
    Ingredients
    • 3 cups grated purple cabbage
    • 1 medium carrot , peeled, sliced & chopped
    • ½ large Granny Smith apple , unpeeled, sliced & chopped
    • ½ cup raisins
    • cup poppyseed dressing
    Instructions
    1. Place raisins in a medium bowl; cover completely with boiling water. Let sit, undisturbed, while you prep other ingredients (about 10 minutes). When done, place raisins in a strainer to drain.

    2. Grate cabbage into a large bowl. Slice and chop peeled carrot into small bite-sized pieces. Do the same with the apple, BUT LEAVE THE PEEL ON.

    3. Add apples, carrots and raisins to slaw. Pour poppyseed dressing over coleslaw; toss gently to coat ingredients.

    4. Cover bowl, and refrigerate coleslaw for at least 1 hour, or until well-chilled, for best flavor. This is best served cold; you can chill it for up to 6 hours. To serve, give coleslaw a quick stir, transfer to a serving bowl (if desired), and dish it up. Enjoy! Cover/refrigerate leftovers for up to 2-3 days.

    Recipe Notes

    NOTE: Caloric calculation was made based on 4 total servings. Caloric calculation for this salad does NOT include poppyseed salad dressing, as homemade or store bought versions may vary quite a bit in calorie count.

    Nutrition Facts
    Poppyseed Apple Raisin Coleslaw
    Amount Per Serving (1 g)
    Calories 95 Calories from Fat 9
    % Daily Value*
    Fat 1g2%
    Saturated Fat 1g6%
    Sodium 34mg1%
    Potassium 390mg11%
    Carbohydrates 24g8%
    Fiber 4g17%
    Sugar 6g7%
    Protein 2g4%
    Vitamin A 3308IU66%
    Vitamin C 41mg50%
    Calcium 40mg4%
    Iron 1mg6%
    * Percent Daily Values are based on a 2000 calorie diet.

    Here’s one more to pin on your Pinterest boards!Crisp Poppyseed Apple Raisin Coleslaw, w/ purple cabbage, carrots, Granny Smith apples, & raisins, is tossed with poppyseed dressing, and served cold.

    Pineapple Peanut Coleslaw

    Pineapple Peanut Coleslaw is an easy and delicious salad/side dish for your next BBQ! This sweet, crunchy salad is ready in 10 minutes, and serves 8.Pineapple Peanut Coleslaw is an easy and delicious salad/side dish for your next BBQ! This sweet, crunchy salad is ready in 10 minutes, and serves 8.

    If you enjoy coleslaw, then I am pretty confident you will really enjoy this slight “twist” on the classic side dish! Crunchy, sweet, and lightly flavored with a creamy dressing, pineapple peanut coleslaw will be a big hit at any get together! The great news is that it is SO EASY to make, with minimal effort!

    Pineapple tidbits add a slightly sweet touch to the salad, and roasted peanuts and crisp cabbage add the crunch! Pour the easy to make handmade dressing over the top, give it a toss, refrigerate until ready to serve, and poof! A great tasting salad for your next BBQ or potluck! Here’s how easy it is to make pineapple peanut coleslaw:

    Scroll Down for A Printable Recipe Card At the Bottom Of The Page

    Make The Pineapple Peanut Coleslaw

    One reason this recipe is so easy is because you use a bag of pre-shredded coleslaw mix, which is available in the produce section of most grocery stores. Place the bag of shredded coleslaw mix into a large salad bowl. Add the peanuts, drained pineapple tidbits (remembering to reserve the juice), and sliced green onions.

    Pineapple tidbits, green onions, peanuts are added to the coleslaw mix in bowl.

    Make The Creamy Coleslaw Dressing

    You can make the salad dressing for the coleslaw in no time at all. The ingredients for the dressing include plain yogurt (regular or Greek), apple cider vinegar, pineapple juice (from the can of pineapple tidbits), brown sugar, salt, black pepper, and red pepper flakes.

    Place the dressing ingredients in a medium sized bowl, and whisk together until fully blended and smooth. You can use a wire whisk or a fork to do this, and it will only take about a minute to fully blend.

    The ingredients for the coleslaw dressing are placed in a bowl to mix.

    Coleslaw dressing is whisked together until fully mixed.

    Pour the creamy salad dressing over the top of the coleslaw, and then gently toss, to combine all the ingredients, and fully coat them with dressing. **See how EASY this pineapple peanut coleslaw is to make? Told ya!

    The salad dressing is added to the bowl of pineapple peanut coleslaw.

    Ready To Eat!

    Once the pineapple peanut coleslaw is fully mixed, you can eat it right away, OR you can chill it in the refrigerator for a couple of hours (your choice). My personal opinion is that this coleslaw is definitely BEST when served very cold… just sayin’.  After refrigerating, toss the salad again before serving to get the dressing mixed back in.

    Right before serving, sprinkle a few more peanuts and red pepper flakes on the top of the coleslaw as a garnish, if desired. Serve, and enjoy.

    A closeup of the pineapple peanut coleslaw, after being tossed with the dressing.Peanuts and red pepper flakes garnish the chilled coleslaw.

    Storing The Pineapple Peanut Coleslaw

    Cover any leftovers, and store in the refrigerator for up to 2-3 days. Juice will accumulate on the bottom of the bowl, due to all those juicy pineapple tidbits. No problem… just spoon any unwanted juice out of the bottom of the bowl, and discard!

    Pineapple peanut coleslaw is a delicious side dish... crunchy and sweet!

    I really hope you enjoy this simple, but flavor-filled coleslaw recipe. We love it as a side dish with hamburgers or pulled pork sandwiches, but the coleslaw can also be placed ONTO a BBQ shredded pork sandwich for a tasty, crunchy addition. If you enjoy coleslaw, be sure to check out my yummy recipes for purple coleslaw and poppyseed apple raisin coleslaw!

    Thanks for stopping by today. I hope you have a great day, and trust you will return for more recipes in the future.

    Looking For More SIDE SALAD Recipes?

    You can find all of my side dish recipes in the Recipe Index, located at the top of the page. A few side salad recipes you might enjoy include:

    Interested In More Recipes?

    Thank you for visiting this website. I appreciate you using some of your valuable time to do soIf you’re interested, I publish a newsletter 2 times per month (1st and 15th) with all the latest recipes, and other fun info. I would be honored to have you join our growing list of subscribers, so you never miss a great recipe!
    There is a Newsletter subscription box on the top right side (or bottom) of each blog post, depending on the device you use, where you can easily submit your e-mail address (only) to be included in my mailing list.

    You Can Also Find Me On Social Media:
    Facebook page: The Grateful Girl Cooks!
    Pinterest: The Grateful Girl Cooks!
    Instagram: jbatthegratefulgirlcooks

    Author's signature

    Recipe adapted from: asouthernsoul.com/pineapple-slaw/

    5 from 1 vote
    Pineapple Peanut Coleslaw
    Prep Time
    10 mins
    Cook Time
    0 mins
    Total Time
    10 mins
     

    Pineapple Peanut Coleslaw is an easy and delicious salad/side dish for your next BBQ! This sweet, crunchy salad is ready in 10 minutes, and serves 8.

    Category: Salad/Side Dish
    Cuisine: American
    Keyword: pineapple peanut coleslaw
    Servings: 8
    Calories Per Serving: 124 kcal
    Author: JB @ The Grateful Girl Cooks!
    Ingredients
    For Coleslaw:
    • 14 ounces shredded coleslaw mix (bagged) , or 3 generous cups homemade slaw mix
    • 20 ounce canned pineapple tidbits , drained (reserve juice)
    • 3 stalks green onions (bulb and stem) , sliced
    • cup roasted salted peanuts , plus more for garnish, if desired
    For Coleslaw Dressing:
    • ½ cup plain yogurt ,regular or Greek
    • 3 Tablespoons reserved pineapple juice
    • 3 Tablespoons apple cider vinegar
    • 3 Tablespoons brown sugar
    • 1 teaspoon salt
    • ½ teaspoon ground black pepper
    • ¼ teaspoon red pepper flakes , plus more for garnish, if desired
    Instructions
    1. Place coleslaw mix in a large salad bowl. Add peanuts, drained pineapple tidbits, and sliced green onions.

    2. Put coleslaw dressing ingredients in a medium sized bowl. Whisk with fork or wire whisk until fully blended and smooth. Pour dressing over coleslaw, and gently toss, to coat and fully combine all ingredients. Serve immediately, or refrigerate 1-2 hours until well-chilled. Garnish with a tiny bit of red pepper flakes and additional peanuts before serving, if desired. Enjoy!

    3. Cover, and store leftover coleslaw in refrigerator for up to 2-3 days. Discard any accumulated liquid that accumulates on bottom of bowl (pineapple juice).

    Recipe Notes

    Substitutions: No peanuts? No problem. You can substitute sliced roasted almonds, or chopped roasted salted cashews.

    Nutrition Facts
    Pineapple Peanut Coleslaw
    Amount Per Serving (1 g)
    Calories 124 Calories from Fat 27
    % Daily Value*
    Fat 3g5%
    Saturated Fat 1g6%
    Cholesterol 1mg0%
    Sodium 336mg15%
    Potassium 245mg7%
    Carbohydrates 21g7%
    Fiber 3g13%
    Sugar 17g19%
    Protein 4g8%
    Vitamin A 156IU3%
    Vitamin C 26mg32%
    Calcium 61mg6%
    Iron 1mg6%
    * Percent Daily Values are based on a 2000 calorie diet.

    Here’s one more to pin on your Pinterest boards!Pineapple Peanut Coleslaw is an easy and delicious salad/side dish for your next BBQ! This sweet, crunchy salad is ready in 10 minutes, and serves 8.