Category: Beverages

Easy Homemade Chocolate Syrup

Make Easy Homemade Chocolate Syrup in 5 minutes, with 4 common ingredients! Use it for chocolate milk, desserts, etc.
Make Easy Homemade Chocolate Syrup in 5 minutes, with 4 common ingredients! Use for chocolate milk, desserts, etc.

Did you know it is really EASY to make your own chocolate syrup at home with only a few ingredients that you probably already have in your kitchen?

That’s right! This recipe for easy homemade chocolate syrup can be made in about 5 minutes or less, and it truly is simple to prepare. Save a trip to the grocery store (and a little bit more of your own money) by making it yourself.

I’ve made this syrup many times over the years, and decided to finally share the simple recipe on my blog. I scribbled the recipe down at least 15 years ago on a little piece of paper, but never noted the original source, so I can’t give credit where credit is due.

Here’s how to make delicious easy homemade chocolate syrup. I think you’re going to like it!

Scroll Down For A Printable Recipe Card At The Bottom Of The Page

What Ingredients Do I Need To Make This?

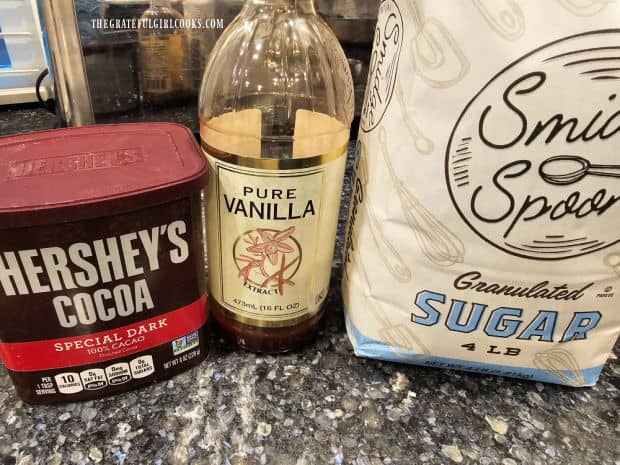
The ingredient list for the homemade chocolate syrup is quite simple. You will need granulated sugar, cocoa powder, vanilla extract and boiling water. That’s it!

Cocoa powder, vanilla, sugar (and water) are the ingredients for chocolate syrup.

Let’s Make Chocolate Syrup!

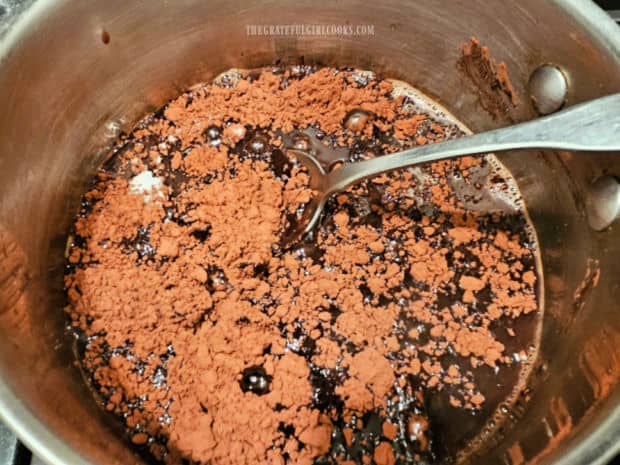
Measure 2 cups of sugar, 1/3 cup of cocoa powder, and 1 cup of boiling water in a medium-sized saucepan. Whisk or stir these ingredients well. The boiling water helps the ingredients blend together.

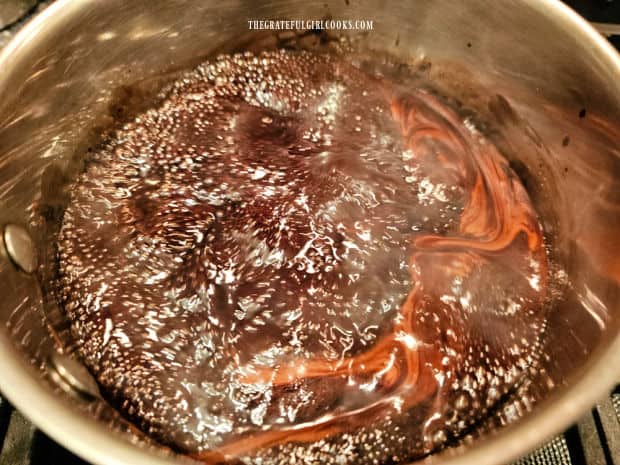
Bring them to a boil on Medium-Low heat, and then once it’s boiling, continue to boil the syrup for 2 minutes, whisking often.

Chocolate syrup ingredients are combined in a medium saucepan.A whisk is used to combine the homemade chocolate syrup ingredients.

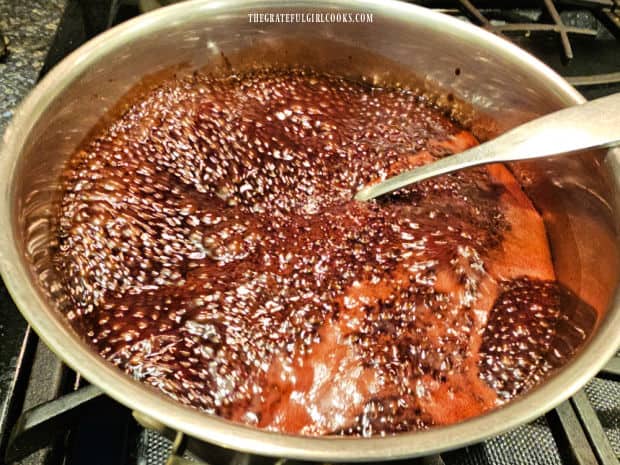
IMPORTANT: Do not step away from the stove while the syrup is boiling! When the easy homemade chocolate syrup boils, it will rise in the saucepan (which is why you need to use a MEDIUM-sized saucepan versus a small pan).

Continue to whisk or stir to keep the bubbling down in the pan. If necessary, lift the pan off the heat for a second until the liquid and bubbles go back down, then put right back on the heat!

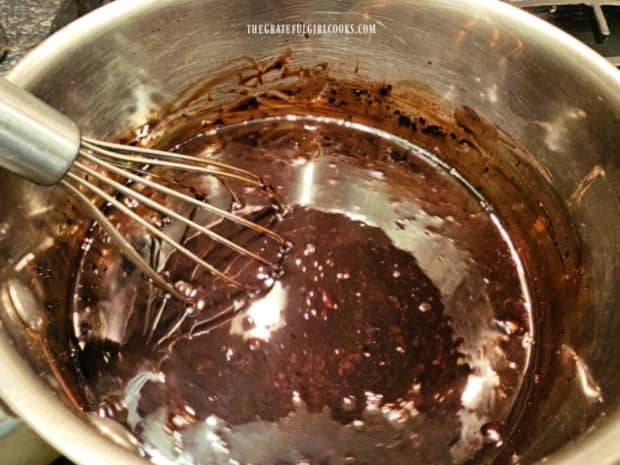
The chocolate syrup is boiled for two minutes, stirring constantly.As the syrup boils, it rises in the pan, so it is stirred constantly.

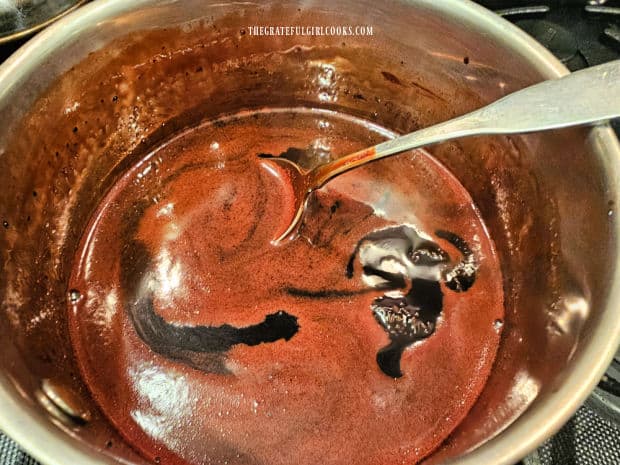
After the homemade chocolate syrup has boiled for 2 minutes, remove the pan from the heat. Stir in 1/8 teaspoon of vanilla extract, and then set the pan aside to allow the syrup time to completely cool.

You can see in the photo below how far up the sides of the pan the syrup rose while boiling. That is why you have to stay right there stirring while it is boiling (unless you want a boil-over and a big mess!).

Chocolate syrup is removed from heat when done, and vanilla is added.

Transfer The Syrup To An Airtight Container

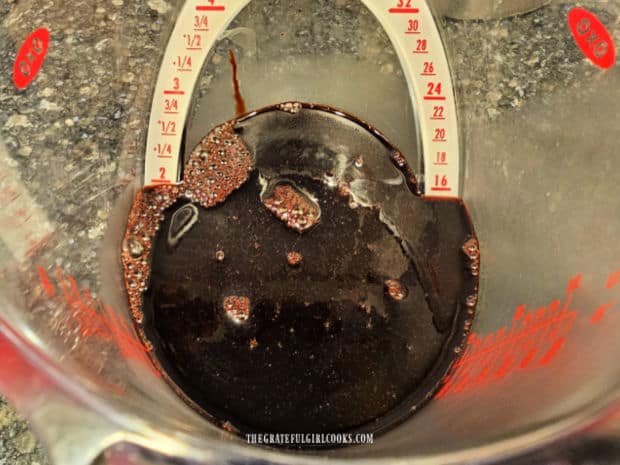
After the homemade chocolate syrup has completely cooled, it is time to transfer it to a bottle or other airtight container. The total amount of syrup should measure about 2 cups.

The recipe for easy homemade chocolate syrup yield about 2 cups total.

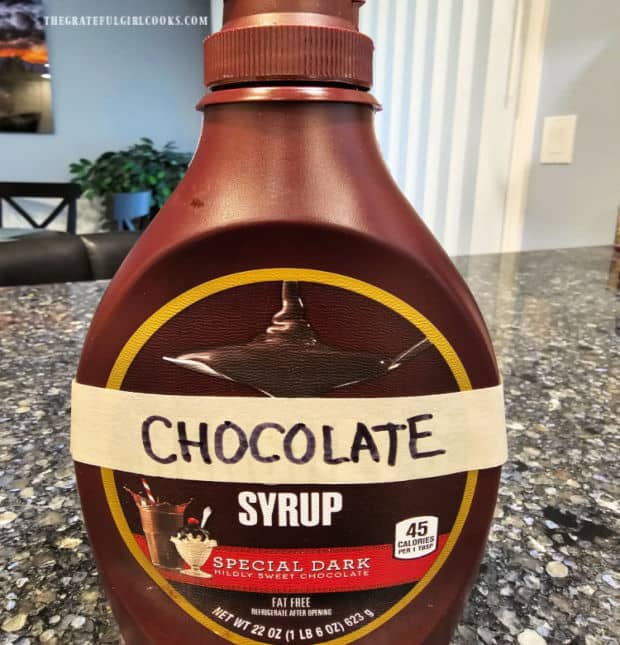
Use a funnel to pour the syrup into an airtight container. I use a leftover name-brand chocolate syrup bottle I saved a while ago for this very purpose! Label the container and store the chocolate syrup in the refrigerator.

Chocolate syrup is poured into a re-used syrup container for storage.

Enjoy Using The Easy Homemade Chocolate Syrup

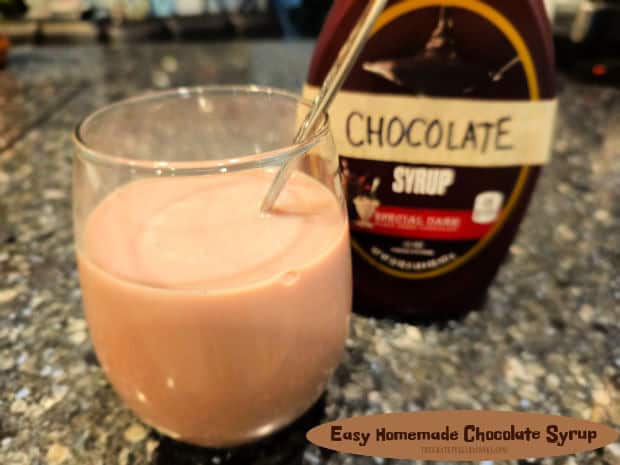
Easy homemade chocolate syrup can be used to make classic chocolate milk or hot chocolate. It can also be used as a dessert topping, by drizzling it over ice cream or other decadent desserts.

I think you’ll be surprised how good it really is, and it’s very convenient to make it from the comfort of home using only a few common pantry ingredients!

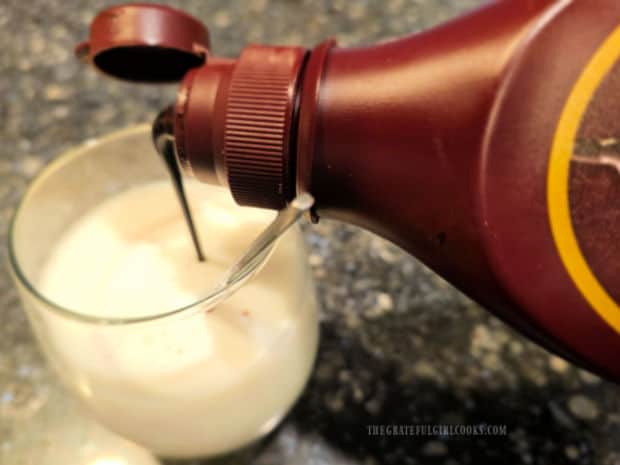
Making chocolate milk using the easy homemade chocolate syrup.The chocolate syrup can also be used to drizzle over a variety of desserts.

I hope you have the opportunity to make this delicious chocolate syrup, and trust you’ll enjoy it, too! It’s a quick, easy and delicious alternative to store bought chocolate syrup!

Thanks for stopping by today, and I invite you to come back soon for more family-friendly recipes. Take care, may God bless you… and have a GREAT day!

Looking For More DESSERT Sauce Recipes?

You can find ALL of my recipes in the Recipe Index, which is located at the top of the page. I have some wonderful dessert sauces you will enjoy, including:

Want More Recipes? Get My FREE Newsletter!

I publish a newsletter 2 times per month (1st and 15th) with lots of recipes, tips, etc..
Would you like to join our growing list of subscribers?

There is a Newsletter subscription box on the top right (or bottom) of each blog post, depending on the device you use.
You can submit your e-mail address there, to be added to my mailing list.

Find Me On Social Media:

Facebook page: The Grateful Girl Cooks!
Pinterest:
The Grateful Girl Cooks!
Instagram:
jbatthegratefulgirlcooks

Author's signature

↓↓ PRINTABLE RECIPE BELOW ↓↓

5 from 1 vote
Easy Homemade Chocolate Syrup
Prep Time
5 mins
Total Time
5 mins
 

Make Easy Homemade Chocolate Syrup in 5 minutes, with 4 common ingredients! Use for chocolate milk, desserts, etc.

Category: Dessert Sauce
Cuisine: All Cuisines
Keyword: homemade chocolate syrup
Servings: 32 Tablespoons (2 cups total)
Calories Per Serving: 50 kcal
Author: JB @ The Grateful Girl Cooks!
Ingredients
  • 2 cups granulated sugar
  • cup cocoa powder
  • 1 cup boiling water
  • teaspoon vanilla extract
Instructions
  1. Place sugar, cocoa powder, and boiling water in a Medium-sized saucepan. Whisk or stir ingredients well. Bring them to a boil on Medium-Low heat. Once boiling, continue to boil for 2 minutes, whisking often.

  2. IMPORTANT: Do not step away from the stove while the syrup is boiling! When the syrup boils, it will rise in the saucepan (this is why you need a MEDIUM-sized saucepan versus a small pan). Continue to whisk or stir to keep the bubbling down in the pan. If necessary, lift the pan off the heat for a second until the liquid and bubbles go back down, then put right back on the heat!

  3. After syrup has boiled for 2 minutes, remove the pan from the heat. Stir in vanilla, then set the pan aside to allow syrup time to cool completely.

  4. Once completely cooled, transfer syrup to a bottle or other airtight container. Store in refrigerator until ready to use. Enjoy!

Nutrition Facts
Easy Homemade Chocolate Syrup
Amount Per Serving (1 Tablespoon)
Calories 50 Calories from Fat 2
% Daily Value*
Fat 0.2g0%
Saturated Fat 0.1g1%
Polyunsaturated Fat 0.004g
Monounsaturated Fat 0.04g
Sodium 1mg0%
Potassium 14mg0%
Carbohydrates 13g4%
Fiber 0.3g1%
Sugar 12g13%
Protein 0.2g0%
Calcium 1mg0%
Iron 0.1mg1%
* Percent Daily Values are based on a 2000 calorie diet.

Here’s one more to pin on your Pinterest boards!Make Easy Homemade Chocolate Syrup in 5 minutes, with 4 common ingredients! Use for chocolate milk, desserts, etc.


Honey Almond Iced Latte

Craving a Honey Almond Iced Latte? No problem! Make 2 servings to refrigerate and enjoy whenever you want one! Recipe is easy and delicious! Today I want to share a recipe for an ice cold latte you can pre-mix and keep on hand in the refrigerator! You know those times when you’re too busy working from home or facing loads of laundry and other chores, but don’t want to go out and BUY ONE?

This is for THAT moment. Pre-mix a couple (or more) honey almond lattes, and store them (without ice) in the refrigerator. It’s a great money-saving option for a cold beverage I like to have around!

As I was writing this, I remembered I had some in our refrigerator, so I ran downstairs, made one quickly and sipped on it while working on this blog post. Truth!

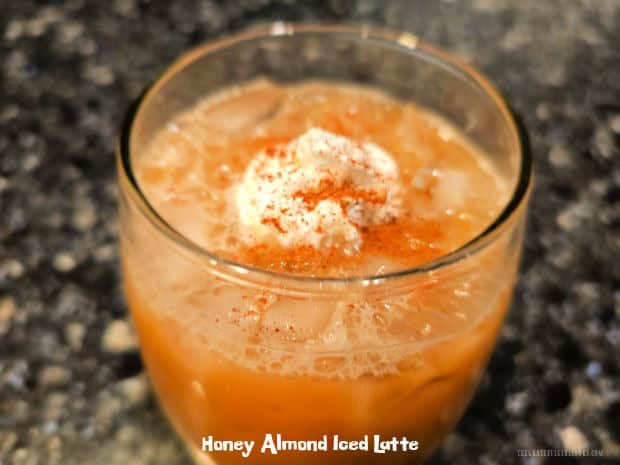
All you need to do when you want a honey almond iced latte is add crushed ice to a cup, pour the latte “mix” in, and top with whipped cream and cinnamon (optional, but oh so good)! Here’s how to make it.

Scroll Down For A Printable Recipe Card At The Bottom Of The Page

Prepare The Latte “Mix”

This recipe makes TWO servings, but can be easily increased to make as many as you wish. For every two servings, you will need a 16 ounce, pint sized container or canning jar (with a lid).

Brew 1 cup of very strong coffee OR espresso (if you have access to espresso). Pour the hot coffee into a pint jar (or other airtight container).

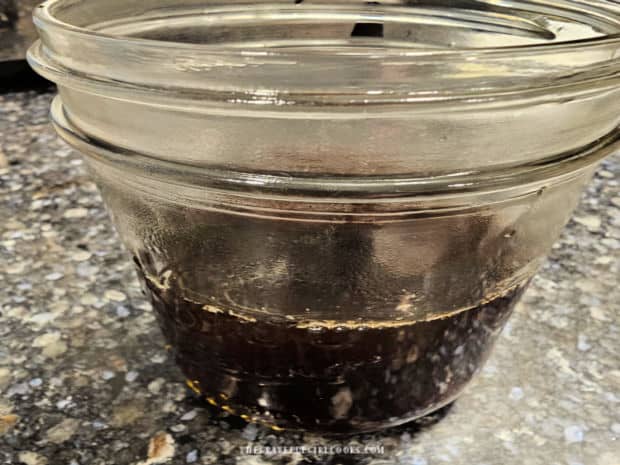
Immediately stir 2½ Tablespoons of raw honey into the hot coffee. Continue stirring until the honey has melted and been blended into the hot coffee.

Very strong brewed hot coffee is added to a pint sized canning jar.Honey is stirred into the strong, hot coffee until it has dissolved.

Add ¾ cup of unsweetened plain almond milk and stir well, to combine. The liquid in the pint jar should almost reach the very top.

Almond milk is added and stirred into the coffee mixture.

Time For The Refrigerator!

Top the jar with a flat lid, then screw on the band. Label the jar and place it in the refrigerator to chill for up to 2-3 days.

I like to make mine this way, because I don’t like it when cups of crushed ice get watered down by slightly warm coffee. UGH. This way the latte “mix” is very cold and ready to use whenever I want it!

Mixture for a honey almond iced latte is jarred and refrigerated until needed.

Make A Honey Almond Iced Latte

When you are ready to enjoy a nice cold latte, fill a glass with crushed ice. Pour HALF of the jarred latte liquid over the ice.

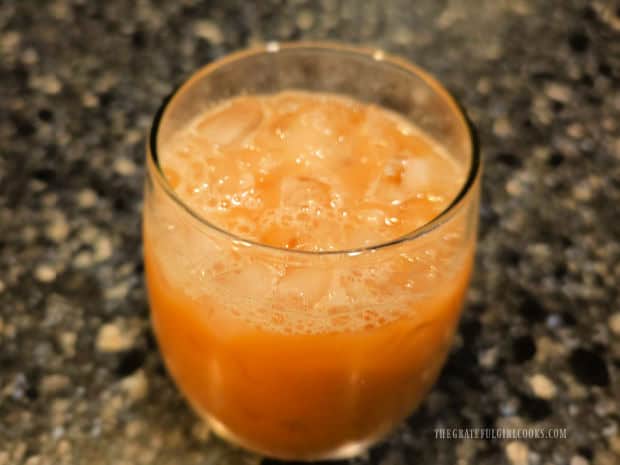
A glass cup is filled with crushed ice before adding the latte mix.A glass full of a honey almond iced latte before a topping is added.

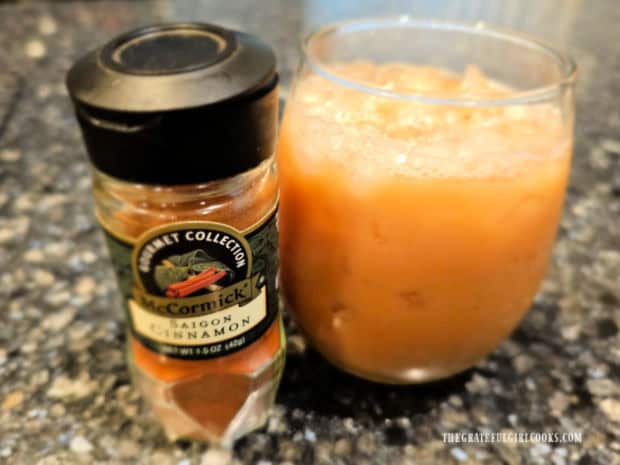
Adding a topping to the iced drink is optional, of course, but I highly recommend it for BEST FLAVOR! I love the taste Saigon cinnamon adds to this latte, but regular ground cinnamon can be used, as well.

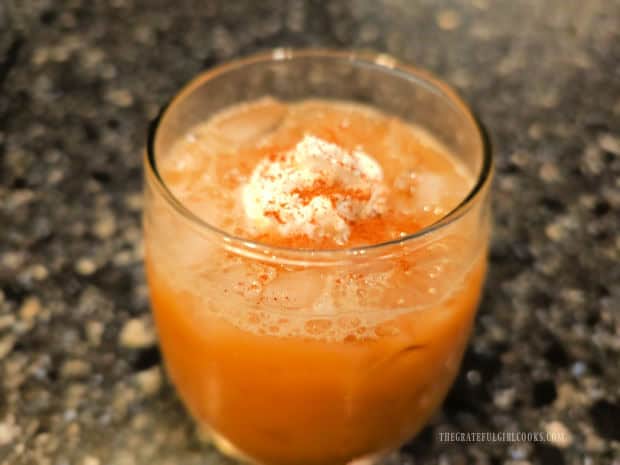
Spray a small amount of whipped cream on top of the drink, then lightly sprinkle with the ground cinnamon. That’s it! All that is left to do is sip and enjoy your delicious honey almond iced latte!

Saigon cinnamon is used to top the finished iced latte.A honey almond iced latte, topped with whipped cream and cinnamon.

I hope you try this low calorie honey almond iced latte and find it convenient to have in your refrigerator when the craving for one hits!

I think they’re really good and find that keeping the latte mixture on hand in the refrigerator is an “easy go-to” for a quick iced coffee fix in the middle of the day.

Thanks for stopping by, and I invite you to come back soon for more yummy recipes! Take care, may God bless you, and have a GREAT day!

Looking For More BEVERAGE Recipes?

You can find ALL of my recipes in the Recipe Index, which is located at the top of the page. I have some delicious cold and hot beverage recipes to choose from, including:

Want More Recipes? Get My FREE Newsletter!

I publish a newsletter 2 times per month (1st and 15th) with lots of recipes, tips, etc..
Would you like to join our growing list of subscribers?

There is a Newsletter subscription box on the top right (or bottom) of each blog post, depending on the device you use.
You can submit your e-mail address there, to be added to my mailing list.

Find Me On Social Media:

Facebook page: The Grateful Girl Cooks!
Pinterest:
The Grateful Girl Cooks!
Instagram:
jbatthegratefulgirlcooks

Author's signature

↓↓ PRINTABLE RECIPE BELOW ↓↓

0 from 0 votes
Honey Almond Iced Latte
Prep Time
5 mins
Cook Time
0 mins
Total Time
5 mins
 

Craving a Honey Almond Iced Latte? No problem! Make 2 servings to refrigerate and enjoy whenever you want one! Recipe is easy and delicious!

Category: Beverage
Cuisine: All Cuisines
Keyword: honey almond iced latte
Servings: 2
Calories Per Serving: 95 kcal
Author: JB @ The Grateful Girl Cooks!
Ingredients
  • 1 cup STRONG brewed coffee or espresso
  • Tablespoons raw honey
  • ¾ cup unsweetened plain almond milk
To serve: (garnish is optional, but highly recommend)
  • ½ cup crushed ice* * for each latte cup
  • 1 spray aerosol whipped cream* *for each latte
  • ¼ teaspoon Saigon cinnamon* *sprinkled/divided between 2 lattes
Instructions
  1. If storing in a canning jar, for every 2 servings, you will need a 16 oz. pint canning jar (or container) with a lid.

  2. Brew 1 cup of very strong coffee OR espresso. Pour the hot coffee into a pint jar (or other airtight container). Immediately stir honey into the hot coffee. Continue stirring until the honey has melted and blended into the hot coffee.

  3. Add almond milk and stir well, to combine. Liquid in pint jar should almost reach the top. Cover jar or container with lid. Label jar; refrigerate up to 2-3 days.
  4. To serve, fill an 8 oz. glass with crushed ice. Pour HALF of latte mix over ice. Top with whipped cream (if desired), then lightly sprinkle with ground cinnamon. Enjoy!

Nutrition Facts
Honey Almond Iced Latte
Amount Per Serving (1 (1/2 of total))
Calories 95 Calories from Fat 9
% Daily Value*
Fat 1g2%
Polyunsaturated Fat 1g
Monounsaturated Fat 1g
Sodium 125mg5%
Potassium 73mg2%
Carbohydrates 22g7%
Fiber 0.5g2%
Sugar 22g24%
Protein 1g2%
Vitamin A 1IU0%
Vitamin C 0.1mg0%
Calcium 119mg12%
Iron 0.1mg1%
* Percent Daily Values are based on a 2000 calorie diet.

Here’s one more to pin on your Pinterest boards!Craving a Honey Almond Iced Latte? No problem! Make 2 servings to refrigerate and enjoy whenever you want one! Recipe is easy and delicious!

Coconut Almond Coffee Creamer

Make simple homemade Coconut Almond Coffee Creamer in 5 minutes or less! This flavorful creamer will really enhance your cup of hot coffee!

I’m not sure about you, but I love coffee! Well… I love my coffee IF it has coffee creamer in it, so it doesn’t really TASTE like coffee. Ha Ha!

Truly, I need my morning coffee with just the right amount of coffee creamer in it! Over the past couple years, I’ve been trying out made from scratch coffee creamers in an effort to find some good recipes that are “keepers”.

This recipe for coconut almond coffee creamer is a “keeper”, for sure. I found the recipe online a few years ago, made a couple slight changes, and today I want to share this simple coffee creamer recipe with you. Here’s how to make it.

Scroll Down For A Printable Recipe Card At The Bottom Of The Page

What Ingredients Will I Need?

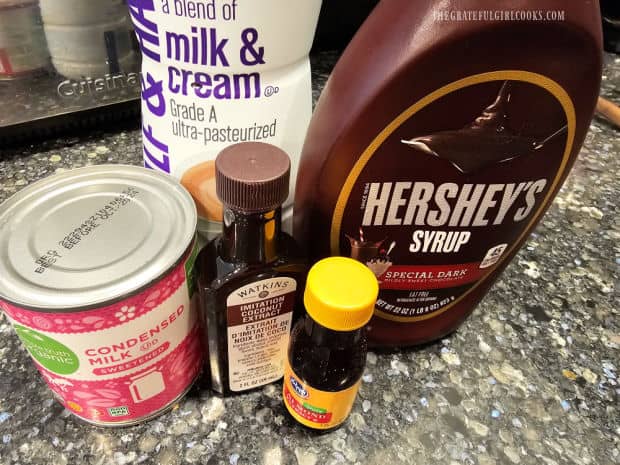
You will need Half and Half, chocolate syrup, sweetened condensed milk, coconut extract and almond extract to make this creamer. NOTE: It is very important to use sweetened condensed milk and NOT evaporated milk!

That’s it! Five ingredients and a few minutes time are all that is necessary to make this delicious, flavorful coffee creamer.

Half and Half, condensed milk, chocolate syrup, coconut/ almond extracts used for creamer.

How To Make This Coffee Creamer

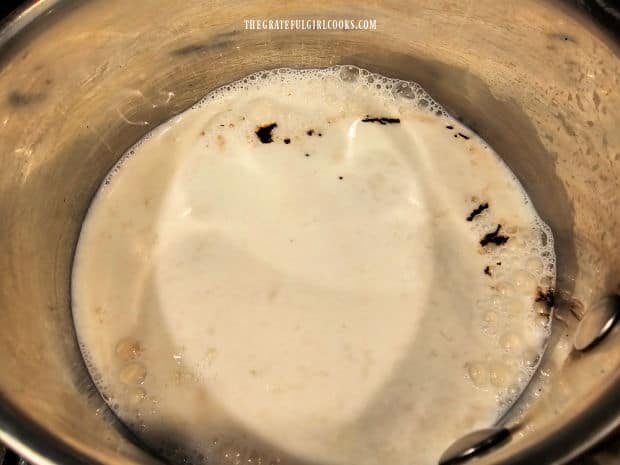
Pour half and half, chocolate syrup, and the coconut and almond extracts into a medium-sized saucepan.

Give them a stir to combine, then heat on Medium-Low heat, stirring often, ONLY until the half and half has been warmed. Do not let the liquid come to a boil, but simply heat it through.

Creamer ingredients are warmed in a saucepan until heated through.The creamer liquid is heated through in a saucepan.

Add The Sweetened Condensed Milk

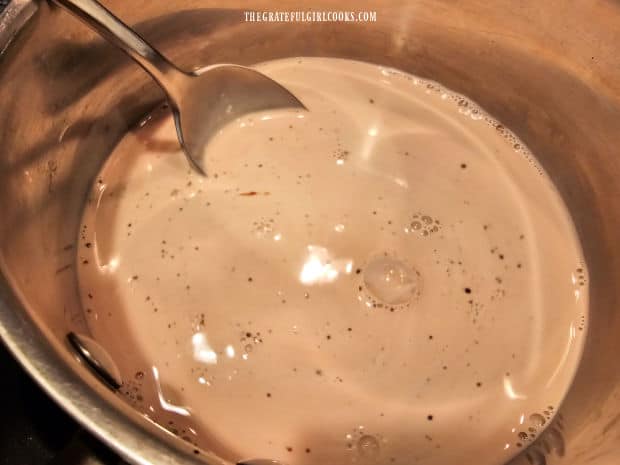
Remove the pan from the heat source. Immediately stir the sweetened condensed milk into the heated half and half, and continue to stir.

The warm half and half will help melt the condensed milk. Continue to stir until the coconut almond coffee creamer is smooth and the condensed milk has been fully incorporated.

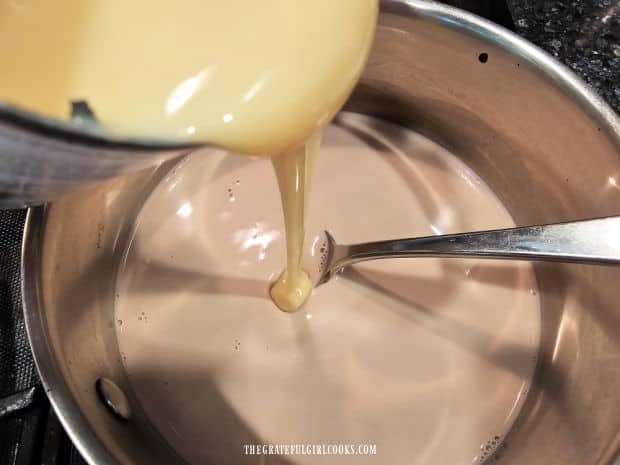
Sweetened condensed milk is added to other creamer ingredients in pan.

Let the creamer cool for a few minutes, then carefully pour it into a storage container. I typically use old creamer bottles to store my homemade creamers.

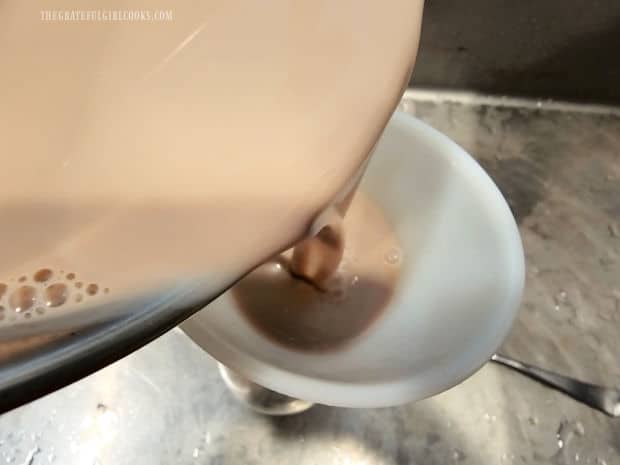
TIP: Insert a funnel into the mouth of the container to transfer the liquid into the bottle (or other container), for less chance of spillage!

A funnel is used to transfer coconut almond coffee creamer to a bottle.

Enjoy The Coconut Almond Coffee Creamer!

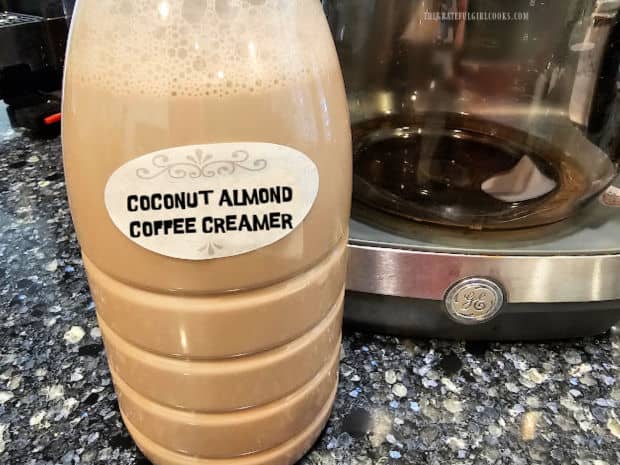
Put a label and a lid on the container, and refrigerate the creamer until it’s well chilled. After the coconut almond coffee creamer has fully chilled, it is ready to be used. 

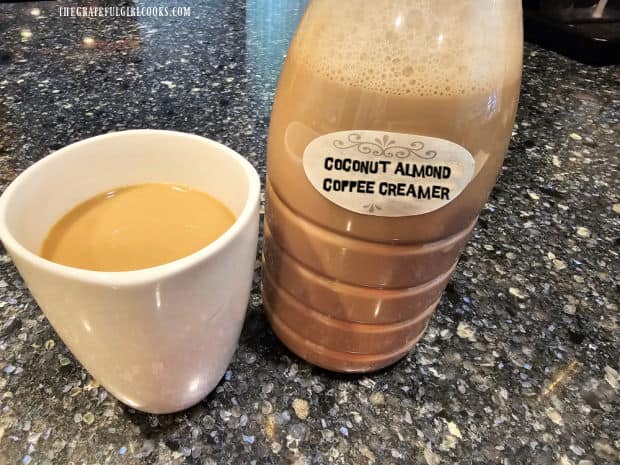
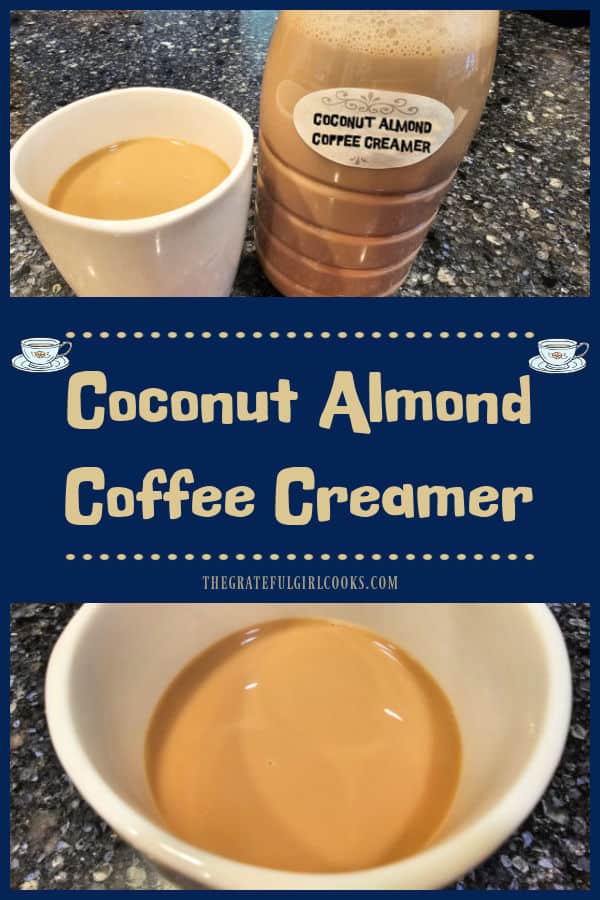
Coconut Almond Coffee Creamer in a bottle, chilled, and ready to use.

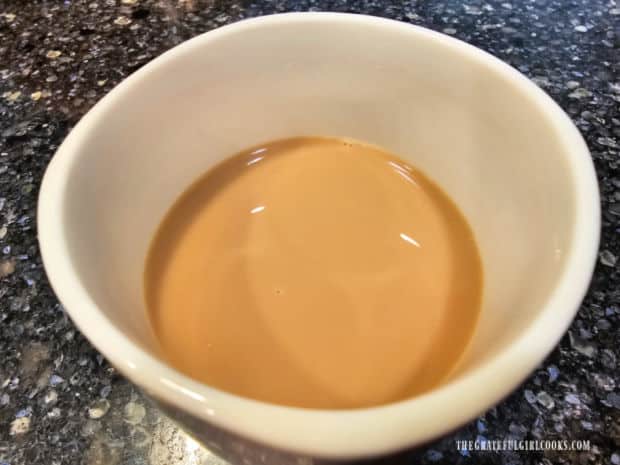
Add your desired amount of coffee creamer to a steaming hot cup of coffee, take a sip, and ENJOY! It is delicious!

Be sure to cover the container and store your leftover creamer in the refrigerator, because it must be kept cold.

A mug of coffee with coconut almond coffee creamer, ready to enjoy.

I hope you enjoy this simple, but GOOD coconut almond coffee creamer! I sure do, and trust you will, as well.

Thanks for stopping by, and please come back again soon for more family-friendly recipes. May God bless you, take care, and have a GREAT day!

Looking For More HOMEMADE COFFEE CREAMER Recipes?

You can find ALL of my recipes in the Recipe Index, which is located at the top of the page. I have several coffee creamer recipes you might enjoy, including:

Want More Recipes? Get My FREE Newsletter!

I publish a newsletter 2 times per month (1st and 15th) with lots of recipes, tips, etc..
Would you like to join our growing list of subscribers?

There is a Newsletter subscription box on the top right (or bottom) of each blog post, depending on the device you use.
You can submit your e-mail address there, to be added to my mailing list.

Find Me On Social Media:

Facebook page: The Grateful Girl Cooks!
Pinterest:
The Grateful Girl Cooks!
Instagram:
jbatthegratefulgirlcooks

Author's signature

Recipe adapted from: sisterssavingcents.com

↓↓ PRINTABLE RECIPE BELOW ↓↓

0 from 0 votes
Coconut Almond Coffee Creamer
Prep Time
5 mins
Cook Time
0 mins
Total Time
5 mins
 

Make simple homemade Coconut Almond Coffee Creamer in 5 minutes or less! This flavorful creamer will really enhance your cup of hot coffee!

Category: Beverage, Condiment
Cuisine: American
Keyword: coconut almond coffee creamer
Servings: 56 Tablespoons (approx. 28 ounces total)
Calories Per Serving: 38 kcal
Author: JB @ The Grateful Girl Cooks!
Ingredients
  • 2 cups half and half
  • Tablespoons chocolate syrup
  • 2 Tablespoons coconut extract
  • teaspoons almond extract
  • 14 ounces sweetened condensed milk = 1 can
Instructions
  1. Pour half and half, chocolate syrup, coconut and almond extracts into a medium-sized saucepan. Stir to combine.

  2. Heat on Medium-Low, stirring often, ONLY until half and half is warmed. Do not let liquid come to a boil- simply heat it through.

  3. Remove pan from heat source. Immediately stir sweetened condensed milk into the heated liquid. Continue to stir until coconut almond coffee creamer is smooth and condensed milk is fully incorporated.

  4. Let creamer cool a few minutes, then carefully pour it into a container (with a lid). TIP: Insert a funnel into the mouth of the container to transfer liquid into the bottle (or other container), for less chance of spillage! Refrigerate creamer before using.

Nutrition Facts
Coconut Almond Coffee Creamer
Amount Per Serving (1 Tablespoon)
Calories 38 Calories from Fat 18
% Daily Value*
Fat 2g3%
Saturated Fat 1g6%
Polyunsaturated Fat 0.1g
Monounsaturated Fat 0.5g
Cholesterol 5mg2%
Sodium 15mg1%
Potassium 41mg1%
Carbohydrates 5g2%
Fiber 0.02g0%
Sugar 5g6%
Protein 1g2%
Vitamin A 50IU1%
Vitamin C 0.3mg0%
Calcium 30mg3%
Iron 0.04mg0%
* Percent Daily Values are based on a 2000 calorie diet.

Here’s one more to pin on your Pinterest boards!Make simple homemade Coconut Almond Coffee Creamer in 5 minutes or less! This flavorful creamer will really enhance your cup of hot coffee!


Watermelon Pineapple Smoothie

Hot outside? Beat the heat with a Watermelon Pineapple Smoothie for a breakfast, lunch or snack. Recipe makes 3 cold, delicious servings!

Smoothies are a wonderful “go to” recipe for me when the temperatures rise outside. Sometimes it feels too warm to prepare a hot breakfast, and that’s where a filling smoothie comes in handy!

I love to make smoothies, and have made quite a few over the years. When I want a light breakfast, a fruit smoothie is one of my preferred choices. A smoothie fills me up without being too heavy.

This cold, refreshing, watermelon pineapple smoothie recipe is easy to make, and has a yummy flavor combo of watermelon, pineapple and coconut.

Cold, fresh and HAPPY watermelon is used to make this smoothie.

Plain Greek yogurt adds great protein and creaminess to the smoothie, which in my book is an added plus! Here’s how to make it.

Scroll Down For A Printable Recipe Card At The Bottom Of The Page

What Ingredients Will I Need?

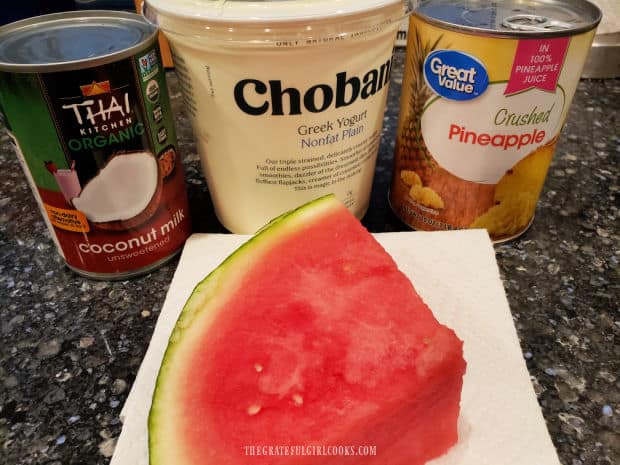
To make the watermelon pineapple smoothies you will need canned coconut milk (regular or light), plain Greek yogurt (regular or nonfat), crushed pineapple, and cold, sweet watermelon.

You will also need crushed ice, which will help make the smoothies cold and slightly thickened. A blender or food processor is also necessary to mix the smoothie.

Canned coconut milk, watermelon, plain yogurt and pineapple used for smoothie.

A Word About Canned Coconut Milk

You can use either regular or light canned coconut milk for these smoothies. I typically use “regular” coconut milk to make this type of smoothie, but it is your choice.

Canned coconut milk can typically be found in most grocery stores, usually in their Asian Foods section. It is thick and creamy, and provides wonderful flavor, so don’t skip this!

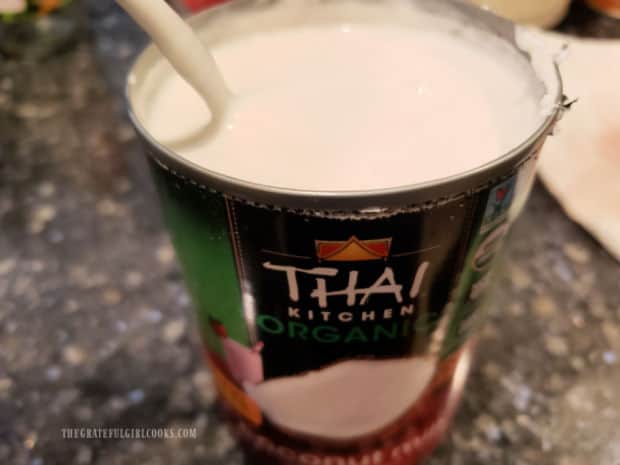
Important Tip: Canned coconut milk is very thick (and separated) when the can is first opened. Be sure to give it a good stir in the can to fully blend the milk before using.

Canned coconut milk needs to be stirred well before using.

Time To Make The Smoothie

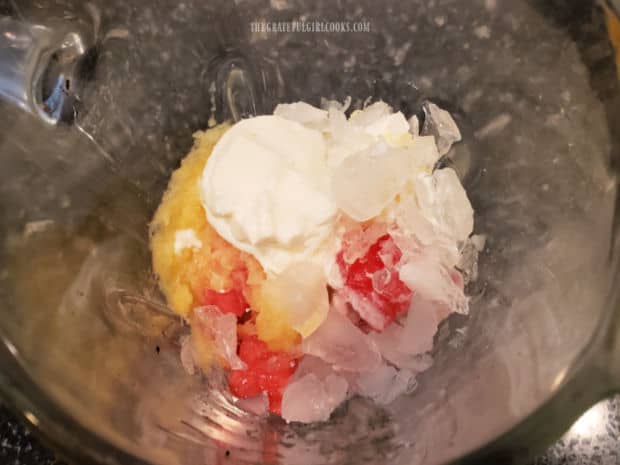
Place the smoothie ingredients into a blender or food processor (including the crushed ice). Process or blend these ingredients until smooth in texture.

If you want the smoothies slightly thicker, add a bit more coconut milk (still some left in the can!) and/or crushed ice until the smoothie reaches your desired consistency.

Ingredients for the watermelon pineapple smoothie in a blender.

Time For A Cold Watermelon Pineapple Smoothie!

Once the watermelon pineapple smoothie is blended, pour each serving into a glass. This recipe will yield enough for 3 small servings, so divide the mixture evenly into three glasses.

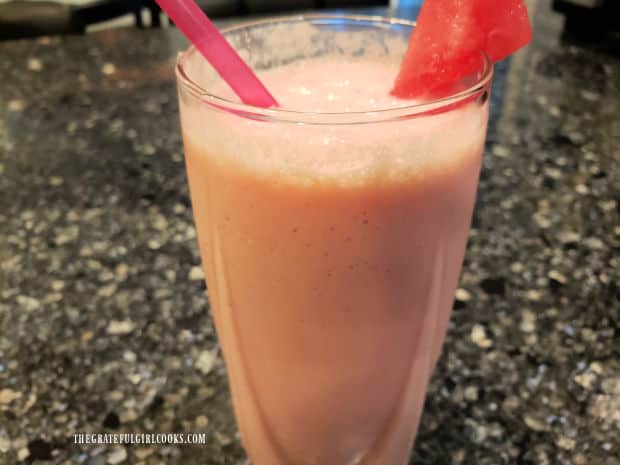
Garnish the cold smoothie with a wedge of watermelon (if desired), stick a straw in the cup, and enjoy! See how easy it was to make this smoothie?

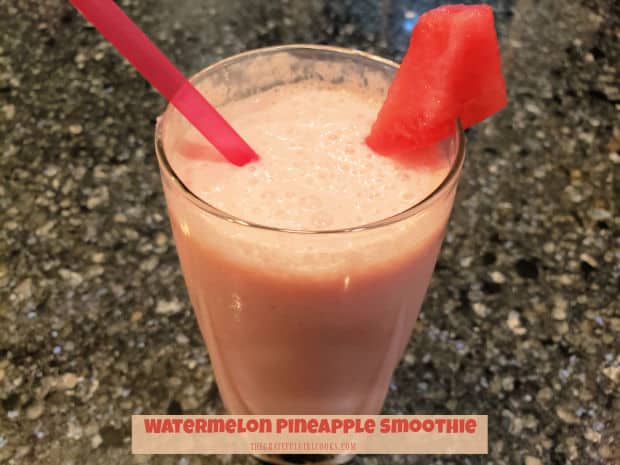
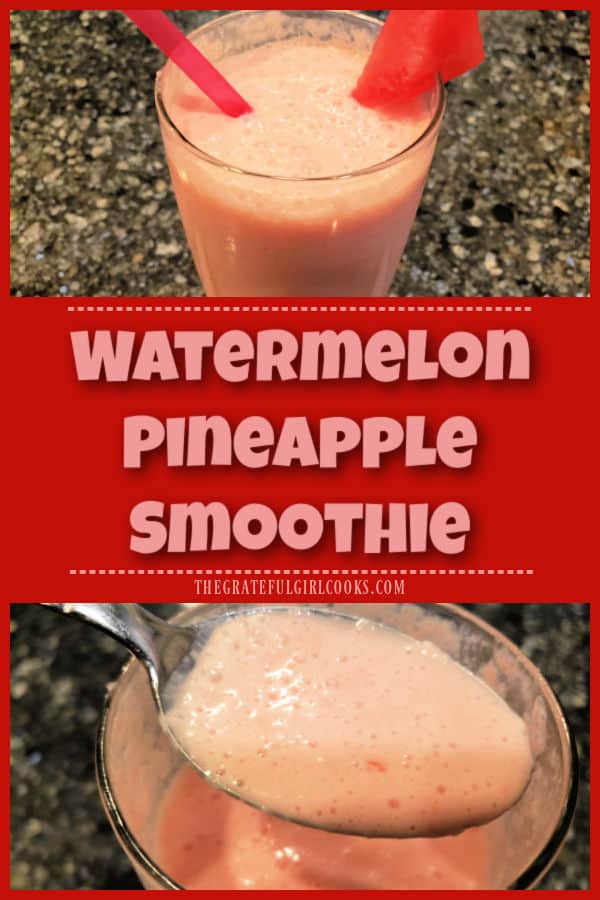
A glass of watermelon pineapple smoothie with a straw and watermelon wedge.

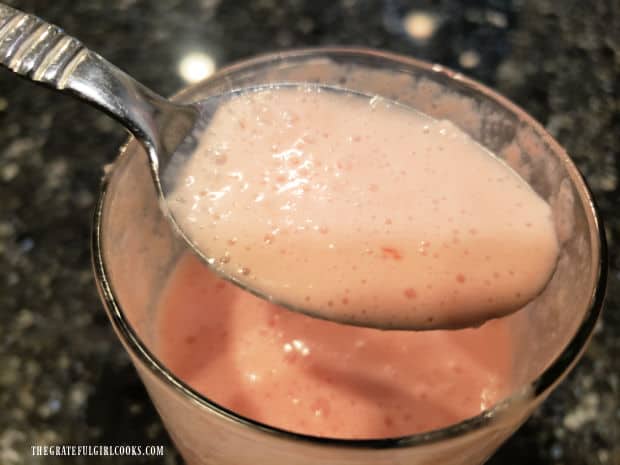
The watermelon pineapple smoothie is creamy, light pink in color, cold and refreshing, especially on a HOT day!

This smoothie’s taste is a good combination of watermelon, pineapple and coconut flavors. None of them overpowers the others. 

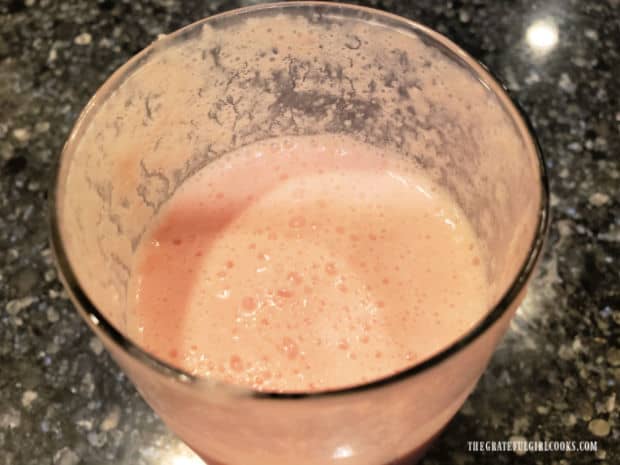
Watermelon pineapple smoothie in a glass is light pink in color.A spoonful of the watermelon pineapple smoothie, held above the cup.

I hope you enjoy this watermelon pineapple smoothie! Thanks for stopping by, and please come back soon for more family friendly recipes. Take care, may God bless you, and have a GREAT day!

Looking For More SMOOTHIE Recipes?

You can find ALL of my recipes in the Recipe Index, which is located at the top of the page. I have a nice variety of smoothie recipes for you to enjoy, including:

Want More Recipes? Get My FREE Newsletter!

I publish a newsletter 2 times per month (1st and 15th) with lots of recipes, tips, etc..
Would you like to join our growing list of subscribers?

There is a Newsletter subscription box on the top right (or bottom) of each blog post, depending on the device you use.
You can submit your e-mail address there, to be added to my mailing list.

Find Me On Social Media:

Facebook page: The Grateful Girl Cooks!
Pinterest:
The Grateful Girl Cooks!
Instagram:
jbatthegratefulgirlcooks

Author's signature

↓↓ PRINTABLE RECIPE BELOW ↓↓

0 from 0 votes
Watermelon Pineapple Smoothie
Prep Time
5 mins
Cook Time
0 mins
Total Time
5 mins
 

Hot outside? Beat the heat with a Watermelon Pineapple Smoothie for a breakfast, lunch or snack. Recipe makes 3 cold, delicious servings!

Category: Beverages, Breakfast, Snack
Cuisine: All Cuisines
Keyword: watermelon pineapple smoothie
Servings: 3
Calories Per Serving: 239 kcal
Author: JB @ The Grateful Girl Cooks!
Ingredients
  • cups watermelon cut in small chunks
  • 1 cup crushed pineapple juice lightly drained
  • ¾ cup unsweetened coconut milk (canned) regular or light, stirred well in can
  • ¾ cup plain, nonfat Greek yogurt or substitute full fat, if desired
  • 1 cup crushed ice
Instructions
  1. Important Tip: Canned coconut milk is very thick (and separated) when can is first opened. Give it a good stir in the can to fully combine before using.

  2. Place all ingredients into a blender or food processor (including crushed ice). Process or blend until smooth in texture. *If you want smoothies to be slightly thicker, add a bit more coconut milk and/or crushed ice until it reaches desired consistency.

  3. Divide smoothie mixture evenly into three glasses. Garnish each with a watermelon wedge and straw, if desired. Serve, and enjoy!

Recipe Notes

NOTE: Caloric calculation was made using plain, nonfat Greek yogurt.

Nutrition Facts
Watermelon Pineapple Smoothie
Amount Per Serving (1 (1/3 of total))
Calories 239 Calories from Fat 135
% Daily Value*
Fat 15g23%
Saturated Fat 13g81%
Trans Fat 0.003g
Polyunsaturated Fat 0.2g
Monounsaturated Fat 1g
Cholesterol 3mg1%
Sodium 32mg1%
Potassium 411mg12%
Carbohydrates 23g8%
Fiber 3g13%
Sugar 20g22%
Protein 7g14%
Vitamin A 474IU9%
Vitamin C 15mg18%
Calcium 85mg9%
Iron 1mg6%
* Percent Daily Values are based on a 2000 calorie diet.

Here’s one more to pin on your Pinterest boards!


Hot outside? Beat the heat with a Watermelon Pineapple Smoothie for a breakfast, lunch or snack. Recipe makes 3 cold, delicious servings!

Classic Mexican Horchata

Classic Mexican Horchata is a cold, creamy, cinnamon drink served over ice. This popular drink is family-friendly & tastes great on hot days!

A couple months ago I enjoyed some horchata and Mexican food from a caterer at a wedding reception for our dear, life-long friends Steve and Patti. 

It was a scorching hot day in Southern California, and this ice cold, delicious drink hit the spot, along with the chicken, beef, and al pastor pork taco bar, etc. they had for the food! It was all so good!

Wedding reception for friends, and the caterer who served us tacos and horchata!

I came home, determined to find a really great recipe to make this drink to have around our house this summer, for really hot days. Horchata can be found on the menu in many Mexican restaurants here in the United States, as well.
The authentic recipe I found online comes from Ana Frias, a talented cook, born and raised in Sonora, Mexico. Her blog “Muy Delish” (which I recommend highly- link below) has a wonderful variety of traditional Mexican recipes.

What Exactly Is Horchata?

Did you know horchata is a beverage made from white rice? YEP! The rice is soaked in water with cinnamon sticks which infuses lots of cinnamon flavor!

After soaking, the rice mixture is blended, then vanilla and two types of milk are added (evaporated and condensed), along with more water.

After mixing, this amazingly creamy, sweet drink is served over ice, with a sprinkle of cinnamon on top. Cold and refreshing, it’s a simple drink to prepare, and the recipe makes enough for an entire pitcher!

Scroll Down For A Printable Recipe Card At The Bottom Of The Page

How To Make Classic Mexican Horchata

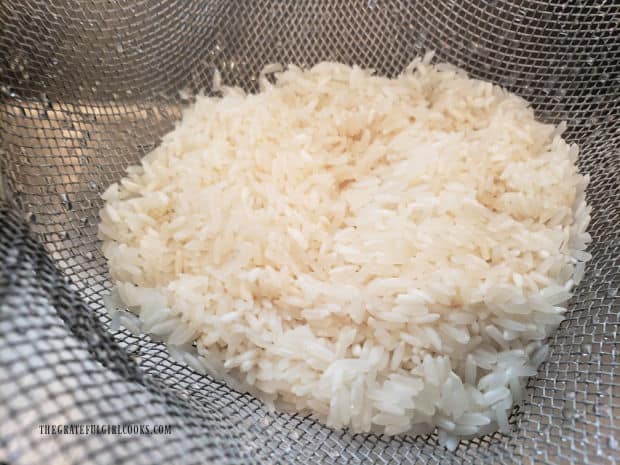
Measure uncooked white rice into a fine mesh strainer. Rinse the rice well, and then drain. You can use any type of uncooked white rice (long grain, Basmati, etc.) to make this drink.

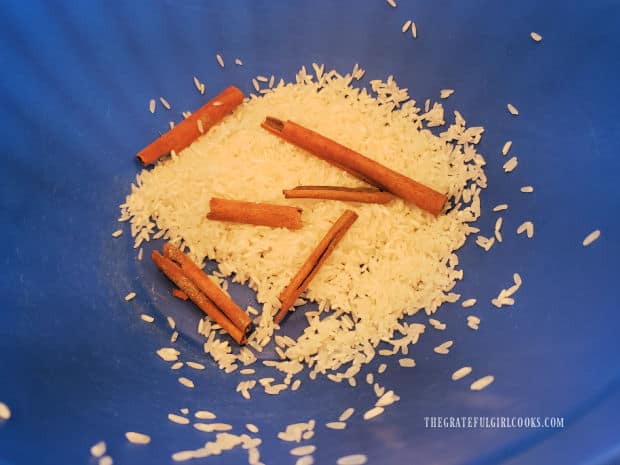
Place the rinsed rice in a very large bowl. Snap a couple of cinnamon sticks into big pieces and add them to the rice.

White rice is rinsed, then drained well in a wire mesh strainer.Two cinnamon sticks (broken in pieces) in a blue bowl with uncooked rice.

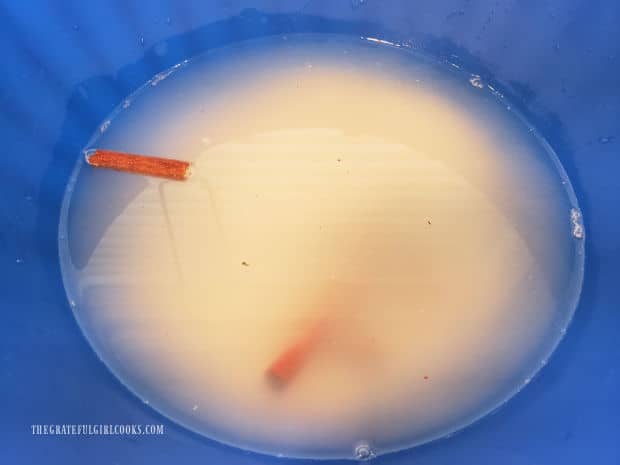
Add 4 cups of water to the rice and stir to combine. Cover the bowl, then refrigerate for a minimum of 6 hours.

I usually refrigerate the rice and water overnight, which infuses a LOT of flavor into the rice. This is a GOOD thing!

Water is added to the bowl, to soak cinnamon sticks and rice.

Time For the Blender!

After the rice has fully soaked, it’s time to blend it! You will need to blend this in two batches, because of the sheer volume of liquid.

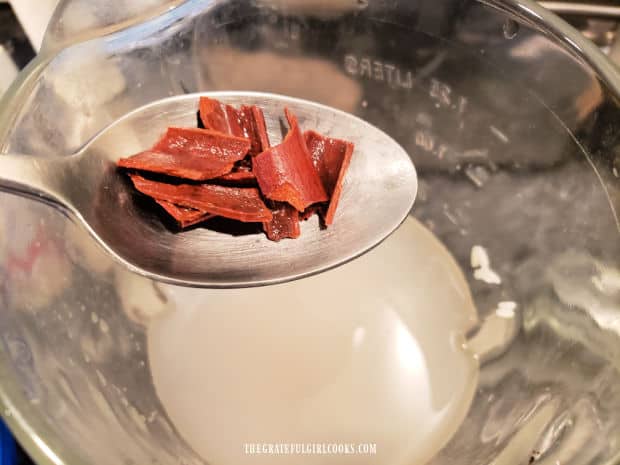
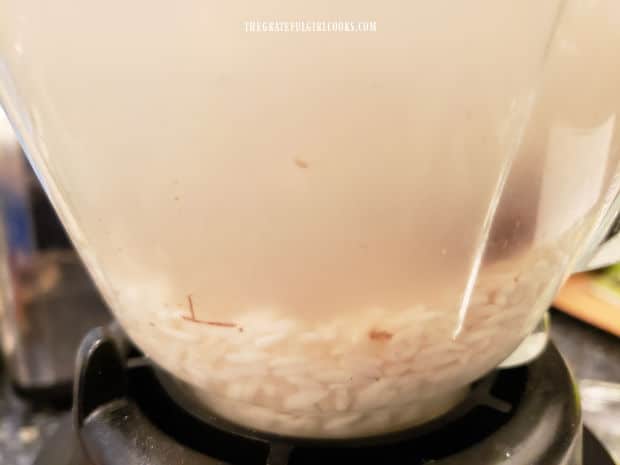
Remove the cinnamon sticks, and tear ONE of the big pieces into smaller pieces. Place these small pieces into a blender with HALF of the soaking water and rice.

Rice, water and broken cinnamon sticks are blended together, after soaking.Soaked rice in blender with cinnamon stick pieces and soaking water.

Time To Strain The Horchata

Blend (puree) the water, rice and small pieces of cinnamon sticks on High speed for 3-4 minutes, until the mixture is smooth.

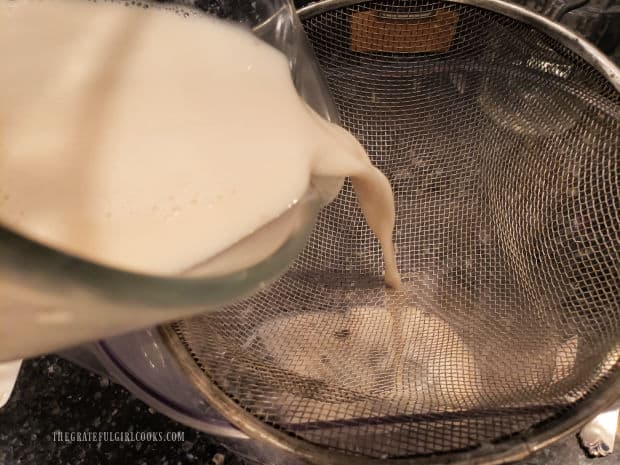
Place a strainer over a large, 2 or 3 quart pitcher, and pour the puree through a wire mesh strainer into the pitcher.

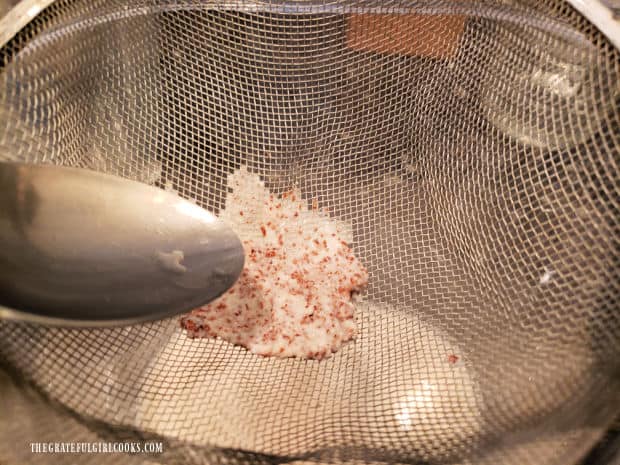
This will help to strain out some of the thick pulp remaining from the cinnamon sticks (discard the pulp).

Repeat this process with the other half of the soaking water, rice and small pieces of another cinnamon stick.

Blended rice, cinnamon sticks and water are strained into a large pitcher.Some of the cinnamon pulp is left in strainer and is discarded.

Now Add The Good, Creamy Stuff!

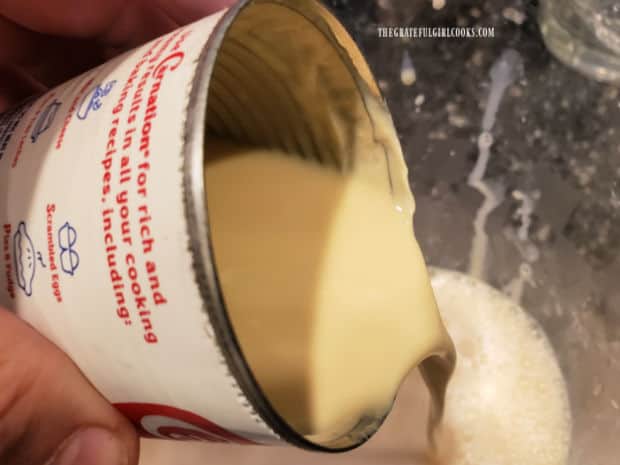
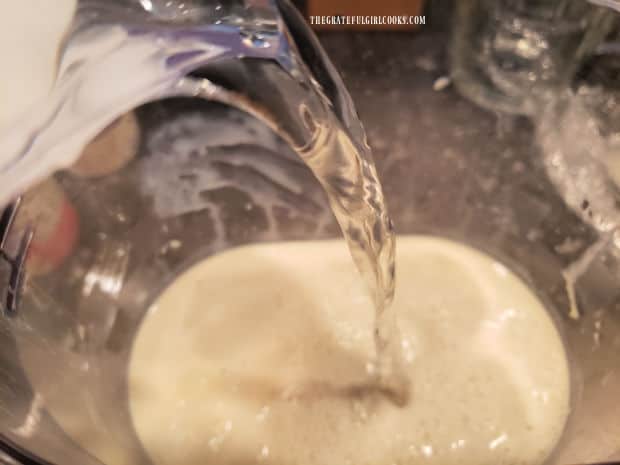
Add one can of evaporated milk and one can of sweetened, condensed milk to the pitcher. Pour in 4 more cups of fresh water and vanilla extract.

Stir the classic Mexican horchata very well, because the condensed milk is very thick! It will take some stirring, but keep going.

Evaporated and condensed milk are added to the horchata in the pitcher.Additional water and vanilla extract are added to the pitcher of horchata.

Chill, Then Serve Classic Mexican Horchata

Once the horchata is thoroughly blended, cover the pitcher and refrigerate the drink until it’s cold.

When cold, and you’re ready to serve, fill a cup with ice cubes, and pour the classic Mexican horchata into the glass.

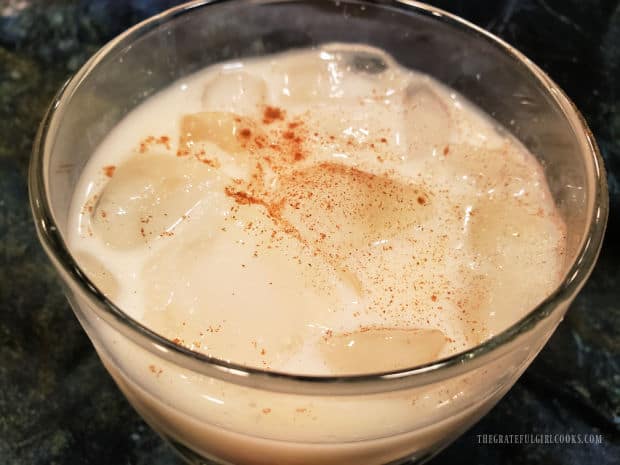
Sprinkle the top of each cup of horchata with a dash or two of ground cinnamon, and serve! It is such a refreshing drink!

Store any leftovers (covered) in the refrigerator for up to 4-5 days. Stir this drink very well, before serving again.
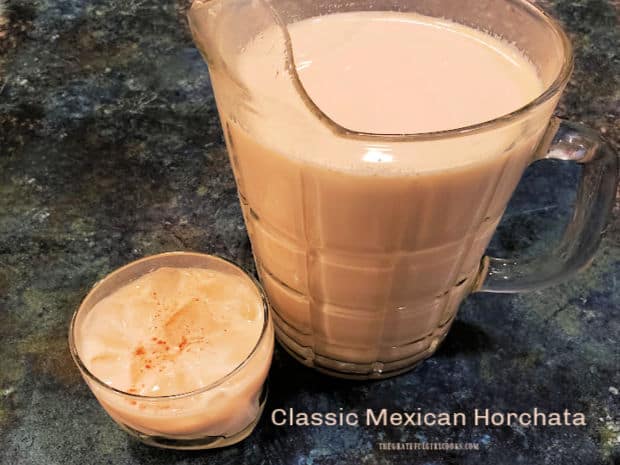
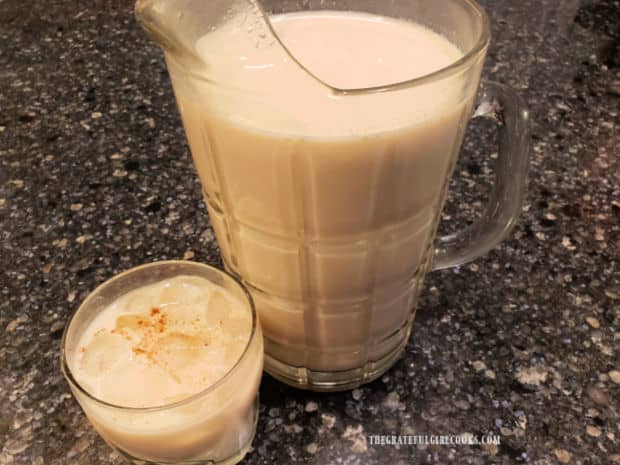
A pitcher and a glass, filled with Classic Mexican Horchata, ready to enjoy.Ground cinnamon is sprinkled on each cup of iced, classic Mexican horchata.

I hope you have the chance to make classic Mexican horchata for those you love. It really is quite simple to prepare, and tastes wonderful!

Thanks for taking the time to stop by today. I invite you to come back soon for more family-friendly recipes. Take care, may God bless you, and have a GREAT day!
Looking For More BEVERAGE Recipes?

You can find ALL of my recipes in the Recipe Index, which is located at the top of the page. I have some delicious beverage recipes to check out, including:
Want More Recipes? Get My FREE Newsletter!

I publish a newsletter 2 times per month (1st and 15th) with lots of recipes, tips, etc..
Would you like to join our growing list of subscribers?

There is a Newsletter subscription box on the top right (or bottom) of each blog post, depending on the device you use.
You can submit your e-mail address there, to be added to my mailing list.

Find Me On Social Media:

Facebook page: The Grateful Girl Cooks!
Pinterest:
The Grateful Girl Cooks!
Instagram:
jbatthegratefulgirlcooks

Author's signature

Original recipe source (and with thanks to): Ana Frias, at muydelish.com/traditional-mexican-horchata/

↓↓ PRINTABLE RECIPE BELOW ↓↓

0 from 0 votes
Classic Mexican Horchata
Prep Time
20 mins
Cook Time
0 mins
Inactive Prep- Refrigeration Time
6 hrs
Total Time
6 hrs 20 mins
 

Classic Mexican Horchata is a cold, creamy, cinnamon drink served over ice. This popular drink is family-friendly & tastes great on hot days!

Category: Beverage
Cuisine: Mexican
Keyword: classic Mexican horchata
Servings: 12 (1 cup per serving)
Calories Per Serving: 202 kcal
Author: JB @ The Grateful Girl Cooks!
Ingredients
  • 1 cup uncooked white rice any type
  • 4 cups water
  • 2 cinnamon sticks
  • 12 ounces evaporated milk (canned) = 1 can
  • 14 ounces condensed milk (canned) = 1 can
  • ½ teaspoon ground cinnamon
  • 4 cups fresh water additional
For Each Serving: serve over ice cubes/ sprinkle with ground cinnamon
    Instructions
    1. Rinse and drain uncooked rice in a wire mesh strainer. Place drained rice in a large bowl. Snap 2 cinnamon sticks into big pieces and add them to the rice. Add 4 cups water; stir to combine. Cover bowl; refrigerate a minimum of 6 hours (overnight is even better!).

    2. After fully soaking, it's time to puree it! You will need to blend this in two batches, because of the sheer volume of liquid. Remove cinnamon sticks, and tear ONE of the big pieces into smaller pieces. Place these small pieces into a blender with HALF of the soaking water and rice mixture.

    3. Blend (puree) water, rice and small pieces of cinnamon sticks on High speed for 3-4 minutes, until smooth. Place wire mesh strainer over a large, 2-3 quart pitcher; pour puree through strainer into the pitcher. This strains out pulp remaining from cinnamon sticks (discard pulp). Repeat with the other half of soaking water, rice and small pieces of another cinnamon stick.

    4. Add evaporated milk and sweetened, condensed milk to the pitcher. Add vanilla and 4 additional cups of fresh water. Stir horchata very well to combine, because condensed milk is very thick!

    5. Once fully blended, cover pitcher and refrigerate until it's cold. To serve, pour horchata over ice cubes. Sprinkle each cup of horchata with ground cinnamon, and serve!

    Recipe Notes

    Store horchata, covered in refrigerator up to 4-5 days. You will need to stir the horchata again well, before serving.
    Nutrition Facts
    Classic Mexican Horchata
    Amount Per Serving (1 cup (8 oz.))
    Calories 202 Calories from Fat 45
    % Daily Value*
    Fat 5g8%
    Saturated Fat 3g19%
    Polyunsaturated Fat 0.2g
    Monounsaturated Fat 1g
    Cholesterol 19mg6%
    Sodium 81mg4%
    Potassium 229mg7%
    Carbohydrates 34g11%
    Fiber 1g4%
    Sugar 21g23%
    Protein 6g12%
    Vitamin A 158IU3%
    Vitamin C 1mg1%
    Calcium 184mg18%
    Iron 0.3mg2%
    * Percent Daily Values are based on a 2000 calorie diet.

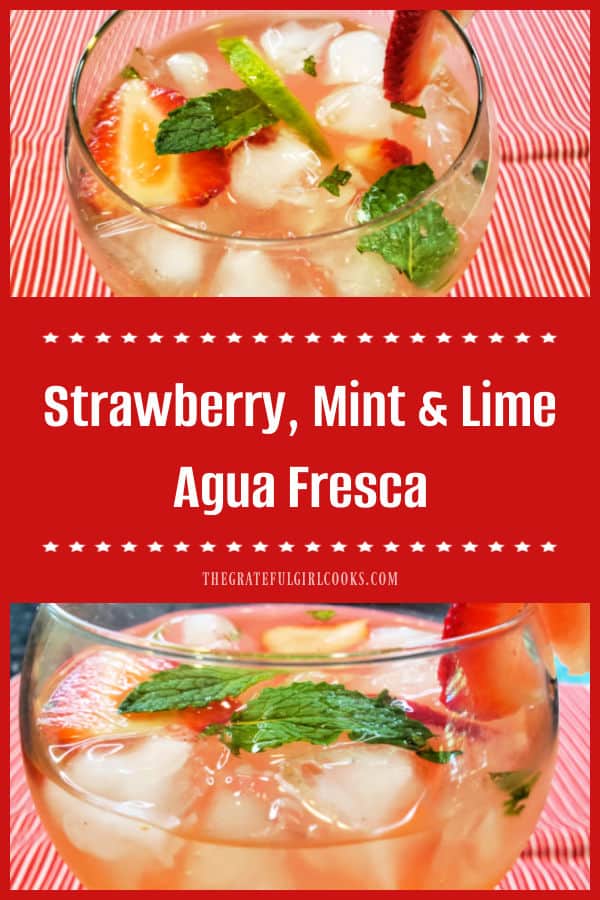
    Here’s one more to pin on your Pinterest boards!Classic Mexican Horchata is a cold, creamy, cinnamon drink served over ice. This popular drink is family-friendly & tastes great on hot days!

    Strawberry, Mint & Lime Agua Fresca

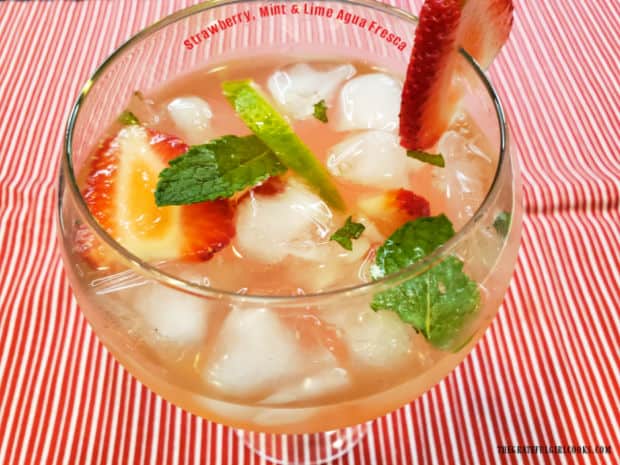
    Strawberry Mint Lime Agua Fresca is a refreshing, low-calorie, fruit-infused drink for hot Summer days! It’s family-friendly, and DELICIOUS!
    Strawberry Mint Lime Agua Fresca is a refreshing, low-calorie, fruit-infused drink for hot Summer days! It's family-friendly, and DELICIOUS!

    Today I want to share a simple recipe for a delicious beverage that is sure to cool you down on those HOT days of Summer! A loose translation of Agua Fresca means “Fresh Water or Cool Water”, and that is what the primary ingredient is in this drink. WATER!

    However, by adding lime juice, lime wedges, fresh mint leaves, and sliced strawberries, this “humble” agua fresca becomes something amazing!

    The fruit and juices, plus the flavor from the mint leaves all come together to infuse the water with fabulous flavor (and color) you’re going to LOVE!

    Traditional agua frescas typically contain water, fruit, occasionally seeds or grains, and sugar. THIS recipe for agua fresca contains no added (processed) sugar, so it’s better for you in the long run, and wow, does it taste great!

    I’ve made several varieties or flavors of agua fresca over the years. Recently I served this one at a birthday BBQ (it was hot outside), and it was a big hit! An added plus is that Strawberry Mint Lime Agua Fresca is super EASY to make. Here’s how to make it.

    Scroll Down For A Printable Recipe Card At The Bottom Of The Page

    How To Make Strawberry Lime Mint Agua Fresca

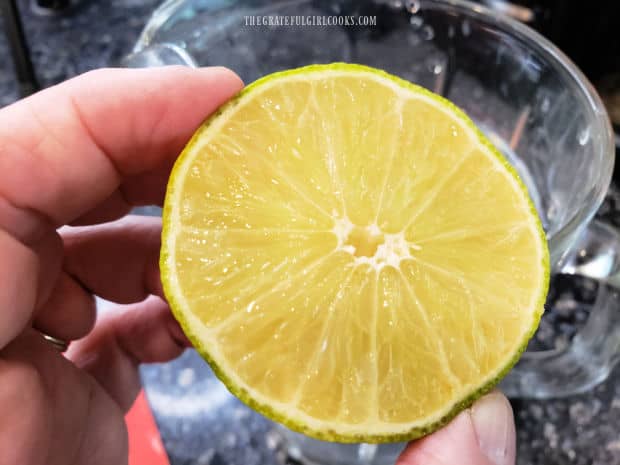
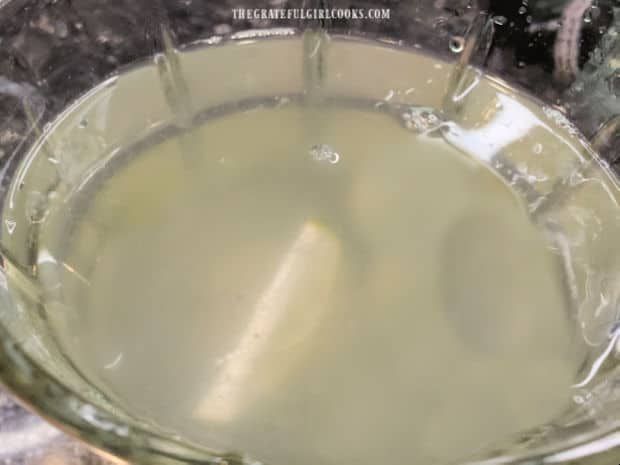
    The first thing you will need to do is fill a pitcher with 2 quarts of water. Squeeze the juice of 1 whole lime into the water.

    Next, slice another lime into wedges, and add them to the pitcher of water. Stir to combine.

    The juice of one lime is added to a pitcher full of water.A second lime is cut into wedges and added to the water in the pitcher.

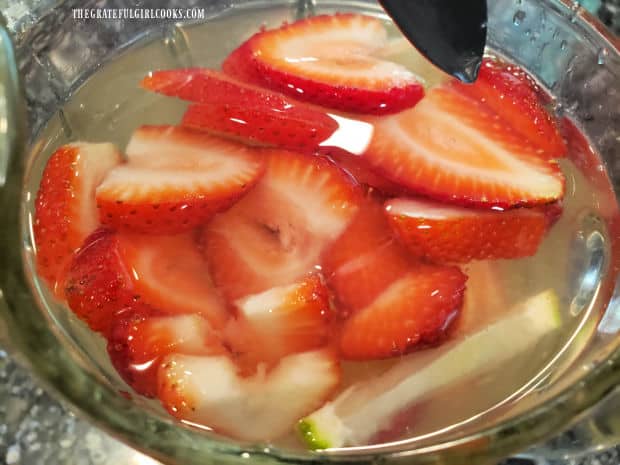
    Add a cup of sliced fresh strawberries to the pitcher of water. Now this drink is starting to look pretty!

    Sliced strawberries are added to the pitcher of water.

    Time To Add Fresh Mint Leaves

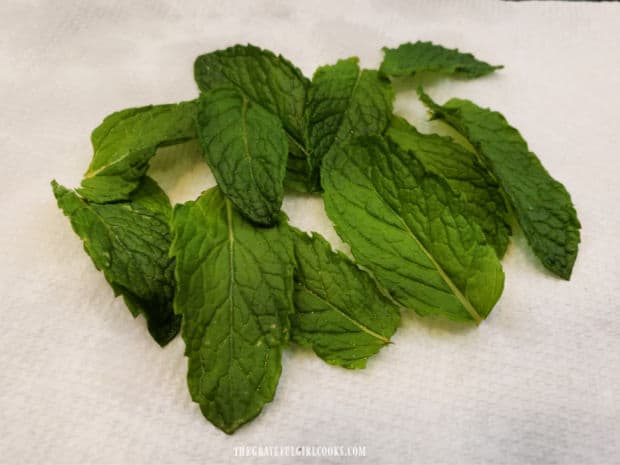
    Mint leaves will be the next flavor-packed ingredient that are added to the water. I’m fortunate to grow my own mint, but packages of mint leaves are usually available in the produce section at most grocery stores. You will need 12 leaves for 2 quarts of agua fresca.

    TIP: Buy a mint plant at a nursery and plant it (in a container, because mint spreads). I bought my mint plant for about .79 cents about 8 years ago, and it is still going strong! It’s been such a great investment through the years.

    Fresh mint leaves are used for this drink recipe.

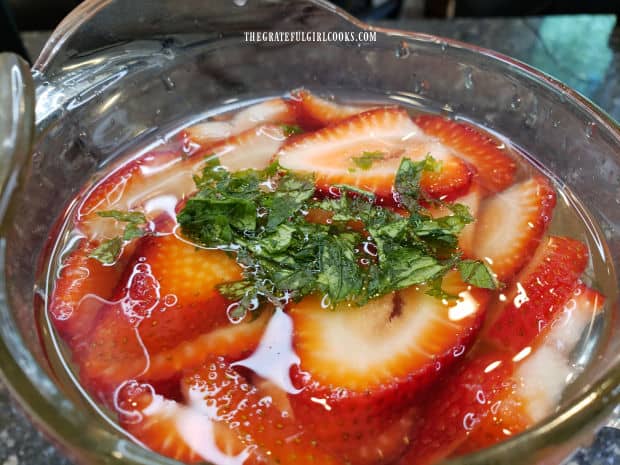
    Crush HALF (6) of the peppermint leaves, and add them to the agua fresca in the pitcher. Crushing the leaves releases the flavorful oils.

    You can also slice them into very small pieces, if necessary. Both methods will extract flavor from the oils present in the leaves.

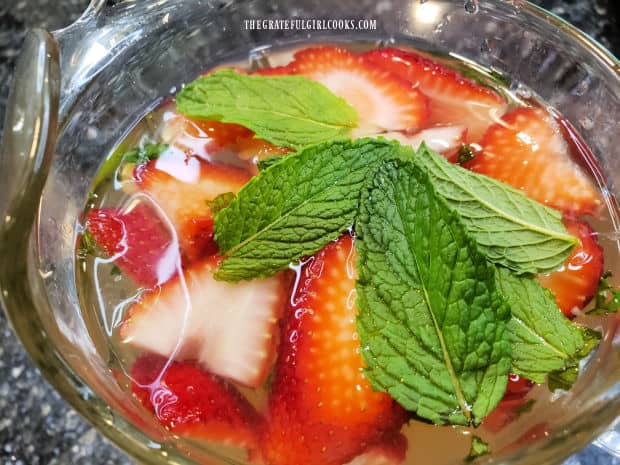
    Add the remaining WHOLE mint leaves (6) to the pitcher. Stir until well-combined.

    Some mint leaves are crushed then added to the strawberry mint lime agua fresca.Several whole mint leaves are added to the pitcher of agua fresca.

    Time To CHILL!

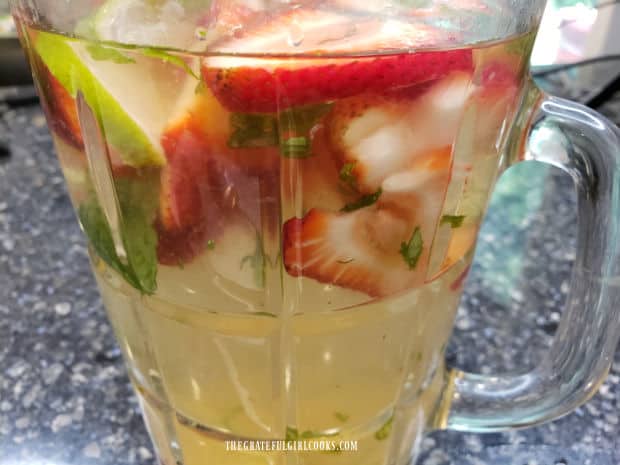
    It won’t look so tasty once all the ingredients are in the pitcher, but as the fruit infuses the water, it will begin to change into a pink color, from the red strawberries.

    Cover the pitcher and place it in the refrigerator to rest for a minimum of 15-20 minutes (more time yields more color and flavor).

    TIP: If possible, make a pitcher of agua fresca early in the day for serving later, so it has full flavor and color!

    Pitcher is covered, then the agua fresca chills in the refrigerator.

    Serve The Strawberry Mint Lime Agua Fresca

    When the strawberry mint lime agua fresca is fully chilled, it can be served. Serve this drink over ice cubes.

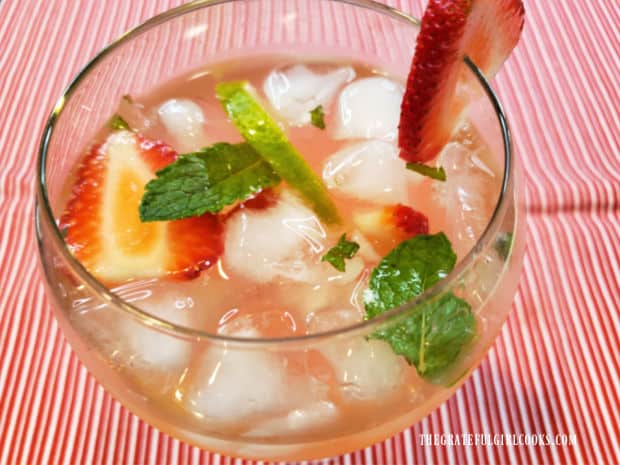
    If desired, garnish each glass with a slice of strawberry, serve and enjoy this tasty, refreshing drink. Make sure each glass has a lime wedge and mint leaves for best presentation.

    You can store this drink in the refrigerator for 2-3 days. The longer it sits, the color intensifies and the flavors permeate more.
    I’ve even added additional water to the pitcher when we’ve demolished it on the first go-around.

    If you have enough strawberries, lime and mint left in the pitcher, fill it with halfway with more water, then let it chill again long enough until the water is infused again.

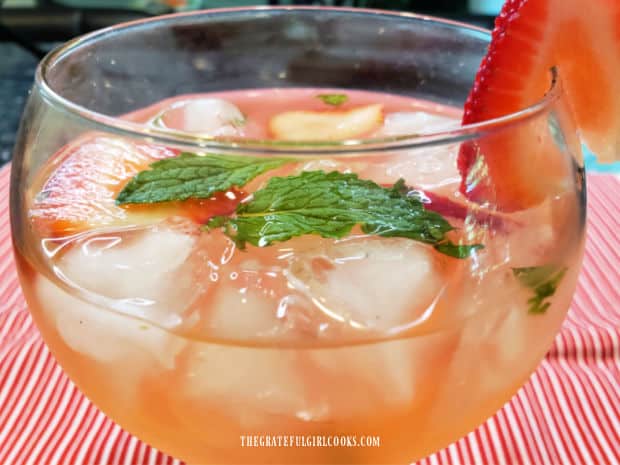
    Strawberry mint lime agua fresca is served cold, over ice cubes in a glassThe strawberry mint lime agua fresca has turned a nice shade of pink.

    I hope you have the chance to make this delicious, infused water. We love this fresh tasting drink, and enjoy it all summer long!

    Thanks for stopping by today. I invite you to come back again soon for more family-friendly recipes. Take care, may God bless you, and have a GREAT day!
    Looking For More COLD BEVERAGE Recipes?

    You can find ALL of my recipes in the Recipe Index, which is located at the top of the page. I have some wonderful tasting cold beverage recipes to check out, including:
     

    Want More Recipes? Get My FREE Newsletter!

    I publish a newsletter 2 times per month (1st and 15th) with lots of recipes, tips, etc..
    Would you like to join our growing list of subscribers?

    There is a Newsletter subscription box on the top right (or bottom) of each blog post, depending on the device you use.
    You can submit your e-mail address there, to be added to my mailing list.

    Find Me On Social Media:

    Facebook page: The Grateful Girl Cooks!
    Pinterest:
    The Grateful Girl Cooks!
    Instagram:
    jbatthegratefulgirlcooks

    Author's signature

    Original recipe source: reusegrowenjoy.com/strawberry-lime-mint-infused water/

    ↓↓ PRINTABLE RECIPE BELOW ↓↓

    0 from 0 votes
    Strawberry, Mint & Lime Agua Fresca
    Prep Time
    5 mins
    Cook Time
    0 mins
    Refrigeration (inactive prep time)
    15 mins
    Total Time
    20 mins
     

    Strawberry Mint Lime Agua Fresca is a refreshing, low-calorie, fruit-infused drink for hot Summer days! It's family-friendly, and DELICIOUS!

    Category: Beverage
    Cuisine: All Cuisines
    Keyword: strawberry mint lime agua fresca
    Servings: 8 (1 cup servings)
    Calories Per Serving: 8 kcal
    Author: JB @ The Grateful Girl Cooks!
    Ingredients
    • 1 cup sliced fresh strawberries
    • 2 limes room temperature
    • 12 leaves fresh mint
    • 2 quarts water
    Instructions
    1. Fill a pitcher with 2 quarts of water. Squeeze the juice of 1 lime into the water. Slice another lime into wedges, and add them to the pitcher of water. Stir to combine.

    2. Add a cup of sliced fresh strawberries to the water.

    3. Crush HALF the peppermint leaves; add them to the water. Crushing the leaves releases the flavorful oils. You can cut them into very small pieces, if necessary. Add remaining mint leaves WHOLE to the pitcher. Stir until well-combined.

    4. Cover the pitcher; refrigerate water for a minimum of 15-20 minutes (more time yields more color and flavor). As the fruit infuses the water, it turn a pink color, from the strawberries. **I recommend making this early in the day, if possible, and chilling it for hours, for best flavor and color!

    5. Serve over ice cubes, and garnish glasses with strawberry slices, if desired. Enjoy!

    Nutrition Facts
    Strawberry, Mint & Lime Agua Fresca
    Amount Per Serving (1 cup (8 oz.))
    Calories 8 Calories from Fat 1
    % Daily Value*
    Fat 0.1g0%
    Saturated Fat 0.003g0%
    Polyunsaturated Fat 0.03g
    Monounsaturated Fat 0.01g
    Sodium 12mg1%
    Potassium 37mg1%
    Carbohydrates 2g1%
    Fiber 0.4g2%
    Sugar 1g1%
    Protein 0.2g0%
    Vitamin A 9IU0%
    Vitamin C 13mg16%
    Calcium 11mg1%
    Iron 0.1mg1%
    * Percent Daily Values are based on a 2000 calorie diet.

    Here’s one more to pin on your Pinterest boards!Strawberry Mint Lime Agua Fresca is a refreshing, low-calorie, fruit-infused drink for hot Summer days! It's family-friendly, and DELICIOUS!

    Orange Spiced Coffee

    Orange Spiced Coffee is brewed with cinnamon, cloves, sugar, and orange marmalade! Top this delicious hot drink with whipped cream, to serve!
    Orange Spiced Coffee is brewed with cinnamon, cloves, sugar, and orange marmalade! Top this delicious hot drink with whipped cream, to serve!

    Are you a coffee drinker? My husband and I love our morning coffee! I drink two cups each morning, and my husband drinks it all day long as he works from home. He is my true “coffee hound”, in the truest sense of the word.

    It seems like there are definitely two schools of thought regarding coffee. For us coffee lovers, there’s just no getting around it. We like our coffee, and we know how we like it!

    COFFEE, COFFEE, COFFEE – The Great Debate!

    One school of thought is “I LIKE MY COFFEE BLACK- DON’T YOU DARE PUT ANYTHING ELSE IN IT”! The other school of thought (which is mine) is “I LOVE COFFEE, BUT PLEASE PUT CREAMER, SUGAR OR OTHER STUFF IN IT SO IT DOESN”T TASTE LIKE COFFEE”. Amen.

    Well… if you enjoy flavoring your coffee with creamers, etc. then today’s simple recipe for orange spiced coffee is just for you. I think it’s a great dessert-style coffee. A few easy additions to your coffee brewing routine, and you can enjoy a cup of this wonderful, citrus-flavored coffee! Here’s how to make 4 small servings!

    Scroll Down for A Printable Recipe Card At The Bottom Of The Page

    Prepare To Brew The Orange Spiced Coffee

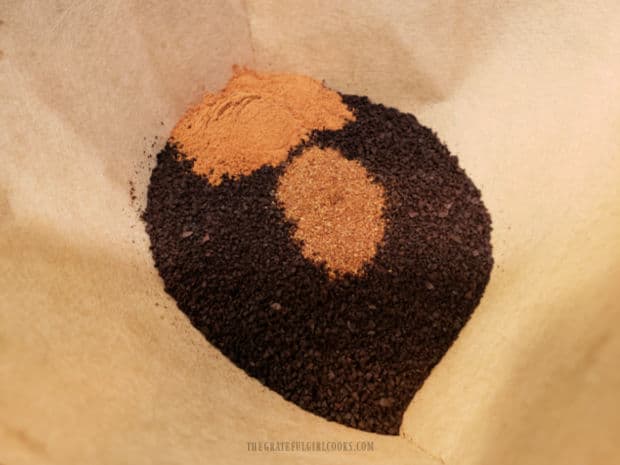
    Place one third of a cup of ground coffee into a coffee filter. Add half a teaspoon of ground cinnamon and one eighth of a teaspoon of ground cloves to the coffee grounds.

    If it’s not already in its spot yet, place the filter into its designated position in your coffee maker. Pour 3 cups of water into the well of your coffee maker, but do not turn the machine on yet!

    Now it is time for the add-ins to go into the coffee pot BEFORE you brew the orange spiced coffee!

    Ground coffee, cinnamon and cloves are placed into a coffee filter before brewing.

    Add Mix Ins To The Coffee Pot Before Brewing

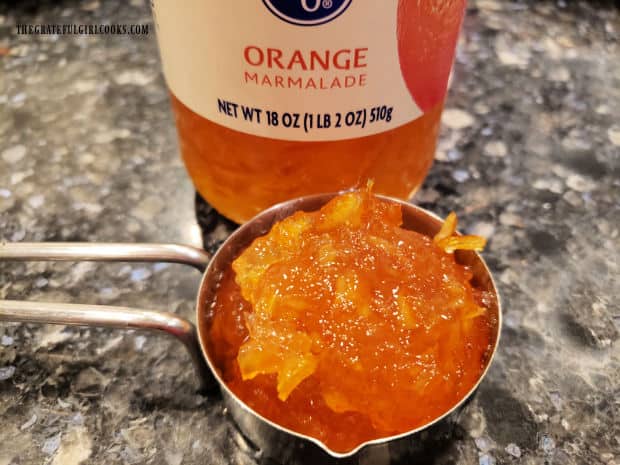
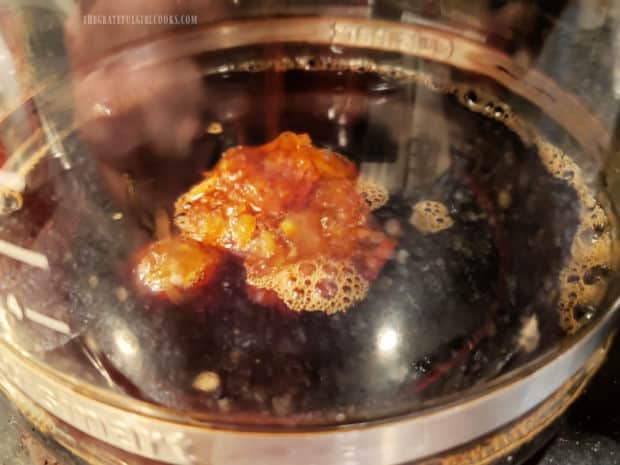
    Before brewing the coffee, add 1/4 cup of orange marmalade and a rounded teaspoon of granulated sugar to the empty coffee pot. I know it seems weird to put JAM into the coffee pot, but trust me on this.

    Once the coffee begins to brew, these two ingredients will dissolve and melt as the hot coffee covers them. This results in the rich orange flavor from the marmalade being infused into the coffee, which adds more flavor!

    Orange marmalade is used to help flavor the spiced coffee with a burst of citrus.Orange marmalade and sugar are placed in the coffee pot before brewing coffee.

    Brew The Coffee

    When you’ve added the marmalade and sugar to the empty pot and have the coffee filter in place, turn on your machine and brew the coffee.

    As the pot fills with hot spiced coffee, it will melt the marmalade and dissolve the granulated sugar, incorporating both into the brewed coffee.

    As the coffee brews, the hot liquid melts the sugar and marmalade jam in the coffee pot.

    Serving Orange Spiced Coffee

    When the orange spiced coffee is finished brewing, it is wonderfully citrus flavored, and ready to serve. Give it a quick stir, then pour about 3/4 cup of coffee into each of the four small  mugs. At this point, taste the coffee. If you prefer sweeter coffee, now is the time to stir in additional sugar, to suit your taste.

    My favorite way to enjoy this coffee is to add whipped cream and a little orange zest (finely grated peel) to top off each cup of coffee. It helps make the coffee look quite appetizing, and the dollop of whipped cream and orange zest make it even more delicious!

    If you enjoy drinking your coffee black, simply leave off the whipped cream and orange zest garnish, and enjoy the coffee, as is. It still has wonderful citrus and spice flavors.


    A mug of hot, orange spiced coffee, without additional garnishes for serving.

    We serve the orange spiced coffee with whipped cream and orange zest on top.

    This is such a simple way to serve some “fancy pants” coffee, for those days when you just want a delicious coffee “treat”. I really hope you enjoy this flavor filled hot beverage, and trust you will enjoy it as much as I do!

    Thanks for stopping by my blog today, and I would invite you to come back soon for more family-friendly recipes. Take care, may God bless you, and have a GREAT day!

    Looking For More Hot Drink Recipes?

    You can find all of my recipes in the Recipe Index, which is located at the top of the page. I have some delicious hot beverage recipes for you to enjoy, including:

    Author's signature

    Recipe adapted from Kay Marone, via “Gooseberry Patch- Have Yourself A Homemade Christmas”, page 281, published in 2014 by Gooseberry Patch and Time Home Entertainment, Inc.

    ↓↓ PRINTABLE RECIPE BELOW ↓↓

    5 from 1 vote
    Orange Spiced Coffee
    Prep Time
    5 mins
    Cook Time
    0 mins
    Total Time
    5 mins
     

    Orange Spiced Coffee is brewed with cinnamon, cloves, sugar, and orange marmalade! Top this delicious hot drink with whipped cream, to serve!

    Category: Beverage
    Cuisine: American
    Keyword: orange spiced coffee
    Servings: 4 (3/4 cup per serving)
    Calories Per Serving: 54 kcal
    Author: JB @ The Grateful Girl Cooks!
    Ingredients
    • cup ground coffee
    • ½ teaspoon ground cinnamon
    • teaspoon ground cloves
    • ¼ cup orange marmalade
    • 1 teaspoon granulated sugar
    • 3 cups water
    Optional Topping (but good!): whipped cream, orange zest
      Instructions
      1. Put ground coffee, cinnamon and cloves in a coffee filter. Pour 3 cups water into the well of the coffee maker, but do not turn the machine on yet!

      2. Add orange marmalade and sugar to the empty coffee pot.

      3. Turn coffee maker on and brew the coffee. As the pot fills with hot coffee, it will dissolve the marmalade and sugar, incorporating them into the brewed coffee.

      4. To serve, stir coffee, then pour ¾ cup of coffee into each of four small mugs. Taste the coffee. If you like sweeter coffee, stir in more sugar, to suit your taste. If desired, add whipped cream and orange zest to top each cup of coffee. If you enjoy your coffee black, leave off whipped cream and orange zest. Enjoy!

      Recipe Notes

      NOTE: Whipped cream garnish is NOT included in the caloric calculation as the amount you use may vary.

      Nutrition Facts
      Orange Spiced Coffee
      Amount Per Serving (1 serving (3/4 cup))
      Calories 54
      % Daily Value*
      Fat 0.01g0%
      Saturated Fat 0.003g0%
      Polyunsaturated Fat 0.01g
      Sodium 20mg1%
      Potassium 9mg0%
      Carbohydrates 14g5%
      Fiber 0.3g1%
      Sugar 13g14%
      Protein 0.1g0%
      Vitamin A 13IU0%
      Vitamin C 1mg1%
      Calcium 16mg2%
      Iron 0.1mg1%
      * Percent Daily Values are based on a 2000 calorie diet.

      Here’s one more to pin on your Pinterest boards!Orange Spiced Coffee is brewed with cinnamon, cloves, sugar, and orange marmalade! Top this delicious hot drink with whipped cream, to serve!

      Peppermint Mocha Coffee Creamer

      Make delicious, homemade Peppermint Mocha Coffee Creamer to brighten the holidays (or ANY time)! Easy to make recipe only has 4 ingredients!Make delicious, homemade Peppermint Mocha Coffee Creamer to brighten the holidays (or ANY time)! Easy to make recipe only has 4 ingredients!

      Do you like making your own homemade coffee creamers? If you do, I would love to share with you today how to make this delicious coffee creamer! Peppermint Mocha Coffee Creamer is the flavor of the day!

      It is SO SIMPLE to make, and tastes wonderful  when added to a big ol’ mug of hot coffee. I scribbled the recipe on the bottom of a piece of paper many years ago, but don’t know where I got it from, so I’m not sure who to give credit to for this recipe. 

      The creamer only has 4 ingredients and can be ready to pour into a cup of coffee in less than 5 minutes. It will yield almost 3 cups of creamer. How’s that for convenient?

      If you enjoy the flavors of chocolate and mint, then I’ll bet you will enjoy this coffee creamer. Here’s how to make it!

      Scroll Down For A Printable Recipe Card At The Bottom Of The Page

      What Ingredients Will I Need?

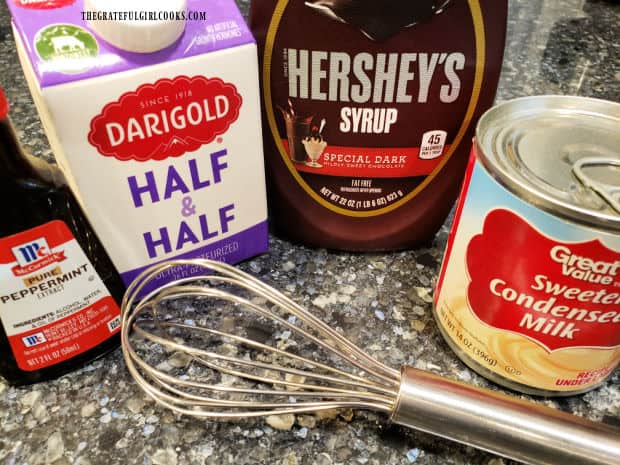
      You need peppermint extract, 2 cups half and half, several Tablespoons of chocolate syrup, and a can of sweetened condensed milk to make this coffee creamer. These ingredients are all you will need, and can be found in most grocery stores.

      If you want to “fancy the coffee up” for serving, you will also want to have whipped cream and some crushed peppermint sticks. You can garnish each steaming hot mug of coffee with them, but that is completely optional!

      Ingredients are half and half, peppermint extract, chocolate syrup and sweetened condensed milk.

      Preparing The Creamer

      Measure all of the creamer ingredients into a large bowl. The only thing you need to do to prepare the creamer is to thoroughly combine the ingredients.

      You can use a wire whisk for this OR an electric mixer. I have used both, but because the sweetened condensed milk is very thick, I find that using an electric mixer works best.

      NOTE: If using an electric mixer, blend, using the LOWEST setting, so the liquid doesn’t splatter everywhere, ok? Whisk or blend the creamer only until everything is completely blended.

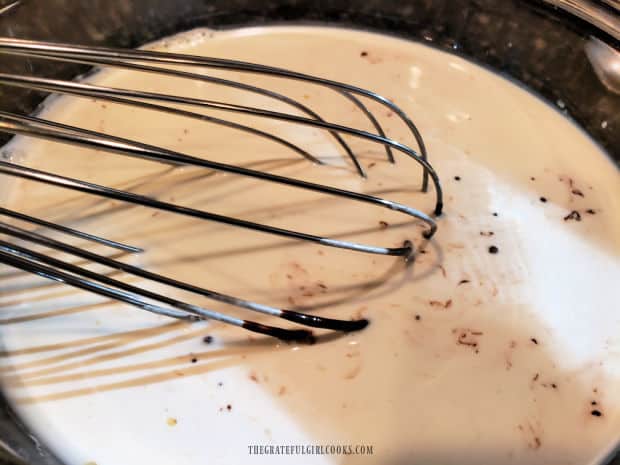
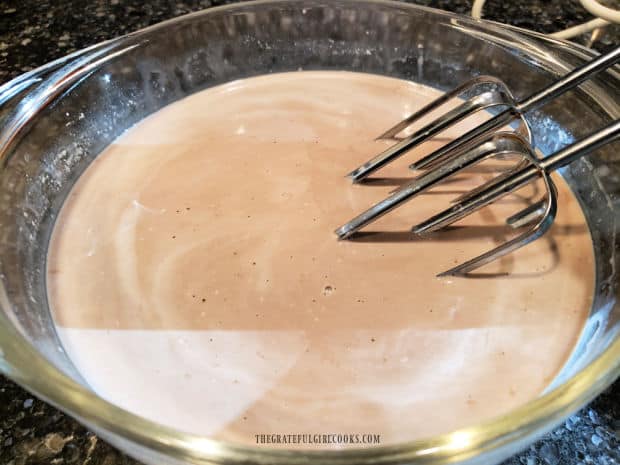
      Using a whisk to combine all the ingredients for the coffee creamer.Electric mixer can also be used (on LOW) to combine coffee creamer ingredients.

      Storing The Peppermint Mocha Coffee Creamer

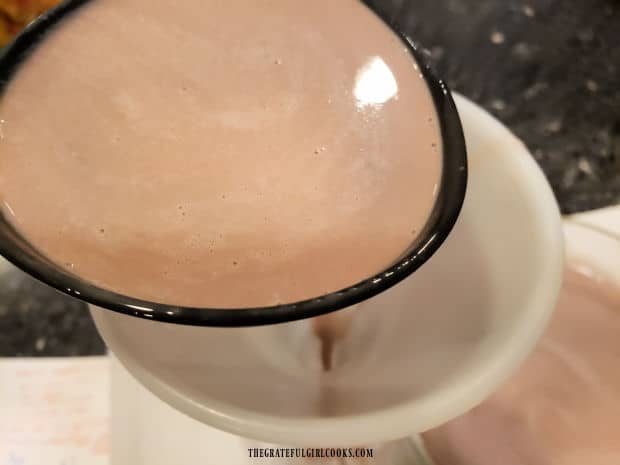
      Once the peppermint mocha coffee creamer is fully combined, place a funnel into the neck of an airtight jar or bottle you’re using for the creamer. You can either POUR or LADLE the liquid creamer into the funnel in the jar.

      I make a lot less mess when I use the funnel instead of just pouring the liquid in the bottle… just sayin’. Now the creamer is ready to enjoy! See how easy that was?

      TIP: To store creamer, I remove the label from an old, empty creamer container. After washing and draining it well, I can re-use the container for homemade coffee creamers! The creamer should last approximately the same amount of time as the expiration date on the half and half carton, if stored in an airtight container.

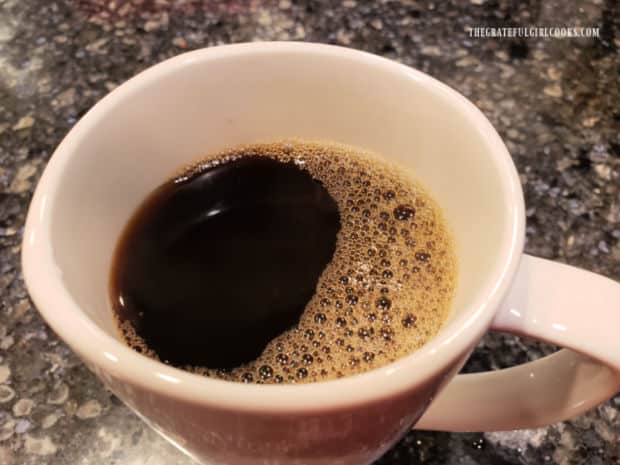
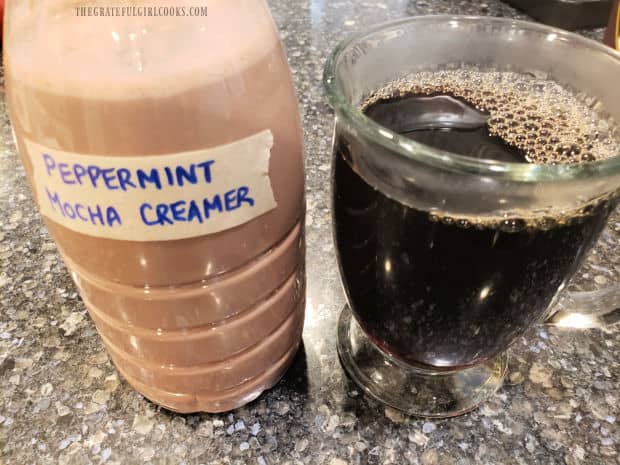
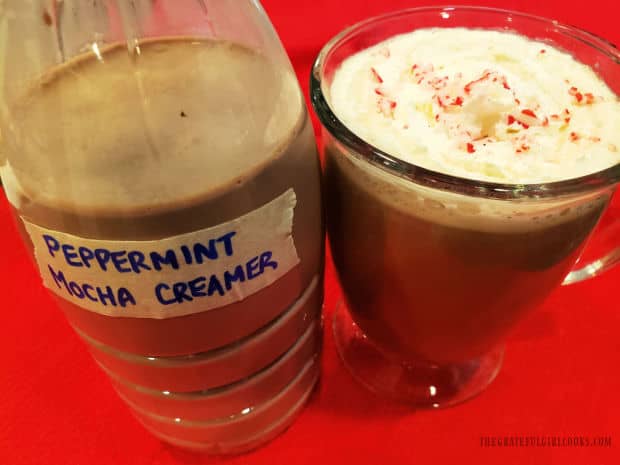
      Peppermint Mocha Coffee Creamer is ladled into a funnel on top of a storage bottle.A container of peppermint mocha coffee creamer and a cup of hot, black coffee, ready for creamer.

      Enjoy Your Coffee With Peppermint Mocha Coffee Creamer!

      Most of the time, I simply add the peppermint mocha coffee creamer straight into my coffee, give it a stir and drink it up! But sometimes… I can’t help myself and try to make my coffee more fancy!

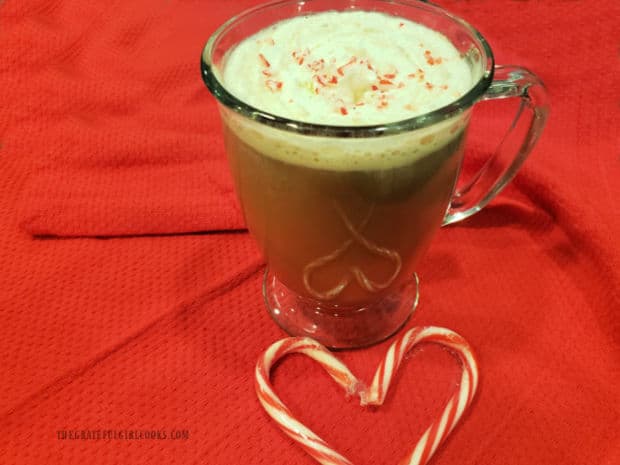
      To do this, stir creamer into the coffee, then top with aerosol whipped cream, and sprinkle with crushed peppermint, right off of a candy cane!

      This coffee creamer has a soothing, yet subtle peppermint and chocolate flavor, which I really enjoy in my strong, hot morning coffee! YUM! It’s a delicious coffee creamer any old time of the year, not just during the holidays!

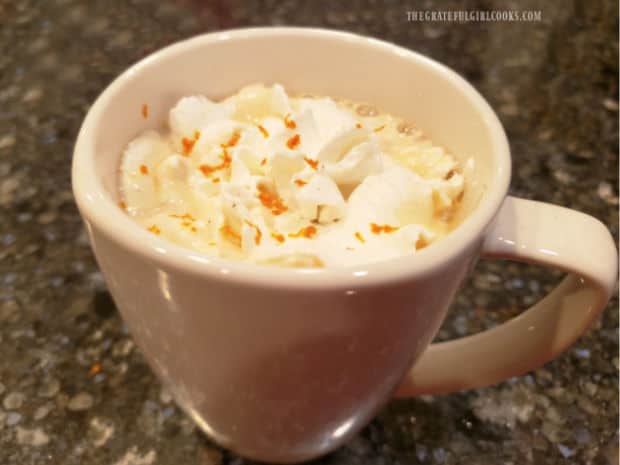
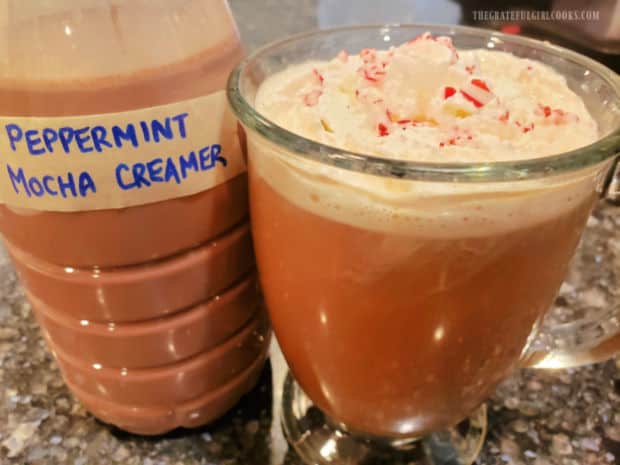
      Whipped cream and peppermint top a cup of coffee with peppermint mocha creamer.A mug of whipped cream topped coffee sweetened with peppermint mocha coffee creamer.

      I hope you have the chance to make this simple, yet yummy coffee creamer, and trust you’ll enjoy it. I make it every year for Christmas, and love it a lot!

      Thanks so much for taking time out of your day to visit my blog. I invite you to come back again soon, for more family-friendly recipes. Take care, and have a GREAT day!

      Looking For More COFFEE CREAMER Recipes?

      You can find ALL of my recipes in the Recipe Index, which is located at the top of the page. I have several delicious coffee creamer recipes to check out, including:

      Want More Recipes? Get My FREE Newsletter!

      I publish a newsletter 2 times per month (1st and 15th) with lots of recipes, tips, etc..
      Would you like to join our growing list of subscribers?

      There is a Newsletter subscription box on the top right (or bottom) of each blog post, depending on the device you use.
      You can submit your e-mail address there, to be added to my mailing list.

      Find Me On Social Media:

      Facebook page: The Grateful Girl Cooks!
      Pinterest:
      The Grateful Girl Cooks!
      Instagram:
      jbatthegratefulgirlcooks

      Author's signature

      Original recipe source: unknown

      ↓↓ PRINTABLE RECIPE BELOW ↓↓

      0 from 0 votes
      Peppermint Mocha Coffee Creamer
      Prep Time
      4 mins
      Cook Time
      0 mins
      Total Time
      4 mins
       

      Make delicious, homemade Peppermint Mocha Coffee Creamer to brighten the holidays (or ANY time)! Easy to make recipe only has 4 ingredients!

      Category: Beverages, Condiments
      Cuisine: American
      Keyword: peppermint mocha coffee creamer
      Servings: 48 (1 T. per serving)
      Calories Per Serving: 46 kcal
      Author: JB @ The Grateful Girl Cooks!
      Ingredients
      • 2 cups half and half
      • 14 ounces sweetened condensed milk canned
      • 5 Tablespoons chocolate syrup
      • 1 teaspoon peppermint extract
      Instructions
      1. Measure all ingredients into a large bowl. Use a wire whisk OR an electric mixer to fully combine ingredients. NOTE: I have used both, but because sweetened condensed milk is thick, using an electric mixer works best. If using an electric mixer, use on LOWEST setting, so liquid doesn't splatter.

      2. Pour creamer through funnel into an airtight jar or bottle for storage. Store in refrigerator for approx. as long as expiration date on the half and half carton. Enjoy!

      Recipe Notes

      Recipe will yield approximately 3 cups of liquid creamer. Caloric calculation is made based on using 1 Tablespoon per serving.

      Nutrition Facts
      Peppermint Mocha Coffee Creamer
      Amount Per Serving (1 1 Tablespoon)
      Calories 46 Calories from Fat 18
      % Daily Value*
      Fat 2g3%
      Saturated Fat 1g6%
      Polyunsaturated Fat 0.1g
      Monounsaturated Fat 1g
      Cholesterol 6mg2%
      Sodium 18mg1%
      Potassium 49mg1%
      Carbohydrates 6g2%
      Fiber 0.1g0%
      Sugar 6g7%
      Protein 1g2%
      Vitamin A 58IU1%
      Vitamin C 0.3mg0%
      Calcium 35mg4%
      Iron 0.1mg1%
      * Percent Daily Values are based on a 2000 calorie diet.

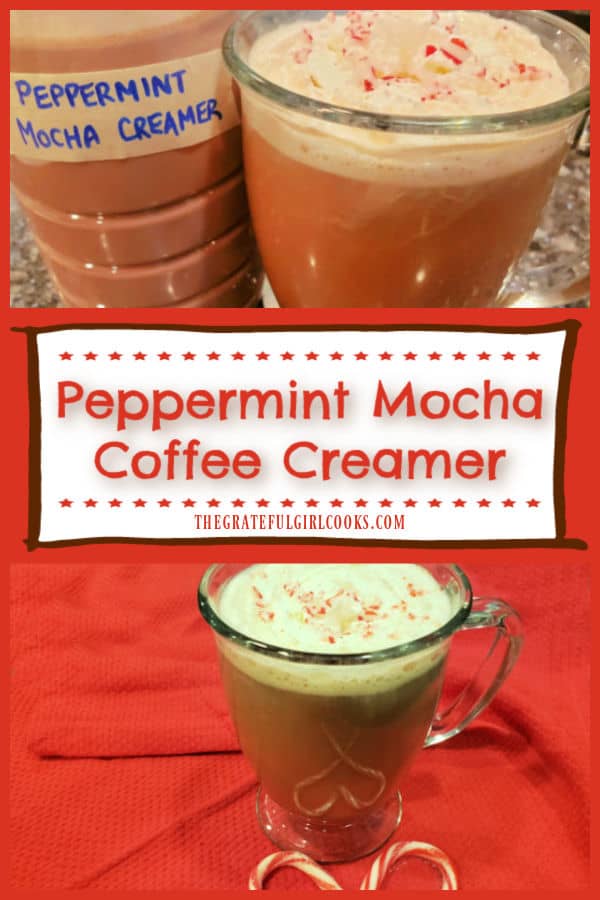
      Here’s one more to pin on your Pinterest boards!Make delicious, homemade Peppermint Mocha Coffee Creamer to brighten the holidays (or ANY time)! Easy to make recipe only has 4 ingredients!

      Lemon Mint Tea

      Lemon Mint Tea is simple to make with only a few ingredients, and it can be enjoyed hot to warm you up, or cold to refresh you on a hot day!Lemon Mint Tea is simple to make with only a few ingredients, and it can be enjoyed hot to warm you up, or cold to refresh you on a hot day!

      On a hot day, nothing refreshes like a glass of iced tea, but on a cold day, there’s something warming and soothing about a mug of hot tea. Lucky for you, this Lemon Mint Tea can satisfy both those expectations! It’s super simple to make in just a few minutes, and it’s flavored with peppermint tea, a cinnamon stick, lemon juice and a bit of sugar. It’s DELICIOUS!

      If you want to drink it hot, it can be ready after steeping 5 minutes, and if you want it cold, you will need to let it cool down before pouring it over ice. Other than that, it’s EASY PEASY, and I know you’re going to love it! I found the recipe years ago in an old cookbook I have, and finally got around to taking photos for my blog. Here’s how to make lemon mint tea:

       Scroll Down For A Printable Recipe Card At The Bottom Of The Page

      How To Make The Tea

      The recipe as written will make 1 serving, but can EASILY be doubled, tripled, etc. (only 1 cinnamon stick needed for up to 10 servings). To make the tea, you will need to have a lemon, a peppermint tea bag, cinnamon stick and granulated sugar. My photos below will show how to make ONE serving.

      One peppermint tea bag, lemon, sugar and a cinnamon stick are used to make this tea.

      Place the tea bag and the cinnamon stick in a small saucepan. Pour one cup of boiling water over them, then immediately put a lid on the pan. Let the tea steep (covered) for 5 minutes. Once it has fully steeped, remove the tea bag and cinnamon stick.

      A peppermint tea bag and cinnamon stick are steeped in boiling water (covered) for 5 minutes.

      Add 1 Tablespoon of granulated sugar and 1 Tablespoon of freshly squeezed lemon juice to the hot tea. Stir well, until the sugar has had a chance to fully dissolve. Now the tea is done!

      Granulated sugar and fresh lemon juice are added to the brewed mint tea.

      Serving Lemon Mint Tea HOT

      If you want to enjoy the tea HOT, simply pour the hot beverage into a mug once the sugar has dissolved. You can garnish the mug of lemon mint tea with a fresh sprig of mint and a lemon wedge, if desired. That is completely optional, but sure makes that mug of hot tea look good!

      Hot lemon mint tea is poured into a mug once done.A mug of hot lemon mint tea, garnished with a mint sprig and lemon wedge, to serve.

      Lemon Mint Tea Served COLD

      If you prefer your tea COLD, let the tea first cool to room temperature. Once cooled, fill a glass with ice cubes, and pour the tea into the glass. NOTE: One reason you shouldn’t pour HOT tea over ice is because it could possibly cause the glass to crack. The other reason is that the HOT tea will melt the ice cubes faster which waters down the tea considerably.

      Iced cold lemon mint tea is garnished with a lemon wedge and mint sprig to serve.

      I hope you have the chance to try this delicious tea, and trust you’ll enjoy it like I do. Thank you for stopping by, and please come back again soon for more family-friendly recipes. Take care, and have a great day.

      Looking For More BEVERAGE Recipes?

      You can find ALL f my recipes in the Recipe Index, located at the top of the page. I have some wonderful hot AND cold beverage recipes you may enjoy, including:

      Interested In More Recipes?

      Thank you for visiting this website. I appreciate you using some of your valuable time to do soIf you’re interested, I publish a newsletter 2 times per month (1st and 15th) with all the latest recipes, and other fun info. I would be honored to have you join our growing list of subscribers, so you never miss a great recipe!
      There is a Newsletter subscription box on the top right side (or bottom) of each blog post, depending on the device you use, where you can easily submit your e-mail address (only) to be included in my mailing list.

      You Can Also Find Me On Social Media:

      Facebook page: The Grateful Girl Cooks!
      Pinterest:
      The Grateful Girl Cooks!
      Instagram:
      jbatthegratefulgirlcooks

      Author's signature

      Original recipe source: “The Complete Cooking Light Cookbook”, page 49, published in 2000 by Oxmoor House

      ↓↓ PRINTABLE RECIPE BELOW ↓↓

      0 from 0 votes
      Lemon Mint Tea
      Prep Time
      6 mins
      Cook Time
      0 mins
      Total Time
      6 mins
       

      Lemon Mint Tea is simple to make with only a few ingredients, and it can be enjoyed hot to warm you up, or cold to refresh you on a hot day!

      Category: Beverage
      Cuisine: All Cuisines
      Keyword: lemon, mint, tea
      Servings: 1 cup
      Calories Per Serving: 52 kcal
      Author: JB @ The Grateful Girl Cooks!
      Ingredients
      • 8 ounces boiling water =1 cup
      • 1 teabag peppermint tea single size
      • 1 3 inch cinnamon stick
      • 1 Tablespoon granulated sugar
      • 1 Tablespoon fresh lemon juice
      • 1 Lemon wedge and Mint sprig (OPTIONAL) for garnish
      Instructions
      Directions For ONE Serving:
      1. Place tea bag and cinnamon stick into a small saucepan. Pour 8 ounces boiling water over them; immediately cover pan. Let tea steep (covered) for 5 minutes. Once fully steeped, remove tea bag and cinnamon stick.

      2. Add 1 Tablespoon granulated sugar and 1 Tablespoon fresh lemon juice to hot tea. Stir well, until sugar fully dissolves.

      To Enjoy HOT:
      1. Pour hot tea into a mug once sugar has dissolved. Garnish with a fresh sprig of mint and a lemon wedge, if desired. Serve, and enjoy.

      To Enjoy COLD:
      1. Let tea first cool to room temperature. Once cooled, fill a glass with ice cubes, and pour tea into glass. NOTE: One reason you shouldn't pour HOT tea over ice is because it could possibly cause the glass to crack. The other reason is that the heat will melt the ice cubes which would water down the tea considerably.

      Recipe Notes

      Note: If making then the quantity desired, increase the amount of tea bags, sugar and lemon juice times the amount you want. However- you will only need ONE cinnamon stick to flavor up to about 10 servings.

      Nutrition Facts
      Lemon Mint Tea
      Amount Per Serving (1 cup (8 oz.))
      Calories 52 Calories from Fat 9
      % Daily Value*
      Fat 1g2%
      Saturated Fat 1g6%
      Sodium 12mg1%
      Potassium 20mg1%
      Carbohydrates 14g5%
      Fiber 1g4%
      Sugar 12g13%
      Protein 1g2%
      Vitamin A 4IU0%
      Vitamin C 6mg7%
      Calcium 18mg2%
      Iron 1mg6%
      * Percent Daily Values are based on a 2000 calorie diet.

      Here’s one more to pin on your Pinterest boards!Lemon Mint Tea is simple to make with only a few ingredients, and it can be enjoyed hot to warm you up, or cold to refresh you on a hot day!

      How To Make Oat Milk

      Ever wondered how to make oat milk? It’s EASY! With only 2-3 common ingredients you can make 5 cups of this non-dairy milk alternative.
      Ever wondered how to make oat milk? It's EASY! With only 2-3 common ingredients you can make 5 cups of non-dairy milk alternative.

      Nowadays there are new options springing up everywhere for non-dairy alternatives for milk, ice cream, etc. I am NOT dairy-free, but I do buy almond milk occasionally, and use it on my cereal or in oatmeal. I became aware of oat milk via commercials on TV and wondered about this product. Truthfully it sounded kind of odd to me, but I was still curious about it.

      I discovered a recipe for how to make oat milk in a book by celebrity chef Michael Symon and thought I’d give it a try. Wow! It was SO EASY to make, and costs a fraction of what a carton in the store costs nowadays! It only takes a couple ingredients to make, and it tastes great on my morning cereal. WHO KNEW?

      I would like to show you how to make oat milk, as a cheaper alternative to buying it, or as a tasty alternative for those who don’t use dairy products. I think you’ll be surprised how easy and inexpensive it is to make.

      Scroll Down For A Printable Recipe Card At The Bottom Of The Page

      Soak The Oats

      Place 1 cup of old-fashioned oats (not instant!) in a large mixing bowl, and cover with 4 cups of cold water. Stir to combine, then let the oats sit and soak in the water at room temperature for 1 hour. Think of it as a “swimming pool” for oats.

      Raw old fashioned oats soak in water for one hour.

      Strain The Soaked Oats

      After the oats have soaked for an hour, position a fine mesh strainer over a large bowl or sink. Slowly pour the water/oat mixture into the strainer to drain the oats. Give the oats a quick rinse (still in the strainer), then dump the accumulated water in the bowl underneath the strainer. Place the drained oats in a blender.

      The water is strained off the soaked oats into a large bowl.The drained oats are placed into a blender.

      Ready To Blend

      Pour 4 cups of FRESH cold water into the blender with the oats. Add a small pinch of salt and a Tablespoon of raw honey OR real maple syrup to the blender, as well. The blender will be pretty full at this point, so make sure you have a tight fitting lid.

      Fresh water, honey and a pinch of salt are added to the oats in the blender.Oats, honey, salt and water in the blender before mixing.

      How To Make Oat Milk

      Put the lid on the blender and blend the oat milk for 2-3 minutes, until it is completely smooth. Start the blender on low speed, then increase it as you go, eventually blending it on high speed, holding the lid in place while mixing!

      After mixing the oat milk is completely smooth and blended.

      Once the oat milk is smooth and finished blending, pour it AGAIN through a fine mesh strainer positioned over a large bowl. The oat milk will collect in the bowl underneath the strainer, and any leftover “pulp” will be caught in the strainer. Discard the pulp. Keep the oat milk! Strain the oat milk again, and discard any more pulp left in the strainer. Now it’s done.

      Pour the oat milk (using a funnel if you have one) into a bottle or other storage container. The recipe will make about 5 cups of oat milk. A quart jar will hold about 4 cups of the milk, so either use two jars or a larger container.

      Oat milk is poured through a fine mesh strainer into bowl, leaving pulp in strainer.A funnel is inserted in a jar and oat milk is poured into the jar through the funnel.

      Label the container and place the oat milk in the refrigerator to fully chill. Congratulations! You’ve just learned how to make oat milk! It’s really not difficult at all to make, and will keep for up to 5 days in the refrigerator. Not bad, right?

      Once fully chilled, shake the oat milk well before each use to reincorporate the ingredients, as they settle a bit and separate during refrigeration. Once mixed, enjoy it over a bowl of cereal, and take pride in knowing you made it yourself, for a fraction of the price of store-bought oat milk.

      It's easy to learn how to make oat milk, and you then store it in a labeled jar in refrigerator.A bowl of cereal topped with some of the oat milk is ready to eat.

      I hope you will have the opportunity to try this “recipe” for oat milk, and hope you will be as pleased with the results as I am! Thanks for stopping by today, and I hope you will come back again soon for more recipes. Take care, and have a GREAT day!

      Looking For More Tips?

      You can find all my tips and recipes in the Recipe Index, located at the top of the page. I have a variety of interesting tips available, including:

      Interested In More Recipes?

      Thank you for visiting this website. I appreciate you using some of your valuable time to do soIf you’re interested, I publish a newsletter 2 times per month (1st and 15th) with all the latest recipes, and other fun info. I would be honored to have you join our growing list of subscribers, so you never miss a great recipe!
      There is a Newsletter subscription box on the top right side (or bottom) of each blog post, depending on the device you use, where you can easily submit your e-mail address (only) to be included in my mailing list.

      You Can Also Find Me On Social Media:

      Facebook page: The Grateful Girl Cooks!
      Pinterest:
      The Grateful Girl Cooks!
      Instagram:
      jbatthegratefulgirlcooks

      Author's signature

      Original recipe source: “Fix It With Food: More Than 125 Recipes To Address Autoimmune Issues And Inflammation- A Cookbook”, by Michael Symon and Douglas Trattner, page 245, published in 2019 by Clarkson Potter

      ↓↓ PRINTABLE RECIPE BELOW ↓↓

      0 from 0 votes
      How To Make Oat Milk
      Prep Time
      5 mins
      Cook Time
      0 mins
      Soaking time (Inactive Prep)
      1 hr
      Total Time
      1 hr 5 mins
       

      Ever wondered how to make oat milk? It's EASY! With only 2-3 common ingredients you can make 5 cups of non-dairy milk alternative.

      Category: Beverage
      Cuisine: All Cuisines
      Keyword: how to make oat milk
      Servings: 5 cups
      Calories Per Serving: 74 kcal
      Author: JB @ The Grateful Girl Cooks!
      Ingredients
      • 1 cup old fashioned oats
      • 4 cups water
      • 1 Tablespoon raw honey OR real maple syrup
      • 1 pinch salt
      Instructions
      1. Place 1 cup of old-fashioned oats (not instant!) in a large bowl. Cover with 4 cups of cold water. Stir to combine; let oats soak at room temperature for 1 hour.

      2. Position a fine mesh strainer over a large bowl or sink. Slowly pour water/oat mixture into the strainer to drain off water. Give oats a quick rinse (still in strainer), then dump any accumulated water.

      3. Place drained oats in a blender. Add 4 cups of FRESH cold water into blender, along with salt and raw honey (or real maple syrup).

      4. Put lid on blender. Blend 2-3 minutes, until oat milk is completely smooth. Start on low speed, then increase it as you go, eventually blending it on high speed, holding lid in place while mixing!

      5. Pour oat milk through a fine mesh strainer positioned over a large bowl. Oat milk will collect in the bowl, and any leftover "pulp" will be left in the strainer. Discard pulp. Strain milk again, then pour oat milk through a funnel into bottle or other storage container, with a lid. Refrigerate until fully chilled.

      6. Once fully chilled, shake or stir oat milk well before using to re-blend, as it settles during refrigeration. Oat milk will keep up to 5 days in refrigerator.

      Recipe Notes

      NOTE: Caloric Calculation made using raw honey.

      Nutrition Facts
      How To Make Oat Milk
      Amount Per Serving (1 cup (8 oz.))
      Calories 74 Calories from Fat 9
      % Daily Value*
      Fat 1g2%
      Saturated Fat 1g6%
      Polyunsaturated Fat 1g
      Monounsaturated Fat 1g
      Sodium 18mg1%
      Potassium 61mg2%
      Carbohydrates 14g5%
      Fiber 2g8%
      Sugar 4g4%
      Protein 2g4%
      Vitamin C 1mg1%
      Calcium 14mg1%
      Iron 1mg6%
      * Percent Daily Values are based on a 2000 calorie diet.

      Here’s one more to pin on your Pinterest boards!Ever wondered how to make oat milk? It's EASY! With only 2-3 common ingredients you can make 5 cups of non-dairy milk alternative.