Month: February 2014

Orange Beef Stir Fry

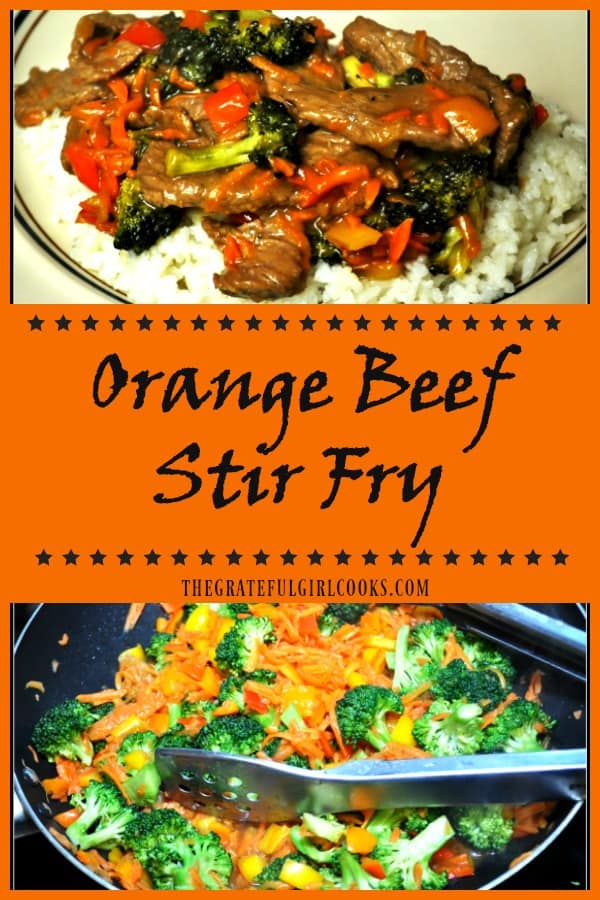
Enjoy an Orange Beef Stir Fry, with marinated steak cooked with broccoli, carrots and red bell peppers, in an Asian-inspired soy and marmalade sauce!Enjoy an Orange Beef Stir Fry, with marinated steak cooked with broccoli, carrots and red bell peppers, in an Asian-inspired soy and marmalade sauce!
Last year I bought a cookbook called “Hungry Girl To the Max!” – The Ultimate Guilt-Free Cookbook”, by Lisa Lillien. I found this recipe for Orange Beef Stir Fry in the cookbook and enjoyed giving it a try. We ended up really enjoying this delicious meal.

I don’t eat very much beef, but this recipe sounded good to me (I’m a sucker for anything with orange in it), and I love the fact that the author has taken steps to cut the fat in a lot of her recipes.

Scroll Down For A Printable Recipe Card At The Bottom Of The Page

The Marinated Steak Is Full Of Flavor!

The steak marinades until time to cook, so it helps to tenderize it, and allows the wonderful, delicious combination of orange marmalade, soy sauce, ginger and garlic flavors to permeate it!  Add to that some good stir-fried veggies, and you’re in for a treat!

The orange sauce would be great just on the veggies alone, if you don’t eat meat…(just sayin’ that for all you vegetarians out there!) Or swap out the beef for chicken if you don’t like red meat. This is a very versatile recipe- the flavor is in the sauce!

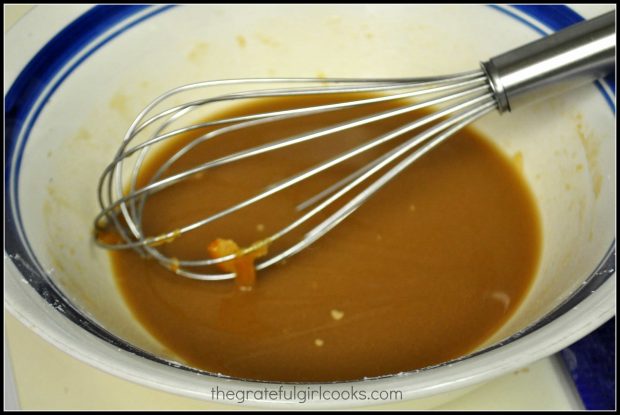
My suggestion would be to get the beef marinating in the refrigerator early in the day…then the recipe will be a snap to throw together later, for a delicious dinner. Hope you enjoy it! Making the sauce is EASY! Simply whisk the ingredients together.

An Asian-inspired orange and soy sauce is mixed for the stir fry.

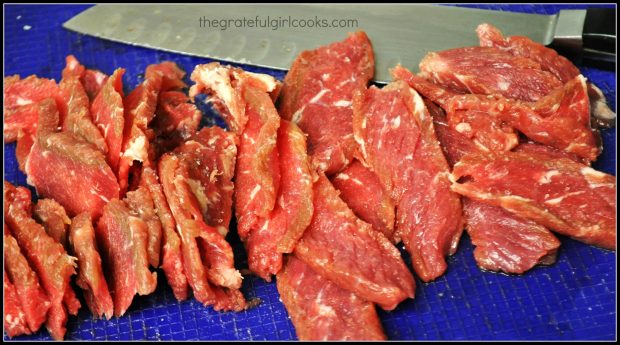
Slice the steak very thin. TIP: You will find it’s easiest to slice thin if the meat is partially frozen before cutting.

Steak is cut into thin strips for the orange beef stir fry.

Marinating The Steak Strips For FLAVOR!

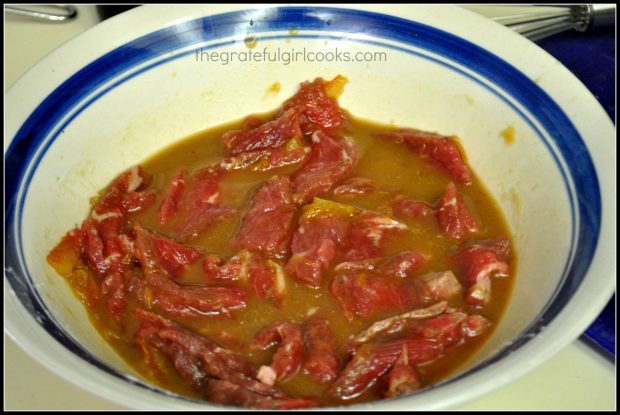
The steak slices are marinated in a delicious soy and marmalade Asian-inspired sauce, before stir frying.

Steak marinates in orange and soy sauce before cooking.

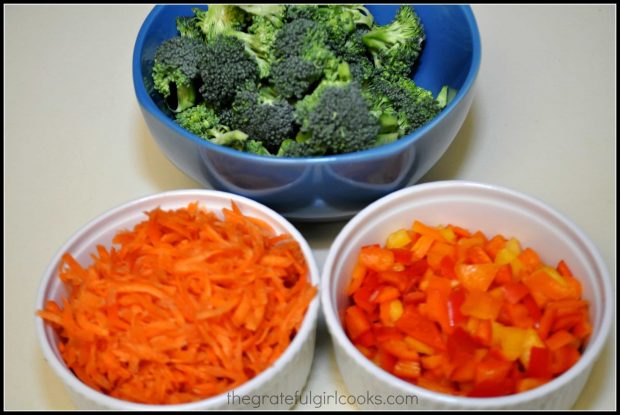
While the steak marinates, I prep the veggies for the orange beef stir fry. The veggies are prepped and ready to go. I love the colors of the veggies in a good stir fry, don’t you?

Broccoli, bell peppers and carrots are chopped and prepped before stir frying.

Stir Fry The Veggies

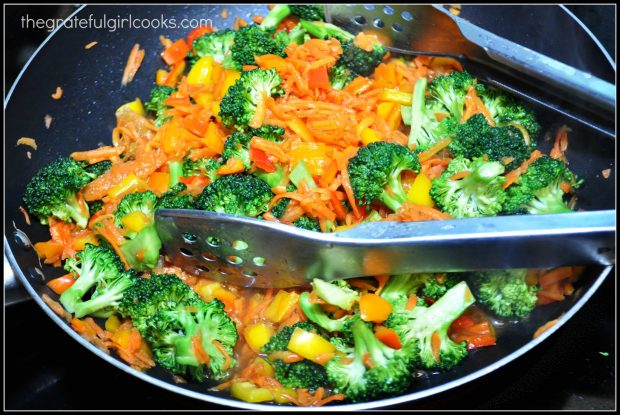
The colorful veggies are stir-fried in some reserved delicious orange and soy sauce mixture.

Broccoli, bell peppers and carrots are stir-fried in orange sauce.

Finish Cooking The Orange Beef Stir Fry And Serve!

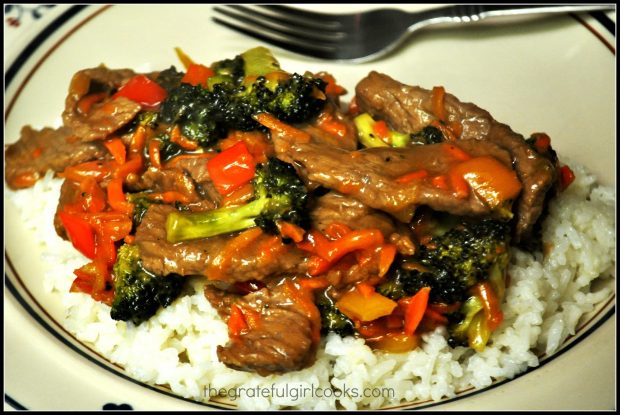
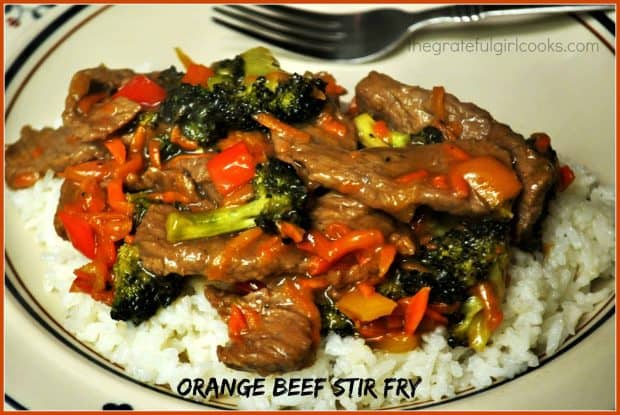
The marinated beef slices and the reserved sauce are then added to the veggies. The dish is cooked until the steak is cooked through, and the sauce has thickened. The finished orange beef stir fry is served on top of a bed of rice. Yum!

Orange Beef Stir Fry is served on top of white steamed rice.

Hope you will consider trying this yummy orange beef stir fry. It is really scrumptious! Thanks for stopping by, and I hope you will come back soon for more delicious recipes. Have a GREAT day!

Looking For More BEEF Recipes?

You can find all of my beef recipes in the Recipe Index, located at the top of the page. These recipes include:

Interested In More Recipes?

Thank you for visiting this website. I appreciate you using some of your valuable time to do soIf you’re interested, I publish a newsletter 2 times per month (1st and 15th) with all the latest recipes, and other fun info. I would be honored to have you join our growing list of subscribers, so you never miss a great recipe!
There is a Newsletter subscription box on the top right side (or bottom) of each blog post, depending on the device you use, where you can easily submit your e-mail address (only) to be included in my mailing list.

You Can Also Find Me On Social Media:
Facebook page: The Grateful Girl Cooks!
Pinterest: The Grateful Girl Cooks!
Instagram: jbatthegratefulgirlcooks

Author's signatureRecipe Adapted from “Hungry Girl To The Max-The Guilt-Free Cookbook, by Lisa Lillien, published 2012.

↓↓ PRINTABLE RECIPE BELOW ↓↓
0 from 0 votes
Orange Beef Stir Fry
Prep Time
1 hr 30 mins
Cook Time
12 mins
Total Time
1 hr 42 mins
 

Enjoy an Orange Beef Stir Fry, with marinated steak cooked with broccoli, carrots and red bell peppers, in an Asian-inspired soy and marmalade sauce!

Category: Entree
Cuisine: Chinese
Keyword: orange beef stir fry
Servings: 3 servings
Calories Per Serving: 243 kcal
Author: JB @ The Grateful Girl Cooks!
Ingredients
  • 3 Tablespoons orange marmalade (author recommends low-sugar)
  • 1 1/2 Tablespoons reduced sodium/light soy sauce
  • 1 1/2 Tablespoons seasoned rice vinegar
  • 1 1/2 Tablespoons cornstarch
  • 3/4 teaspoons ground ginger
  • 1/2 teaspoons garlic powder
  • 8 oz. raw lean beefsteak fillet (I used a rib eye steak I found in the freezer...heh heh heh!)
  • 2 dashes Couple dashes of salt
  • 3 cups broccoli florets
  • 1 1/2 cups chopped red bell pepper (I used a combination of red and yellow peppers for color)
  • 3/4 cup shredded carrots
  • Optional seasonings to taste: additional salt , pepper, and red pepper flakes (I used all of them)
Instructions
  1. Make the sauce: In a medium bowl, mix the marmalade with the soy sauce until blended. Add the vinegar, cornstarch, ginger and garlic powder and mix well. Add 1 cup of water to this and whisk together until the cornstarch is completely dissolved.
  2. At this point, reserve 1/2 cup of the marinade in a separate bowl. Cover and refrigerate. This will be used later in the recipe.
  3. Thinly slice the beef (trimming the visible fat) and season with salt. (Hint: the easiest way to slice the beef thin is to slice while the beef is semi-thawed, but still firm. Trust me.) Add the beef to the bowl w/ the remaining marinade (NOT the 1/2 cup you reserved earlier) and coat well. Cover the bowl and let marinate in the refrigerator for at least one hour (I recommend all day)
  4. Chop and grate the veggies. Spray a large skillet with non-stick spray, and bring to medium-high heat. Add the broccoli, bell pepper, carrots, and the 1/2 cup of the marinade that you reserved earlier. Cook this on medium-high for approximately 5 minutes, stirring, until the veggies have slightly softened.
  5. Add the 1/2 cup of leftover marinade and the beef into the skillet. Cook on medium-high until the veggies are tender, the beef has cooked through, and the sauce has thickened (approx. 4-5 minutes). When done, remove from heat, and serve! We had rice on the side and it was a perfect accompaniment to the stir-fry. ENJOY!
Nutrition Facts
Orange Beef Stir Fry
Amount Per Serving (1 (1/3 of total))
Calories 243 Calories from Fat 36
% Daily Value*
Fat 4g6%
Saturated Fat 1g6%
Cholesterol 46mg15%
Sodium 871mg38%
Potassium 824mg24%
Carbohydrates 31g10%
Fiber 4g17%
Sugar 18g20%
Protein 21g42%
Vitamin A 8245IU165%
Vitamin C 179.2mg217%
Calcium 87mg9%
Iron 2.6mg14%
* Percent Daily Values are based on a 2000 calorie diet.

Here’s one more to pin on your Pinterest boards!Enjoy an Orange Beef Stir Fry, with marinated steak cooked with broccoli, carrots and red bell peppers, in an Asian-inspired soy and marmalade sauce!


Save

Save

Tuscan Garlic Chicken

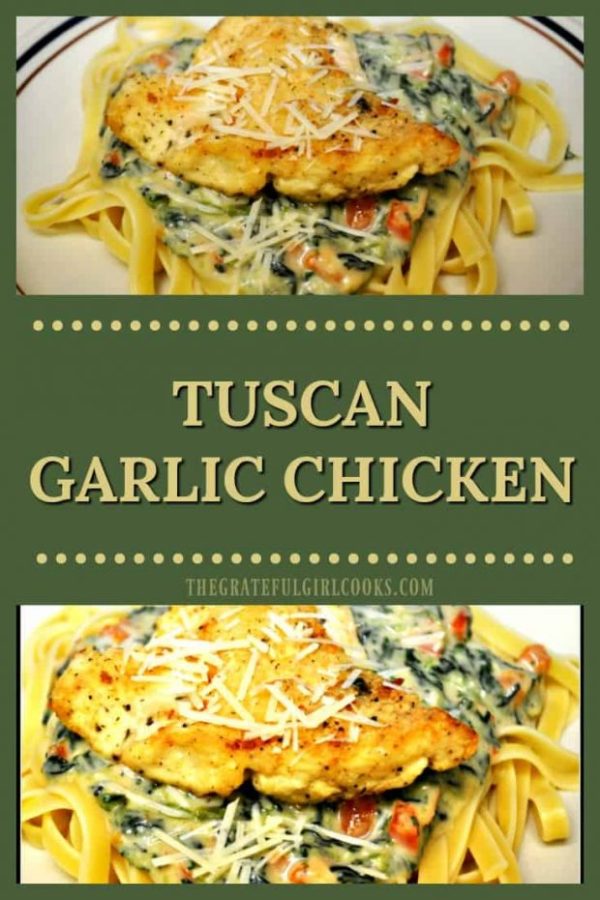
This easy, stove top Tuscan Garlic Chicken features lightly seasoned chicken, with a spinach, red pepper, garlic and Parmesan cheese sauce, on fettuccine pasta.
“Winner, Winner…Chicken Dinner”! I might have said these words after making this amazing recipe for Tuscan garlic chicken last night for dinner.
 
I love to search for new recipes and try them out for my husband and myself, and when I find a great one, like Tuscan garlic chicken, it’s a “Christmas miracle”, as I like to say!  I made a few small changes to the original recipe, utilizing ingredients I had on hand. The end result? We totally enjoyed this dish.
 
Scroll Down For A Printable Recipe Card At The Bottom Of The Page

About This Recipe For Tuscan Garlic Chicken

The Italian flavors of lightly seasoned chicken, spinach, red peppers, garlic and Parmesan cheese on a bed of fettuccine pasta are wonderful! As I made the sauce, I kept tasting it. Yes, it’s a tough job, but “someone” has to do quality control, right?
 
The original recipe calls for 4 chicken breasts, but I only used 2 for this recipe. After pounding them out thinner and cutting them in half (total of 4 pieces of chicken breast), my husband and I ended up having 1 half piece each (with 2 pieces leftover for “leftovers”).That portion size of chicken was more than enough, so that cut the already inexpensive price of this delicious meal way down!
 
I’m very glad I tried this recipe, and look forward to making it again. This would be a great meal to cook when company comes over for dinner! I hope you will give it a try – AND I hope you enjoy it! Here are a few pictures taken while cooking Tuscan garlic chicken:

Some Photos Of The Process

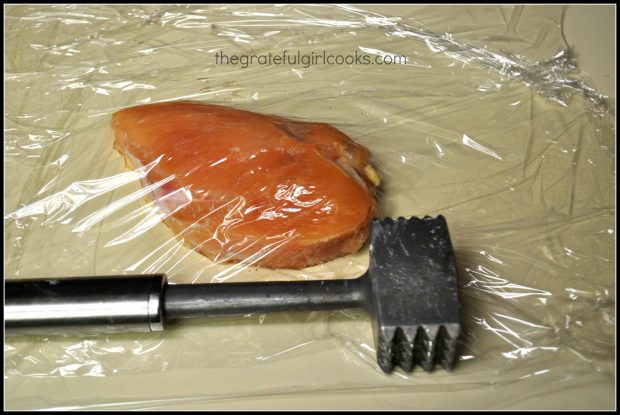
Pounding the chicken breasts between plastic wrap with a meat mallet is good, cheap therapy! Keep pounding until the chicken breasts are fairly flattened.
 
Pound the chicken breasts with a meat mallet, to flatten them.

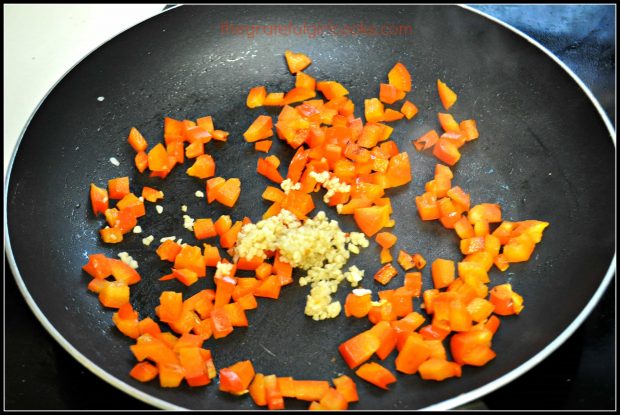
You will cook red peppers and garlic together in a large skillet, before adding the rest of the ingredients needed to make a colorful, creamy sauce for the chicken.
 
Red bell peppers and garlic cook in skillet before adding more sauce ingredients.
 

The Sauce For Tuscan Garlic Chicken Is Very Colorful!

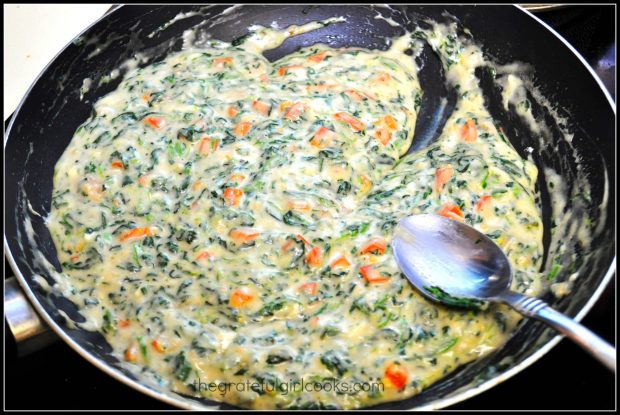
This is what the sauce for Tuscan garlic chicken will look like once all ingredients are added. It is very creamy and full of flavor.
 
The creamy sauce for Tuscan garlic chicken is very colorful in the skillet.

Serving Tuscan Garlic Chicken

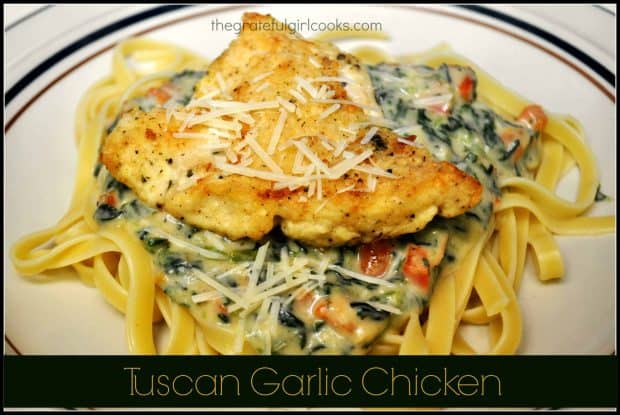
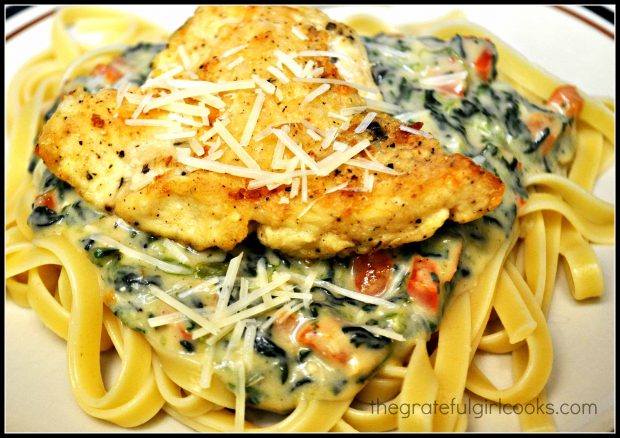
And that’s it! The Tuscan garlic chicken is wonderful, served on top of fettucine pasta. Doesn’t it look good? Well, let me tell you, it IS absolutely DELICIOUS!

Tuscan Garlic Chicken, served on a bed of fettucine noodles.

This chicken dish really is a simple meal to prepare, and it tastes wonderful! Sure hope you will consider making this Tuscan garlic chicken! Thank you for stopping by, and I hope you will come back soon. Have a great day.

Looking For More CHICKEN Recipes?

You can find all of my recipes in the Recipe Index, located at the top of the page. I have LOTS of delicious chicken recipes, including:

Interested In More Recipes?

Thank you for visiting this website. I appreciate you using some of your valuable time to do soIf you’re interested, I publish a newsletter 2 times per month (1st and 15th) with all the latest recipes, and other fun info. I would be honored to have you join our growing list of subscribers, so you never miss a great recipe! 

There is a Newsletter subscription box on the top right side (or bottom) of each blog post, depending on the device you use, where you can easily submit your e-mail address (only) to be included in my mailing list.

You Can Also Find Me On Social Media:

Facebook page: The Grateful Girl Cooks!
Pinterest:
The Grateful Girl Cooks!
Instagram:
jbatthegratefulgirlcooks


Author's signature

 Adapted From: http://www.tastesbetterfromscratch.com/2014/01/tuscan-garlic-chicken.html 

↓↓ PRINTABLE RECIPE BELOW ↓↓

0 from 0 votes
Tuscan Garlic Chicken
Prep Time
30 mins
Cook Time
15 mins
Total Time
45 mins
 

This easy, stove top Tuscan Garlic Chicken features lightly seasoned chicken, with a spinach, red pepper, garlic and Parmesan cheese sauce, on fettuccine pasta.

Category: Entree
Cuisine: Italian
Keyword: Tuscan garlic chicken
Servings: 4
Calories Per Serving: 540 kcal
Author: JB @ The Grateful Girl Cooks!
Ingredients
  • 2 large chicken breasts
  • 2 Tablespoons olive oil
For the chicken coating:
  • 1/2 cup all-purpose flour
  • 1 teaspoon salt
  • 1/2 teaspoon pepper
  • 1/4 teaspoon dried basil
  • 1/4 teaspoon dried oregano
  • 1/4 teaspoon onion powder
  • 1/4 teaspoon garlic powder
For the sauce:
  • 1/2 large red bell pepper , diced
  • 1 Tablespoon minced garlic
  • 1 1/2 Tablespoons olive oil
  • 1/2 cup chicken broth
  • 1/2 Tablespoon flour
  • 3/4 cup milk
  • 1 1/4 teaspoon corn starch
  • 1/4 teaspoon garlic powder
  • salt & pepper , to taste
  • 1/2 small box frozen chopped spinach (cooked according to pkg. & drained well) You can also substitute 2 cups of chopped fresh baby spinach, if desired)
  • 1/2 cup shredded Parmesan cheese (I used the real stuff!)
For the pasta:
  • 1/2 lb. fettuccine noodles , cooked according to pkg. directions)
  • * Note: I'm sure any pasta would work great...the fettuccine noodles were fantastic though; they really handled the sauce well!)
Instructions
  1. Preheat oven to 375 degrees.
  2. Cut the chicken breasts in half. Place each piece between two pieces of plastic wrap and pound with a meat mallet until much thinner (think of this as good therapy...pound, pound, pound!). You can also cut the chicken breasts in half horizontally, if desired. I pounded away!
  3. On a large plate, mix together the chicken coating ingredients (flour, salt, pepper, basil, oregano, onion powder and garlic powder). Dredge the chicken in the mixture, coating both sides.
  4. Heat 2 TBSP olive oil in a non-stick skillet on medium high. When the oil is really HOT, add the chicken. Brown the chicken on both sides (approx. 1-2 minutes per side-till golden brown), then remove chicken from skillet and place in a baking dish and bake at 375 degrees for 15 minutes (or until fully cooked). Keep chicken warm.
  5. While the chicken is in the oven, whip up the sauce. (Easy so far, right?)
  6. To make the sauce, start by sauteing the diced red peppers in just a touch of olive oil for about 5 minutes. Then add the minced garlic and saute for another minute or two (being careful NOT to burn the garlic!). Once done, remove from skillet to a small plate and set aside.
  7. Add the 1 1/2 TBSP olive oil to the warm skillet. Add in the flour and whisk into the oil to blend. Add the chicken broth to this mixture and whisk until smooth. Slowly bring this sauce to a boil.
  8. In a small bowl, combine the milk and the cornstarch until dissolved. Add this to the boiling sauce, then reduce the heat to a simmer.
  9. Stir in the cooked, well-drained spinach (or 2 cups fresh chopped baby spinach), the peppers and garlic mixture, the Parmesan cheese and garlic powder. Season with a touch of salt and pepper (to taste).
  10. Simmer the sauce until it thickens, stirring occasionally. If sauce is too thick, you can always add in several tablespoons of the starchy hot pasta water. (I added 3-4 TBSP of pasta water)
  11. Place fettuccine noodles on plates, top with the sauce and then place the chicken on top. Garnish with a bit of fresh, chopped basil (optional) and some additional shredded Parmesan cheese. ENJOY!
Nutrition Facts
Tuscan Garlic Chicken
Amount Per Serving (1 serving)
Calories 540 Calories from Fat 180
% Daily Value*
Fat 20g31%
Saturated Fat 5g31%
Cholesterol 97mg32%
Sodium 1000mg43%
Potassium 584mg17%
Carbohydrates 59g20%
Fiber 2g8%
Sugar 4g4%
Protein 28g56%
Vitamin A 2120IU42%
Vitamin C 26.6mg32%
Calcium 235mg24%
Iron 2.8mg16%
* Percent Daily Values are based on a 2000 calorie diet.

Here’s one more to pin on your Pinterest boards!This easy, stove top Tuscan Garlic Chicken features lightly seasoned chicken, with a spinach, red pepper, garlic and Parmesan cheese sauce, on fettuccine pasta.

Save

Save

Save

Save

Save

Cranberry Almond Granola

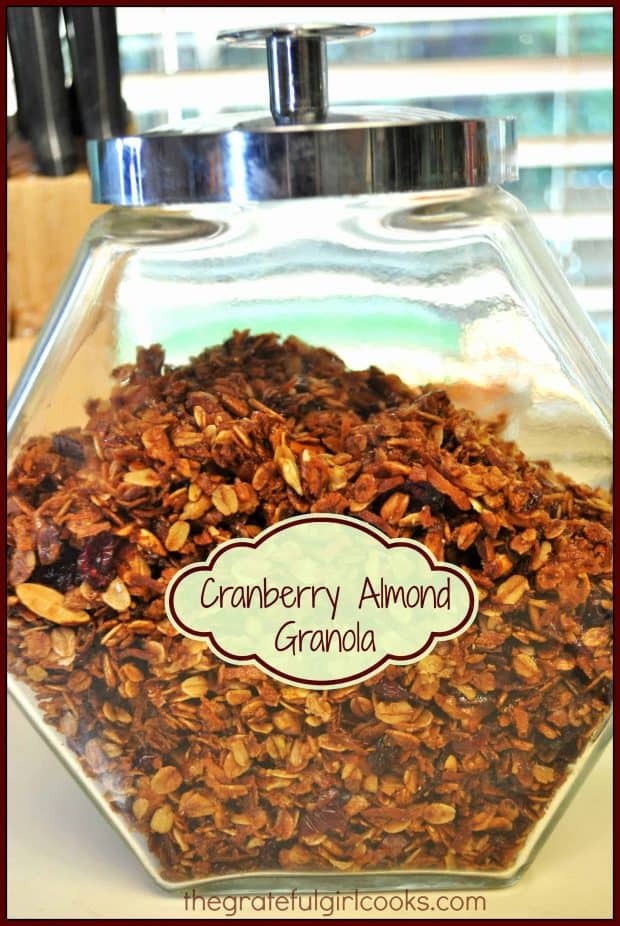
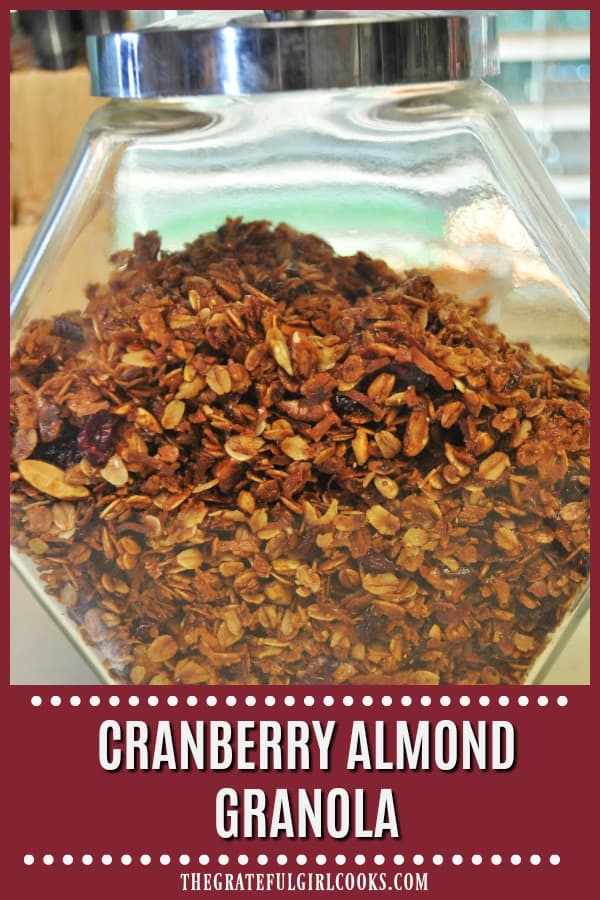
Cranberry almond granola is a yummy, easy to make homemade granola, with toasted almonds, oats, honey, cinnamon, sunflower seeds & dried cranberries!Cranberry almond granola is a yummy, easy to make homemade granola, with toasted almonds, oats, honey, cinnamon, sunflower seeds & dried cranberries! I love to make granola! A few years ago, I decided to try to make Cranberry Almond Granola from scratch. The results? A fantastic tasting breakfast or snack item! Making granola from scratch saves money (granola is getting expensive).

Scroll Down For A Printable Recipe Card At The Bottom Of The Page

It’s also fun to custom make granola to include some favorite items in the ingredients. I’ve been making our own cranberry almond granola ever since then, and don’t miss store-bought at all. It’s been fun to also make great tasting Coconut Pecan Chocolate Chip Granola and Gingerbread Granola.

Over the past few years I have experimented with several recipes, but still love this simple one that I “morph” (by adding a variety of dried fruits) to suit my taste at any given moment. I love this cranberry almond granola sprinkled on Greek yogurt for a quick little breakfast treat. It is also good as breakfast cereal, swimming in a bowl of milk, or even as a topping for ice cream!

I made this batch of granola up this morning, and while it was baking, it began lightly snowing outside for a few brief minutes…how cool is that? Big, fluffy snowflakes coming down, while the aroma of the granola baking filled our kitchen. What a great way to start the day! Here are a few pics of the “process”:
 

Preparing Cranberry Almond Granola

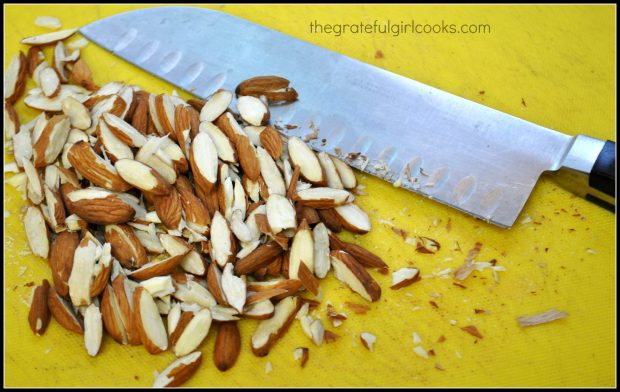
Slice almonds into thin slivers. The almonds will be lightly “dry toasted” in a skillet, to enhance their “nutty” flavor.

Almonds are sliced in slivers before skillet toasting and adding to granola.

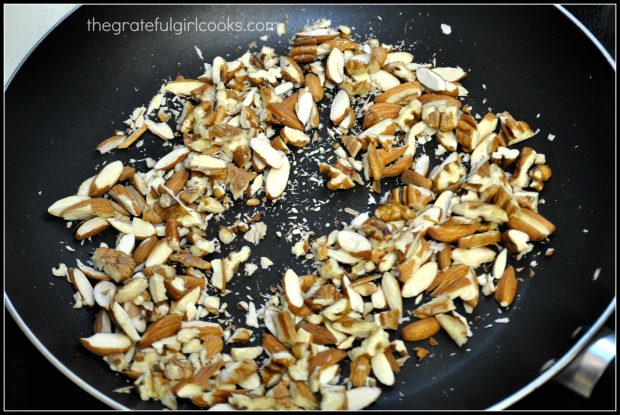
The sliced almond are lightly “toasted” in a dry skillet over low heat for several minutes. The aroma will be a good tip-off that they are done.

Sliced almonds are lightly toasted in a dry skillet.

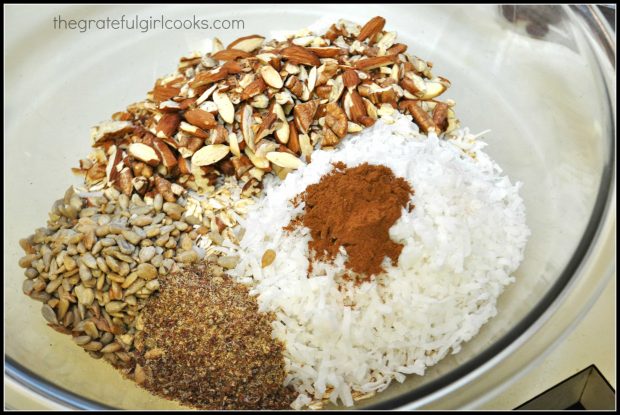
Place the toasted almonds, oats, sunflower seeds, flaxseed, coconut and cinnamon into a large mixing bowl.

In a separate bowl, mix together honey and oil, and then pour this over the almonds, oats, etc. in the mixing bowl. Stir to full combine and cover all the dry ingredients with the honey/oil mixture. DO NOT ADD THE DRIED CRANBERRIES before baking.

Toasted almonds, sunflower seeds, coconut, cinnamon, oats and flaxseed in mixing bowl.

Bake The Cranberry Almond Granola

The granola is then spread out onto a large ungreased baking sheet. Cook the granola at 350° F. for 30 minutes, stirring the granola once and re-spreading it out, halfway through the baking time.

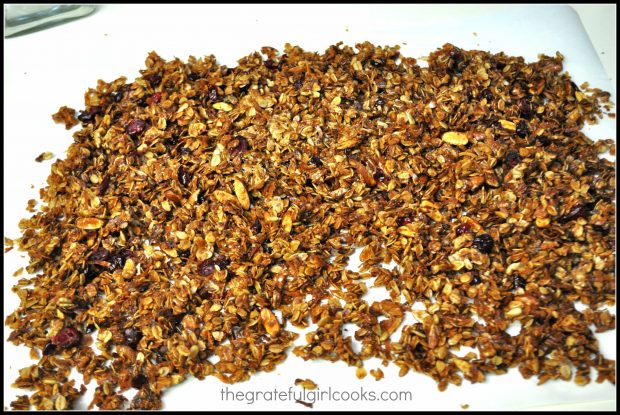
Once the cranberry almond granola (still cranberry-less) is finished baking, remove from oven and place it on parchment paper to cool off. Stir in the dried cranberries, spread it out, and then let the granola cool completely. Once cooled completely, it is ready to eat! Store the cranberry almond granola in an airtight container… and enjoy!

Cranberry Almond Granola cooling on parchment paper before eating!

I do hope you will try this recipe for cranberry almond granola…it is easy to make, and very flavorful, but I cannot guarantee random snowfall while making it…sorry! Hope you enjoy it as much as we do.

Be sure to check out ALL of my recipes in the Recipe Index, located at the top of the page. There are a LOT to choose from. Have a great day, and come back soon!

Interested In More Recipes?

Thank you for visiting this website. I appreciate you using some of your valuable time to do soIf you’re interested, I publish a newsletter 2 times per month (1st and 15th) with all the latest recipes, and other fun info. I would be honored to have you join our growing list of subscribers, so you never miss a great recipe!
There is a Newsletter subscription box on the top right side (or bottom) of each blog post, depending on the device you use, where you can easily submit your e-mail address (only) to be included in my mailing list.

You Can Also Find Me On Social Media:
Facebook page: The Grateful Girl Cooks!
Pinterest: The Grateful Girl Cooks!
Instagram: jbatthegratefulgirlcooks

Author's signatureRecipe Adapted From:  http://www.culinary.net/recipes/RecipeDetail.aspx?ID=7090&CourseName=Healthy+Eating&CourseID=55#.T9Y-bCvKVqg.pinterest

↓↓ PRINTABLE RECIPE BELOW ↓↓

0 from 0 votes
Cranberry Almond Granola
Prep Time
15 mins
Cook Time
30 mins
Total Time
45 mins
 

Cranberry almond granola is a yummy, easy to make homemade granola, with toasted almonds, oats, honey, cinnamon, sunflower seeds & dried cranberries!

Category: Breakfast
Cuisine: American
Keyword: cranberry almond granola
Servings: 9 cups
Calories Per Serving: 460 kcal
Author: JB @ The Grateful Girl Cooks!
Ingredients
  • 1 cup almonds , slivered and lightly toasted
  • 2 1/2 cups rolled oats (I use old-fashioned, but quick cook will work, too)
  • 1/2 cup pecans (can use walnuts), chopped
  • 1/4 cup sunflower seeds
  • 1 teaspoon flaxseed (optional)
  • 1 cup flaked coconut
  • 3/4 teaspoon cinnamon
  • 3/4 cup honey
  • 1/4 cup almond or vegetable oil (I use vegetable oil)
  • 1/2 cup dried cranberries (to add to granola AFTER it is done)
Instructions
  1. Preheat oven to 350 degrees. In a skillet on medium high heat, add the almonds and pecans. Stir the nuts for 4-5 minutes while they toast. They will turn lightly golden once toasted. Be careful not to burn them.
  2. In a large bowl, combine the toasted almonds and pecans with the oats, sunflower seeds, flaxseed, coconut and cinnamon.
  3. In a separate small bowl, add the honey and the oil and mix till combined. Pour over the dry ingredients and mix well, till all ingredients are coated well. Pour mixture out onto a large (ungreased) baking sheet. Evenly spread the granola out over the entire sheet.

  4. Bake at 350 degrees for 30 minutes. Remove granola from oven every 10 minutes during cooking and give the mixture a quick stir, then pop back into oven. Once done, remove granola from oven, stir in the dried cranberries, and pour granola onto a sheet of parchment paper to let it cool completely.

  5. Store granola in an airtight container. Makes approximately 9 cups of yummy granola!
Nutrition Facts
Cranberry Almond Granola
Amount Per Serving (1 cup)
Calories 460 Calories from Fat 252
% Daily Value*
Fat 28g43%
Saturated Fat 12g75%
Trans Fat 1g
Sodium 7mg0%
Potassium 312mg9%
Carbohydrates 51g17%
Fiber 7g29%
Sugar 29g32%
Protein 8g16%
Vitamin A 6IU0%
Vitamin C 1mg1%
Calcium 68mg7%
Iron 2mg11%
* Percent Daily Values are based on a 2000 calorie diet.

Here’s one more to pin on your Pinterest boards!Cranberry almond granola is a yummy, easy to make homemade granola, with toasted almonds, oats, honey, cinnamon, sunflower seeds & dried cranberries!


Save

Save

Banana Nut Scones

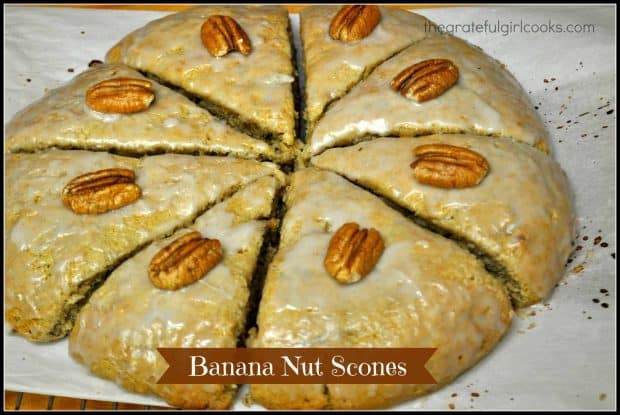
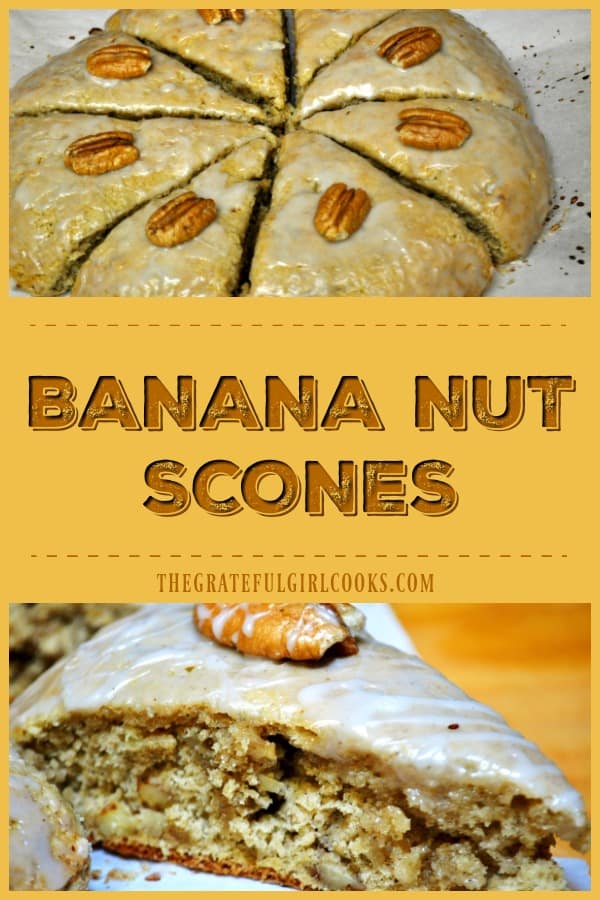
Banana Nut Scones, with pecans (or walnuts) and a banana flavored glazed icing are a delicious, easy to make treat for breakfast, brunch or a light snack!Banana Nut Scones, with pecans (or walnuts) and a banana flavored glazed icing are a delicious, easy to make treat for breakfast, brunch or a light snack! True story – I LOVE scones (wow…bold lettering AND underlined…can you tell how much I love them?) That includes these Banana Nut Scones! But… I don’t like paying high prices for one OR getting one in a coffee house that is dry, crumbly, and rather sawdust-like. UGH. Seriously, scones are so very quick, easy, and inexpensive to make! You can make EIGHT scones for a little more than what some people will pay for ONE! Why not whip up a batch, and freeze a few for later?

These scones are good for “those times“. You know…the times you’re running fast and furious to get to a meeting and forget to eat breakfast…or you’re snowed in…or you need something yummy to enjoy with your afternoon cup of coffee or tea. Perhaps you’ve had those times when you find overly-ripe (dead) bananas on the counter and they need to either go to the resting place for dead bananas or be used in something yummy! All very valid reasons (in my humble opinion) for making BANANA NUT SCONES!

I found this recipe online, made a few minor changes, and just like that had 8 delicious scones (half to be eaten and half to be given away). If you like the flavor of banana nut bread, you will LOVE these scones!

Scroll Down For A Printable Recipe Card At The Bottom Of The Page

Making Banana Nut Scones Is EASY

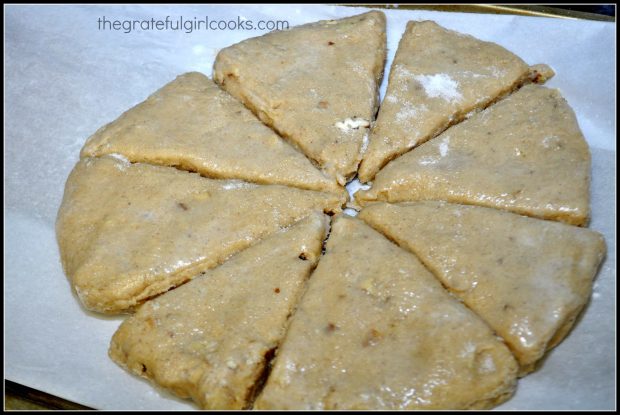
Here are the banana nut scones, rolled out and cut. It is dusted with sugar and now they are ready for baking in the oven.

Scones divided into 8 wedges on parchment paper

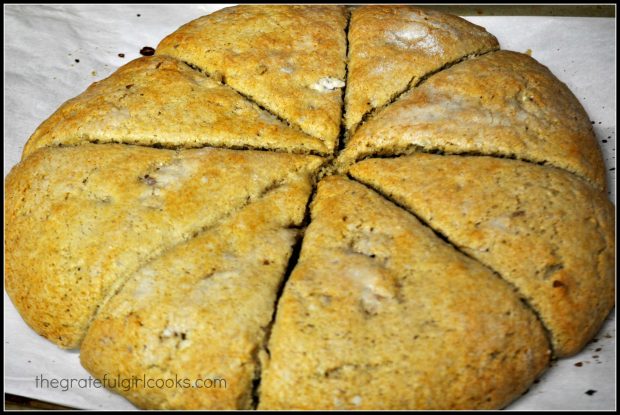
The banana nut scones are hot out of the oven, and lightly browned on top. Now they just need some sweet glaze drizzled on top before eating!

Browned banana nut scones on parchment paper

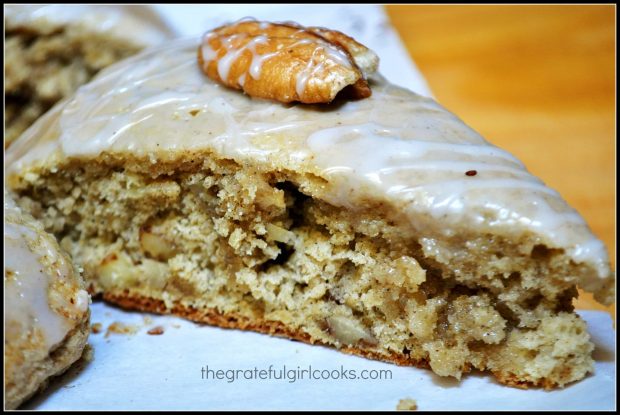
Here is one of the finished banana nut scones. It is lightly glazed, sliced, and is ready to enjoy!

Banana scone side view with pecan on top

I enjoyed nibbling (i.e. “scarfing”, but nibbling sounds daintier) ne of the banana nut scones while sipping my coffee. I did this while also writing in my Gratitude Journal (a daily practice of mine to name and write God’s blessings, as I become aware of and see them). Boy, was I grateful for that delicious scone!  I hope you will give them a try…think you will enjoy them.

Looking For More SCONE Recipes?

You can find all of my scone recipes in the Recipe Index, located at the top of the page. I have lots of them, including:

Interested In More Recipes?

Thank you for visiting this website. I appreciate you using some of your valuable time to do soIf you’re interested, I publish a newsletter 2 times per month (1st and 15th) with all the latest recipes, and other fun info. I would be honored to have you join our growing list of subscribers, so you never miss a great recipe!
There is a Newsletter subscription box on the top right side (or bottom) of each blog post, depending on the device you use, where you can easily submit your e-mail address (only) to be included in my mailing list.

You Can Also Find Me On Social Media:
Facebook page: The Grateful Girl Cooks!
Pinterest: The Grateful Girl Cooks!
Instagram: jbatthegratefulgirlcooks

Have a wonderful day!

Author's signature

Recipe Adapted from: http://heatherchristo.com/cooks/2013/01/10/banana-scones/

↓↓ PRINTABLE RECIPE BELOW ↓↓

0 from 0 votes
Banana Nut Scones
Prep Time
20 mins
Cook Time
20 mins
Total Time
40 mins
 
Banana Nut Scones, with pecans (or walnuts) and a banana flavored glazed icing are a delicious, easy to make treat for breakfast, brunch or a light snack!
Category: Breakfast
Cuisine: American
Keyword: banana nut scones
Servings: 8 servings
Calories Per Serving: 417 kcal
Author: JB @ The Grateful Girl Cooks!
Ingredients
For Scones:
  • 2 cups flour
  • 1/2 cup granulated sugar
  • 1 teaspoon baking powder
  • 1/2 teaspoon baking soda
  • 1/2 teaspoon salt
  • 1/2 teaspoon cinnamon
  • 8 Tablespoons cold butter , cut into small pieces
  • 1 large banana ( very ripe, mashed)
  • 2 Tablespoons milk or heavy cream (I used milk)
  • 1 egg , beaten slightly
  • 1/2 cup pecans or walnuts , chopped (I used pecans)
  • 1 Tablespoon milk or heavy cream
  • Granulated sugar (for sprinkling)
For Glaze Topping:
  • 1 1/2 cups confectioner's sugar (powdered)
  • 1/4 teaspoon banana extract
  • 1/4 teaspoon vanilla extract
  • 3-4 teaspoons warm water (to get glaze to correct "painting" consistency)
Instructions
  1. Preheat oven to 400°F. While oven preheats, line a baking sheet with parchment paper.

  2. In the bowl of a food processor (or large bowl if making by hand), combine all dry ingredients. Add cold butter to processor; pulse to cut in butter (or use hand-held pastry cutter). Process until mixture is crumbly and butter is about the size of peas.

  3. In separate bowl, mix mashed banana, milk (or heavy cream), and egg; Mix until well blended. Add banana mixture to dry ingredients; pulse till dough comes together in a "shaggy" looking ball (If mixing by hand, stir till you have a "shaggy" looking dough ball). Turn dough ball onto a floured work surface; mix in nuts till blended.

  4. With floured hands (sprinkle a bit more flour on dough, cause dough is sticky), gently form dough ball into a round "disc" approx. 8" across. Using sharp knife or pizza cutter, cut disc into 8 wedges.

  5. Re-arrange wedges in a circle on prepared baking sheet. Brush scone tops with 1 TBSP of cream or milk; lightly sprinkle with sugar.

  6. Bake scones at 400°F for 20-23 minutes (check them at the 20 minute mark-keep an eye on them). Bake till golden brown. When done, transfer scones to wire rack (with parchment or foil underneath to catch any drips from glaze icing). Let cool.

  7. While cooling, mix glaze ingredients in small bowl. Once scones are completely cooled, "paint" icing over the scones using pastry brush. ENJOY!

Nutrition Facts
Banana Nut Scones
Amount Per Serving (1 scone)
Calories 417 Calories from Fat 144
% Daily Value*
Fat 16g25%
Saturated Fat 7g44%
Cholesterol 50mg17%
Sodium 325mg14%
Potassium 175mg5%
Carbohydrates 63g21%
Fiber 1g4%
Sugar 36g40%
Protein 4g8%
Vitamin A 395IU8%
Vitamin C 1.3mg2%
Calcium 44mg4%
Iron 1.8mg10%
* Percent Daily Values are based on a 2000 calorie diet.

Here’s one more to pin on your Pinterest boards!Banana Nut Scones, with pecans (or walnuts) and a banana flavored glazed icing are a delicious, easy to make treat for breakfast, brunch or a light snack!

Save