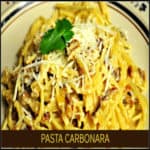
Enjoy classic Pasta Carbonara, an Italian dish with pasta cooked in a creamy bacon and onion sauce, with grated Parmesan cheese. It tastes FANTASTIC!
If you love bacon and you love pasta, then you’re going to LOVE this Pasta Carbonara recipe! I love recipes created by Ree Drummond, The Pioneer Woman, because I love her cooking, photos, and sense of humor. This recipe is adapted from her version of this classic pasta dish. I only made a couple of changes to suit our taste buds.
This pasta carbonara recipe is RIDICULOUS! I’m not kidding – the smell of bacon, onions, and garlic is amazing as they cook. I made this (again!) for us last night and my husband and I both LOVED it. We might have even exclaimed several times “Oh my gosh- this is so good!” Honestly, this dish is quite simple to make, economical, and if that’s not enough, it’s incredibly delicious! I’ve made it with spaghetti noodles (as in pic above) and fettucine noodles. Any pasta will do!
This recipe makes enough for 6 small servings or 4 generous servings. Since our sons are grown and it is now just the two of us at home, we always have LEFTOVERS! Yes…this pasta dish is truly a good thing. Here’s how to make it:
Scroll Down For A Printable Recipe Card At The Bottom Of The Page
How To Make Pasta Carbonara
Bring water in pan to a boil to cook the pasta. While the water is coming to a boil, fry the bacon in a large skillet, until crisp. Drain out the bacon grease, but leave about. 2 Tablespoons grease still in the skillet. Remove and drain the bacon strips on paper towels. When it has cooled, crumble the bacon into small pieces.

Return the skillet you cooked the bacon in back to the stove. Add the onions and mushrooms and cook over medium-low heat until golden brown (3-4 minutes). Carefully add the garlic and crumbled bacon, and continue cooking/stirring for one minute.


Time To Make The Pasta Carbonara Sauce
Now it’s time to make the pasta carbonara sauce. In a small bowl, whisk the eggs, whipping cream, parmesan cheese, parsley, salt, pepper and red pepper flakes together. Now it’s time to “temper the eggs”.
IMPORTANT – “Temper” The Eggs
Because there are fresh eggs in the sauce, you will want to “temper” them. All this means is introducing hot liquid very slowly into the mixture so when you add the hot pasta to the sauce, the eggs won’t scramble. Okay? It’s EASY. Don’t freak out… here’s what you do:
Take 6 Tablespoons of the hot, starchy water from your pasta (when it is about half way cooked). SLOWLY add the water, by drizzling one Tablespoon at a time to the egg mixture, stirring continuously while adding. Repeat until all 6 Tablespoons of hot starch water have been added. This helps warm up the egg mixture and “tempers” the eggs.


Turn the heat on the skillet to low. Slowly pour the mixture back into the skillet with the bacon mixture. Stir continuously, until the egg mixture is fully blended in with the bacon mixture.

Now the pasta carbonara sauce is ready to go! The next step is to add the cooked pasta to the sauce! Add the cooked and drained pasta to the skillet with the sauce. Toss well, to fully combine the pasta and the sauce. Once everything is heated through, the pasta carbonara is ready to serve!

Serve The Pasta Carbonara
When ready to serve, place portions of the pasta carbonara onto each plate. If desired, garnish the pasta carbonara with additional bacon crumbles, parsley, and grated Parmesan cheese. This is optional, but it looks (and tastes) good. Dig in, and enjoy this hearty pasta dish! I bet you will love it!

Hope you enjoy this pasta carbonara dish, because it really tastes fantastic! Have a wonderful day, friends. Thanks for stopping by, and I hope you will come back again soon.
Looking For More PASTA Recipes?
You can find all of my recipes in the Recipe Index, located at the top of the page. I have quite a few pasta dishes, including:
Interested In More Recipes?
Thank you for visiting this website. I appreciate you using some of your valuable time to do so. If you’re interested, I publish a newsletter 2 times per month (1st and 15th) with all the latest recipes, and other fun info. I would be honored to have you join our growing list of subscribers, so you never miss a great recipe!
There is a Newsletter subscription box on the top right side (or bottom) of each blog post, depending on the device you use, where you can easily submit your e-mail address (only) to be included in my mailing list.

Recipe Adapted From: http://thepioneerwoman.com/cooking/2012/05/pasta-carbonara/
↓↓ PRINTABLE RECIPE BELOW ↓↓
Enjoy classic Pasta Carbonara, an Italian dish with pasta cooked in a creamy bacon and onion sauce, with grated Parmesan cheese. It tastes FANTASTIC!
Category: Entree, Pasta
Cuisine: Italian
Keyword: pasta carbonara
Servings: 6
Calories Per Serving: 557 kcal
Author: JB @ The Grateful Girl Cooks!
- 6 slices thick cut bacon
- 1/2 medium onion , chopped finely
- 4 mushrooms , chopped (optional-I added them)
- 2 garlic cloves , minced
- 3 whole eggs
- 3/4 cup grated Parmesan cheese ,or 1/2 c. fresh and 1/4 c. Kraft "green" can)
- 3/4 cup heavy whipping cream
- 1/2 teaspoon salt (add more later, to taste!)
- 1/4 teaspoon black pepper
- 1 teaspoon dried parsley flakes
- 1/2 teaspoon red pepper flakes
- 3/4 lb. pasta fettucine, spaghetti or other pasta you enjoy
While water is coming to a boil for pasta, fry bacon until crisp. Drain most of the grease from skillet, but leave approx. 2 TBSP bacon grease in the skillet. Remove and drain bacon on paper towels. When cool, crumble bacon into small pieces.
Return skillet to stove. Place onions and mushrooms in skillet w/ bacon grease; cook on medium-low until golden brown (3-4 minutes). Add garlic and crumbled bacon; continue cooking for 1 minute, stirring often.
In a small bowl, beat eggs, whipping cream, Parmesan cheese, parsley, salt, pepper and red pepper flakes together using a whisk or fork. Because there are fresh eggs in the sauce, you need to "temper" them. This means introducing hot liquid slowly into the mixture so when you add hot pasta to the sauce, the eggs won't scramble. It's EASY. Here's how (see next step):
Cook pasta according to pkg. directions. When pasta is halfway cooked, measure out 6 Tablespoons of the starchy water. SLOWLY add this water, ONE TABLESPOON AT A TIME, drizzling it slowly into eggs while stirring continuously. Once hot starchy water has been added, the eggs are "tempered". Slowly pour egg mixture back into skillet (on Low heat) with bacon mixture, stirring continuously until egg mixture is fully incorporated.
When pasta is done cooking, drain, then add it to the sauce, stirring while adding. Cook on low heat for 1-2 minutes (do not boil) until pasta and sauce are heated through. Garnish with additional parmesan cheese and bacon crumbles, if desired. Serve and enjoy!
Nutrition Facts
Pasta Carbonara
Amount Per Serving (1 (1/6) of total)
Calories 557 Calories from Fat 288
% Daily Value*
Fat 32g49%
Saturated Fat 15g94%
Cholesterol 157mg52%
Sodium 673mg29%
Potassium 322mg9%
Carbohydrates 46g15%
Fiber 2g8%
Sugar 2g2%
Protein 21g42%
Vitamin A 725IU15%
Vitamin C 1.5mg2%
Calcium 188mg19%
Iron 1.4mg8%
* Percent Daily Values are based on a 2000 calorie diet.
Here’s one more to pin on your Pinterest boards!
Save
Save
Save
Save
Save


 recipe, made in an electric ice cream maker! / The Grateful Girl Cooks!")

 recipe, made in an electric ice cream maker! / The Grateful Girl Cooks!")
, and is a cold, refreshing frozen dessert treat to enjoy on a hot summer day! / The Grateful Girl Cooks!")

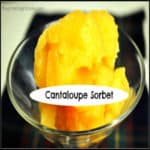
, and is a cold, refreshing frozen dessert treat to enjoy on a hot summer day! / The Grateful Girl Cooks!")


, are little balls of scrumptious buttery shortbread with pecans, coated with powdered sugar.")


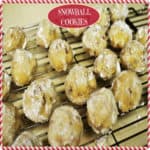
, are little balls of yummy buttery shortbread with pecans, coated with powdered sugar. / The Grateful Girl Cooks!")