Month: May 2026

Greek Tzatziki Sauce

Make homemade Greek Tzatziki Sauce in under 10 minutes! Use this versatile sauce on sandwiches, meats, salads or as a dip. It is delicious!
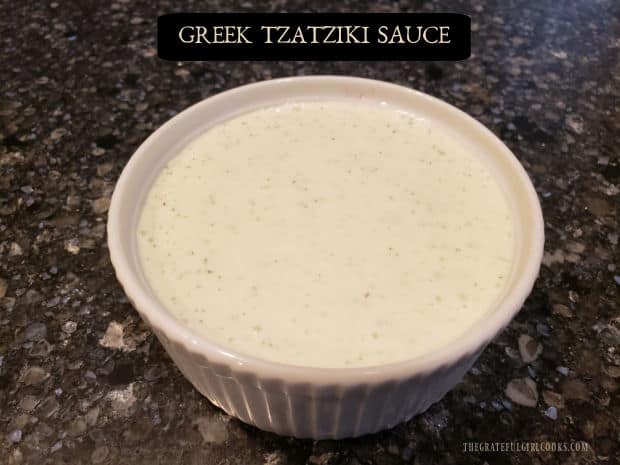

Today I want to share a recipe for a delicious sauce that is typically found served with Greek or other Mediterranean-style food, however, it can actually be used to enhance the flavor in many other foods.

Tzatziki sauce is primarily yogurt-based and is thought to have a history dating back to the Ottoman Empire and then spread throughout the Mediterranean and other places over the years. In modern times it is typically thought of as a big part of Greek cuisine.

This is a super simple sauce to make, and I really think you will enjoy it’s wonderful flavor! It hardly takes any time at all to make and requires only a few ingredients! Here’s how to make Greek Tzatziki Sauce.

Scroll Down For A Printable Recipe Card At The Bottom Of The Page

Prep The Cucumber

I love to grow cucumbers in our small, raised bed garden (shown below). If you are making this recipe (as written), you will only need ½ cup of peeled and chopped cucumber for the tzatziki sauce.

You will probably only use about ½ of one medium-sized cucumber, unless you plan on doubling the recipe. Use a regular, common cucumber, NOT a pickling cucumber. Give it a rinse before peeling.
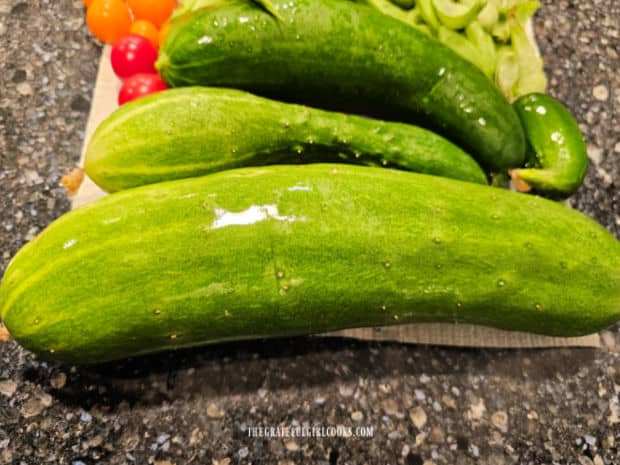
Cucumber is washed and ready to be used.

I usually cut the cucumber in half, then peel only one half because you can always cut and peel more if needed. Once peeled, chop the cucumber into small pieces. 
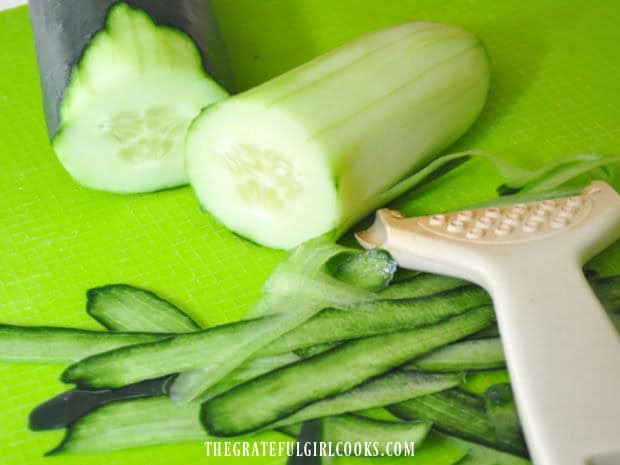
Peel is removed from cucumbers before they are sliced.

You will also need ½ cup of crumbled feta cheese. You can buy a block of feta, then crumble it OR you can use pre-crumbled feta if that is more convenient for you.
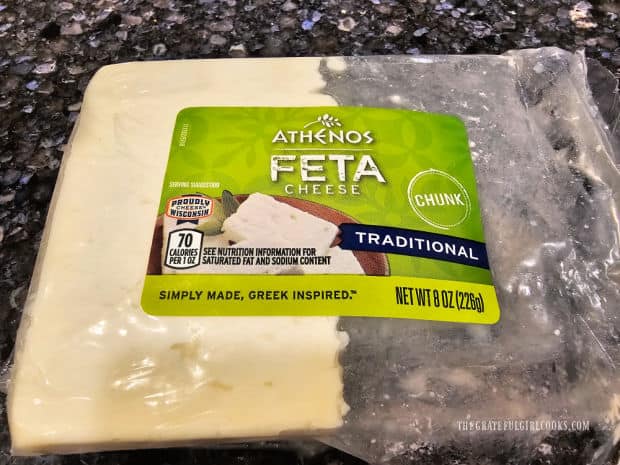
Greek feta cheese will be used in the tzatziki sauce.

Blend Ingredients Until Smooth

Place ALL of the tzatziki sauce ingredients into a blender (or a food processor). Process or blend the cucumber with crumbled feta, plain yogurt, dried dill weed (or fresh), garlic and salt.
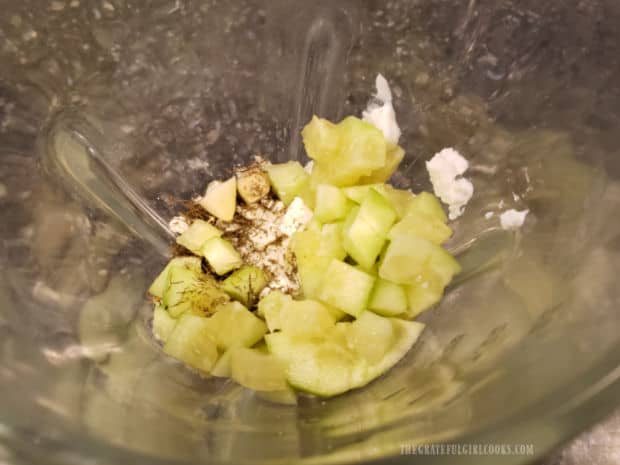
Chopped cucumber, yogurt, feta, dill, garlic and salt are blended together.

Blend or process these ingredients until the cucumbers have broken down and you are left with a very smooth Greek tzatziki sauce.

The final quantity of sauce that will be produced is between ¾-1 cup of tzatziki sauce. If you require more sauce, this recipe can very EASILY be doubled.
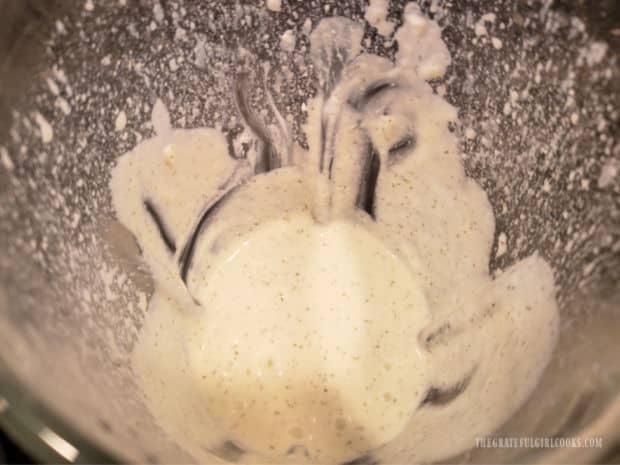
Ingredients are blended until they become smooth for the tzatziki sauce.

Refrigerate The Sauce

Once the sauce is smooth, transfer every last drop of it out of the blender (or processor) and into a small serving bowl. Cover the bowl with plastic wrap.

Put the Greek tzatziki sauce in the refrigerator until it becomes fully chilled. This will allow the sauce time for all the delicious flavors to come together, which results in a better tasting sauce, so don’t skip this step!
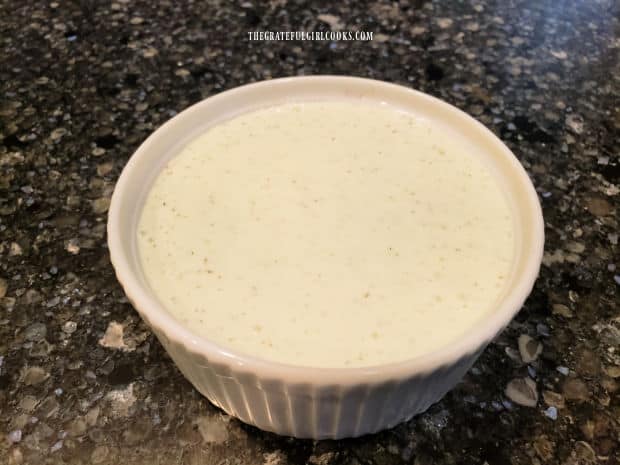
A small bowl of freshly made homemade Greek Tzatziki Sauce, ready to be enjoyed.

Serve The Greek Tzatziki Sauce

After the tzatziki sauce has been fully chilled, remove it from the refrigerator and serve it as desired. We love this sauce as a dip for Greek-Style Chicken Wings, as shown below.

This classic Greek sauce is often used as a topping for lamb and other meats, as well as gyros (YUM) and other sandwiches, and as a salad dressing. The possibilities are endless with this delicious sauce.
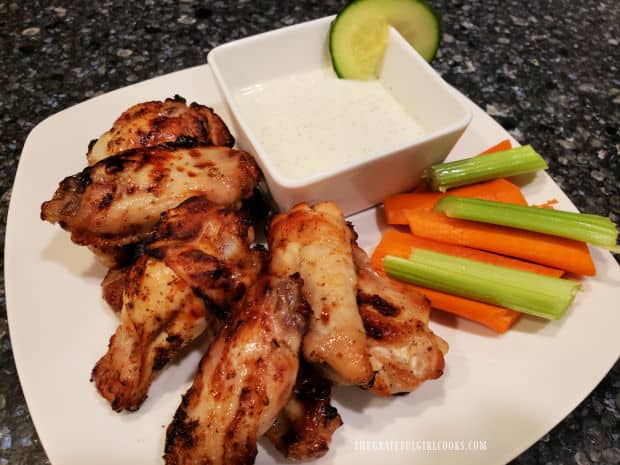
Greek-style chicken wings are cooked and then dipped into Greek Tzatziki Sauce.

I hope you have the opportunity to make Greek Tzatziki Sauce for yourself and for those you love. You will be thrilled with how quickly it can be made and how good it tastes!

Thanks for stopping by, and I invite you to come back again soon for more family friendly recipes. Take care, may God bless you, and have a wonderful day.

Looking For More SAUCE Recipes?

You can find ALL of my recipes in the Recipe Index, which is located at the top of the page. I have lots of homemade sauce recipes (sweet and savory) to choose from, including:

Want More Recipes? Get My FREE Newsletter!

I publish a newsletter 2 times per month (1st and 15th) with lots of recipes, tips, etc.
Would you like to join our growing list of subscribers?

There is a Newsletter subscription box on the top right (or bottom) of each blog post, depending on the device you use.
You can submit your e-mail address there, to be added to my mailing list.

Find Me On Social Media:

Facebook page: The Grateful Girl Cooks!
Pinterest:
The Grateful Girl Cooks!
Instagram:
jbatthegratefulgirlcooks

Author's signature

Original sauce recipe via “Taste of Home” magazine, April/May 2007 edition, page 23, published by Reiman Publications, Inc.

↓↓ PRINTABLE RECIPE BELOW ↓↓

0 from 0 votes
Greek Tzatziki Sauce
Prep Time
10 mins
Cook Time
0 mins
Total Time
10 mins
 

Make homemade Greek Tzatziki Sauce in under 10 minutes! Use this versatile sauce on sandwiches, meats, salads or as a dip. It is delicious!

Category: Sauce
Cuisine: Greek
Keyword: Greek Tzatziki Sauce
Servings: 6
Calories Per Serving: 48 kcal
Author: JB @ The Grateful Girl Cooks!
Ingredients
  • ½ cup plain yogurt (unsweetened)
  • ½ cup feta cheese (crumbled)
  • ½ cup cucumber (peeled/chopped)
  • 2 teaspoons dried dill weed OR 2 Tablespoons fresh chopped dill
  • 1 large clove garlic peeled, chopped
  • 1 pinch salt
Instructions
  1. Place ALL of the ingredients into a blender or food processor.

  2. Blend or process until cucumbers have broken down and the sauce is smooth. Total amount of sauce yield is between ¾-1 cup. If you need more sauce, recipe can EASILY be doubled.

  3. Once the sauce is smooth, transfer it out of the blender (or processor) and into a small serving bowl. Cover bowl tightly with plastic wrap. Refrigerate until fully chilled. This allows time for all the flavors to come together, which results in a better tasting sauce, so don't skip this step!

  4. Once fully chilled, serve (as desired) and enjoy! Cover and refrigerate any leftover sauce for 2-3 days.

Nutrition Facts
Greek Tzatziki Sauce
Amount Per Serving (1 (1/6 of total))
Calories 48 Calories from Fat 27
% Daily Value*
Fat 3g5%
Saturated Fat 2g13%
Polyunsaturated Fat 0.1g
Monounsaturated Fat 1g
Cholesterol 14mg5%
Sodium 159mg7%
Potassium 68mg2%
Carbohydrates 2g1%
Fiber 0.1g0%
Sugar 1g1%
Protein 3g6%
Vitamin A 100IU2%
Vitamin C 1mg1%
Calcium 95mg10%
Iron 0.3mg2%
* Percent Daily Values are based on a 2000 calorie diet.

Here’s one more to pin on your Pinterest boards! Make homemade Greek Tzatziki Sauce in under 10 minutes! Use this versatile sauce on sandwiches, meats, salads or as a dip. It is delicious!

Homemade Pico de Gallo

It’s quick and easy to make Homemade Pico de Gallo! Serve this chunky salsa with tortilla chips or add to tacos, burritos, quesadillas, etc.
It's quick and easy to make Homemade Pico de Gallo! Serve this chunky salsa with tortilla chips or add to tacos, burritos, quesadillas, etc.

Do you enjoy salsa and chips? We sure do! When we put out a bowl of salsa and chips for any gathering it is always one of the first things to get gobbled up!

We love restaurant-style salsa AND we love this type of Pico de Gallo fresh salsa, which contains lots of fresh, chunky tomatoes, onions and other classic ingredients!

This salsa (also known as “salsa fresca”) is a variety of fresh salsa most commonly used to enhance the flavor of many Mexican dishes. I want to share my recipe for Homemade Pico de Gallo with you today.

I’ve been making Pico de Gallo this same way for over 25 years, and it never disappoints, whether it’s enjoyed as an appetizer with chips or as a topping for other Mexican dishes! Here’s how easy it is to make:

Scroll Down For A Printable Recipe Card At The Bottom Of The Page

Prepare The Pico de Gallo

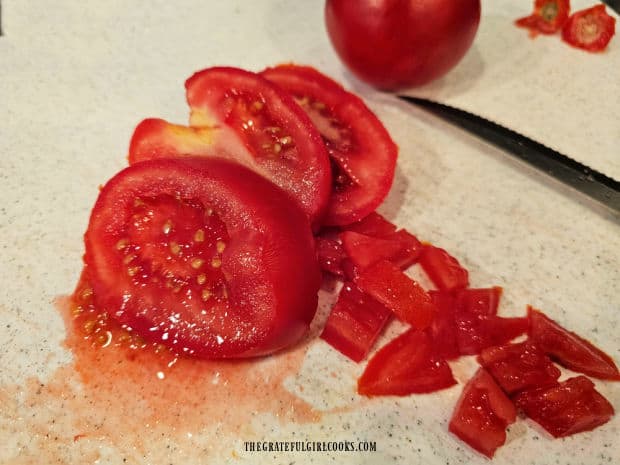
Chop the tomatoes into small chunks. Place all of the chopped tomatoes, seeds and any juice produced into a small serving bowl. 

Fresh tomatoes are cut into small chunks for the salsa.

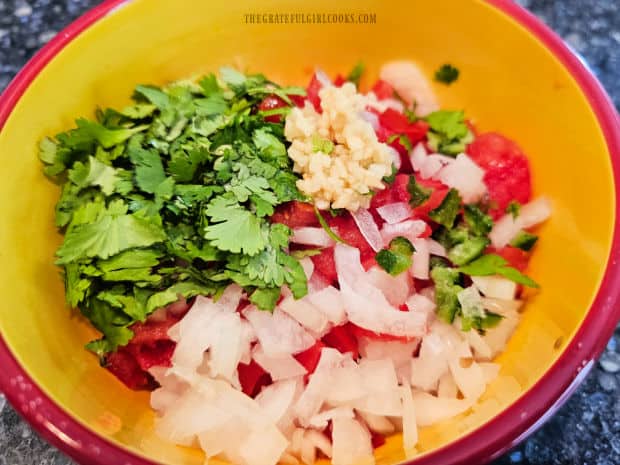
Add chopped cilantro, minced garlic, diced jalapeño pepper, chopped onion and fresh lime juice to the tomatoes in the bowl and stir until combined.

Onions, cilantro, garlic, lime juice and jalapeños are added to the chopped tomatoes.

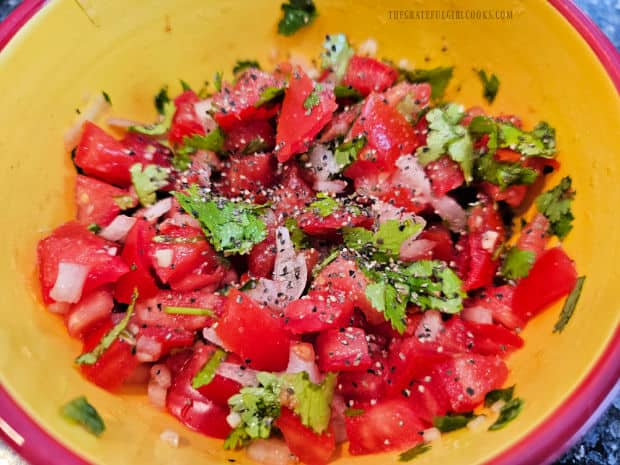
Season the Pico de Gallo to suit your own personal taste with salt and black pepper, then stir to combine all ingredients.

The pico de gallo is seasoned to taste with salt and pepper.

Extract A Bit Of Juice From The Tomatoes

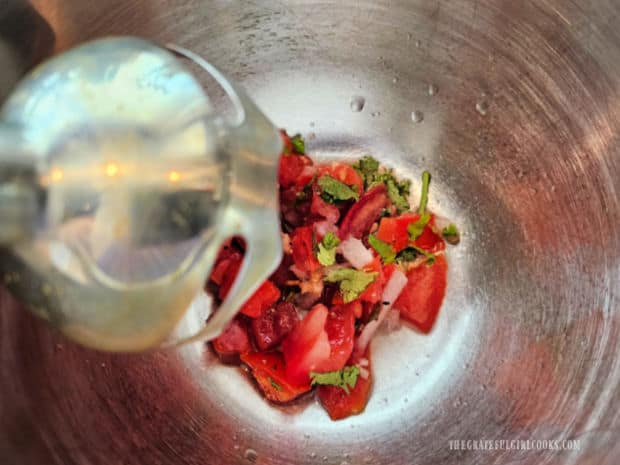
Transfer about one third (1/3) of a cup of the Pico de Gallo into a separate bowl. Use an immersion blender to break down the tomatoes, etc. a bit.

You can also use a flat-edged mallet OR a blender to smash the tomatoes if you do not have access to an immersion blender.

A small amount of the salsa is blended to extract a bit more tomato juice.

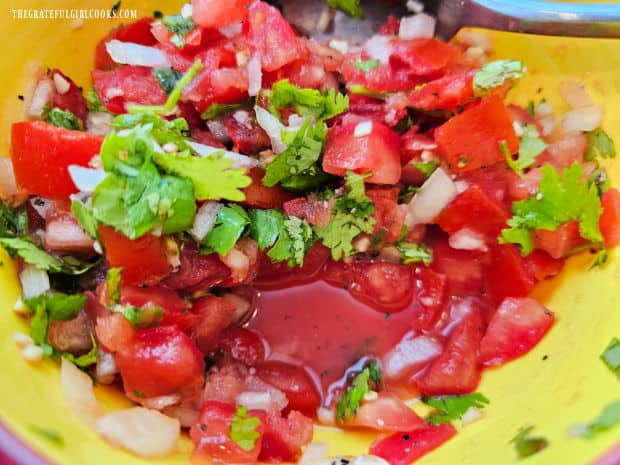
This blending (or pulverizing) will extract a fairly small amount of tomato juice. Add this entire mixture (salsa and juice) back into the bowl with the salsa (shown below).

Stir very well to combine all the ingredients, then cover and refrigerate the “salsa fresca” or Pico de Gallo for at least half an hour to let the flavors mingle (for best flavor).

The small amount of salsa and extracted tomato juice are added back into the bowl.

Serve The Homemade Pico de Gallo

You might be tempted to dig right in but trust me… it will taste even better once all the flavors have had time to come together!

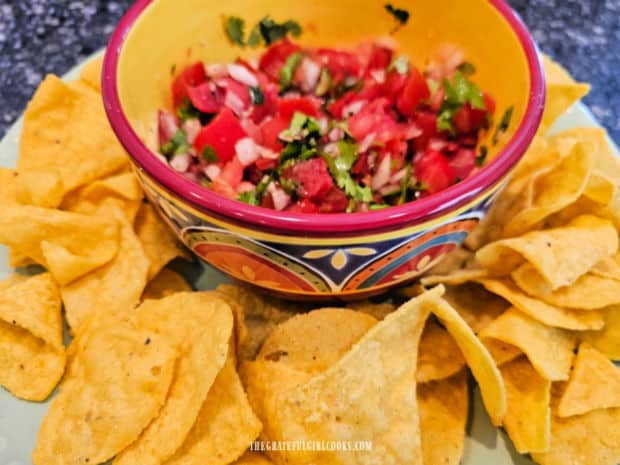
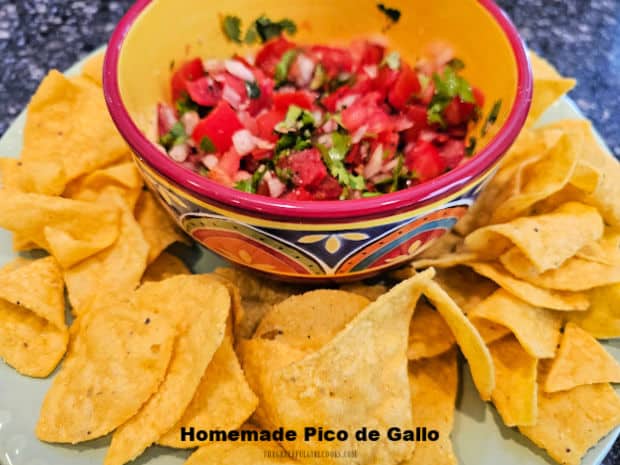
After the homemade Pico de Gallo has had some time to develop its flavors for a while, remove it from the refrigerator. Serve it with crispy tortilla chips on the side for dipping!


Homemade Pico de Gallo is served as an appetizer with tortilla chips.

The flavor of this well-loved type of salsa is wonderful, and it will be a big hit with anyone you serve it to. I’m confident it will disappear fast!

Homemade Pico de Gallo is also a great addition to quesadillas, burritos, tacos and other types of well-loved Mexican foods.

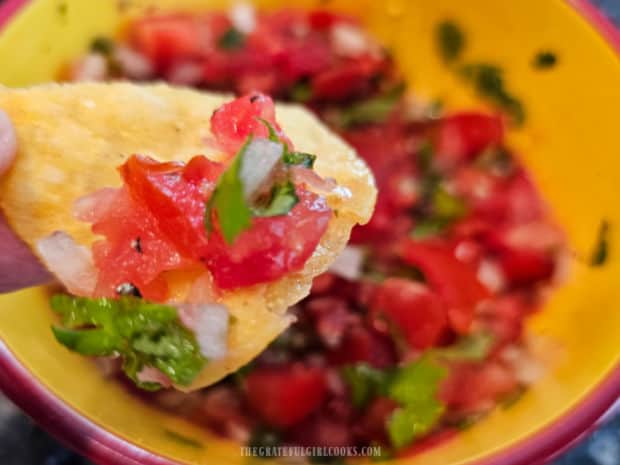
A close-up photo of a bite of Homemade Pico de Gallo on a tortilla chip.

I hope you try this recipe and trust that you and those you love will love it as much as we do! This quick, simple and delicious recipe can EASILY be doubled or tripled to meet your needs!

Thank you for stopping by, and I invite you to come back again soon for more family friendly recipes. Take care, may God bless you, and have a wonderful day.

Looking For More APPETIZER Recipes?

You can find ALL of my recipes in the Recipe Index, which is located at the top of the page. I have a nice variety of Appetizer recipes to choose from, including:

Want More Recipes? Get My FREE Newsletter!

I publish a newsletter 2 times per month (1st and 15th) with lots of recipes, tips, etc.
Would you like to join our growing list of subscribers?

There is a Newsletter subscription box on the top right (or bottom) of each blog post, depending on the device you use.
You can submit your e-mail address there, to be added to my mailing list.

Find Me On Social Media:

Facebook page: The Grateful Girl Cooks!
Pinterest:
The Grateful Girl Cooks!
Instagram:
jbatthegratefulgirlcooks

Author's signature

↓↓ PRINTABLE RECIPE BELOW ↓↓

0 from 0 votes
Homemade Pico de Gallo
Prep Time
10 mins
Cook Time
0 mins
Total Time
10 mins
 

It's quick and easy to make Homemade Pico de Gallo! Serve this chunky salsa with tortilla chips or add to tacos, burritos, quesadillas, etc.

Category: Appetizer/Snack
Cuisine: Mexican
Keyword: pico de gallo
Servings: 4
Calories Per Serving: 25 kcal
Author: JB @ The Grateful Girl Cooks!
Ingredients
  • 3 medium tomatoes finely chopped
  • ½ cup fresh cilantro chopped
  • ¼ cup yellow onion finely chopped
  • 1 Tablespoon fresh lime juice
  • 2 teaspoons minced garlic
  • teaspoons jalapeño seeded, finely chopped
  • salt and black pepper, to taste
Instructions
  1. Chop tomatoes into small chunks. Place all tomatoes, seeds and juice into a small serving bowl. Add chopped cilantro, minced garlic, diced jalapeno, onion and fresh lime juice; stir to combine. Season to taste with salt and pepper then stir.

  2. Transfer ⅓ cup of the Pico de Gallo into a separate bowl. Use an immersion blender to break down the tomatoes, etc. a bit. *Use a meat mallet OR blender to pulverize tomatoes if you don't have an immersion blender. This blending will produce some tomato juice. Add entire mixture back into bowl of salsa.

  3. Stir well to combine. Cover bowl; refrigerate Pico de Gallo at least 30 minutes to allow flavors to fully develop (for best taste). Serve and enjoy!

Nutrition Facts
Homemade Pico de Gallo
Amount Per Serving (1 (1/4 of total))
Calories 25 Calories from Fat 2
% Daily Value*
Fat 0.2g0%
Saturated Fat 0.04g0%
Polyunsaturated Fat 0.1g
Monounsaturated Fat 0.04g
Sodium 6mg0%
Potassium 259mg7%
Carbohydrates 6g2%
Fiber 1g4%
Sugar 3g3%
Protein 1g2%
Vitamin A 926IU19%
Vitamin C 18mg22%
Calcium 16mg2%
Iron 0.3mg2%
* Percent Daily Values are based on a 2000 calorie diet.

Here’s one more to pin on your Pinterest boards! It's quick and easy to make Homemade Pico de Gallo! Serve this chunky salsa with tortilla chips or add to tacos, burritos, quesadillas, etc.
Turkey Veggie Orzo Skillet

Turkey Veggie Orzo Skillet is a delicious dish with ground turkey, broccoli, cauliflower, carrots, orzo pasta and Parmesan in a creamy sauce.

Today I want to share a recipe I found online and changed it quite a bit to suit our tastes and needs. Believe it or not, I found the recipe on a site that shares recipes for homemade pet food!

Now before you freak out, this is NOT a pet food recipe. The website also shares recipes for PEOPLE food too, thank goodness. The original recipe for this dish is one made for real live human beings like you and me.

Ha Ha… believe me it took a few minutes to decide if I even wanted to cook this meal, but once I did, I made quite a few changes and really enjoyed the final result.

After steaming veggies (at the beginning), the rest of this all-in-one meal is cooked in one large skillet, and it is simple. Here’s how to make this turkey veggie orzo skillet meal.

Scroll Down For A Printable Recipe Card At The Bottom Of The Page

First- Steam The Vegetables

For this recipe you will need 1½ cups (combined total amount) of fresh broccoli, cauliflower and carrots. Use any combination of these veggies you want but only end up with 1½ cups total.

Cut up the fresh broccoli and cauliflower into bite-sized florets. Peel and slice the carrots used, as well.

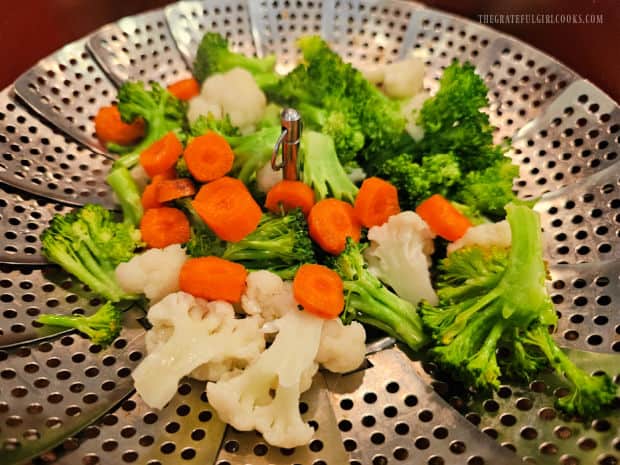
Steam the vegetables in a basket set over boiling water for 4-5 minutes and then set the veggies aside because they will be added to the finished dish right before serving!

A combination of broccoli, cauliflower and carrots are steamed until tender.

Cook The Ground Turkey

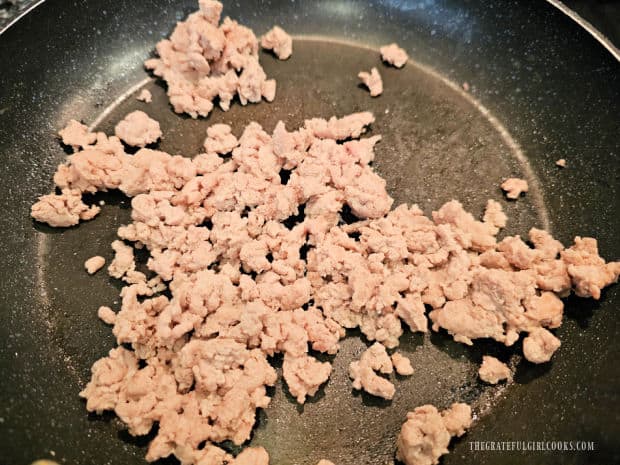
Cook the ground turkey over medium heat in a large skillet, breaking apart the meat as it browns. When fully cooked through, drain off any accumulated grease from the skillet.

Ground turkey is cooked in a large skillet, then grease is drained off.

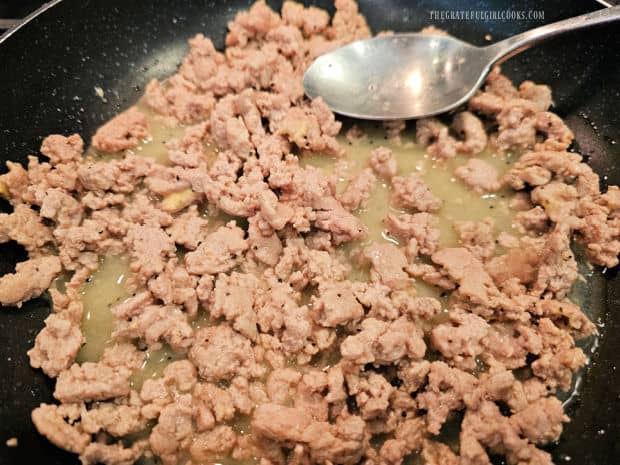
Stir ½ cup of chicken broth, fresh lemon juice, Dijon mustard, salt and pepper into the cooked turkey until combined.

Let this mixture simmer on medium heat for 2 minutes, stirring occasionally as some of the liquid is absorbed and seasons the meat.

Chicken broth, lemon juice, Dijon mustard, salt, pepper are added to cooked turkey.

Add The Orzo And Cook Until Done

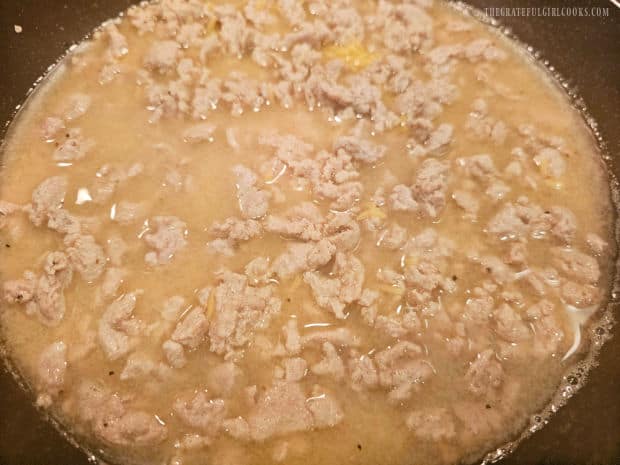
Add 7 Tablespoons of uncooked orzo pasta and 1 additional cup of chicken broth to the skillet. Stir well, to combine all the ingredients.

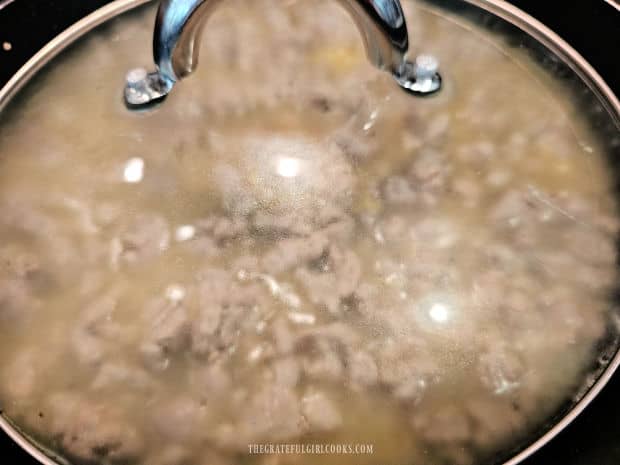
Cover the skillet and then cook the mixture on medium heat for 9-10 minutes OR until all the liquid has been absorbed.

Uncooked orzo pasta and more chicken broth is added to skillet.Skillet is covered and orzo cooks for 9-10 minutes until liquid is absorbed.

Remove the lid and quickly stir the orzo a couple of times during this cooking time, to make sure it doesn’t stick to the bottom of the skillet.

Orzo and sauce are stirred occasionally to prevent orzo from sticking.

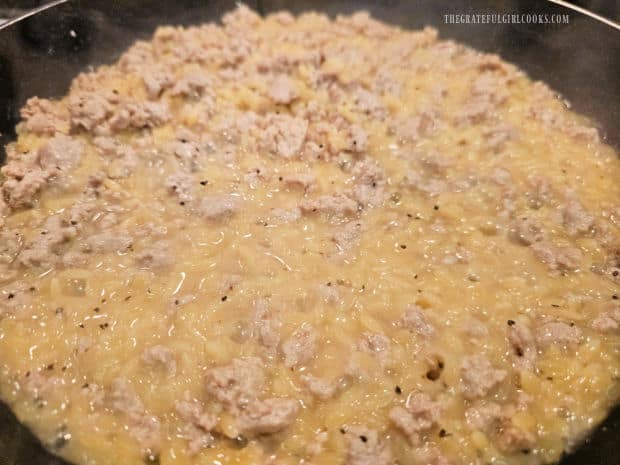
Put the cover back on the skillet and continue cooking until all the liquid has been absorbed into the orzo and the orzo is tender to the bite.

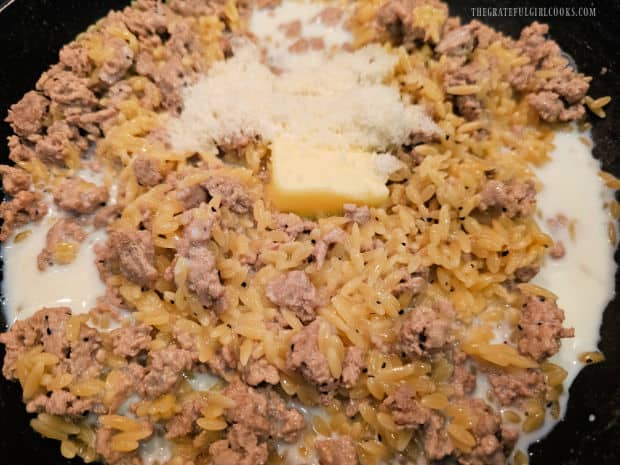
Once liquid is absorbed and orzo is tender, immediately add butter, grated Parmesan cheese and milk to the skillet. Stir well, until the butter has fully melted.

Liquid has been fully absorbed, and the cooked orzo is tender to the bite.Butter, grated Parmesan and milk are stirred into the cooked turkey and orzo.

Serve The Turkey Veggie Orzo Skillet

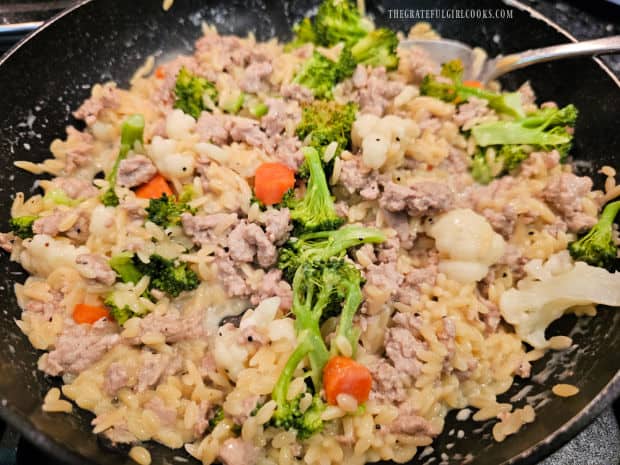
Add the steamed vegetables back into the skillet and stir gently until they are incorporated into the dish. Sprinkle the top with finely grated Parmesan cheese (if desired) and serve immediately.

The turkey veggie orzo skillet can be served “as is” while it is still in the skillet OR you can transfer the mixture to a serving dish and then top it with Parmesan cheese! Your choice!

Steamed vegetables are gently stirred into the turkey veggie orzo skillet.

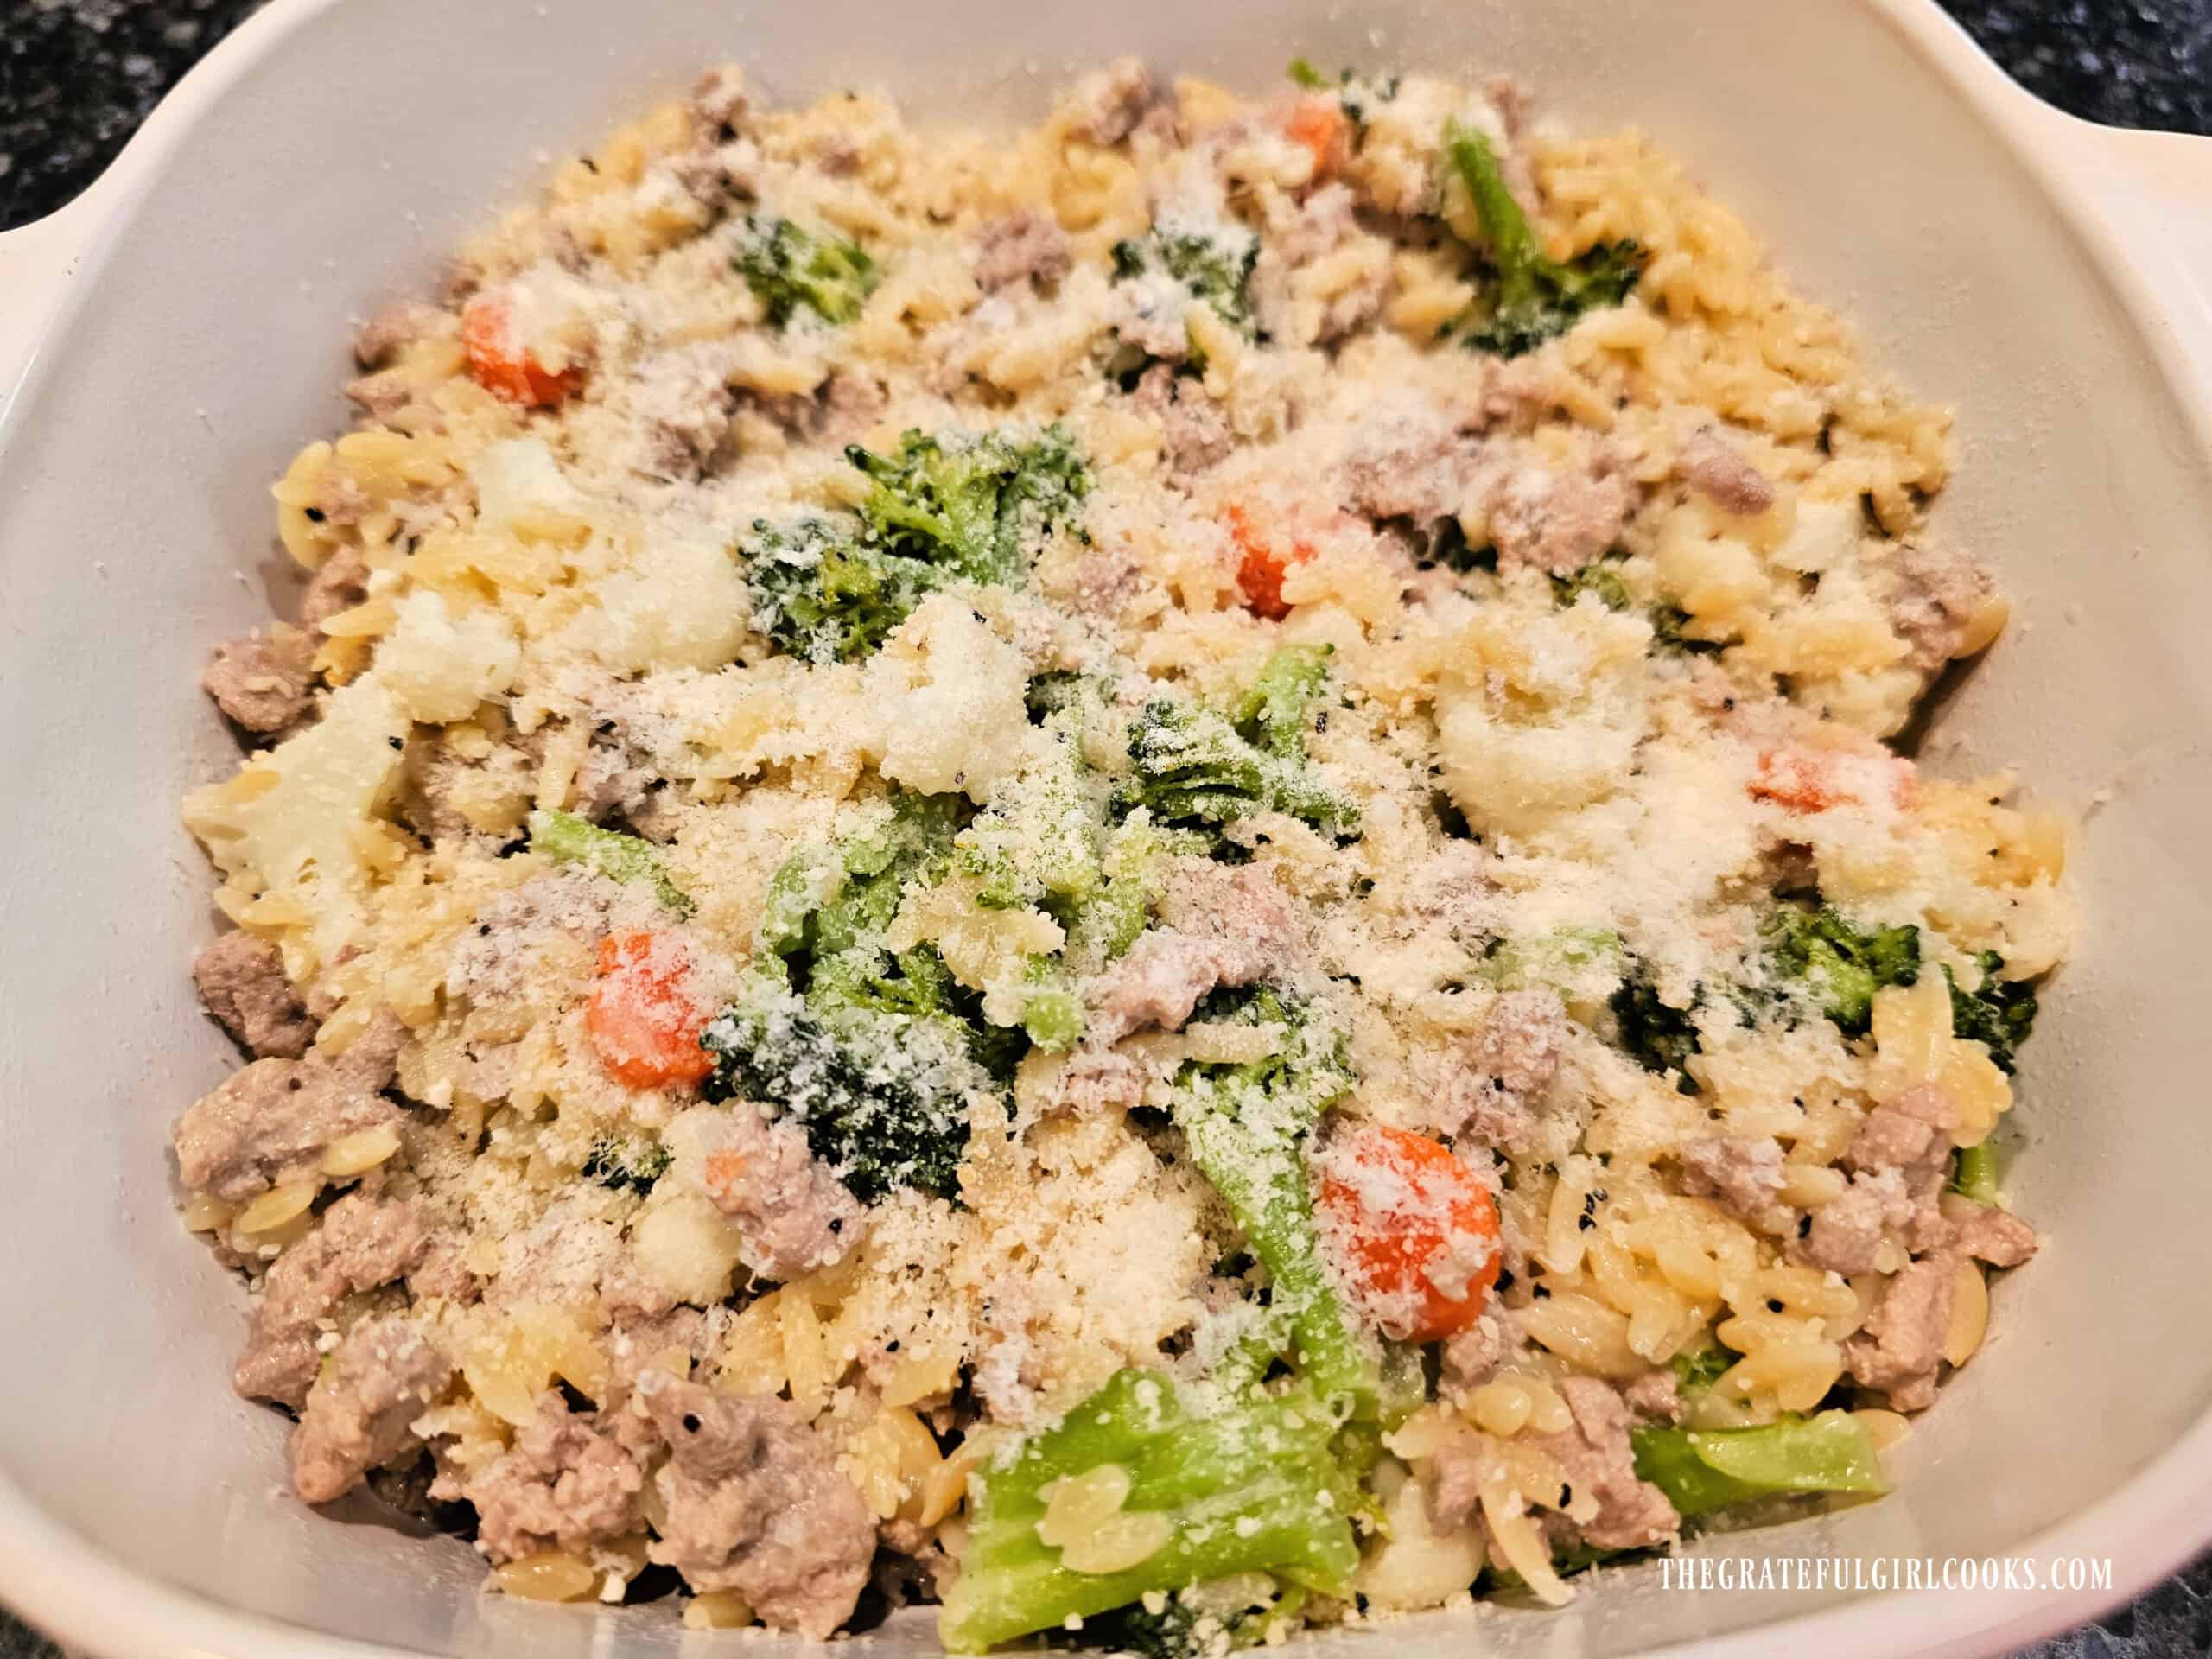
I usually transfer the mixture to a serving dish when I make this meal and then sprinkle the top with some finely grated Parmesan cheese.

When I serve it this way, it makes it easier to store any leftovers we may have by simply covering the dish and popping it in the refrigerator.

The turkey veggie orzo skillet dish is very creamy, and this all-in-one meal has wonderful flavors and textures. I think it tastes really good!

Topped with additional Parmesan, the turkey veggie orzo skillet is served hot.

I hope you have the opportunity to try this yummy all-in-one meal and am confident that you and those you love will enjoy it, too. This dish is low in calories but has great flavor!

Thank you for stopping by, and I invite you to come back again soon for more family friendly recipes. Take care, may God bless you, and have a wonderful day.

Looking For More Recipes Using TURKEY?

You can find ALL of my recipes in the Recipe Index, which is located at the top of the page. I have a variety of turkey recipes to choose from, including:

Want More Recipes? Get My FREE Newsletter!

I publish a newsletter 2 times per month (1st and 15th) with lots of recipes, tips, etc.
Would you like to join our growing list of subscribers?

There is a Newsletter subscription box on the top right (or bottom) of each blog post, depending on the device you use.
You can submit your e-mail address there, to be added to my mailing list.

Find Me On Social Media:

Facebook page: The Grateful Girl Cooks!
Pinterest:
The Grateful Girl Cooks!
Instagram:
jbatthegratefulgirlcooks

Author's signature

Recipe adapted from: https://www.theonlypets.com/delicious-quick-ground-turkey-orzo-recipe-in-under-1-hour/

↓↓ PRINTABLE RECIPE BELOW ↓↓

0 from 0 votes
Turkey Veggie Orzo Skillet
Prep Time
10 mins
Cook Time
30 mins
Total Time
40 mins
 

Turkey Veggie Orzo Skillet is a delicious dish with ground turkey, broccoli, cauliflower, carrots, orzo pasta and Parmesan in a creamy sauce.

Category: Main Dishes
Cuisine: All Cuisines
Keyword: turkey veggie orzo skillet
Servings: 4
Calories Per Serving: 244 kcal
Author: JB @ The Grateful Girl Cooks!
Ingredients
  • cups fresh broccoli, cauliflower, carrots *a combination of all 3 (florets/sliced)
  • ½ pound ground turkey
  • ½ cup chicken broth
  • 1 Tablespoon fresh lemon juice
  • 1 Tablespoon Dijon mustard
  • ½ teaspoon salt
  • ½ teaspoon black pepper
  • 7 Tablespoons orzo pasta (uncooked) = ⅓ cup + 2 Tbsp.
  • 1 cup chicken broth
  • 1 Tablespoon butter
  • ½ cup low-fat milk (1%)
  • ¼ cup finely grated Parmesan cheese + more for garnish, if desired
Instructions
  1. Cut broccoli/cauliflower into small florets. Peel/slice carrots, as well (Total amount = 1½ cups combined veggies). Steam vegetables for 4-5 minutes; set aside.

  2. Cook ground turkey over medium heat in a large skillet, breaking apart meat as it cooks. Once done, drain any grease from the skillet.

  3. Stir ½ cup of chicken broth, lemon juice, Dijon, salt and pepper into the turkey until combined. Simmer on medium heat for 2 minutes, stirring occasionally.

  4. Add uncooked orzo and 1 cup chicken broth. Stir well, to combine ingredients. Cover skillet; cook (covered) on medium heat 9-10 minutes OR until liquid is absorbed, stirring a couple times while it cooks (to prevent sticking). Continue cooking until all liquid is absorbed and orzo is tender.

  5. Add butter, grated Parmesan and milk. Stir until butter has melted. Add steamed vegetables; stir gently until incorporated. Transfer to a serving dish, if desired. Sprinkle with more Parmesan cheese (optional). Serve hot. Enjoy!

Nutrition Facts
Turkey Veggie Orzo Skillet
Amount Per Serving (1 (1/4 of total))
Calories 244 Calories from Fat 63
% Daily Value*
Fat 7g11%
Saturated Fat 3g19%
Trans Fat 0.1g
Polyunsaturated Fat 1g
Monounsaturated Fat 2g
Cholesterol 47mg16%
Sodium 844mg37%
Potassium 417mg12%
Carbohydrates 25g8%
Fiber 2g8%
Sugar 3g3%
Protein 21g42%
Vitamin A 425IU9%
Vitamin C 31mg38%
Calcium 123mg12%
Iron 1mg6%
* Percent Daily Values are based on a 2000 calorie diet.

Here’s one more to pin on your Pinterest boards! Turkey Veggie Orzo Skillet is a delicious dish with ground turkey, broccoli, cauliflower, carrots, orzo pasta and Parmesan in a creamy sauce. 
Homemade Bisquick Substitute

Make Homemade Bisquick Substitute in 10 minutes (only 5 ingredients)! Use this simple baking mix for biscuits, pancakes, etc. Yields 6 cups!

Ever needed an ingredient for a recipe and realize you are out of it at home, or you forgot to get it at the store? That happened to me last year when I realized I didn’t have any Bisquick at home to use for a recipe!

I wrote down a recipe that popped up in my Facebook newsfeed from a Facebook group page (one I don’t even follow). That has been my “go to” recipe for this baking mix from that point on.

It is so easy and fast to make it from scratch with a few very common ingredients at home! The recipe makes enough for 6 cups of baking mix, and when stored in a refrigerator it will keep for about 4 months.

This is a great mix to have on hand for making a quick batch of biscuits, pancakes or any other recipe that requires Bisquick. Here’s how to make this easy baking mix.

Scroll Down For A Printable Recipe Card At The Bottom Of The Page

How To Make This Baking Mix

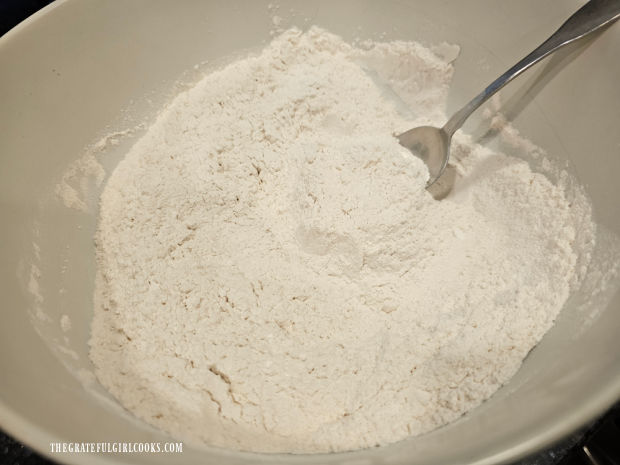
In a large mixing bowl, sift 6 cups of all-purpose flour, 3 Tablespoons of baking powder 1 teaspoon baking soda and 1 Tablespoon of salt into the bowl. 

Repeat the sifting process one more time and then once again into the mixing bowl. Do not skip this step! You will need to sift the dry ingredients THREE TIMES IN TOTAL!

Flour, baking powder and salt are sifted three times into a large mixing bowl.

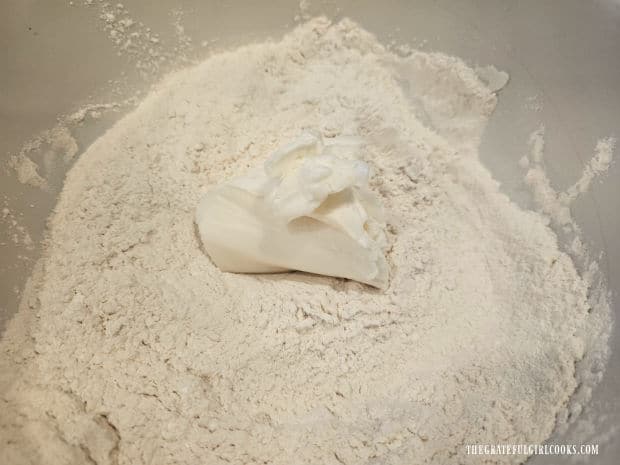
Add 1 cup of vegetable shortening to the bowl of the sifted dry ingredients.

Vegetable shortening is added to the flour mixture.

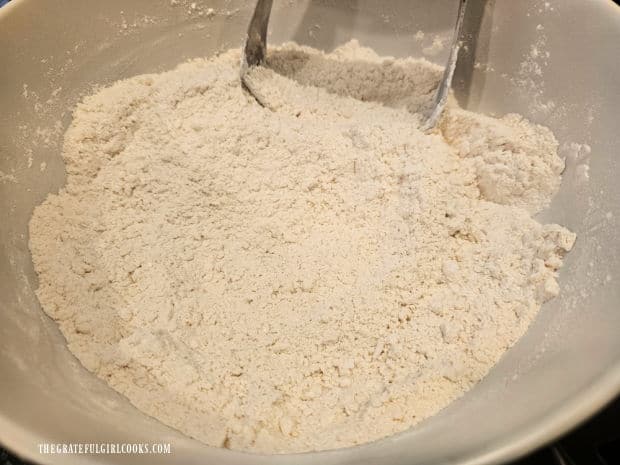
Use a pastry blender to cut the shortening into the flour mixture. Continue to cut the shortening into the flour mixture until the mix has the texture of fine crumbs.

A pastry blender is used to cut the shortening into the baking mix.

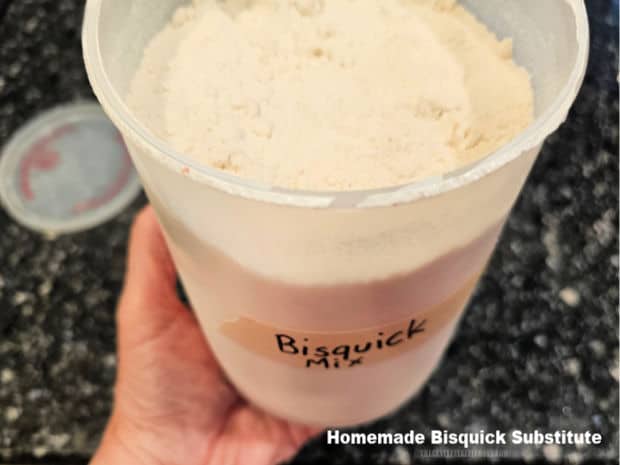
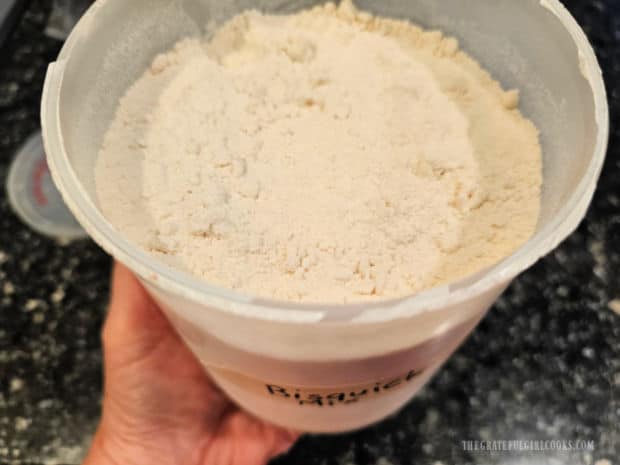
That’s it! You have just made a great substitute for Bisquick in only a few minutes! Store the substitute mix in an airtight, covered container in the refrigerator!

The homemade baking mix will keep for up to 4 months, when stored properly (covered in an airtight container) in a refrigerator.

When you want to use it, simply pull the container out of the refrigerator and use the amount needed when a recipe calls for Bisquick.

The recipe yields 6 cups of homemade Bisquick substitute baking mix.

Using The Homemade Bisquick Substitute

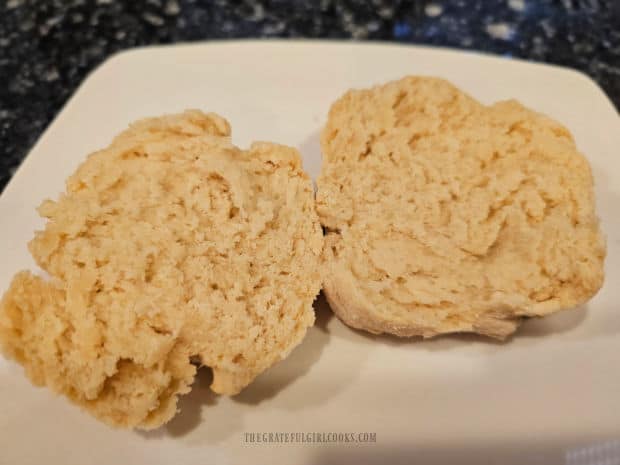
I have even used this substitute baking mix for making a batch of Buttery Bisquick Biscuits when I haven’t had Bisquick in the pantry and they turn out wonderful, every time!

Shown below is one of the biscuits cut in half to reveal the inside, and one of the biscuits served with my homemade “one jar strawberry rhubarb jam“. YUM!

A biscuit made with the homemade baking mix, cut in half on a white plate.Jam is spread on a biscuit made with homemade Bisquick substitute.

I hope you have the opportunity to make some of this Homemade Bisquick Substitute mix to have on hand in your kitchen. Happy Baking!

Thank you for stopping by, and I invite you to come back again soon for more family friendly recipes. Take care, may God bless you, and have a wonderful day.

Looking For More HOMEMADE MIXES?

You can find ALL of my recipes in the Recipe Index, which is located at the top of the page. I have several homemade mixes to choose from, including:

Want More Recipes? Get My FREE Newsletter!

I publish a newsletter 2 times per month (1st and 15th) with lots of recipes, tips, etc.
Would you like to join our growing list of subscribers?

There is a Newsletter subscription box on the top right (or bottom) of each blog post, depending on the device you use.
You can submit your e-mail address there, to be added to my mailing list.

Find Me On Social Media:

Facebook page: The Grateful Girl Cooks!
Pinterest:
The Grateful Girl Cooks!
Instagram:
jbatthegratefulgirlcooks

Author's signature

Original recipe source: Rhonda Fredricks on the Facebook group page called: Old Fashioned Cooking on 5/16/25

↓↓ PRINTABLE RECIPE BELOW ↓↓

0 from 0 votes
Homemade Bisquick Substitute
Prep Time
10 mins
Cook Time
0 mins
Total Time
10 mins
 

Make Homemade Bisquick Substitute in 10 minutes (only 5 ingredients)! Use this simple baking mix for biscuits, pancakes, etc. Yields 6 cups!

Category: Baking mix
Cuisine: All Cuisines
Keyword: homemade Bisquick substitute
Servings: 6 cups of baking mix
Calories Per Serving: 763 kcal
Author: JB @ The Grateful Girl Cooks!
Ingredients
  • 6 cups all-purpose flour
  • 3 Tablespoons baking powder
  • 1 teaspoon baking soda
  • 1 Tablespoon salt
  • 1 cup vegetable shortening
Instructions
  1. In a large mixing bowl, sift flour, baking powder, baking soda and salt into a large bowl. Repeat two more times. Do not skip this step (sift dry ingredients 3 times in total))

  2. Add vegetable shortening. Use a pastry blender to cut the shortening into the flour mixture. Continue to cut in the shortening until it becomes the texture of very small crumbs.

  3. Store this baking mix in an airtight, covered container in the refrigerator! The mix will keep for up to 4 months, when stored properly in a refrigerator. When you want to use it, pull the container out of the refrigerator; Use the amount of mix needed when a recipe calls for Bisquick.

Recipe Notes

NOTE: The calories are calculated for the ingredients using a standard one cup of mix.

Nutrition Facts
Homemade Bisquick Substitute
Amount Per Serving (1 cup)
Calories 763 Calories from Fat 315
% Daily Value*
Fat 35g54%
Saturated Fat 9g56%
Trans Fat 4g
Polyunsaturated Fat 10g
Monounsaturated Fat 14g
Sodium 1172mg51%
Potassium 740mg21%
Carbohydrates 98g33%
Fiber 4g17%
Sugar 0.3g0%
Protein 13g26%
Calcium 280mg28%
Iron 6mg33%
* Percent Daily Values are based on a 2000 calorie diet.

Here’s one more to pin on your Pinterest boards!Make Homemade Bisquick Substitute in 10 minutes (only 5 ingredients)! Use this simple baking mix for biscuits, pancakes, etc. Yields 6 cups!

Lemon Olive Oil Cake

Lemon Olive Oil Cake is easy to prepare, light and fluffy in texture, full of flavor and it’s absolutely DELICIOUS! Recipe makes 8 servings.
Lemon Olive Oil Cake is easy to prepare, light and fluffy in texture, full of flavor and it's absolutely DELICIOUS! Recipe makes 8 servings.

Lemons And More Lemons!

Recently my dear friend (of over 60 years) Lenita sent me three homegrown Meyer lemons from her very own tree in Southern California. They are gorgeous and I was determined to use them in some new, lemon-inspired recipes!

She has sent me her lemons before and I have used them for other recipes, so it seemed fitting to make something “grand” to celebrate her generous gift. This recipe for lemon olive oil cake fits the bill perfectly because it tastes fabulous!

I’ve been looking at different recipes for Lemon Olive Oil Cake for a couple years now, especially since our son married a Portuguese woman and moved to Portugal. My daughter-in-law’s family grows lots of food, including lemons and olives and even produce their own olive oil each year!

This recipe uses extra virgin olive oil AND a fresh lemon. For THIS recipe you will use lemon zest AND fresh lemon juice (from 1 lemon); you can use regular lemons or Meyer lemons.

I’m confident you will LOVE this simple dessert! Here’s how to make Lemon Olive Oil Cake.

Three home-grown Meyer lemons given to me from a friend, and I used one for this recipe.

Scroll Down For A Printable Recipe Card At The Bottom Of the Page

A Little Prep First!

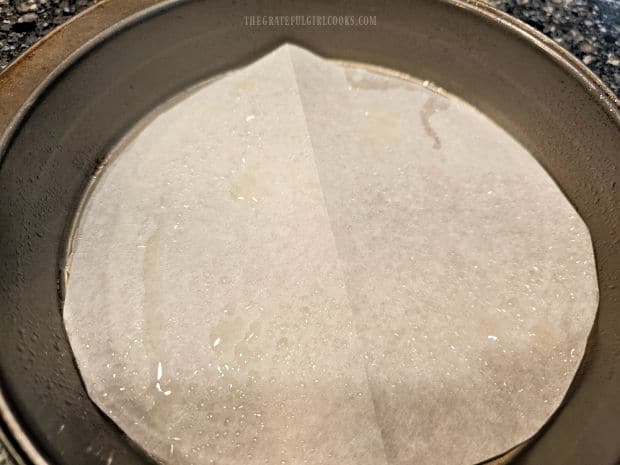
Preheat your oven to 350°F. so it is ready to go as soon as the batter is ready. Grease an 8″ round cake pan with non-stick baking spray.

Line the bottom of the pan with parchment paper that has been cut to fit. Lightly spray the parchment paper with non-stick baking spray.

Parchment paper is put in the bottom of a greased 8" cake pan.

Prepare The Cake Batter

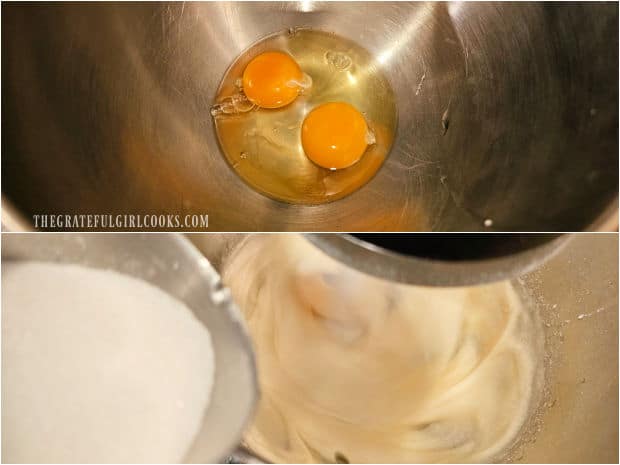
Beat two large (room temperature) eggs in a large mixing bowl for 3 minutes on HIGH speed. Slowly add the granulated sugar to the egg mixture, while continuing to beat the eggs.

Continue beating the sugar into the eggs until you see the mixture has thickened slightly. 

Two eggs are beaten well, then granulated sugar is added and beat in.

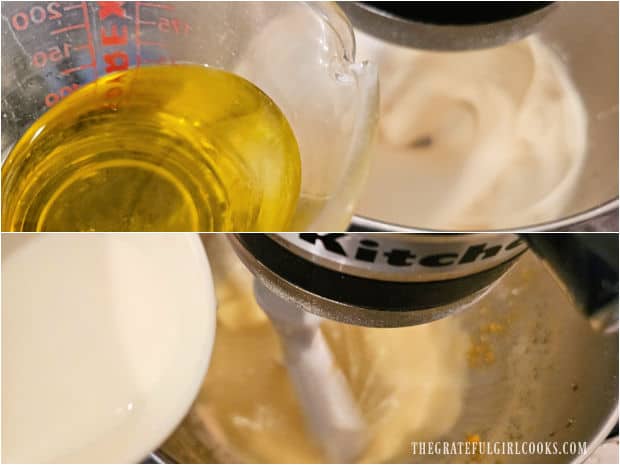
With the mixer still running, slowly add in extra virgin olive oil, a little at a time. Once the oil is fully incorporated, beat in milk, lemon zest and fresh lemon juice.

Continue beating until ingredients are fully combined.

Olive oil is beaten into egg mixture, then milk, lemon juice and zest is also beaten in.

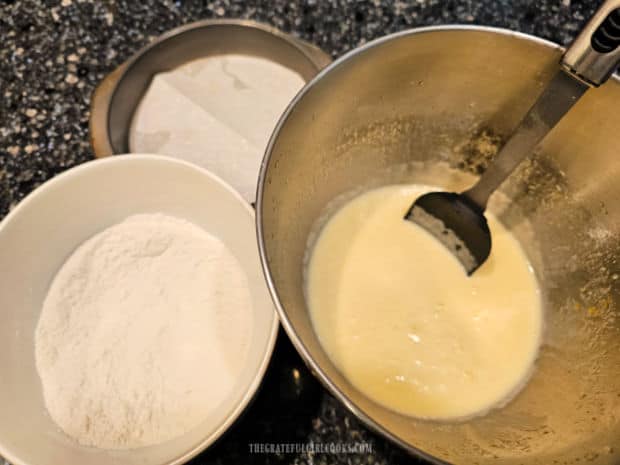
In a SEPARATE bowl, whisk together all-purpose flour, baking powder and salt. FOLD the dry ingredients into the egg batter until fully combined.

Prepared cake pan, plus bowls of dry ingredients and wet ingredients.

Bake The Cake

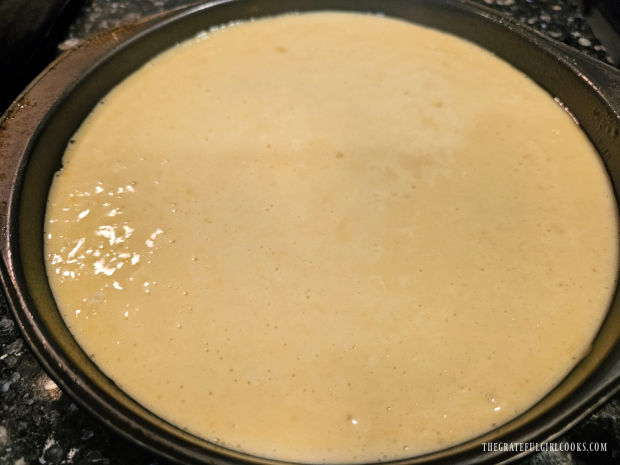
Pour all of the batter into the prepared cake pan, making sure to spread it out evenly in the cake pan.

Bake the lemon olive oil cake at 350°F. for 30-35 minutes. When done, a toothpick that is inserted into the center of the cake should come out clean (batter-free).

Oven temperatures can vary quite a bit, so I recommend checking it first at the 30-minute mark. When done, remove the cake from the oven and place the pan on a wire rack.

Batter for the lemon olive oil cake in cake pan, ready to bake.

Cool Cake Then Remove From Pan

Let the cake cool on the wire rack (STILL IN THE PAN) for 15 minutes for BEST results. The cake should pull away from the edges of the pan a bit.

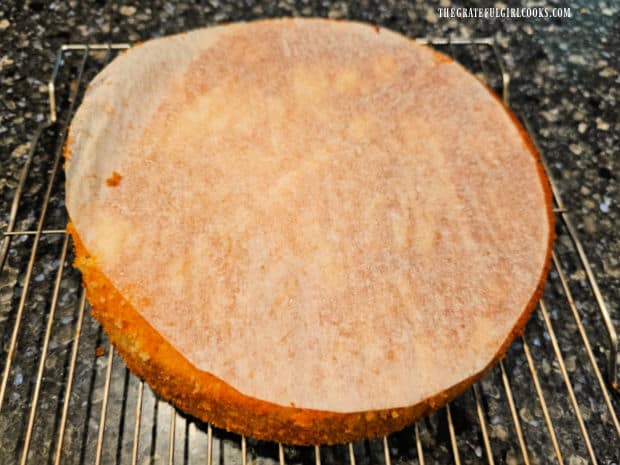
Run a butter knife around the inside edges of the pan to help separate the cake from the pan. *Invert the cake* onto the wire rack so the bottom of the cake (with parchment paper) is on the top!

*HOW TO INVERT THE CAKE*: Do this by putting the wire rack ON TOP of the baked cake pan, then holding on to both the wire rack and the cake pan, carefully flip it over.

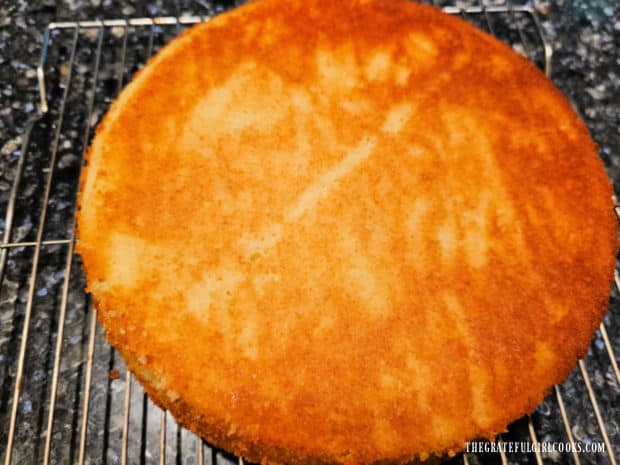
The cake should release (upside down) onto the wire rack (as shown below in the first photo). Carefully remove the parchment paper from the cake (shown in second photo below).

Inverted cake with parchment paper still on the top after baking.The parchment paper is removed revealing the baked cake underneath.

“Dust” The Top Of the Cake

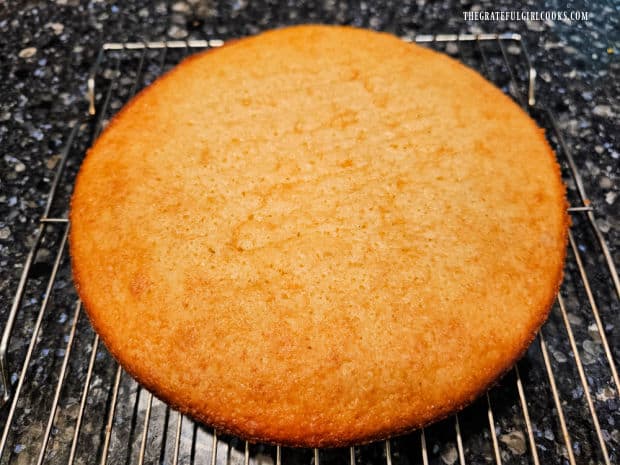
Now carefully turn the lemon olive oil cake back over so the top of the cake is on TOP! Let the cake cool completely to room temperature.

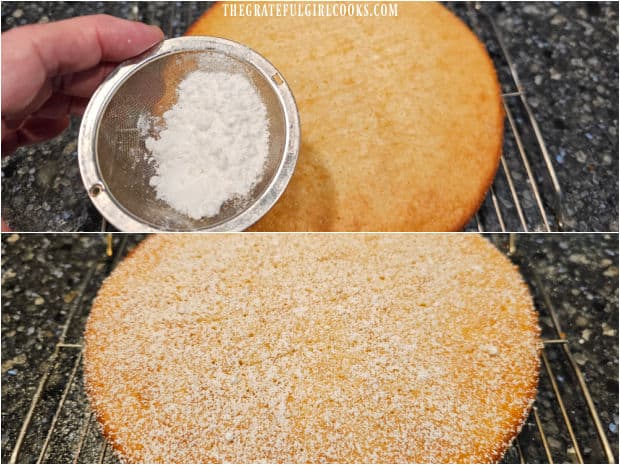
Once the cake has completely cooled, sift powdered sugar lightly over the top surface of the cake. It won’t take much powdered sugar to do this!

Lemon olive oil cake is flipped over so it is right side up on a wire rack.Powdered sugar is lightly sifted over the surface of the cake before serving.

Serve The Lemon Olive Oil Cake

Before serving the lemon olive oil cake, garnish the top with a couple lemon slices. This is an optional step, but it looks good for presentation and gives a hint at what flavor the cake is!

Lemon olive oil cake, dusted with powdered sugar and decorated with lemon slices.

Slice the cake into 8 pie-shaped wedges and serve! The cake has a light texture with great lemon flavor. It is not overly sweet (which we love) and the mild olive oil pairs very well with the tart lemon flavor.

I am confident you are going to love this easy to make, absolutely delicious lemon olive oil cake! Grab a fork and take a big bite because it’s THAT GOOD!

A slice of the lemon olive oil cake with a lemon slice on a white plate.

I hope you have the opportunity to make this yummy Mediterranean-inspired lemon olive oil cake, and trust that you and those you love will enjoy it as much as we do!

Thanks for stopping by, and I invite you to come back again soon for more family friendly recipes. Take care, may God bless you, and have a wonderful day!

Looking For More CAKE Recipes?

You can find ALL of my recipes in the Recipe Index, which is located at the top of the page. I have a nice variety of delicious cake recipes to choose from, including:

Want More Recipes? Get My FREE Newsletter!

I publish a newsletter 2 times per month (1st and 15th) with lots of recipes, tips, etc.
Would you like to join our growing list of subscribers?

There is a Newsletter subscription box on the top right (or bottom) of each blog post, depending on the device you use.
You can submit your e-mail address there, to be added to my mailing list.

Find Me On Social Media:

Facebook page: The Grateful Girl Cooks!
Pinterest:
The Grateful Girl Cooks!
Instagram:
jbatthegratefulgirlcooks

Author's signature

Original Recipe Source, and with thanks to: Nicole Gackowski, at: https://www.tasteofhome.com/recipes/lemon-olive-oil-cake/

↓↓ PRINTABLE RECIPE BELOW ↓↓

0 from 0 votes
Lemon Olive Oil Cake
Prep Time
15 mins
Cook Time
30 mins
Total Time
45 mins
 

Lemon Olive Oil Cake is easy to prepare, light and fluffy in texture, full of flavor and it's absolutely DELICIOUS! Recipe makes 8 servings.

Category: Dessert
Cuisine: All Cuisines, Mediterranean
Keyword: Lemon olive oil cake
Servings: 8 slices
Calories Per Serving: 265 kcal
Author: JB @ The Grateful Girl Cooks!
Ingredients
  • 2 large eggs* *At room temperature
  • cup granulated sugar
  • ½ cup extra virgin olive oil
  • cup 2% milk
  • 1 Tablespoon grated lemon zest yellow peel only
  • 3 Tablespoons fresh lemon juice
  • 1 cup all-purpose flour
  • 1 teaspoon baking powder
  • ¼ teaspoon salt
  • powdered sugar (confectioner's sugar) for dusting top of cake
Instructions
  1. Preheat oven to 350°F. Spray an 8" round cake pan with non-stick baking spray. Line bottom pan with parchment paper (cut to fit). Spray paper, as well.

  2. Beat eggs in a large bowl for 3 minutes on HIGH speed. Slowly add sugar while continuing to beat eggs. Continue beating until mixture has thickened slightly.  Slowly beat in extra virgin olive oil, a little at a time. Once oil is incorporated, beat in milk, lemon zest and fresh lemon juice until combined.

  3. In SEPARATE bowl, whisk together flour, baking powder and salt. FOLD this into the egg batter until combined. Pour batter in cake pan, spreading evenly.

  4. Bake at 350°F. for 30-35 minutes. When done, a toothpick inserted into the center should come out clean (batter-free). Oven temperatures can vary, so I recommend checking it at the 30-minute mark. When done, remove cake from oven, place pan on a wire rack.

  5. Let cake cool (STILL IN THE PAN) for 15 minutes. Run a butter knife around the inside edges of pan to separate cake from the pan. Invert cake onto wire rack so bottom of cake (with parchment paper) is on top! Do this by putting wire rack ON TOP of the cake pan, then holding on to both the wire rack and the cake pan, flip it over. Cake should release (upside down) onto the wire rack. Remove parchment.

  6. Turn cake over so top of the cake is on TOP! Let cool to room temperature. Once cake has completely cooled, sift powdered sugar over top of the cake. Garnish with lemon slices, if desired. Slice, serve and enjoy!

Nutrition Facts
Lemon Olive Oil Cake
Amount Per Serving (1 slice (1/8 of total))
Calories 265 Calories from Fat 135
% Daily Value*
Fat 15g23%
Saturated Fat 2g13%
Trans Fat 0.01g
Polyunsaturated Fat 2g
Monounsaturated Fat 10g
Cholesterol 47mg16%
Sodium 96mg4%
Potassium 106mg3%
Carbohydrates 30g10%
Fiber 1g4%
Sugar 17g19%
Protein 4g8%
Vitamin A 78IU2%
Vitamin C 3mg4%
Calcium 44mg4%
Iron 1mg6%
* Percent Daily Values are based on a 2000 calorie diet.

Here’s one more to pin on your Pinterest boards! Lemon Olive Oil Cake is easy to prepare, light and fluffy in texture, full of flavor and it's absolutely DELICIOUS! Recipe makes 8 servings.