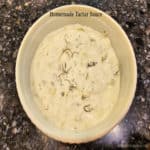
Category: Sauces and Dressings

Italian Vinaigrette

It only takes a couple minutes to make Italian Vinaigrette from scratch! Drizzle this delicious salad dressing on your favorite green salad!

There are so many recipes for making homemade salad dressings and vinaigrettes out there in this big ol’ world. I love finding great recipes and adapting them to our taste buds!

Over the past ten years I have shared many wonderful recipes for making your own salad dressings. Today I want to share a simple recipe for making Italian Vinaigrette from scratch (in the comfort of your own home)!

It is EASY and DELICIOUS, and I really believe you’ll like it, too! Here’s how to make Italian Vinaigrette… in only a few minutes!

Scroll Down For A Printable Recipe Card At The Bottom Of The Page

What Ingredients Will I Need?

To make this Italian vinaigrette, you will need red wine vinegar, extra virgin olive oil, onion powder, garlic, salt, pepper, parsley flakes, mustard powder, dried basil, and sugar.

Note: *Dried basil is not shown in the photo below. If desired, you can substitute dried oregano for this ingredient.*

The ingredients used to make Italian Vinaigrette are shown on kitchen counter.

Make The Italian Vinaigrette

Measure all the ingredients for the vinaigrette into a medium-sized bowl. Use a whisk to fully blend these ingredients.

Oil and vinegar will not “normally” combine and will stay separated (like oil and water), so it is very important to mix them well, until fully incorporated (“emulsified”).

Ingredients for the vinaigrette are measured into a bowl before mixing.

A wire whisk is used to fully blend the ingredients for the salad dressing.

Once the ingredients have become fully incorporated, the Italian vinaigrette is ready to be used to drizzle over a chilled, mixed green salad.

However… I feel the vinaigrette becomes more flavorful as the ingredients have time to “mingle”, so I usually refrigerate it for a couple hours BEFORE using.

The Italian Vinaigrette is now emulsified and ready to use.

Pour the ingredients into a clean jar or bottle with a tight fitting lid. If desired, place a label on the jar, and store in the refrigerator.

When you’re ready to enjoy the vinaigrette, shake the bottle or jar very well, to fully re-blend the ingredients, before adding it to a salad.

A glass jar with lid is used to store the Italian Vinaigrette.

Enhance A Green Salad With Italian Vinaigrette!

Drizzle the Italian vinaigrette over a favorite mixed green salad, and enjoy this delicious, flavor-packed salad dressing! The vinaigrette also tastes fantastic when used as a dressing for pasta salad!

Remember to tightly seal the bottle after you’re done using it, and store the remaining vinaigrette in the refrigerator.

Some of the Italian Vinaigrette is poured onto a mixed green salad.The Italian Vinaigrette is a great dressing for pasta salad, too!

This is such a delicious, easy to make Italian Vinaigrette, and I hope you (and those you love) will enjoy it, too! It’s so easy to make in only a couple minutes, pop it in the fridge, and it will be there when you’re ready for it!

Thanks for stopping by, and I invite you to come back again soon for more family-friendly recipes. Take care, may God bless you… and have a wonderful day!

Looking For More SALAD DRESSING Recipes?

You can find ALL of my recipes in the Recipe Index, which is located at the top of the page. I have a wonderful variety of homemade salad dressings to check out, including:

Want More Recipes? Get My FREE Newsletter!

I publish a newsletter 2 times per month (1st and 15th) with lots of recipes, tips, etc..
Would you like to join our growing list of subscribers?

There is a Newsletter subscription box on the top right (or bottom) of each blog post, depending on the device you use.
You can submit your e-mail address there, to be added to my mailing list.

Find Me On Social Media:

Facebook page: The Grateful Girl Cooks!
Pinterest:
The Grateful Girl Cooks!
Instagram:
jbatthegratefulgirlcooks

Author's signature

Recipe Adapted From: “Dining On A Dime Cookbook”, by Tawra Kellam and Jill Cooper, page 165, published in 2004 by T & L Group

↓↓ PRINTABLE RECIPE BELOW ↓↓

0 from 0 votes
Italian Vinaigrette
Prep Time
3 mins
Cook Time
0 mins
Total Time
3 mins
 

It only takes a couple minutes to make Italian Vinaigrette from scratch! Drizzle this delicious salad dressing on your favorite green salad!

Category: Salad Dressing
Cuisine: All Cuisines
Keyword: Italian Vinaigrette
Servings: 24 (1 Tablespoon per serving)
Calories Per Serving: 82 kcal
Author: JB @ The Grateful Girl Cooks!
Ingredients
  • 1 cup extra virgin olive oil
  • ½ cup red wine vinegar
  • 2 cloves garlic minced
  • 1 teaspoon dried parsley flakes
  • 1 teaspoon mustard powder
  • ¾ teaspoon granulated sugar
  • ¾ teaspoon salt
  • ½ teaspoon dried basil *can substitute dried oregano
  • ½ teaspoon black pepper
  • ¼ teaspoon onion powder
Instructions
  1. Measure all ingredients into a medium-sized bowl. Use a whisk to fully blend. **Oil and vinegar will not "normally" combine and will stay separated (like oil and water), so it's important to mix them well, until fully incorporated ("emulsified").

  2. The Italian vinaigrette is ready to be used, but for "best" flavor, refrigerate it for a couple hours BEFORE using. To store: Pour vinaigrette into a clean jar or bottle with a tight fitting lid. Label, and store in the refrigerator.

  3. When you're ready to enjoy the vinaigrette, shake the bottle or jar very well, to fully re-blend ingredients, before adding to a salad.

Nutrition Facts
Italian Vinaigrette
Amount Per Serving (1 Tablespoon)
Calories 82 Calories from Fat 81
% Daily Value*
Fat 9g14%
Saturated Fat 1g6%
Polyunsaturated Fat 1g
Monounsaturated Fat 7g
Sodium 73mg3%
Potassium 5mg0%
Carbohydrates 0.3g0%
Fiber 0.04g0%
Sugar 0.1g0%
Protein 0.1g0%
Vitamin A 1IU0%
Vitamin C 0.1mg0%
Calcium 2mg0%
Iron 0.1mg1%
* Percent Daily Values are based on a 2000 calorie diet.

Here’s one more to pin on your Pinterest boards!It only takes a couple minutes to make Italian Vinaigrette from scratch! Drizzle this delicious salad dressing on your favorite green salad!


Bacon Jam For Burgers

Bacon Jam For Burgers is a slightly sweet and salty condiment, easily made in a skillet, and used on hamburgers to add lots of great flavor!

It’s Summer here in good ol’ Oregon, and that means lots of BBQ’d hamburgers! Today I want to share a simple recipe to make Bacon Jam for Burgers!

Wait… WHAT??? Bacon JAM? That was my question several years ago when I first heard of it. Since I make and preserve (can) most of our jams and jellies, I couldn’t for the life of me figure out why someone would want to spread bacon jam on an English muffin or toast! Ha Ha!

It turns out to be a completely different case. Bacon Jam is used as a condiment to really jazz up grilled hamburgers! (Oh! Face-palm). Let me tell you… it is absolutely DELICIOUS used in this way.

The recipe is straight forward and simple, and I highly recommend trying it on a favorite burger. Here’s how to make Bacon Jam For Burgers.

Scroll Down For A Printable Recipe Card At The Bottom Of The Page

Cook The Bacon

First, cut 5 slices of bacon in small pieces (I use kitchen scissors to make quick work of it). Place them in a large skillet (cast iron if you have one) and turn the heat to MEDIUM.

Cook the bacon until it is browned and crispy, then remove the bacon from the skillet with a slotted spoon. Place the bacon on several layers of paper towels to absorb excess grease. Set aside. Remove all the bacon grease from the skillet except for ½ Tablespoon.

Chopped pieces of bacon are cooked in a large cast iron skillet.Bacon pieces are cooked until crisp, then removed from skillet to drain.

Cook The Onions

With the heat still on MEDIUM, add chopped onions to the skillet. Cook them, stirring occasionally, until they have caramelized and browned. This will take a few minutes.

Stir in a Tablespoon of minced garlic, and cook for 1 minute, stirring often so the garlic doesn’t burn (and turn bitter in taste). 

Chopped onions are cooked in a little of the leftover bacon grease.Minced garlic is added to the caramelized onions in the skillet and cooked.

Make The Bacon Jam

Add the crispy bacon back into the skillet, then add maple syrup, brown sugar, apple cider vinegar, and a small pinch of cayenne pepper.

Stir these ingredients until fully combined, then turn the heat down to LOW. Let the bacon jam simmer on low heat for about 10 minutes OR until it starts to thicken. Stir the jam often while it simmers, to prevent burning.

Once the bacon jam for burgers has thickened, remove the skillet from the heat, and allow the jam time to cool. You will notice it will thicken a little more while it cools.

Crispy bacon, brown sugar, maple syrup, etc. are added to onions in skillet.The Bacon Jam For Burgers is cooked on Low heat until thickened.

Enjoy The Bacon Jam For Burgers

To serve the bacon jam, prepare hamburger or cheeseburger patties as you normally would, whether outside on a BBQ or inside in a skillet.

Prepare the bun (we like to grill or toast them), and add the toppings you enjoy. I “usually” put mustard AND ketchup on my burgers.

However, when I am adding bacon jam, I simply spread mayonnaise on the bottom bun, top with lettuce, a grilled burger patty, spread bacon jam on top of the meat and add the top bun.

Bacon jam is spread on a grilled cheeseburger on a hamburger bun.

There is usually enough bacon jam to top 3 burgers, but the recipe can EASILY be doubled or tripled to meet your needs.

Serve, and enjoy the amazing pop of flavor the bacon jam brings to grilled burgers! It really takes burgers to the next level! I love it, and really hope you will, too!

A cooked cheeseburger patty, topped with Bacon Jam For Burgers.Cheeseburger is sliced in half, showing the Bacon Jam inside.

I hope you have the chance to make Bacon Jam For Burgers for those you love! Thank you for stopping by, and I invite you to come back soon for more family-friendly recipes. Take care… and have a wonderful day.

Looking For More CONDIMENT Recipes?

You can find ALL of my recipes in the Recipe Index, which is located at the top of the page. I have a variety of condiments recipes you might want to check out, including:

Want More Recipes? Get My FREE Newsletter!

I publish a newsletter 2 times per month (1st and 15th) with lots of recipes, tips, etc..
Would you like to join our growing list of subscribers?

There is a Newsletter subscription box on the top right (or bottom) of each blog post, depending on the device you use.
You can submit your e-mail address there, to be added to my mailing list.

Find Me On Social Media:

Facebook page: The Grateful Girl Cooks!
Pinterest:
The Grateful Girl Cooks!
Instagram:
jbatthegratefulgirlcooks

Author's signature

Original recipe source: Jordan Hanger, at: theninjacue.com/easy-bacon-jam

↓↓ PRINTABLE RECIPE BELOW ↓↓

0 from 0 votes
Bacon Jam For Burgers
Prep Time
5 mins
Cook Time
15 mins
Total Time
20 mins
 

Bacon Jam For Burgers is a slightly sweet and salty condiment, easily made in a skillet, and used on hamburgers to add lots of great flavor!

Category: Condiment
Cuisine: All Cuisines
Keyword: bacon jam, burgers
Servings: 3
Calories Per Serving: 229 kcal
Author: JB @ The Grateful Girl Cooks!
Ingredients
  • 5 slices bacon cut in small pieces
  • ¼ medium yellow onion finely chopped
  • 1 Tablespoon minced garlic
  • 2 Tablespoons pure maple syrup
  • 2 Tablespoons apple cider vinegar
  • 2 Tablespoons brown sugar
  • 1 pinch cayenne pepper
Instructions
  1. Cut bacon in small pieces. Place them in a large skillet (cast iron if you have it). Cook bacon on MEDIUM heat until browned/crispy. Remove bacon from skillet with a slotted spoon. Place bacon on paper towels to absorb grease. Set aside. Remove all bacon grease from the skillet except for ½ Tablespoon.

  2. Add chopped onions to the skillet. Cook on MEDIUM, stirring occasionally, until they've caramelized/browned (a few minutes). Stir in minced garlic; cook 1 minute, stirring often so garlic doesn't burn. 

  3. Add bacon, maple syrup, brown sugar, apple cider vinegar, and a small pinch of cayenne pepper to the onions in skillet. Stir until combined, then reduce heat to LOW. Let jam simmer on LOW heat for 10 minutes OR until it starts to thicken. Stir jam often while simmering, to prevent burning. Once thickened, remove skillet from the heat. Let jam cool (it will thicken a bit more while it cools).

  4. To serve, prepare burgers as you normally would. Spread the thick bacon jam directly on top of the burger patty. Serve with your favorite condiments, and enjoy!

Nutrition Facts
Bacon Jam For Burgers
Amount Per Serving (1 (1/3 of total))
Calories 229 Calories from Fat 135
% Daily Value*
Fat 15g23%
Saturated Fat 5g31%
Trans Fat 0.05g
Polyunsaturated Fat 2g
Monounsaturated Fat 6g
Cholesterol 24mg8%
Sodium 248mg11%
Potassium 145mg4%
Carbohydrates 19g6%
Fiber 0.2g1%
Sugar 16g18%
Protein 5g10%
Vitamin A 28IU1%
Vitamin C 2mg2%
Calcium 31mg3%
Iron 0.3mg2%
* Percent Daily Values are based on a 2000 calorie diet.

Here’s one more to pin on your Pinterest boards!Bacon Jam For Burgers is a slightly sweet and salty condiment, easily made in a skillet, and used on hamburgers to add lots of great flavor!

Honey Mustard Salad Dressing

Make delicious Honey Mustard Salad Dressing (½ cup total) in under 5 minutes! Drizzle this simple dressing on a favorite mixed green salad.

I don’t know about you, but I am always looking for ways to make “store-bought” salad dressings right at home in our kitchen. There’s something very satisfying to be able to make it myself.

Since our sons are grown and live on their own, it takes quite a while for my husband and I to use up entire bottles of purchased salad dressing. Don’t get me wrong- they taste great, but I enjoy saving money by making it myself… in much smaller quantities!

Today I am sharing a tried and true recipe for Honey Mustard Salad Dressing. I’ve had this recipe for years and years written on a 3″ x 5″ index card, and the original source for the recipe is completely unknown.

This salad dressing boasts fabulous flavor and will be a definite hit, drizzled on a favorite green salad, because it’s so good! Here’s how to make it.

Scroll Down For A Printable Recipe Card At The Bottom Of The Page

What Ingredients Are Used For The Salad Dressing

The ingredients you will need to make this honey mustard salad dressing are apple cider vinegar, vegetable oil, Dijon mustard, honey, salt and pepper.

That’s it! I always have these common ingredients around, so it is no problem whenever I want to make a small jar of salad dressing!

Pepper, honey, cider vinegar, oil, mustard and salt used to make salad dressing.

Okay- Let’s Make The Salad Dressing!

This recipe will yield about ½ cup total of honey mustard salad dressing, but you can double or triple the amounts, if you need more.

Place 4 Tablespoons of apple cider vinegar and 4 Tablespoons of vegetable oil in a jar that has a tight fitting lid. Shake the jar very well for about one minute, until the oil and vinegar have become fully incorporated and emulsified.

Vegetable oil and cider vinegar are combined in a small jar with a lid.The jar is shaken well, until oil and vinegar become emulsified.

I typically use a small canning jar or a small bottle (with a lid) to make homemade salad dressing. Below you can see the amount of oil and vinegar in the jar, before adding the remaining ingredients.

Add 2 Tablespoons of Dijon mustard and 2 Tablespoons of honey into the jar. TIP: Use a spoon and carefully add them to the jar, one spoonful at a time.

In the past I tried using a funnel to get the Dijon and honey into the bottle, but don’t recommend it. I thought it might be easier, but it was too messy, and not all the honey and Dijon make it into the jar with this method!

Vegetable oil and apple cider vinegar are combined in jar shown on countertop.Honey being added to the bottle of homemade salad dressing.

Ready To Use The Honey Mustard Salad Dressing

Add salt and pepper to the jar (1/8 teaspoon each, plus more, if desired, to suit your taste). Put the lid securely on the jar and shake very well, until all the ingredients are fully mixed.

At this point, the honey mustard salad dressing is ready to be used. I highly recommend refrigerating it for at least an hour, to let the flavors really have a chance to come together.

Dijon mustard, honey, salt and pepper are added to jar of salad dressing.

When you’re ready to use the salad dressing (especially after refrigerating), shake the jar really well, to ensure the oil/vinegar mixture is fully combined.

Pour it over a beautiful, chilled mixed green salad, and dig in! This salad dressing is wonderful, and I think you will really enjoy it!

Honey mustard salad dressing is poured over a mixed green salad.A green salad drizzled with honey mustard salad dressing, ready to eat!

I hope you have the chance to try this yummy, simple honey mustard salad dressing recipe, and trust you’ll like it as much as we do!

Thanks for stopping by, and I invite you to come back soon for more family-friendly recipes. Take care, may God bless you… and have a wonderful day!

Looking For More SALAD DRESSING Recipes?

You can find ALL of my recipes in the Recipe Index, which is located at the top of the page. I have a nice variety of homemade salad dressing recipes to choose from, including:

Want More Recipes? Get My FREE Newsletter!

I publish a newsletter 2 times per month (1st and 15th) with lots of recipes, tips, etc..
Would you like to join our growing list of subscribers?

There is a Newsletter subscription box on the top right (or bottom) of each blog post, depending on the device you use.
You can submit your e-mail address there, to be added to my mailing list.

Find Me On Social Media:

Facebook page: The Grateful Girl Cooks!
Pinterest:
The Grateful Girl Cooks!
Instagram:
jbatthegratefulgirlcooks

Author's signature

Original recipe Source: unknown

↓↓ PRINTABLE RECIPE BELOW ↓↓

0 from 0 votes
Honey Mustard Salad Dressing
Prep Time
5 mins
Cook Time
0 mins
Total Time
5 mins
 

Make delicious Honey Mustard Salad Dressing (½ cup total) in under 5 minutes! Drizzle this simple dressing on a favorite mixed green salad.

Category: Salad Dressing
Cuisine: All Cuisines
Keyword: honey mustard salad dressing
Servings: 8 - one Tbl. per serving (½ cup total)
Calories Per Serving: 84 kcal
Author: JB @ The Grateful Girl Cooks!
Ingredients
  • 4 Tablespoons vegetable oil
  • 4 Tablespoons apple cider vinegar
  • Tablespoons honey
  • 2 Tablespoons Dijon mustard
  • teaspoon salt + more, if desired
  • teaspoon black pepper + more, if desired
Instructions
  1. Place apple cider vinegar and vegetable oil in a jar (with a tight fitting lid). Shake jar well for 1 minute, until oil and vinegar are incorporated and emulsified.

  2. Add Dijon mustard and honey to the jar. TIP: Use a spoon; carefully add one spoonful at a time.

  3. Add salt and pepper (1/8 teaspoon each, plus more if desired, to suit your taste). Put the lid securely on the jar; shake well, until all ingredients are fully mixed. At this point, the salad dressing is ready to be used. I recommend refrigerating it for at least 1 hour, to let the flavors have a chance to come together.

  4. Shake the jar well before using (especially after refrigerating) , to ensure ingredients are fully combined. Serve, and enjoy! Refrigerate leftover salad dressing.

Nutrition Facts
Honey Mustard Salad Dressing
Amount Per Serving (1 Tablespoon)
Calories 84 Calories from Fat 63
% Daily Value*
Fat 7g11%
Saturated Fat 1g6%
Trans Fat 0.05g
Polyunsaturated Fat 4g
Monounsaturated Fat 2g
Sodium 78mg3%
Potassium 15mg0%
Carbohydrates 6g2%
Fiber 0.2g1%
Sugar 5g6%
Protein 0.2g0%
Vitamin A 3IU0%
Vitamin C 0.05mg0%
Calcium 3mg0%
Iron 0.1mg1%
* Percent Daily Values are based on a 2000 calorie diet.

Here’s one more to pin on your Pinterest boards!Make delicious Honey Mustard Salad Dressing (½ cup total) in under 5 minutes! Drizzle this simple dressing on a favorite mixed green salad.

Easy Homemade Chocolate Syrup

Make Easy Homemade Chocolate Syrup in 5 minutes, with 4 common ingredients! Use it for chocolate milk, desserts, etc.
Make Easy Homemade Chocolate Syrup in 5 minutes, with 4 common ingredients! Use for chocolate milk, desserts, etc.

Did you know it is really EASY to make your own chocolate syrup at home with only a few ingredients that you probably already have in your kitchen?

That’s right! This recipe for easy homemade chocolate syrup can be made in about 5 minutes or less, and it truly is simple to prepare. Save a trip to the grocery store (and a little bit more of your own money) by making it yourself.

I’ve made this syrup many times over the years, and decided to finally share the simple recipe on my blog. I scribbled the recipe down at least 15 years ago on a little piece of paper, but never noted the original source, so I can’t give credit where credit is due.

Here’s how to make delicious easy homemade chocolate syrup. I think you’re going to like it!

Scroll Down For A Printable Recipe Card At The Bottom Of The Page

What Ingredients Do I Need To Make This?

The ingredient list for the homemade chocolate syrup is quite simple. You will need granulated sugar, cocoa powder, vanilla extract and boiling water. That’s it!

Cocoa powder, vanilla, sugar (and water) are the ingredients for chocolate syrup.

Let’s Make Chocolate Syrup!

Measure 2 cups of sugar, 1/3 cup of cocoa powder, and 1 cup of boiling water in a medium-sized saucepan. Whisk or stir these ingredients well. The boiling water helps the ingredients blend together.

Bring them to a boil on Medium-Low heat, and then once it’s boiling, continue to boil the syrup for 2 minutes, whisking often.

Chocolate syrup ingredients are combined in a medium saucepan.A whisk is used to combine the homemade chocolate syrup ingredients.

IMPORTANT: Do not step away from the stove while the syrup is boiling! When the easy homemade chocolate syrup boils, it will rise in the saucepan (which is why you need to use a MEDIUM-sized saucepan versus a small pan).

Continue to whisk or stir to keep the bubbling down in the pan. If necessary, lift the pan off the heat for a second until the liquid and bubbles go back down, then put right back on the heat!

The chocolate syrup is boiled for two minutes, stirring constantly.As the syrup boils, it rises in the pan, so it is stirred constantly.

After the homemade chocolate syrup has boiled for 2 minutes, remove the pan from the heat. Stir in 1/8 teaspoon of vanilla extract, and then set the pan aside to allow the syrup time to completely cool.

You can see in the photo below how far up the sides of the pan the syrup rose while boiling. That is why you have to stay right there stirring while it is boiling (unless you want a boil-over and a big mess!).

Chocolate syrup is removed from heat when done, and vanilla is added.

Transfer The Syrup To An Airtight Container

After the homemade chocolate syrup has completely cooled, it is time to transfer it to a bottle or other airtight container. The total amount of syrup should measure about 2 cups.

The recipe for easy homemade chocolate syrup yield about 2 cups total.

Use a funnel to pour the syrup into an airtight container. I use a leftover name-brand chocolate syrup bottle I saved a while ago for this very purpose! Label the container and store the chocolate syrup in the refrigerator.

Chocolate syrup is poured into a re-used syrup container for storage.

Enjoy Using The Easy Homemade Chocolate Syrup

Easy homemade chocolate syrup can be used to make classic chocolate milk or hot chocolate. It can also be used as a dessert topping, by drizzling it over ice cream or other decadent desserts.

I think you’ll be surprised how good it really is, and it’s very convenient to make it from the comfort of home using only a few common pantry ingredients!

Making chocolate milk using the easy homemade chocolate syrup.The chocolate syrup can also be used to drizzle over a variety of desserts.

I hope you have the opportunity to make this delicious chocolate syrup, and trust you’ll enjoy it, too! It’s a quick, easy and delicious alternative to store bought chocolate syrup!

Thanks for stopping by today, and I invite you to come back soon for more family-friendly recipes. Take care, may God bless you… and have a GREAT day!

Looking For More DESSERT Sauce Recipes?

You can find ALL of my recipes in the Recipe Index, which is located at the top of the page. I have some wonderful dessert sauces you will enjoy, including:

Want More Recipes? Get My FREE Newsletter!

I publish a newsletter 2 times per month (1st and 15th) with lots of recipes, tips, etc..
Would you like to join our growing list of subscribers?

There is a Newsletter subscription box on the top right (or bottom) of each blog post, depending on the device you use.
You can submit your e-mail address there, to be added to my mailing list.

Find Me On Social Media:

Facebook page: The Grateful Girl Cooks!
Pinterest:
The Grateful Girl Cooks!
Instagram:
jbatthegratefulgirlcooks

Author's signature

↓↓ PRINTABLE RECIPE BELOW ↓↓

5 from 1 vote
Easy Homemade Chocolate Syrup
Prep Time
5 mins
Total Time
5 mins
 

Make Easy Homemade Chocolate Syrup in 5 minutes, with 4 common ingredients! Use for chocolate milk, desserts, etc.

Category: Dessert Sauce
Cuisine: All Cuisines
Keyword: homemade chocolate syrup
Servings: 32 Tablespoons (2 cups total)
Calories Per Serving: 50 kcal
Author: JB @ The Grateful Girl Cooks!
Ingredients
  • 2 cups granulated sugar
  • cup cocoa powder
  • 1 cup boiling water
  • teaspoon vanilla extract
Instructions
  1. Place sugar, cocoa powder, and boiling water in a Medium-sized saucepan. Whisk or stir ingredients well. Bring them to a boil on Medium-Low heat. Once boiling, continue to boil for 2 minutes, whisking often.

  2. IMPORTANT: Do not step away from the stove while the syrup is boiling! When the syrup boils, it will rise in the saucepan (this is why you need a MEDIUM-sized saucepan versus a small pan). Continue to whisk or stir to keep the bubbling down in the pan. If necessary, lift the pan off the heat for a second until the liquid and bubbles go back down, then put right back on the heat!

  3. After syrup has boiled for 2 minutes, remove the pan from the heat. Stir in vanilla, then set the pan aside to allow syrup time to cool completely.

  4. Once completely cooled, transfer syrup to a bottle or other airtight container. Store in refrigerator until ready to use. Enjoy!

Nutrition Facts
Easy Homemade Chocolate Syrup
Amount Per Serving (1 Tablespoon)
Calories 50 Calories from Fat 2
% Daily Value*
Fat 0.2g0%
Saturated Fat 0.1g1%
Polyunsaturated Fat 0.004g
Monounsaturated Fat 0.04g
Sodium 1mg0%
Potassium 14mg0%
Carbohydrates 13g4%
Fiber 0.3g1%
Sugar 12g13%
Protein 0.2g0%
Calcium 1mg0%
Iron 0.1mg1%
* Percent Daily Values are based on a 2000 calorie diet.

Here’s one more to pin on your Pinterest boards!Make Easy Homemade Chocolate Syrup in 5 minutes, with 4 common ingredients! Use for chocolate milk, desserts, etc.


Lime Jalapeño Salad Dressing

Make delicious Lime Jalapeño Salad Dressing in only 3-4 minutes. It has 5 ingredients and adds a zesty, fresh pop of flavor to green salads.

I am always looking for new and exciting salad dressings that I can make from scratch at home. Usually it costs less in the long run to make homemade salad dressings, especially with the cost of groceries recently!

This recipe for Lime Jalapeño Salad Dressing is one I found in an old cookbook of mine and tweaked the recipe slightly, to suit our taste.

It is simple salad dressing to prepare, and is a fresh, flavorful addition to mixed green salads. The total amount of salad dressing (as written) is enough for a big green salad (4 servings).

If you want to have more on hand, the recipe can EASILY be doubled or tripled to meet your needs. Here’s how to make it.

Scroll Down For A Printable Recipe Card At The Bottom Of The Page

What Are The Ingredients I Will Need?

To make this salad dressing you will need 5 ingredients. They are fresh lime juice (from 1 lime), vegetable oil, a small jalapeño pepper, a clove of garlic, and a small piece of fresh ginger.

Fresh lime juice (from one lime) is needed for the salad dressing.

Prepping The Jalapeño

This recipe, as written, calls for using ¼ of a small jalapeño pepper. The photos below are representative only, to show you what must be removed.

Remove the seeds (they contain the heat so don’t rub your eyes after handling them!). and finely dice the jalapeño.

Finely minced jalapeño pepper is used, after seeds have been removed.

Prep The Fresh Ginger

Peel a very small “knob” of fresh ginger. Once peeled, mince the small piece very finely with a knife OR use a microplane (shown in photo below) to do the same thing.

The amount of fresh ginger needed is very small (but necessary for the flavor of the salad dressing). Did you know you can freeze the leftover ginger and continue to use it over and over? Here’s how to freeze ginger.

Peeled , finely minced fresh ginger is used to make the salad dressing.

Make The Lime Jalapeño Salad Dressing

Now that the ingredients are prepped, the Lime Jalapeño Salad Dressing will come together in only a brief minute! 

Place the lime juice, oil, minced jalapeño pepper, garlic, and ginger in a small bowl. Use a fork and whisk these ingredients together until they are fully combined.

Salad dressing ingredients are stirred together until fully combined.

Once the salad dressing is fully mixed, it can be used immediately OR you can cover and store it in the refrigerator.

If you choose to refrigerate it right when it’s done, you will need to re-stir the ingredients well once again before you use it.

The Lime Jalapeño Salad Dressing is mixed and ready to top a green salad.

Serve And Enjoy!

When ready to use, give it a quick stir, then add the lime jalapeno salad dressing to any of your favorite mixed green salads.

The salad shown below (first photo) is a kale and sweet potato salad, and this simple, but this flavor-packed dressing pairs really well with it.

The salad dressing also compliments green salads with fresh fruit, because it compliments the sweet fruit well.

Lime Jalapeño Salad Dressing is poured over a kale salad with sweet potatoes.A green salad with fresh fruit is complimented well with the salad dressing.

Hope you give this unique (but delicious) salad dressing a try, and trust you’ll enjoy it! It’s such a simple recipe, but it tastes really good on a cold, crisp green salad.

Thanks for stopping by, and please come back again soon for more family-friendly recipes. Take care, may God bless you, and have a GREAT day!

Looking For More SALAD DRESSING Recipes?

You can find ALL of my recipes in the Recipe Index, which is located at the top of the page. I have quite a few homemade salad dressing recipes to choose from, including:

Want More Recipes? Get My FREE Newsletter!

I publish a newsletter 2 times per month (1st and 15th) with lots of recipes, tips, etc..
Would you like to join our growing list of subscribers?

There is a Newsletter subscription box on the top right (or bottom) of each blog post, depending on the device you use.
You can submit your e-mail address there, to be added to my mailing list.

Find Me On Social Media:

Facebook page: The Grateful Girl Cooks!
Pinterest:
The Grateful Girl Cooks!
Instagram:
jbatthegratefulgirlcooks

Author's signature

Salad dressing recipe adapted from: “Year Round Fresh”, page 184, published by WW International, Inc. in 2018

↓↓ PRINTABLE RECIPE BELOW ↓↓

0 from 0 votes
Lime Jalapeño Salad Dressing
Prep Time
5 mins
Cook Time
0 mins
Total Time
5 mins
 

Make delicious Lime Jalapeño Salad Dressing in only 3-4 minutes. It has 5 ingredients and adds a zesty, fresh pop of flavor to green salads.

Category: Salad Dressing
Cuisine: All Cuisines
Keyword: lime jalapeño salad dressing
Servings: 4
Calories Per Serving: 27 kcal
Author: JB @ The Grateful Girl Cooks!
Ingredients
  • Tablespoons fresh lime juice
  • teaspoons vegetable oil or other neutral oil
  • ¼ teaspoon fresh minced ginger finely minced
  • ¼ small fresh jalapeño pepper seeded, finely minced
  • ½ small garlic clove finely minced
Instructions
  1. Place the lime juice, oil, minced jalapeño pepper, garlic, and ginger in a small bowl.

  2. Use a fork to whisk these ingredients together for about a minute until they're fully combined.

  3. Once fully mixed, it can be used immediately OR cover and store it in the refrigerator. If refrigerate it right when it's done, you will need to re-stir the ingredients well before you use it. Serve, and enjoy.

Nutrition Facts
Lime Jalapeño Salad Dressing
Amount Per Serving (1 (1/4 of total))
Calories 27 Calories from Fat 27
% Daily Value*
Fat 3g5%
Saturated Fat 0.4g3%
Trans Fat 0.02g
Polyunsaturated Fat 2g
Monounsaturated Fat 1g
Sodium 0.2mg0%
Potassium 11mg0%
Carbohydrates 1g0%
Fiber 0.1g0%
Sugar 0.1g0%
Protein 0.1g0%
Vitamin A 12IU0%
Vitamin C 3mg4%
Calcium 2mg0%
Iron 0.01mg0%
* Percent Daily Values are based on a 2000 calorie diet.

Here’s one more to pin on your Pinterest boards!Make delicious Lime Jalapeño Salad Dressing in only 3-4 minutes. It has 5 ingredients and adds a zesty, fresh pop of flavor to green salads.


Hoisin Vinaigrette For Salads

Make Hoisin Vinaigrette For Salads in 5 minutes! Recipe yields enough vinaigrette for 4 side salads or 2 entrée salads, and it’s delicious!
Make Hoisin Vinaigrette For Salads in 5 minutes! Recipe yields enough vinaigrette for 4 side salads or 2 entrée salads, and it's delicious!

Today I want to share a simple, quick recipe for a delicious and unique salad dressing I’ve made for several years.

Hoisin Vinaigrette For Salads is incredibly EASY to make, with 8 ingredients and a blender or food processor. It is a flavor-filled Asian inspired vinaigrette that bumps mixed green salads up a notch, in my opinion.

Did I mention how ridiculously easy it is to make in 5 minutes or less? Oh… I did? Okay! Here’s how to make it.

Scroll Down For A Printable Recipe Card At The Bottom Of The Page

What Ingredients Will I Need?

There are 8 ingredients used to make this hoisin vinaigrette for salads. All of them can usually be found in local grocery stores.

You will need soy sauce, sesame oil, garlic, Dijon mustard, oil, white wine vinegar and hoisin sauce for the vinaigrette. Sesame oil and hoisin sauce are typically found in the Asian food section of most grocery stores. 

Ingredients used to make hoisin vinaigrette for salads.

Hoisin Sauce Is The “Star” Of This Vinaigrette

Hoisin sauce is really the “star” of this vinaigrette. It is a dark-colored, flavorful, slightly sweet and tangy thick sauce, commonly used in Asian recipes. 

A jar of commercially prepared hoisin sauce, used in this recipe.

Did You Know You Can Make Homemade Hoisin Sauce?

If you don’t have access to a jar of commercially prepared hoisin sauce, you can make a homemade version that has a fairly similar flavor. Granted, it’s a “version” of the original but it will work perfectly fine for this vinaigrette recipe.

Authentic hoisin sauce uses fermented soybean paste as one of its main ingredients. I don’t know about you, but I don’t normally keep that ingredient in my pantry!

Many Asian recipes call for hoisin sauce in their ingredient list. If I don’t have a jar of hoisin sauce when I need it, I make my own, using this recipe (found on my blog).

If you don’t have authentic hoisin sauce, this works well in recipes as a good stand-in for the original. The ingredients for the homemade version of hoisin sauce are shown below.

Ingredients used to make a homemade version of hoisin sauce.Close up photo of homemade version of hoisin sauce on a spoon.

Prepare The Vinaigrette 

Making the hoisin vinaigrette for salads is super easy! Place all the ingredients into a blender or food processor.

Process (or blend) all of the ingredients until completely mixed into a smooth and creamy vinaigrette. Transfer the salad dressing into a small container.

Cover and refrigerate the vinaigrette until you’re ready to serve it on a favorite mixed green salad. It tastes best when its had a little time to chill, so all the flavors can “mingle” and get to know each other!

After blending, the hoisin vinaigrette for salads is smooth and creamy.

Time To Enjoy The Hoisin Vinaigrette For Salads

There should be enough of the hoisin vinaigrette to dress four small side salads. If you’re using it on a large, main dish salad, you should have enough of the dressing for two salads.

The photo below shows the vinaigrette on a main dish salad I make called Mixed Salad with Hoisin Vinaigrette and Crisp Panko Chicken.

This flavorful vinaigrette is a wonderful addition to many types of mixed green salad, and I think you’ll enjoy it. Be sure to store any leftover vinaigrette in the refrigerator (covered), for up to 4-5 days.

Hoisin vinaigrette for salads, on mixed greens with chicken, in white bowl.

Thank you for taking time out of your busy day to visit my website. I trust you enjoy this easy to prepare salad dressing as much as we do. This recipe can easily be doubled or tripled, to suit your needs.

Please come back soon for more family-friendly recipes. Take care, may God bless you, and have a GREAT day!

Looking For More SALAD DRESSING Recipes?

You can find ALL of my recipes in the Recipe Index, which is located at the top of the page. I have a nice variety of homemade salad dressings for you to check out, including:

Want More Recipes? Get My FREE Newsletter!

I publish a newsletter 2 times per month (1st and 15th) with lots of recipes, tips, etc..
Would you like to join our growing list of subscribers?

There is a Newsletter subscription box on the top right (or bottom) of each blog post, depending on the device you use.
You can submit your e-mail address there, to be added to my mailing list.

Find Me On Social Media:

Facebook page: The Grateful Girl Cooks!
Pinterest:
The Grateful Girl Cooks!
Instagram:
jbatthegratefulgirlcooks

Author's signature

Original recipe source: “Cooking Light- Annual Recipes 2007”, page 103, published by Oxmoor House, Inc.

↓↓ PRINTABLE RECIPE BELOW ↓↓

0 from 0 votes
Hoisin Vinaigrette For Salads
Prep Time
5 mins
Cook Time
0 mins
Total Time
5 mins
 

Make Hoisin Vinaigrette For Salads in 5 minutes! Recipe yields enough vinaigrette for 4 side salads or 2 entrée salads, and it's delicious!

Category: Condiment, Salad Dressing
Cuisine: All Cuisines
Keyword: hoisin vinaigrette
Servings: 4 side salads
Calories Per Serving: 49 kcal
Author: JB @ The Grateful Girl Cooks!
Ingredients
  • 2 Tablespoons white wine vinegar
  • Tablespoons hoisin sauce
  • 1 Tablespoon Dijon mustard
  • 1 Tablespoon fresh ginger peeled and finely grated
  • 2 teaspoons vegetable oil
  • teaspoons soy sauce or low-sodium, if available
  • 1 teaspoon toasted sesame oil
  • ½ teaspoon minced garlic or 1 large clove
Instructions
  1. Place all ingredients into a blender or food processor.

  2. Process until completely mixed into a smooth, creamy vinaigrette. Transfer salad dressing into a small container.

  3. Cover and refrigerate vinaigrette until ready to serve on a mixed green salad. TIP: It tastes best when its had time to chill, so the flavors can "mingle" and get to know each other!

  4. Recipe is easily doubled or tripled. Store any leftover vinaigrette (covered) in refrigerator.

Recipe Notes

Note: The caloric calculation was made using the amount needed for 4 small side salads. If using on a main dish salad (2 servings), the caloric count will be higher.

Nutrition Facts
Hoisin Vinaigrette For Salads
Amount Per Serving (1 (1/4 of total))
Calories 49 Calories from Fat 36
% Daily Value*
Fat 4g6%
Saturated Fat 1g6%
Trans Fat 0.01g
Polyunsaturated Fat 2g
Monounsaturated Fat 1g
Cholesterol 0.2mg0%
Sodium 207mg9%
Potassium 31mg1%
Carbohydrates 3g1%
Fiber 0.4g2%
Sugar 2g2%
Protein 1g2%
Vitamin A 3IU0%
Vitamin C 0.3mg0%
Calcium 6mg1%
Iron 0.2mg1%
* Percent Daily Values are based on a 2000 calorie diet.

Here’s one more to pin on your Pinterest boards!Make a Hoisin Vinaigrette For Salads in 5 minutes! Recipe yields enough vinaigrette for 4 side salads or 2 entrée salads, and it's delicious!

Peanut Butter Ice Cream Sauce

Peanut Butter Ice Cream Sauce is a DELICIOUS dessert topping! Recipe is easy, and yields approx. 2 cups, using 6 common ingredients!

If you’re looking for a delicious ice cream topping, may I suggest this yummy peanut butter ice cream sauce? It is sweet, creamy, and packed with peanut butter flavor!

This sauce is so good it’s hard to keep out of it, once any leftover sauce is in the fridge. I MIGHT have snuck a few teaspoons of the sauce all by itself, and wow, is it ever yummy!

If you enjoy peanut butter, then I’ll bet you’re going to love this ice cream sauce! The sauce is a perfect topping for vanilla, chocolate or chocolate chip ice cream.

It’s also very simple to prepare, and will make a plain old, ordinary scoop of ice cream absolutely perfect! Here’s how to make it.

Scroll Down For A Printable Recipe Card At The Bottom Of The Page

Make The Creamy Syrup Base

Measure milk, sugar, corn syrup, and salt into a deep, large saucepan. Stir until these ingredients have been well-combined.

Cook the sauce on LOW heat, stirring often, until this mixture thickens (usually about 5-7 minutes).

Sugar, milk, corn syrup and salt are cooked on Low heat in a saucepan.Stirred often, the ice cream sauce base will thicken as it cooks.

Measure creamy peanut butter into a small bowl, so it is ready to add all at once, as soon as the sauce thickens. Set it aside.

Creamy peanut butter in a small white bowl, ready to add to the cooked sauce.

Time To Add The “STAR” Ingredient!

The creamy sauce will thicken as it cooks on Low, then it will begin to boil, and rise up in the saucepan.

IMPORTANT! Keep stirring the sauce, and do not leave the pan unattended, so it won’t boil over!

Add the peanut butter to the sauce, and continue to cook the sauce on Low, keeping it well-stirred, as it melts.

Ice cream sauce base boils as it cooks, prior to adding peanut butter.

Peanut butter is adding to the hot ice cream sauce, and stirred while it melts.

Stir, Stir, Stir!

Keep stirring the peanut butter into the sauce. It will take a couple minutes for the peanut butter to melt and be fully blended into the sauce.

As soon as the peanut butter has been fully incorporated, take the pan off of the heat.

Peanut butter, slowly melting into the sauce in pan, while being stirred.

Let the sauce cool (of the heat) for 5-6 minutes. Once cooled, add vanilla extract and stir, to combine it with the peanut butter ice cream sauce.

Vanilla extract is added to cooled peanut butter sauce (off of the heat).

Serve The Peanut Butter Ice Cream Sauce

This recipe will yield approximately 2 cups of peanut butter ice cream sauce. When it has sufficiently cooled (serve it warm, not hot!), it is ready to be enjoyed!

To serve, spoon a couple Tablespoons of the peanut butter ice cream sauce over a favorite scoop or two of ice cream.

Peanut butter ice cream sauce over a scoop of vanilla ice cream.

If desired, you can top the peanut butter sauce with a few chopped peanuts, for added crunch! We love this sweet sauce!

Peanut butter ice cream sauce, served over chocolate and vanilla ice cream scoops in dish.The peanut butter ice cream sauce on a spoonful of vanilla ice cream.

I hope you have the chance to try this yummy peanut butter ice cream sauce, and feel confident you’re going to enjoy it, too!

Store leftover sauce in an airtight container in a refrigerator for 6-7 days. The sauce can be reheated in a saucepan or microwave, after stirring.

Thanks for stopping by, and I invite you to come back again soon for more family-friendly recipes. Take care, may God bless you, and have a GREAT day!

Looking For More SWEET DESSERT SAUCE Recipes?

You can find ALL of my recipes in the Recipe Index, which is located at the top of the page. I have a nice variety of sweet dessert sauce recipes to choose from, including:

Want More Recipes? Get My FREE Newsletter!

I publish a newsletter 2 times per month (1st and 15th) with lots of recipes, tips, etc..
Would you like to join our growing list of subscribers?

There is a Newsletter subscription box on the top right (or bottom) of each blog post, depending on the device you use.
You can submit your e-mail address there, to be added to my mailing list.

Find Me On Social Media:

Facebook page: The Grateful Girl Cooks!
Pinterest:
The Grateful Girl Cooks!
Instagram:
jbatthegratefulgirlcooks

Author's signature

Original recipe source: unknown (found handwritten recipe on an index card in an old recipe box)

↓↓ PRINTABLE RECIPE BELOW ↓↓

0 from 0 votes
Peanut Butter Ice Cream Sauce
Prep Time
12 mins
Cook Time
0 mins
Total Time
12 mins
 

Peanut Butter Ice Cream Sauce is a DELICIOUS dessert topping! Recipe is easy, and yields approx. 2 cups, using 6 common ingredients!

Category: Desssert, Sauce
Cuisine: American
Keyword: peanut butter ice cream sauce
Servings: 16 (2 Tablespoons per serving)
Calories Per Serving: 93 kcal
Author: JB @ The Grateful Girl Cooks!
Ingredients
  • 1 cup granulated sugar
  • ¾ cup milk
  • 1 Tablespoon Karo syrup (clear)
  • ¼ teaspoon salt
  • 6 Tablespoons creamy peanut butter
  • ¼ teaspoon vanilla extract
Instructions
  1. Place milk, sugar, corn syrup, and salt into a deep, large saucepan. Stir until well combined. Cook on LOW, stirring often, until mixture thickens (5-7 minutes).

  2. Measure peanut butter into a small bowl, so it's ready to add when the sauce thickens. Set aside.

  3. Sauce will thicken as it cooks, then begin to boil, and rise up in the saucepan. Keep stirring; do not leave pan unattended, so it won't boil over! Add peanut butter; continue cooking on Low, stirring constantly, as it melts. As soon as peanut butter has melted, and been fully incorporated, move pan off of the heat.

  4. Let sauce cool 5-6 minutes. Add vanilla extract and stir, to combine. When sauce has cooled, it's ready to serve over ice cream! Best served warm, not hot.

Nutrition Facts
Peanut Butter Ice Cream Sauce
Amount Per Serving (1 (2 Tbl.))
Calories 93 Calories from Fat 27
% Daily Value*
Fat 3g5%
Saturated Fat 1g6%
Polyunsaturated Fat 1g
Monounsaturated Fat 2g
Cholesterol 1mg0%
Sodium 67mg3%
Potassium 52mg1%
Carbohydrates 15g5%
Fiber 0.3g1%
Sugar 15g17%
Protein 2g4%
Vitamin A 22IU0%
Calcium 17mg2%
Iron 0.1mg1%
* Percent Daily Values are based on a 2000 calorie diet.

Here’s one more to pin on your Pinterest boards!Peanut Butter Ice Cream Sauce is a DELICIOUS dessert topping! Recipe is easy, and yields approx. 2 cups, using 6 common ingredients!

Thousand Island Salad Dressing

Homemade Thousand Island Salad Dressing is a cinch to make in only 5 minutes! Use it on your favorite green salads, hamburgers or patty melts!

Today I’m going to share with you how simple it is to make homemade salad dressing in a few minutes, in the comfort of your own home. Simple and delicious is my favorite kind of recipe!

I have quite a few homemade salad dressing recipes here on my blog, and always enjoy learning how to make them from scratch, at home.

Thousand Island Salad Dressing is a cinch to make, and uses fairly “common” kitchen ingredients. This famous salad dressing is named after Thousand Islands, New York (apparently), where it is believed to have been first created.

If you’re interested in learning more about the origins of Thousand Island Salad Dressing, you can do so HERE. Let me show you how to make this delicious salad dressing, lickety-split!

Scroll Down For A Printable Recipe Card At The Bottom Of The Page

Making Thousand Island Salad Dressing Is EASY!

The ingredients you need to make thousand island salad dressing are mayonnaise, sour cream, ketchup, sweet pickle relish, red onion, white vinegar, sugar, garlic, salt and pepper.

Measure, then place all ingredients except the salt and pepper into a medium-sized bowl, and stir until the salad dressing has been fully combined.

Season with salt and pepper to suit your personal taste (it doesn’t take too much- start with 1/8 teaspoon, then add more, as desired).

And just like that, you’ve made homemade thousand island salad dressing!  See how easy that was? You’ll probably also notice that this salad dressing is fairly THICK.

Ingredients for thousand island salad dressing are measured into a bowl.

Some people even add a hard-boiled egg to their dressing. I don’t care for it that way, but feel free to add a finely crumbled hard-boiled egg to the salad dressing if it makes you happy!

You may also notice that the ingredients in thousand island salad dressing are similar to those in Russian Salad Dressing. That’s true, but did you know Russian Dressing also has horseradish in it? 

Thousand Island Salad Dressing is mixed together in a silver, medium sized bowl.

Check The Texture To Suit Your Preference

Check out the texture of the thousand island salad dressing. You may like it very thick, but if you’re like me, you prefer it a bit thinner in texture.

If desired, simply add a little bit of milk (in very small increments), and stir until the salad dressing reaches your desired consistency.

A spoonful of thousand island salad dressing shows how thick it is.

I typically add about 1-2 Tablespoons milk to mine to thin it slightly when I make it. This texture is completely YOUR CHOICE, of course.

A bit of milk has been added, to thin out the salad dressing a bit.

Storing The Salad Dressing

Cover the bowl with plastic wrap and refrigerate the Thousand Island Salad Dressing at least 2-3 hours before serving, for best flavor.

You can also transfer the salad dressing to an airtight container before refrigerating, if you prefer. I usually store mine in a canning jar.

Thousand Island Salad Dressing can be stored safely in an airtight container in the refrigerator for up to 6-7 days. The recipe (as written) will yield about 1 cup of salad dressing, so it is fairly easy to use it up during that week.

A glass canning jar is filled with thousand island salad dressing, then refrigerated.

Serve The Thousand Island Salad Dressing

After the thousand island salad dressing has been fully chilled, use it to top one of your favorite mixed green salads for added flavor!

The salad dressing is also a wonderful condiment which can be used on burgers or patty melts. It is delicious, spread on a grilled patty melt with caramelized onions.

A white plate holding a green salad with thousand island salad dressing on top.A patty melt can be spread with the thousand island dressing.

Making thousand island salad dressing is so absolutely EASY, and I hope you have the opportunity to create this recipe. I think you’re going to really like it.

Thanks for taking the time to visit this website today, and I invite you to come back again soon. Take care, may God bless you, and have a GREAT day!

Looking For More SALAD DRESSING Recipes?

You can find ALL of my recipes in the Recipe Index, which is located at the top of the page. I have a wonderful variety of homemade salad dressing recipes you may enjoy, including:

Want More Recipes? Get My FREE Newsletter!

I publish a newsletter 2 times per month (1st and 15th) with lots of recipes, tips, etc..
Would you like to join our growing list of subscribers?

There is a Newsletter subscription box on the top right (or bottom) of each blog post, depending on the device you use.
You can submit your e-mail address there, to be added to my mailing list.

Find Me On Social Media:

Facebook page: The Grateful Girl Cooks!
Pinterest:
The Grateful Girl Cooks!
Instagram:
jbatthegratefulgirlcooks

Author's signature

Original recipe source (and with thanks to Lauren Allen) at: tastesbetterfromscratch.com/thousand-island-dressing

↓↓ PRINTABLE RECIPE BELOW ↓↓

0 from 0 votes
Thousand Island Salad Dressing
Prep Time
5 mins
Cook Time
0 mins
Total Time
5 mins
 

Homemade Thousand Island Salad Dressing is a cinch to make in only 5 minutes! Use it on your favorite green salads, hamburgers or patty melts!

Category: Salad Dressing
Cuisine: American
Keyword: thousand island salad dressing
Servings: 8 (2 T. per serving)
Calories Per Serving: 122 kcal
Author: JB @ The Grateful Girl Cooks!
Ingredients
  • ½ cup mayonnaise
  • ¼ cup sour cream
  • 3 Tablespoons ketchup
  • 2 Tablespoons red onion finely diced
  • 2 Tablespoons sweet pickle relish
  • 1 Tablespoon white vinegar
  • teaspoons granulated sugar
  • 1 lg. clove garlic minced
  • *salt & pepper, to taste
Instructions
  1. Place all ingredients except salt and pepper in a medium bowl; stir until fully combined. Season with salt/pepper to taste (it doesn't take too much- start with ⅛ teaspoon, then add more, as desired). Stir until combined.

  2. Check texture of the salad dressing. It is fairly thick. If you prefer it thinner, add small amount of milk (1-2 T. at a time). Add milk and stir until salad dressing reaches desired consistency.

  3. Cover bowl with plastic wrap; refrigerate salad dressing at least 2-3 hours before serving, for best flavor. Serve, and enjoy on a favorite green salad or burger.

  4. Store salad dressing in an airtight container in refrigerator up to 6-7 days.

Recipe Notes

NOTE: If interested in reducing the number of calories for this salad dressing, consider using light mayonnaise and/or light sour cream.

Nutrition Facts
Thousand Island Salad Dressing
Amount Per Serving (1 (2 Tablespoons))
Calories 122 Calories from Fat 99
% Daily Value*
Fat 11g17%
Saturated Fat 2g13%
Trans Fat 0.03g
Polyunsaturated Fat 6g
Monounsaturated Fat 3g
Cholesterol 8mg3%
Sodium 176mg8%
Potassium 39mg1%
Carbohydrates 5g2%
Fiber 0.1g0%
Sugar 4g4%
Protein 0.5g1%
Vitamin A 107IU2%
Vitamin C 1mg1%
Calcium 13mg1%
Iron 0.1mg1%
* Percent Daily Values are based on a 2000 calorie diet.

Here’s one more to pin on your Pinterest boards!Homemade Thousand Island Salad Dressing is a cinch to make in only 5 minutes! Use it on your favorite green salads, hamburgers or patty melts!

Creamy Sesame Vinaigrette

Creamy Sesame Vinaigrette is easy to make in under 5 minutes! It’s delicious, and tastes great on mixed green salads or roasted asparagus.
Creamy Sesame Vinaigrette is easy to make in under 5 minutes! It's delicious, and tastes great on mixed green salads or roasted asparagus.

Do you like making salad dressings and vinaigrettes at home? I do, because it’s convenient, budget-friendly and I can control the ingredients. It’s easy to make most homemade salad dressings, with minimal time involved. This recipe yields about twelve servings (2 Tablespoons per serving), so you can enjoy it on quite a few salads.

This creamy sesame vinaigrette has a slight “Asian” flavor, thanks to the addition of sesame seed oil. Sesame oil is used in many Asian dishes, and is made from pressed sesame seeds. You can learn more information about this flavored oil here.

Whisk the ingredients together and POOF! In only a few minutes you will have this creamy sesame vinaigrette ready. It is fantastic on green salads, and tastes wonderful drizzled over roasted asparagus! Here’s how simple it is to make.

Scroll Down For A Printable Recipe Card At The Bottom Of The Page

What Ingredients Will I Need?

This vinaigrette requires only 5 ingredients to make, and they’re pretty common ingredients! The five ingredients are white wine vinegar, light mayo, honey, sesame oil, and Dijon mustard.

NOTE: You can also add white sesame seeds or red chili flakes, if you want. I’ve done both! That is completely OPTIONAL, and it is perfectly fine to leave them out. 

Sesame oil can be found in the Asian section of grocery stores, and it can be stored in the pantry. If you don’t have access to white wine vinegar, regular white vinegar can be substituted, as well.

Ingredients that are used to make the creamy sesame vinaigrette.

Let’s Make Some Creamy Sesame Vinaigrette

Measure all ingredients for the salad dressing into a medium bowl. Mix the ingredients together using a whisk OR a fork, and continue to whisk until the ingredients are fully blended.

NOTE: If you are adding the (optional) sesame seeds (or red pepper flakes), stir them into the vinaigrette once mixed.

Vinaigrette ingredients are measured into a medium sized bowl for mixing.A whisk or electric mixer can be used to combine the creamy sesame vinaigrette ingredients.

Storing The Vinaigrette

Pour the creamy sesame vinaigrette into an airtight container or small jar using a funnel. You will end up with about  ¾ cup of salad dressing, which yields approx. twelve servings (2 T. each). 

The vinaigrette can be used at this point, if necessary. Store this salad dressing in the refrigerator until well-chilled to get the BEST flavor! This gives the vinaigrette time to let those yummy flavors intermingle!

Creamy sesame vinaigrette can be stored in an airtight bottle in the refrigerator

Using The Creamy Sesame Vinaigrette

Use creamy sesame vinaigrette on a variety of mixed green salads or main course salads. This salad dressing adds so much flavor, you’ll be surprised.

Another way to enjoy this versatile salad dressing is to drizzle the dressing over roasted asparagus! It’s a great way to give the veggies a POP of bright flavor!

Use the creamy sesame vinaigrette to top a garden salad or main course salad.Roasted asparagus taste great when drizzled with the creamy sesame vinaigrette.

I hope you’ll enjoy this simple, flavor-packed salad dressing on a favorite green salad! Any leftover salad dressing can be stored in an airtight container in the refrigerator.

Thank you for taking time out of your busy day to stop by this website. I invite you to come back soon for more family-friendly recipes. Take care, may God bless you, and have a GREAT day!

Looking For More SALAD DRESSING Recipes?

You can find ALL of my recipes in the Recipe Index, which is located at the top of the page. I have a nice variety of salad dressings for you to choose from, including:

Want More Recipes? Get My FREE Newsletter!

I publish a newsletter 2 times per month (1st and 15th) with lots of recipes, tips, etc..
Would you like to join our growing list of subscribers?

There is a Newsletter subscription box on the top right (or bottom) of each blog post, depending on the device you use.
You can submit your e-mail address there, to be added to my mailing list.

Find Me On Social Media:

Facebook page: The Grateful Girl Cooks!
Pinterest:
The Grateful Girl Cooks!
Instagram:
jbatthegratefulgirlcooks

Author's signature

↓↓ PRINTABLE RECIPE BELOW ↓↓

0 from 0 votes
Creamy Sesame Vinaigrette
Prep Time
5 mins
Cook Time
0 mins
Total Time
5 mins
 

Creamy Sesame Vinaigrette is easy to make in under 5 minutes! It's delicious, and tastes great on mixed green salads or roasted asparagus.

Category: Salad Dressing
Cuisine: American
Keyword: creamy sesame vinaigrette
Servings: 12 (2 T. per serving)
Calories Per Serving: 44 kcal
Author: JB @ The Grateful Girl Cooks!
Ingredients
  • 3 Tablespoons light mayonnaise
  • 6 Tablespoons honey
  • 3 Tablespoons white wine vinegar
  • 5 teaspoons Dijon mustard
  • ½ teaspoon sesame oil
Additional Add-Ins (optional)
  • 1 teaspoon white sesame seeds
  • 1 pinch red chili pepper flakes
Instructions
  1. Place mayonnaise, honey, vinegar, Dijon, and sesame oil in a medium bowl. Mix, using a whisk or an electric mixer. Continue to mix or whisk until completely blended. NOTE: If adding the (optional) sesame seeds or red chili pepper flakes, stir them into vinaigrette once mixed.

  2. Pour vinaigrette into an airtight container or jar using a funnel. You will end up with about ¾ cup of salad dressing.  The vinaigrette can be used immediately, if necessary.

  3. For BEST flavor, store the vinaigrette in the refrigerator until well-chilled before using. This lets all those yummy flavors have time to intermingle!

  4. Store leftover vinaigrette in an airtight container in refrigerator. Enjoy!

Nutrition Facts
Creamy Sesame Vinaigrette
Amount Per Serving (2 Tablespoons)
Calories 44 Calories from Fat 9
% Daily Value*
Fat 1g2%
Saturated Fat 0.1g1%
Trans Fat 0.002g
Polyunsaturated Fat 1g
Monounsaturated Fat 0.3g
Cholesterol 1mg0%
Sodium 53mg2%
Potassium 11mg0%
Carbohydrates 9g3%
Fiber 0.1g0%
Sugar 9g10%
Protein 0.1g0%
Vitamin A 4IU0%
Vitamin C 0.1mg0%
Calcium 2mg0%
Iron 0.1mg1%
* Percent Daily Values are based on a 2000 calorie diet.

Here’s one more to pin on your Pinterest boards!Creamy Sesame Vinaigrette is easy to make in under 5 minutes! It's delicious, and tastes great on mixed green salads or roasted asparagus.

Blueberry Dessert Sauce

Make a delicious Blueberry Dessert Sauce to spoon on top of cheesecake or ice cream, etc.! It’s made using either fresh or frozen blueberries.
Make a delicious Blueberry Dessert Sauce to spoon on top of cheesecake or ice cream, etc.! It's made using either fresh or frozen blueberries.

One of my all time FAVORITE desserts is cheesecake. Seriously. I can never get enough of that decadent dessert, especially when it is topped with a sweet fruit sauce (strawberry, cherry or blueberry, to name a few).

Today I want to show you how simple it is to make a delicious blueberry dessert sauce with just a few ingredients. It tastes wonderful on many desserts (ice cream, pound cake, etc.), but my favorite way to enjoy it is on top of a big ol’ piece of cheesecake! The sauce not only LOOKS good when served, it adds another layer of plump, juicy blueberry flavor to the dessert! Here’s how to make this yummy, sweet sauce.

Scroll Down For A Printable Recipe Card At The Bottom Of The Page

Making The Blueberry Sauce

Place 6 Tablespoons of blueberry jam and 2 Tablespoons of fresh squeezed lemon juice in a medium sized saucepan. Stir the mixture to combine the two ingredients and heat on low, only until the mixture is heated through.

NOTE: This recipe is unique because of its use of blueberry jam. Because the jam is already sweetened, there is no need for additional sugar. Blueberry jam can be found in most grocery stores nowadays which is quite convenient, but I like to use my homemade jam. If you like to can foods, here is my recipe for making homemade blueberry jam (enough to can and keep in long term storage).

Blueberry jam and lemon juice are warmed in a saucepan on low heat.

In a separate small bowl, whisk or stir together water and cornstarch until the mixture is smooth and lump-free. Stir the cornstarch “slurry” into the saucepan with the jam mixture until well-combined.

Water and cornstarch are mixed together in a small bowl until smooth and lump-free.A water and cornstarch slurry is added to the blueberry jam and lemon juice in pan.

Continue cooking the blueberry dessert sauce on low heat until the sauce has thickened slightly. This usually only takes a couple minutes, so keep an eye on it, stirring occasionally. Once the sauce has thickened, remove the pan from the heat.

The blueberry dessert sauce is cooked until it has slightly thickened, then it's cooled.

Final Step For Making The Sauce

When the sauce has cooled down slightly, add the blueberries and grated lemon zest to the pan. Stir gently, to incorporate these ingredients into the sauce. Let the blueberry dessert sauce finish cooling to room temperature, then it’s ready to use as a dessert topping.

NOTE: If you are using frozen blueberries, make sure they are thawed and drained before adding them to the sauce.

Grated lemon zest and fresh (or frozen, but thawed) blueberries are added to the saucepan.A saucepan with the finished blueberry dessert sauce, ready to be used on desserts.

Serve The Blueberry Dessert Sauce

My favorite way to use this blueberry sauce is to spoon it over a nice slice of cheesecake! The sauce has a small pop of fresh citrus flavor, thanks to the addition of lemon zest, which makes it taste so good!

Blueberry dessert sauce also tastes wonderful as a topping for vanilla ice cream or pound cake. This recipe will yield approximately 12 servings (2 Tablespoons per serving), and any leftover sauce can be covered and refrigerated for 3-4 days.

A slice of cheesecake is topped with some of the blueberry dessert sauce for serving. We served it as a dessert topping on cheesecake recently to dinner guests, and it was a big hit with them! I hope you enjoy this dessert sauce as much as we do. Thanks for stopping by today, and I invite you to come back soon for more family-friendly recipes. Take care, and have a GREAT day!

Looking For More DESSERT SAUCE Recipes?

You can find ALL of my recipes in the Recipe Index, which is located at the top of the page. I have some delicious, sweet dessert sauces you might enjoy, including:

Interested In More Recipes?

Thank you for visiting this website. I appreciate you using some of your valuable time to do soIf you’re interested, I publish a newsletter 2 times per month (1st and 15th) with all the latest recipes, and other fun info. I would be honored to have you join our growing list of subscribers, so you never miss a great recipe!
There is a Newsletter subscription box on the top right side (or bottom) of each blog post, depending on the device you use, where you can easily submit your e-mail address (only) to be included in my mailing list.

You Can Also Find Me On Social Media:

Facebook page: The Grateful Girl Cooks!
Pinterest:
The Grateful Girl Cooks!
Instagram:
jbatthegratefulgirlcooks

Author's signature

Original recipe source: “Treasury of Christmas”, page 404, published in 1996 by Publications International., Inc.

↓↓ PRINTABLE RECIPE BELOW ↓↓

0 from 0 votes
Blueberry Dessert Sauce
Prep Time
10 mins
Total Time
10 mins
 

Make a delicious Blueberry Dessert Sauce to spoon on top of cheesecake or ice cream, etc.! It's made using either fresh or frozen blueberries.

Category: Dessert Sauce, Sauces
Cuisine: American
Keyword: blueberry dessert sauce
Servings: 12 (2 T. per serving)
Calories Per Serving: 37 kcal
Author: JB @ The Grateful Girl Cooks!
Ingredients
  • 6 Tablespoons blueberry jam
  • 2 Tablespoons lemon juice
  • 2 Tablespoons water
  • 2 teaspoons cornstarch
  • 1 cup blueberries fresh OR frozen (thawed/drained)
  • 1 teaspoon lemon zest (finely grated yellow peel)
Instructions
  1. Place blueberry jam and lemon juice in a medium saucepan. Stir to combine ingredients. Heat on low, only until heated through.

  2. In a separate bowl, whisk (or stir) water and cornstarch until smooth and lump-free. Add to jam mixture in pan, stirring until well-combined. Cook on low heat until sauce has thickened slightly (a couple minutes), stirring occasionally. Once sauce thickens, remove pan from the heat; let sauce cool for 2-3 minutes.

  3. Once sauce has cooled slightly, add blueberries and lemon zest. Stir gently, to incorporate these ingredients into the sauce. Let sauce cool to room temperature before serving.

  4. Blueberry dessert sauce tastes wonderful as a topping for cheesecake, vanilla ice cream or pound cake. Recipe will yield about 12 servings (2 Tablespoons per serving). Leftover sauce can be covered and refrigerated for 3-4 days. Enjoy!

Nutrition Facts
Blueberry Dessert Sauce
Amount Per Serving (2 Tablespoons)
Calories 37 Calories from Fat 1
% Daily Value*
Fat 0.1g0%
Saturated Fat 0.01g0%
Polyunsaturated Fat 0.02g
Monounsaturated Fat 0.01g
Sodium 4mg0%
Potassium 20mg1%
Carbohydrates 9g3%
Fiber 0.4g2%
Sugar 6g7%
Protein 0.1g0%
Vitamin A 7IU0%
Vitamin C 3mg4%
Calcium 3mg0%
Iron 0.1mg1%
* Percent Daily Values are based on a 2000 calorie diet.

Here’s one more to pin on your Pinterest boards!Make a delicious Blueberry Dessert Sauce to spoon on top of cheesecake or ice cream, etc.! It's made using either fresh or frozen blueberries.