Month: August 2026

Glazed Peach Scones

Glazed Peach Scones are a tasty snack or breakfast treat! Filled with fresh peaches and glazed with a sweet peach icing, they are delicious!


Recently I went peach-picking at a local farm (a summer tradition of mine) and brought home 2 huge boxes of juicy, delicious fresh peaches.

We enjoyed eating quite a few of those sweet peaches and then I got busy in my kitchen using the rest of them for several different things so we could enjoy them later in the year!

I canned jars of peach jam and canned sliced peaches and then I made (and froze) a yummy peach cobbler to serve when our son and daughter in law come for a visit from their home in Portugal later this summer.

The last thing I used the remaining peaches for was to make these delicious, glazed peach scones. Today I am sharing the recipe with you (after making several changes to a basic peach scone recipe found online). Here’s how to make glazed peach scones, step-by-step!

Scroll Down For A Printable Recipe Card At The Bottom Of The Page

Prepare The Dough

Before starting, preheat your oven to 400°F. and line a baking sheet with parchment paper. Set them aside while you make the scones.

Combine all-purpose flour, sugar, baking powder, salt and ground cinnamon in a large bowl. Add very cold butter that has been cut into small chunks.

Use a pastry blender to cut the butter into the dry ingredients until it becomes the size of peas. The mixture will be crumbly.

NOTE: If you have a food processor, you can use it for this step, if desired. Pulse the butter and dry ingredients several times until the butter is the size of peas.
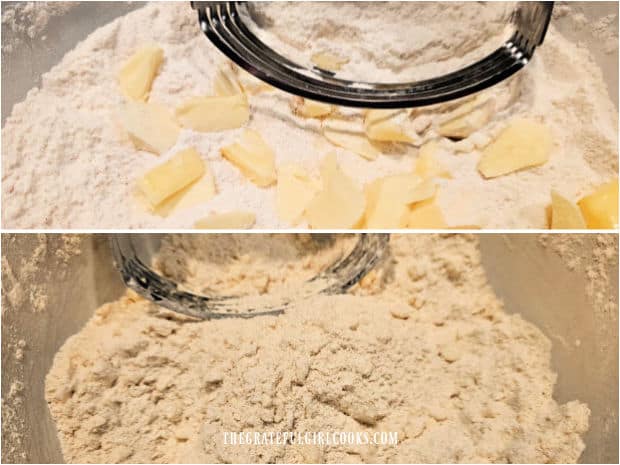
Cold butter is cut into the dry ingredients until crumbly.

Peel and chop fresh peaches into small pieces. Place the peaches onto paper towels and try to blot them gently, but well to remove excess juice.

The number of peaches you will need for the scone dough is 1 cup of chopped peaches, so it will depend on the size peaches you use (usually 1-2).

NOTE: You will also use one half of a small peach for the finishing glaze on the baked scones later on, so plan accordingly.

After blotting the peaches, add them to the dry ingredients and gently stir until combined (as shown below).
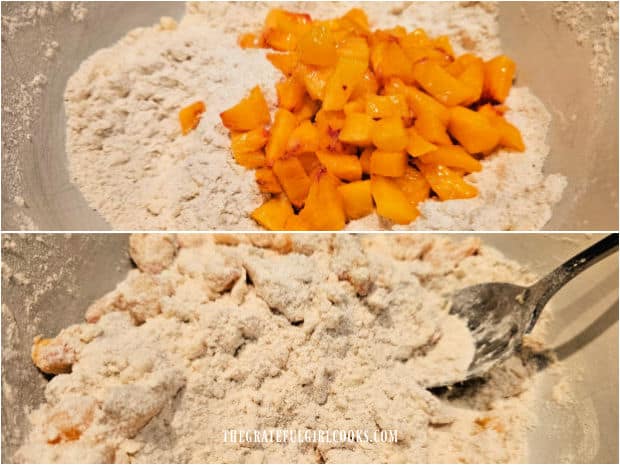
Fresh peach chunks are added to the dry mixture and stirred to combine.

In a separate bowl, mix together sour cream, one egg and vanilla extract. Once they’re combined, add this to the dough mixture and gently stir until it is combined (don’t overmix!).

The dough will be fairly “moist and tacky” in texture due to the peaches and liquid mixture added to the mixture.
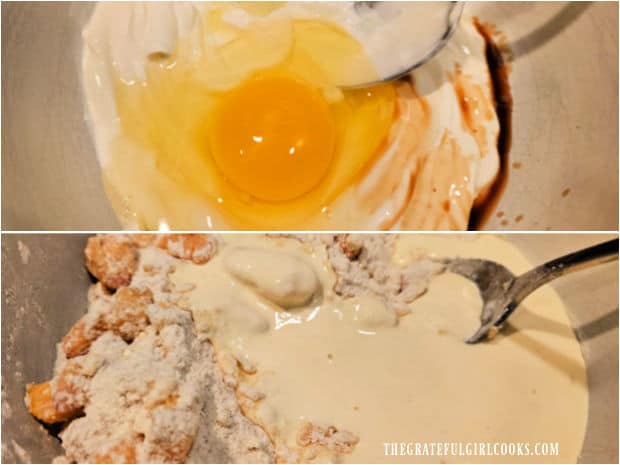
Sour cream, vanilla and an egg are mixed into the scone batter.

Shape The Dough

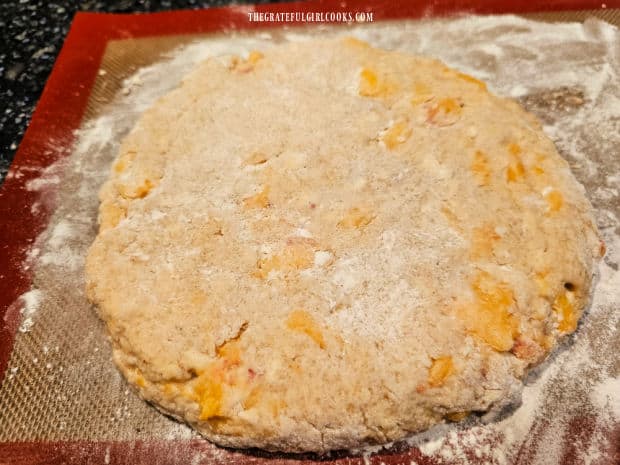
Transfer the “moist and tacky” dough onto a floured work surface (shown below in the first photo). Sprinkle additional flour over the dough, as needed to remove the stickiness of the dough.

Knead the dough gently (5-6 times) with your floured hands, sprinkling it with additional flour as needed to bring the dough together. 

Using your hands, shape the dough into a circle about 8″ wide and about 1″ high (shown below in the second photo). 
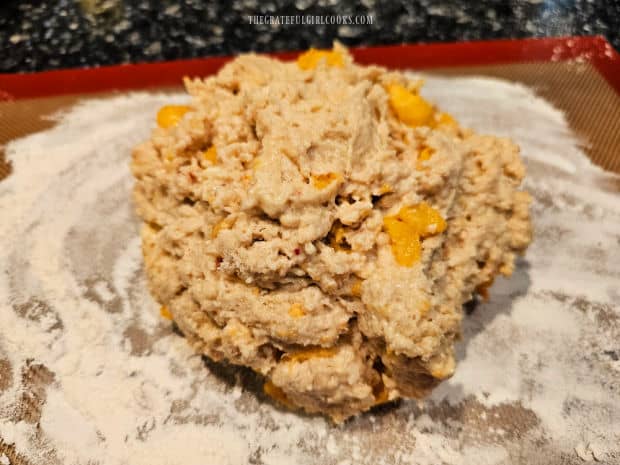
Dough for peach scones is put on a floured surface for shaping.Peach scone dough is shaped into a circle for slicing into 8 wedges.

Prepare The Scones For Baking

You will find that the dough is fairly moist (from the peaches), so carefully cut the dough into 8 equal-sized wedges with a knife. Re-shape them as needed (due to the moist dough).

Place them on a parchment paper lined baking sheet in a circle, leaving ¾”-1″ inch between each wedge. While the scones bake, they will expand, rise and bake together, so the little space in between disappears.

Pre-baked scone wedges are placed on parchment paper lined baking sheet.

Bake The Scones

Place the scones in a preheated 400°F. oven and let them bake for 18-20 minutes (check them at about 18 minutes). When done, the scones should be cooked through and golden brown on top.

A toothpick inserted into a scone should come out free of batter. The scones will have slightly baked together (shown below).

Let the scones cool on the parchment paper, then carefully separate them using a knife to cut the wedges apart.

Transfer the scones to a wire rack to cool. Place the piece of parchment paper UNDERNEATH the rack to catch any drips while glazing the scones later.

After baking, the scones are fused together and cooling.

Make Peach Icing While The Scones Cool

While the scones cool, make up the peach icing. It’s super simple to do this and takes only a couple minutes at most.

In a small bowl place powdered sugar, vanilla and a very crushed half of a small peach. Mash the peach up very well using the flat side of a meat mallet or a fork (shown below)! Stir well to combine.

The juice from the mashed peach will help to turn the powdered sugar mixture into a more liquid form. The glaze should be not too thin OR thick, but “paintable” so it can be easily brushed onto the cooled scones.

If you feel the icing is too thin, add a tiny bit more of powdered sugar or if you think it is too thick, add a drop or two of water and stir again.
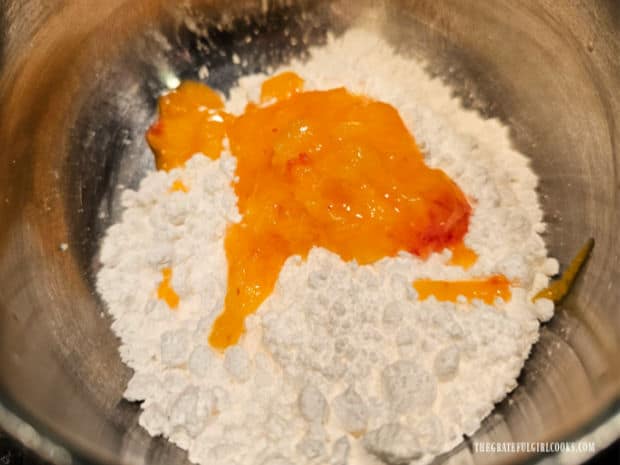
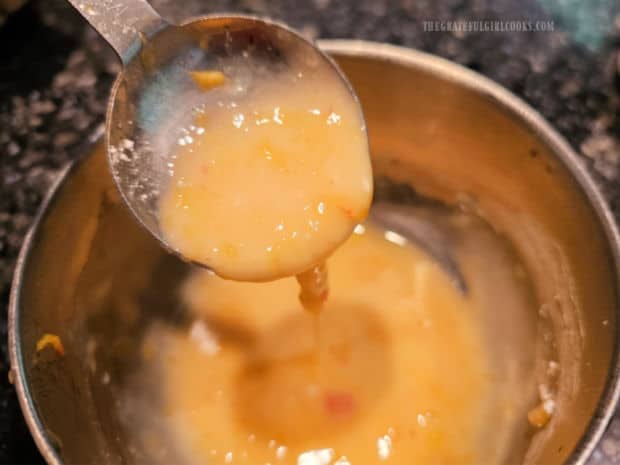
A crushed peach, powdered sugar and vanilla are combined to make icing.Peach icing is ready to be brushed on cooled, baked scones.

Glaze The Scones

Once the baked scones have cooled to room temperature, it’s time to glaze them! DO NOT glaze them while the scones are hot or the glaze will run all over the place!

Use a pastry brush to brush the peach icing over the top of each scone, lightly covering the surface as much as possible (for best flavor!).

Brush the icing (glaze) over all the scones, then if you have any icing left over, go back and brush it over any parts missed on the first go-around.
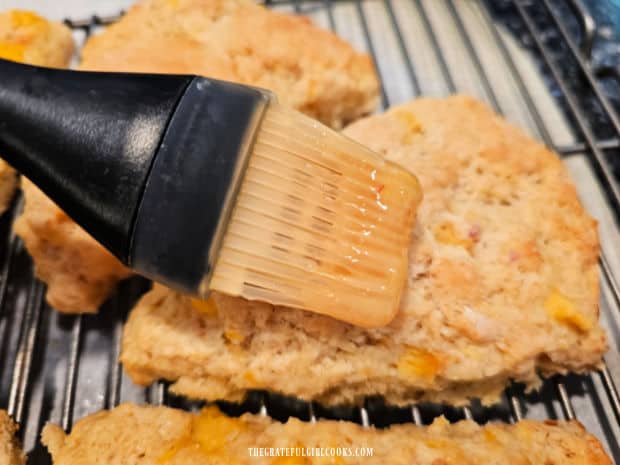
A pastry brush is used to paint on the peach glaze on the cooled scones.

Let the scones rest for a bit after they have been glazed. This allows time for the peach glaze to “firm up” on top of the scones.

Once the icing has hardened slightly, these yummy, glazed peach scones are ready to be eaten and enjoyed and I’m confident you’ll love them.

Eight glazed peach scones continue cooling on a wire rack.

The finished scones are not dry and crumbly but are soft, filled with pieces of peaches, and they have an overall great peach flavor!

Holding up a ready to eat, glazed peach scone.

I hope you have the opportunity to make these absolutely delicious, glazed peach scones for yourself and for those you love. My hope is that you enjoy them as much as I do!

Thanks for stopping by, and I invite you to come back again soon for more family friendly recipes. Take care, may God bless you, and have a wonderful day.

Looking For More SCONE Recipes?

You can find ALL of my recipes in the Recipe Index, which is located at the top of the page. I have lots of amazing scone recipes to choose from, including:

Want More Recipes? Get My FREE Newsletter!

I publish a newsletter 2 times per month (1st and 15th) with lots of recipes, tips, etc.
Would you like to join our growing list of subscribers?

There is a Newsletter subscription box on the top right (or bottom) of each blog post, depending on the device you use.
You can submit your e-mail address there, to be added to my mailing list.

Find Me On Social Media:

Facebook page: The Grateful Girl Cooks!
Pinterest:
The Grateful Girl Cooks!
Instagram:
jbatthegratefulgirlcooks

Author's signature

Recipe adapted from Savannah Pierce at: Peach Scones – ivoryapron

↓↓ PRINTABLE RECIPE BELOW ↓↓

0 from 0 votes
Glazed Peach Scones
Prep Time
15 mins
Cook Time
20 mins
Total Time
35 mins
 

Glazed Peach Scones are a tasty snack or breakfast treat! Filled with fresh peaches and glazed with a sweet peach icing, they are delicious!

Category: Breakfast, Snack
Cuisine: All Cuisines
Keyword: glazed peach scones
Servings: 8 scones
Calories Per Serving: 381 kcal
Author: JB @ The Grateful Girl Cooks!
Ingredients
For Scones:
  • 2 cups all-purpose flour
  • ½ cup granulated sugar
  • 1 Tablespoon baking powder
  • ½ teaspoon salt
  • ½ teaspoon ground cinnamon
  • ½ cup COLD butter = 1 stick/8 TBSP., cut in small chunks
  • 1 cup peaches peeled, cut in small pieces
  • ½ cup light sour cream
  • 1 large egg
  • 1 teaspoon vanilla extract
For Peach Glaze:
  • cups powdered sugar
  • 1 teaspoon vanilla extract
  • ½ small peach MASHED
Instructions
  1. Preheat oven to 400°F. and line a baking sheet with parchment paper. Set aside.

  2. Combine flour, sugar, baking powder, salt and cinnamon in a large bowl. Add very cold small butter chunks. Use pastry blender to cut in butter until it's reduced to the size of peas. NOTE: Use a food processor if desired. Pulse butter and dry ingredients several times until butter is size of peas.

  3. Peel/chop fresh peaches into small pieces. Place on paper towels; blot gently to remove excess juice. Add peaches to dry ingredients; gently stir until combined.

  4. In separate bowl, whisk sour cream, one egg and vanilla extract well. Once combined, add this to the peach mixture; gently stir until combined (don't overmix). Dough will be fairly "moist and tacky" in texture.

  5. Transfer dough onto a floured work surface. Sprinkle additional flour onto dough, as needed, to remove the stickiness. Knead dough gently (5-6 times) with floured hands, adding additional flour as needed to bring dough together. Shape dough into a circle about 8" wide.

  6. Carefully cut dough into 8 wedges with a knife. Reshape as needed (due to the moist dough). Place them on parchment lined baking sheet in a circle, leaving ¾"-1" inch between each wedge. While scones bake, they expand, rise and bake together, so the little space in between disappears.

  7. Bake at 400°F. for 18-20 minutes (check them at 18 minutes). When done, scones should be cooked through/golden brown on top. A toothpick inserted into a scone should come out free of batter. Let scones cool a few minutes, then separate them with a knife. Transfer scones to a wire rack to cool completely. Place parchment paper UNDERNEATH rack to catch drips while glazing scones.

Make Glaze While Scones Cool:
  1. In a small bowl place powdered sugar, vanilla and mashed peach half (mash peach well with flat side of a meat mallet or a fork). Stir to combine. Mashed peach will turn mixture into a more liquid form. The glaze should be not too thin OR thick, but "paintable" so it can be easily brushed onto the cooled scones. Too thin? Add a bit more powdered sugar. Too thick? Add a drop or two of water.

  2. Once scones have cooled to room temperature, it's time to glaze them! Use a pastry brush to brush icing on each one, lightly covering surface. After glazing scones, if you have any icing leftover, go back and brush it on any missed parts. Let glaze harden slightly, then serve and enjoy the scones!

Nutrition Facts
Glazed Peach Scones
Amount Per Serving (1 scone)
Calories 381 Calories from Fat 126
% Daily Value*
Fat 14g22%
Saturated Fat 8g50%
Trans Fat 0.5g
Polyunsaturated Fat 1g
Monounsaturated Fat 4g
Cholesterol 59mg20%
Sodium 264mg11%
Potassium 264mg8%
Carbohydrates 60g20%
Fiber 1g4%
Sugar 33g37%
Protein 5g10%
Vitamin A 525IU11%
Vitamin C 1mg1%
Calcium 100mg10%
Iron 2mg11%
* Percent Daily Values are based on a 2000 calorie diet.

Here’s one more to pin on your Pinterest boards! Glazed Peach Scones are a tasty snack or breakfast treat! Filled with fresh peaches and glazed with a sweet peach icing, they are delicious!

Egg Topped Cheesy Grits

Egg Topped Cheesy Grits is an easy, filling breakfast made in minutes using quick cooking grits, cheddar cheese, green onions and spices.

Today I want to share a delicious breakfast recipe for egg topped cheesy grits. Grits are a true staple in traditional Southern cooking. They are filling, taste great and are easy to make!

Grits are made for the public by grinding dried corn or hominy through a mill into various grind sizes (similar to coffee grinding!).

The corn or hominy kernels are hulled, dried, ground and then sold in grocery stores as “instant” grits, “quick cooking” grits and “regular stone-ground” grits, depending on the grind.

Why I Like This Quick Recipe

One reason this is a quick breakfast to make is because the recipe calls for “quick cooking” grits as opposed to the more traditional stone ground grits.

Quick cooking grits take only 5-6 minutes to cook (they’re ground smaller, so they cook faster). Standard stone ground grits are a larger grind, so they take about 30-45 minutes to cook.

That makes this an easy and convenient way to enjoy grits, especially if you don’t have a lot of time to make breakfast. Here’s how to make egg topped cheesy grits using the quick cooking variety.

Scroll Down For A Printable Recipe Card At The Bottom Of The Page

Cook The Grits

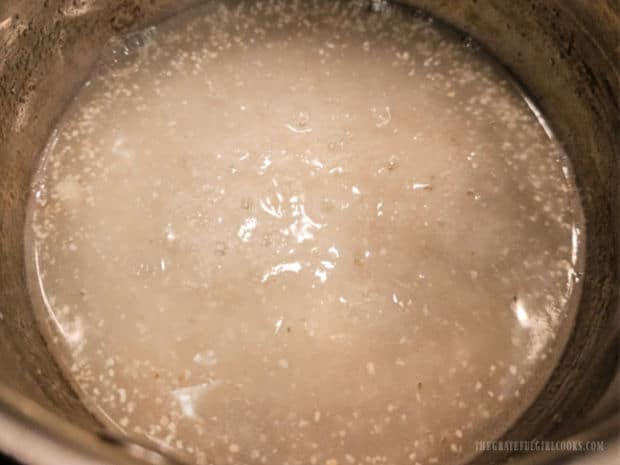
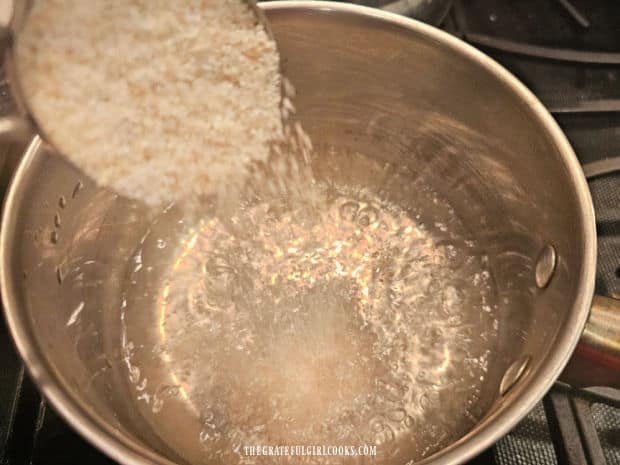
To make quick cooking grits, first bring 1 cup of water and a pinch of salt to a boil in a medium saucepan over medium-high heat.

Once boiling, slowly stir or whisk in ¼ cup of quick cooking grits until combined. Reduce the heat down to LOW and put a lid on the pan.

The amount of grits used (¼ cup) will yield one cup once cooked, which is the amount you’ll need for one serving.

This recipe can easily be doubled or tripled to meet your needs, but you may need to adjust the cooking time as necessary for a larger number of grits!

Quick cooking grits are added to a pan of salted, boiling water.

Cook the grits, stirring them occasionally for about 5-6 minutes. If you prefer thicker grits, simply cook them just a bit longer.

Grits are stirred a few times while they are cooking.

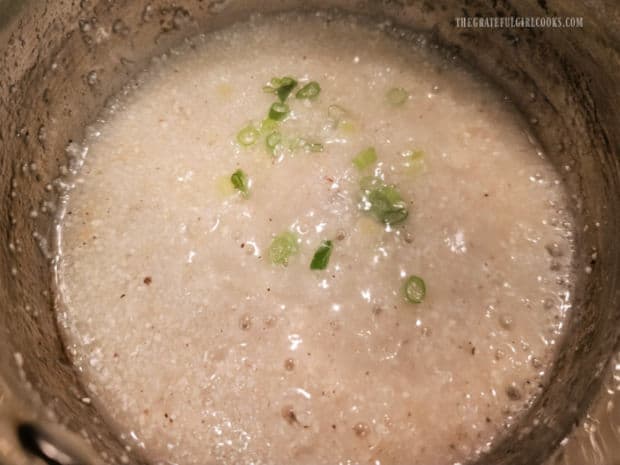
After the grits have cooked for 4 minutes, add garlic powder and thinly sliced green onions to the saucepan, reserving some green onions for garnishing the grits before serving.

Stir until the green onions and garlic powder have been incorporated into the grits. You can see in the photo below that a lot of the liquid has already been reduced at this point.

Thinly sliced green onions and garlic powder are added to the pan of grits.

Add The Cheese

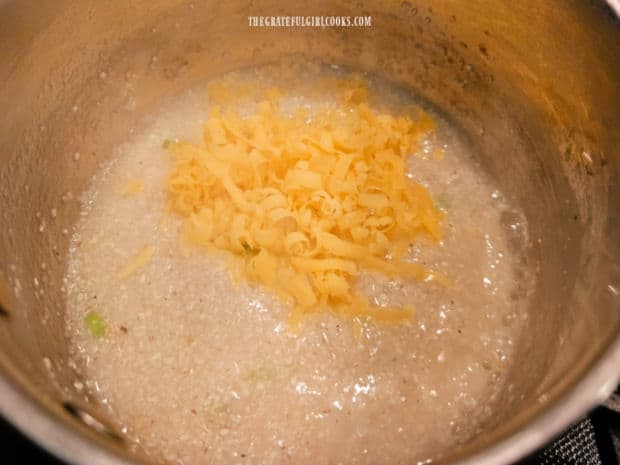
Once the grits have finished cooking, add grated sharp cheddar cheese to the saucepan. Using sharp cheddar produces a stronger cheese flavor, but if you don’t have it, substitute mild cheddar.

Stir well to combine the cheese and grits, stirring often until all the cheese has melted and been fully incorporated.

Take a quick bite and add more salt and/or black pepper, if desired (to suit your personal taste). Cover the grits and keep them hot off of the heat.

Grated sharp cheddar cheese is added to the grits.

Fry The Egg

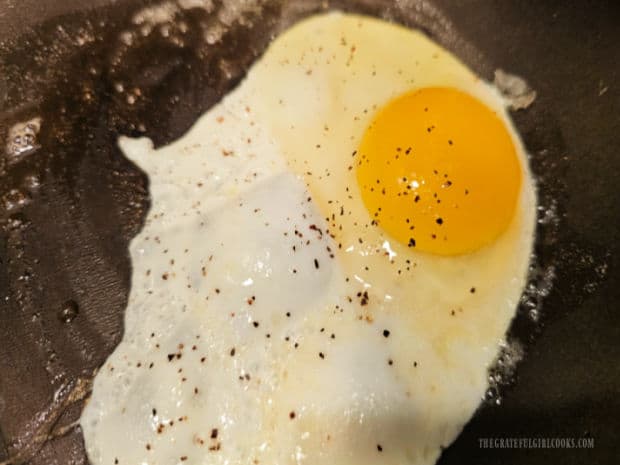
Now you will need to quickly fry a large egg to serve on top of the cheesy grits. Fry the egg to your preference of “done-ness” using oil or butter.

When I make this dish, I fry the egg in a small skillet with a tiny amount of butter until it is cooked “over easy” because I like it to run into the grits a but when cut.

Season the fried egg with salt and pepper if desired, to suit your taste. Once the egg is finished cooking, it’s time to serve this hearty breakfast dish.

One large egg is fried to garnish the top of the cheesy grits.

Serve The Egg Topped Cheesy Grits

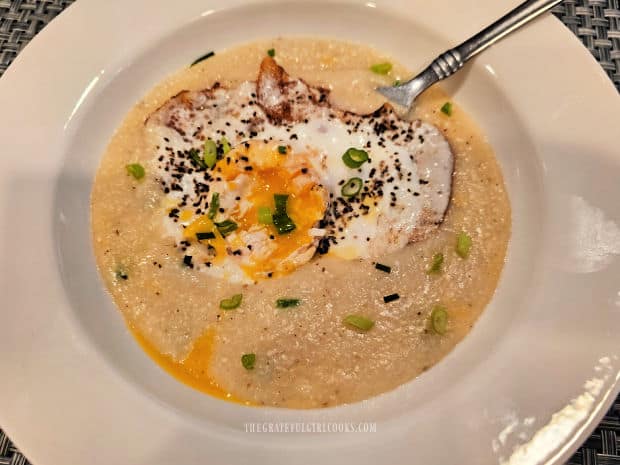
To serve, spoon the cheesy grits into a serving bowl. Use a spatula to transfer the egg on top of the grits.

Sprinkle the reserved sliced green onions on top of the egg topped cheesy grits and serve immediately, while hot.

Egg topped cheesy grits are ready to be enjoyed.

Enjoy the egg topped cheesy grits! Whenever I make this, I find it to be quite delicious AND it is a very filling dish for breakfast.

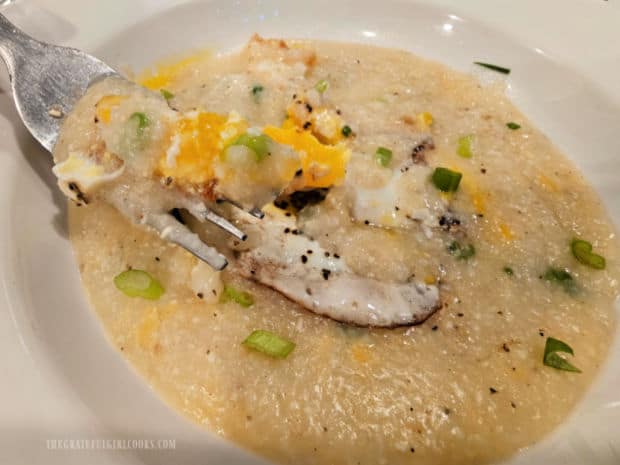
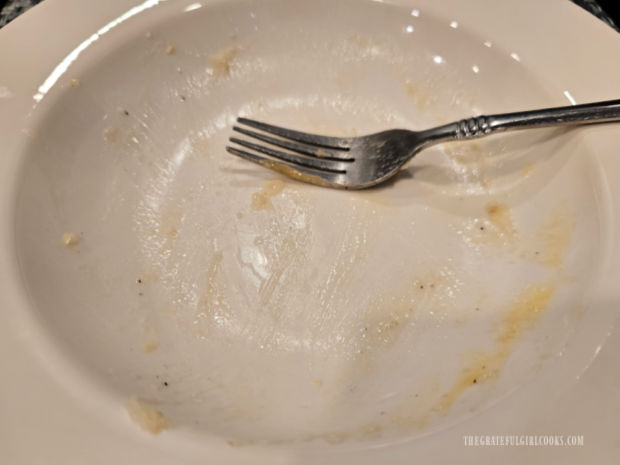
As you can see from the second photo below, this yummy breakfast was gobbled up… completely! It REALLY tastes great!

A forkful of fried egg and grits held over the bowl.An empty bowl after all of the cheesy grits have been gobbled up!

I hope you have the opportunity to make egg topped cheesy grits for your own breakfast and trust you’ll enjoy this dish, as well.

Thank you for stopping by, and I invite you to come back again soon for more family friendly recipes. Take care, may God bless you, and have a wonderful day.

Looking For More BREAKFAST Recipes?

You can find ALL of my recipes in the Recipe Index, which is located at the top of the page. I have a large variety of delicious breakfast recipes to choose from, including:

Want More Recipes? Get My FREE Newsletter!

I publish a newsletter 2 times per month (1st and 15th) with lots of recipes, tips, etc.
Would you like to join our growing list of subscribers?

There is a Newsletter subscription box on the top right (or bottom) of each blog post, depending on the device you use.
You can submit your e-mail address there, to be added to my mailing list.

Find Me On Social Media:

Facebook page: The Grateful Girl Cooks!
Pinterest:
The Grateful Girl Cooks!
Instagram:
jbatthegratefulgirlcooks

Author's signature

↓↓ PRINTABLE RECIPE BELOW ↓↓

0 from 0 votes
Egg Topped Cheesy Grits
Prep Time
5 mins
Cook Time
5 mins
Total Time
10 mins
 

Egg Topped Cheesy Grits is an easy, filling breakfast made in minutes using quick cooking grits, cheddar cheese, green onions and spices.

Category: Breakfast
Cuisine: All Cuisines
Keyword: egg topped cheesy grits
Servings: 1
Author: JB @ The Grateful Girl Cooks!
Ingredients
  • 1 cup water
  • 1 pinch salt
  • ¼ cup quick cooking grits
  • 1 stalk green onion (green/white parts) thinly sliced *DIVIDED USE
  • teaspoon garlic powder
  • cup sharp cheddar cheese (grated)
  • butter or oil for frying egg* *Your personal preference
  • 1 large egg
Salt/Pepper for Egg (if desired) and Reserved Green Onion Slices (for garnish)
    Instructions
    1. Bring water and salt to a boil in a medium saucepan on medium-high heat. Once boiling, slowly stir in quick grits until combined. Reduce heat to LOW; put a lid on the pan. Cook the grits, stirring occasionally for 5-6 minutes. After grits have cooked for 4 minutes, add garlic powder and thinly sliced green onions. Stir until combined. TIP: Set aside some green onions to use as a garnish before serving.

    2. Once grits are done, add grated sharp cheddar cheese. Stir well to combine the cheese and grits, stirring often until all the cheese has melted and been incorporated. Taste grits; add more salt and/or black pepper, if desired. Cover the pan and keep grits hot (off the heat).

    3. Fry egg in a small skillet (in oil or butter) until it is cooked to your preference. Season egg with salt and pepper, to suit your taste.

    4. To serve, Spoon hot, cheesy grits into a serving bowl. Use a spatula to transfer the egg on top of the hot grits. Sprinkle remaining green onions on top; serve immediately. Enjoy!

    Here’s one more to pin on your Pinterest boards! Egg Topped Cheesy Grits is an easy, filling breakfast made in minutes using quick cooking grits, cheddar cheese, green onions and spices.

    Honey Garlic Turkey Meatballs

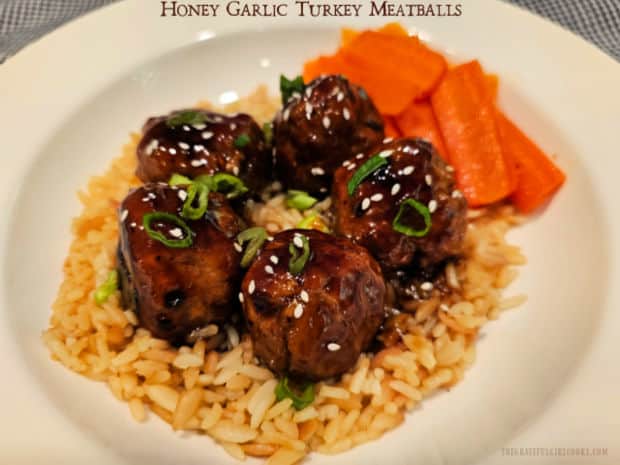
    You’ll LOVE fabulous Honey Garlic Turkey Meatballs, coated in an amazing Asian-style sauce. Recipe uses 1 lb. of ground turkey (4 servings).
    You'll LOVE fabulous Honey Garlic Turkey Meatballs, coated in an amazing Asian-style sauce. Recipe uses 1 lb. of ground turkey (4 servings).

    Today I want to share a recipe for some fantastic meatballs! I know, right? You’re probably sitting there wondering if meatballs are EVER that good, but you know what?

    These honey garlic turkey meatballs ARE THAT GOOD! They are seasoned so well and are glazed with a fantastic tasting Asian-inspired sauce, so I know you’re going to love them.

    A pound of ground turkey will yield approximately 20-24 meatballs, which will make at least 4 servings. If you serve them on a bed of rice with a veggie on the side, you will have an amazing meal that tastes wonderful.

    Here’s how to make yummy honey garlic turkey meatballs.

    Scroll Down For A Printable Recipe Card At The Bottom Of The Page

    Make The Meatball Mixture

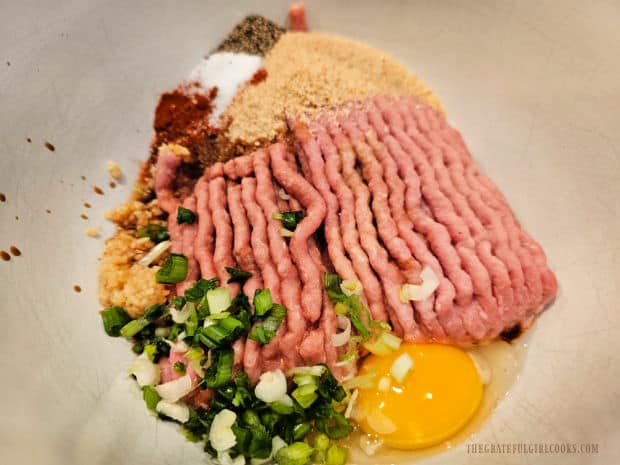
    Place ground turkey, breadcrumbs, egg, minced garlic, soy sauce, chopped green onion, salt, paprika and black pepper in a medium mixing bowl.

    Ingredients for the turkey meatballs are placed in a bowl.

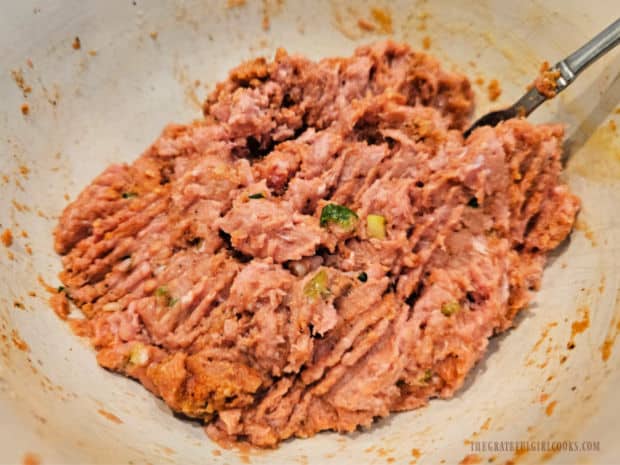
    Thoroughly combine these ingredients until they come together in a slightly “wet”, cohesive mixture. Mix only until combined, being careful to NOT overmix the meat.

    Meatball ingredients are combined into a cohesive mixture.

    Form The Meatballs

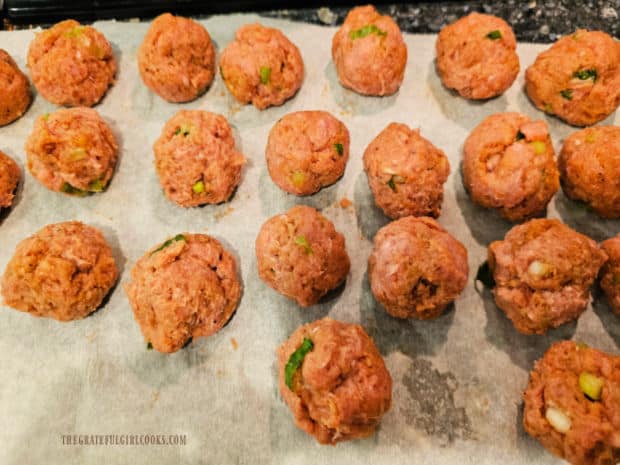
    Now it’s time to shape the meatballs. You should end up with about 20-24 meatballs total from the meatball mixture. Each meatball should be about 1″-1½” in size. 

    Use a small scoop to make the meatballs (or pinch off meat with your hands). Wet your hands, then roll each portion of meat between your palms shaping it into a round meatball.

    Set the meatballs on parchment paper (or foil) to rest until all the meatballs are shaped. Adjust the size of the meatballs, if necessary, to ensure you end up with at least 20 meatballs of similar size. 

    If you plan on 5 meatballs per serving, you will have four servings, but if you decide to serve 4 (or less) meatballs per person, you will have additional servings (or leftovers).

    Turkey meatballs are placed on parchment paper after they are shaped.

    Make The Honey Garlic Sauce

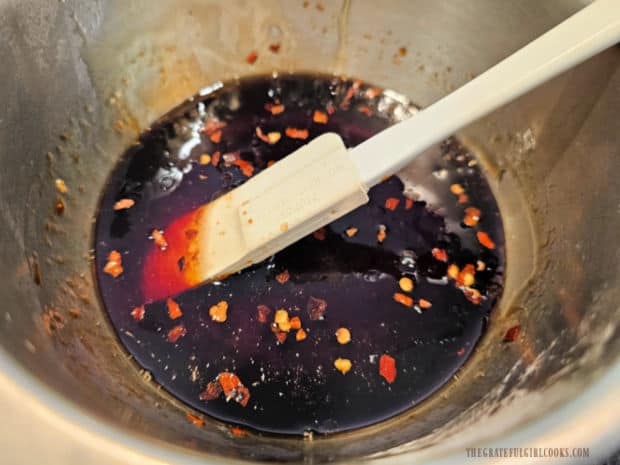
    In a small separate bowl, whisk together honey, soy sauce, minced garlic, red pepper flakes and sesame oil until they are fully incorporated.

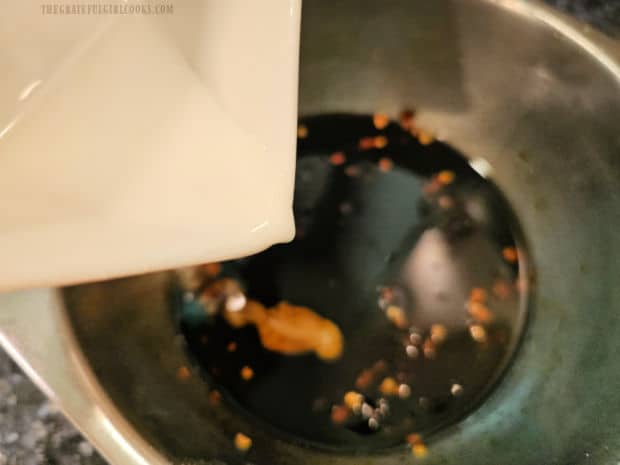
    In a separate container mix together cornstarch and water until it is fully combined (use a fork or small whisk). This mixture is called a “slurry” and is a thickening agent for the sauce when it is cooked.

    Ingredients for the honey garlic sauce are combined in a small bowl.A slurry of cornstarch and water is added to the sauce for thickening.

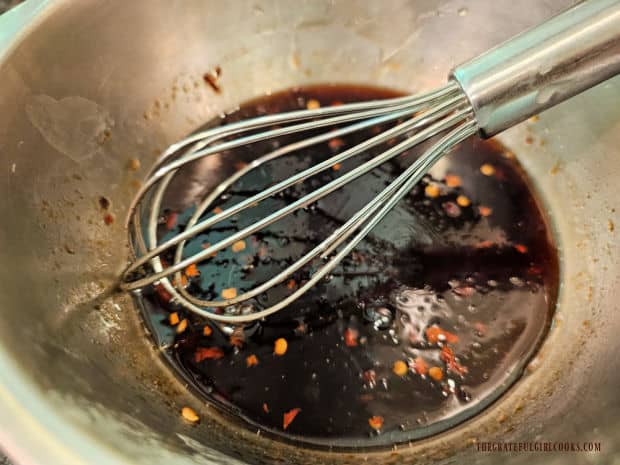
    Add the cornstarch mixture to the bowl of sauce and whisk the sauce well to fully combine the ingredients. Set the sauce aside.

    A whisk is used to incorporate the corn starch mixture into the sauce ingredients.

    Time To Cook The Meatballs

    Heat 2 Tablespoons of vegetable oil in a large skillet on Medium heat. Once the oil is very hot (but not smoking), it’s time to add the meatballs.

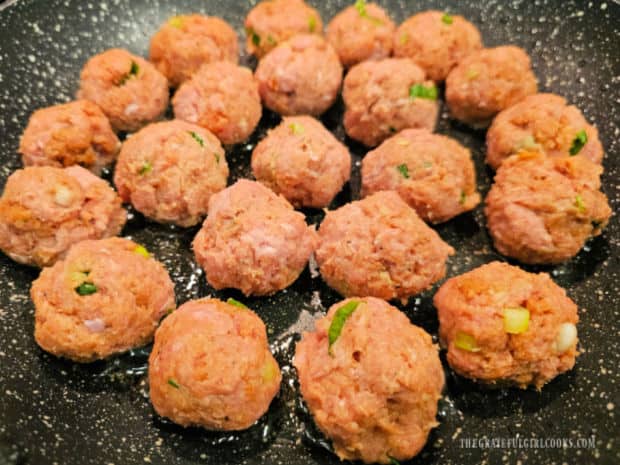
    Place the meatballs into the hot oil in the skillet in a single layer. If you only have a small skillet, you might need to cook the meatballs in two batches.

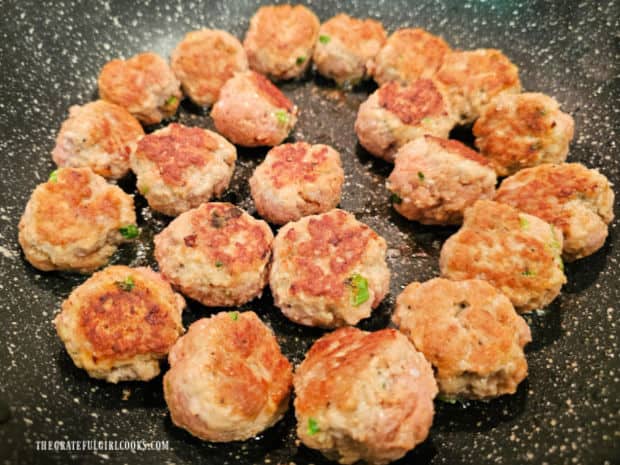
    The meatballs are placed in hot oil in a single layer in a large skillet.

    Cook the turkey meatballs for a couple of minutes on Medium until the bottom of each meatball is browned, then carefully turn them over (shown below).

    Continue to cook and turn (as necessary) until the meatballs are fully cooked through and nicely browned on ALL sides.

    Meatballs are cooked and browned on all sides in in a large skillet.

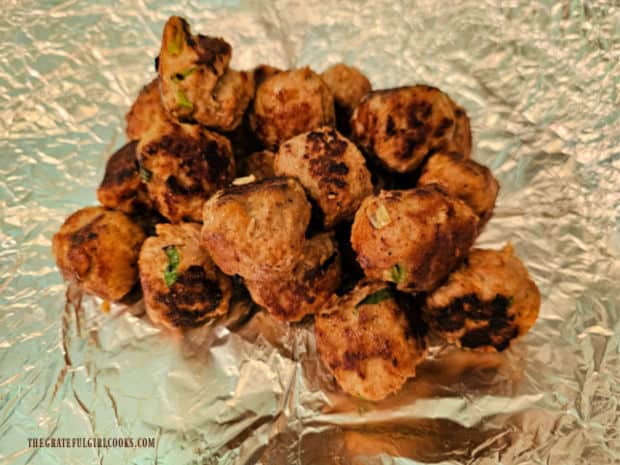
    When the meatballs are done cooking, transfer them out of the skillet and onto a plate or a large sheet of aluminum foil. Do NOT wipe out the skillet!

    Wrap the meatballs tightly in the foil, because you want them to stay warm while you cook the sauce.

    After they're cooked, meatballs are wrapped in aluminum foil to keep warm.

    Cook The Sauce Then Add the Meatballs

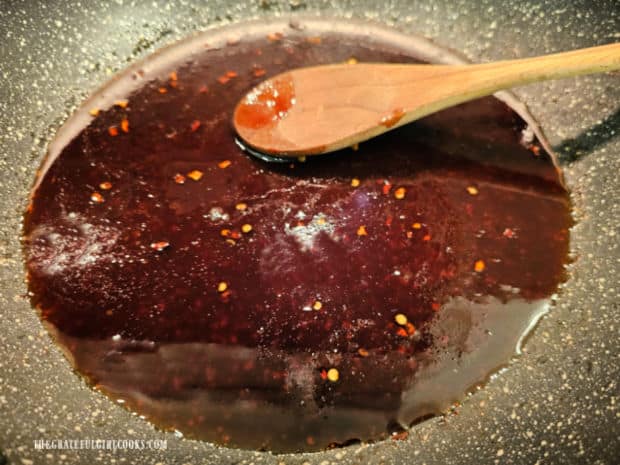
    Using the same skillet (without cleaning it), give the sauce another quick whisk to blend it together again and then add the sauce to the skillet.

    Cook the sauce on Medium, stirring often, until it has thickened slightly (about 2-3 minutes).

    the sauce is cooked only until it has thickened.

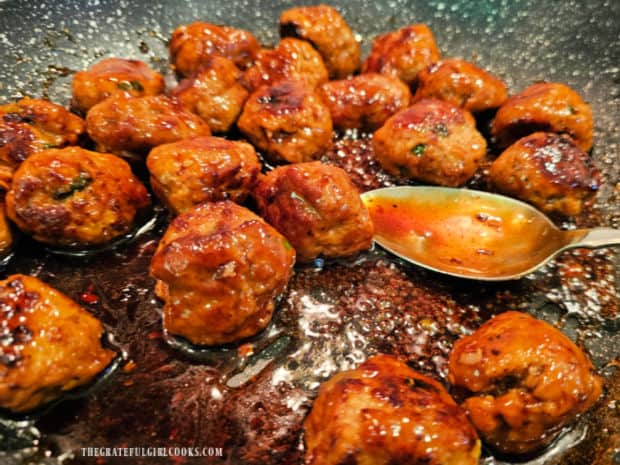
    Once the sauce is hot and thickened, put all of the cooked meatballs back into the skillet with the sauce. 

    Continue to cook on Low heat and spoon the sauce over the meatballs, turning to make sure they all are covered in honey garlic sauce.

    Cook the meatballs only until they are heated all the way through (a couple minutes), and then the honey garlic turkey meatballs are ready to be served. 

    Honey garlic sauce is spooned over the meatballs in the skillet.

    Serve The Honey Garlic Turkey Meatballs

    The honey garlic turkey meatballs can be eaten “as is” if that’s how you would prefer them, but I recommend serving them on top of a bed of hot, cooked rice.

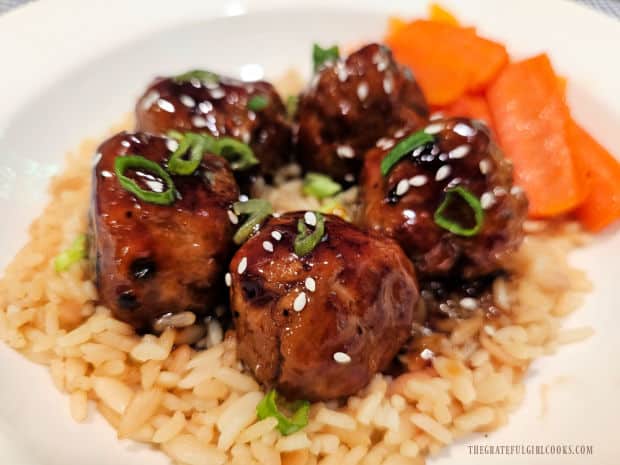
    You can use white rice, brown rice of even rice pilaf, which is how we enjoyed this meal (with rice pilaf).

    Garnishing the meatballs is optional, but I like to garnish the meatballs with a few sliced green onions and white sesame seeds, for presentation.

    The honey garlic turkey meatballs on rice pilaf with cooked carrots on the side.

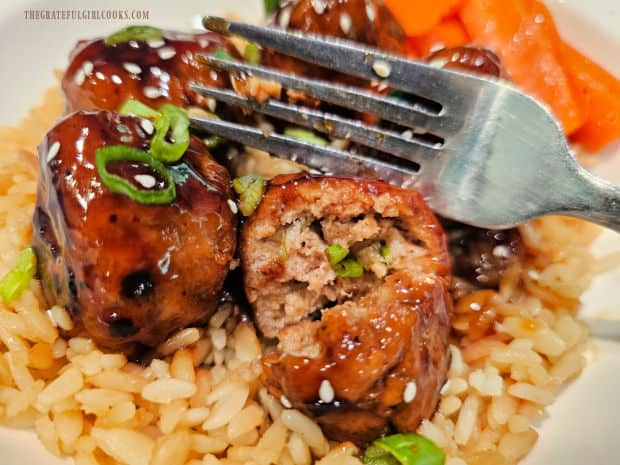
    We absolutely LOVE these delicious meatballs and the first time I made them, my husband couldn’t believe they were made from turkey and not beef.

    The flavors are amazing and the meatballs are wonderful. I am fully confident you will love them, as well.

    Honey Garlic Turkey Meatballs served on rice pilaf.

    I hope you have the chance to make these delicious honey garlic turkey meatballs for yourself and those you love because they are so DELICIOUS!

    Thanks for stopping by, and I invite you to come back again soon for more family friendly recipes. Take care, may God bless you, and have a wonderful day.

    Looking for More MEATBALL Recipes?

    You can find ALL of my recipes in the Recipe Index, which is located at the top of the page. I have lots of delicious meatball recipes to choose from, including:

    Want More Recipes? Get My FREE Newsletter!

    I publish a newsletter 2 times per month (1st and 15th) with lots of recipes, tips, etc.
    Would you like to join our growing list of subscribers?

    There is a Newsletter subscription box on the top right (or bottom) of each blog post, depending on the device you use.
    You can submit your e-mail address there, to be added to my mailing list.

    Find Me On Social Media:

    Facebook page: The Grateful Girl Cooks!
    Pinterest:
    The Grateful Girl Cooks!
    Instagram:
    jbatthegratefulgirlcooks

    Author's signature

    Recipe adapted from: Halit, at Easy Honey Garlic Turkey Meatballs

    ↓↓ PRINTABLE RECIPE BELOW ↓↓

    0 from 0 votes
    Honey Garlic Turkey Meatballs
    Prep Time
    10 mins
    Cook Time
    15 mins
    Total Time
    25 mins
     

    You'll LOVE fabulous Honey Garlic Turkey Meatballs, coated in an amazing Asian-style sauce. Recipe uses 1 lb. of ground turkey (4 servings).

    Category: Main Dish
    Cuisine: All Cuisines, Asian
    Keyword: honey garlic turkey meatballs
    Servings: 22 meatballs
    Calories Per Serving: 64 kcal
    Author: JB @ The Grateful Girl Cooks!
    Ingredients
    For Meatballs:
    • 1 pound ground turkey
    • ½ cup plain breadcrumbs
    • 1 large egg
    • 2 cloves minced garlic
    • 1 Tablespoon low-sodium soy sauce
    • 1 stalk green onion finely chopped (white and green)
    • ½ teaspoon salt
    • ½ teaspoon paprika
    • ½ teaspoon black pepper
    • 2 Tablespoons vegetable oil* (USED FOR COOKING MEATBALLS!) *do NOT add to the meat mixture
    For Honey Garlic Sauce:
    • ¼ cup honey
    • ¼ cup low-sodium soy sauce
    • 2 cloves minced garlic
    • 1 teaspoon sesame oil
    • 1 Tablespoon water
    • 1 teaspoon cornstarch
    • ½ teaspoon red pepper flakes
    Optional Garnish: chopped green onions, white sesame seeds
      Instructions
      1. Place turkey, breadcrumbs, egg, garlic, soy sauce, green onion, salt, paprika and black pepper in a medium bowl. Mix together only until it comes together in a slightly "wet", cohesive mixture. Don't overmix.

      2. You should get 20-24 meatballs in total. Use a small scoop (or pinch off portions with your hands). Wet your hands, then roll each portion between your palms into a meatball about 1" - 1½" in size. Place shaped meatballs on parchment paper (or foil). Adjust meatball size, if necessary, to ensure you have at least 20 meatballs of similar size. Set aside.

      3. In a separate bowl, whisk honey, soy sauce, garlic, red pepper flakes and sesame oil until combined. In a separate bowl whisk cornstarch and water until combined. This mixture is called a "slurry" and will thicken the sauce as it cooks. Add cornstarch mixture to the sauce; whisk until combined. Set sauce aside.

      4. Heat vegetable oil in a large skillet on Medium. Once oil is hot (but not smoking), add meatballs to the skillet in a single layer. Cook meatballs a couple minutes on Medium. When the bottom of each meatball is browned, turn them over. Continue to cook and turn until all meatballs are cooked through and they're nicely browned on ALL sides. When done, transfer meatballs out of the skillet and onto a plate or aluminum foil. Do NOT wipe out the skillet! Wrap meatballs tightly in foil, so they stay warm.

      5. Using the same skillet, give the sauce a quick whisk to blend it again; add the sauce to the skillet. Cook sauce on Medium, stirring often until it has thickened slightly (usually about 2-3 minutes).

      6. Put meatballs back in the skillet with the sauce. Heat on Medium, spooning sauce over the meatballs, turning them until covered in sauce. Cook only until they're heated through. Serve meatballs hot on a bed of rice. Garnish with sesame seeds and green onions, if desired. Enjoy! 

      Recipe Notes

      NOTE: The caloric calculation is for 1 meatball based on 22 meatballs total. Recommended serving size is 4 meatballs, however the portion sizes (or size of the meatballs may vary per user), so each meatball has been given an individual calorie count so you may adjust accordingly.

      Nutrition Facts
      Honey Garlic Turkey Meatballs
      Amount Per Serving (1 meatball)
      Calories 64 Calories from Fat 18
      % Daily Value*
      Fat 2g3%
      Saturated Fat 0.4g3%
      Trans Fat 0.01g
      Polyunsaturated Fat 1g
      Monounsaturated Fat 1g
      Cholesterol 20mg7%
      Sodium 216mg9%
      Potassium 90mg3%
      Carbohydrates 6g2%
      Fiber 0.2g1%
      Sugar 3g3%
      Protein 6g12%
      Vitamin A 59IU1%
      Vitamin C 0.3mg0%
      Calcium 10mg1%
      Iron 0.4mg2%
      * Percent Daily Values are based on a 2000 calorie diet.

      Here’s one more to pin on your Pinterest boards! You'll LOVE fabulous Honey Garlic Turkey Meatballs, coated in an amazing Asian-style sauce. Recipe uses 1 lb. of ground turkey (4 servings).
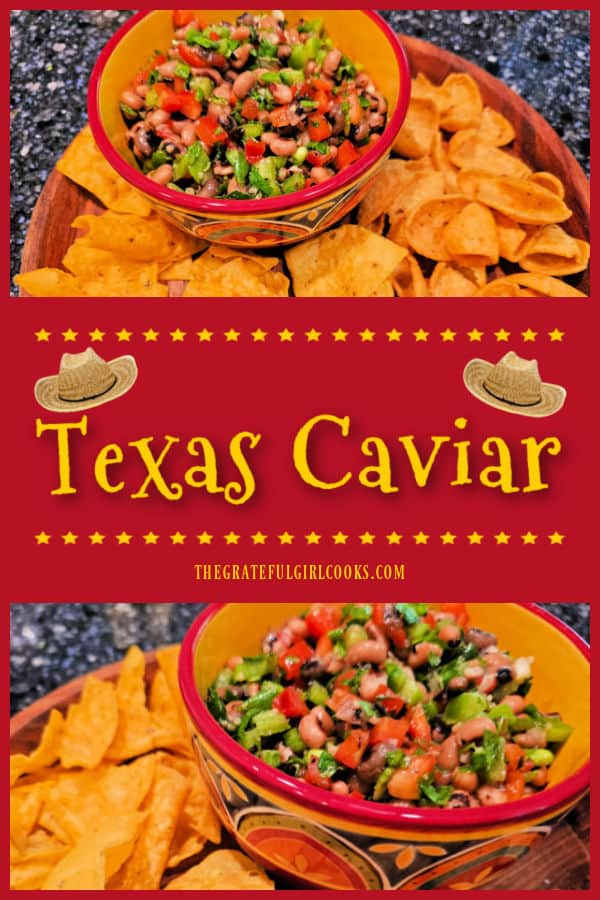
      Texas Caviar

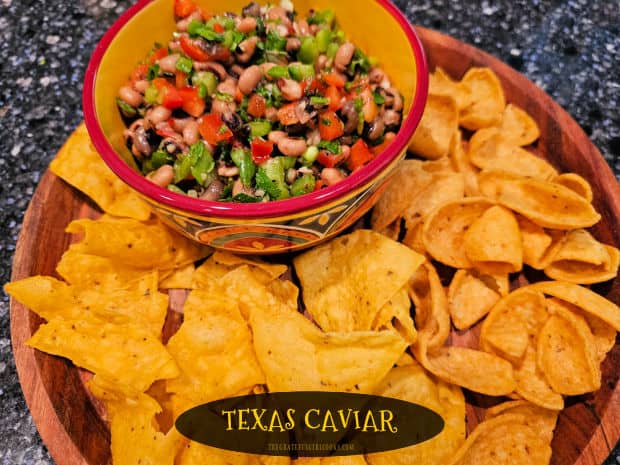
      Make a bowl of Texas Caviar (aka “Cowboy” Caviar), set out the chips for scooping and watch how fast this delicious appetizer is gobbled up!
      Make a bowl of Texas Caviar (aka "Cowboy" Caviar), set out the chips for scooping and watch how fast this delicious appetizer is gobbled up!

      Today I want to share the recipe for a delicious appetizer! It has been called “Texas Caviar” or “Cowboy Caviar” and has many different variations and ingredients.

      Looking for an easy to make recipe? This is it! Texas caviar is a simple dish to make in about 15 minutes and is served as an appetizer with chips for scooping it up.

      This is a much-loved Southern dish, and I truly believe you’re going to love it, especially if you’ve never tried it before.

      It is seasoned well with a very simple vinaigrette which perfectly complements the fresh, crunchy veggies and the star of the show, black-eyed peas!

      An added plus is that the longer it sits, the more flavor it takes on, so you can make it several hours ahead of time and enjoy the best flavor later on.

      Scroll Down For A Printable Recipe Card At The Bottom Of The Page

      Here We Go!

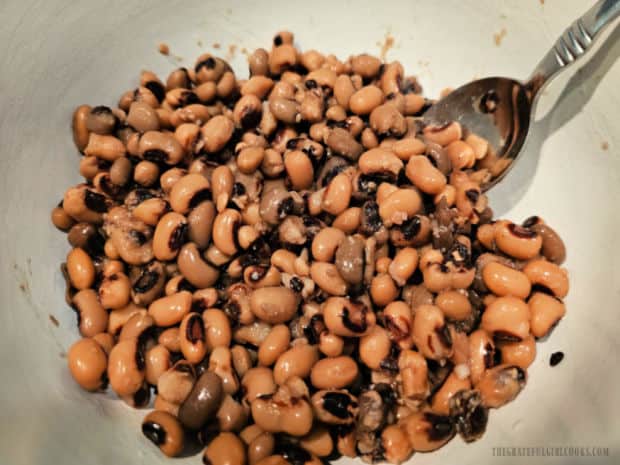
      First things first! This recipe features black-eyed peas, so you need to rinse and drain one 14-15 oz. can of them! Once they are rinsed and drained, place them in a medium mixing bowl.

      Canned blackeye peas are rinsed and drained, then placed in bowl.

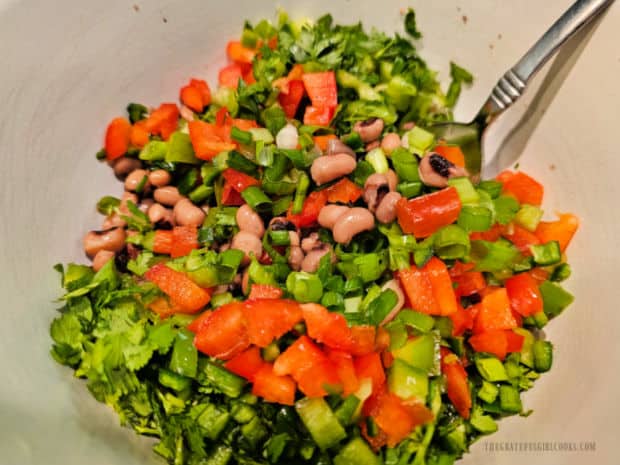
      Add sliced green onions, chopped red and green bell peppers, jalapeño, celery, parsley and cilantro to the bowl of black-eyed peas.

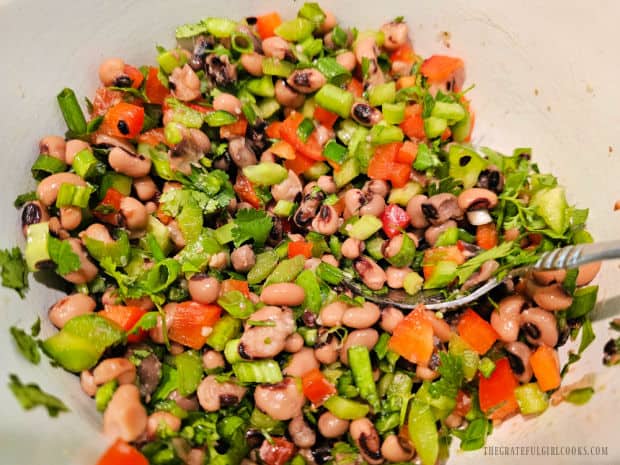
      Look how colorful this dip instantly becomes with the fresh veggies added! Stir well, until they are fully combined. See how easy it is to make?

      It has crunch, color, freshness, a little heat from the jalapeno and creamy soft, black-eyed peas which all help make this a beloved dish!

      All ingredients are chopped and prepared, then added to blackeye peas.Ingredients for the Texas caviar are stirred until combined.

      Make The Dressing

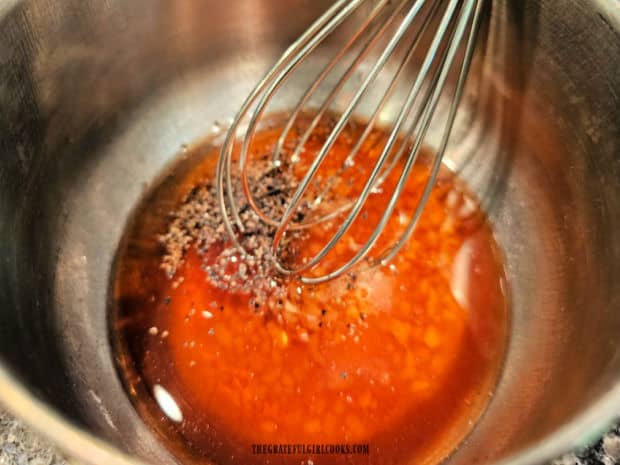
      Whisk vegetable oil, red wine vinegar, minced garlic, salt and black pepper together in a small separate bowl until they are fully combined.

      This basic vinaigrette that brings a lot of additional flavors to the Texas caviar, and it only takes a minute or two to make. Whoo Hoo!

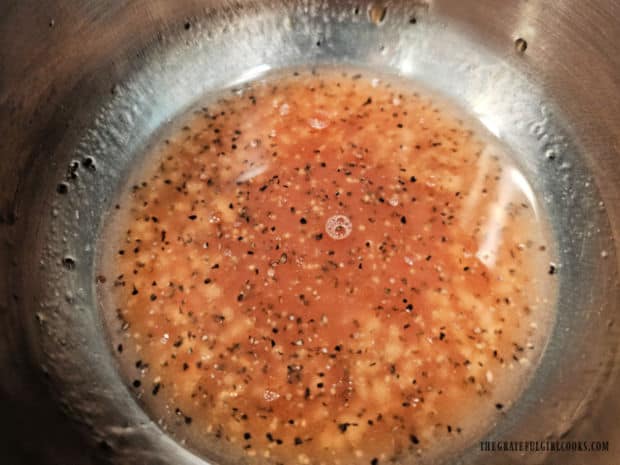
      A simple dressing is prepared in a small bowl.

      The simple dressing will be used to flavor the cowboy or Texas caviar.

      “Dress” The Texas Caviar

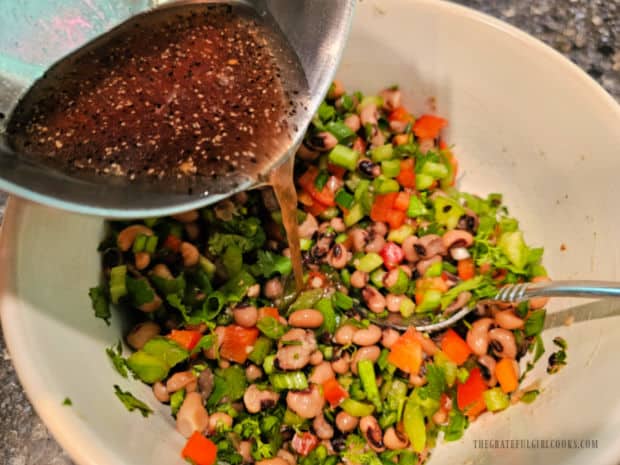
      Pour the vinaigrette dressing all over the veggies. Use ALL of the dressing because that is what helps develop the flavors of Texas caviar (or cowboy caviar) fully.

      Salad dressing is poured over the ingredients.

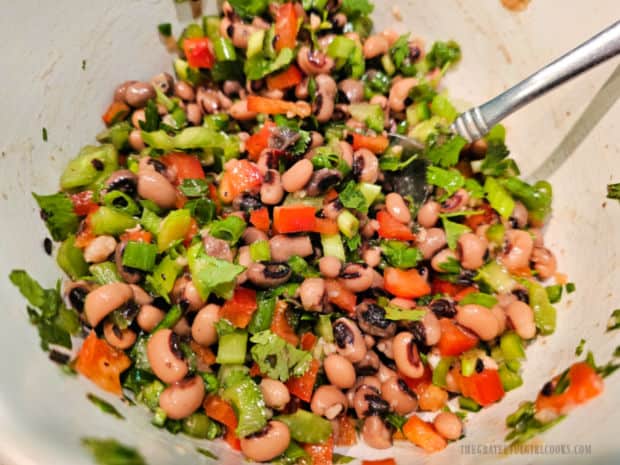
      Stir well, until the vinaigrette and the veggies are fully combined. This will add a final flavor punch to the dip!

      Give it a quick taste and season it with additional salt and pepper to suit your personal taste, if desired. Set the dip aside to “rest” before serving.

      This is where making this dish ahead of time really plays a big part (see important note below). Plan ahead and this will not be an issue.

      IMPORTANT: Do not serve the dip until it has rested for a minimum of one hour! This dip needs time for all the different flavors to develop and come together. The longer it rests, the better the overall flavor will be.

      The Texas caviar is stirred to combine all of the ingredients.

      Serve The Texas Caviar

      It is ready to be served once the Texas caviar has had sufficient time for the flavors to really come together. You won’t regret waiting a little bit more for the cowboy caviar to have its best flavor.

      Before serving, give it a good stir to re-mix the vinaigrette on the bottom of the bowl with the veggies.

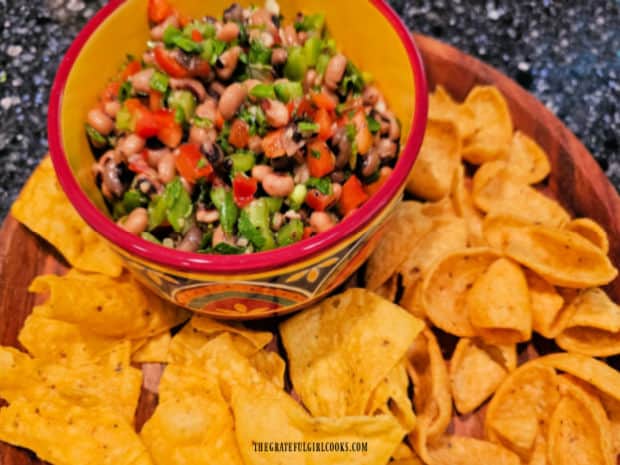
      Place a bowl of the cowboy or Texas caviar out with a bunch of chips. I recommend using scoopable chips because they hold the weight of the dip very well.

      Texas caviar is served with chips to use for dipping.

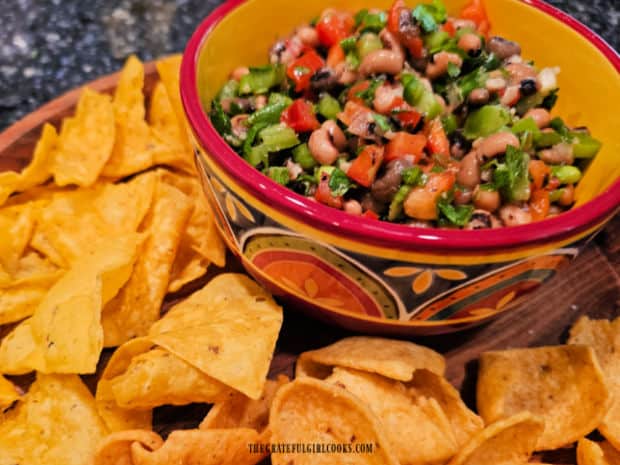
      Texas caviar is colorful, crunchy, tangy, and absolutely delicious and those you serve it to will likely love it, as well!

      We enjoyed some Texas caviar while watching a World Cup soccer game recently and it was so good (the soccer game AND the dip-ha ha). 

      I’m confident it will be a wonderful appetizer for any get-together or party and will be among the first foods to be gobbled up.

      A bowl of Texas caviar is served with chips as an appetizer.

      I hope you have the opportunity to make this delicious appetizer to serve to those you love. The dip has very good flavor, crunch, and is always a favorite.

      Thanks for stopping by, and I invite you to come back again soon for more family friendly recipes. Take care, may God bless you, and have a wonderful day.

      Looking For More APPETIZER Recipes?

      You can find ALL of my recipes in the Recipe Index, which is located at the top of the page. I have a nice variety of appetizer recipes to choose from, including:

      Want More Recipes? Get My FREE Newsletter!

      I publish a newsletter 2 times per month (1st and 15th) with lots of recipes, tips, etc.
      Would you like to join our growing list of subscribers?

      There is a Newsletter subscription box on the top right (or bottom) of each blog post, depending on the device you use.
      You can submit your e-mail address there, to be added to my mailing list.

      Find Me On Social Media:

      Facebook page: The Grateful Girl Cooks!
      Pinterest:
      The Grateful Girl Cooks!
      Instagram:
      jbatthegratefulgirlcooks

      Author's signature

      Recipe adapted from: “When Southern Women Cook”, page 148, published by America’s Test Kitchen in 2024.

      ↓↓ PRINTABLE RECIPE BELOW ↓↓

      0 from 0 votes
      Texas Caviar
      Prep Time
      12 mins
      Cook Time
      0 mins
      Resting Time (INACTIVE PREP)
      1 hr
      Total Time
      1 hr 12 mins
       

      Make a bowl of Texas Caviar (aka "Cowboy" Caviar), set out the chips for scooping and watch how fast this delicious appetizer is gobbled up!

      Category: Appetizer/Snack
      Cuisine: Southwestern
      Keyword: Texas caviar, cowboy caviar
      Servings: 5
      Calories Per Serving: 153 kcal
      Author: JB @ The Grateful Girl Cooks!
      Ingredients
      • 15 ounces canned black-eyed peas rinsed, drained
      • 3 stalks green onions thinly sliced (bulb and stalk)
      • 1 medium jalapeño chile stemmed, seeded, finely chopped
      • ½ medium red bell pepper stemmed, seeded, chopped
      • ½ medium green bell pepper stemmed, seeded, chopped
      • ½ stalk celery rib finely chopped
      • 3 Tablespoons chopped fresh parsley
      • 3 Tablespoons chopped fresh cilantro
      For Dressing:
      • Tablespoons red wine vinegar
      • Tablespoons vegetable oil
      • 2 teaspoons granulated sugar
      • cloves garlic (minced)
      • ½ teaspoon kosher salt
      • ¼ teaspoon black pepper
      Instructions
      Make The "Caviar"
      1. In a medium bowl, combine black-eyed peas, green onions, jalapeño, red and green bell peppers, celery, parsley and cilantro.

      Make Vinaigrette:
      1. In a small separate bowl, whisk together red wine vinegar, vegetable oil, sugar, minced garlic, salt and black pepper until fully combined. Pour all the vinaigrette over the vegetables; stir well, to combine.

      Let Rest, Then Serve:
      1. IMPORTANT: Let the Texas caviar rest for a MINIMUM of one hour so the flavors come together (for BEST flavor). The longer it rests, the better flavor it will have! Stir again; serve with scoopable chips on the side and enjoy Texas Caviar!

      Nutrition Facts
      Texas Caviar
      Amount Per Serving (1 (1/5th of total))
      Calories 153 Calories from Fat 45
      % Daily Value*
      Fat 5g8%
      Saturated Fat 1g6%
      Trans Fat 0.03g
      Polyunsaturated Fat 3g
      Monounsaturated Fat 1g
      Sodium 241mg10%
      Potassium 333mg10%
      Carbohydrates 22g7%
      Fiber 6g25%
      Sugar 6g7%
      Protein 7g14%
      Vitamin A 752IU15%
      Vitamin C 33mg40%
      Calcium 34mg3%
      Iron 3mg17%
      * Percent Daily Values are based on a 2000 calorie diet.

      Here’s one more to pin on your Pinterest boards!Make a bowl of Texas Caviar (aka "Cowboy" Caviar), set out the chips for scooping and watch how fast this delicious appetizer is gobbled up!

      Broccoli and Cheese Sauce

      Need a new side dish? Try this simple recipe for Broccoli and Cheese Sauce! Steamed broccoli is topped with creamy cheddar sauce. It’s yummy!
      Need a new side dish? Try this simple recipe for Broccoli and Cheese Sauce! Steamed broccoli is topped with creamy cheddar sauce. It's yummy!

      Today I want to share a recipe for broccoli and cheese sauce, and I believe you might be as surprised as I was how simple it really is to cook this side dish.

      Fresh cooked broccoli drizzled with creamy cheese sauce has long been a favorite of mine. I figured it was about time I shared how just how easy it is to make.

      Typically, I steam fresh broccoli florets to enjoy with this sauce, but any way you choose to cook the broccoli will be okay when it’s topped with velvety cheese sauce!

      YUM! Here’s how to make broccoli and cheese sauce.

      Scroll Down For A Printable Recipe Card At The Bottom Of The Page

      Prep The Broccoli

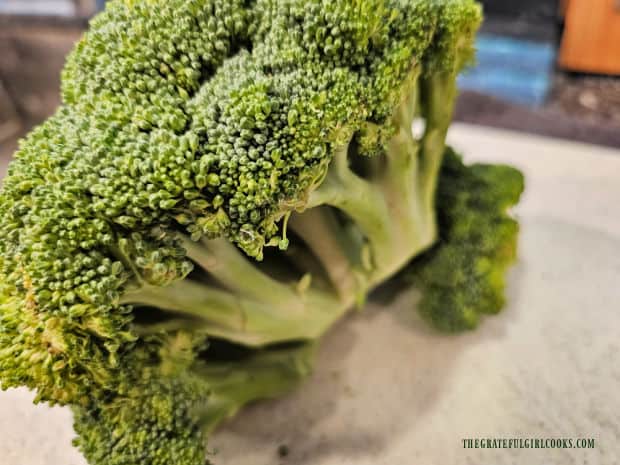
      Rinse the broccoli, pat it dry with paper towels and then cut off most of the thick stalk (and discard).

      Fresh broccoli is used for this recipe. Bottom stem is removed.

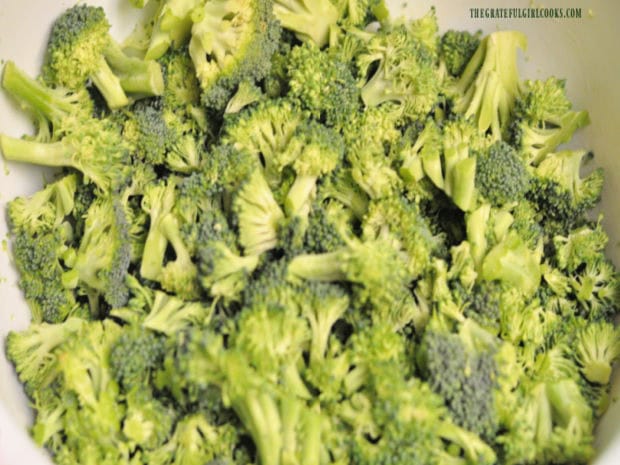
      Cut the broccoli into small florets, then place them in a steamer basket over about 2 inches of boiling water in a large saucepan.

      Steam the broccoli florets (covered) for about 7-8 minutes or until they become tender. Remove and keep them hot.

      TIP: Try to time the broccoli with the time the easy cheese sauce is done, so they are both ready (and hot) at the same time.

      The fresh broccoli is cut into small florets.

      Make The Cheese Sauce

      Now it’s time to make the simple cheddar cheese sauce which will be poured over the hot cooked broccoli.

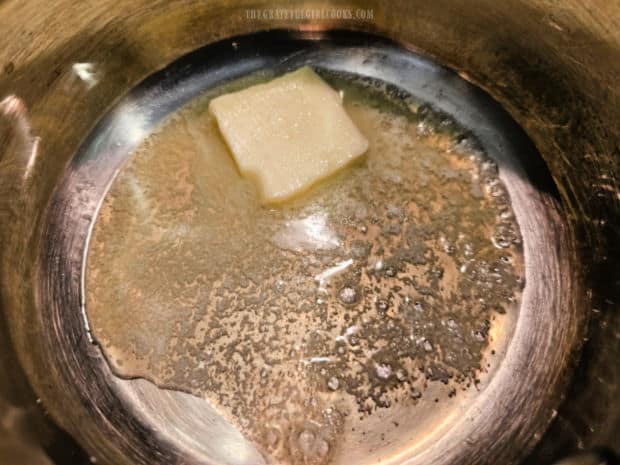
      Melt 1 Tablespoon of butter over medium heat in a medium sized saucepan.

      Butter is melted in a saucepan to begin making the cheese sauce.

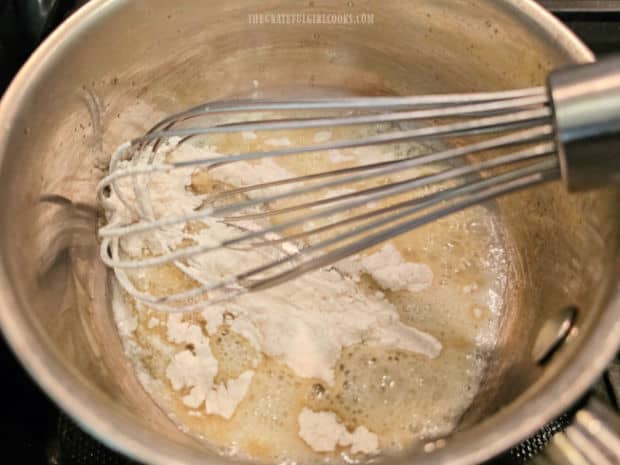
      Once the butter has melted, whisk in 1 Tablespoon of all-purpose flour. Whisk these ingredients together for about 1 minute.

      This helps make a “roux”, or a thick paste out of the butter and flour. It also helps to cook the flour because it removes some of the flour “taste” from the roux.

      Flour is whisked into the melted butter forming a thick paste.

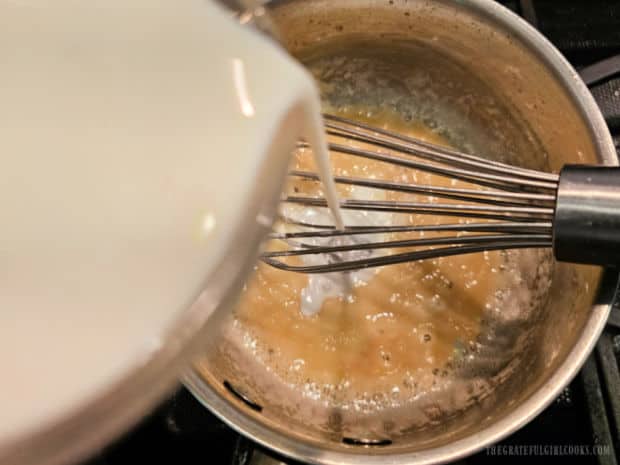
      Slowly pour 1 cup of whole milk into the roux, whisking constantly as you add it, to fully combine the milk with the butter and flour mixture.

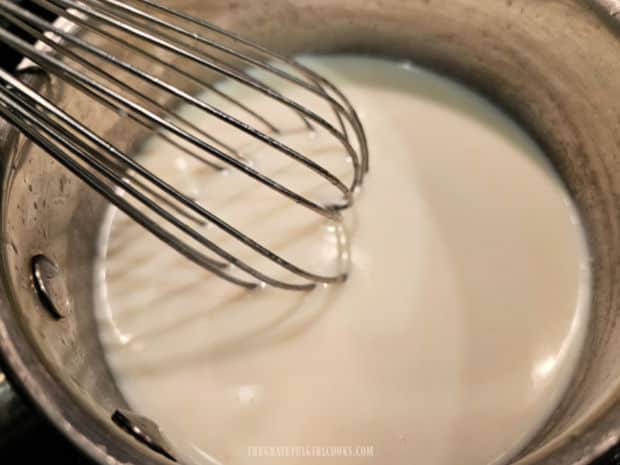
      Cook the mixture (uncovered) on medium-low heat, whisking constantly until it thickens. Once the sauce has thickened, immediately remove the saucepan from the heat.

      Milk is added and combined with the roux mixture in the pan.Whisking the milk, butter and flour mixture until it thickens.

      Add The Cheese!

      Now it’s time to turn the thickened milk mixture into cheese sauce off of the heat. Add 1 cup of grated SHARP cheddar cheese and ½ teaspoon of salt to the saucepan.

      Grated cheddar cheese is added to thickened sauce and stirred to combine.

      Stir often as the cheese begins to melt. Continue stirring until all the cheese is melted and has been fully incorporated into the sauce.

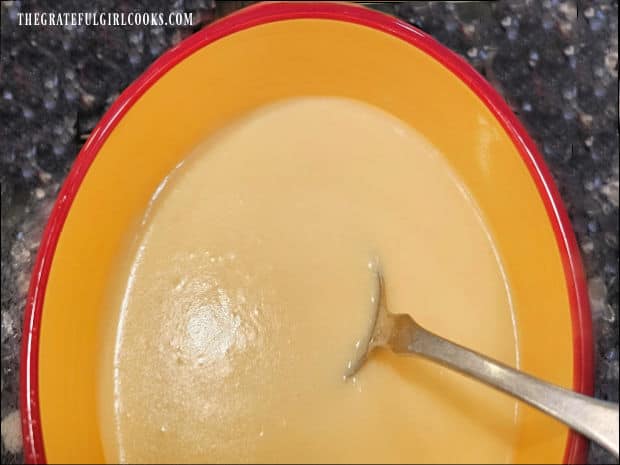
      The cheese sauce will end up pale-yellow in color and should be a hot, slightly thick but smooth cheese sauce. Take a quick taste and add additional salt to suit your taste (if desired).

      Broccoli and Cheese Sauce needs a great tasting creamy sauce!

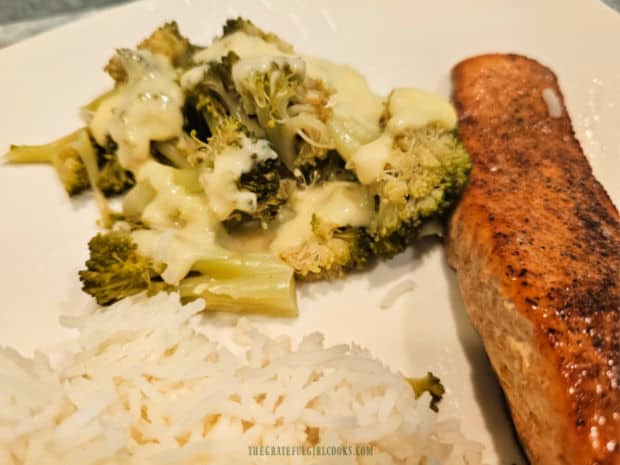
      Drizzle or pour the hot cheese sauce over the hot, steamed broccoli and serve immediately (while it is still hot).

      Serve and enjoy this simple “dressed up” vegetable side dish along with your favorite main dishes, etc. It is so easy make yet tastes quite yummy, too!

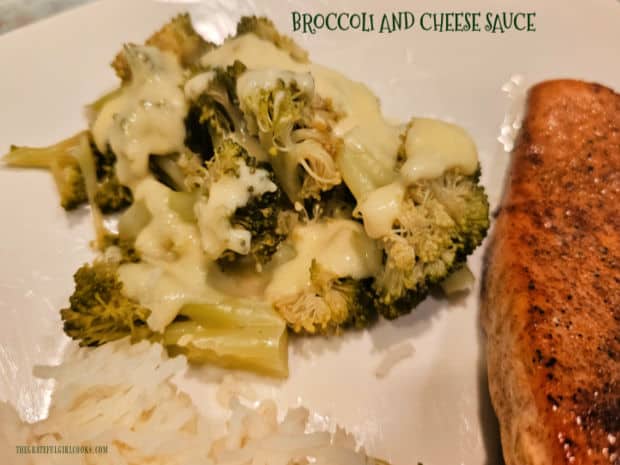
      The broccoli and cheese sauce is served with salmon and white rice.

      My hope is that you will have the chance to make this yummy vegetable dish for yourself and those you love. I trust you’ll enjoy it, too!

      Thank you for stopping by today, and I invite you to come back again soon for more family friendly recipes. Take care, may God bless you, and have a wonderful day.

      Looking For More Recipes For SAUCES (sweet/savory)?

      You can find ALL of my recipes in the Recipe Index, which is located at the top of the page. I have many sauce recipes available to choose from (sweet AND savory), including:

      Want More Recipes? Get My FREE Newsletter!

      I publish a newsletter 2 times per month (1st and 15th) with lots of recipes, tips, etc.
      Would you like to join our growing list of subscribers?

      There is a Newsletter subscription box on the top right (or bottom) of each blog post, depending on the device you use.
      You can submit your e-mail address there, to be added to my mailing list.

      Find Me On Social Media:

      Facebook page: The Grateful Girl Cooks!
      Pinterest:
      The Grateful Girl Cooks!
      Instagram:
      jbatthegratefulgirlcooks

      Author's signature

      ↓↓ PRINTABLE RECIPE BELOW ↓↓

      0 from 0 votes
      Broccoli and Cheese Sauce
      Prep Time
      5 mins
      Cook Time
      10 mins
      Total Time
      15 mins
       

      Need a new side dish? Try this simple recipe for Broccoli and Cheese Sauce! Steamed broccoli is topped with creamy cheddar sauce. It's yummy!

      Category: Side Dish, Vegetable
      Cuisine: All Cuisines
      Keyword: broccoli and cheese sauce
      Servings: 4 servings
      Calories Per Serving: 200 kcal
      Author: JB @ The Grateful Girl Cooks!
      Ingredients
      For The Broccoli:
      • 3 cups fresh broccoli florets
      For The Cheese Sauce:
      • 1 Tablespoon butter
      • 1 Tablespoon all-purpose flour
      • 1 cup 2% milk
      • 1 cup sharp cheddar cheese (grated)
      • ½ teaspoon salt
      Instructions
      1. Rinse broccoli, pat it dry, then cut off the thick stalk (and discard). Cut broccoli into small florets. Cook them in a steamer basket over boiling water in a large saucepan (or use another cooking method you prefer). Steam them (covered) for 8 minutes or until broccoli is crisp- tender. Remove; keep broccoli hot.

        TIP: Try to time the broccoli with when the cheese sauce is ready, so they're both ready at the same time.

      Make Cheese Sauce:
      1. Melt butter over medium heat in a medium saucepan. Once butter has melted, whisk in flour. Continue to whisk for about 1 minute. Slowly add milk, whisking constantly to fully combine milk with the butter and flour mixture. Cook (uncovered) on medium-low heat, whisking constantly until it thickens. Once sauce thickens, remove saucepan from the heat.

      2. Immediately add grated cheese and salt to the saucepan (off the heat). Stir often as cheese melts. Continue stirring until all cheese is melted. Cheese sauce should be pale-yellow in color and a hot, slightly thick but smooth sauce. Take a quick taste; add additional salt to suit your taste, if desired.

      3. Drizzle or pour hot cheese sauce over hot broccoli; serve immediately. Enjoy!

      Nutrition Facts
      Broccoli and Cheese Sauce
      Amount Per Serving (1 (¼ of total))
      Calories 200 Calories from Fat 126
      % Daily Value*
      Fat 14g22%
      Saturated Fat 8g50%
      Trans Fat 0.2g
      Polyunsaturated Fat 1g
      Monounsaturated Fat 3g
      Cholesterol 40mg13%
      Sodium 548mg24%
      Potassium 323mg9%
      Carbohydrates 9g3%
      Fiber 2g8%
      Sugar 4g4%
      Protein 11g22%
      Vitamin A 856IU17%
      Vitamin C 61mg74%
      Calcium 304mg30%
      Iron 1mg6%
      * Percent Daily Values are based on a 2000 calorie diet.

      Here’s one more to pin on your Pinterest boards! Need a new side dish? Try this simple recipe for Broccoli and Cheese Sauce! Steamed broccoli is topped with creamy cheddar sauce. It's yummy!