Month: March 2015

Musings On Seed Planting… and New Life

As I write this, it is the first week of Daylight Savings time. Spring is just around the corner; it’s that time again where I begin planning our backyard vegetable raised beds and container gardens for the year. Walk through our neighborhood and see daffodils and crocuses blooming, trees budding, and birds singing exuberantly,  I can’t help but feel excitement for the coming season of growth and new life! Spring is in the air!

Seeds are planted in our backyard raised bed garden.
I still am completely and utterly amazed that you can take a tiny little seed, stick it into the dark ground, and with the proper conditions, that little seed can produce a beautiful plant that we can nourish ourselves with. I actually get excited to see the growth of my veggies each year, and secretly cheer them on as they struggle up through the cold darkness of the dirt and aim towards the sunlight!

I love to watch them thrive, and I love working in my garden as they grow, to make sure they are not surrounded by or choked out by weeds, and keeping the plants at their best with good nourishment (water, sunlight, and fertilizer).

Garden growing.
Life can kinda sometimes seem like a big gardening experiment… at various times we may feel like we’ve been put into a dark place, alone (like a seed underground), because of circumstances, life choices, etc. That’s not always a bad thing… it’s just the way it is. Now, I may not know much, but what I DO know is that those times can also serve to bring about new growth in our lives.

More veggies growing.Musings on Seed Planting, and green beans growing
It all comes down to what we are surrounded by. If we take care to surround ourselves with things that bring about life (similar to sunlight, fertilizer, and water for a little seed), then we are most likely to come through the “winter, or barren times” into a surprising season of growth, new life, and great productivity.

Musings on Seed Planting... and a great harvest!
For me, my lifelong faith in God, the love of my family and close friends are the “ingredients” I need for maximum growth. Just like a newly planted seed needs the right conditions such as temperature, soil conditions, water and sunlight to really thrive and be the best they can be…so do I.  Occasionally I find it important to take a good, hard look at (and take stock of) the many “things” I invest my time in, the people I surround myself with, and the choices I make, to ensure they aren’t draining, corroding, or depleting me, but nourishing and helping me to be my best self!

I love the verses in the the Bible that illustrate this concept best for me. They’re always a good “self-check”. Colossians 2:7 (New Living Translation): “Let your roots grow down into him, and let your lives be built on him. Then your faith will grow strong in the truth you were taught, and you will overflow with thankfulness”.  Psalm 1: 1-3 says “Blessed is the man who does not walk in the counsel of the wicked or stand in the way of sinners or sit in the seat of mockers. But his delight is in the law of the Lord, and on his law he meditates day and night. He is like a tree planted by streams of water, which yields its fruit in season and whose leaf does not wither. Whatever he does prospers“. Yep. I want to be that kind of woman.

I take such great care to plan my little garden each year, and try to plant my vegetable seeds in the best location, with the right soil, fertilizer, etc. It seems only natural and logical that I take even greater care of my own life (it’s the only one I’ve got) and make sure I am surrounding myself consistently with “things”, “choices”, or “people” that will encourage, prune occasionally (when necessary), nourish, and help bring about the most growth in my own life.

Musings on Seed Planting... and New Life!
Just my thoughts…  Now here’s to Spring… and new life! Have a great day.

Interested In More Recipes?

Thank you for visiting this website. I appreciate you using some of your valuable time to do soIf you’re interested, I publish a newsletter 2 times per month (1st and 15th) with all the latest recipes, and other fun info. I would be honored to have you join our growing list of subscribers, so you never miss a great recipe!
There is a Newsletter subscription box on the top right side (or bottom) of each blog post, depending on the device you use, where you can easily submit your e-mail address (only) to be included in my mailing list.

You Can Also Find Me On Social Media:
Facebook page: The Grateful Girl Cooks!
Pinterest: The Grateful Girl Cooks!
Instagram: jbatthegratefulgirlcooks

Author's signature

Save

Save

Jumbo Chocolate Chip Banana Muffins

Make 6 jumbo chocolate chip banana muffins (or 12 standard sized)! You’ll enjoy these yummy muffins, topped with chocolate chips, graham cracker crumbs & vanilla glaze.Make 6 jumbo chocolate chip banana muffins (or 12 standard sized)! Yummy muffins, topped with chocolate chips, graham cracker crumbs & vanilla glaze.
Spring is on the way… it’s wonderful seeing changes in the landscape around our neighborhood. Leaves are beginning to unfurl on the trees, daffodils and crocuses are blooming everywhere, and the weather has been truly amazing. What a blessing!

We’ve enjoyed a bit warmer Winter here in northwest Oregon than we’re used to. As a result, nature is “springing to life” a bit earlier than normal. It’s amazing what other parts of our country have been dealing with, weather-wise this Winter. I made these Jumbo Chocolate Chip Banana Muffins last week for breakfast. A delicious muffin AND a couple cups of strong coffee and, you guessed it – we were “springing to life”.

Scroll Down For A Printable Recipe Card At The Bottom Of The Page

Making Jumbo Chocolate Chip Banana Muffins

I used a basic recipe for the muffins from a Banana Crumb Muffin recipe I posted last September. Some tweaks of the recipe were made, by adding chocolate chips to the batter, and graham cracker crumbs to the top, along with a few more chocolate chips! After baking, the muffins are drizzled with a simple glaze.

To make them LARGE in size, the muffins are baked in a jumbo sized muffin pan (only holds 6 muffins). However, the recipe can be easily adapted to make in a standard (12 servings) muffin tin. The muffins are easy to make, and the finished chocolate chip banana muffins are truly delicious!

Prepare The Batter

It’s quite easy to make the batter. Mix the flour, baking soda, powder and salt together in a large mixing bowl. Beat the bananas, sugar, egg and melted butter in a separate bowl. The two bowls of ingredients are then combined to make the muffin batter, and the chocolate chips are stirred in.

The batter is ready to put into muffin cups for baking.

Fill The Muffin Tins

Spoon the batter for the chocolate chip banana muffins into a lightly sprayed muffin tin. Add enough batter until the muffin cups are slightly over 1/2 full.

Muffin cups are filled with the batter.
Sprinkle the top of each muffin with crushed graham cracker crumbs, followed by a few more chocolate chips.

Chocolate chips and graham cracker crumbs are placed on top of the batter before baking.

Time To Bake The Chocolate Chip Banana Muffins!

Now the muffins are ready to bake! Bake six jumbo sized muffins for about 30-35 minutes, or until a toothpick inserted into the middle of a muffin comes out clean. Remove muffins to wire rack to cool.

If you are making twelve standard sized muffins, remember to reduce the cooking time to between 18-20 minutes, or until a toothpick inserted into the middle of a muffin comes out clean. Remove muffins to a wire rack to cool.

After baking, the chocolate chip banana muffins cool on a wire rack before glazing.

Make The Glaze For The Chocolate Chip Banana Muffins

Mix up the powdered sugar/vanilla/lemon glaze in a small bowl. Once the chocolate chip banana muffins have cooled, drizzle the glaze over the tops of the muffins. Let the icing firm up before serving. TIP: Place a piece of wax paper UNDER the wire rack before glazing the muffins. This will make your cleanup much easier!

Muffins are drizzled with vanilla glaze after baking.Once the icing has firmed up, you can enjoy one of these muffins! Hope you enjoy making and eating these jumbo chocolate chip banana muffins. We sure did!

A chocolate chip banana muffin, sliced in half, on a plate.

Hope you enjoy these delicious muffins for breakfast or a quick snack! If you’re looking for more muffin recipes, be sure to check out my Recipe Index, located at the top of the page. Have a GREAT day!

Looking For More MUFFIN Recipes?

You can find all my recipes in the Recipe Index, located at the top of the page. I have lots of delicious muffin recipes for you to check out, including:

Interested In More Recipes?

Thank you for visiting this website. I appreciate you using some of your valuable time to do soIf you’re interested, I publish a newsletter 2 times per month (1st and 15th) with all the latest recipes, and other fun info. I would be honored to have you join our growing list of subscribers, so you never miss a great recipe!
There is a Newsletter subscription box on the top right side (or bottom) of each blog post, depending on the device you use, where you can easily submit your e-mail address (only) to be included in my mailing list.

You Can Also Find Me On Social Media:
Facebook page: The Grateful Girl Cooks!
Pinterest: The Grateful Girl Cooks!
Instagram: jbatthegratefulgirlcooks

Author's signatureRecipe Adapted from:  http://thecafesucrefarine.com/2011/04/banana-crumb-muffins/

0 from 0 votes
Jumbo Chocolate Chip-Banana Muffins
Prep Time
15 mins
Cook Time
30 mins
Total Time
45 mins
 

Make 6 jumbo chocolate chip banana muffins (or 12 standard sized)! Yummy muffins, topped with chocolate chips, graham cracker crumbs & vanilla glaze.

Category: Breakfast
Cuisine: American
Keyword: chocolate chip banana muffins
Servings: 6 large or 12 regular
Calories Per Serving: 614 kcal
Author: JB @ The Grateful Girl Cooks!
Ingredients
For the muffins:
  • 1 1/2 cups all purpose flour
  • 1 teaspoon baking soda
  • 1 teaspoon baking powder
  • 1/2 teaspoon salt
  • 3 very ripe bananas , mashed
  • 3/4 cup granulated sugar
  • 1 egg , slightly beaten
  • 1/3 cup butter , melted
  • 1 cup chocolate chips (I used semi-sweet)
  • 1/3 cup finely crushed graham crackers
For the glaze:
  • 1 cup powdered sugar
  • 1/4 teaspoon vanilla extract
  • few drops of fresh lemon juice (plus more, if necessary to thin glaze)
Instructions
  1. Preheat oven to 375 degrees. Lightly spray muffin tin with non-stick spray OR line muffin tin with paper muffin wrappers.
  2. In a large bowl, mix the flour, baking soda, baking powder, and salt together. Set aside.
  3. In a separate bowl, beat the bananas, sugar, egg, and melted butter together until smooth. Add the banana mixture to the flour mixture. Stir to combine only until batter is well combined and moist. Gently stir in chocolate chips. Be careful not to over-mix. Spoon the batter into prepared muffin cups. Fill slightly over 1/2 full.
  4. Finely crush the graham crackers in a plastic zip-loc bag. I use a rolling pin to do this. Sprinkle the tops of the muffins with the crumbs. Add a few more chocolate chips to the top of the muffins, and slightly press them down into the batter.
  5. Bake at 375 degrees for approximately 30-35 minutes (oven temps vary). You will know they are done when a toothpick inserted into middle of muffin comes out dry. Remove muffins to a wire rack to cool.
  6. Mix up the glaze while the muffins are cooling. Stir well. If mixture is too thick, add additional drops of lemon juice (or water) to thin it out. You want the glaze to not be runny, but thick enough to drizzle. If you get it too thin, just add additional powdered sugar. Once the muffins have cooled off, drizzle the glaze over the tops of the muffins. Let them sit for a few more minutes so the glaze can firm up, then serve. Enjoy!
Recipe Notes

If making these in a regular (12 serving) muffin tin, remember to reduce the cooking time! About 18-20 minutes should be about the right cooking time for smaller muffins.

Caloric calculation made based on a LARGE muffin.

Nutrition Facts
Jumbo Chocolate Chip-Banana Muffins
Amount Per Serving (1 LARGE muffin)
Calories 614 Calories from Fat 162
% Daily Value*
Fat 18g28%
Saturated Fat 11g69%
Cholesterol 58mg19%
Sodium 532mg23%
Potassium 330mg9%
Carbohydrates 107g36%
Fiber 3g13%
Sugar 71g79%
Protein 6g12%
Vitamin A 460IU9%
Vitamin C 5.5mg7%
Calcium 82mg8%
Iron 2.4mg13%
* Percent Daily Values are based on a 2000 calorie diet.

Here’s one more to pin on your Pinterest boards!Make 6 jumbo chocolate chip banana muffins (or 12 standard sized)! Yummy muffins, topped with chocolate chips, graham cracker crumbs & vanilla glaze.


Save

Save

Southwestern Cobb Salad with Chili-Rubbed Steak

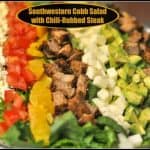
You’ll enjoy this Southwestern Cobb Salad, with chili-rubbed steak, Romaine lettuce, feta cheese, orange slices, jicama, tomatoes, avocado & a delicious salad dressing.You'll enjoy this Southwestern Cobb Salad, with Romaine lettuce, feta cheese, orange slices, jicama, tomatoes, avocado & a delicious salad dressing.
Last summer I found a Food Network cookbook in a used bookstore. The original price was listed as $29.95, but because it was used, I only paid $1.99 for it. SCORE!  I’ve marked several recipes in it that I want to try… the first one that I’ve “officially” tried is this one for a delicious Southwestern Cobb Salad with Chili-Rubbed Steak. This Southwestern cobb salad has it all- meat, veggies, fruit, cheese, sweet, crunch, and spice. WOW!  You’re gonna love it!

Scroll Down For A Printable Recipe Card At The Bottom Of The Page

Why I LOVE This Southwestern Cobb Salad!

I made this entree salad for our dinner a couple of nights ago. It was fantastic… as well as a gorgeous looking salad!  The salad was fairly easy to prepare, and the tastes were amazing! From the homemade salad dressing with a touch of spice and orange burst of freshness, to the simple chili-rubbed steak, this salad is filled with fresh, wonderful flavors!

The flavors I just described are the supporting stars of this Southwestern cobb salad, which features Romaine lettuce, feta cheese, fresh orange slices, jicama, tomatoes and avocado. My husband and I both LOVED it, and he’s already asked me to prepare it again soon.

How To Make The Salad Dressing For Southwestern Cobb Salad

First thing I did was to make the salad dressing. Making the salad dressing is easy. I loved the addition of orange zest to it… the citrus zest helped make it very fresh tasting! Place the salad dressing ingredients into a small bowl. Easy enough so far, right?

Ingredients for salad dressing for Southwestern cobb salad, in a small bowl

Give the salad dressing ingredients a good whisking, and it’s done! Now all you will need to do is cover the bowl, and refrigerate the dressing until ready to use! EASY!

Whisking salad dressing ingredients for Southwestern cobb salad.

Make A Chili Spice Rub For The Steak

The next thing to do is make the chili spice rub mixture in another small bowl.  It’s simply olive oil and chili powder that you can mix together using a fork.. Making this rub is quick and EASY.

Preparing the spice rub mixture for the steak used in the Southwestern cobb salad.

Once fully mixed, put a little bit of the rub on the steaks. TIP:  The chili rub mixture is fairly spicy, so use discretion how much you put on the steaks.

Chili spice rub is put on steaks before cooking them to use in the Southwestern cobb salad.

Rub the chili powder/oil mixture onto both sides of the steaks, before cooking.

Steaks for Southwestern cobb salad are covered with chili spice rub berore cooking.

How To Peel and Cut Orange Slices For Southwestern Cobb Salad

Once salad dressing, spice rub and steaks are ready, it’s time to chop the fresh veggies and fruit. Start with the orange. Cut the top and bottom peel off of an orange. Then cut down the sides of the orange, removing all peel and white “pith”.

You’ll be left with something that looks like this (below). Use a sharp knife and cut between each of the sections and remove the orange slices for the salad. Get the white membrane cut off the orange slices. It’s not too difficult.

Sectioning a whole peeled orange for slices to use in Southwestern cobb salad.

Preparing Jicama For The Southwestern Cobb Salad

This strange looking thing is a jicama, also known as a Mexican turnip. It has the firm texture of a raw potato. Use a sharp knife and carefully cut the peel off. It will look like a potato once it has been peeled.

Jicama must be peeled to use for Southwestern cobb salad.

Cut the peeled jicama into 1 inch slices, then cut each slice into small cubes.

Raw jicama is sliced then cut into cubes for Southwestern cobb salad.

Assembling The Salad

The prep for the salad involves cubing the jicama, cutting the orange into gorgeous sections, chopping the tomatoes, and cutting a fresh avocado into cubes.

These ingredients for the Southwestern cobb salad were layered in rows, along with crumbled feta cheese, on top of the romaine lettuce. Make sure to leave a couple rows open to add the steak after it has been cooked! The platter with the lettuce and veggies was covered with plastic wrap and went into the refrigerator to keep cold, while I cooked the steak.

Cooking The Steak For Southwestern Cobb Salad

The steak was cooked per the original recipe instructions in the broiler of our oven. It was convenient and delicious, using this oven method. The next time I make this Southwestern Cobb Salad, I will throw the steaks on our Weber grill to achieve an even more smoky taste!

Here’s the what the steak looks like, right after coming out from the oven broiler. Let the meat rest for 5 minutes before cutting. It is important to let the meat rest. This will keep most of the good juices inside the meat, instead of all over the pan. More juice INSIDE the steak means more FLAVOR! Once meat has rested, cut into small cubes.

Chili-rubbed steak is cooked under oven broiler for Southwestern cobb salad.

Remove the salad from refrigerator, and add the steak cubes, as shown. This Southwestern Cobb Salad with chili-rubbed steak sure is pretty to look at!

Roadmap For Assembling and Serving Southwestern Cobb Salad

Here’s the “roadmap” for the salad: Place chopped Romaine lettuce on bottom of serving platter (or individual plates). Arrange rows of prepped fruit and veggies for a colorful presentation.

The order I used for the rows, left to right, were Feta cheese, chopped tomatoes, orange slices, steak cubes, jicama cubes, avocado, and more steak cubes. After the salad is layered, the only thing left to do is pour the dressing on top of the Southwestern cobb salad, and toss gently to combine. That’s it!

Ingredients for Southwestern cobb salad are placed in rows on Romaine lettuce before serving.

This Southwestern Cobb Salad is an all in one dinner salad, and it is delicious! Hope you will give it a try. I confident you will LOVE it!  Enjoy!

If you enjoy Main Course Salads, be sure to check out these recipes below. These and others can be found in the RECIPE INDEX, found in the menu toolbar at the top of each page.

Interested In More Recipes?

Thank you for visiting this website. I appreciate you using some of your valuable time to do soIf you’re interested, I publish a newsletter 2 times per month (1st and 15th) with all the latest recipes, and other fun info. I would be honored to have you join our growing list of subscribers, so you never miss a great recipe!
There is a Newsletter subscription box on the top right side (or bottom) of each blog post, depending on the device you use, where you can easily submit your e-mail address (only) to be included in my mailing list.

You Can Also Find Me On Social Media:

Facebook page: The Grateful Girl Cooks!
Pinterest:
The Grateful Girl Cooks!
Instagram:
jbatthegratefulgirlcooks

  Author's signatureRecipe Source: “Food Network Kitchens Cookbook”, published 2003, The Meredith Corporation, page 78.

0 from 0 votes
Southwestern Cobb Salad with Chili-Rubbed Steak
Prep Time
20 mins
Cook Time
15 mins
Total Time
35 mins
 
You'll enjoy this Southwestern Cobb Salad, with chili-rubbed steak, Romaine lettuce, feta cheese, orange slices, jicama, tomatoes, avocado & a delicious salad dressing.
Category: Entree/Salad
Cuisine: Southwestern
Keyword: Southwestern Cobb Salad
Servings: 4 servings
Calories Per Serving: 694 kcal
Author: JB @ The Grateful Girl Cooks!
Ingredients
For the dressing:
  • 2 cloves garlic cloves , minced
  • 1/2 teaspoon salt
  • 1/3 cup mayonaise
  • 1/3 cup buttermilk
  • 1 Tablespoon chipotle hot sauce (I used sauce from a can of adobo chiles)
  • 3 Tablespoons fresh minced cilantro
  • 1 stem scallion (use the white and green parts of the onion), thinly sliced
  • 1 teaspoon finely grated orange zest
For the steak:
  • 1.75 pounds tri-tip steak or other sirloin steak ( I used 2 steaks), for a total of about 1 3/4 pounds meat
  • 1 Tablespoon olive oil
  • 1.5 Tablespoons chili powder
For the salad:
  • 5 cups head Romaine lettuce , torn or chopped
  • 1 ripe avocado
  • 2 ripe medium tomatoes , diced
  • 1/2 cup crumbled feta cheese , or more (can also use Cotija cheese)
  • 1 orange , peeled, cut into sections
  • 1/2 medium jicama , peeled and cubed (about 1 1/2 cups)
  • Salt and freshly ground black pepper , to taste
Instructions
  1. Make the salad dressing: Smash the garlic cloves with the flat side of a butcher knife, then sprinkle with salt. Mix together to form a thick paste. Put the garlic "paste" into a msall bowl, then add the rest of the salad dressing ingredients (mayo, buttermilk, chipotle hot sauce, cilantro, scallion and orange zest). Whisk ingredients together until thoroughly combined. Cover and refrigerate.
  2. Prepare the steak: Lightly salt and pepper the steak. In a small bowl, mix the chili powder and olive oil together until combined into a thick paste. Put this on the meat, and rub the spices into both sides of the meat. If you are grilling steak outside, put on grill and cook until medium. If you are going to be broiling the steak (as per recipe), here's what you need to do: Put a broiler rack and pan about 6 inches away from the broiler in your oven. Turn broiler on and let the pans PREHEAT for several minutes before putting the meat on the pan. When the broiler pan is really HOT, add the steak. (You should hear it sizzle as it hits the broiler pan). Cook for 7-8 minutes on each side for medium, turning once. When done, remove the steak to a cutting board. Let the meat rest for about 5 minutes, then cut into cubes.
  3. To make the salad: Halve, seed, peel and cube the avocado. Peel and section the orange. Peel and cube the jicama. Chop the tomatoes. Put the chopped Romaine lettuce onto a large serving platter (or in a large salad bowl). Arrange the feta, chopped tomatoes, orange sections, steak, jicama and avocado in strips on top of the lettuce. Sprinkle with salt and pepper. Pour the salad dressing over the salad, and toss to combine. (if making individual serving plates, use 3 Tablespoons of dressing per salad).
Recipe Notes

NOTE: This recipe can be adapted to serve 6, by creating smaller portion sizes.

Nutrition Facts
Southwestern Cobb Salad with Chili-Rubbed Steak
Amount Per Serving (1 (1/4 of total))
Calories 694 Calories from Fat 423
% Daily Value*
Fat 47g72%
Saturated Fat 13g81%
Cholesterol 157mg52%
Sodium 891mg39%
Potassium 1393mg40%
Carbohydrates 20g7%
Fiber 9g38%
Sugar 8g9%
Protein 47g94%
Vitamin A 6800IU136%
Vitamin C 46.6mg56%
Calcium 228mg23%
Iron 4.9mg27%
* Percent Daily Values are based on a 2000 calorie diet.

Here’s one more to pin to your Pinterest boards!You'll enjoy this Southwestern Cobb Salad, with chili-rubbed steak, Romaine lettuce, feta cheese, orange slices, jicama, tomatoes, avocado & a delicious salad dressing.

Save

Save

Save

Save

Chocolate Peanut Butter Ice Cream

Grab the ol’ ice cream maker and enjoy a scoop of this delicious, cold and creamy chocolate peanut butter ice cream! You’re gonna love it!Grab the ol' ice cream maker and enjoy a scoop of this delicious, cold and creamy chocolate peanut butter ice cream! You're gonna love it!
Chocolate peanut butter ice cream is such a great flavor combo!  I tried to capture that “yummi-ness” one summer while experimenting with homemade ice cream flavors, and tasting them, too!. Somebody has to do it, right?

Scroll Down For A Printable Recipe Card At The Bottom Of The Page

Making Chocolate Peanut Butter Ice Cream Is Easy!

I took a basic chocolate ice cream recipe from the book that came with our ice cream maker, and incorporated some creamy peanut butter into the mix. The result was really wonderful.  Making this ice cream is really a no brainer, if I’m being truthful.

I added some peanut butter to the ice cream mixture, poured it into my ice cream maker. About 5 minutes before it was done freezing, I added more peanut butter (in small bits) to the ice cream. By adding bits of peanut butter to the mostly finished ice cream, it allowed for it to be spread throughout the ice cream.  Easy-Peasy!

My trusty old machine used to make chocolate peanut butter ice cream.

The end result was a wonderful taste treat on a hot, summer’s day! And surprise, surprise! This chocolate peanut butter ice cream is even good in Winter, Spring, and Fall!

Hope you will consider giving this recipe a try! If you like ice cream, AND you like chocolate and peanut butter. I am confident you will enjoy it!

Looking For More ICE CREAM Recipes?

A collage of ice cream photos from my blog recipes.

You can find all of my recipes in the Recipe Index, located at the top of the page. A few favorite ice cream recipes include:

Interested In More Recipes?

Thank you for visiting this website. I appreciate you using some of your valuable time to do soIf you’re interested, I publish a newsletter 2 times per month (1st and 15th) with all the latest recipes, and other fun info. I would be honored to have you join our growing list of subscribers, so you never miss a great recipe!
There is a Newsletter subscription box on the top right side (or bottom) of each blog post, depending on the device you use, where you can easily submit your e-mail address (only) to be included in my mailing list.

You Can Also Find Me On Social Media:

Facebook page: The Grateful Girl Cooks!
Pinterest:
The Grateful Girl Cooks!
Instagram:
jbatthegratefulgirlcooks

Author's signatureRecipe slightly adapted from: Cuisinart Automatic Frozen Yogurt-Ice Cream & Sorbet Maker Instruction and Recipe Booklet, page 4

3 from 1 vote
Chocolate Peanut Butter Ice Cream
Prep Time
1 hr 30 mins
Cook Time
0 mins
Total Time
1 hr 30 mins
 

Grab the ol' ice cream maker and enjoy a scoop of this delicious, cold and creamy chocolate peanut butter ice cream! You're gonna love it!

Category: Dessert
Cuisine: American
Keyword: chocolate peanut butter ice cream
Servings: 12 (1/2 cup) servings
Calories Per Serving: 315 kcal
Author: JB @ The Grateful Girl Cooks!
Ingredients
  • 1 cup whole milk
  • 1/2 cup granulated sugar
  • 8 ounces semi-sweet chocolate chips
  • 2 Tablespoons peanut butter
  • 2 cups heavy whipping cream (very COLD)
  • 1 teaspoon vanilla extract
  • 1 heaping Tablespoon peanut butter (added in bits right before ice cream is finished)
Instructions
  1. In a small saucepan, heat the milk until it has begun to bubble around the edges of the pan (but not a full rolling boil). You want it hot, but not boiling.
  2. Using a food processor or blender, pulse the granulated sugar and chocolate pieces together, until the chocolate is finely chopped up. Add the 2 Tablespoons of peanut butter, then add the hot milk.
  3. Process until the mixture is well blended, and the mixture is fairly smooth.
  4. Pour the mixture into a large bowl, and let it cool COMPLETELY. Once mixture is cool, stir in the whipping cream and the vanilla extract. Cover ice cream mixture with plastic wrap and put into the refrigerator for at least an hour (the longer time, the better- you want it cold).
  5. When thoroughly chilled, remove mixture from refrigerator. Turn on the ice cream maker, and pour the cold ice cream mixture into the canister. Freezer per manufacturer's instructions (usually about 25 minutes). About 5 minutes BEFORE the ice cream is done, add the final heaping Tablespoon of peanut butter, (in small amounts at a time), to the ice cream.
  6. When ice cream is done, and has thickened, transfer to a covered container and place in freezer for an hour or two to firm up and "ripen".
Recipe Notes

Note that most of the "prep" time is inactive time, while mixture is refrigerating or firming up in freezer. I found it easiest to make up the ice cream and refrigerate it early in the day. I then made the ice cream right before dinner, then it was "ready and firmed up" for dessert a couple hours later!

Nutrition Facts
Chocolate Peanut Butter Ice Cream
Amount Per Serving (1 serving (1/2 cup))
Calories 315 Calories from Fat 216
% Daily Value*
Fat 24g37%
Saturated Fat 14g88%
Cholesterol 57mg19%
Sodium 44mg2%
Potassium 189mg5%
Carbohydrates 21g7%
Fiber 1g4%
Sugar 16g18%
Protein 3g6%
Vitamin A 625IU13%
Vitamin C 0.2mg0%
Calcium 62mg6%
Iron 1.3mg7%
* Percent Daily Values are based on a 2000 calorie diet.

Here’s one more to pin on your Pinterest boards!Grab the ol' ice cream maker and enjoy a scoop of this delicious, cold and creamy chocolate peanut butter ice cream! You're gonna love it!


Save

Save

Save