Month: June 2016

Southwest Steak Salad w/ Avocado & Cilantro Dressing

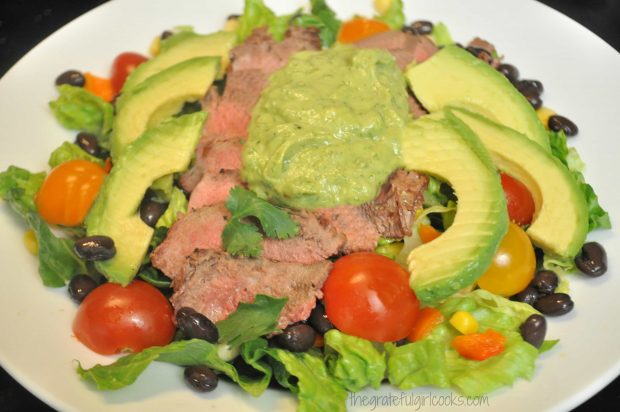
Southwest Steak Salad is a main course salad, with romaine lettuce, steak, tomatoes, avocadoes, beans & peppers in avocado cilantro dressing.Southwest Steak Salad is a main course salad, with romaine lettuce, steak, tomatoes, avocadoes, beans & peppers in avocado cilantro dressing.
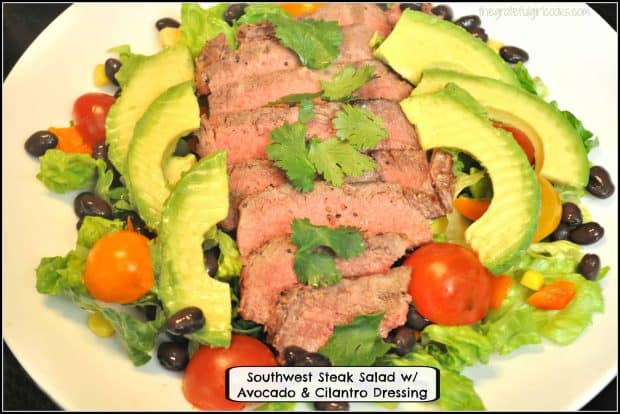
As I write this post, I am still savoring the memory of the delicious Southwest Steak Salad with Avocado & Cilantro Dressing my husband and I enjoyed for dinner last evening! It was absolutely delicious! We had leftover grilled steak  and I decided to see what I could do with it. I found a recipe on Pinterest that sounded great, gave it a try, and it was a fantastic main course salad.

Romaine lettuce, thin slices of grilled steak, black beans, corn, sweet cherry tomatoes, and an absolutely amazing Avocado & Cilantro Salad Dressing that makes the salad PERFECT in Southwestern flavor!  THANK YOU to Krista, at Joyful Healthy Eats for this delicious recipe! I encourage you to check out her blog!

I used grilled steak this time, and next time I’m going to try it using grilled chicken breasts. Either would be fantastic in this salad! Whatever you use, steak or chicken, JUST MAKE SURE TO MAKE THE SALAD DRESSING. It is amazing  since it uses avocado as the main creamy ingredient. Let’s get those “healthy” fats in, okay?

Scroll Down For A Printable Recipe Card At The Bottom Of The Page

Grill The Steak And Make The Salad Dressing

Grill your steak or chicken either outdoors on a BBQ, or indoors on a grill. Let it rest a few minutes after it is finished cooking, then thinly slice it into strips. Set the steak aside.

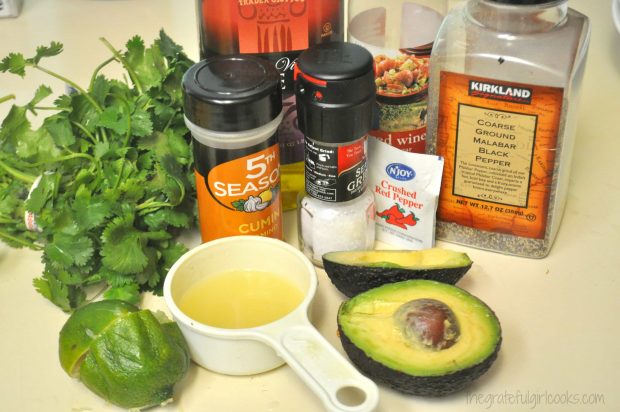
Make the salad dressing by combining the dressing ingredients. They are avocado, cilantro, lime juice, red wine vinegar, olive oil, cumin and red pepper flakes.. Mix the salad dressing in a blender until smooth and creamy.

Ingredients gathered to make salad dressing for the Southwest steak salad.

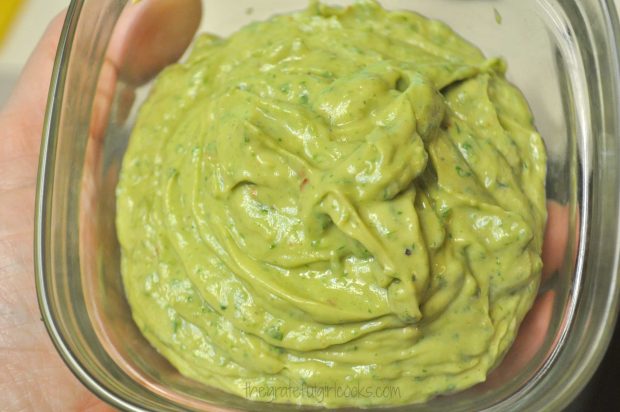
This is what the lime cilantro salad dressing looked like right after removing it from my blender. It’s thick and creamy, and yummy! (I could eat it by the spoonful, but that’s an entirely different story!  Let’s NOT go there).

Creamy Avocado Cilantro Salad Dressing has been blended and is ready to use.

Put The Southwest Steak Salad Together And EAT!

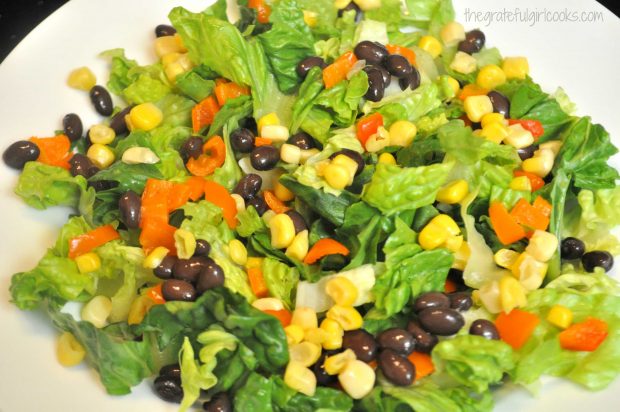
Place the chopped romaine lettuce, orange bell peppers, corn, and black beans into two serving bowls or onto plates.

Romaine lettuce, corn, beans and orange bell peppers are the foundation for the salad.

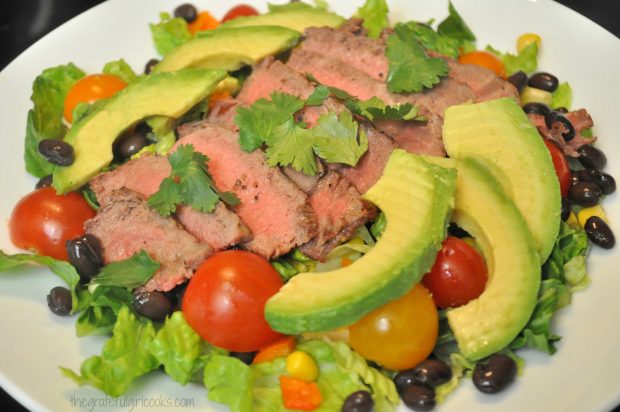
Add warm, thin slices of steak (or chicken), cherry tomato halves, and the garnish the top of the Southwest steak salad with slices of avocado and cilantro leaves.

Avocado and steak slices are added to the top of the Southwest steak salad.

Spoon a big dollop of the salad dressing on top. Give it a big stir to combine, and dig in! You’re gonna LOVE this salad’s amazing Southwest flavors!

A dollop of avocado cilantro dressing tops the salad.

Really hope you will give this salad a try… we really enjoyed it, and were quite full afterwards!  Have a great day, and remember to be KIND. Everyone is facing a battle of some kind and YOU might be the one person to brighten their entire day!

Looking for More MAIN DISH SALAD Recipes?

You can find ALL my recipes in the Recipe Index, located at the top of the page. I have some wonderful main course salads you might enjoy, including:

Interested In More Recipes?

Thank you for visiting this website. I appreciate you using some of your valuable time to do soIf you’re interested, I publish a newsletter 2 times per month (1st and 15th) with all the latest recipes, and other fun info. I would be honored to have you join our growing list of subscribers, so you never miss a great recipe!
There is a Newsletter subscription box on the top right side (or bottom) of each blog post, depending on the device you use, where you can easily submit your e-mail address (only) to be included in my mailing list.

You Can Also Find Me On Social Media:
Facebook page: The Grateful Girl Cooks!
Pinterest: The Grateful Girl Cooks!
Instagram: jbatthegratefulgirlcooks

Author's signature

Recipe Source:  http://www.joyfulhealthyeats.com/southwestern-steak-salad-with-cilantro-avocado-dressing/
0 from 0 votes
Southwest Steak Salad w/ Avocado & Cilantro Dressing
Prep Time
15 mins
Cook Time
0 mins
Total Time
15 mins
 

Southwest Steak Salad is a main course salad, with romaine lettuce, steak, tomatoes, avocadoes, beans & peppers in avocado cilantro dressing.

Category: Main Course Salad
Cuisine: Southwest
Keyword: southwest steak salad, steak salad
Servings: 2 large servings
Calories Per Serving: 614 kcal
Author: JB @ The Grateful Girl Cooks!
Ingredients
For Salad Dressing:
  • 1 medium avocado
  • 1 cup fresh cilantro , chopped
  • 1/4 cup fresh lime juice
  • 1 Tablespoon red wine vinegar
  • 1 Tablespoon olive oil
  • 1/4 teaspoon red pepper flakes
  • 1/4 teaspoon cumin
  • 1/4 teaspoon Salt and Pepper , to taste
For Salad:
  • 6 ounces Ribeye steak , pre-grilled (with salt/pepper or Montreal seasoning), thinly sliced
  • 4 cups Romaine lettuce , chopped
  • 1/2 cup corn (canned, drained)
  • 1/2 cup black beans (canned, drained)
  • 1/2 cup orange bell pepper , diced
  • 1/2 medium avocado , peeled and thinly sliced (for garnish)
  • 1/4 cup cilantro leaves (chopped, for garnish)
Instructions
Prepare Salad Dressing:
  1. Prepare salad dressing by placing all ingredients except salt and pepper into a blender. Blend very well, until it is very smooth and creamy. Season with salt and pepper, to taste. (If it is too thick, you can thin it a bit by adding a tiny bit more olive oil and red wine vinegar). Set aside.
Prepare Salad:
  1. Place chopped lettuce onto serving plate. Top lettuce with corn and black beans; top this with orange bell peppers, thin slices of steak or chicken breast (quantity is your choice), cherry tomato halves. Garnish with chopped cilantro. Top with a large dollop of the salad dressing.
  2. Serve, and enjoy this great salad!
Recipe Notes

Note: Didn't add a cooking time, as it varies between steak or chicken. I used leftover grilled steak, so the prep time was minimal.

Nutrition Facts
Southwest Steak Salad w/ Avocado & Cilantro Dressing
Amount Per Serving (1 (1/2 of total))
Calories 614 Calories from Fat 378
% Daily Value*
Fat 42g65%
Saturated Fat 9g56%
Cholesterol 51mg17%
Sodium 365mg16%
Potassium 1583mg45%
Carbohydrates 39g13%
Fiber 17g71%
Sugar 6g7%
Protein 27g54%
Vitamin A 10425IU209%
Vitamin C 80.3mg97%
Calcium 72mg7%
Iron 4.8mg27%
* Percent Daily Values are based on a 2000 calorie diet.

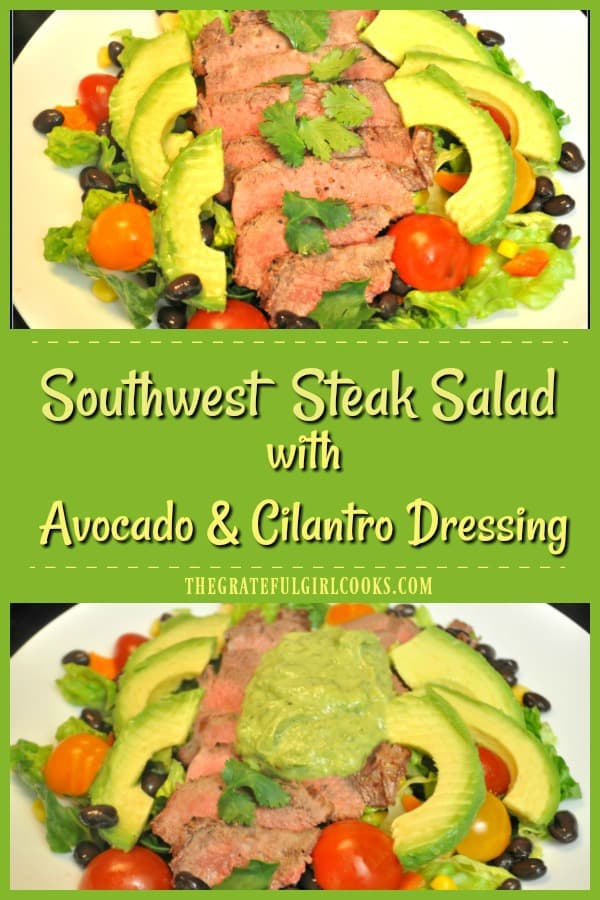
Here’s one more to pin on your Pinterest boards!Southwest Steak Salad is a main course salad, with romaine lettuce, steak, tomatoes, avocadoes, beans & peppers in avocado cilantro dressing.
 

Save

Save

Rhubarb-Orange Jam

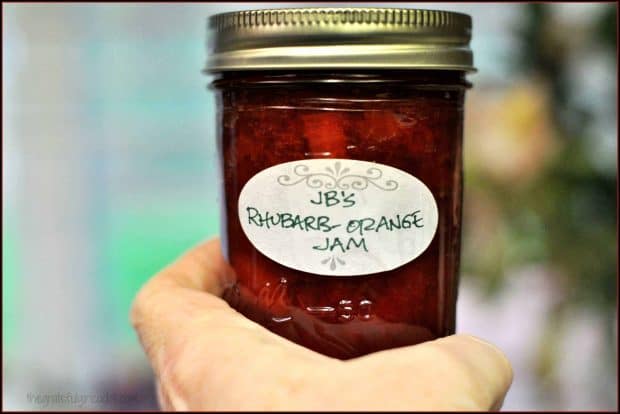
Sweet and just a little tart, this Rhubarb-Orange Jam is a perfect combo to enjoy on toast or muffins! Canning instructions for long term storage are included with recipe.Sweet and just a little tart, this Rhubarb-Orange Jam is a perfect combo to enjoy on toast or muffins! Canning instructions included with recipe.

Last year I ordered the newest edition of “The Ball Blue Book – Guide To Preserving”, and had fun looking at recipes and getting ideas for jams.

The first recipe I used from the book was for Rhubarb-Orange Jam, and boy, was I was surprised at just how GOOD it tastes!

Scroll Down For A Printable Recipe Card At The Bottom Of The Page

How Much Jam Will this Recipe Yield?

This recipe will yield enough jam for about 7 half-pint jars, so I have plenty for our pantry and a few to give to friends!  Talk about simple – this recipe only has 4 ingredients… rhubarb, oranges, sugar, and pectin. If you’ve made jam and canned it before, it is pretty “textbook” jam making.

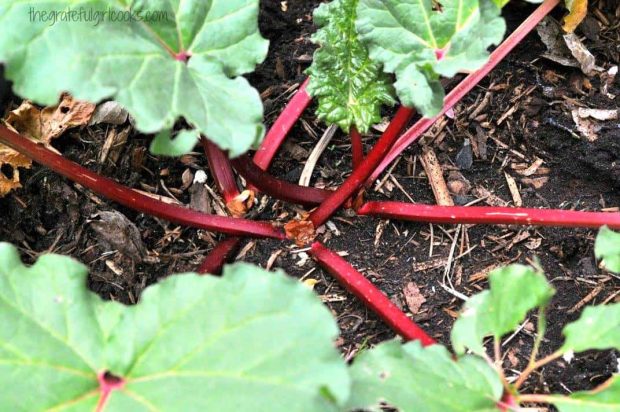
This rhubarb-orange jam is really delicious! A cool thing for me was being able to use rhubarb grown in our own backyard garden to make this jam!

Rhubarb growing in garden, used for making rhubarb-orange jam.

Can I Make Rhubarb-Orange Jam If I Will NOT Be Canning IT?

The answer is YES. However, if storing in the refrigerator, the jam will have a much shorter “life” than processed and canned jam.

If you are NOT going to be canning the jam, make sure to store the jam in a sealed container(s) in the refrigerator. The recipe makes approximately 7 half pint jars of jam, so you will have a LOT of jam to eat! That’s about 112 TABLESPOONS of rhubarb-orange jam!

You can also put this delicious jam (not processed for long term storage) in half-pint jars and give to friends or family, with instructions directing them to keep in the fridge, and use soon. The “unprocessed or un-canned” jars will NOT be shelf stable for long term storage.

If You Are Going To Can The Rhubarb-Orange Jam

I recommend following all basic USDA guidelines for canning, as a matter of precaution. This includes sterilizing the jars and flat lids that you will be using.

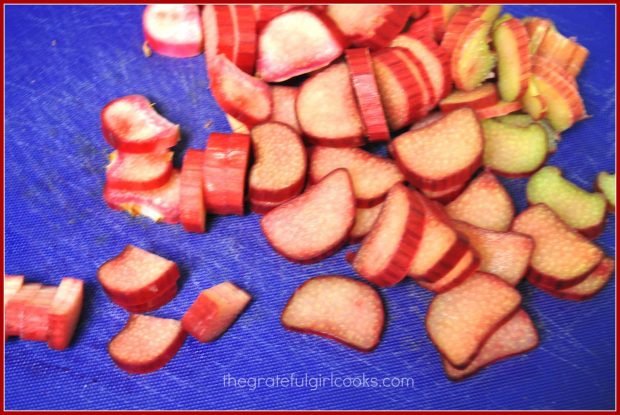
The rhubarb used to make rhubarb-orange jam is sliced before cooking.

Processing Jars Of Rhubarb-Orange Jam

This jam is easily made in a water bath canner. After pre-cooking the rhubarb, oranges, sugar and pectin, the rhubarb-orange jam is carefully ladled into hot, sterilized half-pint canning jars.

The jars are filled, wiped clean, and secured with a flat lid and screw band.  Filled jars of rhubarb-orange jam are then placed on an elevated rack and covered with simmering water in the canner.

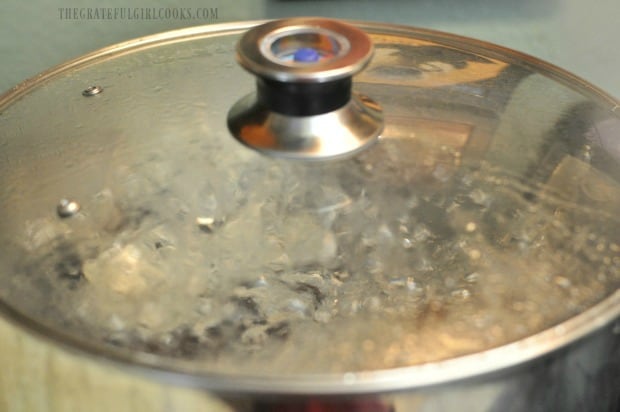
Jars of rhubarb-orange jam are processed for ten minutes in a water bath canner.

This jam is processed for 10 minutes in the water bath canner.  When done, the hot jars are carefully removed, and they are left undisturbed, overnight, to cool completely.

Once cooled, the jars of rhubarb-orange jam are then wiped clean of any sticky residue from the canning process.

The only thing left to do is label the jars, and place them in the pantry, for long term storage.

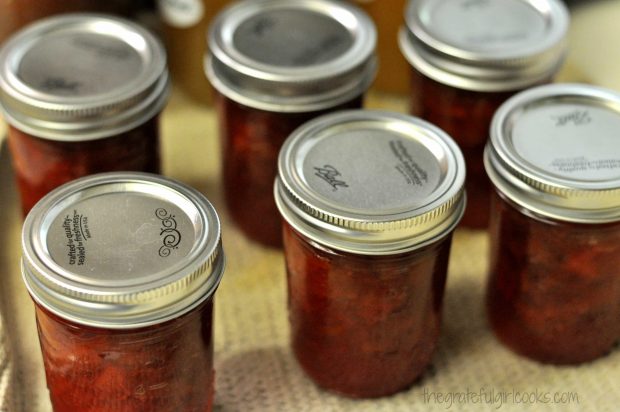
Jars of rhubarb-orange jam cooling on a dish towel, after processing.

Rhubarb and orange flavors present in this jam are very delightful! A little burst of citrus from the orange zest and juice nicely compliments the slightly tart flavor of the rhubarb.

The rhubarb-orange jam will provide a delicious topping for your toast and muffins, etc. If you have canned it for long term storage, you can pull a shelf-stable jar of this yummy jam out of the pantry any time you want!

I hope you consider trying this recipe for rhubarb-orange jam… and trust you will enjoy it!  Have a fantastic day, and please come back again soon.

Looking For More JAM Recipes?

You can find all of my jam recipes in the Recipe Index, located at the top of the page.  A few family favorites include:

Want More Recipes? Get My FREE Newsletter!

I publish a newsletter 2 times per month (1st and 15th) with lots of recipes, tips, etc..
Would you like to join our growing list of subscribers?

There is a Newsletter subscription box on the top right (or bottom) of each blog post, depending on the device you use.
You can submit your e-mail address there, to be added to my mailing list.

Find Me On Social Media:

Facebook page: The Grateful Girl Cooks!
Pinterest:
The Grateful Girl Cooks!
Instagram:
jbatthegratefulgirlcooks

Author's signature

Recipe Source: “Ball Blue Book – Guide To Preserving”, copyright 2014, Hearthmark, LLC (dba Jarden Home Brands), page 54.

↓↓ PRINTABLE RECIPE BELOW ↓↓

0 from 0 votes
Rhubarb-Orange Jam
Prep Time
25 mins
Cook Time
10 mins
Total Time
35 mins
 
Sweet and just a little tart, this Rhubarb-Orange Jam is a perfect combo to enjoy on toast or muffins!
Category: Jam / Canning and Preserving
Cuisine: American
Keyword: rhubarb-orange jam
Servings: 112 Tablespoons (approx. 7 half-pint jars)
Calories Per Serving: 47 kcal
Author: JB @ The Grateful Girl Cooks!
Ingredients
  • 2 1/2 pounds fresh rhubarb (between 10 and 18 stalks, depending on size)
  • 2-3 medium navel oranges
  • 6 Tablespoons Ball Classic Powdered Pectin
  • 6 cups granulated sugar
Instructions
Prep The Fruit:
  1. Prep the rhubarb and oranges. Wash and drain rhubarb, then cut off the leafy tops and the root ends from the rhubarb stalks. Discard. Slice rhubarb into 1/2 inch chunks. Rinse oranges. Cut them in half and take out the seeds. Juice the oranges (you will need 1 cup of fresh squeezed orange juice) Remove the peel from one of the orange halves. Remove the white part (pith) from the peel. Slice the peel into very thin little pieces.
Cook The Jam:
  1. Place the chopped rhubarb, fresh squeezed orange juice and orange peel slivers in a large saucepan. Cover the pan, and cook on a low simmer for about 3 minutes (the rhubarb should be tender when done). Stir in 6 Tablespoons of pectin powder, and stir until fully mixed. Turn the heat up to medium-high, and cook jam mixture until it comes to a boil. Once it reaches a full boil, add the sugar to the pan all at once, stirring well, until the sugar dissolves. Continue cooking the jam until the mixture reaches a FULL ROLLING BOIL (meaning it continues to boil even when stirring). Boil this for 1 minute. stirring constantly while boiling. After one minute, remove the pan from the heat. Use a spoon to skim off any foam that has appeared on top of the jam mixture (and discard).
Fill the Hot Canning Jars:
  1. Canning jars should be sterilized and preheated before filling. Ladle hot jam mixture into your prepared, hot canning jars. Leave 1/4 inch headspace for each jar. Remove any air bubbles by running a plastic utensil down through jam. Completely wipe the jar rim clean. Put the jar lid and ring on jar. Tighten lid to fingertip tight. Place jars on rack in hot water bath canner over simmering water (180 degree F). Repeat with remaining jars.
To Process Jam:
  1. Make sure jars are on rack in simmering water. Water should cover the top of the jars by an inch. (Add boiling water to pan if necessary to completely cover tops of jars). Turn the heat to medium-high. Put a lid on the canner and bring it to a rolling boil. Once boiling, process jars (1/2 pint) for 10 minutes. Turn the heat off and take the lid off the pan. Let the jars sit in pan for 5 minutes to slightly cool. Remove jars from canner (don't try to re-tighten the lids if they have loosened up). Let the jars cool on a dish towel on the counter for 12 hours (don't put hot jars right onto countertop). You should hear each jar "ping" as it seals. Check jars for secure seal after they have cooled for 12 hours. Label jars and store.
Nutrition Facts
Rhubarb-Orange Jam
Amount Per Serving (1 Tablespoon)
Calories 47
% Daily Value*
Sodium 2mg0%
Potassium 33mg1%
Carbohydrates 12g4%
Sugar 11g12%
Vitamin A 15IU0%
Vitamin C 2.1mg3%
Calcium 10mg1%
Iron 0.1mg1%
* Percent Daily Values are based on a 2000 calorie diet.

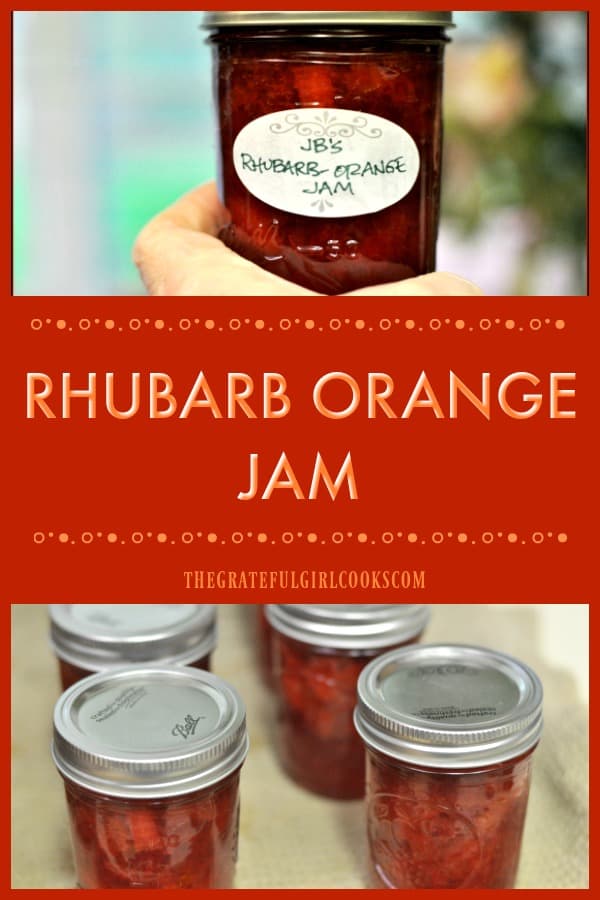
Here’s one more to pin on your Pinterest boards!Sweet and just a little tart, this Rhubarb-Orange Jam is a perfect combo to enjoy on toast or muffins! Canning instructions included with recipe.


Save

Save

Save

Save

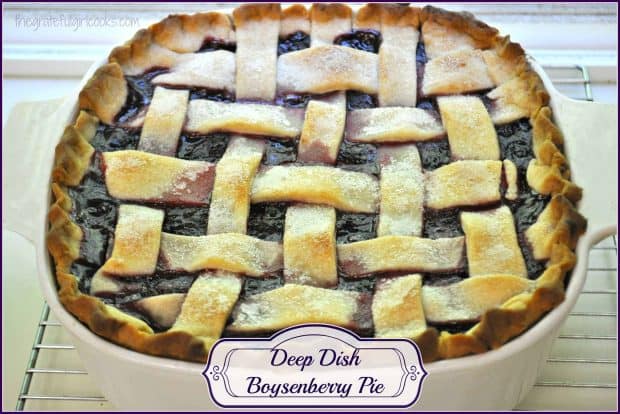
Deep Dish Boysenberry Pie

Deep dish boysenberry pie is easy to prepare with fresh or frozen berries. The perfect summer dessert, especially with a scoop of vanilla ice cream!Deep dish boysenberry pie is easy to prepare with fresh or frozen berries, and is the perfect summer dessert, especially with a scoop of vanilla ice cream!One of my favorite fruit pies is Boysenberry Pie…so it stands to reason that one of my absolute favorite DEEP DISH pies is Deep Dish Boysenberry Pie! I figure it’s just MORE of a good thing, so how can that be anything but DELICIOUS? It just SCREAMS Summer to me!

Scroll Down For A Printable Recipe Card At The Bottom Of The Page

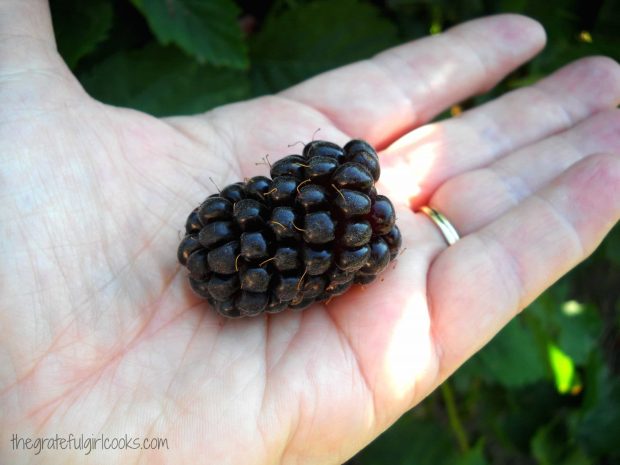
Deep dish boysenberry pie is easy to prepare with fresh or frozen berries, and is the perfect summer dessert, especially with a scoop of vanilla ice cream! I love to go berry picking each summer here in the fertile farmlands surrounding Portland. It’s fun to get out and pick boysenberries during their short growing season. YUM!!! See how big they are?

I have great memories of my Great Aunt Juanita in Southern California growing boysenberries and making us cobblers when we came to visit her in the summer.

Look at the size of that fresh picked boysenberry!

I usually end up making cobblers, jams, and “regular sized” pies when I pick my berries, but I also wanted to try my hand at making a DEEP DISH boysenberry pie…bursting with fresh sun-ripened boysenberries, and crowned with a large scoop of homemade vanilla ice cream. I made my deep dish pie in a Corningware baking dish, and not in a pie pan. It was easy. Here’s what you do:

Make The Filling For The Deep Dish Boysenberry Pie

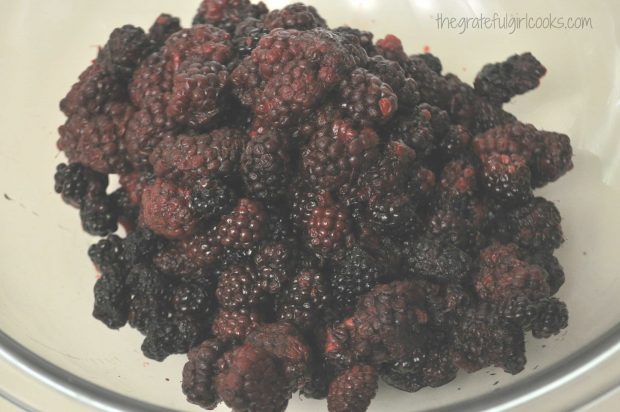
Preheat your oven to 425 degrees.  Rinse and completely drain the boysenberries.

Fresh boysenberries are rinsed then drained.

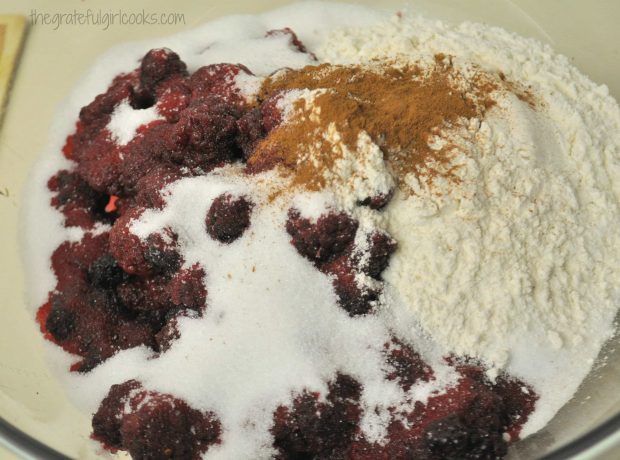
Gently mix the boysenberries with sugar, flour (or cornstarch), and cinnamon.

Boysenberries are tossed with flour, sugar and cinnamon.

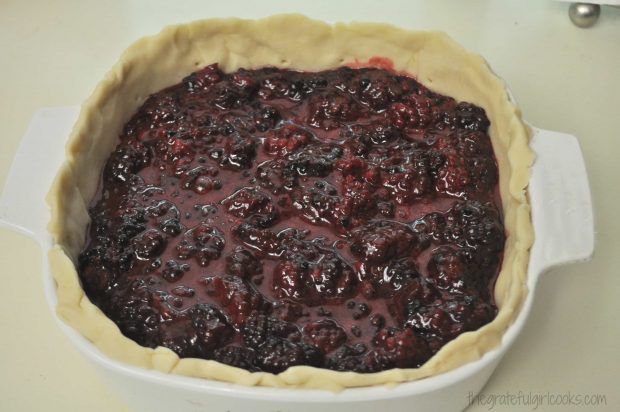
Roll out and place one of the pie crusts into the baking dish. Make sure it comes up to the rim of the dish. Prick the dough with the tines of a fork all over the sides and bottom of crust. Gently pour in the berry mixture.

Boysenberry pie filling is placed into pastry lined deep dish

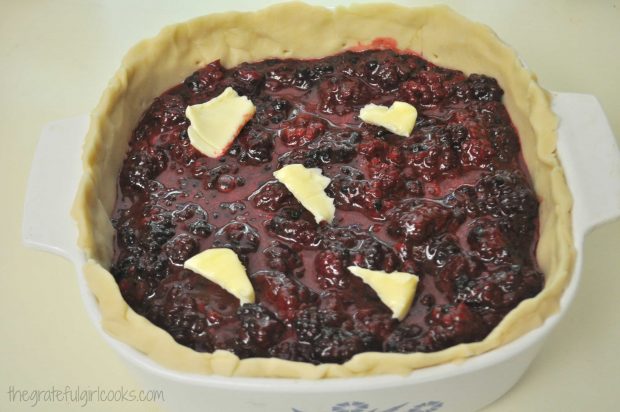
Dot the top of the pie with chunks of butter.

Butter chunks are placed on top of boysenberry pie filling.

Making the Lattice Crust

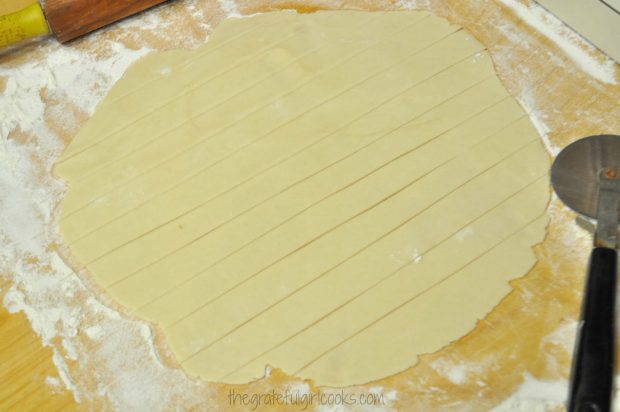
Roll out the remaining pie crust (I always use my Mom’s recipe for all my pie crusts). Cut strips for a lattice crust (I like using a pizza cutter for easy cutting- a sharp knife will also work well).

Pie dough is cut into strips for lattice top for deep dish pie.

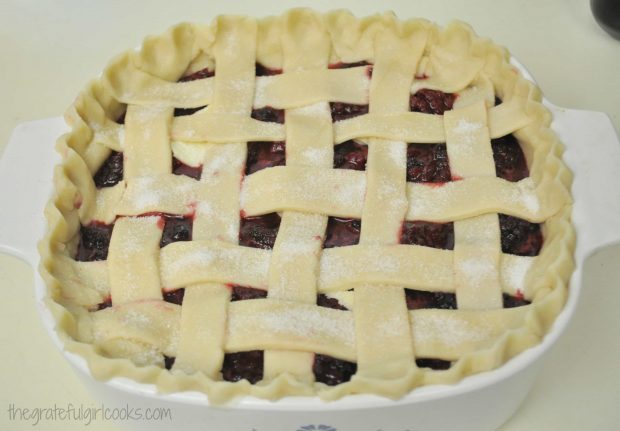
Weave the top crust onto top of pie, and pinch edges together with the bottom crust to seal crust.  Flute the edges to form crust. Lightly brush the top weaved crust with a little milk (or water), then sprinkle with sugar (lightly). This will give the top crust a little shine and a sugary top.

Top lattice crust is arranged on deep dish boysenberry pie.

Bake The Deep Dish Boysenberry Pie

Bake in preheated 425 degree oven for 45-50 minutes (or longer), until crust is light golden brown and juices are bubbling up in the center and around the sides of the pie.  Let pie cool down a bit on a wire rack before attempting to serve. This will give the juices time to coagulate a bit.

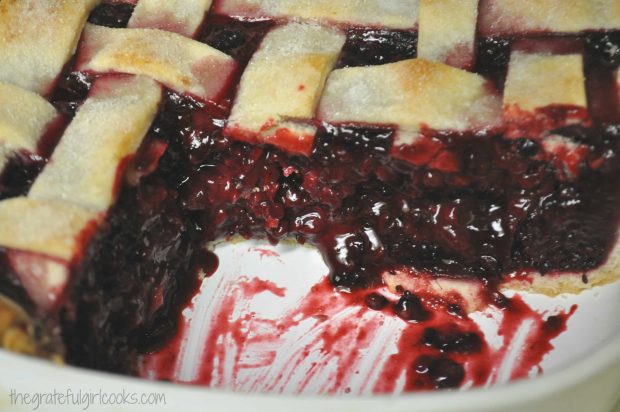
Here’s a peek at the inside of the pie, once that first piece was dished up!

Inside look at the boysenberry pie after a piece was removed.

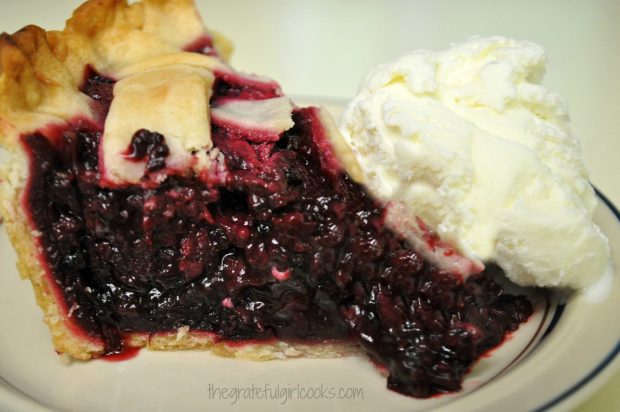
Here it is on the plate with a large scoop of homemade vanilla ice cream. You can’t really tell in this picture, but the heighth of the pie was about 2 ½ inches high. Well… at least it was BEFORE I dumped a large scoop of ice cream on it.. ha ha! Smashed that pie right down…

Deep dish boysenberry pie with a scoop of vanilla ice cream

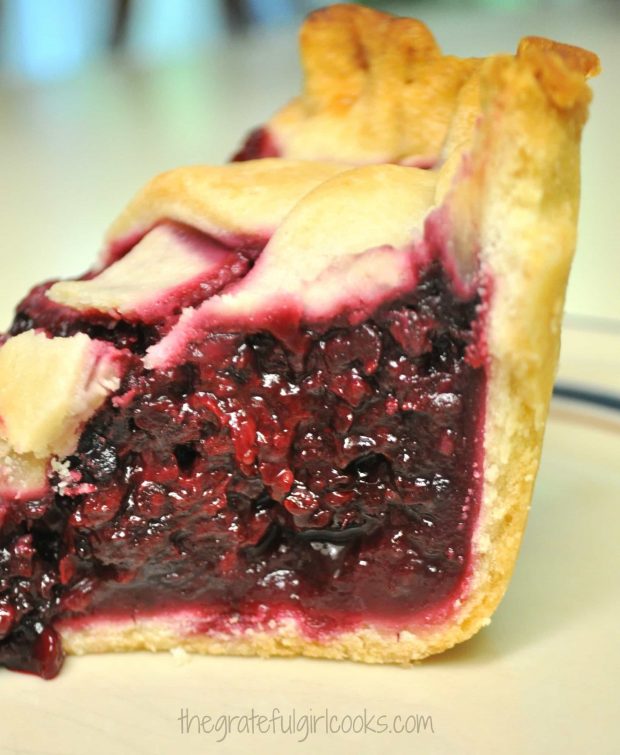
Here’s another shot from the other side of this yummy pie!

A side view of the deep dish boysenberry pie.

I hope you will consider making this delicious deep dish boysenberry pie! If you are interested in my recipe for a “regular sized” boysenberry pie (not deep dish) , you can find it here.

Looking For More PIE Recipes?

You can find all of my recipes in the Recipe Index, located at the top of the page. I have quite a few delicious pie recipes, including:

Interested In More Recipes?

Thank you for visiting this website. I appreciate you using some of your valuable time to do soIf you’re interested, I publish a newsletter 2 times per month (1st and 15th) with all the latest recipes, and other fun info. I would be honored to have you join our growing list of subscribers, so you never miss a great recipe!
There is a Newsletter subscription box on the top right side (or bottom) of each blog post, depending on the device you use, where you can easily submit your e-mail address (only) to be included in my mailing list.

You Can Also Find Me On Social Media:
Facebook page: The Grateful Girl Cooks!
Pinterest: The Grateful Girl Cooks!
Instagram: jbatthegratefulgirlcooks

Have a blessed day!

Author's signatureRecipe Adapted From:  The New Pillsbury Family Cookbook, Published by the Pillsbury Company, 1973, page 149

0 from 0 votes
Deep Dish Boysenberry Pie
Prep Time
15 mins
Cook Time
45 mins
Total Time
1 hr
 
Deep dish boysenberry pie is easy to prepare with fresh or frozen berries, and is the perfect summer dessert, especially with a scoop of vanilla ice cream!
Category: Desserts
Cuisine: American
Keyword: deep dish boysenberry pie
Servings: 8 servings
Calories Per Serving: 420 kcal
Author: JB @ The Grateful Girl Cooks!
Ingredients
  • 6 cups fresh boysenberries (rinsed and drained)
  • 1 1/4 cup granulated sugar
  • 1/2 cup flour OR 1/4 cup plus 2 Tablespoons corn starch
  • 1/2 teaspoon cinnamon
  • 2 Tablespoons cold butter (cut into chunks)
  • 2 Pastry Pie Dough Crusts (homemade or store bought)
  • A little bit of granulated sugar to sprinkle on top of crust
Instructions
  1. Preheat oven to 425 degrees F.
  2. Place boysenberries, sugar, flour (or cornstarch), and cinnamon in a large mixing bowl. Gently toss to combine fully.
  3. Roll out pie dough so you have 2 .Place 1 crust into 2 quart baking dish. Press it into dish so that it covers bottom and comes all the way up to rim of dish. Prick bottom and sides of crust with tines of fork.
  4. Gently pour the berry mixture into prepared pie crust. Dot the top of pie with chunks of butter. Cover the pie filling with the other pie crust. Seal edges. Flute edges. Cut vents to let out steam. IF MAKING LATTICE TOP CRUST: Roll out dough. Cut into approx. 1/2 inch wide strips. Lay half of strips in parallel rows on top of pie filling (about 1 inch apart). To weave, place another row of strips parallel to first rows, but lift every other strip as new strips are added. (up, under, up, under). Seal edges of crusts together. Form standing edge/rim. Flute edges.
  5. Brush top crust lightly with milk or water. Immediately sprinkle wet crust lightly with granulated sugar.
  6. Bake at 425 degrees for 45-50 minutes, or until crust is golden brown, and juices are bubbling. Remove to a wire rack and let cool down slightly, before serving. Serve with ice cream...enjoy!
Recipe Notes

NOTE: Unsweetened frozen boysenberries may be used if fresh berries are unavailable. Mix frozen fruit in with the sugar and flour, etc. Do not use sweetened frozen fruit, as that would mess up the recipe (and be WAY TOO SWEET and the syrup consistency would change!)

Nutrition Facts
Deep Dish Boysenberry Pie
Amount Per Serving (1 slice)
Calories 420 Calories from Fat 126
% Daily Value*
Fat 14g22%
Saturated Fat 5g31%
Cholesterol 7mg2%
Sodium 200mg9%
Potassium 187mg5%
Carbohydrates 70g23%
Fiber 6g25%
Sugar 38g42%
Protein 4g8%
Vitamin A 155IU3%
Vitamin C 3.1mg4%
Calcium 35mg4%
Iron 2.3mg13%
* Percent Daily Values are based on a 2000 calorie diet.

Here’s one more to pin on your Pinterest boards!Deep dish boysenberry pie is easy to prepare with fresh or frozen berries, and is the perfect summer dessert, especially with a scoop of vanilla ice cream!


Save

Save