Month: June 2016

Potato Salad

You’re gonna love this simple, old-fashioned potato salad! It is easy to make, and will be a big hit at your next family BBQ or picnic! You're gonna love this simple, old-fashioned potato salad! It's easy to make, and will be a big hit at your next family BBQ or picnic!

I’ve been making this classic recipe for yummy, old-fashioned Potato Salad for over 30 years now! We have it for BBQ’s, potlucks and picnics, and my family and friends always end up wanting more (including “to go” containers for our grown sons)!

When I was growing up, I didn’t like potato salad. My Mom (who is a fantastic cook) made hers with LOTS of sweet pickle relish, red onions and mustard, and I just didn’t enjoy it (sorry, Mom)!

How I Got This Recipe

Well, many years ago, a friend of mine named Judy made potato salad for a baby shower I was the guest of honor at, and I LOVED it!

I asked her what her “secret” was. She told me she used Claussen Dill Pickles, because they are refrigerated and have the “best” crunch factor! Who knew?

Well, trust me… I don’t owe my allegiance to any particular pickle company, BUT… I gotta tell ya, she was on to something.  I went home and began experimenting with my own version of potato salad (including those DILL pickles).

Eventually I came up with a winner recipe, and have been making potato salad this way ever since! After making this salad hundreds of times over the past 30 years, I finally decided to post it on my blog. Here’s how to make it.

How To Make Old-Fashioned Potato Salad

Boil the Russet potatoes (with the skin on), until they are fork-tender. You will need to do this in a LARGE saucepan.

Hint: See my note section in the printable recipe for a time-saver to cook hard-boiled eggs for the recipe in the same pan with the potatoes.

Drain the cooked potatoes, slightly cool, then peel and cube. Place potato cubes in a large enough bowl to mix up the potato salad.

Potatoes cut into cube shapes for potato salad.

Slice the green onions, chop Claussen pickles, and chop up 2 of the 3 hard-boiled eggs. Add these ingredients to the potato chunks in the bowl.

Potatoes, pickles, boiled egg, green onions in bowl for potato salad.

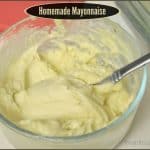
In a separate bowl, combine mayonnaise, a small bit of prepared yellow mustard, several Tablespoons of the pickle juice (straight from the jar!), and a bit of salt and pepper.

This will be the dressing for the potato salad. Pretty easy to make, right?

Potato salad dressing is mixed together in metal bowl.
Mix The Potato Salad

Pour “dressing” mixture over potatoes. Stir gently to fully combine all ingredients. If necessary, add additional mayonnaise.

The amount of mayonnaise needed will vary, depending on the quantity and size of the potatoes used for this potato salad. You can always add more after stirring, if necessary.

You don’t want the potato salad dry.  You definitely do not want it swimming in mayo, either!

Salad dressing poured over potato salad, then mixed together.

Once the potato salad is completely combined, taste it to see if you need a bit more salt and/or pepper, and season to taste.

When you have it seasoned just the way you like it, transfer the potato salad into a large serving bowl.

Potato salad in white serving bowl.

Garnish The Potato Salad 

I use this contraption to thinly slice a hard-boiled egg for garnishing the salad (optional). This device sure makes it easy to cut a hard boiled egg into beautiful, even slices!

Hard boiled egg in slicer for potato salad garnish.
It thinly slices the egg for me, without making a mess!  If you do not have something like this, carefully cut thin slices with a very sharp knife!

Hand holding a sliced hard boiled egg for topping the potato salad.

Garnish, Refrigerate, Then Serve!

Place the egg slices on top of potato salad. Garnish with a few more green onion slices (the green part) OR chopped parsley. Sprinkle the top with paprika, and that’s it!

Cover the potato salad with plastic wrap. Refrigerate for 5-6 hours before serving, for best flavor (and chill factor!).

Potato Salad in white bowl, with sliced egg garnish.

That’s how I make this classic homemade potato salad. It really is quite inexpensive to prepare, and is always enjoyed at family get togethers.

For me, it’s always a hoot to see just how much of this potato salad our two grown sons can pile on their plates! Ha Ha. I say “Have a little hamburger with that potato salad!”

Hope you will find time this summer to give this great potato salad recipe a try! We absolutely LOVE it!

Looking for Other Salad Recipes?

You can find ALL of my recipes in the Recipe Index, which is located at the top of the page. I have a great variety of salad recipes to choose from, including:

Want More Recipes? Get My FREE Newsletter!

I publish a newsletter 2 times per month (1st and 15th) with lots of recipes, tips, etc..
Would you like to join our growing list of subscribers?

There is a Newsletter subscription box on the top right (or bottom) of each blog post, depending on the device you use.
You can submit your e-mail address there, to be added to my mailing list.

Find Me On Social Media:

Facebook page: The Grateful Girl Cooks!
Pinterest:
The Grateful Girl Cooks!
Instagram:
jbatthegratefulgirlcooks

Author's signature

↓↓ PRINTABLE RECIPE BELOW ↓↓

0 from 0 votes
Potato Salad
Prep Time
1 hr
Cook Time
0 mins
Total Time
1 hr
 
You're gonna love this simple, old-fashioned potato salad! It is easy to make, and will be a big hit at your next family BBQ or picnic!
Category: Salad
Cuisine: American
Keyword: potato salad
Servings: 10 servings
Calories Per Serving: 120 kcal
Author: JB @ The Grateful Girl Cooks!
Ingredients
For Potato Salad:
  • 5 large "baker" sized russet potatoes (or 8-9 small potatoes)
  • 2 green onions , sliced (green and white parts)
  • 4 Claussen dill pickle spears (or 1 LARGE Claussen whole dill), chopped
  • 3 hard boiled eggs (chop 2 of them, reserve 1 for garnish, if desired)
For Potato Salad "Dressing":
  • 5 HEAPING Tablespoons mayonnaise (really big heapings-start with this-add more if necessary)
  • 1/2 teaspoon prepared yellow mustard
  • 3 Tablespoons pickle juice (straight from the jar!)
  • Salt and black pepper , to taste
For Garnish:
  • Use 1 reserved hard-boiled egg , thinly sliced
  • Additional sliced green onions (green part) OR chopped fresh parsley
  • Paprika (to lightly sprinkle on top of salad)
Instructions
  1. Boil potatoes (with skin on) until fork tender (time will vary depending on size of potatoes). It will typically take between 35 and 50 minutes. If done, you should be able to insert a knife blade into the potato with no problem. When done, drain, and peel potatoes. Once cool, cut potatoes into chunks and place into large bowl.
  2. Slice green onions and chop dill pickle spears. Add to potatoes. Chop 2 of the 3 hard boiled eggs, and add to potatoes.
  3. Mix up "dressing" for salad in a separate bowl, by mixing mayonnaise, mustard, pickle juice, and salt and pepper (start with 1/2 teaspoon salt/pepper).
  4. Pour the "dressing" over the potato mixture. Stir gently to fully combine ingredients. If more "moisture" is needed, add more mayonnaise and continue stirring until fully coated. (amount of "dressing" and additional mayo will vary, due to amount and size of potatoes used).
  5. Taste test. Add more salt/pepper, if needed. (I usually end up adding a bit more salt).
  6. Place potato salad into serving bowl. Garnish top with thin slices of hard-boiled egg, then add additional sliced green onion (the green part) OR chopped fresh parsley. Lightly sprinkle with paprika.
  7. Refrigerate for 5-6 hours (for BEST flavor and "chill" factor); Serve, and enjoy!
Recipe Notes

To save time, I boil the eggs in the same saucepan while I cook the potatoes! Usually takes them about 23 minutes when added to boiling water with all the potatoes. I take eggs out when done, and finish cooking potatoes! (one less pan!)

Nutrition Facts
Potato Salad
Amount Per Serving (1 serving)
Calories 120 Calories from Fat 18
% Daily Value*
Fat 2g3%
Cholesterol 74mg25%
Sodium 339mg15%
Potassium 475mg14%
Carbohydrates 19g6%
Fiber 1g4%
Protein 4g8%
Vitamin A 130IU3%
Vitamin C 6.5mg8%
Calcium 26mg3%
Iron 1.2mg7%
* Percent Daily Values are based on a 2000 calorie diet.

Here’s one more to pin on your Pinterest boards!You're gonna love this simple, old-fashioned potato salad! It is easy to make, and will be a big hit at your next family BBQ or picnic!


Save

Save

Peach Shortbread Tart

Peach Shortbread Tart with fresh peach filling on a shortbread crust, and crumb topping, is a simple, delicious dessert that will be a favorite!Peach Shortbread Tart with fresh peach filling on a shortbread crust, and a crumb topping, is a simple delicious dessert tart that will be an absolute favorite!A couple years ago I decided to make my own birthday “cake” (really…who does that?).  But I really didn’t want a cake, so I made this delicious Peach Shortbread Tart for myself and my family.  And let me tell you I enjoyed every single bite of it! Happy Birthday to ME!

I had recently been out to a local orchard and had picked about 40 pounds of fresh, juicy peaches (my birthday is in July, the time for the ripest Northwest peaches!). The decision was made to use some of the peaches and “tweak” one of my favorite tart recipes that I received from a friend of mine years ago.

The original recipe is for an Apple Shortbread Tart, and I’ve also used the same basic recipe to make a Boysenberry Shortbread Tart. This time I made it a PEACH Shortbread Tart, and it tastes wonderful! Here’s how to make a peach shortbread tart:

Scroll Down For A Printable Recipe Card At The Bottom Of The Page

Making the Peach Shortbread Tart Crust

The basic recipe is simple. First, you make a shortbread crust, and then you make the filling. Top the filling with some of the reserved shortbread crust crumbs. Bake it, then eat it. You will totally LOVE it! End of story! The shortbread crust is extremely simple to make. It’s ready in a jiff.

Ingredients are processed for the tart crust.

Here’s the crust before putting all the goodies in it! The crust is firmly packed down into the tart pan before baking.

Shortbread crust is packed into a tart pan.

See these gorgeous peaches? Yep. I picked about 40 pounds of ’em at a local You-Pick farm. Fresh peaches are what I use to make this tart, because they are lip smacking good.

Fresh peaches to be picked and used for shortbread tart.

Can’t Wait To Eat The Peach Shortbread Tart

Here’s my finished birthday dessert, a peach shortbread tart, which will be served with vanilla ice cream. You can also see one of our family fixtures. We call him the “Boring Birthday Guy”. He makes an appearance at all of our family birthday celebrations. He’s really quite the party animal.

Peach Shortbread Tart ready to eat for my birthday dessert!

And this is me- the birthday girl, totally ready to dig into a scrumptious birthday dessert I made for myself. Go figure! I polished off that piece or peach shortbread tart and the mandatory scoop of ice cream in no time flat! HA HA! Some birthdays are like that!

Birthday girl with peach shortbread tart for dessert!
Anyways… if you like fresh peach pie, then you will LOVE this Peach Shortbread Tart, even if it’s NOT your birthday. It’s absolutely delicious! Here’s another photo of another time I made this dessert for a “Peach-themed” dinner party!  I made a Peach Coulis (sauce) to drizzle on top! YUM.

Peach Shortbread Tart served with peach coulis drizzle and ice cream.

Sure hope you will consider making this delicious peach shortbread tart.  Have a fantastic, “peachy” kind of day!

Looking For More Recipes For PEACH DESSERTS?

You can find ALL of my recipes in the Recipe Index, located at the top of the page. I have quite a few desserts featuring peaches, including:

Interested In More Recipes?

Thank you for visiting this website. I appreciate you using some of your valuable time to do soIf you’re interested, I publish a newsletter 2 times per month (1st and 15th) with all the latest recipes, and other fun info. I would be honored to have you join our growing list of subscribers, so you never miss a great recipe!
There is a Newsletter subscription box on the top right side (or bottom) of each blog post, depending on the device you use, where you can easily submit your e-mail address (only) to be included in my mailing list.

You Can Also Find Me On Social Media:
Facebook page: The Grateful Girl Cooks!
Pinterest: The Grateful Girl Cooks!
Instagram: jbatthegratefulgirlcooks

Author's signature

Recipe Adapted from my friend, Shari Altree’s recipe for Apple Shortbread Tart

5 from 1 vote
Peach Shortbread Tart
Prep Time
20 mins
Cook Time
45 mins
Total Time
1 hr 5 mins
 
Peach Shortbread Tart with fresh peach filling on a shortbread crust, and a crumb topping, is a simple delicious dessert tart that will be an absolute favorite!
Category: Dessert
Cuisine: American
Keyword: peach shortbread tart
Servings: 8 servings
Calories Per Serving: 387 kcal
Author: JB @ The Grateful Girl Cooks!
Ingredients
For the crust:
  • 2 cups all-purpose flour
  • 1/2 cup granulated sugar
  • 1/4 teaspoon salt
  • 3/4 cup butter
  • 2 egg yolks
For the filling:
  • 1 1/4 pounds fresh peaches (about 6-7 large peaches), peeled, and sliced thin
  • 1 Tablespoon lemon juice
  • 1/4 cup brown sugar , packed
  • 1 Tablespoon all-purpose flour
  • 1/2 teaspoon cinnamon
Instructions
  1. Preheat oven to 400 degrees.
  2. Blend all crust ingredients (except for egg yolks) until they are the texture of coarse meal. (You can use a fork, a pastry blender or a food processor). Add the 2 egg yolks and mix well to blend. **Set aside 1/4 of this mixture and save for later**. Using the remaining 3/4 of the crumbs, pat them down over the bottom and up the sides of a tart pan with removable bottom disk (this is what I use) or a pie pan. Make sure crust is firmly pressed down into the pan and the sides to form a solid crust.

  3. Peel and slice the peaches into thin slices. Place the sliced peaches in a large bowl and mix with lemon juice. Add 1/4 cup brown sugar, 1 TBSP flour and 1/2 tsp. cinnamon. Mix well to coat the peaches.
  4. Once peach slices and dry ingredients are mixed together, gently "pour" or spoon the peaches onto the crust. I use my (clean) fingers to place the slices and fill in the holes; position the slices so they mound in the center and fill in the crust.
  5. Sprinkle the reserved 1/4 of the crust mixture over the top. I find it helpful to hold one hand up around the edge of the pan to try and catch the crumbles before they fall off the tart. Just scoop up any crumbles that fall onto your work surface and put them back on that tart! Cover the entire top of the tart.
  6. Bake the tart at 400 degrees for 15 minutes, then reduce heat to 350 degrees and bake until the top begins to turn a golden brown (approx. 25-30 minutes, depending on your oven). Just keep an eye on it and remove tart when top is golden brown. Let cool just a bit. If using a tart pan, hold your hand on the bottom of the tart and gently press upward on the metal disk to release the tart from the pan. Place the tart (keeping disk on the bottom of tart) on serving dish, slice and serve.
  7. Serve warm, with a scoop of vanilla ice cream...and ENJOY!
Nutrition Facts
Peach Shortbread Tart
Amount Per Serving (1 slice)
Calories 387 Calories from Fat 162
% Daily Value*
Fat 18g28%
Saturated Fat 11g69%
Cholesterol 94mg31%
Sodium 229mg10%
Potassium 187mg5%
Carbohydrates 50g17%
Fiber 1g4%
Sugar 25g28%
Protein 4g8%
Vitamin A 830IU17%
Vitamin C 5.4mg7%
Calcium 26mg3%
Iron 1.8mg10%
* Percent Daily Values are based on a 2000 calorie diet.

Here’s one more to pin on your Pinterest boards!Peach Shortbread Tart with fresh peach filling on a shortbread crust, and a crumb topping, is a simple delicious dessert tart that will be an absolute favorite!


Save

Save

Balsamic Brown Sugar & Rosemary Pork Chops

Pork chops are marinated in a balsamic, brown sugar and rosemary sauce, then cooked to perfection on the stove top in this delicious one pan dinner you’ll love!Pork chops are marinated in a balsamic, brown sugar and rosemary sauce, then cooked to perfection on the stove top in this delicious one pan dinner you'll love!

I recently found a recipe for Balsamic Brown Sugar Rosemary Pork Chops on Pinterest and decided to give it a try. The recipe was incredibly easy, and the pork chops had a nice flavor, due to it’s completely “simple to prepare” marinade.

I’m pretty sure you will love this easy pork chop recipe… all cooked in one pan on the stove top!  Meat is marinated, then cooked until done. BOOM. That’s it! Super simple, and we loved it.  Here’s how to make this dish:

Scroll Down For A Printable Recipe Card At The Bottom Of The Page

Make The Marinade

The marinade is very simple to prepare, and includes balsamic vinegar, brown sugar, fresh rosemary leaves, garlic, salt and pepper. Mix the marinade ingredients together in a freezer bag or covered container. Drop the pork chops into the container, then pour the marinade over it.

Seal the bag and marinate the chops for at least an hour in the refrigerator (I made mine up in the morning, and let the chops swim in the marinade all day).

Ingredients for marinade plus fresh rosemary sprig

Marinade for pork chops in small metal bowl

Marinade being poured into plastic bag over pork

Cooking The Pork Chops

When ready to cook the pork chops, heat olive oil in a cast iron skillet or a non-stick skillet on medium-high. When skillet and oil are very hot, add the pork chops, then pour the remaining marinade over the chops in skillet.  Cook pork chops on both sides, occasionally spooning the sauce over the top of the chops.

Cook until sauce has slightly thickened, darkened, and caramelized on each piece. Cooking time will vary slightly due to different thicknesses (these were about an inch thick). I cooked mine for about 4-5 minutes per side (until they reached the current recommended internal temperature of 145 degrees).

Four boneless pork chops cooking in a black cast iron skillet

Time To Eat The Balsamic Brown Sugar Pork Chops!

Let them sit in the skillet for a couple minutes once done, then transferred them to plates. Spoon a little bit of the thickened sauce over the tops of the meat. We enjoyed the pork chops, served along with a baked potato and home grown green beans. YUM!

The added benefit is that you only have ONE pan to clean up after you are done cooking! I really like that part!

Cooked pork with rosemary sprig in skillet

Hope you will consider trying this recipe. It’s so simple, and the meat really does have a nice flavor… slightly sweet, with lots of flavor!

Looking For More PORK CHOP Recipes?

You can find all of my pork recipes in the Recipe Index, located at the top of the page. I have quite a few pork chop recipes, including:

Interested In More Recipes?

Thank you for visiting this website. I appreciate you using some of your valuable time to do soIf you’re interested, I publish a newsletter 2 times per month (1st and 15th) with all the latest recipes, and other fun info. I would be honored to have you join our growing list of subscribers, so you never miss a great recipe!
There is a Newsletter subscription box on the top right side (or bottom) of each blog post, depending on the device you use, where you can easily submit your e-mail address (only) to be included in my mailing list.

You Can Also Find Me On Social Media:
Facebook page: The Grateful Girl Cooks!
Pinterest: The Grateful Girl Cooks!
Instagram: jbatthegratefulgirlcooks

Author's signature

Recipe Source:  www.tablerpartyoftwo.com/balsamic-brown-sugar-rosemary-pork-chops/

0 from 0 votes
Balsamic Brown Sugar & Rosemary Pork Chops
Prep Time
5 mins
Cook Time
10 mins
Total Time
15 mins
 
Pork chops are marinated in a balsamic, brown sugar and rosemary sauce, then cooked to perfection on the stove top in this delicious one pan dinner you'll love!
Category: Entree
Cuisine: American
Keyword: pork chops
Servings: 4 servings
Calories Per Serving: 321 kcal
Author: JB @ The Grateful Girl Cooks!
Ingredients
  • 4 pork chops (bone in or boneless- about 1 inch thick))
  • 1/2 cup brown sugar
  • 2 Tablespoons balsamic vinegar
  • 2 sprigs rosemary leaves (removed from stem)
  • 1 teaspoon minced garlic
  • 1 dash of salt and black pepper
Instructions
  1. Combine brown sugar, balsamic vinegar, rosemary leaves, garlic and salt and pepper. Mix ingredients until well combined. Pour into a plastic freezer bag or a covered container.
  2. Add pork chops. Seal bag Let chops marinade in the refrigerator for AT LEAST one hour (I made this up early in the day and let it marinade all day).
  3. When ready to cook, heat a cast iron skillet or a non-stick skillet on medium-high. Add 1 Tablespoon olive oil to skillet and let it get hot. Add pork chops to hot skillet, then pour remaining marinade over the top.
  4. Cook pork chops on both sides until sauce has become dark brown and has slightly caramelized on the pork chops. Cooking times will vary depending on thickness of the pork chops used. It averages about 4 minutes per side, but might take longer to reach internal temperature of 145 degrees. (New cooking guidelines from the nation's food-safety agency confirm Pork Checkoff research that shows pork can be consumed safely when cooked to an internal temperature of 145 degrees Fahrenheit, followed by a three-minute rest time.)
  5. Place pork chops onto serving plate and spoon some of the sauce over the chops before serving. Enjoy!
Nutrition Facts
Balsamic Brown Sugar & Rosemary Pork Chops
Amount Per Serving (1 pork chop)
Calories 321 Calories from Fat 81
% Daily Value*
Fat 9g14%
Saturated Fat 3g19%
Cholesterol 89mg30%
Sodium 83mg4%
Potassium 545mg16%
Carbohydrates 28g9%
Sugar 27g30%
Protein 29g58%
Vitamin A 15IU0%
Vitamin C 0.2mg0%
Calcium 32mg3%
Iron 0.9mg5%
* Percent Daily Values are based on a 2000 calorie diet.

Here’s one more to pin on your Pinterest boards!Pork chops are marinated in a balsamic, brown sugar and rosemary sauce, then cooked to perfection on the stove top in this delicious one pan dinner you'll love!

Save

Save

Save

Bing Cherry Jam

Bing Cherry Jam, enhanced with the addition of amaretto, is a delicious fruit spread for toast or biscuits! The recipe includes canning instructions, for long term storage.Bing Cherry Jam, enhanced with the addition of amaretto, is a delicious fruit spread for toast or biscuits! Recipe includes canning instructions.

Each year I enjoy making many varieties of jam to store in our pantry, and to give away to family and friends. I’ve been canning jam for many years now. 

Last summer I made Bing Cherry Jam for the first time, and was surprised at how delicious and flavorful it was on toast and English muffins!

Today I want to share the recipe for making Bing cherry jam, and I really think you will love this delicious jam!  

Scroll Down For A Printable Recipe Card At The Bottom Of The Page

The History Of The “Bing Cherry”

The “Bing” Cherry is a firm dark cherry, which is very common in the Pacific Northwest, where we live. Cherries are commonly acknowledged to have high antioxidant levels, as well.

Bing cherries are believed to have first been cultivated in Oregon in 1875 by a horticulturist named Seth Lewelling. He was helped by his orchard foreman, a Chinese immigrant by the name of Ah Bing, and that is apparently how they got their name. 

Time To Can The Jam!

I searched for a good “canning” recipe for this fruit after being given a large amount of these cherries by a friend, who has a huge cherry tree at her home.

The recipe I used for this jam is from one of my Ball Blue Books (Guide To Preserving). Bing cherry jam is canned for long term storage by using a water bath canner.

The idea of making Bing cherry jam intrigued me, and it was fun being able to use my Homemade Amaretto in it, as one of the ingredients.

Jars of bing cherry jam being processed in water bath canner

Pairing the flavors of ripe Bing cherries with cinnamon, cloves, and almond liqueur make this quite a wonderfully tasty jam!

How Much Bing Cherry Jam Will This Recipe Yield?

This recipe for bing cherry jam makes about 6 half-pint jars.  That means there’s enough jam to save several jars in your pantry.

There are also a few extra jars in case you want to bless others with them! I love to save a few jars to store, and give others to my family and friends.

Finished jars of bing cherry jam on dish towel.

Here is a picture of this delicious bing cherry jam, spread on a toasted English muffin. Trust me, this jam is really GOOD!

Bing Cherry Jam spread on an English muffin.

If you enjoy making homemade jam, I recommend this recipe, because it really has GREAT flavor! I hope you have the opportunity to make this delicious jam.

Thank you for stopping by, and I invite you to come back soon for more family friendly recipes. Take care, and have a GREAT day!

Looking For More JAM Recipes?

You can find ALL of my recipes in the Recipe Index, which is located at the top of the page. I have a great variety of jam recipes to enjoy, including:

Want More Recipes? Get My FREE Newsletter!

I publish a newsletter 2 times per month (1st and 15th) with lots of recipes, tips, etc..
Would you like to join our growing list of subscribers?

There is a Newsletter subscription box on the top right (or bottom) of each blog post, depending on the device you use.
You can submit your e-mail address there, to be added to my mailing list.

Find Me On Social Media:

Facebook page: The Grateful Girl Cooks!
Pinterest:
The Grateful Girl Cooks!
Instagram:
jbatthegratefulgirlcooks

Author's signature

Recipe Source:  “Ball Blue Book Guide To Preserving”, published 2014 by Hearthmark LLC dba Jarden Home Brands, page 49.

↓↓ PRINTABLE RECIPE BELOW ↓↓

3 from 1 vote
Bing Cherry Jam
Prep Time
25 mins
Cook Time
10 mins
Total Time
35 mins
 

Bing Cherry Jam, enhanced with the addition of amaretto, is a delicious fruit spread for toast or biscuits!

Category: Breakfast, Jam
Cuisine: American
Keyword: cherry jam
Servings: 6 half-pint jars or 3 pint jars
Calories Per Serving: 47 kcal
Author: JB @ The Grateful Girl Cooks!
Ingredients
  • 1 quart (about 2 pounds) Bing cherries, pitted and stemmed
  • 6 Tablespoons Ball Classic Pectin (powder)
  • 1/2 teaspoon cinnamon
  • 1/2 teaspoon cloves
  • 1/4 cup lemon juice
  • 1/4 cup almond liqueur (I used Amaretto)
  • 4 ½ cups granulated sugar
Instructions
  1. While preparing the jam, also make sure you prepare water canner and hot canning jars/lids, per manufacturer instructions and USDA canning guidelines.
To Make Jam:
  1. Wash, drain, pit and de-stem cherries. Chop cherries into small pieces (make sure chopped cherries measure out to one quart, which is the equivalent of 4 cups).
  2. In a large saucepan, mix together the chopped cherries, pectin, cinnamon cloves, lemon juice and almond liqueur until well combined. Cook slowly on medium-high heat until mixture comes to a boil.
  3. Add the sugar all at once, stirring until all the sugar has dissolved. Bring this mixture to a FULL ROLLING BOIL (this means the boiling doesn't stop, even if you keep stirring it!). Let the jam boil fully for ONE MINUTE, continuing to stir the entire time. Remove the pan from the heat. If any foam has accumulated on top, skim it off with a spoon and discard.
To Fill Hot Canning Jars:
  1. Ladle hot jam into hot jars. Leave ¼ inch headspace in each jar. Remove any air bubbles from filled jar, by inserting plastic utensil into jar between jam and jar to release air that is trapped. Wipe the jar rim very good to ensure no sticky residue is present. Place lid and screw band onto jar. Tighten to fingertip tight only. Using canning tongs, carefully place each jar onto an elevated rack in simmering water (180 degrees) in water bath canner. Repeat the process until all your jars are filled and in canner.
To Process The Jam:
  1. Lower the filled rack into the simmering water. Make sure that the jars are completely covered with water (water must be an inch over the top of jar). Turn the heat to medium-high. Put a lid on the canner, and bring the water inside to a full, rolling boil. Once the water reaches a rolling boil, process the half-pint jars for 10 minutes. When 10 minutes is up, turn the heat off and take the lid off the pan. Let the jars sit in the hot water for 5 minutes, then carefully remove jars to a dish towel on the counter (Do not place hot jars directly on counter-they might crack, due to temperature variations). Let jars cool, upright, for 12 hours, without moving. Once cool, check to ensure a proper seal has been achieved, then label jars and store in pantry.
Nutrition Facts
Bing Cherry Jam
Amount Per Serving (1 Tablespoon)
Calories 47
% Daily Value*
Sodium 2mg0%
Potassium 22mg1%
Carbohydrates 12g4%
Sugar 10g11%
Vitamin A 5IU0%
Vitamin C 0.9mg1%
Calcium 1mg0%
Iron 0.1mg1%
* Percent Daily Values are based on a 2000 calorie diet.

Here’s one more to pin on your Pinterest boards!Bing Cherry Jam, enhanced with the addition of amaretto, is a delicious fruit spread for toast or biscuits! Recipe includes canning instructions.


Save

Save

Save

Save

Strawberry Balsamic Vinaigrette

Make mixed green salads “pop” with delicious, Strawberry Balsamic Vinaigrette! This salad dressing’s easy to make from scratch, with only a few ingredients!Make mixed green salads "pop" with delicious, Strawberry Balsamic Vinaigrette! This salad dressing's easy to make from scratch, with only a few ingredients!
Looking for an easy, fresh, and wonderful tasting salad dressing for your summer salads? I’ve got just the one for you… Strawberry Balsamic Vinaigrette! With a few basic ingredients and a whisk, blender or food processor, you can have this tasty salad dressing ready to go in just a minute or two!

I love to use fresh strawberries and blueberries in my mixed green salads, along with some feta cheese and pecans or almonds. This addition of fresh fruit to my salads always makes me happy! The strawberry balsamic vinaigrette flavor (with fresh strawberries) compliments the mixed greens, feta and fruit quite nicely!

Scroll Down For A Printable Recipe Card At The Bottom Of The Page

Pouring strawberry balsamic vinaigrette over salad, with strawberries and blueberries.

How To Make Strawberry Balsamic Vinaigrette

All you have to do is blend the ingredients until smooth, and BAM! You’ve made this fantastic Strawberry Balsamic Vinaigrette! You can mix the ingredients by hand with a whisk, or you can blend them together in a blender or food processor, if that is easier.  However you mix this salad dressing together, it couldn’t be easier to make!

Do you enjoy making salad dressings from scratch? I sure do, rather than always having to buy them. Homemade dressings always seem fresher that way, and it’s kind of nice to not have a lot of chemicals or shelf stabilizing ingredients in there!

Other Salad Dressing Recipes On This Blog

If you enjoy making your own salad dressings, I hope you will check out my other salad dressings. These include: Bleu Cheese, Italian, Ranch, Citrus DijonPoppyseed Salad Dressing and Citrus Vinaigrette. These salad dressings are full of flavor, and are easy to make!

Mixed green salad, topped with strawberry balsamic vinaigrette.

Hope you will consider making this Strawberry Balsamic Vinaigrette. The recipe is a keeper!  This recipe, when made as written, makes about 2 cups of salad dressing. Don’t forget to check out ALL of my recipes, found in the Recipe Index, which is located at the top of the page.

Have a wonderful day. Thanks for taking time to visit this website!  I am grateful for each of you.  My sincere hope is that you find delicious recipes here that help you feed those you love and care about.

Interested In More Recipes?

Thank you for visiting this website. I appreciate you using some of your valuable time to do soIf you’re interested, I publish a newsletter 2 times per month (1st and 15th) with all the latest recipes, and other fun info. I would be honored to have you join our growing list of subscribers, so you never miss a great recipe! 

There is a Newsletter subscription box on the top right side (or bottom) of each blog post, depending on the device you use, where you can easily submit your e-mail address (only) to be included in my mailing list.

You Can Also Find Me On Social Media:

Facebook page: The Grateful Girl Cooks!
Pinterest:
The Grateful Girl Cooks!
Instagram:
jbatthegratefulgirlcooks

Author's signature

Recipe Adapted From:  www.theidearoom.net/2016/04/strawberry-balsamic-vinaigrette-salad-dressing.html

0 from 0 votes
Strawberry Balsamic Vinaigrette
Prep Time
2 mins
Cook Time
0 mins
Total Time
2 mins
 
Make mixed green salads "pop" with delicious, Strawberry Balsamic Vinaigrette! This salad dressing's easy to make from scratch, with only a few ingredients!
Category: Salad Dressing
Cuisine: American
Keyword: strawberry balsamic vinaigrette
Servings: 32 (2 cups total)-1 T per serving
Calories Per Serving: 41 kcal
Author: JB @ The Grateful Girl Cooks!
Ingredients
  • 4 Tablespoons honey
  • 4 Tablespoons Balsamic Vinegar
  • 8 Tablespoons Olive Oil
  • 2 teaspoons apple cider vinegar
  • 8 large strawberries , rinsed, hulled, and sliced
  • Pinch of salt and pepper , to taste
Instructions
  1. Place honey, balsamic vinegar, olive oil, apple cider vinegar and sliced strawberries into a blender or food processor.
  2. Process ingredients until smooth.
  3. Lightly season with a pinch of salt and black pepper, to taste.
  4. Enjoy on your favorite salad (especially good with sliced strawberries in salad!)
  5. Store leftover salad dressing in covered container in refrigerator.
Nutrition Facts
Strawberry Balsamic Vinaigrette
Amount Per Serving (1 Tablespoon)
Calories 41 Calories from Fat 27
% Daily Value*
Fat 3g5%
Potassium 8mg0%
Carbohydrates 2g1%
Sugar 2g2%
Vitamin C 1.7mg2%
Calcium 1mg0%
Iron 0.1mg1%
* Percent Daily Values are based on a 2000 calorie diet.

Here’s one more to pin on your Pinterest boards!Make mixed green salads "pop" with delicious, Strawberry Balsamic Vinaigrette! This salad dressing's easy to make from scratch, with only a few ingredients!


Save

Save

Skillet Monterey Chicken

You’re going to LOVE this delicious Skillet Monterey Chicken, which can be made in 20 minutes, and features chicken breasts, bacon, BBQ sauce, and cheese!You're going to LOVE this delicious Skillet Monterey Chicken, which can be made in 20 minutes, with chicken breasts, bacon, BBQ sauce, and cheese!
I tried a new recipe for a quick dinner the other night… Skillet Monterey Chicken! This delicious one pan (copycat) dish features chicken breasts, bacon, BBQ sauce, cheddar and jack cheese, and can be prepared and on the kitchen table in 20 minutes! Yum… it was perfect!

I saw this recipe on Pinterest (thanks Trish, at Mom On Timeout) and knew I wanted to try it. Let’s be real… I mean, come on… chicken AND bacon AND BBQ sauce AND cheese? It’s true. This skillet Monterey chicken was calling to me!

Turns out, it was really good, and only took 20 minutes to prepare!  My hubby loved this dish, as well!  Now I know why it was such a popular menu item at Chilis restaurants for so long! Our local Chilis restaurant permanently closed, so I am really glad I can make this dish at home! Here’s how to make this dish:

Scroll Down For A Printable Recipe Card At The Bottom Of The Page

How To Make Skillet Monterey Chicken

Using an oven-proof skillet, fry bacon until crisp. Once bacon has cooled, cut each piece in half.  Leave some of the bacon grease in pan (to cook chicken breast in), but discard the rest.

Cooking bacon to add to Skillet Monterey Chicken.

Brown The Chicken

While bacon is cooking, salt and pepper the chicken breasts. Once bacon has been removed from pan, add the chicken breasts cutlets to the hot skillet.  Cook about 3 minutes per side on medium-high, until golden brown.

TIP: I cut two large chicken breasts in half lengthwise, so the pieces were fairly thin. This helps to cook them faster, and is still a good portion size. If using whole chicken breasts, make sure to pound them out thinner, between sheets of plastic wrap, before cooking.

Cooking chicken breasts for skillet Monterey chicken dish.

The little bit of bacon grease you left in the skillet when you cooked it really adds great flavor to the chicken.

Chicken breasts are cooked and browned on both sides for skillet Monterey chicken.

Once chicken has cooked on both sides, pour chicken broth over the chicken. Put a lid on the skillet, and continue to cook 4-5 more minutes (covered) or until the chicken is cooked through. The time will vary, depending on how thick the chicken breasts are).

Chicken broth is added to the skillet Monterey chicken while it cooks.

Once chicken is done, remove lid from skillet and remove skillet from heat. Before continuing, PREHEAT YOUR OVEN BROILER.

Skillet Monterey chicken finishes cooking in chicken broth.

Building The Layers On The Chicken

While broiler is pre-heating, spread BBQ sauce over each piece of chicken (1 Tablespoon on each piece).

BBQ sauce is spread over each piece of Skillet Monterey Chicken.

Place two (half) pieces of bacon on top of the BBQ sauce.

Two cooked bacon halves are added to the Skillet Monterey Chicken.

Divide the cheese evenly and place on top of the bacon, covering the entire piece of chicken.

Grated jack and cheddar cheeses are added to the skillet Monterey chicken.

Place the skillet and chicken (see why you need an oven-proof skillet?) on the middle rack of oven under the broiler. Keep an eye on it. Once cheese is fully melted (anywhere from 30 seconds to 1-2 minutes), remove the hot skillet Monterey chicken from the oven.

Garnish And Serve The Skillet Monterey Chicken

Top each piece of chicken with diced tomato and sliced green onions.  The skillet Monterey chicken looks and smells real good, right about now!

Chopped tomatoes and green onions are added to top the skillet Monterey chicken.

Transfer portions to individual serving plates, dig in, and enjoy delicious Skillet Monterey Chicken!

Skillet Monterey Chicken, served on a plate, with rice and string beans.

Hope you will consider making skillet Monterey chicken. It truly was very easy to make, and we loved it!  Have a fantastic weekend!

Looking For More CHICKEN Recipes?

You can find ALL my chicken recipes in the Recipe Index, located at the top of the page. A few favorites include:

Interested In More Recipes?

Thank you for visiting this website. I appreciate you using some of your valuable time to do soIf you’re interested, I publish a newsletter 2 times per month (1st and 15th) with all the latest recipes, and other fun info. I would be honored to have you join our growing list of subscribers, so you never miss a great recipe! 

There is a Newsletter subscription box on the top right side (or bottom) of each blog post, depending on the device you use, where you can easily submit your e-mail address (only) to be included in my mailing list.

You Can Also Find Me On Social Media:

Facebook page: The Grateful Girl Cooks!
Pinterest:
The Grateful Girl Cooks!
Instagram:
jbatthegratefulgirlcooks

Skillet Monterey Chicken / The Grateful Girl Cooks!

Recipe Source: http://www.momontimeout.com/2016/02/20-minute-skillet-monterey-chicken/

0 from 0 votes
Skillet Monterey Chicken
Prep Time
15 mins
Cook Time
15 mins
Total Time
30 mins
 
Easy to prepare and DELICIOUS, this one pan meal features chicken breasts, bacon, BBQ sauce, and cheddar and jack cheese!
Category: Entree
Cuisine: Southwestern
Keyword: skillet monterey chicken
Servings: 4 servings
Calories Per Serving: 380 kcal
Author: JB @ The Grateful Girl Cooks!
Ingredients
  • 4 boneless , skinless chicken breasts, pounded thin (or use 2 large breasts, cut in half horizontally)
  • salt and pepper (to season chicken breasts)
  • 4 slices bacon
  • 1/2 cup chicken stock
  • 4 Tablespoons BBQ sauce
  • 4 ounces Colby Jack cheese (or a combo of cheddar and jack), grated
  • 1 medium tomato , seeded and diced (discard seeds)
  • 2 green onions , sliced
Instructions
  1. Fry bacon slices in a large oven-proof skillet until crispy. Remove bacon to paper towels, to drain. When cool, cut each piece of bacon in half. Leave about 2 Tablespoons bacon grease in skillet; discard the rest.
  2. While you are cooking bacon, pound the chicken breasts out until they are fairly thin so they will cook faster (I cut two LARGE chicken breasts in half horizontally, so I skipped this step). Season chicken with salt and pepper.
  3. Heat reserved bacon grease on medium-high. When skillet is hot, cook the chicken for 2-3 minutes per side, until golden brown (times may vary due to thickness of chicken).
  4. Pour the chicken broth over chicken. Put a lid on the skillet. Continue to cook chicken (covered) for 4-5 minutes. When done, turn off heat.
  5. Preheat your oven broiler.
  6. Spread 1 Tablespoon of BBQ sauce over the top of each piece of chicken. Place 2 bacon halves onto BBQ sauce covered chicken. Divide cheese evenly and cover top of chicken.
  7. Place skillet with chicken in the middle of the oven under preheated broiler. Broil only until the cheese is completely melted. Remove hot skillet from broiler.
  8. Garnish each piece of chicken with diced tomato and sliced green onions. Serve and enjoy.
Nutrition Facts
Skillet Monterey Chicken
Amount Per Serving (1 g)
Calories 380 Calories from Fat 189
% Daily Value*
Fat 21g32%
Saturated Fat 9g56%
Cholesterol 114mg38%
Sodium 673mg29%
Potassium 659mg19%
Carbohydrates 10g3%
Sugar 7g8%
Protein 34g68%
Vitamin A 670IU13%
Vitamin C 6.7mg8%
Calcium 213mg21%
Iron 1.1mg6%
* Percent Daily Values are based on a 2000 calorie diet.

Here’s one more to pin on your Pinterest boards!

You're going to LOVE this delicious Skillet Monterey Chicken, which can be made in 20 minutes, and features chicken breasts, bacon, BBQ sauce, and cheese!


Save

Save

Raspberry Coulis

Raspberry coulis (Koo-LEE) is a 3-ingredient dessert sauce that’s easy to make, and perfect for topping cheesecake, ice cream, cakes, or pancakes.Raspberry coulis (Koo-LEE) is a 3-ingredient dessert sauce that's easy to make, and perfect for topping cheesecake, ice cream, cakes, or pancakes.
Have you ever made Raspberry Coulis before? Coulis is a puréed, sweetened fruit sauce that is really easy to make (only 3 ingredients), and tastes fantastic when served with cheesecake or other desserts! It not only makes a dessert LOOK great… it TASTES great, too!

A coulis (pronounced Koo-LEE) is a slightly thick sauce made from puréed and strained fruit or vegetables. Fruit coulis is typically used to enhance desserts, which is the case with this Raspberry Coulis. A fruit coulis is fantastic as a “garnish” or accompanying sauce on cheesecake, chocolate cake, ice cream, pound cake, or even on pancakes.

Raspberry coulis is made using only 3 ingredients (and one of them is water), so it is really easy to prepare, and makes about 2 cups. You can use frozen fruit, but I always prefer to use fresh fruit, when in season! Here’s how you make raspberry coulis in about 10 minutes:

Scroll Down For A Printable Recipe Card At The bottom Of The Page

How To Make Raspberry Coulis

Place the raspberries, granulated sugar and water into a medium saucepan. Bring this mixture to a boil.

Whole raspberries, water and sugar in a pan, ready to cook!

Continue to cook until the sugar is completely dissolved (about 7-8 minutes) and the raspberries have broken down.

Raspberries, sugar and water cook in pan for about 6-7 minutes.

Pour the raspberry mixture into a blender, and mix until the sauce is nice and smooth.

Strain The Cooked Fruit

Once the cooked fruit has been blended, you need to strain the seeds out!  Place a mesh colander over a bowl, then pour the blended fruit into the strainer.

Cooked coulis is poured into a strainer which sits on top of bowl.

Push the liquid through the strainer (the seeds and some solids will remain in the strainer). I like to use a wooden spoon to press down the sauce into the mesh strainer. Don’t forget to scrape down the underside of the mesh strainer for more raspberry coulis! Discard the seeds, once you have all the fruit coulis in the bowl.

The sauce is forced through a mesh strainer, leaving raspberry seeds behind.

Once all the liquid has been strained through strainer, what is left in the bowl underneath is the finished raspberry coulis. It will be a slightly thick sauce that tastes amazing!

After straining the seeds out, the raspberry coulis is ready to use!

How To Store Raspberry Coulis

I like to pour the coulis into a plastic decorating bottle with a cap on it. These bottles are fairly inexpensive. I got my set of plastic bottles at Michael’s craft store. Handy squeeze bottles make it easier to decoratively drizzle the sauce over the dessert (but is not necessary!).

The fruit sauce is ready to be used right away or can be refrigerated until ready to use. Unused raspberry coulis will keep for several days in the refrigerator.

A plastic bottle helps to decorate desserts with the raspberry coulis.

That’s it! See how easy that was? Raspberry coulis looks great and tastes great, and is a very quick way to “jazz up” a “plain” dessert and make it look fancy! If you enjoy this recipe, be sure to check out my recipe for Peach Coulis!

Have a wonderful day. I hope you will look for opportunities to be a blessing to someone! Don’t forget to check out ALL my recipes in the Recipe Index, located at the top of the page.

Interested In More Recipes?

Thank you for visiting this website. I appreciate you using some of your valuable time to do soIf you’re interested, I publish a newsletter 2 times per month (1st and 15th) with all the latest recipes, and other fun info. I would be honored to have you join our growing list of subscribers, so you never miss a great recipe!
There is a Newsletter subscription box on the top right side (or bottom) of each blog post, depending on the device you use, where you can easily submit your e-mail address (only) to be included in my mailing list.

You Can Also Find Me On Social Media:
Facebook page: The Grateful Girl Cooks!
Pinterest: The Grateful Girl Cooks!
Instagram: jbatthegratefulgirlcooks

Author's signature

Recipe Source: www.marthastewart.com/338850/raspberry-coulis

0 from 0 votes
Raspberry Coulis
Prep Time
5 mins
Cook Time
6 mins
Total Time
11 mins
 

Raspberry coulis (Koo-LEE) is a 3-ingredient dessert sauce that's easy to make, and perfect for topping cheesecake, ice cream, cakes, or pancakes.

Category: Dessert Sauce
Cuisine: American
Keyword: raspberry coulis
Servings: 32 Tablespoons (total=2 cups)
Calories Per Serving: 17 kcal
Author: JB @ The Grateful Girl Cooks!
Ingredients
  • 18 ounces raspberries - 1½ pints (fresh or frozen- I used fresh)
  • 3/4 cup granulated sugar
  • 1/2 cup water
Instructions
  1. Put the raspberries, sugar and water into a medium saucepan. Bring mixture to a boil on Medium-High heat. Once it boils, reduce your heat to Medium-Low, and continue cooking for about 6-7 minutes, until all sugar is dissolved and raspberries have broken down. Remove pan from heat and let cool.
  2. Place cooled mixture in blender and blend until smooth. Place a mesh strainer/colander (fine mesh) over a bowl. Pour blended fruit purée into strainer. Use a spoon or spatula to push the mixture down into the strainer. Continue pushing liquid through strainer (remember to scrape down the underside of strainer for additional sauce!), until all liquid has been pushed through. You will have seeds and some solids left in strainer. Discard these.

  3. The coulis will be in the bowl below the strainer. Place sauce (coulis) into a covered decorator bottle with a cap or another covered container. The sauce is ready to use immediately. Coulis will last for several days when stored in refrigerator. Enjoy!

Recipe Notes

If you use frozen berries, do not use the pre-sweetened (in syrup) kind. Your sauce will be TOO sweet!

Nutrition Facts
Raspberry Coulis
Amount Per Serving (1 Tablespoon)
Calories 17
% Daily Value*
Potassium 16mg0%
Carbohydrates 4g1%
Sugar 3g3%
Vitamin A 5IU0%
Vitamin C 2.8mg3%
Calcium 3mg0%
Iron 0.1mg1%
* Percent Daily Values are based on a 2000 calorie diet.

Here’s one more to pin on your Pinterest boards!Raspberry coulis (Koo-LEE) is a 3-ingredient dessert sauce that's easy to make, and perfect for topping cheesecake, ice cream, cakes, or pancakes.


Save

Save

Italian-Style Tomato Sauce (and how to can it!)

Homemade Italian-style tomato sauce is used in lots of food (pizza, spaghetti, etc.). Learn how to make this classic sauce, and can it for long term storage!Homemade Italian-style tomato sauce is used in lots of food (pizza, spaghetti, etc.). Learn how to make this classic sauce, and can it for long term storage!
Last summer I canned lots of food to store in our pantry, including green beans, ranch-style beans, and this wonderful tasting Italian-Style Tomato Sauce. I was fortunate to be able to use a lot of Roma tomatoes from our backyard garden!

Scroll Down For A Printable Recipe Card At The bottom Of The Page

Some of the tomatoes we grew in our garden, used to make Italian-style tomato sauce.

This Italian-Style Tomato Sauce Is Canned Using a Water Bath Method!

The sauce was fairly easy to can, using a water bath canner.  I thought this sauce would have to be pressure canned, but I was wrong. I used my trusty Ball Canning cookbook for this recipe, and the rest is history! Perfect Italian-style tomato sauce!

The recipe from my “Ball Complete Book of Home Preserving” was tested scientifically so that this Italian-style tomato sauce can be safely processed in a water bath (as opposed to a pressure canner).   As long as you don’t alter the ingredients or quantities of ingredients used (because that might end up with an unsafe product), it is safe to water bath process this Italian-style tomato sauce.

Jars are processed in a water bath canner for 35 minutes

It’s been great to have extra jars of this delicious Italian-style tomato sauce in my pantry for last minute pasta sauces, soup recipes, etc. I’ve used them a lot recently!

Tip For Using The Sauce After Storage

When using the sauce from the pantry to use in your favorite recipes, add a bit of olive oil to the sauce to give it additional flavor. Olive oil is a great addition, because no olive oil is added to the sauce before canning (because it could go rancid during long term storage).

Jars of homemade Italian tomato sauce are canned and ready for pantry!

Lots Of Flavor

The finished sauce has a nice Italian flavor, due to the flavorful Roma tomatoes, minced garlic, onion, celery, carrot, and hot pepper flakes. Italian-style tomato sauce can be used in a variety of recipes. I’ve used it to make spaghetti sauce, some homemade pizza sauce, and have added it to soup, all with great results!

How Many Jars Will the Recipe Yield?

The recipe (as written below) will yield 3 pint sized jars. I easily doubled the recipe using exact measurements and ended up with 7 pints of sauce (as seen below). I am thrilled to have a few extra jars of this delicious Italian-style tomato sauce in our pantry to use in a variety of recipes!

It’s so convenient to know this Italian-style Tomato Sauce is in our pantry, which saves me a trip to the grocery store!

Homemade jars of Italian-style tomato sauce ready to go into pantry.

Have a fantastic day.. I hope you will consider making this recipe of Italian-style tomato sauce, if you enjoy canning as much as I do! Follow the recipe directions exactly. Prepare your jars and canner according to manufacturer’s instructions, and USDA canning guidelines.

Looking For More CANNING Recipes?

You can find ALL my recipes in the Recipe Index, located at the top of the page. I have some wonderful canning recipes (for pressure canning OR water bath canning), including:

Interested In More Recipes?

Thank you for visiting this website. I appreciate you using some of your valuable time to do soIf you’re interested, I publish a newsletter 2 times per month (1st and 15th) with all the latest recipes, and other fun info. I would be honored to have you join our growing list of subscribers, so you never miss a great recipe!
There is a Newsletter subscription box on the top right side (or bottom) of each blog post, depending on the device you use, where you can easily submit your e-mail address (only) to be included in my mailing list.

You Can Also Find Me On Social Media:

Facebook page: The Grateful Girl Cooks!
Pinterest:
The Grateful Girl Cooks!
Instagram:
jbatthegratefulgirlcooks

Author's signature

Recipe Source: “Ball Complete Book of Home Preserving”, page 365, Jarden Corporation, copyright 2006 and 2012. Published by Robert Rose, Inc.

0 from 0 votes
Italian-Style Tomato Sauce (and how to can it!)
Prep Time
25 mins
Cook Time
35 mins
Total Time
1 hr
 
Homemade Italian-style tomato sauce is used in lots of food (pizza, spaghetti, etc.). Learn how to make this classic sauce, and can it for long term storage!
Category: Sauce
Cuisine: Italian
Keyword: Italian style tomato sauce
Servings: 12 3 pints
Calories Per Serving: 39 kcal
Author: JB @ The Grateful Girl Cooks!
Ingredients
  • 8 cups fresh plum (Roma) tomato purée (approx. 4.5 pounds) (see Notes section)
  • 2/3 cup finely chopped onion
  • 2/3 cup finely chopped celery
  • 1/2 cup finely chopped carrot
  • 2 cloves garlic , finely minced
  • 4 Tablespoons BOTTLED lemon juice
  • 2 teaspoons salt
  • 1/2 teaspoon ground black pepper
  • 1/2 teaspoon dried red chili pepper flakes
Instructions
  1. Prepare your water bath canner, jars and canning lids per manufacturer and USDA canning guidelines.

  2. In a big stainless steel saucepan, combine the onion, celery, carrot and garlic with ONE CUP of the tomato purée. Cook on medium-high heat (stirring frequently) until it comes to a boil. Reduce heat, cover the saucepan, and cook this mixture for about 5 minutes (boiling gently). The vegetables should be tender at the end of this cooking time. While the liquid is still boiling steadily, add the rest of the tomato purée to the pan (one cup at a time), stirring well.
  3. Add the bottled lemon juice, salt, black pepper and the dried red chili pepper flakes.
  4. Turn the heat up to High. Bring the sauce to a rolling boil. Continue to boil the sauce hard, making sure you stir the sauce quite frequently. Continue boiling sauce until the mixture has been reduced by one-third (this will take about 15 minutes or so to reduce).
  5. Ladle the tomato sauce (very hot) into the hot canning jars. Leave 1/2 inch headspace. Remove the air bubbles, and adjust the headspace in jars, if needed, by adding more sauce. Clean off the rim. Place the lid on the jar, and add the screw band; tighten screw band until fingertip tight.
  6. Carefully place jars into simmering water in the canner. Make sure that hot water completely covers the jars and goes about an inch OVER the lids. Place lid on canner. Bring water to a full boil, then process jars for 35 minutes. When time is up, turn off heat and remove the lid from the canner. Wait for 5 minutes, then carefully remove hot jars of sauce (without tilting jars) to a dish towel on the countertop (do NOT place jars directly on countertop or they might crack). Let jars cool completely (24 hours), without disturbing them. Water on jar lids will evaporate naturally. After a few minutes, you should hear them make a "pinging" sound, indicating they have sealed properly. After jars have cooled for 24 hours and before storing in pantry, check to ensure lids have properly sealed, per USDA canning guidelines.
Recipe Notes

To puree tomatoes: Blanch, peel, core, and seed tomatoes. Put them into a colander and let them sit for 15 minutes. Discard the liquid. Put the tomatoes into a food processor. Purée with metal blade.

Nutrition Facts
Italian-Style Tomato Sauce (and how to can it!)
Amount Per Serving (0.5 cup)
Calories 39
% Daily Value*
Sodium 404mg18%
Potassium 456mg13%
Carbohydrates 8g3%
Fiber 2g8%
Sugar 5g6%
Protein 1g2%
Vitamin A 2390IU48%
Vitamin C 26.6mg32%
Calcium 24mg2%
Iron 0.5mg3%
* Percent Daily Values are based on a 2000 calorie diet.

Here’s one more to pin on your Pinterest boards!Homemade Italian-style tomato sauce is used in lots of food (pizza, spaghetti, etc.). Learn how to make this classic sauce, and can it for long term storage!


Save

Save

Teriyaki Chicken

Who needs takeout, when you can easily make this delicious Teriyaki Chicken, with chicken breasts baked in an Asian inspired sauce, served on rice? It’s simple and delicious!Who needs takeout, when you can easily make this delicious Teriyaki Chicken, with chicken breasts baked in an Asian inspired sauce, served on rice?

Do you enjoy Teriyaki Chicken? I sure do, so I wanted to share an easy and delicious recipe with you today, so you can make your own at home!  The taste is OUTSTANDING!

This really is one of my favorite dishes! There’s just something about the Asian teriyaki glaze that pushes all my buttons! I enjoy using this recipe (for the Teriyaki Sauce) to also make Teriyaki Chicken Rice Bowls. YUM.  I think you’ll be surprised at just how easy it is to make!

Scroll Down For A Printable Recipe Card At The Bottom Of The Page

Make The Teriyaki Sauce

Here’s what you do:  First make up the teriyaki sauce (don’t worry-it’s EASY). The ingredients are cooked until it becomes a thick and amazing sauce.

Whisking and cooking homemade teriyaki sauce in saucepan

Heat olive oil in a large skillet until it is hot, but not smoking. Cook the boneless, skinless chicken breasts in the hot oil until they are golden brown. Once the bottom side is golden brown, gently turn them over and continue cooking other side, until the chicken is fully cooked through.

Four chicken breasts cooking in skilletBrowned chicken breasts cooking in skillet.

Place the browned chicken breasts into an oven-proof baking dish. Pour the thickened teriyaki sauce on top and around the chicken breasts, to fully coat them.

Teriyaki sauce poured over cooked chicken breasts in white baking dish

Bake The Teriyaki Chicken

Once they are covered in that yummy teriyaki sauce, the chicken breasts are baked for 15-20 minutes. See how it gets the name teriyaki chicken? Chicken and teriyaki sauce… easy peasy!

Teriyaki chicken baked in sauce

To Serve Teriyaki Chicken

Once the teriyaki chicken is fully baked, remove the pan from the oven. Transfer the chicken breasts from the pan onto a cutting board. Slice each chicken breast into thin strips.

Serve the teriyaki chicken slices on top of a bed of rice. Drizzle the chicken with additional sauce, and garnish it with sliced green onions and sesame seeds.  That’s it! See how EASY it is to make delicious teriyaki chicken? Well, just wait until you TASTE it, because it’s absolutely delicious!

The teriyaki chicken is sliced and served on rice, with fruit on side.

A serving of teriyaki chicken with sliced green onions, on top of white rice.

Hope you’ll give this recipe for teriyaki chicken a try. I think you’re gonna LOVE it! Have a blessed day, and I sincerely hope you will stop by again soon.

Looking For More CHICKEN Recipes?

You can find all of my recipes (including chicken) in the Recipe Index, located at the top of the page. A few of these chicken recipes you might be interested in are:

Interested In More Recipes?

Thank you for visiting this website. I appreciate you using some of your valuable time to do soIf you’re interested, I publish a newsletter 2 times per month (1st and 15th) with all the latest recipes, and other fun info. I would be honored to have you join our growing list of subscribers, so you never miss a great recipe!
There is a Newsletter subscription box on the top right side (or bottom) of each blog post, depending on the device you use, where you can easily submit your e-mail address (only) to be included in my mailing list.

You Can Also Find Me On Social Media:
Facebook page: The Grateful Girl Cooks!
Pinterest: The Grateful Girl Cooks!
Instagram: jbatthegratefulgirlcooks

Author's signature

Recipe Source:  http://www.asweetpeachef.com/entrees/teriyaki-chicken/

↓↓ PRINTABLE RECIPE BELOW ↓↓

0 from 0 votes
Teriyaki Chicken
Prep Time
15 mins
Cook Time
20 mins
Total Time
35 mins
 

Who needs takeout, when you can easily make this delicious Teriyaki Chicken, with chicken breasts baked in a flavorful Asian inspired sauce, served on rice?

Category: Main Course
Cuisine: Asian
Keyword: teriyaki chicken
Servings: 4 servings
Calories Per Serving: 225 kcal
Author: JB @ The Grateful Girl Cooks!
Ingredients
For Teriyaki Sauce:
  • 1/3 cup soy sauce (low sodium)
  • 2 Tablespoons honey
  • 1 Tablespoon brown sugar
  • 2 cloves garlic , minced
  • 1 teaspoon fresh ginger , finely minced
  • 1 teaspoon apple cider vinegar
  • 1/3 cup water
  • 1 Tablespoon cornstarch
For Chicken:
  • 1 Tablespoon olive oil
  • 4 boneless , skinless chicken breasts
  • Salt & Black Pepper (just a pinch of each)
For Garnish (optional):
  • sliced green onions and sesame seeds
Instructions
To Make The Teriyaki Sauce:
  1. Place soy sauce, honey, brown sugar, garlic, ginger and apple cider vinegar in a medium sized pan. Heat this mixture on medium-high; stir it frequently.
  2. In separate bowl, combine cornstarch and water. Stir until cornstarch has dissolved, then add it to the ingredients in the pan. Stir frequently and cook for 6-7 minutes, until the mixture has thickened. Remove from heat and set aside.
To Make The Chicken:
  1. Make sure your oven is preheated to 425 degrees F.
  2. Pour Tablespoon of olive oil into a large skillet Heat olive oil on high heat. Season the pieces of chicken with salt and pepper. Put the chicken into hot oil in skillet. Once you put chicken breasts into skillet, don't move them. Cook chicken for 4-5 minutes, then turn to cook other side for 3-4 minutes. Chicken should be golden brown in color. Remove and place in a baking dish that has been sprayed with non-stick spray.
  3. Pour the teriyaki sauce over the top and all around the chicken pieces.
  4. Bake chicken at 425 degrees for 15-20 minutes (or until no longer pink in middle). Sauce will be bubbly.
  5. When done, remove chicken from oven. Serve on top of a bed of rice, and garnish each piece with sliced green onions and sesame seeds. Enjoy!.
Recipe Notes

If you want to cook it all in one pan, make sure to cook the chicken in an oven-proof skillet.

Nutrition Facts
Teriyaki Chicken
Amount Per Serving (1 piece)
Calories 225 Calories from Fat 54
% Daily Value*
Fat 6g9%
Saturated Fat 1g6%
Cholesterol 72mg24%
Sodium 1222mg53%
Potassium 459mg13%
Carbohydrates 15g5%
Sugar 11g12%
Protein 26g52%
Vitamin A 35IU1%
Vitamin C 1.8mg2%
Calcium 12mg1%
Iron 0.9mg5%
* Percent Daily Values are based on a 2000 calorie diet.

Here’s one more to pin on your Pinterest boards!Who needs takeout, when you can easily make this delicious Teriyaki Chicken, with chicken breasts baked in an Asian inspired sauce, served on rice?

Save

Save

Save

Homemade Mayonnaise

It’s EASY to make your own homemade mayonnaise from scratch, to use on sandwiches, or in other dishes, using only a few simple household ingredients!It's EASY to make your own homemade mayonnaise from scratch, to use on sandwiches, or in other dishes, using only a few simple household ingredients!
I was in the middle of cooking last week and ran out of mayonnaise. Normally I’d run to the store, but was taking care of our sick dog Bailey, (just diagnosed with Stage 4 cancer – sigh…) and I didn’t want to leave her alone, so instead… I made Homemade Mayonnaise!

Problem solved… and it was really EASY! Have you ever made homemade mayonnaise from scratch before? I never had, before making it recently, and I was pleasantly surprised with the results. 

Here’s what you do to make your own, with a few simple household ingredients:

Scroll Down For A Printable Recipe Card At The Bottom Of The Page

How To Make Homemade Mayonnaise From Scratch

Whisk egg yolk, yellow mustard, sea salt, and sugar together in a mixing bowl. I bet you won’t even break a sweat doing this… right?

Egg yolk, mustard, salt and sugar are mixed together to start making homemade mayonnaise

In a separate (small) bowl, stir vinegar and lemon juice together. Slowly pour half of the vinegar/lemon mixture into the egg mixture in a steady, thin stream, while whisking continuously.

Vinegar and lemon juice is whisked into egg mixture for mayonnaise

Whisk briskly, until the ingredients have been fully combined.

Ingredients for homemade mayonnaise are whisked until fully blended.

Important Step – Go Slowly!

Add half of the oil in a slow steady stream, while whisking constantly. Don’t rush this step, because it is very important to the success of this recipe.

Maintain a slow and steady stream of oil, while you briskly whisk the oil in. When you’ve whisked in half of the oil, stop and set the oil aside.

Now whisk in the remaining half of the vinegar/lemon mixture. Once that is blended in, finish whisking in the rest of the oil (thin, slow stream).

Light olive oil is added to egg mixture while whisking continuously.

At this point, the mayonnaise mixture will be a bit lighter in color and will have thickened up quite a bit.

Let the homemade mayonnaise sit at room temperature for about an hour, then transfer it to an airtight container with a lid.

Chill the homemade mayonnaise at least 2-3 hours before using, for the best results. The mayonnaise will thicken even more as it chills.

Store the container of homemade mayonnaise in the refrigerator for up to a week.

Homemade mayonnaise needs to thicken in refrigerator before using.

When Ready To Use Your Homemade Mayonnaise

After being refrigerated for several hours, you will notice how much thicker the homemade mayonnaise has become.

When you are ready to use it, give it a really good stir before spreading it, or adding it to a dish.

The homemade mayonnaise is done chilling, is thick, and ready to use!

It spreads well, and tastes like MAYO! Go figure! And just think… YOU made it all by yourself! That has to be some kind of Christmas miracle, right?

Many Uses For Your Homemade Mayonnaise

I used this homemade mayonnaise on some sandwiches, a chicken dish I cooked (Santa Fe Chicken), and in some homemade Potato Salad I made for a Memorial Day BBQ!

This condiment was PERFECT, used in each of those dishes!  Hope you’ll try making this simple pantry staple!

Time to make a sandwich with some creamy, thick homemade mayonnaise!

Now if you’re ever stranded on a desert island with all the ingredients AND a whisk (it COULD happen, right?), now you can have homemade mayonnaise, too!

How’s THAT for your encouraging thought for the day! Thanks for stopping by.  Have a great day, and come back soon.

Looking For More CONDIMENT Or SAUCE Recipes?

You can find ALL of my recipes in the Recipe Index, which is located at the top of the page. I have some delicious condiment and sauce recipes to make from scratch, including:

Want More Recipes? Get My FREE Newsletter!

I publish a newsletter 2 times per month (1st and 15th) with lots of recipes, tips, etc..
Would you like to join our growing list of subscribers?

There is a Newsletter subscription box on the top right (or bottom) of each blog post, depending on the device you use.
You can submit your e-mail address there, to be added to my mailing list.

Find Me On Social Media:

Facebook page: The Grateful Girl Cooks!
Pinterest:
The Grateful Girl Cooks!
Instagram:
jbatthegratefulgirlcooks

Homemade Mayonnaise / The Grateful Girl Cooks!

Recipe Source:  http://www.browneyedbaker.com/homemade-mayonnaise-recipe/#more-33784

↓↓ PRINTABLE RECIPE BELOW ↓↓

0 from 0 votes
Homemade Mayonnaise
Prep Time
15 mins
Cook Time
0 mins
Total Time
15 mins
 
It's EASY to make your own homemade mayonnaise from scratch, to use on sandwiches, or in other dishes, using only a few simple household ingredients!
Category: Condiment
Cuisine: American
Keyword: homemade mayonnaise
Servings: 16 Tablespoons (1 heaping cup)
Calories Per Serving: 16 kcal
Author: JB @ The Grateful Girl Cooks!
Ingredients
  • 1 large egg yolk
  • 1 teaspoon prepared yellow mustard
  • 1/2 teaspoon sea salt
  • 2 pinches granulated sugar (optional, but I used it)
  • 1 Tablespoon white wine vinegar (apple cider vinegar or rice wine vinegar can be substituted)
  • 2 teaspoons fresh lemon juice
  • 1 cup light olive oil
Instructions
  1. Whisk egg yolk, mustard, salt and sugar together in mixing bowl.
  2. In separate bowl, combine vinegar and lemon juice. Slowly pour HALF of the vinegar/lemon mixture in a steady stream into the egg mix, making sure to whisk briskly until completely combined.
  3. Slowly add HALF of the olive oil in a thin, steady stream, while whisking quite briskly. Once you're added half of the olive oil, set oil aside.
  4. Continue slowly streaming in the remaining vinegar/lemon mixture, whisking briskly while adding.
  5. Now stream in the rest of the olive oil, whisking continuously the entire time you pour it in.
  6. Once all ingredients have been completely blended together, let the mayonnaise sit at room temperature on the counter for about an hour. After that time is up, cover the container and place in the refrigerator. Mayonnaise will keep for about a week in the refrigerator.
  7. When ready to use, just give it a quick stir, and you're ready to go! Enjoy!
Recipe Notes

If you are pregnant, I suggest using pasteurized eggs for this recipe.

Nutrition Facts
Homemade Mayonnaise
Amount Per Serving (1 Tablespoon)
Calories 16 Calories from Fat 9
% Daily Value*
Fat 1g2%
Cholesterol 12mg4%
Sodium 76mg3%
Vitamin A 15IU0%
Vitamin C 0.2mg0%
Calcium 1mg0%
* Percent Daily Values are based on a 2000 calorie diet.

Here’s one more to pin on your Pinterest boards!It's EASY to make your own homemade mayonnaise from scratch, to use on sandwiches, or in other dishes, using only a few simple household ingredients!


Save

Save