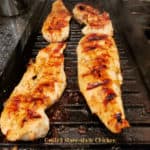
Category: Chicken

Mexican Shredded Chicken (crock pot)

Make Mexican Shredded Chicken in a crock pot to use in tacos, burritos, quesadillas, taco salads, enchiladas, etc. It’s easy to make and delicious!
Make Mexican Shredded Chicken in a crock pot to use in tacos, burritos, quesadillas, taco salads, enchiladas, etc. It's easy to make and delicious!

Today I want to share a recipe I use often for Mexican shredded chicken. There are only a couple simple steps to prep the chicken before adding it to a slow cooker to finish cooking. The meat is seasoned well, and adds great flavor to quite a variety of dishes! You should end up with enough shredded chicken for at least 8 servings (depending on how you choose to use it)

I’ve made shredded chicken this way for years now. I love it’s simple added ingredients that I almost always have in my kitchen. This recipe uses boneless, skinless chicken breasts, but you can make it with a combination of breasts and thighs, if that’s what you have. The recipe can also be easily doubled, and it freezes well! Here’s the way I make Mexican shredded chicken:.

Scroll Down For A Printable Recipe Card At The Bottom Of The Page

Prepare And Pan-Sear The Chicken

Cut boneless, skinless chicken breasts into cubes, about 2″ in size. Use paper towels to pat the chicken dry (drying the chicken helps it brown quickly instead of steaming it). Heat 2 Tablespoons of oil on medium-high heat in a large skillet.

Add the dried chicken pieces, and quickly sear them until browned on all sides. You do not have to cook them all the way through, because the crock pot will do that. You just want the outside of the chicken pieces to be nicely browned. 

Chicken breasts are cut into cubes, then dried on paper towels before cooking.Boneless, skinless chicken breast cubes are lightly browned in hot oil in a skillet.

Into The Crock Pot It Goes!

When done, transfer the chicken pieces from the skillet into a crock pot. Reserve the remaining liquid in the skillet. Add a half cup of water to the “drippings” in the skillet, and cook for about a minute. This helps de-glaze the skillet and adds in any little browned bits of chicken to help flavor the sauce. Pour this liquid over the chicken pieces in the crock pot.

Water is added to skillet to help deglaze the pan after browning chicken.Water and pan drippings are poured onto the browned chicken pieces in crock pot.

Add The Seasoning Sauce Then Cook!

Now it’s time to make the easy seasoning sauce. Combine soy sauce, lime juice, brown sugar, chopped green onions, red pepper flakes, cumin, chili powder and garlic powder in a medium bowl. Stir well, until the brown sugar has dissolved and the ingredients are fully incorporated.

Once combined, pour the seasoning sauce into the crock pot. Stir well, to coat the chicken with the sauce. Put the lid on the crock pot and cook the Mexican shredded chicken for 4-5 hours on LOW heat, OR  for 3 hours on HIGH heat.

A seasoning sauce is mixed together and poured over the chicken in the crock pot.Mexican shredded chicken is cooked in a crock pot for several hours.

Time To Shred The Cooked Chicken

Once the chicken has finished cooking, transfer the chicken to a large bowl using a slotted spoon. There will still be quite a bit of liquid left in the crock pot. Hang on to that, because you can use some of it, okay?

Shred the cooked chicken using two forks. It should shred very easily and only takes a couple of minutes. Add a couple spoonfuls (or more, if desired) of the reserved crock pot sauce to the chicken. This will help ensure your Mexican shredded chicken is juicy (and not dry). Now the shredded chicken is ready to be used in your favorite recipes.

Two forks are used to pull apart the Mexican shredded chicken after it has been fully cooked.Mexican shredded chicken is now ready to use in a favorite dish like tacos, burritos, etc.

Serving Mexican Shredded Chicken

There are LOTS of ways to use Mexican shredded chicken. You can use this well-seasoned chicken for enchiladas, tostadas, flautas, taco salads, burritos and chimichangas. Some of our favorite ways to enjoy this shredded chicken are pictured below. The chicken is the featured ingredient in our chicken taco salad bowls, quesadillas and tacos.

Mexican Shredded Chicken is featured in a Taco Salad Bowl.A chicken quesadilla is served, using the shredded chicken inside.The Mexican shredded chicken can be used to fill tacos for a quick dinner.

I hope you have the chance to try this recipe for Mexican Shredded Chicken. Once made, it is very versatile and can be used in a multitude of dishes. The shredded chicken also freezes well (if wrapped well and stored in an airtight container). Thanks for visiting my blog, and I hope you will come back soon for more family-friendly recipes. Have a good day!

Looking For More CHICKEN Recipes?

You can find ALL of my recipes in the Recipe Index, which is located at the top of the page. I have a LOT of yummy chicken recipes for you to enjoy, including:

Interested In More Recipes?

Thank you for visiting this website. I appreciate you using some of your valuable time to do soIf you’re interested, I publish a newsletter 2 times per month (1st and 15th) with all the latest recipes, and other fun info. I would be honored to have you join our growing list of subscribers, so you never miss a great recipe!
There is a Newsletter subscription box on the top right side (or bottom) of each blog post, depending on the device you use, where you can easily submit your e-mail address (only) to be included in my mailing list.

You Can Also Find Me On Social Media:

Facebook page: The Grateful Girl Cooks!
Pinterest:
The Grateful Girl Cooks!
Instagram:
jbatthegratefulgirlcooks

Author's signature

Original recipe source: unknown (written down years ago on a piece of paper-no original source noted)

0 from 0 votes
Mexican Shredded Chicken (crock pot)
Prep Time
15 mins
Cook Time
4 hrs 30 mins
Total Time
4 hrs 45 mins
 

Make Mexican Shredded Chicken in a crock pot to use in tacos, burritos, quesadillas, taco salads, enchiladas, etc. Easy to make and delicious!

Category: Entree
Cuisine: Mexican
Keyword: Mexican shredded chicken
Servings: 8
Calories Per Serving: 185 kcal
Author: JB @ The Grateful Girl Cooks!
Ingredients
  • 2 Tablespoons vegetable oil
  • 4 large boneless, skinless chicken breasts approx. 2 lbs.
  • cup water
Seasoning Sauce:
  • cup light soy sauce
  • 1 Lime Juice of 1 lime
  • 3 Tablespoons brown sugar
  • 2 stems green onions (scallions) sliced (green + white parts)
  • ½ teaspoon chili powder
  • ½ teaspoon ground cumin
  • ½ teaspoon garlic powder
  • ½ teaspoon red pepper flakes
Instructions
  1. Cut chicken into 2" cubes. Pat chicken dry with paper towels. Heat 2 Tablespoons of oil on medium-high heat in a large skillet. Add chicken; quickly sear until nicely browned on all sides. Do not cook them all the way through (crock pot will finish).

  2. Transfer browned chicken from skillet into crock pot. Reserve remaining liquid in skillet. Add water to "drippings" in skillet; cook/stir for one minute. Pour this liquid over chicken in crock pot.

  3. Make the seasoning sauce: Combine all sauce ingredients in a medium bowl. Stir well, until brown sugar has dissolved and ingredients are fully incorporated. Pour seasoning sauce into crock pot. Stir well, to coat chicken with sauce. Put the lid on the crock pot. Cook for 4-5 hours on LOW heat, OR 3 hours on HIGH heat.

  4. Once done cooking, transfer chicken to large bowl using a slotted spoon. There will still be liquid left in the crock pot. Shred chicken using two forks. Add a couple spoonfuls (or more) of reserved crock pot liquid to the chicken. This helps ensure the shredded chicken is juicy (and not dry). Now the shredded chicken is ready to be used in your favorite recipes. Enjoy!

Nutrition Facts
Mexican Shredded Chicken (crock pot)
Amount Per Serving (1 (1/8 of total))
Calories 185 Calories from Fat 54
% Daily Value*
Fat 6g9%
Saturated Fat 1g6%
Trans Fat 1g
Polyunsaturated Fat 2g
Monounsaturated Fat 2g
Cholesterol 73mg24%
Sodium 678mg29%
Potassium 463mg13%
Carbohydrates 6g2%
Fiber 1g4%
Sugar 5g6%
Protein 25g50%
Vitamin A 115IU2%
Vitamin C 3mg4%
Calcium 15mg2%
Iron 1mg6%
* Percent Daily Values are based on a 2000 calorie diet.

Here’s one more to pin on your Pinterest boards!Make Mexican Shredded Chicken in a crock pot to use in tacos, burritos, quesadillas, taco salads, enchiladas, etc. Easy to make and delicious!

Italian Chicken Parmesan Meatballs

It’s so easy to make Italian Chicken Parmesan Meatballs! Mix and bake delicious, healthy meatballs to serve as is, or with a favorite sauce.
It's so easy to make Italian Chicken Parmesan Meatballs! Mix and bake delicious, healthy meatballs to serve as is, or with a favorite sauce.

Today I want to share a quick and easy recipe for Italian Chicken Parmesan Meatballs. The recipe is simple to prepare, and the Italian-seasoned meatballs are really yummy, whether you enjoy them plain (even though there’s nothing “plain” about them!), or with a favorite sauce!

I found the original recipe in a book I purchased from the New Life Promise healthy eating plan (from Isabel D. Price), and have made them quite a few times since. After a few minor tweaks (and adding more spices) to her original recipe, my husband and I fell in love with these meatballs. Honestly, they are seasoned so nicely, you can simply eat them straight out of the oven, and forget the pasta OR sauce. 

So, if you are trying to eat a little more “healthy”, I would love to recommend these Italian Chicken Parmesan Meatballs to you. This recipe makes 4 servings, but I suggest doubling the recipe, because these little beauties freeze very well. Here’s how easy they are to make:

Scroll Down For A Printable Recipe Card At The Bottom Of The Page

Combine All The Ingredients

Preparing the meatball mixture could not be any easier! Place all the ingredients in a large mixing bowl, and then mix them well, until fully combined. It is a bit messy, but I’ve found the easiest way to do this is to use my (clean) hands, and just get in there, and mix up the ingredients! You can also use a fork to do this… just sayin’.

The recipe calls for almond flour (which is gluten-free), but if that is not available, you can certainly use all purpose flour. Once the ingredients are well-combined, you will have a bowl of well-seasoned ground chicken, ready and waiting for you to shape into meatballs.

Ingredients for the Italian Chicken Parmesan Meatballs are placed in a large bowl before combining.After combining the ingredients, the ground chicken mixture is ready to form meatballs.

Time to Form The Italian Chicken Parmesan Meatballs

Now it’s time to make Italian Chicken Parmesan Meatballs! Again, using your hands, roll the ground chicken mixture into 12 evenly shaped, round meatballs.

Place the meatballs onto a parchment paper-lined baking sheet, leaving a small space in between each of them. Now they’re ready to bake! See how easy they are to make?

Twelve meatballs are placed on a parchment paper-lined baking sheet to bake.

Time To Bake!

Place the baking sheet (and meatballs!) into a preheated 350°F. oven on a middle rack. Bake the Italian Chicken Parmesan Meatballs for approximately 22-25 minutes, until cooked through and lightly browned on top. Oven temperatures vary, so you might want to check them at the 22 minute mark.

If you would like them browned a bit more after they’re done baking (we do!), simply switch the oven to the broiler setting. Place the baking sheet about 3-4″ from the broiler element, and broil the meatballs for 1-2 more minutes. Rotate the pan halfway through the broiling time. TIP: KEEP AN EYE ON THEM SO THEY DON’T BURN!

Once baked, the Italian Chicken Parmesan Meatballs will be golden brown on top.A close up of one of the Italian Chicken Parmesan Meatballs on a spatula.

Ready To Eat Italian Chicken Parmesan Meatballs!

When done, immediately serve the Italian Chicken Parmesan Meatballs while hot. If you want to go the all healthy route, simply place 3 meatballs per serving on a plate, and serve alongside a cool, crisp mixed green salad, or a favorite vegetable.

You can also serve these delicious, healthy meatballs with your favorite sauce and pasta. It’s your choice! However you choose to serve them, I think you are gonna love these delicious meatballs. They also freeze well, so you can save a few for another meal, if desired.

Three Italian Chicken Parmesan Meatballs on a plate with a mixed green salad on the side.

I really hope you enjoy this simple recipe. We sure do! The meatballs are easy to make, so they are perfect for a busy day! Thanks for stopping by today. I hope you will come back again soon, for more family friendly recipes. Take care, and have a wonderful day.

Looking For More MEATBALL Recipes?

You can find ALL of my recipes in the Recipe Index, located at the top of the page. I have several meatball recipes you might enjoy, including:

Interested In More Recipes?

Thank you for visiting this website. I appreciate you using some of your valuable time to do soIf you’re interested, I publish a newsletter 2 times per month (1st and 15th) with all the latest recipes, and other fun info. I would be honored to have you join our growing list of subscribers, so you never miss a great recipe!
There is a Newsletter subscription box on the top right side (or bottom) of each blog post, depending on the device you use, where you can easily submit your e-mail address (only) to be included in my mailing list.

You Can Also Find Me On Social Media:

Facebook page: The Grateful Girl Cooks!
Pinterest:
The Grateful Girl Cooks!
Instagram:
jbatthegratefulgirlcooks

Author's signature

Recipe adapted from: The book “Food Meets Faith- Total Trifecta of Weight Loss”, by Isabel D. Price, page 78, New Life Promise, published by Live Smart Solutions, LLC, 2019

0 from 0 votes
Italian Chicken Parmesan Meatballs
Prep Time
10 mins
Cook Time
22 mins
Total Time
32 mins
 

It's so easy to make Italian Chicken Parmesan Meatballs! Mix and bake delicious, healthy meatballs to serve as is, or with a favorite sauce.

Category: Dinner, Lunch
Cuisine: Italian
Keyword: Italian Chicken Parmesan Meatballs
Servings: 4 (3 meatballs per serving)
Calories Per Serving: 261 kcal
Author: JB @ The Grateful Girl Cooks!
Ingredients
  • 1 pound ground chicken
  • cups chopped, fresh spinach leaves
  • cup grated Parmesan cheese
  • cup all purpose flour can substitute almond flour for gluten-free
  • 3 cloves garlic minced
  • 1 large egg lightly beaten
  • ½ teaspoon sea salt
  • ¼ teaspoon ground black pepper
  • ¼ teaspoon Italian seasoning
  • ¼ teaspoon onion powder
  • ¼ teaspoon red chili pepper flakes (optional, but good)
Instructions
  1. Preheat oven to 350°F. Line a rimmed baking sheet with parchment paper and set aside.

  2. Place all ingredients in a large mixing bowl. Mix ingredients well (you can use your hands or a fork), until they're fully combined.

  3. Using your hands, divide and roll ground chicken mixture into 12 evenly shaped, round meatballs. Place meatballs onto the parchment paper-lined baking sheet, leaving a small space between each one.

  4. Place baking sheet into preheated oven on the middle rack. Bake meatballs for approx. 22-25 minutes, until cooked through and lightly browned on top. Oven temperatures vary, so check them at the 22 minute mark. TIP: If you would like them browned a bit more after they're done, simply switch oven to the broiler setting. Place baking sheet about 3-4" from the broiler element. Broil meatballs for 1-2 more minutes. Rotate pan halfway through broiling time. TIP: KEEP AN EYE ON THEM SO THEY DON'T BURN!

  5. Remove from oven, and transfer the meatballs from baking sheet to plates. Serve as is, or with a favorite sauce or side dish. Enjoy!

Recipe Notes

NOTE: Caloric calculation made using all purpose flour

Nutrition Facts
Italian Chicken Parmesan Meatballs
Amount Per Serving (1 3 meatballs)
Calories 261 Calories from Fat 117
% Daily Value*
Fat 13g20%
Saturated Fat 4g25%
Trans Fat 1g
Polyunsaturated Fat 2g
Monounsaturated Fat 5g
Cholesterol 151mg50%
Sodium 514mg22%
Potassium 699mg20%
Carbohydrates 10g3%
Fiber 1g4%
Sugar 1g1%
Protein 26g52%
Vitamin A 1059IU21%
Vitamin C 3mg4%
Calcium 125mg13%
Iron 2mg11%
* Percent Daily Values are based on a 2000 calorie diet.

Here’s one more to pin on your Pinterest boards!It's so easy to make Italian Chicken Parmesan Meatballs! Mix and bake delicious, healthy meatballs to serve as is, or with a favorite sauce.

Air Fryer Buffalo Honey Wings

Delicious Air Fryer Buffalo Honey Wings are seasoned with a spice rub, cooked until crisp, and coated with a sweet, spicy sauce to serve.

We love chicken wings, and have eaten lots of them since getting an air fryer a couple of years ago. The recipe I am sharing today is an absolutely delicious way to make sweet and spicy wings in an air fryer. I have also included instructions for baking these, in case you do not have access to an air fryer. Either cooking method will produce a scrumptiously addicting chicken wing that you are gonna love!

Basically, you will whip up a quick spice rub, season the chicken, cook the chicken wings, then toss them in a simple buffalo honey sauce. It’s actually quite simple, whether you air fry the wings or bake the wings. Here’s how to make them:

Scroll Down For A Printable Recipe Card At the Bottom Of The Page

Prepare A Spice Mixture For Seasoning The Wings

Making the spice rub for the air fryer buffalo honey wings could not be any more simple! Measure the ingredients into a medium bowl, and stir or whisk until the spices are fully combined. Pat the chicken wings dry using paper towels, then place them in a large bowl or container.

Sprinkle the chicken wings with the spice rub. Make sure to rub the spices into the chicken wings to coat them all sides. Use all of the spice mixture, if making a full recipe (3 pounds of wings)

Spices are measured into a small bowl for the chicken wings.Chicken wings are covered with spices before cooking.

Time To Cook The Air Fryer Buffalo Honey Wings

There are so many air fryer machines today, which can vary quite a bit in cooking temps, so be sure to keep an eye on the wings as they cook, so they will not undercook OR overcook in YOUR machine! I use a Cosori air fryer, and often cook these wings in a couple batches. Here’s how I cook them in my air fryer.

Preheat air fryer to 380°F. Once preheated, add the seasoned wings to the basket (I usually try to keep them in a single layer if possible). Cook the air fryer buffalo honey wings at 380°F for 12 minutes, then flip the wings to the other side and cook for another 12 minutes. I then turn the temperature up to 400°F and cook them for 3-4 more minutes, until cooked through and crispy on the outside.

Air Fryer Buffalo Honey Wings in the basket halfway though the cooking time.

Make The Buffalo Honey Sauce While the Wings Cook

Melt butter in a medium-sized saucepan on medium heat. In a separate bowl, whisk together cornstarch and Frank’s Original Hot Sauce until blended. Add this to the melted butter in the saucepan, and stir to combine. Now add honey and molasses, and stir again, until ingredients are combined.

Heat the buffalo honey sauce until it comes to a boil, making sure to stir (or whisk) it often. When it comes to a boil, reduce the heat to low and then simmer the sauce for 3-5 minutes, until it thickens slightly. Give it a taste. If you want it a bit sweeter, stir in more honey. If you want it spicier, add a bit more hot sauce.

Cooking the ingredients for the buffalo honey sauce.Sauce is ready to add to the cooked chicken wings.

Coat Wings With Sauce Then Serve

Place the cooked wings in a large bowl, and pour the sauce over them. Toss the air fryer buffalo honey wings so they are fully coated with sauce. Once all the wings are cooked and coated with the sauce, they are ready to serve, while hot. Serve with bleu cheese or ranch dressing and carrot and celery sticks on the side, if desired. Enjoy!

Air Fryer Buffalo Honey Wings are coated with the spicy and sweet sauce before serving.Some of the air fryer buffalo honey wings on a white plate, ready to serve and eat!

No Air Fryer? No Problem… BAKE Them!

It will take longer to bake the wings, but here is how to do it. Cover a 9″x13″ baking sheet with aluminum foil, and spray lightly with non-stick baking spray. Place the seasoned wings on the foil in a single layer. Bake in a preheated 400°F. oven for 45-50 minutes. Once done baking, turn the oven setting to BROIL. Place wings (on baking sheet) about 6-8 inches away from the broiler. 

Broil the chicken wings until they reach the crispiness you want, then flip them over to the other side and broil again until crispy on outside. Keep a close eye on the wings so they don’t burn. THE BROILING TIME WILL ONLY BE A COUPLE MINUTES TOTAL. Once done, remove from oven, and toss with prepared buffalo honey sauce, and serve!

Carrots and dip are served with the cooked buffalo honey chicken wings.

Thanks for stopping by today. I really hope you get the opportunity to make these delicious chicken wings, and trust you will enjoy them. Please come back again soon for more yummy recipes. Have a GREAT day.

Looking For More Appetizer Recipes?

You can find all of my recipes in the Recipe Index, which is located at the top of the page. I have some delicious appetizer recipes, including:

Interested In More Recipes?

Thank you for visiting this website. I appreciate you using some of your valuable time to do soIf you’re interested, I publish a newsletter 2 times per month (1st and 15th) with all the latest recipes, and other fun info. I would be honored to have you join our growing list of subscribers, so you never miss a great recipe!
There is a Newsletter subscription box on the top right side (or bottom) of each blog post, depending on the device you use, where you can easily submit your e-mail address (only) to be included in my mailing list.

You Can Also Find Me On Social Media:

Facebook page: The Grateful Girl Cooks!
Pinterest:
The Grateful Girl Cooks!
Instagram:
jbatthegratefulgirlcooks

Author's signature

Recipe adapted from: https://carlsbadcravings.com/buffalo-honey-hot-wings-traditional-buffalo-hot-wings-recipe/

0 from 0 votes
Air Fryer Buffalo Honey Wings
Prep Time
5 mins
Cook Time
28 mins
Total Time
33 mins
 

Delicious Air Fryer Buffalo Honey Wings are seasoned with a spice rub, cooked until crisp, and coated with a sweet, spicy sauce to serve.

Category: Appetizer/Snack, Entree
Cuisine: American
Keyword: Air Fryer Buffalo Honey Wings
Servings: 6 (4 wings per serving)
Calories Per Serving: 376 kcal
Author: JB @ The Grateful Girl Cooks!
Ingredients
  • 3 pounds chicken wings (approx. 24 wings)
Dry Rub Spice Mix:
  • 2 Tablespoons brown sugar
  • 2 Tablespoons baking powder
  • 2 teaspoons onion powder
  • 2 teaspoons salt
  • 2 teaspoons ground black pepper
  • 2 teaspoons paprika
  • 2 teaspoons garlic powder
  • 2 teaspoons ground cumin
  • 2 teaspoons chili powder
  • 1 teaspoon celery salt
Buffalo Honey Sauce:
  • cup Frank's ORIGINAL Hot Sauce (NOT hot wings sauce)
  • 2 teaspoons cornstarch
  • ¼ cup honey
  • 1 Tablespoon molasses
  • 1 Tablespoon butter
Instructions
  1. Measure spice rub ingredients into a medium bowl; stir/whisk until combined. Pat chicken wings dry with paper towels; place wings into large bowl or container. Sprinkle with spice rub, rubbing spices into wings to coat all sides.

If Cooking In Air Fryer:
  1. Preheat air fryer to 380°F. Once preheated, add seasoned wings to basket in single layer, if possible. Cook wings at 380°F for 12 minutes; flip wings to the other side; cook another 12 minutes. Turn temp. up to 400°F. Cook 3-4 minutes, until cooked through/crispy on outside. TIP: Keep an eye on chicken wings. Air fryers can widely vary on heating temperatures!

If Baking In Oven:
  1. Cover a 9"x13" baking sheet with aluminum foil; spray lightly with non-stick baking spray. Place seasoned wings on foil in single layer. Bake in a preheated 400°F. oven 45-50 minutes. When done, turn oven setting to BROIL. Place wings (on baking sheet) about 6-8 inches away from broiler.  Broil wings until they reach the crispiness you want. Flip over to other side; broil again until crispy. Keep a close eye on wings so they don't burn. BROILING TIME WILL ONLY BE A COUPLE MINUTES TOTAL. Once done, remove from oven; toss with sauce, and serve!

Make Sauce While Wings Cook:
  1. Melt butter on medium heat in medium saucepan. In separate bowl, whisk together cornstarch and Frank's Original Hot Sauce until blended. Add to melted butter; stir to combine. Stir in the honey and molasses, until combined. Heat sauce until it comes to a boil, making sure to stir (or whisk) often. Once boiling, reduce heat to low; simmer 3-5 minutes, until it thickens slightly.

Serve:
  1. Place cooked wings in a large bowl; pour warm sauce over them. Toss wings until coated with sauce. Serve wings hot, with bleu cheese or ranch dressing, carrot and celery sticks on the side, if desired. Enjoy!

Nutrition Facts
Air Fryer Buffalo Honey Wings
Amount Per Serving (1 (4 wings))
Calories 376 Calories from Fat 198
% Daily Value*
Fat 22g34%
Saturated Fat 7g44%
Trans Fat 1g
Cholesterol 99mg33%
Sodium 2107mg92%
Potassium 725mg21%
Carbohydrates 23g8%
Fiber 1g4%
Sugar 18g20%
Protein 23g46%
Vitamin A 776IU16%
Vitamin C 1mg1%
Calcium 217mg22%
Iron 3mg17%
* Percent Daily Values are based on a 2000 calorie diet.

Here’s one more to pin on your Pinterest boards!Delicious Air Fryer Buffalo Honey Wings are seasoned with a spice rub, cooked until crisp, and coated with a sweet, spicy sauce to serve.


Butternut Squash Risotto with Chicken

If you’re looking for a delicious, filling dish, try this Butternut Squash Risotto with Chicken! It’s an “all in one bowl” meal you’ll enjoy!
If you're looking for a delicious, filling dish, try this Butternut Squash Risotto with Chicken! It's an "all in one bowl" meal you'll enjoy!

My husband and I really love risotto. It’s hot, filling, delicious, creamy, and to us, a wonderful “comfort food” meal. The best part is that it is an all-in-one dish, with veggies, chicken and rice, so it’s practically perfect… in every way! If you’re a vegetarian and want to make this meal, simply substitute vegetable broth (for chicken broth) and leave out the chicken to enjoy this yummy dish.

I found the original recipe in one of my old cookbooks published in 2004, called “The Best Of Cooking Light”. After making a couple of tweaks (adding and changing ingredients a bit) to the original recipe, I made this delicious dinner and we’ve loved it ever since that first meal. Tender pieces of butternut squash, chicken, and onions, cooked with arborio rice, broth, butter and Parmesan cheese make this a risotto you’re gonna love! It is soooo good. Here’s how to make it:

Scroll Down For A Printable Recipe Card At The Bottom Of The Page

How To Make Butternut Squash Risotto with Chicken

In a large saucepan, bring 1½ cups of water, 1/4 cup of dry white wine, and 2 cans (14.5 oz. each) of low sodium chicken broth to a simmer (do not boil). Keep this liquid broth simmering on low heat while you prepare the risotto.

Heat olive oil on medium heat in a large Dutch oven. Once the oil is hot (but not smoking), add chopped onion, and cook them for 7-8 minutes, stirring often. When done, the onions should be golden brown and tender. Add additional 1/2 cup of water, butternut squash, salt, pepper and garlic powder to the pan, and stir to combine. Continue to cook for about 10 minutes, or until the squash has become tender and the liquid has almost evaporated.

Chopped onions are cooked in olive oil until tender.Lightly seasoned butternut squash cubes for the risotto are cooked in water until tender.

Making The Risotto

Add the arborio rice and pre-cooked chicken cubes to the pan, stirring to combine these ingredients. Ladle ½ cup of the warm simmering broth into the pan, and stir.

Cook this mixture on medium-low heat, stirring often, until almost all of the broth has been absorbed into the rice.

Continue to add warm broth to the pan, ½ cup at a time, cooking and stirring constantly until almost all the liquid is absorbed, before adding the next ½ cup of broth. Repeat this step (½ cup at a time), stirring constantly, until all the broth has been absorbed into the rice.

This should take about 30 minutes total to use up all the broth. Don’t rush this step, as the “low and slow” cooking of the liquid and rice is what will help make the finished risotto creamy and tender.

Arborio rice and cooked chicken pieces are added to the butternut squash in pan.Chicken broth is added to the butternut squash risotto and cooked until it is absorbed.More chicken broth is added and stirred into the risotto as it cooks.

Last Step Before The Butternut Squash Risotto Is Ready To Eat!

Once the broth has been absorbed into the risotto (and the rice is creamy and tender to the bite), remove the pan from the heat. Immediately stir in butter and shredded Parmesan cheese.

Continue stirring until the butter and cheese has melted and been incorporated into the butternut squash risotto.

Butter and parmesan cheese are added to the butternut squash risotto

Time To Serve The Butternut Squash Risotto with Chicken

Now it’s time to serve the butternut squash risotto with chicken while it is HOT! Serve it immediately for best results. For six total servings, each portion should be approx. ¾ cup.

If desired, top each portion with chopped fresh parsley and additional Parmesan cheese (this is optional, but nice!).

The creamy butternut squash risotto is delicious, and will be a wonderful meal for you and those you love. It’s a yummy chicken, veggie and rice dish I’m certain you will enjoy serving to those you love.

If you have any leftover risotto, it can be stored in an airtight container in the refrigerator. All you will need to do is microwave it, to reheat.

Butternut Squash Risotto with Chicken, garnished with parsley, served in a white bowl.

Thank you so much for stopping by my blog today. I truly hope you will have the opportunity to try this delicious Butternut Squash Risotto, and trust you will love it just as much as we do.

If you enjoy butternut squash, you might also want to check out my recipes for Butternut Squash Coconut Curry, or Butternut Squash Soup with Bacon!

Please come back again soon for more family-friendly recipes. Have a great day, and may God bless you with hope, the love of family and friends, and great joy.

Looking For Other RISOTTO Recipes?

You can find ALL of my recipes in the Recipe Index, which is located at the top of the page. I have a couple other delicious risotto recipes I’m confident you will also enjoy:

Interested In More Recipes?

Thank you for visiting this website. I appreciate you using some of your valuable time to do soIf you’re interested, I publish a newsletter 2 times per month (1st and 15th) with all the latest recipes, and other fun info. I would be honored to have you join our growing list of subscribers, so you never miss a great recipe!
There is a Newsletter subscription box on the top right side (or bottom) of each blog post, depending on the device you use, where you can easily submit your e-mail address (only) to be included in my mailing list.

You Can Also Find Me On Social Media:

Facebook page: The Grateful Girl Cooks!
Pinterest:
The Grateful Girl Cooks!
Instagram:
jbatthegratefulgirlcooks

Author's signature

Recipe adapted from: The cookbook “The Best Of Cooking Light”, page 143, published by Oxmoor House, Inc., 2004.

0 from 0 votes
Butternut Squash Risotto with Chicken
Prep Time
15 mins
Cook Time
50 mins
Total Time
1 hr 5 mins
 

If you're looking for a delicious, filling dish, try this Butternut Squash Risotto with Chicken! It's an "all in one bowl" meal you'll enjoy!

Category: Entree
Cuisine: Italian
Keyword: butternut squash risotto
Servings: 6 (approx. ¾ cup per serving)
Calories Per Serving: 388 kcal
Author: JB @ The Grateful Girl Cooks!
Ingredients
  • 2 cups water (divided use)
  • 29 ounces low sodium chicken broth (two 14.5 oz. cans)
  • ¼ cup dry white wine
  • 2 teaspoons extra-virgin olive oil
  • ½ cup onion, finely chopped
  • 3 cups cubed, peeled butternut squash (cut in 3/4" cubes)
  • ½ teaspoon salt
  • ¼ teaspoon black pepper
  • ½ teaspoon garlic powder
  • cups arborio rice (or other short grain rice) (uncooked)
  • cups pre-cooked chicken breast ,(cut in 1" cubes)
  • ½ cup shredded Parmesan cheese
  • 3 Tablespoons unsalted butter
Garnish (optional): additional Parmesan cheese and/or chopped parsley
    Instructions
    1. In large saucepan, bring 1½ cups of water, chicken broth and wine to a simmer (do not boil). Keep broth warming on low heat while you prepare risotto in a separate pan.

    2. Heat oil on medium heat in a Dutch oven (or large saucepan). Once hot (but not smoking), add onion; cook 7-8 minutes, stirring often. When done, onions should be golden brown and tender. Add remaining ½ cup water, butternut squash, salt, pepper and garlic powder; stir to combine. Cook 10 minutes, or until squash is tender and liquid has almost evaporated.

    3. Add arborio rice and cooked chicken cubes to pan, stirring to combine. Ladle ½ cup of warm broth into pan, and stir. Cook on medium-low heat, stirring often, until almost all of broth has been absorbed. Continue to add broth, ½ cup at a time, cooking and stirring often until almost all broth is absorbed, before adding the next ½ cup of broth. Repeat (½ cup at a time), stirring constantly, until all broth has been added and absorbed. This takes about 30 minutes. Don't rush this step- "low and slow" cooking will make risotto creamy and tender.

    4. Once all broth has been added (and absorbed), and rice is creamy/tender to the bite, remove pan from heat. Immediately stir in butter and shredded Parmesan cheese. Continue stirring until they've melted into the risotto.

    5. Serve immediately, garnishing each portion (if desired) with additional Parmesan cheese and/or chopped parsley. Enjoy!

    Nutrition Facts
    Butternut Squash Risotto with Chicken
    Amount Per Serving (1 (approx. 3/4 cup))
    Calories 388 Calories from Fat 108
    % Daily Value*
    Fat 12g18%
    Saturated Fat 6g38%
    Trans Fat 1g
    Cholesterol 46mg15%
    Sodium 415mg18%
    Potassium 584mg17%
    Carbohydrates 51g17%
    Fiber 3g13%
    Sugar 2g2%
    Protein 18g36%
    Vitamin A 7700IU154%
    Vitamin C 16mg19%
    Calcium 144mg14%
    Iron 3mg17%
    * Percent Daily Values are based on a 2000 calorie diet.

    Here’s one more to pin on your Pinterest boards!If you're looking for a delicious, filling dish, try this Butternut Squash Risotto with Chicken! It's an "all in one bowl" meal you'll enjoy!

    Asian BBQ Chicken Wings (Air Fryer)

    Asian BBQ Chicken Wings are marinated in soy sauce, lime juice, garlic, brown sugar, & curry powder, then cooked until crispy in an air fryer!
    Asian BBQ Chicken Wings are marinated in soy sauce, lime juice, garlic, brown sugar, curry powder, then cooked until crispy in an air fryer!

    If you enjoy flavor-filled chicken wings, this is a GREAT recipe! Cooked in an air fryer (using HOT air), these wings will be wonderfully yummy and crispy! The wings are first marinated in a delicious made-from-scratch (easy) Asian BBQ sauce, then cooked. The marinade is cooked until it forms a thick sauce, which is then poured over the cooked wings for serving. Oh my goodness.. they are sooo good!

    NO AIR FRYER? If you do not have an air fryer, you can bake these chicken wings! Follow instructions for this recipe until the cooking time. For baking instructions, see my note in the printable recipe card (located at the bottom of the page) for details.

    These Asian BBQ chicken wings have now become one of my favorite ways to enjoy this “snack”, “appetizer” or “meal”. The flavor is amazing, and my husband and I love them! I found the original recipe in an old cookbook of mine called “The Best Of Cooking Light”. The original recipe was for baked chicken thighs, but I adapted the recipe for wings and the use of an air fryer. Here’s how to make them:

    Scroll Down For A Printable Recipe Card At The Bottom Of The Page

    Make The Asian-Inspired Sauce To Marinate The Wings

    Making the Asian BBQ sauce for the wings is super easy! Place brown sugar, soy sauce, fresh lime juice, minced garlic, curry powder, and crushed red pepper flakes in a small bowl. Stir these ingredients well, until they have been fully combined.

    This is the marinating sauce for the chicken wings. See how easy that was? Place the chicken wings in a large re-sealable plastic bag OR in a shallow large container with a tight-fitting lid. Pour the sauce over the wings, and toss to coat them well. Seal or cover the bag/container, and marinate wings in the fridge for 4-6 hours (or overnight). Turn the wings occasionally to ensure they stay coated with marinade.

    Marinade ingredients (for chicken wings) are mixed in a small bowl.Chicken wings are covered with the marinade, then refrigerated for 4-6 hours.

    After Marinating Is Done, Cook the Asian BBQ Sauce

    Once the chicken wings have been marinated, remove the wings from the bag or container and SAVE THE MARINADE. Pour the marinade into a saucepan, where it will be cooked to safely “kill off” any harmful bacteria (from contact with raw chicken) and to thicken it into a sauce to cover the chicken wings once they are cooked.

    Bring the sauce to a full boil, and then cook on medium heat for 2 minutes, stirring often. As the liquid reduces slightly, the sauce will thicken. Set aside until chicken wings have been cooked. You can quickly reheat it before adding to the chicken, if desired.

    The reserved marinade is brought to a boil and cooked, to thicken sauce.

    Cooking The Asian BBQ Chicken Wings In An Air Fryer

    After the chicken wings have marinated 4-6 hours, they are ready to cook. Place the wings into the basket of your air fryer, trying not to overcrowd them, if possible (for best browning). You may need to cook these in two batches, if necessary.

    Cook the Asian BBQ chicken wings at  380°F. for 12 minutes, then flip them to the other side and cook 12 more minutes. Increase the temperature of the air fryer to 400°F.and cook 3-4 more minutes.


    The marinated chicken wings are cooked in an air fryer.When halfway done, Asian BBQ chicken wings are flipped over to finish cooking.

    Once the chicken wings are fully cooked, transfer them to a large bowl. Immediately pour the Asian BBQ sauce over them, and toss to fully coat with the sauce.

    Asian BBQ chicken wings are coated and tossed in sauce before serving.

    Time To Eat!

    Once the wings are coated with the sauce, it’s time to serve them. If desired, sprinkle the wings with sliced green onions and/or sesame seeds before serving (optional). I usually just sprinkle them with sesame seeds.

    Be sure to serve them with several napkins, because these bad boys are sticky and messy good! There is so much flavor, we eat them without any sauce for dipping… you really don’t need any! YUM!

    Sprinkled with sesame seeds, the Asian BBQ chicken wings are ready to eat.

    I hope you enjoy these Asian BBQ Chicken Wings. We sure do. Thanks for stopping by today, and trust you will come back again soon for more delicious recipes. Take care, and have a GREAT day!

    Looking For More Air Fryer Recipes?

    You can find all of my blog’s recipes in the Recipe Index, located at the top of the page. I have quite a few air fryer recipes you might enjoy, including:

    Interested In More Recipes?

    Thank you for visiting this website. I appreciate you using some of your valuable time to do soIf you’re interested, I publish a newsletter 2 times per month (1st and 15th) with all the latest recipes, and other fun info. I would be honored to have you join our growing list of subscribers, so you never miss a great recipe!
    There is a Newsletter subscription box on the top right side (or bottom) of each blog post, depending on the device you use, where you can easily submit your e-mail address (only) to be included in my mailing list.

    You Can Also Find Me On Social Media:

    Facebook page: The Grateful Girl Cooks!
    Pinterest:
    The Grateful Girl Cooks!
    Instagram:
    jbatthegratefulgirlcooks

    Author's signature

    Recipe Adapted From: The cookbook “The Best Of Cooking Light”, page 219, published by Oxmoor House, Inc. in 2004

    0 from 0 votes
    Asian BBQ Chicken Wings
    Prep Time
    5 mins
    Cook Time
    27 mins
    Inactive Marinating Time
    4 hrs
    Total Time
    4 hrs 32 mins
     

    Asian BBQ Chicken Wings are marinated in soy sauce, lime juice, garlic, brown sugar, curry powder, then cooked until crispy in an air fryer!

    Category: Appetizer, Main Dish, Snack
    Cuisine: Asian
    Keyword: Asian BBQ chicken wings
    Servings: 3 (6 wings per serving)
    Calories Per Serving: 541 kcal
    Author: JB @ The Grateful Girl Cooks!
    Ingredients
    • ¼ cup packed brown sugar
    • ¼ cup low-sodium soy sauce
    • 1 Tablespoon fresh squeezed lime juice
    • 3 large garlic cloves , minced
    • ½ teaspoon crushed red pepper flakes
    • ¼ teaspoon curry powder
    • pounds chicken wings (approx. 18-20 wings)
    • sesame seeds and/or sliced green onions for garnish , optional
    Instructions
    1. Place brown sugar, soy sauce, lime juice, garlic, curry powder, and crushed red pepper flakes in a small bowl. Stir well, until fully combined.

    2. Place chicken wings in large re-sealable plastic bag OR in a shallow container with tight-fitting lid. Pour sauce over wings; toss to coat; seal bag or container. Marinate wings in fridge 4-6 hours (or overnight). Turn wings occasionally so they stay coated with marinade.

    3. Remove marinated wings from container and SAVE THE MARINADE. Pour the marinade into a saucepan. Bring sauce to a full boil; cook on medium heat for a full 2 minutes, stirring often. It is essential you fully cook the sauce to "kill off" any bacteria from it's exposure to raw chicken. As liquid reduces slightly, sauce will thicken. Set aside sauce until wings have cooked. You can quickly reheat sauce before adding to the chicken, if desired.

    4. After wings have marinated, they're ready to cook. Place wings into basket of air fryer, trying not to overcrowd them, if possible (for best browning), in batches, if necessary. Cook at 380°F. for 12 minutes, flip them to other side and cook 12 more minutes. Increase temperature of air fryer to 400°F. and cook 3-4 more minutes.

    5. Transfer wings to large bowl. Immediately pour sauce over them; toss to coat with sauce. Sprinkle with sliced green onions and/or sesame seeds, if desired; serve and enjoy!

    Recipe Notes

    NOTE: If baking, cook at 400 degrees F for 35-40 minutes. When done, place them under the broiler (about 8" below heating element) to further brown them, if desired.

    Nutrition Facts
    Asian BBQ Chicken Wings
    Amount Per Serving (1 (6 wings))
    Calories 541 Calories from Fat 297
    % Daily Value*
    Fat 33g51%
    Saturated Fat 9g56%
    Trans Fat 1g
    Cholesterol 157mg52%
    Sodium 869mg38%
    Potassium 408mg12%
    Carbohydrates 21g7%
    Fiber 1g4%
    Sugar 18g20%
    Protein 39g78%
    Vitamin A 403IU8%
    Vitamin C 4mg5%
    Calcium 51mg5%
    Iron 3mg17%
    * Percent Daily Values are based on a 2000 calorie diet.

    Here’s one more to pin on your Pinterest boards!Asian BBQ Chicken Wings are marinated in soy sauce, lime juice, garlic, brown sugar, curry powder, then cooked until crispy in an air fryer!

    Yum Yum Chicken

    Yum Yum Chicken is an EASY (10 minute prep.) delicious dish. Chicken pieces are covered in a simple, flavorful sauce, and baked until done.
    Yum Yum Chicken is an EASY (10 minute prep.) delicious dish. Chicken pieces are covered in a simple, flavorful sauce, and baked until done.

    Many, MANY years ago I came up with a recipe for super simple, easy to make, baked chicken. Our family liked the chicken the first time I made it, and said it was yummy. So I named it Yum Yum Chicken. True story. Nothing exciting about it, but that’s how it got it’s name, and I’ve been making this simple dish ever since!

    Honestly, this could NOT be any easier to make, and it really does taste yummy, especially when served with steamed rice, which goes perfectly with the simple sauce that tops the pieces of chicken. I originally came up with this ridiculously easy recipe by “dinking around in the kitchen” to see what I could come up with.

    Basically I was looking for something that wouldn’t take too much time to prepare. I worked full-time when our sons were growing up, so anything that was quick, easy, and filling to make for dinner (after work) was always a winner! This recipe only takes about 10 minutes of preparation before throwing it in the oven. HOORAY! Let me show you how easy it is to make yum yum chicken:

    Scroll Down For A Printable Recipe Card At The Bottom Of The Page

    Make The Sauce For The Chicken

    The sauce will go on top of the chicken when it is baked. It is SO EASY to make! In a medium sized bowl, combine a can of cream of mushroom soup, a can of cream of chicken soup, wine, milk, celery, green bell pepper and 3/4 of an envelope of dried onion soup mix. Give these ingredients a stir to fully combine (the sauce will be fairly thick). Set the sauce aside.

    Ingredients for the yum yum chicken sauce are combined in a small bowl.Sauce ingredients are combined before adding it to the chicken.

    Prepare The Chicken For Baking

    Preheat your oven to 375° F. Place a cut up chicken (8 pieces) in a lightly greased or sprayed 9″ x 13″ baking dish in a single layer. Pour or spoon the sauce over the chicken, spreading the sauce to make sure all the chicken pieces are covered. And now, just like that, the only thing left to do is BAKE the yum yum chicken!

    Chicken pieces are placed in a 13"x9" baking pan in a single layer.A sauce is poured over the yum yum chicken, and then is baked for one hour.

    Bake The Yum Yum Chicken

    Bake the chicken at 375° F., uncovered, for one hour. When done, the chicken will be cooked to an internal temperature of 165° F., and the sauce will be golden brown and bubbly around the edges of the pan. Remove the pan from the oven, and let the chicken rest 3-4 minutes before serving.

    After an hour of baking, the yum yum chicken is golden brown, and ready to serve.

    Serving Yum Yum Chicken

    Place pieces of the chicken onto serving plates. Spoon some of the extra sauce over the chicken, and serve. I recommend serving rice on the side with this dish, because it tastes so good with the sauce!

    That’s it! See how EASY this yum yum chicken was to make? YEP. It is a great recipe that you can quickly put together, then go rest or do something else while it bakes! That’s my kind of recipe! The baked chicken tastes good, too!

    Rice and green beans are served alongside the yum yum chicken, on a white plate.Yum Yum Chicken, topped with sauce and served with green beans and rice on the side.

    Thank you for stopping by today for a visit. I hope you’ll have the chance to make yum yum chicken for those you love. Have a great day, and come back again soon.

    Looking For More CHICKEN Recipes?

    You can find all of my chicken recipes in the Recipe Index, which is located at the top of the page. I have LOTS of them you’ll enjoy, including:

    Interested In More Recipes?

    Thank you for visiting this website. I appreciate you using some of your valuable time to do soIf you’re interested, I publish a newsletter 2 times per month (1st and 15th) with all the latest recipes, and other fun info. I would be honored to have you join our growing list of subscribers, so you never miss a great recipe!
    There is a Newsletter subscription box on the top right side (or bottom) of each blog post, depending on the device you use, where you can easily submit your e-mail address (only) to be included in my mailing list.

    You Can Also Find Me On Social Media:

    Facebook page: The Grateful Girl Cooks!
    Pinterest:
    The Grateful Girl Cooks!
    Instagram:
    jbatthegratefulgirlcooks

    Author's signature

    ↓↓ PRINTABLE RECIPE BELOW ↓↓

    0 from 0 votes
    Yum Yum Chicken
    Prep Time
    10 mins
    Cook Time
    1 hr
    Total Time
    1 hr 10 mins
     

    Yum Yum Chicken is an EASY (10 minute prep.) delicious dish. Chicken pieces are covered in a simple, flavorful sauce, and baked until done.

    Category: Dinner, Entree
    Cuisine: American
    Keyword: baked chicken, yum yum chicken
    Servings: 6
    Calories Per Serving: 337 kcal
    Author: JB @ The Grateful Girl Cooks!
    Ingredients
    • 3 pound whole chicken , cut into 8 pieces
    • 10.5 ounces cream of mushroom soup (1 can)
    • 10.5 ounces cream of chicken soup (1 can)
    • ¼ cup dry white wine (can substitute red)
    • ¼ cup milk
    • 1 large celery stalk (or 2 medium), sliced
    • ¼ large green bell pepper , chopped
    • ¾ envelope dried onion soup mix
    Instructions
    1. Preheat oven to 375°F. Lightly grease or spray a 9x13 baking dish.

    2. In a medium sized bowl, combine cream of mushroom soup, cream of chicken soup, wine, milk, celery, green bell pepper and 3/4 of an envelope of dried onion soup mix. Give ingredients a stir to fully combine (sauce will be fairly thick ). Set aside.

    3. Place cut up chicken (8 pieces) in prepared baking dish in single layer. Pour or spoon sauce over chicken, spreading sauce to make sure all chicken pieces are covered.

    4. Bake at 375° F. (uncovered), for one hour. When done, chicken will be cooked to an internal temperature of 165° F. and sauce will be golden brown and bubbly around the edges of pan. Remove pan from oven; let chicken rest 3-4 minutes before serving. Spoon extra sauce over each piece of chicken, to serve. Enjoy!

    Recipe Notes

    PLEASE NOTE: The caloric calculation is an ESTIMATE only, based on the total calories of all the recipe ingredients divided by 8 servings (or pieces) of chicken. Your calorie count will differ slightly, depending on the piece of chicken eaten, and the net weight of each piece (i.e. breast, leg, wing, etc.).

    Nutrition Facts
    Yum Yum Chicken
    Amount Per Serving (1 g)
    Calories 337 Calories from Fat 189
    % Daily Value*
    Fat 21g32%
    Saturated Fat 6g38%
    Trans Fat 1g
    Cholesterol 89mg30%
    Sodium 1183mg51%
    Potassium 364mg10%
    Carbohydrates 10g3%
    Fiber 1g4%
    Sugar 1g1%
    Protein 24g48%
    Vitamin A 291IU6%
    Vitamin C 7mg8%
    Calcium 42mg4%
    Iron 2mg11%
    * Percent Daily Values are based on a 2000 calorie diet.

    Here’s one more to pin on your Pinterest boards!Yum Yum Chicken is an EASY (10 minute prep.) delicious dish. Chicken pieces are covered in a simple, flavorful sauce, and baked until done.

    Greek-Style Chicken Wings

    Greek-Style Chicken Wings can be oven-baked, or cooked in an air fryer! These marinated wings are served with homemade tzatziki sauce for dipping.Greek-Style Chicken Wings can be baked or cooked in an air fryer! These marinated wings are served with homemade tzatziki sauce for dipping.

    Do you enjoy eating chicken wings? We sure do! A couple of years ago I purchased an air fryer with some gift cards I was given on my birthday. That was the beginning of my love for cooking (and eating) chicken wings.

    This recipe for Greek-style chicken wings is simple. The wings can either be baked in the oven OR can be prepared in an air fryer, whichever is most convenient for you. I have included directions for both in the recipe card.

    Greek-style chicken wings are marinated several hours, so remember to plan ahead if you are making this recipe! The marinated, seasoned wings are then cooked, then served with a simple Greek inspired homemade tzatziki sauce for dipping. It’s an easy recipe to prepare, and the wings taste wonderful! Here’s how to make them:

    Scroll Down For A Printable Recipe Card At The Bottom Of The Page

    Marinating The Greek-Style Chicken Wings

    Because these wings taste best once they have marinated for several hours, be sure to plan ahead! Making the marinade is EASY! Simply combine the ingredients in a bowl. The marinade is made from lemon juice, olive oil, honey, oregano, garlic, and salt.

    Once fully combined, pour the marinade over the chicken wings. You can either have the wings in a large re-sealable bag or in a shallow large container with a lid. Turn the wings, to ensure all are coated with marinade, then cover, and refrigerate for 6-8 hours (or overnight).

    A Greek marinade is mixed together for the chicken wings.Pouring the marinade over the chicken wings before refrigerating.

    Make The Tzatziki Sauce For Serving

    I also make the dipping sauce ahead of time, because it will need time to fully chill, so the flavors can develop well. The sauce, also known as tzatziki sauce, is made with plain yogurt, feta cheese, chopped cucumber, dill, garlic and salt is a cinch to make!

    Place the tzatziki ingredients in a blender or food processor. Blend or process until the sauce is smooth. Transfer the sauce to a small serving bowl, cover, and refrigerate until fully chilled and you are ready to serve. The sauce can be made up to 1 day ahead.

    Ingredients for tzatziki sauce are placed in a blender to combine.After blending ingredients, the tzatziki sauce (for dipping) is smooth and creamy.

    Baking In Oven Directions

    If you are BAKING the Greek-style chicken wings, preheat the oven to 400°F. Drain the marinade off the chicken wings (discard the marinade). Place the wings on a wire rack sitting on top of a 9×13 or 15×10 baking pan.

    Bake the wings for 35-40 minutes, flipping them over to the other side halfway through the cooking time. Once they have finished baking, I usually turn the oven to BROIL, and keeping the wings about 5-6 inches away, and brown them under the broiler for a couple minutes to help to “darken and crisp them up”. Keep an eye on them so they don’t burn! When browned, they are ready to serve.

    Greek-style chicken wings are baked after marinating in sauce.Chicken wings are broiled after baking, to brown them up more.

     Air Fryer Directions

    If you are using an air fryer to cook these Greek-style chicken wings, preheat your air fryer to 380° F. Place the marinated wings in the air fryer basket. Lay the wings into the basket, trying to keep as many of them in a single layer as possible.

    Cook for 12 minutes, then turn the wings over to the other side. Place the basket back into the fryer, and continue to cook for an additional 12 minutes. Increase the temperature to 400°F., and cook for 4-5 more minutes. When done, the wings should be browned all over, and crispy on the outside. They are now ready to serve.

    Greek-style chicken wings cooking in air fryer after marinating in sauce.

    Serve The Greek-Style Chicken Wings

    Serve the Greek-style chicken wings with small bowls of tzatziki sauce for dipping on the side. You can also serve the wings with the traditional slices of carrots and celery on the side, if desired. The carrots and celery taste great, dipped in the sauce, as well.

    The Greek-style chicken wings are serving with dipping sauce, carrots and celery.

    I hope you enjoy these Greek-style chicken wings, whether you bake them OR air fry them! If you like wings, be sure to check out my yummy recipes for baked Asian chicken wings, and buffalo honey hot wings, too!

    Be sure to check out ALL of my recipes in the Recipe Index, which is located at the top of the page. There a LOT of great recipes to make and enjoy! Have a great day, thank you for visiting my blog, and I hope you come back soon.

    Interested In More Recipes?

    Thank you for visiting this website. I appreciate you using some of your valuable time to do soIf you’re interested, I publish a newsletter 2 times per month (1st and 15th) with all the latest recipes, and other fun info. I would be honored to have you join our growing list of subscribers, so you never miss a great recipe!
    There is a Newsletter subscription box on the top right side (or bottom) of each blog post, depending on the device you use, where you can easily submit your e-mail address (only) to be included in my mailing list.

    You Can Also Find Me On Social Media:

    Facebook page: The Grateful Girl Cooks!
    Pinterest:
    The Grateful Girl Cooks!
    Instagram:
    jbatthegratefulgirlcooks

    Author's signature

    Original recipe source: “Taste of Home” magazine, April/May 2007 edition, page 23, published by Reiman Publications, Inc.

    0 from 0 votes
    Greek-Style Chicken Wings
    Prep Time
    15 mins
    Cook Time
    40 mins
    Marinating Time (inactive)
    6 hrs
    Total Time
    6 hrs 55 mins
     

    Greek-Style Chicken Wings can be oven-baked, or cooked in an air fryer! Marinated wings are served with homemade tzatziki sauce for dipping.

    Category: Appetizer, Main Dish
    Cuisine: American, Greek
    Keyword: Greek-style chicken wings
    Servings: 4
    Calories Per Serving: 581 kcal
    Author: JB @ The Grateful Girl Cooks!
    Ingredients
    Marinade For Wings:
    • 3 Tablespoons fresh lemon juice
    • 2 Tablespoons olive oil
    • 2 Tablespoons honey
    • 1/4 teaspoon salt
    • 1 large garlic clove, minced
    • 3 pounds chicken wings (approx. 20 wings)
    For Tzatziki Dipping Sauce:
    • 1/2 cup plain yogurt
    • 1/2 cup chopped, peeled cucumber
    • 1/2 cup crumbled feta cheese
    • 2 teaspoons dried dill weed or 2 Tablespoons fresh, chopped dill
    • 1 large garlic clove, peeled
    • 1 dash salt
    Instructions
    1. Make Marinade For Chicken Wings: Whisk marinade ingredients well in a small bowl (lemon juice, olive oil, honey, oregano, garlic and salt). Pour marinade over chicken wings (use large re-sealable plastic bag or covered, shallow container). Toss wings, to ensure they're coated with marinade; cover and refrigerate 6-8 hours (or overnight).

    2. Make tzatziki sauce: Place yogurt, cucumber, feta, dill, garlic and salt in blender or food processor. Blend or process until sauce is smooth. Transfer sauce to small serving bowl; cover and refrigerate until fully chilled. Sauce can be made up to 1 day ahead.

    If Oven-Baking:
    1. Preheat oven to 400° F. Drain marinade off wings (discard marinade). Place wings on a wire rack fitted on top of a 9x13 or 15x10 baking pan. Bake wings on the middle rack 35-40 minutes, turning them over halfway through cooking time. Once done, turn oven to BROIL, keeping wings 5-6 inches away from broiler element. Brown them under broiler for 1-2 minutes to help brown them. Don't let them burn! Once browned and cooked through, they're ready to serve.

    If Using An Air Fryer:
    1. Preheat your air fryer to 380° F. Place marinated wings in air fryer basket, in a single layer, if possible. Cook for 12 minutes, then turn wings over. Place basket back into the fryer; continue to cook for 12 more minutes. Increase temperature to 400°F. and cook 4-5 more minutes. Once wings are crispy brown and cooked through, they're ready to serve.

    To Serve:
    1. Place hot wings on serving plates. Serve with tzatziki sauce for dipping, and slices of celery and carrots on the side. Enjoy!

    Nutrition Facts
    Greek-Style Chicken Wings
    Amount Per Serving (1 (1/4 of total))
    Calories 581 Calories from Fat 369
    % Daily Value*
    Fat 41g63%
    Saturated Fat 12g75%
    Trans Fat 1g
    Cholesterol 160mg53%
    Sodium 512mg22%
    Potassium 361mg10%
    Carbohydrates 12g4%
    Fiber 1g4%
    Sugar 11g12%
    Protein 40g80%
    Vitamin A 408IU8%
    Vitamin C 7mg8%
    Calcium 163mg16%
    Iron 2mg11%
    * Percent Daily Values are based on a 2000 calorie diet.

    Here’s one more to pin on your Pinterest boards!Greek-Style Chicken Wings can be oven-baked, or cooked in an air fryer! Marinated wings are served with homemade tzatziki sauce for dipping.

    Orange Cashew Chicken

    Orange Cashew Chicken is a yummy twist on a Chinese classic! Chicken, veggies and cashews are cooked in a thick, Asian-inspired orange sauce.
    Orange Cashew Chicken is a yummy twist on a Chinese classic! Chicken, veggies and cashews are cooked in a thick, Asian-inspired orange sauce.

    Many, many years ago… long before I ever even had the remotest thought of starting a blog, I jotted down a recipe on an index card and filed it away in an old wooden recipe box of mine. Back in the days before Pinterest… and before I even had a computer! Recently I stumbled upon this old recipe, and decided to share it here on the blog, because it is soooo good! I don’t even know who to properly credit for the old original recipe, but this orange cashew chicken sure tastes great!

    The recipe is INCREDIBLY EASY to make, and it’s not an understatement to say I LOVE IT! When I make it, I do the prep work ahead of time (cut the veggies/chicken, and make the sauce (easy peasy). Then when I’m ready to cook our meal all that is needed is to stir-fry the chicken and veggies for about 8 minutes, add the sauce, and cook 2 more minutes to let the sauce thicken. That’s it!

    If you enjoy traditional cashew chicken, you can check out my recipe for that, too. But… you’ve just got to try this one for orange cashew chicken. I truly think you will love it! Here’s how easy it is to make:

    Scroll Down For A Printable Recipe Card At The Bottom Of The Page

    Prepping First Is The Key!

    If you prep the ingredients first, this dish is a cinch to cook in only about 10 minutes! Pat boneless, skinless chicken breasts dry with paper towels. TIP: The reason you want to dry them this way is so that when they hit the hot skillet, the extra moisture doesn’t “steam” the chicken. You want the chicken to “sear” and brown slightly.

    Cut the chicken breasts into 1″ cubes. Thinly slice two medium carrots, and roughly chop up the celery until you have 1/2 cup. Set aside (or refrigerate, if saving for later in the day) until ready to prepare this dish.

    In a small bowl, combine the orange sauce ingredients, and whisk or stir together until fully combined. The sauce ingredients are orange juice (fresh or commercially prepared work well), cornstarch, soy sauce, honey, and ginger (fresh or dried). Set aside.

    Chicken breast, carrots and celery are cut and ready to stir-fry.An Asian-inspired orange sauce is whisked and is ready to add to orange cashew chicken.

    Stir-Fry The Chicken And Veggies

    When ready to cook, heat 2 Tablespoons of vegetable oil on medium-high heat in a large skillet. Let the oil get really hot (but not smoking) before adding anything to the skillet. This will allow the chicken to brown nice and quick.

    Add the chicken, carrots and celery to the hot oil. Cook the chicken and veggies for about 8-9 minutes, stirring often. When done, the chicken will be lightly browned, and the veggies will be tender. Once done, reduce the heat to medium-low.

    Carrots, celery and chicken are stir-fried in hot oil until cooked and tender.After stir-frying, the chicken is lightly browned and veggies are tender.

    Add The Orange Sauce

    Give the orange sauce a good stir, then add it to the skillet with the chicken mixture. Stir to combine, and bring the sauce to a boil. Cook for 2 minutes, stirring constantly as the sauce will quickly thicken in the skillet.

    Once the sauce has cooked for 2 minutes, add the cashews to the skillet. Stir, to coat everything very well with the thickened sauce.

    The sauce is added to the orange cashew chicken and cooked for 2 minutes.Roasted cashews are added to the thick orange sauce, chicken and veggies in skillet.

    At this point, the chicken, veggies and cashews should be hot, and the sauce will be nice and thick. That means the orange cashew chicken is ready to serve! See how easy that was?

    Once heated through, the orange cashew chicken is ready for serving.

    Time To Serve The Orange Cashew Chicken!

    Orange Cashew Chicken is best when served on top of a bed of steamed rice. I highly recommend serving this dish with rice (a perfect pairing)! Sprinkling the chicken with sliced green onions and sesame seeds is a nice garnish and pop of color for this dish as well, but that is optional.

    The chicken and veggies are tender, and the thick orange sauce is… wonderfully scrumptious! All the flavors of this orange cashew chicken “play well together”. I truly feel you and your friends or family will love this dish, too!

    Orange Cashew Chicken is served on white rice, garnished with green onions and sesame seeds.

    Thanks for taking the time to visit my blog today. I hope you have a great day, and trust you will come back soon for more great recipes like this one! Take care, and may God Bless You.

    Looking For More “Asian-Inspired” Recipes?

    You can find all of my recipes in the Recipe Index, which is located at the top of the page. I have quite a few recipes for Asian-inspired foods, including:

    Interested In More Recipes?

    Thank you for visiting this website. I appreciate you using some of your valuable time to do soIf you’re interested, I publish a newsletter 2 times per month (1st and 15th) with all the latest recipes, and other fun info. I would be honored to have you join our growing list of subscribers, so you never miss a great recipe!
    There is a Newsletter subscription box on the top right side (or bottom) of each blog post, depending on the device you use, where you can easily submit your e-mail address (only) to be included in my mailing list.

    You Can Also Find Me On Social Media:

    Facebook page: The Grateful Girl Cooks!
    Pinterest:
    The Grateful Girl Cooks!
    Instagram:
    jbatthegratefulgirlcooks

    Author's signature

    Original recipe source: unknown (found my handwritten recipe card in an old recipe box from many years ago-no source noted)

    0 from 0 votes
    Orange Cashew Chicken
    Prep Time
    10 mins
    Cook Time
    10 mins
    Total Time
    20 mins
     

    Orange Cashew Chicken is a yummy twist on a Chinese classic! Chicken, veggies and cashews are cooked in a thick, Asian-inspired orange sauce.

    Category: Entree
    Cuisine: Asian
    Keyword: orange cashew chicken
    Servings: 4
    Calories Per Serving: 410 kcal
    Author: JB @ The Grateful Girl Cooks!
    Ingredients
    • 1 pound boneless, skinless chicken breasts (I use 2 LARGE breasts)
    • 2 medium carrots peeled
    • ½ cup chopped celery
    • 2 Tablespoons Vegetable oil
    • ½ cup roasted cashews
    For Orange Sauce:
    • ¾ cup orange juice fresh or commercially prepared
    • ¼ cup honey
    • 3 Tablespoons soy sauce (low sodium, if available)
    • 2 Tablespoons corn starch
    • ¼ teaspoon dried ginger (or 1 tsp. fresh, finely grated ginger)
    • ½ teaspoon orange zest (finely grated peel) OPTIONAL
    For Serving (Optional): Hot steamed rice, sesame seeds and sliced green onions
      Instructions
      1. Pat chicken dry with paper towels. Cut chicken into 1" cubes. Thinly slice carrots, and roughly chop celery. Set aside (or refrigerate, if saving for later in the day) until ready to cook.

      2. Make Sauce: In small bowl, whisk or stir sauce ingredients together until combined. Set aside.

      3. Heat oil on medium-high heat in large skillet until really hot (but not smoking). Add chicken, carrots and celery to hot oil. Stir-fry for 8-9 minutes, stirring often. When done, chicken will be lightly browned on all sides, and veggies will be tender. Once done, reduce heat to medium-low.

      4. Stir sauce, then add it to chicken mixture. Stir to combine; bring sauce to a boil. Cook for 2 minutes, stirring constantly. Once sauce has thickened, add the cashews,; stir to combine with chicken, veggies and sauce.

      5. Serve orange cashew chicken on top of hot, steamed rice. If desired (optional), sprinkle the top of each serving with sesame seeds, and a few sliced green onions. Serve hot... and enjoy!

      Recipe Notes

      NOTE: The caloric calculation does not include rice (optional for serving with this dish).

      Nutrition Facts
      Orange Cashew Chicken
      Amount Per Serving (1 (1/4 of total))
      Calories 410 Calories from Fat 162
      % Daily Value*
      Fat 18g28%
      Saturated Fat 8g50%
      Trans Fat 1g
      Cholesterol 73mg24%
      Sodium 567mg25%
      Potassium 774mg22%
      Carbohydrates 36g12%
      Fiber 2g8%
      Sugar 24g27%
      Protein 28g56%
      Vitamin A 5279IU106%
      Vitamin C 27mg33%
      Calcium 37mg4%
      Iron 2mg11%
      * Percent Daily Values are based on a 2000 calorie diet.

      Here’s one more to pin on your Pinterest boards!Orange Cashew Chicken is a yummy twist on a Chinese classic! Chicken, veggies and cashews are cooked in a thick, Asian-inspired orange sauce.

      Garlic Lime Chicken Thighs

      Garlic Lime Chicken Thighs feature bone-in, skinless thighs, coated in spices, baked in a simple broth, and garnished with lime and cilantro.
      Garlic Lime Chicken Thighs feature bone-in, skinless thighs, coated in spices, baked in a simple broth, & garnished with lime and cilantro.

      We tend to eat more chicken than any other meat in our house. How about you? There are so many great chicken recipes out there, and I never get tired of finding new ones to try. Especially if they taste great, like these garlic lime chicken thighs, for example.

      I discovered the original recipe in an old cookbook called “The Best Of Cooking Light”. It features lighter calorie meals, so I thought I would give it a try, and my husband and I really enjoyed this dish.

      It is easy to make, the chicken has lots of flavor, and the meat is very juicy after baking. I hope you’ll consider trying it… it’s GOOD! Here’s how to make it, step by step:

      Scroll Down For A Printable Recipe Card At The Bottom Of The Page

      Make The Spice Rub For The Chicken Thighs

      The spice mixture for the chicken is very EASY to make. In a small bowl, combine minced garlic, ground cumin, dried oregano, salt and pepper. Add 1 Tablespoon (HALF of the total amount) of fresh squeezed lime juice, and stir these ingredients, until fully combined.

      Rub the spice mixture onto four (6 ounces each), bone-in, skinless chicken thighs. Make sure to add the spices to all sides of the chicken, using all of the mix. 

      Garlic, cumin, oregano, lime juice, salt & pepper are mixed in bowl.Four bone-in, skinless chicken thighs are coated with spice mix before cooking.

      Place the four chicken thighs into an oven-proof skillet (cast-iron works GREAT!). In a separate bowl, mix together chicken broth, the remaining Tablespoon of lime juice, and white vinegar. Pour this liquid over the chicken thighs in the skillet.

      Bring the liquid to a boil on medium heat on the stovetop, then remove the skillet from the heat. Cover the skillet with a lid, or with aluminum foil.

      Chicken broth, lime juice and vinegar are brought to a boil in skillet with chicken.

      Bake The Garlic Lime Chicken Thighs

      Now it’s time to bake the garlic lime chicken thighs. Place the covered skillet on the middle rack in a preheated 350°F. oven. Bake the chicken for 30 minutes, or until the chicken reaches an internal temperature of 180°F.

      When done, remove from oven, and transfer the chicken thighs out of the skillet to a platter (and cover, to keep them warm). Keep the accumulated juices in the skillet.

      Garlic lime chicken thighs are baked in a covered skillet in oven.When done, the chicken will be transferred out of the skillet while sauce cooks.

      Cook the juices remaining in the skillet on medium-high heat for 3-4 minutes, or until the liquid reduces to about 1/4 cup. The sauce will be used to spoon over the pieces of chicken when serving. Now you’re ready to enjoy this delicious main course!

      The juices are cooked until liquid reduces to about 1/4 cup in the skillet.

      Serve The Garlic Lime Chicken Thighs

      Place the chicken thighs onto a serving platter (or individual plates). Each serving is 2 pieces, so this recipe will serve two people (or more, if you only want to eat ONE piece).

      Spoon some of the reduced sauce in the skillet over each piece. Garnish each piece of chicken with chopped cilantro, and a thin slice of lime.  We enjoyed the garlic lime chicken thighs served with green beans and delicious potato wedges on the side.

      Lime slices and chopped cilantro garnish the garlic lime chicken thighs for serving.Wedge potatoes and green beans are served with two garlic lime chicken thighs.

      I really hope you will consider making this delicious chicken dish, which is low in calories, yet big on flavor! Have a great day, and thank you for stopping by. Come back soon for more recipes.

      Looking For More CHICKEN Recipes?

      You can find all of my chicken recipes in the Recipe Index, which is located at the top of the page. I have LOTS of them you’ll enjoy, including:

      Interested In More Recipes?

      Thank you for visiting this website. I appreciate you using some of your valuable time to do soIf you’re interested, I publish a newsletter 2 times per month (1st and 15th) with all the latest recipes, and other fun info. I would be honored to have you join our growing list of subscribers, so you never miss a great recipe!
      There is a Newsletter subscription box on the top right side (or bottom) of each blog post, depending on the device you use, where you can easily submit your e-mail address (only) to be included in my mailing list.

      You Can Also Find Me On Social Media:

      Facebook page: The Grateful Girl Cooks!
      Pinterest:
      The Grateful Girl Cooks!
      Instagram:
      jbatthegratefulgirlcooks

      Author's signature

      Original recipe source: The book “The Best Of Cooking Light”, page 221, published by Oxmoor House, Inc., 2004

      0 from 0 votes
      Garlic Lime Chicken Thighs
      Prep Time
      10 mins
      Cook Time
      30 mins
      Total Time
      40 mins
       

      Garlic Lime Chicken Thighs feature bone-in, skinless thighs, coated in spices, baked in a simple broth, & garnished with lime and cilantro.

      Category: Entree, Main Dish
      Cuisine: American
      Keyword: garlic lime chicken thighs
      Servings: 2 (2 thighs per serving)
      Calories Per Serving: 270 kcal
      Author: JB @ The Grateful Girl Cooks!
      Ingredients
      For Spice Rub:
      • 1 Tablespoon minced garlic
      • teaspoons ground cumin
      • ½ teaspoon dried oregano
      • ¼ teaspoon salt
      • teaspoon black pepper
      • 2 Tablespoons fresh lime juice (divided use)
      Remaining Ingredients:
      • 24 ounces chicken thighs (bone-in, skinless) (4 six oz. thighs)
      • 3 Tablespoons low sodium chicken broth
      • 1 Tablespoons white vinegar
      • 2 teaspoons chopped cilantro OPTIONAL garnish
      • 2 thin lime slices (each cut in half) OPTIONAL garnish
      Instructions
      1. Preheat oven to 350°F.

      2. In a small bowl, combine minced garlic, ground cumin, dried oregano, salt and pepper. Stir in 1 Tablespoon (HALF the total amount) of fresh lime juice.

      3. Pat chicken dry with paper towels. Rub spice mix onto all sides of the chicken, using all of the mix. Place chicken thighs into an oven-proof skillet in a single layer.

      4. In a bowl, mix together chicken broth, remaining Tablespoon of lime juice, and white vinegar. Pour liquid over the chicken thighs in skillet. Bring liquid to a boil on medium-high heat on stovetop, then remove skillet from heat. Cover skillet with a lid or aluminum foil.

      5. Place covered skillet on middle rack in preheated oven. Bake chicken for 30 minutes, or until chicken reaches internal temperature of 180°F. When done, remove skillet from oven; transfer chicken thighs to a platter (and cover, to keep them warm). Keep accumulated juices in the skillet. Cook the juices in the skillet on medium-high heat on the stovetop for 3-4 minutes, or until liquid reduces to about 1/4 cup.

      6. To serve: Spoon some of the reduced juices in the skillet over each piece. If desired, garnish each piece of chicken with chopped cilantro and a thin slice of lime. Enjoy!

      Nutrition Facts
      Garlic Lime Chicken Thighs
      Amount Per Serving (2 thighs)
      Calories 270 Calories from Fat 81
      % Daily Value*
      Fat 9g14%
      Saturated Fat 2g13%
      Trans Fat 1g
      Cholesterol 194mg65%
      Sodium 483mg21%
      Potassium 603mg17%
      Carbohydrates 5g2%
      Fiber 1g4%
      Sugar 1g1%
      Protein 41g82%
      Vitamin A 93IU2%
      Vitamin C 7mg8%
      Calcium 58mg6%
      Iron 3mg17%
      * Percent Daily Values are based on a 2000 calorie diet.

      Here’s one more to pin on your Pinterest boards!Garlic Lime Chicken Thighs feature bone-in, skinless thighs, coated in spices, baked in a simple broth, & garnished with lime and cilantro.

      Easy Baked BBQ Chicken

      Easy Baked BBQ Chicken is just that… EASY! The homemade BBQ sauce is simple to make, and compliments the browned, baked chicken perfectly!
      Easy Baked BBQ Chicken is just that... EASY! The homemade BBQ sauce is simple to make, and compliments the browned, baked chicken perfectly!

      Today I want to share a recipe (from my trusty old recipe box) that I’ve had for years and years, for easy baked BBQ chicken. I don’t know the source of the original recipe, because I jotted the ingredients/directions down on an index card over 20 years ago, but it is very easy! Basically, you will cook a quick and delicious BBQ sauce, lightly pan-sear chicken pieces, then douse the chicken with the sauce and put it all in the oven to bake.

      This recipe is a perfect way to enjoy good BBQ chicken when it’s just too cold, rainy or snowy to get out and cook BBQ chicken on the old family grill.

      The prep time is only about 20 minutes total, and then the chicken bakes for about an hour, filling your kitchen with a delicious aroma as it cooks. You can start watching a Hallmark movie, remodel your house, or play with the kids while the chicken bakes… yahoo! The end result? Absolutely DELICIOUS easy baked BBQ chicken, with minimal hands-on time! Here’s how easy it is to make:

      Scroll Down For A Printable Recipe Card At The Bottom Of The Page

      What Ingredients Will I Need?

      First and foremost, you will need approx. 8 pieces of chicken. Use whatever type of pieces you want (legs, thighs, breasts, skinless, skin-on, bone-in, boneless, or any combo, etc.). IT’S YOUR CHOICE.

      The ingredients you will need for the easy BBQ sauce are: onion, butter, ketchup, brown sugar, vinegar, mustard, worcestershire sauce, water, salt and pepper.

      The ingredients used to make BBQ sauce for chicken.

      Make The BBQ Sauce

      In a medium saucepan, sauté chopped onion in melted butter. Cook for a couple minutes, stirring often, then add the rest of the ingredients (except for the chicken). Let the sauce simmer (uncovered) on low heat for 15 minutes, stirring occasionally. When done, set aside.

      TIP: If you are a multi-tasker and like to save time, you can brown the chicken pieces (see below) while the sauce cooks. That way they will be done about the same time.

      Chopped onion is cooked in melted butter to start the bbq sauce.The BBQ sauce is fully cooked and ready to use.

      Lightly Brown The Chicken Pieces Before Baking

      Pat each of the chicken pieces you will be using with paper towels to absorb extra moisture before cooking. Pour just enough oil into a large skillet to cover the bottom. Heat the oil on medium-high heat until very hot but not smoking.

      Carefully add the chicken pieces in a single layer to the hot oil and do not move them once they hit the pan. You may find it necessary to brown the chicken in batches, but it doesn’t take long at all to brown them, so nor worries! Brown the first side for 2-3 minutes, then carefully turn over each piece to lightly brown the other side.

      Place the lightly browned chicken pieces in a single layer in a 13″x9″ baking dish. Repeat browning process with 2nd batch, if necessary. I cooked mine in two batches. You do not want them to be fully cooked or very brown, just enough to lightly brown and to help seal the juices in the meat.

      Chicken pieces are lightly browned in hot oil on both sides.Lightly browned chicken pieces are placed in baking dish.

      Time To Cook Easy Baked BBQ Chicken

      Once all the chicken has been browned and added to the baking dish, pour all of the BBQ sauce over the chicken. Turn to make sure both sides are fully coated in that yummy BBQ sauce!

      Bake the chicken (uncovered) at 350°F. for 1 hour, or until the chicken reaches a safe internal temperature of 165°F. Once done, remove from oven. Let chicken “rest” for 3-4 minutes, and then the easy baked BBQ chicken is ready to be served.

      Homemade BBQ sauce is poured over chicken, to coat, before baking.Easy Baked BBQ Chicken, hot from the oven!

      Time To Eat Some Easy Baked BBQ Chicken!

      Place chicken onto a platter or individual plates. Before serving, spoon some of the extra sauce from the baking dish over the top of each piece of chicken.

      That’s it! With minimal prep, and a lot of “inactive” baking time, this meal is ready to be enjoyed. The flavor of the bbq sauce-coated chicken is wonderful, in my humble opinion. We enjoyed our meal of easy baked BBQ chicken with mashed potatoes and a spinach salad (with warm bacon dressing) on the side. It was wonderful! 

      The easy baked bbq chicken, served with mashed potatoes and spinach salad.

      I truly hope you have the opportunity to make this easy chicken recipe for those you love. It doesn’t matter what kind of chicken pieces you use (breasts, legs, thighs or a combo); the result will be delicious. Have a great day, and thank you for visiting. Come back again soon!

      Looking For More CHICKEN Recipes?

      You can find all of my chicken recipes (there’s a LOT) in the Recipe Index, located at the top of the page. There are many delicious chicken recipes there, including:

      Interested In More Recipes?

      Thank you for visiting this website. I appreciate you using some of your valuable time to do soIf you’re interested, I publish a newsletter 2 times per month (1st and 15th) with all the latest recipes, and other fun info. I would be honored to have you join our growing list of subscribers, so you never miss a great recipe!
      There is a Newsletter subscription box on the top right side (or bottom) of each blog post, depending on the device you use, where you can easily submit your e-mail address (only) to be included in my mailing list.

      You Can Also Find Me On Social Media:

      Facebook page: The Grateful Girl Cooks!
      Pinterest:
      The Grateful Girl Cooks!
      Instagram:
      jbatthegratefulgirlcooks

      Author's signature

      Original Recipe Source: unknown

      0 from 0 votes
      Easy Baked BBQ Chicken
      Prep Time
      20 mins
      Cook Time
      1 hr
      Total Time
      1 hr 20 mins
       

      Easy Baked BBQ Chicken is just that... EASY! The homemade BBQ sauce is simple to make, and compliments the browned, baked chicken perfectly!

      Category: Dinner, Main Dish
      Cuisine: American
      Keyword: easy baked bbq chicken
      Servings: 8
      Calories Per Serving: 217 kcal
      Author: JB @ The Grateful Girl Cooks!
      Ingredients
      For BBQ Sauce:
      • 3 Tablespoons butter
      • cup chopped yellow onion
      • ¾ cup ketchup
      • cup white vinegar
      • ½ cup water
      • 3 Tablespoons brown sugar , light or dark
      • 2 teaspoons prepared yellow mustard
      • Tablespoons worchestershire sauce
      • ¼ teaspoon salt
      • ¼ teaspoon black pepper
      For Rest of Dish:
      • 8 pieces chicken (breasts, thighs, legs)
      • vegetable oil (enough to cover bottom of large skillet)
      Instructions
      1. Preheat oven to 350°F.

      2. In a medium saucepan, sauté chopped onion in melted butter. Cook 2-3 minutes, stirring often, then add remaining ingredients (except for chicken). Let sauce simmer uncovered on low heat for 15 minutes, stirring occasionally. When done, set aside. TIP: If you are a multi-tasker and like to save time, you can brown the chicken pieces (see below) while the sauce cooks. That way they will be done about the same time.

      3. Pat each of the chicken pieces you will be using with paper towels to absorb extra moisture before cooking. Pour just enough oil into a large skillet to cover the bottom. Heat oil on medium-high heat until very hot but not smoking. Carefully add chicken pieces in a single layer to hot oil. Do not move them once they hit the skillet. Brown first side for 2-3 minutes, then carefully turn over each piece to lightly brown other side. Place chicken in single layer in a 13"x9" baking dish. Repeat browning process with 2nd batch, if necessary.

      4. Pour all of the BBQ sauce over chicken. Turn to make sure all sides are fully coated with sauce before baking. Bake chicken (uncovered) at 350°F. for 1 hour, or until chicken reaches a safe internal temperature of 165°F. Once done, remove from oven. Let chicken "rest" for 3-4 minutes. then place chicken on platter or individual plates. Spoon extra sauce from baking dish over each piece, then serve. Enjoy!

      Recipe Notes

      ***PLEASE NOTE: This caloric calculation is an estimate only, because the sizes/weights, and variety of chicken pieces (bone-in or boneless, skinless or skin-on) YOU use will be different. The caloric calculation for this recipe was made using boneless, skinless chicken breasts as a point of reference. Using thighs and legs or any combination of pieces/sizes, will result in a different caloric value per serving.

      Nutrition Facts
      Easy Baked BBQ Chicken
      Amount Per Serving (1 breast)
      Calories 217 Calories from Fat 63
      % Daily Value*
      Fat 7g11%
      Saturated Fat 3g19%
      Cholesterol 84mg28%
      Sodium 493mg21%
      Potassium 530mg15%
      Carbohydrates 12g4%
      Fiber 1g4%
      Sugar 10g11%
      Protein 24g48%
      Vitamin A 281IU6%
      Vitamin C 3mg4%
      Calcium 19mg2%
      Iron 1mg6%
      * Percent Daily Values are based on a 2000 calorie diet.

      Here’s one more to pin on your Pinterest boards!Easy Baked BBQ Chicken is just that... EASY! The homemade BBQ sauce is simple to make, and compliments the browned, baked chicken perfectly!