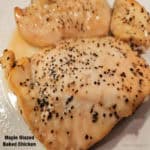
Make Air Fryer Chicken Breast Strips to eat as is, or add to soups, salads, burritos or tacos! This well-seasoned chicken is very versatile!

Looking for a quick and delicious air fryer recipe for chicken breasts? Well, this one is pretty amazing, and it’s incredibly versatile!
Chicken breasts are well seasoned, then cooked in an air fryer for about 10 minutes. After that they are sliced into strips which can be eaten as is, or added to soups, salads, casseroles, taco shells, quesadillas, burritos, pasta, etc.
How’s that for versatile? This recipe comes together so fast, it is a perfect choice for a crazy busy day… and the chicken tastes so good! Here’s how to make air fryer chicken breast strips. I think you’re going to love them!
Scroll Down For A Printable Recipe Card At The Bottom Of The Page
What Ingredients Will I Need?
When making this dish, you will need 1¼ pounds of boneless and skinless chicken breasts (about 3), olive oil, and seasoning mix. To make the seasoning mix you need paprika, garlic powder, onion powder, smoked paprika, salt, brown sugar and cornstarch.

Mix the spices in a small bowl until they’re fully combined. It takes about a minute to whip this spice mix together. That’s it. So easy, right?


Prepare And Season The Chicken
Pat the chicken breasts dry using paper towels, then slice each chicken breast into 3 pieces. Place each piece (one at a time) between layers of plastic wrap, and pound them thin, using a meat mallet.
Season the chicken (on one side) with HALF of the seasoning mix, then drizzle with HALF of the olive oil. Rub the oil and spices together to cover the chicken.


Turn the chicken pieces to the other side and repeat the process with the seasoning and olive oil. Now both sides of the chicken should be well-coated with spices and oil.

Cook Chicken Breasts In The Air Fryer
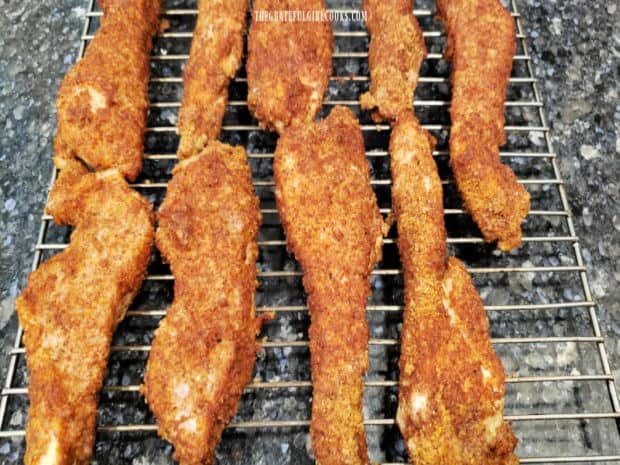
Preheat the air fryer to 400°F. Lay the seasoned chicken pieces (in a single layer) in the basket of the air fryer. Try not to crowd them, so the hot air circulates better.
Cook the chicken at 400°F. for 5 minutes, then pause the cooking, and carefully turn the pieces over to the other side.


Put the basket back into the air fryer and continue cooking the other side of the chicken for an additional 3-5 minutes.
Keep an eye on the internal temperature using a digital thermometer. When done, the chicken should register an internal temperature of 165°F.

Time To Enjoy Air Fryer Chicken Breast Strips!
Now it’s time to enjoy air fryer chicken breast strips! Transfer the chicken from the air fryer onto a cutting board. Let rest for 2-3 minutes.
Slice each piece of chicken into thin strips, and then they are ready to be eaten. There are so many different ways you can enjoy these chicken strips!
Serve them on rice, pasta, in tacos, on mixed green salads, make chicken quesadillas, add to a casserole, or use them in soup. There really is no limit to what you can use air fryer chicken breast strips for… use your imagination!

I love that there are so many ways to use this deliciously seasoned chicken and trust you will find this chicken recipe convenient and tasty, too!
Thanks for stopping by, and I invite you to come back soon for more family-friendly recipes. Take care, may God bless you… and have a wonderful day!
Looking For More AIR FRYER Recipes?
You can find ALL of my recipes in the Recipe Index, which is located at the top of the page. I have a nice variety of Air Fryer recipes to choose from, including:
- Air Fryer Italian Meatballs
- Blackberry Air Fryer Handpies
- Blueberry French Toast Cups
- Air Fryer Pork Chops For Two
- Air Fryer Cheddar Biscuits
Want More Recipes? Get My FREE Newsletter!
I publish a newsletter 2 times per month (1st and 15th) with lots of recipes, tips, etc.
Would you like to join our growing list of subscribers?
There is a Newsletter subscription box on the top right (or bottom) of each blog post, depending on the device you use.
You can submit your e-mail address there, to be added to my mailing list.
Find Me On Social Media:
Facebook page: The Grateful Girl Cooks!
Pinterest: The Grateful Girl Cooks!
Instagram: jbatthegratefulgirlcooks

Original recipe source: Lindsay, at: https://pinchofyum.com/ridiculously-good-air-fryer-chicken-breast
↓↓ PRINTABLE RECIPE BELOW ↓↓

Make Air Fryer Chicken Breast Strips to eat as is, or add to soups, salads, burritos or tacos! This well-seasoned chicken is very versatile!
- 1½ teaspoons brown sugar
- 1 teaspoon cornstarch
- ¾ teaspoon paprika
- ¾ teaspoon salt fine grind-not coarse
- ½ teaspoon garlic powder
- ½ teaspoon onion powder
- ¼ teaspoon smoked paprika
- 1¼ pound boneless, skinless chicken breasts (approx. 3 large)
- 2 teaspoons extra virgin olive oil
Mix brown sugar, cornstarch, paprika, salt, garlic powder, onion powder, and smoked paprika in a small bowl until combined.
Pat chicken breasts dry with paper towels; slice each chicken breast into 3 pieces. Place pieces (one at a time) between layers of plastic wrap, and pound them thin, using a meat mallet. Lay in single layer on cookie sheet.
Season chicken (top side) with HALF the seasoning mix, then drizzle with HALF the olive oil. Rub oil/ spices together to cover chicken. Turn chicken over; repeat with remaining seasoning/ oil.
Preheat air fryer to 400°F. Lay chicken (in single layer) in air fryer basket. Cook at 400°F. for 5 minutes; pause cooking; turn pieces over. Continue cooking chicken an additional 3-5 minutes. Keep an eye on internal temp. using a digital thermometer. When done, chicken should have an internal temperature of 165°F.
Transfer chicken to a cutting board. Let rest 2-3 minutes. Slice into thin strips, and serve as is, or added to a favorite salad, soup, etc.. Enjoy!
Here’s one more to pin on your Pinterest boards!


 - The Grateful Girl Cooks!")
 - The Grateful Girl Cooks!")
 - The Grateful Girl Cooks!")
 - The Grateful Girl Cooks!")
 - The Grateful Girl Cooks!")
 - The Grateful Girl Cooks!")
 - The Grateful Girl Cooks!")
 - The Grateful Girl Cooks!")
 - The Grateful Girl Cooks!")
 - The Grateful Girl Cooks!")
 - The Grateful Girl Cooks!")
 - The Grateful Girl Cooks!")
 - The Grateful Girl Cooks!")

 - The Grateful Girl Cooks!")