Month: July 2022

Old-Fashioned Tapioca Pudding

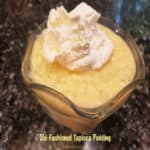
Make 4 servings of delicious Old-Fashioned Tapioca Pudding from scratch! Rich and creamy, you’re going to love this classic dessert!
Make 4 servings of delicious Old-Fashioned Tapioca Pudding from scratch! Rich and creamy, you're going to love this classic dessert!

Growing up, I did not care too much for tapioca pudding, but as an adult, I’ve come to love it! Long ago I used to keep a box of INSTANT tapioca in our pantry, but years ago found a yummy recipe to make this creamy classic pudding from scratch!

Once you buy tapioca pearls at the grocery store, you can store them in the pantry for a long time! Now- whenever we want some old-fashioned tapioca pudding, I’ve already got the tapioca pearls, ready to go! To make this pudding from scratch you need uncooked tapioca pearls, plus a few other common ingredients (sugar, salt, water, eggs, milk and vanilla)! I always have these other ingredients in my kitchen, so when we want this pudding, it’s very convenient to pull together!

Making tapioca pudding from scratch does take a little bit of time (and stirring), but it is well worth it, in my opinion. The finished pudding is cold, creamy, thick, and delicious!

Scroll Down For A Printable Recipe Card At The Bottom Of The Page

Prepare The Tapioca Pearls

This old-fashioned recipe calls for uncooked small pearl tapioca. You can usually find it near the pudding mixes (or sometimes in the pasta section) at the local grocery store. Do NOT use boxed instant tapioca mix for this recipe. To prepare it to be cooked, measure 1/3 cup of the tapioca pearls into a Medium sized non-stick saucepan. NOTE: Make sure to use a non-stick saucepan, so the pudding won’t scorch on the bottom of the pan during the extended cooking time. I learned this the hard way once awhile ago… trust me!

Cover the tapioca pearls with ¾ cup of water, and then let them sit and soak for 30 minutes. This “soaking” helps soften the hard tapioca pearls a bit before cooking. 

Tapioca pearls are measured in a measuring cup before cooking.The tapioca pearls are soaking in a pan full of water.

Once the tapioca has finished soaking, add milk and salt to the saucepan. Bring the liquid to a boil on MEDIUM heat, then reduce the heat to LOW and let the pudding simmer for 30 minutes, stirring frequently. The pudding mixture will thicken considerably while it is cooking.

Milk and salt are added to the pan of soaked tapioca pearls.Old-fashioned tapioca pudding cooks for 30 minutes until it thickens.

Temper The Eggs So They Don’t Scramble

When the pudding is done cooking, remove the pan from the heat. Now you need to prepare the eggs to add to the hot mixture. If you add the eggs directly into the hot pudding, they will scramble, and we don’t want that to happen! So the eggs must be “tempered” first, which means warming them up slowly so they can be added to a hot mixture without scrambling them.

In a small bowl, combine lightly beaten eggs with granulated sugar. Whisk these 2 ingredients together, to combine. Remove ½ cup of the hot pudding from the saucepan. SLOWLY (very slowly) while whisking continuously, drizzle the hot pudding into the eggs, a little at a time. Keep whisking while slowly drizzling in the hot stuff!

Once ½ cup of hot pudding has been incorporated into the eggs, slowly drizzle the combined mixture back into the remaining hot pudding in the saucepan. Whisk continuously while it’s being added. 

Eggs are whisked with sugar until they're combined.The egg mixture is tempered by drizzling in some hot pudding mixture a bit at a time.Tempered eggs are whisked back into the pan of hot tapioca pudding.

Final Steps Before Chilling

Return the pan to the heat. Cook the old-fashioned tapioca pudding on LOW heat for 4 more minutes, stirring constantly as it continues to thicken. Remove the pan from the heat, and stir in vanilla extract. Transfer all the pudding from the saucepan into a medium sized mixing bowl.

Fill a large bowl (larger than the one the pudding is in) with lots of ice cubes and small amount of water. Set the bowl with the pudding over the ice in the larger bowl (see photo #3 below). This will help to quickly cool the old-fashioned tapioca pudding. Allow the pudding to sit over the ice for 15 minutes, stirring occasionally, as the pudding continues to thicken.

Old-fashioned tapioca pudding is cooked longer until it really thickens.Vanilla extract is added to the tapioca pudding, once off the heat.A bowl of old-fashioned tapioca pudding rests on a bowl of ice water to cool it quickly.

Who Wants Some Old-Fashioned Tapioca Pudding?

Once the pudding has chilled on top of the ice water “bath” for 15 minutes, remove the pudding bowl from the ice bath. At this point, you can either leave the pudding in the mixing bowl or divide it up into 4 serving containers… your choice. The recipe will yield four servings (½ cup each) of old-fashioned tapioca pudding. Use plastic wrap to cover the pudding (see note below).

IMPORTANT NOTE: Lay the plastic wrap directly on top of the pudding, making contact with the surface of the pudding. This will help to prevent a “skin” from developing on the pudding as it chills.

Place the (covered) old-fashioned tapioca pudding in the refrigerator, and chill completely until ready to serve. Garnish each serving with a dollop of whipped cream or a sprinkle of nutmeg, if desired, then serve cold!

Four servings of old-fashioned tapioca pudding, ready to be refrigerated.Each portion of tapioca pudding is topped with whipped cream before serving.

I hope you enjoy this recipe for old-fashioned tapioca pudding. It takes a little bit of time to prepare, but results in a thick, creamy and delicious classic pudding, I’m confident you’ll enjoy! Thanks for stopping by, and come back soon for more yummy, family-friendly recipes! Take care, and have a great day.

Looking For More PUDDING or MOUSSE Recipes?

You can find ALL of my recipes in the Recipe Index, located at the top of the page. I have some delicious pudding and mousse recipes for you to enjoy, including:

Interested In More Recipes?

Thank you for visiting this website. I appreciate you using some of your valuable time to do soIf you’re interested, I publish a newsletter 2 times per month (1st and 15th) with all the latest recipes, and other fun info. I would be honored to have you join our growing list of subscribers, so you never miss a great recipe!
There is a Newsletter subscription box on the top right side (or bottom) of each blog post, depending on the device you use, where you can easily submit your e-mail address (only) to be included in my mailing list.

You Can Also Find Me On Social Media:

Facebook page: The Grateful Girl Cooks!
Pinterest:
The Grateful Girl Cooks!
Instagram:
jbatthegratefulgirlcooks

Author's signature

Original recipe source: “Cooking Light Annual Recipes 2007, page 292, published in 2006 by Oxmoor House

↓↓ PRINTABLE RECIPE BELOW ↓↓

0 from 0 votes
Old-Fashioned Tapioca Pudding
Prep Time
30 mins
Cook Time
35 mins
Total Time
1 hr 5 mins
 

Make 4 servings of delicious Old-Fashioned Tapioca Pudding from scratch! Rich and creamy, you're going to love this classic dessert!

Category: Desserts
Cuisine: American
Keyword: old-fashioned tapioca pudding
Servings: 4 (1/2 cup) servings
Calories Per Serving: 204 kcal
Author: JB @ The Grateful Girl Cooks!
Ingredients
  • cup small pearl tapioca uncooked
  • ¾ cup water
  • cups low-fat milk (1%)
  • ¼ teaspoon salt
  • 2 large eggs lightly beaten
  • cup granulated sugar
  • ½ teaspoon vanilla extract
OPTIONAL GARNISH FOR SERVING: whipped cream and/or grated nutmeg
    Instructions
    1. Place tapioca pearls in a medium sized non-stick saucepan. NOTE: Make sure to use a non-stick saucepan, so pudding won't scorch on bottom of pan while cooking. Add water; let tapioca soak in water for 30 minutes.

    2. Add milk and salt to the saucepan. Bring liquid to a boil on MEDIUM heat, then reduce heat to LOW. Let pudding simmer for 30 minutes, stirring frequently. Remove pan from heat when done cooking.

    3. In a small bowl, combine eggs with sugar. Whisk, to combine. Remove 1/2 cup hot pudding from the saucepan. SLOWLY (very slowly) while whisking continuously, drizzle this hot pudding into the eggs, a little at a time. Once ½ C. hot pudding has been incorporated into eggs, slowly drizzle combined mixture back into remaining pudding in saucepan, whisking continuously while adding. 

    4. Return pan to heat. Cook pudding on LOW heat 4 more minutes, stirring constantly as it continues to thicken. Remove pan from heat; stir in vanilla. Transfer pudding into a medium-sized mixing bowl.

    5. Fill a large bowl (larger than pudding bowl) with ice cubes and small amount of water. Set pudding bowl over ice in larger bowl for 15 minutes, stirring (carefully) occasionally, as pudding continues to thicken.

    6. After 15 minutes, remove pudding bowl from ice bath. *At this point, you can either leave pudding in mixing bowl or divide it into 4 serving dishes/containers. Use plastic wrap to cover pudding. NOTE: Lay plastic wrap directly on top of pudding, making contact with surface of pudding. This helps prevent a "skin" from forming on pudding as it chills. Place (covered) pudding in refrigerator; chill completely until ready to serve. Garnish each serving with whipped cream and/or a sprinkle of nutmeg, if desired, and serve cold!

    Nutrition Facts
    Old-Fashioned Tapioca Pudding
    Amount Per Serving (1 (1/2 cup serving))
    Calories 204 Calories from Fat 36
    % Daily Value*
    Fat 4g6%
    Saturated Fat 2g13%
    Trans Fat 1g
    Polyunsaturated Fat 1g
    Monounsaturated Fat 1g
    Cholesterol 100mg33%
    Sodium 235mg10%
    Potassium 248mg7%
    Carbohydrates 35g12%
    Fiber 1g4%
    Sugar 24g27%
    Protein 8g16%
    Vitamin A 395IU8%
    Calcium 185mg19%
    Iron 1mg6%
    * Percent Daily Values are based on a 2000 calorie diet.

    Here’s one more to pin on your Pinterest boards!Make 4 servings of delicious Old-Fashioned Tapioca Pudding from scratch! Rich and creamy, you're going to love this classic dessert!

    Strawberry Pecan Bread

    Enjoy a delicious loaf of Strawberry Pecan Bread! Ten minutes prep time and into the oven it goes. This easy to make bread yields 8 slices!
    Enjoy a delicious loaf of Strawberry Pecan Bread! Ten minutes prep time and into the oven it goes. This easy to make bread yields 8 slices!

    Recently I made a loaf of this delicious bread and photographed the “process” so I could share it here on the ol’ blog. Strawberry Pecan Bread is absolutely scrumptious, and I’m pretty confident you’ll enjoy it, too! The recipe is super easy to prepare, and before you know it, it will be baking away in your oven.

    This bread loaf also freezes well, so if you want to double the written recipe, you can wrap the extra loaf very well in freezer bags or foil. It will store well in the freezer until you’re ready for another loaf to enjoy with family or friends! Here are the instructions for how to make this yummy strawberry pecan bread.

    Making The Bread Batter

    To make the batter for the bread, place flour, sugar, cinnamon, baking soda and salt into a large bowl. Stir well, to combine. Add 2 eggs, ONE AT A TIME, beating well after each one, using an electric mixer. The dough will be very crumbly, even after mixing.

    Dry ingredients are combined, then eggs are added and beaten in, one at a time.Dough for the bread is crumbly after the eggs are beaten in.

    Add The Remaining Ingredients

    Stir oil into the mixture until incorporated into the “batter”. Once combined, add sliced strawberries and chopped pecans (or walnuts, if using), and stir gently until they’re mixed in. At this point, the dough will not be too fluid, but will be quite thick.

    Oil is added, and stirred into the dough until incorporated.Sliced strawberries and chopped pecans (or walnuts) are stirred into the batter.The dough for the strawberry pecan bread is ready to add to a loaf pan for baking.

    Time To Bake The Bread

    Spoon the strawberry pecan bread batter into a generously greased and floured 9″x5″ loaf pan until evenly distributed. Pat the dough down with the back of a spoon until solidly combined.

    Bake the bread in a preheated 350°F oven (on the middle rack) for 55-60 minutes, or until a toothpick inserted deep into the top of the loaf comes out clean. When done, transfer the pan to a wire rack, and let the strawberry pecan bread cool 10-12 minutes before removing it from the pan. Run a butter knife around the edges of the bread to loosen, then invert the pan to remove the loaf.

    Bread batter is patted down in a 9x5" loaf pan before baking.After baking, the loaf of strawberry pecan bread cools before being removed from pan.

    Who Wants A Slice Of Strawberry Pecan Bread?

    After removing the loaf from the pan, let it cool completely before slicing and serving. We think this bread tastes the best when served at room temperature. Once sliced, you can see those strawberry slices and chopped pecans inside the bread. It’s delicious, and I am sure you’re going to like it!

    Out of the loaf pan, the strawberry bread cools before slicing and serving.A slice of the strawberry pecan bread, ready to enjoy!I hope you have the chance to make this delicious strawberry pecan bread for yourself or for those you love. Thanks for stopping by, and I invite you to come back soon for more family-friendly recipes. Take care, God bless you, and have a great day.

    Looking For More BREAD Recipes?

    You can find ALL of my recipes in the Recipe Index, located at the top of the page. I have some wonderful bread recipes for you to choose from, including:

    Interested In More Recipes?

    Thank you for visiting this website. I appreciate you using some of your valuable time to do soIf you’re interested, I publish a newsletter 2 times per month (1st and 15th) with all the latest recipes, and other fun info. I would be honored to have you join our growing list of subscribers, so you never miss a great recipe!
    There is a Newsletter subscription box on the top right side (or bottom) of each blog post, depending on the device you use, where you can easily submit your e-mail address (only) to be included in my mailing list.

    You Can Also Find Me On Social Media:

    Facebook page: The Grateful Girl Cooks!
    Pinterest:
    The Grateful Girl Cooks!
    Instagram:
    jbatthegratefulgirlcooks

    Author's signature

    Recipe adapted from original recipe in: “Gooseberry Patch Big Book Of Holiday Cooking”, published in 2012 by Gooseberry Patch & Oxmoor House, page 73

    ↓↓ PRINTABLE RECIPE BELOW ↓↓

    0 from 0 votes
    Strawberry Pecan Bread
    Prep Time
    10 mins
    Cook Time
    55 mins
    Total Time
    1 hr 5 mins
     

    Enjoy a delicious loaf of Strawberry Pecan Bread! Ten minutes prep time and into the oven it goes. This easy to make bread yields 8 slices!

    Category: Bread/Breakfast, Snack
    Cuisine: American
    Keyword: strawberry pecan bread
    Servings: 8 slices (about 1" thick)
    Calories Per Serving: 277 kcal
    Author: JB @ The Grateful Girl Cooks!
    Ingredients
    • cups all purpose flour
    • ¾ teaspoon ground cinnamon
    • ½ teaspoon salt
    • ½ teaspoon baking soda
    • 1 cup granulated sugar
    • 2 large eggs
    • ¾ cup vegetable or canola oil
    • 1 cup fresh strawberries hulled and thinly sliced
    • ¾ cup chopped pecans (or walnuts)
    Instructions
    1. Preheat oven to 350°F. Generously grease and flour a 9" x 5" loaf pan.

    2. Measure flour, sugar, cinnamon, baking soda and salt into large bowl. Stir well, to combine. Add eggs, ONE AT A TIME, beating well after each one, using electric mixer. Dough will be crumbly, Add oil; stir until incorporated, then add strawberries and pecans (or walnuts, if using). Stir gently until combined (mixture will be thick).

    3. Spoon dough into prepared loaf pan until evenly distributed. Pat dough down with back of a spoon until solidly combined.

    4. Bake at 350°F (on middle rack) for 55-60 minutes, or until a toothpick inserted deep into the top of the loaf comes out clean. Transfer pan to a wire rack. Let bread cool 10-12 minutes before removing from pan. Run a butter knife around edges of bread to loosen, then invert the pan to remove loaf. Let bread cool completely before slicing and serving.

    Nutrition Facts
    Strawberry Pecan Bread
    Amount Per Serving (1 slice (1" wide))
    Calories 277 Calories from Fat 81
    % Daily Value*
    Fat 9g14%
    Saturated Fat 1g6%
    Trans Fat 1g
    Polyunsaturated Fat 6g
    Monounsaturated Fat 1g
    Cholesterol 47mg16%
    Sodium 233mg10%
    Potassium 120mg3%
    Carbohydrates 46g15%
    Fiber 2g8%
    Sugar 26g29%
    Protein 6g12%
    Vitamin A 72IU1%
    Vitamin C 11mg13%
    Calcium 26mg3%
    Iron 2mg11%
    * Percent Daily Values are based on a 2000 calorie diet.

    Here’s one more to pin on your Pinterest boards!Enjoy a delicious loaf of Strawberry Pecan Bread! Ten minutes prep time and into the oven it goes. This easy to make bread yields 8 slices!


    Easy Black Bean Stew

    Easy Black Bean Stew is a hearty meatless dish, with black beans, pearl couscous, onions, and tomatoes in a savory Southwestern-style broth.
    Easy Black Bean Stew is a hearty meatless dish, with black beans, pearl couscous, onions, and tomatoes in a savory Southwestern-style broth.

    If you enjoy the flavor of chili, then I’m confident you will enjoy this easy black bean stew. The dish is incredibly simple to prepare, and is very filling, because of the black beans and pearl couscous used. Onions, diced tomatoes and spices round out the dish, and when garnished with sour cream and green onions, it’s a great meatless meal! 

    My husband and I are trying to eat a couple of meatless meals each week, and this one is always a big hit! With only a few minutes prep time and a short cooking time, this meatless meal is not only quick and simple, it tastes GREAT! Here’s how to make this easy black bean stew:

    Scroll Down For A Printable Recipe Card At The Bottom Of The Page

    The recipe calls for pearl couscous (also known as Israeli couscous), which is typically located near the rice at most grocery stores.. It is a round-shaped pasta, similar in size to a pearl, so you can see why it’s called “pearl” couscous. Pearl couscous cooks quickly and is a wonderful addition to this dish.

    Pearl couscous is used in this recipe, and is pearl-shaped pasta.

    First, heat 2 teaspoons of olive oil on medium heat in a large, non-stick saucepan. Once the oil is hot (but not smoking), add chopped onion and the pearl couscous (uncooked). Stir often, and cook for 5 minutes. The onions will soften and the couscous will become lightly “toasted”.

    Add chicken broth, minced garlic and ground cumin to the pan, then bring the liquid to a boil. Cover the saucepan with a lid once it begins boiling, and turn the heat down to low. Allow the broth to simmer (covered) for 5 minutes.

    Chopped onion and pearl couscous are cooked in pan for about 5 minutes.Chicken broth and spices are added to the onion and couscous in pan.

    Almost Finished Making The Stew

    Remove the lid and add black beans (drained, rinsed), diced tomatoes (including juice), and a teaspoon of minced chipotle pepper in adobo sauce. Stir the black bean stew until all the ingredients are combined. 

    Put a lid on the pan and let the stew simmer (covered) on low heat for 4 minutes, or until the pearl couscous is tender. The stew will be fairly thick when done. If you want it to be more “soup-like”, add a bit more broth or hot water, and stir it in. I usually tend to add a bit more broth to ours at the very end. See how easy it is to make black bean stew? Now you’re ready to serve it! 

    Chipotle pepper, black beans and diced tomatoes are added to the easy black bean stew.Easy black bean stew cooks and broth is added to thin it out, if desired.

    Serve The Easy Black Bean Stew

    When the stew is fully heated and the couscous is tender, it is ready to serve! Ladle the black bean stew into serving bowls. If desired, garnish each serving with a dollop of sour cream and some chopped green onions (scallions). The garnishes are optional, but provide great added color and flavor to the dish, and I heartily recommend it!

    You could also add avocado chunks or chopped cilantro, if desired, to “make it your own”. This soup really does taste great, for something so simple to make! I am confident you’re going to enjoy this meal. A big slice of crusty bread on the side goes well with the stew. It tastes great dipping it into the seasoned broth. YUM!

    The easy black bean stew is garnished with chopped green onions and sour cream to serve.A white bowl full of easy black bean stew is ready to be eaten and enjoyed.

    I sure hope you enjoy this delicious black bean stew, if you have the opportunity to try it. Thank you so much for stopping by today, and I invite you to come back soon for more delicious recipes. Take care, may God bless you, and have a great day.

    Looking For More SOUP Recipes?

    You can find ALL of my recipes in the Recipe Index, located at the top of the page. I have lots of fantastic soup recipes for you to check out, including:

    Interested In More Recipes?

    Thank you for visiting this website. I appreciate you using some of your valuable time to do soIf you’re interested, I publish a newsletter 2 times per month (1st and 15th) with all the latest recipes, and other fun info. I would be honored to have you join our growing list of subscribers, so you never miss a great recipe!
    There is a Newsletter subscription box on the top right side (or bottom) of each blog post, depending on the device you use, where you can easily submit your e-mail address (only) to be included in my mailing list.

    You Can Also Find Me On Social Media:

    Facebook page: The Grateful Girl Cooks!
    Pinterest:
    The Grateful Girl Cooks!
    Instagram:
    jbatthegratefulgirlcooks

    Author's signature

    Recipe adapted from the cookbook: “Cooking Light Annual Recipes 2004, page 273, published in 2003 by Oxmoor House

    ↓↓ PRINTABLE RECIPE BELOW ↓↓

    0 from 0 votes
    Easy Black Bean Stew
    Prep Time
    10 mins
    Cook Time
    15 mins
    Total Time
    25 mins
     

    Easy Black Bean Stew is a hearty meatless dish, with black beans, pearl couscous, onions, and tomatoes in a savory Southwestern-style broth.

    Category: Main Dish, Meatless, Soup
    Cuisine: American
    Keyword: black bean stew
    Servings: 4 small bowls
    Calories Per Serving: 211 kcal
    Author: JB @ The Grateful Girl Cooks!
    Ingredients
    • 2 teaspoons olive oil
    • ½ cup chopped yellow onion
    • cup uncooked Israeli (pearl) couscous
    • cups low-sodium chicken broth
    • 1 can black beans (14.25 oz.) rinsed, drained
    • 1 can diced tomatoes (14.25oz.) including juice
    • 1 teaspoon minced canned chipotle chili in adobo sauce
    • 1 teaspoon minced garlic
    • ¼ teaspoon ground cumin
    For Garnish: (optional, but recommended!)
    • 1 Tablespoon sliced green onions
    • 4 teaspoons low-fat sour cream
    Instructions
    1. Heat olive oil on medium heat in a large, non-stick saucepan. Once oil is hot (but not smoking), add chopped yellow onion and uncooked couscous.. Stir often, and cook for 5 minutes.

    2. Add chicken broth, garlic and cumin to the pan. Bring liquid to a boil. Cover pan with a lid once boiling and turn heat to low. Let stew simmer (covered) for 5 minutes.

    3. Remove lid; add black beans, tomatoes (including juice), and minced chipotle pepper in adobo sauce. Stir until all ingredients are combined. Cover pan; simmer (covered) on low heat for 4 minutes, or until couscous is tender. NOTE: Stew will be fairly thick. If you want it more "soup-like", add more broth or hot water, and stir it in.

    4. Ladle stew into serving bowls. If desired, garnish each serving with a dollop of sour cream and chopped green onions. Garnishes are optional, but provide added color and flavor, Serve hot, and enjoy!

    Recipe Notes

    NOTE: Caloric calculation includes sour cream and green onion garnish in total.

    Nutrition Facts
    Easy Black Bean Stew
    Amount Per Serving (1 (1/4 of total))
    Calories 211 Calories from Fat 36
    % Daily Value*
    Fat 4g6%
    Saturated Fat 1g6%
    Polyunsaturated Fat 1g
    Monounsaturated Fat 2g
    Cholesterol 1mg0%
    Sodium 581mg25%
    Potassium 648mg19%
    Carbohydrates 36g12%
    Fiber 9g38%
    Sugar 4g4%
    Protein 11g22%
    Vitamin A 215IU4%
    Vitamin C 14mg17%
    Calcium 87mg9%
    Iron 3mg17%
    * Percent Daily Values are based on a 2000 calorie diet.

    Here’s one more to pin on your Pinterest boards!Easy Black Bean Stew is a hearty meatless dish, with black beans, pearl couscous, onions, and tomatoes in a savory Southwestern-style broth.

    Italian Plum Jam

    Make yummy, pectin-free Italian Plum Jam with prune plums! Small batch recipe makes about 3 half pints, and canning directions are included.
    Make yummy, pectin-free Italian Plum Jam with prune plums! Small batch recipe makes about 3 half pints, and canning directions are included.

    A good friend of our family brought us an incredibly HUGE amount of Italian plums last summer. He had been given so many by one of his neighbors there was no way he could eat them all. So… he blessed us with them! We ate some, and I made several jars of this delicious jam AND used the rest to bake an incredible Italian Plum Shortbread Tart!

    I’ve made literally HUNDREDS of jars of jam over the years, but had never tried making plum jam until I tried this recipe. It is so very good! This small batch recipe is convenient, especially if you don’t eat lots of jam! This way, you can just try it, and you won’t be overwhelmed with prep work or make “too many to eat” jars of jam! It is a pectin-free jam made with only THREE ingredients! I’ve also included the instructions to safely can this jam, if you don’t plan on eating it right away, or want to make a few jars for storage in your pantry.

    Scroll Down For A Printable Recipe Card At The Bottom Of The Page

    Prepare The Italian “Prune” Plums

    Behold… the humble Italian prune plum. Black/grey in color, oblong shaped, and typically harvested in late August, they’re very unassuming, as far as fruit goes. But let me tell you… they taste wonderful!
    NOTE: Plan ahead to make this jam, because the prepared plums need to be refrigerated overnight!

    To prepare the plums for jam, begin by cutting each one into quarters, and removing and discarding the seeds. Place the quartered, pitted plums into a large bowl. You will need a total of 2 pounds of plums for this small batch recipe, so get cutting! The insides of the plums are a brilliant golden hue (before cooking). 

    Italian prune plums are oblong in shape, and black and grey in color.Italian plums are cut into quarters, pitted, and the flesh is golden in color before cooking.

    Add granulated sugar and the juice of a lemon to the plums, and stir well, to combine these ingredients. Once combined, cover the bowl with plastic wrap, and place in the refrigerator. Allow the plums to refrigerate overnight or at least 8 hours for best results.

    Granulated sugar and fresh lemon juice are stirred into the plums, then they're refrigerated overnight.

    After being refrigerated overnight, the plum mixture is ready to be cooked into jam.

    Cooking The Italian Plum Jam

    Since this Italian plum jam is being made without pectin, before you begin cooking the plums, place a small plate into your freezer to get it really cold. NOTE: You will use the freezing cold plate to test the jam for doneness later on, so this is an important step!

    Pour the refrigerated plum mixture into a medium-sized saucepan. Turn the heat to MEDIUM, and bring this mixture to a boil. Once boiling, continue to cook the plums for about 2 minutes, stirring often. As they cook, the plums will perform magic and turn into a bright red color… isn’t that awesome?

    Now turn the heat down to LOW, and continue to cook, stirring often for another 15- 20 minutes. Skim off and discard white foam that rises to the surface as it cooks

    While the Italian plum jam cooks, the plums turn from golden in color to red.

    To check to see if the jam is ready, grab the plate out of the freezer. Put a teaspoon of hot jam onto the frozen plate. If the jam “sets up” within the first minute, the Italian plum jam is ready. If the jam is too runny, put the plate back in the freezer and continue to cook the jam a few more minutes. Try again, and once the jam will set up, it’s ready. Remove the saucepan from the heat.

    To test for doneness, a spoonful of hot jam is placed on a frozen plate to see if the jam sets up.

    Canning Italian Plum Jam

    Canning jars and lids will need to be clean, sterilized and hot, following recommended USDA guidelines for safe canning. The total amount of jam (as written) this small batch yields is approximately 3 cups. Because this is a small batch, I usually get about 3 half pint jars for canning (sometimes a little extra for the refrigerator), but you can easily double or triple the recipe.

    Spoon or pour jam through a canning funnel into sterilized jars, leaving a headspace of 1/8″. Use a plastic utensil to remove air bubbles in the jars, then wipe the rims of the jars clean with a damp towel. Attach prepared flat lids and add screw bands, then tighten to fingertip tightness. Process the jars of Italian plum jam (in boiling water at least 1″ above the top of the jars) in a water bath canner for 10 minutes.

    Remove hot jars with tongs and place on a dish towel on the counter. NOTE: Do not place boiling hot jars directly on countertops because differences in temps. could cause jars to crack. Let the jars sit undisturbed for about 12 hours. The jam will thicken slightly as it cools, and jars should seal during this time (you should hear a pinging sound as they seal). If sealed correctly, lids should have no give when tested by gently pressing down on the lid with a finger after jam cools. Any jars that do not correctly seal should be refrigerated. Label sealed jars, and store in pantry (or refrigerator, if desired).

    Jars of jam being processed in a water bath canner.

    Italian Plum Jam Is Ready To Enjoy!

    Keep jam refrigerated, once the jar has been opened. Italian Plum Jam tastes fantastic straight out of the jar, or spread on toast or English muffins. It is also really yummy mixed into plain Greek yogurt, or as a topping for vanilla ice cream. YUM! The recipe as written is estimated to yield about 48 Tablespoons (or servings) of jam, so even this small batch should last for a little while.

    A pint jar of Italian Plum Jam, only half full after a lot of jam has been gobbled up.A toasted English muffin, covered with Italian Plum Jam, and ready to enjoy.

    I hope you have the opportunity to make a small batch of this Italian plum jam for yourself and those you love. Thanks for stopping by today, and I invite you to come back soon for more family-friendly recipes. Take care, may God bless you… and have a GREAT day!

    Looking for More JAM Recipes?

    You can find ALL of my recipes in the Recipe Index, located at the top of the page. I have lots of delicious homemade jam recipes for you to enjoy, including:

    Interested In More Recipes?

    Thank you for visiting this website. I appreciate you using some of your valuable time to do soIf you’re interested, I publish a newsletter 2 times per month (1st and 15th) with all the latest recipes, and other fun info. I would be honored to have you join our growing list of subscribers, so you never miss a great recipe!
    There is a Newsletter subscription box on the top right side (or bottom) of each blog post, depending on the device you use, where you can easily submit your e-mail address (only) to be included in my mailing list.

    You Can Also Find Me On Social Media:

    Facebook page: The Grateful Girl Cooks!
    Pinterest:
    The Grateful Girl Cooks!
    Instagram:
    jbatthegratefulgirlcooks

    Author's signature

    Original recipe source: Lora at: savoringitaly.com/italian-plum-jam/

    ↓↓ PRINTABLE RECIPE BELOW ↓↓

    5 from 1 vote
    Italian Plum Jam (small batch)
    Prep Time
    10 mins
    Cook Time
    30 mins
    Refrigeration Time (inactive-overnight)
    8 hrs
    Total Time
    8 hrs 40 mins
     

    Make yummy, pectin-free Italian Plum Jam with prune plums! Small batch recipe makes about 3 half pints, and canning directions are included.

    Category: Condiment
    Cuisine: American
    Keyword: Italian plum jam
    Servings: 48 Tablespoons (approx. 3 cups total)
    Calories Per Serving: 33 kcal
    Author: JB @ The Grateful Girl Cooks!
    Ingredients
    • 2 pounds Italian prune plums pitted, quartered
    • cups granulated sugar
    • 1 lemon, JUICE only
    Instructions
    Prepping The Plums:
    1. NOTE: Plan ahead- prepared plums need to be refrigerated overnight!

      Cut each plum into quarters: remove/discard pits. Put plums into large bowl. Add sugar and lemon juice; stir well, to combine. Cover bowl with plastic wrap, and place in refrigerator. Refrigerate overnight or at least 8 hours for best results.

    Cooking Jam:
    1. Before you cook the plums, place a small plate into your freezer. NOTE: You will use freezing cold plate to test jam for doneness later, so this is an important step!

      Pour refrigerated plums into medium-sized saucepan. Turn to MEDIUM eat; bring mixture to a boil. Once boiling, continue cooking plums for 2 minutes, stirring often. Turn heat down to LOW. Continue to cook, stirring often, for 15- 20 minutes (plums will turn red). Skim off/discard white foam that rises to surface,

    2. To see if jam is ready, remove plate from freezer. Put a teaspoon of hot jam on plate. If jam "sets up" within first minute, jam is ready. If jam is too runny, put plate back in freezer; continue to cook jam 2-4 more minutes. Try again, and once jam will set up, it's ready. Remove saucepan from the heat.

    Canning Instructions:
    1. Canning jars and lids need to be clean, sterilized and hot, following recommended USDA guidelines for safe canning. This small batch will yield approx. 3 cups ( about 3 half pint jars), but you can easily double or triple recipe.

      Spoon or pour jam (using a a canning funnel) into sterilized jars, leaving a headspace of 1/8". Use a plastic utensil to remove air bubbles in jars, then wipe rims of jars clean with a damp towel. Attach prepared flat lids and add screw bands; tighten to fingertip tightness. Process jam (in boiling water at least 1" above top of jars) in a water bath canner for 10 minutes.

      Remove jars with tongs; place on a dish towel on counter. NOTE: Do not place boiling hot jars directly on countertop because temperature variations could cause jars to crack. Let jars sit undisturbed for about 12 hours. Jam will thicken as it cools, and jars should seal; (you hear a pinging sound as they seal). If sealed correctly, lids should have no give when tested by gently pressing down on the lid with a finger after jam cools. Any jars that don't seal should be refrigerated. Label sealed jars; store in pantry. After opening jar, keep refrigerated.

    Nutrition Facts
    Italian Plum Jam (small batch)
    Amount Per Serving (1 Tablespoon)
    Calories 33 Calories from Fat 1
    % Daily Value*
    Fat 0.1g0%
    Saturated Fat 0.003g0%
    Polyunsaturated Fat 0.01g
    Monounsaturated Fat 0.03g
    Sodium 0.1mg0%
    Potassium 30mg1%
    Carbohydrates 8g3%
    Fiber 0.3g1%
    Sugar 8g9%
    Protein 0.1g0%
    Vitamin A 65IU1%
    Vitamin C 2mg2%
    Calcium 1mg0%
    Iron 0.04mg0%
    * Percent Daily Values are based on a 2000 calorie diet.

    Here’s one more to pin on your Pinterest boards!Make yummy, pectin-free Italian Plum Jam with prune plums! Small batch recipe makes about 3 half pints, and canning directions are included.

    Chocolate Peanut Butter Brownies

    Chocolate Peanut Butter Brownies are filled with chopped peanuts, chocolate chips and peanut butter, and are absolutely delicious!
    Chocolate Peanut Butter Brownies are filled with chopped peanuts, chocolate chips and peanut butter, and are absolutely delicious!

    If you love the flavor combo of chocolate and peanut butter, I think you’ll enjoy these delicious chocolate peanut butter BROWNIES!

    The peanut butter taste is not too strong, and it perfectly blends with the fudgy chocolate flavor in these yummy dessert bars!

    With only 10 minutes of hands-on prep, you can have a big ol’ pan of yummy tasting brownies in the oven before you know it. Chocolate peanut butter brownies can be eaten unfrosted OR frosted

    I’ve included a recipe for a delicious chocolate frosting (in the printable recipe card) for your convenience. Here’s how easy these brownies are to make:

    Scroll Down For A Printable Recipe Card At The Bottom Of The Page

    Make The Brownie Batter

    Measure peanut butter, softened butter, brown sugar and granulated sugar into a large mixing bowl. Cream ingredients together using an electric mixer on High speed until fully blended.

    Turn the mixer down to Medium speed, and add vanilla extract and 4 eggs, ADDING EGGS ONE AT A TIME. Beat the ingredients very well after each egg is added.

    Once done, the chocolate peanut butter brownie batter will be fairly thick.

    Peanut butter, brown & granulated sugar, and butter are combined using a mixer.Four eggs are added to the batter, one at a time, then mixed in.

    Stir cocoa powder, flour, salt, chocolate chips and chopped peanuts into the brownie batter until well combined. Now the brownies are ready to be baked!

    Cocoa powder, chocolate chips, flour, salt and peanuts are stirred into the brownie batter.

    Ready To Bake!

    Lightly grease a 9″ x 13″ baking pan and then spread the batter evenly in the pan. Place the pan of chocolate peanut butter brownies on the center rack of a preheated 350°F. oven.

    Bake at 350°F for 15-20 minutes, or until a toothpick inserted deep into the center of the brownies comes out clean. The top of the brownies should also feel firm once done.

    The batter for chocolate peanut butter brownies is spread into a greased cake pan.

    If You Like “Unfrosted” Chocolate Peanut Butter Brownies

    Remove the pan from the oven, and cut the brownies into 24 portions while still hot. Let them cool  to room temp (still in the pan) after slicing, before serving.

    If you enjoy the chocolate peanut butter brownies UNFROSTED, simply let them cool completely. Transfer them from the pan to a serving plate, and serve.

    After baking, the chocolate peanut butter brownies are cut while still hot into 24 portions.A white plate with several unfrosted brownies ready to enjoy.

    If You Like “Frosted” Chocolate Peanut Butter Brownies

    If you prefer chocolate frosting on brownies, you can make it while the brownies cool. It’s EASY! I’ve included the printable recipe below, but here are the basics. 

    Melt butter in a saucepan on low heat. Add cocoa powder, and stir it in, until blended with the melted butter. Stir in salt, vanilla, and ¼ cup of milk, stirring by hand until combined.

    Add powdered sugar, and stir well. If necessary add a bit more milk until the frosting becomes smooth and slightly pourable.

    Poke holes in the tops of the brownies, then immediately pour the chocolate frosting evenly over the surface. The frosting will cover the top and sink into the holes in each brownie. 

    Chocolate frosting can be made to frost the brownies, if desired.Holes are poked in the brownies, then they're covered with chocolate frosting.

    Let the frosting become firm before slicing and transferring the brownies out of the baking pan to a serving plate. Serve, and enjoy these decadent dessert bars.

    A pan of frosted chocolate peanut butter brownies showing the inside after removing brownies..A white plate with several frosted chocolate peanut butter brownies on it.

    I really hope you enjoy these delicious brownies! They taste wonderful, and I hope you (and those you love) like them as much as we do.

    Thanks for taking the time to stop by today, and I invite you to come back soon for more family-friendly recipes. Take care, may God bless you, and have a great day!

    Looking For More BAR COOKIE Recipes?

    You can find ALL of my recipes in the Recipe Index, located at the top of the page. I have some wonderfully delicious bar cookie recipes to enjoy, which include:

    Interested In More Recipes?

    Thank you for visiting this website. I appreciate you using some of your valuable time to do soIf you’re interested, I publish a newsletter 2 times per month (1st and 15th) with all the latest recipes, and other fun info. I would be honored to have you join our growing list of subscribers, so you never miss a great recipe!
    There is a Newsletter subscription box on the top right side (or bottom) of each blog post, depending on the device you use, where you can easily submit your e-mail address (only) to be included in my mailing list.

    You Can Also Find Me On Social Media:

    Facebook page: The Grateful Girl Cooks!
    Pinterest:
    The Grateful Girl Cooks!
    Instagram:
    jbatthegratefulgirlcooks

    Author's signature

    Original recipe source for brownies: “Mollie Katzen’s Vegetable Heaven”, page 204, published in 1997 by Tante Malka, Inc.
    Original recipe source for frosting: my Mom’s frosting recipe for chocolate cake

    ↓↓ PRINTABLE RECIPE BELOW ↓↓

    0 from 0 votes
    Chocolate Peanut Butter Brownies
    Prep Time
    10 mins
    Cook Time
    15 mins
    Resting Time (inactive cooling time)
    30 mins
    Total Time
    55 mins
     

    Chocolate Peanut Butter Brownies are filled with chopped peanuts, chocolate chips and peanut butter, and are absolutely delicious!

    Category: Desssert
    Cuisine: American
    Keyword: chocolate peanut butter brownies
    Servings: 24
    Calories Per Serving: 260 kcal
    Author: JB @ The Grateful Girl Cooks!
    Ingredients
    For Brownie Batter:
    • 1 cup creamy peanut butter (not natural)
    • 1 stick butter (½ cup), softened
    • 1 cup light brown sugar (packed)
    • ½ cup granulated sugar
    • 4 large eggs
    • 1 teaspoon vanilla extract
    • 1 cup unsweetened cocoa powder
    • 1 cup all purpose flour
    • cups semisweet chocolate chips
    • ½ cup cocktail peanuts finely chopped
    For Chocolate Frosting (if using):
    • 6 Tablespoons butter (3/4 stick)
    • 4 Tablespoons unsweetened cocoa powder
    • 1 pinch salt
    • 1 teaspoon vanilla extract
    • 12 ounces powdered sugar
    • ¼ cup low-fat milk (1%) more if necessary to thin frosting
    Instructions
    1. Preheat oven to 350°F. Lightly grease a 9x13 baking pan.

    2. Measure peanut butter, butter, brown sugar and granulated sugar into large mixing bowl. Cream ingredients using electric mixer on High until fully blended. Turn mixer to Medium; add vanilla and eggs, ADDING EGGS ONE AT A TIME. Beat well after each egg is added.

    3. Remove beaters. Add cocoa, flour, chocolate chips and peanuts to batter; stir by hand until fully incorporated into thick batter.

    4. Spread batter evenly in prepared pan. Place pan on center rack of oven. Bake at 350°F. for 15-20 minutes, or until a toothpick inserted deep into the center of the brownies comes out clean. The surface of the brownies should feel firm.

    For UNFROSTED Brownies:
    1. Remove pan from oven. Cut brownies into 24 servings while still hot. Let cool (still in pan) to room temp. after slicing, before removing from pan and serving.

    For FROSTED Brownies:
    1. Slice brownies while still hot. To make frosting: Melt butter on low heat in medium saucepan. Remove from heat. Add cocoa powder; stir well, then add salt, vanilla, and ¼ cup of milk, stirring by hand until combined. Add powdered sugar, and stir well. If necessary add a bit more milk until the frosting becomes slightly pourable. When fully combined, poke holes in the top of the brownies, then pour frosting over the surface to cover. Let frosting become firm, before removing brownies from pan and serving.

    Recipe Notes

    NOTE: Caloric calculation is for UNFROSTED brownies (260 per serving). If using frosting included in recipe card, the caloric content of each brownie will be approx. 344 calories per serving.

    ALSO... if you are using non-salted peanut butter in the brownies, add ¼ tsp. to the brownie batter.

    Nutrition Facts
    Chocolate Peanut Butter Brownies
    Amount Per Serving (1 brownie (1/24 of total))
    Calories 260 Calories from Fat 144
    % Daily Value*
    Fat 16g25%
    Saturated Fat 6g38%
    Trans Fat 1g
    Polyunsaturated Fat 2g
    Monounsaturated Fat 6g
    Cholesterol 42mg14%
    Sodium 106mg5%
    Potassium 223mg6%
    Carbohydrates 27g9%
    Fiber 3g13%
    Sugar 18g20%
    Protein 6g12%
    Vitamin A 167IU3%
    Calcium 33mg3%
    Iron 2mg11%
    * Percent Daily Values are based on a 2000 calorie diet.

    Here’s one more to pin on your Pinterest boards!Chocolate Peanut Butter Brownies are filled with chopped peanuts, chocolate chips and peanut butter, and are absolutely delicious!

    Hoisin Marinated Pork Chops

    Hoisin Marinated Pork Chops are boneless pork chops, marinated 8 hours in a simple Asian-style sauce, and grilled until done and delicious!Hoisin Marinated Pork Chops are boneless pork chops, marinated 8 hours in a simple Asian-style sauce, and grilled until done and delicious!Summer is here and with it comes lots of BBQ’s on our back deck! The recipe I want to share with you today is one I found many years ago in one of my old cookbooks. Hoisin marinated pork chops are so easy to make, and the only hard part of the recipe is YOU HAVE TO PLAN AHEAD to enjoy them!

    That’s right… a simple Asian-style marinade is made and then the pork chops have to marinate in the sauce for 8 hours or overnight, so plan ahead. I thaw the pork chops out the night before we plan to cook them, then marinate them early in the morning on the day we will eat them.

    The marinade for the pork is made with Hoisin sauce (a common Chinese cooking sauce) and a few other ingredients. Hoisin sauce can typically be found in the Asian section of most supermarkets. Combine the ingredients for the marinade and let the pork chops hang out in it overnight, then grill the pork chops once done marinating! The marinade helps tenderize the pork and imparts great flavor to the meat. Here’s how to make this dish:

    Scroll Down For A Printable Recipe Card At The Bottom Of The Page

    Make The Asian-Style Marinade

    You will need hoisin sauce, soy sauce (regular or low-sodium), honey, crushed red peppers, and minced garlic to make the marinade for the pork. 

    Marinade ingredients are hoisin sauce, soy sauce, garlic, honey, and crushed red peppers.

    Place the ingredients for the marinade in a small bowl, and stir or whisk until combined. That’s it… you just made the marinade! See how easy it is? NOTE: I used four pork chops for this recipe, but there is enough marinade to coat 6 pork chops, if needed

    Ingredients for the Asian-style marinade are placed in a small bowl.After mixing the ingredients, the Asian-style marinade is ready for the pork chops.

    Prepare The Hoisin Marinated Pork Chops

    The pork chops should be boneless, about 4 oz. each, and approx. 3/4″ thick. Pat them dry with paper towels, then place them in a gallon size re-sealable plastic bag or shallow container with a secure lid.

    Pour the marinade over the pork chops and seal the bag or container securely.  Make sure to coat the pork chops on all sides with the sauce, then refrigerate 8 hours or overnight. If you do this early in the morning, the pork chops will be ready to grill by dinner. Don’t skip this step, because it helps tenderize the meat. The longer the pork chops marinate, the better the flavor.

    Four boneless pork chops are patted dry, then are ready to be marinated.The marinade coats the pork chops in a large resealable bag in a refrigerator for 8 hours.

    Time To Grill The Pork Chops Then Eat!

    After the pork chops have fully marinated, they’re ready to grill. Prepare your BBQ for grilling, as normal. Spray the BBQ grill rack with cooking spray, then place over hot coals. Remove the chops from the bag/container, discarding any extra marinade. This extra marinade is not safe to eat, because its been in contact with raw meat and will not be cooked.

    Cover the BBQ and cook the pork chops about 4-5 minutes, then flip them to the other side. Continue cooking until done (4-5 minutes typically). Keep an eye on the pork chops, so the sugar present in the honey doesn’t burn. The pork chops are done when they reach an internal temperature of 145°F. Cooking time may vary slightly, depending on the thickness of the pork chops being used (or the BBQ heat).

    Once done, transfer the pork chops to a serving plate, and let them rest for a couple minutes to let the juices redistribute inside the meat. Serve, then enjoy these delicious hoisin marinated pork chops!

    Four hoisin marinated pork chops are grilled over hot coals on a BBQ.Green beans and mashed potatoes, served with one of the hoisin marinated pork chops.A picture of a sliced open, juicy hoisin marinated pork chop, on a plate.

    I hope you have the chance to grill some of these delicious hoisin marinated pork chops, and trust you’ll enjoy them like we do! Hey there… since we’re speaking of CHOPS, if you enjoy eating LAMB CHOPS, be sure to check out my recipe for Rosemary Wine Lamb Chops!

    Thanks for stopping by today. I invite you to come back again soon, for more family-friendly recipes. Take care, may God bless you, and have a great day!

    Looking For More Recipes For PORK CHOPS?

    You can find ALL of my recipes in the Recipe Index, located at the top of the page. I have lots of great pork chop recipes, including:

    Interested In More Recipes?

    Thank you for visiting this website. I appreciate you using some of your valuable time to do soIf you’re interested, I publish a newsletter 2 times per month (1st and 15th) with all the latest recipes, and other fun info. I would be honored to have you join our growing list of subscribers, so you never miss a great recipe!
    There is a Newsletter subscription box on the top right side (or bottom) of each blog post, depending on the device you use, where you can easily submit your e-mail address (only) to be included in my mailing list.

    You Can Also Find Me On Social Media:

    Facebook page: The Grateful Girl Cooks!
    Pinterest:
    The Grateful Girl Cooks!
    Instagram:
    jbatthegratefulgirlcooks

    Author's signature

    Recipe adapted from original recipe in the cookbook: “The Best Of Cooking Light”, page 186, published in 2004 by Oxmoor House

    ↓↓ PRINTABLE RECIPE BELOW ↓↓

    0 from 0 votes
    Hoisin Marinated Pork Chops
    Prep Time
    5 mins
    Cook Time
    9 mins
    Marinating Time (inactive prep)
    8 hrs
    Total Time
    8 hrs 14 mins
     

    Hoisin Marinated Pork Chops are boneless pork chops, marinated 8 hours in a simple Asian-style sauce, and grilled until done and delicious!

    Category: Main Dish
    Cuisine: Asian
    Keyword: hoisin marinated pork chops
    Servings: 4
    Calories Per Serving: 188 kcal
    Author: JB @ The Grateful Girl Cooks!
    Ingredients
    • 3 Tablespoons hoisin sauce
    • 3 Tablespoons low-sodium soy sauce (or regular)
    • 3 Tablespoons honey
    • ¾ teaspoon red chili flakes (crushed red peppers)
    • 2 garlic cloves minced
    • 4 (4-ounce) boneless pork chops about ¾ inch thick
    • cooking spray for grill rack
    Instructions
    1. Place hoisin sauce, soy sauce, honey, red chili flakes and garlic in a small bowl; stir or whisk until combined.

    2. Pat pork chops dry with paper towels; place chops in a large, re-sealable plastic bag or shallow container with secure lid. Pour marinade over pork chops; seal bag or container securely.  Make sure pork chops are covered on all sides with sauce, then refrigerate 8 hours or overnight. Don't skip this step, because it helps tenderize the pork. The longer the pork chops marinate, the better the flavor.

    3. Once pork has marinated, prepare BBQ for grilling. Spray BBQ grill rack with cooking spray, then place over hot coals. Remove chops from bag/container, discard extra marinade. Extra marinade is not safe to consume, because its been in contact with raw meat and will not be cooked.

    4. Cover BBQ and cook pork chops for 4-5 minutes, then flip them to the other side. Continue cooking until done (4-5 minutes typically). Keep an eye on the pork chops, so the sugar present in the honey doesn't burn. Pork chops are done when they reach an internal temperature of 145°F. Cooking time may vary slightly, depending on thickness of the pork chops being used (or BBQ heat).

    5. Once done, transfer pork chops to serving plate. Let them rest 2-3 minutes to let juices redistribute inside the meat. Serve and enjoy!

    Nutrition Facts
    Hoisin Marinated Pork Chops
    Amount Per Serving (1 pork chop)
    Calories 188 Calories from Fat 56
    % Daily Value*
    Fat 6.2g10%
    Saturated Fat 2.1g13%
    Polyunsaturated Fat 0.7g
    Monounsaturated Fat 2.8g
    Cholesterol 62mg21%
    Sodium 249mg11%
    Carbohydrates 6.7g2%
    Fiber 0.2g1%
    Protein 25g50%
    Calcium 27mg3%
    Iron 1mg6%
    * Percent Daily Values are based on a 2000 calorie diet.

    Here’s one more to pin on your Pinterest boards!Hoisin Marinated Pork Chops are boneless pork chops, marinated 8 hours in a simple Asian-style sauce, and grilled until done and delicious!

    Air Fryer Crispy Mini Potatoes

    It doesn’t take long to make Air Fryer Crispy Mini Potatoes! Crispy outside, soft inside and seasoned well, they’re a great veggie side dish!
    It doesn't take long to make Air Fryer Crispy Mini Potatoes! Crispy outside, soft inside and seasoned well, they're a great veggie side dish!

    If you enjoy potatoes and have access to an air fryer, you’re more than likely going to LOVE these little potatoes! We sure do! They are cooked in an air fryer, which is a kitchen appliance that uses super hot circulating air to cook food, using very little oil.

    The outside potato peel get all crispy and delicious, yet the inside stays fluffy and soft! These yummy little potatoes are so delicious, and the best part is they’re simple to make, and only take a few minutes to prep! Let me show you how to make this perfect side dish, which pairs well with poultry, fish, beef or pork!

    Scroll Down For A Printable Recipe Card At The Bottom Of The Page

    Prepping The Mini Potatoes For The Air Fryer

    Preheat your air fryer to 400°F. for 3-4 minutes while you get the potatoes ready to cook. You can use small red or golden potatoes, but if you happen to have both kinds, USE them! Ours came already combined in a bag at our local grocery store.

    My favorite way to make this recipe is using both red and gold potatoes. Try to use small potatoes, roughly about the size of a plum for this recipe (and for quickest cooking time). Clean or scrub the outside of the potatoes to remove any dirt, then dry them thoroughly. Slice each potato in half, then place the halves in a mixing bowl.

    Red and gold mini potatoes are rinsed clean, then dried and cut in half before seasoning.

    Drizzle the potatoes with olive oil, and then add Italian seasoning, garlic powder, salt and pepper to the potatoes. Toss the potatoes well, so they’re covered with the oil and the spices. That’s it… see how easy the prep work is? Now the mini potatoes are ready to cook!

    Olive oil and seasonings are added to the bowl of halved mini potatoes.The mini potatoes have been tossed with olive oil and seasonings and are ready to cook.

    Into The Air Fryer They Go!

    Place the seasoned potato halves into the basket of your air fryer, trying to keep them in a single layer, if possible. Cook them at 400°F for 10 minutes, then remove the basket and stir them or give the basket a good shake.

    Cook them for an additional 7-8 minutes, then check to see if they’re done. The outsides should be crispy and lightly browned. Stick a knife into a potato half. If done, the knife should easily glide into the softened insides of the potato. NOTE: If your potatoes are slightly larger in size, please be aware they may require 2-3 more minutes to finish cooking all the way through.

    Seasoned mini potatoes are placed in a single layer in air fryer basket to cook.Air Fryer crispy mini potatoes are finished cooking, and are ready to serve.

    Prepare Potatoes For Serving

    Once done, transfer the hot air fryer crispy mini potatoes to a serving bowl. Generously squeeze fresh lemon juice over the top of the potatoes and gently stir. Sprinkle the top of the potatoes with chopped fresh parsley, and serve the potatoes immediately.

    Fresh lemon juice is squeezed over the hot mini potatoes before serving.A white bowl of air fryer crispy mini potatoes garnished with parsley, ready to be eaten!

    Time To Enjoy Some Air Fryer Crispy Mini Potatoes!

    Wow… I think you’re going to love these little spuds! They were served (in the photo below) with Pan Seared Creole Salmon  and some of our home grown and canned green beans! What a delicious meal, and I’m not kidding… these little potatoes taste wonderful!

    Salmon and green beans served on a plate with air fryer crispy mini potatoes.

    I hope you have the chance to make some air fryer crispy mini potatoes soon for those you love, and trust you’ll enjoy them! Thank you so much for stopping by, and please come back again soon for more family-friendly recipes. Have a great day.

    Looking For More POTATO Recipes?

    You can find ALL of my recipes in the Recipe Index, located at the top of the page. I have some wonderful potato recipes for you to enjoy, including:

    Interested In More Recipes?

    Thank you for visiting this website. I appreciate you using some of your valuable time to do soIf you’re interested, I publish a newsletter 2 times per month (1st and 15th) with all the latest recipes, and other fun info. I would be honored to have you join our growing list of subscribers, so you never miss a great recipe!
    There is a Newsletter subscription box on the top right side (or bottom) of each blog post, depending on the device you use, where you can easily submit your e-mail address (only) to be included in my mailing list.

    You Can Also Find Me On Social Media:

    Facebook page: The Grateful Girl Cooks!
    Pinterest:
    The Grateful Girl Cooks!
    Instagram:
    jbatthegratefulgirlcooks

    Author's signature

    Recipe adapted from: Delish.com

    ↓↓ PRINTABLE RECIPE BELOW ↓↓

    0 from 0 votes
    Air Fryer Crispy Mini Potatoes
    Prep Time
    5 mins
    Cook Time
    17 mins
    Total Time
    22 mins
     

    It doesn't take long to make Air Fryer Crispy Mini Potatoes! Crispy outside, soft inside and seasoned well, they're a great veggie side dish!

    Category: Side Dish, Vegetable Dish
    Cuisine: American
    Keyword: air fryer crispy mini potatoes
    Servings: 4
    Calories Per Serving: 123 kcal
    Author: JB @ The Grateful Girl Cooks!
    Ingredients
    • 1 pound baby potatoes (red /gold) (about 20 small potatoes), halved
    • 1 Tablespoon extra virgin olive oil
    • 1 teaspoon Italian seasoning
    • 1 teaspoon garlic powder
    • ½ teaspoon salt + more if desired
    • ½ teaspoon black pepper + more if desired
    • fresh lemon juice a generous squeeze or two
    • fresh parsley chopped
    Instructions
    1. Preheat air fryer to 400°F. for 3-4 minutes while you get potatoes ready.

    2. Clean potatoes to remove dirt, then dry. Cut potatoes in half; place in bowl.

    3. Drizzle potatoes with olive oil; add Italian seasoning, garlic powder, salt and pepper. Toss potatoes well, so they're covered with oil/spices.

    4. Place potatoes halves in air fryer basket in a single layer. Cook at 400°F for 10 minutes; stir potatoes or give basket a good shake. Cook potatoes 7-8 more minutes, then check to see if they're done. Stick a knife into a potato. If done, knife should easily glide in and out of the potato. NOTE: If potatoes used are larger, they may require 2-3 additional minutes to finish cooking.

    5. Transfer potatoes to serving bowl. Squeeze fresh lemon juice over them; gently stir to combine. Sprinkle with chopped parsley; serve immediately.

    Nutrition Facts
    Air Fryer Crispy Mini Potatoes
    Amount Per Serving (1 (1/4 of total))
    Calories 123 Calories from Fat 36
    % Daily Value*
    Fat 4g6%
    Saturated Fat 1g6%
    Polyunsaturated Fat 1g
    Monounsaturated Fat 3g
    Sodium 298mg13%
    Potassium 496mg14%
    Carbohydrates 21g7%
    Fiber 3g13%
    Sugar 1g1%
    Protein 2g4%
    Vitamin A 12IU0%
    Vitamin C 22mg27%
    Calcium 24mg2%
    Iron 1mg6%
    * Percent Daily Values are based on a 2000 calorie diet.

    Here’s one more to pin on your Pinterest boards!It doesn't take long to make Air Fryer Crispy Mini Potatoes! Crispy outside, soft inside and seasoned well, they're a great veggie side dish!

    Hearty Oatmeal Bowl

    Enjoy a hearty oatmeal bowl, a filling breakfast with oats, toasted pecans, raisins, apples, brown sugar and cinnamon! Easy and delicious!
    Enjoy a hearty oatmeal bowl, a filling breakfast with oats, toasted pecans, raisins, apples, brown sugar and cinnamon! Easy and delicious!

    Do you enjoy oatmeal? I sure do! In its purest form oatmeal is known to provide antioxidants, and helps you to feel full (thanks to fiber)! It has other health benefits as well, but I especially love it because it’s filling and you can add so many different ingredients to it for flavor!

    The recipe I want to share today is one of my favorite ways to prepare and enjoy oatmeal. I call it a hearty oatmeal bowl, because it is just that… hearty! Filled with dried fruit and nuts, and seasoned with cinnamon and brown sugar, how can you go wrong? I enjoy using dried apples in it, but you can substitute or add dried cranberries, peaches or blueberries, if you prefer! This oatmeal is simple to prepare and really delicious. Here’s how to make it:

    Scroll Down For A Printable Recipe Card At The Bottom Of The Page

    Making The Oatmeal

    Bring 1 cup of milk and ¼ cup of water to a boil in a medium saucepan. Once it begins to boil, add old fashioned oats, raisins, dried apples, toasted pecans, brown sugar, cinnamon and salt to the pan. Stir these ingredients well, until incorporated into the liquid.

    Milk and water are brought to a boil in a medium sized saucepan.Oats, raisins, apple, pecans, brown sugar, cinnamon and salt are added to the milk in the pan.

    Turn the heat to Medium-Low, and continue cooking the oatmeal mixture for between 5-7 minutes, or until it reaches YOUR desired consistency. As it cooks, the oatmeal will become creamy and will thicken.

    The oatmeal and added ingredients cook in the saucepan until thickened.When the oatmeal is cooking to desired consistency, it is ready to be served.

    Serve The Hearty Oatmeal Bowl

    When done cooking, spoon portions into individual serving bowls, and sprinkle lightly with additional ground cinnamon, if desired. The raisins are plump, it’s sweetened with brown sugar, the toasted pecans add crunch, and the cinnamon and apples add great flavor to this hearty oatmeal bowl.

    All in all, this is an incredibly simple, yet filling breakfast which will yield 3 small servings or 2 large servings. I really think you’re going to enjoy it!

    A hearty oatmeal bowl ready to be eaten, sprinkled with ground cinnamon on top.One spoonful of oats from the heaty oatmeal bowl.

    Thanks for stopping by today. I really hope you have a chance to try this recipe for a hearty oatmeal bowl, and trust you will enjoy it! Please come back again soon for more delicious recipes, take care, and have a great day.

    Looking For More OATMEAL Recipes?

    Yu can find ALL of my recipes in the Recipe Index, located at the top of the page. I have some delicious oatmeal recipes for you to check out, including:

    Interested In More Recipes?

    Thank you for visiting this website. I appreciate you using some of your valuable time to do soIf you’re interested, I publish a newsletter 2 times per month (1st and 15th) with all the latest recipes, and other fun info. I would be honored to have you join our growing list of subscribers, so you never miss a great recipe!
    There is a Newsletter subscription box on the top right side (or bottom) of each blog post, depending on the device you use, where you can easily submit your e-mail address (only) to be included in my mailing list.

    You Can Also Find Me On Social Media:

    Facebook page: The Grateful Girl Cooks!
    Pinterest:
    The Grateful Girl Cooks!
    Instagram:
    jbatthegratefulgirlcooks

    Author's signature

    ↓↓ PRINTABLE RECIPE BELOW ↓↓

    0 from 0 votes
    Hearty Oatmeal Bowl
    Prep Time
    5 mins
    Cook Time
    5 mins
    Total Time
    10 mins
     

    Enjoy a hearty oatmeal bowl, a filling breakfast with oats, toasted pecans, raisins, apples, brown sugar and cinnamon! Easy and delicious!

    Category: Breakfast
    Cuisine: American
    Keyword: oatmeal, breakfast
    Servings: 3 small servings
    Calories Per Serving: 329 kcal
    Author: JB @ The Grateful Girl Cooks!
    Ingredients
    • 1 cup low-fat milk (1%)
    • ¼ cup water
    • cups old fashioned oats uncooked
    • ¼ cup dried apples (chopped) or other dried fruit
    • ¼ cup raisins
    • ¼ cup toasted pecans chopped, measured after chopping
    • 2 Tablespoons brown sugar
    • ½ teaspoon ground cinnamon
    • teaspoon salt
    Instructions
    1. Bring milk and water to a boil on medium heat in a medium saucepan. Once it begins boiling, add remaining ingredients to pan. Stir well, to combine.

    2. Turn heat to medium-low, and continue cooking for 5-7 minutes, or until it reaches YOUR desired consistency. Stir often. Oatmeal will become creamy and will thicken as it cooks.

    3. To serve, transfer oatmeal into individual serving bowls. Sprinkle lightly with additional cinnamon, if desired. Serve hot, and enjoy!

    Recipe Notes

    NOTE: Can substitute dried cranberries, peaches, blueberries, etc. for the dried apple called for in recipe.

    Nutrition Facts
    Hearty Oatmeal Bowl
    Amount Per Serving (1 1/3 of total)
    Calories 329 Calories from Fat 81
    % Daily Value*
    Fat 9g14%
    Saturated Fat 1g6%
    Polyunsaturated Fat 3g
    Monounsaturated Fat 4g
    Cholesterol 4mg1%
    Sodium 143mg6%
    Potassium 450mg13%
    Carbohydrates 55g18%
    Fiber 7g29%
    Sugar 16g18%
    Protein 9g18%
    Vitamin A 160IU3%
    Vitamin C 1mg1%
    Calcium 141mg14%
    Iron 2mg11%
    * Percent Daily Values are based on a 2000 calorie diet.

    Here’s one more to pin on your Pinterest boards!Enjoy a hearty oatmeal bowl, a filling breakfast with oats, toasted pecans, raisins, apples, brown sugar and cinnamon! Easy and delicious!